#i need a video step by step tutorial to run this thing
Explore tagged Tumblr posts
Text
go ahead and do the following:
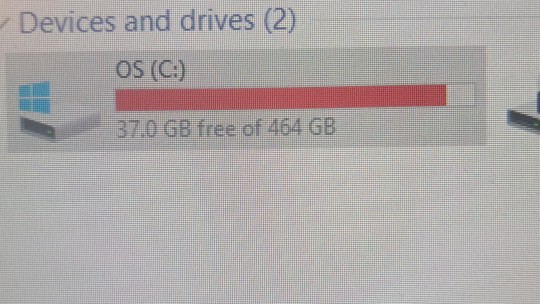
- put a secondary hdd in your PC, this is the hardest and most dangerous part as you will directly interact with your motherboard. If you can, ask a friend for help through video call or check a tutorial, it's not as hard as it may seem
- mount it and give it a memorable drive letter, for example T: or E: or A: (you can do this pretty easily with disk management)
- copy your music/pictures/documents/... folders to it and verify that the copying is complete and successful
- write down the path of, and then delete the original folders
- now, open CMD as administrator and execute the following command:
mklink /D C:/Users/<username>/Documents A:/Documents
- repeat for each subfolder that you copied. Of course, replace the A:/ path with your actual new location, and
- make sure to consider onedrive folders first, because windows doesn't even ask any more to use that instead of the default location i named here
Congratulations!
Your documents are now safe on a secondary drive, windows has the space it needs to be the evolving mutant that it is, and no software can tell any difference (unless the other drive dies)
I'm happy to help anyone through the process, just ask
an extenal USB drive would work just as well and would simplify step 1, but then you can potentially break things when you unplug it when the PC is running.
I may be a data hoarder

533 notes
·
View notes
Text
x
#i sooo want to use the bg3 dialogue parser but i feel like an 80yo grandma#i need a video step by step tutorial to run this thing
3 notes
·
View notes
Text
cultivating your hobbies to become that girl
as summer starts to end, i find my days a little emptier and im full of anticipation for the coming academic year. but the last thing i want to do is waste the last part of summer so now is the perfect time to cultivate or begin a new hobby, focusing on four areas to level up your body, skills, mind and passions! enjoy angels and i hope this gives you some inspiration.
────୨ৎ────────୨ৎ────────୨ৎ───────
body
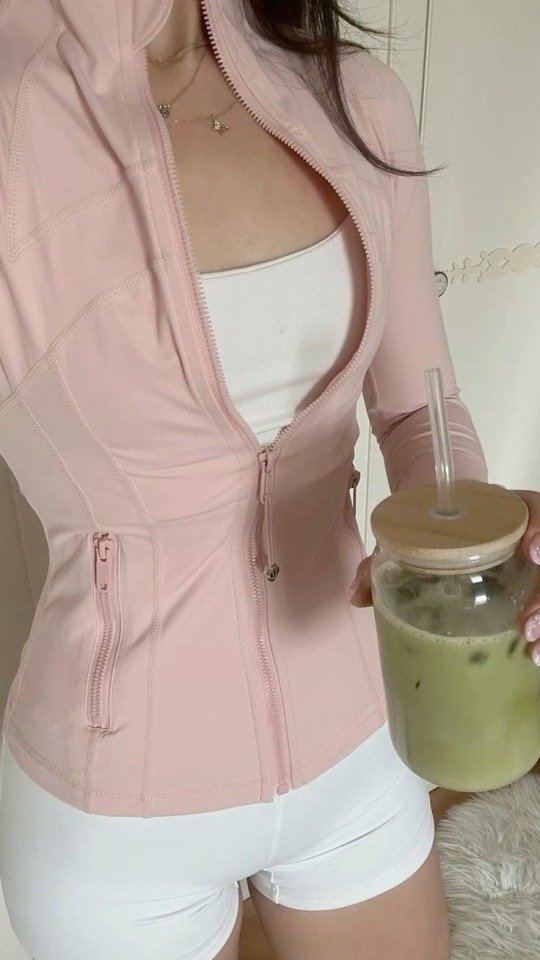
having a hobby that helps you reach your dream body, maintain a healthy lifestyle or just help with your mental health (as moving your body always does!) is such a good idea. the past few months my workout schedule has decreased due to the amount of schoolwork i have had and exam season so now is the perfect time for me to get more disciplined and build up a good workout scheme. my hobbies based around my body are pilates or yoga, both of which help me with my fitness goals. here are some more ideas/inspiration for some hobbies you could start:
‘hot girl walks’ - set a goal for your daily steps and go on walks everyday to help you achieve that.
running daily.
swimming daily.
tennis or badminton daily.
joining a sports club such as football or gymnastics.
dance - could be by yourself at home following dance workouts!
strength training.
starting a fitness challenge - such as a month long youtube challenge.
start making your own fitness content! film videos or write tutorials.
bike riding daily.
skills
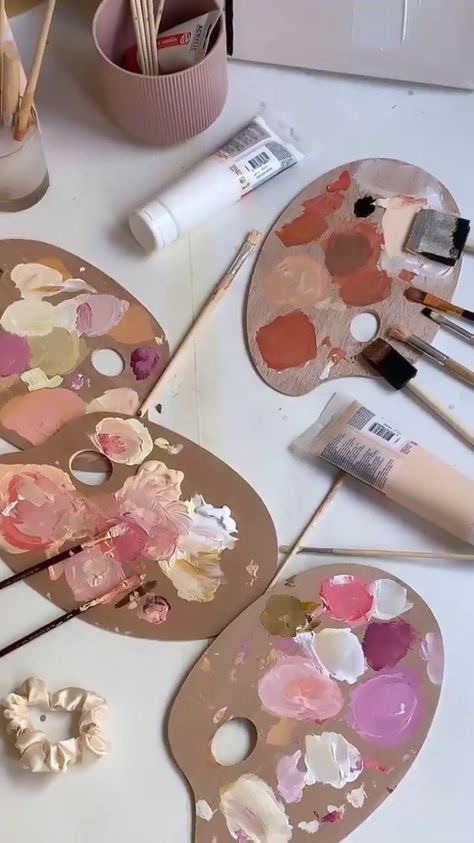
finding a hobby that helps you develop/cultivate your skills is so important. mine personally is cooking/baking as it helps me focus on giving my body what it needs, becoming more independent and providing for those i love. here are some ideas/inspiration:
painting.
making your own clothes - sewing, knitting or crocheting.
gardening.
scrapbooking.
photography.
drawing.
writing - poetry, novels, articles or anything similar.
acting - helps with public speaking, confidence and making friends.
jewellery making.
chess or a similar intense mental game - cultivates your thinking skills and mind.

mind
finding a hobby that helps you mentally, especially if relevant to schoolwork or career plans is so helpful. mine is reading/engaging with literature as not only does it align with my academic work but also helps me with how i think, view the world and allows me to be more empathetic.
mindfulness/meditation.
learning to play an instrument.
writing/researching around your subjects.
budgeting - good way of keeping track of and understanding money even if you aren’t planning on doing anything economics based!
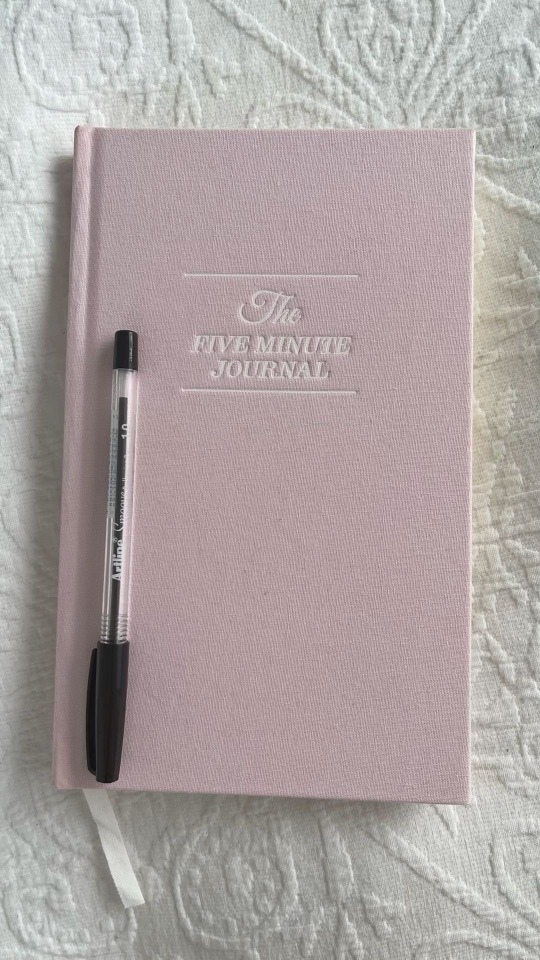
journalling or keeping a diary.
joining/starting a book club.
starting a studyblr, study youtube channel etc.
learning a new language.
tutoring someone - great way of helping yourself learn as well!
joining a debate team.
passions
finding a hobby around one of your passions is such a fun and unique way of engaging in things you enjoy. mine personally is visiting museums/areas of historical importance as i am so passionate about history.
visiting art galleries.
attending the theatre/cinema.
going to live music events.
visiting libraries/book shops - growing your wish list, finding new book inspo etc!
going to cooking classes, restaurants or cafes.
travelling to new areas (could be local or international) - perhaps to develop language skills, find places to hike etc.
attending lectures on subjects youre interested in.
watching documentaries or video essays.
starting a new course - i do several history courses, my most recent was on European empires!
making a blog, channel, instagram etc for a new hobby or interest.

────୨ৎ────────୨ৎ────────୨ৎ─────── thank you for reading angels! hopefully this will help us all on our hobby journeys and have given you ideas of hobbies to try or develop for the end of summer or just in general! love, m.
#becoming that girl#it girl energy#clean girl#girlblogging#girlhood#glow up#it girl#just girly things#pink pilates princess#pink aesthetic#pink blog#tumblr girls#cute#this is a girlblog#that girl
3K notes
·
View notes
Text
Casually calling them "daddy" LADS

Word count; 1,913
Themes; slightly barely there suggestive content, fluff, established relationship
Warnings; mention of "daddy" ofc, fluff
Notes; So these turned out more fluffy than I originally intended...honestly, thought they'd be more smutty, but I've learnt that it's really difficult for me to write smut. Or at least, smut with little to no context before it all goes down. I might eventually write some smuttier drabbles, but regardless of smut, I hope you enjoy this little thing I wrote!

You saw that there was an old trend about calling your boyfriend “daddy” and videoing their reaction so, obviously, you wanted to give it a try…
Xavier
It's been almost a year since you and Xavier started dating– and it was a wonderful eleven months! He told you everything about himself. What his future with you was like, all of his feelings throughout the centuries, and you listened. You wholeheartedly believed him, because it would be one hell of a lie if it wasn't true…and you didn't think Xavier had the time or energy to come up with a complex lie like that.
But even if you now know, time moves on. There's not much you can do about your future self, so you can't really change the future in that way though…Xavier's here now, in the past, and that's all that matters to you.
Anyway, today was just a normal day as any.
You were sitting at the counter, keeping a close eye on Xavier– who was attempting to follow, yet another, cooking tutorial. The man was desperate to cook a decent meal for you. His heart dead set on making you something edible for your upcoming year anniversary…and while that was cute, you also wanted to mess with him.
You push your cup just out of your reach and make a big show of trying to reach for it, before sighing loudly.
“Daddy, can you pass me my drink please?”
You can hear the clang of a spatula hitting the floor and you watch Xavier’s body comically whip around to face you.
“What?” His head cocks to the side as his wide eyes were set on your face. “Say that again..”
“Hmm? I said ‘Xav, can you pass me my drink, please’.” You copy his head tilt and he quickly shakes his head.
“No, no you didn't.” He takes a few steps toward you before grabbing your hand in-between both of his. “Say it again.”
You couldn't resist his sweet puppy dog eyes, so you hold back a smile as you meet his eyes. “I...called you daddy.”
“Really?” He seems unusually excited. “So are we…?” His gaze lowers to your stomach and you can’t help the giggle that slips from your lips.
Gosh, he was so cute.
“Baby– no, no. We're not pregnant.” You run your fingers through his hair with a smile on your lips. “Are...you disappointed?”
“Mmh..” Xavier hums thoughtfully for a moment before he shakes his head. “No. We can just make it a reality later. No need to rush.”
Zayne
You and Zayne have only been dating for six months, but it felt like much longer. Having known each other since you were little, you both had always been close– well, your definition of close and his were probably different. You always thought of him as a friend while he tried to keep a distance and thought you hated him. But time brought you both back together with him as your primary care physician.
The two of you had been flirting up until his birthday and finally made it official once he blew his candles out on the cake you made for him. It was a sweet time, but that was six months ago.
Now, though, you really want to fluster the man.
He always embarrasses you and makes you feel nervous, but you never get to see him that way. Sure, his ears will turn red and sometimes he won't meet your eyes when you get too intense with him, but you've never seen him absolutely shocked. And you just wanted to see one look of surprise from him.
So, what did you decide to do?
You decided to casually call him "daddy” as a joke.
That should definitely go over well.
Zayne is seated behind his desk at the hospital, sorting through papers as you longue on his sofa. Your eyes continuously glancing toward the windows to make sure the door was shut and the blinds were closed.
“If you keep staring at the door, you just might burn a hole through it.” Zayne says, though he didn't even look up from his paperwork. He was attentive like that and probably already knew you wanted something or you were ready to go home. And he was right.
“When are we going home…daddy?” You ask as you kick your feet in the air behind you. You were on your stomach, resting your cheek against your arms as you watched his expression…which didn't change at all.
"Just give me a few more minutes, angel, and I'll be done.” Zayne pushes his glasses up with his index finger and clicks his pen, jotting down a few notes.
“I–” You puff your cheeks out with a small sigh and decide to keep going with it. “I want to go home now, daddy.”
“Didn't I just tell you to be patient?” Now Zayne finally looks up at you with one of his brows raised. “I'll deal with you when we get home.”
Rafayel
It's been four months since Rafayel asked you out. Four months since you tugged Rafayel down into the bath with you, which set off a chain reaction of a steamy night, followed by him asking you out the next morning; he also complained that you both went out of order, but he wasn’t too upset when you continued where you left off…
Now, though, you moved out of your apartment and to Rafayel's home, ‘Mo Art Studio’ at Whitesand Bay.
It was definitely odd at first, but it was a good change of pace. Always being by the ocean, able to take your morning walks together on the beach and collect seashells. You had a whole collection on your desk at work. He'd always give you the most unique and prettiest shells, saying “only the best for his cutie”.
He was also so easy to fluster.
You immediately knew you had him wrapped around your finger every time his ears would turn red. That same crimson slowly made its way from his ears to his cheeks, all the way to his whole face. So you assumed your little ‘prank’ would also have the same effect.
You were sitting on a beach towel in the sand with an umbrella blocking your eyes from the bright sun. In front of you was Rafayel, painting your visage, with an easel. His hand deftly moves across the canvas as he sketches the outline for his new painting.
Lately, you are the only thing he can paint. Always asking you to stop what you're doing so he can run and get his sketch pad. You could be doing something so normal and mundane, but he'd be struck with the inspiration to record your very image.
As much as you loved it and thought this was very sweet, after almost two weeks of this…You wanted some form of payback.
“Hey, daddy, can we take a break for a second? It’s really hot out here.” You squint your eyes to try and see Rafayel's face, your hand fanning at your body because you, seriously, are hot out here.
“Huh?”
It's like Rafayel is frozen in time, or buffering. He's just blankly staring at you with a confused expression on his face until his pencil drops into the sand. That's when he quickly stands up and makes his way toward you.
“Again.”
Now, it's your turn to be confused.
“Raf, what–”
“Not that, say the other word again.” His ears were red as he crouched down in front of you, a look of determination in his eyes.
“No– you're making it weird!” You put your hands on his shoulders, trying to put some distance between him as your face turns red.
“Please, I really need to hear you say it again! I'm seriously going to die if you don't.” There's your overdramatic fishy.
“Fine, but just this once.” You grumble, turning your head to look away from him. “Daddy…” Though you say it as low as you can and Rafayel groans, tilting his head back.
“Louder.” He rests his forehead against yours. “Come on, cutie. If you don't…I might want to change that to my new nickname.”
Sylus
It's been about…a year? Yes, definitely a year since you and Sylus started dating. Well, you both have differing opinions on when exactly you started dating. Sylus claims it was the moment he laid eyes on you in the N109 Zone, while you claim it was only about six months ago– which is when you and Sylus made a bet.
It was a bet where if he came back safely from his mission, he'd leave you alone. He wouldn't bother you anymore, wouldn't talk to you, contact you, anything of the sort…and you won, but you didn't realize he'd actually do it. So whenever you seeked him out to make sure he was safe, and he ignored you, you realized that maybe you did want him in your life.
This led to you running across the street to him and jumping into his arms like this was a hallmark movie, and you claim this was when you officially started dating Sylus.
But between us, you just agree with Sylus when he says a year, because if you don't, he'll pout for the whole day.
...And today was one of those ‘pouty Sylus’ days.
You went on a mission that was probably way too dangerous, even though you told Sylus you were going to slow down on your Hunter's work. But you couldn't just ignore endangered civilians. If any of them would have died, that would've been too much for your sympathetic heart to handle.
And even if Sylus understands your reasoning, he's still upset that you left without telling him– having woken up to a cold bed without you by his side sent him spiraling into a panic.
So, when you got home, you noticed he was sulking in the kitchen as he made dinner.
“Sy…” You take your shoes off by the door, nervously fiddling with your fingers as you tentatively walk into the kitchen. Standing behind the counter, you sigh, “I'm reeaally sorry...”
“If you're reeaaally sorry, then help me make our dinner.” He says, not looking up at you and that doesn't make you feel any better.
“Okay..” You finally step past the counter and you look around. “So…what do you need?” You were trying to figure out something– anything that could make Sylus feel better when a thought comes to your mind.
Most guys probably like it when their girlfriend calls them daddy…right?
“In the cabinet, top shelf. I need a bottle of garlic powder.”
Okay, you got this.
You take a deep breath and open the cabinet, straining your arm to try and reach the seasoning bottle, but your fingertips barely brush it and knock it over. “Shit…” You swallow back your nervousness before continuing, “Daddy, can you grab it for me?”
The room fills with silence for a moment, but then you hear Sylus chuckle.
“Sure, kitten.”
Your back suddenly feels warm as a firm chest presses against it and Sylus reaches up from behind you to grab the bottle.
“I ask you to do one simple thing and you can't even do that.” Sylus chides, clicking his tongue as he pops the bottle open to pour some into the pan on the stove.
“Da–”
“If you think a few empty words will make me feel better, kitten…you've got to try a lot harder than that.”

I'd like to say, this is definitely one of my better drabbles– one of my favorites, in fact!
I have like...six more ideas for drabbles and then I'll need to come up with some more. Like these new cards and Rafayel's student photoshoot event really had me thinking of how seriously the LADS men would take roleplaying– and that spawned a whole different drabble idea, so you can definitely look forward to that!
I'm trying to come up with new ways to do my drabbles, so that's why I did a little prelude before I started writing for the guys. Please let me know any feedback yall have for me! Especially with the coloured dialogue, I'm not too sure if I like it, but it seems really pretty and probably makes it easier to tell who is talking apart. (I won't use it for my fic though, only the drabbles!)
Anyway, I have a small personal project I'm working on this weekend so I probably won't be able to write any chapters for my 'Divisa' fic, but I'm still going to post chapter nineteen of 'Twist of Fate' and try to write at least two more chapters since I'm only on twenty-three or so.
I hope you all enjoyed these drabbles and I hope yall have a great night/day! 🩷
#lads#love and deepspace#love and deepspace x reader#lads x reader#lads sylus#lads xavier#lads zayne#love and deepspace sylus#love and deepspace xavier#love and deepspace zayne#lnds xavier#lnds x reader#lnds zayne#lnds#lnds sylus#lnds rafayel#lads rafayel#sylus x reader#zayne x reader#xavier x reader#lads xavier x reader#love and deepspace rafayel#rafayel x reader#zayne love and deepspace#lads sylus x reader#lads drabble#lnds drabble#love and deepspace drabble
939 notes
·
View notes
Note
Any tips on learning to make buttonholes? I've been putting it off for.... *checks notes* like three years.... but better late than never and all that. I don't have any fancy machines so I gotta do it by hand but that seems right up your alley.
Thanks!
It IS up my alley, yes, I do most of my buttonholes by hand!
I'm actually part way through filming an 18th century buttonhole tutorial, but I expect it'll be a few more weeks before I finish that and put it on the youtubes, so in the meantime here's the very very short version. (The long version is looking like it'll probably be about 40 minutes maybe, judging by how much script I've written compared to my last video?)
Mark your line, a bit longer than your button is wide. I usually use a graphite mechanical pencil on light fabrics, and a light coloured pencil crayon on dark ones. (I have fabric pencils too, but they're much softer and leave a thicker line.) You may want to baste the layers together around all the marked buttonholes if you're working on something big and the layers are shifty and slippery. I'm not basting here because this is just a pants placket.
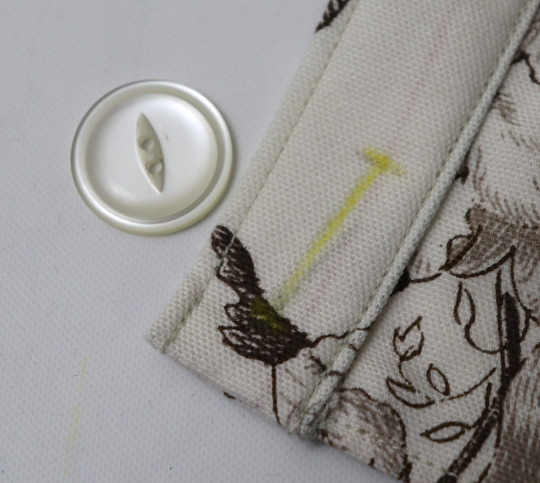
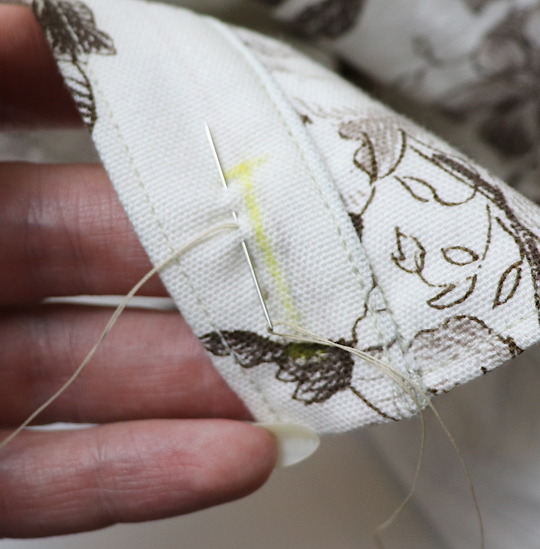
Do a little running stitch (or perhaps a running backstitch) in fine thread around the line at the width you want the finished buttonhole to be. This holds the layers of fabric together and acts as a nice little guide for when you do the buttonhole stitches.
Cut along the marked line using a buttonhole cutter, or a woodworking chisel. Glossy magazines are the best surface to put underneath your work as you push down, and you can give it a little tap with a rubber mallet if it's not going through all the way.
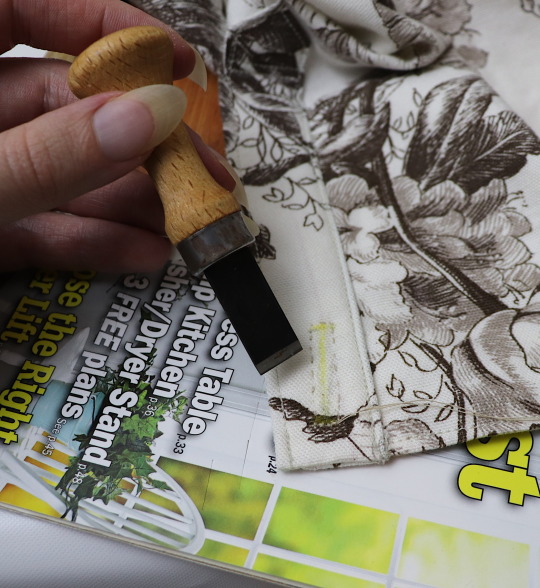
I'm aware that there are some people who cut their buttonholes open using seam rippers, and if any of them are reading this please know that that is abhorrent behaviour and I need you to stop it immediately. Stop it.
Go get a buttonhole cutter for 10 bucks and your life will be better for it. Or go to the nearest hardware store and get a little woodworking chisel. This includes machine buttonholes, use the buttonhole cutter on them too. If you continue to cut open buttonholes with a seam ripper after reading this you are personally responsible for at least 3 of the grey hairs on my head.
Do a whipstitch around the cut edges, to help prevent fraying while you work and to keep all those threads out of the way. (For my everyday shirts I usually do a machine buttonhole instead of this step, and then just hand stitch over it, because it's a bit faster and a lot sturdier on the thin fabrics.)
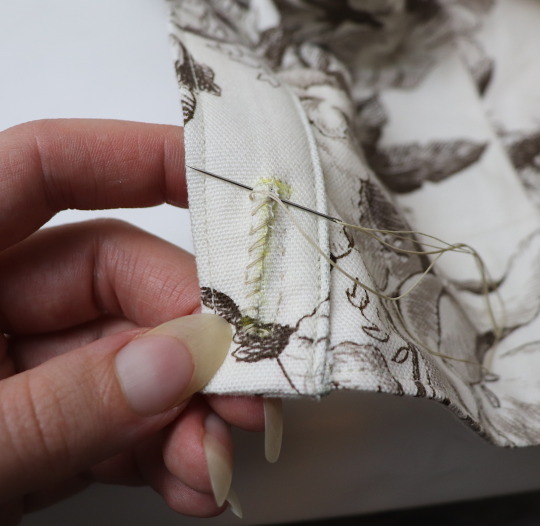
I like to mark out my button locations at this point, because I can mark them through the holes without the buttonhole stitches getting in the way.
For the actual buttonhole stitches it's really nice if you have silk buttonhole twist, but I usually use those little balls of DMC cotton pearl/perle because it's cheap and a good weight. NOT stranded embroidery floss, no separate strands! It's got to be one smooth twisted thing!
Here's a comparison pic between silk buttonhole twist (left) and cotton pearl (right). Both can make nice looking buttonholes, but the silk is a bit nicer to work with and the knots line up more smoothly.
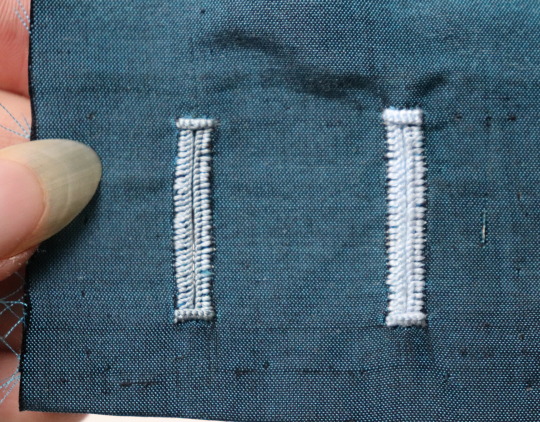
I've actually only used the silk for one garment ever, but am going to try to do it more often on my nicer things. I find the cotton holds up well enough to daily wear though, despite being not ideal. The buttonholes are never the first part of my garments to wear out.
I cut a piece of about one arm's length more or less, depending on the size of buttonhole. For any hole longer than about 4cm I use 2 threads, one to do each side, because the end gets very frayed and scruffy by the time you've put it through the fabric that many times.
I wax about 2cm of the tip (Not the entire thread. I wax the outlining/overcasting thread but not the buttonhole thread itself.) to make it stick in the fabric better when I start off the thread. I don't tend to tie it, I just do a couple of stabstitches or backstitches and it holds well. (I'm generally very thorough with tying off my threads when it comes to hand sewing, but a buttonhole is basically a long row of knots, so it's pretty sturdy.)
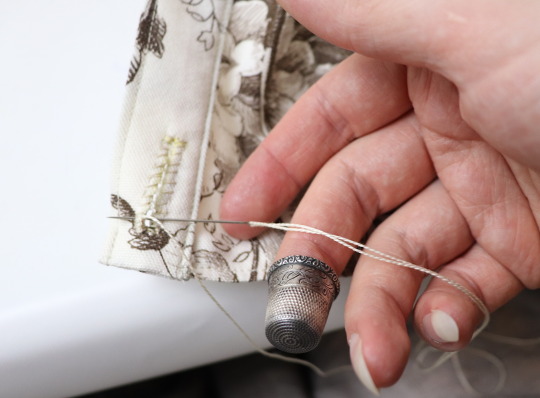
Put the needle through underneath, with the tip coming up right along that little outline you sewed earlier. And I personally like to take the ends that are already in my hand and wrap them around the tip of the needle like so, but a lot of people loop the other end up around the other way, so here's a link to a buttonhole video with that method. Try both and see which one you prefer, the resulting knot is the same either way.
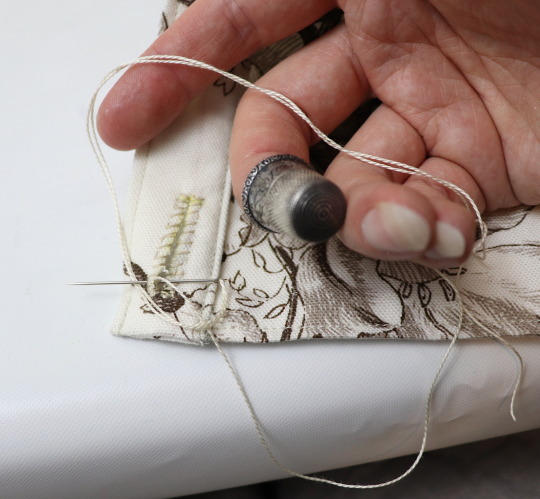
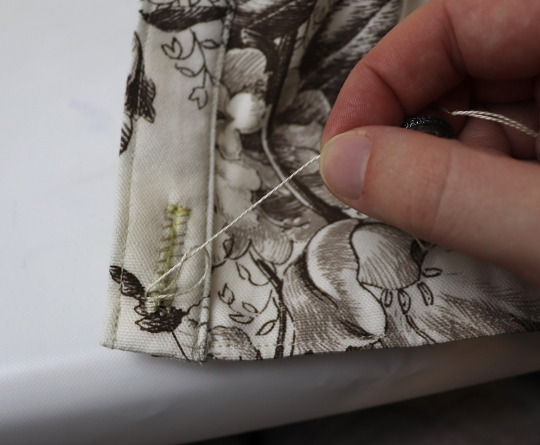
Sometimes I can pull the thread from the end near the needle and have the stitch look nice, but often I grab it closer to the base and give it a little wiggle to nestle it into place. This is more necessary with the cotton than it is with the silk.
The knot should be on top of the cut edge of the fabric, not in front of it.
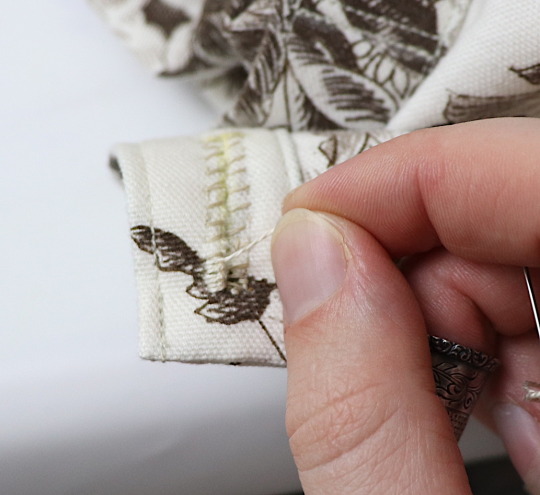
You can put your stitches further apart than I do if you want, they'll still work if they've got little gaps in between them.
Keep going up that edge and when you get to the end you can either flip immediately to the other side and start back down again, or you can do a bar tack. (You can also fan out the stitches around the end if you want, but I don't like to anymore because I think the rectangular ends look nicer.)
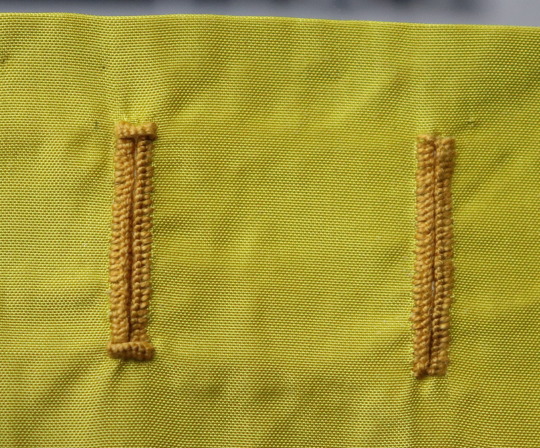
Here's a bar tack vs. no bar tack sample. They just make it look more sharp, and they reinforce the ends.
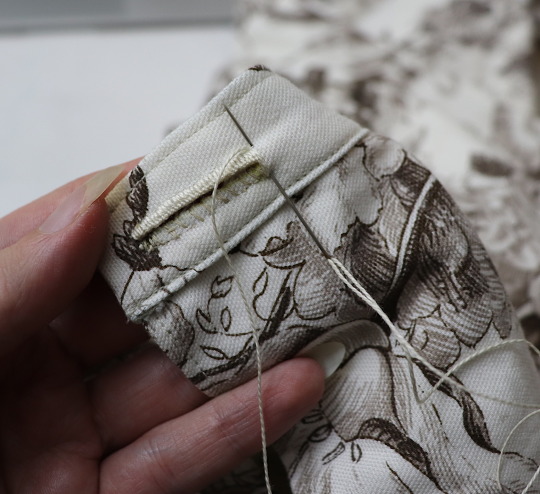
For a bar tack do a few long stitches across the entire end.
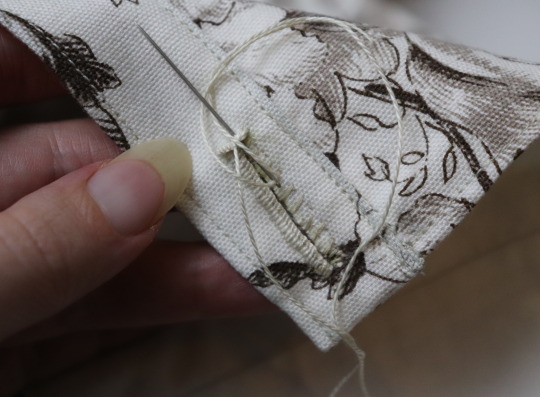
And then do buttonhole stitches on top of those long stitches. I also like to snag a tiny bit of the fabric underneath.
Then stick the needle down into the fabric right where you ended that last stitch on the corner of the bar tack, so you don't pull that corner out of shape, and then just go back to making buttonhole stitches down the other side.
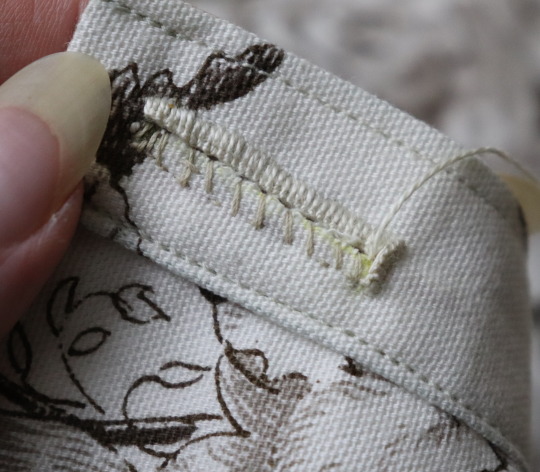
Then do the second bar tack once you get back to the end.
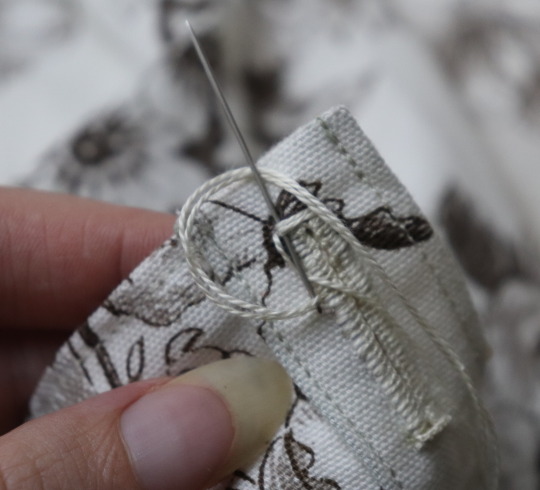
To finish off my thread I make it sticky with a bit more beeswax, waxing it as close to the fabric as I can get, and then bring it through to the back and pull it underneath the stitches down one side and trim it off.
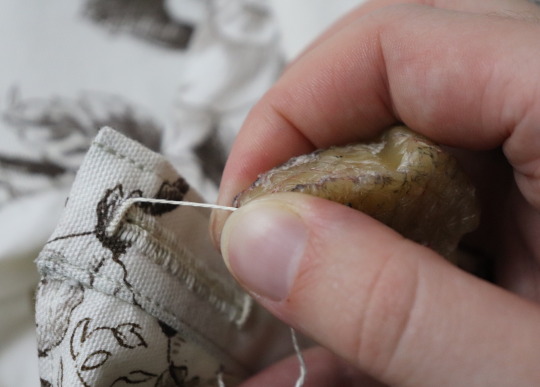
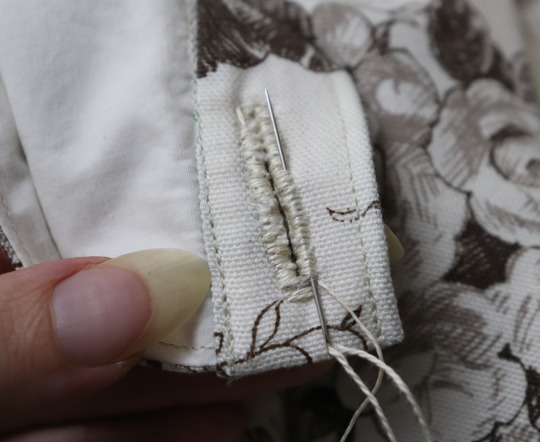
In my experience it stays put perfectly well this way without tying it off.
Voila! An beautiful buttonholes!
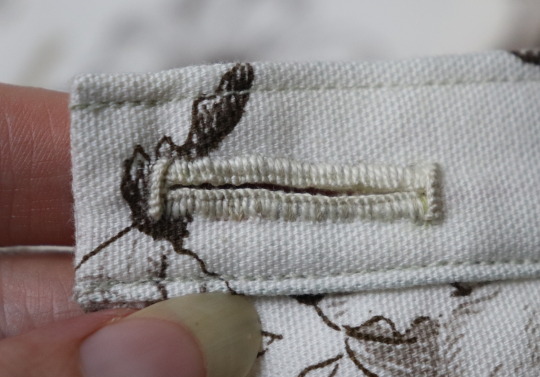
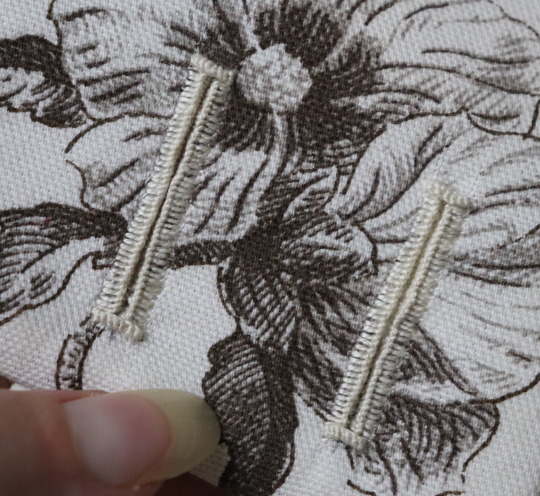
If you want keyhole ones you can clip or punch a little rounded bit at one end of the cut and fan your stitches out around that and only do the bar tack at one end, like I did on my 1830's dressing gown.
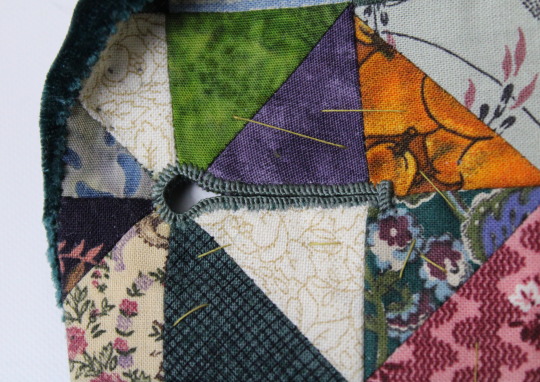
(I won't do that style in my video though, because they're not 18th century.)
Do samples before doing them on a garment! Do as many practice ones as you need to, it takes a while for them to get good! Mine did not look this nice 10 years ago.
Your first one will probably look pretty bad, but your hundredth will be much better!
Edit: Video finished!
youtube
And here's the blog post, which is mostly a slightly longer version of this post.
#ask#buttonholes#sewing#hand sewing#sewing tutorial#I've been procrastinating on the video this week#I want it done! I don't want to work on it I want new projects! I want to cut out more gloves!#currently forcing myself to do the last few buttonholes on these pants and then maybe I can cut out new gloves? as a treat?#but I hope I get some filming done tomorrow too
4K notes
·
View notes
Text
I've always wanted to learn bookbinding, ever since I was a wee little nerd, but there are a lot of things I've always wanted to learn, and this one has both a daunting upfront materials cost and a daunting upfront research cost. however, my sister is a jewel among siblings and gave me for christmas last year a handy dandy bookbinding manual, a block of good paper, and a little bag of tools.
but I still didn't have a suitable workspace, nor any of the many important tools and materials that she didn't include in her gift. so I just read the manual and pined. until maybe a month ago I got fed up with pining, flattened a cardboard box for a cutting mat, and went to town.
and I'm real proud of myself, so here's me rambling, plus photos!
I went to the thrift store and got glue + some fabric to bind the cover, went to Michaels for a paintbrush (and later went back for a metal ruler lmao it's amazing how useful it is to have a straightedge for cutting the paper), and...could not find material for the cover boards. so I went home and pined some more. but the urges were too strong, so after a couple hours of moping I got a stack of printer paper at the grocery store (I could not bring myself to use the good paper for my first, inevitably weak attempts, I just couldn't do it) and started making a little booklet. which was a great idea, it turned out, since it makes for good practice with cutting the paper, measuring things, punching holes in the signatures, etc.
I have a big box of greeting cards from Michaels, which I used for the covers. it didn't feel like I was making a Real Book, so I got some colored paper from the stationery store and used that for end papers.
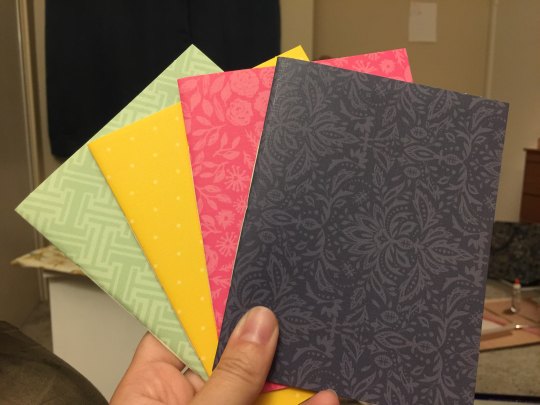
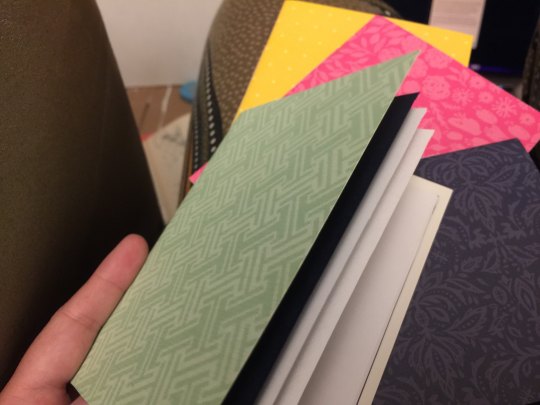
so fancy~
galvanized by this success, I ordered a stack of chipboard online to use for cover boards; and once I was confident that I could cut paper without making it look too stupid (getting that straightedge ruler sure helped lol), I made signatures out of the good paper, left them under some heavy books overnight since I don't have a book press, and then punched holes in them! (huzzah for this nice video on getting the holes right)
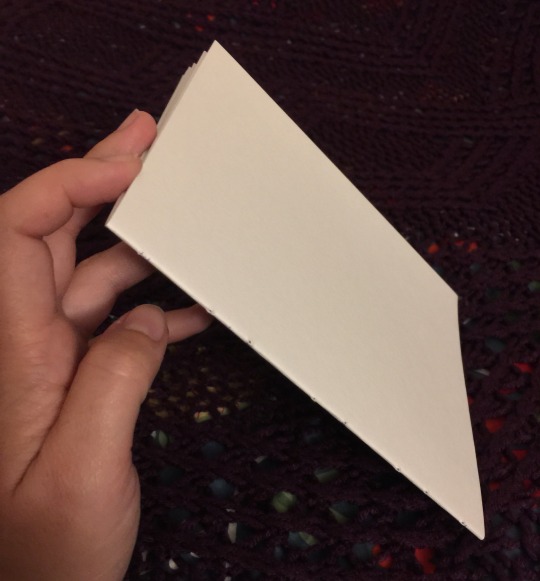
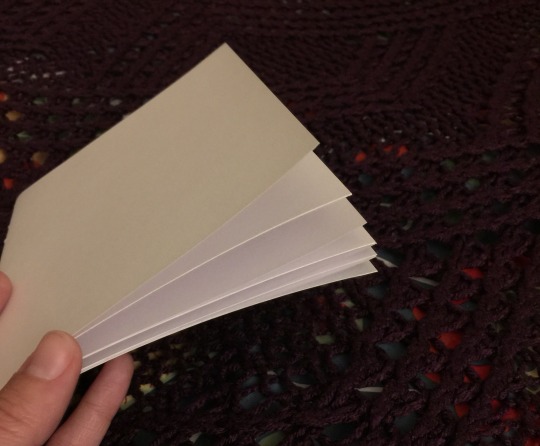
my sister's gift included good linen thread. it's unwaxed, but after some poking around on r/bookbinding it looks like that just means I'll have to be more careful to avoid tangles and keep good tension. I am fine with this. I can be extra attentive. (I considered just running it over a beeswax candle, but one commenter said if your wax has paraffin in it, it could melt in a hot car, ruining the spine. I can't guarantee my candle is 100% beeswax, I didn't make it, so maybe we just move on.)
I don't have good linen fabric to use for the tapes, but the important part there is that the fabric be thin, sturdy, and not stretchy. the probably-cotton I got from the thrift store fits the bill, so it'll do!
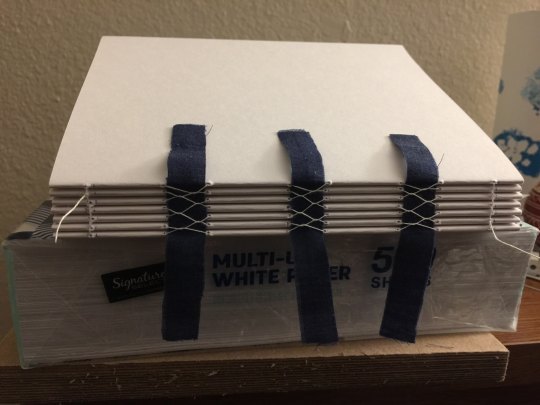
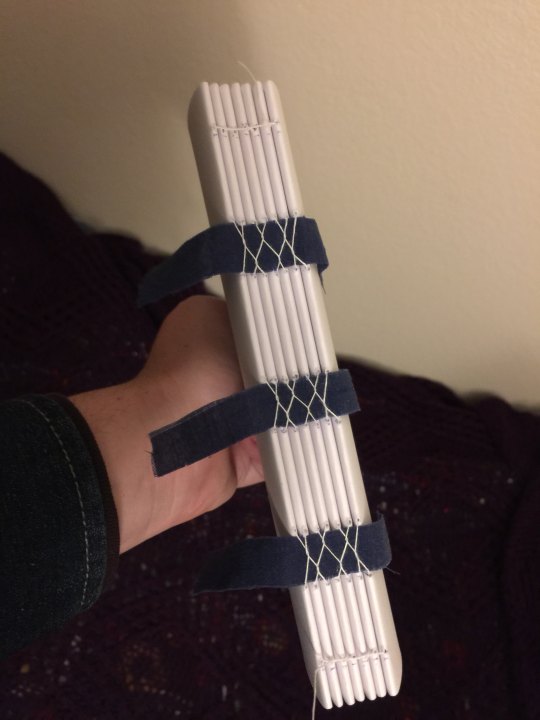
this is a french link stitch, which I got from this exceedingly good tutorial. apparently it's strong enough on its own that for a book of this size, I don't actually need tapes, but I'd already cut the things so eh here we are. and tapes plus french link will make it a stronger binding still (according to a friendly redditor on r/bookbinding), so we carry on.
specifically we carry on to the gluing step. now as I mentioned, I do not have a book press, and you....kinda need one for this step. you need to hold the book block in place with the signatures facing upwards, pressed together hard enough that the glue won't run down between them and stick the pages together (though you do want the glue to get between them just a little, just for like a 16th of an inch). you at least need some clamps and a couple boards to sandwich the book block with.
but you know what? I'm not a professional, this is my first ever book, if it's a little bit off it'll be fine. so we grab all the heaviest books off the bookshelf and improvise.
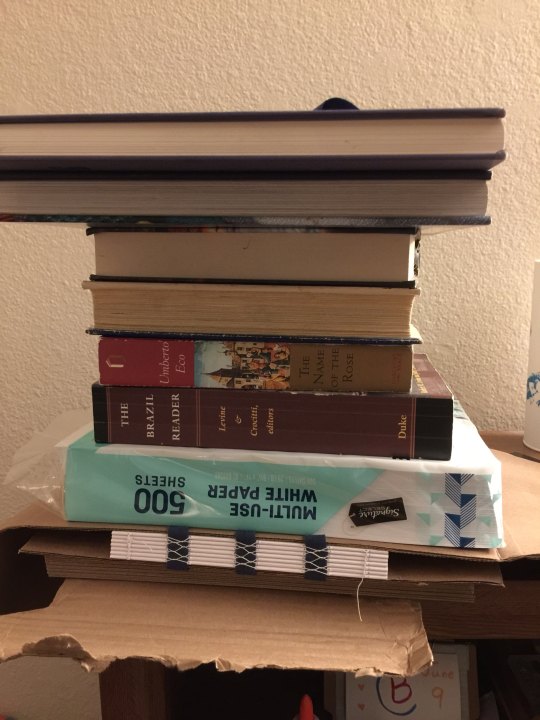
it's fine! I'm sure it's fine! and just in case it's not, I've tucked a bit of cardboard underneath to catch any glue that drips down so it won't land on the floor. see? I'm prepared! I'm acing this.
and actually, it really was fine. I used clear elmer's glue, applied with a flat paintbrush from the art supplies aisle at Michael's, and frankly I liked the way the flat paintbrush let me slip glue in between the signatures. I did poke around on a couple bookbinding sites to see what kind of glue I should use, and the gist is that although there are better options than this, elmer's glue is perfectly serviceable, and the main downside is it's not archival grade. but I don't need my first bookbinding attempts to last 200 years, that's fine.
the next step is to add the mull. mull is a specific type of fabric – extremely loose-weave linen – and the idea is to paste it down over the spine to essentially hold the tapes and signatures all in place in relation to each other.
but I don't have mull! so I'm using more of the thrift store probably-cotton, because it's thin enough and not really stretchy at all. I'm sure this will be fine too. I painted a layer of glue onto the spine, then left it to dry a bit while I measured and cut the fabric, then painted a generous stripe of glue down the center, where it'll affix onto the spine. then I added a bit more glue to the spine, just to be sure, and pressed the mull into place, rubbing it thoroughly to make sure it's firmly affixed to every signature, with no creases in the fabric or air bubbles beneath it.
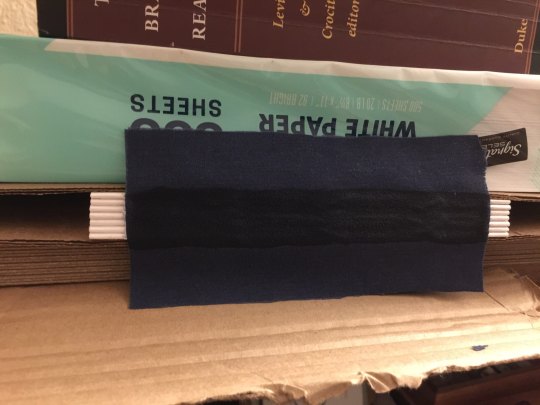
honestly I might have overdone it on the glue. I've never done this before, I don't know! I think it's okay, though – I tried not to ever let it become a thick layer, just a slight coating, since the danger of too much glue is that it might crack once dry and weaken the spine.
and now we leave it in the press overnight to dry, and pick up the next step in the morning!
#finx rambles#bookbinding#finx makes stuff#technically this is the second hardcover book I've made#but it's the first I'm making using Approved Techniques™#instead of watching a handful of half-relevant youtube videos and making up the rest#which was fun!#but did mean that once I was done I didn't know where to go from there#and at the time I couldn't find better resources#(I really wanted better youtube videos! just didn't know how to find them idk)#(it was 2020 I was unwell. as I'm sure we all understand)#but now I have an abundance of good sources#and I'm determined
583 notes
·
View notes
Text
The Castoria Ukagaka is OUT!

Artoria Caster (Castoria for short) from popular video game Fate/Grand Order is here and ready to mingle on your desktop! Written by @versegm, coded & drawn by @characteroulette, she can do many things such as
Nothing
Chill
Relax
Look pretty
Make conversation
Get pet
Change into no less than three (3!) different shells, each of which featuring a removable hat
Empty your bin and check your calendar, if you really want her to do something useful.
You can download her here!
CONTENT WARNINGS:
Chronologically, Castoria hails from the aftermath of her adventure. Meaning she is dead. She does occasionally mentions her death and its circumstances, albeit in vague terms.
While Castoria mostly acts kind and helpful, she does occasionally get really bitter and vitriolic. This will never be targeted towards you as a user, but I figure this warrants a warning regardless.
She has one whole line about petplay.

What's an Ukagaka/How do I get the desktop Castoria?
An Ukagaka/Ghost is a computer widget that hangs around desktop. It can do a variety of things (empty your bin, check your calendar, set you reminders, ect) though in Castoria's specific case this is really just "what if blorbo could hang around with you and randomly chat you up." It's a bit like a shimeji, if you've heard of those.
Follow this very simple tutorial and you, too, will get to have the funny Castoria on your desktop! (And perhaps, many other ghosts! We did a Herlock Sholmes a few years back :)
Step 1: Get SSP
SSP is the software that allows ukagakas to run. You can get it here. Yes, the website is in full japanese, but fearen't! I screenshotted the download button you need.

Step 2: Get the .nar file of the ukagaka you want
Some ukagakas have multiple .nar files (Castoria has two for instance), just get all of these bad bitches :]

Step 3: Launch SSP
You should get good ol Emily popped on your desktop!
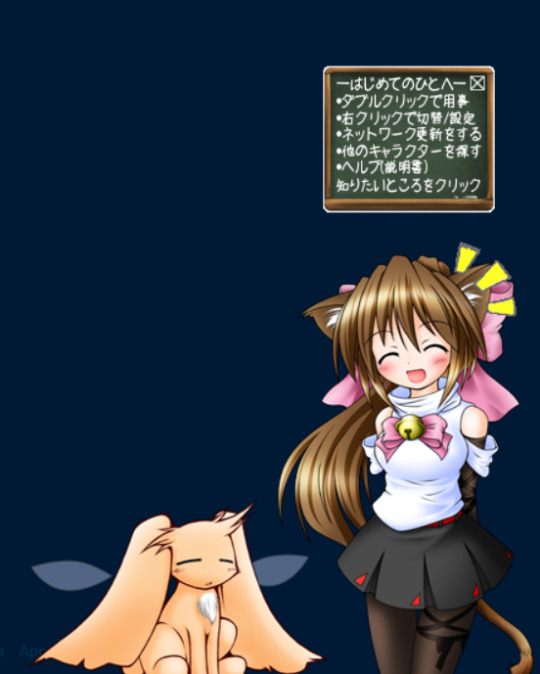
Step 4:
Drag your .nar files on emily! A pop-up will ask you if you want to install the ghost, and you shall say yes!
Step 4.5:
If the previous doesn't work, you can unzip the .nar files in the ghost folder in SSP, next to Emily's folder.
Step 5:
Right click + change ghost + Artoria Caster
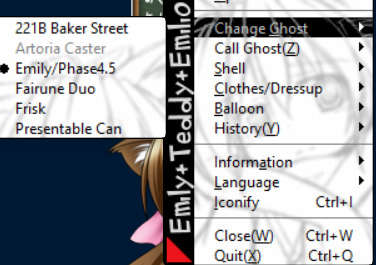
And you should be good!
If you are still having issues, I will redirect you to the Ukagaka wiki and to Zi's blog.

249 notes
·
View notes
Note
I love your art so much!!! I've also been starting to paint with gouache, and I'd love to know a little more about your process! What kind of paints do you use, do you sketch first or start with paint, do you paint in layers over several day or all at once?
Hi and thank you! I hope you don't mind me answering this publicly and apologies for length, but:
MY ART PROCESS!
Supplies: I use winsor and newton gouache and arches cold press paper blocks, usually 140 lbs (the lime green ones) and sometimes 300 lbs (the teal green ones). Even though this paper comes pre-stretched in blocks, I actually take the sheets off and stretch them myself because I've found arches' glue isn't as strong as it used to be. This is how you get watercolor paper to lay flat! I recommend youtubing some videos on how to do it -- there's a lot of great tutorials out there. Also, I use princeton brushes, and kraft paper tape and these boards to stretch my paper. (these aren't affiliate links, I just shop at blick)
A word about art supplies: these are the exact tools I use but everyone uses supplies differently and two people with the exact same supplies might get different results! A lot of it is about what works for you and what you like, so I always suggest that gouache/watercolor beginners just buy a few tubes from a couple of different paint companies and some small pieces of paper from different manufacturers to see what you like. Just changing one ingredient in the above has created massively different results for me, but maybe that'll end up being something you'd like! The first step in learning a new medium imo is to play. Just have fun!
ALSO: gouache isn't super light permanent, check your tubes for which ones hold up to sunlight. Here is winsor and newton's color chart explaining which ones will fade when exposed to sunlight -- all manufacturers will give you this. I only use the colors rated A and AA, and I still frame my pieces with UV glass just to be safe. Not all gouache is re-wettable, but winsor and newton is. I just put it in my palettes and refill my palettes if it runs low. AND SOME PAINT IS TOXIC. A lot of paints have cadmium and cobalt in them. I don't use any of the toxic colors, but if you do, make sure you don't eat while working and wash your hands thoroughly afterwards. This information is also usually available on manufacturer's websites. As more people are rejecting cadmium paint, you'll see more tubes labeled things like cadmium-free yellow. This is why. More artists should be aware that their tools can be dangerous. You don't need that many tubes of paint to begin, just a warm and cool red, warm and cool yellow, warm and cool blue, white and black. I have around 50 colors and use 20 regularly. I always mix all my colors myself, and never use straight tube paint. Most of my colors have about 5-6 different tube colors mixed together. If you use re-wettable paint a tube of paint will last you years; even as a professional I only buy new paints every 5 years or so.
Process: I ALWAYS start with a sketch first. Not everyone has to, but because I do illustration work -- where sometimes a client gets input on a drawing -- I always do a lot of preliminary work before I even begin to paint. At this point, even my personal work usually involves the exact same process:
I start with a 3" or so thumbnail that I scan (left; I traced it quickly digtally for clarity to myself here) and then either clean up digitally or print out and clean up traditionally with tracing paper (right):
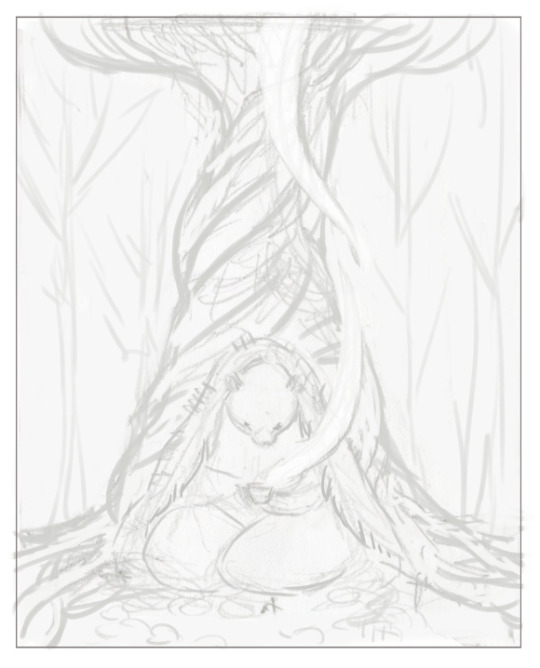

Then I scan the cleaned sketch in and color rough it digitally (left, this was for a gallery show, so no one had to approve my color roughs, so it's messy!) then I transfer my sketch to my paper (with either carbon transfer paper or a light table), stretch my paper, and paint (right):
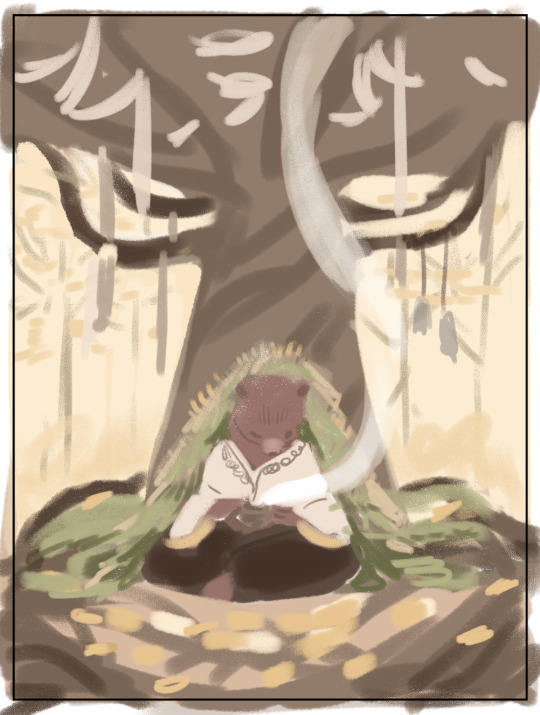
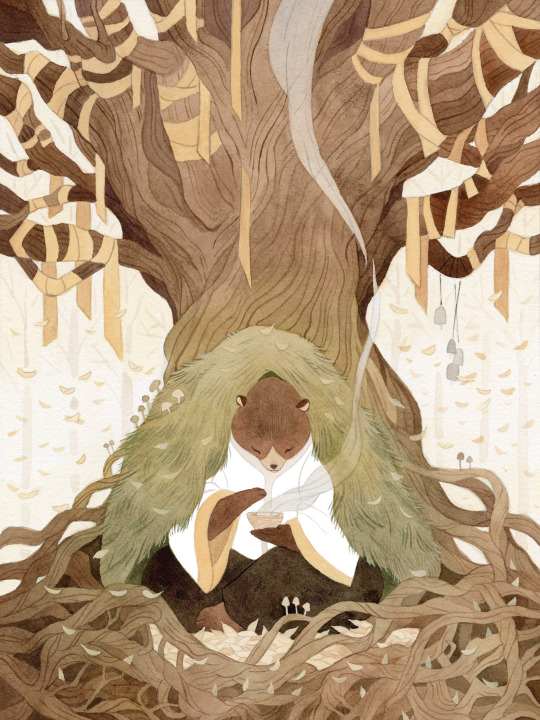
I obviously changed my mind about the color of the ribbon in the trees, ha, and made everything a lot more vibrant. The benefit again of gallery work is no pre-approval!
You are correct, I paint in a series of washes, going from lightest to darkest, where I apply the same color beneath all shapes that are the same warmth (cools under all upcoming cools, warms under all upcoming warms). I paint a piece usually in one or two days, depending on complexity. I didn't take pictures of the above painting, but here's a different painting to show you a little bit what I mean:
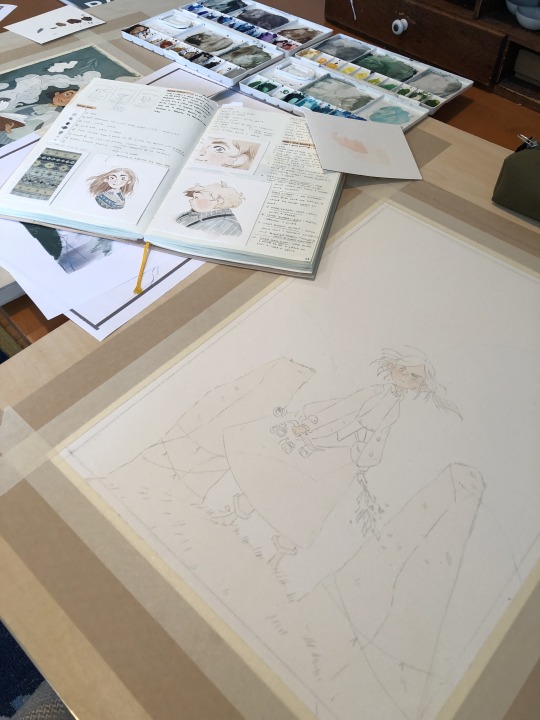
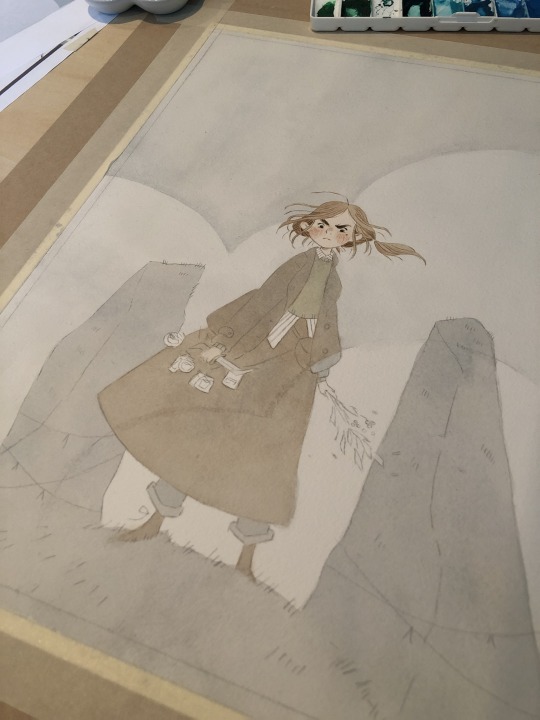
I painted the peach color under everything (and twice for skin tones), and the gray color of the sky under everything that would be grayish (the rocks, trees, her pants, her skirt, and coat). I do this to stop me from getting darker lines where two different colors butt up against each other, and also for color harmony. I have step by step photos of this in my process stories highlight on my instagram; also check my FAQ and tip highlights for more info on all this stuff. Most pieces take around 25-30 washes before I start adding in the details (sometimes I add in face details early though because if I mess those up it's not worth finishing the rest of the painting! 😅)
All this might seem like a lot of work (...it is) but I do it so that I can show clients previews of the final piece and so I don't have to repaint the finals. I also used to pre-test all of my washes on scrap paper like this:
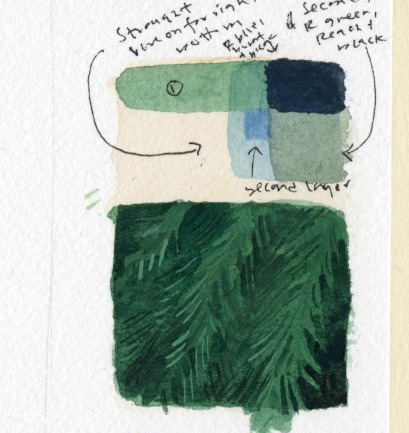
I still recommend doing this if you're just beginning! But at this point I only do it when testing techniques because I know my paints really well. (the above was my test for the pine boughs in this piece)
Painting by far is the longest part of the process, so I do more work up front to not have to do it twice. Every piece takes about 6-24 hrs of actual work time to produce. Stretching watercolor paper takes about 24 hrs to dry, and because I sell most of my originals in galleries, they need to be flawless, so planning ahead is useful and in the end saves me time.
And to conclude this novel of an explanation, don't be overwhelmed by all the information I've given you! I put it here so that people at various stages of their artistic journey can maybe find something useful in it. But seriously, the first step to learning how to paint whether it's traditionally or digitally is just to have fun. Try it out, see what's working and what isn't, and then try to solve specific issues that you're struggling with. I've been doing this for a loooooong time at this point, but here's my first watercolor piece from when I was re-teaching myself how to paint traditionally nine years ago:
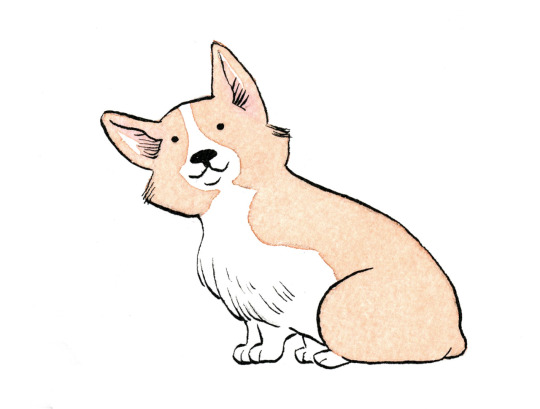
Obviously, I was destined for greatness. Ha, yeah, no. If you scroll back through my tumblr archive, you can see me learning how to use these paints in real time. And keep in mind that I'd been working digitally for years before then, and years before that where I didn't post my work online at all.
So for anyone who needs to hear it: there's no such thing as talent, just hard work, patience, and trying again and again and again...and sometimes again. What I do is a skill and anyone can learn it. Sometimes, progress is slow. I'm 38. I only really feel like my art was half-way decent starting a few years ago, but I've been making art my entire life, and I went to art school at 18. 20 years later I'm kind of figuring it out.
The best advice I can give, whether it's about art or not, is find the thing you love so much that you'll keep at it even when you suck at it, because most skills you'll suck at to begin with -- and perhaps for a long time. I sucked at art for yeeeaaaaarrrrs. On top of the usual learning curve, I struggled with fine motor control and dexterity. But I loved it so much I kept trying every time I failed. If I can do it, so can all of you, no matter what stage of art you're at now, and no matter how old you are.
Anyway, thank you to those still reading this deep in. I wish you all the best on your artistic journey. Art can kick your butt sometimes, but it's also pretty dang rewarding 💛
536 notes
·
View notes
Text
GM Cannon II (Space Command Type)
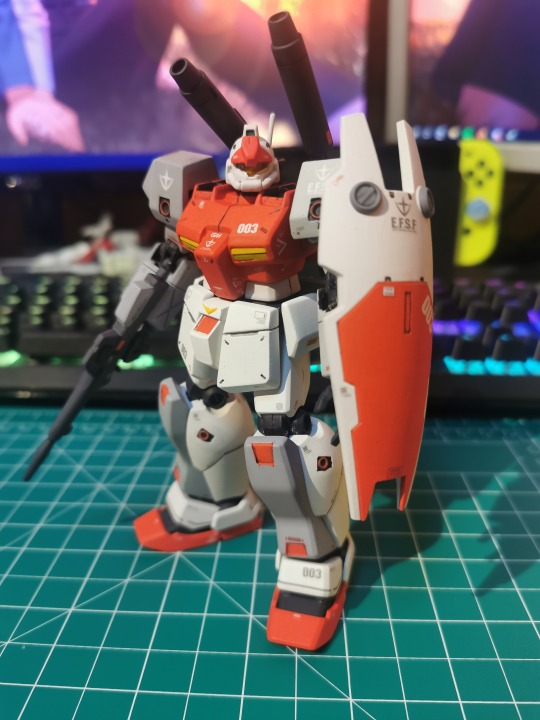
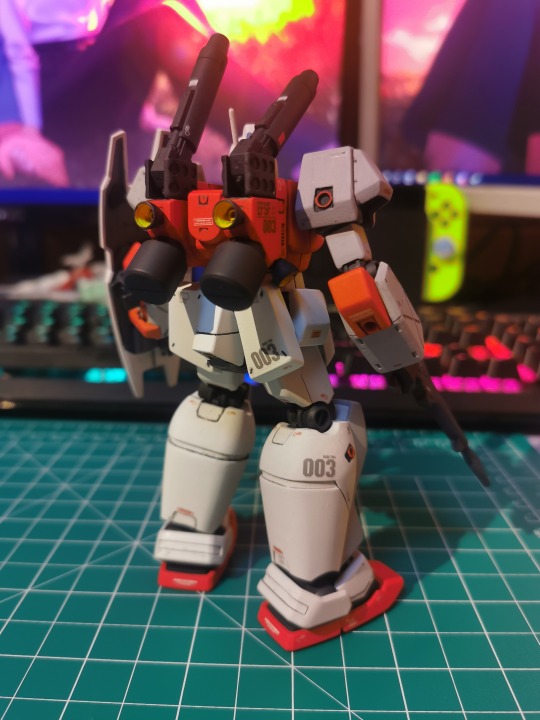
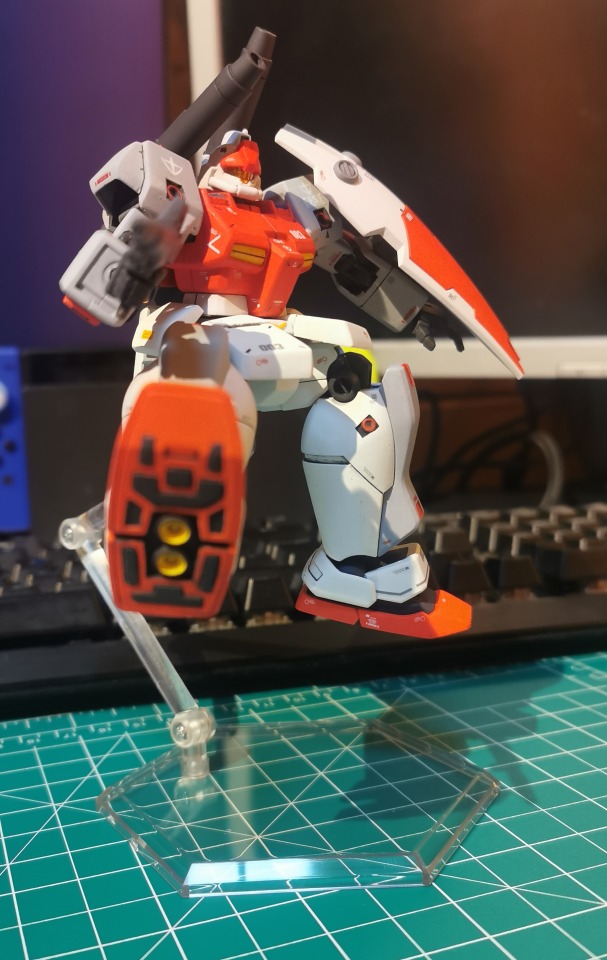
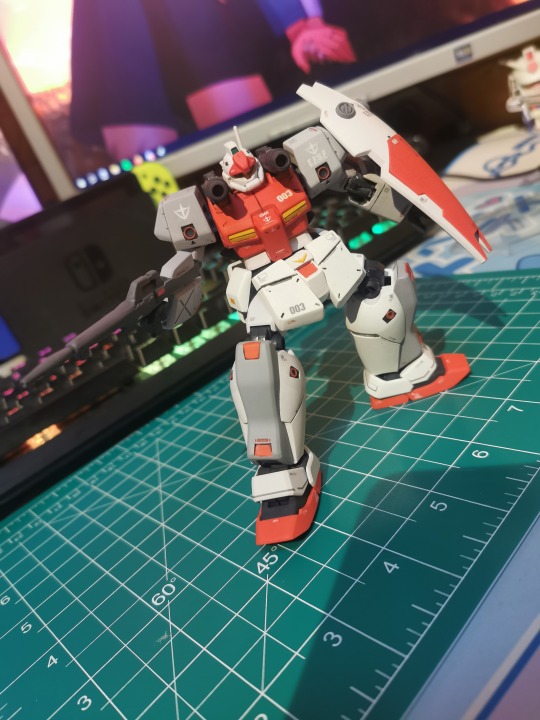
It honestly feels a little surreal posting this right before the new year rolls in, but it also feels so satisfying to put this project behind me so that I can focus on my backlog in 2025. This is a project I started a few months ago at this point, and at long last I can properly show it to you all! It's a custom colour scheme that I decided to paint on the GM Cannon II.
If you don't care to read about the process of painting this thing and just want to see some extra pictures and angles of the finished product, scroll down to the end of the post :)
I like the design of this mobile suit but I thought the original colour scheme was kind of gross and unpleasant to look at, so I decided that I would use this kit as a practice to familiarise myself with brush painting techniques. I decided to go for something simple enough and just adapt the GM Space Command colour scheme to use with the GM Cannon II. In case you haven't seen what the kit looks like out of box, here it is:
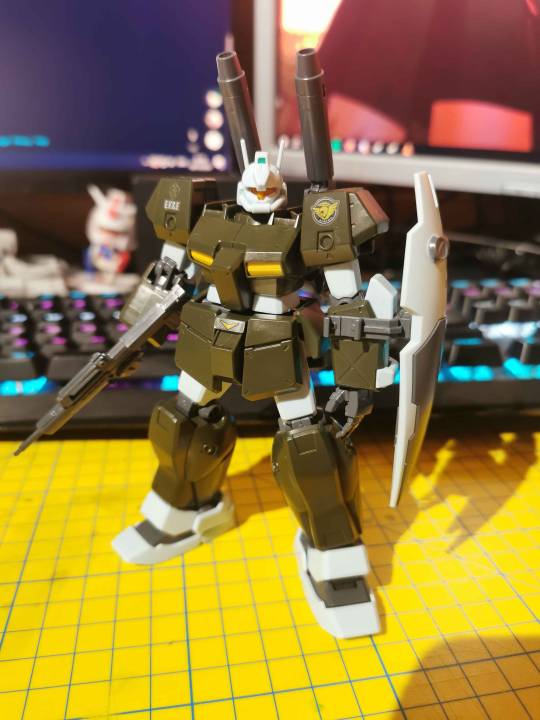
I originally expected this project to take me a few weeks, but it ended up spanning months, and for a first time attempt at this, I'm actually very proud of it! I think it looks very clean, and despite the GM Cannon II kit being kind of a piece of hot garbage when it comes to articulation and stability, it served as a good practice kit that I considered to be low stakes.
I'm not going to go into the entire process in detail about how to paint this and instead I will just point you towards the Tea and Gunpla youtube channel, specifically their video about brush painting gunpla. All of the videos on their channel are extremely informative, to the point and act as great tutorials for improving your gunpla customization skills.
The Process (Summarised)
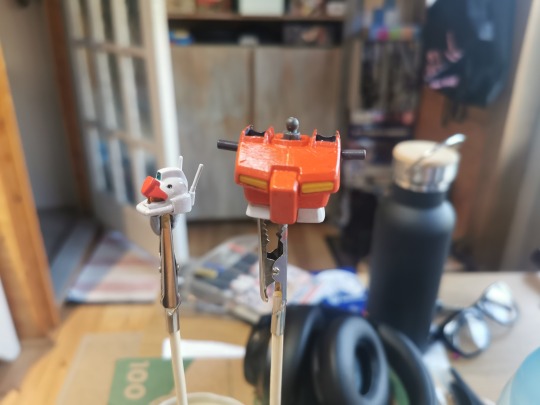
To summarise the steps it took from start to finish though, I first had to familiarise myself with how the kit is assembled and identify the seam lines I wanted to remove (mainly around the arms, shoulders and legs). I then had to remove those seam lines, either by using plastic cement or putty, and then I had to sand every single part down so that paint would adhere to it more easily.
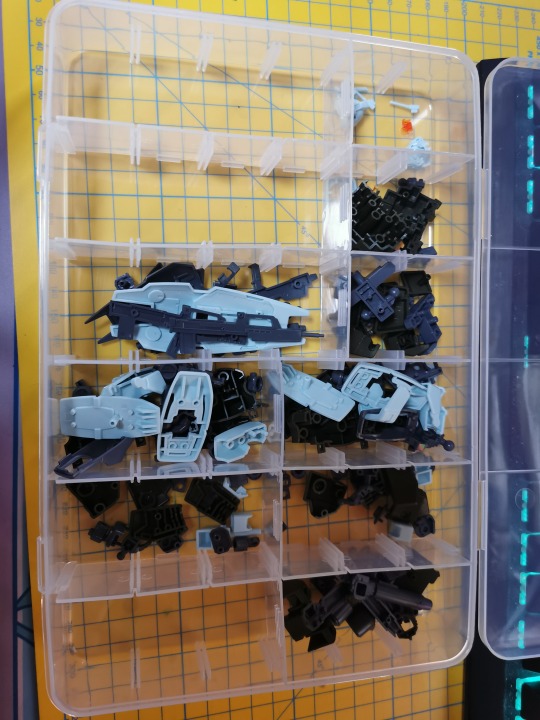
From there, I could start painting the kit, initially priming all of the parts and then painting them all with the respective colours I wanted them to be.
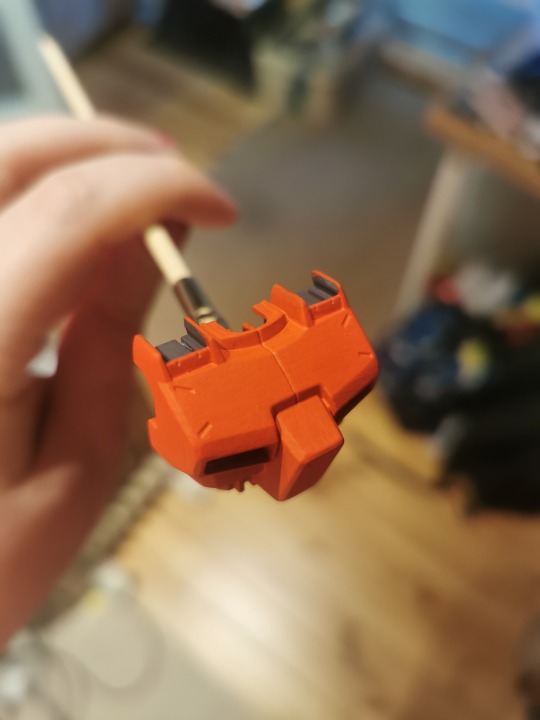
From there, my usual process would be to assemble the painted pieces very carefully as to not chip any paint, and then brush paint on a layer of gloss varnish in order to protect the paint and prepare the piece for panel lining and decals. For the decals, I used G-Rework's GM II decals, since there are no decals to be found for the GM Cannon II specifically and the GM II decals looked very good and appropriate for this kit.
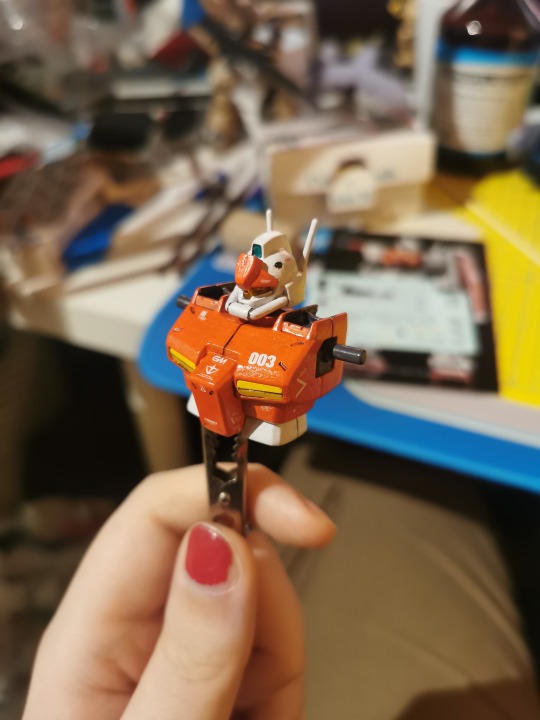
This process is repeated for the rest of the kit until everything is ready to be top coated with a matt spray coat.
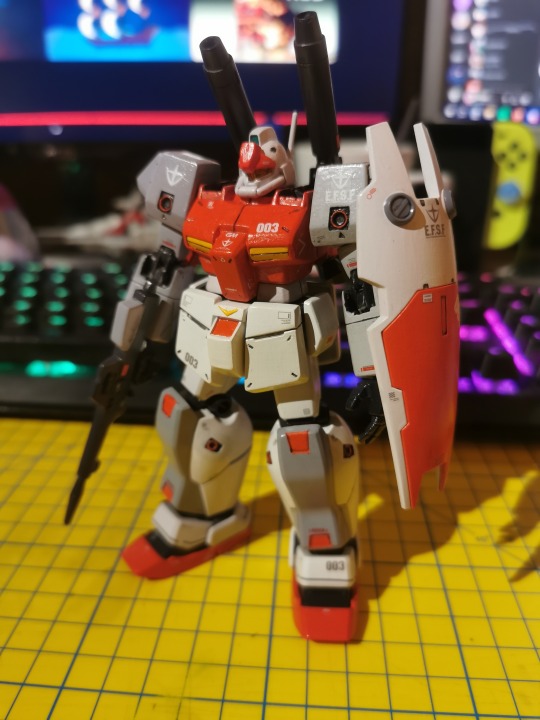
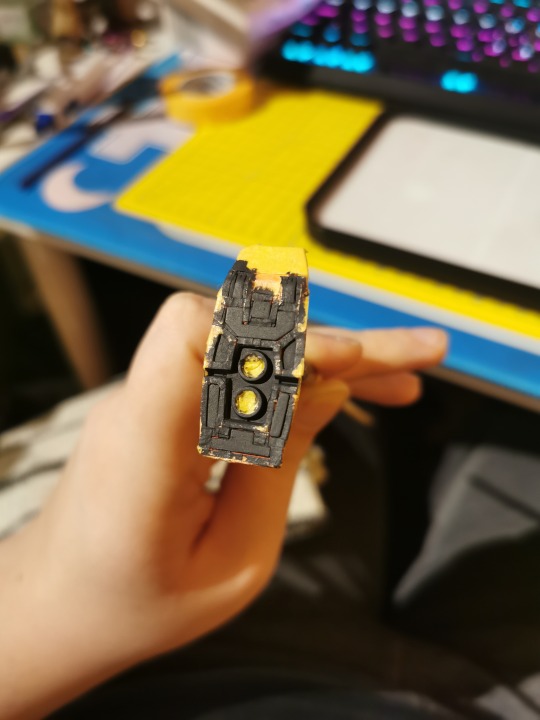
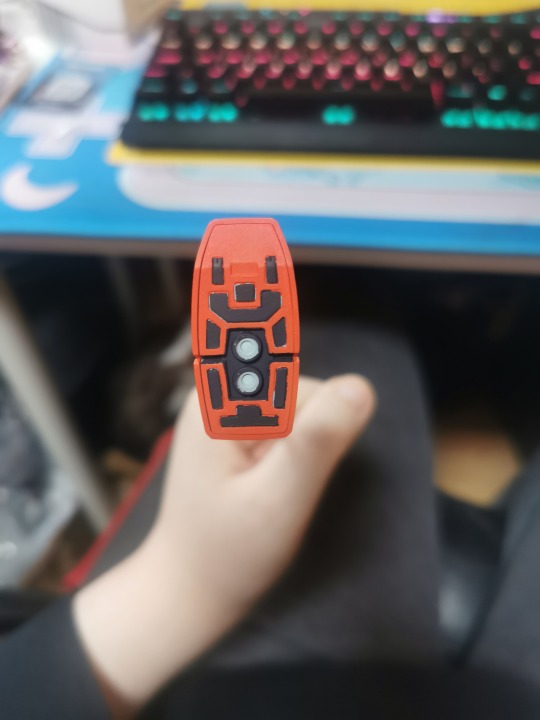
I incorporated some additional techniques to make the painting process a bit easier for myself when working on this kit, and the main one I want to point out is the use of masking tape to cover parts that you don't want to paint over. I found this to be most useful when painting the bottom of the feet, as I wanted to paint the thrusters on the feet as well as extra details in order to make it look nice, but I didn't want to stress myself out with needing to be precise when painting.
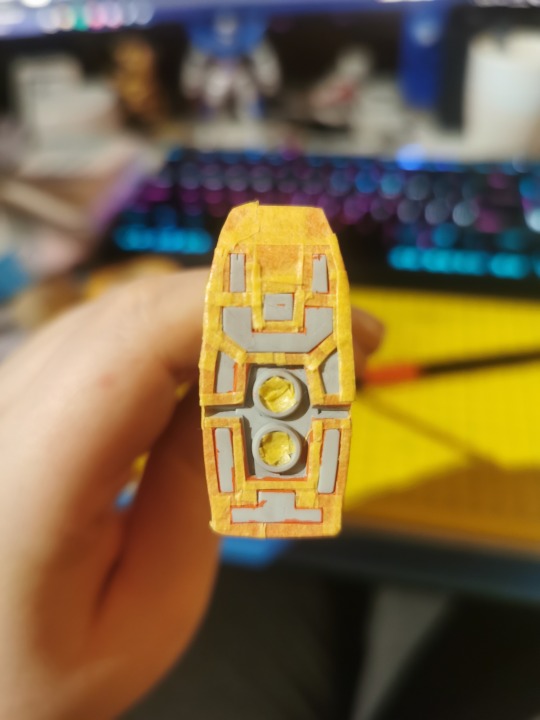
Lessons Learned
I highly recommend using masking tape when painting those kinds of details on a piece, though do be careful with it as you also risk the paint building up on the edges of the tape and making the finished paint job uneven and messy.
I unfortunately had some breakages on the kit as I was working on this project, the most noticeable one being one of the antennas on the back of the head breaking off. I tried to repair this using a piece of runner, but I decided it would be too much work in the long run so I decided to leave it. It's a practice kit after all, so I allowed myself to make some mistakes!
I also had the shield arm joints snap on me completely because I used too much gloss varnish on them and they stuck together, so do be careful when applying the brush varnish. I ended up fixing the arm using some plastic cement, but they no longer have any articulation and are basically stationary at the elbow joint. In future I will look into perhaps spraying the varnish on using a rattle can instead, but I have no idea when I will start another project like this lol.
This practice kit served as a very good lesson in how to pace my painting projects going forward. When working on this, I did every step one at a time for every piece of the kit. That is to say, I first sanded every piece, then I painted/panelled/decaled every piece, and then I matt coated every piece. That ended up being a mistake on my part, as it was incredibly easy to burn out of working on this project. I ended up missing the simplicity of just snap building a kit, and my one-kit-at-a-time policy will not work here for future. Next time I take on a project like this, I will do the painting in the background of other gunpla projects, and I'll treat it as more of a long-term side project.
I also learned to NEVER MIX PAINTS when working on a project like this, unless I'm mixing a large amount of a colour in advance to use multiple times. I originally didn't intend for the kit to have a two-tone white colour scheme with the offwhite and lighter gray, but a mistake when painting the gun arm made me improvise a bit and adopt the two-tone scheme. It ended up actually being a sort of happy accident, because I think it looks great, but keeping the colours consistent like that was a huge hassle and just added extra stress. In future I will be primarily using paints straight out of the bottle and minimising mixing paints.
One thing I didn't give enough attention to was priming my pieces. I sort of haphazardly primed my pieces for painting, and I should have been a lot more careful with it. I let primer build up in corners and it was unevenly applied, and it ended up making some of the painting take much longer than it should have, especially when painting offwhite on pieces that were originally darker in colour.
The last thing I would really want to mention is that matt coating certain colours, particularly metallic ones like what you can see on the head sensors, is not a great idea as it will end up dulling the colour. perhaps it might be better to spray a glossier coating on it, or leaving it un-coated so that the metallic aspect can shine through a bit more. It still looks pretty good overall I think, but definitely something to experiment with.
In Conclusion...
This was a really fun project, and while it was quite tedious and sometimes annoying, the finished product makes all that suffering worth it. I learned so many things and adopted new techniques that I can transfer into my usual gunpla works, which I'm really happy with. If you have any questions as to the process or anything else, feel free to ask! Reblogs are also appreciated <3
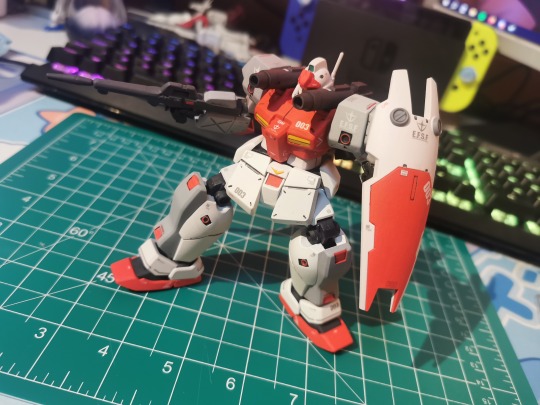
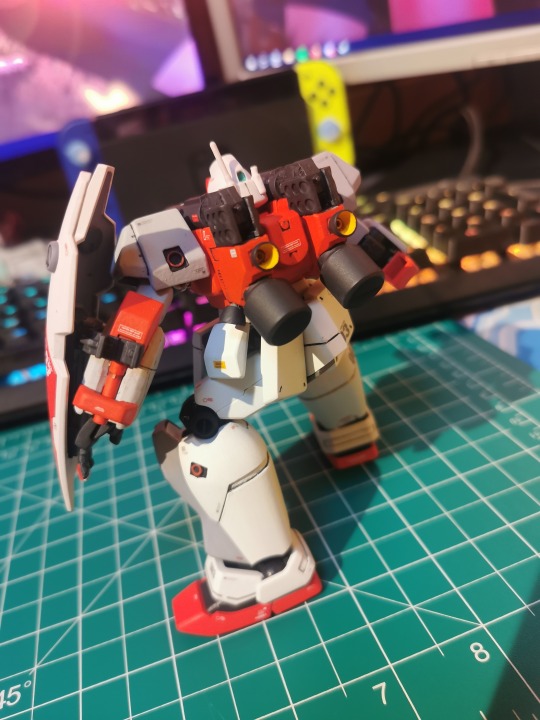
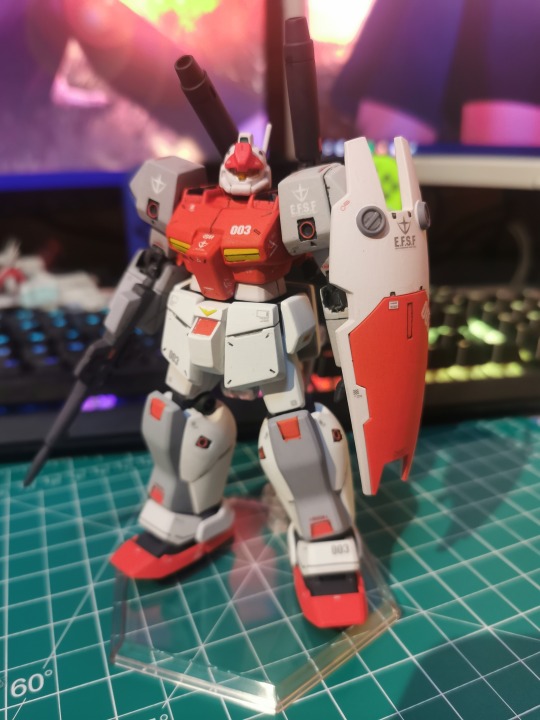
#gunpla#gundam#custom#plamo#plastic model#GM#GM Cannon II#0083#gundam 0083#stardust memory#mecha#mech
36 notes
·
View notes
Text
Tips and tricks to survive Eden even less
Seeing a lot of people struggling with the fourth quest of Revival, aka the 'die and come back for one (1) heart pretty please' quest, and I thought some helpful hints and tricks I've found over the years might be helpful! (Feat: spoilers, obviously)
Step 1: Overcome your fear of death and accept your fate.
I'm serious! People are very cautious in Eden, and often to their detriment! Panic and rush will only make you clumsy and make the whole thing far more stressful than it needs to be! And take longer too!
Step 2: Carry a source of light, or bring a friend! Assembly guide sells a torch, I believe, but in an emergency the rememberance guide sells a teapot on a brazier that does the same... At a Very slow rate. If you bring a friend, you can carry friendship candles that work really well! Unfortunately they're also sort of fragile, so it's best when someone who is being carried holds it.
This will go a long way both to being useful and easing any stress! Just... Make sure not to place it anywhere in the way of krill or rocks.
Step 3: Don't rush after lost wings! If you're already losing light, you're not in a situation to be chasing the metaphorical ball into the busy road! Your first priority is yourself, get to safety and recharge. Lights that land nearby or in safe places sure, but don't jump into the path of rocks just to try and get one back!
I know it's counter instinctive, but you're going to be losing those lights anyway in a few minutes. Even if you have low numbers to begin with, you want to focus on keeping the ones you do have!
Step 4: Jumping vs skipping, also sliding. They're your best friends.
To jump, you press the jump button. Easy. To skip, you want to take your finger off the move circle so it fades, and then flick the screen in the direction you want to go, so your sky kid skips in that direction! The best part is, it has tracking abilities, which is invaluable in helping you land precise jumps (such as that freaking candle bridge in valley). Cool, but why is this important?
Skipping isn't affected by the winds like jumping. Well - it is a little, but it won't send you backwards the way a bad jump will. Not to mention the homing ability will make things easier! It's a bit weaker than a jump, but mix it in to make the journey easier!
Similarly, sliding can be achieved on almost any surface flat enough to walk on. It's not affected as much by the winds either, so try to slide where possible for some speed! Especially if you can move it into a skip, to get a good boost! (This is because you can slide without actively moving your sky kid.)
Step 5: Did you know? Emotes affect not only your hitbox, but also your knock back? If you're unfortunate enough to get caught by a short ledge, try using an emote to duck behind it! When you're in a standing emote (ie, one you have to stop manually and can't move until it's finished. Think the point emote vs the wave emote) you also become a lot harder to knock over! (Warning: this does not work on krill! They are bigger and beefier than you in every way!)
I recommend an emote that's fast to get in and out of, like the first stage faint emote! It's saved my hide many a time.
Also, most people run on Sunday, so if you're looking for a kindly guide, that's your best time!
Now. The route.
At the very start of Eden, there's a thin stone bridge with rushing rocks blowing left to right.
That bridge is optional.
For more experienced players with enough wedges, you can fly right across to the door with a little skill. (There's lots of video tutorials on youtube if you're curious!)
For people with less wedges or skills, hop right on down into the gap. Follow the bridge to where it meets the other side, and there's a slope you can climb back up to skip the rocks entirely!
The second area loads all at the same time. To be precise, in roughly the time it takes to open the door and trigger the cutscene with the krill, you'll usually hear the sound signalling a wave of falling rocks after the second horn note. You can still move in this cutscene! Also that krill can't see you, thank goodness, so don't worry about it.
For taller players (I'm serious lol) there's a big chip in the wall on the far left of the room. It's about in the middle, it's part of a seam, but if you can't find it get your candle out. Walk into the crack. Jump forward a couple times. Escape to oob. Make sure you got the door cutscene, though, because it will get you if you don't!
Climb the clouds as high as you can, following the path. You want to be ridiculously high up to avoid the invisible wall and the winds. You will get softlocked. Not 'I think I'm high enough', not 'I gotta be high enough now', you want 'I'm going to faceplant the sun' high. 'This feels like I shouldn't be here' kind of high. Right by the giant red pillar at the end! Then dive down. Straight down. Straight towards the entrance to the hall of lights. Avoid flying above the krill!! You should land without bother, but run to safety!
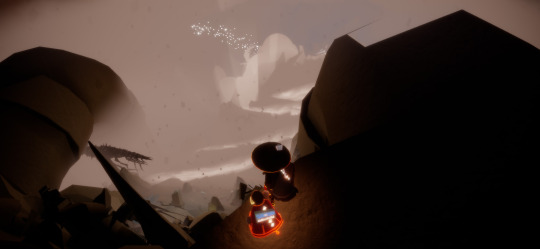
^^^ it looks cool, but don't land here! Land in the actual area down there, by the krill!
For shorter players or less experienced ones, run out and as far left as you can to make it to a safe spot to ride out the first wave of rocks! When the camera returns to you, I recommend keeping left and then running right to the tunnel: keeps you in the path of the rocks as little as possible. RUN.
You have a few seconds between the signal noise (which sounds like a match striking, or a carbonated bottle decompressing) and the surge of rocks (which sounds like strong winds and crunching). There's always particles flying, they're just decorative! It's safe to run when the rocks have stopped!
If you're close to safety, don't stop running!! Don't divert to somewhere that looks safer, get there as fast as you can. Because of the angle of the rocks, at the tunnel/pipe entrance, there's actually a little bit of area in front of it they don't hit. You're closer to safety than you think.
The next phase: pipes. Now, this area is either very easy or very hard, depending on if you get seen by a krill. There's two.
These guys work on a timer. They loop. You can hang around in the pipe between phases and watch them to get an eye on what they're doing, but they move pretty slowly lol. This is the phase you want to rush LEAST. If a krill is coming, hide under the girder. It has a zigzag pattern to help spot, and it's on the switchback leading up to the giant pipe. Don't try and rush it, there's very few places to hide quickly here.
However, the winds are very weak here! You can fly and run, if you're careful! Should a krill spot you on that ledge around the pipe, you can simply fly around it to the other side! Be aware, though, that you might fall into the sludge water below, so check you don't fall in! It's an annoying climb back up lol, but krill don't check down there unless they've been disrupted, so you're safe if you fall.
Do not jump over the girder bridge! Just run! I know it's faster but the girder is thin and slippy! If you get spotted there, just keep running, there's a rock you can hide behind on the other side.
Inside the pipe, you can take a break. There's a brazier of light and some crabs in a ditch you can take your anger out on. You'll see krill lights, but they can't get you as you climb out, they just pass very close. You can safely ignore that one!
Emerging, you'll see the giant red crystal. That's the goal. Again, keep left, use emotes and hiding spots. Listen for the signal sound. Do not be fooled by the placement of braziers! Some spots can still be hit with rocks if you're anything but a chibi!
There will be black, calcified bodies starting to appear. Do not worry. You can't interact with them. You can't save them. They will not protect you from rocks.
When you see a miraculously intact stone arch, you're close! Don't hide behind it, though! You want the ledge just under it. The arch won't keep you from rocks or the krill just ahead.
The krill moves in a very tight circle, for a krill. I'd recommend following its path from a distance, because it moved faster than we can, right now. Spots that will protect you from the krill won't save you from the rocks, either! This is a very tough spot to move through, so take your time choosing the right moment!
Also, there's a child of light, just to the left. This is a trap. Reach the safety of the corridor first, then once you've caught your breath drop back down and grab it. Grabbing the child on your way up risks slowing you enough for the krill to spot you.
And you're in the hall of lights! Lighting all the statues won't do anything, unfortunately. But this is also the first time you'll see children of light in any position other than standing looking up... It's a bit eerie. They're still the same thing, though.
At the end of the corridor, READ THE WARNING that pops up. This is your last chance to avoid death, if you're here to help a friend, or there's lights you want to get first, now is your last chance. Returning home after this point will take you to a scary, empty home, where thunder rumbles and the portals have been returned to rubble. The only way out is through eden.
The final phase: the eye of Eden.
There is no flying. Don't even bother. You'll need to conserve your light. Your goal is to light every calcified body you can - you can see them by the blue lines, if you're struggling. They also look unlit from the front, which can be very annoying, but if they're on fire or glowing, you've already got them. Eden can only be run once a week, and that's why. They don't reset until the Sunday/Monday daily reset, I'm pretty sure. You can still die and light ones you missed the first time, but it's usually not worth it. You'll need all your courage and recklessness here to move quickly.
There are no krill here. There is no clever skip. The only problems are the rocks and the sludge water (though that's not nearly as much of an issue lol. It's never more than ankle deep). Also the rocks to hide behind aren't very good. Sometimes you'll get hit despite being in a 'safe' spot. Don't linger.
Now, the rocks. You have more time than you think between waves, but as there's no noise to signal their stop, it can be hard to tell.
What you want to be listening for is the signal, of course, but also the sound of crashing. The signal is early. You have a few seconds. The crashing only starts when the rocks hit the floor.
What you want to be looking for is the bright neon red of rocks breaking on objects. It comes in waves, starting from the eye and washing to the entrance. These are the only rocks that will hit you, and if you see it coming, you can move out of the way! When they fade, start moving again immediately for the maximum safe time!
Watch for the blue or black of lights! They cost one light each, and each one will become roughly 1/3 of an ascended candle later. Get as many as you can!
Light every statue you go by and refill your light. If you're experienced, it might feel inefficient, but YOU WILL get hit at least once later and you don't want to crawl all the way back to the start to re light lmao.
The waves will come faster and harder as you get closer to the eye, and the angle the rocks fall from will also change, so watch out for that! If you get too close to the sides, they'll change direction SPECIFICALLY to spite you, so be aware of that too lol.
The very final stretch starts when the ground flattens into broken tiles. It's a straight line to the eye, and that's where we're going! Rocks fall all the time, there's little to no cover or light.
You just gotta run. You can't jump, don't try, it'll knock you down fast. You gotta take the hits. There's no two ways about it.
Well... There's kind of a way.
You see, the rocks fall in a pattern. Of you look up, you see them spawn in zigzag lines, and then fall at about 40° from horizontal. If you're very lucky, or very skilled, you can use that to predict where the rocks will fall. And avoid them.
Unfortunately, you can't move very fast. Especially once (not if!) you get knocked to a crawl. Sometimes you're just going to watch a rock spawn and then fall directly onto you lol. Don't try and zigzag to avoid, it'll just slow you down and you'll get hit.
Because of the rocks and the sludge water, any lights you lose will disappear the second they touch the ground. They are no longer your concern. Don't bother trying to focus on reaching the eye, just return the lights you do have to as many crystallised bodies as possible.
And then you die.
You gotta wait ages, at this point. For some reason. It can take about five minutes, longer if there's people there with you, but EVENTUALLY a pop up will appear asking if you want to move on without waiting for people. Click yes, or you'll be waiting even longer. Don't worry, your friends will come with you if they've also died.
Hug your own light, your bright reflection. It's always the exact same height as you. Fly up through the torrent.
There's one last shortcut, funnily enough. I'll include a picture.
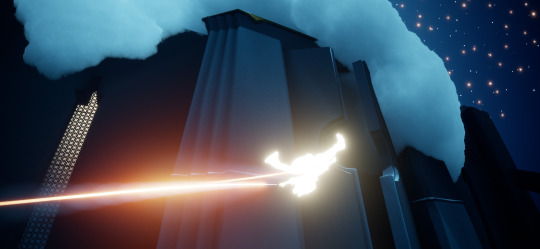
See that pale window on the left of the giant doors? That I'm flying away from? That's intangible. You can fly straight through it to oob.
Go through. Go up.
Follow the clouds, just keep flapping up, as high as you can, even when you get lost. Aim for the space at the top.
And then you're headed for orbit, and there may be a giant slug whale sharing your personal space. Don't worry! It won't hurt you!
And that's Eden!
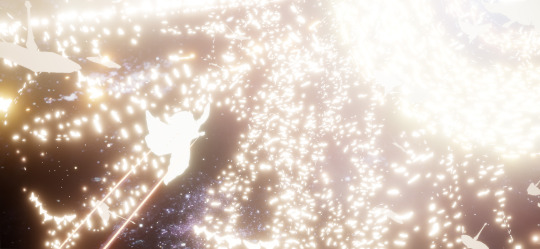
#long post#sky children of the light#sky cotl#thatskygame#that sky game#season of revival#sky children of light#skyblr#skykid#sky cotl eden#Sky cotl orbit#tutorial#Well... Guide#Sky cotl guide
245 notes
·
View notes
Text

Art: @iamespecter
CHAPTER EIGHT
Racing AU!
IT'S SHOWTIME! Pomni needs to learn how to drift! Who better to teach her than the race AI himself? It's totally not a date. Nope.
Hey... anyone seen Gummigoo?
WARNING: none
~~~
The afterparty in the garage was still going strong. Colorful lights flashed through the windows into the night. Loud, bassy music vibrated the walls. A heavy crowd of NPCs danced in repeating patterns, never stopping.
As rowdy as the party was, it was muffled for Caine as Pomni still held his half melted body. He couldn't hear anything over the sound of his code memorializing this moment. He managed to pull himself together just enough to return her embrace, carefully wrapping his arms around her.
Pomni's head cleared with a jolt. The small amount of silly juice she drank had worn off, and because video game logic, had no side effects. Her inebriated state just ended abruptly. Her eyes widened as she realized what she was doing. She jumped back away from Caine. "Oh my god, I am SO sorry!"
Caine was still holding his arms out in front, missing her already. "Whatever for, my dear?"
Pomni's cheeks burned hot. "For- I shouldn't have- I just- the drink!" She couldn't form a coherent sentence from the embarrassment.
"It's okay, Pomni! Really! I thought the hug was very sweet of you!" He grabbed his cane out of mid air and kept his hands busy with it. "I rather enjoyed it, actually!"
That didn't help Pomni's state of mind. She heard Jax's voice in her head. "He's taken a liking to you. Find a way out." This was madness. Every logical part of her brain was screaming HE'S A PROGRAM! Every other part of her... liked the hug.
"Pomni..?" Caine watched her stand there staring into nothing for at least a solid minute.
She jumped like Caine had suddenly appeared. "I'm sorry. I...I'm just, uh... thinking about today's race."
"Really? Me too! It was nice to do a simple just have fun race!"
She was glad he took the bait for a new subject. "Yeah, would have been better if I could drift properly." She rubbed the back of her neck.
"Wait, you weren't driving like that on purpose?"
"Pfff, no. I just suck." She looked down.
"No, you don't! You just lack experience! Would you like to take a drive on the tutorial drift track? I could teach you!" He gripped his cane, hoping she'd agree.
Pomni saw the eagerness in his eyes. He really wanted to spend time with her alone. "Alright."
He almost exploded with glee. "Fantastic! Right this way!" He snapped his fingers and a portal appeared. "After you." He took off his hat and bowed.
"Thanks..." She stepped through and found herself on a short, windy track. Garage gone. Stands gone. The track was lit by a multitude of high power light poles. The sky above just as dark as the default. She figured the whole game ran on the same day/night cycle.
Caine came through behind her and the portal vanished. "Alrighty, my dear! How would you like to do this? I could summon your kart and I just tell you what to do OR I could summon my own and do the driving for you for a few laps as you get the feel for it first." He posed, ready to snap.
"Uh...I don't know. Maybe, you should drive-"
That was all he needed to hear. He snapped and his bright red and white kart appeared, engine running. "Your chariot awaits!"
"Oh...oh boy." The last time she was in his cart, it was the wildest ride of her life. She hoped she at least wouldn't vomit this time.
She got in and prepared for takeoff, but the kart didn't burnout from the start. It moved forward slowly, taking her through the track turn by turn like it was casual Sunday drive. Caine's voice came through the radio as his body flew high above the track for an arial view.
"Welcome to the drift tutorial! My name is Caine and I'll be your guide-! Ahem- sorry, force of habit."
That got a small smile out of her.
"Drifting is really simple, my dear! First thing you need is speed! Let's rev things up!" The kart accelerated, taking the turns as fast as it could without drifting. Pomni held tight to the steering wheel.
"Now, it's all about timing! This is the part that will take practice! Hit the break and flick the steering wheel hard as you go into the turn. Use the throttle to control the angle of the drift and once you're out of the turn, let off the accelerator and straighten your kart."
"That doesn't sound simple!" Pomni's heart raced with the kart.
"Eh, drifting Is more of a skill you gain through experience than explanation. But that's what we're here for! Let's give it a try, shall we?"
His kart hit the first sharp turn and drifted around it with ease. Pomni felt thrown into the side of the kart by the g-force, but fought it. She got used to it after a few turns and learned to lean with the kart.
"You're getting it!" Caine cheered. "Now, pay attention to the pedals and steering wheel! Feel how they move!"
By the third lap she felt she had a grasp of what to do. "Let me try!"
"You got this, Pomni!" The kart decelerated as Caine releases his control over it.
Pomni put the petal to the floor. Gold flames shot out the tail pipes as she braced for the first turn. She threw the kart sideways and it nearly over shot the turn entirely.
"Little too much speed! But that was a good start! Keep going!"
Turn after turn, her confidence grew until she was flying around the tutorial track like it was nothing.
"You're a natural, Pomni! You could give Jax a run for his money!"
She didn't know about that, but it was nice to hear. She stopped the kart at the start and stood before Caine as he descended, giving he applause.
"Very well done! But, that's just the tutorial. How do you think you'd fare on a real track?" He arched his upper jaw.
The rush of racing was coming back. It was something that kept coming up inside of her. The speed. The competition. Maybe it was her, maybe it was the game, but right now, she didn't care. "..how about we find out? You and me. Random track. One lap." She crossed her arms bravely.
Caine's lower jaw dropped. "You want to race me?"
"You have a kart, don't you?" She pointed her thumb to the red kart idling behind her.
"Well yeah, but no one's ever..." He chuckled. "You know what?" He snapped and Pomni's kart appeared next to his. "You're on. But I feel I must warn you." He drifted closer to her. "I've never lost."
She stepped closer, defiantly. "Yet."
Caine felt a tingle of static up his spine. "My dear, you become a different person behind the wheel."
Pomni shrugged. "Maybe I become the real me."
Caine smiled. "Whoever you are, you're about to see why they keep me in that host box." He winked and flipped over her head into his kart.
Pomni rushed to hers and jumped in with practiced accuracy. Caine threw his cane and it's gold too started to glow. It dinged once, glowing brighter. Then again. And again.
Green!
The took off and a giant portal appeared just beyond the start. They zoomed through it to space! The translucent track wound it's way around planets and stars and comets. Nebulous formations of colorful clouds shifted in a transcendental dance. Galaxies dotted the background. It was beautiful. Pomni took the first big turn high and hit a booster, getting ahead of Caine. He watches her fly by with as many stars in his eyes as there were around them. She was beautiful. A shell conked him out of his trance. A distant laugh from Pomni.
He shook his head. "Oh, so that's how we're going to play? Very well." He said with a smirk. He went through an item box and got a bar of soap. "Boo." He carelessly tossed it and took a separate direction at a fork on the track. His next item was a pen. Pomni was on a track below him and he threw the pen at her.
Pomni sputtered at the ink on her face and didn't see the next turn. The ink cleared for her in time to avoid running into her wall head on but she ground the side of her kart against it.
They were neck and neck when the track merged. It spiraled around a shooting star with no sense of gravity. Caine got a popper and tossed it at Pomni. "For you, my dear!"
"Ah!" The popper exploded in her face and she lost ground. Another fork in the track took her down a steep booster towards a wormhole. She went through it and was sailing through open space at an unknown part of the track. She used her glider to control her desent, seeing Caine come over a hill. She'd teleported in front of him!
Taking advantage of her shortcut, she landed just before a sharp turn and drifted like an expert through it, hitting another item box on the way.
Caine was flabbergasted. Where'd she come from?? He put the pedal to the metal and drifted after her. His next item was the cilli pepper. He got close and prepared to fire when she turned her head and fired first. He released his flames as he spun out.
Pomni got a huge lead. She completed several turns without seeing Caine again but after a huge turn around a planet, she heard the dreaded purple shell. She couldn't avoid it. BOOM!
She was stunned long enough for Caine to close the gap. He tried to pass but she stonewalled him. It took a shell for her to move and he waved as he went by. It didn't last, his own cane wacked him sideways and Pomni drifted around him on a turn.
On the next bug booster, Caine got a gold cupcake and double timed it at Pomni. He pit maneuvered her and she spun to face the wrong way. She threw it in reverse. Pulling a Kinger and waving as she passed backwards.
"What the!?" Caine couldn't believe it. She was actually outmaneuvering him.
Pomni cranked the kart the right way around and casually tossed some soap.
"Oh no, you don't!" Caine avoided the soap and pulled out an orange shell. He threw it but was too close to Pomni so it ricocheted and hit him too.
"You're making rookie mistakes! You scared?" Pomni taunted.
"The only thing I'm scared of is having no room for another win!" Caine clapped back.
There karts bang into one another like bumper cars, both being more aggressive with their place on the track.
Pomni got an idea to distract Caine from the next item box. "Hey Caine!" When he looked at her, she blew him a kiss.
He blue screened. He was completely spaced out for several seconds and missed the boxes entirely.
Pomni laughed and zipped ahead.
When Caine came back around, she had yet another lead on him and he gripped his steering wheel hard. "Now you're playing with fire." He smirked and floored his kart. Golden flames rocketed out the back as he wheelied from the force of the acceleration.
He got all the speed. Boosters and cupcakes galore. He was going so fast, he defied physics and did a three sixty drift around Pomni. "This has been a fun date, when's the next?"
"You think this is a HUH??"
He full belly laughed at her face.They drifted together through a sharp turn and the finish line was in sight. One last box for each. They both got the same thing, a hat.
They became two comets shooting across the heavens, flying together in a dance of power and speed. They crossed together, the finish line unable to tell who won. The karts slid to halt on the other side as their powers disappeared. Pomni and Caine looked at each other, out of breath and full of excitement.
Caine was out first, flying up and doing an arial flip. "That was the best! Holy mackeral on toast! You were amazing! How have you EVER lost a race driving like that!?"
Pomni got up from her kart and stretched. "Like I said. I suck." She laughed at herself. "That was a lot of fun. And I'm saying it sober this time. Thank you...er, for teaching me."
"It was very much my pleasure, Pomni. And thank you for that race! My code is absolutely buzzing!" He settled a bit and floated in front of her. "I mean this Pomni, you have been the best addition to our roster of racers, and I-...I've never met someone so easy to talk to before. I always feel like I'm talking at people, not connecting. But you...um, I may have connected too well now that I think of it. I may have overshared the first few times we've talked and I apologize. My problems shouldn't be yours to bear. Certainly not while you're still adjusting."
Pomni gave him a soft smile. "It's alright, really. I'm happy to listen. It seems like a lot has happened before I showed up."
"A truer statement has never been spoken, however, today was meant to be fun. Problems can wait." He gently took one of her hands and held it with both of his. "Pomni, would you be interested in doing this again? Just the two of us?" His eyes pleaded with her.
"You really meant when you called this a date, huh?"
Caine looked away, feeling a bit bashful. "Oh, well, I mean-"
Pomni giggled. "I'd love to."
Caine blue screened again.
"Oh. Oops. Caine?"
He came to with a start. "Pomni! You-!"
"Me?"
"...I forgot what I was going to say."
"Yes?"
"Yes!! I said you said YES!! AH-HA!!"
Pomni laughed more, more than she had since day one.
~
Pomni teleported into the garage alone. The NPCs had all disappeared, the music was off and the lights stopped flashing. The party was over. The place was a mess. Jax was passed out under the table and everyone else was nowhere to be seen.
She got to her room and plopped face down on her bed, smiling into her pillow. She has to admit to herself, racing Caine was some of the most fun she had since she got here. The adrenaline, the banter, his excitement and encouragement and wit and... beautiful eyes. She gripped her pillow in realization. She couldn't actually be-
"Enjoy your trip?"
A voice broke the silence of her room and she sat up with a shout. "WHA-!? Gummigoo? What are you doing in my room?"
Gummigoo was sat in a chair in the corner behind the door. His arms and legs were crossed. There was a faint blue shimmer in his eyes and he spoke without his accent. "Gummigoo isn't available at the moment. We must speak."
"What do you mean? What's going on?" She asked slowly, scarred to move. The way he was speaking so coldy freaked her out.
"I'm your way out of here."
Pomni's anxiety spiked. "You know h-how to leave? WHO are you??"
"I am Abel."
~~~
CH1 PREV NEXT
#the amazing digital circus#tadc#tadc pomni#tadc fanfiction#tadc caine#tadc showtime#tadc jax#tadc ragatha#tadc gangle#tadc kinger#tadc zooble#tadc au#the amazing digital raceway
49 notes
·
View notes
Text
Attempted Execute of Non-Executable Memory - Chapter 10
RotTMNT Michelangelo x Kendra

We're peeling out in this week's chapter art by @dryad-druid
Rated: Teen and Up Audiences
Warnings/Tags: Fake/Pretend Relationship, Revenge, Falling In Love, Love, Romance, Dating, Aged-Up Mutant Ninja Turtles, Love Confessions, Human/Turtle Relationships (TMNT), Step-Parents, Neglect, First Kiss, First Generation Immigrant Kids, Acculturation, Loss/Removal of Cultural Identity, Incarceration, Prison Time, I flesh Out Kendra’s Character, Character Exploration, Character Study, I Give Kendra a Backstory
Synopsis: After hitting the lowest of lows, Kendra has carved out a simple life for herself. She’s content enough to live this way until opportunity walks through her place of employment in the form of an orange turtle mutant. She just needs to get close enough to him to plant a virus in his infuriating brother’s servers, but will she be infected long the way?
Also available on Ao3
First 🧡 Previous
“Illegal or not illegal?” Mikey asked as soon as Kendra walked up to him.
She reviewed where he was sitting on a curb wearing a backpack that had two skateboards strapped into it. “Which part?”
“Where I teach you to ride.” He smiled up at her.
She was getting far too used to the warm feeling that inspired. “What else goes into that choice?”
He was prepared for the secondary question. “Do you want people to see you wipe out or not?”
“It’s like that, huh?”
“Yeah. One of those sports.”
She debated quietly. She supposed there was no mood of hers that was good enough to want to partake in humiliation. Falling was sure to conjure that, but if it was a given when it came to skateboarding then it was also unavoidable. The little study she had done online hadn’t amounted to much. Tutorial videos were painfully belittling and often had literal children as their dummies to learn. The entirety of the sport itself, if it could be called that, did not hold her interest and she had moved on with the mind that this would be a one-off thing. “If it wasn’t me you were teaching, where would you bring some rando?”
“Hamilton Bridge.” He spoke instantly. “Good flat areas off to the side. Nice vibe. Brooklyn Banks, maybe, depending on where we were.”
She hummed lightly and debated sitting down.
“Thanks for doing this.”
“We’re kind of past the point of running off your energy.”
“Eh, I always got some of that to spare.” He finally hopped up to his feet.
“One of those for me?” She gestured to the boards.
“Yup!” He turned to show her. “Guess which one!”
She spun the cyan wheels of one and could sort of see scales on the board itself. “Hm, I wonder.”
“Dragon warrior, heads up!” He turned back around before she could glimpse his.
“How are you moving your exalted one?” She asked with a turned out finger.
“Public transport or if you wanted… something really wild…?” He had a playful air.
She should have thought twice.
She had the forethought.
‘Something wild’ and that of the ‘really’ variety by Mikey’s definition was bound to be something she didn’t care for.
She was also trying.
Trying to take her next step.
Trying to embody her new self.
Trying to find renewed interest.
He was part of that vision.
She was inclined to trust that much.
“Break it down for me.” She demanded and unfurled her fingers.
In a blur, he twirled the backpack to his front, flipped the flap, and dove down into it to reveal a helmet, which he slapped into her palm. “I’m gonna go all in on my razzmatazz. We’ll get from point here to point there while doing a freestyle street skate routine. That’s aerial stunts, showing off, the feel of flying, falling, and almost crashing, except I would never let you actually fall. At least not yet. Not from like a building height.”
She turned the helmet over since it landed upside-down and it appeared utilitarian for what she expected of Mikey.
She gave a hopeless grin at it.
She looked up to find him admiring the headgear. “Kill me and I will figure out whatever mystic bullshit I need to haunt you forever.”
“I’ll draw up the spell!” He closed the backpack.
She put her helmet on and he got his board free. “Show me that.”
He flipped it to show her the deck. “New board! I painted an updated version of the design I had from when I was a kid. Sentimental junk. It’s an awesome turtle skull that’s on fire!”
“What happened to your old board?” She pulled her chin strap tight.
“Oh, I broke it.” He tucked his board under his arm and helped her adjust the straps on the side.
She stared at him dully.
“I broke a lot of boards. I’ve been skateboarding since I was like 10.”
“Same time you met April?”
“Probably!” He shrugged a little too nonchalant.
“You’ll kill me. I’m going to die. I’ll be dead.” She cursed herself in a haunt.
“No, no!” He feigned a fuss and put his board down. “So…?”
“Fine! Yes. Hurry up!”
He chuckled. “We feeling loose? Wanna stretch?”
“I want to live.” She rolled her shoulders regardless.
“You will. You’ll never feel more alive. Better than jetpacking. I’ll top it all.”
“Brag much.”
“You’ll see, just watch.” He positively gleamed and bowed to offer her his skateboard.
She moved toward the board, but didn’t step up.
He put an authoritative foot on it and took her waist while urging her on.
She pretended to be put out when their hips met.
“Come on, you gotta get up here to be ready.” He downright purred.
“Yeah, yeah.” She pushed him lightly.
“Hold on for me?”
“For you. Not to you?”
“You’d do that anyway.”
She turned her head away as she pressed closer to him.
She blindly felt into his form and delicately skirted his shoulders until she found a grip around his shell.
In a light hop, he lifted her up onto the board.
“Knees bent helps with balance.” He instructed.
She flexed slightly.
He adjusted both their footings on the board before he kicked off.
They picked up speed quickly and he led the movements. From weaving around pedestrians, he used both his hold and their pressed bodies to indicate to her which way to lean. It was only when she was almost doing it on muscle memory did he kick off the curb. They landed in the street and she felt a flare of wariness as they dove into traffic. They maneuvered lights at a rapid pace and she keenly felt the moment his core clenched.
She went from holding his shoulders to nearly wringing his neck.
He kicked back up a curb, a mailbox, an awning, and finally a fire escape before his body revved with energy. In a tug with his free hand, he grabbed the very air before it turned into glowing chains. They had a hollow look in the daylight, but they still sparkled as he used them as a whip. Metal hit metal and with a roll of his wrist, he caught the length and they shot into the sky.
It was just as he described.
The feel of flying.
The threat of falling.
Only the force of the wind kept his board to their feet and his angles to keep it there showed how many times he had done this. Instead of doing actual calculations, he felt out physics in its natural state. Each twist and curve was painted in exact paraboles and he knew just when to throw out another length of chain. It connected to whatever distant object would keep them moving without ever dropping their momentum.
She could tell he was holding back. While they flew from building to building like some neighborhood arachnid poster boy, Mikey was obviously telegraphing his moves. She knew it was for her sake. With his history of duping her under the guise of surprise, it was a sort of welcome action. At the same time, Kendra knew her aerial limits and he wasn’t even close to the adrenaline she had conjured on her own time.
“No-!” She fought the wind as they skated down a rooftop. “No tricks!?”
“Tricks?” He chirped into a grind.
“Yeah.” She squeezed him and leaned to kick off to the next building. “Afraid to up the ante?”
“Me?” He had them leave the board for a moment.
Her stomach flew into her throat with the thrill.
They landed and Mikey wove side to side. “Watch this!”
With a slight bump, he physically asked if she would move.
They were still in motion and Kendra was a little creaky in stepping back. It was the only direction she could go since she had been perched on the nose of the board. There was limited time with the current roof running out, but she managed to slip behind him before the edge came up. She readied for one more, but flailed into another as Mikey kickflipped to change direction. She secured her arms around his waist as they headed straight for a roof access door. This time, he bent his knees to show her when and she was ready with a tight squeeze when he jumped the board onto it. There he engaged all his muscles in a fit of control and kicked off the door so hard that they both shot out horizontally.
Kendra thought the board was a goner, but Mikey twisted. It subverted her world and it turned further upside-down when Mikey caught the ledge they almost flew over with a single arm. For one solid moment, he held them there and she noticed how his other arm had brought the board with them. With clear intent, he made sure the board was adjusted just so before he kicked it like a hacky sack. Building up momentum, he bounced his foot one last time and sent the skateboard straight up into the air. She didn’t have time to watch it as they began to lower. With all his strength in a single arm, he bent at the elbow and she felt the small slack in her helmet give along with all the blood to her brain.
In a single flex, he flung both of them up in the direction he had sent the board.
A delighted cackle erupted from her throat as they made contact and spun. Mikey’s mystic energy burst with sparks and they rotated an amount of degrees that she lost count of. Gravity then caught hold and pulled them down with Mikey crouching as he got the board underfoot again. She followed along, glued to him, and he caught the nose of his board to aim. They hurtled downward where a few pedestrians glimpsed them and screamed.
“EAT YOUR HEART OUT!!!” She yelled as they soared past the onlookers.
They hit a sloped skylight with a force that shattered the windows. Her laughter tinkled along with the glass and they rode down the metal casing before clacking onto another roof. From there it was a few more jumps and flips before they neared the river roads. It was a stepwise dropping process to get them safely to the ground and they skated in a cool down among the sidewalks.
The concrete soon ran out and Mikey turned the board to grind to a halt. The moment she perceived they were safe, she jumped to bowl him over. “Mikey!”
He stumbled off the board and tried to wrangle her.
She crawled over him to keep out of his grasp. “That was great and I do not compliment people!”
“Is that so!? Let me enjoy it! Stop moving!” He couldn’t get his hands on her.
“We have got to do that again! Take me swinging through the city! No wait! Better yet, let me make a jetpack and together-!”
She stopped and he instinctively did the same.
“Or… you can take me. Yeah…”
“Kendra…” He finally got her around to his front.
“I forgot for a second. It’s fine.”
“I don’t think it is.”
“There’s nothing to do about it.” She pulled away.
He let her and only took one sidestep to get the board.
“Can’t do tech. It’s a slippery slope. I fix things sometimes, but that’s it. It’s not illegal, but you get it.”
“Sure, but-”
“Trust me.” She gave him a serious glance from her profile.
He was momentarily stunned and nodded.
She hopped a few steps. “That was good! Ugh! I missed that feeling!! The rush!!”
She gave a yell to the hill they were about to descend.
Mikey continued to watch her.
She breathed out like she hadn’t in a long time.
“Feels good. I feel alive!”
“Gonna feel real good when you nail one of those tricks yourself.”
“That won’t be the same.” She spoke breezily.
“No?”
“How could it?!”
Mikey hummed as if he knew something.
“You spike my wheels or something?”
“No!” He leapt ahead so he could walk backwards in front of her. “It’s that satisfaction of doing it yourself! I have a feeling…!”
“What?”
He continued his silence with a bobbing of his brow ridge.
“What?!” She picked up the pace.
He made it obvious that he would run.
She felt good enough to chase after him.
He let her catch him at the gates of the skate park and she added on the treat of a giggle as they hugged. He clucked happily and his expression was warm enough to toast s’mores on. She held out, but couldn’t keep looking as she surveyed the people here. There were several groups of lanky twenty-somethings. A few parents with kids and some rogue teens that put on the most egregious aura. Kendra knew their type as she had been one and planned to steer clear.
Mikey squeezed her to attention.
“Ready?” She told him as if she hadn’t been canvassing and broke free to enter. “Hurry up!”
“Mhm.” He teased as he followed after.
She jogged over to an open space that was a good distance from other patrons. “What will I accomplish in one day? An Ollie? I read about the mechanics of the typical tricks.”
“First things first…!” Mikey set the backpack down and unlatched her board. He then dug into the bag itself and produced a set of black and teal objects. “We gotta get you into the top priority… Safety!”
She placed that they were pads. “No.”
“You’ll want them when you fall the first time.” He walked them over to her.
“I’m not five!”
“Kendra…”
“You never put on a helmet!”
“I have this whole situation.” He swept a hand over his body. “And kneepads! I’ve been wearing kneepads the whole time! I made kneepads a fashion statement back when you were working that little French hat!”
She gasped full offense.
He smirked.
She outright snorted her dismissal and returned to the subject at hand. “Whatever! They look dumb!”
“Think of your joints!”
“Think of how stupid I’ll look!”
“Dumber when you get hurt…!”
“Ugh!” She snatched them from him. “If I get called a dork one time!”
A quick inventory separated the pad sets and she correctly shoved one arm through the necessary padding. Mikey came around to harmlessly help, but she rebuffed him. Since she was doing what he asked, he let it slide and switched to pulling out her board from his bag instead. He lined it up with his and waited out as she got both knees strapped in.
When she stood, she felt like she hobbled.
She must have because he suddenly chewed his lip.
She seethed.
“I’m taking them off.”
“No! You’re so cute!!” He withered toward her.
She didn’t dodge and let him fall against her. “Idiot.”
“Your idiot.”
“Unfortunately.”
He smiled wide. “Let’s get on those boards.”
Without holding her hand, he led them over and talked her through the process. He wasn’t demeaning, which she never outwardly thanked. She instead gave him her attention, something she found to be a far more precious commodity, and followed his guidance. She was soon walking the board around, which gradually gave way to her being able to glide on it. The ride then took her to turns and that morphed into the side to side weaves that she had seen him do during his roof stunts.
Her pads didn’t allow her the right range of motion.
They capped her knees where she needed to bend to get the right level of stability.
They hindered her arms where she needed those to act as her true ballast.
“I think you’re ready to go down a bank!” Mikey kicked up his board into his hands.
“Sure, but first…” She got a steady foot on the ground before she ripped the Velcro off one of her pads.
“Uh…!” Mikey wandered towards her.
“I’ve plateaued. I won’t progress like this! They’re in the way!” She went for the other elbow pad.
“That’s not how that works!” He complained.
“I’m fine. I haven’t fallen yet.”
“Again, that’s not-!”
“Which bank?” She eyed the parts of the park available.
“Uh, that one…” Mikey feebly pointed.
She knew the mechanics of kicking the board up as he had, but didn’t have near the same amount of effortless skill. Instead of leaving a mistake up to chance, she simply stepped off her board and ducked down to yank it off the ground in a fluid motion. She grabbed the trucks and hoisted the board up.
He was immediately on her and blocked her with his body. “Oh, hell no!”
“W-what?” She squawked against him.
“That’s called a mall grab. Don’t do that. Only posers do that.” He pulled her board from her.
“What? Why?”
“It means you probably got your stuff from the mall and you’re showing off. I made your board custom.”
“Custom?” She pushed on the wood in his grip to glimpse it.
She had long noticed the colored wheels, but the graphic on the deck hadn’t caught her eye. For the dragon warrior he described her as, the bottom of her board was a series of scales that represented said creature’s body. Now flipped up to the light, she could see an iridescent sheen to the paint and the faint shape of brush strokes.
“How… custom…?” She appreciated the detail.
“I didn’t carve it out if that’s what you’re thinking. I could if I wanted, but there’s all this layering and pressure sensitivity things so keep them safe. We didn’t have that much time, so I did some mental math, eyeballed your measurements, and got a board your size and did all the detailing.” He rubbed down the design. “You know, striping whatever was there before, a devil head I think, and sanding and painting.”
“It’s pretty tame…”
“I didn’t want to assume. The designs are personal. Not to show off, but for you. You can build it up. Put stickers on it or I can paint something else. It’s totally yours.”
“Mine?”
“Mhm.”
“I didn’t plan on making skateboarding a recurring thing.” She revealed lamely.
“So?”
“So what else am I gonna do with this?”
“It’ll make pretty cool wall art!” He gripped the edge of the board. “You hold it like this by the way. Grip tape out.”
She nodded and did as he instructed.
He was quiet for a second. “That… none of this makes you a poser though.”
“I know. I’m a noob.”
“You’re doing great.”
“Save it for when I really am.” She headed toward the closest bank.
He trailed after.
She felt echoes of other times.
It wasn’t like she had been to a skate park before, but she had once been taken to an empty parking lot. Under the guise of getting donuts, her dad had gone around to the trunk instead of the shop. Even at age six, she had tried to correct his folly, but found him pulling out a bike. He set it down and gave it a pat to the seat and hadn’t needed to say more. It had been a sweet gesture and a nice day when he taught her to ride. The glazed rings tasted all the sweeter knowing she had hit some milestone.
She was on the platform of the bank and Mikey had been rattling off instructions beside her. The slope was barely 15 degrees. Looking down it was a joke for how much he was talking. This was patently a ramp for beginners and she had acknowledged she was such. She would do this as many times as necessary to make the movements stick and move onto something else.
There were easy to visualize steps.
“Want me to hold your hand going down the first time?” Her partner asked genially.
“This is shorter than a curb and you didn’t hold my hand when we were hurtling through the sky.” She glimpsed him.
“No, but I was leading then and this is you; it’s new.”
“I’ve got it. Assume the stance.” She demonstrated how she knew to stand with her feet perpendicular to the board. “Knees bent.” She squatted lower. “Ride down.”
“Sure.” He stepped back. “Of course.”
She readied herself and prepared to kick off.
It was a quick change for her feet.
She would need to rotate and get into that stance.
She played how to do so several times before chancing it.
She celebrated when her feet hit the board perfectly.
She cheered at the speed she achieved.
She readied her body with her knees bent to take the drift.
The skateboard tipped with a click and went down the slope.
She rode it until her center of gravity leaned too far back and in a quick slide of the wheels, they soared out from under her. Mikey yelled and her elbows made contact with the bank before he could reach her. The slick surface was worn smooth and she slid the few feet down to where a metal band lined the edge of the bank. Her ass bounced on the metal as it brought her to a halt.
“Kendra!” Mikey slid down to her on his kneepads. “You okay?”
“Don’t!” She flinched away from him.
“I’m not…” His protest was gentle.
“You are! I saw! I know what I…” She winced as she tried to glimpse her elbows.
They weren’t torn, but there was a heat rash from the slide.
Instead of weeping, they just shined up with blood that would never drip.
She clicked her tongue away from it.
“Go ahead.”
“I’m not going to.”
“’I told you so.’” She said it for him.
“I wouldn’t.”
“Why not!?” She turned to him. “It’s so easy! Low hanging fruit.”
“Then it’s boring.” He said simply.
She frowned deeply.
He stared back.
She disengaged because she had no choice.
He sat with her as she folded her legs up.
“This isn’t like riding a bike.”
“There is BMX.”
“Not what I meant!”
He quieted.
“You don’t fall.”
He was ready with a retort that she could tell was saying he could.
She hadn’t.
She never had.
Her dad was there.
The utility of her bike had run out when her mom had gotten sick.
It wasn’t the same, she reasoned. Nothing that reminded her of those times ever was. Falling off a skateboard was nothing like losing her mom and she knew the recurrence was just part of some grieving process. Mikey and all the research she had done were all clear. You fell when skateboarding. You fell; that was learning how to ride. This sport had a prerequisite of ground time to develop one’s skills.
Was it disheartening because that self-fulfilling prophecy came true?
Was it frustrating because Mikey hadn’t been the fall back she thought?
Was it her damned insistence that she didn’t need a safety net?
Like she never had.
Because she always stupidly acted before thinking of the consequences.
She was goal-oriented in the positive sense of the word.
A buzz worthy note to be picked up by resume software.
She adjusted her helmet.
She would sting and she would get back up. She would be sore and she would try again. She would survive this and reach success, but not on this bank. This slope was a joke and she needed higher. Kendra spied one that was at least twice this height and made that a goal. There was also dropping in, but that felt a little lofty for her first day.
“Is it too late to put the pads back on?” She asked quietly.
“Nope. I got alcohol wipes in my bag.”
“Get them?” She asked without looking.
“Course.” He tapped her to signal he was going.
She used the time alone to talk herself up to her feet. Mikey helped wipe her elbows off and she powered through the nettles of the disinfectant. She then got the pads back on and he complimented her battle armor. She liked the change in perspective on the objects and felt the horn sound to signal a charge.
In time, she was skating down the slope with ease. Her issue had been her body. While she accounted for the weight distribution, she had neglected to keep her body level with the shifting angle of the board. It was all about following through and she needed to lean forward where forces pushed her back. She knew that all too well and how to face them head on.
They moved embankments and skated together. Mikey wove expertly around her and encouraged her. She chased after him for speed and was cut off by those teens. It caused her second fall, but this time, she saw nothing but red as she stopped herself with her palms. She used the rashed digits to lash out, but Mikey was already berating them before her claws could land. He took their fight to the battle ground they were in and skated circles around them. They were soon praising him and asking for lessons, but he turned them down in favor of his star pupil that, he warned, they would soon have to watch out for.
They visibly gagged at the display, but Kendra clung to him for the sake of making them sicker. It ran them off and then she stayed close because she was already there. Mikey reminisced about when he used to challenge his brother to skateboard offs to settle disputes. He never used to win due to their larger size so he was forced to get creative. Where they had power, he trained his balance. His ‘one with the board’ mantra was something he spent hours perfecting. In a quick flip, he demonstrated how he could balance on the board on one finger while it was only on two wheels and said his family hadn’t dared to pick a fight with him in years.
She appreciated crushing one's foes and offered him her sense of pride.
It made him smile and she spied a faint teeter.
As if the ground itself betrayed him, the board shot out from his person and he flopped into a heap that only made him laugh. “See!”
She knelt down to help him up.
“We all do it. It always happens” He took her hand with great care. “Even to me.”
Instead of up, she pulled him to her lips.
He languished against her for a moment and broke apart with the spark of an idea. “Let’s do a kickflip!”
“Sure.” She shook her head at him.
Again, all the physics made sense on paper, but hitting those necessary points with the precision she wanted came with muscles she hadn’t used. Over and over the board whacked into her knees pads and she rued the wood for trying to get through them. Mikey was amused by her gloating and helped her in the hop. He would lift her up like a dancer and she kicked the board. It took another dozen tries until it landed how they both wanted and he dropped her right down onto it the moment it did.
She skated away with her arms up and pumping.
It threw off her gravity and she flayed, but stayed upright.
This took learning.
There was no immediate greatness.
One practiced.
One refined code.
A perfect program wasn’t born without trial or error.
With time wearing on, dropping into the bowl was chosen as her last task for the date. They discussed options for what to do after and decided to start with tea. There was a place with fruit ones nearby that seemed alright and helped offset the daunting nature of hooking her board at the edge of the precipice. She was familiar with this sort of drop as she longed to hurl herself over them, but without her usual bravado, it seemed especially deep.
Mikey stood stoic beside her and made it clear that he wasn’t going to attempt his until she did hers.
He would chase her.
She wasn’t going to crash this time.
He would be there and ready.
Her weight was on the back of the board to keep it level, but she got that preparatory foot ready to push forward.
Mikey did the same.
She bent her knees.
He mirrored her.
She readied herself with a small wiggle.
Mikey chuckled softly to himself.
There was no call to action as she let her weight drop.
She only kept herself parallel to the board.
She had to steel herself to stay in line.
In a rush and bottoming out of her stomach from the speed, she skated straight into the bowl with Mikey right beside her.
She went partially up the next ramp, but didn’t bother giving it a kick of momentum. She slid right back into the bottom and ran straight off the board in her excitement. She saw glimpses of her little self cheering for riding without her dad’s hand and she turned to Mikey who similarly scooped her up to celebrate. He propped her on his shoulder to show her off and one of the teens from earlier who had stuck around joined in the congratulations.
Kendra blamed adrenaline for her warm cheeks as she was sat down.
“Now that!” Mikey shouted. “Was amazing! You can’t take that from me! First try! That’s my girl!!”
She swatted him lightly, but leaned into him. “That deserves a treat.”
“Oh! Treat time! Tea? You ready?” He kicked up both their boards.
Kendra caught hers and Mikey rounded her with excited screams to hype her up more.
She laughed.
He ate up the sound as he came back around to her front.
“Martabak would be good.”
“What’s that?!” His attention popped.
“Kinda… like a pancake? It’s sweet and special… I guess. I learned it from-I don’t know. It doesn’t matter. It’s like the only thing I can cook. That and basics: ramen, scrambled eggs, fried rice, sandwiches.”
“You can make that!?” He leaned too far into her. “Not the other stuff, but that martabak thing?”
She pushed his excitement down. “I guess!”
He dropped to his knees to beg. “Make it for me.”
He hadn’t even said please and she was sort of impressed. “They aren’t that good.”
“I don’t care! Cook for me!”
“Mikey!”
“I will do this all the way to the tea place.”
“Mikey!!”
“For weeks if I have to!”
“No!”
He inhaled a single time, not enough for what he prepared to do, and immediately began to say ‘please’ over and over and over.
“Stop! No! Fine! Whatever! I’ll make them! You’re not allowed to complain when it’s mid!”
“Yes!” He twirled up into the air to make a video game-esque power pose. “Wait! No! It won’t be mid and oh!”
“What now!?” She tipped her board to grab his bag.
“Cooking show date!”
“What?!” She reared incredulously.
“Yes! Let’s do it! It’s perfect! I need pictures of you anyway and videos are like pictures that move! I feel like I’m missing out! We’ve been on so many dates now and I will start forgetting and I don’t have evidence of all the tricks you did today! Your first time skateboarding!? What am I even doing!?”
“You are not going camera dad on me.”
“I’ll get all your good angles?” He rounded her while making a rectangle with his hands.
“Pain in the ass.”
“Does it still hurt?” He lowered his pseudo-lens.
“Kiss it and make it better.” She sneered and got hold of his backpack. He had a blush to him that was knocked clean off as she chucked the object at his midsection with all her force.
🧡 NEXT 🧡
We got a big 10-4 check on betas @tmntxthings and @unrestrainedhotsoup that means Chez Dork is doing well!
#AENEMfic#rottmnt#rise of the tmnt#rise of the teenage mutant ninja turtles#rottmnt Michelangelo#rise Michelangelo#Michelangelo hamato#rottmnt mikey#rise mikey#rise kendra#rottmnt kendra#me#fanfiction#my fanfiction#kenkey
17 notes
·
View notes
Text
Baldur's Gate 3 Screenshot Tutorial
Hi, I decided to make a more in-depth guide for my twitter followers, as I'm super limited in characters and formatting options over there.
For this tutorial, I'll explain how you can enhance your screenshots. I'll divide it into five parts: ReShade, making your screenshots high resolution, camera mods, photography basics, and post-processing. By the end of following all of these steps, you should have something way better than the start!
I recommend going through this tutorial downloading things step-by-step for the first three parts, as it'll help you to quickly identify where you've gone wrong if you have any issues.
1. ReShade ReShade is a post-processing tool that allows you to change the look of a game with an array of different effects and adjustments to use. It can be a lot to wrap your head around at first, so I recommend starting off by finding a ReShade preset that speaks to you from this page if you're not already familiar with using it. The mod authors should explain how to download it. I find 22:20 of this YouTube video to be helpful to introduce ReShade if you're completely new to it. This video is for the Sims 4, but ReShade typically works the same across different games. Now that ReShade is downloaded, we can get depth of field working within the ReShade. This step is optional. Depth of field refers to what will be in focus in your screenshot, and what will be blurred. It's essentially simulating shooting with a camera, like so:
To get this effect working, you need to follow this tutorial within the ReShade menu.
2. Making Your Screenshots High Resolution Typically, Baldur's Gate 3 is ran in 1920x1080 resolution, or standard HD (unless you have a higher resolution monitor and are running the game in 4k, in which case, you can ignore this step if you'd like). This is definitely an acceptable quality, but if you'd like to capture any detail, you're not going to get much out of this. To get a better quality image, there are two ways to achieve this. The first method is through hotsampling. Hotsampling is briefly running a game in a much higher resolution than your monitor supports, allowing you to capture screenshots with incredible detail, then bringing it back down to a native playable resolution. To hotsample, you'll either need to use the BG3 camera tool, or SRWE. For either of these hotsampling tools, it's important that you've downloaded ReShade, or they will not work.
Once you have either of these downloaded, make sure your game is running in windowed mode. If you have more than one monitor, you need to change your display to show only on one screen. Or again, this will not work.
Next, you're going to want to make sure you have a key set for taking screenshots in ReShade, as well as making sure you like the folder where your screenshots are set to be saved. You can find this in the settings tab. Once you have those set, you're ready to take really HD screenshots!
To do that, you want to set your game's resolution to 2x, or even 3x what it's currently displayed as. Once it's set, your game screen is going to look giant and probably run way off your monitor. This is a sign it's working! Once it looks like this, press the screenshot key you set earlier within ReShade, and there you go, a nice big screenshot should be in the folder you set!
If you don't want to do hotsampling, and if you have a Nvidia graphics card, you can download their their app, which can take resampled screenshots. It won't be as high quality as hotsampling, but still better than standard HD.
3. Camera Mods
There are two camera mods that I know of for BG3. One is paid, the other is not.
The first one is the Native Camera Tweaks mod. This mod allows you to move the camera around more freely as you're traversing the world, but in cutscenes you'll still be stuck.
The second one is the paid one, but it allows for total freedom within the game, even during cutscenes. This tool is also very helpful for hotsampling. Within this tool, it's very useful to configure your own controls for moving the camera around in game, as well as setting a key you'll remember for pausing the game so you can set up a screenshot. I changed the movement keys to be wasd and the keys to change the angle of my camera side to side/up and down to the arrow keys.
4. Photography Basics
Taking screenshots in a game is a lot like doing photography irl tbh lol, same rules mostly apply. You of course want to do the basics like making sure your subject is in focus, it's not too dark or too light. But some other tips for people not very familiar with taking photos to take note of are:
Make sure if you're taking a photo of a person, the top of their head is within frame
Try and either make sure someone is front and center, or in the rule of thirds
Pay attention to the lighting, sometimes it's too bright or too dull. Sometimes it's unflattering in certain angles. Lighting will always make a huge difference
5. Post-Processing
You can now leave your screenshot as is, or edit it further with a photo editing software! I recommend using Photopea, as it offers basically everything Photoshop does without the insane price tag. From here you can do whatever you feel is best to enhance your image.
And that's all! If you have any questions, feel free to ask, and if you get stuck anywhere in this tutorial, don't feel bad. A lot of this stuff is just trial and error, but if you're very persistent with it, I promise you'll get these working. Also I would just like to mention that a lot of this stuff applies to taking screenshots in a lot of games! So you can take this knowledge with you elsewhere <3
If you happened to follow all this, please send in an image of your Tav you took!
123 notes
·
View notes
Text
some of you have asked me about my crt setup!!
some basic materials you'll need.
CRT TV (duh)
computer or laptop (duh)
HDMI2AV (NOT AV2HDMI)
RCA cords (the red, white and yellow ones)
HDMI to USB converter if your laptop doesn't have HDMI like mine does.
here is the setup, this is a multi monitor setup but you can just do this with one CRT.
step one: plug in your crt. cord in the back. that will power your crt!
step two: plug in the RCA cables like this.
step three: plug your RCA cords into the HDMI2AV adapter like so. you'll plug in an HDMI cord on the other side. MAKE SURE IT'S SET TO THE CORRECT SETTING. THERE'S NTSC AND PAL
if you don't know what yours is, check this map that explains where each one was sold.
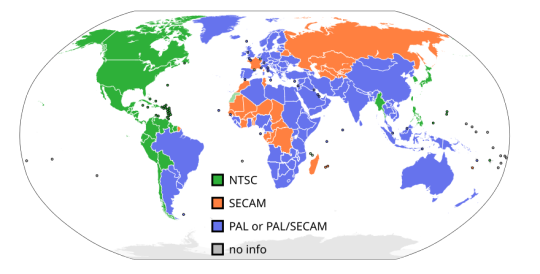
PAL is just a different color encoding system, a bunch of technical stuff you can learn on your own.
step four: plug your HDMI into the USB adapter if you need it. YOU MIGHT NOT. DEPENDS ON YOUR DEVICE.
i use a windows surface pro and it requires i use this adapter. sucks ass but whatever.
OPTIONAL: if you have ONLY ONE usb port in your computer, consider getting a USB splitter so you can plug multiple things in. i have one.
and voila. a set-up!
you can treat these like different displays.
mines connected by the 3 cords in the front, but if you have more money and can get another adapter and etc etc, you can make these all different.
a few FAQ since i assume quite a few of you have never used crts or vhs players:
whats the ringing sound?: its a ringing sound caused by the transformer in the back, its the 15kHz tone. as you get older, you stop hearing it because you lose high frequency hearing. i cant hear it in one ear because of a radio accident and i bursted my eardrum.
can i stop the ringing?: buy a crt pc. theyre smaller and dont ring as much/at all depending on which one you have.
how do i use my vhs player: you plug the cords into the back of the vhs player and then into the crt.
where do i buy a crt: theyre not in production anymore so you will have to buy it secondhand on markets.
where did you get all your cords: most stores with an electronics section will have it but consider secondhand computer parts store.
what do you do with it: literally watch YouTube, vhs tapes, make vhs tapes (whole different thing) or play video games.
can it run bad apple?: yes
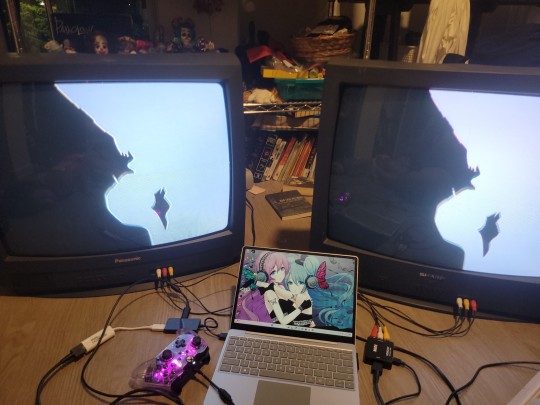
can it run doom?: yes
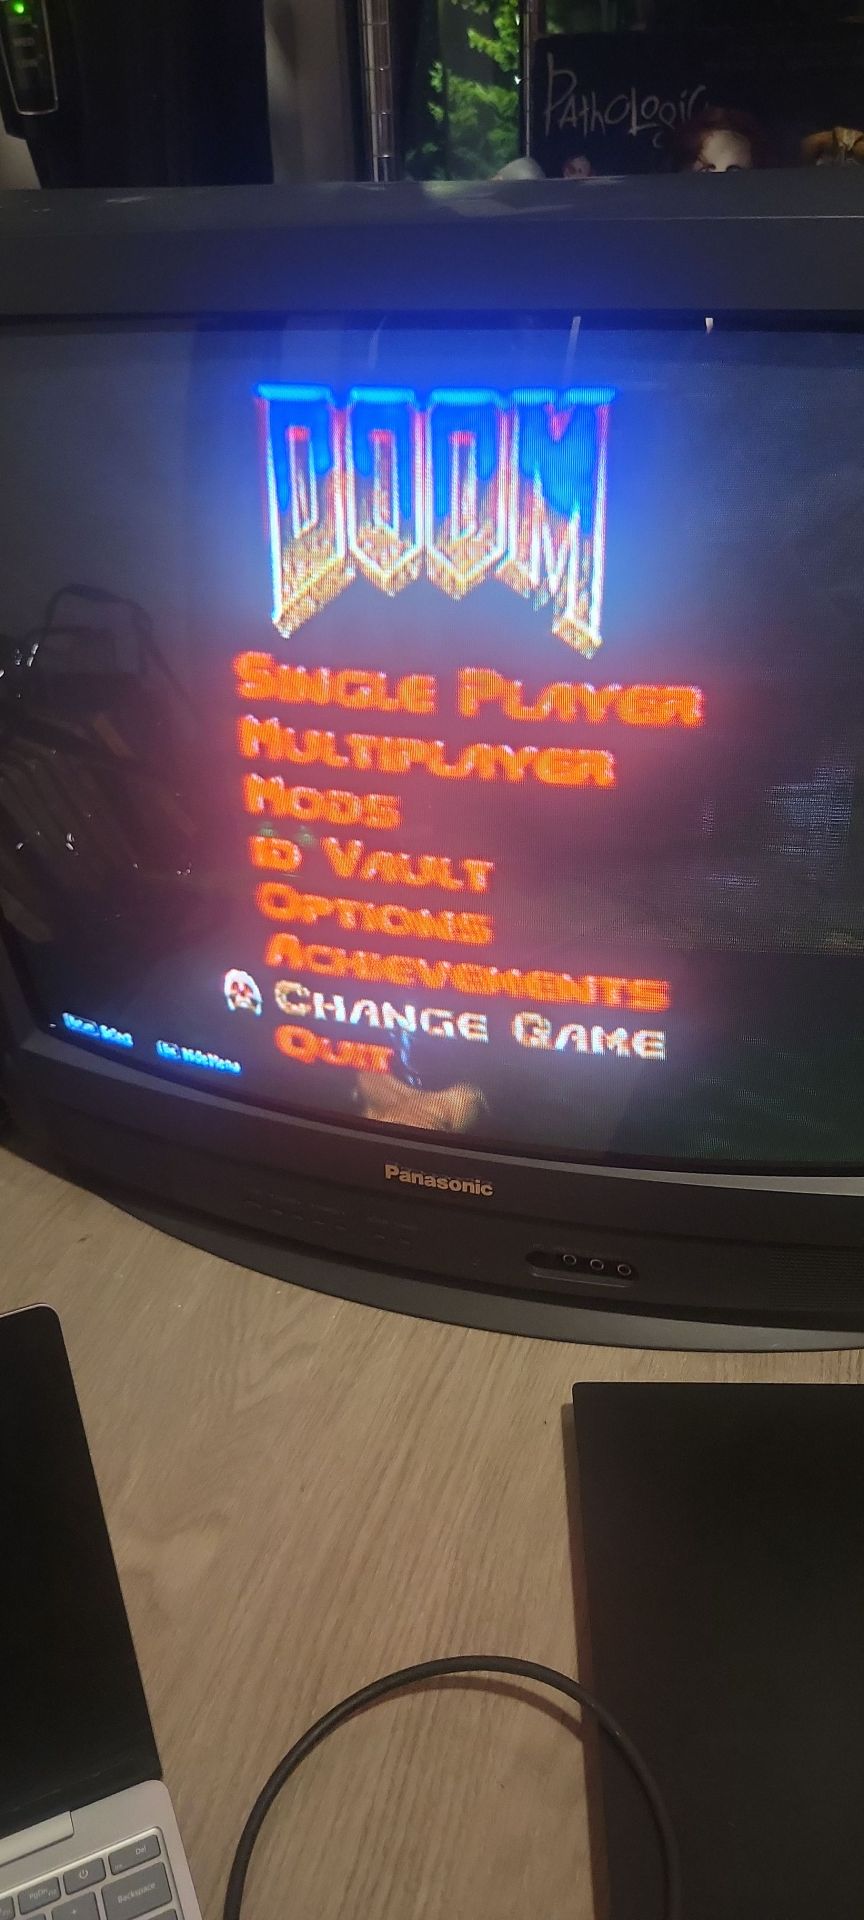
anyways yeah. end tutorial. 🥳
23 notes
·
View notes
Text
someone sent in this ask and I spent literal hours putting together this tutorial but then it wouldn't let me post it and when I went back into my inbox the ask was gone?? good thing I copy and pasted it, so here it is in its own post

I'm not sure if this will work with programs other than photoshop, but this is how I do it. I know @shinobi-bacon has a tutorial here on how they do it which is pretty different from the way I do it, so if my tutorial is confusing maybe theirs will click with you better lmao. I stole the greenscreen idea from them anyway
SO FIRST, you want your villager on a green screen background. to do this, go to harv's island and use a custom pattern to make the walls and floors bright green. If the villager you're using has green in their design, you'll have to pick a different colour that isn't in their design, but for most villagers green is fine.
if your villager has every colour on them like pietro or stiches then rip you're gonna have to do some manual editing frame by frame. try to choose a colour that doesn't touch the edges of their silhouette too much in that case because it'll make life easier for you
so once you have them in green purgatory, record them doing their emote or whatever. I just use the built-in screen record function that the switch has. press and hold this button to record the last 30 seconds that your switch displayed:

next send that video to your computer and trim off the start of the video so it starts right before a recognizable part of the animation. for this emote I cut it off right before the blink. if you have a slow computer, you'll probably want to trim the end off too so the video is only a little bit longer than one full animation loop
(you can use the video editing software of your preference, I just use quick time player Edit -> Trim)
okay time for photoshop. go File -> Import -> Video Frames to Layers
for "range to import" select "from beginning to end" (or you could skip the last step about trimming the video and select a range here, but I find it kind of finicky), and make sure "make frame animation" is checked
once imported, if it doesn't pop up on it's own, go Window -> Timeline to get your animation at the bottom

click through those frames at the bottom until you find an easily recognizable frame (I chose the first frame where her eyes are closed) and delete all the frames before it. in the layers panel, the layer from the frame you've selected should be the only one turned on. delete all the layers below it
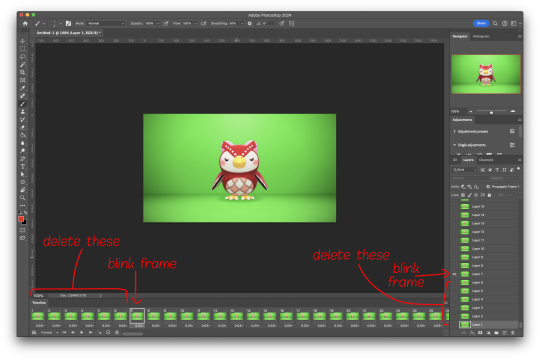
now go through the frames to find the next identical frame. this is where the animation loops. delete that frame and all the frames after it, as well as all of their corresponding layers (note in the picture, frame 121 is selected, and it's exactly the same as the frame from the start of the animation)

hit the play button on the bottom left to double check that it loops properly
next, make sure both THE FIRST FRAME AND BOTTOM LAYER are selected, and crop and reduce the image to your desired size. you can do this step later if you want, it's just that doing it now will reduce the load on your computer and make it run a bit faster. just as long as the first frame and bottom layer are selected, you can do this at any time
SAVE HERE because if you mess up this next part it's a pain to fix, but it's easy to quit and start over if need be
now it's time for my best friend the actions panel !! say hi actions panel !! (Window -> Actions). what the actions panel does is record your steps so you can quickly automate repetitive tasks.
in the actions panel, click the folder and name it whatever you want
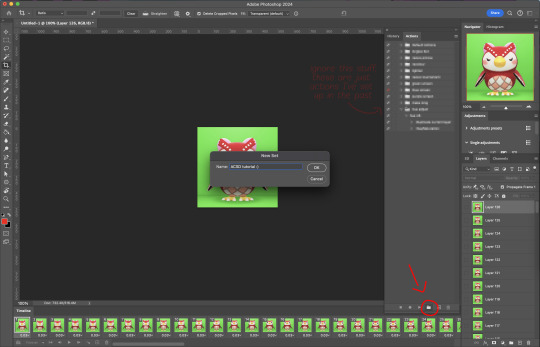
then click the little plus and name that whatever you want and hit record. You'll see the dot turn red to indicate that your actions are now being recorded
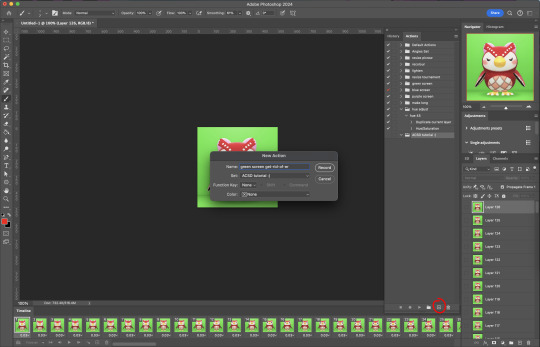
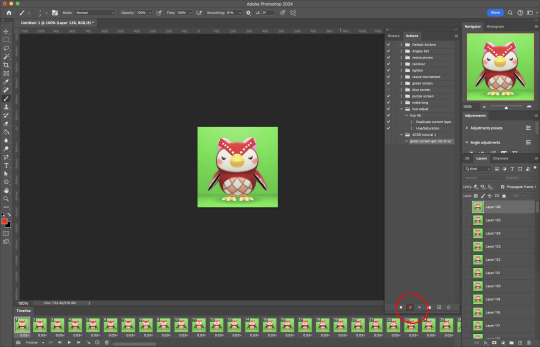
now with the BOTTOM LAYER AND FIRST FRAME selected (ignore that I have the wrong layer selected in the pictures, I fixed it after), go to Select -> Colour Range

click on a part of the canvas that would be green

shift+click on the rest of the green background and adjust the fuzziness until just the character's silhouette remains
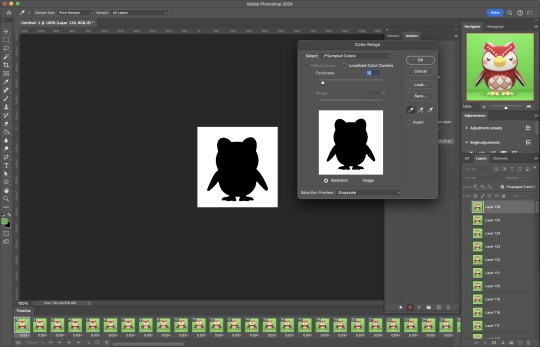
hit OK, now the background should be selected. go Select -> Inverse so that the character is selected, and click on layer mask.
click the next frame button (you MUST click the button, not the actual frame. you need the recording to recognize "go to next frame" and not "select frame 2"),
then keyboard shortcut option + ] to select the next layer up (again, you MUST use the shortcut so it knows to move up one layer and not just "select layer 2"),
and then stop recording.
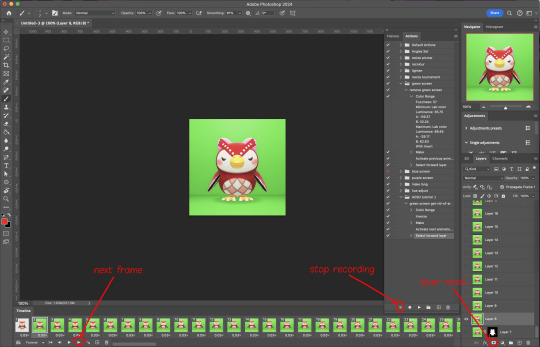
now just repeatedly click the play button and it will do all those steps we just did for each frame :)

this part is usually where it gets messed up for me. if it did something weird like duplicate the same frame or layer your animation over a static frame, just quit and reopen that save I told you to make earlier. the action recording you just made will still be there when you reopen photoshop, so just select the first frame and bottom layer and repeatedly hit play again. if it STILL doesn't work, you probably did something wrong
the recording is now saved in photoshop forever until you delete it, so you can reuse the recording for other gifs! but if they use a different colour background, you'll need to make a new recording (you can see I have separate ones for blue and purple screens). also if you were working with one of those colourful villagers and parts got masked out that shouldn't have been, you'll have to go frame by frame and manually fix them. that's why we masked out the background instead of deleting it.
now it's time to make it into a gif! go File -> Export -> Save for Web. make sure Matte is set to "none" so you don't get those weird white flecks. colours and dither you want as high as they can go, but you can lower them if you need to make the file smaller (though I'd recommend resizing the image smaller first). the bottom left shows your file size. currently as of January 2024, tumblr allows gifs of up to 10MB
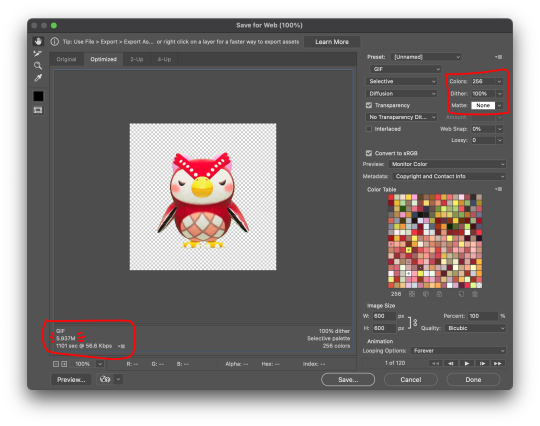
and there ya go! gif! :)
62 notes
·
View notes
Note
Hello there! do you still have an older version of evolwallpaper? I was late to the party and I can't install it properly anymore T_T
Hi anon, unfortunately I no longer have the old .exe 😩 I checked weibo, other users in China are having problems with it as well, my conclusion to this is that it's a broken app full of bugs, probably got nothing to do with regions (ノへ ̄、)
Babe because of your ask, I spent good 5 hours tonight trying to debug it, because I insist we all get the dynamic wallpapers!!!
Original guide // Deepspace PC guide
By the end of this tutorial, we should have a video like this applied to our computer wallpaper:

There's Nikki, MLQC, Deepspace and The Perceiver wallpapers.
New guide:
https://paperwall.papegames.com/

Same step as before, download this but don't install yet!
The following was actually hidden in their Q&A, you'll also need this for it to run, download the runtime version.
https://dotnet.microsoft.com/en-us/download/dotnet-framework/net48

After you install the .NET Framework 4.8 go ahead and try to install the PAPERWALL .exe
→ If it works, great! We solved the problem!! 🎉 (You can skip to the section on the bottom on how to use the app)
→ If you get this error message, ugh congratulations, this is where I tried about 67 solutions for hours just so you don't have to
It's weird, because at this point, the thing have successfully installed on your local drive but it won't run.

Let's go back a step, if you open the .exe again, take note of where it's at on your computer. For me you can see that it's in the C drive, I presume it'll be the same for you.

Find the folder, open it
Open the app

→ If it works, great! We solved the problem!! 🎉 (You can skip to the section on the bottom on how to use the app)
→ If you get the same error message, read on:

If the images haven't loaded in the 1.0.1 version it will most likely going to crash when you try to do anything on it, so read on:

Let go back to the C drive

We are gonna move this somewhere else, if you have a hard drive, paste it to your hard drive, if you have another drive on your pc, you can move it to the other drive. BUT DO NOT MOVE IT TO YOUR DESKTOP!!!! Because we practice good computer hygiene 🙏
Once you've moved everything away, open it back up and try to install it again in your new file location

→ If it works, great! We solved the problem!! 🎉 (You can skip to the section on the bottom on how to use the app)
→ If you still get the same error message, I will send my portfolio to Paper Games to be a software developer in their office and write a new app

Once you get it running *fingers crossed* move the entire folder back to your C drive if you moved it to your hard drive, unless your hard drive is plugged in all the time.
If for whatever reason you get the "access to the path is denied" error message, try the right click and select the "Run as administrator" option.

For easy access:

Go onto your desktop, or wherever you want to access it from quickly and paste shortcut!! Remember it's the shortcut!!

───── ⑅ ♡ ⑅ ─────
How to use the app
The UI has changed a little since the original one, but it's easy to navigate.


Change the language to English, it should reboot the app

From here it's self explanatory
For good computer hygiene you might want to double check where the wallpapers are stored and change directory if needed.

If you're like me and have 2 monitors, this is what it'll look like with the wallpapers applied and the game opened, looks like I need a 3rd monitor for Shen Xinghui ⭐
(Desktop icons should show up, I just don't have icons on the desktop)
───── ⑅ ♡ ⑅ ─────
If you still have problems, check your PC specifications against the following that were recommended on the official site:
System: Windows10 or above
RAM: 1024MB or above
Processor: 1.66Hz Intel i5 or above
Graphics: HD Graphics 4000 or above
DirectX: 10
Secret third thing: you might be able to run it and have the lovely wallpapers but it suddenly goes glitchy or black screen... that's because of the faulty app, I've seen people mention it on weibo, it's not just you 😔
───── ⑅ ♡ ⑅ ─────
Feel free to drop me an ask with images if you still run into problems, hope this helps, until next time~ (✿◠‿◠)
Check out this tag for already answered questions #/wallpaper woes
#ask#anon#love and deepspace#love and deep space#love and producer#mlqc#shining nikki#love nikki#the perceiver#mr love queen's choice#live lockscreen#this is not a good sop its written all over the place but ive spent too long sorting it out and writing this up it'll have to do for now#if this helped you out i would appreciate it if you can reblog it!#you dont have to but its a good indication for me to post more things like this in the future for the english speaking fandom 💕
59 notes
·
View notes