#i learnt how to make gifs in photoshop!!
Explore tagged Tumblr posts
Visit Tumblr Blog
Explore Tumblr blogs with no restrictions, modern design and the best experience.
Last Seen Tumblr Blogs


Fun Fact
Tumblr has 411 employees.
Text


THE MALLORCA FILES S01 E08 — Death in the Morning
“The papers will enjoy this story. But at least the motive was personal, not political, so... a national outcry averted.”
#i learnt how to make gifs in photoshop!!#honestly it is considerably quicker than the insane back and forth between four different apps i did for my miranda & maría gifset#don’t get me wrong it still took me ages to make these but it was less tedious hndjfjshf#(also i already knew how to use photoshop for colour grading & whatnot so that made things a bit easier)#the mallorca files#gif#gifs#the mallorca files gifs#gifset#the mallorca files gifset#my gifs#miranda blake#max winter#ines villegas#s1 ep8#death in the morning
35 notes
·
View notes
Text
Day 8: Family guy imp
Lois, spin around (this is in 4/4 time so she dances to almost every song)

#imptober 2023#digital art#art#illustration#digital drawing#animation#family guy#tiktok#i cannot believe i made this#i learnt how to animate in photoshop for this#it hurt me to make#and then i watched her dance to miku for an hour straight
6 notes
·
View notes
Text

my take on the Stone Greatsword from DS1


modelled in blockbench, with the textured created in blockbench and then refined in photoshop. no lighting whatsoever, the shading is all in the textures. really happy with the impression it gives of a sharp shining edge on the blade, and the metallic ridges on the rest of the sword. the vines were a lot of fun as well. i learnt a lot making this and im really happy with how it came out.
184 notes
·
View notes
Note
Hi! Happy 4k celebration 🥰 Can you share how you make your gifs or make a gif tutorial?
hi !! tysm <3 i'm more than happy to give you a little tutorial on how i make my gifs ! of course, my process is not the same to other gifmakers and may not always work for everyone but i hope it helps !
for this tutorial, i'm using the most recent edition of photoshop (2023) on my mac. full explanation under the cut.
full disclaimer: most of what i've learnt about photoshop and the giffing process is through pure trial and error. this won't work for everyone and others may think it's a little weird, but this is just how i make my gifs !!
1.find your scenes.
finding your scenes is sometimes very time consuming but you want to get it right the first time !! for this tutorial, i'm using a music video in mp4 format.
2. loading your scenes.
to load your scenes, you want to go: 'file' > 'import' > 'video frames to layers'. i know that this step varies on the user because some people like to go to timeline first, but i'd advise starting in frames first !
after that, a screen like i've depicted below will pop up. i've also annotated everything for you as well.
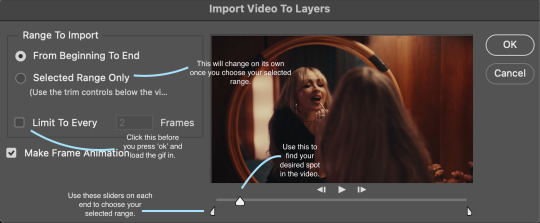
so, select your desired range, press 'ok' and then it will all load into ps !
3. setting up your gif.
i'm grouping this all into one step, but it's broken down into a few things.
the first part of this is: cropping. the recommended dimensions i follow are on this guideline here, but for the sake of this tutorial i'm just going to crop my gif 540x540 (as a w x h setting). the crop tool is on the left hand tool bar.
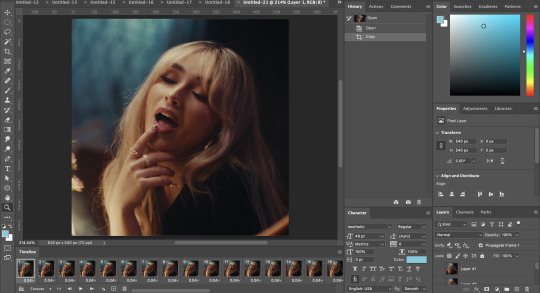
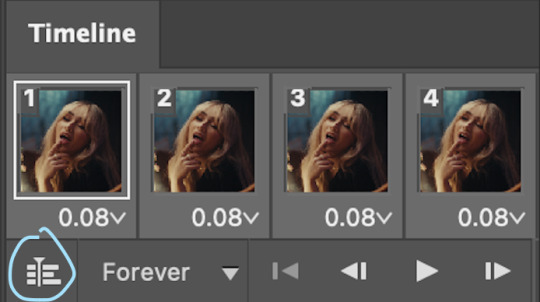
now, my gif looks like this. from here, i'm going to click on the timeline (the space along the bottom that has every frame). from there, click on the three lines to get this menu (i've circled where to go + what you'll click):

from there, go 'select all frames' and then click on any of the frames NUMBERS (where it says 0.04 with an arrow besides it, or whatever yours says) then change the frame rate. with most youtube videos i will use 0.08 as my desired frame rate, but when i'm gifing a show or something, it loads in as 0.02, so i change it to 0.05. 0.05-6 on any normal screen cap should be fine, but obviously you can change it depending on if it looks right or not.
from there, you've basically done the first half of the basics. now, you'll want to click on this button:
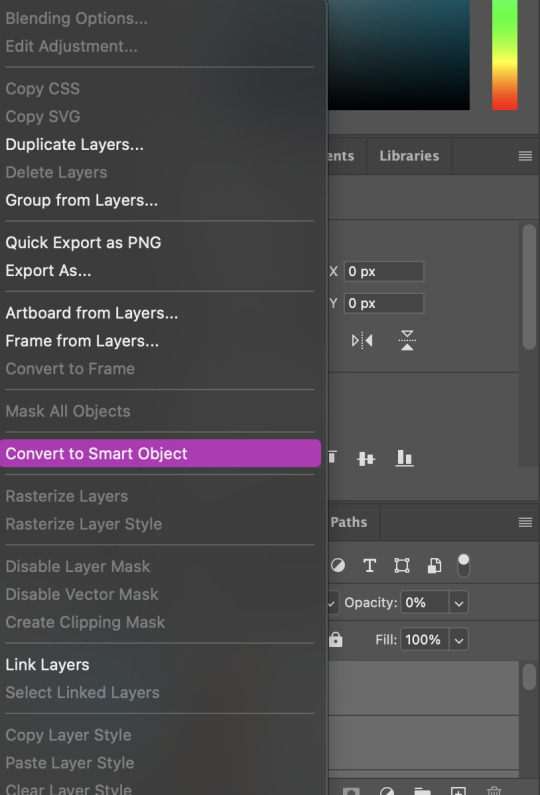
and now you'll be taken to the video timeline ! from here, select command + option + a (this is for mac, i think it would be control if you're on another device) then, right click on your layers and go 'convert to smart object'.
from here, i'll sharpen my gif before i colour. for this step i have two alternative sharpening settings first one by anyataylorjoy (rb to download !) and the other by maygrant (please ask !). the first one is tuser maygrant's and the second one is tuser anyataylorjoy's. i typically use morgan's for all my basic gifs but anyataylorjoy's for creative sets. every user has a different preference but just find what's good for you !

4. colouring your gif.
definitely the most tedious, this can be a little bit of a hassle depending on the scene. if the colouring isn't riddled with heavy yellows or cyans, colouring is usually a breeze but if it is, it can be hard.
CURVES

the circle with the arrow dropdown and that's half grey-white is the circle you want to click on to find curves. it'll open a menu and curves will be at the top.
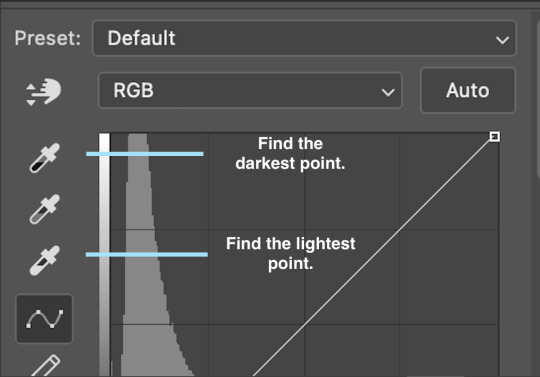
you'll see a little menu like above appear. now, select the dropper i've indicated as being the "light point" and then, using the zoom tool, we're going to zoom in and find the brightest point on the gif. this is typically where the light source is.
in this section here, i can see a couple of bright points. using the dropper, i'll click on the closest to white (note: i find that white rarely changes the colouring of the gif, so if there's like, a really really light yellow, for example, click on that) and then i'll do a similar process with the "dark point" dropper, finding the darkest spot, which is usually in shadows or in the corners. unlike with the light dropper, you want the closest to black, whether that's a dark dark brown or dark dark blue.
now, we can see how the colouring has changed:

optional: you can change the white line on the curves menu, which can make it lighter, or darker in different points of the gif.
LEVELS
levels is an optional step, but i recommend it on very light gifs, or if you want to add a little more depth. probably don't do it on an already very dark gif.
the levels menu looks like this:
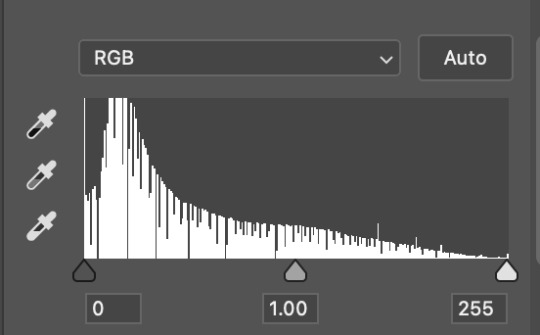
the far left slider adds shadows and the far right slider makes it lighter. on this particular gif, i only need a little bit of depth to her face and i only need to contrast that a little bit. by just dragging the slider a little bit:
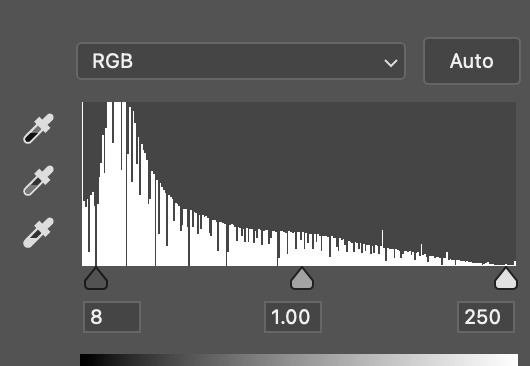
this is the result:
with levels, it can very quickly alter skin tone/make your gif look bad !! with levels, i don't think you need to go above 1-12 in adding depth.
OPTIONAL: BRIGHTNESS/CONTRAST
brightness/contrast is optional !! only add it if it's necessary :)
COLOUR BALANCE
a colour balance layer is great for fixing the tones for the gif !!

this one's pretty self explanatory. if you want it to be more yellow, slide it towards yellow. if you want it to be more red, slide it more towards red, etc etc. i've attached some gifs showing how i change tone:
but just play with it until it looks right. be very careful with skin tone !! colour balance can very easily whitewash/colour wash and that is not something encouraged, in the slightest.
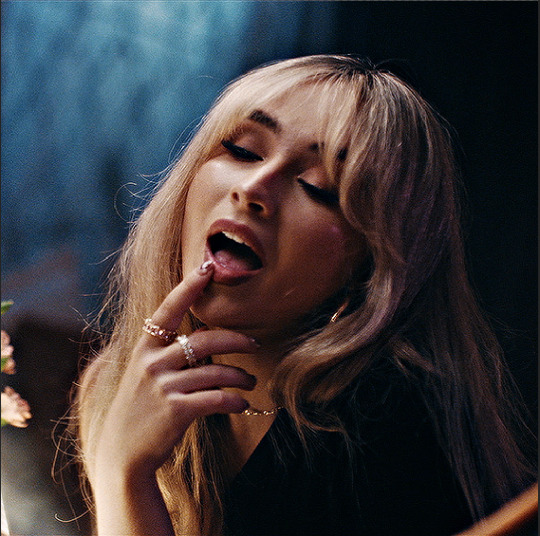
SELECTIVE COLOUR
a selective colour layer is basically a "final touch" to colouring. where colour balance just kind of does an overall change of the gif, selective colour allows you to alter your specific tones, ie. reds, magentas, blues, etc. for me, i'll do the bulk of getting my desired colouring with colour balance, but if it overcorrects reds, for example, i'll add some cyan to red tones in selective colour, to diffuse that.
currently, in my gif, it's very red/yellow heavy. to balance that out, i want to add cyans. so, on the drop down list of the selective colour menu, i'll select 'red' and then i'll ADD cyans (so move the slider to the right, not the left to decrease) and then repeat that on other tones that i want to correct, with different colours.
with each of the sliders, just add or decrease how much of that colour is in that tone. once again, be mindful of skin tone and whether it is appropriate or not.
with selective colour, if there are any standout colours (eg. in my gif, there's a big patch of cyan) that don't interrupt their face (eg. reds and yellows are always in faces) and change the way the subjects look, you can change those colours to make it more vibrant. so, in this gif, i'll enhance the cyans and blues and magentas to make the colours pop more.
5. saving your gif
once your happy with the colouring of your gif and done what you need to do with it, save it as a smart object with all your colouring layers, then go to 'file' > 'export' > 'save for web (legacy)...' . play back your gif, and it should be all good !! congrats on making your gifs !
i've included a playback of each layer, which is staggered to show each layer come into effect.
in order: nothing -> curves -> levels-> brightness/contrast -> colour balance -> selective colour.
hope this helped !!
#*tutorial#gif tutorial#ps help#ps tutorial#userriel#userautie#userraffa#usernorah#userrsun#usercats#thingschanged#**l.myeditss
112 notes
·
View notes
Text
✨ Self Rec Tag Game✨
I was tagged by the creator of the tag game herself, @shivunin and I'm terribly sorry if I came back to it super late ;; it was super fun looking at what others made with it tho <3 people are so talented!!
Rules: Share five of your own fanworks (fic, art, etc.). Then, tag five more people to share the things they've made.
Something you absolutely adore
Something that was challenging to create
Something that makes you laugh (or smile, if that fits more comfortably)
Something that surprised you (in how it turned out, how much other people liked it, etc.)
Something you want other people to see
For those I'll tag: categories aren't necessary, "they're more guidelines than rules" (cit. @shivunin)
I may have broken the rules because I'm chronically undecided << hopefully it's fine sorry in advance
Something you absolutely adore
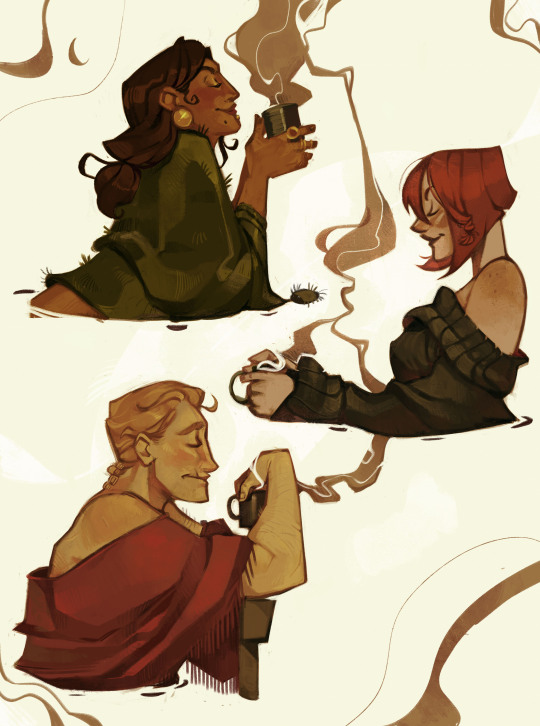
I just... I'm into chill and comfy vibes <<' These three together bring me so much joy, like, I remember reading all their interactions on the wikia and smiling like an idiot because I wished that all of it was more blatant rather than "yea there's a 3% chance you'll get this interaction in game"
Something that was challenging to create
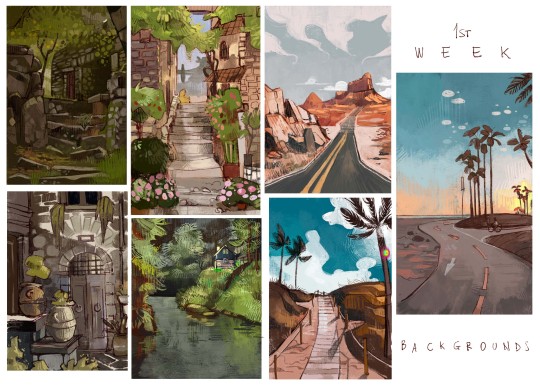
Probably the first batch from everything-else-but-Inktober 2020. I decided to drop the idea of messing with inks and straight up exercised on things I usually fail at / wanted to improve. The whole challenge was, well, a challenge. I remember struggling from day 1 to 30 because I'm terrible at studies, I tend to filter and filter and filter and... But I like the results!! Far from perfect, but I've learnt big deal through it ;; If you're interested, here's the links to the instagram posts: Weeks 1 - 2 - 3 - 4
Something that makes you laugh (or smile, if that fits more comfortably)
I can't decide! Aaaaaargh Here, have a multitude of things that make me crack a smile :'D
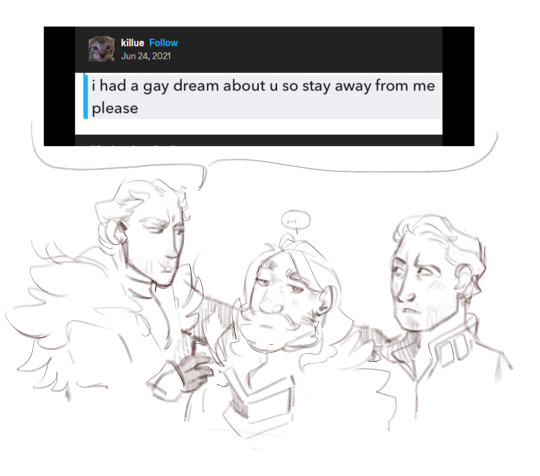

...I wanted to add more but I don't wanna make another monsterpost :'D
Something that surprised you (in how it turned out, how much other people liked it, etc.)
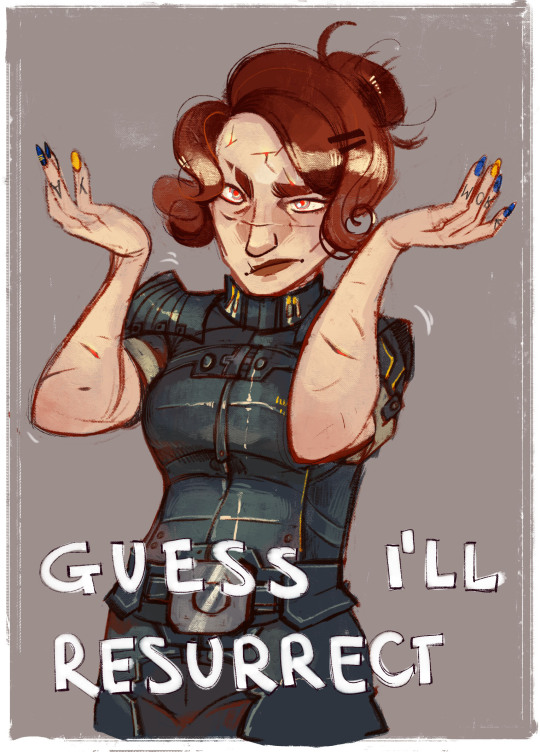
This fanart of Ophélie from Le Passe Miroir, which I'm very proud of ;; I know it doesn't seem like a huge accomplishment or an art megazord, but I was very in my head before opening Photoshop but during the process, when I realized I was doing exactly what I pictured beforehand, I just couldn't stop being proud of myself lol which is something I don't experience a lot :'''
Also this comm I did for @n7viper that made me say "oh, you can handle this" This was quite the experience ;; thanks again for letting me work on this dude <3 I started with a greyscale then added colors, which is a technique I used some times and like, I was sure it was challenging because it's super hard to balance everything out, but when things came out exactly how I wanted them to be?? Woah, alright Picasso, slay
Something you want other people to see
-My dwarven ladies 🧔✨
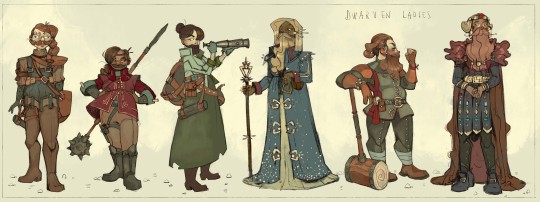
you can check it out here
-The things I'm doing for this artfight lol I think I leveled up in some cases 👌


These are previews, everything will be posted in this blog, my artblog, insta, twitter etc etc
-The collabs and trades I made with some of the most talented people I know and cherish ;;
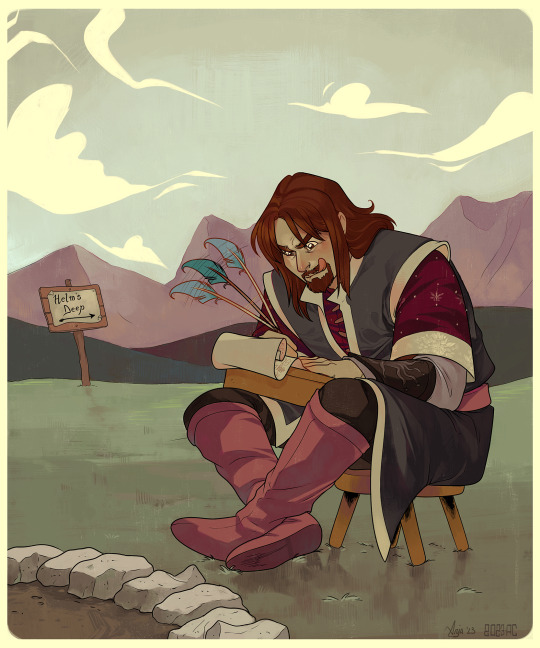
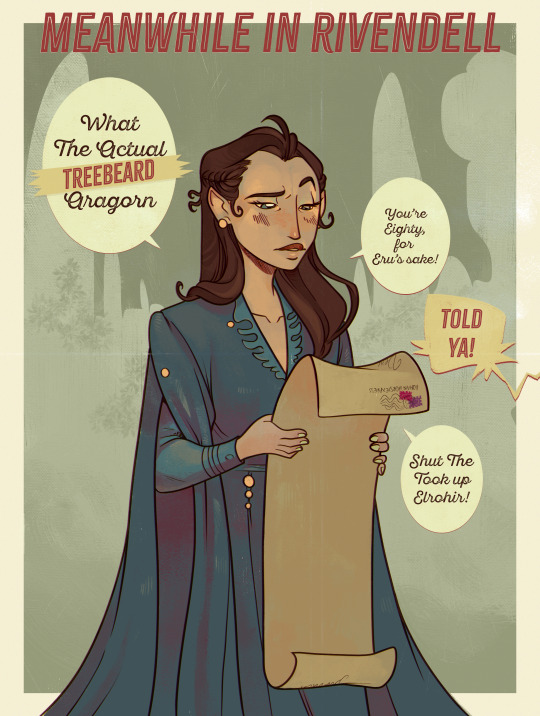
Like this one amongst the many I did with @greypetrel who dragged me back into Lord of the Rings after years and I'll be forever thankful for that ;; but also for the experience <3

Or these ones I did with @underneathestars Plus our joint effort for last year's N7 Day: her post - my post That was a challenge and your girls served 💅
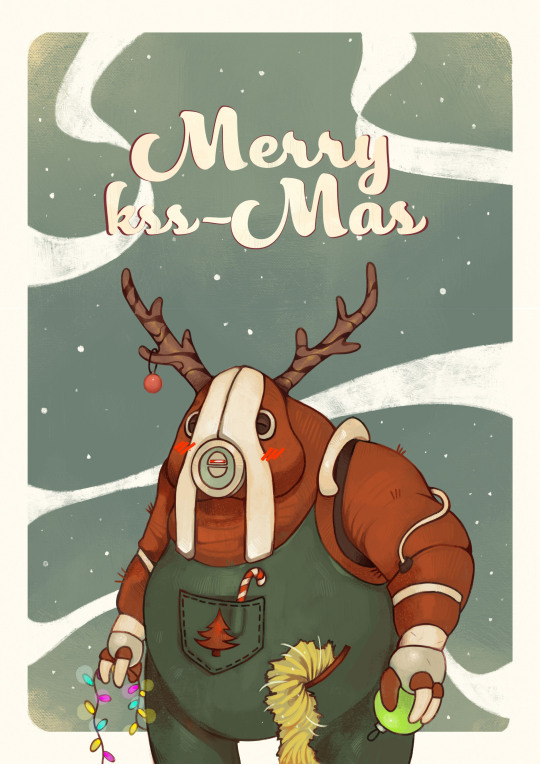
Also This!!! Courtesy of @demandthedoodles This was like, one of the funniest - yet astounding - outcomes from a sketch I almost forgot I made lol I need to print this out when I can!
I would include all of them, because I traded art and collaborated with people I really appreciate but I can't possibly include other things ;; I'll mass reblog / share them in the next days!
Also, thanks again @shivunin for this tag game ;; I discovered things I've never seen from people I follow and found out awesome new things from people I didn't follow already. So super fun <3
I'm tagging (no pressure, no commitment): @n7viper @underneathestars @qwib @skeltrr @lethalhoopla @kassarts @aukanemin @ii-then @daggerbean @vaesivlasta @sparatus
#long post#tag game#self rec tag game#ndo sta l'art tag#of course I did a monsterpost siigh#listen I'm easily entertained when it comes to shitposting I had to spam :'#no I didn't have to but I did it anyway because I have no self control#I didn't include fics tho <<#I need to stop tweaking this post gdi
36 notes
·
View notes
Note
hello! i'm not sure if someone has asked this before but the blending here post/733052341549498368/kpopcreators-bingo-challenge-free is really good!! i was wondering if you could teach me how you did so perfectly because i don't understand much about blending and yours is so pretty
thank you so much! i've listed some of the basic steps here but i've also linked some really good tutorials i learnt from 💙
so if you want to get a gif with blending (like this! as a rough example below <3)

first make sure you have your two gifs ready! they should have the same amount of frames 🫡


the key to remember when selecting scenes for blending is that you're gonna be utilising blending modes on photoshop (most commonly screen or rarely multiply) so you want to choose scenes that have equal amounts of black in them.
because since you're choosing screen as a blending mode, the top gif will be more visible in darker parts of the bottom gif! so you can see there's plenty of dark available in the two gifs, think of them as merging/meeting spots for the two gifs to blend the most <3


once you've coloured your gifs as you like (a bit of contrast/increase in black selective colour is good!) you can put both gifs in folders with their respective colouring, and go to the top gif and change the blending mode to screen!

so this is the most basic blended gif <3

for a pop of colour, add a solid fill layer of any colour of your choosing 🫶

and you can play around with the blend mode settings for the colour but i most commonly use multiply for darker or bolder colours, and overlay for brighter ones!

and there you go <3
there's lots of experimentation to be done tbh with blending and i'd definitely recommend reading through the amazing below tutorials:
this double exposure tutorial by @eddiediaaz this blending tutorial by @aziraaphales this one that i first used ages ago to learn <3 by @yenvengerberg
hope that helps!
17 notes
·
View notes
Note
Duuuuude! You are so incredibly talented. May I ask, how do you make your graphics? Everytime I see one, they look fucking amazing. What program/s do you use? And how hard are they to learn?
nonnie! you are coming for my heart like this! 🥹😭
of course you can ask! I am always willing to help out anyone creatively where I can.
this is quite a spill so I have the explanation underneath the cut! 🥰
I use 2 programs, and it depends what for -
my gifs, headers, icons, and dividers I use adobe photoshop.
my collages for my writing social media and my wattpad, I use canva.
I want to give credit where it is due and say I learnt how to make gifs and graphics from my best friend, @sgt-seabass. she took me under her wing and from there she's taught me how to operate photoshop and make the gifs like I do, and since then, I branched out and fucked around with the program and that's how I got where I am.
as for how hard it is to learn, personally, it is not hard at all.
gif making can be challenging but I also don't have so much of an affiliation for them, and I like keeping them simple. header, banner, and divider making is my bread and butter. I fucking love making them and I just... I don't know. I love doing it so much, and I guess my passion shows.
the most important thing to making graphics look seamless and effortless is familiarity with the program you use, because if you don't know your tools, you don't know shit, basically. I would really recommend getting to know the software you choose to use - play around and make some dummy designs and make mistakes. making mistakes has helped immensely in my creative process.
learn the dimensions for posts and pixels, too. it can be different for all blogs!
I use the following for my blog: (all in pixel measurement)
line dividers - 600 x 5

thin dividers - 600 x 15

thick dividers - 600 x 25

headers - 3000 x 1000 the squares for these headers are 1000 x 1000

blog header - 640 x 360 even when transparent, like the two I use, they are still the above dimensions.

disclaimer banner - 2000 x 300 (the bigger the canvas, the better the transparent elements show)


if you have any other questions, my love, my inbox is always open! 💗
honestly, I would be open to doing tutorials when I have some spare time between these events - would that be something that's helpful? lemme know, chaos kittens! 😘
13 notes
·
View notes
Text
FIT DIGITAL GRAPHICS INTENSIVE II
Session 1- 27/01/25
Today we began by going through the class syllabus and discussing what we were going to be doing this sprint semester 2025. We discussed the projects we would be having-
1. digital collage based on an article
2. digital collage storyboard
We then read all 3 articles that we were given and I chose this one-
I created a mind map of my thoughts as I read the article, to help me decide what I want to create for my digital collage-

Session 2- 30/01/25
Today we discussed what we found reading our articles and talked about whether we enjoyed mind mapping. I don't think it's a very popular way of learning in American schools as most of my class had never made a mind map. I do enjoy making them and find them effective as I can summarise the information and it means I don't have to keep referring to the original piece constantly, and I can just look at my maps. About the article- I feel the information was common knowledge for people interested in dogs- whether that means you own one or you are interested in owning a dog. I think some dog owners are ignorant and see their dog as superior, meaning they look down on how other dogs are treated even though it isn't necessarily 'wrong'. Therefore, I do believe in the article as there is a lot of myths about dogs, and there is a lot of misinformation around dog- human relationships.
Some sketch ideas-

We had our first photoshop class- We learnt about cropping images and angling a buildings perspective from wonky to direct view. I created this building of British icons after class to practice the skills I learnt in class.

Session 3- 03/02/25
Today we ran through all of our sketches and building designs. My feedback was to add more purpose and detailing to my sketches as mine were more sketches of concepts rather than composition realistic design ideas. Kris loved my building and said it was nice how I added a memorial top left (unintentional). We ran out of time for a PS lesson.
Homework- develop sketches further and create a mood board for my collage design.

Session 4- 06/02/25
Today we covered selecting and masking on PS, which I have done many times before but I re did masks which I had forgotten. I created this by using lots of different techniques and tools, to practice all kinds of cutting images out.

I got feedback from a further developed sketch-
" I think the base idea is fine as far as it goes, but I'm not sure yet that it goes far enough.
My question is, how will we know that the dog is trying to communicate, and that the man is confused? I think those two emotions need a bit more teasing out. There are lots of possibliities: hand drawn images, icons, thought bubbles, speech bubbles... Consider having the dog and the man looking at each other. Right now they are just two figures in the same frame. How can you use their poses, their gazes, to help communicate the confusion that is going on.
These ideas can be resolved as you begin to source images.
The sketch is charming, btw. " 93/100 A-
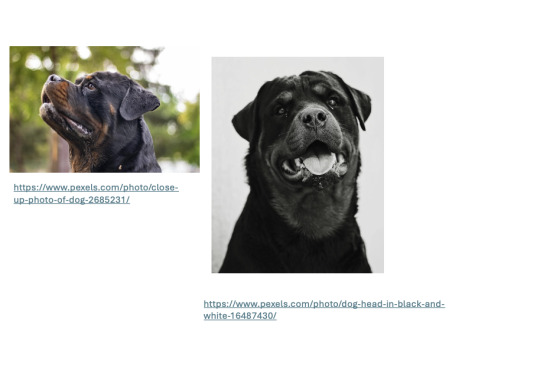
Homework- mood board, collect some images for collage compositions (explore different public domain images and stock images)


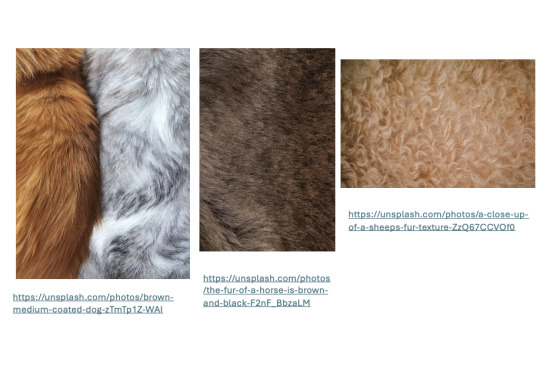


Session 5- 10/02/25
Kris was ill today so our class was cancelled, our assignment was to carry on collecting images and upload our homework to brightspace.
Session 6- 13/02/25
Today we went over ps layer mask and adding adjustment layers... we watched kris demonstrate with a bird and make it look unique and then we began by starting our final files by adding our sketches and layering on top of it... This is the experiments I did.

I started my file by creating a ps doc 8 inches by 8 inches, 150 pixels/inch, rib colour, transparent. I added my sketch as the background and locked the layer. I experimented with some images I used in my mood-board and experimented with scale, colour and adjustment layers.
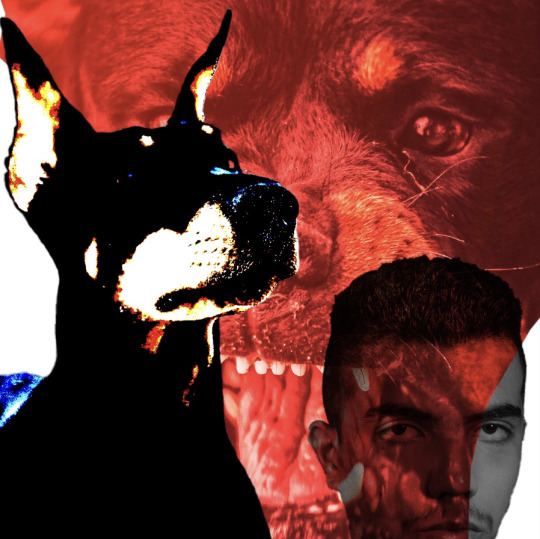
Feedback from Kris- experiment with layering onto of the dogs face- different eyes, teeth, nose??
0 notes
Text
Today's twitter writing community's question of the day that's making big rounds is where would you be now if you had followed the career ambitions you had at age 13.
Hah..hah..hahahhahaha ahhh...life loves to rub it in my face. I'd still be here, mourning my life. I did follow my ambitions since 13. In fact the ambition started at age 9 and it's been haunting me since.
At age 9, while it was mostly play pretend that I was already in the business of my dreams, I started making edits as much as I could with the resources I had. At age 11, my teachers allowed me write and direct my first and last theatrical play ever (didn't go that well cause they put it last at the school closing ceremony and parents and kids were tired and chatting, but oh well my family and the families of the kids that played did pay attention). At age 12 I turnt more on video editing, cause I finally decided which exact job I wanted in the business of my dreams and that required knowledge on video making. At age 15-16 I met my Technology teacher in high school, who after finding out my love for music video making, gave me a cracked version of Vegas pro and books on filmmaking and camerawork. At age 18 I applied for 3 filmmaking schools in the UK. I was accepted in 2 but one wished to give me a place in animation instead (probably cause I didn't have original material just fanvideos, not my fault my friends didn't want to help me record shit) so I ignored it and went with the one in Wales, but due to my parents' insecurities I lost my chance. At age 21 I finally found the balls to try Photoshop and start building a portfolio. I also learnt how to code through the uni I was forced in, helped with building my fanblogs and website.
And it all froze there. I made a couple of fanvideos, one of which got noticed by the band I had made it for and got banned in Japan the next day, no wonder why (I didn't know much about copyrights back then and just accepted people can no longer make fanvideos). I quit making videos within the year. My portfolio not being good enough and not getting attention in social media either eventually discouraged me and I stopped improving it around 2019. I haven't finished a single original work since. But it is slight improvement I got back to both thanks to vtubing. Even if it's not really what I want in life.
Dream they said. I'm good.

1 note
·
View note
Text

Today I went and did the Photoshop Introduction Workshop for my morning session. We got shown how to use all the basic tools and function of Photoshop. We also got to make a little animation using the skills we learnt in the workshop. I had always wanted to learn how to use Photoshop so i had a lot of fun in this workshop.
0 notes
Text
week 12
this was our final week of fundies, learning the software. today we did a bit on exporting in InDesign. we looked a little bit into RGB and CMYK. what these stand for and what we use what for. i had learnt a bit about this in DT1 and DT2 so i already had an idea of the use and what the colours combined in each one create.
today we exported our book as a PDF.
3mm bleed is always a good idea, because it means we aren't loosing any of the image but still getting the full size. we don't want a white edge going down the side of the page.
we also use crop marks to know where to cut the page, with the bleed on.


in the compression tab we can adjust how big the file is. we can also make it a high quality print which is what we want.

then we opened it with adobe acrobat.
we downloaded mockups for our book in photoshop and were able to add covers. it was all under smart objects so it created another file that when we save it, it will update the other tab of the mockup... see below.


i started off having a transparent background so i went back into indesign ad editted the actual cover. little did i know there was a shortcut for this that would save me so much time...

then we made spreads, it was the same idea and system to it...


from there we can add any background we want to.
learning this was super handy and helpful. i know know how to create mockups! throughout school in design, i always made it manually and edited the individual images.
shift + option + command + s (save as web) this means it can easily be uploaded. it saves as a gif.

here are the mockups of my whole book. (below) (because the mockup file was very small the quality is not very good)


0 notes
Text
Reflection
Today was the last day we had of Fundamental's. So now I need to write an honest report on how I felt the course went.
Firstly I want to look back at the start of the course where we looked at vector art/drawing. As much as I want to say I loved it I honestly found it very frustrating as I wasn't able to properly comprehend how the curves would go based on the anchors and branch's. Although it did get better and got everything done as necessary.
Apart of this was a group activity where we chose picture's to replicate with vector drawings. I found this helpful as I got to see how someone else delt with these drawings. We spoke on aspects of our drawing and about things we could change so the communication was there which was great.
Next we looked into photoshops photo editing and how we can make images look more alive wither its bring color or taking away. I really enjoyed this part of the course and thought I was okay at doing what I was doing. From sacrificing aspects of an image to bring forward another part was fun as it was a toss up which you had to consider. It was great being able to edit my own personal photos which were taken on a real bad phone so now they look good as new.
We moved onto cropping and editing images by moving stuff around, tacking them out, or adding stuff in. This part was pretty mild for me as I neither really enjoyed it or hated it, although I could not for the life of me get my head around the smart objects / masking layers as they never worked for me as I wanted them to. This was probably due to lack of knowledge on this part of the program. When it came to the jumping man I am still confused on how we ended up getting to make the line object to move around him. I know it uses masks and such but If I had to replicate this action I would be lost on how to do it.
And now the holy grail of Fundamentals Dum Dum Dum. In Design!!
This was by far the most fun part of the course for me and more intuitive. It really allowed for mostly free creative freedom when making the book especially. I found some parts strange as InDesign worked in places and not in others but it always seemed to fix itself or a quick google search would give me the answers. It's funny how I had a InDesign project on the go for another class that I finished and handed in a week before we started this which would have been very helpful but what can you do.
Overall I learnt lots from this course, some stuff I will hopefully remember for a very long time and unfortunately other things I have already forgotten. But a great experience and enjoyable ride non the less.
CHEERS!!

0 notes
Photo


BEFORE/AFTER COLOURING TAG 🧡 thank you @minghao-s for tagging me </3 i can’t ever resist these sort of things!!!
lately i’ve been trying to do simpler colouring and not to overthink my adjustment layers. because i feel like i always stare at a psd too much and suddenly it doesn’t look right to me
most of these gifs have a curves layer for lighting and a channel mixer layer to subtly fix the red/green/blue casts on the gifs
a lot of the time my colouring also depends on the sharpening im going to use because if i’m using a really sharp colouring it can work well for shows/films but it highlights the whites on the face too much on kpop gifs - the point of whitewashing so i need to add some extra layers there to take care of that
i’m not sure who has already done this but just in case i’m tagging @loverbbh @dqmeron @saintalicent @capinejghafa @woozification @suuho @heeseunq @bisexualgyu @jjaes @nina-zcnik @kingsroad @sahyoz @sith-maul ❤️
#today i learnt how to make a triangle in photoshop...after six years </3 growth...#i really wanted to add some colouring gifs for turkish shows (because they can be very yellow-casted) but the quality was not working...#so i just used whatever files i had already downloaded#creations#resources
39 notes
·
View notes
Photo


#i learnt how to maje gifs in photoshop what did you expect#make*#bnha#bakugou katsuki#my hero academia#mha#boku no hero academia#gifset#mine#bnha edit#edit#bnha gifs
18 notes
·
View notes
Photo


How Kadavul(s) feel about our lives.
Oh My Kadavule (2020)
#oh my kadavule#Vijay Sethupathi#vijay sethupathy#ramesh thilak#kollywood#sontha post da#kolly#I learnt how to finally make gifs on photoshop instead of in browser sites#gif#my gif
83 notes
·
View notes
Photo

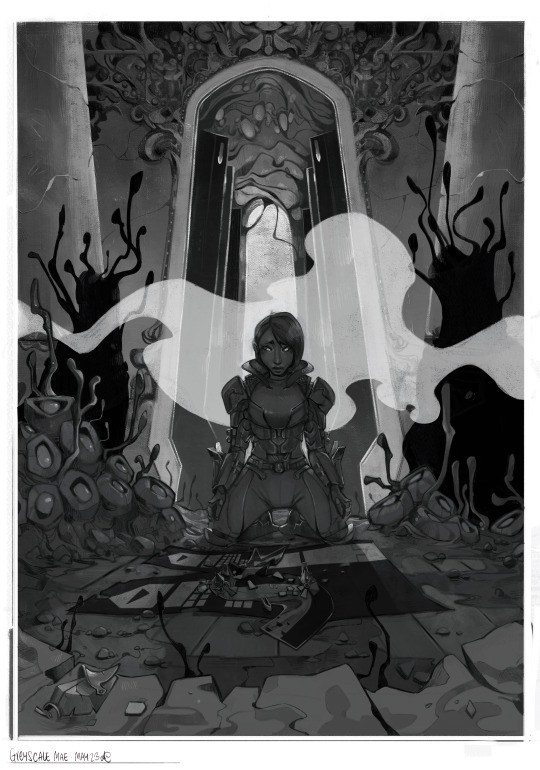
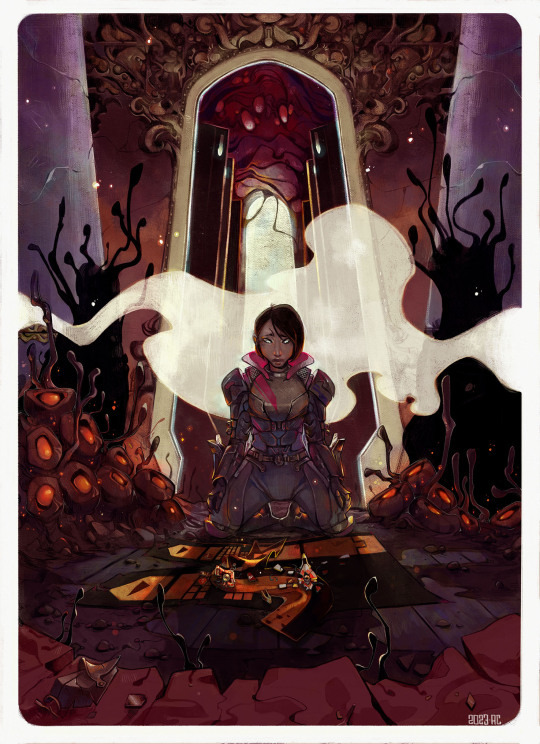
Written in Blood (Animated)
Meiri Lavellan - 9:41 vs 9:44 Dragon
[static version]
#dragon age#dragon age inquisition#solavellan#solas#lavellan#meiri lavellan#i finally learnt how to make gifs in photoshop#my art
23 notes
·
View notes