#i bought an embroidery kit just for this project
Explore tagged Tumblr posts
Text

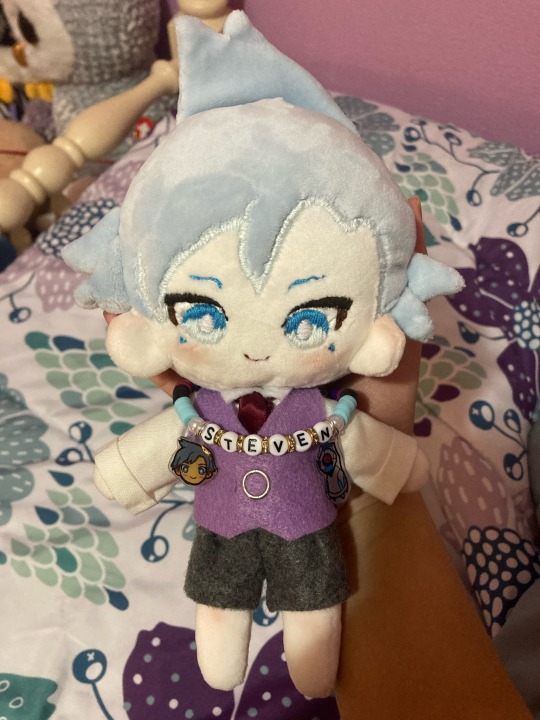
little steven plush in progress
#me btw if you even care#pokemon#steven stone#my art#not sure if that’s the best tag for this but i’ll put it there#my crafts#maybe that’s better#i bought an embroidery kit just for this project#steven i’m learning new skills all for you baby ❤️
13 notes
·
View notes
Text
John Price x Reader. Fluff. Implications of a BDSM relationship.
At some point in the evening—for you, anyway, since when you answer the call it’s clearly midday for him—John finds the time during his latest deployment for a video chat.
He looks a little haggard when the call connects, face reddened across his nose and cheekbones and dark circles under his eyes. He brightens when he sees you, though, crows feet deepening.
“There’s my dove,” he says fondly, the rasp of his voice low and soft. His beard is growing out, curly and dark in the artifacting of the camera.
“There’s my captain,” you return, smiling.
“What day is it for you, there?” he asks, sitting back, getting comfortable.
“Saturday,” you answer.
“Mmm,” he hums, as if it’s the nicest thing he’s heard all day. Probably is, really. “Tell me about it.”
You do; John always likes to hear about your days, when he’s far away. The tiny adventures, the workplace dramas, the little pleasures and minor catastrophes of normal civilian life. Keeps him balanced, he tells you; reminds him there are other parts of his life aside from the job, and the work.
You show him the embroidery project you’re close to finishing, the little window hinges you bought at the craft store for the miniature apartment you’ve been building from a kit. It’s the same one that he always half-complains about being spread over the kitchen island when he’s home, and you always remind him that he doesn’t have much room to complain; he bought you the kit on a whim, after all, without your even asking.
At one point the door starts opening behind him—he’s posted up in a large tent, empty bunks behind him—and he quickly covers the camera with his hand. He mutes you for a moment, then comes back.
“Only got a few more minutes, sorry,” he says, refocusing on you. “And—y’didn’t mention that other project, I noticed.”
You suck your lips between your teeth, effecting ignorance. “Hm?”
“The writing one.”
As always, nothing escapes him.
“So here’s the thing,” you say, strangling the fingers of one hand with the fingers of the other, “the bathroom is so clean now, John.”
“Dove.”
“And I finally ordered my new glasses, you know, like I’ve been meaning to for months, and you keep reminding me about.”
He pinches the bridge of his nose between two broad fingers, eyes sliding shut like you’ve just told him that some important intel has gone bad. “How long have you been working on this.”
“I don’t think that’s important,” you squeak.
One blue eye opens, piercing you. Humor sparks in its depths, though when he speaks, his voice is gruff, every bit as commanding as when he gives orders to his men. “I need to go,” he says, “so here’s the deal I’m gonna offer you. If that draft isn’t done by the next time I speak to you, then when I get home I’ll put you over my knee and tan your arse until you’re crying. Understood?”
Your voice has retreated somewhere down your throat, hiding very far beyond your trembling vocal cords. “Yes sir, understood,” you manage to peep.
His other eye opens, and he smiles affectionately. “There’s a love.”
#true story#lol y’all are gonna hunt me down it’s not even that long of a one shot…like 4k max#price x reader#mwritesprice#madi writes#captain john price#john price#price cod#john price x reader
859 notes
·
View notes
Note
Hiii, do you have any tips for drafting out embroidery patterns? I've got one in mind, but drafting it out and color picking is so nerve-wracking!!
[Hi!!!! this got kinda really long so I'm gonna crop it under a read more. And I honestly don't have any real training/instruction in fiber arts so this is just how I do things, and probably others do them very differently!]
Haha so my fandom embroideries are VERY different from my non-fandom personal pieces in this respect. For non-fandom things i just kind of throw myself in like WAHOO FREEFORM LETS GO and go for a kind of messy colorful approach that ends up as things like this:
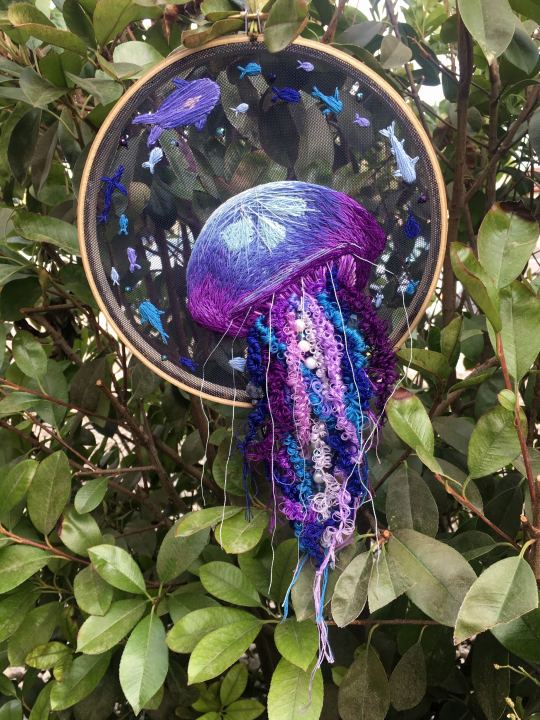
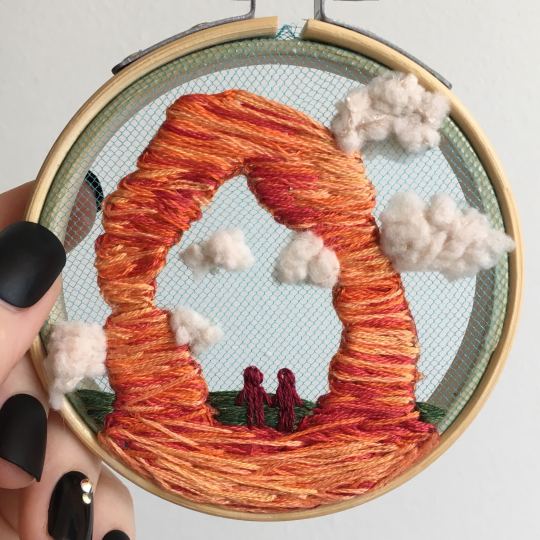
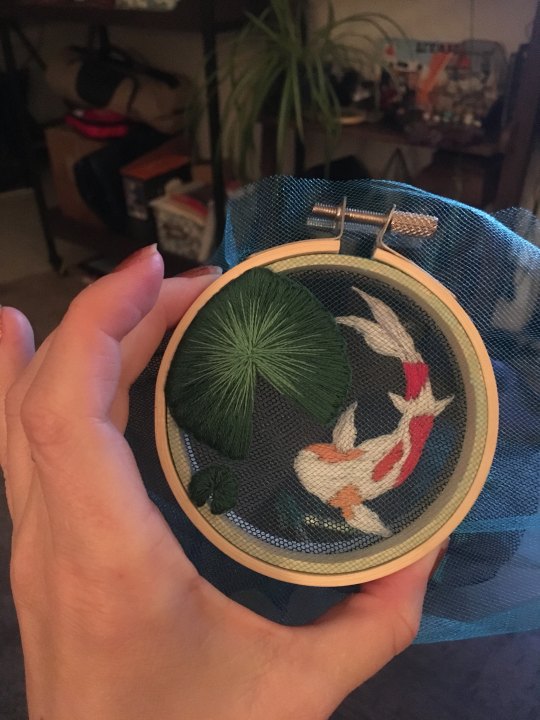
Versus my fandom stuff is way more structured and designed to fill space, be very precise, etc. So for those I do go in with a digital mock up of the design I make in photoshop, that I then color in, and then as my last step translate to thread colors.
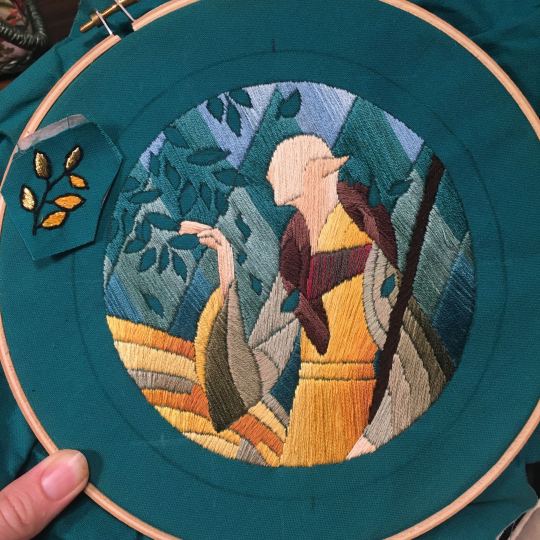
For my Dragon Age series. this has been because I'm specifically trying to mimic the stained-glass style of art you see in parts of the game like the dialogue wheels, some icons, windows, etc. The icons in particular were really easy to copy into embroidery because they already come in handy circles:

This is mostly because I have desperately wanted to pick up stained glass work as a hobby for like 6 years now. As in once every 3-6 months I put everything I'd need to start doing it into an online shopping cart and look at the price total and then sadly close the window because I just don't actually have any space I could do it in (I live in a 2bed apartment so i have no garage or yard or anywhere it wouldn't make everything else a mess or be a hazard). The day after one of those events I impulse bought and completed a floral embroidery kit from the craft store and kinda was like... ok, well, I did this once how hard can it be to use this medium to mimic the hobby I wish I could be doing? Plus, it's only like 60 cents per color! I can afford that! So I took the first design I wanted to do, the romance icon, and basically redrew it sloppily in photoshop, then freehand-copied the design onto fabric and stitched it the next day:

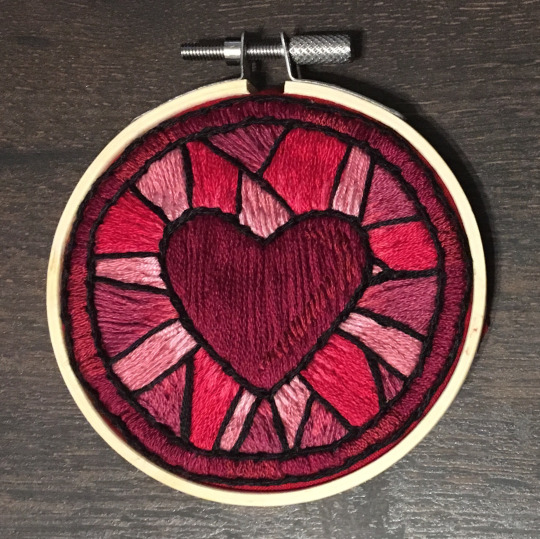
I learned a lot from this piece and changed my approach a little. Here you can see I tried shading in the parallel direction to my thread, which looked messy and added texture, so now I shade horizontally to my thread direction instead.
But it gave me a basic approach for turning the Tarot cards or DA Keep tiles (or any other art!) into embroidery patterns, which I couldn't copy as directly into this really smooth stained-glass style. There's a basic process I follow when doing these conversions that generally follows the same order, which I'll go through below.
STEP 1: SHAPES
The first thing I do is pick the shape of my display frame which is usually a circle, but could be an oval or rectangle too, since I hang the finished pieces on my wall to have nice way to show them off. I like to fill the whole space so knowing the size and shape of what I want the finished project to look like is a good goal for me. Since I am doing fandom pieces I want to be recognizable, I do stick pretty close to the "original" character design/art, but you can absolutely change as much as you want and freehand draw your own interpretation instead. If you're doing original art just substitute the below composition notes with "sketch out roughly what you want it to look like". I personally do my pattern drafting digitally as I find it easier, but you can do this part by hand too.
First, I keep the reference image I'm working off of open next to me while I work, and draw in the shape of my frame (here, a circle). If I'm adding in the little border to be fancy, I add a second inner circle. I keep these as their own top layer so I always know I'm working within the final "frame" and don't spend time designing any section that will fall outside it. Then I will take copies of the reference image and knock the layers down to 25-50% opacity, and start moving them around underneath the 'frame' layer until I like the way their positioning looks as a composition. Sometimes elements of a card I want to include don't all fit in, so I'll chop the section out and add an additional layer to throw in (like the background circle things in the Hermit design below). Or I'll just freehand things like adding much bigger diamonds behind Solas in my Hierophant design because I did NOT want to do 1000 tiny ones. Then once I'm satisfied with the general composition, I'll use the plain ol circular brush tool to trace out the major shapes of each element. I try to keep in mind that I can't go too small, and curvy lines are more difficult to fill in than straight ones. I usually do a rough messy version first, make it mostly transparent, and then a cleaner and more precise one over that.
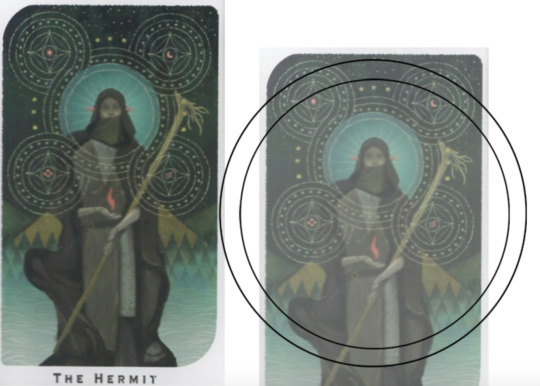


(you can see parts of the rough one on the left and the fully 'cleaned up' on the right for the Hierophant design)
Now: depending on what you are doing next with the pattern, this might be where you stop and start coloring. If you are planning to freehand your design or just trace it onto fabric (or even print it onto fabric here), there's no need to do more than this kind of lineart! However, if you are working digitally and want to create a scalable vector so you can print it at different sizes, you can use the pen tool in photoshop to trace your design and make a "work path" of the lineart. However, another note: THIS PART IS VERY FRUSTRATING AND TEDIOUS BECAUSE THE PEN TOOL WAS CREATED BY THE DEVIL TO TORMENT US. It is so so so easy to accidentally delete a line or even the whole path and not notice later on. Ask me how I know 😭 Anyway I'm not going to include a pen tool tutorial because I don't even know how to use it well and have to google or watch videos every other time I try to use it. But if you can muddle through it gets you some really clean lines that eventually look like this:

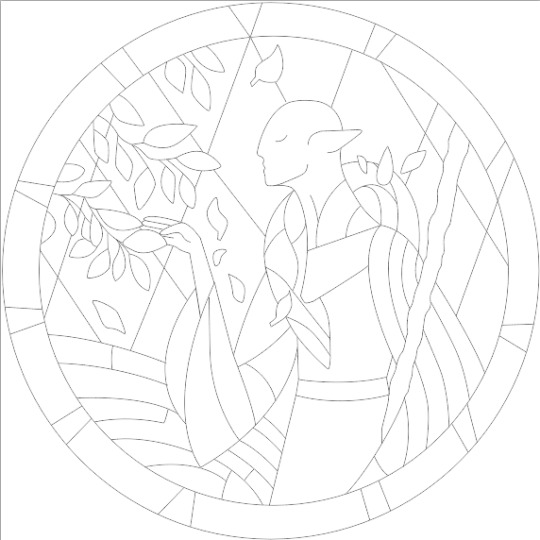
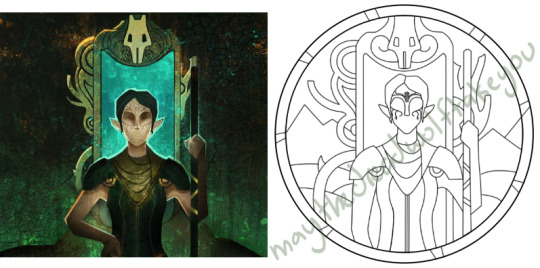
With the work path selected, you can select the brush tool/size/color and use the "stroke path" option to create lineart of the vector. Then you can save this as a transparent png file for use at different sizes and for printing and it looks so nice and clean! one of the big benefits to this is that you get really fine lines that are easier to be precise with stitching on. This is extra perfect if you are printing the design directly onto your fabric (which you can do with an at-home inkjet printer for designs under 8inches wide, as long as you stick a piece of stabilizer on the back of your fabric and cut it down to printer sheet size--this is what I do and can make another post about that process if people want haha), or if you are printing onto transfer paper like you can buy at craft stores.
This is where I end the lineart for my designs. After I have this, I move on to the next phase, which is...
STEP 2: COLOR
For interpreting my designs into thread, I start by thinking of it as flat colors first. You can't "shade" as easily with threads as you can with things like paint or brushes in digital art (though you can A Little, which I will get into), so to start color planning I pick the "main" color each section will be in the piece.

For the existing icons this was simple--I kept the same sections as the original designs, so for each I just color picked or eyeballed the color in photoshop and colored it in (but you could do this on paper with pencils, markers, whatever as well--they don't need to match your threads exactly and usually won't, it's just to give you an easy reference to follow as you go). For the tarot cards which were more complicated in coloration, I just did my best and went with what looked good next to each other, even if it was a little off the original art. It will be off more later anyway when you have to pick threads so don't stress it too much honestly. I will often make layers with different color options and turn them on/off for direct comparison to try to determine what I think looks best as well, like below where I was debating between more blue/desaturated for the background or brighter colors.

I do wanna note I have regrets about the color selection, shapes, or shading in EVERY SINGLE ONE of my finished pieces. But no one else ever comments or probably even notices! One aspect of this hobby is just learning to be satisfied with what you've made and using what you learned to get closer to your preferences next time. I'm only going back and redoing some of my designs' colors because I want to make it easier for others to choose on the patterns I sell, more than I care for just for myself. Also since I'm doing this lineart/stained glass looking approach where I go over the distinct shapes with black thread at the end, it means I get these clear delineations between sections you might not necessarily have in your own pieces, and that's ok.
Ok right. Now while shading/coloring in detail is hard with thread, you CAN make whats essentially dithered gradients. "Dithering" in the concept of art means using 2 (or more) colors to give the impression of a third color, or to gently scale between the existing binary rather than a hard line. Think of it like blocky pixel art or gameboy game images. If you're doing needlepainting, you use really small stitches close together to get this effect, which translates to "smaller pixes"--if you look at the jellyfish in my first photos that's a very messy casual version of that. If you want a better example, I recommend looking at @ammocharis 's pieces like these in her pinned post, which are truly amazing! I simply do not have the patience myself 😂 For my stained glass style, I work only in very long straight stitches, so I can only shade in one direction and have to be a little more precise with it.
So for shading, I think about in each section which direction my threads might go. Then perpendicular to that direction I pick which side will be the light one and which the darker one. Sometimes I color this in on my pattern mockup, but sometimes I don't! Or I'll only do it for certain sections to make sure I don't forget. Like for my Tower design I only colored it as flats, and waited until I selected threads to decide how the shading would go. I am currently working on a smaller, simplified version of my Hierophant design and I did add shading digitally for that one just for fun. But it's not as important as having the flat color version you can use to quick-reference how you want your design to go while you're stitching. You might also notice I don't actually color my gold--I just throw in a stock image of gold foil for that layer so I can't confuse it with any of my yellow thread sections.

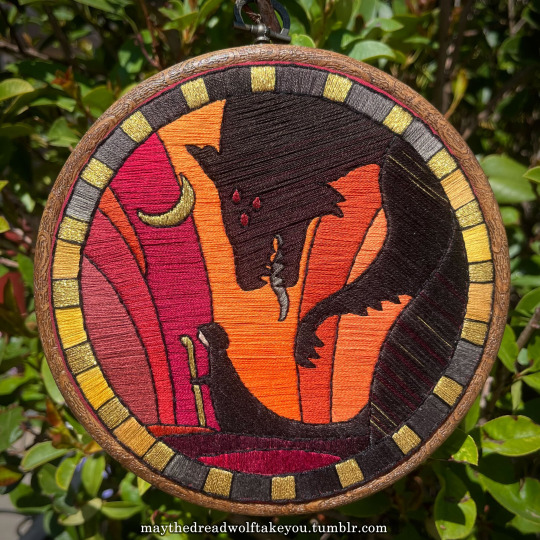

Here's a close up where you can kind of see what I mean by the "dithered" effect between colors--some are more obvious (like the red on the far left or middle orange) and others pretty subtle (dark grey to dark red on the wolf face):
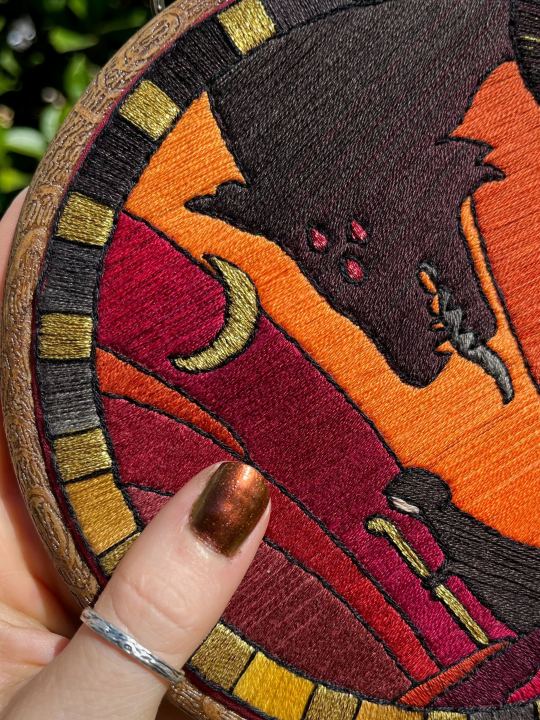
Now, while I use single layers of satin stitches for this, and just alternate thread colors increasing/decreasing as I go, you can accomplish the same thing with short overlapping stitches like with needlepainting, or with clusters of french knots, or whatever else. But in GENERAL you are going to be able to trick people into seeing gradients out of dithering best when you are using the same type of stitch for that whole area. So if I was using multiple stitch types like having french knots, daisy chains, ladder stitching or whatever else for some sections, I would keep those to contrasting areas/colors. A fantastic example of using different layered types of stitching to create more intricate color/texture in an embroidery would be these incredible tarot card depictions by @hattedhedgehog, which I like even better than my own embroideries. Here's his take on the Tower card as well for comparison to mine (I'm so in love with it!!!).
But anyway, at this phase, your design is actually still digital--the above is just to explain how it translates later in the process. The next step is...
STEP 3: THREAD SELECTION
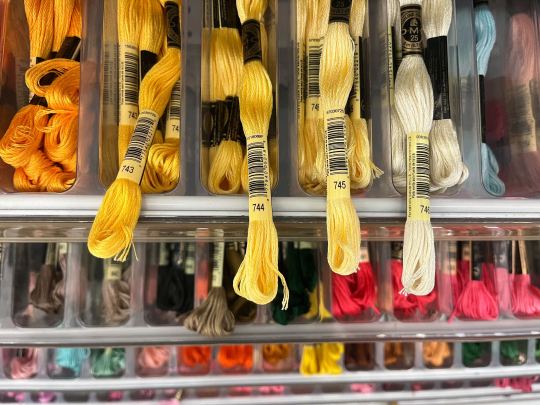
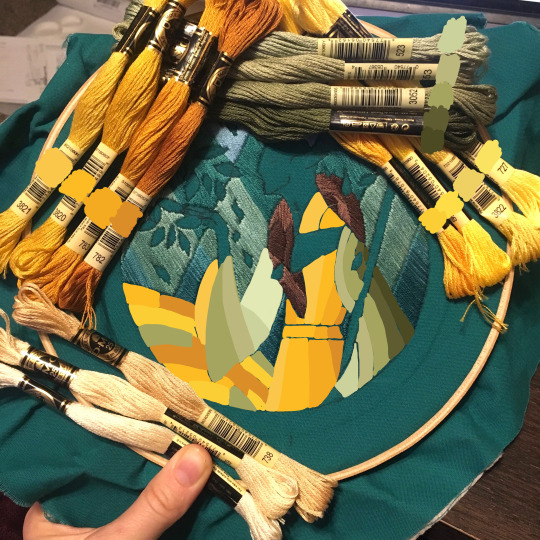
I will admit here I am not great at this part. I am constantly second guessing my thread colors, and can spend over an entire hour in the thread aisle at the craft store agonizing over choices. Really, I think this is just one of those things that takes practice and you get better at it over time. What I have had the best luck with is actually printing out a reference photo of my design/the original artwork and taking it with me. If you already have threads you can do this part at home too, but DMC alone has over 500 colors and I definitely don't even own half that so I like to torture myself by looking at them all together on the thread racks. Plus Anchor and Artiste and whatever other brands there are out there. One approach is to just sit there and pick out what you want for each section and line it all up together on top of your printout. Or in the case of my Tower I laid a bunch of options out on top of my template in the hoop to guess how they'd look in the frame.
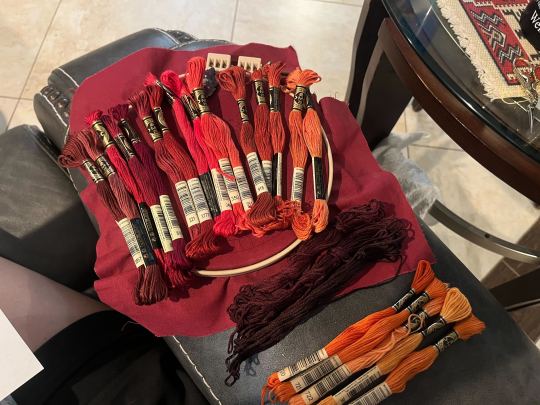
For me since I am also doing this dither shading thing, I also need 2-3 colors per sections depending on its size. Sometimes it's easy and the threads have a color just a little darker or lighter right next to them in the numerical lineup! Other times, there is no good match, or it looks too far away to shade nicely, or I want one to be a warmer or cooler tone than the other... which means a lot of standing and fretting to myself over it. I actually take a lot of photos at this stage because it can be easier to see how they will look in the end from a photo than in person to me? Idk why. Plus then after they get scrambled in my bag I remember wtf order I meant for them to go in later. But as long as you're not preventing other customers from shopping themselves, you can spend as long as you want staring at thread in the embroidery aisle and they won't kick you out unless it's closing time, so take your time.
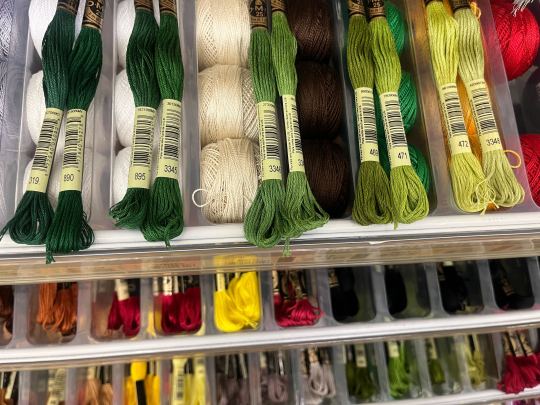
Now, IN THEORY, you can sort of combine steps 2 and 3 by color-selecting from your threads and using that to color in the design. However I have tried this and it led to mixed success because the photoshop eyedropper brush simply isn't actually that exact (in my experience, it desaturates compared to what we actually see). And because then you have to have the threads on hand while you're coloring... which means you might buy ones you don't end up using if you don't like them. So I prefer to just use this as a refinement step where I pick threads based on the design colors, then will re-color the design a second time to match those threads more closely to be sure I like the effect.
I've even used this as a tool when I needed to adjust my color choices mid-project, by digitally coloring over over my WIP:
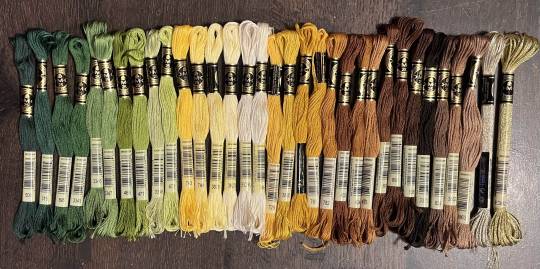
Or here's a design (but I haven't posted the finished piece yet bc it's a gift so shhh) I made with certain color tones initially, but after buying thread I re-did the color mockup to be more vibrant, because I liked those threads better in the store:


Once you have your thread, you can make yourself a little reference chart with the colors you intend noted on the sections you want them, like below:
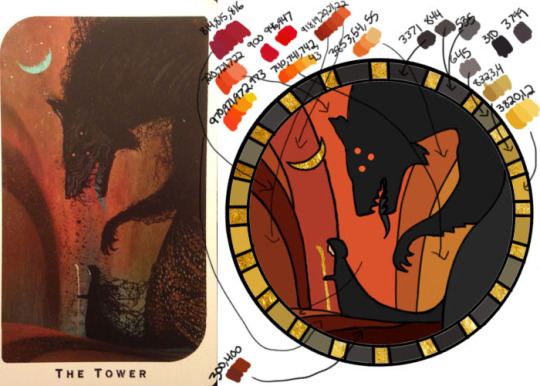
(note: i didn't end up sticking to these colors because I ended up dying my own thread for several sections. And then forgot I made this entirely and picked new ones because I put the project down for a year between design and stitching. Sigh).
Or for my Solas pattern I did this in a really detailed way, which i am sorry but i have redacted because... i have it for sale now and don't wanna just give that away haha. But if you buy the pattern from my shop this is one of the files you'd get with it, for ease of reference. I do also include a text-only list of them as well.

Now I don't go to this much trouble for all my designs, just the ones I put up for sale (or plan to). You can also just make a text list of your color plans if you want. Though for fun I also have been using my scrap thread to make these little "color palette" keyrings for my finished pieces, so if I ever remake them or update their patterns I will know what the original colors were, plus I can compare what i used to other threads if I wanna change part of the design up. This step is absolutely not necessary and I'm just doing it because I'm selling the patterns now, but they are kinda fun to look at.
And don't forget.. if you start a section in a certain color and decide you don't like it, you can just cut the threads and pull them out! I did that with my original hierophant piece actually. I had an entirely different color for one row of diamonds i thought just clashed way too much with the others, so I used photoshop to paint over it with some alternate options until I found one I liked better. Then I cut away all the old threads and put in the new color. It can be a little harder to fill a piece the second time since the fabric will have stretched out a little, but as long as you're using a good stabilizer it usually doesn't move too much.
You can also just make test swatches on spare fabric to test before you add them to your real piece. I wish I'd done this for some color transitions that didn't end up looking the way I wanted, but I am simply too lazy most of the time. My exception is usually for metallic, satin, or sparkly threads, because I want to know how they feel while embroidering. But if you're really worried about a certain color or shade it's a good thing to remember you can just do.
SO yep, that's my general process for drafting patterns. I start with the shapes/design, then do my flat color version, then I pick my threads. Makes it sound easy and short when phrased like that :) But I can honestly spend 8-10 hours just on making the lineart and coloring it in. If I was better at art, probably this would be less, but I'm working with what I've got (not much) 😂 I think all aspects of this are also something that gets easier over time, but it will probably never look as bad as you worry when you start out. I think all my pieces look awkward and rough right up until I do the finishing steps and move them to the display frame sometimes.
I hope this was helpful and answered your questions!! Feel free to post/share your WIPs to ask for feedback or advice ever too :) I've only ever had people in the embroidery community on tumblr be encouraging and helpful to me, and I'm happy to answer any questions myself when I can or if parts of this were confusing
#ramblings#my stuff#my embroidery#embroidery#dragon age embroidery#calicostorms#oh god tumblr changed the alignment of all my images so theyre all huge now great#WELL I keep tryign to rearrage them to be on the same line and it is NOT working so. thats how they will look i geuss#this is gonna annoy me all night... thats what i get for expectign a Functional Website though#embroidery chatter
29 notes
·
View notes
Text
It's the Most Wonderful Time of the Year
(Part 17 to The Snowball Effect)
Read on AO3.
Tags: Enji Todoroki, Endeavor, Female Reader, Reader Has an Ice Quirk, Endeavor x Reader, Enji Todoroki x Reader, MHA Christmas Special, Spending Time with Friends/Family, Toshinori Yagi, Shinya Kamihara, All Might, Edgeshot, Original Female Character(s), A Lot of Warm Fuzzies in Here
Word Count: 1,205 words
Summary: After getting over a cold, you and Enji arrange for a babysitter so you can both take a well-deserved break while you go visit your friends at a Christmas party.
Playlist: The Snowball Effect

December 17
“I took the liberty of calling Tokei to watch the kids this evening so you and I can catch a break.” Enji tells you over a cup of tea. “I figure you need it especially after being sick.”
“That’s very sweet of you, Enchan. What are we going to do? I take it you’ve made plans?” You poke out your tongue as you mark the stitch in your current crochet project.
“Well, we do have the Christmas party tonight with Toshinori and Sayuri, remember?”
“Oh, shoot. Is that tonight? I forgot all about it! I’ll go out and get some gifts.”
His hand palms your shoulder to pause you before you can even sit up.
“Relax, my flame, I’ve got it all taken care of. You were sick and I didn’t expect you to remember.”
His thoughtfulness drains the tension from your muscles as you smile and lean against his side. The couch sinks with the added weight of your worry before you turn to rest your head on Enji’s comfy thigh.
“What did you get them, then?”
“It’ll just be Toshinori, Sayuri, Hana, and Shinya. I got a present for everyone. You know how much Toshinori likes America – I got him a package of American postcards with a barbecue sauce sampler.” He pauses. “You’re from America. Why is that a thing?”
“Barbecue samplers? Oh, sweetheart, that’s an easy go-to for gift giving! There’s always a barbecue going on in the United States.” You chuckle, pulling his massive hand into yours to idly trace pictures into his skin.
“Hm, well, I guess it’s good that I got him something traditional. He’ll like that.” Enji decides, before continuing on his rundown. “I got Sayuri an embroidery kit. Hasn’t she mentioned needing more patterns?”
“Oh, yes! She’ll love that. I’m a little jealous; you might win over her heart and I’ll have to beat her off of you for that.” You tease.
“As if the embroidery kit would be able to pry her from Toshinori in the first place.” Enji snorts. “Hana was the easiest. I just bought her a small collection of books from her wishlist.”
“Define small.”
“Oh, hush. It’s not a lot. I didn’t want anyone to think we were favoring them, so it’s just five or so.” He ruffles your hair.
You swipe at his hand playfully when he purposefully flips half of your wavy locks over your eyes. He flicks your forehead on principle with a laugh.
“Last is Shinya. What about him?”
“I got him a sushi making kit. He enjoys cooking and was just talking about making an attempt at putting together his own Edgeshot sushi roll.” Enji shrugs. “Like I said, I have the presents handled.”
“Color me impressed.” You giggle.
“You say that as if I would have planned to go without any.”
“I never doubted you; only worried that you might have forgotten.”
. . . . .
When you step up to the threshold of Toshinori’s house and get ushered in, you chuckle with Sayuri about how well the boys get along. Toshinori claps Enji on the back and by the time they reach the living area, they’re already smiling and exchanging pleasantries. Every day you wait with buzzing anticipation for Enji to learn that his best friend is none other than All Might himself. Not because it’ll piss him off, oh no, but the look on Enji’s face is one you don’t want to miss.
Maybe you’ll frame the picture of his expression when it finally happens.
As Shinya and Hana join the crowd a few minutes later, Sayuri seems to read your thoughtful expression.
“I still say he’s just gonna haul back and punch him on principle.” She snickers.
“I mean, it’s Enji’s own fault. How many other men does he know that are blonde-haired, blue-eyed, and seven feet tall?” You whisper back.
“Who are we talking about?” Hana suddenly squirms her way between the two of you with a smirk that’s up to no good.
“We’re talking about how loud Toshi is in bed and if Enji can top it.” Sayuri winks. “Or should I say, our dearest ice queen can top him.”
“All I’m saying is Shinya’s a ninja in the streets and a monster in the sheets.” Hana wiggles her eyebrows, before sneaking back towards the kitchen as we drop our jaws.
Of course, you both trail after her, doubled over in mirth.
“Have you finished Christmas shopping, Hana-chan?” You ask when you’re composed. “We’ve only got eight more days.”
“I really should have it done, but you know I always end up finishing shopping last minute.” She sighs. “Shinya can be so hard to buy for, sometimes.”
“Tell me about it.” You groan. “I’m just lucky inspiration struck me at the mall for Enji.”
“You didn’t tell me you bought Enji’s big gift already! Now I feel bad that I haven’t gotten Toshi’s!” Sayuri whines, flopping her head on your shoulder.
“I know, I know, I’m sorry. I can go help you find something if you’d like.”
“You don’t have to feel obligated, but I’ll never turn down time with my bestie!” She laughs. “Besides, you have to tell us! What did you get him?”
“Yes, tell us what you got him.” Enji’s deep timbre rumbles from behind, making you jolt and smack his arm. “What? I want to know.”
“And you will…on Christmas!”
“I think she means it.” Toshinori pops in behind him, earning a smack from Sayuri. “What? You ladies always sneak in on our conversations. Why can’t we be one of the girls for the night?”
“Because you’re just doing it because you want to know your presents!” We all cry in unison.
You hear Shinya’s sigh before he materializes out of thin air in the middle of the group.
“Guilty as charged.”
Enji smirks at you, blue eyes burning with loving adoration that forces a smile on your rosy cheeks – you can’t help but kiss him. The other two couples in the room have the same idea.
“Well, if we can’t know what our actual Christmas presents are…might as well start this party with the presents we got for each other this evening.” Toshinori decides.
Despite the dopamine rush of receiving some new headphones, the real magic forms after the gift exchange. In the middle of a pile of presents and soft decorative lights hanging from the banisters, the warm glow permeating your heart has nothing to do with presents and everything to do with the people surrounding you.
With a smile, you lean on Enji’s shoulder while Toshinori heralds a funny story about his awkward first kiss with Sayuri. Hana follows up with her own embarrassing tale of the time she nearly sprained her ankle on her first date with Shinya. You conclude with an egregious anecdote about the time Enji left you sitting at a hero gala alone because he’d been needed at the last minute for an emergency villain attack.
At the end of it all? The six of you raise a glass to true friends and true loves.
You meet Enji’s gaze as the bubbly champagne touches your lips, thanking God for blessing you with a man who’s both, and friends who won’t let you forget it.

Day 18
Credit to @saradika-graphics for the holiday banner! Thank you so much!
#mha#bnha#my hero academia#boku no hero academia#mha fanfiction#bnha fanfiction#Enji Todoroki#Endeavor#Female Reader#Reader Has an Ice Quirk#Endeavor x Reader#Enji Todoroki x Reader#MHA Christmas Special#Spending Time with Friends/Family#Toshinori Yagi#Shinya Kamihara#All Might#Edgeshot#Original Female Character(s)#A Lot of Warm Fuzzies in Here
10 notes
·
View notes
Note
Oh my gosh, I just saw your post that you only hand sew too and I thought I was the only one that disliked sewing machines! Do you have any tips or channels you'd recommend? I'm trying to get more confident in different stitch styles.
Sorry! Meant to answer this earlier!
I think the only channel I regularly watch that’s sewing-related is Bernadette Banner on YouTube, she does a lot of historical fashion stuff but that includes a lot of discussion of stitches, embroidery, and garment construction.
I tend to keep my stitches pretty simple, but I’d say my favorite for garment repair is the blind stitch/ladder stitch.
Also, I bought this travel sewing kit and you wouldn’t believe how many projects I’ve used it for, even just at home. It’s incredibly good value for the money. I also do travel with it, and it’s saved my butt (and other people’s) more than once. Basically it has everything you would need to do a fair amount of hand sewing projects, including so many different colors of thread that every time I’ve needed to do a mending project on the go, I’ve been able to find a color that more or less matches the garment in my kit.
10 notes
·
View notes
Text
How I made little Haarlep


A few days ago I posted about my latest finished crochet project for my good friend @tavyliasin, and I wanted to share how I made them! This is for people who would also like to make a little Haarlep (Raphael, Karlach, or any other character with horns for that matter), those who are curious how I did it, and I just love to yap about my projects. When I started this project I had only been crocheting for about 8 months, and it really pushed me to step out of my comfort zone, try new things, and learn a whole lot. I took the time to explore, experiment, and try again if needed. And man, did I learn from little Haarlep.
Note that this isn't a tutorial; I have made mistakes, oversights, and stumbled against problems. I will try my best to list these here, but if you have any questions about the listed patterns I advise you to head over to the linked etsy store to ask the creator of said pattern. But if you have any questions specifically regarding this project I'll try my best to answer them as best as I can. There are also some parts of little Haarlep where I didn't use a pattern at all, and either freehanded it, or did a load of guesswork.
Now, let's get started!
Used patterns:
Body: Doll base Amigurumi Body Version 3 by TheLoftyLoop
Wings: Kawaii Bat by ZeroGravityCrochet (I have also used this pattern for my Batstarion plushie)
Horns: Horns (3 sizes) by KnottedLovebymima
Used Materials:
Body: Katia Bambi #312 (3x)
Hair: Twister Solid XL Black #105 (1x)
I had bought the yarn for the hair and horns in a local yarn shop, and have thrown away the labels a long time ago. Once I have found them again I will list them here as well.
Polymer stuffing
PLA filament (optional)
Small chains which were part of a jewelry repair kit.
Soft silver RVS rings, 1,5 x 7,0 millimeters
Epoxy Resin (optional)
Gold and orange pigment powder
Gold glitter
Red embroidery thread
Used tools:
Crochet needles (3,0 millimeters and 3,5 millimeters)
Knitting markers
Yarn scissor
Yarn needles
Row counter (optional although it literally saved my life)
3d printer (Optional)
Silicone half circle mold
Pliers (x2)
Cutting pliers
Mini hand drill
Instant glue
Tweezers (optional)
Step-by-step guide:
First, I needed to know what the hells I was getting myself into. For that I have used several references on Haarlep. I have used these as a guidelines for the entirety of the project. The screenshots have been provided by @tavyliasin.


Then, I made a list every single part of the doll I needed to make.
Body
Tail
Wings
Horns
Ears
Eyes
Face
Harness
Hair
The body


For the body I have used the 3,5 millimeter crochet needle because I wanted the stitches to be as tight as I could. I had ignored the advised crochet hook size on the label of the yarn because of this. Although I quickly found out that the yarn itself was too large for this pattern as well, resulting in the doll becoming bigger and longer than I initially expected. But this is not necessarily a mistake because that would mean that there would be more to cuddle!
The head ended up being way too long though, so after I finished the body I folded the part of the head that was too long and stitched it on the back of the head.
The Tail

I didn't use a pattern for the tail, instead I made a magic ring with 6 single crochet stitches, and increased the stitch each time I felt like I should make the tail wider. For this I also used the 3,5 mm needle.
The wings

I used my trusty 3,5mm needle for this part as well. I already had a pattern for a bat plushie, which I had used to make the wings. From there I diverged from the pattern, and created a bigger 'spiral' so to speak by adding 3 more rounds.
If you are using this pattern, I diverged from the guide from row 5:
r5.1: 5dc, inc.
r5.2: 6dc, inc.
r5.3: 6dc, inc.
After that I followed the pattern again, and diverted from it once more to add more single crochet stitches to each 'spike' of the wings, making them more bulky and longer.
The ears

I also didn't follow any pattern for the ears, I just made a triangle of single crochets (again, with my 3,5mm needle), and stitched the points of the ears to one another to make them more pointy and give them more depth. Then I attached them on the side of the head with *only* the base of the triangles. This is because I was going to add the hair and horns later on, and I didn't want the ears to get in the way of them.
The eyes.


I worked with resin before, and still had some. I mixed a small amount of epoxy resin with gold and orange pigment powder, and golden glitters. I poured it in a half circle silicone mold I have with various sizes. After it had cured I tested which size I liked the most for the doll, and used those for the eyes.
Next was the application, glueing the eyes directly on the head would be a surefire way for them to detach in the near future. So at first I tried to use these screw eyes by hanging them over the mold as the resin cured, so I could simply sew them in. But that didn't work as the resin swallowed the entirety of the screw, and the thread I hung them over the mold with. The 'eyes' were still semi-transparent even though I used a lot of pigment, so I could easily see the ends of the screws inside the eyes. So this was a failure.
On my second try I didn't mess with the resin as it cured at all, and used even more pigment powder just to be sure it wouldn't be transparent. This time, I used a small hand-drill to create 2 holes on each side of the half-circle, as close to the edge as I could. Then I drilled another 2 holes on the flat side where the end of the first 2 holes ended, making a little tunnel. I took some tweezers and stuffed and pulled the thread through the tunnels until I could pull it through. I tied them on each end, and superglued the knots for extra security.
Once everything was dry I sew the eyes directly on the spots I wanted them to be. But I wasn't too happy with the result, in all honesty...

... So I gave Haarlep some eyelids. Sure, they still look quite bug-eyed, but I decided to trust the process.
The horns (and a nose!)

I had completely forgotten to photograph any of my progress from when I was done with the eyes t'ill the horns were already finished. I had also decided to give Haarlep a little nose (which I made out of a magic circle with 10 single crochets, 2 rows of increases, and 3 rows of decreases).
In the original pattern there are 3 sizes available, and I used size 1 and 2 for the horns on this doll. The yarn I used for this was quite thin, but I made the mistake to use the 3,5 mm needle *again*. Which is why I could see directly through all the stitches, and see all the polymer filling within. I admit that the horns were about my least favourite part of this project, and I was struggling to get through them (no hate to the creator of the pattern at all, as it was a very well-written pattern! I just didn't enjoy making these because of some Morb-problems). So I was not ready to do it all over again. Instead, I noticed I had a lot of yarn I used for the horns left, so I used that as filling so the large holes in each stitch wouldn't be noticeable.
The Hair

Again, I forgot to take any pictures of this process, so I'll have to write down what I did. I used the Twister solid XL yarn for this.
First I gave Haarlep a much-needed hairline to map out where I wanted his hairdo to start and finish. For each 'strand' of hair I repeated one of 2 processes whether I wanted it to curl or not.
(fun fact, the 'curly' hairs are based on a very simple pattern a friend of mine created to make toys for her cat!)
Curls:
Chain (make it as long as you want depending on how long you want it to be, but for this project I used in between 8-15 chains per strand), single crochet in the 2nd chain stitch from the end of your chain. 3 single crochets in every chain (I did this for about 3-6 chain stitches). Than I did a bunch of single crochets in every chain until I reached the end of the chain. Then I put another single crochet in the 2nd chain, and put 1 single crochet per chain stitch until you reach the end, tie and cut your yarn on both ends. I kept about 15-20 centimeters of yarn on the end that's the furthest away from the curl so I could use that to sew the strand of hair directly onto the head.
You can also put 2 single crochets per chain, or more than 3 depending on how curly you want your strand of hair to be.
Straight strand:
Follow the same steps as the curls, but just keep adding single crochets per chain stitch after you've made your chain, and repeat this twice.
I then worked in layers when attaching each strand of hair onto the head, I added one or two rows of "hair" starting from the neckline. Once I sew in those strands I sew about 3-5 centimeters of hair directly onto the head (the point that's the furthest away from the curl/the part of the strand that's attached to the head). This is so if the hair on the doll moves it wouldn't go out of place, and you wouldn't see any bald spots. This way I also wouldn't have to make countless of strands and add too much hair.
I have no idea how I can explain this properly without pictures, so if anyone reading this really wants to know how I did it I'll recreate the steps mentioned above.


I also added some sideburns to give Haarlep's hair a bit more of a finished look. After I was completely done with the hair (checked that I had not left any bald spot unchecked) I attached their ears on their lower horns using a piece of the same yarn I have used for the body.
The Harness
This was arguably my favourite part of this entire project! I really enjoyed making this as I could use several types of materials into this. I wanted to make the harness without having to directly attach it to Haarlep's body, so that it could be tight enough for it to stay attached. Bit first I had to start with the basics.

The undies! I freehanded the underwear as well, which goes as follows:
I started with the front, and made a chain that reached the diameter of Haarlep's body. From there I worked down, adding a single crochet per chain stitch. And at each end of the row I made a decrease. I used knitting markers to attach the underwear on the body as I made it to get as much of an accurate fit as possible. I kept going until I reached the hind, which is where I had to "split" the underwear to accommodate the tail. At first I went to the left, making every row very small until it reached 3/4 of the top of the tail (while making sure it could reach the front side of the underwear). I then made a chain that went around the entire top of the tail, and kept going until I reached the other side of the underwear, and attached my chain on it. I did the same stitching as I did on the other side of the tail, except in reverse until I reached the rest of the underwear. From there I finished up the underwear by securing all sides of the underwear to each other using the same yarn so it would seamlessly fit across the doll's waist.


I have no idea how to write a comprehensive tutorial and/or a pattern. So again, if you don't understand how I did this from the text I wrote please send me a message. I'll draw how I did this instead, and edit it into this post.
Next was the harness itself. I used a chain with a double crochet per chain stitch, and measured the chain against the body as I made it. I started out from the middle (the back strap that divides on the shoulders, to the front of the chest where it splits. I made several different sizes of "straps", always making a pair. I then attached every strap on a chainmail ring (the soft silver RVS rings), and kind of worked my way from there. I opened each ring with 2 pliers, slid on the end of each strap in place, and closed the ring with the pliers again. This was very much a 'trust the process' type of work for me.

If I couldn't secure the strap just yet I held them in place with a knitting marker (see shoulders).
For the shoulder pads I only used a chain to make the straps that go under the arms, and almost followed the same steps as I did when creating the underwear. Start with a chain (except smaller, like 5 or 6 chain stitches), do a round of single crochets, decrease at the ends of the rows, a round of single crochets, etc. Until I got a tiny rounded triangle, which I attached to the shoulder chain.
Next, I wanted to create the spikes that go on top of the shoulder pads. At first I wanted to make the tiniest studs using some embroidery thread. But I recently acquired a 3d printer! And as I already was using metal in the harness, I wanted those studs to match.
So I created a simple design on Tinkercad.com using a simple cone, printed 10 of them (using a 0,25mm nozzle and neutral white PLA filament), and painted them silver. Then I figured that I could drill a little hole in it with the same small hand drill I used on the resin, but turns out that cured PLA filament is quite hard, and brittle at the same time. So I went back to Tinkercad, and designed a cone with a hole in it that would allow a larger needle to go through it. I made the cone 0,5x0,5 millimeters.


After that was done I painted them silver again. Below you also see the shoulder pads, which is the only picture I have of them before I attached them to the doll.

I used 5 studs per shoulder pad, and sewed them directly onto the pads with black thread. After I secured them with a tiny drop of instant glue so they wouldn't shift. I could've created another hole that ran opposite of the one already going through the cone, but I think that it would've made the integrity of the inner (teeny tiny) supports within the cone too vulnerable.
After that was done I attached the shoulder pads around the arms and the harness.


For the final touches I attached the small chains from the jewelry kit, mirroring the references I found. I simply opened them with the pliers, hooked them through a stitch in the harness, and closed them. I actually had run out of these chains, and literally dismantled a necklace as I wasn't going to wait around and buy another jewellery kit or a whole spool of necklace chains when I was so close to the end. And I'm glad I did, because my patience had run out after I had been working on little Haarlep since August 2024.
And with that, they were done!

As soon as I was done I made pictures, and sent Haarlep on their way to Lia along with some snacks and a few other bits and bops. This project was such a challenge, but very much a welcome one. I had started learning how to crochet in december 2023, and truly went out of my comfort zone, and learned so much about crocheting techniques, trusting the process, and Frankensteining several patterns into one.
If you have any questions regarding this project, or if I can clear up anything mentioned here I'd love to help to the best of my abilities! Other than that, thank you for reading this and following the journey of creating the most intricate and hardest crocheting project I have made so far. And it was a joy to make. But it will most likely not be the last one, and not the hardest as I have no plans of quitting crocheting anytime soon. Who knows I'll surprise myself with the next Baldur's Gate 3, or other fandom project I'll decide to undertake.
#my art#my crochet#crochet plushie#crochet project#crochet guide#baldur's gate 3#bg3#baldur's gate 3 haarlep#bg3 haarlep#baldur's gate 3 fanart
4 notes
·
View notes
Text
Sanji/Cora/Zoro Fic Snippets, Part 2
More of the prompts that @starcrossedjedis sent me!
These are both a bit more on the shorter side, hope you don't mind! Also, I originally promised myself I was gonna do fluff only, but a little bit of hurt/comfort snuck into the second one ^^"
Enjoy!

💛 Reunion Kiss/Relief
Cora was leaning over the railing, waiting for Usopp to come back up with Sanji. Whatever had happened to Sanji over the last two years, it was concerning, to say the least.
“That idiot,” Zoro grumbled, coming up behind her and wrapping an arm around her waist.
That was… new. Well, one of those things.
Cora chuckled. “You’re always so nice to him… Glad to know at least that hasn’t changed.”
Zoro spun her around in his arms, then placed a rough hand beneath her chin and kissed her on the lips. The kiss was oddly gentle, yet desperate at the same time, and all the while just as rough as Zoro’s kisses always were. It was the comfort that Cora had been yearning for for the last two years, mixed with the thrill of something new. When Zoro finally pulled away from her, she immediately missed the taste of his lips.
“Eager, are we?” she breathed.
“Can you blame me?” Zoro chuckled. “It’s been too fucking long.”
“It has.”
As if she were just a doll, Zoro easily scooped her up into his arms, letting her wrap her legs around his waist.
“There we go. Did you get smaller?”
“No, you idiot,” Cora laughed. “You got taller!”
“Did I?”
“Yeah! I’m wearing taller heels than usual and you’re still bigger than I remembered.”
“That’s good.”
“Is it?”
“You’ll get tired of looking up, so I get to carry you around more.”
Once again, Cora laughed, clinging on to Zoro so she wouldn’t lose her balance and fall. Not that he would ever let that happen. She let herself lean against him, running her fingers through his hair, trying to familiarize herself with every single detail about him again as quickly as possible. New freckles, new scars, the same shapes and colors she knew so well. The same but different. And she couldn’t wait to get to know him all over again.

True Love’s Kiss/Magic Kiss/Healed
Cora stood in front of her closet, going through her clothes. She was looking for some old clothes to improve on, an embroidery project for those long days at sea, for those nights spent out on night watch, whether voluntary or not. Clad in only her underwear, she flicked through the various clothes hangers, looking at one garment, trying on another… Finally, she picked out an old skirt, plain black and uneventful. One of the few items she had actually bought and not sewn herself. Perhaps… Swiftly, she put it on, spinning around once or twice, then walking over to her vanity table to grab a piece of chalk. Carefully, she started sketching patterns and lines onto the fabric.
That was until she saw something out of the corner of her eye. Her gaze got caught on those characteristic lines on her back, senseless and discolored, as if someone had dropped their sewing kit and the needles had gone everywhere. Some were bigger, some were smaller. Some still hurt sometimes.
Suddenly, she heard someone call her name, and there were steps in the room. In a hectic motion, she yanked one of her jackets out of the closet and swung it over her shoulders, covering her back. Then, she noticed who it was: Zoro and Sanji, probably there to have her settle an argument or a bet. Or both. Or being clingy. Maybe all three.
“God,” Cora gasped, “don’t scare me like that.”
“Sorry, princess,” Sanji apologized.
“The door was open,” Zoro just shrugged.
“Was it?” Cora sighed, sounding both annoyed and tired.
“Aren’t you supposed to cover your tits when people come in?” Zoro asked, causing Sanji to give him an annoyed stare.
“And since when do I care about covering my chest, huh?” Cora replied. “I’ve got some very pretty bras, why not show them off? Such a shame to be hiding them under shirts all the time.”
“But you’re still hiding your back?”
“… Touché.”
Typical Zoro. He always knew how to hit a nerve, but he had no idea how to do it gently. “Gentle” was more Sanji’s style. True to this, the blonde cook came up to hug Cora within seconds, gently running his fingers through her hair.
“There’s nothing to be embarrassed about,” he whispered.
“Wounds on the back are a swordsman’s greatest shame,” Cora just mumbled.
“Don’t use my words against me, you got it?” Zoro growled, pulling the jacket off of Cora’s back. “You’re not a swordsman, you’ve told me that over and over. And that rule only applies in a situation where you’re in control. Where it’s fair. You didn’t even have a chance to fight.”
“Look, Cora,” Sanji mumbled, cupping her face with his hands as Zoro ran his fingers along the scars across her back. “How you got those scars doesn’t matter anymore. It’s over. They healed. And we’re not going back there anymore. Never ever, you hear me? They’re never gonna find us, and if they do, we’ll be far away before they can even try to catch us. Alright?”
Cora nodded, wiping the tears from her eyes.
“That’s my girl,” Sanji smiled, giving her a gentle kiss.
“If any of those guys even try to get close to you, I’ll chop off their heads,” Zoro declared.
“I just wish I could’ve gotten out of there sooner,” Cora mumbled.
“You did what you could, and what’s done is done. Let them be assholes all they want, everyone’s gotta die one day.”
Cora hummed quietly, then a smile spread on her face. “Why did you come here anyway? Did you need anything?”
“That waiter claimed he was a better kisser than me,” Zoro grumbled.
“Really?”
“Because I am,” Sanji beamed. “Right, Cora? – It’s about the technique, not just shoving your tongue down someone’s throat.”
“You never seem to mind it when I do it to you,” Zoro chuckled. “And neither does Cora, by the way. Right, babygirl?”
“I, uh… I dunno,” Cora stammered. But then she smirked. “I’d need a direct comparison to know for sure.”
Immediately, there was a mischievous grin on both Zoro and Sanji’s faces.
“As you wish, madam,” Sanji purred.
Just then, Zoro picked Cora up from behind, causing her to let out a surprised shriek. Within few steps, he placed her down on her mattress. Both of the men crawled over her and started covering her in kisses, all the while trying to push each other away, throwing Cora into a giggling fit.
#one piece#one piece live action#one piece oc#opla oc#fyeahonepieceocs#oc: akaito coraline#otp: you wouldn't fight a katana with a rapier#ot3: the prince. the princess. the knight.#fanfiction#ask
11 notes
·
View notes
Note
Oh my God, Rikerssexblouse! That salamander embroidery is just stunning!
Did you do it freehand? Or did you have some kind of instruction because if I wanted to take up embroidery before - I now need to do it! 😂🦎💕
Thank you! It was not freehand, and this was actually my first attempt doing one that wasn’t out of a kit. Before this I’d only bought kits on amazon or Etsy, which is nice because you get everything you need, plus instructions. But for a while I’ve wanted to do something of my own design, but I hadn’t quite figured out how. So since it would have been useful for me when I was trying to figure this out, I’m going to explain the whole process. And to be clear, I’m just figuring this out, so maybe people have other strategies, but it worked for me.
First, I took a screenshot of the salamander babies poking out of the hole and opened it up in Procreate. I am not at all experienced with Procreate (my 9 year old is better with Procreate than I am), but I created a second layer, and then drew on the second layer to outline the image. That looked like this:

Then I hid the layer with the screenshot, so you only saw the outline. It looked like this:

Then I printed it out.
Michaels has little squares of fabric for embroidery, so I bought two of those, one white and one purple.
It’s probably overpriced for the amount of fabric you get? But it’s a very convenient size for one embroidery project and it’s just two bucks.
But then I had to transfer the pattern to the fabric. This meant that I had to lay the fabric on the printoff and trace it with a special pen. I used this one.
It’s water soluble, so you can rinse the marks right out when you are done.
The problem I ran into, was that the purple was much too dark to see through to be able to trace, so I had to use the white (I just thought the purple would be more fun but dark colors won’t work well with this strategy). Then I was just filling in the shapes from my pattern. After I was done, I took it out of the hoop, rinsed it in water to rinse away the blue pen marks, pressed it between towels overnight, then put it back on the hoop and tied it up the back.


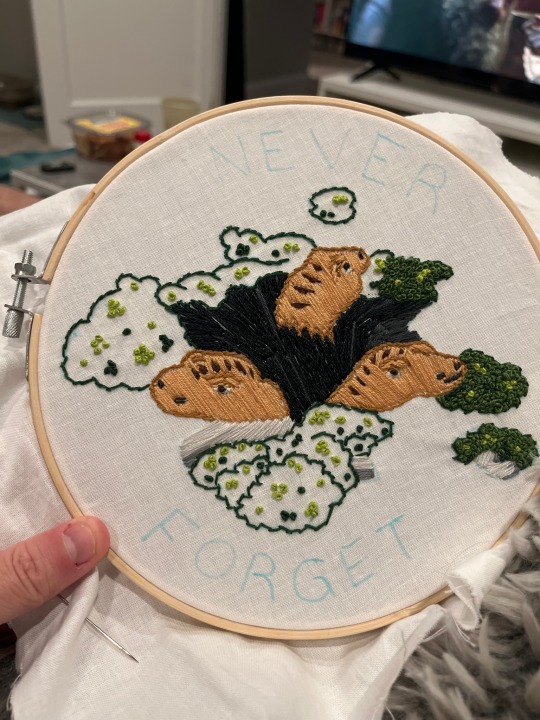

I think figuring out what stitches to use were might actually be the hardest part. It’s a combination of your vision/creativity and just enough experience with the stitches that you can visualize what they will look like. I used satin stitches (to fill in the big spaces like the salamander babies’ faces and the rocks), lazy daisy stitches (the nostrils), stem stitches (for the outlines), and about a thousand million french knots (the moss). Oh and straight stitches for the letters.

The salamander babies’ heads were hard, because I had to work around the spots and eyes and everything. The hole might be the part I’m most proud of, because my plan to give it depth actually worked. Instead of doing a satin stitch to fill it in smooth, I did straight stitches and arranged them directionally (into the middle and then down) to try to give it shape so you could see how the the hole goes down into the ground. I also used a little gray in between the black to give it some dimension.
The french knots that made up the knots aren’t particularly hard (although I do suggest finding a YouTube video to see how to do it, I could NOT figure it out from written instructions when I first started) but it used up SO MUCH more thread than I ever anticipated. Doing a kit, you get everything you need, but I didn’t know what I needed. Whoops. So I had some last minute panic about running out of thread (literally the night before Threshold Day). So a lot of the color variation is a matter of necessarily rather than my plan. But it worked out well.
If you look closely, the moss on the left has a lot more color variation than the moss on the right, and that is because I was running out of thread. But it’s not too noticeable (hopefully). I do love how the moss looks though! French knots are usually used for little details, but the mass of them gives it so much texture. I love it.
I will say, if you are trying it for the first time, don’t start by doing your own design. Follow a kit and figure out what you are doing first. And don’t be afraid to look up YouTube videos when you can’t figure out how to do something. Video is a MUCH better teacher than words can ever be, in this context. But at the same time, there really isn’t anything that difficult about embroidery. You mostly just have to be patient. I find it quite relaxing.
15 notes
·
View notes
Text
DIY Idea 1: -Fishnet Jeans

It's been a long time since I've attempted DIY. The last project I worked on was in an embroidery kit I bought for $10. I was working on the tutorial flowers and vines and my stitches weren't coming in straight. I'll continue it eventually, but I want to pivot to something that might be a bit easier than sewing by hand. I want to be able to actually gain some sort of experience in the DIY space. I realized I had a lot of plain black jeans. I need a cooler pair of pants so I figured I'd start there. MATERIAL 1:

An old, boring pair of jeans. Next, I found some black mesh on Joanne's for $5.99! I'll be cutting holes into the first layer of denim and gluing the mesh on to make fishnet jeans!

Next, I'll be distressing parts of the denim. Think something like this, but alongside the added fishnets.

The final touch, is in my opinion, one of the most important parts! I plan to add jewelry that reflects my personal style, interests, and tastes. I hope to loop around chains and have a nice charm dangling off the waist. I could do something with the hems but I don't know if I'd want to alter it.


Please note that this probably won't be what my charm is shaped like. I'll pick up whatever I find. I already have chain links stored away somewhere at my house. You can buy chains cheaply at pet stores, craft stores, craft fairs, and possibly the hardware store. And finally, I'll post the tutorials I'll be following.
The first is for making the fishnet jean itself.
DIY FISHNET JEANS - YouTube
The second relates to ripping/fraying the jeans.
HOW TO : DIY Distressed / Ripped Jeans Tutorial - YouTube
When I'm finished my pair, I'll showcase the process and results here. Since I have my permit, it might take a few days to convince my mom to drive me over to Joanne's. This upcycle is completely within my budget, and she won't have to pay for any of it. She's just hesitant to drive with me because of ridiculous, high gas prices.
Wish me luck!

#goth#goth subculture#gothic#alternative#goth style#goth aesthetic#goth fashion#gothcore#gothic fashion#alternative fashion#alt aesthetic#alt style#goth life#alternative lifestyle#diy#diy inspiration#diy ideas#diy projects#diy clothes#upcycle#upcycled clothing#upcylced#slow fashion#anti fast fashion#distressed jeans#denim jeans#custom clothing
6 notes
·
View notes
Text
Chapter 6: In Which Darkrai Gets a Hobby
Twig was going to have a mental, emotional, and physical breakdown of never-before-seen proportions if she didn’t get ten minutes away from Darkrai.
How could this guy be so clingy? Yes, she was too nervous to tell him to back off and give her room to breathe when she went on errands with him hovering over her shoulder, or to demand that she get some time alone when they were at her house, but she couldn’t imagine being so brazen with inserting herself into someone’s daily life. It felt like he was effectively glued to her side at this point, give or take a yard or two.
As a last ditch effort to get him to cool it with the whole “I refuse to be even a room away from you” thing, Twig dug out some old curtains that a local Vemomoth had given away after her kids chewed them to oblivion, along with a pocket sewing kit. Darkrai gave her a curious look when she shoved them into his arms while almost certainly looking every bit at the end of her rope as she felt.
“Mind mending these for me?” She asked, voice dripping with frustrated exhaustion.
He blinked, glancing from her to the bundle of fabric in his arms. “No, not at all. Is there a way you’d like them mended? A certain stitch, or—”
“Nope, anything’s fine, I don’t care, I’m going to take a nap. Bye.”
If Darkrai knew something was off by the way she slammed the guest room door, he didn’t comment on it, and Twig didn’t have the reserves to care whatsoever herself. She was tired and frazzled and angry. Forget keeping up appearances for the amnesiac minor deity in her front room, she needed a breather. She collapsed in the center of the floor and tried to sleep— and while sleep never did grace her, wired as she was, she had the chance to breathe without the reminder of her situation breathing down her neck.
She didn’t know how long she spent curled up on the floor there. It was long enough that the light filtering through the shuttered window had dimmed significantly, and her stomach was gnawing at itself in hunger. She cracked several joints as she rose— shows her right for spending an hour straight curled up in a ball on the floor— and reentered the main room.
Darkrai had mended the curtains she’d given him, yes, but a host of other items were repaired as well. Blankets and pillows, tea towels and napkins— all of them folded neatly and mended with beautiful stitches that swirled and wove in on each other to make little works of art where there had once been just worn-through holes. He looked up from a throw pillow that had been practically worn in half that he was in the process of stitching back together as she passed the hallway threshold.
“Ah.” He looked over his handiwork. “In hindsight, I should have asked permission to mend so much more than you had asked. I hope I did not disrupt anything by—”
“Where did you learn to do this stuff?” Twig asked, gingerly taking one tea towel that had been embroidered in addition to being mended— though embroidery seemed almost too simple a word for what had been done to it. It was more like painting with thread. The towel was mended with patchwork squares of fibers that sported all sorts of different textures— the thread was all one color, just a uniform navy that she had bought because it was the cheapest one for sale at the time, but the way it had been sewn into the towel showed clear scenes of forests and fields with clouds overhead thanks to the textures they had been stitched with.
He blinked, taken aback. “I… I don’t recall,” he said. “Though I certainly seem to have picked up the talent at some point in my history.”
She frowned. She understood that sort of thing all too well. Not knowing where you learned something, or why you were better at one skill than another. Puzzling over the bits and pieces of a past that you could only see in a sort of portrait shaped by negative space— you could see the silhouette of something there, something that was made distinct by the outline of quirks you still possessed, but not the centermost piece itself.
She picked up a set of colored thread and an embroidery hoop the next time she stopped by the market. Darkrai received them with a baffled expression— the first real emotion she had seen on his face since she’d found him in Mount Travail.
“You probably want something to do other than stare out the window all day, right?” She gestured to the supplies she’d handed to him. “Seems like you’re good with a needle, so I figured you’d probably like… Um. I should have asked first, shouldn’t I? Shoot. Uh— if you don’t want them, I can—”
“No, no.” He shook his head. “I appreciate the gesture and the gifts. I was only surprised by the suddenness of them. Thank you.” His eyes creased in a smile. “I’m touched, truly.”
Twig blinked. “Uh. Cool beans. I’m gonna get started on dinner.”
Her ulterior motive of getting him something to do so he would stop hovering over her shoulder at all times worked wonderfully, and she was able to steal away to the kitchen alone while he stitched happily in the main room. It was nice to get the time to herself, even if it was only in a side room without a door. She pulled out the journal she had written her pros and cons list in weeks ago and reviewed it. That one awful pro still outweighed all the cons of housing Darkrai. But if she could have little moments away from him like this, maybe she could manage to keep another apocalypse from occurring without having a breakdown of monumental proportions.
***
That one spot above Twig’s wrist was hurting again. It wasn’t uncommon for the area to flare up with pain, especially during changes in weather, but it didn’t make it any easier to deal with the throbbing, dull ache that kept her up at night more than her newfound roommate’s nightmarish aura did. She massaged the complaining spot absentmindedly most days now, barely noticing her efforts to soothe the pain.
Darkrai, of course, did not fail to take note.
“Forgive me my prying,” he asked early one morning while Twig looked over her list again, “but the scar on your arm is clearly quite bothersome to you. Is there anything I could fetch to soothe it?”
She snapped the journal closed, startled by his voice after he had so silently approached her. He almost certainly couldn’t read English, but she didn’t want to risk the chance that he might be able to. “Um. No, not really. I’ve tried pretty much everything, but medicines and painkillers don’t do much for it.”
“Peculiar.” His brow furrowed just barely— the slightest change to his expression. “How did you earn the scar? I’ve not heard of an old injury refusing even numbing agents before.”
Twig opened her mouth to say she didn’t remember, but a flurry of colliding memories stopped her.
(Her aunt seized her arm just above her wrist and dragged her out from under her bed. She couldn’t remember what was screamed during the events that followed, but she wasn’t sure she even wanted to remember it when just the memory of the fevered pitch and furious tone made her stomach turn. Her arm burned at the thought of it. And then the memory turned hazy, almost warped and shifted, and suddenly she was in Dark Crater.
(Darkrai launched forward to where Kip had collapsed, ready to deliver the final blow, and Twig had thrown herself between them and taken the hit. He seized her arm and threw her against the cavern wall. What ensued was a burning, icy pain that stabbed through her veins and gripped her innards, but she forced herself back onto her feet. Cresselia swept over to tend to Kip, and Twig let loose a vicious counterstrike on a terrified looking Darkrai. The next thing she knew, she was waking up weeks later, having apparently been laid so low by her injuries that she’d nearly died.)
Twig looked down at her arm, shoulders drawing up. She flexed her claws. Her hands were shaking.
“Dunno,” she finally answered. Her voice was tangled up, a knotted lump in her throat that she had to force out. “I’m not sure how I got it. Just that it hurts.”
“Are you certain? It seems an odd injury to not recall gaining—”
“I don’t want to talk about it,” she spat, and immediately regretted it.
Silence.
She didn’t dare look up at him.
It was a long moment before Darkrai spoke. His voice was collected as ever— calm, cool, and calculated. “My apologies. I seem to have touched a nerve. I won’t make the same mistake again.”
He left the kitchen. She could hear him moving about in the main room.
Why did she feel so nauseous all of a sudden?
***
She curled up in her bed as he plucked away at his needlework across the room. Sleep came quickly with how exhausted she was. Nightmares came even quicker with Darkrai's presence. She was used to it, and she was prepared for the usual fare of being chased, or falling, or getting lost. She could almost count the days of the week by the rotating selection that was employed, and she had the fortitude to jerk awake, yawn, and roll back over when she woke from one.
This wasn't one of those nightmares.
(She was hiding in her aunt’s unit again. She was extra mad at her now because she hadn’t done well with her schoolwork, and that apparently meant that her aunt wasn’t a good enough person to be in charge of her. She was shouting about how she was making her look bad, so hiding seemed like the best thing to do at the time.
(She had a lot of bruises when her aunt found her. Her arm hurt the worst— she had squeezed it until it felt like it snapped between her fingers. She ran away at that part, convinced that she would kill her, and her aunt got in big trouble when people found her crying and clutching at her arm. She wasn’t supposed to go out when she was crying, but she did. And now her aunt was going away because she had done something wrong, and she still didn’t know what it was that was so bad she had to never see her again.
(She was scared. She didn’t want to have to go live with someone else. Her aunt said that everyone else was mean and they’d be really angry if she went to live with them.
(She was scared before, but she was terrified when the fire happened.
(Apparently when her aunt was being taken away, she had started a fire in ther unit. Sometimes she would do that when it was extra cold in the bunker and she didn’t want to have to ask for extra blankets from the neighbors. But it was a different kind of fire, because it spread really fast. The entire bunker filled up with smoke. People were screaming. She found a room that led away from the rest of the bunker corridors and hid in there, but when the fire started to get inside that room she pulled and pulled on a door at the back of it until it finally opened. The metal of the handles bent under her fingers and burned her hands as she pulled it open, but she ran up the stairs that it led to until she could breathe without smoke filling up her lungs and the scrape of locking machinery drowning out any other sound.
(When she left the bunker, she looked up at the sky, and all she could think of was how the stars were a lot darker than she thought they’d be.
(She came back to the bunker the next day. She wanted to apologize to her aunt. She wanted to go to her teachers and say she was fine and that they didn’t need to tell the bunker officials that she needed help.)
(She found nothing but ash and charcoal, warped metal and bones, carnage and rot.)
(Twig’s surroundings seemed to stutter— jerking back and forth between slow and erratic before beginning to melt. She forced herself to look up from the bodies at her feet. She found ice-blue eyes staring back at her from across the visceral scene. And then everything was gone, sloughed off like a second skin, leaving nothing but dripping shadows behind.)
Suddenly, she was lying on her stomach, with her guts clenching in fear and a hand on her shoulder. She sucked in ragged gasps as panic gripped her, and when she finally came to enough to recognize Darkrai looming at her bedside, she waved him away perhaps a bit more violently than was needed— though it was hard to care when she desperately needed to focus on getting control of her breathing.
When her lungs finally decided to listen to reason, she spat a quick flame and lit the lamp she kept next to her bed. Darkrai swiftly retreated into the shadows, settling in the opposite end of the room and out of reach of the lamp's illumination, though not that of the dimmest reaches of her tail’s flame. His eyes never left her.
She didn't ask for an explanation. He still broke the silence with one. "You looked unwell. Pained."
Oh. She let out a short, dry laugh at that. Guess he freaked out the same way she had when Grovyle took a nap around her for the first time. She'd woken him in a panic because she thought he was dying, what with how he cringed and contorted himself in his sleep.
"You wouldn't wake when addressed, nor when shaken," he continued.
Another dry sound, though this one walked the line between a laugh and a sob. The irony was not lost on her— Darkrai, lord of nightmares, unsettled by someone being affected by his powers. It was kind of sweet, in a pitifully twisted way.
Despite her reluctance to ask it, she still found a question falling from her mouth half-formed. “How much did you…?"
Silence.
When he finally spoke, it was with a noticeable discomfort in his unflappable tone, and for a heartbeat, he turned away. "Enough," he murmured. "I saw enough."
Great. That meant he saw everything.
Quiet swallowed the room again, the flicker of lamplight the only motion in the awful stillness. The pokemon across from her was unmoving, unflinching. He didn't look away again, and the way his gaze dissected her every twitch was nauseating.
This was, to put it in the most joyous of terms possible, agony. Real, true agony beyond anything she’d experienced. Agony because she hadn't told anyone about this memory since it returned. Agony because it was the only memory that had returned. Agony because it was Darkrai that found out. Agony because Darkrai had already found out, before his botched escape into the Passage of Time, and he hadn't said anything— and not out of some sense of compassion or pity. It was because she knew what the icy gaze that flashed in her nightmares back then meant, and because he knew she had witnessed him prying. It was because she had a dirty little secret she hadn't admitted to anyone—that she had barely even admitted it to herself— and he had made it into a carrot on a stick, into something to get her to pay attention and follow along with everything he said and did. If her focus slipped up for a second as he spoke to the terrified people of Treasure Town, he would hint, and people would worry, and she couldn't handle the people who deserved so much more than her fretting over someone who didn't even deserve to exist.
(When Kip and Twig refused to fight Darkrai initially, he decided to give them a bit of motivation to confront him in his trap. Everyone in Treasure Town began having nightmares of their worst memories whenever they closed their eyes. She overheard the Guildmaster quietly discussing an old mentor he was forced to part from with Chatot. Marill came to the market alone one day, looking skittish and fearful, and said Azurill was torn up about the mess with Drowzee bugging him again. Kip cried on Twig's shoulder about seeing his parents in his nightmares, only for them to disappear without a trace as evening fell and the happy memory curdled— a newly christened orphan, the old wound made fresh once more.
(Twig had nothing. No bad dreams whatsoever. No nightly reminders of why she'd left humanity behind. No midnight rehearsals of the reason she kept her distance from everyone but the select few who could touch her under specific circumstances. Nothing.
(Darkrai knew. And this felt somewhere between an olive branch and a debt he intended to collect.
(Twig said she'd been dreaming of the execution posts in the Dark Future. Kip nodded sympathetically through his tears.)
She took a deep breath, staring back at the cold, pinprick glows coming from the dark of her home.
He had known before. And he knew now. Might as well take back some of the control here and explain what he no doubt was registering wasn't just the figment of a stressed-out, weary brain.
"I was human, once," she said.
The light of his eyes dipped and raised, barely, as he nodded in the darkness. He’d discerned that already.
“We all lived underground. There was some big disaster that we were scared of happening, and so we were supposed to hide until it blew over. But the thing is, sickness spreads real fast when you’re living in an enclosed space with limited clean air, so… Well. My parents didn’t make it when a nasty bug hit our area. I started living with my aunt, who— I mean… You saw how that was.” Twig laughed weakly.
Darkrai didn’t even chuckle.
She cleared her throat. “Um. Yeah. Looking back, I think she was mad at my mom for having a picture-perfect life when she didn’t, and she'd take it out on me once my folks died. I don't blame her. I was an obnoxious kid.” She rubbed her hands together, unable to meet Darkrai’s gaze anymore. “Didn’t expect her to try and smoke everyone out when people got all huffy about it, but… I guess I should have.”
The glow of his eyes in the dark didn’t waver.
She explained briefly about the Dark Future— how she’d come from it, how a number of her friends had as well, how she’d saved the Present with the help of her partner and a handful of other pokemon— Grovyle, Celebi, Lapras, and more. She gave the explanation, careful to leave out any hint of Darkrai’s involvement, to draw his attention away from her shameful origins and how she should have died in that fire as well— how she would have, if she wasn’t such a coward she ran away at the first whiff of smoke.
He didn’t even flinch at the story of her revival thanks to Dialga or all that came before it. He just sat there, silent, watching.
“A-Anyways, none of that matters. I’m here now, and everything’s peachy. I don’t even have the same body that got all banged up back then! It’s fine. I’m fine.”
He didn't speak.
This silence was going to strangle her. Would he just react, already? She said all of this to take ownership of the secret’s reveal, but it still felt like he was the one holding all the cards here, even if he had a distinct air of unease about him despite his menacing presence in the darkness.
"You knew,” she said. “You knew about the life I came from.” She intended it to be comforting— a way to smooth over the tension in the air. A lie of omission where one could assume he had been her trusted confidant in an ugly situation, instead of teasing at the truth in front of everyone she knew.
Silence.
"Nobody else did, not even Kip, or Grovyle, or— anybody. But you knew," she repeated herself, feeling her voice jitter with nerves.
But he saw through the lie, because of course he did— because she couldn't keep any secret away from ice-blue vivisection. Not then, and not now.
"You didn't want me to," he murmured, and it wasn't a question. He knew. He always did, and he always would.
She put out the lamp and rolled over to face the wall, regretting having spoken at all.
#pmd2#pmd eos#pmd sky#pmd explorers#pokemon mystery dungeon#pmd fanfic#pmd fanfiction#pmd fic#the present is a gift au
8 notes
·
View notes
Text
Nameless Bard Cosplay Breakdown
Why? Why not (I want to share my creation especially with seeing so many tiktok cosplays of them, but never any guides/posts about how people. did stuff for them /lh)
I..don't know how well screen-readers will handle such a long post. I hope it works out okay.
Note: final image does not have alt image text at the time of posting, but I intend to add it later on
add alt text to images (all minus final since that would be a picture from the morning of)
Cloak
This thing is LONG. I'm about 5'1/155 cm, and this thing goes down to my KNEES (& big hood too!)
The inside fabric is from old off-white/beige bedsheets, and the outside fabric was from joann's (link).
I used a pattern from Aliceincosplayland on Etsy (link) (note: you don't need to buy a pattern to make a cloak- I bought it because of the different options between the lengths & hood sizes) ; for mine, I used the knee-length pattern & the larger hood size.
The large covered hook & eye also from joann's (link).
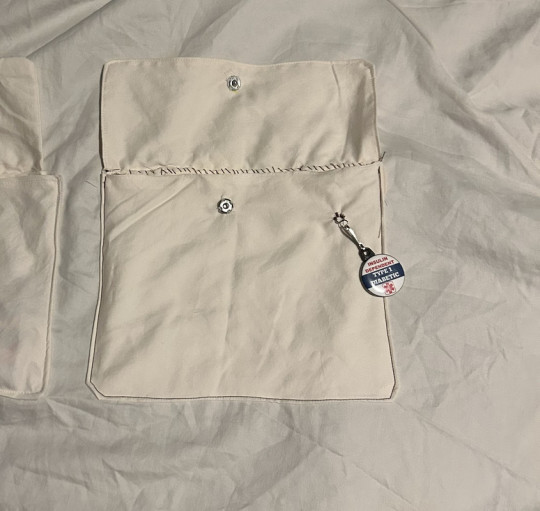
POCKETS! There's 2 small pockets close to the edges, & a bigger one I added this year to fit things like my PDM, testing kit, battery pack, etc. The smaller pockets have wooden buttons & button holes, the bigger one has a snap w/ a wooden button hot-glued on top because I didn't wanna tinker with the button hole foot.
Windblume Flower
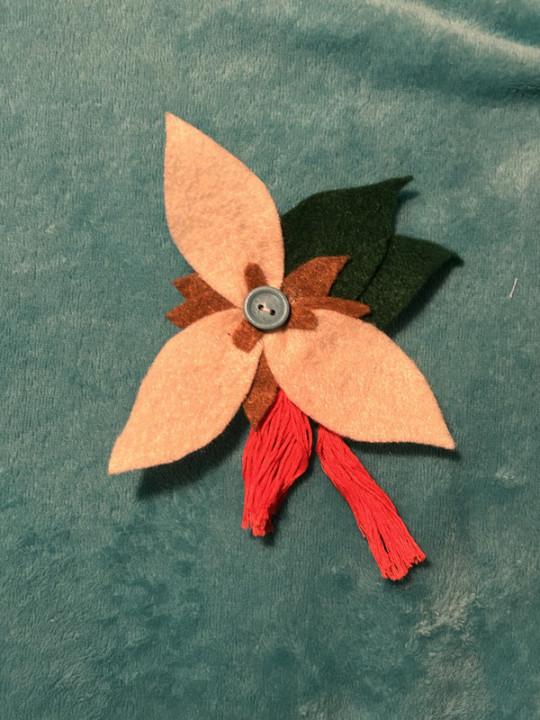
I forgot what I traced but I made patterns for the leaves and petals & used a tutorial to make the tassels with red embroidery thread.
It's made of felt, hot glue, and I hand-sewed some bits like the button in the middle. It's also removable & fastens via safety pin sewed into the back.
Shirt
I gotta be honest, I forgot to work on it and tried to finish it about a week before the con. It looked like it was going well, but little errors made it look not up to the standard I was holding myself to and I hated it. I didn't even add the finishing touches with the shirt's collar's closure, or the ruffles on the cuffs of the sleeves. Instead, I'm using the original shirt I got off amazon last year (link), which I'm glad I kept intact when trying t make the second version's pattern.
I wanted to make another variation that was closer to his canonical outfit and was not made out of that plasticky fabric material (not that it was uncomfy, I just thought it'd be better for a convention center with a lotta people). The arm holes were a bit too big, the neck hole was a bit snug, and I botched the collar almost entirely. Lesson learned, make mockups and do not procrastinate on your projects until the week before the event.
I have the picture of it in this post.
If it counts, last year I made a slight alteration to the original shirt in which I sewed part of the slit in the top so it didn't go as deep. That's about it, honestly.
Shorts
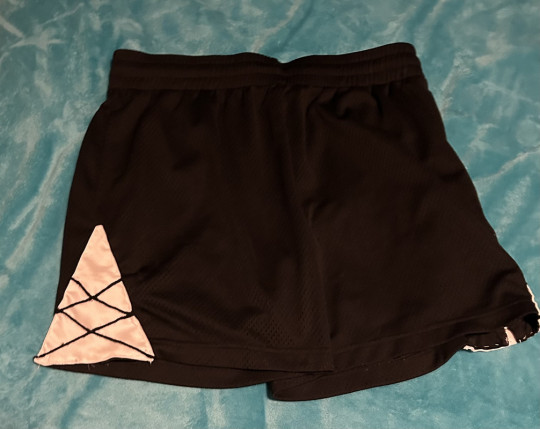
Honestly, these weren't too bad overall. I cut the triangle panels out of white fabric, used embroidery thread for the criss-cross bits, and hand-sewed said panels onto the shorts.
It's great 'cus it has pockets and it's adjustable with the drawstring on the inside.
Wig
This fucker (part 2)
I combined a wig off Amazon (link) with wefts from hair extensions (link; though it comes with two I used just under one weft for both briads) to get the general shape
I went into detail on how I redid it here (also where the pictures are) but to sum it up: washed out hairspray/gel from last year, trimmed & rebraided the longer strands, used hairspray to do the bangs & gel to fix the ends.
Belt
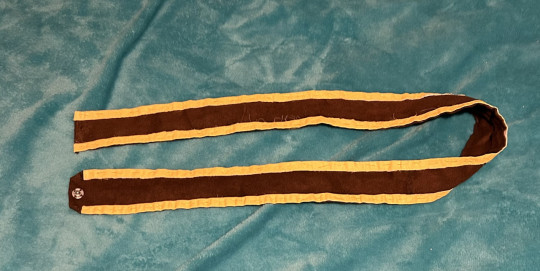
I had this old brown fabric from an old sewing class project that I used. I measured the length by putting the rest of the costume on and using a measuring tape, overlapping a little so there was room to add the snaps for a closure. I think I used the trim from an old bedsheet and put it on either of the longer ends, then painted it yellow to match the bard's. Semi-reliable snap closure sewn in later, then boom, belt!
Lyre Prop
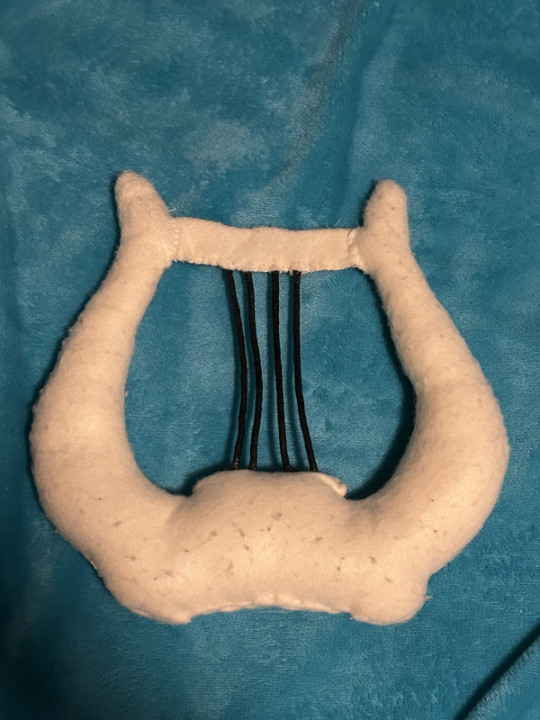
I forgot what I traced to make this pattern too, but I made it out of felt, essentially a stuffed toy. The little bar bit at the top is a separate pattern piece, as I tried making it all into one and was unable to turn it inside out. I forgot what kind of cord/string I used for the lyre strings, I just remember using mod podge to stiffen it as a finishing touch.
I used it last year as a prop, but I ended up just carrying it around so it might be best to leave home unless you plan to take a lotta pictures.
Miscellaneous Parts
Corset Belt: bought off amazon (link) ; It's comfy for the most part. liked the idea of a faux corset as opposed to the vest
Boots: last year I used a different set of boots that I've had for years, this year I'm using slightly newer boots that I got off my brother since they're small on him. They're timberlands I think? A li'l bit of height, lace-up, slight heel, feels 3% more badass /j
Makeup: I... know very little about makeup. I highly doubt the bard used makeup back then (/j). With that in mind, I really just use black eyeshadow & an eyebrow brush to fill my brows in and that's it. I use an old eyeshadow palette, but I also have an eyeshadow stick from the dollar store that works if you wet it slightly (mostly because it's a year old and is dried out by now..probably).
Wisp Prop: Touched on in this post, I like to take along one of my wisp dolls- the second one I've ever made, specifically. Made with my own personal pattern, he's easy to tuck away into a smaller pocket with just his head sticking out. I'll never forget the excitement of the Bennett and Fischl cosplayers I ran into last year when I took the wisp out to show them. 100/10, easily my favorite prop. The only real change made to him is that he has glow in the dark paint on his eyes, which probably won't do much in a convention setting but I still think it's cool.
Sword Prop: Very unnecessary & impromptu, but also very fun. At last year's con there was a vendor selling foam game/anime weapons and I got a foam Freedom Sworn. At the time of writing this out, I'm unsure if I will be taking it with me this year or not, since I can't exactly store it under my cloak when I'm not holding it.
Final Reveal!
(like I said at the top, this image is the only one w/out alt image text; I'll add it later)
(face scribbled over for comfort reasons)
#genshin impact#cosplay#genshin#nameless bard#old mondstadt#genshin cosplay#nameless bard cosplay#🎭 | og posts#cosplay genshin impact#long post#sewing#cosplay guide#today's the day of the con & I'm fuckin' pumped >:33
13 notes
·
View notes
Text
October FairyLoot box thoughts
I’m honestly kind of devastated that I missed this one! Part of me wishes I’d gotten it and skipped the December box instead — I skimmed part of the preview of What The River Knows, and I wasn’t too interested. While The Mummy is a cinematic masterpiece, the book inspired by it was underwhelming initially, and the male love interest seemed… annoying. But since I’ve used up my skips for the year, I’ll be getting it anyway, so I’ll give it a chance.
The book was The Forest Grimm, and it’s a fairytale retelling with a GORGEOUS redesigned cover and a design on the painted edges. I love when they have images on the edges! I’m also a sucker for things about woods done in forest green, and I’ll have to talk myself out of trying to get it during the restock sale next year. I already bought a copy of the standard hardcover; I don’t need two copies!
The box contained an embroidery kit, which I don’t believe I’ve received in a book box before. Admittedly I’ve only gotten FairyLoot boxes so far, with two Rainbow Crate boxes and one Owl Crate box to break up the streak. But I would have LOVED that; I love doing easy work with my hands, and I really need more analog activities that are reasonably short; I desperately need to cut down on my screentime. I haven’t seen it in completed form, but if any of you have done it, feel free to post pictures of the completed project!
The book also has a mushroom spoon, a sort of… tiny spoon with a mushroom on the end? It’s very cute, but… what is it for? Stirring tea? Is this something British? I’m an American and sadly do not know what customs they have across the pond.
There was a photo album. Normally I’m not into these, but this design was so pretty that I regret not having gotten it! It’s blue and looks sparkly. And I really need fewer book-like objects, as I probably am already out of space and just don’t know it because I haven’t unpacked all my books yet; but I’ve heard that these albums actually let you store all the nice spoiler cards and art prints from book box subscriptions, which would be very useful. We’ll see if I receive another one from a different subscription!
There’s an Emily Wilde overlay set. I actually had no idea what an overlay set was, and had to look it up, but once I did — I am SO jealous of everyone who didn’t skip this box. I need this in my life!
Finally, there’s a set of bag clips. This would have come in handy — I do buy too many snacks in bulk and then need a way of closing their bags to make sure they stay fresh. I use gallon zip log bags sometimes, but that’s inconvenient, and then I have to wash them if I want to reuse them… ugh, these would have been so good. I’m so salty I missed this box. They’re Alice in Wonderland-themed, too, and the designs look lovely.
The box also came with tarot cards. I really wish the site would say somewhere which characters from which book the cards represent. It’s not on the box details or the tarot card descriptions in the Fairy Trove. This is a bit frustrating.
I love that this box had five items. Sadly, it seems that every time I skip a box, it’s a five-item one. I need to stop doing that!
#book boxes#book merch#fairyloot#what the river knows#The forest grimm#fairy tale retellings#Enchanted forest#october#salt
1 note
·
View note
Text
Summer Reading / Writing / Arting Tag
Tagged by: @coping-via-clint-eastwood. (Fun! Thank you!)
1. Describe one creative WIP project you’re planning to work on over the summer.
I’m planning to submit a story for the ficwip 5k AU challenge, but I wrote that two days after it was announced (I have absolutely zero control over my mind), so now I’m just waiting for sign-ups and posting. I consider it a pre-canon divergent, canon convergent modification of a coffee-shop AU (not that I’ve ever read a coffee-shop AU). I think it’s pretty cute. But, since it’s already complete, I won’t exactly be working on that over the summer….
I will still be working on my ongoing series. It was ostensibly finished last August, but it’s grown in length by at least 50% since then (by adding to the middle—the end point is roughly the same). I currently have two unfinished sections (sections where I started adding something but need to fill in the rest).
In a dream world I would make a video to accompany the fic series, but I am an extreme perfectionist and don’t currently have the patience, so I think I would likely just drive myself crazy in the attempt.
I’d love to learn to make gifs in Photoshop, with pretty colours and layers and I don't know what…. I made a gif-set in PS once, but the end result was really big and unusable for most purposes because I didn’t really know what I was doing.
I’d also kind of like to embroider something. I bought some embroidery kits while slightly out of my mind during the height of the pandemic, and I think it would be fun to try using them and then, after learning a bit, make up something on my own. (Would it involve bees and butterflies? Probably.)
2. Rec a book!
Fiction: Girlfriend in a Coma by Douglas Coupland. I haven’t read this in forever, but I meant to recommend it to someone about a decade ago and never got the chance. So I’m recommending it now to y’all instead.
Non-Fiction: Stamped from the Beginning: The Definitive History of Racist Ideas in America by Ibram X. Kendi, which is about the development of racist ideas and non-racist ideas alongside each other. I think this is one of the last books I read before I broke my brain.
3. Rec a fic (outside your character tag)!
How cute of you, question-asker, to think I read any fic outside GSR!
4. Rec music!
I’m terrible at recommending music, but I do have a Spotify playlist for my GSR series. (The Spotify playlist is only current to the stories I’ve posted so far. My private iTunes playlist has about 100 more songs. The Spotify playlist will get there eventually.)
5. Share one piece of advice!
I did my undergrad in History and English Lit, but I have no background in creative writing (aside maybe from previously running my dog’s Instagram account), so I don’t know if I’m in much of a position to give advice, but I’ll tell you how I approached my writing process (and had a lot of fun with it!), and maybe that’ll help someone.
Writing fan fiction was not something I seriously considered doing until the day before I started doing it. On the day before I started, I thought of it as something I might do quite a ways in the future, when I’d prepared more. But then the next day my brain was like, actually, no, we’re doing this now.
The reason I’d decided to write fanfic was that I had all these little romantic GSR scenarios running around my head at night (and in the morning, and in the afternoon, and in the evening…), and it was getting really tiresome having to recreate the dialogue every night.
When I started I did an outline in a Word doc with story or chapter headings, based on the different aspects of the GSR story I knew I wanted to address. After I had the outline, I didn’t fill in the story linearly, though. I first wrote whatever scenario was most pressing to get out of my head. Then I wrote the next thing, then the next, then the next, all based on what was most urgently trying to escape my head. Sometimes I added more headings when I had new ideas.
But it was never work; it was always fun. I probably looked a little goofy. I kept thinking… oh my god, I can’t believe I’m doing this. (You have to keep in mind that, until January 2022, I had not read any fic since (or before) I read fic for Josh and Donna when they were taking their own sweet time back in the mid-2000s.)
Eventually I had to write some sections that were more functional—stuff that was simply necessary to get from Point A to Point B—but that was really minimal and still relatively enjoyable. (I have a hard time even remembering what those sections were anymore, but I think the chapter explaining how they got from the year of honeymoons to the events of season 13 was definitely one of them).
So I guess my advice would be that you should just do whatever works for you. (E.g., you don’t have to start at the beginning.) I think this works well with c-v-c-e’s advice: “This is art. There ARE no rules, especially ones restricting flexibility and expression.”
And, most importantly, please remember to try to have fun!
Tagging: If you would like to participate, please consider yourself tagged!
2 notes
·
View notes
Text
going into this project, I was aware I have no experience sewing but the choice in medium was intentional. I wanted to work in something that was considered “women’s work” but I also wanted this project to intentionally document my learning of this skill, the act of teaching myself to sew would be some kind of performance art within itself.
my materials would also be very intentional.
both my mum and my paternal gran are able to sew, hence why I never found it necessary to learn. with the idea of the learning being intentional I didn’t want to just purchase a sewing started kit from amazon and go from there, I wanted to start with the kit that had fixed so many of my clothes throughout my whole life so I politely asked my mum if I could borrow her supplies and she agreed.
this is my mums humble sewing kit, it’s not elaborate or excessive but it’s been the kit my mum has used my whole life, for as long as I remember. any time I had a rip or tear, needed a name sewn into my school uniform, or had a fatal injury to a teddy, my mum would open the bottom drawer and pull this little tub out.
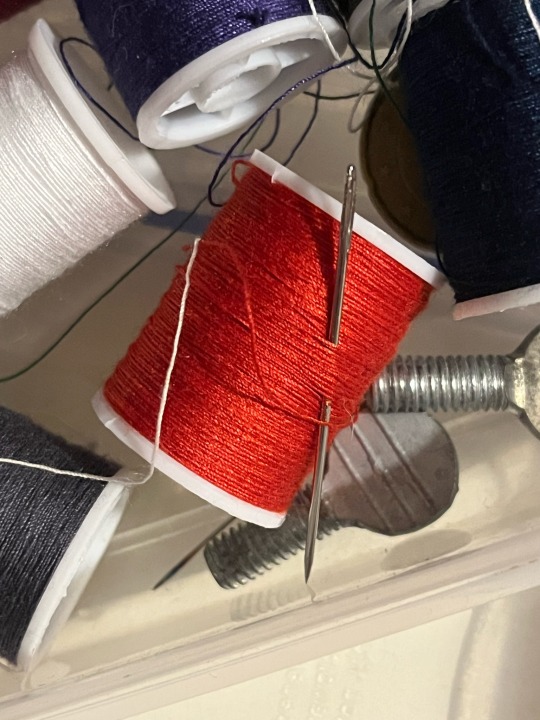
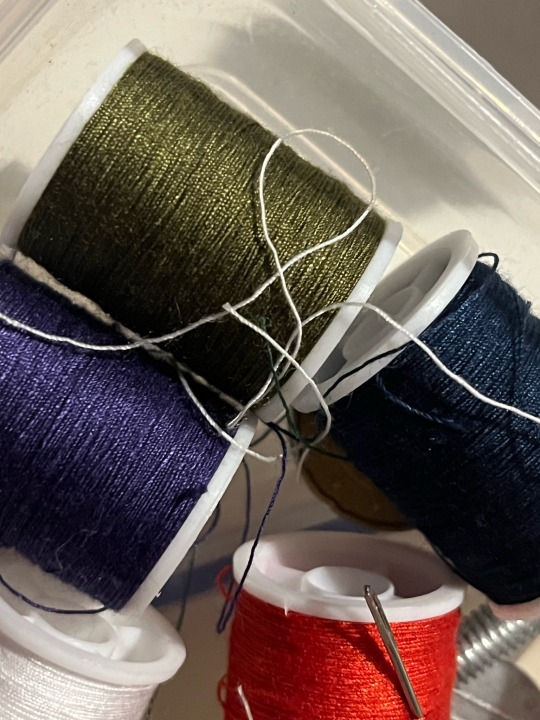
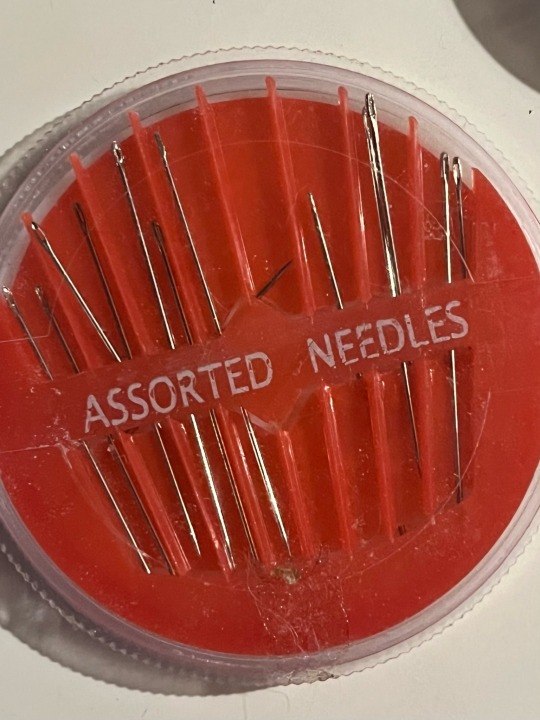
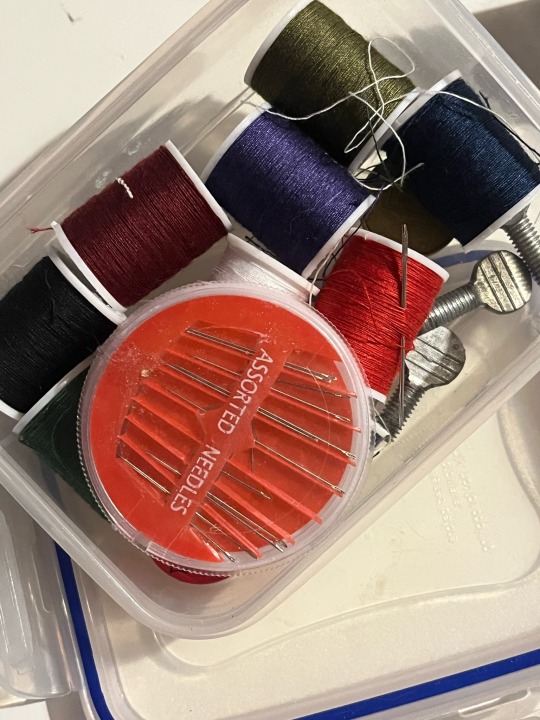
note the “vintage” needles, her favourite needle laced into the thread she last used, and various bits of thread saved in case they were ever useful.
the selection of colours are also interesting, my mum never bought a kit, she just bought thread when she needed it so in there she has various greens that were bought for sewing my dads army uniform/badges, white for school shirts, navy for school blazers, a burgundy for brownie uniforms, and purple (my mums favourite colour).
there is also an eclectic selection of objects in there including school badges, screws (?), and a foreign coin. I’m not sure where any of these came from and I don’t imagine my mum would know either.
now I had my materials, it was time to learn!
while I would love to sit with my mum and have her teach me to sew, that wasn’t possible. my mum struggles a lot with chronic pain and various symptoms from medication and mental illness, including shaky hands which means fine motor skills like sewing and incredibly challenging for her. this is another reason learning to sew is so important to me.
since my mum wasn’t able to teach me I went to this next best thing…someone else’s mum on youtube!
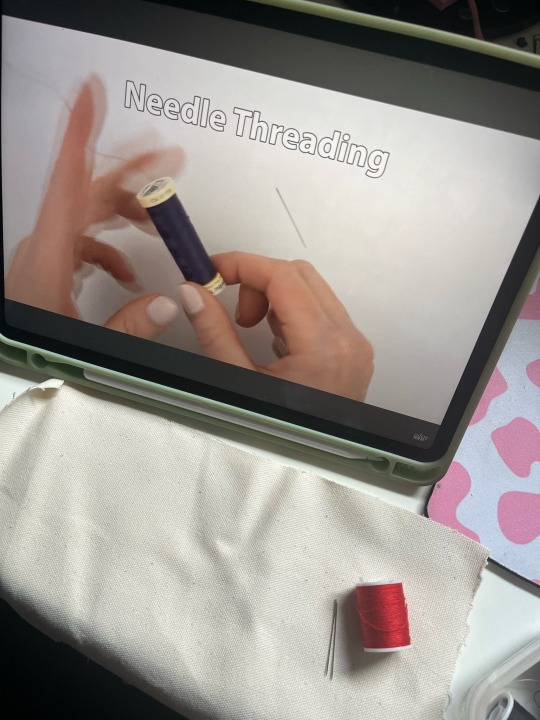
I was also intentional with the fabrics I used for sewing, I didn’t want this project to create any waste and was set on using what I had in hand like so many generations of women before me would’ve done.
my initial idea for learning to sew was to sew together tears/rips so once I learned a simple stitch and a back stitch, I made some small cuts in the canvas I was working on and attempted to sew these pieces together without any tutorials, as i said before, I wanted every detail of this body of work to be intentional and thought through with purpose. I wanted to learn a few simple stitches and then go on to teach myself the rest, again, just as the generations of women before me have done.
Here is how the stitches turned out.
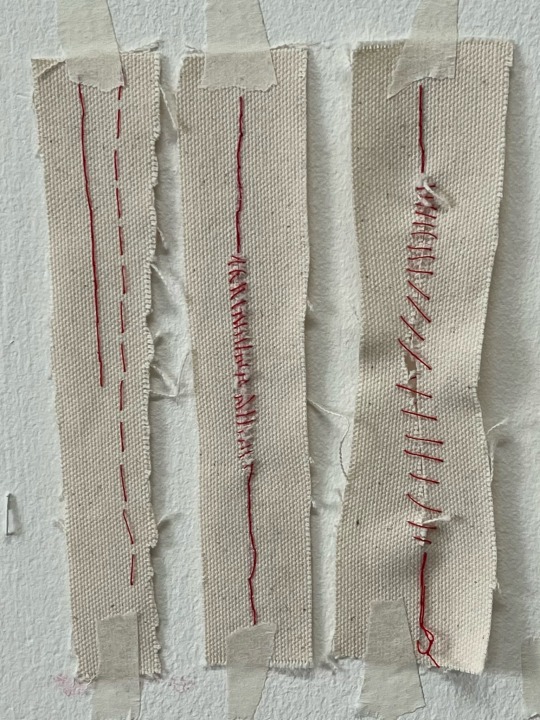
I think it’s visible from these development pieced that I don’t really know how to sew and that’s exactly what I wanted.
There is no “finished product” feel and you can see my loose stitches and fumbling work. I think this gives my work more feel and personality within the context of this project. You can see that I’m a beginner and that I’m self taught, to me you can almost see me fumbling and pricking myself in the finger countless time to achieve this simple stitch.
Moving past this, I feel like I had my back stitch maybe not mastered but I’m confident I know what I’m doing and I a work with this stitch.
Knowing I wanted this project to involve a lot of text, the natural next step to me was to practise the alphabet.
While doing this, continuing to use the needle and thread I borrowed from my mum, Leona (a friend and studio peer), introduced me to embroidery thread. She showed me the difference in thickness and how the threads can be pulled apart to experiment with how thick you want the thread.
Leona even let me take a long piece to use over the weekend as practise, so that’s what I did.
I even chose to be intentional with the way I learned. I chose to practise as I sat with my mum on a weekend afternoon, we watched TV, drank tea, and ate biscuits as we chatted and i was sewing. My mum was even able to give me some tips as I worked.

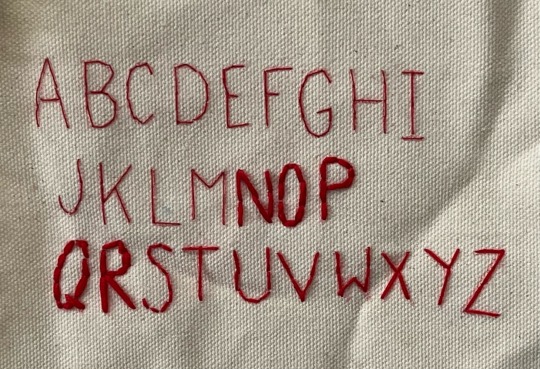
You can very clearly see me experiment with the thickness of the thread and learn how to work with things like curves and odd shapes.
It was at this point I felt comfortable enough to begin working on more polished and theme-based pieces.
0 notes
Text

This is the project that got me back into embriodery! I never felt like I knew what to do with other kits, but this one was very good at identifying where certain base stitches would work best and why. It also gave enough space to really practice the stitch. I've gotten better since I finished this piece, and it's such a relief to know that I finally figured out how to get the lazy daisy stitches to look right.
This isn't my pattern, just my embroidery! I got the kit from StitchedStories on Etsy, and I definitely bought one of their kits for a friend who said they wanted to figure out embriodery.
1 note
·
View note
Text
The Allegory of Truth and Wisdom
For this assignment we were to pick a peace from before 1850 and conduct a thorough color analysis. For the first exercise I created a color chart that helped me expand the colors that had come in my kit for the class. By doing this I was able to grasp how different colors can show in different shades and hues. The class was also given opportunities to read about color and other exercises to help understand the full effect color can have. As an artist I had a fun time exploring different mediums and techniques to grasp this concept. For this project I chose a piece that stood out to me the most, from that piece selected the warm and cool colors and made my color palette which I later turned into an abstract shaped color wheel. From there I enlarged the portion of the piece I felt would give me a variety of color best and pixelated it to later remodel it with color aid paper. The color aid process was very tedious, but taught me how color can be so different when viewing from the naked eye rather than from the computer itself. The final portion was to recreate the piece. Instead of working traditionally with paint or simply things like buttons and toothpicks I decided I wanted to challenge myself with an even more tedious task, thread and thumbtacks. For this process I carefully studied the colors from my printed piece and went to the craft store to select the embroidery floss desired, I then bought and painted the cork board to my desire and began laying the thumbtacks out. In this process I did conquer challenges brought when feeding the thread through and around the thumbtacks such as running out of thread, and trying to figure out how to make the model look like the original. I also had not thought about how the thumbtacks would be clear over the color thread, so I later had to correct those spots with paint that I had to mix to match the thread accurately. Overall, this project really challenged the art of studying color and the different types one can work with especially when studying and trying to recreate a piece to the best ability. I learned how to work color more into my work, and I also learned how to appreciate the mood and meaning it may give a piece overall.
The following is a mix of all my progress photos!
The piece I chose below plus the color wheel color study and color wheel. The next step was picking an square and making it an 8x8 piece. When picking the image I selected just below the cherub and pixelated it digitally and later went in with color -aid paper to recreate a physical piece.


The final piece is that last image above , but the materials and process behind that was collecting the proper color from embroidery floss and looping it through and around the thumbtacks. To make my purge look neat I color matched paint to the floss and painted to layers over the stub part of the thumbtack. Ta-da! Our rendered version is done!
1 note
·
View note