#going for a desktop this time so I can add so much storage
Explore tagged Tumblr posts
Text
i think with tax returns…I’ll be able to get a new pc 😭
#going for a desktop this time so I can add so much storage#this laptop has had a good run#but it’s time#of course this is pending how much we get back#so I’m not getting too excited#but I’m allowing myself to get a little excited
18 notes
·
View notes
Note
Hi pxl! I apologize if this has been previously asked, but what are your PC peripherals? I’d appreciate your two-cents before I blow my savings on a good setup :’)
Hello, I have but it was a really long time ago and I have since changed configurations so I don't mind answering again. I need to preface and stress that you absolutely do not need the set up that I have just for gaming or the sims. I'm running on a professional grade workstation for other reasons. (I also use Apple, and play on Bootcamp with a Windows 11 partition):
Mac Pro (2019)
8-Core Intel Xeon W-3223 3.50 GHz
Radeon Pro W6800X 32GB DDR6 VRAM
128GB DDR5 RAM
16TB SSD Internal Storage Across 3 PCI Slots
My advice for building or selecting a gaming PC is to invest as much as you can in graphics power (graphics card), and RAM and adequate cooling. These parts of your hardware will be more beneficial to a better gaming experience than getting a 12 core processor, for example. Do not waste money on a system that you cannot upgrade the parts of in the future! — I would always, always go for a Desktop tower over a laptop 10000% of the time if you're looking for the best gaming experience. Also remember that you can always switch out your SSD drive with a bigger one, or add more as you go along, so don't worry too much about wasting $$$ on storage either. Here is a list of systems in various price ranges for 2024 (assuming you are in the US/UK).
Hopefully, that helps, but also understand it's probably not the exact answer you were looking for because I'm a weird case user lol.
17 notes
·
View notes
Text
so I finally got my new laptop yesterday! it's not new-new, it's an old one from my partner's work, but it was free and it works really well and I'm soooo happy with it 🥰
we're going to replace the SSD with a bigger one, add a second one (I need storage... I'm so glad it can fit two 😅), and upgrade the RAM, then it'll be perfect (for what I want to use it for - I have my old desktop PC for gaming, and my partner is upgrading his computer so if I want to play any newer games I can also use that. I'm going to try playing over Steam, I don't know if that'll work great over wifi but it's an option at least, haha)
it's insane how different of an experience this is compared to my old laptop. that one has an 11 inch screen, 4GB RAM, and is like 8 years old (a good, expensive 8 year old laptop might still be usable... but this was literally the cheapest one I could find at the time and it was already awful then). I never used the old one unless I really had to, it was so awful to use. having a 15 inch screen is so much better. I can actually see things, and have multiple windows open at the same time! and things just load! it's so fast!! I love it.
now I don't have any excuses why I can't write my stupid thesis 😬😬😬 which. I really need to do. I only have 5 months left until I need to be done, completely, so I basically only have 3 months to actually write it. which is definitely enough. if your brain and body actually work right...
#even my desktop computer only has 12GB of RAM so having 16 seems excessive to me. but since it's cheap and we're already opening it up... 🤷#I'll only have 3TB of storage though so my PC will still be used for all my 🏴☠️ stuff 😅#but that's kinda nice actually. now that's mostly just for storage and streaming the things in my library#it was kind of annoying when I'd want to use it for anything else while it was downloading stuff lol#anyway I'm just really happy about this#I might have to get a skin or something for it. it looks very very boring. plus it's almost the exact same model as my partner's work laptop#so it would get confusing lol#personal
4 notes
·
View notes
Text
those tags were a very condensed version of the many thoughts I have on this subject so it's fair that it was misinterpreted, but my point was never that learning computer technology isn't important. I don't believe that.
The main problem I was expressing here was just my irritation with the superiority complex of it all - I think some of the twentysomethings on tumblr who grew up with home computers really like to make themselves feel good about being familiar with 90s and 2000s technology. Posts like this tend to feel like they're just made to gawk at youth, who they think is technologically illiterate. Speaking as someone who grew up with the same tech as those tumblr users, this sentiment is useless and annoying. There are good arguments to be made regarding tech trends in conjunction with Gen Z and Gen Alpha, but to me it feels that, more often than not, their argument is just "wow, kids today spend so much time on their phones. tech literacy is dead." It kind of irritates me, because there are legitimate issues with modern tech trends that I'd like to see talked about rather than millenials bitching about the way that teenagers interact with technology.
However, I kind of have a problem with the argument that is there as well. I don't think tech literacy is, like, crumbling in our hands because of chromebooks. The keyword that I think a lot of people are missing in this conversation is "casual." The average casual computer user favors convenience and simplicity over quality, and this has always been the case. Many millenials would and have embraced smartphone-era technology for the sake of simplicity too. While I think children's computer education is sub-par in general, the way ppl are acting about it is an overreaction. I don't think everyone needs to learn every facet of how a computer works if they aren't going to use it much. And not everyone does use computers much!
As someone who grew up with both computers and smartphones/tablets, I'm familiar with both and they both come with pros and cons. Personally, I greatly prefer my local files and customizability and computer specs, but it's a personal preference. While most of my peers skew toward casual modern tech uses, I must stress that that, in fact, most people are casual users. I've almost never met a young person who can't navigate a desktop PC, but many of them just don't see the point because they have easier methods at their fingertips. This doesn't mean they're tech illiterate iPad babies. It doesn't mean tech literacy is dead.
Oh, and not to mention: computers are expensive. I can say this as someone who grew up relatively poor: being familiar with computers in the modern day is a privilege. In order to be familiar with computers, you need to have grown up with a home computer and had good tech education in elementary school. Fortunately, my school did have good computer classes and I was exposed to them consistently, but at home I made do with a Kindle Fire. I got a smartphone at age 11, but it was a shitty $40 one with 4GB of storage. Meanwhile, I didn't get my own laptop until I bought my own for college. Because it was $1000. Of course casual users would rather spend $200 on a chromebook, but many also straight-up can't have a computer. This is a problem, but it's not their fault they don't understand computers. That adds another layer of irritation I have at tumblr users who like to gawk at people my age and younger for whom home computers are not just culturally inaccessible, but financially.
This isn't to say that I think cloud storage is a good thing, or that it's not important to understand computer technology. But at the same time, I think that if you're legitimately worried that young people are becoming technologically illiterate because they prefer phones over computers, you should ask yourself why you think that. Is it because it's objectively worse in every way, or is it because you personally prefer customizability over convenience and can't conceive of someone who feels differently? How much of this sentiment you feel is born from a subconscious feeling of superiority? And no matter what conclusion you come to about this subject, why do you feel the need to put down non-PC users for not knowing computers? it's weird.
I don't want to imply that this is a good trend. I think that Google and Microsoft and Apple and other giant tech corporations are moving toward smartphones/streaming/cloud storage for the sake of profit. Yknow, phones are made to last no longer than, like, three years. More and more features of our devices are being locked behind subcription services. It sucks. But this is not a problem caused by individual people because they use a chromebook or don't know what a graphics driver is. I won't call tumblr users anti-technology, but I will say that for such a progressive website, a lot of tumblr users are pretty resistant to change. It's, like, a meme that tumblr users hate any new features, but look at the way they've historically treated TikTok, or new users coming from Twitter, or mobile users. This feels the same to me - Tumblr users seem to be mostly in their 20s, and they're pretty resistant to they ways tech has changed... they can dislike it and they can discuss the problems with it, but I find it really irritating when they just go "computer good, phone bad" without thinking about it. At most, it's a disproportionate reaction to something inevitable, and at least, they're just judging children for being younger (and again, sometimes poorer) than them.
TL;DR: tumblr users generally seem to be more self-righteous than actually worried about tech literacy, and casual computer users don't really need to understand computers beyond the level at which they interact with people anyway.
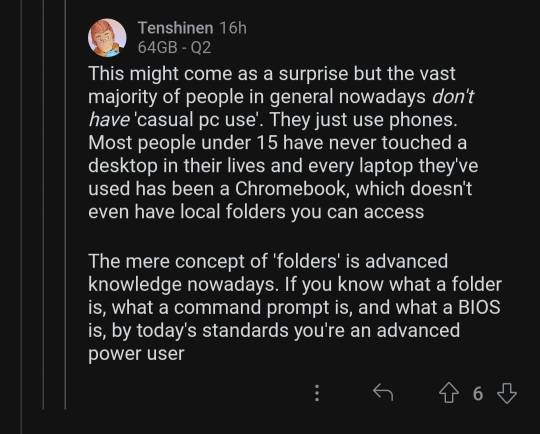
this can't be true can it
#i think a lot of tumblr users forget how biased tumblr is#tell the average non-tumblr user to switch to Firefox and they'll brush you off because they just don't care that much#most people don't need to know what ram or a BIOS is to functionally interact with their technology. they don't need to use folders.#anyway sorry to my mutuals this is so long#if you can believe it's pared down already but i do not know how to be concise#tech#mine
99K notes
·
View notes
Text
My next computing setup
The idea of trying to paint the full picture of my computing needs exhausts me for some unknown reason. Even this short post has been a chore. But I thought it important to get some of my thoughts down because it helps me to clarify my own thinking and will hopefully help me make some decisions. And I would love it if you commented via my website, on Mastodon or Micro.blog or email or USPS.
The main issue is that it just so happens that I find myself at a time where I have a 5+ year old Intel-based MacBook Pro, an 8 year old iPad Pro, and a 4+ year old iPhone 12 Pro Max.
All of these devices are currently working fine, their software is up-to-date, and except for the MacBook Pro – their batteries are in very good shape. (The MacBook Pro has never had great battery life.)
One could say that I do not need to upgrade any of these devices just yet. I could likely hold out another year. But Apple has made it plain that the M-series chipset has their full attention. There are apps from the App Store that will not run on my Intel-based Mac (the iOS/iPad OS apps). The upcoming Apple Intelligence features will not be available for any of my current devices.
To add to the incentive, I’ve had a good year financially. I could use an expense or two to write-off before the end of the year. In fact, based on my math, I think I’ll want a fairly big expense if possible. (Try as I might, I’m having a hard time understanding exactly how much I should be trying to write-off.)
So, let’s just say that I’ve decided I should upgrade one or all of my computing devices before the end of the year. What should I buy?
I work at my desk about 98% of the time. In over 20-years of using a laptop as my primary computing device, I can count on one hand the number of times I’ve used it on my lap. I have had years of more mobile work – going into coworking spaces or working both at home and an office – and years where I’m only at home. Currently I work almost exclusively in my home office connected to a display.
My main computing tasks are programming, graphic, video, and photo editing, and most recently running local LLMs.
I’m wrestling with the following questions:
Since I work from home, should I switch to a desktop computer?
For the few times per year that I travel, should I keep my current MacBook Pro or should I trade up to an M-series laptop for compatibility reasons? This way I’d have both a desktop and laptop computer.
For years I’ve not had enough internal storage to have my ever growing photo library (~1TB as of this writing) on-device, should I finally buy more enough to do so?
Am I kidding myself that I feel like I need to max out whatever device I buy for what I do day-to-day? Perhaps I only need a relatively inexpensive laptop and I’d be fine?
My strategy when buying new work hardware is to buy as much computing power as I can reasonably afford and then don’t think about it for about 5 years. This strategy works and it helps me mentally when I consider the price tag.
For instance, if I price out a maxed out Mac Studio today (with an M3 chipset, not an M4 like I would likely wait for) it comes to around $8000+ USD. Which, likely seems like a lot of money to many but it really isn’t. I use my computer for 12-hours a day nearly every workday. Over a 5 year period it is only $1,600 a year. Or $6 per workday. Ask any business owner if $1,600 a year in expenses is a lot – I assure you that being a computer programmer is likely the least expensive profession known to humankind. For context my 16-inch Intel-based MacBook Pro was about $4200 USD.
But then $8000+ wouldn’t be my only expense. A new iPhone 16 Pro Max and iPad Pro would bump it up to well over $10000 USD. Still, in my opinion, not a lot over a 5 year time span.
Stay with me here.
But then I circle back to the last of my six questions above; do I really need this much compute? Or can I get away with far less? Should I just buy a used M3-based laptop and see if that would be plenty? Should I keep what I currently have until they don’t work at all? Should I go all-out?
I have no idea!
I’m leaving the comments open on this post because I genuinely wonder what all of you think I should do.
0 notes
Text
I Will Confidently Go In The Direction Of My Dreams

Source: Unknown
This will take a bit of getting used to, especially since I tend to lean more towards the cautious side (which is something that has only happened to me as I've gotten older), but I want to focus on the direction of my dreams, even if they do seem like a road with two diverging paths that will take me to two completely different destinations.
At the moment, my dreams/goals typically involve updating the curation front (so that the site itself looks decent), as well as eventually being able to earn a little bit of an income from it, even if all I earn is enough to cover the costs of maintaining the site (especially as I'm starting out, since I want to keep it realistic, mainly to avoid high expectations and bitter disappointment), but this will allow me to spend more time and effort working on the site, as well as having some form of accountability and incentive to continue with it.
Longer term, I would like to be able to work on it full time, but not in a traditional 9-5 way, since I now realise that working a 9-5 can be stifling and draining, especially when you have no work to do, but you still have to pretend to be busy (which I actually find more exhausting than just doing the work, since I always feel guilty when I waste time just aimlessly browsing the internet, especially when I know that I could be doing other things), so I would focus on efficiency instead, where I block out between 1-4 hours of deep work (depending on my energy levels, the amount of time that I have, the amount of work that needs to be done, and other factors) per day, where I just get stuff done, and I don't have to worry about trying to fill the time up with other things, since I realise that it just adds bloat.
Additionally, my "work day" would sometimes involve going to galleries and museums (as well as events that might come in handy, since I still want to be able to put myself out there, but doing it in a way that works for me, so that I don't become stressed or overwhelmed), although I'd only do this if I was genuinely in the mood to go out, since it would be pointless otherwise to go somewhere and not enjoy it, yet still throwing money at it for the privelege.
Sometimes, my "work day" could be doing something that's completely unrelated, where I would have a better chance at getting ideas and coming up with different solutions (as well as the slight chance that I might have more energy than normal) than I would if I was sat at the desk for the length of a conventional work day, so I think that going on walks (and also to the gym) would definitely help me out a lot, since I'd be able to exercise and let my mind wander at the same time.
At the moment, I'm also thinking about my dream setup that would work best for me at this moment in time, since a good setup will motivate me to spend more time pursuing my ideas and dreams, instead of forcing me to fight with it, like how it currently is, and is the main reason why I never work on my ideas and dreams on my personal computers outside of work.
I'm currently eyeing up the latest Mac Mini (with 16GB memory and 512GB storage, mainly because I have those same specs on my work laptop (although that's just a semi-decent Windows laptop), which I think is enough for me), because I think that it's an affordable bit of decent hardware (although with my configuration, it's currently at £1,049, but compared to the MacBooks (a 14-inch MacBook Pro with those same specs would cost £1,899, and a 13-inch MacBook Air also with the same specs would cost £1,649), I think that I'd get much more for my money if I went with Mac Mini), and also because having a desktop computer (rather than a laptop) would work much better for me, since there are better ergonomics in using a desktop (I get to sit up straight, and have a larger screen at eye level (which I realise is extremely important when it comes to designing things), instead of being hunched over a laptop and essentially squinting at a tiny screen), and also because I don't have to worry about charging it, since I find that it usually and needlessly occupies space in my mind.
I also realise that I only ever use my laptop in one place (at the desk in my room), and that I've never actually used it on the go, not to mention that I already have the rest of the peripherals that I need (a TV that I use as a large monitor, a HDMI cable to plug the computer into the monitor, and a matching bluetooth keyboard and mouse combo), so I'd just pay for the actual computer itself, which would potentially sit unobtrusively on my desk.
The main reason why I'm deciding to get myself a Mac (instead of a PC) is purely because it looks much more aesthetically pleasing, and also because everything that Apple does UI/UX and Marketing wise is so effective that I basically have to tear myself away from it (i.e. I have to force myself to not spend so much time on my iPhone or spending an insane amount of time eyeing up things on the Apple website for this exact reason, since everything works so smoothly that I barely notice it), which I think is what makes it so appealing.
I think to help (partially) cover the cost of the Mac, I'd definitely sell my old laptop (potentially for parts, since it's somewhat modular and repairable, but also because I think I'm emotionally and spiritually done with it now, after having spent about 7 years with it, to the point where the mere thought of using it feels like a headache, since I know that I'd have to spend more time wrangling with the technology itself rather than on actually being productive) and my Raspberry Pi (since I basically never use it, not to mention that it feels very childish and feels very embarassing to use, so it kind of feels like a waste of money to me, since not a lot of thought has gone into the actual design), mainly because I know that I'll only ever use those two Linux boxes once in a blue moon, although I think I'd probably only make about £300 from those two devices combined (I've also got about £200 worth of birthday/special occasion money from over the years, so I'd also use all of that (since that's basically in cash, but I've mainly stashed it away since I don't want to spend it on little things), and I'd pay for the rest of it from my normal bank account), but I think that all of this would make a world of difference to me, instead of just letting one device gobble up two thirds of a month's wage.
I know I could always pay it off monthly, but after reading some of the fine print, I'd end up paying interest on top of the actual thing, and to me, that's basically a no-go, so it'd be much easier to just buy it outright and be done with it right there and then.
The reason why I've talked about the act of buying a new computer for myself is because I want to just purchase it once, and then just forget about it for the next 5-10 years, not to mention that I want to be able to use it for as long as possible, by only upgrading it when there's a whole heartedly genuine reason to do so, and only when I realise that hacking it and finding workarounds ends up being more effort than it's worth.
I think that having a good computer (ideally the best one that I can afford) is very important to me, and will allow me to just get things done without having to become a sysadmin.
Dream setup (well, just my dream computer) aside, even if Apple will inevitably release a new bunch of machines in September, I just want to focus purely on design now, and get as good with that as I can with it, since it'll make my life so much easier if I focus on what I already know, as well as expanding upon that.
However, I'm probably thinking about getting the Mac around June time, since I'll now have a few months to save up (and potentially get one with better specs, if it's needed, but otherwise, I could just put the Mac money into a separate bank account), it would coincide with my birthday (it could potentially be a birthday present from myself to myself, although this sounds a little bit sad, but getting my own Mac for my 23rd birthday would sound cool, not to mention that it would potentially make up for the absolute scam that was my 22nd birthday), and my job may or may not go up in flames by then, since I'm still on a temporary contract until the end of June, with a 50/50 chance of either continuing to work with the company or being unemployed working at another place, but doing similar work.
Additionally, it would also give me the time to network with others within the industry (I'm not sure if connecting with random people that do similar jobs to you on Linkedin would count, but it would increase my chances of getting myself out there), as well as having the time to build up the curation front and promote it on different platforms in different contexts.
I also want to surround myself with positive and enthusiastic people who are ambitious and want to do things in life (I think that entrepreneurs are good at this), because to be honest, being overly critical about everything every has just made me miserable, so perhaps I need to stop taking myself way too seriously, and also because I don't enjoy being stuck in one place for too long, since it becomes stale after a while.
Further on down the line, I'd also want to become a freelancer again, but this time, focusing on web design (since it's in higher demand, I already have actual experience in that area, freelance web designers tend to be a lot more ambitious with what they do, and because it's interesting but straightforward at the same time, although I'd probably create a semi-personal brand, so that everyone knows that they're dealing with a person (rather than a faceless company), and so that I can choose what I reveal to others), mainly because I enjoy doing the work as efficiently as I can, but I don't enjoy stalling or pretending to look busy, nor do I really enjoy the concept of trying to fill the time by going and doing the work as slowly as possible, since this will basically wreck my work ethic as well as my motivation, and is something that will lead me to the inverse of burnout.
So, I think this is the year in which I will confidently go in the direction of my dreams, by focusing on myself and on what I actually want to do, instead of getting drowned in lots of unnecessary opinions all the time, since they usually hold me back.
0 notes
Text
Securing The Studio
Most people will build a Garden Studio as an office, gym, recording studio, games room etc. This means that the building is likely housing equipment or objects that might be of value.
The Studio is no different and therefore I wanted to secure it as much as possible. However, as the old saying goes, if they want to get in, they'll get in.
So despite The Studio having modern bi-fold doors and locking systems, I still felt I wanted some reassurance that the building was secure.
The motion activated light are a good start. They are sensitive enough to pick up Maisie (our dog) having a sniff around at night, and light up the area pretty well. But I can't keep an eye out on the building all the time and so I wanted a video monitoring system that I could trust.
I've been using Blink for many years. I backed them as a Kickstarter project quite a few years back, and then they were acquired by Amazon. Blink provide a series of solutions to fit most needs and I find that the app is really easy to use.
The system uses a little Blink hub (to synchronise the cameras and to manage the cloud storage of your content) and is not limited to 1 hub per system (unlike Hive) which means as long as you have wifi coverage, you can place a sync box remotely to the house (which is where a lot of garden studios are). Hubs can be bought seperately, but are included if you buy a system so you shouldn't need to buy one unless you are looking to expand your system or need a replacement (although see my note below).
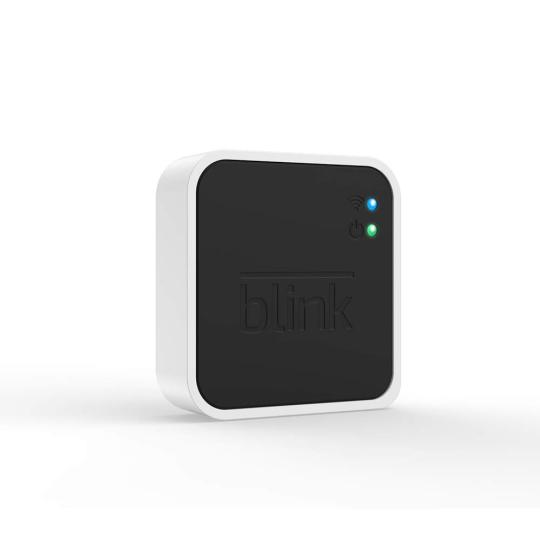
In my house I have 3 hubs managing 3 distinct areas, and 1 hub in the studio, exclusively for the studio. All cameras work with the hubs. and you can mix indoor and outdoor cameras on each hub.
Each hub and their attached cameras are given their own zone in the app so it's easy to switch between the zones.

Zones can be scheduled to arm and disarm whenever you want and each camera has a wealth of variables that can be set including how long they record for when triggered, re-trigger tim, sensitivity, etc etc.
There are a number of different camera units that you can buy.
There are battery powered cameras, one exclusively for indoor use which is white with a black face (they used to be all white so not sure why they changed it), and one designed for outdoor use, which is black. Both units have "night vision" enhancements, and the battery life (2 AA batteries) lasts for quite a long time (about a year by my reckoning) which is impressive.
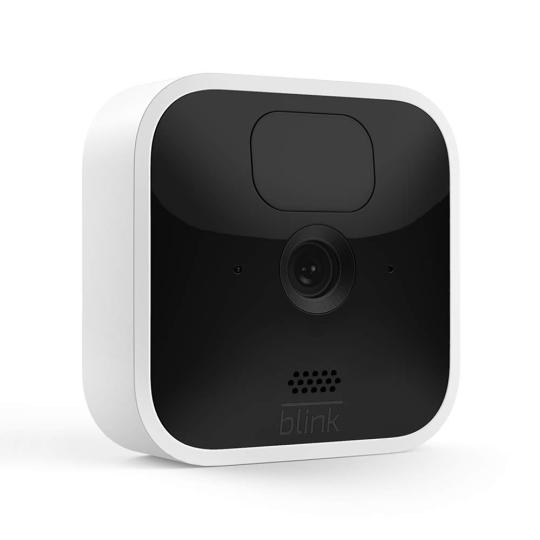

There are also small desktop internal mains powered cameras that come in white and black that are small and subtle.

There is also a battery powered motion activated spotlight system to which you can attach an indoor or outdoor camera to for a interior or exterior camera and light setup.

Many of the cameras come in packs of 1, 2, 3 or 4 cameras. You can also buy ad-on cameras seperately.
Note: Have a proper look at the pricing because a lot of the time the 1 camera system is the same price as an add-on camera. Get the 1 camera system in that case, because you get a sync module as well which in essence is free, but always useful to have either as a spare, or to add an extra zone in the house.
This is an example of the video recording when an outside camera detected a fox around the studio. The fox hadn't triggered the motion lights because it came in from the side of the building that doesn't have a sensor.
Clips can be stored to the cloud (for an additional monthly subscription) but this is not mandatory and you can run the system "free" if you want to, receive alerts to motion etc. There's no hub subscription.
Additionally, the system works with Alexa so you can arm and disarm your system manually using Alexa, as well as go live into any camera if you have an Echo Device with a screen, like the Echo Show 5 or Echo Show 8.
As Blink are now owned by Amazon it's the only place to buy them but the systems are really quite cost effective and a breeze to set up.
Blink have also expanded into Front Door Video bells, as well as a pan and tilt motion camera to keep an eye on your pets, so you can utilise their system for your whole house monitoring needs.
0 notes
Note
Hello, a bit of a different ask but I'm struggling with my organisation. I have lots of scenes/one-shot/prompt ideas hanging around everywhere (notebooks, phone, pc). Do you have any tips or organisation methods? I know people use Scrivener, but I can't pay for the subscription. I've tried Notion, but I heard it isn't private? It doesn't even have to be a digital program, honestly. I'm at a loss, any advice would be greatly appreciated!
Organizing Story Ideas
Here are my tips for how to organize ideas for different stories...
Choose Your Storage Method
There are lots of different ways you can store ideas, but it may take trying a few before you find one that really works for you. Ultimately, you're looking for something that will let you place the ideas into different categories and potentially sub-categories. Here are some suggestions:
Writing Programs/Apps - There are several beloved writing programs and apps that offer the ability to categorize ideas. Scrivener is certainly one of them, and for the record, it's not subscription-based. As of 8/21 it's a one-time fee of $49. Minor updates are free, but very occasionally there will be a major update that requires a small upgrade fee. Pros: It's easy to type ideas and move things around. Cons: You could lose your ideas if you don't back them up.
Computer File Folders - This is the main method I personally use. In my writing folder on my laptop, I have a folder labeled "plot bunnies" that contains sub-folders for different kinds of ideas. Here's what it looks like:
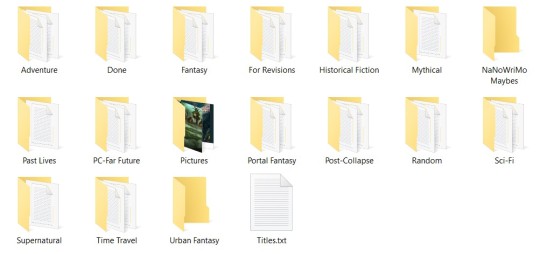
I don't have sub-folders for sub-categories, but you certainly could if you wanted to. I put each idea into its own notepad file, then save it into the appropriate folder. Pros: It's easy and super organized. I know exactly where to find a certain idea when I need it. Plus, it's easy to add new ideas when I have them. Also, when I'm struggling with an WIP, it's easy to look through other ideas to see if I can incorporate them into the WIP. Cons: You could lose all your ideas if something happens to your laptop, so it's a good idea to have them backed up and make sure you update back ups often.
Notebooks - This is the method I used to use, and TBH it would be a good back up for either of the above methods. I also keep a notebook by my bed for writing down dreams and middle-of-the-night ideas, and I try to transfer them into the appropriate plot bunnies folder every now and then. Look for a multi-subject notebook. If you need sub-categories, you can buy stick-on file tabs to sub-divide. With this method, it's best to let every idea have its own page or half-page. You might also look for one that has built-in pockets where you can quickly store ideas written on post-its, scrap paper, etc. Just make sure to transfer them to their own sections eventually! Pros: Notebooks are inexpensive, easy to store, and easy to grab when you're writing. Cons: If you lose it, you lose your ideas, so this method warrants a back-up method as well.
Three-Ring Binder - This is a variation on the notebook method but one that works especially well if you need a lot of categories and sub-categories. Not only can you use tabbed dividers to create sections, you can use stick-on tabs to create sub-categories as needed. You can also add folders and pockets, or anything else you need. Pros: Binders are relatively inexpensive and come in a variety of sizes. You can fill them with whatever kind of paper works best for noting your ideas. Cons: They're more expensive than notebooks, not as easy to store, and generally work best if you have a lot of empty space on a table or desk so you can work in them. Once again, a backup method is recommended.
Index Cards/Organizer - This method would be especially good if you have a ton of ideas, need a ton of categories, and need lots of sub-categories. Ideally, each idea would go on its own card. Pros: there are a variety of index card storage methods available. You can color code different categories. You can use tabbed index card dividers for categories or make your own using stick-on tabs. Cons: Ideas take longer to find in categories with lots of cards. You need to purchase cards and container. Also need a backup method.
Kanban Board/Binder - Kanban boards are dry erase boards (or bulletin boards) that are divided into sections, each one being its own category. Tasks (or in this case, ideas) are written down on an index card or post-it note, and stuck to (or tacked to) the board in its proper category. You can also use punched, laminated cardstock to create a Kanban Binder. Here's the one I use for writing tasks. I did mine using an old Happy Planner using old Happy Planner covers (since they're already laminated,) but you could also use a three-ring binder.
Looking at the image in the bottom right, each category consists of two laminated pages facing each other. So, this could be "novel ideas" and the columns (sub-categories) are genres like mystery, romance, fantasy, etc. Or, the category could be "fantasy" and the columns could be poems, short stories, novellas, and novels. Whatever works for you! You can Google Kanban boards to see what the board version looks like. Pros: Quick reference, easy to add ideas and remove them when they've been done. Also, it's a versatile/flexible method. Cons: You may need to buy a board or binder and post-it notes/index cards. Also needs a backup method.
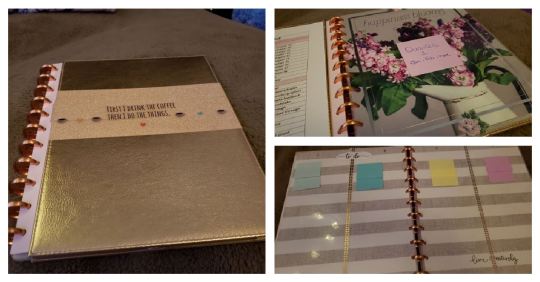
Figure Out Your Categories/Sub-Categories
Once you have your method chosen and set up, you'll need to think about how you want to categorize everything and what categories/sub-categories you need. You may even want to do this before you settle on a method. Genres and sub-genres would be one method, writing formats (poetry, fan-fiction, short story, etc.) is another option. You might even choose to categorize by publishing method/intention or how much you like the ideas.
Gather, Sort, and Re-Home
Now it's time to grab your phone, notebooks, and laptop/desktop, gather up all those disparate ideas, sort them into their categories and sub-categories, and put them into their new home!
Choose a Backup Method
Whether you designate a thumb drive and back up your laptop plot bunny folder every week, buy a spiral notebook to jot down new ideas before they go into the primary storage, or take occasional photos of your Kanban board/binder, you definitely want to make sure you have your backup method chosen and use it often. That way, if something happens to the main method, you don't lose all those ideas.
Keep an eye on the comments in case there are more ideas!
•••••••••••••••••••••••••••••••••
Have a writing question? My inbox is always open!
Visit my FAQ
See my Master List of Top Posts
Go to ko-fi.com/wqa to buy me coffee or see my commissions!
#writeblr#writing#writing community#writing tips#writing advice#writers of tumblr#writing organization#writing help#wqaadvice
137 notes
·
View notes
Photo
Finding high quality film/tv rips, saving the large files, and screencapping them are half the battle for gifmakers when setting out to make a gifset. Here’s a little guide on this process, including my advice on
Where to download stuff
Where to store your movies/shows
Screencapping programs
Making gifs as HQ as possible, including tips for picking out what to download when you have multiple options (not all 1080p rips of the same movie or tv episode are the same quality and I explain why)
Why screencaps of 4k movies can look weird and washed out and how to fix that
and more
✨ You can find my gifmaking 101 tutorial here and the rest of my tutorials here.
Where can I download movies and shows?
First off, I prefer direct downloading rather than torrenting stuff because it’s faster and with torrenting, there’s more of a risk. Other people downloading the same torrent can see your IP address. This means movie studios can find out you’re downloading their content and can send you a warning letter. The download speed also varies depending on how many other people are seeding it. I would only do it if it’s your only option and you have a VPN or something.
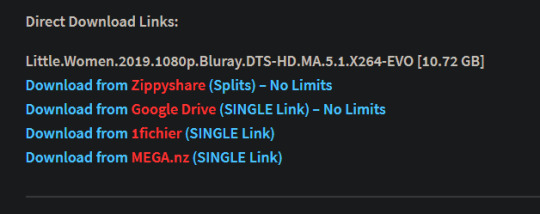
This is THE best guide for pirating I’ve ever seen. I use it for finding sites for books, music, you name it. The part of the guide you’d want to look at is where it says Direct Downloads Link (DDL) sites. My favorite place is Snahp. These ddl sites will have links to their movie/tv rips that are typically hosted on one of these two sites: google drive or mega.nz. You can download stuff from both of those sites for free, but with mega, they have a 5GB file download limit unless you have a premium account. I personally pay the $5 a month membership for mega because it’s worth it imo. You can buy a subscription through the mega app found on the iphone app store (so you’re billed through apple and it’s less scary than giving a random site your credit card info lmao) and as for androids I think mega has an app on there too.
So basically, if you go to http://snahp.it, they’ll have rips for different movies and shows.
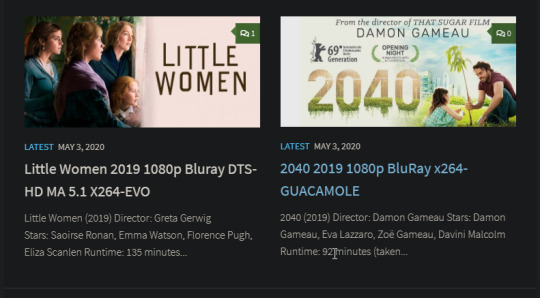
You click on the movie title and it’ll take you to a page where they have links for the video which they have uploaded on a variety of sites (including mega).
How do I make my gifs as HQ as possible?
It’s best to gif things that are 1080p. And usually the higher the file size, the better. A really important thing to note is that not all 1080p bluray rips are the same. The piracy groups that rip these files take uncompressed .mkv rips from discs that are anywhere from 10gb to like 50gb, and then run that through video converters to compress the file down so that they’re 2-8gb. Sometimes when that happens, the video quality goes down a LOT. The same goes for TV episodes. One rip could be 800mb, the other could be 3gb and both could claim to be “1080p” but the quality would be NOTICEABLY different. Your best bet is to always pick the rip with the highest file size.
I’ll show you an example with this scene from You’ve Got Mail.

I downloaded 2 different 1080p rip versions of the film. Both claim to be 1080p, but one is 2.41 GB and the other is 9.75 GB. After taking screencaps, it’s obvious that there’s a BIG difference in quality.
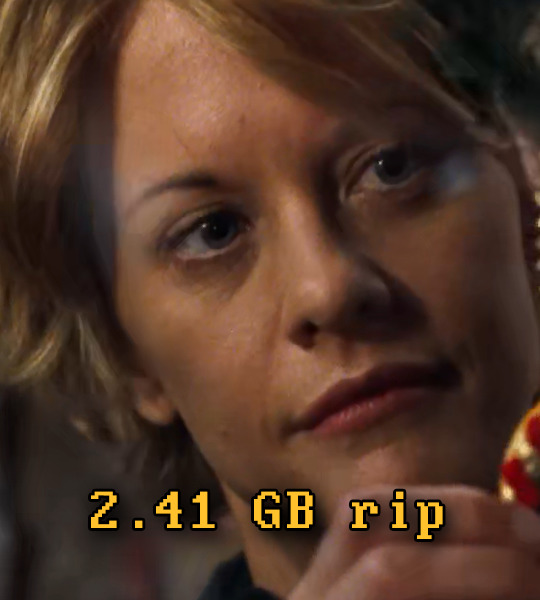
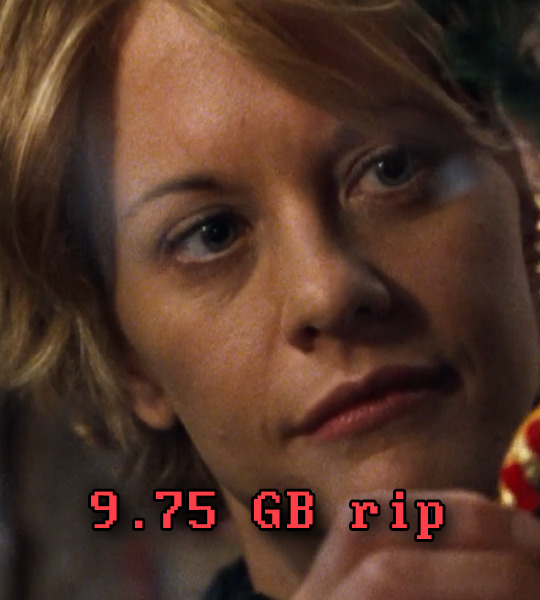
(these pictures are best viewed on desktop tumblr)
When it comes to Blu-ray rips, download remux versions of films and shows if possible. Remux means .mkv files that are uncompressed and straight from a Blu-Ray disc. Giffing remux rips cuts down on the possibility of seeing pixel-y effects a LOT in my experience. It’ll take a bit longer to download than typical 1080p rips but it’s worth it imo.
For TV episodes, if you can’t find a Blu-Ray rip, uploads with the word AMZN in it are usually the highest quality and your best bet (unless you see another upload that’s higher in file size - again: always try to pick the highest file size). 'AMZN’ means they’re from a person that ripped the episode from Amazon Prime Video.
Also, even better than 1080p is 4k (2160p). I only really recommend this though if you know you’re going to gif something up close and crop it a lot - like if it’s a big 540x540px close-up gif of a person. You’ll REALLY see the difference if it’s a 1080p vs 4k rip in that situation. I usually don’t bother with giffing 4k files unless it’s the case above because my laptop lags when taking 4k screencaps and it takes longer to load them into photoshop (4k screencaps are usually about 60mb each!)
⭐️ Another thing that’s important is making sure that when you actually make your gifs, you set them to the correct speed (.05 for movies and most shows, and .04 sometimes for reality tv and live broadcasts). Here’s my gif speed guide. Having the right gif speed is really important for making a gifset HQ. You don’t want it to look too slow or too fast.
What’s your favorite video player to take screenshots with?
MPV player, hands down. And I’ve tried a TON of programs over the years. I’ve tried KMPlayer and found that it added duplicate frames (and even missing frames) which is horrible, and I’ve tried GomPlayer which is.....I’m just gonna say it, I’m not the biggest fan of it. It’s a little overly complicated in my opinion and it has ads. If you like these programs, more power to you! Use whatever you’re comfortable using. I just like MPV the most because it doesn’t have ads, it’s simple, you can take sequential screencaps with a keyboard shortcut, and it can play 4k movies.
Screencaps I take of 4k 2160p movies look so dull and washed out, like the colors aren’t right. Why is that?
That’s because your computer can’t handle HDR 4k video files. It probably can handle SDR 4k video files, but unfortunately, 99% of 4k rips out there are HDR.

[picture source]
Now, HDR displays just fine on computers that have 4k-HDR capabilities, but most older computers don’t have this ability. Having said that, MPV - the video player I mentioned above can take a 4K-HDR video and fix the colors/lighting in real time so it displays correctly AND take screenshots of it with the fixed colors. If you have an older version of MPV, make sure you download the newest update for this. In my general gifmaking tutorial, there’s a portion on how to install this program on macs. I also just made a video tutorial on how to install it on pcs here!
High quality TV and Movie rips can take up a LOT of space on my computer. Where do you store your files?
I store them on external hard drives. External hard drives are like flash drives but they have a MUCH higher storage capacity. You just plug them into your computer via a usb cord when you need access to the files and it’s that easy. I have two of these Seagate 4TB hard drives in different colors so I can easily pick out whichever one I need. I have silver for my movies (because it makes me think of “silver screen” lmao and it’s easier for me to remember) and then I just have a blue for shows. Now, external hard drives of this size can be $$$$ but it’s worth it imo. Look out for when they’re on sale.
What’s the size limit for gifs now?
It’s 10mb! It used to be 3mb and then last year Tumblr upped it to 5mb. Some gifs initially had distortion because of Tumblr’s switch from the .gif to .gifv format, but they’ve fixed the problem AND increased the upload limit to 10mb. Just make sure not to add any lossy to a gif.
Lossy is basically a grain you can add to a gif to lower the file size down. Gifmakers (including myself) used to use this as a trick to get the file size down under 3mb. However, since the .gifv update on Tumblr, any gifs with Lossy added will look distorted like it’s a gif made on a phone app or something.
_________________________________
That’s it for this guide! Again, feel free to check out my other tutorials on photoshop, how to center subtitles, download hq movie trailers, and more ✌️
UPDATE 6/23/20 ⚠️
I’ve gotten an ask about this problem 3 times since I’ve uploaded this tutorial, so I thought I’d add this in. If you are experiencing duplicate and/or missing frames in mpv, it is a glitch with the latest version of mpv. download an older version like 0.29.0. this happened to me on my mac and downloading an older version fixed the problem.
3K notes
·
View notes
Text
I'm not knowlagable enough on particle physics to discuss photonic computing. The gist i'm getting is like if your entire PC processed everything using optical connections, instead of electrical signals.
Again, I might be off about that, do your own reading, and make your own judgements.
However, lets talk about these claims with multiple decades of hindsight.
Because we're all old now.
10 Gigahertz
Simply phenomenal. However, by 2005 the highest speeds you'd expect to see in consumer hardware would be around 2-3 Ghz, and for the next 10-20 years as high as 3-5 base clocks, not factoring per core speeds, which wasn't a concept back in 95 (as far as I know). 10 Ghz for consumer PCs wouldn't be possible without it being permanently on LN2 (liquid nitrogen), and even then I don't think that would be enough. Let alone the power requirements would probably be through the roof... if you tried to harness lightning, which would come close... actually that would honestly be too much.
A Gigabyte of Memory
Not even ten years, by 9 years our computer had a GB of memory, and we even doubled it soon after. But it's crazy to think how much RAM sizes had exploded in 10 years. We went from going 64 MB was pretty good for windows 95, possibly even overkill, and then we multiplied that by 15.5 just about... then again 10 years earlier, one of the most popular microcomputers had 64 KB of RAM. Considering I have 64 GB of RAM in my own PC now, it sorta tracks.
100 Gigabytes of Storage
Aw yep. our PC in 2004 came with 120 GB of storage. Certainly an upgrade from our previous desktop's 1.5 GB. 20 years later, 100 GB would be criminally small, as games, apps, and the OS itself became bloated and unoptimized, because AAA games don't bother spending the time and money running compression or conserving data sizes. I'm still quite salty that the 4k upscaled cutscenes that come with the remaster of Command & Conquer and Red Alert from switching between 2 CDs each, to 32 GB. I'm doing my very best to stave off a conniption thinking about it. Warframe takes up 50 GB, but that is because it actually has that amount of content in it. So the takeaway is 100 GB has gone from something special to being not even enough to hold Call of Duty.
Weighing 4 ounces
If you're me that's about 100 grams, or a serving of bolognese before pasta (unless you're really hungry tonight). In 2005, I don't think I could concieve of a PC that has those requirements, and weighs that much. My PC does not weight 100 grams. In fact the GPU is heavy enough that when I transport my PC, I usually transport it and the GPU seperatly, because I don't want the PCI-E slot snapping off in transit. However... if you want a PC that meets the previous requirements (sans 10 GHz)... the Raspberry Pi 4 (model B) which came out about 5 years ago...
has a quad core ARM CPU at 1.8 GHz
Can have 1 GB of memory, but can also go up to 8 GB
has a micro SD card slot, which you can probably fit a 100 GB card in there
All that... and it's about 2 ounces.
Weeks of battery time
And we're back to the extrodanary. The most that Apple is claiming for their latest Macbook Pro is 22 hours. Most Laptops will lose their charge within the day guaranteed. I doubt it was any better in 2005. But let's focus on our design requirements for a 4 ounce tops PC that can (not) do 10 Ghz (because that's crazy, so 2 GHz at least), has 1 GB of memory at least, and 100 GB of storage at least.
Well... it seems like we've conveniently forgot to mention the modern smartphone. The Pocket PC of today!
Well a problem with that is that, while they meet and surpass the requirements for speed memory and storage, a lot of the good ones are actually heavier than 4 ounces, and they certainly don't have weeks of battery life. So, you could add a battery to the Pi, but that's extra weight, and I don't think 2 ounces of battery power is going to add charge in the multitude of weeks, when even the most hideously expensive flagship phones can barely crack a day... and this is taking use cases into account. Your phone may last longer on charge if it's doing not a one thing, but that's not the point.
And especially bad if it's trying to drive...
A Crisp 10,000 x 10,000 resolution display
So... how big is this 4 ounce device? because if it's REALLY small, then it's 10k display just about meets the definition of diminishing returns, as is any phone that has a 4k screen meets the definition of diminishing returns. My iPhone 12 mini has 2340‑by‑1080-pixel resolution at 476 ppi. It was designed to meet the reqirements that it the pixels are just small enough to not be visible by the naked eye. Most phones are like this these days. Here, this site is pretty interesting when it comes to that stort of thing.
But that's besides the point.
10k resolution is absurd for a 4 ounce device to handle (unless it actually has 10 Ghz of processing power). Our next resolution milestone 16k had just been shown off for the first time only last year. Hell, 8k is now at the point 4k was when it started hitting the mainstream.
And then it occurred to me.
All of this, it all has to be at least these specs or better. It has 10 Ghz of processing power, possibly a RISC based processor. It's super light, so you can take it with you, even wear it. It has exceptional battery life so you can sustain usage for long periods of time. And it has a extremely high resolution display.
This all sounds like the perfect, not as a dream PC of the future... but as a dream VR headset of the future. And at 4 ounces and weeks of battery life it would be comfortable to wear for extended periods of time, possibly days of use, resting and waking in VR. And with 10 Ghz at your disposal, you wouldn't be teathered to a PC. In fact with all that processing power not only to process visuals to a crisp 10k display, but to process...
YOUR BRAINSS... DOING THINGS... uh, ye.
So... are you ready to strap the multi Kilowatt VR headset on? Now with liquid oxygen cooling!
What are they saying with that, while I was 5 years old?
While we wouldn't stop getting Packard Bells to play with until 1997 where we got our first PC for christmas. For the word and card game boxes, I guess it's fun to throw numbers around. think about
I mean 10 Ghz for anything PC related is pretty funny to think about at the time of writing. On the other hand we got Bill Gates' alleged quote about 640k of memory from 1981 or something. Looks like 64 really took off as a number. It's in my OS, it's in my RAM, it's in the amount of drive space I have left because games are too big.
So either surpass expectation or you kinda stick around the same area but improve it in different ways, like how CPU speeds are sorta the same Ghz wise, but just have more cores. You tell that to 90s PC mag guy and he's like 'you put 8 pentiums in there for real?' and you tell them 'no I use AMD'.
Here's to another decade of computing... but not until 2025, please hold your uh... whatever you would call that until then.
Hey now, here's hoping virtual reality actually breaks out of it's niche, trapped in enthusiast hardware, and underpowered machines owned by terrible people... I mean that the people who produce it are terrible, not the owners... unless.
Actualy, there's your answer, Damo. Where is VR going to be in 10 years (as of 2015)? it's not... unless something happenes in the next year, otherwise mostly nothing (except boneworks, and HLVRAI)
Okay, wrapping up for real. Thank you for reading too much of this.

PC Mag - August 1995
618 notes
·
View notes
Note
Yeah im more familiar with desktops but im pretty sure you've been dealing with a lemon.
Even built in graphics with no card can pretty much run Portal.... make sure to do your research on laptops! HP is a fairly solid brand if you're going lower end :) try to stay away from Toshiba and stuff. I had one if those and I could fit my entire finger between the screen and the glass within a year cause it started to fall apart really easily....
I think you'll find most laptops that are worth buying only have a small amount of storage space, like 500GB at most. This isn't really a big deal cause you can easily add SSDs after you get it or use an external storage device, so honestly don't get the option that's worse in specs just cause it might have more space in it.
A good cooling system is your best friend!!
And as always, never go with Apple.
These are really good tips, thank you!! Despite overall lasting almost 7 years, this laptop has had a whole laundry list of weird quirks since the beginning. But I suppose that's what happens when you just start college and go with the cheapest option student discounts can buy. Fortunately I do have the means to splurge on something a little nicer this time...
7 notes
·
View notes
Text
Zip File Magic
You ever hear about knot magic or a witch's ladder? There’s a couple different ways it can play out, so here’s a few example purposes.
binding something (negative energy, feelings, etc) with a series of knots and burning the string to cleanse it from you
binding something's abilities until you undo the knots
storing energy within a knot and then untying it when you need the specific energy contained within
Honestly, go look up some of the examples here on Tumblr if you haven’t heard of it already. But, the general gist is the energy of the spell is contained within a knotted piece of string, to either maintain or store a spell's workings until such time as the knot is undone. This is a great and subtle way to do magic as most people don't think much about a knotted piece of string lying around.
Along those same lines, most people don't think too much about a zipped (compressed) file folder on your computer. When reading about knot magic I thought “hmm, wouldn’t this work well with zip files on a computer?”
A Conceptual Outline
Gather the contents for the zip file. It doesn't have to be one file, mind you. I try to think of a couple different things that can help with my intent. For example, if I am storing energy and motivation, I'll include a file that is the core of my spell, sure... but I'll also add in a motivational gif, a quote that inspires me, a song that makes me happy, an animal picture, whatever I think will make me motivated.
If you are making multiple zip files at once, remember that each needs its own energy. Copy-paste is tempting on the computer but it can dilute the magic.
Decide what sort of ritual you wish to do while compressing the files. For me, most of tech magic is about front-loading intent so that, when you go to enact the magic, it's already charged and loaded with power. You might want to have a small spell to recite or something in mind to visualize. Decide on a specific name for the file archive that is both protective and binding to hold the energy for you, while also being nondescript enough that no one will question it.
Do the thing and compress the files! How you do this and what file type it will save as will depend on your device's OS and software. Remember to follow through on the ritual you planned.
And there you go! If this is a spell that requires "burning" the "knots," then you'll want to release the energy by deleting the zip file. If this is the sort of spell you open at a later date, put the compressed file in a safe place. Put it in a folder somewhere that you'll remember. If you have a good flash drive to store these things in that you won't lose, that's a great option. If you want it for use on a different device, move it now. Be careful with cloud storage.
When the time comes, unzip the file. There are methods to do this on phones as well as desktops, so go for what works for you. As the files extract from the archive, embrace what you stored within. Consume/enact any magical elements you stored. View/enjoy any mundane elements you stored.
If you want to save any element of an unzipped file for your spell work for later reference, put them in a "magically used up files" folder somewhere, like storing incense ash in the physical world. They've done their piece, so let them rest.
133 notes
·
View notes
Text
Changed - NCIS Reader Insert
Pairing: Gibbs x reader
Warnings: language (I think?), feelings of anxiousness and trauma (symptoms of PTSD), feelings of fear
Word count: 2732
A/N: I’m not entirely sure if you get to leave the Witness Protection Program after the case is solved or not, but for this one-shot, I’m taking some liberties. I also am not writing Ziva into this one-shot because I feel if Gibbs “lost” a member, he would wait as long as he could before filling the position. Kate’s death is another thing that I left out of this piece. I just felt that it didn’t really go with my storyline so I left it out.
If ya’ll want me to write a part 2 to this, let me know!
Reader had to join witness protection for a period of time. When the reader returns to the team, she is changed. No one knows how to talk with her, no one except Gibbs, who never stopped loving her.

Your POV:
You stood across the street, staring at the two-story house that used to be your home. You had been gone for three years. Three long, treacherous years, the entirety of which had been spent under a different identity, thousands of miles from home, constantly looking over your shoulder, ready to run. Three years that had changed you beyond recognition. And now you were back. Which meant you got to pick up the pieces of your shattered life and try to glue them back together. The first thing you had done when you had gotten out of the program was come back here. Yes, it was the place it all started but it was also the place you had left your heart three years ago. The place were you had left your family behind.
-----
After a psych evaluation and an entrance interview of sorts with Director Vance, you had been reinstated as an agent on Gibbs’ team. Tomorrow was your first day back with the team and the excitement and nervousness consuming you were keeping you from sleep. Add to that the fact you were staying in a motel room, with a disturbing lack of security measures, for the first time in years and you knew it was going to be a sleepless night.
You had tried everything you could think of to fall asleep, you had even resorted to ‘counting sheep’. Finally, around five in the morning, you were able to fall into a light sleep, which you were rudely awakened from only an hour and a half later when your alarm goes off.
You drag yourself out of bed and head to the bathroom. Looking in the mirror, you cringe internally at the sight of yourself. Your Y/H/C hair is tangled from the constant tossing and turning you did last night. There are dark bags underneath your eyes, which feel gritty and dry from your lack of sleep. You sigh and decide the best you can do is take a long, hot shower.
An hour later you were dressed and ready, or as ready as you’ll ever be, for work. You grab your jacket, the room key, and head towards the Prius you had rented until you could get your car out of storage.
The closer you got to the office, the more the feeling of anxiety in your chest grew, threatening to consume you entirely. You park the rental at the far edge of the parking lot, taking a minute to gather your breath before heading towards the NCIS building. You flash your badge at security, making it through much quicker than you had anticipated. You opted to take the stairs, not ready to encounter anyone you know just yet.
Reaching the floor of the NCIS offices and bullpen, you take a deep breath before pulling the door open. Upon reaching the bullpen, you notice the only other person present was Agent McGee. Agent McGee had been new to the team prior to you leaving, so you hadn’t been able to get to know him very well.
Taking a few steps forward, until you stood in front of Tony’s desk, you call out a simple greeting, “Good morning Agent McGee.”
McGee lifts his head up, bringing his attention onto you. You watch as the confusion in his features morphs to recognization. “Agent Y/L/N right?” He questions, standing and walking closer to you, extending a hand as he does. You nod and shake his hand, as he presses you further, “Boss said you were in the Program and didn’t know when, or if, you’d be back.” You nod tightly in response, but the conversation is brought to a halt when a booming voice fills the bullpen.
“McGee, who’s the hott-...” Tony trails off as you move to face him. He stares at you in shock before softly whispering, “Y/N?”
Nodding, you feel tears start to cascade down your face. You move forward at the same time Tony does and the two of you collide together in a tight embrace. You had missed him, your best friend. You had missed being a part of the team, a part of a family.
“I missed you, Tony.” You mumble, trying to stop the tears falling from your face.
His grip on you tightens before he whispers, “I missed you too.” He held on to you for a moment longer before releasing you and pulling back to look at you.
“You don’t look too bad there, sweet cheeks.” He says with a smirk. You smile open your mouth to reply, but Gibbs’ voice cuts you off, “Grab your gear. We have a case.”
You had been dreaming of this day for the past three years, the day you would finally get to lay eyes on the man you loved. His blue eyes are drawing you in, causing you to unconsciously move towards him. You stop when you are a foot away from him, breathing in his unique musk of coffee and cedar for the first time in three years. As you look into his eyes, you can clearly see the future you had thought was long gone come back to light. That alone calms you, but the moment he gently pulls you into a hug, you feel like you are truly home.
“Are you safe?” He murmurs into your ear. You nod in response. Gibbs was the only one who knew the details of why you had to join the program. The hug doesn’t last long but it is better than anything you had imagined. As you step back from his embrace, he flashes you a small, discrete smile, which you return with a smile of your own.
Your recently reinstated status keeps you back at headquarters, filling out paperwork. The day goes by slowly, with a visit from Abby and Ducky being the only thing breaking the day up. You don’t see Tony, Gibbs, or McGee for the rest of the day and you head back to your motel room, in a dejected mood.
-----
The rest of the week passes much in the same fashion, with you seeing the rest of your team only briefly. The nights don’t pass any smoother and by Friday you are waking up at 4:30 in the morning, spending a few hours swimming in the motel pool to relax your tense muscles before heading to work.
You are the last one to arrive at the office, sitting down at your desk and taking a moment to lean back in your chair. When you sit up properly in your chair, you notice a coffee on your desktop. Your eyes drift towards Gibbs’ desk to see he’s watching you. You mouth a quiet “thank you” before grabbing the coffee and taking a long sip.
The morning passes quickly, with you adding some input to the ideas bouncing around the bullpen about the current case.
After a lunch of Chinese takeout, kindly supplied by Tony, the team comes across a break in the case as an identity of the unsub is discovered. Gibbs and McGee head to the unsub’s work location and you and Tony head to the unsub’s house.
After a twenty-minute car ride, the entirety of which you spent trying to calm the growing anxiety in your gut, you and Tony reach the house. Tony steps up to the door, knocking and announcing the two of you. No response comes, so after checking to see if the door is locked, Tony kicks in the door. You and Tony sweep the rooms of the house, finding no one. Passing back through the hallway you had just cleared, you feel a hand on your shoulder.
Fear takes ahold of you and you ram your elbow backward, meeting a body, and as you whirl around, you grip the person’s wrist, twisting it behind their back.
“Son of a bitch! Y/N, it’s me.” Tony whisper yells, causing you to immediately release him. “I noticed a shed in the back. All the windows are blacked out with newspaper. We need to approach from the side and get the front and back entrances.” His words have you tensing up again, yet you follow him out of the house and around towards the shed.
You place a hand on Tony’s shoulder, stopping him only feet away from the shed. You stretch up and whisper nervously, “Shouldn’t we wait for the rest of the team?” Tony hesitates briefly before shaking his head. You huff out a breath in frustration but follow after him.
Tony splits off from you, sending you towards the back of the shed. You slowly progress forward towards the back door. You wait off to the side of the door, listening as Tony announces himself before pushing the door open. The door flies open and the unsub comes running out, followed closely by Tony. The suspect doesn’t get far though because as he shoots past you, you stick out a leg, sending him crashing to the ground.
“Don’t move, you’re under arrest.” Tony’s voice is deep with frustration. You haul the unsub to his feet, slapping cuffs onto his wrists. The two of you drag him to the car. Tony gives him a subtle push into the backseat. The drive back to the NCIS goes relatively quickly and the suspect is in the interrogation room, under Gibbs stern glare, shortly after.
A few hours after Gibbs got a confession from the suspect, you were sitting at your desk, completing paperwork for the case. It was well after six, but you didn’t want to leave paperwork for tomorrow. Tony and McGee had gone home about half an hour ago and you knew Gibbs was around somewhere, but you hadn’t seen him in a while.
You had just finished the required paperwork when your desk phone rang. Picking up the phone you answer, “NCIS, Agent Y/L/N.”
There is no sound coming from the other end of the phone call so you repeat your greeting. As you wait for a response, a chill travels up your spine. You quickly write down the phone number before slamming the phone down.
You hurry downstairs, bringing the number with you. Heavy metal music gets louder the closer you get to the door of Abby’s lab and you place your hands over your ears as the door slides open.
“Abby?” You yell into the lab as you move towards her radio. Turning the music down, you call out at a much lower volume, “Abby? Are you here?”
Abby pops up from behind her computer, causing you to let out of a squeak of surprise.
“What’s up chickadee?” Abby cheerfully asks as she moves in your direction.
“Can you run some background on this phone number for me?” You question, handing over the slip of paper with the number on it.
Abby grabs the paper, heading back to her computer. “Just give me a minute.” She starts furiously typing on her keyboard. A moment later, she looks at you before relaying the gathered intel.
“The number belongs to a burner phone so I couldn’t get a name. And the call didn’t last long enough for me to trace it, sorry Y/N.” You nod your head, the information disappointing but you hadn’t been expecting anything promising.
“Thanks, Abs. And could you keep this between us? I don’t need the team knowing, especially Gibbs.” You reply as you start moving towards the lab door.
Abby looks a bit confused before nodding. “Of course Y/N.”
You wave a good-bye before retreating back up to the bullpen. Your heart is thudding in your chest and you can’t bring yourself to head back towards your motel room just yet, so you sit back down at your desk. Sitting at your desk becomes leaning back in your desk chair, which eventually became resting with your eyes closed.
A deep voice causes you to snap up out of your chair and place your hand on your holstered gun. Your eyes scan the bullpen in a panic until they land on Gibbs standing in front of you. His electric blue eyes bore into your Y/E/C eyes. He reaches out a hand, placing it gently on top of the hand resting on your gun holster.
“Y/N, why don’t you go home?” His quiet voice manages to slow your racing nerves.
“I don’t feel safe in that motel room. And I got a weird call earlier that didn’t sit right with me.’” You answer truthfully, knowing that you never have to hide what you were feeling from him. And even if you did, he would find a way to figure out what you were hiding from him.
His hand grips yours before saying, “Come home with me. You’ll be safe there.” His words consume you with an intense feeling of love and you know that the safest place you could be was with Gibbs. You nod your head and follow him out of the office.
--—
The night you spent at Gibbs’ was the safest you had felt since even before you had joined the Witness Protection Program. And Gibbs made it easy for you to forget the fear you’d felt since returning home, even if it was just for a night. The fear that this was all a mirage and you’d be killed by those who were after you before you could enjoy your life again. Before you had the chance to tell Gibbs how you felt about him.
Although you had the weekend off, a case early Saturday afternoon had you forgetting about your need for a permanent residence, other than the crappy motel room you were staying in. You arrive at the crime scene shortly after leaving Gibbs’ house. You had spent a good amount of the morning watching Gibbs work on his boat, allowing yourself to simply relax in his presence.
DiNozzo gets to the crime scene at the same time as you and the two of you walk towards the tape together. Just before you reach the body, your cellphone rings. You grab it, glance at the caller ID, and answer with a “Hello?”
Silence answers from the other end. The hair on your arms pricks up and a shiver runs down your spine. You quickly hang up, ignoring the strange look Tony gives you, and block the number on your phone.
Just then Tony’s phone rings and you rapidly say, “Don’t answer that”, as you place a firm hand on his forearm.
Tony’s brow is wrinkled in confusion as he looks at you. “Y/N, it’s only McGee.” His gentle voice brings you to reality as you realize you just freaked out on your own best friend.
You mumble out an apology before rushing ahead to the body. You don’t even hear a word Ducky says about the victim and you almost miss Gibbs sending you to the victim’s house with McGee as he and DiNozzzo go to interview the victim’s boss and co-workers.
You and McGee search the victim’s house, finding nothing out of the ordinary. The ride back to the office was uneventful, with McGee trying to make small talk, but you were quick to shut it down. You weren’t able to think about anything but the fear swirling around in your brain after this morning’s event.
Walking into the bullpen, you are immediately greeted by Gibbs. He barely gave you any time to dump your gear at your desk before dragging you along with him to the elevator.
You watch as Gibbs pulls the emergency stop button and then turn his gaze to you. You wait, unsure of exactly what he wants from you.
“Y/N. Are you safe?” Worry and protectiveness lace through his voice. Although it was a simple question, of only three words, you know that there is more to it than that. His question told you of all the feelings that he hadn’t yet voiced.
“I don’t feel safe Jethro. I feel like I am always looking over my shoulder. And these random phone calls...they scare me.” Your honest confession causes the fear to resurface, bringing tears along with it. Gibbs steps forward, wrapping his arms tight around you, tucking your head in close. You press your face into his chest, finding comfort in the steady beating of his heart.
“We’ll get him. And in the meantime, I’ll keep you safe, I promise.” His gentle words remind you of all the reasons you fell in love with him in the first place.
“I love you.” You murmur, unable to hold back the truth any longer.
“I know.” And although he didn’t say it back, you know he loves you as well.
#leroy jethro gibbs#gibbs#gibbs x reader#gibbs x you#gibbs reader insert#ncis#ncis imagine#ncis fanfiction#ncis fandom#ncis reader#ncis reader insert#reader insert#imagine#fanfition#fandom#reader
271 notes
·
View notes
Text

Here's an update for Theme: Inuyasha Kagome. In this theme, I try not to make another all-in-one theme and just go for a good plain contained theme. Here are some of the ideas for this theme:
Dark mode - a lot of the surveyors suggest in my survey to add a dark mode. I failed miserably once upon a time but hey! I did it ;)
Select Font - I have included dyslexia font as one of the many fonts inside it. Hence, those with dyslexia can read the content better! However, since I do not know how to make it stay permanent, then say that you want to click the next page, it'll change back to their original font family. If you're familiar with local storage / ways on how to make it permanent, do reach me out!
Contained theme (optional)
Pop up navigation - inside this will include a search bar and your links.
Responsive
I foresee that it's gonna be another lengthy code :')

For Lil Mo's Revamp, there's no update yet... However, here are what to expect for this theme:
Responsive
Desktop-ish post styling (the posts can be 'deleted')
Draggable update notes (can be 'deleted')
Footer
Or something like that haha!
Btw, thank you so much to those who recently following me and participating in this survey of mine. It helps me a lot in reminding myself the do's and don'ts in creating new themes. While I believe that creating what I like should come first, it is equally important to consider other people's interest especially if such interest is a valid interest.
#personal#blog#idk when i'll be finishing these themes tho#but i expect to finish either of these two before final year starts
5 notes
·
View notes
Text
detailed giffing + basic coloring tutorial for beginners
so a lot of gif/coloring tutorials are pretty outdated or not that detailed & i wanted to put my own out there! in this:
how to get the screencaps for your gifs
how to make a general gif
basic coloring (no psds here, it just gives you a basic idea for making colors pop and look nice. you can look up how to use psds, but i prefer making my own for every gif as it’s much more personal, gratifying, and creative. there’s nothing wrong with using psds as long as you don’t claim them as your own, it’s just not my personal thing)
how to save a gif
we’ll be going from this:

to this

what you need:
photoshop (cc 2019 is what i’m using, but this works with any version of photoshop really as long as you download a version with the timeline feature) i won’t add download links here since i don’t want this deleted, but you can look some up on tumblr or use the pirate bay (current url is pirateproxy.blue as of 4/29/2020) & follow the instructions there.
for windows: potplayer/kmplayer (both use literally the exact same instructions) this tutorial uses potplayer but kmplayer uses like literally the same instructions, it just doesnt work right on my computer
for mac: mplayer. this tutorial does NOT cover this so find a tutorial on tumblr on how to take screencaps with mplayer & then skip to the “how to make a general gif” section. though, again, i’m on a pc so i have no idea if this is entirely accurate for mac.
if you’re downloading from youtube: clipconverter
if you’re Definitely Legaly torrenting: utorrent + the pirate bay (again, current url is pirateproxy.blue as of 4/29/2020) or another torrent site + you should really consider getting a VPN when torrenting (i use privateinternetaccess but you can find one that suits you)
note: download an adblock of some kind, disable automatic downloads on your computer, & download an antivirus program if you want because some sites are sketchier than others! this is ESPECIALLY crucial on sites like piratebay. keep your computer safe babes.
1. screencapping
there’s several ways to get screencaps on photoshop, but this is the easiest imo and i’ve never done the whole convert video frames to layers thing. like i said, you’ll need potplayer or kmplayer. i’m using potplayer. important note: don’t accidentally download viruses here! read each screen carefully & make sure you’re not hitting accept to download any secondary programs.
1. download your .mp4/.mkv. you can go to youtube & find a clip/scene/whatever and use clipconverter to download it. just make sure you download it at 720 (or higher) as anything lower than that will give you a poor quality gif. you can also download using somewhere like the pirate bay, but for this you need utorrent & i would HIGHLY recommend using a vpn if you live in a country where torrenting copyrighted content is illegal, as your internet provider may flag your ip address if you don’t & you torrent too often.
2. download potplayer/kmplayer & get it set up
3. create a screencaps folder. i always put mine on my desktop. in your screencaps folder, make a folder for however many gifs you want in your set. i just have one for mine so:
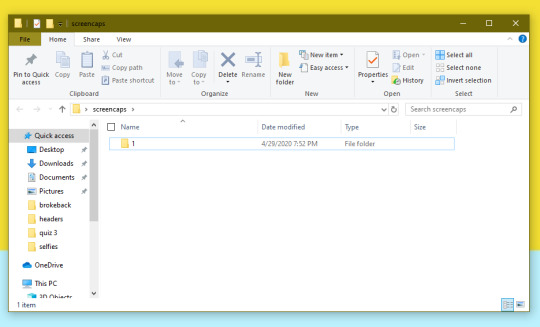
4. open up your .mp4/.mkv
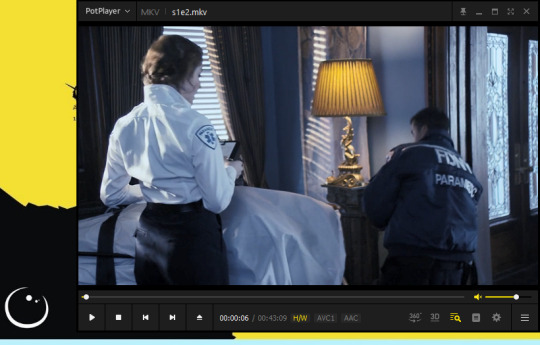
5. hit ctrl + g to bring up the screen capture pop-up & set your settings to these. click the button w/the three dots next to the storage option & select the folder you created for your first gif
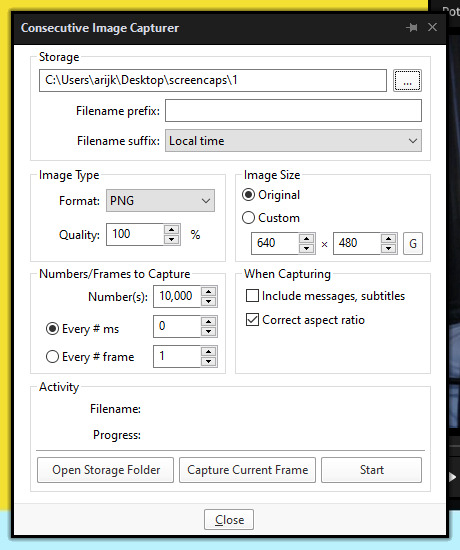
6. navigate to the scene you want to gif. when you’re there, pause it and hit the start button on the consecutive image capture screen, then play the video. how many screencaps you need depends on the size of your gif. for larger gifs (so like 540px wide gifs), you’re probably going to want to keep it below 30 frames. for smaller gifs (268px wide or less) you can maybe stretch it to 60, depending on how much coloring you add. you can always delete screencaps later though in photoshop, so don’t worry about it too much. for this gif, i only had 17 frames because the scene was really short lmao
7. go to your screencap folder you made & delete any unnecessary frames. it’ll look like this:
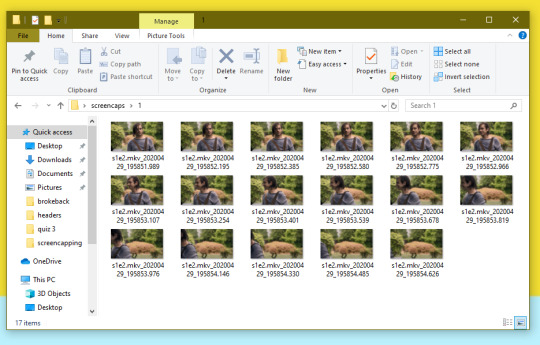
8. repeat the process for any other gifs, making new folders in your “screencaps” folder, numbered for however many gifs you’re making. make sure to change the folder you’re loading the images into on the image capture pop up though so they don’t all go into folder 1.
2. making a simple gif (+sharpening)
1. first, you need to load your screencaps. when you open up photoshop, go to file > scripts > load files into stack
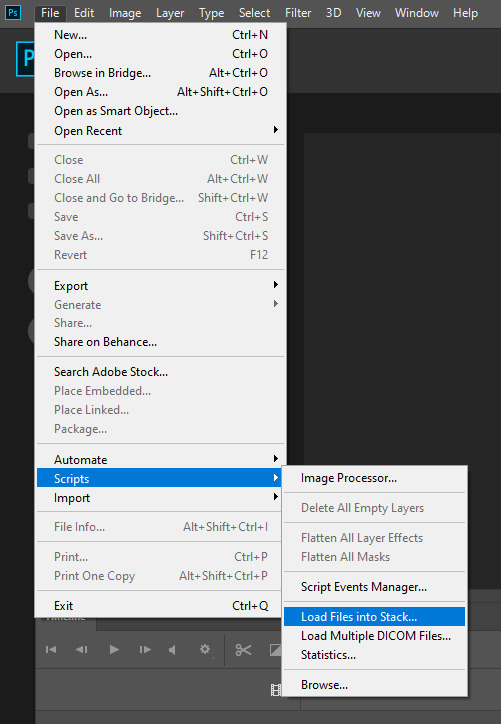
2. when the window pops up, switch the “file” option to “folder”
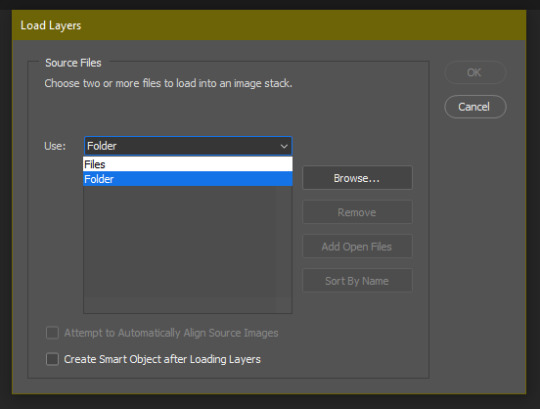
3. click browse and find your screencap folder for your first gif (in my case, desktop > screencaps > 1) once it’s all loaded, click “OK”
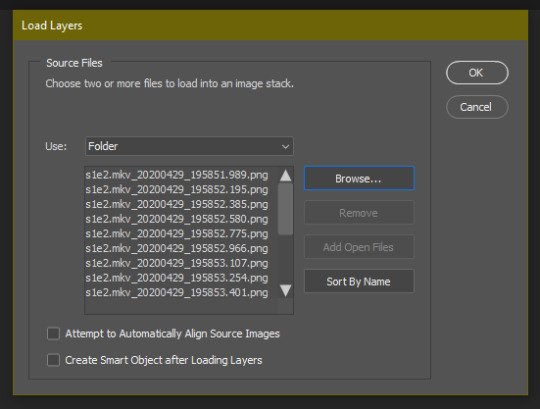
4. it’ll take a minute to load all your screencaps into photoshop. when they do, go to the upper bar on photoshop > windows > timeline
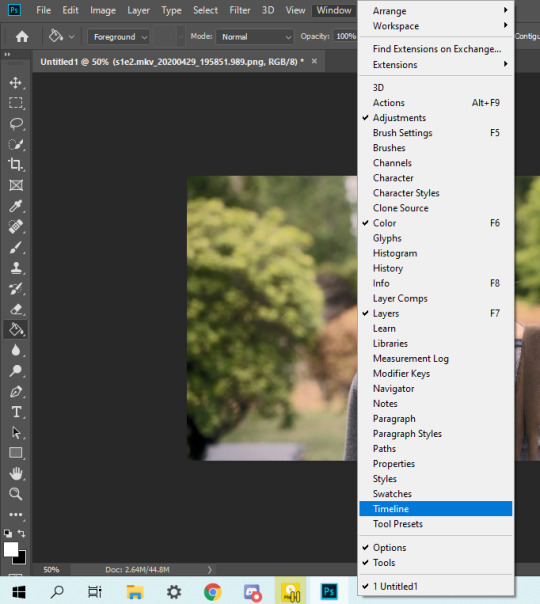
5. when the timeline bar shows up, click “create frame animation”

6. hit this button and click “make frames from layers”

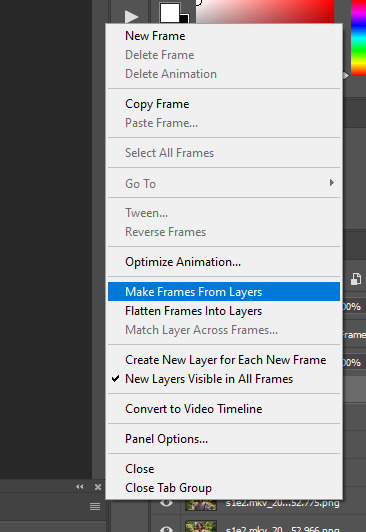
7. hit the button again and click “reverse frames”
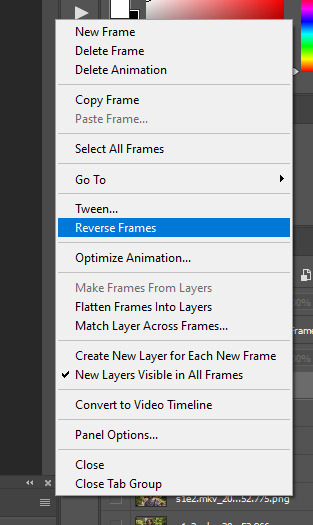
8. click back onto your first gif. then select the rectangular marquee tool and set it to whatever gif size you want. the width for 2 small gifs next to each other is 268px, the width for full size gifs is 540px. most people use 268x150 px for gifsets of 4+


9. use the marquee tool to select what area you want for your gif, like this. it’s up to you how to crop it! get creative!
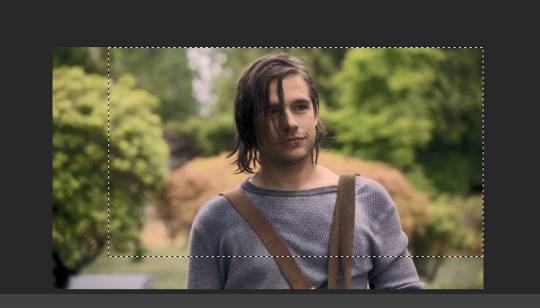
10. go to image > crop
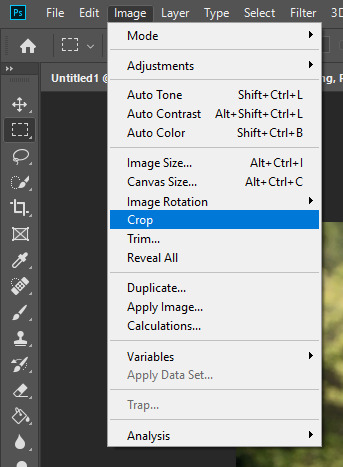
11. now that your image is cropped, go to image > image size. change the size to your desired gif size (in this case 268x150). hit “OK”. then make sure it’s zoomed in to 100%
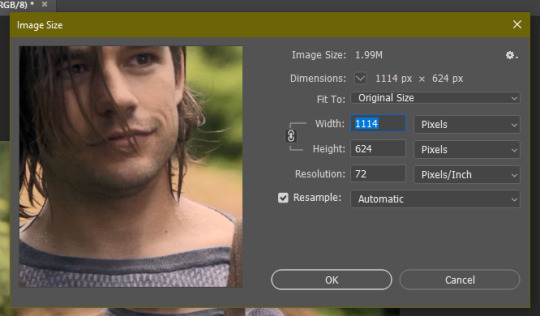
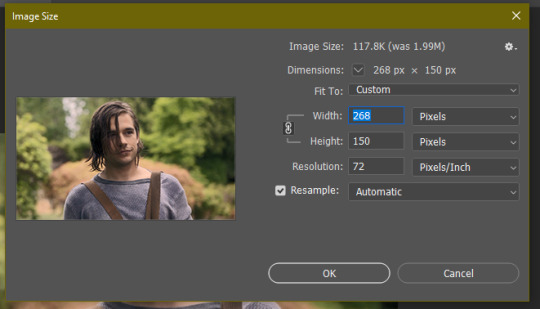

12. now, you COULD just save this gif, but they look way better sharpened. so you need to convert this to a smart object. to do so, first select all your layers in the righthand layer window. to select all the layers, click on your top layer, hold shift, and scroll down to your bottom layer & click on it as well while still holding shift
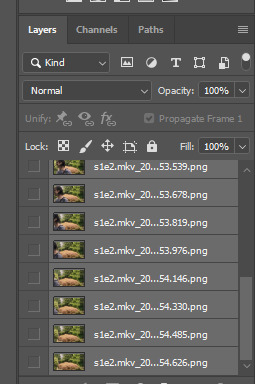
13. next, you need to select all your frames. go back to the options button from part 6 > select all frames
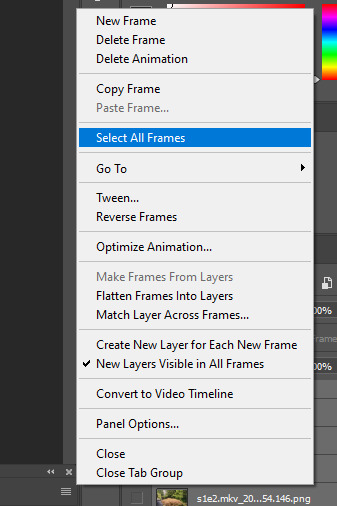
14. next, we’re going to create an action to make your life 100x easier when it comes to sharpening gifs in the future. to do so, go to the actions icon (may look different on different versions of photoshop, but basically just find the actions window)
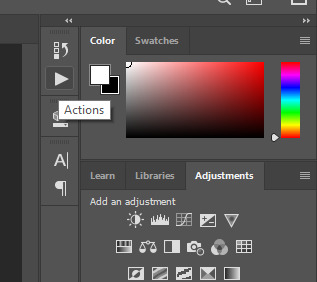
15. create a new action with this button. name it something. i named this one “sharpen tutorial” and hit “record”
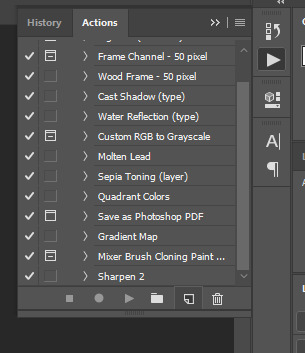
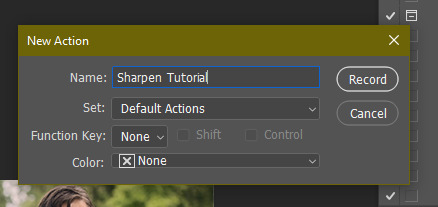
16. click this button to convert to video timeline
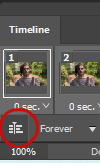
17. go to filter > convert for smart objects
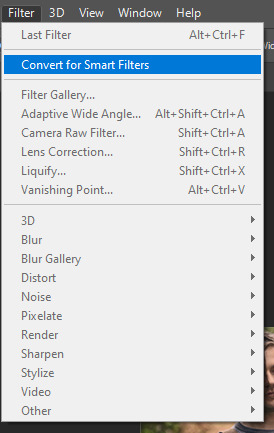
18. go to your single created layer and right click and click duplicate layer. this helps get rid of the transparent border around the gif.
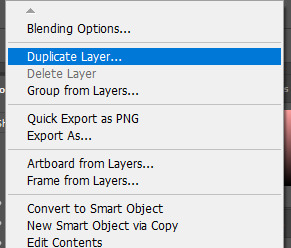
19. go to filter > sharpen > smart sharpen & use these settings
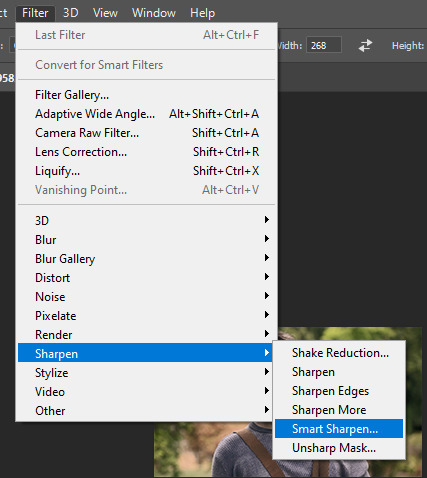
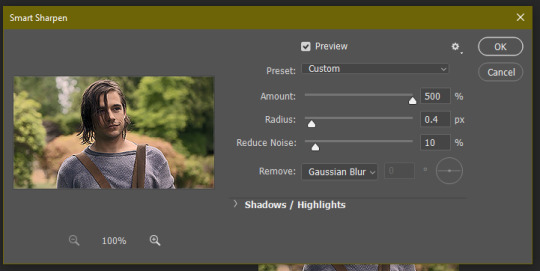
20. go to filter > blur > gaussian blur. set it to these settings.
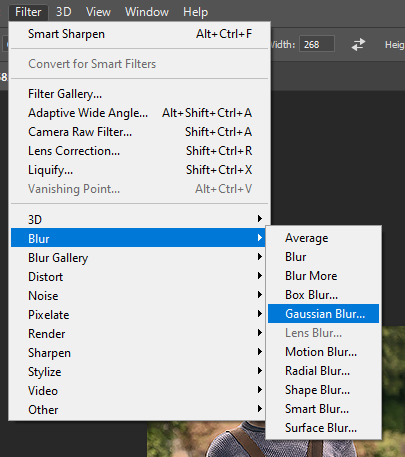
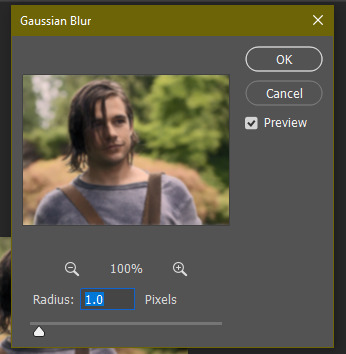
21. go to your second layer with the filters on it & right click on the gaussian blur filter to select “edit smart filter blending options” and set the opacity to 50%. you can mess around with this for different levels of sharpness. the closer to 0%, the sharper your gif will be.
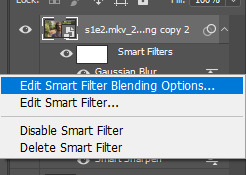
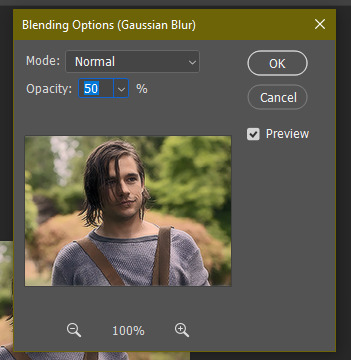
22. hit the stop recording button on your sharpen action. now you’ll have an action to use next time you make a gif! after you’ve followed all the steps 1-13 you simply go to actions, click on your saved sharpening action, and hit play instead & it’ll do steps 14-21 in a few seconds. here’s a pic of the stop button on the actions window
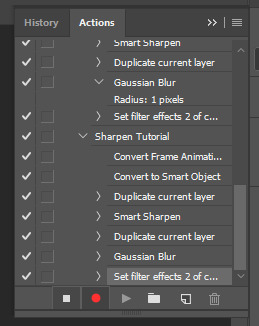
23. our gif is now sharpened! you can end with this & skip to the saving a gif section, or you can continue to coloring. here’s what we have so far.

3. coloring
now on to coloring. this is pretty basic coloring and it probably won’t work if you follow my numbers exactly, as every single scene is different color + lighting wise. but this is just an example of the kind of thing you could do. basically, if you’re making vibrant gifs, you want to up the brightness + contrast + vibrance and make the colors already present pop. if you want anything more complicated (pale gifs, changing the colors to make, say, quentin’s shirt in these gifs red instead of blue), you’ll have to find other tutorials or experiment on your own. learning how to color & finding your style takes time! you can download psds if you want, but imo those kinda take the fun out of making gifs? that’s just me though.
after each step, i’ll show you what the gif looks like.
1. i usually start with a curves layer. i usually don’t mess with the color curve options, just this one:
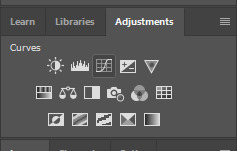
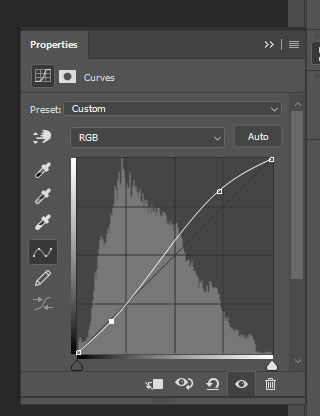

2. next, i do a brightness/contrast layer
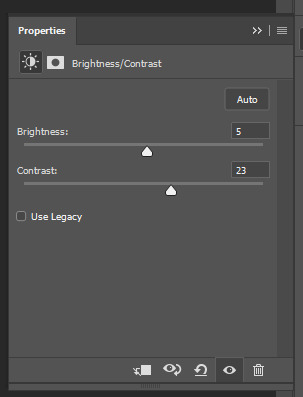

3. next, i do a vibrance layer. make sure not to make it TOO saturated or it’ll look bad.
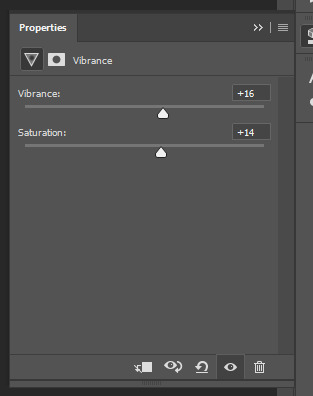

4. next i do a color balance layer. this is where it really starts differing depending on what color you want your gif to be.
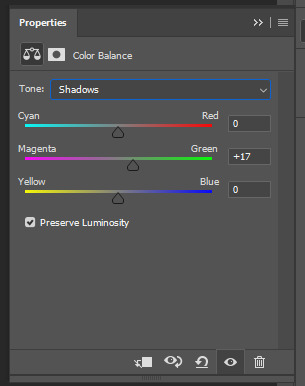
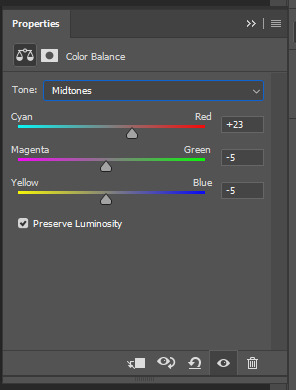
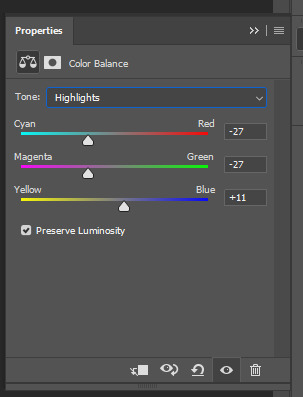

5. next we move to the selective color layers, which are arguably the most powerful. here you can make colors pop, change colors, etc. it’ll take lots of practice & messing around with, but here’s what i did with this gif. this one is making yellow + blue pop
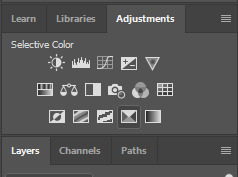
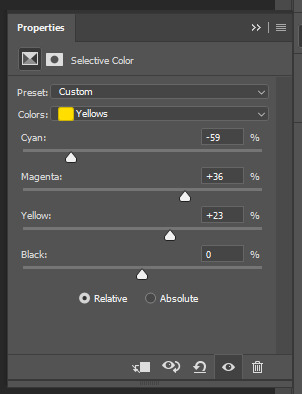
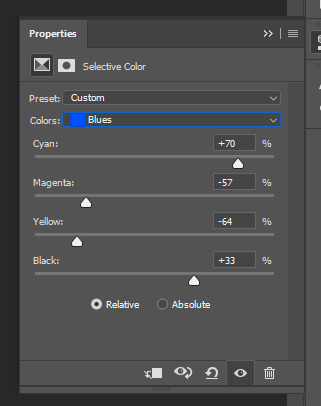

6. next, i did two more selective color layers editing the blue tab to make the blue pop even more
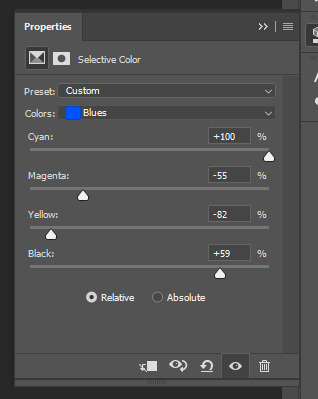

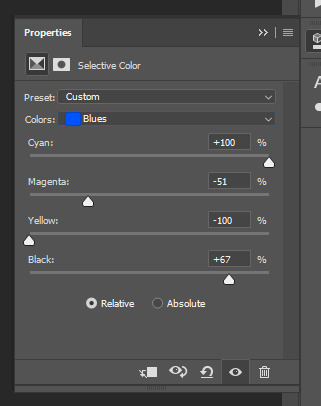

7. i still wasn’t quite happy with it, so i added another selective color layer to edit the blacks + neutrals + greens
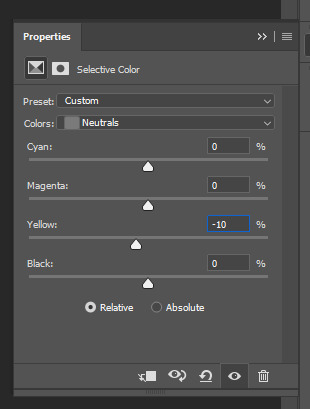
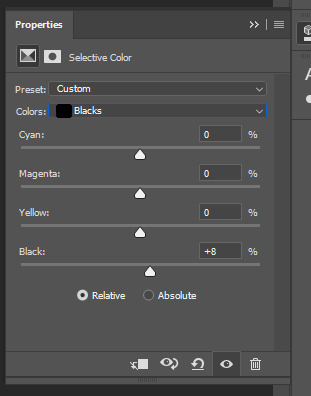
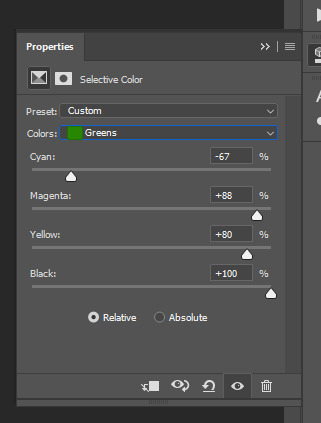

8. for good measure, i added one more brightness/contrast layer
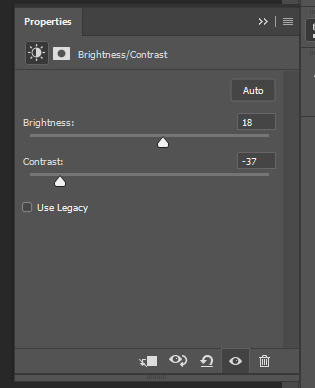

9. and the gif is done! however, you can play around with various adjustment layers until you’re happy. again, this is just an example of how to do basic coloring. it’s a skill like any other & takes practice. to keep consistent coloring in a gifset,
9b. you may want to make a psd of this coloring. to do so, you need to put all your adjustment layers in a folder, delete your frame layers, and click file > save as. save it as a .psd. then you can open it and drag it onto any other gifs you make, adjusting the coloring accordingly but still with the same vibes. you don’t have to do this, but it makes life easier. here’s how to use your saved psd, though obviously you’re using your own in this case and not a downloaded one.
4. saving your gif
1. on photoshop cc 2019, you go to file > export > save for web (legacy). for other versions, you can just go to file > save for web. use these settings. the gif size limit is 3mb per gif, so make sure your file size is under that. if it’s not, you’ll need to delete some frames or some adjustment layers.
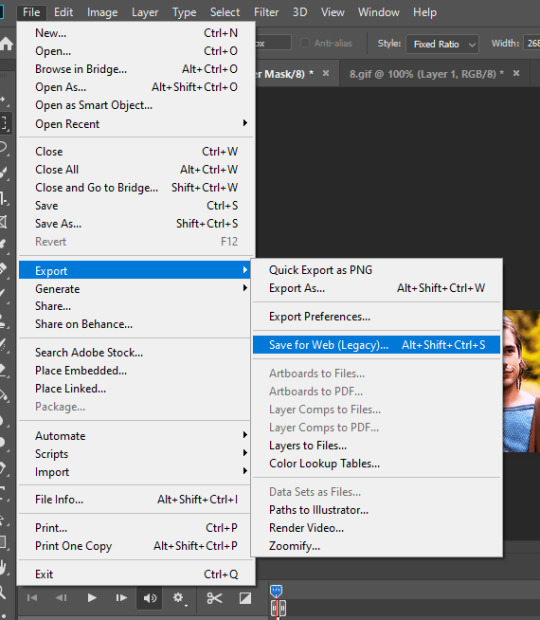
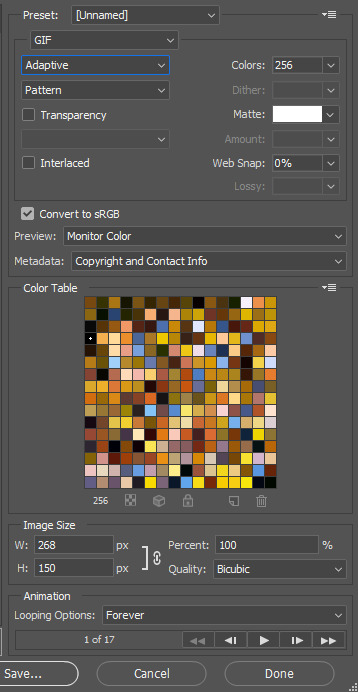
2. now, photoshop is a bit of a pain & this gif timing will not be right. so you need to open your newly saved gif. then you hit this button + select all frames


3. click this button & select “other”. tumblr gifs are typically .05-.08. my photoshop is glitchy and i have to set mine to .1-.15 or they’re WAY too fast. but usually, go with .05-.08 unless yours ends up glitching too.

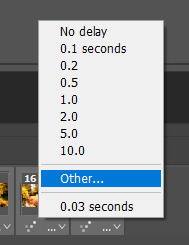
4. save it like you did the first time and ta-da! you’ve made a gif!
#gif tutorial#photoshop tutorial#edit tutorial#coloring tutorial#yes im using the magicians its my hyperfixation and i get to choose the gifs
164 notes
·
View notes
Note
Hey, I’m just wondering... how do you gif Netflix shows? I’ve been wanting to do some but i can’t figure it out. If you don’t want to explain that’s cool too. Have a great day!!
Hey!! Glad you asked :) I’m gonna put the answer under a cut because I talk too much. (Obligatory this is the way I do it, people who are “better” at gifs than me prolly have a much different way that they do it and that’s super cool!)
So, I’m doing this on a Mac, Chrome browser, and then just the Netflix website. I’ve found that Netflix won’t let you screen-record through the app on a phone or iPad :( that being said, I only know this works on here for sure. First I go to whatever part of the episode I want gifs of, fullscreen, and turn off captions. I skip around ten-fifteen seconds before the actual scene starts (so that the lil Netflix overlay thing goes away in time), and pause there. On Mac, the keyboard shortcut to screen-record is command+shift+5, and then the furthest right option is “record selected portion.” I drag the highlight box to the size of the actual Netflix “screen,” and hit record. Wait for the recording to capture as much of the scene as I want, and then I end the recording and it saves to my desktop. For picking which parts to record I try to keep the snippets under 2 minutes, just because otherwise it’s a lot of storage to use (even for a short period of time) and most of it’s not what I’m looking for, anyways. I usually record everything I’m looking for in big batches, and then edit it in batches again, but you can do everything one by one, too. So, finished recording, and now I’ve got a heap of screen recordings on my desktop. I trim them to the length I want first (between 2 and 4 seconds is preferable in terms of eventual gif size and also being enough to capture what a human is doing in my opinion), and I name them something... descriptive. If I’m planning something long out in a specific order then I’ll go, like, “1 [what it is]”, “2 [more description]” just so that when I go to make them into gifs it shows up in the right order. Optional but recommended, but also really tedious, but also the easier version to me than trying to do it some other way, but also might only be useful for Apple: I AirDrop all the trimmed snippets to my phone to color-adjust and filter, just because I find that photos editor to be a lot less cumbersome than what I can find online, and the Apple desktop photos app won’t let you adjust videos. Then I AirDrop them back again. Now I’ve got properly-filtered, properly-trimmed video files! Because I’m cheap and lazy, I don’t use PhotoShop, and two nights ago I found a new gif text editor and it was very exciting to me. So I use EZgif.com ! It’s super intuitive, and I’m not gonna bore you with the step-by-step of that, but essentially you go “Video to GIF,” I do 20 frames per second, and then you convert it and can add more effects (I usually up the lightness and saturation a bit more just to my personal tastes), and then you can save it straight from there. (HEADS UP: Tumblr doesn’t like gifs over 8MB in size, you can use EZgif’s “Optimize” function thing to make them comply.) For text overlays I use gifgit.com . Fair warning on this that, for some reason for me the text position adjuster only works in the top left quarter, and its position there corresponds to the position on the whole thing? It’s weird, but hey, it’s free. They also have a lot of fonts, which slaps. Then you save those, and you’re done!! I really hope this helped, or was at least informative? If you’ve got more questions please feel free to DM me :D ...and I’m so sorry for how long this got, oh my gosh, I just really like making gifs and am trying to learn how to get good at it.
6 notes
·
View notes