Text
Cleaning Vinyl - Recommended product
One of the fun parts of getting back into vinyl is finding copies of albums that are no longer produced. I'll write about Discogs later. However, buying second hand vinyl is obviously always a bit of a gamble and on many occasions you might receive some vinyl which is free from scratches but looks like it hasn't been cleaned in 40 years.
This is where a vinyl cleaner comes in and is an essential part of your audio setup. I bought this kit from Amazon and my goodness it does wonders.

This relatively inexpensive cleaning kit costs around £16 and will renew your vinyls terrifically. You have to make sure that you spray the solution on the record, and then using one of the microfibre cloths work anti-clockwise and make sure you really get dirt our of the grooves.
The record will come out gleaming and dust and dirt free. Then remember to let the record dry.
The results are incredible. It manages to remove so many pops and crackles and let the record really shine.
The bottle is good for cleaning hundreds of vinyls. Head over to Amazon and give renewed life and clarity to your vinyl.
0 notes
Text
Sounds of the Studio - The Vinyl Sessions
I was born in the 1970's and discovered music properly in the 1980's. The music format of choice for the general populous was vinyl, but in time that became displaced by tapes (thanks largely to the walkman), and then CD's. Then for a long period of time CD's dominated and people dumped their vinyl collections in favour of the "purer sounding" CD.
The internet launched, Apple created iTunes and the MP3 was created, and Napster and piracy went into overdrive with no barrier to distribution. And while people were not prepared to pay for music, they would pay (or at least accept hearing the odd advert) for convenience and so in the late noughties the streaming services came into existence and within a short decade ha dcompletely turned the music industry on it's head once again.
However, music and the music experience had along the way become commoditised and somehow less valuable. Along with immediacy and the algorithims, the investment in time, and the emotional attachment to music had become diluted.
But then something strange started to happen. Vinyl sales started to grow. People had begun to realise that the detahcment from the music came from the format of delivery and wanted to reconnect with music like they used to. And whole sales are still dwarfed by the hayday of the 70's and 80's, Vinyl sales have overtaken where they were at the tail end of the 1980's when the CD revolution had really begun.

Why this brief (and perhaps slightly inaccurate) history lesson? Well despite working for the big green streaming machine for 7.5 years and having a wonderful experience working there, I recently too found myself identifying my detachment from music. I've come to learn that my relationship with music has become far less deep and invested than it used to be. I think it's because I finally have a place where, away from the maddening crowd of the bustling home life, I have this sanctuary and the opportunity to once again bask in music.
I have my original Arcam 7R amp from the 1990's and have reclaimed my Denon-835 CD Player from my parents who no longer use their stereo, but as much as I enjoyed listening to CD's again, there was something missing that I couldn't quite put my finger on (at least until I heard what it was I wasn't hearting) and started to research turntables.
Purchasing turntables is a risky affair because if you're not careful you can either blow the budget entirely on the initial purchase, or you can end up in a never-ending cycle of upgrades which just blows your budget over time instead.
So I set myself a ballpark budget of "up to" £500 and started my research which honestly whittled the chpice down to 2 turntables. The Rega Planer 2 and the Pro-Ject Debut Carbon Evo.
Reading the reviews it felt like the Rega got better reviews when it came to sound quality, but there were significantly more stories of the turntable breaking and requiring fixing that really stood out, so product quality was a concern for me.
Additionally, the need to change the drive belt to switch from 33 to 45 seemed like a hassle I wanted to avoid, especially as I did plan to be buying a few singles as part of my collection.
The Rega also came with a lower spec cartridge which would mean an upgrade was on the card sooner rather than later, whereas the Pro-Ject came with the Omron Red cartridge which seemd, from the reviews, to be a perfect starter cartridge that might have more life then the unit that came on the Rega deck.
The final straw was the fact that the Pro-Ject deck comes in many different colours and finished (matt and gloss) and since I was keen for the deck to stand out a little, I felt myself leaning to the Pro-Ject Debut Carbon Evo in Satin Blue.
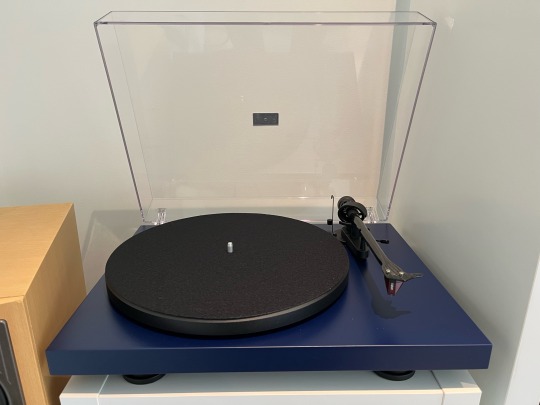
The deck was a breeze to put together (even for a luddite like me) as I was able to follow the clearly laid out illustrations, and it really looks the part.
The first vinyl I bought was "Is this the life we really want" by Roger Waters, of Pink Floyd fame. What was immediately apparent was the breadth and depth of the musical soundscape that the vinyl offered over the streaming service, and even over the CD.
Putting the album on all 3 sources and then switching between the sources on the amp was really eye ear opening. The vinyl sounds lush and it breathes and immerses you in a way that streaming or the CD simply don't.
In this video I start with Vinyl, more to CD and then finally onto the streaming service. It's certainly clear to me in reality. Not sure how this transposes through my mobile phone recording but here we go anyway.
This isn't a review of that album as I'll be reviwing the albums and singles I buy on vinyl and reviewing them seperately.
Anyhow, I’m now firmly committed to the vinyl world and really enjoying rediscovering how music can make me feel.
0 notes
Text

Bought a few plants to complement the Studio yesterday. Really like them!
2 notes
·
View notes
Text
Condensation in The Studio
Condensation is a very normal occurrence in highly insulated garden studios. The warm air in the studio hitting the double or triple glazed glass with the cold air from outside causes condensation build up on the inside on the windows.
The Karchaer Window Vac is a small wireless window vac that does away with the condensation, collecting it in a small container as you go, and leaves the windows smudge free and clear.
This video shows the vac in action.
And the result is clean, clear and dry windows.
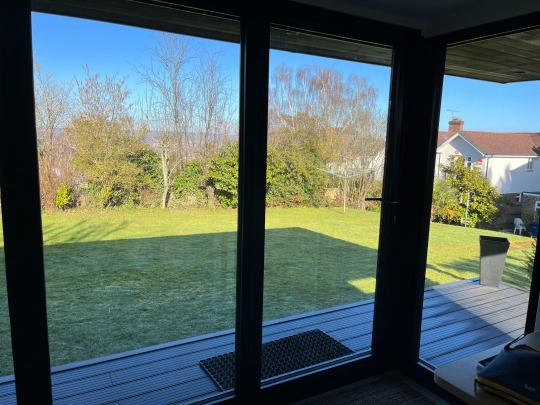
Do me this is a must have product for garden studios that’s convenient and easy to use and very necessary, especially in the winter months.
The Karcher Window Vac is available to buy on Amazon.
0 notes
Text
Recording in The Studio
When The Studio was built I went for an additional option of sound-proofing, which not only made sense from a privacy standpoint (because I am taking work calls on loudspeaker in the sapce) but also because I anticipated that I would pick up my guitar again after many years away from it and even start to record some music again.
My setup is pretty basic, but also therefore quite affordable, and is within the reach of most (albeit with some amendements to different models of certain equipment deending on how deep your budget is).
First up. The Mac Mini. In my case this is a second hand one that I sourced off ebay for about £250 and it does everything I need it to. Obviously had my budget been more significant I could have opted for a new model which would be future-proof for many years to come but I couldn't justify it at this point. The other great thing about the mac Mini is the small footprint. It sits very easy ion my desktop.
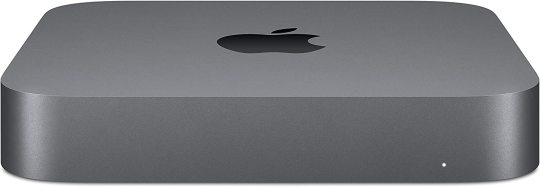
The Mac Mini was a good option in another regard for me as I didn't want another monitor, and instead it shares the monitor which I use for work. In this case the mac Mini is connected via HDMI to my 27" AOC monitor. My work Macbook air connects to the same monitor using the DP input and switching between work and msauic is a breeze.
For recording I use a Steinberg UR22 audio interface connected to the mac Mini. I used this originally because I used to use Steinberg Cubase to record, but I have now switched to Logic Pro but this audio interface works perfectly with it.

Mic recording is done thoguh either the Shure Prologue mic which has been supersceded by new generation mics, like the Shure 58 which provides a great deal of bang for your buck.
I also use a Behringer T-1 tube mic which requires a pre-amp. This mic has been supersceded by the Behringer TM1 and represents true professional quality microphone setup for a pretty reasonable price. This is a professional piece of kit whjich provides a very real and deep recording capability.
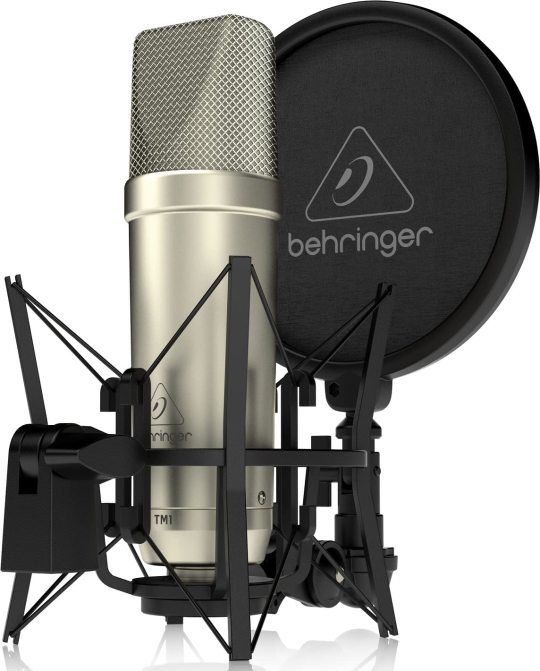
There are cheaper Behringer condensor mics on the market like the Behringer C-1 which is a self-powered condensor mic and the C-3 which can also be driven by a phantom power unit,
The 1 piece of kit I'm missing is some active studio monitors as my old ones broke due to being stored in the cold roof, so I need to fid a replacement set. In the meantime I am using an old pair of B&O wired headphones.
Guitar duties are taken up by my Martin electro-acoustic 000C-16RGTE, which whilst discontinued, new equivalents sell for over £2000 now. However, a more budget appreciative model is the LX1RE which gets very solid reviews for a fraction of the price.
I also play around on my Mexican Fender Stratocaster. Again, these come at a price, but the Squier Stratocaster range are a great budget alternative.
So that's it. Her'es a couple of shots of my setup.
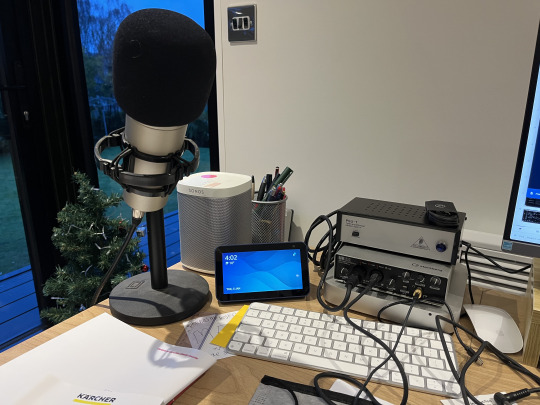
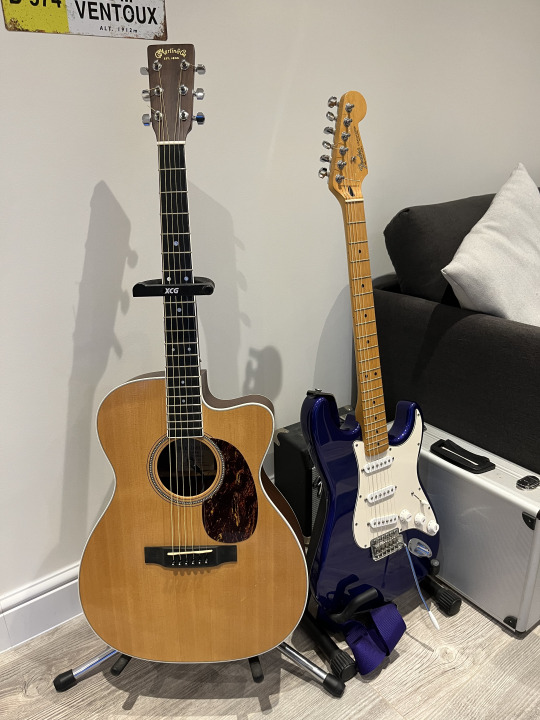
It's simple but everything I need to be able to create some content is reasonable quality for public consumption.
#studioet#garden office#garden studio#music studio#martin guitar#fender stratocaster#steinberg UR22#behringer#mac mini#logic pro#music production#home studio#recording#studiorecording
0 notes
Text
Sounds of The Studio
Music is an integral part of my life (I spent 7 1/2 years working at Spotify after all) so my sound setup was always going to be one of my top priorities.
When I started planning my setup(s) in the studio, I first dug out my old Arcam amp and Mission 700 speakers. This was the first "proper" hifi system I owned and I remember spending many hours in Sevenoaks HiFi in Kingston swithing Amps, Speakers and CD player until I had the sound I wanted.
The CD's are now all archived in the roof and my music is provided by Spotify (obviously), but for the HiFi I could replace the CD player with a wifi streaming device that was compatible with Spotify Connect.
I actually had a few to choose from that I had bought and backed on Kickstarter a long time ago. I opted to connect my Gramofon device, because it was quick and easy to setup, and is very onobtrusive.
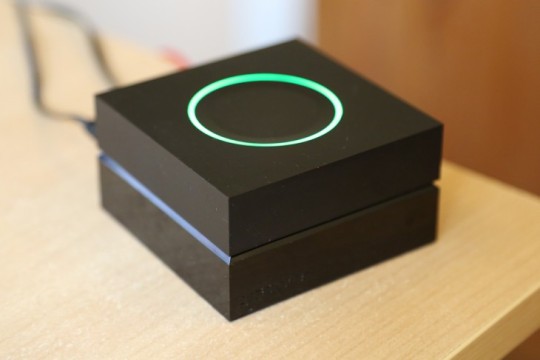
Once set up it just shows up as a device in the Spotify app within the Spotify Connect Devices list. Simply tap on the device and music starts to play out through the amp and speakers. (It's Arcam Studio in this case).
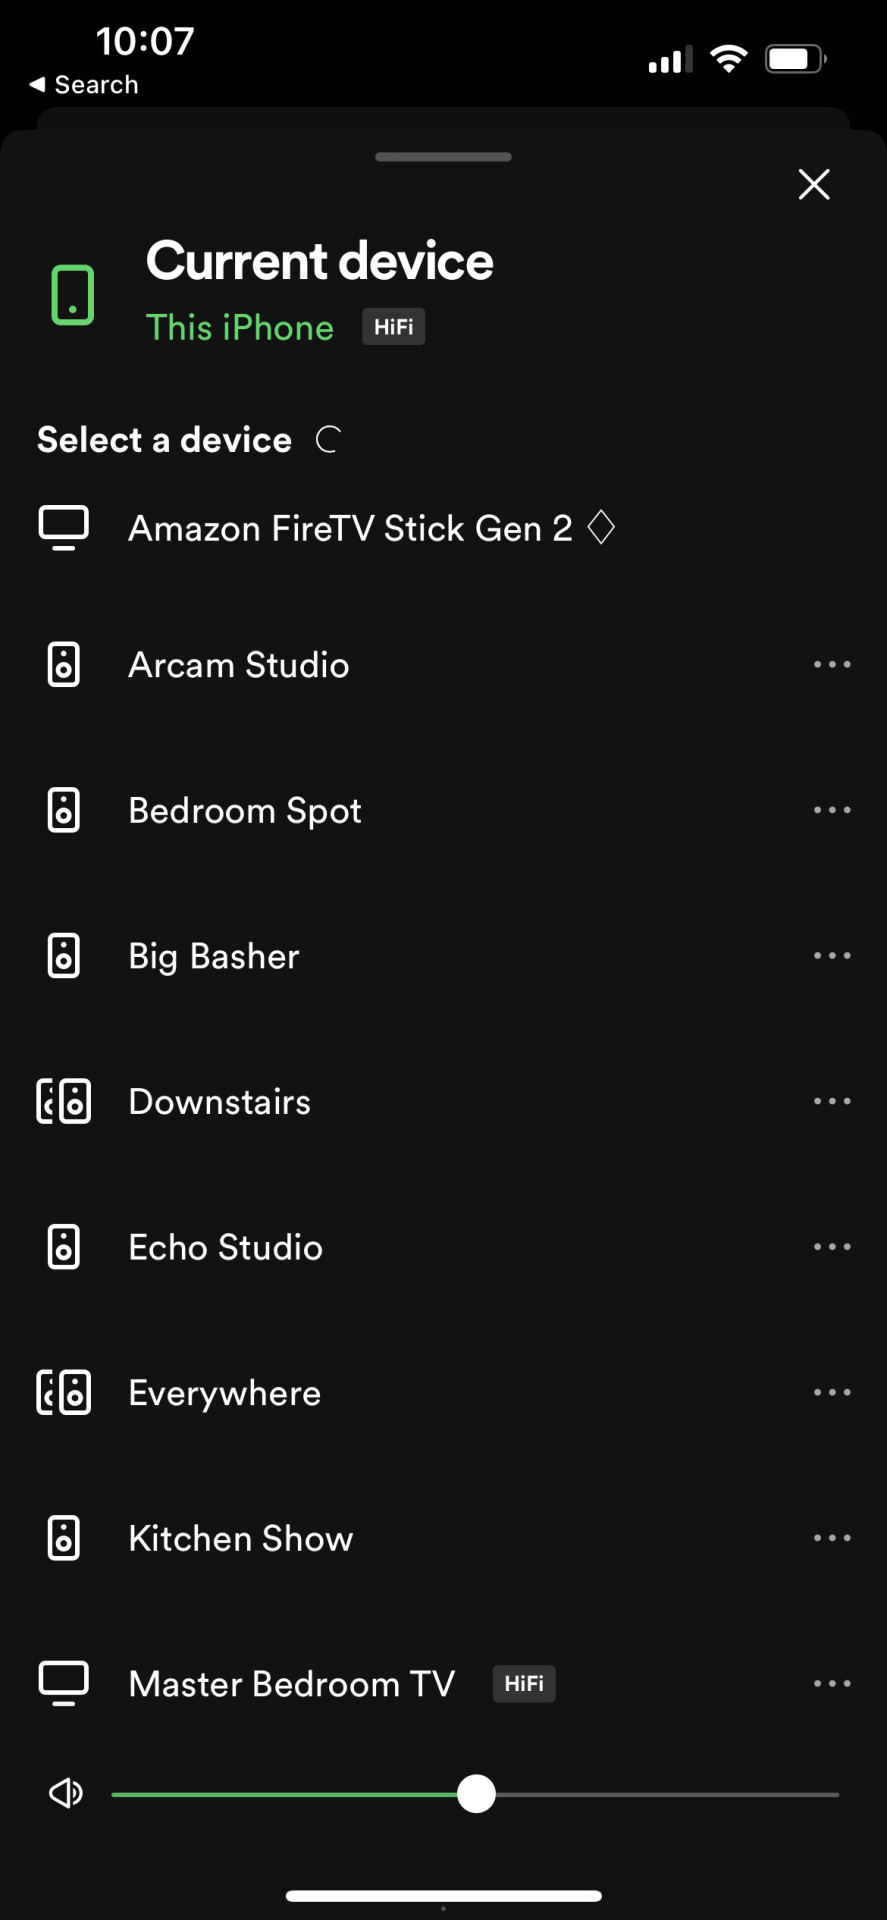
This device isn't available to purchase any more but there are plenty of wifi streamers on the market that will do the same job, and come in various prices and packages.
This unit on Amazon is very similar in terms of features and capability but supports Airplay and even Tidal connect is that's your preferred streaming service, and can connect to your network physically or wirelessly.
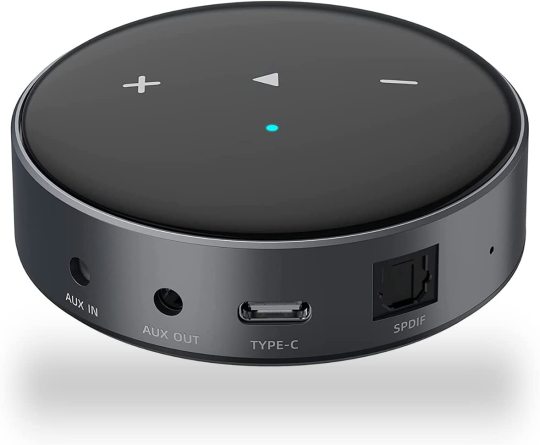
In my case, the Gramofon is hidden from view (because it needs no physicaly interaction once set up) and is nicely encased in my Ikea Kallax unit.

However, that's not my only setup. The setup above is great for when I'm sitting on the sofa, but I wanted music while I'm sitting at my desk and for me there was only 1 solution that I felt would delivery the sound experience in a compact speaker unit and that's the Sonos range.
I have 2 Sonos One's (the basic versions) that again allow me to connect to them through Spotify Connect and sit each side of my desk offering me a warm, lively and engaging sound while I type away. I've connected them via Wifi, although they can be hard wired into a multi-port router should you desire.

The Sonos One range come in and basic SL Black or White, or the fully integrated Alexa voice version which also comes in Black or White. The premium for the voice enabled version is about £20-£30 which seems reasonable given the cost of a basic Alexa device.
The Sonos devices can also be grouped together so if you want to control multiple devices at once then you can no problem. Sonos also has a neat feature to optimise the acoustics based on the position of the speakers in the room.
In addition to the 2 One units, I also have a Sonos Roam SL. This is a small portable, battery powered Sonos speaker which really packs a punch. It behaves exactly the same as the One's in terms of connectivity etc, but the beauty of this unit is that I can take it outside onto the veranda on those lovely balmy days when I want to sit outside. It connects via wifi, and again can be connected through Spotify Connect. It does also behave like a Bluetooth speaker as well.
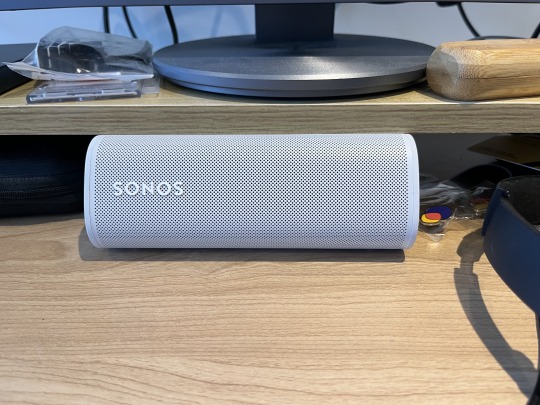
The basic Sonos Roam SL comes without voice support, while the bigger sibling Sonos Roam comes with Alexa built in. There are white and black verisons, just like the rest of the Sonos range.
There are 2 other models to the range. The Sonos Move, which is a larger portable speaker which is fully weatherproof and has Alexa built in also, and the Sonos Arc which is their premium smart soundbar. It sounds absolutely amazing, but it does come at a fairly heft price tag. However, if you've got the space and you're after a premium solution for you music and TV, then you should check it out. It's stunning.
As an end note, when I was spec'ing the studio I did opt for additional sound-proofing so while all these solutions will pack a punch when it comes to blasting out music, I'm sure my neighbours will be none the wiser.
#sonos#music#spotify#apple music#tidal#garden studio#garden office#studioet#sound proof#spotify connect#hifi#music streamer#gramofon#sonos one#sonos roam#sonos arc#sonos move#alexa
0 notes
Text
Connecting The Studio
The studio is connected to the house with a 75mm armoured cable leading to the consumer unit in The Studio which holds the various fuses for the different circuits (plugs, internal lights, external lights, radiator etc.)
I also had 2 ethernet cables laid at the same time which runs from the router in the house through to The Studio providing a fixed line cable solution for the internet connectivity. One 1 cable is connected. The second cable is there as a backup in case the first cable fails for some reason.
Providing fixed line internet through a direct cable was definitely the most fail-safe way of providing internet access ot the studio and it works a treat. However, I have a large number of devices in the Studio that rely on wireless connectivity (like all my smart spotlights) so I had to provide a solution for that also.
This choice was pretty simply. I run Eero (from Amazon) in the house and connecting an additional Eero wireless router in The Studio was the most logical and cost efficient way to get great wifi coverage and internet performance in the space.
The Eero is a small white box which can sit in your home (or be wall mounted) very subtley, with just a small white indicator light on the top. It's sylish and unobtrusive.
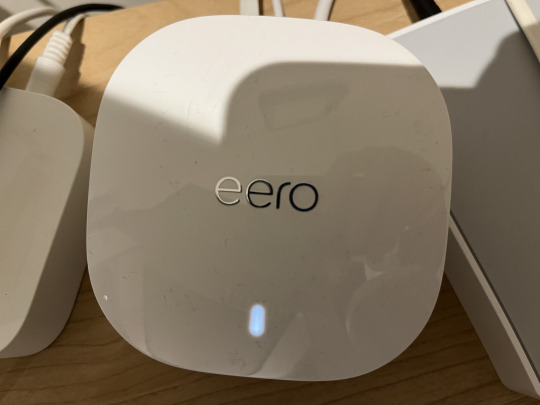
Eero works by in essence replacing the wifi capabilities of the router that is provided by your ISP. You plug one Eero unit into the router, disable the routers wifi and then setup Eero to provide the wifi. You can place additional Eero units around the house to extend the reach of the wifi network (they need to be in reach of the main unit) and you can even piggy back Eero's via fixed ethernet if you need to. And all the routers are managed from the Eero app which is easy to use and manage the network at home.
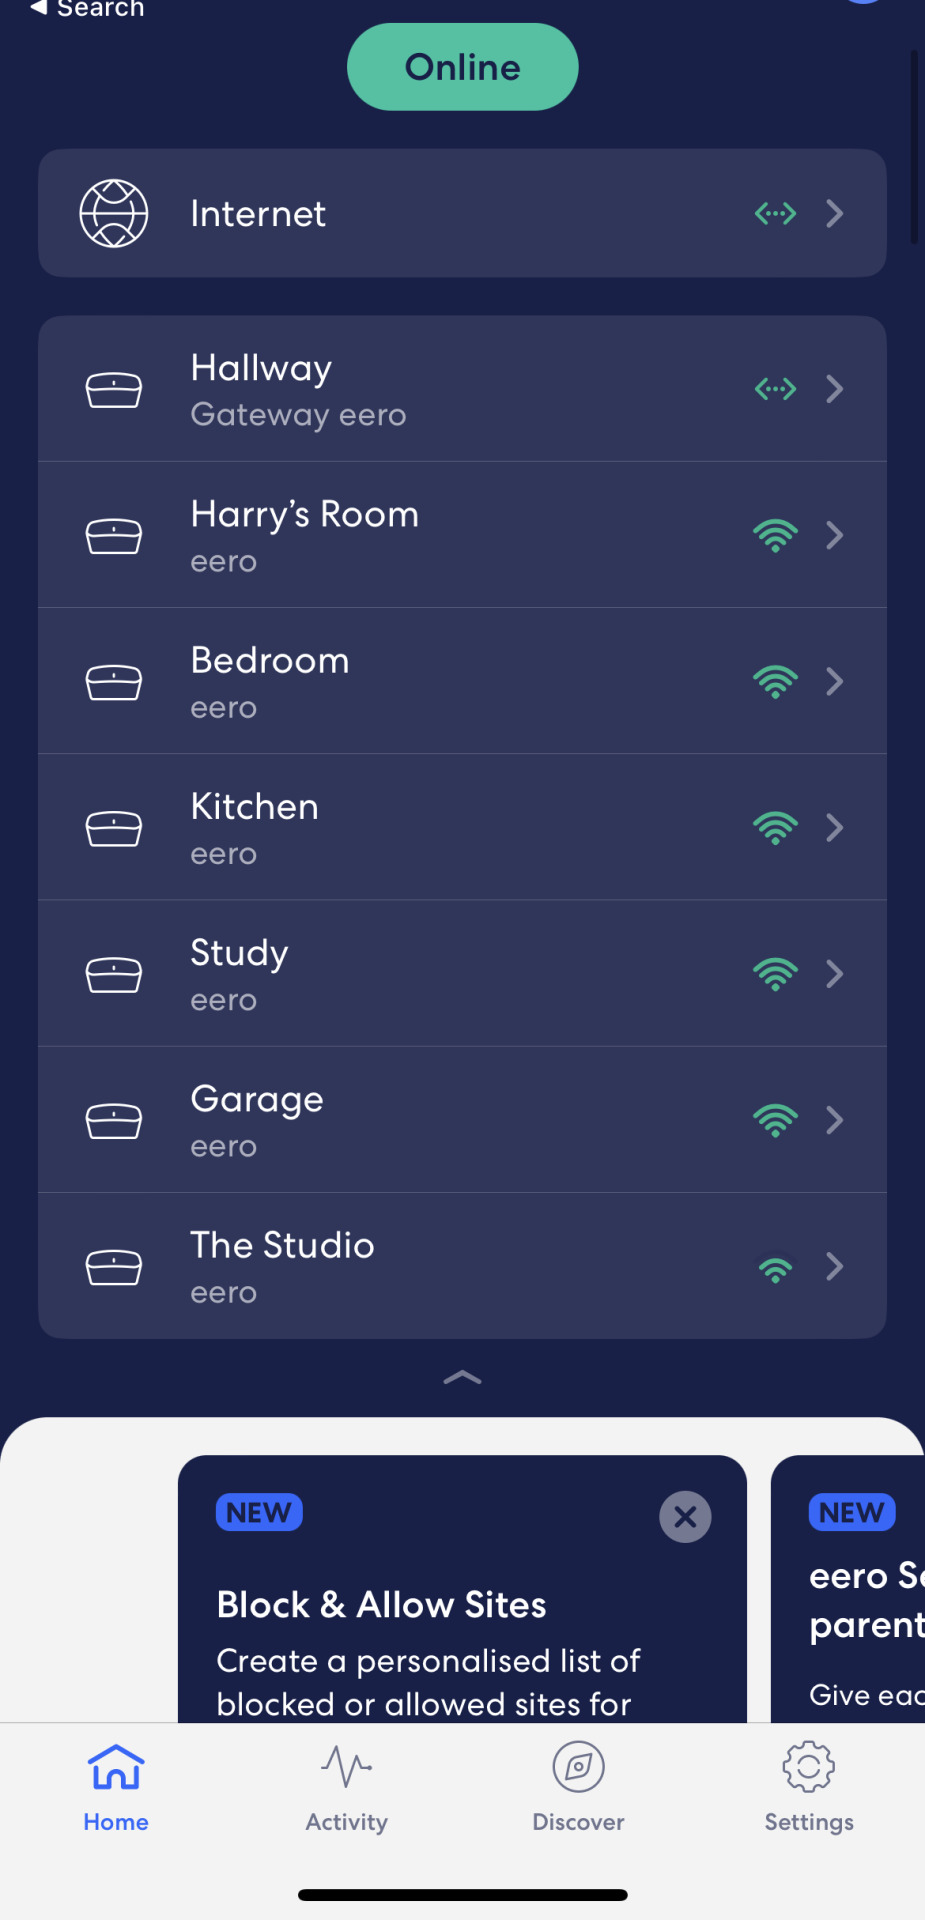
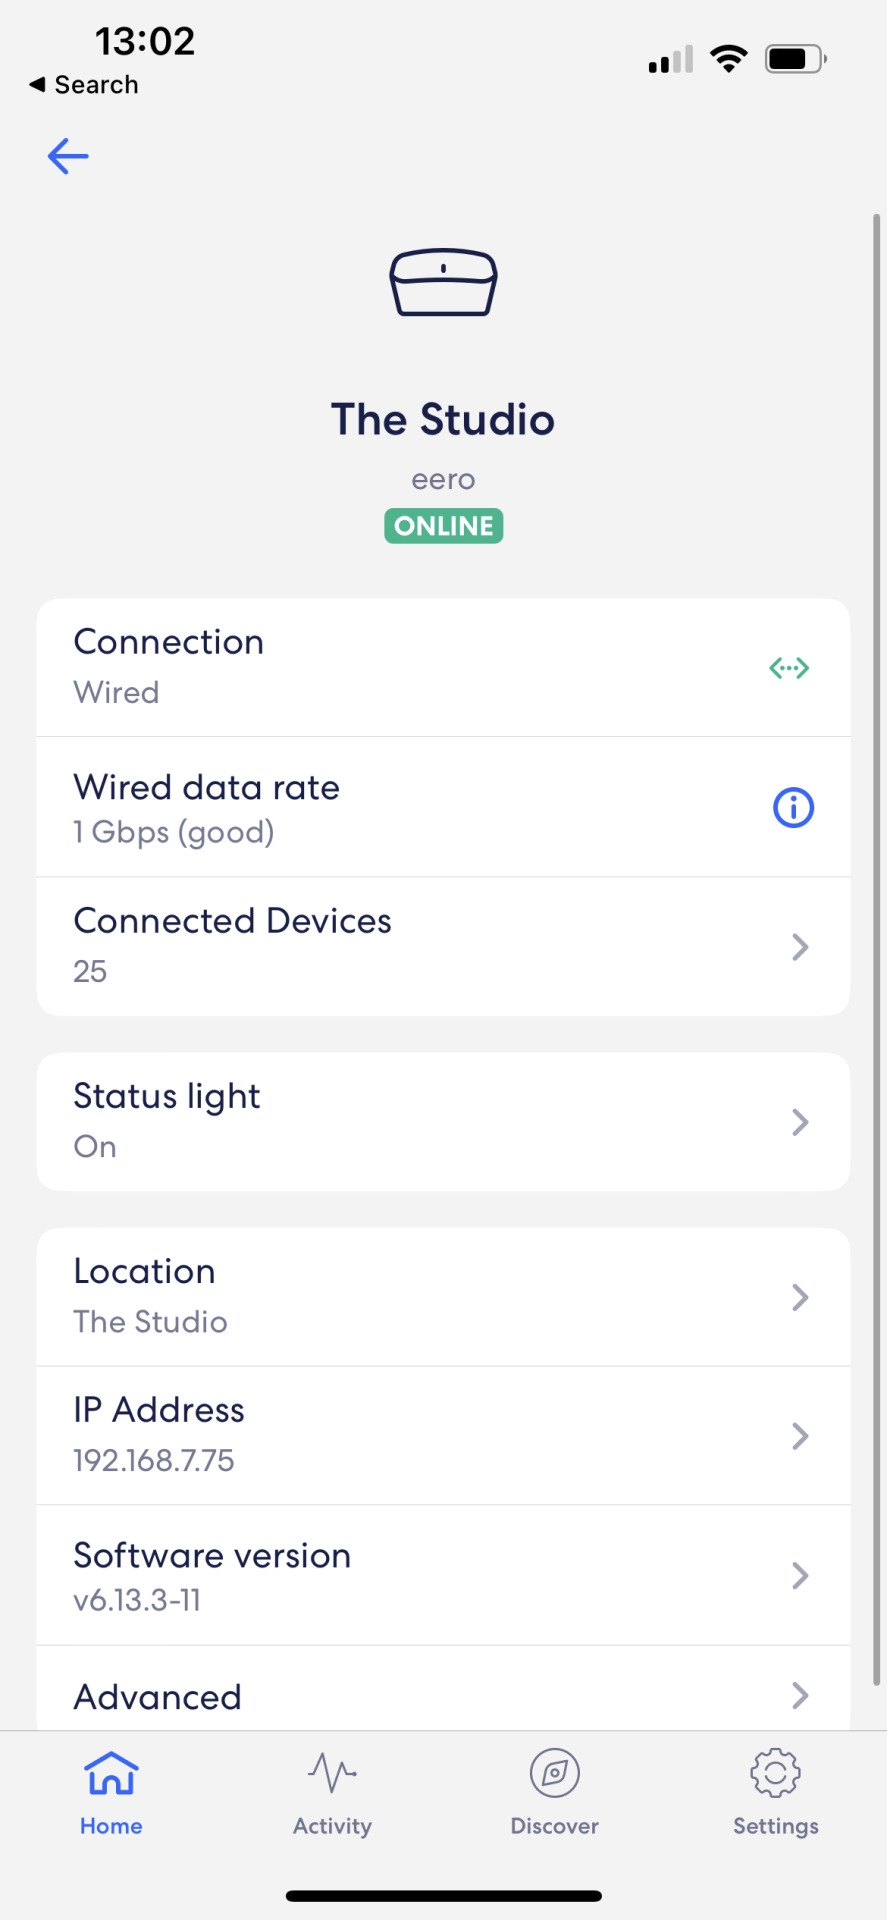
Note : If you plug your remote Eero into the Master Eero by your swithc the connection shown in the app would be like the "Hallway" device in the image above. Because my Remote Eero "The Studio" is actually plugged into my router, which in turn is plugged into the Master Eero, the unit shows that it is connected via wifi. I think is is an anomolie because I am getting the same speeds from The Studio as I do from my Master Eero when I run a speed test so I am not concerned.
My setup on a 35mbps download link and 8mbps upload link, with the Eero 5 system, performs perfectly for work video calls, streaming Netflix, Amazon Prime, gaming on PlayStation and Xbox, listening to Spotify etc. all without buffering or noticable network issues.
There are now 5 versions of eero on the market and they can all co-exist happily, although I'd recommend sticking with the same units unless you have a few 5 units and want to upgrade parts of your setup with faster units.
There's the Eero Wi-Fi 5 router system which I run and is the oldest of the 5 systems.
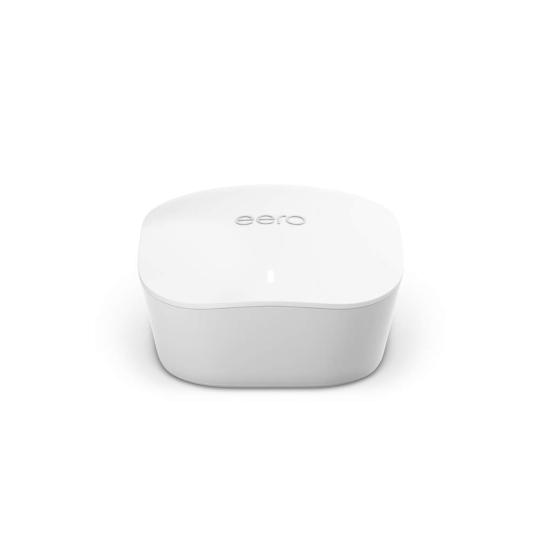
Each unit covers up to 140 sq.m on wifi, runs wireless speeds from up to 550mbps (single unit system) to 350 mbps (multi-unit setup). I find it ample for all my office and leisure needs on my 35mbps download and 8mbps upload internet connection.
As I said, there are 5 flavours of Eero system in total, designed to suit every budget and need.
In fact it's really quite confusing so this table should help identify what system would be best for your needs.
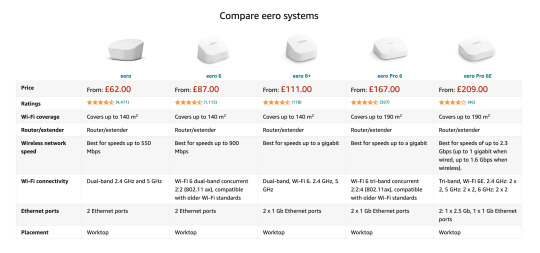
As you'd expect and can see, the more capable / faster systems are more expensive, but still offer choice value for money. You can mix and match systems so if you've invested in an older generation setup, you don't need to replace all the units just because you want a faster unit in your garden studio.
Post Edit : Never one to leave something uncovered I decided after all to plug the Eero from The Studio into the matser Eero in the home and sure enough the connection went from wireless to line connected and the speed being offered through the connection is now 1gbps. Obviuously the majority of my traffic comes from the internet so is limited to my broadband connection but I've decided to keep it configured this way as a future-proof in case we ever get a significant upgrade to our internet connectivity in these parts.

0 notes
Text
The daily snapshot build pictures set to music.
0 notes
Text
Some new visitors to The Studio tonight. They were active around the space for quite some time tonight and had about 30 motion alerts from the Blink cameras.
I actually saw one of them while on one of my last calls today.
0 notes
Text
Working in The Studio - The Desk
Like many peope I use the studio to work in, and as a result I need a desk to put my computer and various other items on to work at.
Like many people I also cannot sit for too long as I find my limbs get stiff and worse, my back can start to suffer (although I do have a great new chair which has all but alleviated that issue).
I therefore opted for a standing desk, but wanted the ability to have it standing or sitting, or anywhere in between, for complete flexibility.
The desk I opted for I found on Amazon and is called the KAIMENG Height Adjustable Electric Standing Desk. It comes in different sizes to suit your needs, and I went for the 160 x 80 which is a great size for my ample "stuff", and with different worktops. This is the Maple one.
The desk has a top height of 116cm and a lowest hight of 72cm. This photo is taken at 116cm.

At this height I can store my chair under the desk which is really convenient.
I find the setting of 80cm perfect for sitting.

The desk height is controlled by the small electronic controller where you can change the height incrementally using the up / down buttons or move the desk to 1 of 4 programmable preset heights.

Re-programming a button is simply just a case of getting the desk to the height you want and then long pressing on the preset number you want to store it to.
The motorised mechanism that moves the desk to different heights is pretty quiet and efficient. I videod it for your refernece.
What was quite unexpected was the quality of the desk given it's price point. The usual price is £300 but it can be cheaper on Amazon through various promotional periods throughout the year.
It does come flat packed and so needs to be built, but the instructions were clear and the whole process took about 45 minutes.
0 notes
Text
Securing The Studio
Most people will build a Garden Studio as an office, gym, recording studio, games room etc. This means that the building is likely housing equipment or objects that might be of value.
The Studio is no different and therefore I wanted to secure it as much as possible. However, as the old saying goes, if they want to get in, they'll get in.
So despite The Studio having modern bi-fold doors and locking systems, I still felt I wanted some reassurance that the building was secure.
The motion activated light are a good start. They are sensitive enough to pick up Maisie (our dog) having a sniff around at night, and light up the area pretty well. But I can't keep an eye out on the building all the time and so I wanted a video monitoring system that I could trust.
I've been using Blink for many years. I backed them as a Kickstarter project quite a few years back, and then they were acquired by Amazon. Blink provide a series of solutions to fit most needs and I find that the app is really easy to use.
The system uses a little Blink hub (to synchronise the cameras and to manage the cloud storage of your content) and is not limited to 1 hub per system (unlike Hive) which means as long as you have wifi coverage, you can place a sync box remotely to the house (which is where a lot of garden studios are). Hubs can be bought seperately, but are included if you buy a system so you shouldn't need to buy one unless you are looking to expand your system or need a replacement (although see my note below).
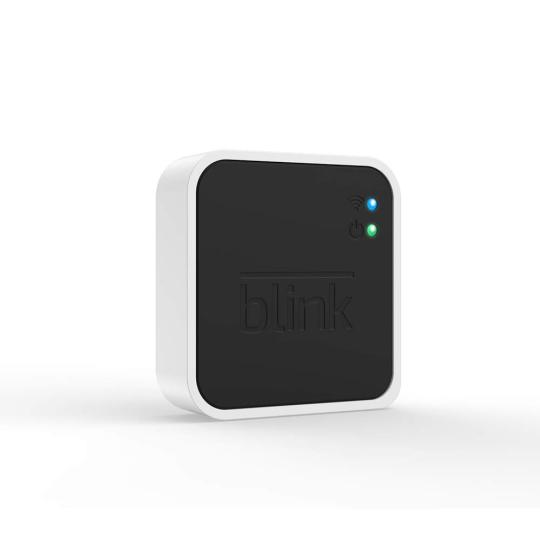
In my house I have 3 hubs managing 3 distinct areas, and 1 hub in the studio, exclusively for the studio. All cameras work with the hubs. and you can mix indoor and outdoor cameras on each hub.
Each hub and their attached cameras are given their own zone in the app so it's easy to switch between the zones.

Zones can be scheduled to arm and disarm whenever you want and each camera has a wealth of variables that can be set including how long they record for when triggered, re-trigger tim, sensitivity, etc etc.
There are a number of different camera units that you can buy.
There are battery powered cameras, one exclusively for indoor use which is white with a black face (they used to be all white so not sure why they changed it), and one designed for outdoor use, which is black. Both units have "night vision" enhancements, and the battery life (2 AA batteries) lasts for quite a long time (about a year by my reckoning) which is impressive.
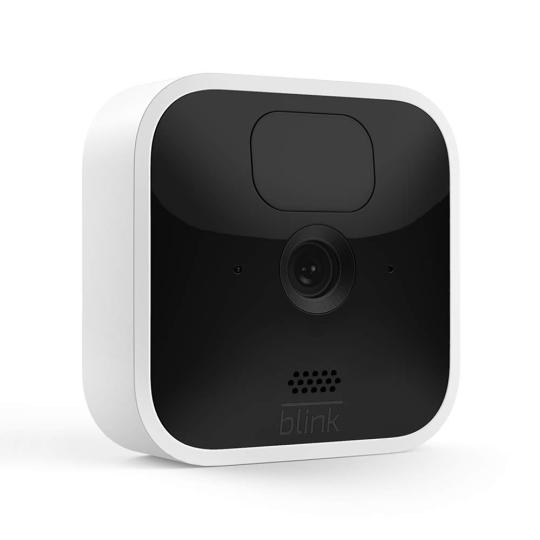

There are also small desktop internal mains powered cameras that come in white and black that are small and subtle.

There is also a battery powered motion activated spotlight system to which you can attach an indoor or outdoor camera to for a interior or exterior camera and light setup.

Many of the cameras come in packs of 1, 2, 3 or 4 cameras. You can also buy ad-on cameras seperately.
Note: Have a proper look at the pricing because a lot of the time the 1 camera system is the same price as an add-on camera. Get the 1 camera system in that case, because you get a sync module as well which in essence is free, but always useful to have either as a spare, or to add an extra zone in the house.
This is an example of the video recording when an outside camera detected a fox around the studio. The fox hadn't triggered the motion lights because it came in from the side of the building that doesn't have a sensor.
Clips can be stored to the cloud (for an additional monthly subscription) but this is not mandatory and you can run the system "free" if you want to, receive alerts to motion etc. There's no hub subscription.
Additionally, the system works with Alexa so you can arm and disarm your system manually using Alexa, as well as go live into any camera if you have an Echo Device with a screen, like the Echo Show 5 or Echo Show 8.
As Blink are now owned by Amazon it's the only place to buy them but the systems are really quite cost effective and a breeze to set up.
Blink have also expanded into Front Door Video bells, as well as a pan and tilt motion camera to keep an eye on your pets, so you can utilise their system for your whole house monitoring needs.
0 notes
Text
Lightling the interior of The Studio
Once the decision had been made on the exterior look, dimensions and materials for the studio, the next stage was looking at some of the technology that would powe the space.
The first area I looked at was dimmable spotlights. I didn't want to have standard spots and a dimmer switch because in my exprience the dimmers are noisy and prone to failure, and I also wanted to be able to control the lights from my phone or through Alexa so I could set the lighting from anywhere, or have it on timer.
I've used Hive GU10 dimmable spots in the home for years and they've been pretty good, but I've been disappinted with their failure rate after a few years of use, and their unit price is quite eye-watering, so I went looking for another solution that wouldn't brealk the bank, especially as I was having to source 12 of them for the interior space.
The other challenge I faced with Hive for use in the studio, was the distance between it and the hub in my home. Although I have wired ethernet to the studio from the router, the Hive system requires the Hive network to be accessible, not just your wifi, so I would have had to try to find a solution to boost the Hive signal to the studio which is some way from the house and it just felt too risky.
I eventually landed on Tapo L610 Smart Bulbs. These bulbs are made by TP-Link and the real benefit of these lights are that they don't require a hub to work. Therefore they run idependently and are not exposed to server downtimes and outages that can occur on other hub-based solutions, don't require you to boost the signal of the hub to reach the light, and run off standard 2.4ghz wifi.

These bulbs are also slightly different in that they are halogen spots as opposed to LED. I wasn't too concerned about this and actually have been pleasently surprised by the colour they give off.
They give off 350 lumens each and are rated at 2.9w (due to the smart nature of them) which gives them an energy consumption rating of D which is better than some of the laternative bulbs available through Amazon.
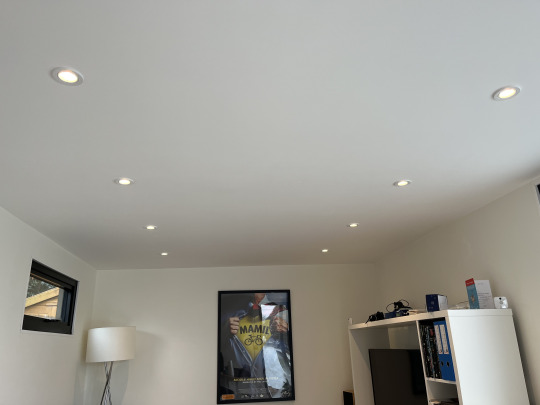
The Tapo app is a breeze to use, and the setup process is straight-forward, although the lights do need to be set up one by one. However, once you get into a rhythm with the setup it only takes a couple of munutes per bulb and that includes a firmeare update (we it did for the ones I sourced) through Amazon.
You can group the bulbs into as many groups and sub-groups as you want giving you complete control of the lights, and they are dimmable from 1% through to 100% for full mood setting flexibility.
I also bought a couple of Tapo Smart L510B bayonet fitting bulbs.
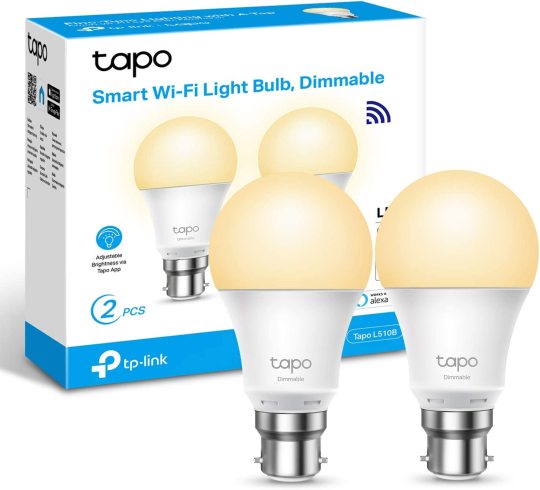
I've installed one of them into the corner light unit for alternative lighting and again it is fully dimmable, and controllable via Alexa or the app.
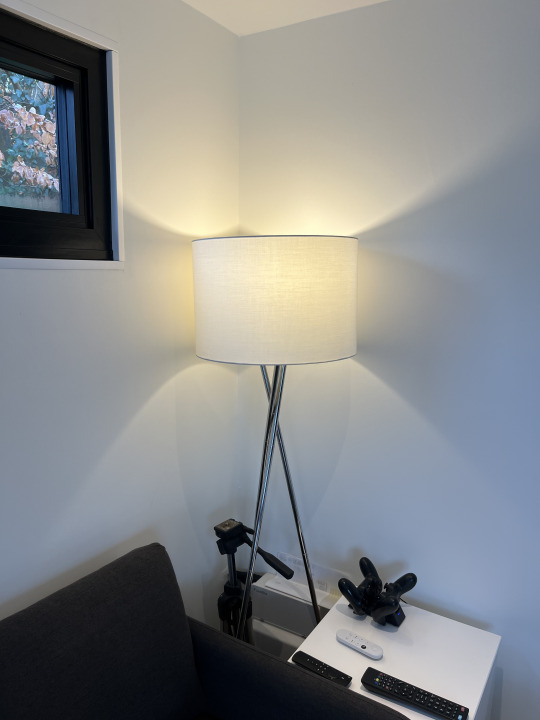
It's also worth noting that you can get full colour changeable variants of the GU10 bulbs and the B22 bayonet fitting bulbs if you'd like to liven things up with a bit of colour.
One final note of setup. I've setup my home wifi network to run both 5ghz and 2.4ghz wifi off the same network name, so irrespective of the device and the freqeuncy they are connecting over, they always connect to the "same network". I have found this to be a perfect solution especially as I have other devices (like my exercise bike) which connect over 2.4ghz only.
I hope you've found this guide useful. Do reach out if you have any questions on using these bulbs for your own room.
0 notes
Text
instagram
Day 31 - The Studio build is complete. Connor and @green.space.studios have left no stone unturned and their attention to detail has been exemplary. Connor even jet-washed the building down (after having to pour boiling water into my hose which had frozen) to give it the showroom finish.
The @cladcoprofiles Olive Green composite smooth cladding coupled with the @cladcodecking decking looks amazing.
I’m also really happy with the @tplinkuk Tapo spots I’ve used internally to give me complete control of the lighting.
Next steps is to setup the space internally.
0 notes
Text
instagram
Day 30 - I billed today as completion day but @green.space.studios are perfectionists and masters of their craft, so while many of the final trims were put in place, and the majority of the final finishes internally were completed, Connor will be back tomorrow to finish things off.
I’m grateful for his, and his teams, care and attention to detail, and it gives me a burden of responsibility to make sure we care and treat The Studio with the same respect. Can’t say fairer than that!
0 notes
Text
instagram
Day 28 & 29 - I didn’t post an update for The Studio yesterday because whilst @green.space.studios worked really hard on the roof, the final trims were not done till today and therefore visually nothing much had changed.
Today all that changed. The Studio now has power and Internet connectivity, most of the step trims done and all the remaining spots, up/down lights and the external socket.
I believe we will sign it off tomorrow which is day 30 and rather fitting that it should finish on a round number.
This evening I set up the @tplinkuk Tapo smart bulbs internally and I really like the halogen warm light they give off. Externally the up/down lights are motion sensored but can be overridden for when we’re sitting out. The external spots are all in one LED units with a very long shelf life.
0 notes
Text
instagram
Day 27 - big strides made and nearing completion next week. Back window trim done and the floor is now laid. Mainly just cosmetic finishing off, and of course the electrics to be wired in on Monday. Can’t wait to move in.
0 notes
