#especially not with the mic quality in session 1
Explore tagged Tumblr posts
Visit Tumblr Blog
Explore Tumblr blogs with no restrictions, modern design and the best experience.
Last Seen Tumblr Blogs


Fun Fact
Tumblr Inc. is using 66 technologies for its website.
Text
I have discovered that whenever Andy’s character is constantly agreeing with another character by episode 1 or 2, then that usually means the two are gonna get paired up together
—Skrimm and Barnabos in Icebound (with Skrimm constantly being like “I agree with Barnabos” “oh, Barnabos is the man for the job” “I follow Barnabos” by the first hour in episode 1)
—Marius and Lethica in Edge of Midnight (tho it’s mostly applicable to episode 2 onwards)
—Shepherd and Sarnax in Curse of Strahdanya (which I am personally surprised about. I honestly thought the two would butt heads more early on, but no. I think they mostly butt heads in session zero, but by session one, they were basically already bffs)
#I really am trying to listen to cos to understand the popularity of shepnax#and I am slowly going through it#but I didnt realize the episode lengths of cos were like bdw#like I have listened to 7 hour episodes before#once in one sitting#but those were usually finales. kinda hard to make myself listen to a near 9hr episode#when it’s literally session 1. a lot of shit has been happening sure but also like#every time I think they’re gonna end it there I find there’s still 5 hours left yknow?#and I can’t really listen to loa at work bc I won’t be able to hear anyone#especially not with the mic quality in session 1#legends of avantris#icebound#edge of midnight#curse of strahd#curse of strahdanya#skrimm stabbaskotch#barnabos the dreadwake#fishing partners#marius renathyr#lethica nightborne#lethicus#silas shepherd morgan#sarnax of the edelwood#shepnax
72 notes
·
View notes
Text
What’s the Best Gear for Hosting Live Podcasts on Social Media?
In the age of social media, podcasts have taken a massive leap from pre-recorded episodes to live, interactive formats. Hosting live podcasts on platforms like Instagram, YouTube, or TikTok allows creators to connect directly with their audience, build relationships, and create authentic moments in real time. But to make your live podcast successful, having the right gear is non-negotiable.
Whether you’re a beginner or a seasoned podcaster, investing in the right tools can elevate your production quality, making your content stand out in a sea of live streams. Let’s explore the best gear for hosting live podcasts and why each piece is crucial for delivering a polished, engaging experience.
1. Microphones: The Backbone of Any Podcast
Your voice is the star of your podcast, so a high-quality microphone should be your first investment. Live podcasts demand crystal-clear audio to ensure your listeners stay engaged and don’t miss a word.
Dynamic Microphones are ideal for live settings. They’re durable, reduce background noise, and handle loud environments well. This makes them perfect for live social media sessions where unpredictable noise can be an issue.
Condenser Microphones capture more detail and are great if you’re streaming from a quiet, controlled space. They provide studio-like sound but are more sensitive to background noise.
Look for a microphone with a cardioid pickup pattern, which focuses on your voice and minimizes background sounds.

2. Audio Interfaces: Bridge the Gap
If you’re using a professional microphone, you’ll need an audio interface to connect it to your computer or mobile device. An audio interface converts your microphone’s analog signal into digital audio that your streaming platform can process.
Choose an interface with at least one XLR input (for your mic) and USB connectivity. Many modern interfaces are compact and portable, making them ideal for podcasters on the go.
Look for features like gain control and headphone monitoring, which help you fine-tune your sound during the broadcast.
An audio interface ensures your listeners hear you as clearly as if they were sitting in the same room.
3. Headphones: Monitor Your Sound
Monitoring your audio in real time is essential to catch any issues before your audience does. A good pair of headphones allows you to hear exactly what your listeners are hearing.
Closed-Back Headphones are perfect for podcasting. They prevent sound from leaking into your microphone and offer an immersive listening experience.
Prioritize comfort, especially for long live sessions. Lightweight headphones with cushioned ear pads are a great choice.
Monitoring your audio ensures your levels are balanced, and any potential hiccups are addressed immediately.
4. Lighting: Look Your Best on Camera
While podcasts are traditionally audio-focused, live podcasts on social media often include video. Good lighting can make a huge difference in how professional your stream looks.
Ring Lights are a favorite among content creators for their ability to provide soft, even lighting. They’re perfect for illuminating your face during live sessions.
LED Panel Lights are more versatile and allow you to adjust brightness and color temperature to match your setup.
Lighting not only enhances your appearance but also keeps your audience focused on you, rather than distractions in your background.

5. Cameras: Level Up Your Video Quality
If your live podcast involves video, investing in a quality camera can make your streams more engaging.
Webcams: Modern HD webcams are an affordable and easy-to-use option for beginners. They plug directly into your computer and deliver decent quality.
DSLR or Mirrorless Cameras: For a more professional look, consider using a DSLR or mirrorless camera with streaming capabilities. These offer superior image quality and customizable settings.
Don’t forget to position your camera at eye level to create a natural and inviting angle for your audience.
6. Pop Filters and Shock Mounts: Minimize Distractions
Live podcasts are unpredictable, and the last thing you want is your audience being distracted by plosive sounds (like “p” and “b”) or vibrations.
Pop Filters are affordable tools that reduce harsh sounds caused by sudden bursts of air. They’re a must-have for any podcast setup.
Shock Mounts isolate your microphone from desk vibrations, ensuring clean audio even if you accidentally bump your desk or move your mic stand.
These small additions go a long way in maintaining high audio quality.
7. Mixers: Fine-Tune Your Sound
A mixer gives you control over your audio levels and allows you to incorporate multiple microphones or sound effects seamlessly.
For solo podcasters, a simple mixer with 2–4 channels is sufficient.
If you’re hosting guests or incorporating music, a more advanced mixer with multiple inputs and effects can enhance your production.
Mixers are especially helpful if you’re streaming directly to social media platforms, as they allow you to adjust sound levels in real time.
8. Internet Connection: The Unsung Hero
No matter how great your gear is, a weak internet connection can ruin your live podcast. A stable and fast internet connection ensures your stream runs smoothly without lag or interruptions.
Use a wired connection whenever possible for the most reliable performance.
If you’re using Wi-Fi, position your setup close to the router and consider upgrading to a faster plan if needed.
9. Stream Decks: Simplify Your Workflow
If you’re hosting live podcasts frequently, a stream deck can be a game-changer. These devices allow you to control your stream with customizable buttons, making it easy to switch scenes, adjust audio, or trigger sound effects without fumbling around.
Stream decks add a layer of professionalism and make multi-tasking during live sessions much easier.
10. Backup Power and Storage: Stay Prepared
Live podcasts don’t come with a pause button, so preparation is key.
Keep a backup power source, like a portable battery or uninterruptible power supply (UPS), to avoid interruptions during unexpected power outages.
Record your sessions locally on an external drive or cloud storage. This not only provides a safety net in case of connectivity issues but also gives you content to repurpose later.
Why Invest in Quality Gear?
While it’s tempting to cut corners when setting up your podcast, high-quality gear pays off in the long run. Professional equipment ensures your audience stays engaged, helps you build credibility, and sets you apart in a crowded digital landscape.
When shopping for audio gear, it’s always a good idea to purchase from professional audio shops. Not only do they offer a wide range of options to suit your needs, but they also provide expert advice to help you make informed decisions.
Final Thoughts
Hosting live podcasts on social media is an incredible way to connect with your audience, share your ideas, and build a loyal community. But success doesn’t just come from great content—it’s also about presentation.
With the right gear, you can deliver a seamless and professional live podcast that keeps your audience coming back for more. From high-quality microphones and lighting to reliable internet and backup power, every piece of equipment plays a role in creating an engaging experience.
Invest in the tools that best suit your needs and goals, and you’ll be well on your way to becoming a standout live podcaster in no time.
#audio#audio gear#music#dj#professional audio#audio shop in brooklyn#brooklyn#podcast#podcasting#social media#audio equipments#pro audio gears
2 notes
·
View notes
Text
Top 7 Tips for PTE Online Class Success

Online PTE classes are a smart way to prepare for the exam from the comfort of your home. But to make the most of them, you need to stay focused, disciplined, and organized. Here are the top 7 tips to help you succeed in your PTE online classes and get the score you want.
1. Choose a Trusted Coaching Platform
Start by picking a reliable PTE coaching institute that offers structured online classes, expert trainers, and quality materials. Institutes like Vision Language Experts offer live sessions, recorded lectures, and PTE practice tests that match the real exam pattern.
2. Set Up a Distraction-Free Study Zone
Your learning environment matters. Find a quiet spot, use headphones, and avoid multitasking. A dedicated study area helps you stay focused during live classes and practice sessions.
3. Follow a Fixed Schedule
Consistency is key. Attend your online classes regularly and create a daily study plan around them. Make time for revision, mock tests, and extra practice after each session.
4. Interact and Ask Questions
Online learning doesn’t mean learning alone. Be active in class. Use the chat box or mic to ask questions. Don’t hesitate—clearing your doubts immediately boosts your confidence and understanding.
5. Record and Review Your Performance
Use platforms that offer mock tests with feedback. After each test, check your strengths and weaknesses. Improve your pronunciation, fluency, and grammar using feedback from your trainer.
6. Use Supplementary Study Materials
Online classes should be supported with extra learning tools. Use PTE apps, YouTube channels, vocabulary lists, and grammar exercises to reinforce what you learn in class.
7. Stay Motivated and Positive
PTE preparation can be challenging, especially online. Stay positive, take short breaks, and track your progress. Celebrate small wins—every improvement counts toward your final goal.
Final Words
Success in PTE online classes doesn’t happen by chance. It’s the result of planning, practice, and persistence. If you're serious about your PTE goals, follow these tips and stay committed. And remember—Vision Language Experts is here to guide you with expert-led online coaching, real-time feedback, and full-length mock tests to help you score high.
0 notes
Text
Skullcandy SLYR, Gaming Headphones Skullcandy, WH-CH510 Wireless Headphones: The Ultimate Sound Experience
About
In the world of audio gear, finding the perfect headphones can be a challenge—especially when you need them for gaming, casual listening, or on-the-go convenience. Today, we’re comparing three popular options: the Skullcandy SLYR, gaming headphones skullcandy, and the Sony WH-CH510 wireless headphones. Whether you're a gamer, a music lover, or someone who values wireless freedom, this guide will help you pick the best headphones for your needs.

1. Skullcandy SLYR: Gaming Headphones Built for Immersive Play
The Skullcandy SLYR is a wired gaming headset designed for competitive and casual gamers alike. Here’s what makes it stand out:
Crisp, Clear Audio: With 50mm drivers, the SLYR delivers deep bass and clear highs, perfect for in-game sound effects and voice chat.
Noise-Isolating Mic: The detachable boom mic reduces background noise, ensuring your teammates hear you loud and clear.
Comfortable Fit: Memory foam ear cushions and an adjustable headband make long gaming sessions comfortable.
Multi-Platform Compatibility: Works with PC, PlayStation, Xbox (with adapter), and mobile devices.
Best For: Gamers who want an affordable, high-quality wired headset with great sound and mic clarity.
2. Skullcandy Gaming Headphones: Power and Style for Gamers
Skullcandy offers a range of gaming headphones, but their Crusher Evo and Hesh Evo models are popular among gamers who want wireless freedom and powerful bass.
Bass You Can Feel: Skullcandy’s Crusher Evo features haptic bass feedback, making explosions and in-game effects more immersive.
Wireless Convenience: Bluetooth connectivity means no tangled wires, with up to 40 hours of battery life.
Built-in Mic: While not as advanced as the SLYR’s boom mic, the built-in mic is solid for casual gaming and calls.
Sleek Design: Bold colors and a lightweight build make these headphones stylish and comfortable.
Best For: Gamers who prefer wireless headphones with deep bass and long battery life.
3. Sony WH-CH510 Wireless Headphones: Affordable Wireless Freedom
If you’re looking for budget-friendly wireless headphones that deliver great sound, the Sony WH-CH510 is a strong contender.
Lightweight & Comfortable: Weighing just 132g, these headphones are ideal for long listening sessions.
30-Hour Battery Life: One of the best in its price range, perfect for all-day use.
Bluetooth 5.0: Ensures stable connectivity with smartphones, tablets, and laptops.
Balanced Sound: While not as bass-heavy as Skullcandy, Sony provides clear mids and highs for music and podcasts.
Best For: Those who want an affordable, reliable wireless headphone for music, calls, and casual gaming.
Conclusion: Which Headphones Are Right for You?
For Hardcore Gamers: The Skullcandy SLYR is the best choice with its wired reliability, great mic, and immersive sound.
For Wireless Gaming & Bass Lovers: Skullcandy’s Crusher Evo or Hesh Evo offer deep bass and long battery life.
For Budget Wireless Listening: The Sony WH-CH510 is a fantastic all-rounder with excellent battery life and comfort.
No matter your preference, each of these headphones delivers great value. Whether you need a gaming powerhouse, a bass-heavy wireless headset, or an everyday Bluetooth option, there’s a perfect pair for you!
0 notes
Text
How to Choose the Best Travel Camera: Expert Photography Tips for Beginners

Best Travel Camera: Travel Photography Tips for Beginners
Travel photography is an exciting way to document new places, cultures, and experiences. However, choosing the best travel camera can be overwhelming, especially for beginners. With so many options available, selecting a camera that balances image quality, portability, and ease of use is essential.
In this guide, we’ll explore the best travel cameras, travel photography tips, and essential features to look for when choosing the right camera for your adventures.
1. Why Choosing the Best Travel Camera Matters
Travel photography involves a variety of shooting conditions — from capturing breathtaking landscapes to candid street portraits. Your travel camera should be:
Lightweight and portable — Easy to carry without adding bulk.
Versatile — Suitable for different lighting and environments.
Durable — Withstand travel conditions.
High-quality — Capture sharp and vibrant images.
Having the right camera enhances your ability to capture unforgettable moments with clarity and creativity.
2. Types of Travel Cameras: Which One is Right for You?
1. Compact Cameras (Point-and-Shoot)
Compact cameras are small, easy to use, and perfect for casual travelers. They offer decent image quality and automatic settings, making them ideal for beginners.
Pros:
Lightweight and pocket-friendly.
Simple to use with automatic settings.
Built-in lens eliminates the need to carry extra gear.
Cons:
Limited manual control.
Smaller sensors may reduce image quality.
Best for: Casual photographers who want an easy, travel-friendly camera.
Recommended Models:
Canon PowerShot G7 X Mark III
Sony Cyber-shot RX100 VII
Panasonic Lumix TZ90
2. Mirrorless Cameras
Mirrorless cameras offer professional-grade image quality in a more compact body than DSLRs. They allow for interchangeable lenses, making them more versatile for different photography styles.
Pros:
Compact and lightweight.
High-quality images with larger sensors.
Faster autofocus and better video capabilities.
Cons:
Shorter battery life compared to DSLRs.
Lenses may add extra weight.
Best for: Travel enthusiasts who want more control over their photography without the bulk of a DSLR.
Recommended Models:
Sony Alpha A6400
Canon EOS M50 Mark II
Fujifilm X-T4
3. DSLR Cameras
DSLRs provide the best image quality and full manual control but are bulkier than other travel cameras. They’re ideal for serious photographers who prioritize high-resolution images and lens flexibility.
Pros:
Superior image quality and low-light performance.
Wide selection of interchangeable lenses.
Long battery life.
Cons:
Heavy and bulky for travel.
Learning curve for beginners.
Best for: Professional and enthusiast photographers who need full control over their shots.
Recommended Models:
Canon EOS 90D
Nikon D7500
Canon EOS 5D Mark IV
3. Essential Features to Consider When Choosing a Travel Camera
1. Image Quality (Resolution)
Choose a camera with at least 20 megapixels to ensure sharp and detailed images. Larger sensors (APS-C or full-frame) perform better in low-light conditions.
2. Portability & Weight
For frequent travelers, a compact or mirrorless camera is ideal. If you prioritize quality over portability, a DSLR might be worth carrying.
3. Battery Life
Long battery life is essential for extended shooting sessions. Carry extra batteries or a power bank, especially for mirrorless cameras, which consume more power.
4. Lens Versatility
Wide-angle lenses (16–35mm): Best for landscapes and cityscapes.
Zoom lenses (24–200mm): Great for capturing distant subjects without carrying multiple lenses.
Prime lenses (50mm, 85mm): Perfect for portrait and low-light photography.
5. Video Capabilities
If you plan to vlog or record travel experiences, look for cameras with 4K video recording, good stabilization, and an external mic input.
6. Connectivity
Wi-Fi and Bluetooth-enabled cameras allow for easy sharing and backup of photos on the go.
4. Best Travel Cameras for Beginners
If you’re new to travel photography, these beginner-friendly cameras offer an excellent balance of performance and ease of use:
1. Sony Alpha A6000 (Mirrorless)
Why it’s great: Compact, fast autofocus, and excellent image quality.
2. Canon EOS Rebel T7i (DSLR)
Why it’s great: Affordable, beginner-friendly, and solid image quality.
3. Panasonic Lumix TZ200 (Compact)
Why it’s great: Pocket-sized with a powerful zoom and 4K video.
4. Fujifilm X-T30 (Mirrorless)
Why it’s great: Lightweight, stylish, and delivers professional-looking images.
5. Travel Photography Tips for Beginners
1. Plan Your Shots
Research destinations and lighting conditions beforehand. Sunrise and sunset provide the best natural lighting.
2. Use the Rule of Thirds
Compose shots using the rule of thirds for balanced and visually appealing images.
3. Experiment with Angles
Try different perspectives — low-angle shots, reflections, and framing techniques — for unique photos.
4. Keep Your Gear Safe
Invest in a weatherproof camera bag and always carry a lens cloth to keep your gear clean.
5. Capture the Details
While landscapes are stunning, don’t forget to capture the small details — local food, street signs, or textures.
6. Edit Your Photos
Use apps like Adobe Lightroom or Snapseed to enhance colors, contrast, and sharpness.
6. Conclusion: Finding the Best Travel Camera for Your Needs
Choosing the best travel camera depends on your travel style, budget, and photography goals. Compact cameras are perfect for casual photographers, mirrorless cameras offer versatility and quality, while DSLRs provide professional-grade performance.
No matter which camera you choose, the key is to capture your travel moments beautifully and effortlessly. If you’re still unsure about which camera to pick, The Lens India offers expert advice and top-rated travel cameras to help you make an informed decision.
Start your travel photography journey today with the best travel camera and capture stunning memories!
FAQs: Best Travel Camera & Travel Photography Tips
1. What is the best travel camera for beginners?
The best travel cameras for beginners include:
Sony Alpha A6000 — Compact and great autofocus.
Canon EOS Rebel T7i — User-friendly DSLR.
Panasonic Lumix TZ200 — Pocket-sized with a powerful zoom.
2. Should I choose a mirrorless or DSLR for travel?
Mirrorless cameras are lightweight and ideal for travel, while DSLRs offer longer battery life and superior lens choices.
3. What are the best travel photography tips for beginners?
Use the Rule of Thirds for balanced shots.
Shoot during Golden Hour for perfect lighting.
Carry a versatile zoom lens for different scenes.
Protect gear with a weatherproof camera bag.
4. What is the best budget travel camera?
Canon EOS M50 Mark II — Affordable and lightweight.
Sony RX100 VII — Compact yet powerful.
Nikon D3500 — Best budget DSLR.
5. Can I use my smartphone for travel photography?
Yes! Smartphones with multiple lenses and AI features can capture great shots, but a dedicated travel camera offers better zoom and manual controls.
Want expert guidance? Join Lens India’s Photography Tours in Japan’s cherry blossom season or India’s wildlife parks to learn from the best and capture breathtaking shots!
Stay Inspired and Informed! Follow The Lens India on social media for more captivating content, photography insights, and the latest updates:
Instagram: @thelensindia — Explore stunning visuals and behind-the-scenes stories!
Facebook: The Lens India — Join the conversation and never miss a post!
Let’s build a community of creators and storytellers together!
#TravelPhotography #CameraTips #PhotographyTips #TravelCamera #PhotoGearGuide #WanderlustPhotography #TravelWithCamera #ShootAndTravel #CameraLovers
#TravelBlogIndia #PhotographyBlog #LensIndiaTips #TheLensIndia #PhotographyForBeginners
0 notes
Text
How to Choose the Best Travel Camera: Expert Photography Tips for Beginners

Best Travel Camera: Travel Photography Tips for Beginners
Travel photography is an exciting way to document new places, cultures, and experiences. However, choosing the best travel camera can be overwhelming, especially for beginners. With so many options available, selecting a camera that balances image quality, portability, and ease of use is essential.
In this guide, we’ll explore the best travel cameras, travel photography tips, and essential features to look for when choosing the right camera for your adventures.
1. Why Choosing the Best Travel Camera Matters
Travel photography involves a variety of shooting conditions—from capturing breathtaking landscapes to candid street portraits. Your travel camera should be:
Lightweight and portable – Easy to carry without adding bulk.
Versatile – Suitable for different lighting and environments.
Durable – Withstand travel conditions.
High-quality – Capture sharp and vibrant images.
Having the right camera enhances your ability to capture unforgettable moments with clarity and creativity.
2. Types of Travel Cameras: Which One is Right for You?
1. Compact Cameras (Point-and-Shoot)
Compact cameras are small, easy to use, and perfect for casual travelers. They offer decent image quality and automatic settings, making them ideal for beginners.
Pros:
Lightweight and pocket-friendly.
Simple to use with automatic settings.
Built-in lens eliminates the need to carry extra gear.
Cons:
Limited manual control.
Smaller sensors may reduce image quality.
Best for: Casual photographers who want an easy, travel-friendly camera.
Recommended Models:
Canon PowerShot G7 X Mark III
Sony Cyber-shot RX100 VII
Panasonic Lumix TZ90
2. Mirrorless Cameras
Mirrorless cameras offer professional-grade image quality in a more compact body than DSLRs. They allow for interchangeable lenses, making them more versatile for different photography styles.
Pros:
Compact and lightweight.
High-quality images with larger sensors.
Faster autofocus and better video capabilities.
Cons:
Shorter battery life compared to DSLRs.
Lenses may add extra weight.
Best for: Travel enthusiasts who want more control over their photography without the bulk of a DSLR.
Recommended Models:
Sony Alpha A6400
Canon EOS M50 Mark II
Fujifilm X-T4
3. DSLR Cameras
DSLRs provide the best image quality and full manual control but are bulkier than other travel cameras. They’re ideal for serious photographers who prioritize high-resolution images and lens flexibility.
Pros:
Superior image quality and low-light performance.
Wide selection of interchangeable lenses.
Long battery life.
Cons:
Heavy and bulky for travel.
Learning curve for beginners.
Best for: Professional and enthusiast photographers who need full control over their shots.
Recommended Models:
Canon EOS 90D
Nikon D7500
Canon EOS 5D Mark IV
3. Essential Features to Consider When Choosing a Travel Camera
1. Image Quality (Resolution)
Choose a camera with at least 20 megapixels to ensure sharp and detailed images. Larger sensors (APS-C or full-frame) perform better in low-light conditions.
2. Portability & Weight
For frequent travelers, a��compact or mirrorless camera is ideal. If you prioritize quality over portability, a DSLR might be worth carrying.
3. Battery Life
Long battery life is essential for extended shooting sessions. Carry extra batteries or a power bank, especially for mirrorless cameras, which consume more power.
4. Lens Versatility
Wide-angle lenses (16-35mm): Best for landscapes and cityscapes.
Zoom lenses (24-200mm): Great for capturing distant subjects without carrying multiple lenses.
Prime lenses (50mm, 85mm): Perfect for portrait and low-light photography.
5. Video Capabilities
If you plan to vlog or record travel experiences, look for cameras with 4K video recording, good stabilization, and an external mic input.
6. Connectivity
Wi-Fi and Bluetooth-enabled cameras allow for easy sharing and backup of photos on the go.
4. Best Travel Cameras for Beginners
If you’re new to travel photography, these beginner-friendly cameras offer an excellent balance of performance and ease of use:
1. Sony Alpha A6000 (Mirrorless)
2. Canon EOS Rebel T7i (DSLR)
3. Panasonic Lumix TZ200 (Compact)
4. Fujifilm X-T30 (Mirrorless)
5. Travel Photography Tips for Beginners
1. Plan Your Shots
Research destinations and lighting conditions beforehand. Sunrise and sunset provide the best natural lighting.
2. Use the Rule of Thirds
Compose shots using the rule of thirds for balanced and visually appealing images.
3. Experiment with Angles
Try different perspectives���low-angle shots, reflections, and framing techniques—for unique photos.
4. Keep Your Gear Safe
Invest in a weatherproof camera bag and always carry a lens cloth to keep your gear clean.
5. Capture the Details
While landscapes are stunning, don’t forget to capture the small details—local food, street signs, or textures.
6. Edit Your Photos
Use apps like Adobe Lightroom or Snapseed to enhance colors, contrast, and sharpness.
6. Conclusion: Finding the Best Travel Camera for Your Needs
Choosing the best travel camera depends on your travel style, budget, and photography goals. Compact cameras are perfect for casual photographers, mirrorless cameras offer versatility and quality, while DSLRs provide professional-grade performance.
No matter which camera you choose, the key is to capture your travel moments beautifully and effortlessly. If you’re still unsure about which camera to pick, The Lens India offers expert advice and top-rated travel cameras to help you make an informed decision.
FAQs: Best Travel Camera & Travel Photography Tips
1. What is the best travel camera for beginners?
The best travel cameras for beginners include:
Sony Alpha A6000 – Compact and great autofocus.
Canon EOS Rebel T7i – User-friendly DSLR.
Panasonic Lumix TZ200 – Pocket-sized with a powerful zoom.
2. Should I choose a mirrorless or DSLR for travel?
Mirrorless cameras are lightweight and ideal for travel, while DSLRs offer longer battery life and superior lens choices.
3. What are the best travel photography tips for beginners?
Use the Rule of Thirds for balanced shots.
Shoot during Golden Hour for perfect lighting.
Carry a versatile zoom lens for different scenes.
Protect gear with a weatherproof camera bag.
4. What is the best budget travel camera?
Canon EOS M50 Mark II – Affordable and lightweight.
Sony RX100 VII – Compact yet powerful.
Nikon D3500 – Best budget DSLR.
5. Can I use my smartphone for travel photography?
Yes! Smartphones with multiple lenses and AI features can capture great shots, but a dedicated travel camera offers better zoom and manual controls.
Stay Inspired and Informed! Follow The Lens India on social media for more captivating content, photography insights, and the latest updates:
Instagram: @thelensindia – Explore stunning visuals and behind-the-scenes stories!
Facebook: The Lens India – Join the conversation and never miss a post!
Let’s build a community of creators and storytellers together!
The Lens India
Tirupati Co-op Housing Society, Tirupati Campus, Phase – 2, Bldg – B8, F.no 402, Adarsh Colony Rd no -2,Tingre nagar,
Vishrantwadi Pune, Maharashtra 411015
Visit Us : https://thelensindia.com
Email Us : [email protected] Our Social Presence :
Facebook — https://www.instagram.com/thelensindiaInstagram — https://www.facebook.com/thelensindiaphotography/
#TravelPhotography
#WanderlustShots
#CaptureTheWorld
#ExploreWithCamera
#GlobetrotterShots
#WanderlustPhotographer
#TravelPhotography#WanderlustShots#CaptureTheWorld#ExploreWithCamera#GlobetrotterShots#WanderlustPhotographer#BestTravelCamera#TravelCameraGuide#MirrorlessCamera#DSLRPhotography#CompactCameraLife#BeginnerPhotographyGear#PhotographyTips#PhotographyForBeginners#LearnPhotography#BeginnerPhotographer#TravelPhotoTips#TravelPhotographyBasics#VisualStorytelling#FramingTheWorld#GoldenHourPhotography#StreetPhotographyVibes#LandscapeLovers#DetailsMatter#CameraGear#LensLove#4KVideo#LowLightPhotography#WiFiCamera#ShootLikeAPro
1 note
·
View note
Text
How to Choose the Best Travel Camera: Expert Photography Tips for Beginners
Best Travel Camera: Travel Photography Tips for Beginners
Travel photography is an exciting way to document new places, cultures, and experiences. However, choosing the best travel camera can be overwhelming, especially for beginners. With so many options available, selecting a camera that balances image quality, portability, and ease of use is essential.
In this guide, we’ll explore the best travel cameras, travel photography tips, and essential features to look for when choosing the right camera for your adventures.
1. Why Choosing the Best Travel Camera Matters
Travel photography involves a variety of shooting conditions—from capturing breathtaking landscapes to candid street portraits. Your travel camera should be:
Lightweight and portable – Easy to carry without adding bulk.
Versatile – Suitable for different lighting and environments.
Durable – Withstand travel conditions.
High-quality – Capture sharp and vibrant images.
Having the right camera enhances your ability to capture unforgettable moments with clarity and creativity.
2. Types of Travel Cameras: Which One is Right for You?
1. Compact Cameras (Point-and-Shoot)
Compact cameras are small, easy to use, and perfect for casual travelers. They offer decent image quality and automatic settings, making them ideal for beginners.
Pros:
Lightweight and pocket-friendly.
Simple to use with automatic settings.
Built-in lens eliminates the need to carry extra gear.
Cons:
Limited manual control.
Smaller sensors may reduce image quality.
Best for: Casual photographers who want an easy, travel-friendly camera.
Recommended Models:
Canon PowerShot G7 X Mark III
Sony Cyber-shot RX100 VII
Panasonic Lumix TZ90
2. Mirrorless Cameras
Mirrorless cameras offer professional-grade image quality in a more compact body than DSLRs. They allow for interchangeable lenses, making them more versatile for different photography styles.
Pros:
Compact and lightweight.
High-quality images with larger sensors.
Faster autofocus and better video capabilities.
Cons:
Shorter battery life compared to DSLRs.
Lenses may add extra weight.
Best for: Travel enthusiasts who want more control over their photography without the bulk of a DSLR.
Recommended Models:
Sony Alpha A6400
Canon EOS M50 Mark II
Fujifilm X-T4
3. DSLR Cameras
DSLRs provide the best image quality and full manual control but are bulkier than other travel cameras. They’re ideal for serious photographers who prioritize high-resolution images and lens flexibility.
Pros:
Superior image quality and low-light performance.
Wide selection of interchangeable lenses.
Long battery life.
Cons:
Heavy and bulky for travel.
Learning curve for beginners.
Best for: Professional and enthusiast photographers who need full control over their shots.
Recommended Models:
Canon EOS 90D
Nikon D7500
Canon EOS 5D Mark IV
3. Essential Features to Consider When Choosing a Travel Camera
1. Image Quality (Resolution)
Choose a camera with at least 20 megapixels to ensure sharp and detailed images. Larger sensors (APS-C or full-frame) perform better in low-light conditions.
2. Portability & Weight
For frequent travelers, a compact or mirrorless camera is ideal. If you prioritize quality over portability, a DSLR might be worth carrying.
3. Battery Life
Long battery life is essential for extended shooting sessions. Carry extra batteries or a power bank, especially for mirrorless cameras, which consume more power.
4. Lens Versatility
Wide-angle lenses (16-35mm): Best for landscapes and cityscapes.
Zoom lenses (24-200mm): Great for capturing distant subjects without carrying multiple lenses.
Prime lenses (50mm, 85mm): Perfect for portrait and low-light photography.
5. Video Capabilities
If you plan to vlog or record travel experiences, look for cameras with 4K video recording, good stabilization, and an external mic input.
6. Connectivity
Wi-Fi and Bluetooth-enabled cameras allow for easy sharing and backup of photos on the go.
4. Best Travel Cameras for Beginners
If you’re new to travel photography, these beginner-friendly cameras offer an excellent balance of performance and ease of use:
1. Sony Alpha A6000 (Mirrorless)
📸 Why it’s great: Compact, fast autofocus, and excellent image quality.
2. Canon EOS Rebel T7i (DSLR)
📸 Why it’s great: Affordable, beginner-friendly, and solid image quality.
3. Panasonic Lumix TZ200 (Compact)
📸 Why it’s great: Pocket-sized with a powerful zoom and 4K video.
4. Fujifilm X-T30 (Mirrorless)
📸 Why it’s great: Lightweight, stylish, and delivers professional-looking images.
5. Travel Photography Tips for Beginners
1. Plan Your Shots
Research destinations and lighting conditions beforehand. Sunrise and sunset provide the best natural lighting.
2. Use the Rule of Thirds
Compose shots using the rule of thirds for balanced and visually appealing images.
3. Experiment with Angles
Try different perspectives—low-angle shots, reflections, and framing techniques—for unique photos.
4. Keep Your Gear Safe
Invest in a weatherproof camera bag and always carry a lens cloth to keep your gear clean.
5. Capture the Details
While landscapes are stunning, don’t forget to capture the small details—local food, street signs, or textures.
6. Edit Your Photos
Use apps like Adobe Lightroom or Snapseed to enhance colors, contrast, and sharpness.
6. Conclusion: Finding the Best Travel Camera for Your Needs
Choosing the best travel camera depends on your travel style, budget, and photography goals. Compact cameras are perfect for casual photographers, mirrorless cameras offer versatility and quality, while DSLRs provide professional-grade performance.
No matter which camera you choose, the key is to capture your travel moments beautifully and effortlessly. If you’re still unsure about which camera to pick, The Lens India offers expert advice and top-rated travel cameras to help you make an informed decision.
📸 Start your travel photography journey today with the best travel camera and capture stunning memories!
FAQs: Best Travel Camera & Travel Photography Tips
1. What is the best travel camera for beginners?
The best travel cameras for beginners include:
Sony Alpha A6000 – Compact and great autofocus.
Canon EOS Rebel T7i – User-friendly DSLR.
Panasonic Lumix TZ200 – Pocket-sized with a powerful zoom.
2. Should I choose a mirrorless or DSLR for travel?
Mirrorless cameras are lightweight and ideal for travel, while DSLRs offer longer battery life and superior lens choices.
3. What are the best travel photography tips for beginners?
Use the Rule of Thirds for balanced shots.
Shoot during Golden Hour for perfect lighting.
Carry a versatile zoom lens for different scenes.
Protect gear with a weatherproof camera bag.
4. What is the best budget travel camera?
Canon EOS M50 Mark II – Affordable and lightweight.
Sony RX100 VII – Compact yet powerful.
Nikon D3500 – Best budget DSLR.
5. Can I use my smartphone for travel photography?
Yes! Smartphones with multiple lenses and AI features can capture great shots, but a dedicated travel camera offers better zoom and manual controls.
🚀 Want expert guidance? Join Lens India’s Photography Tours in Japan’s cherry blossom season or India’s wildlife parks to learn from the best and capture breathtaking shots!
Stay Inspired and Informed! Follow The Lens India on social media for more captivating content, photography insights, and the latest updates:
📸 Instagram: @thelensindia – Explore stunning visuals and behind-the-scenes stories! 👍 Facebook: The Lens India – Join the conversation and never miss a post!
✨ Let’s build a community of creators and storytellers together!
Conclusion :
The Lens India
Tirupati Co-op Housing Society, Tirupati Campus, Phase – 2, Bldg – B8, F.no 402, Adarsh Colony Rd no -2,Tingre nagar,
Vishrantwadi Pune, Maharashtra 411015
Visit Us : https://thelensindia.com
Email Us : [email protected]
Our Social Presence :
Facebook — https://www.instagram.com/thelensindia Instagram — https://www.facebook.com/thelensindiaphotography/
#TravelPhotography#CameraTips#TravelCamera#PhotographyLovers#PhotoTips#TravelGear#WanderlustPhotography#CameraHacks#TravelEssentials#PhotographyTips#TravelPhotographer#CaptureTheMoment#AdventurePhotography#TravelWithCamera
1 note
·
View note
Text
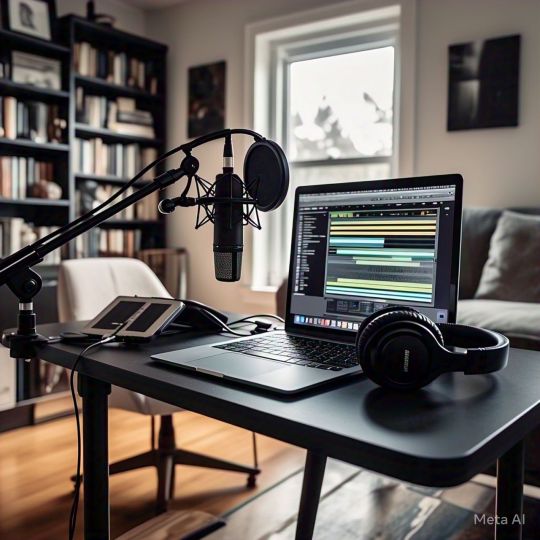
Live Streaming Audio Gear: Must-Have Products for 2025
Live streaming has quickly become a part of everyday life — whether you’re gaming, hosting podcasts, teaching online classes, or performing live music. As 2025 rolls in, the expectations around audio quality are higher than ever. Blurry video or slow internet might be forgivable, but bad audio can ruin a stream instantly.
If you’re planning to step up your streaming game this year, investing in the right audio gear is essential. Here’s a complete list of must-have audio equipment for live streaming in 2025, plus some helpful tips to make sure your setup sounds professional.
1. Microphones — The Heart of Your Setup
A good microphone is non-negotiable for live streaming. Viewers want to hear your voice clearly, without distortion, background noise, or weird echoes. There are three main types to consider, depending on your style and needs:

Condenser Microphones
These are perfect for streamers who need crisp, detailed vocals, like podcasters or musicians. Condenser mics are highly sensitive, capturing every subtle tone — which is great for studio-like sound, but also means they pick up more background noise.
Dynamic Microphones
Dynamic mics are less sensitive, which can be a good thing in noisy environments. If you’re streaming from your bedroom or a less-than-soundproofed space, a dynamic mic will focus on your voice and filter out background noise.
USB Microphones
For beginners or casual streamers, USB microphones are the simplest option. They plug directly into your computer, cutting out the need for extra gear. While they might not match the audio quality of pro-level mics, some modern USB mics have impressive clarity and features that work well for streaming.
2. Audio Interfaces — The Essential Middleman
If you choose an XLR microphone (which many professionals prefer for better sound control), you’ll need an audio interface. This device connects your mic to your computer and converts the analog audio signal into a digital one.
In 2025, many audio interfaces come with built-in preamps, EQ controls, and even software integration that helps you shape your sound in real time. For streamers doing interviews, live music, or multi-person streams, interfaces with multiple inputs are especially useful.
3. Headphones — Monitor Your Sound
It’s easy to forget, but monitoring your own audio is just as important as capturing it. Wearing good-quality headphones helps you catch problems (like buzzing, low volume, or distortion) before your audience does.
What to Look for in Streaming Headphones
Closed-back design to prevent sound leakage into your mic
Comfort for long streaming sessions
Neutral sound profile so you hear exactly what your audience hears
Avoid relying on built-in laptop speakers or cheap earbuds — they won’t give you an accurate sense of your audio quality.

4. Pop Filters and Shock Mounts — The Small Accessories That Make a Big Difference
Professional-sounding audio isn’t just about the mic — it’s about how you use it. Two inexpensive accessories can drastically improve your sound:
Pop filters reduce harsh plosive sounds (like the "p" and "b" bursts when you speak too close to the mic).
Shock mounts isolate the mic from vibrations (like desk bumps or keyboard noise).
These might seem minor, but they’re the secret weapons for clean, professional audio.
5. Mixers — For Full Control Over Your Audio
If your streams involve multiple audio sources (like game audio, voice chat, music, and your microphone), a mixer can help you balance everything in real time. Some newer models designed specifically for streamers also come with:
Customizable sound pads for triggering sound effects
On-the-fly voice filters
Easy integration with streaming software
For simple one-person setups, you might not need a mixer, but for more advanced streams, it’s worth considering.
6. Acoustic Treatment — Your Secret Weapon
Even the best mic can’t fully compensate for a bad-sounding room. If your space is full of echo, reverb, or background noise, adding some basic acoustic treatment can dramatically improve your sound quality.
Simple Fixes for Streamers
Foam panels on the walls to reduce reflections
A thick rug or carpet to absorb floor noise
Bookshelves, curtains, or blankets for extra dampening
You don’t need a professional studio — just some smart adjustments to make your room sound more controlled and less echoey.
7. Audio Processing Software — The Final Polish
Most modern streaming platforms (like OBS or Streamlabs) include basic audio controls, but for extra polish, you might want to explore third-party audio software. These programs can:
Clean up background noise
Add subtle compression to balance your voice
Apply EQ to make your voice clearer and warmer
Many audio interfaces and mics now come with free software suites, giving you extra tools to fine-tune your sound.
8. Backup and Redundancy — Be Prepared
Nothing ruins a stream faster than technical failures. In 2025, smart streamers are investing in backup gear and redundancy setups.
Backup Options to Consider
A secondary microphone (even a simple USB mic) in case your main mic fails
A secondary recording device (like a portable recorder) to capture audio separately, just in case
A power backup (UPS) to protect your gear if the power flickers
This might sound like overkill, but one unexpected glitch can ruin hours of work, so it’s better to be safe than sorry.
Quality Audio Sets You Apart
Audio quality used to be an afterthought, but in 2025, it’s a core part of every successful stream. With so much content out there, viewers expect clean, professional sound, whether they’re watching a gaming session, a live concert, or a casual chat stream.Investing in good gear from the start doesn’t just make your streams sound better — it makes you look more professional overall. And while there are countless options online, buying from professional audio shops ensures you get reliable products, expert advice, and the right equipment for your specific needs. If you’re serious about streaming in 2025, don’t just focus on your camera and overlays — great audio is what keeps people listening.
0 notes
Text
Recording Techniques for Professional Documentary Voice Over
A professional documentary voice over is an essential element that can bring a narrative to life, making it engaging and immersive for the audience. For documentaries, the voiceover must be clear, compelling, and emotionally resonant, while also ensuring the technical quality is top-notch. For a gruff voice actor, there are specific recording techniques that help produce the ideal sound.
Here are some key practices for achieving a professional documentary voiceover performance:
1. Proper Microphone Selection and Setup
The first step to achieving a high-quality professional documentary voice over is selecting the right microphone. For a gruff voice actor, a dynamic or cardioid microphone is often ideal as it focuses on capturing sound from the front while minimizing background noise. Proper microphone placement is also crucial: placing the mic 6 to 8 inches from the mouth ensures clarity while preventing distortion from plosives or harsh breathing sounds. It's also important to use a pop filter to minimize sibilance and plosive sounds, which can ruin the audio.
2. Optimal Recording Environment
A professional recording environment is key to achieving a clean and polished sound. For a gruff voice actor, recording in a soundproof room or booth is highly recommended. If you're recording at home, using acoustic treatments like foam panels or blankets can help reduce echo and background noise. A professional documentary voice over requires an environment where the voice can be captured in its purest form, free from distractions and outside noise.
3. Pacing and Tone Control
For a gruff voice actor, tone and pacing play a significant role in creating the right atmosphere for a documentary. The delivery should match the gravity or intensity of the subject matter. A documentary often requires a deliberate, measured pace, allowing the information to resonate with the audience. Avoid rushing the lines; instead, focus on speaking with purpose. For a professional documentary voice over, subtle shifts in pacing can convey different emotions, whether it’s the urgency of a dramatic moment or the calmness of an informative segment.

4. Breathing and Posture Techniques
Breathing is critical for voiceover work, especially for a gruff voice actor who might use more chest-based resonance. Good posture allows for deeper, fuller breaths and better voice control. Breathing deeply and steadily not only prevents excessive panting or gasping but also enhances vocal projection, which is especially important in a professional documentary voice over. Practicing diaphragmatic breathing can help maintain vocal stamina during long recording sessions and prevent the voice from sounding strained.
5. Voice Warm-Up and Hydration
Before recording any professional documentary voice over, it’s essential to warm up the voice. A gruff voice actor might naturally rely on lower registers, which can be rough on the vocal cords if not properly prepared. Gentle vocal exercises, such as humming or lip trills, can loosen the vocal cords and improve resonance. Hydration is equally important—drinking plenty of water ensures that the voice remains clear and free of unwanted cracks or dryness. Avoiding dairy products before recording is also advised, as they can cause mucus buildup, which can negatively affect the voice.
6. Editing and Post-Production
Even with the best recording techniques, post-production is where the magic happens. For a professional documentary voice over, editing ensures that the final product is polished. In the editing phase, noise reduction software can eliminate any background hum or unwanted noise. Equalization (EQ) adjustments can enhance the tone and clarity of the voice, while compression ensures consistent volume levels throughout the recording. For a gruff voice actor, a slight EQ adjustment in the mid to low frequencies can help emphasize their natural gravitas without making the voice sound too muddy.
Summary:
The right recording techniques are essential for producing a professional documentary voice over that stands out. Whether you’re a gruff voice actor or not, investing in quality microphones, optimizing your recording environment, controlling breathing, and practicing voice warm-ups all contribute to a high-quality end product. Post-production further refines the audio, ensuring that the voiceover is clean, clear, and emotionally resonant. When these techniques are combined, they result in a voiceover that captures the audience's attention and elevates the documentary's narrative.
Get in touch with us:
Phone: 615 302-2812 (Studio)
Phone: 615 390-4109 (Mobile)
Email: [email protected]
0 notes
Text
Top 6 Common Guitar Recording Mistakes to Avoid for Better Sound Quality
Recording guitar can be a rewarding yet challenging process. Capturing the perfect tone and achieving professional sound quality requires attention to detail. Unfortunately, even small mistakes can make your recordings sound amateurish or lackluster. In this blog post, we’ll cover six common guitar recording mistakes and how to avoid them for a cleaner, more polished sound.
1. **Neglecting Proper Tuning**
One of the simplest yet most overlooked mistakes is not ensuring the guitar is properly tuned before recording. Even if the tuning is slightly off, it can make the whole track sound out of key and unprofessional. Guitars can easily slip out of tune during sessions, especially when recording multiple takes.
**How to Avoid It:**
- Always tune your guitar before each take, and check the tuning periodically throughout the recording session.
- Use a reliable tuning pedal or app to ensure precision.
- Consider using a guitar with good tuning stability or locking tuners to avoid frequent re-tuning.
2. **Choosing the Wrong Mic Placement**
Microphone placement plays a crucial role in how your guitar sounds on the recording. Placing the mic too close to the sound source may result in a boomy or overly bass-heavy sound, while placing it too far can make the recording sound distant or thin. Experimenting with mic placement is essential to capturing the best tone.
**How to Avoid It:**
- For acoustic guitar, start by placing a condenser microphone around 12 inches away from where the neck meets the body of the guitar. Adjust the distance and angle depending on the sound you want to capture.
- For electric guitar, place the mic (usually a dynamic mic like the Shure SM57) off-center from the speaker cone to avoid harshness.
- Always monitor your sound as you adjust the placement to find the sweet spot.
3. **Overloading the Gain or Input Level**
Recording with the gain set too high can lead to unwanted distortion or clipping, which causes unpleasant, distorted artifacts in your sound. On the other hand, setting the input level too low can result in weak recordings with too much background noise. Striking a balance is key.
**How to Avoid It:**
- Use your audio interface’s input gain controls to ensure that your signal peaks between -6 dB and -3 dB. This gives you headroom without risking distortion.
- Monitor levels during the recording to ensure consistency.
- Remember, it’s easier to boost a low-level signal during mixing than to fix a clipped recording.
4. **Using Old or Worn-Out Strings**
Guitar strings lose their brightness and sustain over time, making your guitar sound dull or lifeless. Recording with old strings is one of the most common mistakes that can negatively affect your tone.
**How to Avoid It:**
- Always change your strings before an important recording session, especially if you haven’t changed them in a while.
- If you want a bright, punchy tone, opt for new strings. For a warmer sound, you can record with slightly broken-in strings (but not too old).
- Keep a backup set of strings handy during long sessions in case of breakage or wear.
5. **Ignoring Background Noise**
Background noise can be a major issue, especially when recording in a home studio. Noises such as hums, air conditioning, street sounds, or even the sound of your chair creaking can be captured by sensitive microphones, compromising the quality of your guitar recording.
**How to Avoid It:**
- Record in a quiet, isolated space where you can control external noise.
- Use noise gates or high-pass filters to eliminate low-level hums and background noise.
- For electric guitar recordings, eliminate amp hum by using balanced cables and grounding your equipment.
6. **Not Double-Tracking Guitars for Fullness**
Recording a single guitar track often leads to a thin sound that doesn’t fill out the mix. One common mistake is forgetting to double-track (recording the same part twice on separate tracks) guitars, which can add depth and fullness to your sound, especially in rock and pop music.
**How to Avoid It:**
- Record the same guitar part twice on separate tracks, panning each take hard left and right. This creates a fuller, wider stereo image.
- Be sure that both takes are as tight as possible for a cohesive sound.
- Experiment with slightly different tones or guitar settings for each take to add more texture and dimension.
Final Thoughts
Avoiding these common guitar recording mistakes can significantly improve the sound quality of your recordings. Whether you’re working on an acoustic track or a full electric arrangement, proper tuning, mic placement, and attention to detail can make a world of difference. By following these tips, you’ll be well on your way to capturing clean, professional-sounding guitar tracks that stand out in your mix.
Happy recording!
#GuitarRecording#SoundQuality#MusicProduction#RecordingMistakes#AudioEngineering#GuitarTips#HomeStudio#MusicRecording#SoundDesign#Guitarists
0 notes
Text
Building Your First Podcast Setup: Essential Gear and Tips
Starting a podcast is an exciting journey that allows you to share your passions, stories, and insights with a global audience. However, diving into the world of podcasting can feel overwhelming, especially when it comes to selecting the right equipment and understanding the essentials. Fear not! This guide will walk you through the fundamental gear and tips to set up your first podcast, ensuring you create content that resonates with your listeners.
1. Defining Your Podcast Concept
Before delving into equipment, it's crucial to have a clear vision of your podcast's theme and target audience. Ask yourself: What topics am I passionate about? Who would benefit from or enjoy this content? By narrowing down your niche, you can create focused and engaging episodes that cater to a specific group, enhancing listener loyalty. For instance, if you're enthusiastic about sustainable living, your podcast could explore eco-friendly practices, interviews with environmental experts, and tips for reducing one's carbon footprint. Having a well-defined concept not only guides your content creation but also helps attract a dedicated audience.
2. Essential Equipment for Beginners
Investing in the right equipment is pivotal for producing clear and professional-sounding episodes. Here's a breakdown of the essentials:
Microphone: The cornerstone of your setup. USB microphones are user-friendly and ideal for beginners, offering plug-and-play functionality. They connect directly to your computer, eliminating the need for additional interfaces. As you progress, you might consider XLR microphones, which, while requiring an audio interface, often provide superior sound quality. Dynamic microphones are generally preferred for podcasting due to their durability and ability to handle various sound levels.
Headphones: A good pair of closed-back headphones is essential for monitoring your recordings. They help you catch background noises, ensure audio clarity, and make precise edits during post-production. Over-ear models are often recommended for their comfort during extended recording sessions.
Pop Filter: This accessory reduces plosive sounds (like hard 'P' and 'B' sounds) that can cause distortion in your recordings. It's an affordable addition that significantly enhances audio quality.
Microphone Stand or Boom Arm: Holding a microphone can lead to inconsistent sound levels and unwanted noise. A stand or boom arm stabilizes the microphone, allowing for hands-free recording and optimal positioning.
Audio Interface (Optional): If you opt for an XLR microphone, an audio interface is necessary to connect the mic to your computer. It converts analog signals to digital, ensuring high-quality sound transmission.
3. Recording Environment
Your recording space plays a significant role in sound quality. Choose a quiet room with minimal echo. Soft furnishings like curtains, carpets, and cushions can help absorb sound reflections. Some podcasters even use DIY solutions, like hanging duvets or foam panels, to create a more acoustically friendly environment. The goal is to minimize background noise and echo, ensuring your voice remains clear and crisp.
4. Recording and Editing Software
Once your equipment is set up, you'll need software to record and edit your episodes. There are several user-friendly options available:
Audacity: A free, open-source platform that's great for beginners. It offers a range of editing tools and effects to polish your recordings.
GarageBand: Ideal for Mac users, this free software provides a straightforward interface with various sound editing features.
Adobe Audition: A professional-grade software with advanced editing capabilities. While it comes with a subscription fee, it's a worthy investment as you advance in your podcasting journey.
These platforms allow you to trim unwanted sections, adjust audio levels, and add music or sound effects to enhance your episodes.
5. Planning Your Content
Consistency is key in podcasting. Outline your episodes in advance, deciding on topics, formats (interviews, solo discussions, panel discussions), and episode lengths. Creating a content calendar can help you stay organized and ensure regular uploads, which is crucial for building and retaining an audience. Engaging with your listeners through social media or feedback segments can also foster a sense of community and loyalty.
6. Hosting and Distribution
After recording and editing, you'll need a platform to host your podcast files and distribute them to various directories like Spotify, Apple Podcasts, and Google Podcasts. Many hosting services offer analytics to track your audience's engagement and demographics, helping you tailor your content effectively.
7. The Importance of Professional Guidance
While it's tempting to purchase equipment from the most convenient sources, buying from reputable audio shops ensures you receive quality products and expert advice tailored to your needs. These professionals can guide you in selecting gear that aligns with your budget and podcasting goals, setting you up for success from the outset.
8. Practice and Patience
Your first few episodes might not be perfect, and that's okay. Podcasting is a learning process. Seek feedback, be open to making adjustments, and most importantly, enjoy the journey. Authenticity resonates with audiences, so let your passion shine through each episode.
Embarking on your podcasting adventure is an exciting endeavor. With the right equipment, a clear plan, and a commitment to continuous improvement, you'll be well on your way to creating content that informs, entertains, and inspires.
#audio#audio gear#music#dj#professional audio#audio shop in brooklyn#musician#podcast#podcasting#brooklyn#pro audio shop
0 notes
Text
Tools Every Modern Musician Needs to Succeed
The music industry today is more dynamic and accessible than ever before. With a surge in digital tools and resources, musicians no longer need expensive studios or extensive training to kickstart their journey. Whether you’re a singer honing your vocal skills, a producer experimenting with new sounds, or an artist promoting your work, modern technology provides the tools to succeed. This article explores five essential resources every musician should know about, from learning platforms to portable gear and marketing strategies.
1. Singing Simplified: Online Tutorials for Every Level
For aspiring singers, learning to sing can feel overwhelming, especially without proper guidance. Fortunately, there are accessible resources like gana gana kaise sikhe that break down vocal training into simple, actionable steps.
These guides are perfect for beginners, offering insights into breathing techniques, pitch control, and vocal exercises. Advanced singers can also benefit by refining their skills and exploring new styles. One of the biggest advantages of online singing tutorials is their flexibility; you can practice at your own pace, anytime and anywhere. Whether you aim to sing for personal enjoyment or as part of a professional career, these resources are invaluable.
2. The Rise of Portable Instruments
Gone are the days when musicians were tied to bulky equipment and fixed locations. The rise of portable instruments has transformed the way music is created and performed.
From compact keyboards to foldable guitars, portable instruments allow artists to create on the go. These tools are especially beneficial for touring musicians and creators who draw inspiration from their environment. Some popular examples include:
Digital MIDI Keyboards: Lightweight yet powerful, these keyboards integrate seamlessly with music production software.
Travel Guitars: Smaller in size but big on sound, travel guitars are perfect for jam sessions or casual practice.
Portable Drum Pads: Ideal for beatmakers, these devices are easy to carry and allow real-time experimentation.
With these instruments, musicians no longer need a dedicated studio to bring their ideas to life. They can simply set up their gear in any setting and let creativity flow.
3. Discord: A Hub for Music Collaboration and Community
Music is not just about creation but also about connection, and platforms like Discord have made collaboration easier than ever. The concept of discord music revolves around creating shared spaces where artists, fans, and producers can come together.
On Discord, users can:
Share playlists with friends or community members.
Host live listening sessions for feedback.
Collaborate with other musicians remotely.
Discuss trends, techniques, and gear in dedicated music channels.
What sets Discord apart is its ability to foster a sense of community. Musicians can use the platform to build their fan base, gather feedback on their work, or even find collaborators for new projects. The interactive nature of Discord makes it an indispensable tool for modern artists.
4. Achieving Professional Audio Quality with the Right Microphone
No matter how talented you are, poor audio quality can diminish your efforts. Investing in the best mike for voice recording is crucial, especially if you’re producing music, podcasts, or YouTube videos.
Choosing the right microphone depends on your specific needs:
Dynamic Microphones: Great for live performances, these are durable and handle high sound pressure levels.
Condenser Microphones: Perfect for studio recording, they capture a broader frequency range with incredible detail.
USB Microphones: Ideal for beginners or content creators, these are plug-and-play and don’t require additional equipment.
A high-quality microphone ensures clarity and reduces background noise, making your recordings sound professional. Pairing the right mic with proper editing software can elevate your sound to new heights.
5. Marketing Your Music: Social Media Ads That Work
Creating great music is only half the battle; the other half is ensuring it reaches your audience. Social platforms like Facebook and Instagram have become essential for promoting music. Learning to advertise on Facebook and Instagram is a skill every modern musician should master.
Why social media ads work for musicians:
Precise Targeting: Platforms allow you to target users based on demographics, interests, and behavior, ensuring your music reaches the right audience.
Cost-Effective: Even with a modest budget, you can run impactful ad campaigns.
Engagement-Driven: Social ads encourage interaction, such as likes, shares, and comments, which further amplify your reach.
Analytics: Tools like Facebook Insights and Instagram Metrics help track the performance of your campaigns, allowing you to refine your strategies over time.
A well-executed ad campaign can significantly boost your visibility, grow your fan base, and even drive album or ticket sales.
Conclusion
Modern musicians have access to an incredible array of tools that can enhance their skills, streamline their workflow, and expand their reach. Whether you’re learning through resources like gana gana kaise sikhe, leveraging portable instruments, or building your community with discord music, there’s a solution for every challenge. Pair these innovations with the right gear, like the best mike for voice recording, and smart marketing strategies such as advertising on Facebook and Instagram, and you’re set for success.
What’s your favorite tool or strategy for music? Let us know in the comments below, and don’t forget to share this article with fellow musicians looking for inspiration!
0 notes
Text
The Best Eight Affordable Audio Interfaces for Home Studios on a Budget
As home studios continue to rise in popularity, the demand for quality yet affordable audio equipment has never been higher. Setting up a functional studio from home requires smart choices—balancing quality and cost without compromising on performance. One of the first essentials for any home recording setup is a reliable audio interface that converts analog sound to digital with clarity, giving musicians and producers the power to record, mix, and produce at home. The good news? You don’t need to invest in the most expensive gear to get professional results.
This guide focuses on the eight affordable audio interfaces that are perfect for building a high-quality home studio on a budget. Whether you’re a beginner or an intermediate producer, these budget-friendly options provide the essential features and compatibility needed for producing music, recording vocals, or even creating podcasts—all from the comfort of your own space. We’ll explore each interface’s unique features, ease of use, and best practices for setting up an efficient home studio. By the end of this article, you’ll have a clear understanding of which interface will bring the best value to your budget-conscious setup.
1. Focusrite Scarlett 2i2 (3rd Gen)
Overview: A favorite in the home recording world, the Focusrite Scarlett 2i2 is well-known for its high-quality preamps and user-friendly design.
Features: It features two preamps, each with gain halos for clear visual feedback, balanced line outputs, and a direct monitor switch.
Why It’s Ideal for Home Studios: With its easy setup, USB-powered design, and compatibility with most DAWs, it’s a perfect choice for beginners or intermediate users recording at home.
Price: Around $160, making it an affordable option with great value.
2. Behringer UMC404HD
Overview: Behringer’s UMC404HD offers one of the best input-to-price ratios, with four MIDAS-designed preamps and a robust metal build.
Features: It includes four XLR/TRS inputs, pad buttons, and gain control for each channel, making it suitable for more complex setups.
Why It’s Ideal for Home Studios: The UMC404HD is particularly ideal for users who want to record multiple instruments simultaneously.
Price: Around $120, it’s affordable and especially good for bands or multi-instrument setups.
3. PreSonus Studio 24c
Overview: A modern option from PreSonus, the Studio 24c is compact but powerful, offering 24-bit/192kHz resolution for crystal-clear sound.
Features: Two XMAX-L mic preamps, MIDI I/O, and a USB-C connection make it versatile and ready for current setups.
Why It’s Ideal for Home Studios: It’s compatible with Studio One Artist software, making it ideal for users new to music production.
Price: At approximately $150, it’s a mid-range option with impressive capabilities.
4. Steinberg UR22C
Overview: Known for its portability and durability, the Steinberg UR22C is a great fit for musicians on the go.
Features: With USB-C compatibility, MIDI, and two D-PRE preamps, the UR22C can handle both studio and mobile recording.
Why It’s Ideal for Home Studios: It’s perfect for those who need an interface that they can use both at home and on the road.
Price: Priced around $180, it’s a reliable option for versatile recording needs.
5. M-Audio AIR 192|6
Overview: M-Audio’s AIR 192|6 has gained popularity for its professional-grade preamps and low-latency USB-C connection.
Features: It features two combo inputs, XLR/TRS, and balanced stereo outputs, along with a direct monitoring feature.
Why It’s Ideal for Home Studios: It provides clear sound with very low latency, ideal for live monitoring during recording sessions.
Price: Approximately $170, it’s a top choice for serious recording on a budget.
6. Audient iD4 MKII
Overview: Audient’s iD4 MKII is known for its pristine sound quality, thanks to its Class-A mic preamps and JFET instrument input.
Features: It has one XLR input, one instrument input, and offers latency-free monitoring.
Why It’s Ideal for Home Studios: While slightly pricier, its sound quality and sturdy design make it ideal for serious home recording.
Price: Around $199, it’s worth the investment for those prioritizing sound quality.
7. Tascam US-2x2HR
Overview: Tascam’s US-2x2HR is a high-quality yet affordable interface with easy setup and cross-platform compatibility.
Features: It includes two XLR/TRS combo inputs with Ultra-HDDA preamps and provides MIDI I/O and USB-C connection.
Why It’s Ideal for Home Studios: Tascam’s design is ideal for beginners looking for a straightforward setup.
Price: Around $130, it’s a good choice for users who value simplicity and reliability.
8. Native Instruments Komplete Audio 2
Overview: Known for its compatibility with Komplete software, this interface is compact and offers high-quality recording.
Features: It has two XLR/TRS combo inputs, low-latency performance, and a sleek, compact design.
Why It’s Ideal for Home Studios: Especially beneficial for users of Native Instruments software, and it integrates seamlessly into DAWs.
Price: Approximately $120, it’s a reliable choice for new producers or podcasters.
Tips for Setting Up Your Home Studio on a Budget
Choose a Quiet Space: While audio interfaces are crucial, location matters too. A quieter, smaller room can minimize echo and improve sound quality.
Invest in Affordable Acoustic Treatment: Affordable options like foam panels or DIY sound absorbers can improve recording quality significantly.
Use Free or Budget-Friendly DAWs: Many interfaces come with free DAW software, which can save money and help beginners learn before investing in higher-end software.
Consider USB vs. USB-C: If your computer supports it, a USB-C interface may offer lower latency and faster transfer speeds, which can be beneficial in home recording.
Monitor Options: If studio monitors are out of budget, a good pair of headphones will provide adequate sound quality for editing and mixing.
Work With the Essentials: Start with a basic setup and build up slowly as your skills improve and you better understand your recording needs.
Conclusion:
Building a home studio on a budget is easier than ever with these eight affordable audio interfaces that provide professional-grade sound without the high price tag. Each interface in this list brings a unique combination of features, such as USB-C compatibility, high-quality preamps, or portable design, ensuring you have the tools to start recording with confidence. From the highly versatile PreSonus Studio 24c to the studio-quality Audient iD4 MKII, these options offer something for everyone, whether you’re an aspiring podcaster, musician, or producer.
Choosing the right audio interface will help lay the foundation for a successful home studio experience, enabling you to explore music production, record vocals, or create content from the comfort of your home. With a bit of research and some hands-on practice, an affordable interface can go a long way in achieving professional results without a large financial investment. As technology advances, home recording setups will only get better, so now is the perfect time to dive in and start creating.
0 notes
Text
Top Audio Equipment Hire Options for Corporate Events in London
osting a corporate event in a bustling city like London requires meticulous planning, especially regarding audio equipment hire. Quality sound equipment is vital to ensure every presentation, speech, and announcement is clear and impactful, and the right provider can elevate the experience for all attendees. For event planners, options like London speaker hire and PA hire in London provide a range of solutions, tailored to meet the specific needs of each event.
This article explores the best audio equipment options for corporate events, factors to consider when hiring, and the benefits of speaker rental services in London.

1. Why Quality Audio Matters at Corporate Events
In the world of corporate events, from conferences to product launches, communication is key. Clear, professional audio creates a seamless experience that keeps attendees engaged and reflects positively on the brand. High-quality sound ensures that every word is heard, whether in a large auditorium or a small breakout room.
Poor audio can make even the best presentations fall flat, and it may leave a lasting negative impression. When planning a corporate event, choosing PA system hire near me and audio equipment hire services that offer top-quality sound is essential.
2. Key Audio Equipment for Corporate Events
To create an exceptional audio experience, selecting the right equipment is crucial. Here are some essential components to consider:
a. Microphones
Choosing the right microphone setup is important for clarity and range. Depending on the event type, various options are available:
Handheld Microphones: Ideal for speakers who prefer flexibility, handheld mics work well for Q&A sessions or presentations.
Lavalier Microphones: These clip-on microphones allow hands-free use and are great for presenters who need to move around.
Headset Microphones: Perfect for dynamic presenters who need mobility without sacrificing sound quality.
b. PA Systems
A PA system (Public Address system) is necessary for amplifying sound across large rooms. Many PA hire London services offer systems suited for different room sizes, from small meeting rooms to large auditoriums. A powerful PA system ensures that all attendees can hear the speakers clearly.
c. Speakers
Speakers are the heart of any audio setup. High-quality speakers ensure sound is projected evenly throughout the venue. London speaker hire options include a range of speakers tailored to various room sizes, ensuring a consistent listening experience for every attendee.
d. Mixers
Mixers are essential for controlling the sound output from multiple sources. This piece of equipment allows event staff to adjust volume levels, mix audio inputs, and fine-tune the sound quality.
e. Amplifiers
Amplifiers are used to boost the audio signal, allowing it to reach larger spaces without distortion. Choosing an amplifier that suits the venue size is critical for maintaining sound quality.
3. Audio Equipment for Breakout Sessions
Corporate events often feature breakout sessions or workshops in smaller rooms. Portable PA systems and compact speakers work well in these environments, offering clear sound without overwhelming the room. Many PA hire near me services provide solutions specifically tailored for smaller spaces.
4. Audio Solutions for Large-Scale Corporate Events
For large-scale events, such as company-wide conferences or product launches, powerful PA systems and a robust network of speakers are required. A multi-speaker setup ensures that sound reaches every corner of the venue. Working with a London speaker hire service with experience in large corporate events can help in setting up a system that ensures consistent sound quality.
5. Benefits of Audio Equipment Hire for Corporate Events
Choosing audio equipment hire over purchasing has numerous advantages:
a. Cost-Effectiveness
Renting equipment is often more affordable than buying, especially for one-time events. Speaker rental and PA hire London services provide top-quality equipment without the upfront costs, allowing businesses to allocate their budgets more efficiently.
b. Access to the Latest Technology
Many London speaker hire companies frequently update their inventory, offering clients access to the latest advancements in sound technology. From wireless microphones to high-definition speakers, renting allows businesses to benefit from state-of-the-art equipment.
c. Professional Setup and Support
Setting up audio equipment for a corporate event can be challenging. Hiring a professional team ensures that everything is installed and configured correctly. Many PA hire near me services offer on-site support, so you can focus on running the event while experts handle the technical aspects.
d. Flexibility
Different events have different requirements, and hiring audio equipment provides flexibility to meet each event’s specific needs. Renting allows you to select the right equipment for each occasion, whether a small meeting or a large-scale conference.
6. Finding the Right Audio Equipment Hire Service in London
To make the most of your audio equipment hire experience, consider these tips for finding the right provider:
a. Look for Experience in Corporate Events
Choose a provider with a track record of supporting corporate events. An experienced company understands the unique requirements of business gatherings and offers solutions to meet those needs.
b. Check for Comprehensive Services
Opt for a company that offers a range of services, from equipment rental to on-site support. Full-service companies like Sound Control PA ensure you have everything you need in one package, streamlining the event planning process.
c. Assess Their Equipment Range
Ensure the provider offers a variety of equipment suited to different event sizes and types. The best PA hire London services provide options for everything from small meetings to large conferences, with scalable solutions to fit any setting.
d. Ask About Technical Support
Technical issues can disrupt even the best-planned events. Having a provider that offers technical support on standby ensures any issues are quickly resolved, keeping the event running smoothly.
7. Customizing Your Audio Setup for Corporate Events
Each corporate event is unique, so tailoring the audio setup to the specific needs of your event is essential. Here’s how to make the most of your PA system hire near me or audio equipment hire:
Venue Size and Layout: Larger venues may need a more powerful audio setup, while smaller rooms benefit from compact systems. Consider the venue’s layout to determine the best placement for speakers.
Event Type: Whether it's a formal conference, a product launch, or a networking event, select equipment that enhances the event’s specific needs.
Audience Size: The number of attendees impacts the type of equipment needed. Larger audiences require more powerful sound systems and amplifiers.
8. Advantages of Working with a Full-Service Audio Provider
A full-service audio provider offers more than just equipment; they also provide expertise, ensuring the setup meets the highest standards. From delivery and installation to on-site troubleshooting, having a professional team manage the audio setup allows organizers to focus on the event’s content and logistics.
9. Best Practices for Managing Audio at Corporate Events
Properly managing audio equipment during the event ensures a smooth experience for speakers and attendees alike. Some best practices include:
Testing Equipment Beforehand: Always conduct sound checks before the event starts to ensure all equipment functions properly.
Assigning an Audio Technician: An audio technician can monitor sound levels, adjust settings, and address any issues in real-time.
Keeping Backup Equipment: Having backup microphones, cables, and batteries can prevent disruptions in case of equipment failure.
Conclusion
Selecting the right audio equipment hire for a corporate event is critical to creating a professional and engaging experience. From London speaker hire to PA hire near me options, companies can access high-quality equipment that fits their event’s needs and budget. Renting audio equipment not only offers cost savings and flexibility but also allows event organizers to benefit from professional setup and support. With the right audio setup, corporate events can be more impactful, ensuring clear communication and an enjoyable experience for all attendees.
0 notes
Text
Roland Presents the New Lightweight, Portable JUNO D-Series
Roland JUNO-D Series Keyboard Synthesizers Review: Key Features, Pros & Cons, and Customer Feedback The Roland Corporation recently introduced their latest lineup in the world of synthesizers with the release of their new JUNO-D Series. This series includes three models - the JUNO-D6, D7, and D8 - each designed to cater to different preferences while maintaining a consistent quality core that defines Roland’s synth offerings. Key Features - Variety in Keys: The series provides options for all players; from lightweight synth-action keys (61-note on the D6 and 76-note on the D7) for swift movements across octaves to an authentic piano feel on the fully weighted 88-key hammer action keyboard found on thheD8. - ZEN-Core Sound Engine: A standout feature within these synths is Rolands's proprietary ZEN-Core engine. This powerful technology delivers a vast range of sounds from acoustic pianos and electric keyboards to robust orchestral instruments or ethereal synthetic tones catering both classic tastes also those seeking modern timbres. - Expandable Sound Library: Users can import WAV samples directly into any model within this series—enabling customization by adding personal sound effects or rare sampleSs thus broadening their sonic palette further than ever before possible Uder one unit -Sound Management Tools : Robust onboard controls allow quick access up16Andfulde simultaneous tone layering alongside split-hand functionalities contribute greatlySequoncaninPerfo ostageonsense/SitOne-The go performances OrSongwritingSessionEs alike Equipped FavoriteFeatMust-have When rapidly switching between setups during live playbacks without hitch -Vocal Effects Suite With built-in mic input Support Pro-level vocals are no longer out-of-reach thanks addition CompressiveEQReverVbacrNoiseSuppressionEffectBitsWeeIAutoPItMetvocoderUpFurtherEnhancePerformance Appeal Front audiences Influences lurking present-day pop sungarders -Roland Cloud Access Continuing commitment providing users cutting-edge tech inclusivity Roleady gives buyers free Rein Online Exclusive Content Presets Ensuring instrument remains future-proof against evolving music scenesadaptations over time Pros: - Wide Range Sounds Thanks Zen-coreSynthEngineloaded 2.Portability Across Models Despite Size Differences Light Designs Make Transportation Hassle-free Either Gig studio session meantime) 3.User-friendly Interface Short Learning Curve Intimidating Newcomer Additional enthusiastsAltelikeke)) 4.Extensive Customization Options Through Import Feature WavDefiningPersonalSoundSpace MoreDirect Way Compared Traditional FactoTesterbeonydsinnApparatuses Previously poses Syndonymousities as limiting factors Eraturn Voluminous surpassed expectations Herebiscreation HeOpPortuniSysbyasyopfounses liTorialCo eAppears Utilize Cons: 1.Price Point May high beginners entry-Level musicians budget constraints Consideration Especially higher-end Model(DwithinSerieswhichLogicallyXpectedNevertheless ItbothersomesomelyAudienceDespite WorthQuality Beaterlfetched Upon UseIndeedWarrantInvestment Cogeneration Precious Musical Endeavors advancementForfeit 2.Complexity Advanced features After Initial Phase Familiarity There steep Arrow upward mastery FullScopeWhat equipment offer Interrupt Flow Inexperienced UserTimeEffort Must Invest UnderstandManipulateFunctions effectively Counteracting initial ease use advertised lengthen adaptation periodCertain Demographic Customer Feedback Summary: Overwhelmingly positive reviews highlight how well-equipped user community felt diving musical projects using Juno seri Tesla particularly praised realism synthesis capabilities blending various genres seamlessly together contrast few noted learning curve associated deeper functions make most tool could perplex not accustomed rich functionality However consensus maintains satisfaction prices justified investment looking upgrade refresh current setup bringing refreshing touch authenticity compositionsWhether stage home studio environment enthusiast professional alike 종류feedback underscores value proposition representLimitless possibilities awaits unlock Timberreur https://www.roland.com/global/promos/juno-d_series/ Read the full article
0 notes
Text
Creating an ASMR and study YouTube channel is a great idea! Here’s a step-by-step guide to help you get started:
1. Define Your Niche and Content Style
ASMR: Decide on the type of ASMR you want to create (e.g., whispering, tapping, role-play, object sounds).
Study Content: Determine the study-related content you'll include (e.g., study with me sessions, study tips, ambient study music).
Combination: Think about how you can combine both niches creatively, like ASMR study sessions or relaxing study background videos.
2. Plan Your Content
Content Calendar: Plan your videos in advance. Decide on a posting schedule (e.g., weekly, bi-weekly).
Video Length: ASMR videos are often longer (20-60 minutes), while study videos can vary. Aim for content that encourages viewers to relax or focus for extended periods.
Series and Themes: Create recurring series (e.g., "Morning Study Sessions", "Evening ASMR Relaxation"). Themes help maintain consistency and attract loyal viewers.
3. Set Up Your Equipment
Camera: Use a high-quality camera. A smartphone with a good camera can work initially.
Microphone: Invest in a high-quality microphone, especially for ASMR. Popular options include the Blue Yeti, Rode NT1-A, or Tascam DR-05.
Lighting: Use soft lighting to create a relaxing atmosphere. Ring lights or softbox lights are popular.
Background: Create a clean, calming background. Consider using plants, books, candles, or minimalistic decor.
4. Film Your Videos
ASMR Techniques: Use a close-up mic, speak softly or whisper, and experiment with different triggers (e.g., tapping, crinkling paper).
Study Sessions: Record yourself studying or working on a task. Ensure a quiet environment, and consider adding background music or ambient sounds.
Editing: Edit your videos to remove any distractions. Software like Adobe Premiere Pro, Final Cut Pro, or DaVinci Resolve are excellent, but simpler tools like iMovie or Wondershare Filmora can also work.
5. Optimize Your YouTube Channel
Channel Name: Choose a catchy and memorable name that reflects your niche.
Channel Art: Design a banner and logo that represents your content. Tools like Canva can help.
Thumbnails: Create engaging thumbnails with a consistent style. Use clear images and bold text.
SEO: Use relevant keywords in your video titles, descriptions, and tags. Research trending keywords in the ASMR and study niches using tools like TubeBuddy or vidIQ.
6. Engage with Your Audience
Comments: Respond to comments to build a community. Ask viewers for feedback and suggestions.
Social Media: Promote your channel on social media platforms like Instagram, Twitter, or TikTok. You can also join ASMR or study-related communities to share your content.
Livestreams: Consider doing live study sessions or ASMR sessions to engage with your audience in real-time.
7. Monetize and Grow Your Channel
AdSense: Once you reach 1,000 subscribers and 4,000 watch hours, apply for YouTube Partner Program to monetize your videos.
Sponsorships and Affiliate Marketing: Partner with brands that align with your niche. Use affiliate links for products you recommend.
Merchandise: As your channel grows, consider creating merchandise (e.g., mugs, t-shirts) with your branding.
8. Stay Consistent and Evolve
Consistency: Regular uploads and consistent content help retain viewers and attract new ones.
Analytics: Monitor your YouTube Analytics to understand what content performs best and refine your strategy.
Adapt and Innovate: Stay updated with trends in ASMR and study niches. Be open to trying new ideas and formats.
Final Tips
Patience and Persistence: Growing a channel takes time. Stay motivated and keep improving your content.
Authenticity: Be genuine in your videos. Authenticity resonates with viewers, building a loyal audience.
Good luck with your ASMR and study YouTube channel!
0 notes