#decorative planters
Explore tagged Tumblr posts
Visit Tumblr Blog
Explore Tumblr blogs with no restrictions, modern design and the best experience.
Last Seen Tumblr Blogs


Fun Fact
Tumblr was acquired by Yahoo for $1.1B in 2013.
Text
Radish Growing Guide: Seed to Table in Just Four Weeks
Radishes are one of the quickest and easiest vegetables to grow, making them perfect for both beginner gardeners and seasoned green thumbs. Whether you’re looking to add a peppery crunch to your salads or a vibrant pop of color to your garden, radishes can go from seed to table in just four weeks. Let's dive into the essentials of growing radishes successfully.
Key Takeaways
Radishes can be harvested in as little as four weeks from planting.
Choose seeds based on the radish variety that suits your climate and taste preference.
Plant radishes in well-drained, loose soil with a pH of 6.0 to 7.0 for optimal growth.
Space seeds 1 inch apart and sow them at a depth of 1/2 inch for best results.
Ensure consistent watering, especially during dry spells, to prevent radishes from becoming woody.
Getting Started with Radishes
Before planting radishes, it's crucial to understand what makes them thrive. Radishes are cool-season crops, which means they prefer the cooler temperatures of spring and fall. They grow best in full sun, but they can tolerate partial shade, especially in warmer climates. Most importantly, radishes require well-drained soil to prevent root rot and other moisture-related issues.
One of the most exciting aspects of growing radishes is their rapid growth rate. With some varieties ready to harvest in just 25 days, they are ideal for gardeners who want quick results. Plus, their short growth period allows for multiple plantings throughout the season.
Choosing the Right Seeds
The first step in your radish growing journey is selecting the right seeds. Radishes come in a variety of shapes, sizes, and colors. From the classic red globe radishes to the elongated white daikon, there's a radish for every palate and garden. When choosing seeds, consider your climate, the space you have available, and your taste preferences.
Here are a few popular radish varieties to consider:
Cherry Belle: A classic round, red radish that matures in about 22 days.
French Breakfast: An oblong radish with a mild flavor, ready in 25 days.
Daikon: A large, white radish often used in Asian cuisine, taking 60 days to mature.
Watermelon Radish: Known for its vibrant pink interior, it matures in 60 days.
Understanding Seed Varieties
Different radish varieties have different growing requirements and flavors. For instance, if you live in a region with a short growing season, opt for faster-maturing varieties like Cherry Belle. Conversely, if you have a longer growing season, you might enjoy experimenting with slower-growing types like Daikon.
Besides that, consider the culinary uses of each variety. While Cherry Belle is perfect for salads and garnishes, Daikon is excellent for pickling and cooking. Knowing the characteristics of each type can help you make an informed decision and ensure a successful harvest.
Best Time to Plant
Timing is everything when it comes to planting radishes. They thrive in cooler temperatures, so aim to plant them in early spring or fall. If you’re planting in spring, sow seeds as soon as the soil is workable. For fall planting, start sowing seeds about four to six weeks before the first expected frost.
One key advantage of radishes is their ability to be succession planted. By sowing seeds every two weeks, you can enjoy a continuous harvest throughout the growing season. This technique is particularly useful for maintaining a steady supply of fresh radishes for your kitchen.
"For a continuous harvest, plant radish seeds every two weeks throughout the growing season."
Optimal Soil Preparation
Preparing the soil properly is crucial for growing healthy radishes. They prefer loose, well-drained soil with a pH between 6.0 and 7.0. Heavy clay soils can impede root development, so consider amending such soils with organic matter or sand to improve drainage.
Before planting, work the soil to a depth of at least 12 inches and remove any rocks or debris that might obstruct root growth. Adding compost or aged manure can enhance soil fertility and support robust radish growth.
Planting Techniques for Success
Once your soil is ready, it's time to plant your radish seeds. Planting radishes is straightforward, but following a few key steps can make all the difference in your harvest.
First, make shallow furrows in the soil, about 1/2 inch deep. Space the rows about 12 inches apart to give the radishes room to grow. Next, sprinkle the seeds evenly along the furrows, aiming for a spacing of about 1 inch between seeds. Cover the seeds lightly with soil and water gently to ensure good soil contact.
Sowing Seeds Correctly
Sowing radish seeds at the correct depth and spacing is essential for healthy growth. If seeds are planted too deep, they may struggle to germinate. Conversely, if they are too shallow, they might dry out or be disturbed by wind and rain.
Once planted, keep the soil consistently moist but not waterlogged. Radishes require regular watering, especially during dry spells, to prevent the roots from becoming woody and bitter.
Spacing and Depth Guidelines
Proper spacing is crucial for radishes to develop fully. If planted too closely, they may compete for nutrients and space, resulting in smaller, less flavorful roots. Therefore, thin seedlings to about 2 inches apart once they have two true leaves. This spacing allows each radish ample room to grow without competition. For more detailed planting advice, consider resources like The Self-Sufficient Backyard.
Timing for the Fastest Growth
Radishes are fast-growing plants, but certain factors can influence their growth rate. For the quickest harvest, plant radishes in full sun and ensure they receive at least six hours of sunlight per day. Additionally, maintaining consistent soil moisture and avoiding extreme temperature fluctuations can help radishes grow rapidly and uniformly.
As radishes mature, keep an eye on their growth. Most varieties are ready to harvest when the roots are about an inch in diameter. Harvesting promptly prevents them from becoming overgrown and woody.
Care and Maintenance
Once your radishes are planted, proper care and maintenance will ensure they thrive and reach their full potential. Radishes are relatively low-maintenance, but they do have specific needs that, when met, lead to a bountiful harvest.
One of the most important aspects of radish care is maintaining consistent soil moisture. Radishes need regular watering, particularly during dry spells, to develop crisp and tender roots. Uneven watering can lead to split or misshapen radishes.
Besides watering, keeping the area around your radishes free of weeds is crucial. Weeds compete for nutrients and space, which can hinder the growth of your radishes. Regularly check your garden beds and remove any weeds by hand or with a hoe, being careful not to disturb the shallow roots of the radishes.
Watering Schedule and Tips
Radishes require about an inch of water per week, whether from rainfall or supplemental watering. It's best to water deeply and less frequently to encourage roots to grow deeper into the soil. This practice also helps prevent the soil surface from drying out too quickly.
Water your radishes in the early morning or late afternoon to reduce evaporation and allow the plants to absorb moisture more effectively. Avoid overhead watering, which can encourage fungal diseases; instead, use a soaker hose or drip irrigation system to deliver water directly to the soil.
Fertilizing for Healthy Growth
Radishes are light feeders, so they typically don't require much fertilization. However, if your soil is lacking in nutrients, a light application of a balanced, slow-release fertilizer can support healthy growth. Apply the fertilizer at planting time or when the seedlings are a few inches tall.
Avoid high-nitrogen fertilizers, as they can promote leafy growth at the expense of root development. Instead, look for fertilizers with a balanced ratio of nitrogen, phosphorus, and potassium, such as a 10-10-10 formula.
Pest and Disease Management
Although radishes are generally hardy plants, they can still fall prey to pests and diseases. Common pests include flea beetles, aphids, and root maggots. To protect your radishes, consider using row covers to create a physical barrier against these pests.
If pests become a problem, try introducing beneficial insects like ladybugs or lacewings to your garden, as they can help control pest populations naturally. For disease management, practice crop rotation and avoid planting radishes in the same spot each year. This helps prevent the buildup of soil-borne pathogens. For more tips on sustainable gardening, consider exploring The Self-Sufficient Backyard.
Additionally, ensure good air circulation around your radishes by not overcrowding your plants. This can help reduce the risk of fungal diseases, such as downy mildew and damping-off.
Harvesting Radishes
Harvesting radishes at the right time is key to enjoying their crisp, peppery flavor. Radishes that are left in the ground too long can become woody and bitter, so it's important to monitor their growth closely. For those interested in sustainable gardening practices, The Self-Sufficient Backyard provides valuable insights.
Most radish varieties are ready to harvest when the roots reach about one inch in diameter. Regularly check your radishes by gently pulling back the soil to expose the tops of the roots. If they appear to be the right size, it's time to harvest!
Signs of Readiness
Besides size, another sign that your radishes are ready to harvest is the appearance of their tops. Healthy radish tops should be vibrant green and firm. If the leaves start to yellow or wilt, it's a sign that the radishes may be past their prime.
Remember, radishes grow quickly, so check them often. Harvesting them promptly ensures the best flavor and texture.
Harvesting Techniques
To harvest radishes, simply grasp the tops of the plants and gently pull them from the ground. If the soil is compacted or the roots are stubborn, use a garden fork to loosen the soil around the plants before pulling.
After harvesting, rinse the radishes under cool water to remove any soil. Trim the tops and roots to about an inch long to help them store better. Freshly harvested radishes can be enjoyed raw, cooked, or pickled.
Post-Harvest Storage Tips
Radishes are best enjoyed fresh, but if you need to store them, there are a few tips to keep them crisp and flavorful. First, remove the tops, as they draw moisture away from the roots. Store the roots in a plastic bag in the refrigerator's crisper drawer.
To keep them crisp, wrap the radishes in a damp paper towel before placing them in the bag. Stored this way, radishes can last up to two weeks. If your radishes become soft, you can revive them by soaking them in ice water for a few hours before using them.
Common Challenges and Solutions
Growing radishes is generally straightforward, but like any crop, they can face challenges. Whether it's slow growth, pest issues, or splitting, understanding these problems and their solutions can help you achieve a successful harvest.
Most importantly, addressing these challenges early can prevent them from affecting your entire crop. Let's explore some common issues and how to overcome them with insights from The Self-Sufficient Backyard.
Addressing Slow Growth
If your radishes are growing slowly or seem stunted, it could be due to several factors. Poor soil quality, inadequate sunlight, and inconsistent watering are common culprits. Ensure your radishes receive at least six hours of sunlight daily and that the soil is well-drained and nutrient-rich.
Additionally, check for signs of overcrowding. Thinning seedlings to the recommended spacing can improve air circulation and reduce competition for resources, encouraging faster growth.
Dealing with Pests Naturally
To manage pests naturally, consider companion planting. Certain plants, like marigolds and nasturtiums, can deter pests and attract beneficial insects. Additionally, rotating crops each season helps prevent pest populations from becoming established.
For an immediate solution, handpicking pests off your plants can be effective, although time-consuming. Regular monitoring and quick action can help keep pest populations under control and protect your radish crop.
Preventing Radish Splitting
Radish splitting often occurs when the plants receive irregular watering, causing them to absorb too much water too quickly. To prevent this, maintain consistent soil moisture throughout the growing season. Avoid allowing the soil to dry out completely between waterings, as this can lead to rapid water uptake when the plants are watered again.
Another factor that can cause splitting is over-maturity. Harvest radishes promptly when they reach the desired size, as leaving them in the ground too long increases the risk of splitting. Regularly checking your radishes and harvesting them at the right time will ensure they remain crisp and intact.
Culinary Uses and Recipes
Radishes are versatile in the kitchen, adding a peppery crunch to a variety of dishes. They can be enjoyed raw, pickled, roasted, or even sautéed. Their vibrant colors and unique flavors make them a delightful addition to both simple and gourmet meals.
Raw in Salads: Thinly sliced radishes add a refreshing crunch to green salads, slaws, and grain bowls.
Pickled: Quick-pickling radishes in vinegar and spices creates a tangy condiment that pairs well with tacos, sandwiches, and charcuterie boards.
Roasted: Roasting radishes mellows their spiciness and brings out their natural sweetness, making them a great side dish.
Sautéed: Sautéing radishes with butter and herbs creates a simple yet flavorful dish that complements a variety of proteins.
Besides these ideas, radishes can also be used as a garnish, adding visual appeal and a hint of spice to dishes like soups and omelets.
Simple Salad Ideas
One of the simplest ways to enjoy radishes is in a salad. For a classic radish salad, thinly slice fresh radishes and toss them with arugula, feta cheese, and a lemon vinaigrette. The peppery radishes and arugula are balanced by the creamy feta and tangy dressing, creating a harmonious blend of flavors.
Incorporating Radishes in Cooked Dishes
Radishes aren't just for raw dishes; they can also be cooked to bring out different flavors. Try roasting radishes with olive oil, salt, and pepper until they're tender and caramelized. Roasted radishes make a delicious side dish for roasted meats or fish.
Alternatively, sauté sliced radishes with garlic and butter for a quick and tasty side. The cooking process softens their texture and mellows their spiciness, resulting in a delightful dish that's sure to please.
Savory Snacks Featuring Radishes
Radishes can also be transformed into savory snacks. For a healthy and flavorful treat, spread a layer of herbed cream cheese on whole-grain crackers and top with thinly sliced radishes. The combination of creamy, crunchy, and spicy elements makes for a satisfying snack that's perfect for any time of day.
Frequently Asked Questions
As you embark on your radish-growing journey, you may have some questions. Here are answers to common queries that can help you cultivate a successful radish crop.
What is the fastest-growing radish variety?
The Cherry Belle radish is one of the fastest-growing varieties, maturing in just 22 to 28 days. Its quick growth makes it a favorite among gardeners looking for a speedy harvest.
How often should I water radishes?
Radishes require consistent moisture, so water them about once a week, ensuring the soil stays evenly moist. During hot or dry spells, you may need to water more frequently to prevent the soil from drying out completely.
When should I plant radish seeds?
Plant radish seeds in early spring as soon as the soil is workable, or in late summer for a fall harvest. Radishes thrive in cool weather, so timing your plantings to avoid the heat of summer will yield the best results.
What are some common pests of radishes?
Common pests that affect radishes include flea beetles, aphids, and root maggots. To manage these pests, use row covers, introduce beneficial insects, and practice crop rotation to reduce pest populations.
Can I grow radishes indoors?
Yes, radishes can be grown indoors in containers. Choose a sunny spot or use grow lights to provide sufficient light, and ensure the containers have good drainage. Indoor-grown radishes may take slightly longer to mature, but they can be a rewarding addition to your indoor garden.
#organic pest control#eco-friendly pest management#sustainable garden practices#natural pest solutions#vegetable garden health#enhancing fruit yield#ecological balance#educational workshops#interactive eco-education#physical removal of nests#sustainable gardening#organic soil#vertical gardening#drip irrigation#solar-powered pond pump#organic seed sourcing#raised beds#self-watering pots#quick-harvest vegetables#arts and crafts gardening#child-friendly garden#seasonal planting#decorative planters#hydroponic systems#urban micro-farming#fresh produce#rainwater collection systems#solar-powered grow lights#square-foot gardening#self-watering planters
1 note
·
View note
Text

"Welcome to Krupex India, your premier destination for high-quality decorative pots. As a leading manufacturer, we pride ourselves on offering an extensive range of beautifully crafted pots designed to enhance the aesthetic appeal of any space. Our collection includes a variety of styles, sizes, and finishes, ensuring that you find the perfect pot to complement your home or garden decor. At Krupex India, we understand the importance of quality and durability. Each of our decorative pots is made using the finest materials and meticulous craftsmanship, guaranteeing a product that not only looks stunning but also stands the test of time. Whether you are looking for contemporary designs, traditional styles, or something uniquely artistic, our diverse selection has something to suit every taste and preference.
#Decorative pots#Krupex India#pots manufacturer#high-quality pots#home decor pots#garden decor pots#crafted pots#stylish pots#durable decorative pots#contemporary pots#traditional pots#artistic pots#decorative planters#premium pots#Indian pot manufacturer
1 note
·
View note
Text
Contemporary Deck - Uncovered

Inspiration for a large, open-air, contemporary rooftop deck renovation
0 notes
Photo

Garage Tampa expansive, elegant garage image
#dark brown garage door#small plants#decorative planters#brick border#stone brick siding#garage door with window#garage brick border
0 notes
Photo
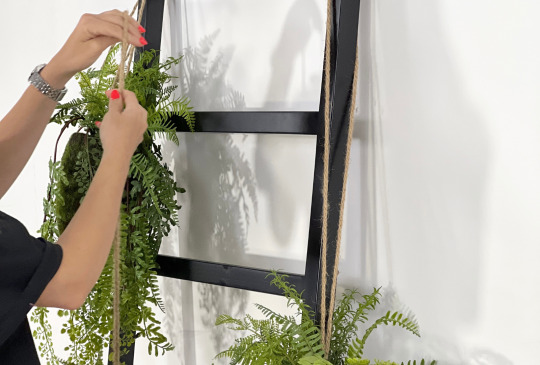
Green Up Your Space: The Benefits Of Incorporating Artificial Greenery Into Your Home Interiors
As humans, we have an inherent affinity towards nature. Unfortunately, not all of us have the luxury of living in homes that have a lush green garden. Artificial greenery is a perfect solution for those who want to add a touch of greenery to their living space without the hassle of maintaining real plants. Artificial greenery comes in a variety of forms, including flowers, plants, stems, trees, and pot plant sets, that can be easily incorporated into your home interiors. In today’s blog we’ll discuss the benefits of incorporating artificial plants and accessories into your home interiors.
Here are some of the benefits of using artificial greenery in your home:
1. Low Maintenance
Artificial plants and flowers do not require any watering, pruning, or sunlight. They stay fresh and green all year round without any upkeep, making them perfect for those who have busy lifestyles or those who may be travelling frequently.
2.Versatility
Artificial greenery can be used in a variety of settings and décor styles. Whether you are looking to create a tropical oasis or a minimalist interior, there is an artificial plant or flower for every style. You can also mix and match different types of greenery to create a unique look that suits your style.
3. Durability
Unlike real plants, artificial greenery is not susceptible to pests, diseases, or harsh weather conditions. They are made from high-quality materials that can withstand wear and tear, making them a long-lasting investment for your home.
4. Cost-effective
Investing in real plants can be expensive, especially if you have a large living space. Artificial greenery is a cost-effective alternative that still provides the benefits of a lush green environment without breaking the bank.
5. Health Benefits
In addition to adding visual appeal to your living space, artificial greenery can also provide health benefits. Plants have been shown to reduce stress levels and improve air quality by removing toxins from the air. Along with the physical benefits of artificial greenery, there are also mental health benefits that come with incorporating greenery into your living space. Studies have shown that exposure to nature, even in the form of artificial plants, can have a positive effect on mental health by reducing stress levels and promoting relaxation.
When it comes to incorporating artificial greenery into your home interiors, there are several options to choose from. Pot plant sets are a great way to add a touch of greenery to your living space without taking up too much room. You can also opt for larger trees or plants that can be placed in a corner or against a wall to create a statement piece.
Adding planters and pots for plants can also enhance the overall look of your home décor. Choose pots that complement your existing furniture and accessories, and be sure to vary the size and shape of the pots for added interest.
Incorporating artificial greenery into your home interiors can transform your living space into a green oasis. Whether you are looking for a low-maintenance solution or simply want to add some natural beauty to your home, artificial greenery is a versatile and cost-effective option. With so many options to choose from, you can easily find the perfect artificial plant or flower to suit your personal style and décor preferences.
#Leather Gallery#Artificial Plants & Greenery#Greenery#Artificial Trees#Faux Flowers#Decorative Planters#Benefits of Greenery#Home Interiors#Home Décor#Pot & Planter Sets#Plant Accessories#Modern & Contemporary#Rustic#Traditional#Durable#Cost Effective#Statement Piece#Bring the outdoors in#Positives of Plants#low maintenance#South Africa
0 notes
Photo

Large trendy rooftop deck container garden photo with no cover
#wood siding#decorative planters#wood#outdoor movie theatre#wood panel wall#rooftop deck#outdoor living
0 notes
Photo
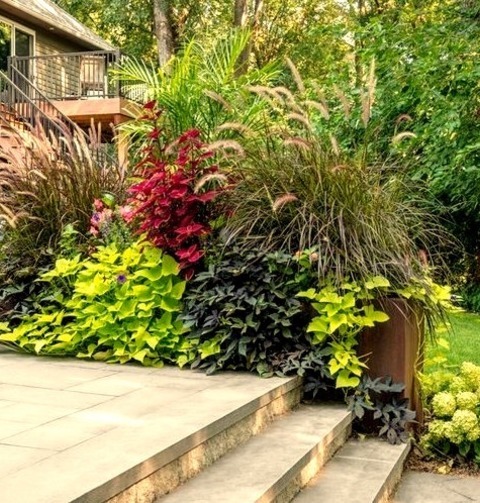
Natural Stone Pavers Landscape Minneapolis Photo of a large modern backyard stone landscaping.
0 notes
Text


Pokemon Planters made by HomebodyClub
#pokemon#bulbasaur#gardening#plants#cute#kawaii#gameboy#kanto#90s#gaming#video games#oddish#grass type#gifts#merch#artists#art#crafts#planters#etsy#retro#nostalgia#nostalgic#aesthetic#decor#90's#nineties#retrogaming#gen i#gen 1
296 notes
·
View notes
Text


x
1K notes
·
View notes
Photo
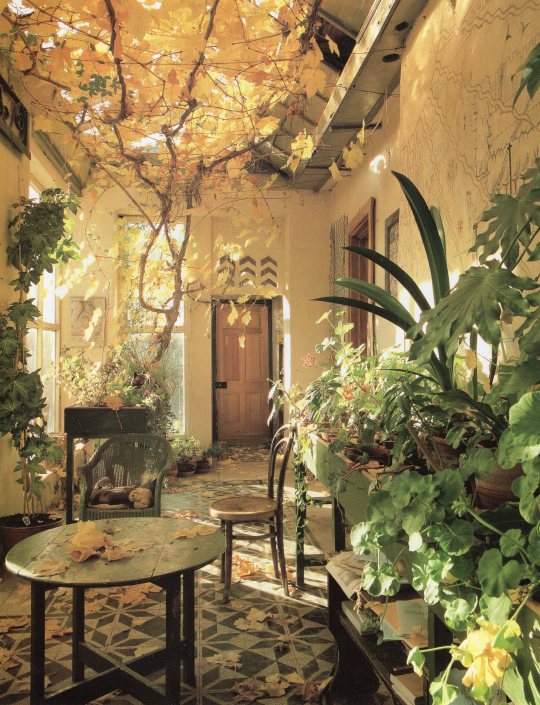
Traditional Country Style, 1991
#vintage#vintage interior#1990s#90s#interior design#home decor#conservatory#greenhouse#custom#tile#garden room#plants#planters#mural#antique#furniture#traditional#country#style#home#myfavorites
4K notes
·
View notes
Text

From @evan-collins90
#80s#interior design#decor#mirrors#lighting#planter#benches#geo glam#vaporwave#cocaine decor#aesthetic
549 notes
·
View notes
Text


Chenier House, Rye, Australia - Eastop Architects
#Eastop Architects#architecture#modern#house design#house#minimal#modern architecture#building#design#interiors#timber cladding#black and white#garden#cool architecture#beautiful houses#bathroom#living room#home decor#australia#australian architecture#beautiful architecture#cool design#contemporary architecture#glass#wall tile#planter#stone#interior design#design inspiration#exterior
273 notes
·
View notes
Photo
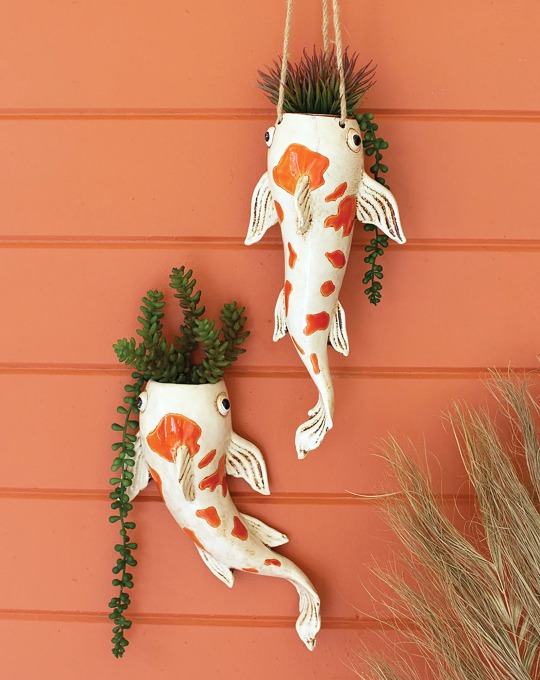

Koi Planters // Angel Falls Co
2K notes
·
View notes
Text

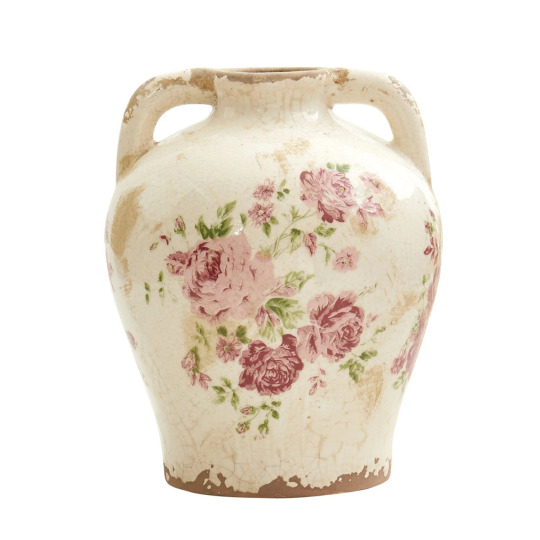
Fat Cat Ceramic Pot // StudioCeramiku
237 notes
·
View notes
Text

Neutral Checkerboard Pattern Handmade Ceramic Plant Pot by dumbcute
#ceramic plant pot#plant pot#plant pots#pot#pots#pot planter#planter#planters#small planter#shelf decor#plants#ceramic planter
34 notes
·
View notes
Text


Pastry Unicorn
20 notes
·
View notes