#da tutorial
Explore tagged Tumblr posts
Text
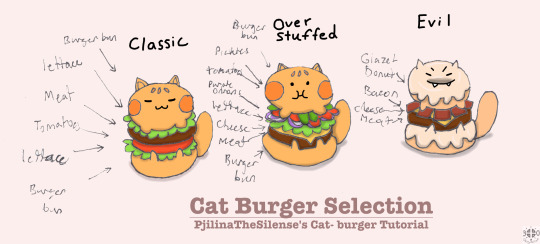
In case it is hard to read my writing...
Menu
Classic
Burger bun
Lettuce
Meat
Tomatoes
Lettuce
Burger bun
Over-Stuffed
Burger bun
Pickles
Tomatoes
Purple onions
Lettuce
Cheese
Meat
Burger bun
Evil
Glazed donut
Bacon
Cheese
Meat
Glazed donut
2 notes
·
View notes
Text
Let It Snow (DA badge, CW)

NOTE: I DO NOT CONDONE OR SUPPORT THE ACTIONS OF DEVIANTART AND/OR WIX.
I STAND WITH PALESTINE.
PRO-ISREALI/ANTI-PALESTINE/Z10N1STS DNI (DO NOT INTERACT).
MY PRESENCE ON DA IS NOT BECAUSE OF WHAT SIDE OF THE G3NOC1DE SITUATION THE SITE IS ON.
I AM ON DA TO HAVE FUN AND SHOW EVERYONE MY WORK, NOT TO SUPPORT IT.
Made a snowflake to snatch up a free badge (tutorial + badge design by KovoWolf )!
It was pretty easy! Think I overdid the background snowflakes. But it would feel... too empty without them.
4 notes
·
View notes
Text

#datutorialpotion
no me quería quedar atrás con esto de dibujar pociones y se me ocurrió dibujar una poción adorable me pregunto qué es lo que hará si alguien se la bebe 🧪⚗️🔮.
✧˖°🌷📎⋆ ˚。⋆୨୧˚✧˖°🌷📎⋆ ˚。⋆୨୧˚✧˖°🌷📎⋆ ˚。⋆୨୧˚✧˖°🌷📎⋆ ˚。⋆୨୧˚
I didn't want to be left behind with this drawing of potions and it occurred to me to draw an adorable potion. I wonder what it will do if someone drinks it 🧪⚗️🔮.
#art#artwork#blue#colorful#cute#da challenge#drawing#dreamy#hearts#light#love#magic#magic potion#pink#potion#whimsical#whimsy#da tutorial#potion bottle#cute potion#da tutorial potion#my drawing#my art#art post#digital art#digital artwork#art tag
2 notes
·
View notes
Note
How do you make your stamps? :0
Disclaimer: this is an obscenely long explanation, with pictures. Efficiency is stupid
So, for the static ones, I make a 99x56 px file on ibis paint x. Other programs are probably available online but I don't use them.
After that, I either upload an image I want to make into a stamp, or I draw one.
Then, I find a frame I want to use. Ill upload them here but let it be known I stole all of these right from deviantart


Most of them are from Lil-Devil-Melii on deviantart. The rest i have no idea. They're not all 99x56px but you can crop the canvas it's fine
Make sure to erase the edges of the picture , so they're transparent. It's not as cute otherwise
Upload those frames over your image in whatever art program you're using and viola, stamp.
For moving ones, it's a lot harder. Mostly because I refuse to download Photoshop.
There are a couple ways to do this. Some are simple animations, like with flashing text and whatnot. For these, you download the individual animation frames from your art program. Make sure it's transparent.
Then, upload each frame to ezgif.com under the option "GIF maker." You can play around with how fast each frame goes and whatnot but in the end, it'll be a stamp with some rad text that moves. This is easy, and doesn't make me want to shit my pants and cry. If you're new, do this. This is fun. This is good. This does not kill me inside
I made that↓ stamp with this method :)

this next one is how we turn gifs into stamps. This one makes me sad. It involves math and sucks. But we gotta do it. For the vibe
First, grab your gif. I'm using this cow gif because it's awesome

Then, I resize it using ezgif. Literally everything for this will be using ezgif. I am a simple man
At this point you should decide what frame to use. I'm using this one because its the first one I clicked

Figured out what size the inside of the frame is. That's what I resize the gif to, so the edges can be transparent. The inside of this one is 93x50 px, so those are the dimensions I'm making the gif.
Figure it out by putting the frame into ibis paint and realizing the canvas to fit just the inside of the frame, then seeing what the dimensions are. But there could be easier ways

Woah it's so small now
Then, still on ezgif, I go to the "crop" option.
Make sureeee to upload the smaller gif
press the button that says "extend canvas size", and then put the "width" and "height" as the dimensions for your FRAME. This'll put a bit of a transparent border around the gif. For this frame, I did 99px and 56px.
The "left" and "top" boxes show how many pixels the cropping happens from the edges of the canvas. The formula for finding that is
(width of gif / 2) - (difference between gif width and frame width / 2) = left box
For me it's (93 / 2) - (6 / 2) = 43.5
Then you do the same.for the height, which for me ends up being 22 from the top
This is reallyyy touchy and annoying though
Here's my result , with no visible difference

Okay so THEN you go to the "overlay" option, under "effects." And upload your frame. If the cropping was done right, you shouldn't have to move the frame at all and can just download it
Here's my result:

if you don't care about transparency, you can resize your gif to be the same size as the frame, and then put the frame over it. But I'm a slut for transparency
Anyways. I'm sorry if anything was unclear, it's two am. And I hope this was helpful :) these really are fun to make once you get it down
also if anyone has an easier way to make stamps from gifs, please god tell me
#web graphics#old web#neocities#custom#custom blinkies#stamps#page decor#web resources#da stamps#deviantart stamps#blinking gif#How to#tutorial#How to make stamps#Spacehey#deviantart#rentry graphics#old internet#early internet#stamp collecting#ezgif#stamp making#stamp template#Stamp frames#blinkies
6K notes
·
View notes
Text
Digital Stamp Making Tutorial
Hello, and welcome to the long-awaited(at least on my part) digital stamp-making tutorial from neosprites! I’d like to preface that I learned what I was doing from this tutorial so it may be a bit redundant, but if anything I get a bit more specific. Thank you so much to @graphic--horde for your work, it changed me as a graphic maker. This is gunna be a long post so feel free to bookmark it for later. Now, onto the show!

The frame I will be using for this tutorial (which is the frame I use on 99.9% of my stamps) I found from the above linked post, which I believe is from a creator that OP lost track of. Its inner dimensions are 94x50 pixels and its outer dimensions are 99x56 pixels. Here it is!

Find your material! - I recommend using websites like Tumblr and searching with the “GIF” filter only on, or alternatives such as Giphy or Tenor. Your browser may let you directly save the .gif file; if not and you are noticing it restricts you to save it as a .webp file you can try an extension like “Save webp as PNG or JPEG” (for Firefox but I image other browsers have similar functions, but I really recommend you switch to Firefox). To use this you will right click on your source .gif like normal but instead of clicking on “Save image as…” click “Save webP as…” and then click “GIF”. You should be redirected to the website ezgif.com where we will actually be doing all of our editing! Here’s the .gif we’ll be working with.

Convert to GIF (optional) - if you used the extension from the above step you should already be ready to click the blue “Convert to GIF” button. If not, go ahead and open ezgif.com and click on “webP” and then “WebP to GIF”; then convert to a gif with the blue button.

Resize the GIF - now that we have a gif ready to edit, let’s make it the right size. The easiest method I have found is to change it directly to the frame’s inner dimensions, 94x50 pixels. [EDIT: Make sure in the aspect ratio drop drop menu you select "stretch to fit" and not "center and crop to fit" like I did in the photo example.] Click “resize” and then type [94] in for the width and [50] for the height. Next press the blue “resize image” button.


Add the frame - next click “overlay” then click the thin blue button that says “Extend canvas size(use if overlay exceeds GIF sizes)”. This will give us some extra room to add the frame onto the design. Next click “Browse…” and find the frame you have saved onto your device, then click the blue “Upload image” button.


After that it’s going to be misaligned, that’s normal! It will say you have the option to drag it into place, but don’t bother. That’s one of the reasons my old stamps look wack, it’s just harder to do. Instead type [44] in for the Left box and [22] in for the Right box. It took me a while to figure out these dimensions to be honest, and I’ve only tested it with this frame so I don't know if it works with others. Then click the blue “Generate image” button.


Crop the transparent edges - click on “crop”. You will have the option to check a box that says “trim transparent pixels around the image” however, I don’t recommend this as it tends to crop a few of the frame’s pixels with it sometimes. Next, set the Left position to [44] and the Right position to [22]. For the other dimensions we will use the outer dimensions of the frame which are 99x56 pixels, this will trim everything except the tiny spaces in between the stamp frame’s spikes. Type the width as [99] and the height as [56] and click the tiny blue button that says “set”. After that click the blue “Crop image” button.


Save and use! - all that's left is to click “save” and upload the graphic to your liking. (best seen on dark mode obviously)


If you’d like to tag me in stamps you’ve made using my tutorial I would love to see them, but it’s not required!! Make sure to always give credit for pictures/gifs when you can and try not to make stuff out of personal/fan art. Thank you to the person in my inbox who requested this tutorial, I had been meaning to for a while but it was just the kick I needed. :)
#carrd graphics#carrd resources#carrd stuff#rentry graphics#rentry resources#rentry decor#rentry pixels#rentry stuff#rentry inspo#deviantart#neocities#mine#my graphics#my tutorials#resources#tutorials#tutorial#how to#stamps#blinkies#graphics#web graphic#old internet#early internet#spacehey#da stamps#page decor#custom#old web#frames
333 notes
·
View notes
Text
Bookbinding: The New Deal by Closer
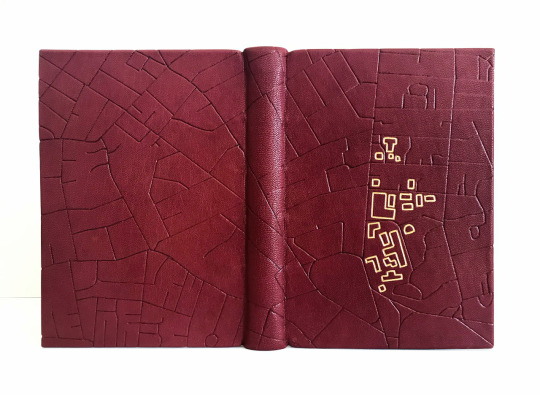
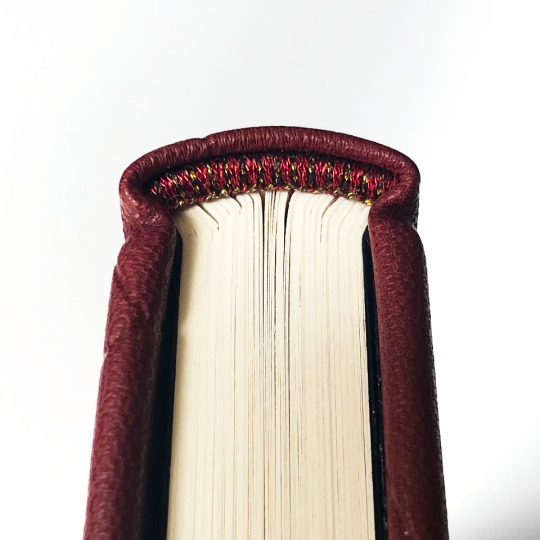

Moar bookbinding! This one is a Suits fanfic that I bound for @brambleberrycottage's birthday (pictures shared with the author's permission).
[Same disclaimer as always applies: I do this for fun; no money has been made from this project!]
Notes on the binding: This was my third leather book, but my first time sewing on cords (my previous leather books were both split boards). The actual sewing process was definitely...something. Sewing is usually my favorite step of a bind, but not this time. (Possibly because I was sitting on the floor at the base of the stairs sewing the book on a shelf under my desk, as that was the easiest sewing frame hack I could come up with - once I rig something that will allow me to sit up like a human being and not be scrunched up like a hermit crab, I am sure I will enjoy the process more.)
So the sewing itself was a bit painful, but I did really love how the board attachment played out in the end, with the cords laced into the boards. It is SO satisfying not to be doing case bindings anymore! It's the same feeling of relief I had when I first learned how to do split board bindings - you have so much more control over the placement of the cover boards, so much less opportunity for skew, so much more stability. No more casing-in anxiety necessary. (You do acquire all-new steps to be anxious about, but for me, it's worth it).
Notes on the design: I've never actually watched Suits, but the fic itself takes place in and around Harvard Law, so I used that as my inspiration for the book's design. The book is covered in crimson leather from Siegel. Endbands are handsewn with metallic red and gold threads. The blind tooling on the cover is a street map of Cambridge, MA, which I drew onto tracing film and then tooled through the film onto the leather. (So far I've only used a foil quill heat pen to do this, because brass tools are expensive. I'm taking a class on traditional tooling soon and I'm VERY excited for it, but for now, this is what I have access to.)
The gold outlines in the design highlight the buildings of Harvard Law. (These lines are also not actual gold tooling - paint pen for now.)
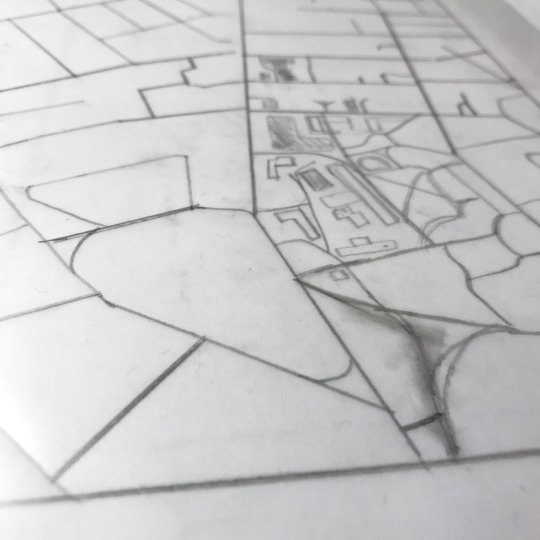
^ early design work, featuring unsightly eraser smudges.
I followed a similar theme/color scheme for the interior. For the endpapers, I used acrylic paints and a dry sponge to make a crimson and gold pattern:

For the title page, I modified an image of Harvard's Veritas shield to display the fic's title and author.

The chapter headers may not immediately ping an association for anyone who doesn't live here/spend a lot of time on the T, but they were the first thing I came up with - they're designed to look like the signage for the Red Line, which is the subway route that serves Harvard Square.


Notes for future me: The one thing that went "wrong" with this bind was that the endpapers ended up being short at the foreedge. I knew this was going to happen before I pasted them down, but I had to make a choice between two undesirable results - the boards were already VERY slightly curved inwards after doing the fill-in, and if I used paste on the endpapers (so they would stretch), I was worried it would pull too hard as it dried and make the boards curve too much. But if I used PVA, the endpapers wouldn't stretch enough and would end up being short. I decided I would rather have short endpapers than warped boards, so that's what I went with, but next time I might try doing one less lining inside the boards and hope that the pastedown will handle more of the counterpull.
Despite little things like that, I had a great time with this! Every time I make something I learn new things, and every time something goes "wrong" it's good to look back and be like "ten years ago I was duct taping the spines of loose pages that I covered in cardstock! i'm doing fine, actually." Lots of progress has happened and lots of fun has been had, which is ultimately the point.
Big thank yous are owed to @brambleberrycottage for letting me send her all my bookbinding experiments, and also to Closer for a) writing this fic in the first place and b) okay'ing the sharing of photos! Much appreciation goes out to both of you :)
#i love how much i've been able to learn with the resources that are out there now#it has helped me so much!#wild to look back and remember that these things did not exist when i started doing this#there was no discord#there was no das (imagine...what a world)#every time i look at my older stuff and want to be like 'this looks it was made by a toddler' i have to check myself like#'ok but back then there was no incredibly endearing australian guy making in-depth tutorials for free' XD#bookbinding
84 notes
·
View notes
Text

I couldn't fit the tutorial on a reply lmao, here's a full post explaining my process :]]
STAMP TUTORIAL (TF2 edition, but works for everything)
99% of the process is done on the website ezgif. Ezgif carries the stamp-making process lmao
1. Get your GIF
Tenor: Ok place to grab your GIFs. Average quality of the GIFs is good enough, and looks ok when resized to the size of the stamp. You'll find like 1 normal GIF every 4 buff characters GIF tho.
GIPHY: Average quality of the GIF is better (I don't think the web compresses the GIFs that are uploaded)… If you find what you're looking for. You'll have to SCROLL before finding what you're looking for because there are always non-related GIFs on the top of your searches or the same GIF multiple times, it's crazy.
makeagif: You will find cool GIFs, but the quality is pretty low (I think the web itself compresses the GIFs a lot). It looks bad even when resized down. And it has a watermark, which I recommend cropping because it's not even visible when resized, it just looks like a gray blob on the corner.
Google: Best option by far, quality is pretty good and the ratio of “things I was looking for/things I actually find” is SLIGHTLY in favor of “things I was looking for” (and most of “things I actually find” are just the characters rotating, not NSFW, so that's only a nice change from Tenor). You won't have to scroll much to see different and interesting GIFs. JUST REMEMBER TO FILTER BY GIFS.

You search whatever > Images > Tools > Type > GIF
Make it on your own: Aka, you download your video, go to ezgif's “Video to GIF” (then you can crop it, CUT IT. THIS IS IMPORTANT, YOU DON'T NEED TO GO ANYWHERE ELSE TO CUT YOUR CLIP, YOU CAN DO IT ON EZGIF ITSELF). Ok, I lied, it wasn't Google, this is the best oftion by far. You get exactly what you want, the best quality if you don't compress it much until after the GIF has been resized into the size of a stamp… It's just super time-consuming, and you'll have to spend like an entire hour just watching a video to find the clips.
OK, I HAVE MY GIF NOW
Hehe, his legs go pipupipu
2. Resize
Go to ezgif, this is where the fun begins (if you weren't on ezgif already). You download your GIF, or copy the link and insert it, or you'll have it there if you made it yourself.
A STAMP MAKES 99px × 56px
THE INNER PART OF THE STAMP MAKES 91px × 47px
I RECOMMEND MAKING YOUR GIF 92px × 48px
BTW, THESE MEASURES ARE FOR THE TEMPLATE I'LL GIVE YOU LATER. If you use another template, just go to an image editor and see what the inner size of the stamp is.
So, you set your GIF's width to 92px.

Then crop it, so your height is 48px.

Or you can resize it so it's directly 92px × 48px, but the crop will be in the center, and SOMETIMES YOU DON'T WANT THAT.
For example:

It's a vertical GIF whose area of interest is not in the center, so if we resize it directly-

oops-
ANYWAY
Once you have your GIF resized:
IMPORTANT: BEFORE THE NEXT STEP, REMEMBER TO CONVERT TO GIF IF THE FILE YOU'RE WORKING ON ISN'T A GIF ALREADY
Sometimes you'll be working with a webp without even noticing (EW, I hate webp) and transparencies don't work particularly well with that extension.
3. Overlay

Click on this icon.
Ok, now that that's fixed:

Extend the size of the canvas.

Select your template and Upload image!

This is the template, btw.

Then move the overlay around until it contains the GIF nicely, or just set Left to 43, Top to 20 and Generate image! (I have these numbers memorized, it saves you like 20 seconds lmao)
Also, again, these numbers work on MY template, if you use another one, you'll have to figure it out yourself.
4. Crop

THIS OPTION IS A TIME-SAVER FR
5. Optimize (optional, highly recommend)

I always set my optimization method to Lossy GIF and level 10 because I find that there is no quality loss, and the file size might drop by 30%-70% (actually crazy). These percentages don't change much in higher compressions, even though you'll start seeing a drop in quality around level 35 of compression (the default).
6. Save

YIPPE!!! Your stamp is done :D
You can save it and look at it and place it on your profile or website.


Here it is btw, in case someone wanted it :]] The Sniper GIF but correctly cropped and made into a stamp as well.
Now do that another… eleven times, and you'll have a stamp pack to make into a Tumblr post... Oof TT
There's no website that lets you make stamps faster lmao (I wish)
@sir-broken-bones (I'm @ them so they actually see it, I made this tutorial for them after all lol)
#team fortress 2#tf2#tf2 scout#tf2 sniper#stamps#da stamps#tutorial#graphics#old graphics#neocities#old web graphics#old web
172 notes
·
View notes
Text

Need help figuring out how to use references in your art process? Look no further! I've got a video for you ✨
youtube
#dragon age#digital art tutorial#art tutorial#art reference#artist reference#emmrich volkarin#dragon age veilguard#da:tv#da: the veilguard#veilguard#Youtube
139 notes
·
View notes
Text

Made a mini guide on how I draw and stylise Fenris' hair and thought it'd be helpful so I'm sharing it, feel free to save this if you'd like but don't repost it without credit
77 notes
·
View notes
Text


The Witch of the Wilds
#dragon age#dragon age: the veilguard#da:v#morrigan#daedit#*gif#*da#sbd DROP the mf makeup tutorial NOW#i have the lipstick i just need the smoky eye tut#id wear this look daily sigh
140 notes
·
View notes
Text
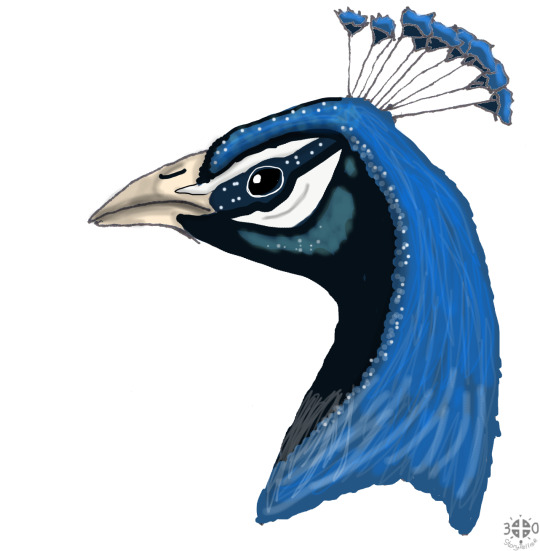
Drawing a Peacock head, a tutorial by Reptangle from Deviantart
So. Much. Detail.
1 note
·
View note
Text

Low approval Eelis tarot card :(
first card-second card-third card-fourth card
#i've been thinking about the scene where you wake up in haven after the tutorial and you scare the young elf that came to get you#in the game literally just get up and spook them but what if this was what you actually look like to them? food for thought#i've had a sketch for this in the chamber for a while! Just didn't know how to make it look interesting yet#OC:eelis lavellan#inquisitor lavellan#dragon age#dai#da tarot#beesart
127 notes
·
View notes
Note
this is embarrassing, how do you make stamps? 😭😭
For my picture ones, I use IbisPaint x!
I use this stamp template by AHMED-ART on deviantart for all my stamps!!! (97 x 57)

You can honestly use any stamp template tho! There's tons on deviantart and they're easy to find :3
On ibis, Import a picture layer
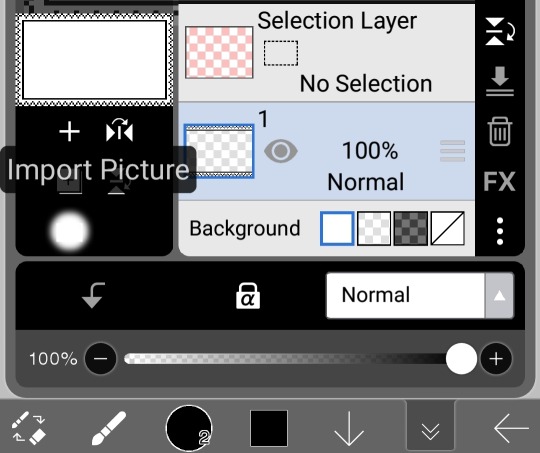
Once you do that and size it however you want on your canvas, move your picture layer down to be the first layer

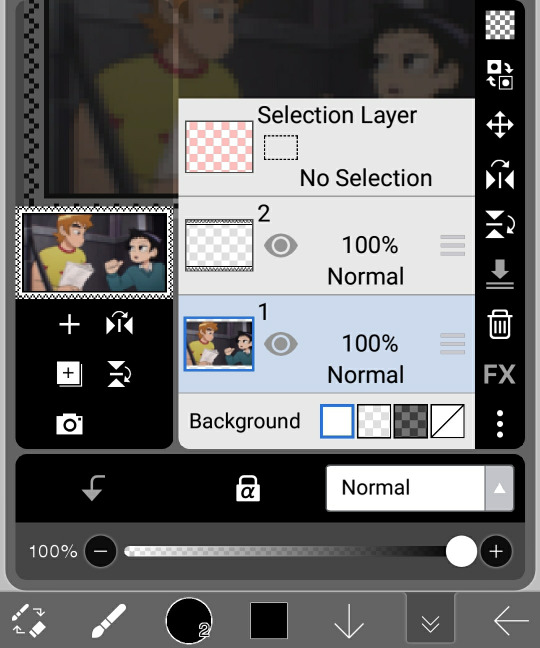
And then boom, you have your very own stamp now :3

If the picture looks too pixelated / bad quality, dw, it's supposed to look like that cause the stamps are rlly tiny 👍 have fun, I hope this was understandable!! ^_^
#not art#tutorial#Michael post#questions#stamp#stamps#deviantart stamp#da stamp#da stamps#deviantart stamps#im gonna fandom tag this#toddallace#wellsgram#veganmargarita#todd x wallace#wallace x todd#wallace wells x todd ingram#todd ingram x wallace wells#todd ingram#wallace wells#sp#scott pilgrim#spto#spvtw#scott pilgrim takes off#scott pilgrim vs the world#blinkie#blinkies#f2u
134 notes
·
View notes
Text
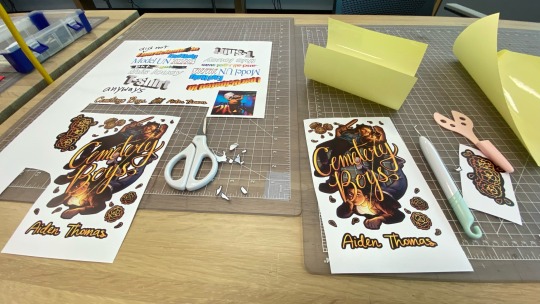
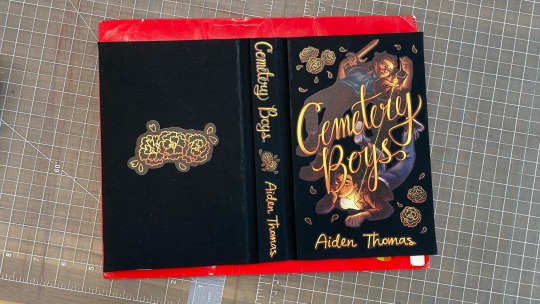
finished the rebinding!!! i’m really happy with how this turned out, very excited to give it to my partner 🗣️🗣️🗣️‼️‼️‼️ original drawing + progress pictures below

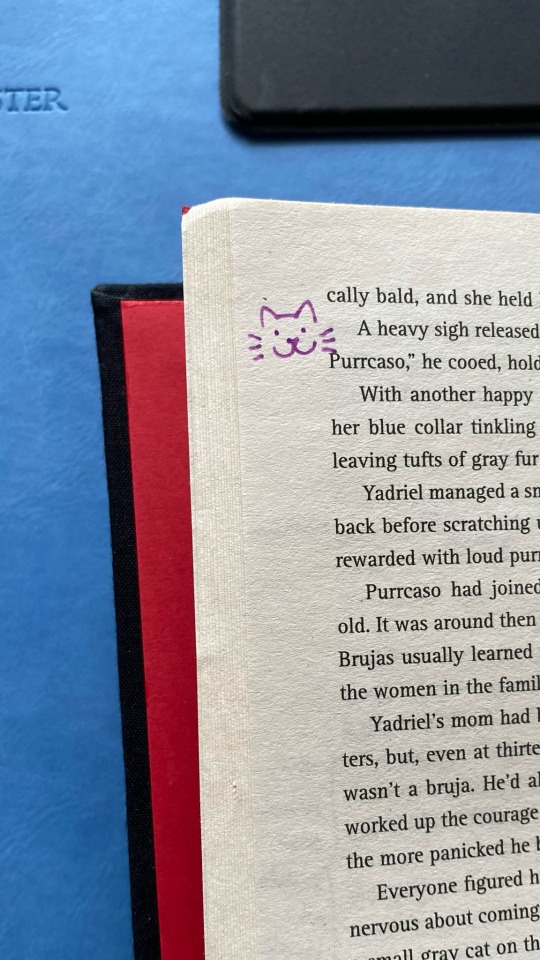
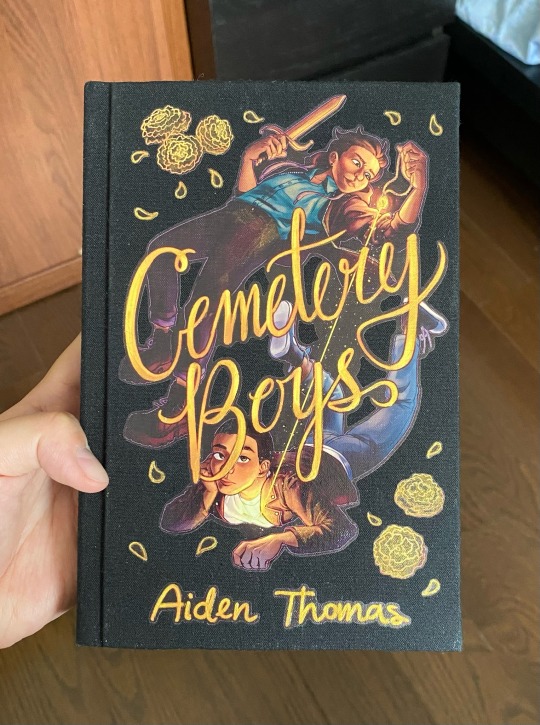
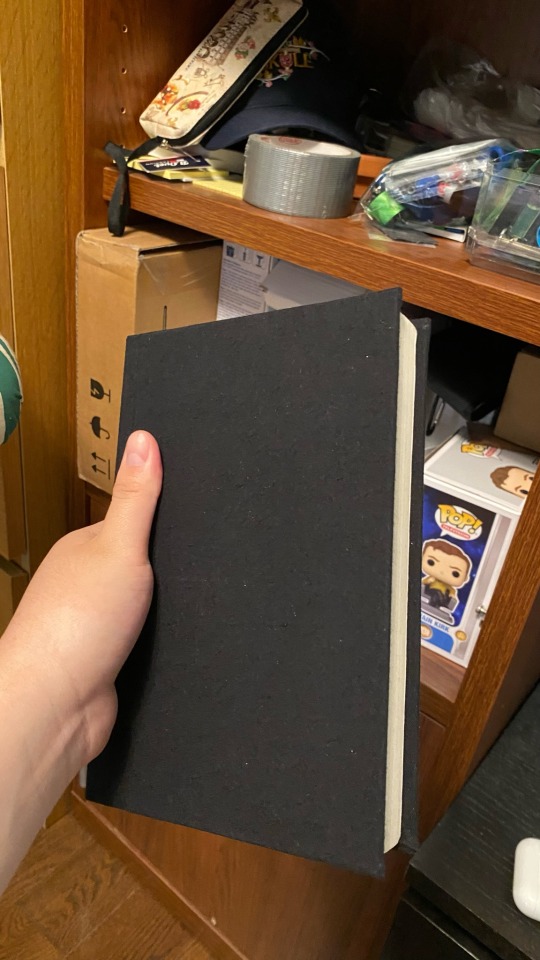
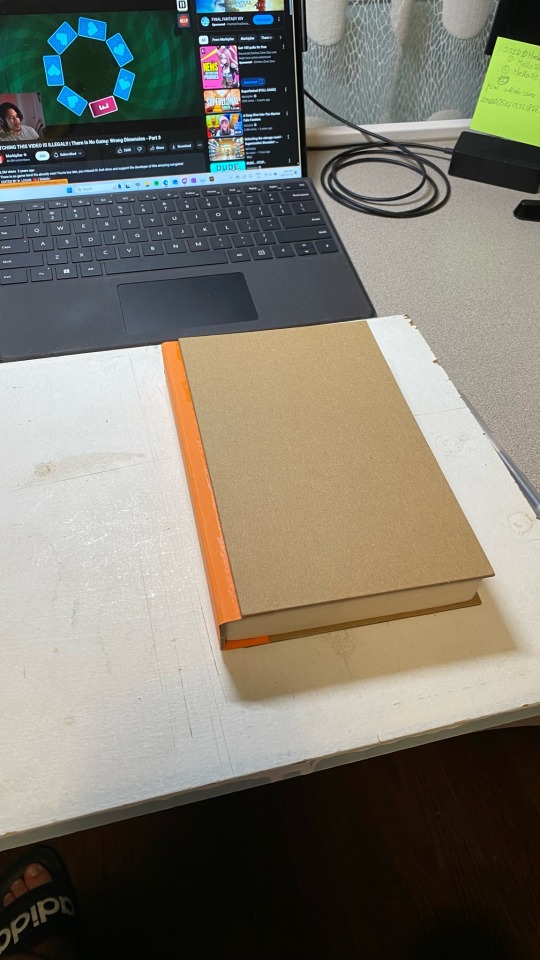
#wherefore art thou#cemetery boys#yadriel vélez flores#julian diaz#ignore the house md playing in the background#had to double check the spelling of ‘Cemetery’ multiple times#mostly followed Abound Bindery’s bookbinding tutorial on youtube! also learned a lot from Nik the Booksmith and DAS Bookbinding#also i can’t remember what channel came up with the idea but i used a glue stick on the back of the cotton cloth. poor man’s bookcloth.
98 notes
·
View notes
Text
Karow ist ja son richtiger Loser. Da hilft ja nicht einmal, dass Mark Waschke überdurchschnittlich hübsch ist. Er hat einfach so eine Loser-Aura
#spätestens wenn er den mund aufmacht ist dann auch klar dem mann ist nicht zu helfen#hat aber überraschenderweise immer noch rizz wenn er will. zeigt auch#das ist alles performativ#sein wahres ich ist ein loser aber er kann in rollen schlüpfen die das nicht sind#liebster soziopath#das ist das tolle an fiktion ich kann ihn als charakter lieben obwohl er mich richtig unwohl fühle wenn er mal wieder eine episode hat#wo er creepy unterwegs ist#mark waschke bring uns mal ein tutorial wie man sowas so lebensecht darstellt#wtf lass mal ein bisschen talent für den rest über#tatort berlin#tatort#robert karow#kommt aus meinen entwürfen. hatte offenbar vor ein paar wochen SEHR viel zu karow zu sagen
27 notes
·
View notes
Text
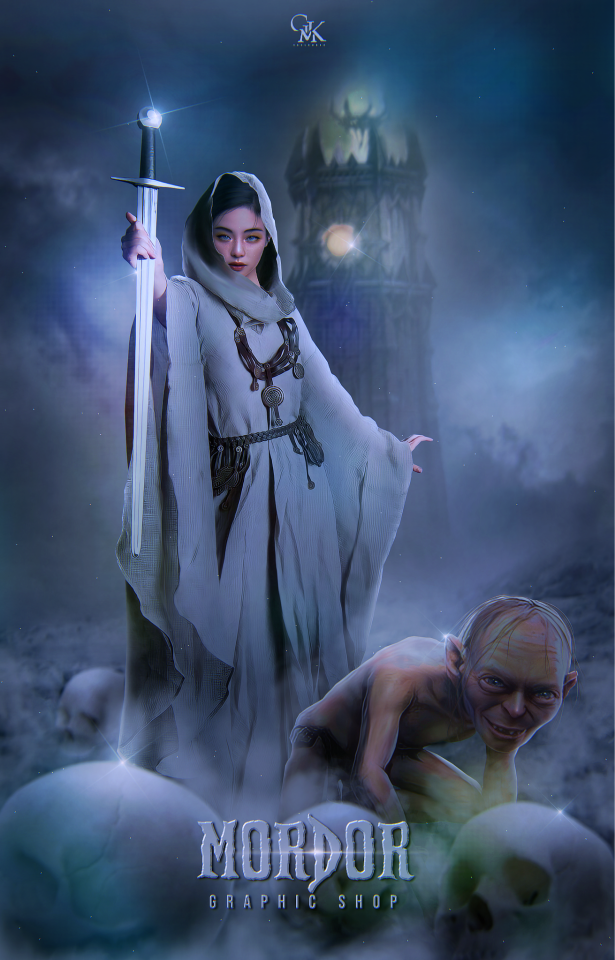
✨️ "Mordor" foi uma era muito importante pra mim e eu simplesmente esqueci de postar aqui a capa da graphic. Além do mais, também fiz um vídeo de watch me edit e postei no meu canal do YouTube. Faz 4 meses desde então, e eu me considero uma borboleta sempre em transformação, então eu já mudei um pouco a forma de fazer algumas coisas, mas ainda sim, é bem atual. Não é um tutorial, mas espero que possa ajudar alguém.
youtube
73 notes
·
View notes