#creating a custom menu in wordpress
Explore tagged Tumblr posts
Visit Tumblr Blog
Explore Tumblr blogs with no restrictions, modern design and the best experience.
Last Seen Tumblr Blogs


Fun Fact
130K people were victims of a chain letter scam that affected Tumblr in May 2011.
Video
youtube
Learn to create a menu in WordPress - eComHardy Woocommerce tutorialThis video is about how to create and manage menus on a WordPress website. Visit ecomhardy.com for more tutorials, website development, and eCommerce learning material. Part 1- How to make a website - Buy the right Domain and Hosting https://youtu.be/y-JoRxhwhE8 Go to, https://ecomhardy.com/make-a-website All the steps with useful information are provided there. Part 2- Make a website- How to install WordPress on your website; https://youtu.be/t0E7_rp8LrY Bonus video: To know How to point the domain name servers to your hosting, check out the link; https://youtu.be/6UNA7AY-lxw Part 3 - How to install a theme on WordPress. https://youtu.be/inO0H4LPpNQ
#ecomhardy#how to create a menu in wordpress#create a menu#menu in wordpress#wordpress menu#creating a custom menu in wordpress#dropdown menu#how to set up menus in wordpress#create navigation menu in wordpress#navigation menu#add menu#how to add menu in wordpress header#change menu#edit menu#wordpress menu tutorial#how to create custom menu in wordpress#header menu in wordpress#drop down menu in wordpress#how do i create a menu bar in wordpress
0 notes
Text
7+ Best Art Portfolio Website WordPress Premium Theme

Art Portfolio Website WordPress Premium Theme
Creating an art portfolio website is essential for artists, designers, and creatives to showcase their work and attract potential clients. Let’s explore some of the best WordPress premium themes specifically designed for art portfolio websites:
1. Dabble – Creative Agency & Portfolio WordPress Theme:

A sophisticated and stylish theme with multiple menu layouts, sliders, and preset blog post styles.
Features a portfolio system using a custom post type, allowing you to display your projects effectively.
Available in both free and premium versions, with advanced controls in the premium version.
2. Rubrash – Personal Portfolio WordPress Theme:
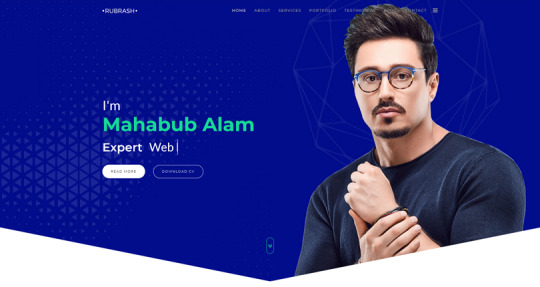
Known for its rock-solid coding and fantastic support.
Offers full-width portfolio layouts, including checkerboard style and carousel options.
Utilize the drag-and-drop Elementor Builder to create stunning pages for each portfolio entry.
3. Swipy – Creative Agency WordPress Theme:
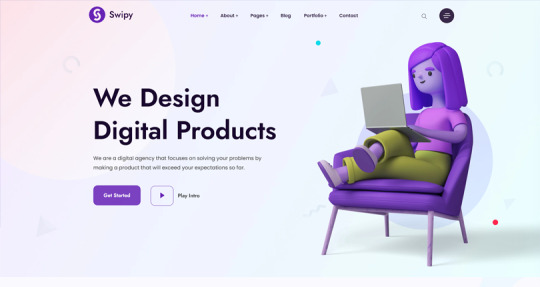
A flexible and feature-rich theme powered by the Elementor page builder plugin.
Suitable for various types of websites, including art portfolio website.
Explore its extensive library of over 300 templates for startups, freelancers, and personal sites.
4. Kulluu – Creative Agency WordPress Theme:
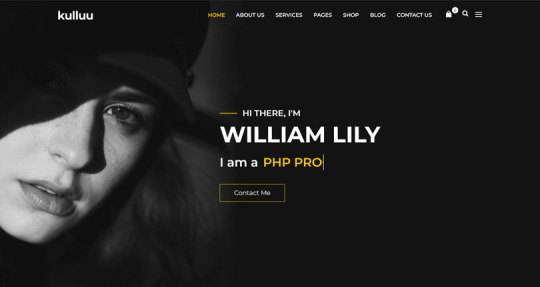
A minimalist freelancer and agency portfolio theme.
Ideal for showcasing your work with a clean and modern design.
5. Bionic- Personal Portfolio WordPress Theme:

Another portfolio WordPress theme that emphasizes simplicity.
Perfect for artists, photographers, and creative professionals.
6. Cretic – Creative Agency WordPress Theme:

A multi-concept artist and creative agency theme.
Offers versatility and a variety of options for different types of art portfolio website.
7. Mifo – Creative Minimal Portfolio WordPress Theme:
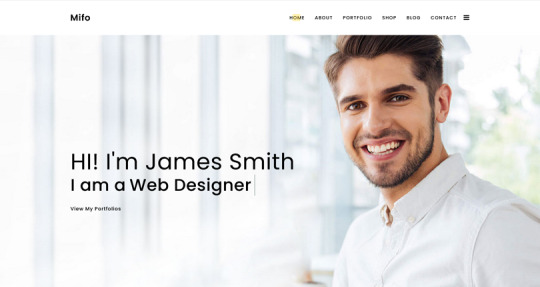
A clean and minimal multipurpose theme suitable for art portfolio website.
Focuses on elegant design and typography.
Remember to choose a theme that aligns with your artistic style, provides an excellent user experience, and effectively showcases your work. Happy creating! 🎨🖌️
For more options, you can explore other themes from ThemeForest. Each of these themes has unique features and customization options to suit your specific needs.
#premium wordpress themes#premium wordpress theme#app landing wordpress theme#wordpress premium themes#education wordpress theme#education & online course wordpress theme#paid wordpress themes#consulting business wordpress theme#online learning wordpress theme#wordpress plugins#art portfolio website#Art Portfolio Website WordPress Premium Theme#Creating an art portfolio website is essential for artists#designers#1. Dabble – Creative Agency & Portfolio WordPress Theme:#A sophisticated and stylish theme with multiple menu layouts#sliders#and preset blog post styles.#Features a portfolio system using a custom post type#allowing you to display your projects effectively.#Available in both free and premium versions#with advanced controls in the premium version.#2. Rubrash – Personal Portfolio WordPress Theme:#rubash#Known for its rock-solid coding and fantastic support.#Offers full-width portfolio layouts#including checkerboard style and carousel options.#Utilize the drag-and-drop Elementor Builder to create stunning pages for each portfolio entry.#3. Swipy – Creative Agency WordPress Theme:#swipy
4 notes
·
View notes
Text
Making a Website: A Beginner’s Guide
Creating a website is one of the most powerful ways to build an online presence. Whether you want to promote your brand, grow your business, or share your personal blog, making a website can make a significant impact. Here’s a beginner’s guide to help you navigate the essential steps and make the process smoother.
1. Define the Purpose of Your Website
Before you start, it’s crucial to clearly define the purpose of your website. Are you building an e-commerce store, a blog, or a portfolio site? Understanding your goals will help guide your design choices, content strategy, and the overall structure of your website. Knowing the purpose is essential to making a website that resonates with your audience.
2. Choose the Right Platform
Selecting the right website platform is key to achieving a user-friendly and professional website. Platforms like WordPress, Wix, and Squarespace offer various templates and customization options, but if you want full control, consider creating a custom website. For more insights on choosing a platform, check out Making a Website.
3. Prioritize User Experience and Design
A well-designed website should be easy to navigate and visually appealing. Make sure to create a layout that guides visitors smoothly through your content. Focus on mobile responsiveness, intuitive menus, and fast loading speeds to keep users engaged. Making a website that prioritizes the user experience can lead to higher visitor satisfaction.
4. Optimize for SEO
To increase visibility, ensure your website is SEO-friendly from the start. Use relevant keywords, optimize image sizes, and write clear meta descriptions. By paying attention to these SEO basics, you can help your website rank better on search engines, attracting more visitors. These steps are crucial in making a website that stands out.
Creating a website is a journey that can transform your online presence. Remember, the key to success lies in setting clear goals, selecting the right tools, and prioritizing the user experience. For more tips on building and optimizing your website, don’t forget to explore the resources available at Making a Website.
2 notes
·
View notes
Text

I’m excited to share that I’ve just wrapped up a fantastic project in the restaurantwebsite niche, built on wordpress platform! 🎉
Working on this project allowed me to combine my passion for web development with the goal of creating a website that promotes delicious culinary offerings. From user-friendly design to seamless functionality, I ensured that every detail on Wordpress website contributed to a positive user experience.
𝗞𝗲���� 𝗛𝗶𝗴𝗵𝗹𝗶𝗴𝗵𝘁𝘀💡 📌Developed a responsive and visually appealing website on wordpress 📌Integrated features like online reservations, menu showcases, and customer reviews 📌Ensured easy navigation for users to explore our menu, learn about our story, and book a table
I’m excited to have been part of this journey, helping my client bring her vision to life. If you’re in the restaurant industry and looking to elevate your online presence, let’s connect! 🍽️✨
#restaurant#wordpressdesign#webdesign#websitedesign#wordpresswebsite#food Whatsapp : +234 814 456 5452 Behance : JUBILEE DIGITALZ
4 notes
·
View notes
Text
7 Best Dropbox Plugins for WordPress
Dropbox is one of the most common free cloud storage offerings. Dropbox is a secure place to store your WordPress backups, media, and documents. Your files are safe and accessible from any device or location. It also improves your website’s performance, functionality, and safety.
Using a Dropbox plugin for WordPress saves hosting space and manages files in the cloud. As your website grows, so do your media files, documents, and digital assets. This increase requires more management. Dropbox integration offers a simple, efficient solution that enhances your website experience.
Why Use Dropbox In WordPress
Dropbox WordPress Plugin boosts your site’s storage without changing hosting. It also enhances security. Dropbox offers better protection than traditional computers. It includes encryption, secure transfers, and audits.
Storing files on Dropbox eases the server’s load. This improves loading times and free up resources for quicker page downloads.
Popular plugins For Dropbox Integrations with WordPress
Integrate Dropbox
Updraft Plus
WP Media Folder
Out-of-the-Box
WooCommerce Dropbox
Dropr
Zapier
Top Reasons to Choose Integrate Dropbox over competitors
Conclusion
Integrate Dropbox
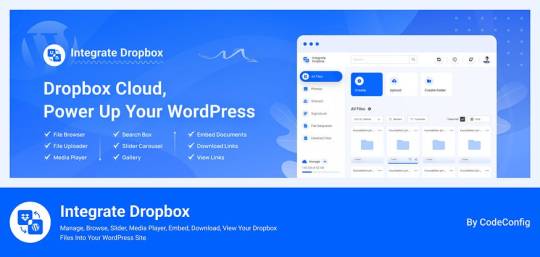
Integrate Dropbox offer smooth integration between Dropbox and WordPress with the most user-friendly Dropbox plugin from WordPress Dashboard. Easily Manage your media files and save hosting space without coding hassles. This plugin has several benefits. It allows users to access Dropbox files in the WordPress Media Library. They can also upload and download files directly from the dashboard. These files automatically sync with their Dropbox account.
Additionally, users can search for Dropbox files and folders in the dashboard. They can create shortcodes for display on the front end. This includes live search and thumbnail previews.
Price: Free for the base plugin, This plugin has Premium Plan
Features Of Integrate Dropbox
⚙️ Easy Setup — Effortlessly Setup! With this plugin, just add the Dropbox App and Secret Key from your Dropbox account to authorize Dropbox Account and WordPress integration. Documentation
🔎 Search Module — Search your Dropbox Files and Folders by name and use them in your shortcode, featured images, or different pages and posts.
🗂️ Upload/Create files & folders — Upload or Create Files and Folder in Dropbox files from your WordPress dashboard
👷♀️ Shortcode Builder — Shortcode Builder lets users easily create and customize modules. These include a Media Player, Slider, File Browsers, Galleries, and Download & Embed links. Users can insert the generated shortcode anywhere on their WordPress site.
🌆 Gallery — Gallery allows you to create a gallery to display images and videos interactively. Showcase your content beautifully and engage your audience with a visually appealing presentation.
🛠️ Shortcode Module — Shortcode Module allows you to easily select and insert built-in shortcodes from a dropdown menu, streamlining the process of adding custom features to your website.
📄 Embed Documents — Embed your Dropbox documents directly into your WordPress website.
🔗 Download Links — Allow your e-commerce, Digital Product customers to download media and document files.
👁️ View Links — Protect your important files by allowing customers to only view them without downloading them.
🛟 Preloader — Choose from our selection of predefined preloaders to enhance your website’s loading experience.
🌈 Customize Backend Colors- Easily customize the colors of your website’s backend using our predefined options.
📱 Responsive Design- The plugin makes your File Browser, Gallery, Upload Box, and Media Player look great on desktop and mobile. It provides a seamless user experience.
UpdraftPlus
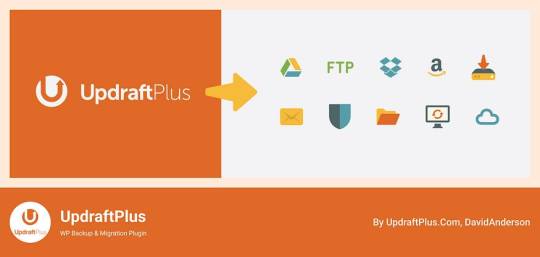
UpdraftPlus is a top WordPress plugin for easy backups and restores. It allows users to store backups in Dropbox safely. The plugin excels in features. Notably, it offers automated backup schedules for easy recovery. It also supports incremental backups, saving only changes since the last full backup. This approach cuts down on space and resource use. Moreover, UpdraftPlus encrypts backups before sending them to Dropbox, ensuring added security.
Price: Free for the base plugin, This plugin has Premium Plan
WP Media Folder
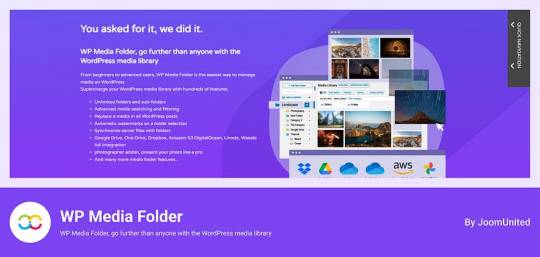
WP Media Folder connects your WordPress media library to Dropbox for easy management. You can organize Dropbox media directly from WordPress. The interface is similar to desktop applications, making it simple to use. Changes made in one platform appear in the other instantly. It also allows you to create galleries from Dropbox images, improving your website’s media handling.
Price: The plugin offers a Premium Plan.
Out-of-the-Box
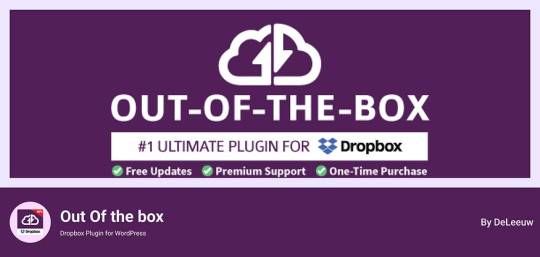
Out of the Box is a WordPress plugin that integrates Dropbox files. It brings your Dropbox info to the WordPress dashboard. You can easily drag and drop content. This is especially useful for projects with multiple users needing frequent updates. The plugin keeps files in sync, ensuring a smooth experience across both platforms.
Price: This plugin has Premium Plan
WooCommerce Dropbox
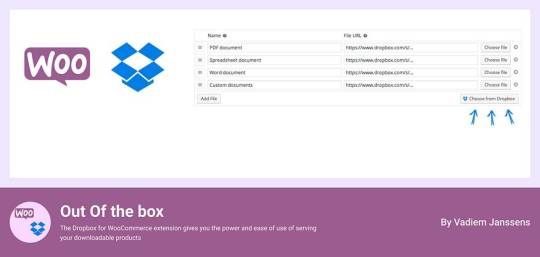
WooCommerce Dropbox lets store owners link their digital products to Dropbox files. It enhances WooCommerce and ensures timely delivery of digital products. This setup is especially helpful for selling digital items like software, music, or videos.
Shoppers get fast and simple downloads without slowing the website down. Using less server effort helps the site stay strong when many people visit. The WooCommerce Dropbox plugin improves downloadable products. It allows store owners to use Dropbox for their files. This saves server space and speeds up downloads for customers.
Price: Free for the base plugin
Dropr
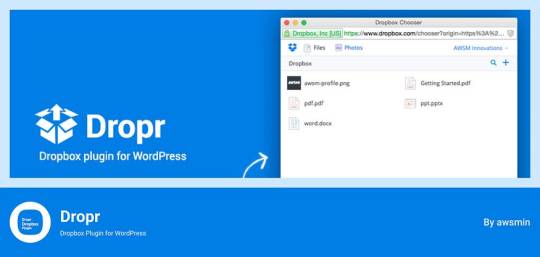
Dropr links Dropbox to your WordPress site easily. It sets Dropbox as the main storage for media files. Thus, all uploads go directly to Dropbox, saving server space. Moreover, Dropr lets you share Dropbox files in your WordPress media library and embed them in posts. Uploading images, videos, or documents with Dropr is as simple as using local files.
This setup is perfect for sites with lots of posts and resources. It ensures constant updates and supports various media. Dropr speeds up file transfers. This way, you keep your site fresh and active.
Price: Free for the base plugin, This plugin has Premium Plan
Zapier
Zapier links with WordPress and Dropbox to automate tasks. Though not standard plugins, they create complex workflows, enhancing efficiency and collaboration. For example, you can automatically post on WordPress when new files are added to Dropbox. This feature is especially beneficial for teams that need an updated and efficient online dashboard.
Price: Free for the base plugin, This plugin has Premium Plan
Top Reasons to Choose Integrate Dropbox over competitors
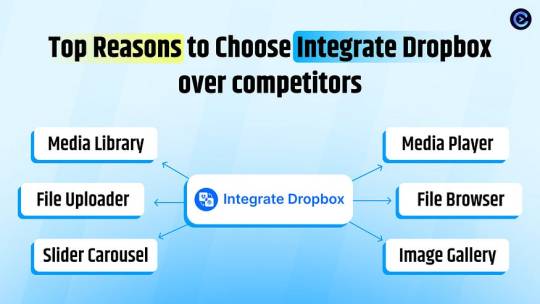
Integrate Dropbox plugin is free for WordPress and links your site to Dropbox easily. It’s perfect for organizing files. Site owners with often updated content find it especially helpful. They can manage everything from one place. This prevents issues with file syncing and access, all through the WordPress dashboard.
File Browser offers easy access to Dropbox files from any device upload on WordPress media library. Meanwhile, the Media Player lets users play Dropbox media on their WordPress site with a customizable player. By upgrading to premium, users can create unlimited shortcodes to integrate content anywhere on their site. This feature works well with popular themes.
These features collectively enhance usability, integration, and media management, making the “Integrate Dropbox” plugin a strong choice for WordPress users.
🧩 RICH INTEGRATION WITH POPULAR PLUGINS
▶️ Media Library Integration Simply use your Dropbox files from WordPress Media library and add the images in pages and posts as media, featured images, galleries, etc. Get the Image from Dropbox directly.
🔀 Gutenberg Block Editor Integration Integrate Dropbox allows 7 blocks for using File Browser, Gallery, Media Player, Slider, View, and Download link modules in the Gutenberg editor.
🔀 Elementor Website Builder Integration This plugin integrates with Elementor, offering over 7 widgets for File Browser, Gallery, Media Player, Slider, View, and Download link modules.
Conclusion
Integration of Dropbox on WordPress has turned into a necessary technique for current website scenario.
Connecting Dropbox to WordPress is now essential for managing websites. It improves file organization, backups, and collaboration. Plugins like “Integrate Dropbox” and “WP Media Folder” help site admins and developers. They can work faster and manage digital media better.
The right Dropbox WordPress plugin can greatly improve website management. It saves space and boosts performance. Additionally, it helps users create a more efficient online setup. This secures content and allows easy sharing across platforms.
4 notes
·
View notes
Text
How to make a travel website design
how to design a successful travel website, combining best practices and essential considerations:
Planning Phase
Define Your Niche: What kind of travel will you focus on? Luxury, adventure, budget, specific destinations, or a blend? This clarity will guide your design choices.
Target Audience: Understand your ideal customers – their age, preferences, and how they like to research trips. Your design should resonate with them.
Competitive Analysis: Examine other successful travel websites. Note what you like, dislike, and where you can offer an improved experience.
>>>>Please click hare Fiverr<<<<
Design Fundamentals
Simple, Intuitive Navigation: Visitors should find what they need fast. Use clear menus, breadcrumbs, and a strong search function.
Responsive Design: Your site must adapt flawlessly to all devices (desktops, tablets, smartphones). Travel planning happens everywhere.
Visual Impact: Stunning, high-quality images and videos of destinations and experiences are key to inspiring wanderlust.
Compelling Content: Engage with well-written descriptions, travel tips, and blog posts to boost interest and SEO.
Social Proof: Include testimonials, reviews, and social media integration to build trust and credibility.
>>>>Please click hare Fiverr<<<<
Essential Features
Robust Search Functionality: Allow searches by destination, activity, date ranges, and budget. Include advanced filters to refine results.
Detailed Listings: Provide comprehensive information on hotels, tours, flights, etc., including photos, descriptions, pricing, availability, and amenities.
Secure Booking Engine: Integrate a reliable, user-friendly booking system that supports multiple payment methods.
Personalized Recommendations: Use data and AI to suggest trips that align with individual user preferences.
Maps Integration: Use Google Maps or similar to visually display destinations and travel routes.
Trip Planning Tools: Allow users to save itineraries, create wishlists, and compare options.
Customer Support: Provide accessible contact options (live chat, email, phone) for resolving queries.
>>>>Please click hare Fiverr<<<<
Technical Considerations
Website Builder vs. Custom Development:
Website Builders (Wix, Squarespace, WordPress): Offer ease of use and templates but may have limitations in customization.
Custom Development: Provides maximum flexibility but requires coding skills or hiring a developer.
Hosting: Select a reliable host with sufficient bandwidth to handle traffic and ensure a fast-loading website.
Content Management System (CMS): A CMS like WordPress makes managing your content easier.
Design Execution
Color Palette: Choose colors evoking travel (blues for oceans, greens for nature, etc.). Maintain a balanced and visually appealing scheme.
Typography: Use clear, readable fonts. A hierarchy for headings and body text improves scannability.
White Space: Avoid cluttering. White space allows information to breathe and enhances the design.
Call-to-Actions: Place prominent "Book Now", "Learn More" buttons to guide users through the booking process.
Testing and Launch
Thorough Testing: Test on various devices and browsers. Ask friends and colleagues for feedback.
Launch: Once you're confident, launch your site!
>>>>Please click hare Fiverr<<<<
Promotion and Maintenance
Marketing: Utilize SEO, social media, content marketing, and potentially paid advertising to drive traffic.
Updates: Keep content fresh, add new destinations, and enhance features based on user feedback.
>>>>Please click hare Fiverr<<<<
Let me know if you'd like a deeper dive into any of these aspects, or help choosing a website builder or CMS!
Thank you
#websitedesign#ecommerce website builder#wordpress website#web design#web development#wordpress development#ecommerce website templates#wordpresswebsitedevelopment
2 notes
·
View notes
Text
Top Reasons to Build Websites in WordPress in 2024
In today's competitive era, having a solid online presence is essential for businesses. After all, your website is the virtual storefront showcasing your line of business, products and services to your target audiences. However, with so many website-building options available, choosing the right platform can feel overwhelming.
That's where WordPress comes in. So, what started off as a blogging tool has quickly evolved into a powerful website builder and a robust content management system. Yes, we are talking about WordPress, the powerful CMS that constitutes more than 40% of the websites across the world. If that isn't already an impressive enough statistic to help convince you why you should choose WordPress, then keep reading.
WordPress
WordPress is an excellent CMS that enables WordPress website developers to create, edit and publish content such as blogs, websites, e-commerce products and more. The world's most powerful platform is used by countless businesses to build their website, and for good reason. Let's delve into the top reasons why you, as a small business owner, should consider joining the WordPress bandwagon-
Free to use
WordPress is a free platform, which means the WordPress website developers are free to download, install, use, and modify it to match your business needs. While the software is free, you would still require a domain name as well as web hosting to install and start using it.
Ease of use
WordPress is one of the most flexible and powerful platforms; therefore, WordPress website developers find it quite easy to use. The platform comes with a simple dashboard with different menu options in the sidebar,y making it easier to create posts and pages and customise the website design. It regularly releases updates so that WordPress professionals can easily install it with mere a click of a button. There are excellent plugins for backups that allow you to set up automatic backups. In addition, it also comes with secure best practices, which makes the website secure.
Customizable
Most WordPress professionals find the platform to be the perfect solution because there are thousands of free templates or themes from which to choose. These themes are easy to customise because many of them come with their own options panel, allowing you to change the colours and background, create sliders, and truly customise anything without writing the code.
SEO Friendly
Any website in the world will not be a success if it doesn't attract traffic or the target audiences. Luckily, WordPress is built with SEO-search engine traffic in mind. It uses high-quality code with semantic markup, which means Google and other search engines platforms can easily keep track of your website. This is why WordPress websites tend to rank higher than other search engines.
Highly Flexible
As your business scales, you need a reliable platform to ensure the higher traffic does not disrupt the overall user experience. WordPress offers higher scalability for websites and can easily handle traffic. It uses caching to store content locally, so when the user requests data, reloading the website is easy, and data is available. Also, when it comes to flexibility, it allows businesses to customise their features.
Third-party Integrations
WordPress's website has loads of features that offer advanced functionalities. However, if your website needs additional functionality, you would need to integrate the external services. For example, an eCommerce website may require additional functionality like payment gateway integrations. External services may use a different programming language, or you may plan to integrate a custom plugin for which Rest APIs are also the best option. The Rest APIs in WordPress enable enhanced third-party integrations for added functionalities and improved performance.
Minimal coding
WordPress platform offers many drag-and-drop functionality for WordPress development. The platform offers WordPress professionals capabilities with minimal coding knowledge using the Elementor. You can use a drag-and-drop page builder on WordPress to create a website without extensive coding. The plugin helps create user-friendly web pages with the visual editor.
Enhanced Security
WordPress is a highly secure platform that includes user authentication mechanisms, secure plugin integrations, and monitoring. It has key components, including-
Theme security & Plugins
There are several plugins and themes which offer better website security.
WordPress core
It is secure and requires timely updates, thereby providing regular security updates for the core services you need.
Responsive Designs
Responsive designs are crucial because they impact the customer base. Research has observed that a significant reason users leave a website is that it is non-responsive. Thankfully, WordPress can develop responsive websites and enhance the overall user experience. You can use the platform to develop responsive websites by integrating plugins and themes.
With this, we conclude some of the essential top reasons why WordPress is a popular platform and how best it can be utilised. The best way to truly experience the power of WordPress is by using it. If you are looking for a WordPress development company, contact our experts. Yiron Technologies, WordPress website developers, provide cutting-edge solutions, consulting and more to meet our business needs. Our experts have a passion for innovation, which helps empower businesses to achieve their goals in the digital landscape.
2 notes
·
View notes
Text
Facebook pixel setup to wordpress
Integrating Facebook pixels and setting up retargeting on Builderall pages is a powerful strategy to enhance your Facebook advertising efforts and reach your target audience more effectively. Here's a step-by-step guide to help you with the process:
Step 1: Create a Facebook Pixel:
Log in to your Facebook Business Manager account.
Navigate to the "Events Manager" section.
Click on "Add New Data Source" and select "Facebook Pixel."
Follow the prompts to create your Facebook pixel, providing a name for your pixel and entering your website URL.
Copy the generated pixel code provided by Facebook.
Step 2: Integrate Facebook Pixel with Builderall:
Access your Builderall dashboard and navigate to the page where you want to integrate the Facebook pixel.
Go to the page settings or settings menu, depending on the Builderall interface.
Look for the "Tracking Code" or "Analytics" section.
Paste the Facebook pixel code into the designated area provided by Builderall.
Save the changes and publish the page.
Step 3: Set Up Standard Events (Optional):
In the Facebook Events Manager, navigate to the "Aggregated Event Measurement" section.
Click on "Configure Web Events" and select "Add Events."
Choose the relevant standard events that you want to track on your Builderall pages, such as page views, purchases, or sign-ups.
Follow the prompts to add the selected events and configure their parameters.
Step 4: Create Custom Audiences:
Go to the Audiences section in Facebook Business Manager.
Click on "Create Audience" and select "Custom Audience."
Choose "Website Traffic" as the source for your custom audience.
Define the criteria for your custom audience based on specific actions or pages visited on your Builderall website.
Set the desired time frame for audience inclusion, such as the last 30 days.
Create the custom audience and give it a descriptive name.
Step 5: Set Up Retargeting Campaigns:
Go to Facebook Ads Manager and create a new campaign.
Choose your campaign objective based on your marketing goals, such as traffic, conversions, or lead generation.
Define your target audience, selecting the custom audience you created earlier.
Set up ad creative, including images, ad copy, and call-to-action buttons.
Choose ad placements and budget allocation based on your advertising strategy.
Review and publish your ad campaign.
Step 6: Monitor and Optimize:
Monitor the performance of your retargeting campaigns in Facebook Ads Manager.
Track key metrics such as reach, click-through rate (CTR), conversion rate, and return on ad spend (ROAS).
Use the insights gained to optimize your campaigns, adjusting targeting, ad creative, or budget allocation as needed to improve results.
Continuously test different ad variations and strategies to maximize effectiveness and ROI.
By following these steps, you can effectively set up Facebook pixels, integrate them on Builderall pages, create custom audiences, and launch retargeting campaigns to engage with your audience and drive conversions effectively.
2 notes
·
View notes
Text
The Essential Steps to Build a Website from Scratch

Creating a website from scratch might sound intimidating, but with the right steps and tools, it becomes a manageable and even enjoyable process. Whether you're a business owner, freelancer, or just curious, knowing how to build a website can open many opportunities. If you’re unsure where to start, this guide will walk you through the essentials.
For businesses in Bhubaneswar looking for professional help, web development services in Bhubaneswar can provide expert solutions tailored to your needs.
1. Define Your Purpose and Goals
Before diving into the technical aspects, ask yourself:
What is the main purpose of the website?
Who is your target audience?
What actions do you want visitors to take?
For example, if you’re building an e-commerce site, your goals might include showcasing products and offering seamless online purchases. Clarity at this stage will guide the rest of your decisions.
2. Choose a Domain Name
A domain name is the address users type to access your site (e.g., yourbusiness.com). It should be simple, relevant, and easy to remember.
Check availability using domain registration platforms.
Avoid long or overly complex names.
Use a .com extension if possible, as it’s the most recognized.
3. Select a Hosting Service
Website hosting is where your site’s files are stored. Popular hosting providers include Bluehost, HostGator, and SiteGround. Factors to consider when choosing a host:
Storage and bandwidth limits.
Customer support availability.
Pricing and scalability options.
4. Plan Your Website Layout
Think of the pages you want to include. Common options are:
Home
About Us
Services/Products
Contact
Blog
Use a wireframe or sketch to outline the structure. This will help you visualize how users will navigate your site.
5. Build Your Website
Now comes the fun part—creating your site. You can do this using one of the following methods:
a. Website Builders Platforms like Wix, Squarespace, and Shopify offer drag-and-drop tools that are user-friendly and require no coding skills.
b. Content Management Systems (CMS) For more customization, CMS options like WordPress allow flexibility with plugins and themes.
c. Hiring Professionals If you want a polished and functional website without the hassle, hiring experts offering web development services in Bhubaneswar ensures you get a professional product tailored to your business needs.
6. Design for User Experience (UX)
A good design isn’t just about aesthetics. It should provide a smooth and intuitive experience. Key tips:
Ensure mobile responsiveness so the site works well on all devices.
Use clear navigation menus.
Opt for a clean, consistent design with easy-to-read fonts and colors.
7. Add Essential Features
Your website should include:
Contact Information: Make it easy for visitors to reach you through a contact form, email, or phone number.
SEO Optimization: Use keywords, descriptive meta tags, and optimized images to improve search engine rankings.
Call-to-Actions (CTAs): Encourage users to take specific actions, like “Buy Now” or “Subscribe.”
Security Measures: Install SSL certificates for a secure browsing experience.
8. Test Your Website
Before going live, thoroughly test your site for:
Loading speed.
Broken links.
Responsiveness on different devices.
Compatibility across various browsers.
Ask friends or colleagues to navigate your site and provide feedback.
9. Launch Your Website
Once you’re confident everything works smoothly, it’s time to publish your site. Inform your audience through email campaigns, social media, or other marketing channels.
10. Maintain and Update Regularly
A website isn’t a one-and-done task. Keep it updated to ensure it stays relevant and functional:
Add fresh content like blogs or news.
Monitor analytics to understand user behavior.
Regularly back up your site’s data.
Building a website can be a rewarding experience, especially when you see it come to life. Whether you’re doing it yourself or seeking professional help, having a clear plan and understanding the steps involved will make the process smoother. If you’re in Bhubaneswar and need expert guidance, consider leveraging web development services in Bhubaneswar to create a site that represents your brand perfectly.
#digital marketing services in bhubaneswar#seo services in bhubaneswar#web development services in bhubaneswar#digital marketing agency bhubaneswar#best digital marketing company in bhubaneswar
0 notes
Text
Proper Steps To Create A WordPress Website For A Dental Clinic
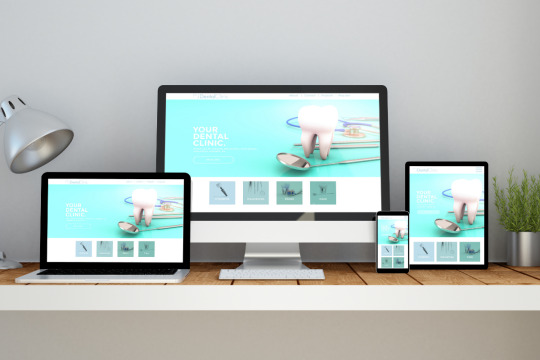
Visitors are more likely to return to your dental business if your website is visually appealing. Even if your clinic is small and you rely on word of mouth, patients are likely to search for your business online. Creating a stunning website for dentists doesn’t have to break the bank, and we’ll show you how in this guide.
Choosing A Dental Clinic Website Template
Choosing a WordPress dental clinic website theme is the first step in constructing your WordPress site. To begin, you can choose between general healthcare or a dentist’s theme. To make a significant effect on the internet, we suggest that you select a specialist theme from our list of the finest dentist themes. A cross-browser-compatible, responsive WordPress theme is the best way to make sure that your website visitors see a beautiful site regardless of their device type and size.
It’s even better to use a theme that includes a page builder like visual composer or Elementor page builder. It allows you to create new pages with greater freedom and control over the look and feel of your website. If you’re looking for a dental clinic WordPress theme, establish a list of all the features you need, and then look for a theme that supports a plugin that can help you get them all.
For instance, an appointment booking form if you wish to have online appointments, a full-width layout, a giant menu for your site, or any number of other options. When you have a clear picture of what you want your website to look like, picking a theme becomes easy.
Subscribing For Hosting And Domain Name
A domain name and web hosting can now be obtained in conjunction with the dental clinic website theme you’ve previously purchased.
In the same way that other website builders don’t charge a fixed monthly fee, WordPress does not. It’s free, but you’ll need to find a place to put your site on the internet.
Hosting
Because of the fierce rivalry amongst web hosting firms, it is now easy to locate a host for your website that is both affordable and reliable. Your site can be hosted by finding the best options in your area. To host your website, we recommend Bluehost, which has the finest uptimes, top-notch customer service, and security.
Domain name
You can think of your domain name as essentially representing your online persona and location. Because of this, you should always take your time while picking a domain name.
Choosing A Domain Name Might Be Tricky, So Here Are Some Pointers:
Short and easy to remember
Make spelling mistakes a thing of the past
Do not use symbols or numbers
Use caution while selecting a domain name extension
Include the keywords if you can
Symbolize your company’s identity in a unique way
Bluehost is a great option for hosting your domain name, as we’ve said before. Search for the availability of two or three distinct domain names. For your dental clinic’s website, purchase the domain name.

Installing WordPress for a Dental Clinic Website Theme Is A Simple Process.
Following purchase and download, you’ll be given access to all of the components that come with the template, including a parent theme and a subtheme. Our WordPress dashboard is now ready for theme installation, so let’s get to it! We need to go to the ‘Appearance’ area and click on ‘Themes’ in order to do so.
What we really want is for you to be taken to a page that lists all of the installed themes, but we’re not interested in that! Select the “Add New” option. By now you should have selected the “Dentario” zip package by selecting “Upload Theme” and then “Upload”. After you’ve installed the theme, WordPress will inform you which plugins are required.
This is critical since it will ensure that all of the template’s features perform as expected. Just select all of the plugins you need and click the “Install” button to begin the process of installing them. You’ll have to go through the same process again to activate them when they’ve been installed.
Content Of Your Website
Your website’s content is unquestionably king!
What keeps your site’s users interested and motivated to take action is the variety of content you offer them on your site. Your website’s success is entirely contingent on how successfully you prepare and implement the content.
Material writers can be hired to develop a wide range of different types of content for you.
Mobile-Friendly Dental Clinic Website
Optimizing your website for the mobile platform will increase the number of visitors to your site. It is important to take notice of spacing, image sizes, and features that may not look good or perform properly on mobile devices. You don’t want to be in a situation where your dentist’s website development appears bad on a mobile device and causes customers to go to other, better-looking dentist websites.
Tips for Building a Dentist Website
Add Statistics
Even if the numbers are bad, people enjoy reading them. Add a few numbers on the homepage to show how many people have visited. Customer satisfaction, procedures, or anything else you think is significant can be included in these numbers.
Use Popups
Using popups for messages that you want the user to focus on is a good practice. Anything from a discount to an invitation for you to get in touch is possible.
Use Forms
Users can easily reach out to you by filling out forms on your website. Become their favorite dentist by making their life easy.
Having a website for your dental practice is a good idea. We’re not just referring to a pretty website that doesn’t actually do anything. It should be able to help with things like scheduling an appointment, finding a dentist, and looking at their work. All of these elements were incorporated into ‘Dentario’ by its designers. Just a few blocks are all you need to do to get there. A few tweaks are all that is needed before you’re ready to launch your website. If you’re seeking help with dental website development, you should consider contacting a WordPress development company in Cincinnati.
Contact Us
At Reversed Out Creative, we understand the challenges and opportunities presented by AI disruption. Our team of experts specializes in web design, SEO, graphic design, and digital marketing services. Reach out to us through our contact form to learn more about navigating the evolving job market and embracing the potential of AI. Together, let’s shape a future that combines human ingenuity with the power of AI.
Content source: https://reversedout.com/benefits-of-wordpress-for-dental-clinic-website/
#Website Development Company In Cincinnati#WordPress Website Create#WordPress Website Building#Web Development Company Cincinnati#Design Agencies In Cincinnati
0 notes
Text
Build Your Own Web Portal: 10+ Expert Tips for Success

It is experiencing massive growth in online portals. In fact, studies show that businesses with optimized web portals see a 50% increase in user engagement. A web portal is a solution that provides users with all kinds of resources, services, and information in one location. This article will unveil the essential tips for building your own web portal, helping you harness its potential for better communication, user interaction, and overall efficiency.
Planning Your Web Portal: Laying the Foundation
Defining Your Target Audience and Niche
Your ideal users are the key to your web portal's success. Knowing who you are trying to serve helps to inform the content and features you create. For example, a travel portal targeting solo adventurers might focus on budget tips and solo-friendly destinations, while a portal for outdoor enthusiasts may highlight gear reviews and safety tips.
Setting Clear Goals and Objectives
You can establish what goals you want to achieve and how you want to measure them, e.g., using SMART goals (Specific, Measurable, Achievable, Relevant, Time-bound). For example, you could set a goal to grow user registrations by 25% over the next six months. When you have a clear goal in mind, it helps to maintain your vision, which serves as a compass guiding your actions.
Choosing the Right Platform and Technology
Choosing a suitable Content Management System (CMS) is crucial. Options like WordPress, Drupal, and Joomla each come with unique advantages:
WordPress: User-friendly, ideal for beginners, with numerous plugins but may have limitations on scalability.
Drupal: More complex but offers high customization and scalability for advanced users.
Joomla: A good balance of user-friendliness and customization, suitable for interactive sites.
Consider your technical skills, budget, and long-term goals when choosing a platform.
Designing a User-Friendly Interface
Prioritizing User Experience (UX)
A straightforward design, seamless navigation, and fast loading times ensure users stick around. Research shows that 53% of mobile users will abandon a page that takes longer than three seconds to load. To enhance UX, focus on:
Simplified navigation menus
Consistent design elements
Fast-loading pages
Creating an Engaging Visual Design
Visual appeal matters. Using high-quality images, keeping consistent branding, and adhering to design principles would give a professional look. Best practices include:
Cohesive color schemes
Balanced layouts
Readable typography
Optimizing for Mobile Devices
Make Your Portal Mobile Friendly — With over 60% of web traffic coming from mobile devices, your portal must be mobile-friendly. Responsive design adapts to different screen sizes, increasing user engagement. Mobile usage statistics can make this feature significant.
Content Strategy: Creating Valuable and Engaging Content
Developing a Content Calendar
It enables you to be consistent in your content creation. An editorial calendar is established for scheduling blog entries, videos, and infographics If you own a travel portal, for instance, it might mean writing destination guides, packing tips, photo essays, or other content to get a diversified flow of visitors.
SEO Optimization for Search Engines
To increase visibility, prioritize keyword research, on-page SEO, and backlinks. Use tools such as Google Keyword Planner and SEMrush to identify relevant keywords, and optimize your content for search engines. Combining on-page SEO practices such as title tags, headers, and meta descriptions with off-page strategies, including backlinks.
Content Promotion and Distribution
Use a variety of ways to promote your content Traffic can also be driven through leveraging social media, email marketing, and influencer collaborations. Use interesting content formats like polls or behind-the-scenes clips to draw attention.
Building Your Community: Fostering Engagement
Implementing Interactive Features
Add interactive elements: for example, forums or comment sections They provide interactivity to users and create a community. Some portals, like Reddit, absolutely depend on engagement and user discussion/feedback to survive.
Moderating User-Generated Content
Managing user-generated content is essential for a positive environment. Establish guidelines for contributions, and Enforce them with Moderators Content is reviewed routinely to maintain a respectful and safe environment for all users.
Encouraging User Participation
Engage users through contests, rewards, or polls. Inviting them to participate, such as asking for feedback on new features, increases user loyalty and community involvement. Celebrating active members enhances motivation.
Monetization Strategies: Generating Revenue
Advertising and Sponsorship Opportunities
Explore various advertising models. These can take the form of banner ads, sponsored articles, or affiliate marketing. A tech portal can have tie-ups with software companies, but that would be considered a sponsored review and would truly be an income generation.
Subscription Models and Premium Content
Introduce subscriptions for premium content. Memberships With Tiers: Users can access premium resources with tiered memberships. Although they can equal reliable revenue, make sure that the worth delivered proves more than the fee.
Selling Products or Services
Explore e-commerce Platforms on your portal. Merchandise or digital products can be an additional source of income alongside your content. Such as branded merchandise or online courses, to create additional revenue streams.
Analyzing and Improving Performance
Setting Up Web Analytics
Analytics tools, like Google Analytics, are essential for tracking performance. These features let you track traffic, user behavior, and conversions. You draw from this data to inform your strategy and identify areas for improvement.
Monitoring Key Performance Indicators (KPIs)
Choose KPIs that are important for your goals. Key performance indicators include web traffic, user engagement levels, and conversion statistics. Check these indicators frequently to measure the success of your portal.
Iterative Improvement Based on Data
Use the data collected through analytics to make informed decisions. Regularly refining your portal based on user feedback and behavior encourages continuous improvement.
Conclusion
Web Portal Development is a multi-faceted journey requiring careful planning and execution. Every step plays a major role in your portal's success, from learning your audience and defining the purpose to user interaction and monetization. Build a wealth of expertise that will not only provide value for your users but also serve as a springboard for future growth and impact by adhering to these expert tips. Just start the journey now — take the steps to have your web portal ready, today!
For more info visit us: https://deorwine.com/blog/best-tips-to-build-your-own-web-portal/
Contact Us:
Website: https://deorwine.com
Email id: [email protected]
Skype: deorwineinfotech For Any Query Call Us at: +91-9116115717
#web portal development#web portal development company#web development#web portal development cost#web portal feature#mobile app development#mobile app development company
0 notes
Text
How to Create a Stunning Website for Your Clothing Brand ?
Creating a stunning website for your clothing brand is essential in today’s digital age. A well-designed website serves as your brand’s online storefront, allowing potential customers to explore your products, learn about your brand story, and make seamless purchases. Whether you’re just starting or looking to revamp your existing website, a clothing store website design plays a vital role in shaping the perception of your brand. From selecting the right design elements to enhancing user experience, every detail counts.

What is Website Design for Clothing Brand?
Website design for clothing brand refers to the process of creating an attractive and functional website that reflects the identity and values of your clothing brand. It involves various design elements such as layout, color schemes, typography, images, and interactive features tailored to meet the needs of your target audience. A good clothing store website design should provide a seamless experience, guiding visitors effortlessly through the website to view products, learn about the brand, and complete transactions.
The goal is to create a visually appealing website that showcases your clothing collections while offering easy navigation and functionality. A professional website design for clothing brand helps build trust, encourages engagement, and boosts sales.
How to Create a Stunning Website for Your Clothing Brand
Creating a stunning website for your clothing brand involves multiple steps. From planning and designing to maintaining and optimizing, every step plays a crucial role in ensuring your site stands out in the competitive fashion market.
Define Your Brand Identity Before you start designing your website, it’s essential to have a clear understanding of your brand identity. This includes your brand colors, logo, message, and target audience. Define what makes your brand unique, such as your style, ethos, and the story you want to convey through your website design for clothing brand.
Choose the Right Platform Selecting the right platform for your clothing store website design is crucial. Options like Shopify, WordPress, and custom-coded websites provide flexibility and features suited for clothing stores. Shopify, for example, is a popular choice due to its ease of use, customization options, and e-commerce capabilities.
User-Centric Design Focus on designing a user-friendly website. Navigation should be intuitive with a clear menu, easy product search, and quick checkout processes. Ensure that the website design for clothing brand is optimized for mobile and desktop views, as most users access sites through different devices.
Showcase Products A visually appealing product display is essential. Use high-quality images, product descriptions, and multiple views to help customers make informed decisions. Also, incorporate filters and categories to enhance product discovery.
Optimize for Speed and SEO Website speed and search engine optimization (SEO) are vital. A fast-loading website ensures that users stay engaged, while SEO helps your site rank higher on search engines, driving more organic traffic.
Engaging Features Add engaging features like interactive elements, storytelling sections, customer reviews, and social media integration. These features create a more personalized experience and increase customer interaction.
Importance of Website Design for Clothing Brand
A well-designed website for your clothing brand serves as a powerful tool for brand representation, customer engagement, and business growth. Here are a few reasons why investing in a professional clothing store website design is important:
First Impressions Matter Your website is often the first point of contact with your customers. A stunning website design creates a strong first impression and builds trust. A poorly designed website can discourage visitors from staying or making purchases.
Enhances User Experience A seamless user experience is crucial for retaining visitors. A well-structured website design for clothing brand improves navigation, reduces bounce rates, and keeps customers engaged, leading to higher conversion rates.
24/7 Accessibility Unlike physical stores, a website allows customers to shop anytime, anywhere. A well-designed website acts as a 24/7 sales channel, providing access to your products 24 hours a day, 7 days a week.
Marketing and Branding Opportunities Your website serves as a marketing hub where you can showcase your latest collections, share your story, and connect with your audience through various channels. It plays a key role in promoting your brand identity.
Benefits of Website Design for Clothing Brand
A professionally designed website for your clothing brand comes with numerous benefits that contribute to business success:
Increased Sales A well-optimized website design for clothing brand can lead to more sales. A user-friendly design with streamlined checkout processes can significantly improve conversions.
Better Customer Engagement Engaging website features such as blogs, social proof, and interactive elements allow customers to connect with your brand on a deeper level. This boosts engagement and loyalty.
Cost-Effective Marketing A well-designed website reduces the reliance on traditional marketing methods. Through SEO, content marketing, and paid ads, you can drive traffic and achieve cost-effective results.
Flexibility and Scalability With a professional website design for clothing brand, you have the flexibility to scale your business as needed. You can add new products, launch promotions, and expand globally with ease.
Data-Driven Insights A website allows you to track user behavior, sales performance, and other key metrics through analytics tools. This helps you make informed decisions to optimize your website for better results.
A well-designed website is essential for any clothing brand to succeed in the competitive online market. With a focus on user experience and aesthetics, dubaiwebsitedesign.ae offers tailored solutions to create stunning, functional websites that drive engagement and boost sales. By leveraging their expertise, brands can establish a strong online presence and stand out in the digital space.
#clothing store website design#website#website design.#web design#web design in dubai#dubai website design
1 note
·
View note
Text
How to Create a Stunning Portfolio Website: A Graphic Designer's Guide
As a graphic designer, your portfolio website serves as your digital storefront, showcasing your creative skills, style, and capabilities to potential clients or employers. A well-designed portfolio not only demonstrates your design expertise but also reflects your professionalism and attention to detail. Whether you're starting from scratch or revamping your existing site, creating a stunning portfolio website can significantly elevate your brand and open doors to new opportunities.
This guide will walk you through essential steps to craft an impressive portfolio website that stands out.
1. Define Your Goals and Audience
Before diving into the design process, it’s crucial to define your goals and identify your target audience. Are you looking to attract freelance clients, secure a full-time position, or simply share your creative journey? Knowing your purpose will help shape the content, structure, and overall tone of your portfolio.
Similarly, consider your audience’s preferences and expectations. For instance, corporate clients may appreciate a clean, minimalist design, while creative agencies might prefer bold, innovative layouts. Tailoring your portfolio to meet these expectations ensures it resonates with the right people.
2. Choose the Right Platform
Selecting a platform for your portfolio is a critical step. Popular options include:
Wix and Squarespace: Ideal for beginners, these platforms offer user-friendly drag-and-drop editors and customizable templates.
WordPress: Offers more flexibility and scalability, making it a great choice for designers with some technical expertise.
Adobe Portfolio: A favorite among creatives, this platform integrates seamlessly with Adobe Creative Cloud.
Custom Design: For designers with coding knowledge, building a custom site allows for complete creative freedom and personalization.
Choose a platform that aligns with your technical skills and long-term goals.
3. Create a Strong Visual Identity
Your portfolio website should be a reflection of your unique style and brand identity. This involves:
Logo and Branding: Use a custom logo and consistent color palette to reinforce your personal brand.
Typography: Choose fonts that complement your design aesthetic while ensuring readability.
Layout: Prioritize a clean, intuitive layout that guides visitors through your work effortlessly.
Remember, less is more. A clutter-free design ensures your work takes center stage without overwhelming visitors.
4. Showcase Your Best Work
Curating your projects is perhaps the most critical aspect of creating a portfolio. Follow these tips:
Quality Over Quantity: Feature only your best and most relevant work, even if it means showcasing fewer projects.
Diversity: Include a range of projects that highlight your versatility across different styles, mediums, or industries.
Context: Provide brief descriptions of each project, explaining the objective, process, and outcomes. This demonstrates your problem-solving skills and thought process.
Visuals: Use high-quality images or mockups to present your work in its best light. Consider using interactive elements, such as hover effects or slideshows, to engage visitors.
5. Optimize for User Experience (UX)
A stunning portfolio website is not just about aesthetics; it should also offer a seamless browsing experience. Key UX principles to consider:
Navigation: Ensure the menu is simple and accessible, with clear categories such as "Work," "About," and "Contact."
Responsiveness: Optimize your site for mobile devices, as many users browse on their smartphones.
Loading Speed: Compress images and optimize code to reduce loading times. A slow website can frustrate visitors and impact your credibility.
Accessibility: Make your site inclusive by using alt text for images, ensuring proper color contrast, and providing keyboard navigation.
6. Include an Engaging About Page
The "About" page is your chance to connect with your audience on a personal level. Share your background, design philosophy, and unique selling points. Keep the tone professional yet approachable.
Include a professional headshot or creative illustration of yourself to add a personal touch. Additionally, mention any notable achievements, certifications, or collaborations to establish credibility.
7. Add Testimonials and Case Studies
Social proof can significantly boost your portfolio's impact. Include testimonials from satisfied clients or colleagues to build trust. Highlight case studies for key projects, diving deeper into your process, challenges, and results. This not only showcases your expertise but also demonstrates your ability to deliver value to clients.
8. Optimize for SEO and Discoverability
To attract potential clients or employers, your portfolio website should be easy to find online. Implement basic SEO strategies:
Use Relevant Keywords: Incorporate terms like "graphic designer," "freelance design," and "portfolio website" in your content.
Meta Descriptions: Write compelling meta descriptions for each page.
Image Optimization: Use descriptive file names and alt text for images to improve search engine visibility.
Blogging: Consider adding a blog section to share insights, tutorials, or case studies, boosting traffic and demonstrating expertise.
9. Include Clear Call-to-Actions (CTAs)
Guide visitors toward taking action by including clear CTAs throughout your site. Examples include:
"Contact Me": Direct visitors to your contact page or email.
"View My Work": Encourage exploration of specific projects.
"Hire Me": Link to a form or page detailing your services.
CTAs should be strategically placed and visually distinct to draw attention.
10. Regularly Update and Maintain
A portfolio is not a one-time project. Regular updates keep your site fresh and relevant. Add new projects, refine older ones, and remove outdated work. Regular maintenance also ensures your site runs smoothly and remains secure.
Conclusion
A stunning portfolio website is an invaluable asset for any graphic designer. It not only showcases your creative abilities but also serves as a powerful marketing tool to attract clients and employers. By defining your goals, curating your best work, and optimizing for user experience and discoverability, you can create a portfolio that leaves a lasting impression.
Start building your portfolio website today, and let it become the ultimate testament to your skills and creativity!
1 note
·
View note
Text
Choosing the Perfect WordPress Menu for Your Website

Your website's menu is one of its most important elements. It not only helps users navigate but also impacts SEO and user engagement. A well-designed menu ensures visitors can find the content they need with ease. For specific industries, such as restaurants, an intuitive menu can make all the difference. For instance, the Best WordPress restaurant menu plugin offers specialized tools to create visually appealing and functional menus tailored to your business.
What Makes a WordPress Menu Exceptional?
A great menu isn’t just about looks—it’s about functionality and usability. Here are the core elements that define an outstanding WordPress menu:
Ease of Use: Keep it straightforward to help users navigate without confusion.
Responsive Design: Menus must work flawlessly across desktops, tablets, and mobile devices.
Customizable Features: The ability to match the menu to your site's branding is essential.
SEO-Friendly Labels: Optimize your menu with strategic keywords to enhance your site's visibility.
Plugin Support: Choose a system that integrates well with other WordPress plugins to add functionality.
Recommended Plugins for Crafting Your WordPress Menu
Max Mega Menu
A versatile tool that allows for advanced customization, including mega menus and drag-and-drop capabilities.
UberMenu
This premium plugin is perfect for creating complex, highly responsive menus for large-scale websites.
WP Restaurant Manager
Designed specifically for restaurants, this plugin offers tools to create beautiful food menus along with reservation systems.
Elementor Pro’s Nav Menu Widget
For Elementor users, this widget makes it simple to design stylish, mobile-responsive menus.
Why the Right Menu Matters
Your menu serves as a guide for visitors, directing them to the most critical sections of your website. For businesses like restaurants, the menu is even more important—it’s often the first thing potential customers check to explore your offerings. A well-structured and optimized menu improves user experience, lowers bounce rates, and boosts conversions.
Tips for Designing the Best Menu
Keep It Clean: Avoid clutter by including only the most important links in your main menu.
Use Dropdowns for Subcategories: This keeps the main menu tidy while still providing access to deeper pages.
Test Responsiveness: Ensure your menu looks great and functions well on all devices.
Highlight Key Actions: Include clear calls to action like “Order Now” or “Contact Us” for easy access.
Conclusion
Creating the perfect menu for your WordPress site is all about balancing aesthetics with functionality. Whether you’re running a restaurant, blog, or eCommerce site, investing in the right menu tools and design can significantly enhance user experience and SEO.
By leveraging plugins and following best practices, you can build a menu that not only meets your visitors' needs but also supports your business goals. With careful planning, your WordPress menu can become a powerful asset for your website.
0 notes
Text
Bootstrap in WordPress: Setup, Themes, Pros & Cons, and Alternatives
Web development keeps to conform, with responsive layout emerging because the gold trendy for web sites. At the leading edge of this movement is Bootstrap, a effective the front-give up framework. Paired with WordPress, the sector’s maximum famous content cloth control device (CMS), Bootstrap offers developers a streamlined technique to constructing responsive, netherland rdp at&t vps residential rdp cell-first web sites.
This manual explores the whole thing you want to realize approximately the use of Bootstrap in WordPress, from setup and issues to pros, cons, and alternatives. Throughout the blog, we’ll also display how tools like Netherlands RDP, AT&T VPS, and Residential RDP can enhance the improvement, finding out, and website hosting system.
What is Bootstrap?
Bootstrap is a front-give up framework that simplifies net improvement. Created thru Twitter in 2011, Bootstrap has grown into a comprehensive toolkit with pre-designed CSS lessons, responsive grid structures, JavaScript plugins, and reusable UI additives.
Why is Bootstrap Important?
The primary motive for Bootstrap’s popularity lies in its functionality to create websites which are responsive, mobile-first-class, and visually attractive. Integrating Bootstrap with WordPress permits developers to:
Rapidly prototype responsive websites.
Create visually cohesive difficulty topics.
Optimize consumer revel in throughout devices.
Use Cases for Bootstrap and WordPress
Bootstrap’s flexibility makes it quality for a number of WordPress tasks, including:
Business web sites.
Portfolios.
E-commerce systems.
Blogs.
While working on those use cases, gadget like Netherlands RDP can offer a stable, remote surroundings for trying out usual performance globally. Similarly, an AT&T VPS ensures that the hosted internet site on line runs seamlessly underneath heavy site traffic.
Why Use WordPress with Bootstrap?
WordPress and Bootstrap together provide the exceptional of each worlds. WordPress manages the backend, at the identical time as Bootstrap handles the the front-quit layout, ensuring a seamless workflow.
Advantages of Combining WordPress with Bootstrap
Rapid Development: Pre-designed additives reduce coding.
Responsive Design: Ensures a regular person experience at some stage in devices.
Customizable Themes: Easy to regulate with Bootstrap’s grid and software instructions.
Community Support: Both systems boast widespread communities for troubleshooting and assets.
For builders operating remotely, a Residential RDP allows brief get right of entry to to files and servers, making sure paintings continuity.
How to Set Up Bootstrap in WordPress
Setting up Bootstrap in WordPress involves three essential steps: including Bootstrap, customizing the subject matter, and trying out responsiveness.
Step 1: Adding Bootstrap
Bootstrap may be introduced the use of:
CDN: Quick and lightweight.
Local Files: Provides extra manage however requires net web hosting Bootstrap documents in your server.
Here’s an instance of together with Bootstrap via CDN on your functions.Php report: -\code\- function add_bootstrap_to_theme() { wp_enqueue_style('bootstrap-css', 'https://cdn.jsdelivr.net/npm/[email protected]/dist/css/bootstrap.min.css'); wp_enqueue_script('bootstrap-js', 'https://cdn.jsdelivr.net/npm/[email protected]/dist/js/bootstrap.bundle.min.js', array('jquery'), null, true); } add_action('wp_enqueue_scripts', 'add_bootstrap_to_theme');
Testing the mixing the usage of Netherlands RDP permits make certain the scripts load efficiently for the duration of numerous networks.
Step 2: Customizing Your Theme
Bootstrap calls for modifications to the WordPress situation count number documents, along with header.Php, footer.Php, and index.Php. Add Bootstrap instructions to factors like menus, buttons, and paperwork.
Bootstrap Navbar Example
Here’s a clean Bootstrap navbar in your WordPress theme:
<nav class="navbar navbar-expand-lg navbar-light bg-light"> <a class="navbar-brand" href="#">Site Name</a> <button class="navbar-toggler" type="button" data-bs-toggle="collapse" data-bs-target="#navbarNav"> <span class="navbar-toggler-icon"></span> </button> <div class="collapse navbar-collapse" id="navbarNav"> <ul class="navbar-nav"> <li class="nav-item"><a class="nav-link" href="#">Home</a></li> <li class="nav-item"><a class="nav-link" href="#">About</a></li> </ul> </div> </nav>
Tools like Residential RDP can be used to test the ones adjustments for the duration of numerous devices with out disrupting neighborhood environments.
Step 3: Testing Responsiveness
Bootstrap’s grid tool is the coronary heart of its responsive layout. Create layouts that adapt to unique display sizes:
<div class="container"> <div class="row"> <div class="col-md-6">Left Column</div> <div class="col-md-6">Right Column</div> </div> </div>
Testing on an AT&T VPS ensures your website performs properly under awesome situations, collectively with low bandwidth or immoderate traffic.
Top WordPress Themes Built with Bootstrap
Several WordPress subjects leverage Bootstrap’s skills. Here are a few famous alternatives:
Shapely
Features: A one-web page layout suitable for portfolios and corporation internet websites.
Ideal For: Showcasing awesome snap shots or merchandise.
Use Case: Hosting on AT&T VPS guarantees speedy loading instances for photo-heavy pages.
Sparkling
Features: Minimalist format with a focal point on clarity.
Ideal For: Blogs and private web web sites.
Testing: Use Netherlands RDP to assess international net page overall performance.
Newspaper
Features: A modern-day difficulty designed for content material-heavy web sites.
Ideal For: Online magazines or records blogs.
Advantages: Pairing this with Residential RDP ensures seamless a long way flung updates.
Pros of Using Bootstrap in WordPress
Responsiveness
Bootstrap guarantees your internet site is cellular-first, providing fantastic usability in the course of gadgets. Test the responsive features the use of Netherlands RDP to validate global overall performance.
Customization Options
With pre-designed additives and grid structures, Bootstrap permits countless customization. Accessing those files remotely thru Residential RDP guarantees consolation.
Developer Efficiency
Using Bootstrap minimizes the time spent on repetitive coding obligations. Hosting on an AT&T VPS similarly hurries up improvement with quick loading environments.
Cons of Using Bootstrap in WordPress
Learning Curve
Beginners may additionally find Bootstrap’s application instructions overwhelming. Using Residential RDP for committed studying durations can assist decrease downtime.
Code Overhead
Bootstrap consists of capabilities that might not be used, which includes unnecessary bulk. Testing load times on an AT&T VPS can spotlight regions for optimization.
Limited Originality
Websites constructed with Bootstrap on occasion appearance comparable. Customizing designs on Netherlands RDP ensures a completely unique appearance.
Alternatives to Bootstrap for WordPress
While Bootstrap is strong, a few developers select different frameworks. Here are tremendous alternatives:
Tailwind CSS
A software-first CSS framework that gives flexibility with out Bootstrap’s bulk. Test its integration with WordPress the usage of Residential RDP.
Foundation through Zurb
Known for advanced responsiveness and accessibility functions. Hosting it on an AT&T VPS affords fast net web page masses.
Bulma
A lightweight framework with a simple syntax. Use Netherlands RDP to test its basic performance in splendid regions.
RDP and VPS in Bootstrap Development
Netherlands RDP for Global Testing
Testing your WordPress internet web site via Netherlands RDP ensures compatibility throughout particular areas and net situations.
AT&T VPS for Hosting
Using an AT&T VPS provides immoderate-tempo website hosting, decreasing downtime and making sure clean average performance for Bootstrap-powered web sites.
Residential RDP for Remote Work
A Residential RDP lets in developers to paintings securely on their WordPress tasks, even on public networks.
…Conclusion…
Bootstrap and WordPress are a dynamic duo for growing responsive, feature-rich internet websites. By leveraging tools like Netherlands RDP, AT&T VPS, and Residential RDP, developers can streamline their workflow, take a look at successfully, and host effectively.
Whether you pick Bootstrap or explore alternatives like Tailwind CSS or Foundation, the essential thing to fulfillment lies in adapting the device and technology for your specific wishes. With the proper setup and assets, you may construct a internet site that not best meets man or woman expectations however exceeds them.
0 notes
Text
Transform Your Website Navigation with RT Mega Menu – WordPress Mega Menu Builder for Elementor
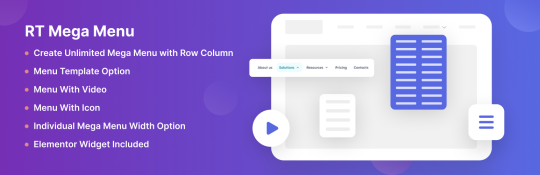
Introduction Website navigation plays a crucial role in delivering an exceptional user experience. With the RT Mega Menu for Elementor, you can elevate your site's navigation game effortlessly. This powerful and feature-rich mega menu plugin empowers WordPress users to create visually stunning and highly functional menus without writing a single line of code. Whether you're a web designer, developer, or WordPress enthusiast, RT Mega Menu is the perfect solution to make your website's navigation stand out. Let’s explore its features and why it’s a must-have tool for Elementor users.
Key Features 1. Flexible Layout Options Create structured mega menus with multiple columns and rows, perfect for organizing your content in a visually appealing way. 2. Customizable Design Easily match your menu's design with your website’s branding using Elementor’s intuitive drag-and-drop editor. 3. Multimedia Content Go beyond plain text! Add videos, images, and even tabs to make your menu engaging and interactive. 4. Tabbed Menus Conserve space and simplify navigation by organizing menu items into easy-to-access tabs. 5. Dynamic Content Keep your menus fresh with dynamic elements like recent posts, product listings, or custom data. 6. Responsive Design Your menu will look amazing on all devices, thanks to its responsive design that adapts to various screen sizes. 7. Elementor Templates Easily integrate Elementor templates into your menu for a cohesive design experience. 8. Submenu Positioning Control and customize submenu positions to achieve the perfect layout. 9. Widget Support Includes a versatile Elementor widget loaded with customization options. Pro Version Features For those who want even more flexibility, the Pro version offers: Menu Icons & Badges: Add stylish icons and custom badges to menu items with full control over positioning, size, and color. Advanced Layouts: Build complex mega menus with enhanced design options. Exclusive Styling Options: Further personalize your menu's look and feel. Why Choose RT Mega Menu? Ease of Use: Built for Elementor, the plugin leverages its drag-and-drop interface to simplify the menu-building process. All-in-One Solution: It combines advanced features like multimedia support, dynamic content, and responsive design. No Coding Required: Create professional-grade mega menus without technical expertise. Free to Get Started: Available on WordPress.org, with a Pro version for enhanced functionality. Try RT Mega Menu Today! Ready to revolutionize your website's navigation? Download the RT Mega Menu for free from WordPress.org and start building beautiful, functional menus today. For advanced features, check out the Pro version and unlock the full potential of your mega menus. Live Demo | Documentation | Upgrade to Pro
0 notes