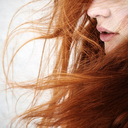
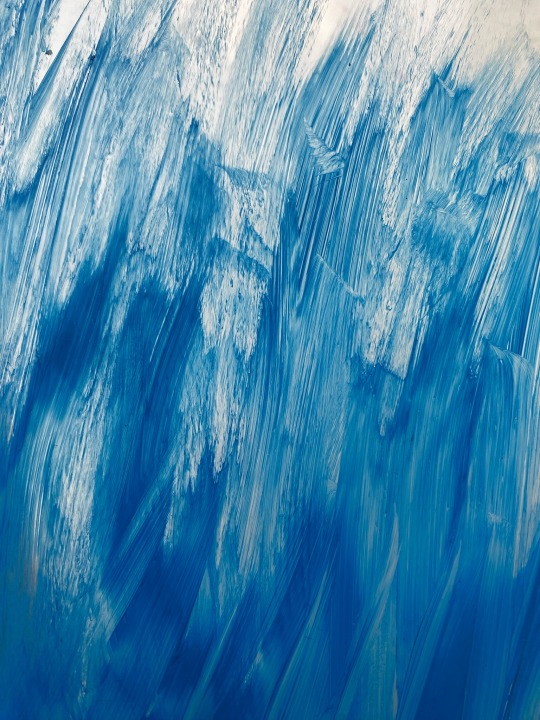
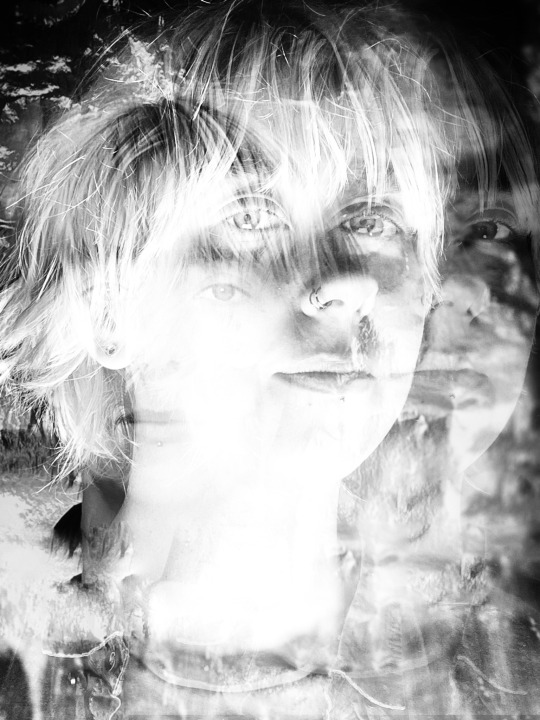
#created using snapseed
Explore tagged Tumblr posts
Visit Tumblr Blog
Explore Tumblr blogs with no restrictions, modern design and the best experience.
Last Seen Tumblr Blogs


Fun Fact
Premium Tumblr themes are available from anywhere between $9 to $49.
Text
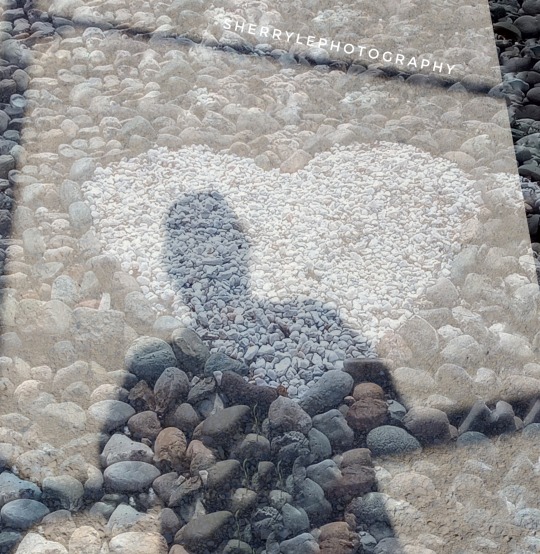
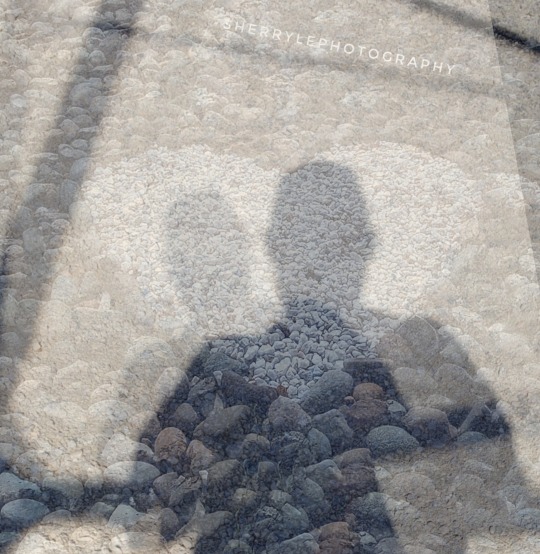
My photography @sherrylephotography
Just finished watching See you in my 19th life, a TV show I watched on Netflix
Ban Ji-eun can remember all her past lives. When her previous life is cut short by a tragic accident, she sets out to reunite with a man named Moon Seo-ha whom she met in her 18th life.
IMBd gives it 7.7
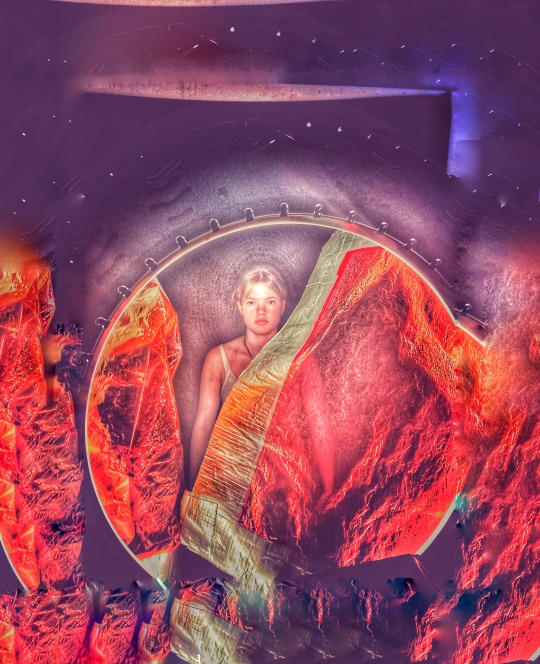
Created using snapseed double exposure.
Submitting to @abstract-challenge
Wasn't found in my kitchen but was fun to create. I miss you abstract challenge.
#abstract challenge#original photography on tumblr#abstract expressionism#created using snapseed#my digital photography abstract art
122 notes
·
View notes
Note
Hello,
Thank you for your posts. They look beautiful. How are you generating these images? What AI do you use?
Thank you! I'm using Stable Diffusion as the core AI for generating them. However, it's about more than just straightforward AI generation. I also use Inpainting and ControlNet to refine the details or change something. Occasionally, I use Photoshop and Snapseed to further enhancements or modify objects. I also use various LoRA models from Civitai, some of which I've compiled myself.
Previously I already wrote about Inpainting:
100 notes
·
View notes
Note
I’m sorry if it was already asked by someone, but what materials do you use for your traditional art?
Heya!!
Okay this will be a bit of a longer reply since over the years I do art I've accumulated a lot of tools, but I'll try to write it in a "digestible" way under the cut.
1. Sketchbooks
I am an easy woman, I like sketchbooks that have a lot of pages, can handle multiple tools and doesn't cost me a fortune. So far the winner in this is Canson XL for mixed media.
2. Sketching
For my sketching and pencil doodles I use mechanical pencils in size 0.5 and 0.3 with HB lead, it's the easiest one to erase and it doesn't smudge, not any preference in a brand, just don't really use the light plastic ones since they tend to creak.
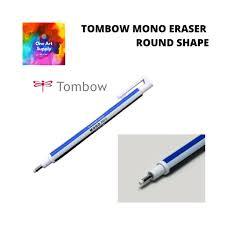
For erasing I use a combination of kneadable eraser and tombow mono eraser for more precise things.
3. Lining
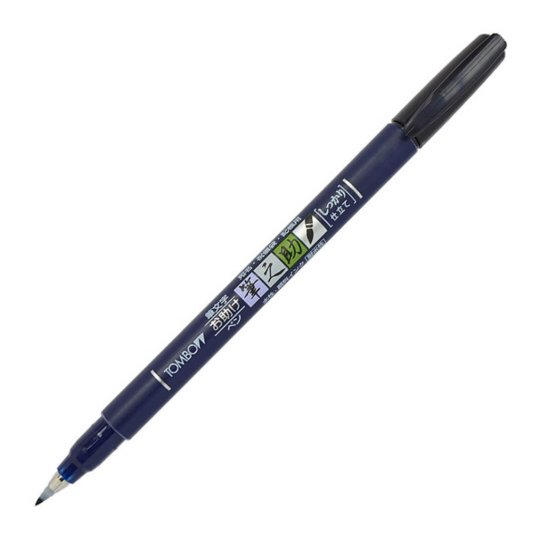
tombow fudenosuke!!!!! Best marker ever, doesn't smudge under water nor alcohol markers and has flexible nib.
If you're not a fan of the flexible nib, my other go to are either liners from Uni-pin or microns
4. Coloring
For my marker pieces like this one :
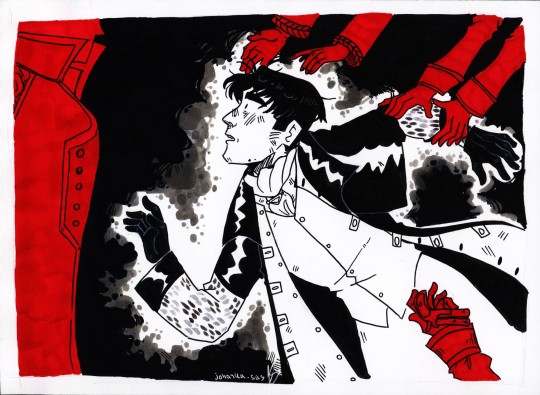
I use the cheapest off-brand alcohol markers I bought in a big set on AliExpress. They're great for personal work but not that much if you're planning to display it anywhere, the color gets immediately eaten by sun
For my watercolor pieces like this
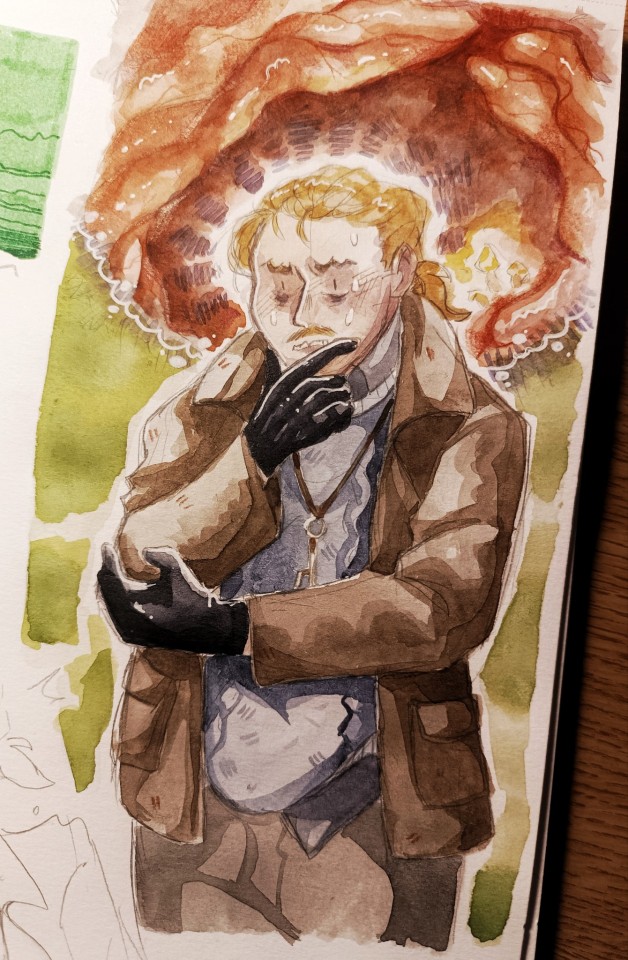
I now use white nights watercolors :]
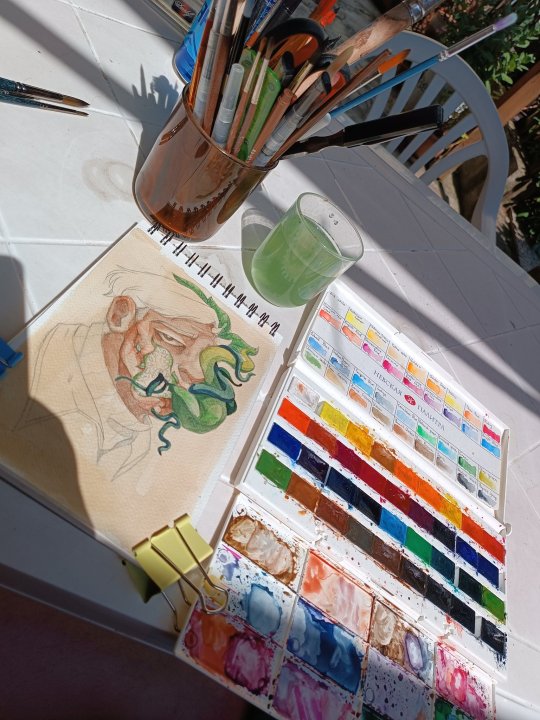
The set of 36 to be exact and some random brushes I also accumulated over the years.
Before investing in white nights I used watercolors from Koh-i-noor, that looked like this :
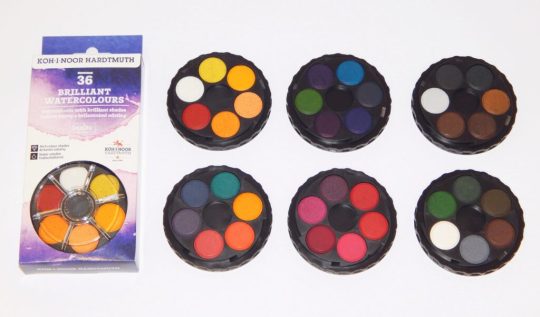
And are much cheaper (in Czechia, dunno the prices out of the country)
For white highlights I use Sakura gelly roll pens. I tested out different brands too and these do their job the best.
5. Scrapbooking/ collage backgrounds
For backgrounds like this:
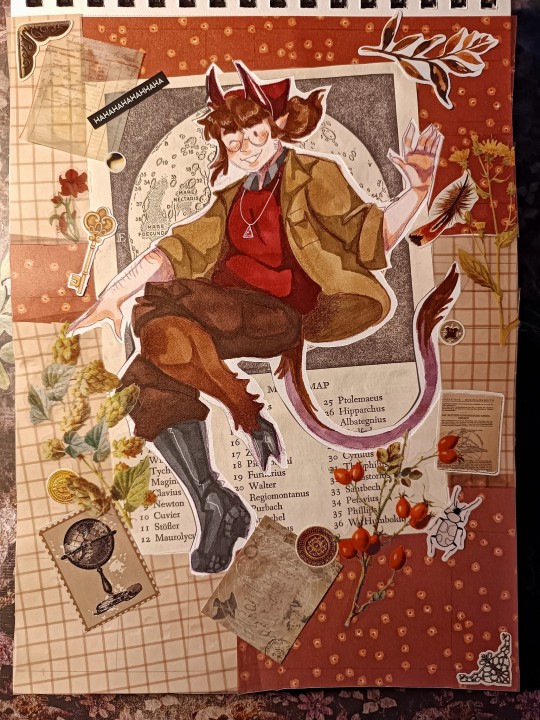
I accumulated over some time a lot of scrapbooking papers and stickers either from action or AliExpress, but also sometimes I use cut outs from magazines I get for free.
For precise cutting I use a precision craft knife, but before that I just used a box cutter knife, just don't press too hard.
Also a very good thing to get is a light pad, again AliExpress is your friend in this, and tbh before moving to the light pad, I used to shine my phone camera under the paper.
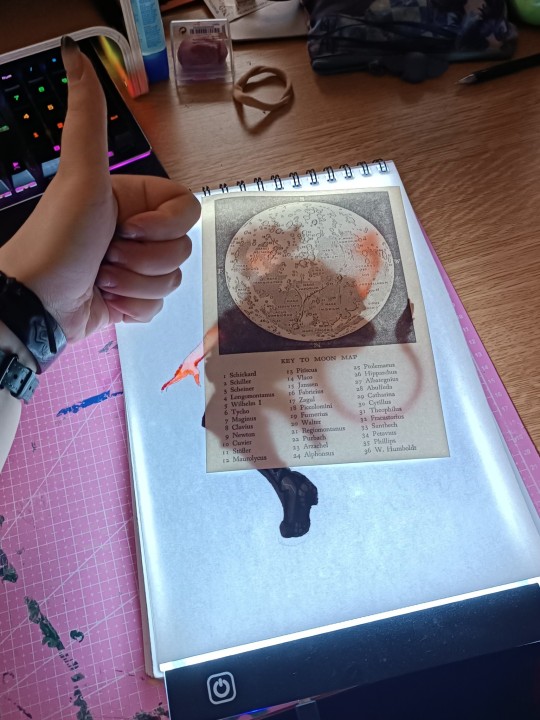
Makes the cutting muuuuuch easier.
And last but not the least
6. Taking photos of your art/ scanning
Phone camera + Snapseed is god tier combo for me, there are so many tutorials on YouTube how to edit the photos into full crispy quality.
But between my friend group it's well known that I am not very good at taking photos, so I scan most of my things.
Just a disclaimer that a good scanner is a very expensive thing ... But if you're willing to go through some loops, you can get a very neat CCD scanner from second hand for very cheap, sadly most of the time the cheap ones are very old and it took a lot of prayers and IT friend to set that thing up :DDD
So that's all I can think of right now, don't forget I got all these things over the years, and still I tend to draw or doodle with pretty cheap low quality things, since I believe that art can be made with everything... The more professional tools just tend to make things easier, but still it's better to test it out a bit before fully jumping into buying big expensive sets.
I wish a lot of luck with creating and don't be scared to experiment :3
#me žblptin#long post#art tips#jojka's creations#traditional art#i hope that my rambling is understadable-
12 notes
·
View notes
Note
*eyes glued to cute and aesthetic journals!*
Hi!
How do you make your photos of your entries so beautiful and aesthetically pleasing???😁😍
They look like they should be in a photo album or something! 😁
This made my day! I never know if my own photography is any good until someone mentions it to me, so thank you so much for that!
I don’t know a lot about photography, but I can tell you what I’ve picked up over the years:
TL;DR: Play and experiment with texture, depth, lighting, shadows, and angles. Snapseed is an app that allows you to easily edit your photos, but lately I’m feeling limited by it.
1. I start with a wooden background because I like nature and it makes me think of trees. To add a bit of color and more texture, I then lay down some sort of fabric/cloth towards the top of my wooden background. In my photos, I’m often using scarves to add texture.
2. I place down my notebook on top of the wooden piece/fabric, then I lay some dried flowers around it because, again, I like nature. I find dried baby’s breath to be elegant, dainty, with a nostalgic feel in the right light. Don’t flatten them to dry them—hang them up by string so they keep their shape and add depth to the photos. I hung mine up by the cords of my blinds. They’ve lasted me years so far.
3. Most importantly, play with lighting and shadows. I’ve found that natural sunlight makes for a far better photo than artificial lighting, which may mean you need to have patience to find the right location and time of day to take your photos. I have these three windows (I think they’re called bay windows?) that face to the west, I believe. In the late afternoon, the sunlight shines through my sheer curtains with a warm glow. The sheer curtains also create interesting shadows, which helps create an aesthetic I like.
4. I mostly do flat lay photos taken from above, but I’m trying to experiment with angles more. This is definitely something I need to work more on, but my suggestion is to take multiple photos from a variety of angles. Look away from the camera/phone for a little while before comparing your photos to each other and choosing which one(s) to use.
5. I edit most of my photos in Snapseed. It’s easy and intuitive to use. I play with brightness, contrast, filters, and sometimes white balance until I get the look I want. I enjoy adding a vignette to my photos because I can make the photo a bit darker while keeping the focus of the photo (my notebook) in brighter light so it’s nice and clear to the viewer. Snapseed is pretty intuitive, but lately I’ve been feeling limited by it, so perhaps it’s time for me to branch out a bit. We’ll see. For now, I need things to be quick and easy, though, because I lack time and energy.
Phew. 😮💨 That was a long explanation of my process, but I hope it helps. And if anyone has any other tips to add, I’d love to hear them! I want to expand my amateur photography skills.
10 notes
·
View notes
Text
Yvette Heiser - Phone Photography Essentials without Formal Education
In today's digital world, the art of photography has become more accessible than ever. You no longer need a formal education or expensive camera equipment to create stunning images. With advancements in smartphone technology, your phone can be a powerful tool for capturing professional-quality photos. Here’s everything you need to know to excel in phone photography without a formal education.

Understanding Your Phone’s Camera
Before diving into photography, it’s essential to understand the capabilities of your phone’s camera. Modern smartphones are equipped with high-resolution sensors, multiple lenses, and advanced image processing software. Take some time to familiarize yourself with the various settings and features available on your phone's camera, including HDR, portrait mode, night mode, and manual controls for ISO, shutter speed, and white balance. For more detailed insights, consider exploring resources like Yvette Heiser Texas – All You Need to Know about Phone Photography.
Mastering the Basics of Photography
Even without formal education, you can learn the fundamental principles of photography. Start with the basics:
Composition: The rule of thirds, leading lines, and framing are essential techniques that can help you create balanced and visually appealing photos.
Lighting: Excellent lighting is essential for taking outstanding photos. Natural light is your greatest ally, so it's important to learn how to use it effectively. Understand the differences between soft and hard lighting and how to leverage shadows and highlights to enhance your images.
Focus and Exposure: Ensure your subject is in sharp focus. Most smartphones allow you to tap the screen to set the focus point. Adjusting exposure can help you manage the brightness and contrast of your photos.
Leveraging Photography Apps
One of the advantages of phone photography is the plethora of apps available to enhance your images. Here are a few must-have apps:
Editing Apps: Tools like Adobe Lightroom, Snapseed, and VSCO provide robust features for tweaking exposure, contrast, saturation, and other elements. They also come with presets and filters that can add unique and creative touches to your photos.
Camera Apps: Apps like ProCamera and Camera+ offer advanced manual controls, allowing you to fine-tune settings like ISO, shutter speed, and white balance.
Special Effects: Apps such as Lens Distortions and Afterlight can add unique effects and overlays to your photos, helping them stand out.
Building a Strong Portfolio
Your portfolio is your introduction in the photography world. Create a diverse collection of your best work to showcase your skills and style. Include different subjects such as landscapes, portraits, and macro shots. Regularly refresh your portfolio with updated and enhanced photographs. Sharing your portfolio on social media platforms like Instagram, Facebook, and Pinterest can help you reach a wider audience and attract potential clients.
Networking and Marketing
Building a successful photography career requires more than just taking great photos. Networking and marketing are essential components:
Networking: Join online photography communities, attend local meetups, and participate in photography challenges. Networking with other photographers can lead to collaborations, referrals, and learning opportunities.
Social Media Marketing: Use social media to market your photography services. Regularly post your work, engage with your audience, and share behind-the-scenes content. Consider creating a website to establish an online presence and make it easy for clients to find and contact you.
Continuous Learning and Experimentation
Photography is an ever-evolving field, and staying updated with the latest trends and techniques is crucial. Follow industry leaders, read photography blogs, and watch tutorial videos. Don’t be afraid to experiment with new styles and subjects. Continuous learning and experimentation will help you grow as a photographer and keep your work fresh and innovative.
Conclusion
Excelling in phone photography without formal education is entirely achievable with dedication and practice. By understanding your phone’s camera, mastering photography basics, leveraging apps, building a strong portfolio, networking, and continuously learning, you can create stunning images and establish a successful photography career. Yvette Heiser- Is it possible to start a career in photography without formal education? Embrace the journey, and let your creativity shine through your lens!
#wedding#moments#camera#pictures#photographer#photography#childphotography#yvette heiser#photographytips#events
7 notes
·
View notes
Text
FAQ’s
Frequently asked questions to eeeaaasseee your mind :)
1. Can I recolour your CC?
Yes! Recolours and retextures are a-okay in my book, you don’t even have to ask first! Just please credit me and link to the original CC. My full TOU can be found here.
2. Is your CC free?
Yes! My stuff will ALWAY be free unless it is a commission. I sincerely doubt I will ever start a Patreon, although maybe one day I will have a Kofi donation page.
3. How do you start making a sim? What’s your process?
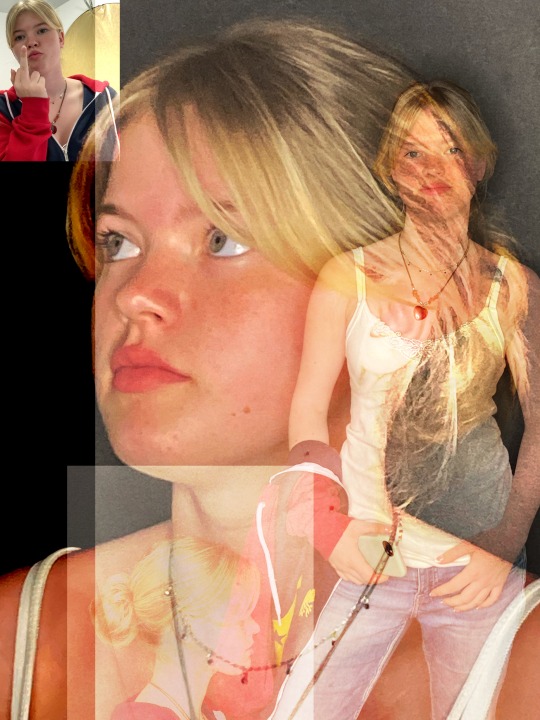
If it is a celebrity sim, or a sim of a fictional character like Arthur Morgan, I will always go CC shopping first! I usually start with the hair, then if the sim has particularly iconic outfits (e.g. Fran Fine) I will find as close as possible. Sometimes this is really easy, as with @plazasims RDR2 Outfits, but sometimes I have to be a little creative! Then, I always try to create the sim from Pinterest references first. I usually take a few hours away from it so I can see it again with fresh eyes, and it is usually at this point where I will introduce a photo overlay. Essentially, I will overlay an image onto The Sims 4 window and have my sim and the photo side by side. Laying the photo directly on top and ‘tracing’ is a BAD idea! You can’t see the real sim underneath! Usually looks WEIRD afterwards. If I’m feeling stuck, finding a reference on Pinterest at a 3/4 angle and editing my sim in that view helps a lot! It gives you a fresh perspective and often sorts out problems you didn’t even know you had.
4. What’s your main save?
My main save is (totally cliche, I know) actually my Simself in PlumbobKingdom’s save file! It’s INCREDIBLE, and makes the game so much more fun and interesting with the variety of locations, and everything just looks SO much nicer!
5. Who’s the favourite sim you’ve made so far?
I secretly LOVE my Maxwell Sheffield sim, I think he looks awesome. I love my Arthur Morgan Redux, too, and I’m really looking forward to making Bree Van De Kamp! Might develop it into a DH series if the response is positive enough :)
6. How do you edit your screenshots and/or do you render your sims in Blender?
I don’t render my sims in Blender, as I can’t use TS4 Sim Ripper! I am a Mac user. My photo editing process; taking screenshots in CAS using Trait poses, and photos in game using poses and @ravasheencc Full Control Camera. I then use Picsart on iOS to knock up the composition, Snapseed to clean up the photo (sharpen, colour balancing, glow, vignette etc) and Clipdrop Relight (online) for the lighting.
2 notes
·
View notes
Text

Happy 60th birthday to Jason Isaacs. One of the funniest and loveliest people I have met.
I do have a new piece of art in the pipeline for Jason, but, unfortunately, due to unforseen circumstances, it isn't ready. Here are two of my favourites of my older artwork. Both were created using Medibang Paint and Autodesk Sketchbook. Edited together with Pixlr and Snapseed.
#jason isaacs#lucius malfoy#actor#portrait#artist#art#digital artist#digital art#happybirthday#happy60th#my art#my ediit
16 notes
·
View notes
Text
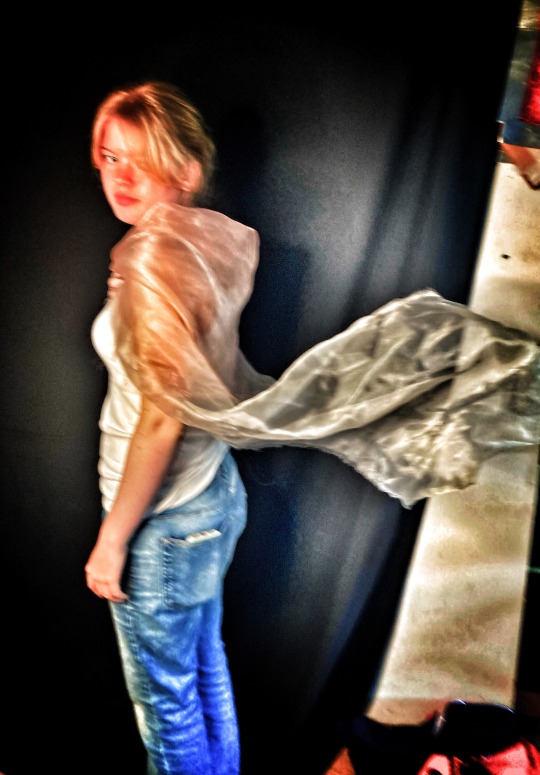
After creating the hooded belero I took two images that I then edited in Snapseed.
Ideally I wanted to go to Deborah and use the DSLR camera, create effects and drama, but unfortunately time ran out.
So here are the two images I took trying to capture sadness. In the form of my reluctant daughter. Curled up in a posture to suggest sadness. Showing the empty space all to the left of the sofa. And how incredibly lonely sadness can be.

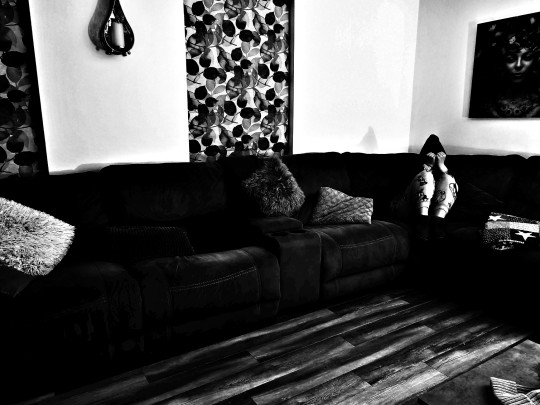
Like I said I had hoped to use the DSLR camera. The intention had been to take a series of images, with and without effects, make a video/slideshow and add music. The song I would have used was Billie Eilish- What was I made for.
youtube
2 notes
·
View notes
Text
Mastering the Art of Image Editing: Unveiling the Secrets to Stunning Visuals
In the dynamic and visually-driven digital landscape, image editing has become an indispensable tool for individuals and businesses alike. From social media influencers curating eye-catching feeds to businesses enhancing product images for e-commerce, the demand for high-quality, visually appealing content is at an all-time high. In this comprehensive guide, we delve into the world of image editing, exploring its significance, popular techniques, and the tools that empower creators to transform ordinary visuals into extraordinary masterpieces.
The Significance of Image Editing:
Images are powerful communicators, capable of conveying emotions, telling stories, and leaving a lasting impression. Image editing serves as the catalyst that elevates visuals to new heights, making them more engaging and effective. Whether you're a professional photographer, a social media enthusiast, or a business owner, the ability to enhance and optimize your images is a game-changer in today's competitive digital landscape.
Key Techniques in Image Editing:
Color Correction and Grading:
One of the fundamental aspects of image editing is adjusting and enhancing colors. Color correction ensures accurate reproduction of hues, while color grading allows for creative manipulation, setting the tone and mood of the image. Professionals use tools like Adobe Lightroom or Photoshop to fine-tune colors and achieve a visually cohesive look.
Retouching and Enhancement:
Perfecting portraits or product images involves retouching and enhancing details. Removing blemishes, smoothing skin tones, and refining textures are common techniques employed to achieve a polished and professional look. Advanced tools such as frequency separation help achieve nuanced results without sacrificing realism.
Cropping and Composition:
The right composition can transform an ordinary image into a captivating one. Image editing tools provide the flexibility to crop, resize, and reframe images to improve their overall composition. Attention to composition is crucial for creating visually pleasing and balanced visuals.
HDR Imaging:
High Dynamic Range (HDR) imaging is a technique that combines multiple exposures of a scene to capture a broader range of light and detail. This is particularly useful in landscape photography, architectural shots, and any scenario with varying light conditions. HDR enhances the overall tonal range and details in an image.
Adding Filters and Effects:
Filters and effects are powerful tools for infusing creativity into images. From vintage looks to modern aesthetics, a plethora of filters and effects are available to cater to diverse preferences. These can be applied to evoke specific emotions or align with a brand's visual identity.
Tools of the Trade:
Adobe Creative Cloud:
Adobe's suite of creative tools, including Photoshop and Lightroom, remains the industry standard for professional image editing. With a wide range of features and capabilities, these tools offer unparalleled flexibility and control.
GIMP (GNU Image Manipulation Program):
GIMP is a free, open-source alternative to proprietary image editing software. Despite being free, GIMP provides a comprehensive set of tools for tasks ranging from photo retouching to graphic design.
Canva:
Canva is a user-friendly online platform that caters to both beginners and professionals. It offers a range of templates and tools for easy image editing, making it accessible to those without extensive design experience.
Snapseed:
For mobile users, Snapseed is a powerful and intuitive photo editing app. Developed by Google, Snapseed provides a wide array of editing tools and filters, making it a favorite among smartphone photographers.
Conclusion:
In the digital age, where visuals reign supreme, mastering the art of image editing is a valuable skill. Whether you're a seasoned photographer or a social media enthusiast, understanding the significance of image editing and familiarizing yourself with the essential techniques and tools will undoubtedly elevate the quality of your visuals. So, embark on this creative journey, experiment with different editing styles, and witness the transformative power of image editing in making your visuals truly stand out in the digital realm.
2 notes
·
View notes
Text
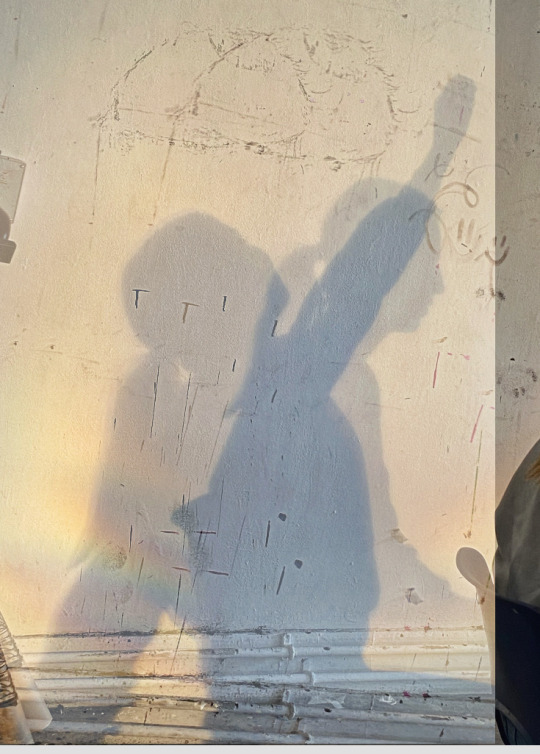
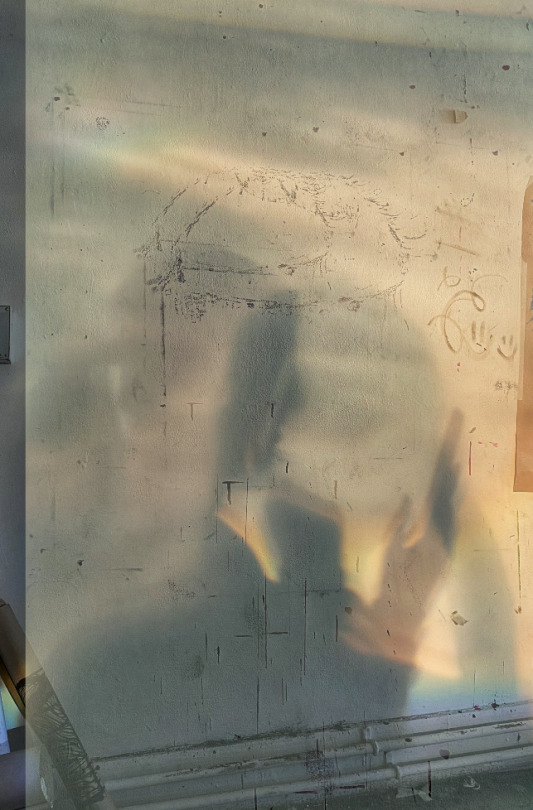
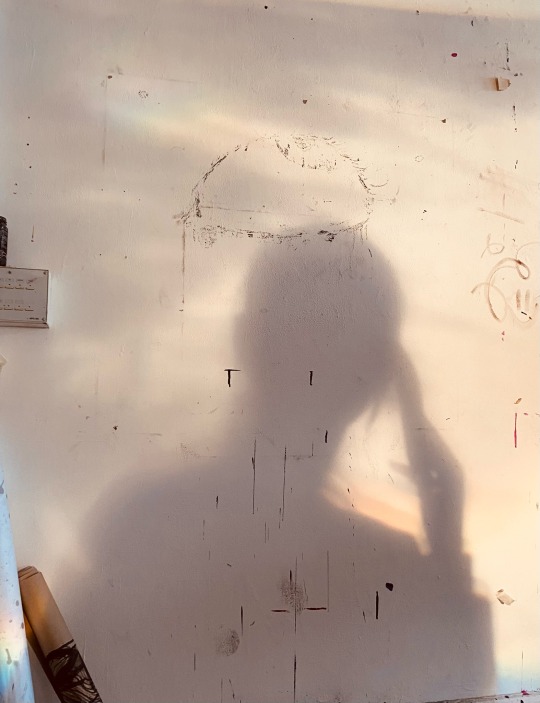
Disrupt Studio Day-9/11/23
I was researching more artists for inspiration and i came across an artist called Kumi Yamashita she is a Japanese artist based in New York , she is best known for her light and shadow sculptures constructed from everyday objects. Whilst i was researching i came across pieces she creates with light shadow figures which i will link

I thought her work was so creative and unique and i wanted to portray some shadow and light figures of my own . My idea was to replicate a memory and how it’s not completely clear as time has passed so the face becomes unclear and it might be as simple as an action or a feeling you are left with in your mind.
To do this i got a projector and used Chloe and Ella to model for me as my figures and i started taking pictures of them with the projector shining against the wall and Chloe and Ella sitting in front of the wall having a conversation .

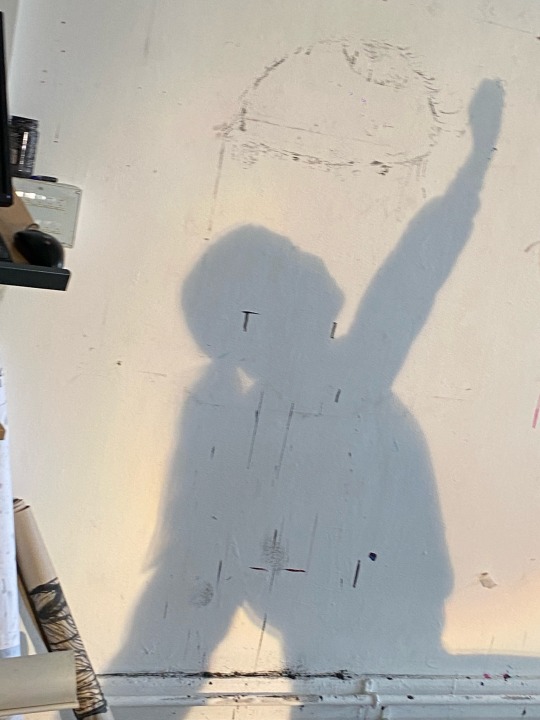
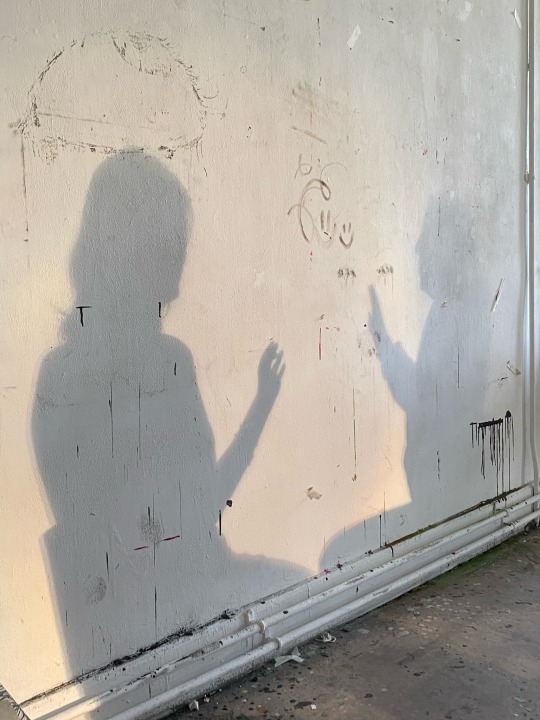
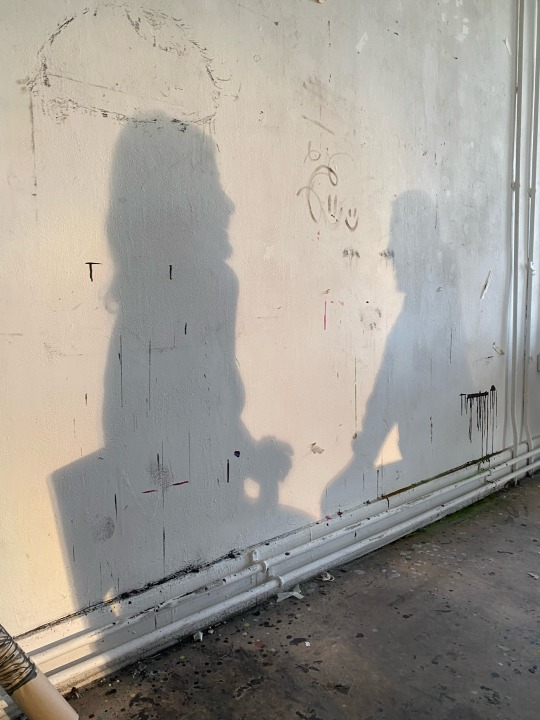
After that, i painted onto a piece of acetate just some simple brush strokes and used Chloe to model for me again and tried to create or resemble the memory with brain fog almost or just the memory becoming more unclear .
Lastly i edited some of the pictures on Snapseed and overlapped them on top of eachother and added some filters and made them almost hazy looking like a memory or a dream and i really liked how they turned out.

3 notes
·
View notes
Text
photography workshop Photography
Day 4 of the tus course
Today we completed a photography workshop.Before this workshop I had never tried out photography properly before .We were paired into groups of two so that we could photograph our partners.I found photography to be quite interesting as I was able to use lighting ,colours and angles to create artwork.I used the app Snapseed to edit the photos.These are some of the finished pieces of photography,I found the vibrant colours and shadows inspiring and I tried to show these in the photos I took.I the first photo the light hitting the cape shows the shadow really well.My favourite one is the bottom photo as I love the bright shades of pinks , reds and oranges that make the photo eye catching.
3 notes
·
View notes
Text
today i did photography. i used my friend L as a model.
i had a lot of fun playing around with Snapseed. it is a free app with a lot of different photo editing features.
i especially enjoyed the double exposure feature.
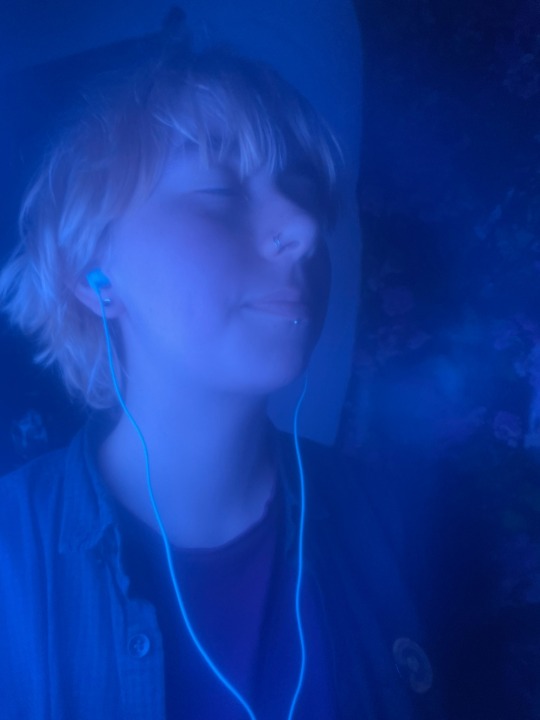

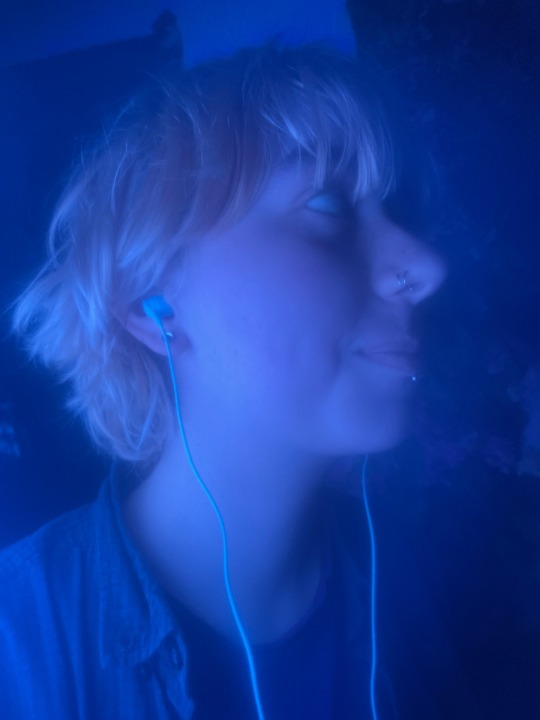

these are some of the photos i used and the final version i created from them.
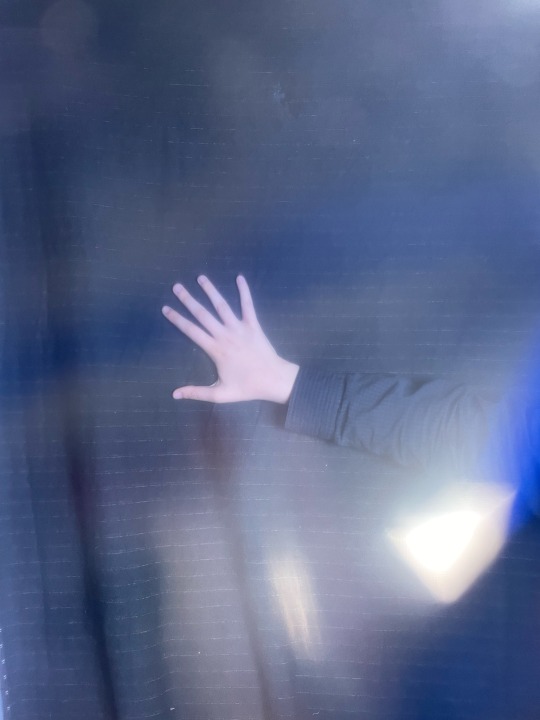


i included different colour gels while taking the photos and i am very pleased with the finished version .

overall i really enjoyed this module and it was amazing seeing how many great images you could create using just your phone and some lighting.
4 notes
·
View notes
Text


It looks like you're diving into the world of food photography, food aesthetics, and food culture! Whether you're a food lover, a budding photographer, or someone who loves sharing food snaps on platforms like Snapchat or Instagram, here's a breakdown of your interests and some tips to elevate your food game:
1. Food Photography
Lighting is key: Natural light works best for capturing the true colors and textures of food. Avoid harsh shadows by using diffused light.
Composition: Use the rule of thirds or leading lines to make your photos visually appealing. Experiment with angles (overhead, 45-degree, or close-ups).
Props and Backgrounds: Keep it simple. Use neutral plates, wooden boards, or textured fabrics to make the food stand out.
Editing: Apps like Lightroom, VSCO, or Snapseed can help enhance colors and adjust brightness.
2. Food Porn
Go for the ooze: Capture melted cheese, gooey chocolate, or saucy dishes to evoke cravings.
Texture and Layers: Highlight crispy, crunchy, or creamy textures to make the food look irresistible.
Close-Ups: Zoom in on details like sprinkles on a dessert or steam rising from a hot dish.
3. Food Lover Tips
Explore cuisines: Try new recipes or visit local eateries to expand your palate.
Food journaling: Document your food adventures with notes on flavors, textures, and experiences.
Pairings: Experiment with food and drink pairings (e.g., wine and cheese, coffee and pastries).
4. Food Snapchat
Filters and Lenses: Use Snapchat’s fun filters to add a playful touch to your food snaps.
Behind-the-Scenes: Share quick videos of food being prepared or plated.
Time-Lapse: Capture a time-lapse of you eating or cooking for a creative twist.
5. Aesthetic Munch
Color Coordination: Create a cohesive color palette for your food photos (e.g., pastels, monochrome, or vibrant tones).
Flat Lays: Arrange food, utensils, and ingredients in a visually pleasing way for overhead shots.
Minimalism: Sometimes less is more. A single dish with clean lines can be stunning.
6. Food Recipes
Document the process: Share step-by-step photos or videos of your cooking process.
Recipe captions: Include ingredients and instructions in your posts for followers to recreate your dishes.
Themed recipes: Try seasonal or holiday-themed recipes (e.g., pumpkin spice in fall, refreshing salads in summer).
Popular Hashtags to Use
#FoodPhotography
#FoodPorn
#Foodie
#InstaFood
#FoodLover
#AestheticFood
#FoodBlogger
#FoodGasm
#FoodSnaps
#FoodArt
Inspiration Accounts to Follow
Instagram: @food52, @symmetrybreakfast, @foodwithmichel
YouTube: Binging with Babish, Tasty, Joshua Weissman
Pinterest: Search for "food photography ideas" or "aesthetic food recipes."
Whether you're snapping a quick pic for Snapchat or creating a full-blown food blog, the key is to have fun and let your passion for food shine through! �📸🍴
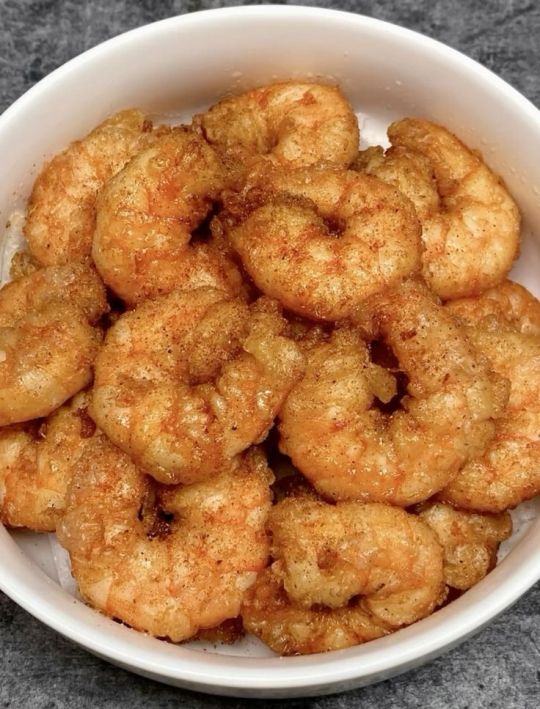
Creamy Garlic Chicken Parmesan Pasta A Pasta Perfection
Creamy Garlic Chicken Parmesan Pasta is the ultimate comfort food dish that combines tender chicken, rich Parmesan cheese, and a velvety garlic cream sauce—all tossed with perfectly cooked pasta. It’s a crowd-pleaser and perfect for a cozy dinner or impressing guests. Here's how to make this pasta perfection:
Creamy Garlic Chicken Parmesan Pasta Recipe
Ingredients
(Serves 4)
For the Chicken:
2 boneless, skinless chicken breasts
1/2 cup all-purpose flour
1 tsp garlic powder
1 tsp Italian seasoning
Salt and pepper, to taste
2 tbsp olive oil (for cooking)
For the Pasta:
12 oz (340g) pasta (penne, fettuccine, or your favorite)
Salt (for boiling water)
For the Sauce:
2 tbsp butter
4 cloves garlic, minced
1 cup heavy cream
1 cup chicken broth
1/2 cup grated Parmesan cheese
1/2 cup shredded mozzarella cheese
1 tsp Italian seasoning
Salt and pepper, to taste
Fresh parsley, chopped (for garnish)
Instructions
Prepare the Chicken:
Slice the chicken breasts horizontally into thin cutlets.
In a shallow dish, mix flour, garlic powder, Italian seasoning, salt, and pepper.
Dredge the chicken cutlets in the flour mixture, shaking off excess.
Heat olive oil in a large skillet over medium heat. Cook the chicken for 4-5 minutes per side until golden brown and cooked through. Remove and set aside.
Cook the Pasta:
Bring a large pot of salted water to a boil. Cook the pasta according to package instructions until al dente. Drain and set aside.
Make the Sauce:
In the same skillet used for the chicken, melt butter over medium heat.
Add minced garlic and sauté for 1-2 minutes until fragrant.
Pour in the heavy cream and chicken broth, stirring to combine. Let it simmer for 2-3 minutes.
Stir in the grated Parmesan and mozzarella cheese until melted and smooth.
Add Italian seasoning, salt, and pepper to taste.
Combine Everything:
Slice the cooked chicken into strips.
Add the cooked pasta and chicken to the skillet with the sauce. Toss everything together until well-coated and heated through.
Serve:
Garnish with freshly chopped parsley and extra Parmesan cheese.
Serve hot with garlic bread or a side salad.
Tips for Perfection
Creamy Consistency: If the sauce is too thick, add a splash of pasta water or chicken broth to thin it out.
Extra Flavor: Add a pinch of red pepper flakes for a subtle kick.
Cheese Lovers: Use a mix of Parmesan, Romano, and Asiago for a more complex flavor.
Vegetarian Option: Skip the chicken and add sautéed mushrooms or spinach for a veggie-packed version.
Presentation Ideas
Serve in a large pasta bowl with a sprinkle of parsley and a dusting of Parmesan.
Add a sprig of fresh basil or a drizzle of olive oil for a restaurant-worthy look.
Pair with a glass of white wine for a complete dining experience.
This Creamy Garlic Chicken Parmesan Pasta is pure comfort in a bowl—creamy, cheesy, and packed with flavor. Perfect for any occasion! 🍝✨Learn More
#foodvlog#food#christmasfood#christmascookies#dessert#foodies#UK#usa#america#snacks#foodie#foodporn#snack#yummy#foodphotography#instafoodnacktime#foodstagram#foodblogger#delicious#homemade#healthyfood#foodlover#americanfood#orange#breakfast#unitedstates#breadbaking#usa🇺🇸#breadmaking#pudding
0 notes
Text
Yvette Heiser - Perfect Self-Portraits: Creative Photography Ideas You Can Learn Quickly
In today’s world of social media and digital expression, mastering the art of self-portraits is more relevant than ever. A perfect self-portrait isn’t just about taking a picture of yourself—it’s about telling a story, capturing emotions, and creating an image that resonates with you and your audience. Inspired by Yvette Heiser – Creative Ideas For Perfect Self-Portraits, these photography tips are designed to help both beginners and enthusiasts elevate their self-portrait game effortlessly.

1. Experiment with Lighting
Lighting can make or break a photograph. For self-portraits, explore natural light by positioning yourself near a window during the golden hour. Soft, diffused light creates a flattering glow, while direct sunlight can add dramatic shadows for a more artistic touch. Don’t hesitate to experiment with artificial lighting, like LED panels, ring lights, or even string lights, for unique effects.
Quick Tip: Use household items like lamps or candles to create moody and atmospheric portraits.
2. Use Props to Add Personality
Props can transform a plain self-portrait into a captivating story. Incorporate items that resonate with your personality or the theme of your photo. It could be a book, a musical instrument, or even a cup of coffee. Props not only enhance the visual appeal but also help convey your individuality.
Quick Tip: Make sure your props enhance the overall composition without dominating or distracting from the main subject.
3. Play with Angles and Perspectives
Angles can significantly alter the mood of your self-portrait. Instead of sticking to traditional front-facing shots, experiment with high angles, low angles, or even side profiles. Using a wide-angle lens can create a unique perspective, while close-ups emphasize facial expressions and details.
Quick Tip: Use a tripod or a sturdy surface to keep your camera steady and experiment hands-free.
4. Incorporate Reflections
Reflections add depth and intrigue to your self-portraits. Use mirrors, water surfaces, or reflective objects like glass windows to create stunning visuals. The layered effect of reflections adds a dynamic quality to your photograph.
Quick Tip: Position the camera to include both your reflection and some surrounding elements for added context.
5. Leverage Negative Space
Negative space—the area around your subject—can make your self-portrait feel more expansive and balanced. Use simple backgrounds or minimalistic settings to highlight yourself as the focal point. This technique works well for both dramatic and serene compositions.
Quick Tip: Experiment with blank walls, open skies, or uncluttered environments.
6. Experiment with Motion
Motion in self-portraits adds a sense of dynamism and life. Try tossing your hair, spinning, or walking while the camera captures the action. A slow shutter speed can produce a soft, blurred effect that beautifully highlights motion and adds a dreamy quality to your image.
Quick Tip: Use the timer or remote shutter feature to capture motion without assistance.
7. Focus on Your Eyes
Often called the windows to the soul, the eyes play a crucial role in self-portraits, offering a way to express deep and compelling emotions. Ensure your eyes are sharp and well-lit, as they naturally draw attention.
Quick Tip: Use your camera's focus settings to lock onto your eyes before taking the shot.
8. Explore Post-Processing
Editing is where your self-portrait truly comes to life. Experiment with filters, color grading, and retouching to enhance your image. Software like Adobe Lightroom or mobile apps like Snapseed can make a huge difference in the final look.
Quick Tip: Stay authentic—edit to enhance, not to overdo.
9. Add a Creative Concept
A concept can elevate a self-portrait from good to unforgettable. Think about themes, moods, or stories you want to convey. For example, dress in vintage attire for a nostalgic feel or incorporate bold colors for a vibrant vibe.
Quick Tip: Plan your concept in advance, including wardrobe, props, and background.
Final Thoughts
Perfect self-portraits are a blend of creativity, technique, and personal expression. By experimenting with lighting, props, angles, and editing, you can quickly develop the skills needed to create stunning, standout images. Drawing inspiration from 10 Secrets About Yvette Heiser Photography You Can Learn From TV, you’ll discover new ways to refine your approach and make each shot uniquely yours. Remember, practice is key, and there’s no right or wrong—just your unique perspective.
Now, grab your camera or smartphone, unleash your creativity, and start capturing self-portraits that truly reflect who you are!
#moments#wedding#camera#photographer#pictures#childphotography#photography#yvette heiser#photographytips#events
5 notes
·
View notes
Text


It looks like you're diving into the world of food photography, food aesthetics, and food culture! Whether you're a food lover, a budding photographer, or someone who loves sharing food snaps on platforms like Snapchat or Instagram, here's a breakdown of your interests and some tips to elevate your food game:
1. Food Photography
Lighting is key: Natural light works best for capturing the true colors and textures of food. Avoid harsh shadows by using diffused light.
Composition: Use the rule of thirds or leading lines to make your photos visually appealing. Experiment with angles (overhead, 45-degree, or close-ups).
Props and Backgrounds: Keep it simple. Use neutral plates, wooden boards, or textured fabrics to make the food stand out.
Editing: Apps like Lightroom, VSCO, or Snapseed can help enhance colors and adjust brightness.
2. Food Porn
Go for the ooze: Capture melted cheese, gooey chocolate, or saucy dishes to evoke cravings.
Texture and Layers: Highlight crispy, crunchy, or creamy textures to make the food look irresistible.
Close-Ups: Zoom in on details like sprinkles on a dessert or steam rising from a hot dish.
3. Food Lover Tips
Explore cuisines: Try new recipes or visit local eateries to expand your palate.
Food journaling: Document your food adventures with notes on flavors, textures, and experiences.
Pairings: Experiment with food and drink pairings (e.g., wine and cheese, coffee and pastries).
4. Food Snapchat
Filters and Lenses: Use Snapchat’s fun filters to add a playful touch to your food snaps.
Behind-the-Scenes: Share quick videos of food being prepared or plated.
Time-Lapse: Capture a time-lapse of you eating or cooking for a creative twist.
5. Aesthetic Munch
Color Coordination: Create a cohesive color palette for your food photos (e.g., pastels, monochrome, or vibrant tones).
Flat Lays: Arrange food, utensils, and ingredients in a visually pleasing way for overhead shots.
Minimalism: Sometimes less is more. A single dish with clean lines can be stunning.
6. Food Recipes
Document the process: Share step-by-step photos or videos of your cooking process.
Recipe captions: Include ingredients and instructions in your posts for followers to recreate your dishes.
Themed recipes: Try seasonal or holiday-themed recipes (e.g., pumpkin spice in fall, refreshing salads in summer).
Popular Hashtags to Use
#FoodPhotography
#FoodPorn
#Foodie
#InstaFood
#FoodLover
#AestheticFood
#FoodBlogger
#FoodGasm
#FoodSnaps
#FoodArt
Inspiration Accounts to Follow
Instagram: @food52, @symmetrybreakfast, @foodwithmichel
YouTube: Binging with Babish, Tasty, Joshua Weissman
Pinterest: Search for "food photography ideas" or "aesthetic food recipes."
Whether you're snapping a quick pic for Snapchat or creating a full-blown food blog, the key is to have fun and let your passion for food shine through! �📸🍴
Creamy Garlic Chicken Parmesan Pasta A Pasta Perfection
Creamy Garlic Chicken Parmesan Pasta is the ultimate comfort food dish that combines tender chicken, rich Parmesan cheese, and a velvety garlic cream sauce—all tossed with perfectly cooked pasta. It’s a crowd-pleaser and perfect for a cozy dinner or impressing guests. Here's how to make this pasta perfection:
Creamy Garlic Chicken Parmesan Pasta Recipe
Ingredients
(Serves 4)
For the Chicken:
2 boneless, skinless chicken breasts
1/2 cup all-purpose flour
1 tsp garlic powder
1 tsp Italian seasoning
Salt and pepper, to taste
2 tbsp olive oil (for cooking)
For the Pasta:
12 oz (340g) pasta (penne, fettuccine, or your favorite)
Salt (for boiling water)
For the Sauce:
2 tbsp butter
4 cloves garlic, minced
1 cup heavy cream
1 cup chicken broth
1/2 cup grated Parmesan cheese
1/2 cup shredded mozzarella cheese
1 tsp Italian seasoning
Salt and pepper, to taste
Fresh parsley, chopped (for garnish)
Instructions
Prepare the Chicken:
Slice the chicken breasts horizontally into thin cutlets.
In a shallow dish, mix flour, garlic powder, Italian seasoning, salt, and pepper.
Dredge the chicken cutlets in the flour mixture, shaking off excess.
Heat olive oil in a large skillet over medium heat. Cook the chicken for 4-5 minutes per side until golden brown and cooked through. Remove and set aside.
Cook the Pasta:
Bring a large pot of salted water to a boil. Cook the pasta according to package instructions until al dente. Drain and set aside.
Make the Sauce:
In the same skillet used for the chicken, melt butter over medium heat.
Add minced garlic and sauté for 1-2 minutes until fragrant.
Pour in the heavy cream and chicken broth, stirring to combine. Let it simmer for 2-3 minutes.
Stir in the grated Parmesan and mozzarella cheese until melted and smooth.
Add Italian seasoning, salt, and pepper to taste.
Combine Everything:
Slice the cooked chicken into strips.
Add the cooked pasta and chicken to the skillet with the sauce. Toss everything together until well-coated and heated through.
Serve:
Garnish with freshly chopped parsley and extra Parmesan cheese.
Serve hot with garlic bread or a side salad.
Tips for Perfection
Creamy Consistency: If the sauce is too thick, add a splash of pasta water or chicken broth to thin it out.
Extra Flavor: Add a pinch of red pepper flakes for a subtle kick.
Cheese Lovers: Use a mix of Parmesan, Romano, and Asiago for a more complex flavor.
Vegetarian Option: Skip the chicken and add sautéed mushrooms or spinach for a veggie-packed version.
Presentation Ideas
Serve in a large pasta bowl with a sprinkle of parsley and a dusting of Parmesan.
Add a sprig of fresh basil or a drizzle of olive oil for a restaurant-worthy look.
Pair with a glass of white wine for a complete dining experience.
This Creamy Garlic Chicken Parmesan Pasta is pure comfort in a bowl—creamy, cheesy, and packed with flavor. Perfect for any occasion! 🍝✨Learn More
#foodvlog#food#christmasfood#christmascookies#dessert#foodies#UK#usa#america#snacks#foodie#foodporn#snack#yummy#foodphotography#instafoodnacktime#foodstagram#foodblogger#delicious#homemade#healthyfood#foodlover#americanfood#orange#breakfast#unitedstates#breadbaking#usa🇺🇸#breadmaking#pudding
1 note
·
View note
Text


It looks like you're diving into the world of food photography, food aesthetics, and food culture! Whether you're a food lover, a budding photographer, or someone who loves sharing food snaps on platforms like Snapchat or Instagram, here's a breakdown of your interests and some tips to elevate your food game:
1. Food Photography
Lighting is key: Natural light works best for capturing the true colors and textures of food. Avoid harsh shadows by using diffused light.
Composition: Use the rule of thirds or leading lines to make your photos visually appealing. Experiment with angles (overhead, 45-degree, or close-ups).
Props and Backgrounds: Keep it simple. Use neutral plates, wooden boards, or textured fabrics to make the food stand out.
Editing: Apps like Lightroom, VSCO, or Snapseed can help enhance colors and adjust brightness.
2. Food Porn
Go for the ooze: Capture melted cheese, gooey chocolate, or saucy dishes to evoke cravings.
Texture and Layers: Highlight crispy, crunchy, or creamy textures to make the food look irresistible.
Close-Ups: Zoom in on details like sprinkles on a dessert or steam rising from a hot dish.
3. Food Lover Tips
Explore cuisines: Try new recipes or visit local eateries to expand your palate.
Food journaling: Document your food adventures with notes on flavors, textures, and experiences.
Pairings: Experiment with food and drink pairings (e.g., wine and cheese, coffee and pastries).
4. Food Snapchat
Filters and Lenses: Use Snapchat’s fun filters to add a playful touch to your food snaps.
Behind-the-Scenes: Share quick videos of food being prepared or plated.
Time-Lapse: Capture a time-lapse of you eating or cooking for a creative twist.
5. Aesthetic Munch
Color Coordination: Create a cohesive color palette for your food photos (e.g., pastels, monochrome, or vibrant tones).
Flat Lays: Arrange food, utensils, and ingredients in a visually pleasing way for overhead shots.
Minimalism: Sometimes less is more. A single dish with clean lines can be stunning.
6. Food Recipes
Document the process: Share step-by-step photos or videos of your cooking process.
Recipe captions: Include ingredients and instructions in your posts for followers to recreate your dishes.
Themed recipes: Try seasonal or holiday-themed recipes (e.g., pumpkin spice in fall, refreshing salads in summer).
Popular Hashtags to Use
#FoodPhotography
#FoodPorn
#Foodie
#InstaFood
#FoodLover
#AestheticFood
#FoodBlogger
#FoodGasm
#FoodSnaps
#FoodArt
Inspiration Accounts to Follow
Instagram: @food52, @symmetrybreakfast, @foodwithmichel
YouTube: Binging with Babish, Tasty, Joshua Weissman
Pinterest: Search for "food photography ideas" or "aesthetic food recipes."
Whether you're snapping a quick pic for Snapchat or creating a full-blown food blog, the key is to have fun and let your passion for food shine through! �📸🍴
Creamy Garlic Chicken Parmesan Pasta A Pasta Perfection
Creamy Garlic Chicken Parmesan Pasta is the ultimate comfort food dish that combines tender chicken, rich Parmesan cheese, and a velvety garlic cream sauce—all tossed with perfectly cooked pasta. It’s a crowd-pleaser and perfect for a cozy dinner or impressing guests. Here's how to make this pasta perfection:
Creamy Garlic Chicken Parmesan Pasta Recipe
Ingredients
(Serves 4)
For the Chicken:
2 boneless, skinless chicken breasts
1/2 cup all-purpose flour
1 tsp garlic powder
1 tsp Italian seasoning
Salt and pepper, to taste
2 tbsp olive oil (for cooking)
For the Pasta:
12 oz (340g) pasta (penne, fettuccine, or your favorite)
Salt (for boiling water)
For the Sauce:
2 tbsp butter
4 cloves garlic, minced
1 cup heavy cream
1 cup chicken broth
1/2 cup grated Parmesan cheese
1/2 cup shredded mozzarella cheese
1 tsp Italian seasoning
Salt and pepper, to taste
Fresh parsley, chopped (for garnish)
Instructions
Prepare the Chicken:
Slice the chicken breasts horizontally into thin cutlets.
In a shallow dish, mix flour, garlic powder, Italian seasoning, salt, and pepper.
Dredge the chicken cutlets in the flour mixture, shaking off excess.
Heat olive oil in a large skillet over medium heat. Cook the chicken for 4-5 minutes per side until golden brown and cooked through. Remove and set aside.
Cook the Pasta:
Bring a large pot of salted water to a boil. Cook the pasta according to package instructions until al dente. Drain and set aside.
Make the Sauce:
In the same skillet used for the chicken, melt butter over medium heat.
Add minced garlic and sauté for 1-2 minutes until fragrant.
Pour in the heavy cream and chicken broth, stirring to combine. Let it simmer for 2-3 minutes.
Stir in the grated Parmesan and mozzarella cheese until melted and smooth.
Add Italian seasoning, salt, and pepper to taste.
Combine Everything:
Slice the cooked chicken into strips.
Add the cooked pasta and chicken to the skillet with the sauce. Toss everything together until well-coated and heated through.
Serve:
Garnish with freshly chopped parsley and extra Parmesan cheese.
Serve hot with garlic bread or a side salad.
Tips for Perfection
Creamy Consistency: If the sauce is too thick, add a splash of pasta water or chicken broth to thin it out.
Extra Flavor: Add a pinch of red pepper flakes for a subtle kick.
Cheese Lovers: Use a mix of Parmesan, Romano, and Asiago for a more complex flavor.
Vegetarian Option: Skip the chicken and add sautéed mushrooms or spinach for a veggie-packed version.
Presentation Ideas
Serve in a large pasta bowl with a sprinkle of parsley and a dusting of Parmesan.
Add a sprig of fresh basil or a drizzle of olive oil for a restaurant-worthy look.
Pair with a glass of white wine for a complete dining experience.
This Creamy Garlic Chicken Parmesan Pasta is pure comfort in a bowl—creamy, cheesy, and packed with flavor. Perfect for any occasion! 🍝✨Learn More
#foodvlog#food#christmasfood#christmascookies#dessert#foodies#UK#usa#america#snacks#foodie#foodporn#snack#yummy#foodphotography#instafoodnacktime#foodstagram#foodblogger#delicious#homemade#healthyfood#foodlover#americanfood#orange#breakfast#unitedstates#breadbaking#usa🇺🇸#breadmaking#pudding
0 notes