#chaiNNer
Explore tagged Tumblr posts
Visit Tumblr Blog
Explore Tumblr blogs with no restrictions, modern design and the best experience.
Last Seen Tumblr Blogs


Fun Fact
Celebrities use Tumblr as well.
Text
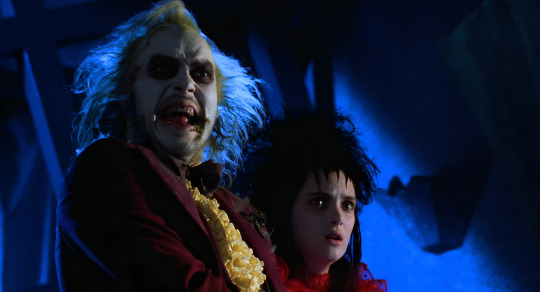
ai upscaling is WILD

I have begun the endeavor of upscaling my BJ screenies FOR SCIENCE... they're from my 2160p mkv's anyways but they're still a bit grainy for my preferences so
BEHOLD THE JUICE IN UNHOLY HD GLORY
ヽ(ಠ▄ಠ)ノ EEEEEEEE
#beetlejuice#betelgeuse#beetlejuice screenies#muh screenshots#beetlejuice 1988#ai upscaling#ChaiNNer#ESRGAN#artificial intelligence#ai#keaton's fucking face
40 notes
·
View notes
Text

Kim2091 chaiNNer TTA Templates: A Rundown on Test-Time Adaptation and Averaged Outputs
SKIP TO THE MAIN EXPLANATION BY SCROLLING TO THE CHAIN PICTURES
TTA stands for Test-Time Adaptation, it is a method of putting an image through various transformations to produce more accurate output results (an averaged output). When you’re upscaling an image it’s making approximations to fill in the information it doesn’t have. There are many reasons why it has trouble with that information, lighting, artifacts and obscured objects being some primary ones.
Using the TTA method, it applys transformations like rotation, missing parts, exposure and transparency to the image and tests it against each other before combining it into a final result, that is (potentially) more accurate to the original. Many tests are showing that TTA methods could increase accuracy by up to 15%. It does however depend on on what you are upscaling and your model as well, don’t expect TTA to give you 15% better accuracy 100% of the time.
Within upscaling it became more popularized by being a setting in Waifu2x.

However it has been around before that and is seeing wider use as more industries add machine learning to their process, there is no one singular method to TTA but the ‘standard' for upscaling as seen in this chain preset and in the previously mentioned Waifu2x is 8 rotations of the base image. Although Kim has made lightweight TTA presets, that use less, I’ll be showing as well.

Note that if you have a slower or older computer TTA will be far more taxing on your system vs a more simple upscale process. Batch processing using TTA will be noticeably longer, no matter what kind of computer you have.
TTA is not something you need to use, if you’re happy with your upscaling results then it would be pointless to waste resources on it. It will typically be used when accuracy matters or when you are having issues getting the results you want the normal ways. For example many of the gifs I will be posting to this account soon will be featuring use of TTA since line and object accuracy matters more heavily when viewed in motion vs a still image. It would also be good for images with heavy artifacts.
When I first heard ‘TTA’ I had no idea what it meant, and couldn’t find much at first beyond ‘it rotates the image, and sometimes your image might look better because of it', even finding comparison images was scarce. This led me down a rabbit hole on TTA. I will not burden any of you with a sources and links list because you would be scrolling for awhile. Instead I will have it listed here https://trello.com/c/COHYy9u9 . It is quite an extensive list, I have tried to take it and summarize it for you (as I understand it) the best I can.
------------------------------------------------------------------------------
Kim2091 made these templates, I am just explaining their use and showing examples. The example chains are pretty simple, but I understand how they can seem overwhelming which is why I have made this. This is beginner to intermediate level, you should have foundational knowledge on chaiNNer and upscaling.
This is the second part of this series. The first is here Kim2091 chaiNNer Templates I also made a starter guide for chaiNNer you can check out chaiNNer (AI) Upscale Basics
All credit for these chains goes to Kim2091, these chains are linked on the chaiNNer github page as well. They're a great resource to use.
------------------------------------------------------------------------------
Some previews have the following edits in PS, find edges filter, b+w adjustment (max blk), and exposure adjustment with gamma turned turned down (0.25).
I have also broken down Kim’s preset a bit to better explain how everything is connecting together.
------------------------------------------------------------------------------
Similarly to the section in Pt 1 on comparison chains, I will be covering all three TTA chains in one go because they’re so similar it would be pointless to make three separate explanations. These chains are very plug and play, despite the scary number of nodes, you don’t actually have to mess with them at all if you don’t want to outside of Load Image/Model and Save Image which should be familiar already.

LITE

LITE DUAL (lite TTA chain using two models)

FULL
------------------------------------------------------------------------------
Now the basics of how the TTA portion of the chain itself works is that it is taking your base image, splitting it for the various transformations (while keeping one un-transformed copy for the base layer that the transformations will apply on top of), applying the transformations (the transformation is applied through the upscale image node and is reverted while keeping the information from the transformed upscale to compare against the upscaled base layer and other transformed upscales), reverting the transformations, merging/averaging the results together and then spitting out the final merged result.

These are the only actual nodes you need to change anything on, you’ll notice it’s just a basic upscale chain without the TTA additions.

The image is split and connected to the beginning transformation nodes of the TTA chain

The ‘base layer’ that is unaffected by transformations


The main transformations that are reverted further along the chain before the results are averaged together.

The results being merged together

The final output
I’m sorry this was so long compared to the simple chains post, I hope it has at least been informative. I wanted to attempt to break down TTA enough for anyone that wanted to experiment with making their own TTA chains, and provide enough background information that what I’m showing can be easily understood and applied to your own upscaling work.
------------------------------------------------------------------------------

Gifs are out of sync I'll fix them soon I swear.
Still image previews will be uploaded soon and linked here.
0 notes
Text
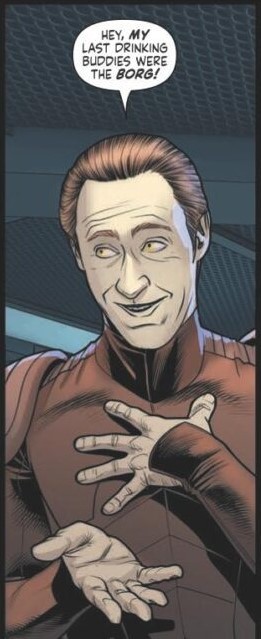

mods are asleep, time to post upscaled Lore
(source: Star Trek comics)
#i havent had the energy for my own creative work recently#done with chainner and the 1x bendel halftone model and a sharpen filter#star trek tng#star trek#lore soong#upscale#i cant remember which comic book this is from so if you know plz let me know!
46 notes
·
View notes
Text


(Please full-size to see the actual difference in quality! Tumblr compression sucks)
Looking for collaborators!!!
Here's a project I've been noodling on for some time now -- using ERSGANs to upscale Sims textures! I'm quite excited about the results so far. It's bittersweet to post about this though. I was hoping to collaborate with CmarNYC's on updating the HQConverter to use new techniques for upscaling. Without CmarNYC's HQ Converter, the current HQ mod would not even have been possible. Her contributions to the Sims community were so helpful and ubiquitous and she will be remembered. So right now the TS4k Upscale mod is a semi-manual process, of exporting textures using Sims 4 Studio, then upscaling those using chaiNNer, and importing those upscaled textures back into the package. So these screenshots are just a proof-of-concept. The program I'm imagining would be a blend of S4pi or S4TK, and using pytorch to upscale extracted images.
I can handle the Python portion, but I unfortunately do not know C# or JS. Admittedly I started this project last year and looked into the HQConverter source and S4pi and and then got overwhelmed. So... if anybody who is a little more savvy with C#/S4pi (or JS/S4TK) want to collaborate on creating the program together, please let me know. I would love to make this project a reality some day!
CC Shown: Llumisims Vanilla Noodles Body Overlay , Twisted-cat Lemonade Skin Overlay
CmarNYC's HQConverter
ERSGAN paper
chaiNNer
106 notes
·
View notes
Text


Above: before-and-after pictures of this process. Thank you to @cloudywithachanceofsims, @silverthornestudfarm, and @blueridgeequines for giving me permission to use their coats as examples!
CK's Guide to Fixing Pixelated Horse Coats
As we all know, every time you paint a horse (or any pet or werewolf, really) in Create-a-Pet, it inevitably gets pixelated. This is due to the TS4 engine's compression of Sims textures, which it does to theoretically save on file space and load time. The more you paint on your horse (and the more you save it over and over again), the greater the artifact damage becomes, until you're left with a pixelated mess.
Luckily, I've figured out a way to fix it. Yay!
This method uses a program called chaiNNER, which is an incredibly versatile node-based graphics UI that (among many other things) uses AI models to upscale and process images. After a month and a half of experimenting on multiple different types of coats with about a dozen different models, I've identified two AI models that work best at repairing the artifacting damage done by TS4: RealESRGAN_x2plus and 2xAniscale. I extract the painted coats from the tray files using Cmar's Coat Converter, process them using chaiNNER, use Photoshop to make any touch ups (softening hard edges, fixing seams, adding in the appropriate hoof texture), and then create a new hoof swatch to put the newly fixed coat back into the game.
Fair warning: chaiNNER is a bit of a hefty program that requires significant RAM and VRAM to run. If you have a beefy gaming computer, you should have no issues running this (as long as no other major programs - games, graphics programs, etc. - are running as well). If you've got a lower end computer, though, your computer might not be able to handle it and this method might not be for you. Make sure to read all the documentation on chaiNNer's github before proceeding.
Before we begin, we're going to need to gather some resources. We will need:
A graphics program. I use Photoshop, but GIMP or any other program that can work in layers will work too.
chaiNNER
AI Models; these are the ones I use are RealESRGAN_x2plus and 2xAniscale
Cmar's Coat Converter to extract the coat textures from your tray files
Tray Importer (Optionally) to isolate your household tray files and save you the trouble of searching the Tray Folder
The TS4 Horse UV as a helpful guide to make sure all our textures are lined up properly
Sims 4 Studio to create your new package.
I recommend using S4S to export hoof swatch textures from the game or from existing hoof swatch cc. Some popular hoof swatch CC include @walnuthillfarm's Striped Hooves and @pure-winter-cc's Glorious Striped Hooves
This tutorial assumes you are familiar with the basics in how to use Sims 4 Studio, such as how to clone a base-game item & how to import and export textures, and the basic functions of your graphics program, such as adding multiple different image files together as layers. I'll try to keep my explanations as straight-forward as possible.
STEP ONE: Extract the Coats
Install Cmar's Coat Converter and run it. Cmar's Coat Converter works by looking through your tray files for specific texture files (ie. The coats of cats, dogs, horses, and werewolves) and converting them to png files. You can go through the households of your Tray folder one by one, but I typically just use Tray Importer to separate the household containing the horses I want to fix.
Save the extracted coats in a project folder. These are your OG coats.
STEP TWO: Extract the hoof textures
Open up S4S. To extract the hoof swatches from the base game, create a new package by clicking CAS -> New Package, filter everything by species (ie. Horse) and then part type (Hoof color). Highlight all the basegame swatches and then save your new package.
Open up that package and then extract the texture for each swatch. Save them in your project folder (In a 'basegame hooves' folder to keep things organized).
To extract the textures from Hoof Swatch CC files, simply open them up in S4S and repeat the above.
STEP THREE: Download the AI Models
Right as it says on the tin. These are the models I use currently & some notes about them:
RealESRGAN_x2plus - this model is THE workhorse. It repairs artifact damaging with minimal loss to texture quality and results in a very smooth coat. It may sometimes darken the texture a little bit, but it's not noticeable in-game. That being said, it has a harder time with finer details such as spots, individual ticking for roans, dapples etc. I run this one first on all the coats because it usually does the job.
These models are trained to find and repair any incidence of artifacting/jpeg damage and approximate what the image is supposed to look like. The reason RealESRGAN_x2plus has an especially hard time with spots/dapples/tiny repetitive details etc. because it registers those areas as particularly damaged and works extra hard to smooth it out… which can sometimes result in a bit of an iffy coat repair. When things don't turn out the way I want, I turn to...
2xAniscale - I use this model for any appaloosas, roans, sabinos etc. that have very fine detail and came out mangled by RealESRGAN_2xPlus. It's also good for light-duty repairing (in cases where people have only 'saved' the coat once, as opposed to working on it on and off). While not strong enough on its own to tackle the more heavily damaged coats, it still does a decent job while keeping the fine details intact.
Go make a folder somewhere and name it 'AI Models' or something similar, and drop these guys in there.
STEP FOUR: Setting up chaiNNER
Obviously, go ahead and download chaiNNER, and then (through chaiNNER itself) download & install the dependencies. You really only need PyTorch for this, so if you'd like, you can skip NCNN, ONNX, and Stable Diffusion.
At first glance, chaiNNER is a bit overwhelming. It is unlike any other graphics ui I've seen before, but the basic premise is pretty straightforward: you 'chain' together specific functions ('nodes') in order to get your result.
We're going to start by setting up a chain for single coat conversions.
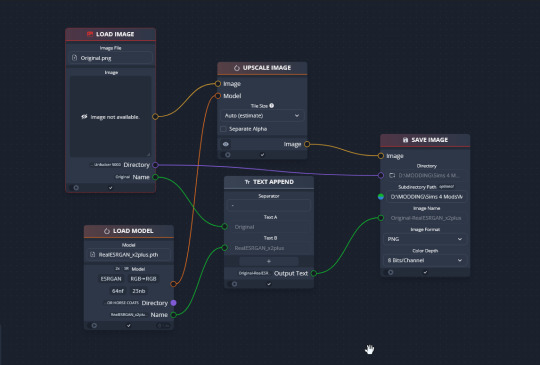
Drag & drop these nodes into your workspace:
Load Image
Save Image
Upscale Image
Load Model (From the PyTorch tab only!)
Text append
Next, connect the nodes just as I have connected them in the image.
Load Image, obviously, loads your image. We then tell the program we want to upscale that image by linking to the Upscale Image node. Upscaling can't happen without a model, so we then want to link Upscale Image with Load Model.
Text Append takes the original name of the image and combines it with the model name. This is super helpful, because if you're playing with many models at a time, you need to tell your result images apart. Link the output text to the Save Image Model.
Finally, Save Image obviously saves the image. We link the directory from Load Image to save it in the same place as the OG image, or, optionally, add in a file path link to another folder (in my case, I load images from a folder called 'Unprocessed' and save them into a folder called 'Processed'. Link the image from Upscale Image to Save Image to complete this chain.
Go in and select your image, model, and save locations.
Ta dah! You made your first chain.
To create an Iterator to batch process coats, we follow the same general idea, only we use 'Load Images'.
STEP FIVE: Run chaiNNER
Go ahead and run chaiNNER. Repeat using 2xAniscale if your spotty/dappled coat comes out funky.
Optionally, you can also add 'Resize' between 'Upscale' and 'Save Image' so the output texture is the same size as the OG. I like keeping mine big, as it makes it easier to fix any fine details in Photoshop.
STEP SIX: Combine in Photoshop
Go ahead and open up the horse UV, your coat texture & hoof swatches in Photoshop. This is a fairly straightforward process: layer the hooves overtop the texture, and then hide all hoof layers except the one you want. Make sure everything is lined up properly using the horse UV.
This is also where you would go in and fix any sharp, jagged edges you might spot. I often notice jagged edges on white face markings. Since the head is often one of the worst areas for artifacting, the AI models don't really have much to work with, resulting in jagged edges as they try to extrapolate what had been there 'before'. Either paint over it or use blur to smooth it out.
I personally would also remove any stray color that isn't the horse texture (body + ears). It won't hurt to leave it there, but I personally like things neat and tidy. Use the horse UV as a guide.
I also add in any little details using extracted stencils & layer masks.
Save your new coat as a png. Optionally, downsize it by 50% back to the original size. I don't do this because I'm very forgetful, but this would definitely help in keeping your package size smaller.
STEP SEVEN (Optional): Make a thumbnail
I make thumbnails for all the coats I do because it makes it much easier to identify them under the Hoof Swatch category. TS4 thumbnails are 144 x 148. You can label it with your horse's name, or stick a headshot in there etc. whatever works for you that will help it stand out from the other hoof swatches.
STEP EIGHT: Put it all Together
Finally, we've come to the end.
Using S4S, create a new package cloned from a hoof swatch. Import your new coat into 'Texture', and your thumbnail into 'Thumbnail'. Make sure you import the thumbnail for both Male and Female!
Check to make sure there aren't major seams, and that your texture is properly projected onto the S4S horse model. If there are seams, go back to check that your texture is lined up properly with the Horse UV. If there are minor seams (legs, chest, underbelly etc.) you can carefully paint (using the same color as on either side of the seam) just beyond the UV mesh boundaries to close the seam.
Then, go into Categories, scroll down, and uncheck Random. This will prevent random townie horses from wearing the coat.
Save your package.
Congratulations! You're done!
#ts4 tutorial#ts4 resource#ts4 guide#Ts4 horse cc#ts4 equestrian cc#sims 4 horse cc#sims 4 equestrian cc#ts4 equestrian#sims 4 equestrian#ts4 horses#sims 4 horses#ts4 horse ranch#sims 4 horse ranch#sims horses
77 notes
·
View notes
Text
How to Upscale Arcane (or other) Images
Cupscale is broken and Chainner only increases image size, not detail. So I went around testing a bunch of apps on the play store, pretty much all of them were garbage for Arcane. But, I found one that actually works wonders and genuinely upscales, free!
The app is called SuperImage and it is insane! Here is an image of Silco I had before upscaling:

And after:

I can zoom in the upscaled image much further and it actually stays true to the image when enhancing the image. SuperImage does have ads, but it seems they only appear during the upscale process and are skippable. It has an option for making the image 4x larger (what I used) and 16x larger. The processing time is a bit strange, it tends to be longer than in other apps and varies from a couple of seconds to a couple of minutes. You can leave the app while it's processing, but it warns you that the device may be slower while processing. I have done this and so far have not experienced any slowness from it.
#arcane silco#silco#silco arcane#arcane#arcane in 4k#4k#upscale#image#image enhancement#apps#SuperImage#upscaling#high definition#arcane league of legends#arcane netflix
45 notes
·
View notes
Text


More 'how to make Paint Mode actually viable to help reduce the borderline-criminal compression and add HQ support' experiments - Turns out adding custom nose swatches isn't that hard and it's actually super easy to export a painted coat (again, via Cmar's Coat Converter tool that I linked in my previous reverse engineering post) and then spank it onto an additional swatch after it gets cleaned up. Plus, this gives the massive boon of being able to then paint on top of that 'exported' Paint Mode coat, which when the coat was a hoof overlay, you couldn't do. Also you don't even need to make the texture fully opaque; in the previews above Schrodcat painted a sooty dapple overlay in Paint Mode that can then be applied on top of any base coat preset.
This then can lead to a very interesting 'making a cool horse coat' workflow of;
Painting an initial pass of a coat in Paint Mode.
Exporting that Paint Mode coat with Cmar's tool.
Fixing the compression of the texture via ChaiNNer or PS/whatever.
Making it a nose colour swatch.
Painting more details on the coat in Paint Mode, on top of that nose colour swatch.
Repeating steps 2 and 3, and then overlaying the new exported coat with the one exported initially in PS/whatever.
Rinse and repeat as often as you'd like to add more details/shading/etc.
Make it all into one nose colour swatch and bingbangboom, custom horse coat with no compression artifacts that you can still paint on top of for things like shine stencils, etc. & just requires you to share the custom nose swatch .package when gifting the horse around.
"Well, okay, Maddie," You may be thinking now, "That's cool for nose colours, even though not having a thumbnail might be kind of annoying. But what can hoof colours be used for now?"
Excellent question, and my answer is they're perfect for custom white markings, since, like I addressed last time, you can't paint over them in Paint Mode; anything you paint will always be drawn under the texture that is in hoof colour slot.


So if you make custom white markings (Heck, you can even paint one in Paint Mode if you'd like, so long as you don't add a base colour beneath it in Paint Mode, Cmar's tool will export with full transparency since the tool doesn't export things like the underlying coat preset) and turn them into a hoof colour, you can continue to paint the base coat beneath the markings and you'll never risk painting over them and/or needing to paint around them.
Ezpz, as the kids say.
In terms of HQ, this is probably an even better way to translate Paint Mode coats for use with the HQ mod too.
89 notes
·
View notes
Text
Guess who just spent a week figuring out chainner and pytorch just so I could upscale my own textures, specifically llymlaen's hair and aymerics whole ass outfit
20 notes
·
View notes
Text
“The transfer of True Lies has a truly vile quality to it, a feeling like someone clandestinely dosed you with LSD just a hair below the threshold. At times it can look passable in motion, but then you notice something out of the corner of your eye: a thick fold of skin, a framed photo of a child, folders that are too thick at the margins, cheeks that look rendered. It’s that familiar dread at the pit of your gut when you spot AI generated imagery, a combination of edges not looking quite right and surfaces that are simultaneously too smooth and too sharp. A crime was committed here, and you can tell.
The transfers of Aliens and The Abyss are markedly less bad than True Lies, but I still have difficulty watching them. The skin looks sterile and waxy with too much film grain removed. Everything looks like it has raytracing on. Both transfers are, however, within acceptable parameters for most normal people.
The recent transfer of Titanic got a similar treatment, with similarly mixed reactions online.
“Why would you do this?” is a logical question. It’s worth contextualizing who handled these “restorations” – namely Park Road Post, a subsidiary of Peter Jackson’s WingNut Films. They have worked on multiple films in the past, but the two that are most germane here are Jackson’s They Shall Not Grow Old and the 3-part Disney+ documentary The Beatles: Get Back. Both movies recontextualize pre-existing footage and, importantly, do so with an aggressive use of machine learning. They Shall Not Grow Old upscales and colorizes old World War I imagery in an attempt to set the bloodshed in a more modern context, while Get Back recycled footage shot for Michael Lindsay-Hogg’s Let It Be, including moments never before seen by the public, to elucidate the process behind the creation of some of The Beatles’ most iconic songs.
(…)
I wish we had stopped Jackson then and there. As my good friend Danielle joked, this was a trial balloon. People praised Jackson for doing this to Lindsay-Hogg’s footage in the name of restoration, and it emboldened him to do worse things. Before the True Lies debacle, the most recent example of this was the aggressively saccharine and confusing Now & Then, a long unfinished demo now finished by Ringo and Paul, edited together with archival footage of younger John and George composited in an a fashion that can be charitably described as tremendously weird.
Lest I am accused of being a luddite, I firmly believe there are many use cases for this technology. Nvidia’s DLSS and competing variants generally work very well on the games they are trained on. I regularly use Flowframes in the rare case that I need interpolation. I have often used waifu2x and now chainner if I need to photoshop a still and my source is bad, and there are databases of countless AI upscaling models. But the flip side to this is that these technologies are often used in place of proper ingest. “Crap in, crap out” is a truism for a reason. I spend a lot of time regularly capturing VHS and Laserdisc at the highest possible quality for fun, and when I see people who should know better say “Just use Topaz” (a commercial AI upscaler) instead of learning how to correctly ingest footage and deinterlace it, it makes me want to pull out my hair, because it almost uniformly looks bad to anyone who works with video professionally.
When you finally do see a piece of footage transferred well, it can be breathtaking. Good archival practices require a lot of institutional knowledge and labor. It’s an art when done well, and the people who do it care so much about what they do. But the modern application of much of AI is precisely about taking labor out of the equation. Why transfer a tape correctly when we can just have a computer guess badly instead? What if crap goes in, and it doesn’t come out?
What makes all of this worse is that True Lies, as I understand it, did not need to be shoved through the AI wringer. According to The Digital Bits, Park Road Post had a recent 4k scan of True Lies from the original camera negative. Park Road Post’s own website claims they have a Lasergraphics Director 10K film scanner on the premises. So what is the purpose of adding AI to this mix? Why do that to a perfectly fine-looking film? What is gained here, other than to slightly yassify an Arnold film? At this point, maybe they are simply doing it just to say that they did, because the technology is lying around, like a loaded gun with the safety off.
Nerds who post on blu-ray forums as a rule often need to calm down, and the forum threads I have read about this are no exception, but there are certain cases where a filmmaker is just wrong about how their films should look. Lucas is the infamous notable example, but Cameron is not innocent here in his treatment of his own films. Wong Kar-wai is another notable example, as what he did to Ashes of Time is criminal as was his recent “remasters” of his movies like In The Mood For Love. In certain rare conditions like this, it’s healthy to question if directors have the best interests of their own films in mind, as Cameron himself personally approved of these remasters.
What actually chills my blood more than anything is the thought that a lot of people think this all looks pretty good. You see this mindset at work whenever an AI fetishist posts a stable diffusion image of a woman with 13 fingers, 40 incisors and comically huge breasts. There’s an entire portion of the population that takes overt pleasure in the over-smoothed, perverts that prefer all media to be fast, high frame rate, and scrubbed squeaky clean. The cameras on our phones don’t simply capture images anymore, they compute them and ‘optimize’ them. It’s Italian Futurism in 4k, a noise reduction death drive. It’s not simply enough for much of digital cinema to look crystal clear and lifeless; the past should be denoised, grain managed and cleaned to conform to that standard. It is expedient and profitable if people don’t remember what film is supposed to look like.
I don’t think anyone gets into preservation to destroy film. I believe that everyone involved with this process worked hard and had the best interests of the film in mind, but the exact nature of restoration itself can vary wildly. I believe that some companies get blinded by new tech, get high on their own supply, and that can result in work that is destructive instead of restorative. I don’t know what the solution to this is in the world we live in, outside of decoupling film preservation from the profit motive whenever possible.
But I am certain about one thing. For a while, much of gaming tried looking like Aliens. Now, Aliens looks like a video game. And that doesn’t sit right with me.”
6 notes
·
View notes
Text
Red Dead Redemption já tem mods de texturas em 4K no PC
Por Vinicius Torres Oliveira

Modders já estão cirando formas de melhorar a aparência de diversos assets no jogo
Red Dead Redemption 1 acabou de chegar no PC oficialmente e os modders já estão trabalhando em diversas melhorias visuais para o jogo. Inclusive, uma série de modders já criaram pacotes de texturas em 4K para diferentes assets do jogo lançado originalmente em 2010 para consoles.
Uma das modificações foca especificamente no nosso protagonista, John Marston, e melhora as suas texturas para alta definição.
Os assets do personagem tiveram sua resolução melhorada para 4K com o uso de tecnologias de upscaling por IA, um trabalho feito pelo usuário modgamer767 do Nexus Mods.
Além do nosso protagonista, outros assets do jogo também já receberam um tratamento para maiores resoluções, como a grama, com o mod chamado UPSCALED GRASS TEXTURES criado por ChaiNNer e disponível gratuitamente pelo Nexus Mods.
Um ponto positivo desse tipo de modificação é que elas não costumam ter um grande impacto em desempenho em um jogo. Como comenta o próprio criador do mod para melhores texturas de grama, o impacto deve ser de apenas um uso de cerca de 50 MB de VRAM adicional. Considerando que Red Dead Redemtion já é bem leve no PC, isso não deve ser um problema para a maioria dos sistemas.
Outra modificação tem o foco em texturas para a expansão, Undead Nightmare, dobrando a resolução de várias das texturas da DLC, agora inclusa no jogo. O nome desse mod é Undead Nightmare 2K AI Upscaled Textures e foi criado por DerErwurden e está disponível gratuitamebte no Nexus Mods.
Red Dead Redemption ainda deve receber muitas modificações no PC
Depois de tantos anos de espera, Red Dead Redemption tem potencial ainda para ser um dos jogos com maior possibilidade de modificações, tanto por sua grande popularidade, quanto pela própria necessidade e desejo da comunidade de ver como pode ser uma versão do jogo com gráficos atualizados, ou ao menos que estejam comparáveis ao que seria um trabalho de remasterização mais completo.
A partir de agora, além dos consoles como Nintendo Switch e PS4, Red Dead Redemption 1 também está disponível oficialmente para o PC.
0 notes
Note
Haha yeah, it's been a bit of time!!! I think I'm doing fairly ok, had some trouble with university and also went no-contact with my mother and i have a tattoo now (got it for my birthday lol). How about you, are you doing well : D?
I wouldn't call it impressive but it's pretty fun when it's not infuriating dkshkjdhk. What will be impressive will be the moment I finally manage to play the waltz I composed some time back correctly. I keep fucking it up even though the melody is really easy. Oh that reminds me, I have no idea if I ever posted my new ukulele, whom I call Henry, to Tumblr? I got him for Christmas because I really wanted a wooden ukulele but of course I had to customise it, and I know that I have showed him to people on Discord but unsure about Tumblr because it's possible I deleted before that. And no, it isn't a secret jdkfhkdjf. I've just been modding Baldur's Gate 3 since like early December and at first I was like "I'll just make one single head so that my characters is accurate and then I'll stop." and um yeah I have not yet stopped. I'm mostly making heads both my own and just making pre-existing but unusable heads usable for players (which can be either a nightmare or easy breezy depending on why exactly it isn't usable. Like nightmare nurse heads? A breeze, easy as hell, at least resculpted their ears for all races as to avoid the task being too low effort lol. Oh yeah the textures sucked hell but like the 3d models themselves were fine. On the other hand...Gerringothe Thorm? Awful, no good, a horrifying experience, would do it again but yeah I wouldn't recommend. That is because she is a monster and naturally does not use the same skeleton as humanoid characters nor is her UV map anything close to normal and her textures sucked and Chainner was not available when I was making her meaning I don't even remember how the hell I upscaled those textures but I did and it was a nightmare. So yeah.), but sometimes I also make armour if I have a particular vision. I post some progress stuff and general BG3 modding stuff on my sideblog @featherymuffins-moi (long story but when i started making mods i jokingly wrote moi, meaning me in French, in the author field that mods have and then I forgot to remove it when I decided to publish the mod so ever since then I'm "featherymuffins - moi" on Nexus) if you wanted to take a look but I haven't posted much there, you can see more of my stuff on Nexus, but I also have some stuff that's private for now that I haven't really posted, usually because it isn't really super release-ready yet or because I keep forgetting about it but I can show you some photos of, for example, Wrestling, which is a head/character I made like a week ago and proceeded to make armour for them immediately. I haven't posted Wrestling as a head anywhere yet because...idk...
Yeah, I was just mentioning the Toymaker analysis specifically because that is something I really want to do and I feel kinda bad about how I seem to be incapable of doing it in a decent time frame? Like I feel like the list of my tasks/projects/hobbies keeps getting bigger and never gets any smaller dsfsfsf.
Right, right, right, so I'm actually not sure if I was posting about it before I deleted or if I finished the book only afterwards, but around New Year's I read this book by Stephen King called Dreamcatcher, and uh, it's very difficult to recommend because the ending sucks shit. But if you ignore like 5 sentences that completely ruin everything and pretend they do not exist then it's a good book. So that's what I do. Funnily enough I do not like it for the plot, the plot is in itself fairly unremarkable, but I like the themes present and the execution of them. Like what is actually going on is your typical sci-fi horror stuff and is cool I guess but what I like way more than that is the psyche of the characters and who plays what role in the narrative etc etc. The book is long, has about 700 pages, I do have a PDF if you're interested (I have a physical copy but I'm in the process of analysing my fucked up idiot meow meow and it's a real damn hassle to analyse characters when you have to flip through pages and can't just skip to your highlights you know? So that's why I also have a PDF now.). There are also audiobook versions. I do not know if they're good. I hope they are because I would actually like to listen to one later. I can provide a link to at least one.
And this is getting like real long so I should cut it off but just a bit of info about the character whom I'm like insane about, the only problem is that he's hard to talk about because the themes, they do slap way goddamn harder when you do not expect them. But the total basic gist is: the freak in question is called Mr. Gray and he's an alien from what was an alien hivemind before the rest got absolutely annihilated in a battle, and he's just,,,,he's so everything. You know how that one meme is kinda like "Stop giving me your toughest battles I am not your strongest soldier I am your weakest soldier." or whatever the counter-meme to "God's strongest soldier" was like? Yeah well he's definitely the aliens' weakest soldier. I'm willing to bet the whole hivemind cluster that go to Earth was the race's weakest soldier. They have to be from alien Florida or something. It's also really funny how he like almost always says complete bullshit? Like sometimes it's really funny because he'll be like "Hmmm yes well you see unlike the primitive human race that cannot be considered sentient, we truly think and aren't weighed down by these 'emotions' of yours." and in the next breath he'll be like "We came to Earth because your mom. Lmao." When he doesn't want to answer a question truthfully he'll either just ask you a question or he'll say something that is so clearly either a lie or a straight up shitpost. Alien fungi is funnier than some Tumblr users for real sdkjhsfkss.
But that's just the absolute basic gist that doesn't say anything but if you would like to hear more about the alien I can definitely talk at length about like everything about him including the themes, I just didn't want to talk about him too much in this reblog because it's,,,,so long jksdhskjdhk.
Hey! How have you been? Sorry for disappearing, I deleted my Tumblr for a bit and then I uh forgot to remake it because I was 3D modelling in Blender for 3 months and learning how to code. Long story. I still haven't done the analysis of the Toymaker that I promised back in December. So there is that. But the good news is that I am not currently spending my days 3d modelling all day every day, which does actually make the possibility of me ever doing an analysis much more possible.
Also I might have a book recommendation for you. I have been recommending it to literally everyone around me lol. It has weird little men. Who are fucked up and pathetic but in a bit of a cute way? Depends on what genres of books you like tho. There is also an audiobook version if you prefer that. Oh and a film adaptation but that one...well...it is technically a good adaptation but it also kinda completely glosses over any of the deeper themes. Like yeah the plot is very faithful. No themes present though. Not sure about the quality of the audiobook but I personally want to listen to it later because I want to see what direction they took my favourite freak's voice in.
Anyway, I hope you are doing great!
Ira oh my goodness you're ALIVE!!! 🙈💖💖💖 hello my dear friend, how are you doing? it's been so long!! 🥰 ooh wow, sounds like you've been super busy!! please don't worry at all - real life can always pull us away from our Internet sillies, but i'm so glad you've been doing something so interesting with your time!! 3d modelling in Blender and coding is so impressive - are you working on something specific, or is it a secret? 😉 oh pal, don't worry about the Toymaker analysis at all! if i had a penny for every time i've said i'll do a fandom-related thing and then didn't, i'd be very rich indeed 😂 if the mood strikes you i would be delighted to see it, but don't let fandom fun become another job, you know? :3c ohoho i am very curious about this book recommendation - what is it? 👀 you know i love weird little men!!!! and it's always fun to see what gets other people fixating hahaha i'm so glad you're back buddy!! welcome home, settle in, and i hope to talk to you more soon 🙏💖
#im trying to get like everyone in 50km radius to read Dreamcatcher for real skjhdjskfhks#it isnt a very popular book of King's#which is a shame because well it do slap hard as all hell#King himself hates it but tbh he hates like every book hes ever written so thats a him issue i think
4 notes
·
View notes
Text

Kim2091 chaiNNer Templates
Kim2091 made these templates, I am just explaining their use and showing examples. The example chains are pretty simple, but I understand how they can seem overwhelming which is why I have made this. You do require some basic knowledge on chaiNNer and upscaling to make use of these since I will only be going over the relevant nodes.
All credit goes to Kim2091
SIMPLE IMAGE UPSCALE


This should be familiar to you already. This is the basic upscale chain consisting of Load Image/Load Model/Upscale Image/Save Image nodes. These are the only nodes you actually need to run an upscale. View image and View Image External are nodes that let you preview your upscale before/after saving it. You can use the switch on the bottom left of a box to make it inactive during an upscale, allowing you to leave it connected.
SIMPLE FACE UPSCALE
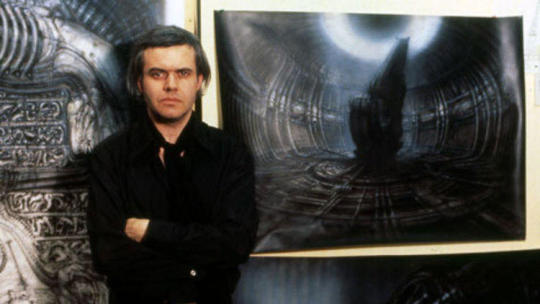
Original (Old picture of H.R. Giger)

Normal upscale

Upscale with added Upscale Face node and GFPGAN (lowered custom scale on upscale face node for size req)

The Upscale Face node is kind of a special node, it will only connect to models that are specifically for face restoration (FaceSR) I don’t believe you will find them in the normal database here is the link for GFPGAN which I am using here in the Load Model node connected to the Upscale Face node (the other model can be any model just the one connected directly has to be FaceSR).
I can't explain exactly how it works, I do know that GANs self-discriminate to produce much more accurate images than normal (in my experience using ESRGAN models which are also used in most of these examples) Here's a Google Doc that can better explain. The difference with a normal GAN model and GFPGAN, or similar FSR models, is that GFPGAN is specifically trained for head/face upscaling. Since it only affects the face, you still need a normal upscale model for the rest of the image. Here are the other two FSR models I know of RestoreFormer / CodeFormer.
If this interests you, search for more broad photography restoration, it’s a very technical/specific photo editing skillset and involves work beyond just this. I recommend starting with Rememorie they do some really awesome work, they also do make use of GFPGAN on occasion so I would look through their resources or reach out to them, they have a Reddit account and a personal website I know of in addition to YouTube.
SIMPLE SPLIT TRANSPARENCY

Original image (regular non-upscaled frame half ereased in PS with outer glow layer style)

Upscaled with normal chain

Upscaled with Split Transparency (ignore the banding, I’m not using a very good example for this)

This chain is used for upscaling images with transparency. It separates the alpha from the rest of the image with the Split Transparency node and upscales each independently before merging them with the Merge Transparency node. You would mostly be using this for textures, but it has a bunch of other uses as well.
Normal upscales only read rgb not rgba (which is why the middle picture is grey on the edge it’s not set up to read the alpha channel), you used to have to separate the image manually in something like GIMP and upscale each separately before going back to remerge, now we have chaiNNer.
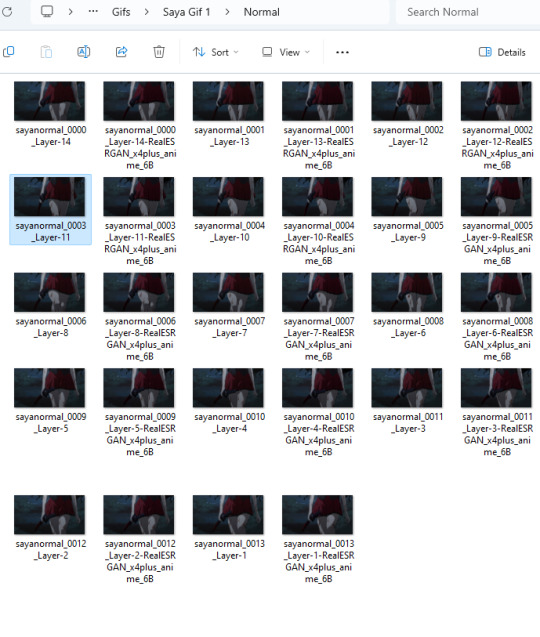
SIMPLE VIDEO ITERATOR

Original GIF

Upscaled GIF
Upscaled to MP4 format
(note: custom scale was lowered to fit 10mb upload requirement on GIF, trust me it looked the same either way it does look a bit better if you expand it) Something that you won’t see very commonly used, but it’s there, is Video Iteration which is just upscaling videos (mkv, mov, gif, mp4, avi, webm). You will not get the same results as you will from upscaling frames. I don’t upscale videos using this method so there’s better people out there to explain it and better upscaling programs to do it in. This is just what this chain is and what it’s for.
SIMPLE IMAGE ITERATOR

This chain is a batch processing chain. I have some examples here of one's I typically use. The difference between this one and mine is this one is saving to the same folder and using the same image names but adding the model name to the end so there’s no need for a Math node. You do lose a bit of control going with this method.
SIMPLE BLENDED OUTPUT


I have used a x2 model against a x4 model to showcase what this chain does. It’s just two separate upscales overlaid on one another with a Blend Images node and an Opacity node to control the visibility of the overlay layer (upscaled image). If you are familiar with Photoshop, you will be very at home with the Blend Images node since it uses the same/similar blend modes as PS layers.
CAPTIONED COMPARISONS / TWO MODEL COMPARISONS / SIMPLE COMPARISON
CAPTIONED COMPARISON

This is how the chain looks for a basic comparison. This is what people use for their model previews, you’ll see this used a bunch in general. There’s basically three presets that kind of do the same thing so I’ll only be explaining it one time with the Captioned Comparisons preset and showing examples for the other two (Two Model and Simple.)
The node that matters most in this chain is the Stack Images node. This will stack our images either vertically or horizontally into one image. You can hit the button with the plus sign to add more images to your stack.
The Add Caption node will add the name of the model being used for the image as text either on top or at the bottom of the image. By connecting it to the name of the Load Model node, it will use that as the caption so it changes dynamically and you don’t have to type it out. note: the size of the text in the comparison is also determined by the size of the image see a better example below.
TWO MODEL COMPARISON


(since the third caption node is connected to the load image node it’s pulling from the image file name, break the green line and type in a custom caption or keep it in mind while naming your files.)
SIMPLE COMPARISON


No captions, no OG image, just a simple comparison of two models.
OTHER MODELS USED
#upscaling#chaiNNer#videoupscaling#tutorial#ai#chaiNNertutorial#kim2091#assetsbyothers#models#ai upscaling
0 notes
Note
ooooh the new theme looks so good bestie!! do you make your own themes? they always go so hard and theyre always so unique i love
hehe tyy !! aww im honored u think so but naw, the base of the theme is by cloverparty ! i do alter and make a lot of assets for my themes tho, for example i made the machine girl stamp on my page, the floating windows 98 paint window, the swirly pattern in my description box and i also used chainner to upscale all of the assets :D the background of my theme i also ai expanded my background to the correct resolution :3
4 notes
·
View notes
Video
youtube
Blender más ChaiNNer= super resolución de imágenes 🔎
0 notes
Photo

(画像の処理内容を数珠つなぎに設定して複雑な処理を一発実行できる無料ツール「chaiNNer」を使ってみたよレビュー - GIGAZINEから)
0 notes
Text
画像の処理内容を数珠つなぎに設定して複雑な処理を一発実行できる無料ツール「chaiNNer」を使ってみたよレビュー
画像の処理内容を数珠つなぎに設定して複雑な処理を一発実行できる無料ツール「chaiNNer」を使ってみたよレビュー Source: https://gigazine.net/news/rss_2.0/
View On WordPress
0 notes