#but I like it. also the tutorial at least the first time around was necessary to me bc the difficulty scales way up later on lol
Explore tagged Tumblr posts
Visit Tumblr Blog
Explore Tumblr blogs with no restrictions, modern design and the best experience.
Last Seen Tumblr Blogs


Fun Fact
Post activity is at the highest at 4:00 pm EDT; notes peak at 10:00 pm EDT.
Note
Your swsh art always makes me want to replay the game because i love it and its my favorite pokemon game and every time i play another pokemon game i think of it how i miss certain elements from swsh. Then i boot up the game and im once again caught in the 1 hour 40 minutes hand held intro and im like ah- now i remember why i have been playing other pokemon games instead of this one. Happy (late?) birthday!
you don't want to listen to hop? you don't want to hear him teach you about type matchups? you don't wanna let him cheer u on...? 🥺 waa....?
#ask#bakuspeech#I am joking to be clear lmao#thank u happy bday to me !!#tbh I got real used to pokemon overexpositioning since sumo lol. it's kind of a boon for me#cause I'm not a Gamer™ and my brain takes stuff on Very slowly#so the tutorial stuff and the cutscenes give me time to catch up. also it's still fun to see these guys run around#I am in fact here for these guys lol. weird thing to say about the game built on and with an essential focus on the pokemon I know#I just like humans! I just like watching hop running circles around my player character all excited#and leon being a dick to his hometown people when they're expecting 'leon' back and they get the champion instead#and you get to see sonia used to dealing with it but the frustration never fully fades and how close she is to hop and that picture's bleak#listen this is my bread&butter lol. leon really doesn't show up That much himself around the game he's a shadow casted over the story#it's always interesting to me! does Not mean it's not sluggish to other people who want to play the game lmao#but I like it. also the tutorial at least the first time around was necessary to me bc the difficulty scales way up later on lol#it's a very good first pokemon game I maintain this. sumo never managed to teach me the same way swsh did#I still care drampa tho thank u drampa for being real I love u#lmao it feels like saying I'm not a Gamer™ violates some tenets of having adhd somehow. but its just the case here#the main genres I play are 'itch games tangential to the haunted ps1 people' and 'popcap-style casual games'#my sport's figuring out shapes n movin my stylus sadly. well not sadly why would that be sad
23 notes
·
View notes
Text
Ok! I've finally decided to put together a (somewhat) comprehensive tutorial on my latest art~
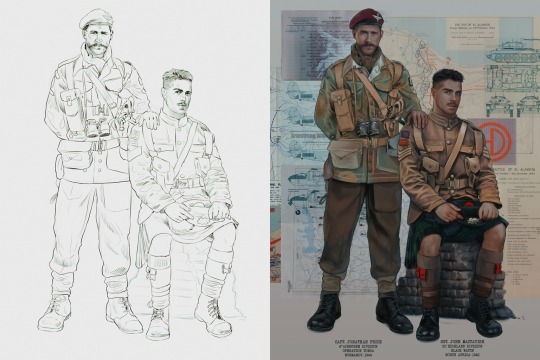
Please enjoy this little step-by-step 💁♀️
First things first--references!
Now I'm not saying you have to go overboard, but I always find that this is a crucial starting point in any art piece I intend on making. Especially if you're a detail freak like me and want to make it as realistic as possible 🙃
As such, your web browser should look like this at any given point:

Since this is a historical piece, it means hours upon hours of meaningless research just to see what color the socks are, but...again. that isn't, strictly, necessary 😅
Once I've compiled all my lovely ref pics, I usually dump them into a big-ass collage ⬇️
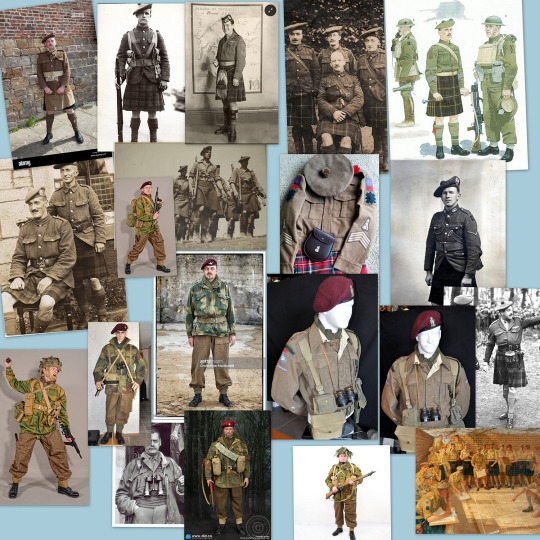
(I will end up not using half of these, alas :'D)
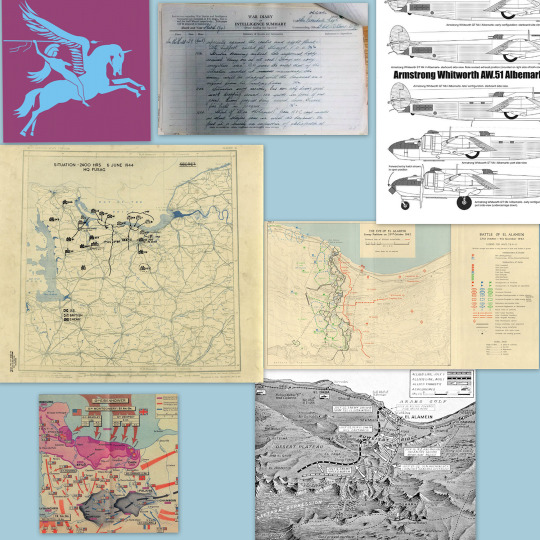
Another reference search for background material, and getting to showcase our models of choice for this occasion~
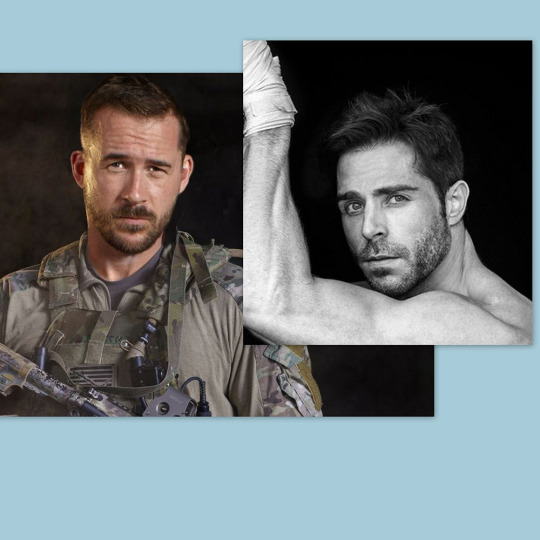
When picking a reference for an actor or model, the main thing I keep in mind (besides prettiness 🤭) is lighting and orientation. Because I already kinda know what pose I'm gonna go with for this piece, I can look for specific angles that might fit the criteria. I should mention that I am a reference hound, and my current COD actor ref folder looks like this:

Also keep in mind, if you're using a ref that you need to flip, make sure you adjust accordingly. This especially applies to clothing, as certain things like pants zippers and belt buckles can be quite specific ☝️
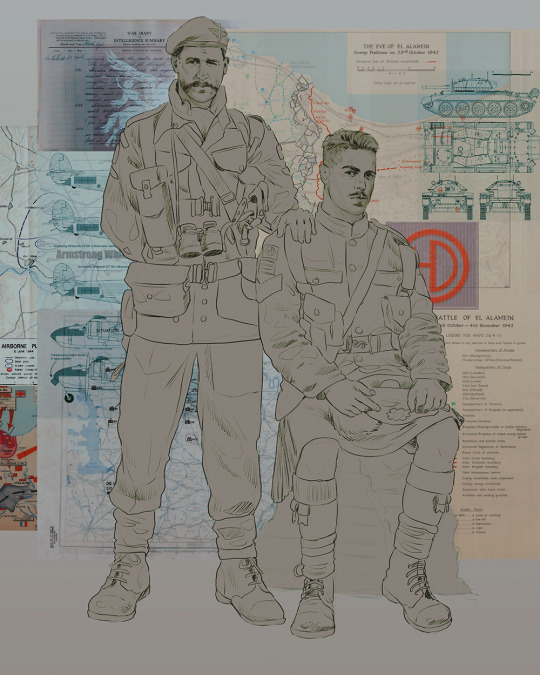
Now that we've spent countless hours googling, it's time to start with a rough sketch:
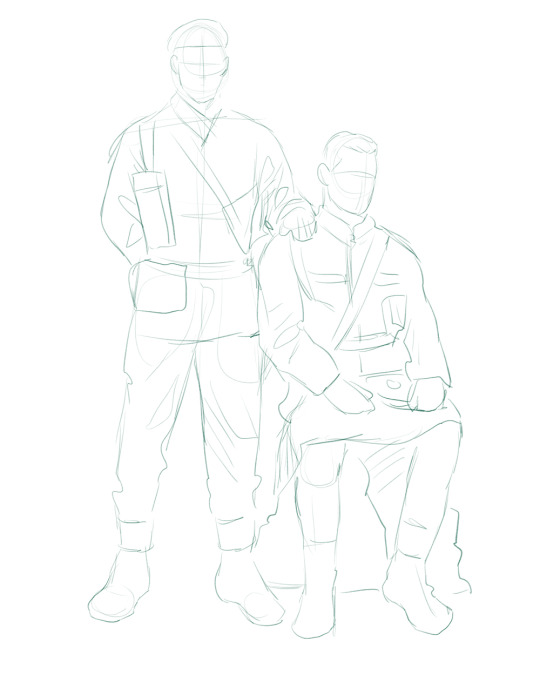
It doesn't have to be pretty, folks, just a basic guideline of where you want the figures to be.
The next step is to define it more, and I know this looks like that 'how to draw an owl' meme, but I promise--getting from the loose sketch above to below is not that difficult.
Things to keep in mind are--don't go too in-depth with the details, because things are still subject to change at this point. In terms of making a suitable anatomically-correct sketch, I would suggest lots of studying. This doesn't even have to be things like figure drawing, I genuinely look at people around me for inspiration all the time. Familiarize yourself with the human form, and things like weight, proportions, posing will seem a little more feasible.
It's also important at this stage to consider your composition. Remember to flip the canvas frequently to make sure you're not leaning to one side too often. I'm sure something can be said for the spiral fibonacci stuff, which I don't really try to do on purpose, but I think keeping things like symmetry and balance in mind is a good start ✌️

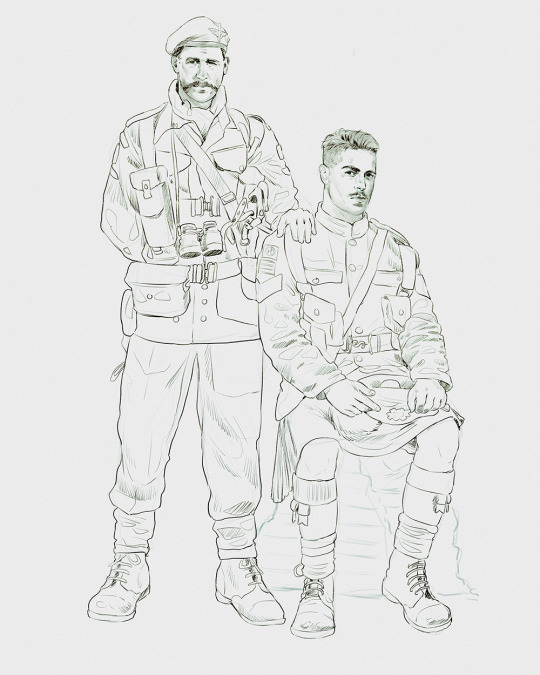
Next step is just blocking in the figures. Standard. No fuss 👍
Now onto the background!
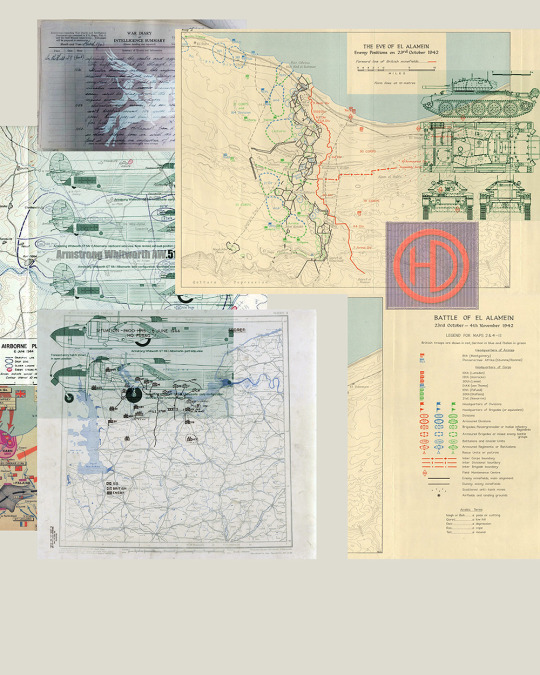
It's frankly hilarious how many people thought I was *hand-drawing* these maps and stuff 😂😂 I cannot even begin to comprehend how insanely difficult that would be. So yeah, we're just taking the lazy copy and paste way out 🤙
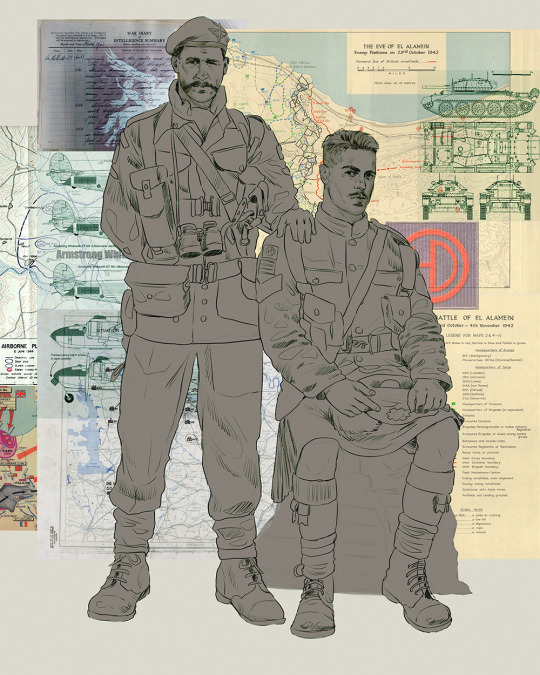
I almost always prepare my backgrounds first, and this is mostly to get a general color scheme off the bat. For collage work, it's really just a matter of trial and error, sticking this here, slapping this there, etc. I like to futz around with different overlay options until I've found a nice arrangement. Advice for this is just--go nuts 🤷♀️
Next, I add a few color adjustments. I tend to make at least 2 colors pop in an art piece, and low and behold, they usually tend to be red and blue ❤️💙There's something about warm/cool vibes, idk man..
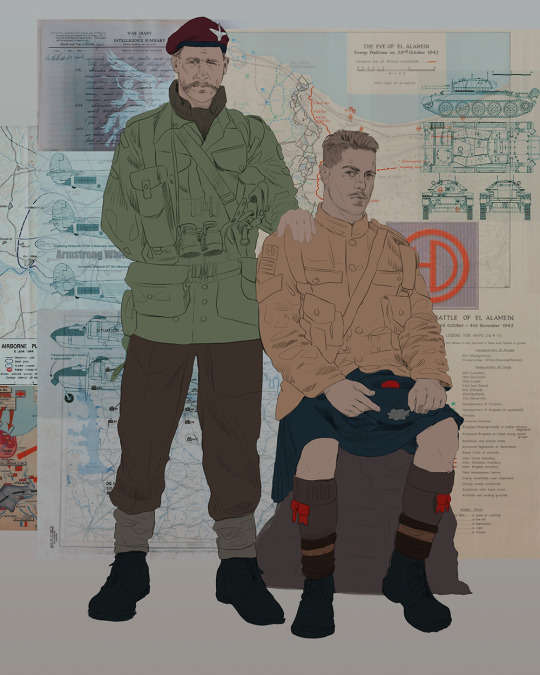
Now we move on to coloring the figures. This is just a basic block and fill, not really defining any of the details yet.
Next, we add some cursory values. Sloppy airbrush works fine, it'll look better soon I promise 🙏
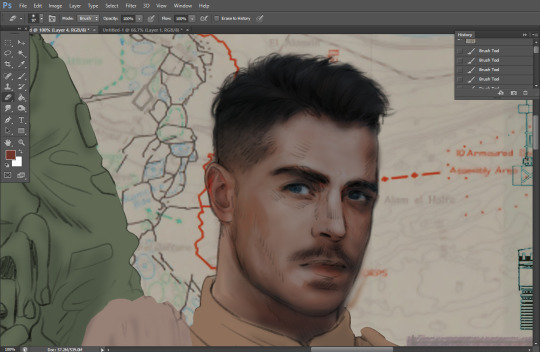
And now--rendering!
I know a lot of beginner artists are intimidated by rendering, and I can totally understand why. It's just one of those things you have to commit to 💪
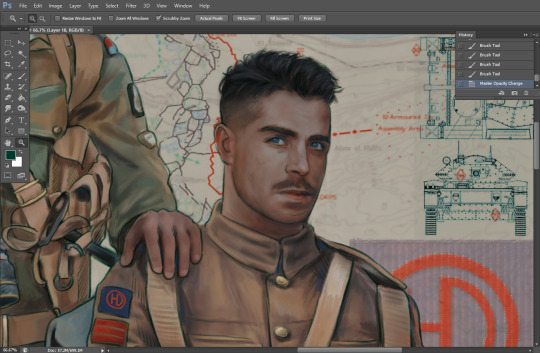
I've decided to show a brief process of rendering our dear Johnny's face here:
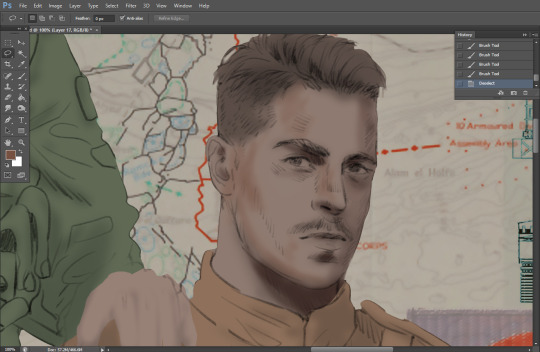
Starting off, I usually rely on the trusty airbrush just to get some color values going. Note--I've kept my sketch layer on top, but feel free to turn it on and off as you work, so as to not be too bound to the sketch. For now, it's just a guideline.
This next stage may look like a huge jump, but it's really just adding more to the foundation. I try to think of it like putting on make-up in a way~ Adding contours, accentuating highlights. This is also where I start adding in more saturation, especially around areas such as ears, nose and lips. Still a bit fuzzy at this point, but that's why we keep adding to it 💪
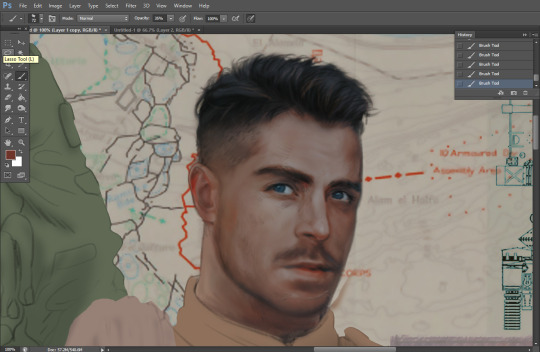
A boy has appeared! See--now I've removed most of the line layer, and it holds up on its own. I'll admit that in order to achieve this realistic style, you'll need lots and lots of practice and skill, which shouldn't be discouraging! Just motivate yourself with the prospect of getting to look at pretty men for countless hours 🙆♀️
I'll probably do a more in-depth explanation about rendering at some point, but let's keep this rolling~

Moving forward is just a process of adding to the figures bit by bit. I do lean towards filling in each section from top to bottom, but you can feel free to pop around to certain parts that appeal to you more. I almost always do the faces first though, because if they end up sucking, I feel less guilty about scrapping it 😂 But no--I think he's pretty enough to proceed 😚
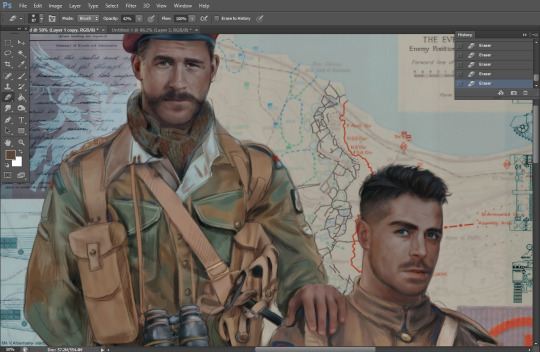
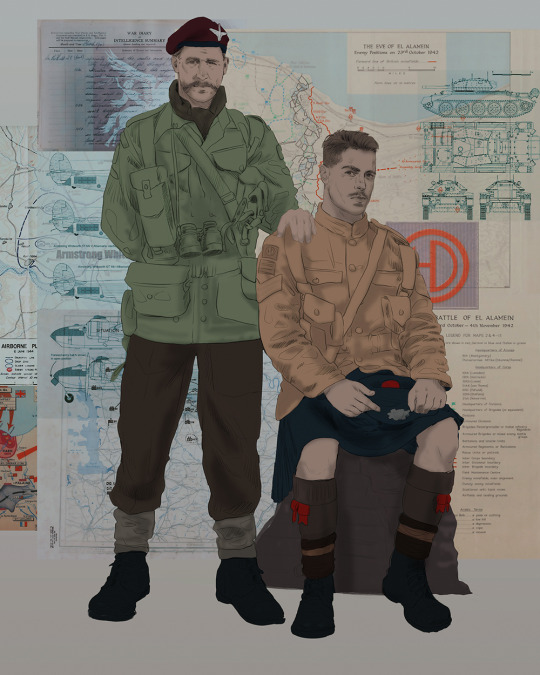
They're coming together now 🙆♀️ Another helpful tip--make sure you reuse color. By that, I mean--try to incorporate various colors throughout your piece, using the eyedropper tool to keep a consistent palette. I try to put in bits of red and blue where I can
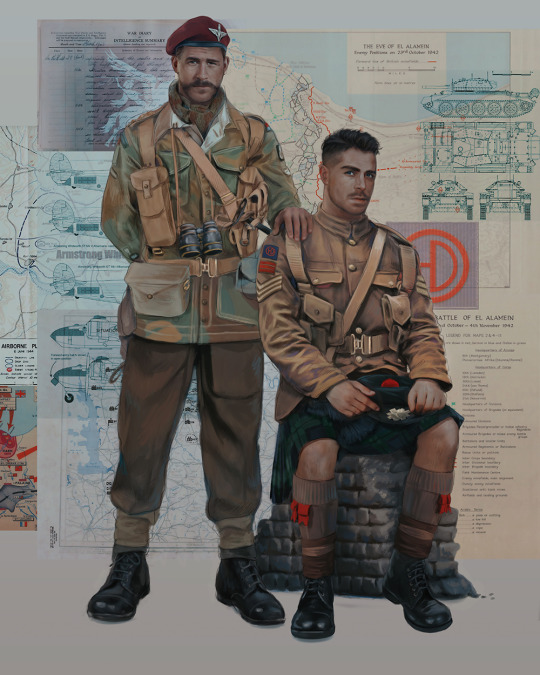
Here they are fully rendered! Notice I've made a few subtle changes from the sketch, like adjusting the belt buckles because I made a mistake 😬 Hence why you shouldn't put too much stock in your initial sketch~
The next step is more of a stylistic choice, but I usually go over everything with an outline, typically in a bright color like green. Occasionally, I can just use my initial line layer, but for this, I've made a brand new, cleaner line 👍
And the final step is adjusting the color and adding some text:
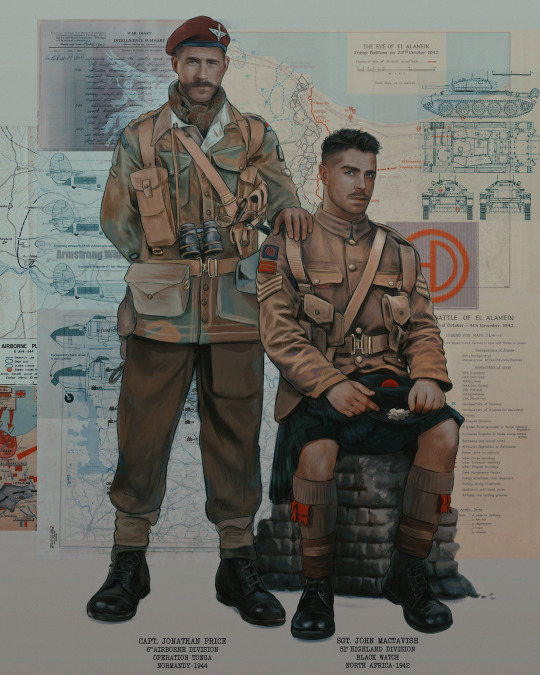
Tada!! It's done!
All in all, this took me the better part of a week, but I have a lot of free time, so yeah ✌️
I hope you appreciated that little walkthrough~ I know people have been asking me how I do my art, but the truth is--I usually have no clue how to explain myself 😅 So have this half-assed tutorial~
As a bonus, here is a cute (cursed) image of Johnny without his mustache:
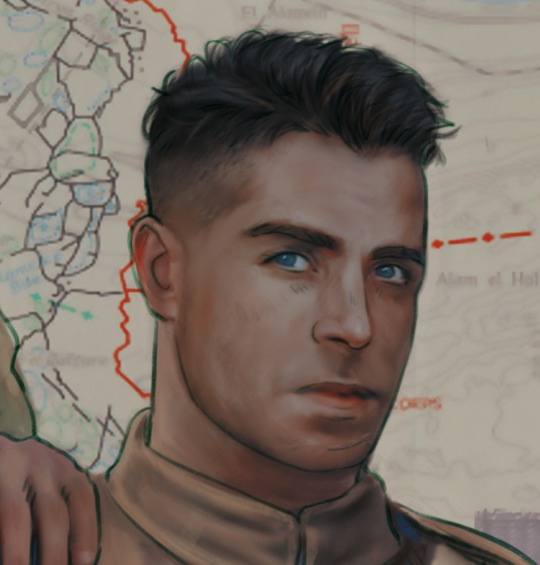
A baby, a literal infant child !!! who put this wee bairn on the front lines ??! 😭
Anyway! peace out ✌️
#tutorial#my art#art tutorial#since people have been asking#I remembered to save my process from this latest work~#enjoy 🙆♀️
1K notes
·
View notes
Text
Are you transgender and scared of the future of America? Here is how you can keep yourself safe.
The results of this election are not at all what we expected or wanted them to be. While this is incredibly unfair and there is a strong likely hood that Trump cheated, we must move on. The government, and our country has failed us. The next four years are looking to be very dark for people of color, women, immigrants, queer and transgender people. These times are very frightening, but we still have time before things change. Trump will not be in office until inauguration day, which is Monday, the 20th of January 2025. While we do not know exactly what will happen to transgender people after Trump is in office, project 2025 is stated to remove protections of LGBTQ+ individuals.
So, what can transgender people in America do to stay safe in Trump's America? First, know the safety of where you live. Many states, even states that were red in this election, have laws that protect transgender individuals in hate crime laws, and how they regulate gender. Lgbtmaps is a wonderful resource to figure out if your state is safe. If you live in a state that is generally not safe for transgender people and moving somewhere safer (such as states in New England, New York, California etc.) is an option, you should do so now. For those that live in unsafe areas and cannot leave, you still have options.
If you are on HRT, consider stockpiling your hormones. Testosterone and estrogen can be purchased online. This site can show you how to get hormones online. IF you purchase hormones online, be cautious and do your research on the website you are purchasing from. If you can, use a prepaid visa card instead of a credit or debit card. Producing your own hormones is an option, but this should be a LAST RESORT option. Passing, though unnecessary in trans places, will become extremely important as aggression against transgender people becomes more rampant under Trump's reign.
For transgender men, consider binding using trans-tape or KT tape (around $5 at Walmart for the generic brand) instead of using a binder. Using tape is generally safer, you can wear it 24/7 without having to take binding breaks. If you decide to wear tape instead of a binder, watch a tutorial before using. Packing may also be necessary, using something as simple as a folded pair of socks can give the illusion of being male. Do not fear using the men's bathroom, most cisgender men are stupid don't know transgender men exist, let alone use their bathrooms. Using a 'stand to pee' device may be helpful, but most men do not think anything of a man peeing sitting down (if you are questioned, you have diarrhea).
For transgender women, you can wear a face mask in public if you have traces of facial hair, this can also help to disguise your voice. Tucking generally will make or break your passing, but you can wear loose clothing such as skirts and dresses as an alternative. Since I am not a transgender woman, I don't have all of the tips and tricks that transgender women might have, if you have specific questions for passing in female spaces there are resources such as the mtf subreddit where you can get advice from people who are in the same place you are.
This is also the time to change your name, and if possible, your sex, on your id and birth certificate. Changing your name is a relatively easy process in most states, and most states do not require publication of name change statements. Your state's government website should have information about how you can change your name. In 2022 and living in Massachusetts, it took me just a few days for my name change to be finalized, though this will differ based on where you live.
If you live in one of the twenty-five states that allows it, you can even amend your birth certificate to show your preferred sex without even having sex reassignment surgery! This process, at least for me, was somewhat of a lengthy process but the result is your future employers never needing to know that you are transgender. Most cisgender people do not even know that this is an option. This will be easiest for people who have a diagnosis of gender dysphoria from a doctor, but if you are on HRT, you already have that. Specific states have different laws and processes, so be sure to check your state's government website for what you need and how to go about it. I underwent this process in Massachusetts, so if you have any questions about how this looks in Massachusetts, send me a message.
Most states allow gender markers on IDs to be changed, some even allow an 'X' to be marked instead of 'M' or 'F'.
Overall, be safe and careful. These are just tips on what you can do now while things are still safe. There is no telling what the future will hold, but we can control the present. To all of my trans siblings, we will get through this. The world is a better place with you in it. Do not let them take away your identity. Be there for your friends. If anyone needs help or just someone to talk to, my inbox is open.
If you are struggling crisis lines are available: Call 988- Suicide and crisis lifeline
Text 'TALK' to 741-741- Crisis text line
Call 1-866-488-7386- Trevor Project lifeline
Text START to 678-678- Trevor Project text line
Call 1-877-360-LGBT (5428)- LGBT crisis lifeline
Call 1-877-565-8860- Trans lifeline
#transgender#be safe#stay safe#psa#ftm#mtf#us elections#fuck trump#kamala harris#safety tips#health and safety#lgbt#trans community#crisis#help#support#signal boost#you are loved#you are worthy#you are not alone#you matter#we will get through this#leftist#left wing#project 2025
33 notes
·
View notes
Text
Mr. Qi Friendship and Romance Mod: 4/19 Progress Update
It's a working title, I'm trying to come up with something less wordy that still will pop up in Nexus searches.
I wanted to be able to track my progress, mainly for myself, but if you're curious, this is the state of the mod right now:
Writing:
Heart Events - the 2 heart event is fully written (with blocking directions), and the 6, 8, and 10 heart events are outlined. The 4 heart cutscene currently has me a bit stumped; I have ideas, but nothing concrete yet. I definitely now understand why Sam's 4 heart cutscene is him dropping an egg. 14 hearts is on the back-burner as a little treat to myself once I get further into things.
Generic Daily Dialogues - about 1/3 done, probably the highest priority for writing. I'm leaving his vanilla casino dialogue as the two heart dialogue, and the vanilla Walnut Room dialogue as his four heart dialogue, with a few small changes. And, since it's me, I have more marriage dialogue written than anything else...
Day-Specific Dialogues - very few written, lower priority. Hoping to have a lot of these made eventually, and I have plenty of ideas, but they aren't necessary for the core of the mod so they're on the back-burner for now.
Gift Dialogues - all 5 generic gift response dialogues are written, with an additional 22 dialogue lines for specific items/groups of items. I'm also up to around item 530 in figuring out what item corresponds to which dialogue/whether or not he likes it. Certain item groups, like cooked food, still need more lines, however. This is definitely something that should be low priority, but also something I'm really enjoying working on. Some personal favorites so far are-
[if given a fish (hated)]: "Eugh, it's all slimy..."
[if given a legendary fish (disliked)]: "If you must give me one of the rarest fish in the valley, can you at least wrap it so I don't have to touch it with my bare hands?"
And I think that's pretty funny.
Art
Portraits - 3 new portraits finished: "deep frown" "glint" and "glasses-less". I'll probably be messing with "glasses-less" for a looong while; it's first shown at a dramatic moment so it needs to look good. Blushing portraits are next on the docket.
Here's "glint" btw, with a background thrown on so I can have a custom icon. You know I gotta make him do the anime glasses thing a few times.
Sprites - no progress yet. Walk cycle is up next after I finish the blushing portraits. Did you know he doesn't have a walk cycle at all? [1.6 spoilers] in the cheated Summit cutscene where he attacks(?) you, he literally just slides at you very fast. Anyways, I may also change his map sprite a bit as well, since it was drawn to match his old portrait and doesn't actually have the same color scheme as his sprites. Note to self: is it possible to make the sparkles on his outfit prismatic?
Maps - no progress yet. The 6 heart and 10 heart cutscenes both require custom maps, with the 6 heart one being a fully custom asset. 10 heart recycles some existing assets but will still need some custom stuff done as well.
Misc Sprites - in my head, there's a dream version of the 8 heart cutscene that has so, so many unique sprites. Like an incredible amount of stuff. I think it'll kick ass, but also that sequence could be done with a few lines of text. So, for now, it's low priority. But maybe in a few months I'll put out a request for help.
Implementation
Not totally sure how to split this into sections yet, as I'm very much still in the preliminary stages so far. To say that I'm feeling overwhelmed is an understatement; documentation on the wiki swings wildly between "an asset is a file in a video game" and "this is an advanced tutorial. Read these 4 other pages first before continuing."
I've started using Ms. Coriel's NPC Creator which has been good for setting up the basic file structure, but ultimately doesn't cover some of the more complex stuff I want to do. EDIT: Turns out it's completely outdated for 1.6! Had to throw out a bit of work, but I still learned from it so it's fiiine.
I think setting up his "schedule" will be a challenge, in that I don't actually want him to have a real schedule like most NPCs. Not to pull back the curtain too much here, but I want him to "exist" in both the Casino and the Walnut Room simultaneously, which is to say, he does not exist in two places at once in the narrative, just in the code. This will change after marriage, however.
My next goal is to set up placeholder cutscenes for each of the heart events, and then to implement the generic daily dialogues once those are finished.
Final Notes
God, this will be a work in progress for a while, but I'm enjoying it! Definitely enjoying the writing more than anything else, but hey, that's how it be. I've got around 70 lines of dialogue written, a bit of art done, and I've started learning how to actually get stuff in game. I've always been more of a designer than a coder, but it's getting there!
ADDITIONALLY I've decided that if I abandon this project for more than 8 months, anyone is welcome to request my work so far and use it for their own mod. If this blog hasn't posted in a long while, feel free to send me an ask or message! I may say no, however.
Ultimately, I want this mod to exist in some fashion. While there is an existing one, I have a pretty different take on the character and I want to share it with you all! Every line of dialogue, every heart event, every little detail needs to share something interesting about a character and their world. Yet, Mr. Qi is a mysterious guy, and I think some things should be left up to player interpretation. And I think it's crucial to be able to match his tone and voice to the vanilla game, while also expanding on his characterization. It's a fun challenge to write, and I hope the finished product, uh, well I hope it gets finished mostly, but I think it'll be pretty good.
Thanks for reading all this. This is largely just a stream of consciousness for myself, but I hope it's...interesting, or something?
104 notes
·
View notes
Text
idk my stained glass post is going around again and a lot of people are saying it's inspiring them but they're still hesitant to start whatever craft has their fancy rn, so here's a dipshit's guide to getting from horsey to whale when you're starting out a craft


Step 1: skim a tutorial.
don't take notes, don't pay all that much attention to it, give it like. at max 10 minutes of your time. Just get the general shape of the process into your head along with any relevant safety precautions.
the point of doing this is to stop yourself from forming expectations. Expectations are the motivation killer. Strangle them to death.
Step 2: Tool time
You may want to start right in on a project, you might even have one in your head already.
Don't. Stop that, see the point above about expectations. Your first project is going to suck major nuts, it doesn't matter what you do, so you simply must plan to make your first project as nut-sucktastic as physically possible. Burry your expectations so deep in the ground that you will leap over them by simply faceplanting.
So here's what you do instead, gather the necessary tools and materials then set aside an amount of material that you are ok with just pissing away. just absolutely wasting. If you went right in and got discouraged enough to drop a project while doing it, youd be wasting the materials anyway. Might as well get the wasting over and done with Before it eats hours of your mortal life.
Ok, now pick the first tool and associated skill involved in your new craft and just practice That. Don't try to make anything, just learn the motions and teach yourself how things move or break or bend or etc etc etc. all the real basic boring parts that don't produce anything.
Then move onto the next steps associated skills and tools. Connect them back to the product you got from practicing the first step if you can, then the third and so on, so that at the end of this ordeal you too can have a horrible abomination you can pretend looks like a horse.
Step 3: nap
With that done, fuck off and do something else for a bit. like for at Least a few hours if not a full day. Take a nap. do some drugs, play a hentai gatcha game, fuck if I care man. Just don't do the craft. This is the best way to kill expectations: fuckin forgetting what you're capable of.
step 4: learn it right this time
Actually watch/read that tutorial now. like. for real. give it your full atten and take notes on where you fucked up and how you struggled back in step two. like actual written/typed notes. You're going to be focusing on those areas and having a neat list to keep thing orderly in your head can help.
at this point it's also a good idea to try to find other tutorials that explain the Thing, but have a different person explaining it. or tutorials that are more granular. like ones that talk about the skills involved in a single step instead of the whole process. having that little bit more detail can be a game changer.
step 5: visualization
Come up with the easiest and most basic project you can think of while referring to that list of areas you struggled. You want this project to primarily focus on those weak spots and give you room to practice and improve them. ok. and now scrape the top 10% off the project. Make it easier make it smaller, make it less detailed, find a pattern instead of making your own, whatever just simplify it that little bit more.
Step 6: just do it
actually do that project while referring to your tutorials and notes.
Let yourself fuck up. Let yourself waste shit. And then move on. Don't get tangled in expectations, or let your perfectionism strangle you. Look it in the eye and strangle it back, make your shit uglier just to spite it.
Skills take time to develop. Give yourself that time and don't let your brain issues take the joy of creation from you. It's fuckin hard, but you've Got to do it if you want a modicum of happiness in this hell world. the vibe is Cognitive Behavioral Therapy but done with pure violence and vitriolic hatred of what your own neurosis are trying to take from you.
step 7: aw shit it's a never ending cycle
repeat step 5, but go for something a bit harder, then step six until you find a new muse to start over at step 1 with.
40 notes
·
View notes
Text
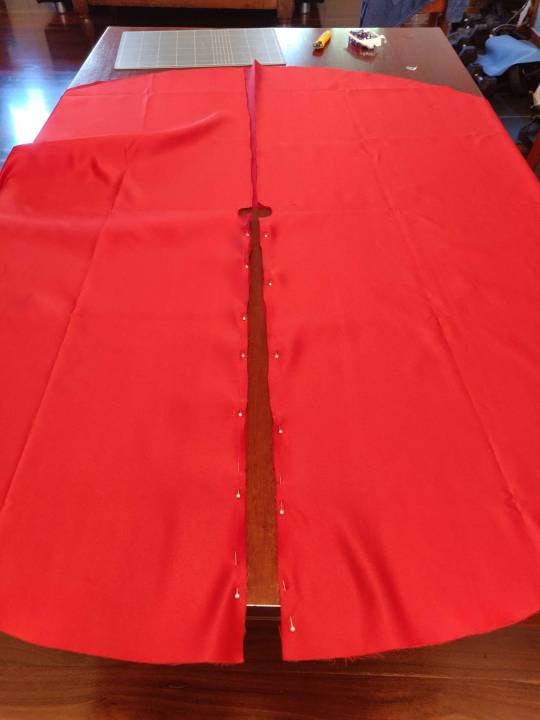
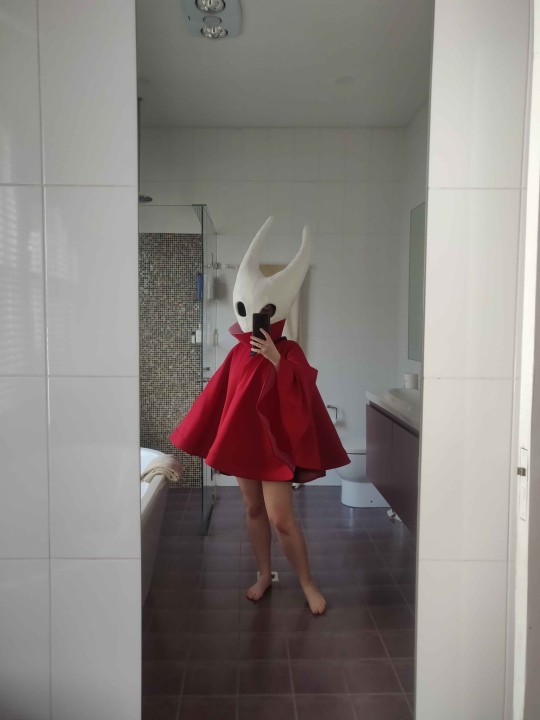
One more post from my recent Hornet cosplay, this time the wip/progress pics when sewing Hornet's cloak!
This was a bit daunting as I had never tackled anything so large before - my prior sewing experience was more accessories, belts, bows, stuffed tails, that sort of thing, and not full outfits! I had a couple ideas in mind for her cloak, (boning, petticoat, ballgown panels, etc) but ultimately ended up going for a double circle skirt with horsehair as it seemed like the easiest option for my sewing skill, while giving the perfect flowy look!
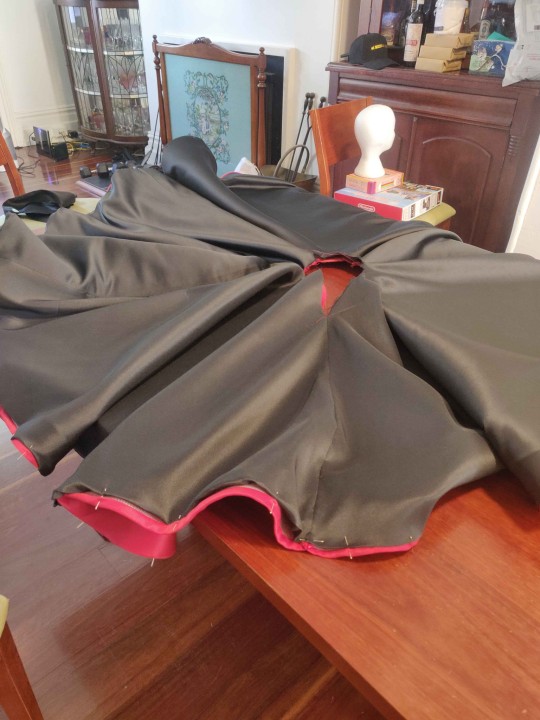
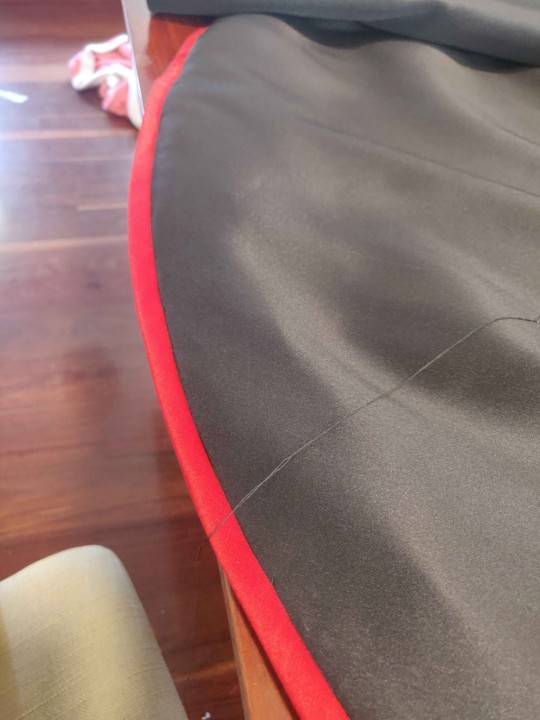
I decided on using duchess satin because obviously Hornet is a princess and deserves nice fabric ♥️ it was quite heavy but I think it ended working out well as the weight gave it some solid structure! I used a crimson satin for the outside, and chose to line it with black satin - that step maaay not have been necessary, but I think it made the overall cosplay look much sleeker and cohesive 😅
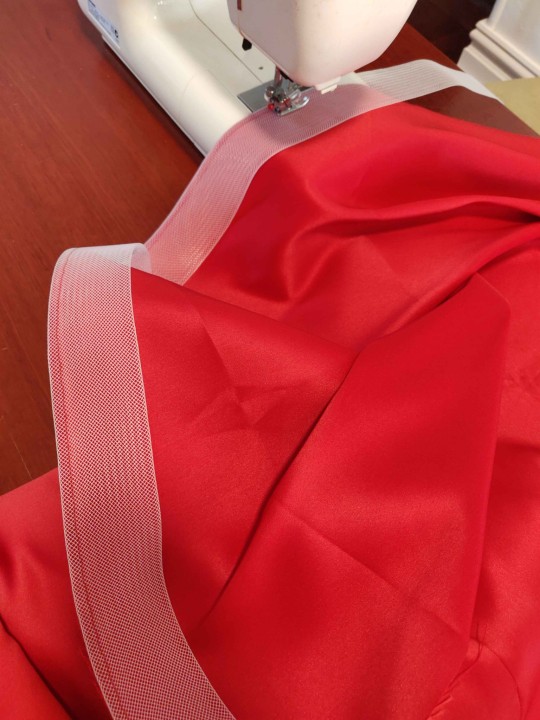
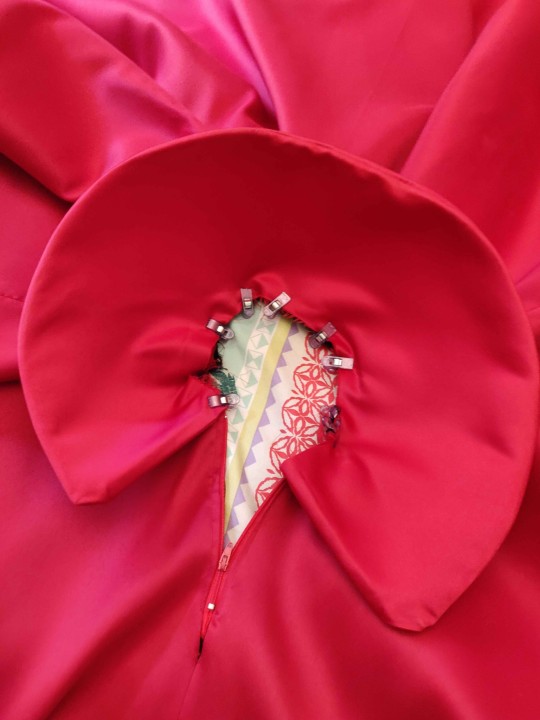
I drafted my pattern with the help of La Modéliste's YouTube tutorial and an online calculator, and got to work! I first cut out my pattern, sewed the pieces together as needed and then attached the horsehair first to the wrong side, and then folded and ironed underneath to give a clean finish. I then spent a solid amount of time hand stitching a catch stitch to keep the horsehair in place... this did take awhile.. orz Then it was time to attach the black lining underneath, for which I hand sewed a ladder stitch ALL the way around, 10/10 do not recommend, took me probably three days straight, but it meant there was NO ugly seam showing on the front!!
Last, but not least, I took some scraps from my crimson satin and attempted few different collar/cone shapes until I found one I was happy with; then used thick interfacing on one side to keep it stiff before sewing at the neck hole and attaching some snaps to keep it closed. I am still terrible at getting crisp corners, so that's something to improve on next time 🥲
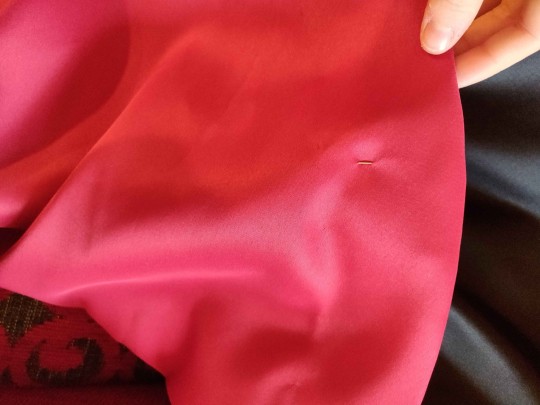
I also accidentally forgot one poor lonely pin and entombed it inside the lining, and had to stage a rescue operation so that it wouldn't stab me at the convention 🫠
16 notes
·
View notes
Text
cleared 15 more floors of side order last night and left the last 5 for tonight (i remembered that i beat octo expansion like a day or 2 before the first splatfest after it--the orange juice one--so i decided i should try to be done in time for this one too)
and i beat it! (some spoilers ahead)
first 2 phases of the final boss weren't so bad, but in the third i died once (from the stingray... i remembered stingers are the number one thing i die from in salmon run so after that whenever i heard it i just RAN. reefsliders also broke my armor once so i learned to be careful of those too)
and since i only have 2 lives i had to play it super safe the rest of the fight. after dying, it literally took me almost 20 minutes for just that one phase (i recorded my playthrough so i know exactly how long it took).
i'd swapped my special for killer wail at a vending machine early on (using dualies btw) so my strategy was just to continue swimming + inking around the perimeter of the stage and then point the wail at it and go back to running. i also had a swim speed up chip and that certainly helped. slowly i wore each of the targets down bit by bit until they were gone (and sometimes ofc if i felt safe enough i'd hurl a splat bomb--i also got those--or go in and shoot at it)
wave 4 was super fun but i let all that power (and the music) go to my head and almost got killed by stingray again (if i didn't have armor i wouldve been dead)
was a little surprised that you only have to clear 30 floors (i guess 40 including the tutorial) considering how quick a lot of them go, i guess the expectation is you'll lose at least one run? (and i guess i did come close to doing that)
it's gonna get harder from here though probably. generally i chose based on which color chips seemed best, so i ended up doing a lot of easier floors (and i quickly learned my dislike of splat zones extends to this version of them too, i barely made it through a couple of normal/hard ones and decided to avoid them for the rest of the run) (tbh they're still better than defending an orb. at least you don't die if they take the zone)
....but i expect i'll probably want to clear all of the floors at least once in the end, just like how i've cleared every octo expansion/rotm stage with every weapon even though that isn't really necessary. so im going to have to go through splat zone hell later. maybe that'll make me better at splat zones though (also i guess the hacks should make that significantly easier. all i had was one extra life and slight damage reduction)
i did do one rigorous floor, acrobatic_triangular.floor, and it was fine. as with a lot of things in this game the trick was to just keep moving
and now that i've finally unlocked inkopolis square i can work on clothing store badges again (having unlocked the gold one in splatsville recently). i added up the amount needed to get everything i didn't have from 1 star to 2 stars and it was well over a million (this was before fresh season added more, too) so i didn't have to worry about potentially not being able to put money towards the jelfonzo badges. but at least now i'll get them sooner
i do still need gold hat/shoe badges from splatsville (i have all the inkopolis plaza ones) so i guess i'll be running back and forth until i have all of those and can focus my purchases entirely on inkopolis square shops
anyway splatfest for the next couple days so i guess i won't be doing anything in side order until at least after that. i do have several days off in a row though. also i gotta do my taxes. also i gotta get up for work in like 3 hours goodnight
3 notes
·
View notes
Note
Hi!! i hope you're having a wonderful day <3
for the ask game, 13- any advice for beginners? ty!
hello you too!! here goes some tips ive gathered over the years
be organized from the get go, otherwise you'll find yourself cleaning code before releasing something that you can't even understand yourself. some examples of what i do is: write the css in the same order you wrote the html, use comments as much as you can, name classes something easy to understand (ex. if you have an element thats the block of text in an about, name it something like #about-text)
you can always look at other's peoples code to figure out how to do something. there might be a grey line between getting inspiration from and stealing code, and the best course of action is to ask the original maker about it
back up as often as you can, if what im coding is complex/has a lot of code in general i usually back up codes every couple of hours, and most importantly: right after youve solved a problem
kind of obvious but google will be your best friend, even when you're good with code you'll always need help and google will give you a solution around 99.9% of the time
always add credit for outside resources cannot stress how important this is
make your codes resposive, might be a hassle at first but this is crucial. your codes should be usable across all browers and screen sizes to the best of your ability
foolproof your codes, have in mind once you release something, people are going to do whatever they want to do with it, for example: if there's an element that has a lot of text, make sure it still works and looks good whether the user is writing one word or a full block of text. it can be hard but you need to make sure that, when people customize the code, whatever they decide to add/modify wont break the code
write instructions to your code if necessary i suck at this one but it's still good pratice to explain how to do something in your code, or at least link to a tutorial that explains it
gather resources! bookmark everything and anything that you might want to use in the future
have a working base code if youre using your own base code, make sure its up to date. you can also have different base codes depending on what you need (ex. have a base code exclusively for when you'll use isotope filter, etc)
thats all i can think of right now but hope that helps!
7 notes
·
View notes
Text
The Executioner
Something in Bloodborne worth examining closely if you’re into game design is an optional enemy hidden away in an alley fairly near where you start. It doesn’t have some excellent drop, as far as I know, and being as I’ve killed it once it certainly doesn’t have an excellent guaranteed drop.
It’s also unreasonably strong. It has one grab that will straight-up one-shot you if it’s an early encounter. Most of its other moves will take half your health or more.
So why is it there? As a troll? Well, no (at least, not exclusively. There’s enough troll content in Bloodborne - lookin’ at you, jumpscare villager #57 - that we can’t say that wasn’t a factor, but there’s an obvious better purpose). It’s there as an opt-in tutorial, and it’s one of the best out there. Once you have the ladder nearby there are functionally no consequences to fighting this thing. You can just die, slide down the ladder, run past or kill one crazed villager, and hop into the rematch as many times as it takes. If you decide you don’t like it, you can walk out of the alley and it won’t chase you. Conversely once you’re in there you won’t have to deal with extra villagers wandering in - without the fancy boss mist it is very much set up as a duel. Furthermore if you decide you don’t want to mess with it...that’s fine. It is not strictly necessary to anything. But if someone responded to complaints about the difficulty of the game with “git gud” and you felt that was horrible advice because it doesn’t say how? The executioner is how. This is your training partner to get a handle on weapon range, attack timing, dodge timing, and the practice of learning enemy movesets. The executioner is unreasonably strong but not unreasonably fast, and as you dodge around it you start to internalize the tells and work out which of its attacks are followed by big openings for your own counterattacks. It’s in a fairly claustrophobic space, big enough for dodging but not for kiting, and it’s got some clevely placed coffins and carriages to make cheesing the monster by attacking it from beyond its aggro range difficult if not impossible. It also blocks, and unlike the “shield and torch” villagers, it’s a real threat all by itself if you attack into its block and get thrown off-balance.
The full package is pretty amazing. In one tucked-away alley is a tutorial that
Teaches you how to learn enemy movesets and figure out timing
Sets the grim tone for the game
Clarifies the importance of dodging over attempting to bull through and take hits
Lets you know the game is dangerous and includes challenges that have no reward besides the enjoyment of overcoming them
Teaches that some deadly enemies may just be worth leaving alone
If you’re on your first playthrough, beat this creature. Beat it before your first boss fight. I know I just said it’s not strictly necessary. But like many action games the amount your character levels up is nowhere near as valuable as the amount you level up. The items you find around Yarnham are how your character levels up. Fighting the executioner is how you level up.
7 notes
·
View notes
Text
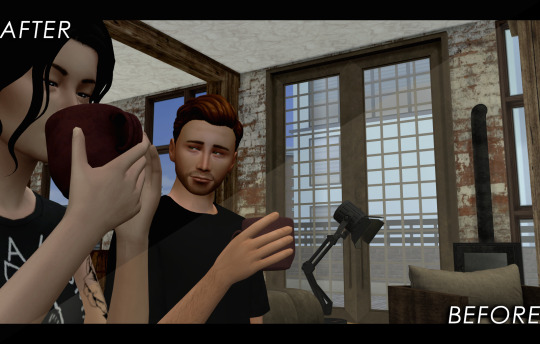
EDITING BOOTCAMP: WARWICKROYALS EDITING PROCESS
So, about five hundred years ago (or somewhere in that ballpark), an anon kindly asked me to share my editing process. It's been a long time coming because I've recently stopped using Pixlr (a free online photo editing program) and have moved on to 2020 Photoshop. I really recommend using Photoshop, it might be confusing or overwhelming at first, but I think it's worth it and ultimately it cuts your editing time in half once you get the hang of things. However, you can still use this tutorial if you're using GIMP, PIXLR, or whatever else. So, let's get into it (YUH)!
STEP 1 | ASPECT RATIO & SIZING
Alrighty, so what we have here is what I call a "raw screenshot." After playing around with multiple versions of ReShade and countless presets, I have come to the conclusion that I hate it. It makes my game slower, switching between filters is a pain and they just get in the way. But this is just my opinion, there are some very pretty ReShade filters out there, I just don't think they're necessary for a pretty screenshot.
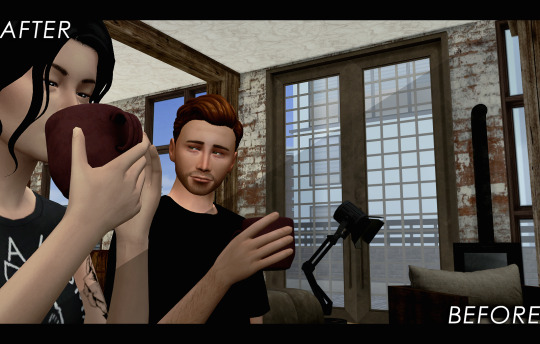
When I load up my screenshots they are almost totally vanilla. I do use Luumia's NoGlo and NoBlu mods, but that's about it. I do not resize my screenshots at all, they are 1600x900 by default. However, one of the first things I do is add an aspect ratio (those two black bars you see at the top and bottom of the image) to give it a more "cinematic" feel.
I do this by adding a background layer and resizing the width from 900 to 1020. With the untouched screenshot in the centre, there should be two bars above and beneath it that are 60 px wide. I then colour the background layer black with the paint bucket tool. BOOM. Aspect ratio. Technically my edited posts are 1600x1020 when edited, but the screenshot remains 1600x900.
STEP 2 | PSD/PHOTOSHOP ACTIONS
The next step is for me to add my PSD. Think of it as your own personalized filter that changes how your screenshots will look. What your PSD does to your images is really just based on personal taste. For me, I love a rich screenshot with lots of contrast and strong blacks and more dramatic shadows. So, that's what my PSD does!
Your own PSD might look totally different for you. Maybe you what a lot of brightness, with warmer undertones, and lots of bloom. It's totally up to you! I recommend you play around with Photoshop's setting until you find an aesthetic that suits your own taste.
You can also download some Sims 4 PSDs and Photoshop actions from other creators. I really recommend those from @/intravertt here on Tumblr. They make ReShade presets, PSDs, and have a variety of other resources that are stunning.
Here's what my PSD looks like.
STEP 3 | SHADOWS AND HIGHLIGHTS, BRIGHTNESS, AND SHARPNESS
After adding my PSD I do some further edits to change how my screenshot looks. Because the shadows are so overwhelming, I add some highlights and might tweak with the exposure just to make sure nothing is too dark/under-exposed. I sometimes draw in some light shadows, but this is quite time-consuming so I don't most of the time. I also add a bit of sharpness to make certain details stick out some more. If the screenshot is taken outside, I will add some vibrance just to regain some warmth and make it look like my characters are in the sun.
Like PSD what you chose to edit, and how, it 100% up to you and what you what to achieve from your screenshots. I again recommend playing around with different settings to find something that works for you.
STEP 4 | ADDING TEXT
I recommend a text size of at least 35 pt. My texts are also bolded, outlined, and have a drop shadow, just so that it's easier to read for some people. Text tends to blend into the background and it's super annoying, so those elements help a lot. I also recommend using a sans serif font (ironic, I know, but I'm using a serif font exclusively for this arc for a reason, I swear). Also, make sure that the spacing is all good so the text isn't jumbled or crammed together. If your posts are word-y like mine (lol) you might feel the need to lower the spacing, just don't go crazy with it.
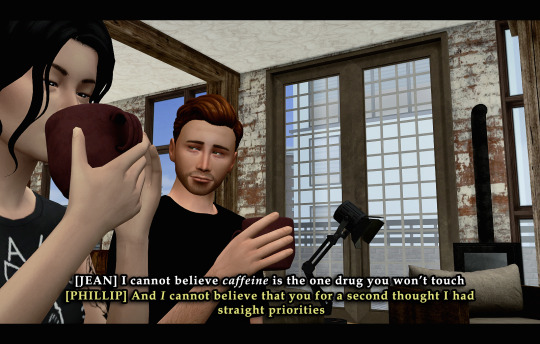
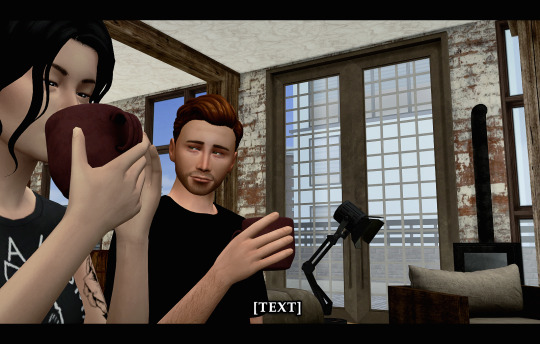
My text is centre justified. I write the name of the character who is speaking only once before their first line [LIKE THIS]. I start a new paragraph each time a new character starts speaking. To tell characters apart I assign different colours to each character, based on the order they are speaking in. The first character to speak is white, the second is yellow, the third is blue, etc. I recommend having some colour variation between characters' dialogue. Even if you have the name of who is speaking before each line, text of the same colour blends together easily.
Fun fact, I also often don't close off my paragraphs with a period or any punctuation (unless it's an exclamation point). Screw grammar, I just prefer it that way.
Here are some of the fonts I recommend, both serif and sans-serif:
Arial
Garamond
Century gothic
Book Antiqua
Josefin Sans
Perpetua Titling MT (this is the font I use in my banner)
Alte Haas Grotesk (My main sans serif font)
Can you tell I'm a author?
My loser ass legit has a list of favourite fonts
STEP 5 | BLUR/OVERLAYS/FINISHING TOUCHES
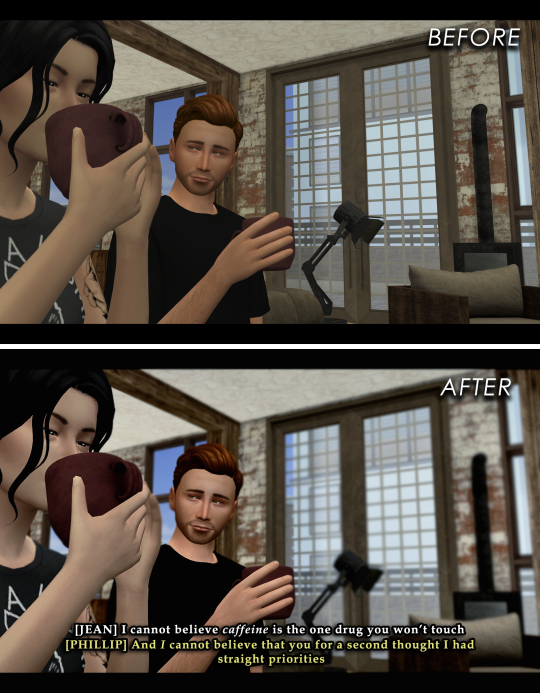
Adding blur to my posts is something I've just started doing at I don't know why. It's a great way to focus on certain objects/people and put things into perspective! It doesn't have to be a lot, but it does wonders. I just use a brush tool to go over the areas I want blurred. However, there are other faster ways to do this for sure such as cutting out and blurring the area you want out of focus separately.

If there are any clipping issues, like skin poking through clothing, I will go in with a tiny brush tool and paint over the skin with the same colour as the clothing's fabric. Sim's joints always look strange and jagged when bent (like the skin clips around a sim's bent elbow or leg, so annoying) so I'll often go in with the smudge tool with very little strength/hardness in order to remove that
Sometimes my posts have lens flares or little dust particles. These are just simple overlays I add with a layer mask + reduced opacity. You can find overlays like that easily online and maybe I'll make a post about how exactly I use them but we're DONE 'N' DUSTED for now. I hope this tutorial is useful for someone. This was fun! I'm totally down to do more in the future.
32 notes
·
View notes
Note
I wanna start making music but I have no idea where to even start. I've never fully learned an instrument before or used like any kind of audio software really. Do you have any tips for getting started??
Here are some tips and hopefully I don't get too long winded with this lol
Playing an instrument is not necessary to make music, though I would highly recommend learning how to play one as it can usually be a great reference point if you're ever working with other instruments. For instance, I started out playing guitar, and was able to translate that skill to bass and to a lesser extent keyboard. Sweetwater is a good site that has listings for some pretty cheap starter instruments. Reverb is another that sells used stuff.
If you get an instrument, make sure you buy something cheap. Not because you shouldn't expect yourself to keep going with it, but because sinking a bunch of money into something is just going to put extra pressure on you to learn it, and the last thing you need when learning to make music is pressure.
If you can't afford an instrument you can still make music with a digital audio workstation, commonly referred to as DAW. Ableton is one of the biggest ones out there. it's very user friendly, has lots of documentation and plenty of tutorials on youtube. Reaper is rather barebones DAW and has a somewhat steep learning curve but it's got a really long trial and a really cheap license and it's highly modular. It also has tons of tutorials and documentation. Couple others I can think of are FL Studio, Cubase. You'll want to look around and see what looks appealing to use.
If you do end up learning an instrument, there are plenty of places online and on youtube that can give you scales and whatnot to practice.
You're probably gonna start out making stuff that sounds kinda wonky. It will sound really off and it'll take a while to pick up on why. You need to be comfortable with this because literally everyone goes through this.
Don't compare your progress of learning and making stuff with other people. Music is not a race nor a competition.
The last tip I have might be kind of a ramble, but I've been teaching myself to play and write music for the past 16 years and the most important thing anyone should know when they start learning music is that there is no wrong way to learn.
A lot of people start out learning chords/scales, and things about theory, but I always hated the idea of learning that way. The way I kept myself going was to really hone in on what kind of music I liked the most, and how can I imitate it. And I don't mean perfectly imitate either, I mean at least just match the notes I'm playing/writing to the notes of the music I like the most.
When I first picked up a guitar I was obsessed with Green Day, so what I started doing to learn guitar was match the notes on my guitar to whatever I heard in the song. For the first 3-4 months I only played on one string, just sliding one finger up and down. And most of the time I'd just be playing the bass line or something, but through that I eventually figured out what a bar chord is, what it sounds like, how to do it, and just kept moving up from there. Not only was I learning, I was also kept entertained by getting to listen to my favorite music.
Years later, I still do that (on more than one string and finger now) and I'm able to play and write for multiple instruments. And that's not me trying to flex, that's just saying that you can start literally anywhere doing anything. Don't worry about efficiency, don't worry about being perfect, don't worry about getting something out there for everyone to hear as soon as possible. It's cliche as fuck but really, you just gotta enjoy yourself with it. Hope this helps <3
24 notes
·
View notes
Text
How to edit and color manga-caps
This is a tutorial on how I personally color and edit manga caps in photoshop. I’ve done my best to explain my editing and coloring process but English isn’t my native language so please excuse any grammatical errors! Anyway, let’s get started💛
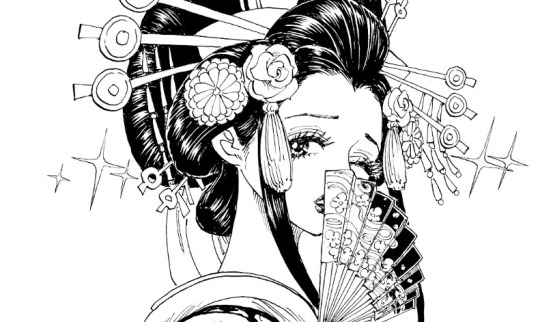
Clean-up
First of all you need a clean manga cap to work with. Start by erasing the parts of the image that you don’t want to keep and redraw parts if necessary. In this case I erased the speech bubble and redrew parts of the sparkles surrounding Komurasaki. Try to stay consistent with the artists original style If you redraw parts of the image as it will be very noticeable if you’ve strayed too far from the original style. I recommend that you study the line width especially and try to emulate that!
Then level the image as seen in this tutorial by @aldiwali, by leveling the image you erase some of those grainy dots surrounding the line-art. I’ve also found that it helps darken the line art! When you are done with clean-up separate the line art from the background. I’ve already made an in-depth tutorial how to do that (and erase more of those grainy dots) so I’ll link that here: X.
Once you’ve cleaned your manga cap and separated the line art from the background you can start putting down your base colors and flats!
Coloring process
Start with a simple base color for the skin, I usually go for #9e7e7d as that will give the skin a nice warm tone once your done! Then make a copy of your base layer. Go to your copy of your base layer, right click and create clipping mask and color it with something more akin to an actual skin tone. Combine the clipping mask and the copy of your base layer, then lower the opacity to your liking, I usually go for around 85% opacity.
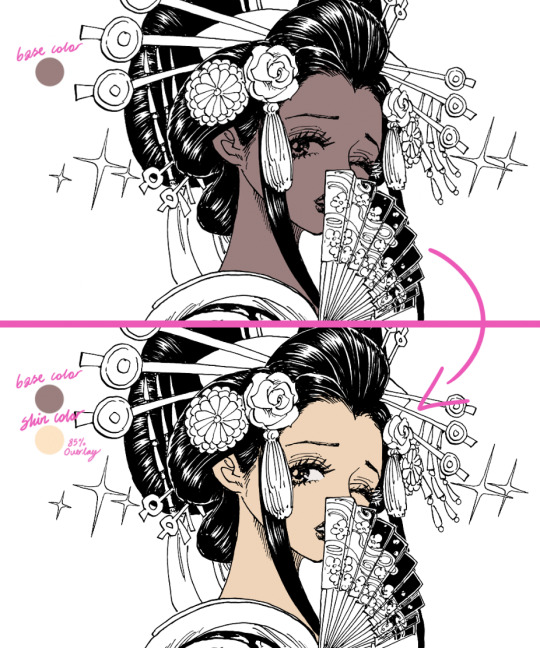
This step is very unnecessary and you don’t need to actually do this (just a normal skin-tone as a base) but I do it out of habit. If you look at some of my older stuff it’s way more noticeable (see example down below).

If you use this method please be aware of that it does tend to lighten colors so I don’t recommend that you use this method for when you’re using darker colors.
BONUS TIP for when you’re coloring: Make a color palette! I try to keep track of what colors I use for different characters but it’s easy to get a bit lost so I actually made a little color palette as a reference for myself. That way I can easily keep track of what colors I like to use for a base and for shading.
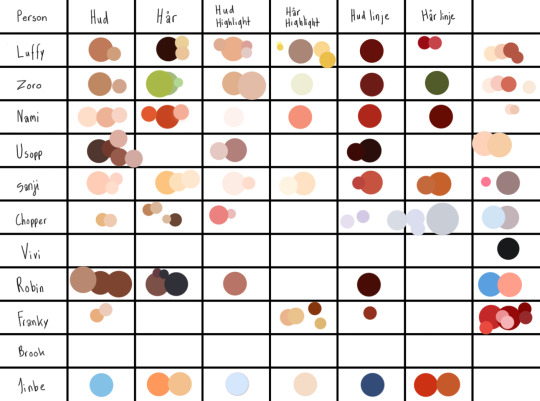
Anyways.... back to the actual tutorial! Time to color the rest of the image! Try to get some good reference pictures of the character/characters (preferably something that was colored by the actual artist) if you’re going for canon colors. I usually play around with hues for a bit before I’m happy with results! For example I gave Komurasakis red dress more of a purple/pink undertone to make it work better with her fan and the flowers in her hair.

Try to divide your colors into different layers to make the shading process easier but don’t make to many separate layers as that can get a bit confusing! I try to divide my layer based on color and placement!
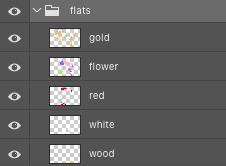
If you’re not using a reference for what colors you’re going to use I recommend that you at least follow a color scheme. Try to find colors that work with each other but still contrast each other. A lot of people will be looking at your graphics trough their phone and a lot of details will be lost so by making your colors contrast each other you keep some of clarity! I’m not saying that you shouldn’t use colors that are very similar but you should keep the format which your graphics will be looked at in mind.
Anyways now that we’ve colored everything we need to add color to the parts of the line-art that aren’t supposed be black, in this case we need to add color to the hair, lips, fan and dress. Go to your line-art layer, right click, make a clipping mask and then you can color the line-art. Your layers should look similar to this:

Make a base which you can work off later as seen below.
I usually color everything first and then I refine the outlines with the help of the eraser. Try to keep the width of the outline consistent with the rest of the line-art, otherwise it won’t be as seamless. (I did’t outline her hairline as it’s very “feathered” and I wanted to keep that feeling, but I usually outline the hairline too)
You don’t have to separate each color into its own clipping mask as that isn’t going to make any difference when you shade everything later. Now time to add the line-art to the hair!
Line-art
I do recommend using some sort of drawing tablet to make your new line-art. It’s not that isn’t possible to do it without one but it’s a bit tedious to it with a mouse or touchpad.
If you use a drawing tablet use a brush that allows you to control the stroke weight of the brush. I usually go for one of the default brushes but I’m sure that there are a tons of fun brushes out there to play with!
Create another layer just above your manga-cap, this is where we’ll draw the new line-art! Try to follow the “flow” of the original line-art. In this case it’s fairly easy for me to see where line-art would fit naturally thanks to the way Oda choose to illustrate the “shine” on Komurasakis hair!

Look at the area that I’ve encircled, it’s easy to imagine that that’s where Oda would have chosen to add the line-art if he hadn’t colored the hair black. If you can’t find any of these spots try to find a few references for how the original artist does the line-art when it’s in full color. For example I used the cover of volume 92 to get a feeling of how I wanted my line-art to look.

Basically try to find what makes the original artists line-art distinct and copy that for your own line-art!
After I’m done with my line-art I go back to the black base and fill in some of the empty spaces that were left by the artist for clarity. Like the gap between the line-art and the deep purple parts of the her fan. When your happy with your base and line-art you can start shading!
Shading
(Before I start shading I generally color in all the stuff I left out like her eyes, makeup and the shine on her hair. I also decided to outline her eyebrows.)
Let’s start with shading the flats! Add a clipping mask to your layer and set the layer style to multiply. The amount of layers I use differ from color to color but I tend to stick between two our four layers of shading. When you’re shading use a color that is soft but with enough contrast to your base so it doesn’t blend into it. I generally use a color with a warmer tone to shade but the you can play around with colors and tones to add different effects.

Create a clipping mask and set the layer style to overlay or soft light to highlight certain areas with a lighter color. I tend to play around a bit with the opacity before I’m happy the results. When you’re finished with shading the flats you can start shading the base!
It’s basically the same thought process as before, just add a clipping mask your base layer and set to multiply! Your layers should look like this:

And that’s it! We’ve shaded everything and we’re basically done! There’s just a few more minor things to do.
Details / Coloring the line-art
I like coloring the line-art as it gives the graphic some extra color. To add color to your line-art just do as we did before. Make a clipping mask and color the lines, simple as that! Try to use colors that are dark enough that the line-art isn’t lost.

I did some finale clean-up, colored the sparkles surrounding Komurasaki, added som motion filters to that, fixed the background and that’s that! We’re done! That’s how I edit and color manga-caps! I hope this helps! I might have gotten lost on a few tangents so please feel free to ask questions if you need clarification on anything💛
#gahhhh I hope I spelled everything right#anyways I hope you guys enjoy this#this isnt the only way to color#and edit manga caps its just the way I do it!!! and im not a professional or anything I simply do this because it's fun!#tutorial#coloring tutorial#coloring#manga coloring#manga#one piece#op#shonen jump#opgraphics
639 notes
·
View notes
Photo

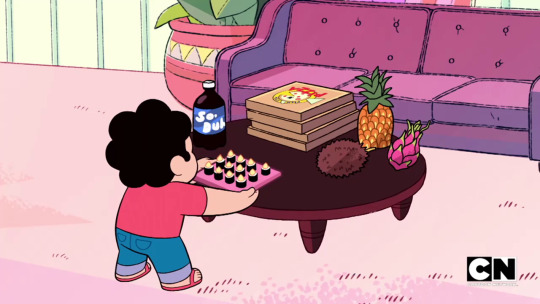


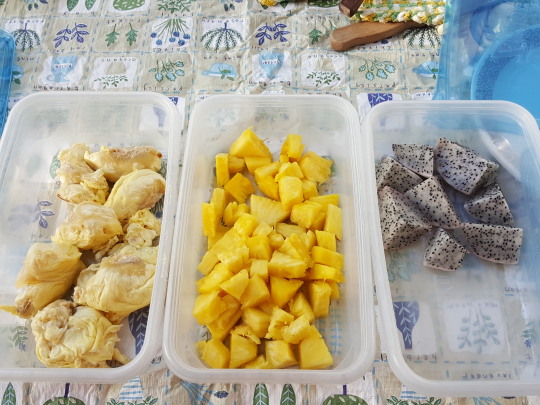
Very Cool Potluck
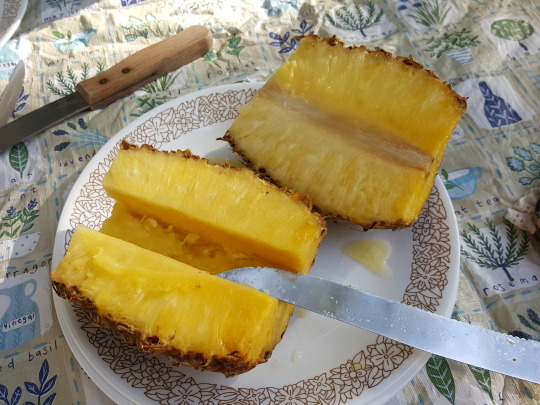
Did you know that some people are so dedicated to reproducing Steven Universe recipes that they’ll both put cheese puffs in their sushi AND willingly bring durian into their homes?
I will teach you the basics of how to prepare the Cool Kids’ Potluck and also tell you the story of how I got food poisoning.
(Sorry, Lars’ ube roll is not included, because it didn’t make it to the potluck. It is available as a separate recipe, of course.)
See more SU food tutorials!
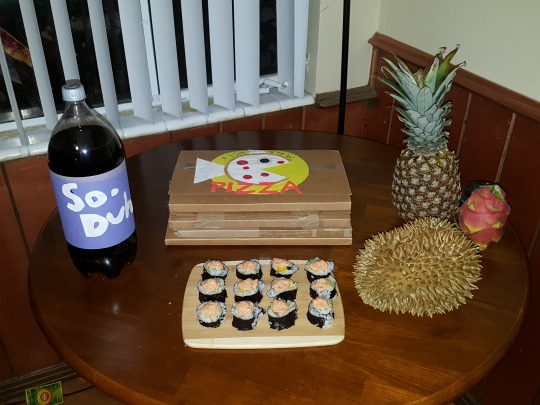
I decided it was time to do the Cool Kids' POTLUCK!

STEVEN: (holds up Snack Sushi) "Who's feelin' lucky?"
SOUR CREAM: "I brought the soda."
JENNY: "I brought the pizza."
BUCK: "I brought the assorted fruit."
And Sadie brought paper plates to complete the set. Too bad Lars's Ube Roll couldn't join them!
Okay, so we have a four-part meal. Most complicated of course is the sushi! We can assume it is Snack Sushi, which I have made before but didn't really give instructions. Steven explains pretty well but doesn't give you a sushi rice recipe. How about I just tackle this here and show you how?
Recipe 1: SNACK SUSHI
Ingredients:
11 1/2 ounces sushi rice
1 1/2 cups cold water
4 tablespoons rice vinegar
3 tablespoons sugar
1 teaspoon salt
1 package nori (seaweed sheets)
1 avocado
1 bag cheese puffs
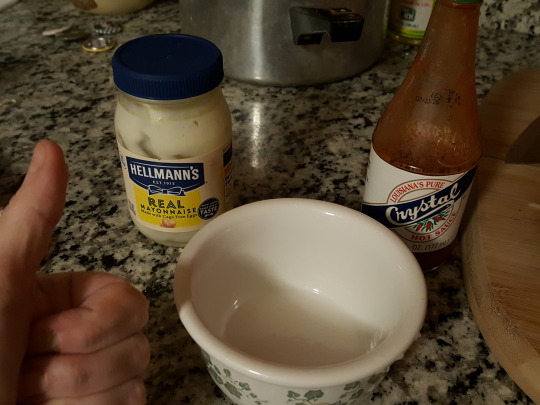
Mayonnaise
Hot sauce

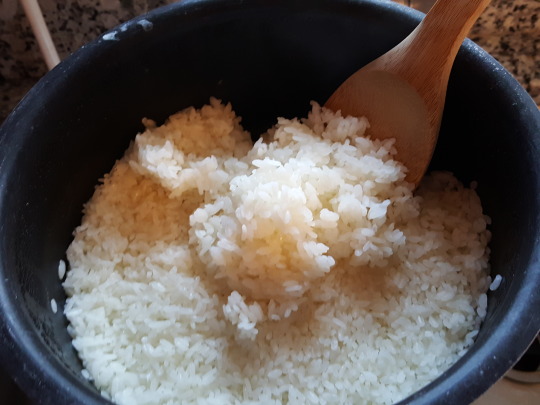
First, sushi rice is made a special way. I am no expert, but the way I do it has worked fine for sushi in the past. First you measure out your 11.5 ounces of rice and put it in a sieve, then wash thoroughly with tap water.


Put it in the pan you will cook it in, pour the 1.5 cups of cold water on, and let sit WITHOUT COOKING for 30 minutes.

When the soak time is up, turn on high and boil. As soon as it hits boil, turn to low, cover, and cook 15 minutes. Then turn off the heat and let steam in the pan for 10 more minutes. You now have fluffable, tasty, sticky steamed rice!

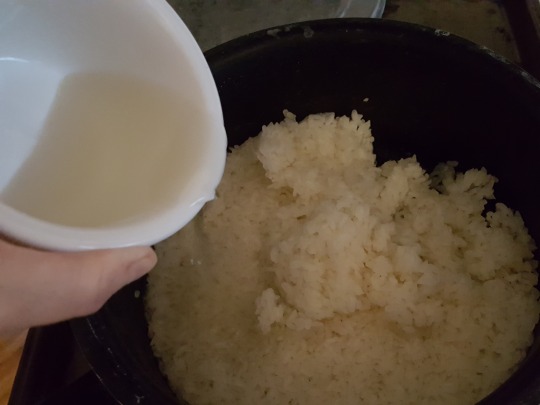
Next, make your vinegar concoction. Combine the vinegar, the sugar, and the salt in a small dish. Microwave it to dissolve the sugar. I did this in a few 20-second bursts. It smells strongly but I love that smell. Make sure when you stir it, there's no sugar on the bottom! It must be dissolved.

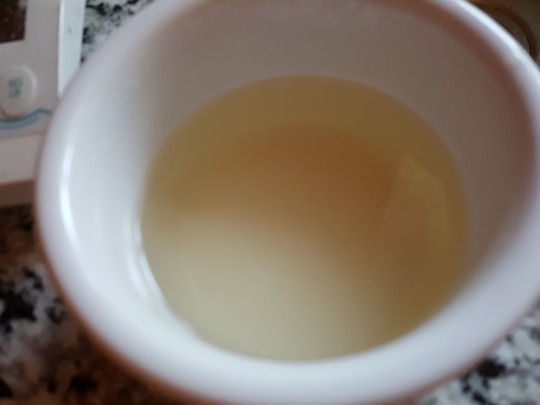
Pour the concoction over the hot rice and stir it in. You are ready to work with it!

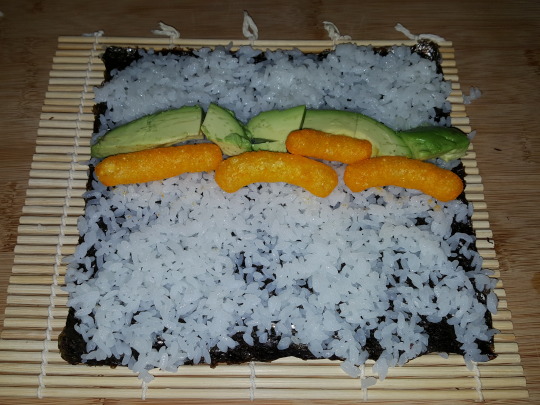
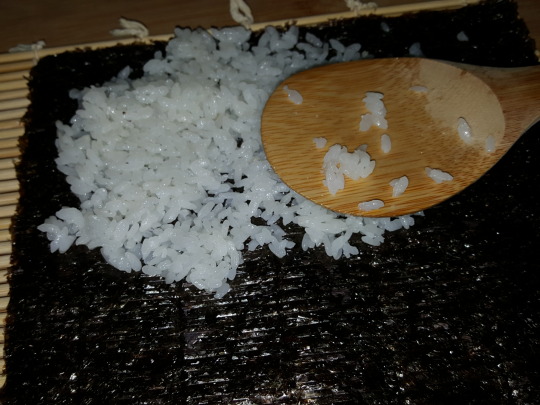
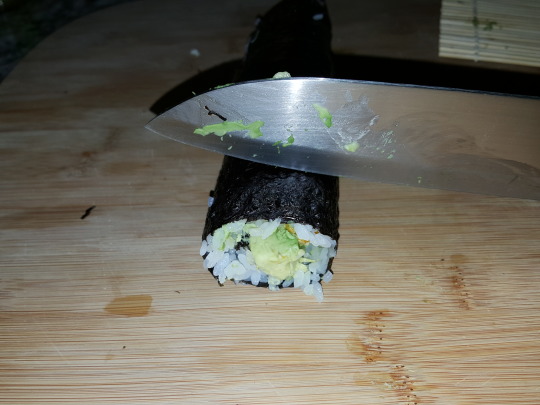
From there, it is as Steven shows us in "Cooking With Lion."
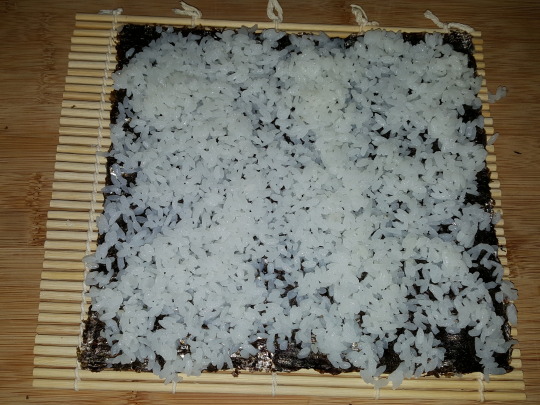
• Put nori on a rolling mat, rough side up
• Spread sushi rice on the nori thinly
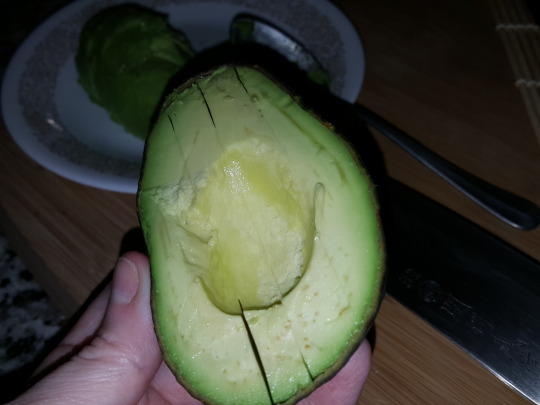
• Halve the avocado, remove pit, cut in slices and rub a spoon around the avocado flesh to dislodge it
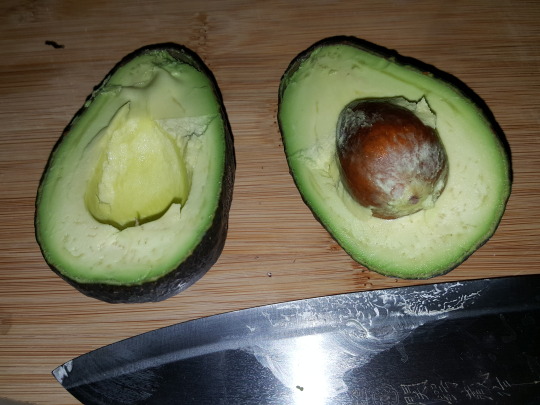
• Place the avocado slices in a line on the rice

• Place a line of cheese puffs in a line next to the avocado
• Roll compactly, tucking as necessary to get it into roll shape

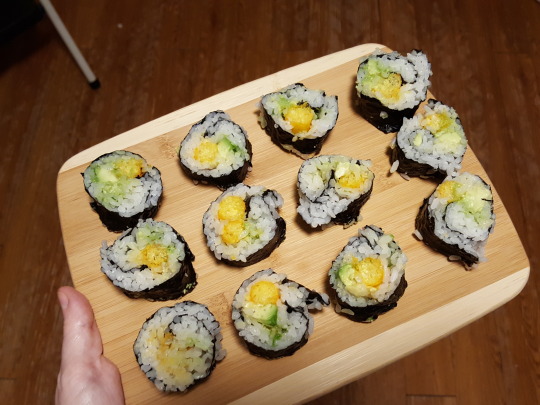
• Cut!
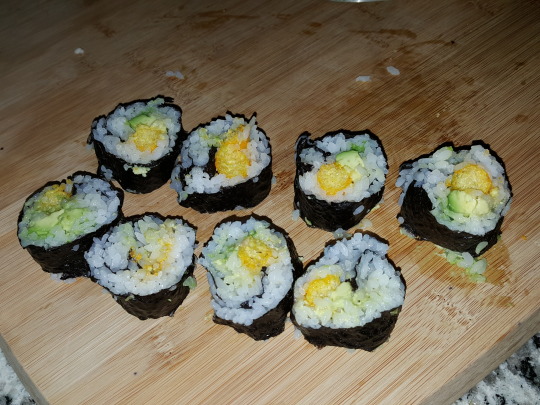
You'll also need to make "spicy mayo" for the garnish. Steven uses hot sauce and mayonnaise. Mix together and squirt neatly onto the top of each roll.

"Who's feelin' lucky?!"

And that's the recipe!
Tip:
Use rice shortly after cooking. Refrigerate it if you will not be eating it soon after. Guess who got food poisoning from eating old rice because of this? CAN YOU GUESS?? 🤢
Recipe 2: PIZZA
So I've made pizza from scratch half a dozen times already for this show. I'm not gonna do it again. (Here's my personal Fish Stew Pizza recipe.)
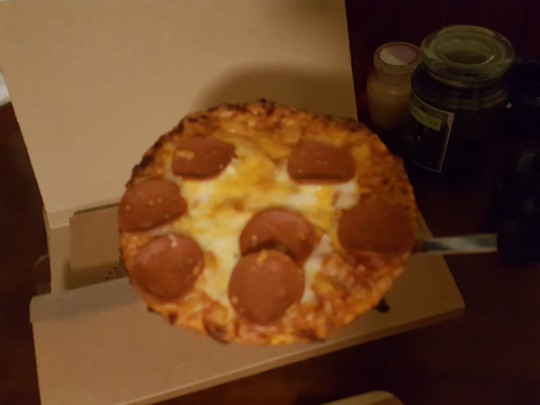
Jenny simply brings pizza from work! So I decided to go the easy route and purchase a commercial pizza this time.

We never actually see the pizza eaten. I will assume it's the default pepperoni pizza and add veggie pepperoni to mine.
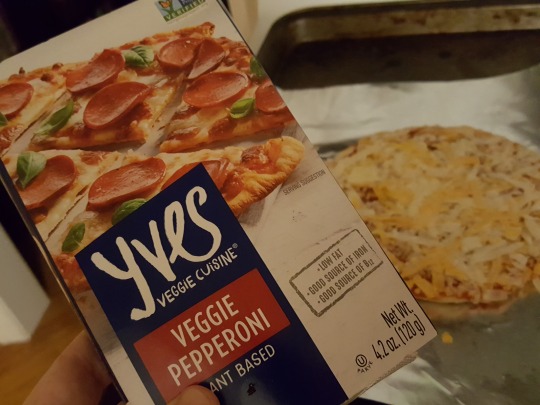

Baking in the oven per box directions as I figure out pizza boxes!!
Jenny's got four dang boxes of pizza on that table. I'm sorry, but I will not be preparing four pizzas. I live by myself and am not actually having a real potluck here. I will use comic book boxes to provide the illusion of many pizzas even though I am only cooking one. Shhhhh.
I actually used paper cutouts and markers to design my own Fish Stew Pizza box!!

Done! Next!

Recipe 3: SODA
Another recipe where I don't really make anything. I am just dressing up a bottle of Diet Coke.
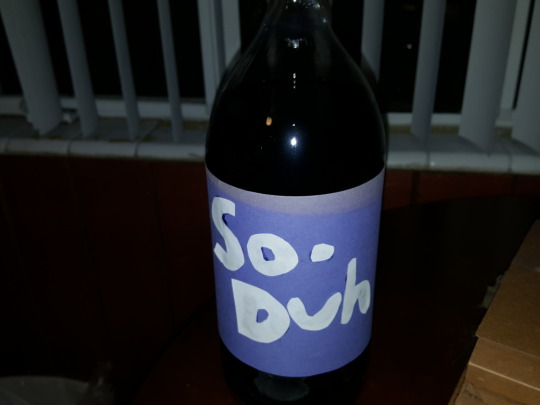
But at least I made it look like the soda Sour Cream brought (termed "So-Duh").
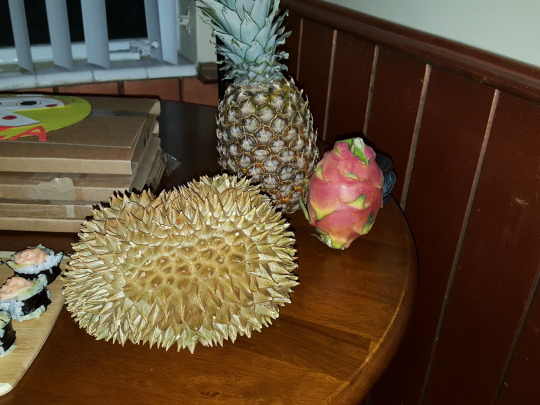
Recipe 4: ASSORTED FRUIT
Oh god.
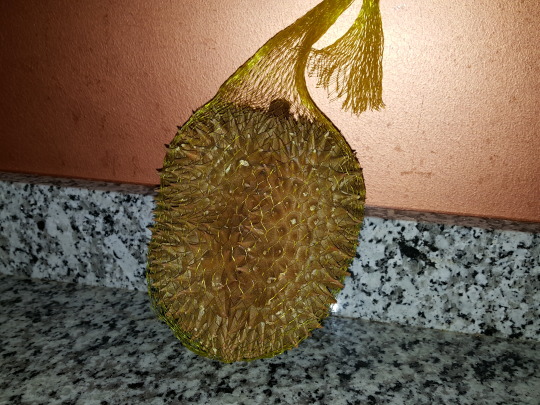
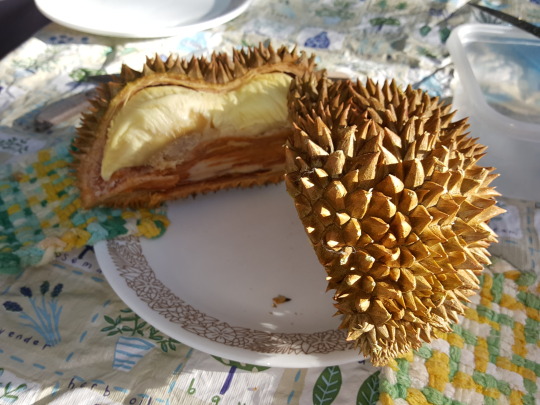
Buck, you clown. 🤡🤡 You went and bought various pokey-skinned fruits and forced me to BRING A DURIAN INTO MY HOME.
Folks, do you have any idea what durian is?
Let's just say it's known as the King of Fruits and it is SMELLY. You can't look up anything about durian online without related news stories discussing areas where durian is BANNED, neighbors complaining if you bring durian home, and tips on getting the smell off your hands and out of your breath.
I've bought frozen durian before to make Durian Juice Boxes. It was bad enough frozen. But then I had to go buy a FRESH STANK MACHINE at the Asian Market.
The things I do for this friggin show
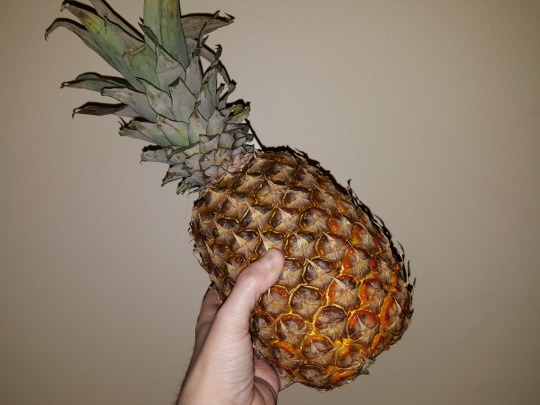
So we have pineapple.
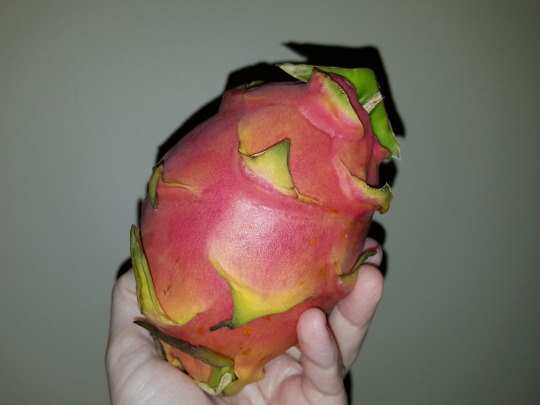
We have dragonfruit.
And we have &%#!%@ durian.
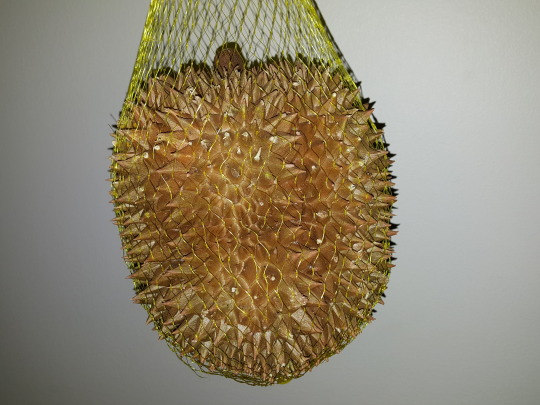
Durian! People! Do you have any idea what my house smells like!!! And they put it in a bag like that because you can't pick it up without GETTING STABBED! god what am i doing
Anyway.
There, you happy?
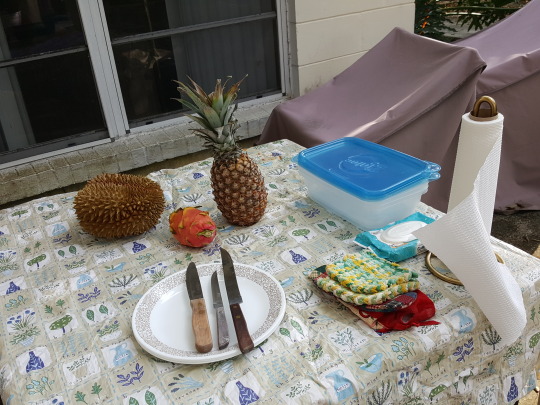
Here is my beautiful POTLUCK.
Add paper plates because Sadie brought them and now Sour Cream is thrilled he doesn't have to do the dishes.


Also, I'm sure it wouldn't be all that much fun if you didn't get a quick lesson on how to eat the weird fruits, even though the Cool Kids did not cut into them. Right?
So after I recovered from food poisoning from that rice, I put down a plastic tablecloth on my outdoor porch table, gathered an assortment of knives and plates, grabbed some gloves, and prepared these fruits for eating.
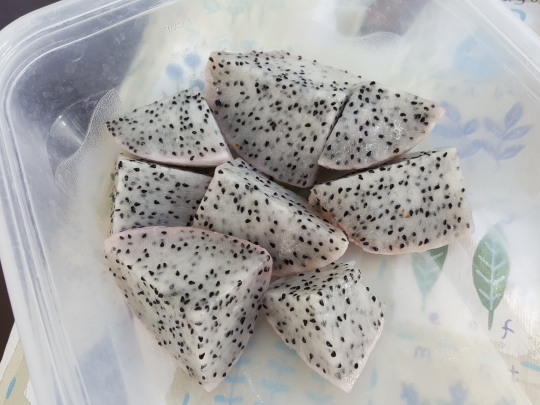
Dragonfruit:
Cut in half. Cut further in quarters and eighths. Peel the fruit out of the husk and store.

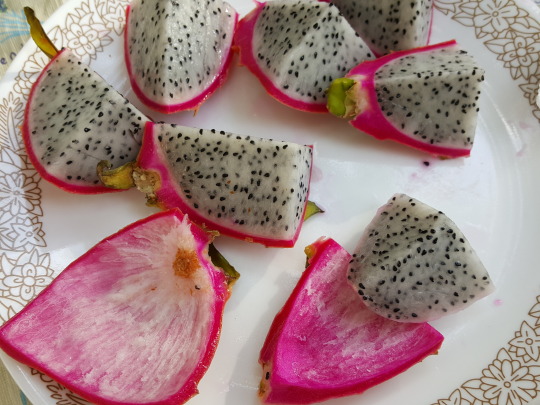
Verdict: I don't like dragonfruit. It tasted like weird, hurty watery kiwi. Maybe you should know I'm allergic to kiwi. This is probably related. I shouldn't eat this.
Pineapple:
Cut the top and bottom off and discard (including the bush at the top). Slice the remainder completely in half. Cut the core out--you shouldn't eat it. Then slice each half and slice again into manageable strips. Cut lines in the fruit and cut them off into a storage container.


Verdict: I am allergic to pineapple so I didn't try it, but it smelled amazing. I saved it for my friend.
Durian:
All right, stank fruit, here we go.
Cut the stem off and flip the durian to stand on the top where you cut the stem off. Use pot holders to manipulate because otherwise IT WILL CUT YOU. Examine the durian's shape and see if you can figure out based on its bulges where the huge scary pods are inside. Make a cut through the very tough husk and pull it apart with your hands.

Pods will emerge. They are soft and delicate, so if you hold them too hard they'll break. Each contains HUGE seeds. Take the seeds out before eating. Go around the rest of the durian and get all the pods out. It's a scavenger hunt! Store.
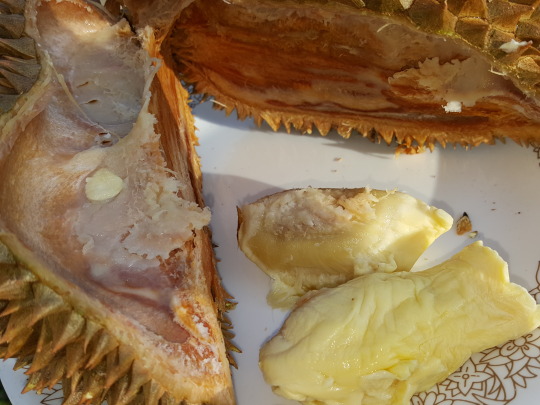

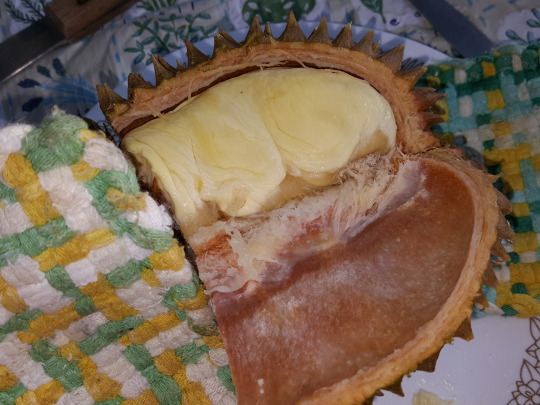

Verdict: The smell is literally not any worse when you open it. It is a very thick, pervasive smell but to me it didn't smell like a rotting corpse or poop or anything.
But then I ate a little bit and the aftertaste was really dark and musty. Dip a butt in tropical fruit syrup. It was pretty vile. I swallowed it though, and my mouth was Very Unhappy. I do not like durian.
I guess I'm 0 for 3. My sushi made me sick because I left the rice out for hours, I can't eat any of my fruit, and I reused the pizza to make a damn Pizza Steve.
But at least my life is interesting while it's being a disaster, huh?
At least I can still drink my So-Duh.
See more SU food tutorials!
82 notes
·
View notes
Text

Anon said: Would you draw SukuFushi? (Sukuna x Fushiguro)
maybe? *thinking face* if I ever got an idea for it, why not. I find sukuna’s obsession with fushiguro entertaining so I don’t count fanarts for it as impossible haha
Anon said: I looked and I couldn't find if you've answered this already, so apologies if you did, but how do you draw your faces? I always struggle with face shape and yours are always super good with really expressive features! Anyway, thanks so much I love your art <3
HMMMMMMMM how do I do that indeed, the basics are honestly what you’d find on any basic tutorial about drawing a face (circle, cross in the middle of it, build the face around that - I really still can’t avoid that step and probably never will). As for the expressions, to be honest with you my way of going about them is thinking them up in emoji/kaomoji form first and then go from there. Emojis and kaomojis have to simplify expressions to the max since it’s such a simple format, right? But they’re still super expressive and convey exactly what they’re trying to say with one single glance, so using them as some kind of reference sheet has helped me a lot in figuring out what’s essential to express what I’m trying to say - still working on it though! I’m rarely satisfied with my expressions, they really do make or break a drawing don’t they............ you never stop learning, I guess!
Anon said: Ahhhhhhh I just spent like hrs scrolling thru ur oc tag and they’re all amazing I love them so much but I keep confusing the everloving SHIT out of myself cuz I too have a child who is Leo and he’s literally so different from ur Leo lol. Anyway tho ur art is amazing and it honestly just makes me so happy so ty and hope have a good day!!
OHHHHHHHHHHHH MY LEO! It’d been forever since I’ve last drawn him, I kind of miss him............... glad you like my stuff, by the way! Especially about you liking my ocs, that means the world to me!
Anon said: hi there !!! i was wondering if i had ur permission to ur ur itafushi art in one of my edits ! i wanted to be sure before using it <3 total respect if its a no !! thankyouuuu
Sorry but I’d prefer if you didn’t do that!
Anon said:THERES A OCTOPATH TRAVELER LIGHT NOVEL AND ITS SO COOL BUT ITS ONLY IN JAPANEESE ! ;^;There's four stories with centered around pairs of characters and alfion is one of them !Idk if itll be transleted but i hope itll be cuz it sound awesome
OH I KNOW!!!!!!! I saw the art for the alfion one a while back, it looks so soft!!!! ;;;;; 8path is kinda niche as a game though, so who knows.............. let’s cross our fingers!!
Anon said: hello, i am here to recc Skeletons by New Years Day because i think it might fit a few of your ships<3
Thanks anon now I’m emo ;;;;;
Anon said: bakubro gives the best hugs. kirishima is the only one who knows this. everyone is absolutely incredulous when the question "who gives the best hugs" goes around and kirishima answers bakugo. (bakugo thinks kirishima is the best but he benefits from kirishima bodily hugging him and he's biased)
Definitely!! He’s strong and warm after all, bet hugging him would feel the best.... the only one who shall ever know is kiri though, as I bet his hugs are only that nice when he really likes the person he’s hugging hahaha
Anon said: Hi! Just wanted to say that I absolutely love your JJK art! The colors and style are absolutely stunning.
Thank you so much!!!!!!! I feel like I’m mostly drawing for myself lately ngl hahaha so knowing you like it means a lot!!
Anon said: Hi!! This isn't a request I just really like your art! I found you from Pinterest on a kiribaku thing you drew! Your art is so cool! I wish I could draw like that!!! I'll keep looking for new art you've made :D
Aw pinterest.......................... glad you could find your way back here though!! And thank you!!
Anon said: This happened a while ago, but i wanted to say it anyway. I remember when I started watching jujutsu kaisen and I was looking for content arter finishing the first 10 episodes in less than a day and I found your first jujutsu kaisen post (it was posted that dame day) and i was like ???? One of my favorite artists got into jk at the same time than me!!! I just thought it was a neat coincedence to share! I really love your art too, you're amazing!! Happy New Year!!
It’s!!!!!!!!!!!! a pretty dang neat coincidence for me too, since it’s always nice to know at least some of my followers are still into the stuff I make hahahaha
Anon said: i think a lot abt ur art and how ive been seeing u since middle school and now im graduating highschool and we're still in the same fandoms, i hope this doesnt make u feel old but rather VERY cherished qwq
No anon this makes me feel amazing you’ve been around so long!!!!!!! I can’t believe you’re still here with my thank you so much for that!!!!!! I think I’m gonna cry a little here.......... ;;;
Anon said: Hi! I love your art so much!! 🥰 Have you read a KiriBaku fic called The Pit??
Probably not, haven’t been reading krbk fics in a while by now! I’ll add it to my for-later list, thank you so much for the rec!!
Anon said: can u believe that (sans sero) the entire bakusquad can be put into some form of punk/goth fashion? the realization was a galaxy brain moment for me. also realizing that tokoyami, kirishima, and tamaki are all varying levels of goth/emo (some more concerning than others)
Sero’s the hippie friend every punk friend group needs, he balances things out and that’s why he’s very cherished and necessary!!!!
Anon said: your bakugo drawings convinced me to finally start stretching my ears and tbh i'm extremely excited (i've had off and on thoughts of stretching my ears (again) before this so it's not as impulsive as it sounds haha)
Anon that’s so cool!!!!!!! I love gauges so much.....................glad I could give you the last push for it!!
Anon said: uhhhh, i love the style of that top left goge drawing dude!!
THANK YOU I LOVE DRAWING IN THAT STYLE THIS ASK MEANS THE UNIVERSE TO ME
Anon said: i sent the dragon!kiri and bakugo tug-of-waring over a piece of meat and honestly your response is exactly what i thought
Great minds!!!!!!! hahaha
116 notes
·
View notes
Text
HOW TO USE THE MBL ANYTAUR BASE - PART ONE
These instructions will be structured around a main narrative--someone who has everything they need for best results, and for whom everything goes right--with digressions for what to do when things go wrong at each step.
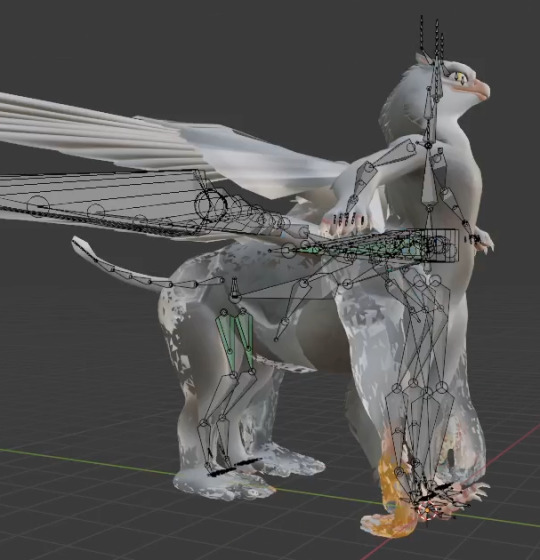
Pictured: gryphoranguAnytaur.
WHAT YOU NEED (WANT):
- A fully weight-painted taur model .fbx. *If you have a quad instead, see “I HAVE A QUAD INSTEAD” **If you’re modeling from scratch, see “I’M MODELING FROM SCRATCH” - CATS Blender plugin, just in case. (We’ll be using its assign rest pose function, if we need to.) - A Unity 2019.whatever.it.is project, with the latest VRChat Avatars 3.0 SDK. - Pumkin’s Avatar Tools package (THIS IS SO IMPORTANT). ***If this tool is unavailable, see “I DON’T HAVE PUMKIN’S AVATAR TOOLS, OR IT ISN’T WORKING FOR ME NO MATTER WHAT I DO”
Open MakeYoursInHere.blend. Find the Humanoid hips on the base Anytaur, but DON’T touch them--just find them. Turn on Isometric view and import your taur .fbx; scale and move your model until its Humanoid hips (you know, the bone below its spine, in the Humanoid torso up front), or Humanoid hip-ish-area, matches the Anytaur’s, and the legs are long enough to put your feet ALMOST on the floor (same as the Anytaur is fine). You don’t want to leave so much clearance it’s obvious you’re hovering, but you do want your taur’s (mesh) feet to be raised very slightly above the floor. This makes it easier to avoid clipping. *If you CAN’T STAND having your feet clip into the floor at all, you may wish to pursue using Final IK to run your taur limbs instead, but that’s the opposite hookup method from this tutorial!
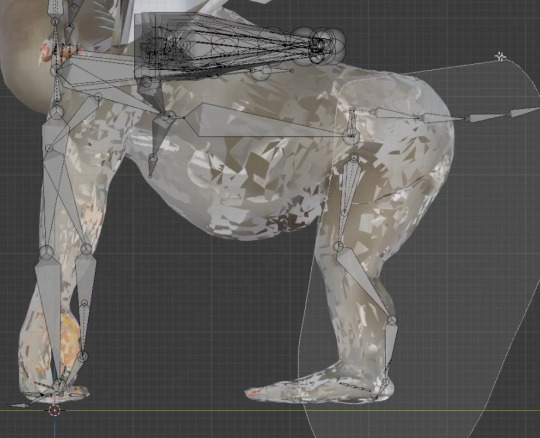
When you’re positioned and sized, select your taur and put its wings into a flat T-pose, like the Anytaur’s, and its arms into an A-pose, at the same angles as the Anytaur’s. Apply this pose as your rest pose with CATS, or look up how to do it without CATS if you don’t have CATS. Then select the Anytaur, and, WORKING ISOMETRICALLY AND SYMMETRICALLY (symmetry has been preserved within the Humanoid armature, so you can work normally), you may move the spine, chest, neck, and head around to match the scales and angles of your taur’s existing armature. Again, make sure nothing you do alters the hips--OR interrupts the hierarchy!
If you have Dynamic Bone rigging on the Humanoid torso chain (like for fur or accessories), you may separate the bones out from your taur’s armature at this stage and join and parent them to the Anytaur’s. Same with anything wiggly you have on the arms, next, too.
Once the Anytaur’s Humanoid torso chain matches yours, select the either the left or right WHOLE ENTIRE Anytaur arm, including shoulder. View it isometrically, and shift it in xyz and scale it until it matches your taur’s arm. DO NOT rotate ANYTHING in ANY WAY! *If you have changed the angles in the Humanoid arms or legs, see “I CHANGED IMPORTANT BONE ANGLES IN BLENDER. :(”
You may rotate and reposition the fingerbones freely, though!
Now that both taur armature Humanoid upper bodies match, go into Pose Mode on the Anytaur and find RRA.spacer, off the Humanoid hips. Grab it and rotate it; the Anytaur’s taurbody’s back should respond dramatically. You’ll be toning this behavior down later in Unity, but I’ve recreated it here in Blender to help with weight painting. Try to understand what you’re looking at in the Anytaur’s hind torso chain. Hind.spine is one huge bone to make an optional Dynamic Bones-based-sit work correctly; hind.chest ends wherever is necessary for the “hinge” of that sit. We WILL NOT be going over how to implement sit in this tutorial, but since you’re looking, you might as well know why it’s like that. The .tinybones are because Dynamic Bones needs at least two transforms in a row to operate, and when I had ONLY two, I got stupid bugs preventing the butt collider from showing up in hind.hind.tinybone, so with this setup, Dynamic Bones gets THREE transforms, and the collider on hind.hind.tinybone definitely shows up. Unless you specifically commed your artist for it or they worked with this base in mind, you won’t have a BEND bone, and will need to paint your own, but you should already have hind.hips to start with! There are bone constraints in the hind thighs for weight painting purposes, again--you’re advised to leave them until you’re satisfied with the BEND/hind.hips torso chain action you get on your own taur.
NOW:
Go into Object mode, select the Anytaur’s mesh, and delete it. *If your taur IS NOT weight painted, see “I’M MODELING FROM SCRATCH.” Then select your taur’s mesh and duplicate it. Then, shift-select the Anytaur armature, and parent the duplicate to it with empty groups.
You could go to your duplicate’s vertex groups and start finding and renaming them to match the Anytaur’s armature as best you can at this point, but first, I recommend you fit the Anytaur armature to your taur!
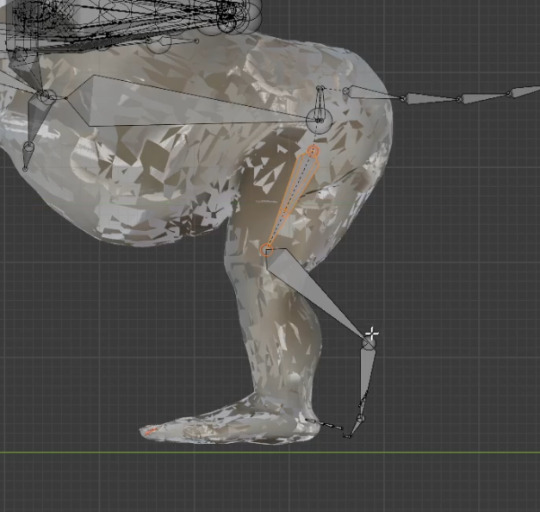

Using your original as a reference, BUT ALSO taking at least a glance at a real animal’s skeletal reference (especially for shoulder length and angle), work isometrically from the sides and front--symmetry has been preserved in all the taurbody legs, lucky you! Rotate the Anytaur’s taurbody bones pair by pair (of bones, left-right) until they’re all angled right to fit your mesh. You may wish to grab and hide anything that’s getting in your way, if you haven’t already, like the zillions of wing and utility bones, and the Humanoid legs (shortcut in edit mode is “h” with a bone selected.) When you’re finished from the side, select the taurbody foreleg chains, switch to viewing isometrically from the front, and shift them in X until they mostly match the width-apart of your forelegs. For the forelegs, I’d prioritize matching the feet to the feet over matching the width of your taurbody shoulders. DO NOT ROTATE ANYTHING--they must stay straight-up-and-down from the front! Do the same for the hindleg chains, though unless you intend to individually articulate your hind beans, you may wish to split the difference between matching the feet versus matching the width of the hind hips above, or just match the hips width and ignore the hind feet, like I did on the Anytaur--If you noticed before deleting it, the hindpaws are quite far outside the hind foot armature--that’s about the limit I’d ever recommend you deviate, though. I just started to get some weird behavior on hindpaw twist at that distance (but I did get to enjoy having my hindlegs always look a little extra jaunty because of how they were modelled “at rest” around the bones here). If you’re lucky, your artist just has those hindlegs straight up and down lol so you won’t have to make any decisions.
You may add/graft on extra bones out of your old armature if you’ve got them (floof bones, etc), SO LONG AS YOU DON’T DELETE, REPARENT, OR RENAME ANYTHING ALREADY THERE, OR OTHERWISE BREAK THE ANYTAUR HIERARCHY.
The twist bones don’t like being moved, sometimes, so make sure to check on them specifically and fix them if they’ve gotten skewed by grabbing just their left/right heads or tails at a time and shifting them in x.
Don’t forget to fit your toes! They don’t have to be straight up and down, just have them fit your toes. You don’t have to use EVERY beanbone either, there’s a final (FINAL--do NOT do it until you’re SO SURE you’re finished) optimization pass in Unity where we’ll delete any bones that didn’t get used. You could probably just graft your old toebones on, here (but DON’T do that with anything but the toes! We’ll need the leg chain transforms to all be named in PRECISELY this way or nothing will work AT ALL later. Working this way around, renaming your vertex groups to the Anytaur armature, allows you to check your work here in Blender AND not ruin anything silently before we move to Unity).
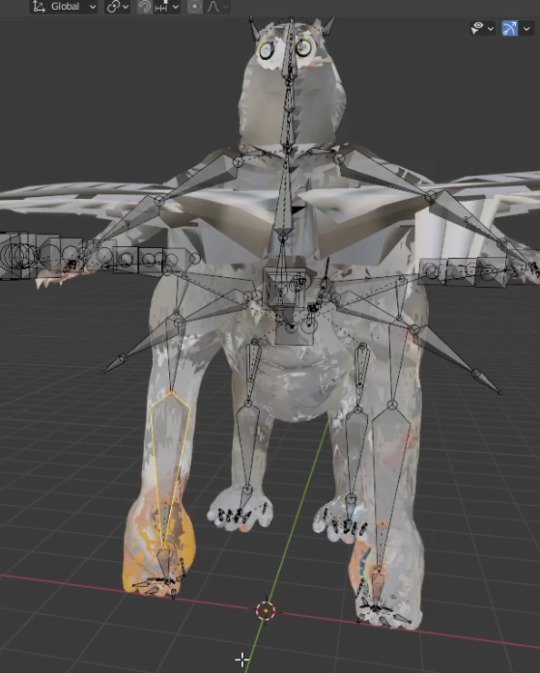
The Anytaur armature should now be fit to your taur! Well, except for wings--SYMMETRY IS BROKEN IN THE WINGS, I’M SO SORRY, so if you need them, handle them by scaling left/right pairs of the bones’ heads and tails in and out in X from the isometric front and top views, and moving left-right pairs freely together with g + zy shortcuts. If you have dragon wings with extra wing fingers, graft yours from your old armature onto the Anytaur wingfingers. Just shrink the Anytaur wingfingers way down first; they’ll act as control bones. If you have feathery wings, look at the weight painting “zones” of influence that already exist in them. You’ll likely want to rename and/or merge your weight paint vertex groups to use only the (wing upper arm, forearm, and hand, obviously, but also the) first, the fifth, and the tenth feathers, OR--if you have a bunch of existing dynamic rigging, graft your wing surface rigging bones ONTO (parent them to) the first, fifth, or tenth feathers as appropriate. Only use the individual feather rigging if you HAVE (or are making!) individual feathers, it will look weird if your wings are a solid surface (each of the bones is going to roll quite a bit). Basically, the fifth and tenth feathers are rigged to “smooth out” the wing-arm action... hopefully the effect looks okay. If it winds up looking weird later you can reparent your (YOUR) bones directly to the appropriate Anytaur wing-arm bones instead.
Oh, and tails. Do whatever with the tail. The Anytaur tail comes with six bones and limited but ready-to-go rotation constraint rigging, but it isn’t Dynamic Bones compatible, so you’ll probably just want to keep the rigging in the tailbase bone in Unity later, because it’s important for finishing the harmonious “feel” of the movement of your hind hips, and capturing all of your Humanoid hip motions. You can make it really small and not weight paint it if you want, though, so it’s at the base of your tail as a control bone. Do match the next five Anytaur tail bones to the rest of your tail, then feel free to add (or graft on) however many more you need. If you graft your entire old tail on instead of the existing one, you’ll NEED to rename it to match/replace the Anytaur tail in the hierarchy EXACTLY, taking into account whether you kept the first tailbone as a tiny control bone or not! Pumkin’s Avatar Tools, at least as I’ve used it, will FAIL on EVERYTHING DOWNSTREAM OF THE FIRST BREAK... so watch out.
Okay... NOW the Anytaur armature has been fitted.
Use Pose Mode to pose your original model and then your Anytaur duplicate, into a pose suitable for weight painting (or for referencing, in your original). Now, begin the process of renaming/recovering your original vertex groups...
Using your original as a reference as necessary, rename each corresponding old-naming vertex group in Your New Anytaur(tm) to match the naming of the new taurbody bones. Since some preserve symmetry and some do not, especially in the wings, just copy-paste each of the bone names out of the Anytaur hierarchy and into your old vertex groups’ names. Every time you find a match, the fixed mesh should leap up and stick to the right bone!
But maybe you have multiple vertex groups that all need to be collapsed onto one Anytaur bone, because the Anytaur rig is so different. In that case, use the VERTEX WEIGHT MIX MODIFIER. Important: this modifier HAS to be first in the list of modifiers, or it won’t work! It’s to the left in the modifiers list, under the wrench icon for “modifiers”. The first slot is the vertex group you’re adding more influences into (it should be an Anytaur one, like hind.spine). The second slot is where you put the group from your original model you want to add. After you put those, you change the dropdown mix method to addition. Rather than applying each modifier as you go, I recommend you duplicate them as needed and get them all ready and moved above your Armature modifier. Then look them over a few times once you think you’ve captured everything, then apply them one after the other when you’re sure it’s all there. There should be a big, immediate improvement in your Anytaur(’s taurbody torso chain, you’re probably doing this for stuff in the taurbody’s torso chain) after this step.
Once you’ve figured out somewhere for all of your preexisting vertex groups to go, and you can freely pose your Anytaur without leaving any vertices behind, it’s time to WEIGHT PAINT TWO THINGS.
You’ll need to grab the RRA.spacer animation-rig-style control bone (off the Humanoid hips) in Pose mode, rotate it a little (A LITTLE) from the side isometrically, then find the vertex group for the BEND bone and start painting on weight at either full strength 1 yolo (valid) or around .4. Your back should begin to either raise or dip, depending on which way you rotated RRA.spacer. Don’t do too finicky of a job yet, because BEND doesn’t work alone, it operates in conjunction with hind.hips. Find and switch to hind.hips, and add or blur some weight forward into the lower back and belly, just, probably the whole taurbody tube. You want to balance the action of hind.hips and BEND until you get a strong but reasonable-looking response in your taurbody. Moderate the action you get by trying out the levels function on your hind.spine group (though levels is a little bugged currently--click back and forth between the viewport and the hind.spine vertex group a couple times so it doesn’t bump you back to the vertex group you were on previously). Give levels a value less than one to turn it down and free up the action in your BEND and hind.hips, or turn it up somewhat to damp them down if they’re just too freaky/rubbery/bendy. If you’re working with everything way up bright red at one you do risk getting lost in the sauce somewhat, so I recommend toning your hind.spine down to a firm green and working with red in your hind.hips and BEND that you then blur out as necessary.
Once you can grab RRA.spacer and get an amusing but like... coherent... and goodlooking... response from your torso chain, at least to moderate/reasonable movements :p, add twist bone weight painting to your taurbody thighs if you haven’t already! That’s where the hind thigh twistbones get the top halves of the thighs up to the butt--make sure they’re well-positioned up there, with their heads matching the regular thighbones’ heads, and that they reach the halfway point on the regular thigh bones--and the regular thigh bones get the bottom half of the thigh to the knee.
ONE NEAT TIP: to prevent butt crunch, move the heads of your thighbones down to the level of the “crease of your buttcheek” (but maintain the same angle as they’re supposed to have; the head of the thighbone should still be ALONG the original thighbone’s line). When your thighs hinge from THERE, they won’t vanish your butt and leave your crotch poking out into the wind when you crouch or sit! However, after moving your thigh bones’ heads, you’ll need to revisit the isometric front view and grab the tails of your twist bones, then move them back into alignment with x. If your leg chain is still properly straight up and down, you can just zoom in and move their tips to touch the dotted line.
Your Anytaur should now be FULLY WEIGHTED to its armature!! Now it’s time to GET THIS BEAST INTO UNITY.
23 notes
·
View notes
Text
The Last Phoenotopia Blog Update
(Date 2021 MAR 01)
I debated how to open this blog post, but perhaps the main crux of this blog post is the best place to start. The blog is being retired.
The purpose of this blog was to be a "development" blog for Phoenotopia, and well, Phoenotopia's development is done. I'll still be doing bug fixes and maintenance on the PC and Switch versions, and playstation and xbox ports are underway (by a publisher). But I'm not going to be making any more major changes to the game. At some point, you put the paintbrush down and say it's done. Blemishes and all.
Recent Events
The game launched on Steam last month, and like any launch, it was hectic. Bugs Galore. This is our first commercial PC launch, so it was a real baptism by fire. Unlike Switch's one configuration, the PC has multiple configurations and factors to account for. The game needed to be able to handle multiple control schemes, screen resolutions, refresh rates, and more! I had a 60Hz monitor going into launch and didn't know anything about Hz (I do now). There was a troublesome stutter that some players were sensitive to that my whole team didn't notice since our eyes compensated it away. There were a few times where in fixing something at one party's behest, it introduced problems for another party. A few times, due to disorganization, I unwittingly rolled back a fix that was meant to be applied. For some, the game couldn't play at all (really glad Steam allows refunds).
It was messy. It was tiring. I.AM.BEAT.
I think the worst of it is over... I'll still be around to do the last updates and bug fixes, but I'm ultimately ready for what's next.
SO what is next?
What isn't next... is Phoenotopia 2. As you may have heard down the grapevine, the game couldn't be what you call successful. No one's earned even minimum wage on it.
Maybe there's hope in the game's long tail. A year or two down the line... maybe. I won't hold my breath though. At some point in the past few months, I finished processing (or grieving) and it's time to move on.
The game has at least earned enough for us to continue our modest operations. As long as we don't expand the team, and we don't take another monster six-year dev cycle like what Phoenotopia took, we can continue. We'll have to be smarter and faster. Perhaps the most valuable thing we gained from all this is experience.
The Experience
It is a dev blog. Here are some of the lessons I've accumulated from this game's development.
- Have a good menu design. Menus aren't just that in-between fluff before you get to the good stuff. Menus are KEY. Your menus need to be robust, expandable, and *understandable* (to you, the developer). Because once the game's out, you will invariably be asked to add more options. And if your menu design is bad, every time you have to add a new menu option, it becomes a whole new pain all over again. Support mouse from the get-go, etc.
- Focus on features that people will actually care about. For instance, I've never seen anyone praise the camera's zoom feature. In practice, people try that feature a few times and then never use it again. But that feature was a constant consideration factor for every level. Run through it multiple times to make sure the level didn't break, think about which zoom levels made sense, resize rooms because they worked at one zoom level but not the other, and so on.
- Don't do boxes that you can move around. Other 2D platformers avoid movable boxes because they're a huge headache to program and they really complicate the game space. Enemies need to respond to boxes you throw in their path and either navigate around or attack it. When you're moving the box, you have to worry about constantly changing your collision size and reconciling when the box gets snagged on the environment. The boxes were also a constant source of bugs because people can manipulate them to soft-lock themselves and more.
- More focused script. Phoenotopia's 100,000+ word script was panned more for being bloated than it was praised for being lengthy. Long scripts take a long time to write and make the game more unwieldy, increasing the costs of translation and upkeep. Every update we're addressing some textual error or mistranslation. There are some highly renowned games (e.g. Hyper Light Drifter) that do without a script at all!
- Be flashy! A bat and a lightsaber take the same amount of work to program, but the lightsaber will draw a lot more attention and interest.
- Slopes, surprisingly! Six years ago when I started, Unity was ill-equipped for 2D games. If you used the physics that Unity provided you'd have a really floaty character that wouldn't adhere to the slope when going downhill. There were a hundred different tutorials saying different things (use forces, use move position, use translation, etc). You can get rectangular collisions done in a day, but to do slopes took weeks. Meanwhile, games can actually get by fine without slopes. Most people won't even notice. Did you know the Phoenotopia flash game didn't have slopes? Neither does Hollow Knight or Rogue Legacy. You can save yourself a lot of work by avoiding slopes.
(big entities look weird on slopes. Bad slope!)
I could write enough little knowledge nuggets like this to fill a book! But I'd rather just make the next game.
So… what IS next?
As mentioned previously, it's not Phoenotopia 2. Pirate and I are mostly just tossing some ideas back and forth right now. We'll go silent for a year (or two). Our next game's scope will be more modest in some ways, more ambitious in others. It will definitely be more smartly designed. (There will be a map!)
We'll announce it when it's ready for the public. It might be necessary for us to do a kickstarter. I've tried to avoid kickstarters having been burnt on quite a few myself and also because I worry that mismanaging a kickstarter would earn the ire of backers.
But I did keep this blog regularly updated for six years. So I've gained some confidence in my abilities to at least manage a kickstarter well.
Is it really the last Phoenotopia Blog update though?
Okay, not really. There is some news that I'll need to announce, and this blog is one of the game's main outreach channels. Here are the events that will cause me to update the blog:
Announcing the launch of the xbox/playstation ports when they're ready
If a physical edition of the game happens
If a new language is getting introduced into the game (Korean is a high possibility)
When we're ready to talk about our next game
If (BIG IF) we begin development on a Phoenotopia sequel. I do want to do a sequel one day if we have the means and the demand is there.
Those updates will be more on a "when they happen" basis, rather than me reporting in every couple months.
Fan Art
As always, I'm very happy to see fanart of Phoenotopia. Major thanks again to Pimez for collecting all the artwork from the corners of the internet! Since this is the "last" blogpost, Sir Pimez can finally take a rest from collecting the fanart :P

ÆV made a series of pictures that tell a story. A Pooki is humanely sheared of its wool to create a hat. The Pooki is unharmed. Nice! Gotta love Gail’s expressions.
Amagoo Mazeru makes a stunning landscape shot of a full moon and shooting stars. It’s a sharp and clear vector art. I like the faint glow of the moon and the fire and the subtle gradient in the night sky. Very skillfully done!
Hah hah. I got a chuckle out of this one. I imagine this is how Gail's enemies see her by the end of the game. CaESar made this image based on TerminalMontage's famous youtube videos. Nailed it!
CrownStar drew two pictures of Gail. I'm a big player of JRPGs, so the first shot instantly reminded me of Persona 4's art style. (Hmmm... Phoeonotopia as a JRPG... there’s potential there...) Next, Birdy is shown carried off after her defeat. I really like Birdy's expression here - she just seems mildly uncomfortable.
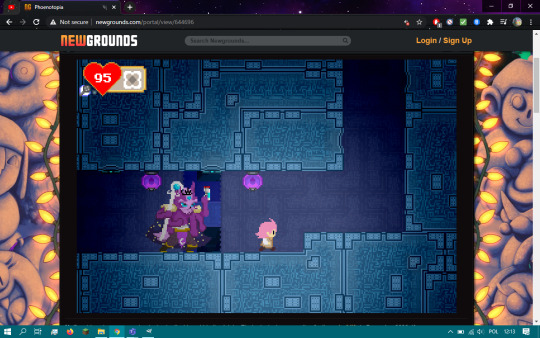
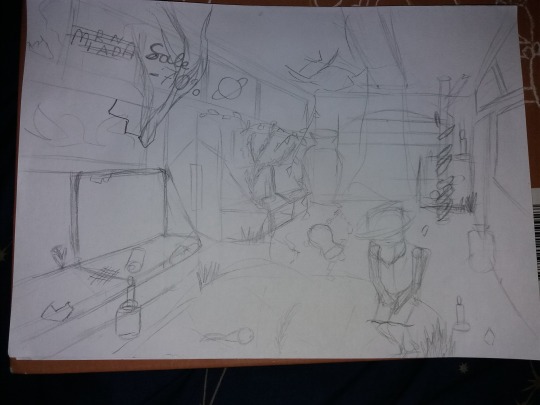
There's a bit of a story behind the first image. As Firanka shares it, she wasn't able to defeat the Big Eye monster at the end of the flash game, so she believed a tall tale that what awaited after was a 6 armed Kobold boss. Hilarious! The second is a rendition of the lonely Anuri elder. A rare subject. The loneliness is portrayed well here. I feel lonely just looking at it!
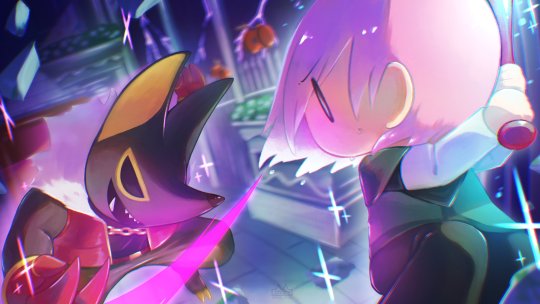
Koo_chop draws the clash between Gail and Katash at the top of the towers. I really like this interpretation of the game's art style. It’s faithful to the in-game graphics. And the lighting, from the glow of Gail's bat, to Katash's sword, and the lightning in the background... Amazing!
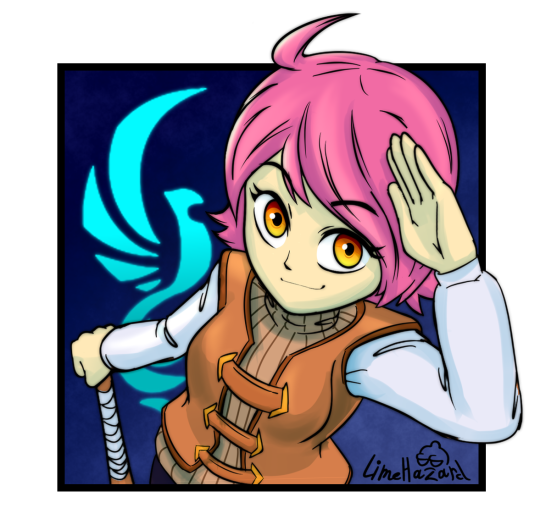
Lime Hazard shows Gail with a salute pose. Very appropriate for this occasion. I also like how there's a slight tilt in the angle that Gail is portrayed. Those dynamic angles are always hard to get right, and Lime Hazard pulled it off very skillfully. See you next mission!
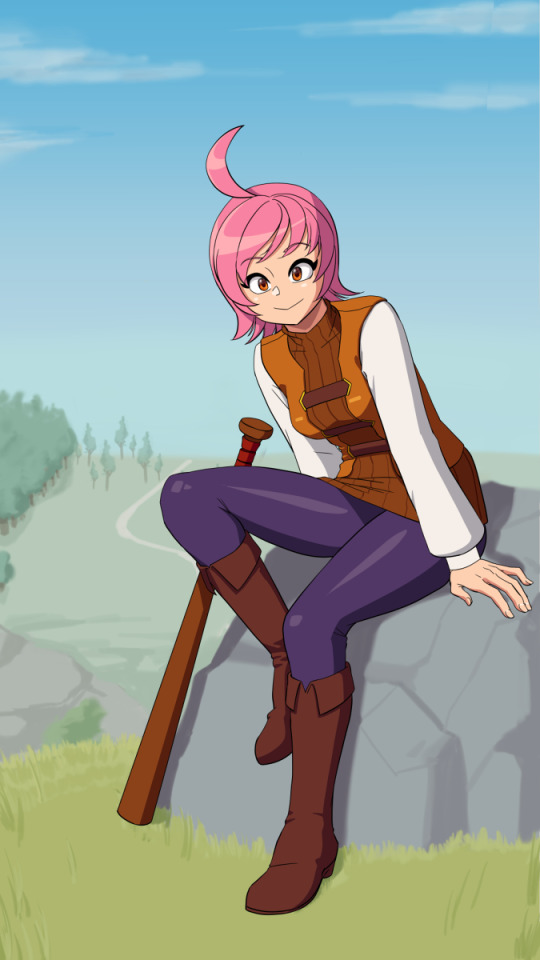
Lyoung0J with a digital painting of Gail posed sitting on a rock. I like how it almost seems like she was caught in a candid moment - she’s smiling, but also feeling self-conscious. Cute! The art style really pops, and I like how Gail is sporting what I call the old anime style nose.

MyUesrNameIsSh*t with a sketch of Gail performing a skillful slingshot. I like how Gail is depicted with her tongue out in a mischievous manner, the way all mischievous people with slingshots do.
Niitsu Kentaro returns with a 2021 Happy New Year picture. That happened didn't it? A New Year... Gail's pose gave me a chuckle with how she seems to be waving the bat around as casually as one would wave hello. And "Phoenotopiyear"... Well said! One day we'll have our Phoenotopiyear...


Ochan Nu breaks all records with a stunning NINE pictures in one session :O
There's so many goodies here. My favorite would be the one with Gail staring intently at the screen - it's like she's looking directly at you. You almost feel uncomfortable.
Next, there's an Animal Crossing villager dressed as Gail and sporting her pink hair. It even looks like a house Gail would live in. Gail is a connoisseur of the arts and likes Mona Lisa. Yes :)
There are various comics of Gail pointing out Gail's weird food habits. A picture of Fran looking really cool, and even Gail rocking a bathing suit. (bathing suit image linked here in case NSFW). Wow!
Pimez didn't just collect the arts, he creates them as well! This one, which he aptly named 'The Year 175' is a depiction of when the dragons invaded the towers as told by an elderly Daean woman. Great pixeling skills! I got a good chuckle from the ice dragon leaving with its stuff slung over its shoulder.
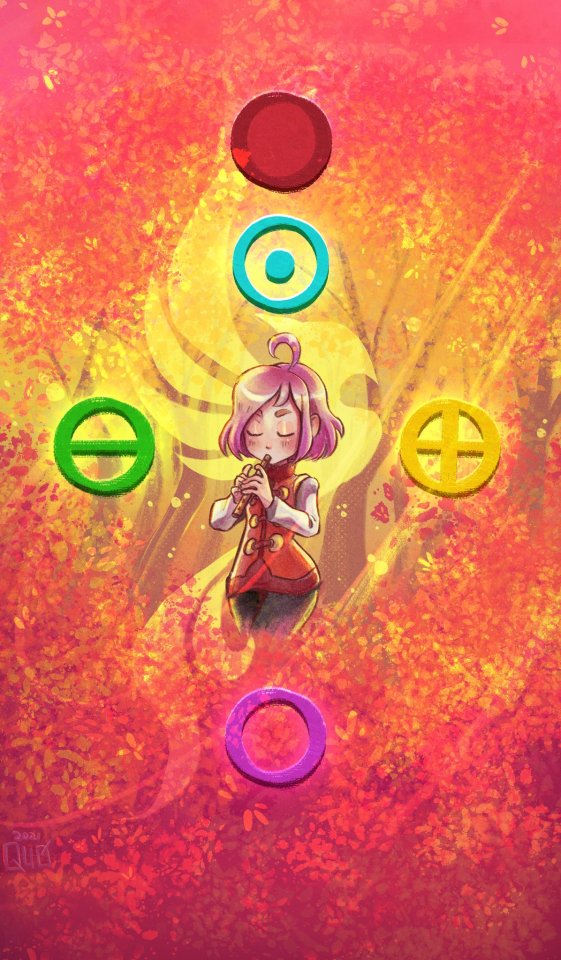
Quo made a stunning picture of Gail playing the flute surrounded by the 5 musical notes and the Phoenix logo behind her. The theme seems to be "fire" and it works really well. Gail herself looks awesome depicted in her red suit - it's like she's leading a marching band!
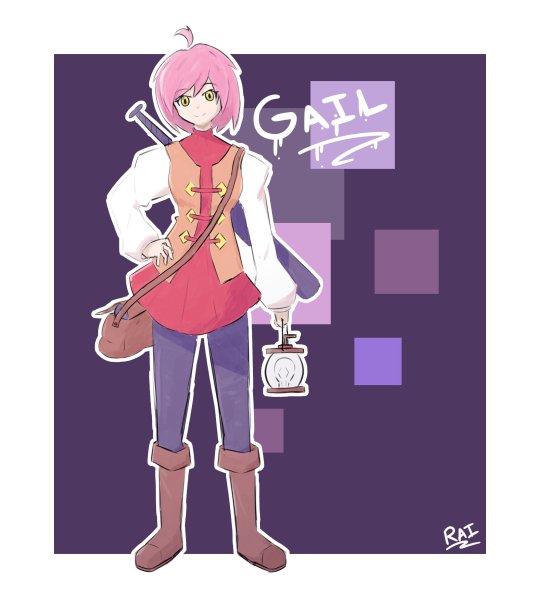
Rai Asuha depicts Gail in the late game with her red suit, and night star bat, and holding a lamp. She looks ready for adventure! I really like the white outline here and Gail's poofy shoulders here - the art style feels reminiscent of Final Fantasy Tactics.
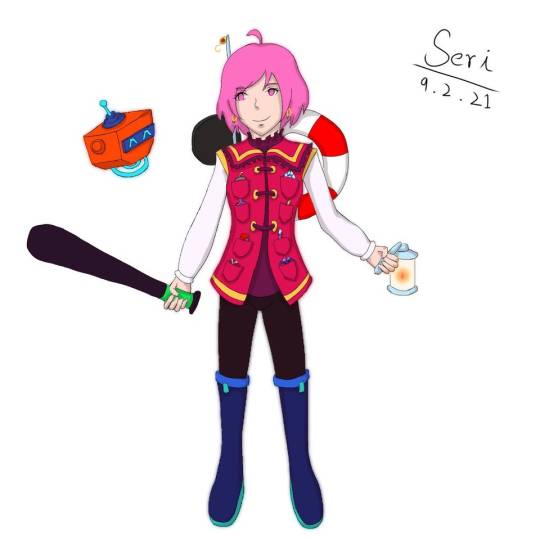
Seri also draws Gail bearing her late game equipment. Unique to Seri's drawing is how all of Gail's equipment is accessible from a pocket on her shirt. I also like how Gail is depicted with her lucky earrings - that accessory is often forgotten.
Treedude depicts Gail with a bat and wearing a funny smirk. She looks like she's ready to hurt someone!
Warotar returns with everyone's favorite Great Drake, Bubbles! It seems so happy to be featured!
I'm really grateful for all the fanart this game has received. From the bottom of my heart, thank you!
Closing Notes

Pirate drew a picture to mark the occasion. It shows Gail enjoying a hot chocolate with marshmallows and a pumpkin muffin. A rest well-earned...
Goodbye! Until next time!
99 notes
·
View notes