#beginner tips
Explore tagged Tumblr posts
Text
The questions I ask myself, roughly in this order, to interpret any* tarot spread:
How did the cards appear? Because I shuffle for jumpers, it matters whether cards pop from the deck together. They form pairs (or groups) which have stronger connections to each other than other cards in the spread.
What types of cards are on the field? Majors? Minors? All numerical cards? Court cards? What suits? What numbers? This is where I consider the raw, memorized meaning of individual cards and the archetypes they represent.
Are there obvious patterns or cadences in the order? Think like poetry, ABAB or AABB, but with the types of cards. In a hand of five, it's interesting if the order is Major-Minor-Major-Minor-Major. Or maybe the cards are in a descending numerical order, Nine-Eight-Seven-Six-Five. Or, perhaps Nine-Eight-Six-Five-Four -- the jump in the pattern matters.
Are there repeating numbers or suits? Repetition strengthens the significance of a number's or suit's meaning.
Are there repeating motifs in the card art? Again, repetition strengthens the significance. This includes colors, background details, people, animals, and so forth.
Where are figures in the art looking? Are they looking at other cards? At each other? Away from each other? The direction of figures' attention directs where that card's focus might be.
Is there a cohesion or flow in the spread, or is it interrupted and disorganized? Some spreads flow smoothly left to right, while others show disruption and a lack of coherency. This question looks a the spread as a whole again after all other questions have been asked to consider all elements together.
Does it make sense? Do the cards answer the question being asked? How do they apply? Is there something missing? Is there a deeper meaning to delve into? Do I need clarifiers? Do I need to try again with new cards? Can I explain these cards to the querent and have them understand my meaning?
And then I write out my analysis! There's obviously more to it than this, with a ton of nuance at every step, and I could probably write a whole essay about any individual part of this... and I probably still will, honestly. (And I started to, then decided to just write up a little list instead, lmao.)
*May not work for some tarot spreads, depending on the style.
399 notes
·
View notes
Text
Playing Dwarf Fortress, and so are a few of my friends now, so I figured I’d document some common pitfalls I know of, and how to avoid them.
Strange Moods:
-Best way to handle these?
First, build one of each of the following workshops: Craftsdwarfshop, Carpenter’s, Stoneworker’s, forge (either kind), jewelers, glass kiln (any kind), kiln (any kind), bowyers, mechanics, leatherworks, & clothiers. This is all the different types of workshops a dwarf may claim. Don’t worry about fueling a workshop, moods don’t need fuel.
Second, ideally try to keep a supply of at least one of the following items: A boulder, a log, a block, a bone, a cloth, metal bar, an uncut gem, a tanned hide, raw glass, and a cut gem. This is roughly all materials a dwarf may demand for their artifact. Tbh, you *can* cut gems (or polish stones) when a mood occurs, but it’s easier to keep a few on hand prior. Generally they need one item based off the workshop type they claim, then the rest seems to be somewhat random/based on their likes. Each time they collect an item for their artifact, it resets the timer for insanity. Generally in my experience dwarves really tend to grab boulders a LOT. But that’s based off my total experience, my recent experience has been a lot of bars, so it depends on what the dwarf’s workshop chosen is. I’ve been having a lot more metal required because most of my artifacts have come from my metalsmiths
If they’ve been standing at the workshop for a while, bring up their menu and see if they’re crafting the object, or shouting. If they’re shouting, it will cycle through hints or outright stating what the dwarf wants for their artifact. Generally artifacts are WORTH getting a hold of because it gives the dwarf a significant skill boost & a high value item. Worst case you put it in a display case somewhere to boost room value
Animals:
-My animal starved to death!
This only happens to grazers. You need to set up a pasture somewhere with some kind of growth on the soil. At the beginning you’re going to be limited to the green surface grass. If you want to keep them underground, you’re going to have to dig into one of the caverns, which will trigger some sort of fungal growth on underground natural tiles within your fort. Surprisingly as it may seem, this is perfectly safe for your farm animals to eat. Generally a rule of thumb is, if it is egg laying, or smaller than a dog, it is not a grazer, and does not need soil/some grass like substance to survive.
-My animal starved to death in a cage. Why won’t my dwarves move it!
So, going with the above, a pasture zone must be marked, and then animals must be assigned to those areas. After setting up a pasture, click the icon with a plus over a horse to assign animals to it. Any semi-domesticated animal can be assigned to a pasture.
-Why won’t my chickens lay eggs
They need a nest box to lay eggs in. Generally place a pasture somewhere (I like to do it underground as I have yet to find a grazing egg-layer) and build nest boxes there. Dwarves will automatically harvest eggs from the boxes, including fertile ones which may make farming for leather/meat harder. You can seal the room and forbid entry until the eggs hatch, and then forbid them, or have no stockpiles accepting eggs. Then eggs will only be taken by cooks, and only when they’re cooking.
Migrants:
If you are struggling attracting migrants, a major factor is your exports. Basically fortress wealth, and wealth exported are two of the factors that determine your migrant waves, the last factor is the health of your civilization, which is basically just the population. Weirdly enough, migrants are built different, as I’ve played in dying civs (one SURFACE fort with 20 dwarves, this was the only NPC settlement for my Civ) and had migrant waves of 30+ dwarves. Basically the more high value goods you make, and the more you trade them, particularly with the home caravan, the more migrants you’ll get.
Children:
Dwarves only produce children if they’re married, and the parents have time to… get intimate. Fortunately the getting intimate is more “having idle time in a bedroom together” at which point, if it’s a married male/female pair, the female will become pregnant. The game does not display information on pregnancy at all, and all pregnant creatures will just carry on their normal business until they give birth, at which point a dwarf will abandon her current task to “seek infant” at which point they will pop out a baby, you will get a notification of this, and they will pick the child up and go back to doing tasks. Dwarves are capable of having multiples, and I have seen twins, triplets, and even a very weird case of quadruplets… which is its own story.
Trading:
Of the four types of civilizations that exist, you can trade with 3 of them. Elves trade in the spring, humans in the summer, and dwarves in the autumn. Each offer different advantages… mostly… to trading with them.
-Elves:
Generally the most annoying and least useful trading partners. Trading them anything made from wood or an animal product upsets them, instantly ending the trades, and sending them home. If this happens enough, they will declare war and begin sieging your fort. Generally elves are great for selling low-quality stone, (green) glass, or metal objects to. Silk and cloth can be safely traded, but yarn cannot. Generally it’s best practice to only trade rock, green glass, and metal objects to avoid offending them. Due to elves not sending merchant nobles to negotiate, they have no export requests for better trading, and you cannot request imports from them. Despite this, they can make an excellent source of exotic animals, cheap barrels, or offer a way to trade rock crafts for food.
-Humans
Humans know a good deal, and actually care about trade. Humans tend to reach out among the first outsider civs to trade with you. They don’t always send a merchant nobles, but once you have a baron or higher, they tend to much more frequently. Humans are amazing trading partners as they offer unique trading resources from dwarves. They have no offendable rules either, but they actually do defend their goods. They can be reliable for exporting in rare crops, seeds, or other materials, and they will happily trade you pretty much anything they have access to. So while you can’t get steel from them, you can get surface crops, more varied animals, and bladeweed dye and other fabrics.
-Dwarves
Without player intervention, you will only usually receive a Dwarven caravan from your home Civ. You can by contacting other Dwarven civs get other civs to send merchants to your fort as well. Dwarven caravans are much like human caravans, but carry steel. They also only carry crops and items unique to their Civ, which is usually pretty much exactly the same as yours. Dwarves do also send merchants to negotiate import/export deals as well, notably the outpost liaison being your factions representative.
-Getting new trading partners
Send a squad out to an uncontacted Civ and set the mission to “demand one-time tribute” civs either pay the tribute, or reject it, and it seems to have little impact on the civ’s opinion of you/your fort. Once this is done, they can start, and often do, sending caravans your way when the correct season starts.
-Getting better trade goods/merchant nobles
Traders bring more goods the more profitable trading was with you historically. So the more you trade, the more they bring. So if a trader brings nothing of interest to you, you buy nothing, and they leave, next year, they are likely to bring even LESS. So to prevent this, it can be a good idea to buy things even if they aren’t that useful. I commonly try to buy all the food I can from the merchants, as I can usually use it, and it encourages the merchants to take more items, which can end up being items like codexes/scrolls that I really want. Likewise the more successful the trades are, the more likely they are to send a noble for trade agreements. They don’t always send them though, so it is possible to miss them for a few years, even when trading seems to be going fine.
Hospitals:
-You will need a hospital before you think you do. But you do not need a Good one really. A basic hospital is something like a few beds & tables in a room together. You should also have a water source, some buckets, a textile industry, and some splints/canes. The only specialty thing you really need is a single traction bench. Just make a table, rope and mechanism, and combine them for a traction bench at a mechanics. Soap isn’t strictly necessary early on, nor is having security in the hospital. Bleeding out on the hospital floor is a major improvement to bleeding out anywhere else.
-Soap
It reduces infections and will lower mortality rates, but generally a hospital itself will do a more significant job at that. Still if you need to make it, you need at least 5 buildings roughly. Soap needs lye, which needs ash and needs to be made in an Ashery and a wood furnace respectively. Soap also needs either an oil, or a tallow. Oil is made at a screw press from certain plants, tallow is made at a kitchen from roasting fat. Fat is gathered at a butcher from butchering (animal) corpses
This is it for part 1. If there’s other questions or tips, I can do a part 2
64 notes
·
View notes
Text
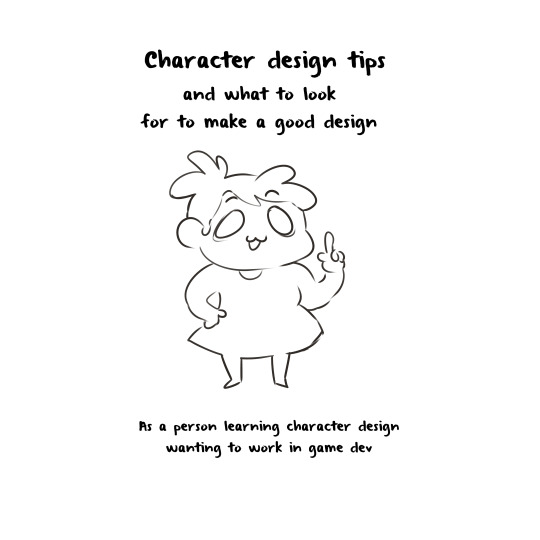
Here is 🧵of the tips I learned, might be helpful for people that want to dabble in character design
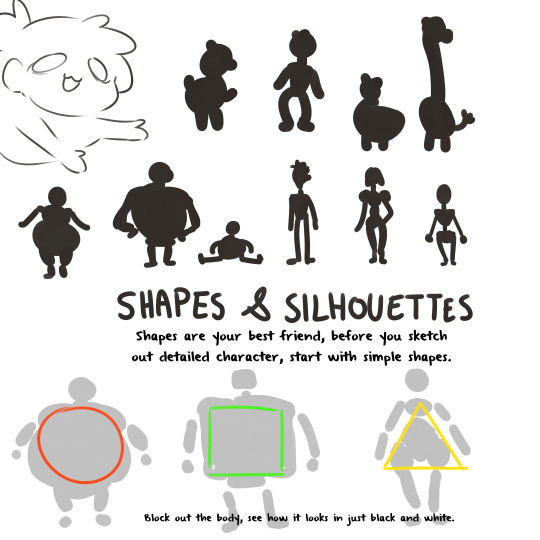
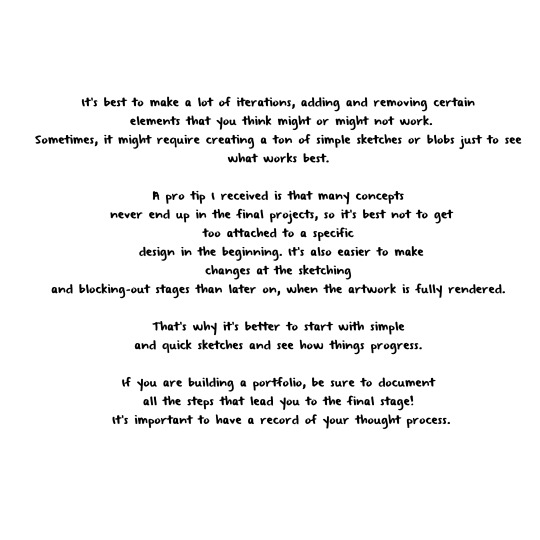

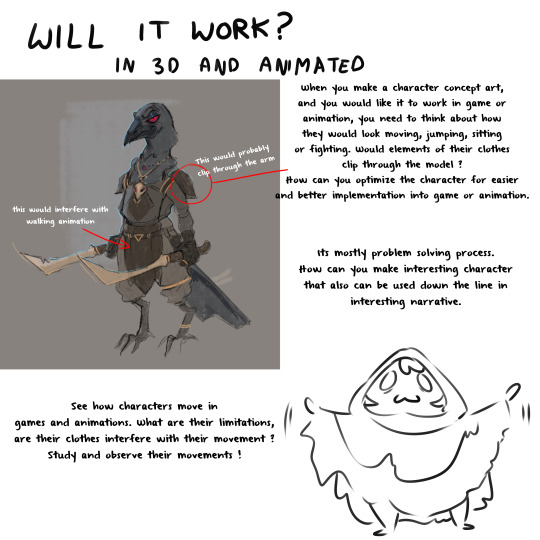
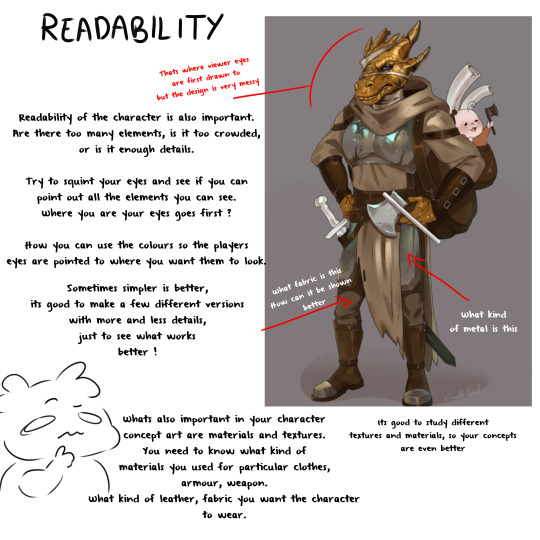

In conclusion : I myself am a beginner in character design, so take all the tips with a grain of salt ! Im also still learning.
#my art#tips#character design tips#character concept#character concept art tips#drawing tips#beginner tips#concept art tips#concept art#thread#art thread#art tips
145 notes
·
View notes
Text
New in the Screen Tones Ko-Fi shop: Texture Packs!


We have some all-new original texture packs over on our Ko-Fi shop, crafted and scanned by the Screen Tones cast for your commercial and non-commercial projects! Use them to dress up your webcomic or illustration art!
Masterlists: Digital and Traditional Mediums


We've also updated our Digital and Traditional Mediums masterlists! These are free guides walking through the features, compatibility, and pricing of our favorite digital programs, and our favorite brands/tips for traditional mediums. If you're looking to treat yourself to a new art set up, this is a great place to start!
🌟Both are available in our Ko-Fi shop! 🌟
Thanks for supporting our podcast and projects!
24 notes
·
View notes
Text

Hey there! Given that I signed up for my blog over ten years ago, when things were very different, I unfortunately have no idea what things are like now, sorry!
But wanted to mention that you yourself also look like a bot (hence why I didn't respond directly to your ask, and am instead answering via screenshot). Assuming you are a real person and not a new weird bot, I would very strongly recommend doing the following things so other Tumblr users don't accidentally block you!
Change your icon from the default one. Just use anything else as a placeholder for now! I recommend something unique to you, such as a photo of your pet, or idk, take a picture of your favorite pen or snack or something.
Write something in your bio! List your fandoms/hobbies, or even just "I'm new here and figuring stuff out" etc
Make a post or reblog some! Empty blogs look like bot blogs, and we have no way of knowing when you made your account. Just a brief self-intro elaborating more on your fandoms/interests (no word count limit! go wild!), photo of your pet, or reblogging from other users using the two arrows circling button 🔄. You're very welcome to reblog from me!
(note, reblogging is very different from reposting/reuploading. The former is where you use the reblog button/function to share other Tumblr users' posts onto your own blog. Creators generally love this, as it helps boost our own posts, and all credit, likes, shares, etc will come back to us! Reposting/reuploading is when you save work that isn't yours to your device, and create a brand new post. This doesn't link to anyone, and is theft, and hurts creators. Don't do this!)
I hope this information was helpful to you, and if you have any other questions, I'm happy to help!
❀ ❀ Send YukiPri an Ask! ❀ ❀
#YukiPri replies#themadhad8#assuming you are not a bot#if u are ah well i hope others will find this useful lol#tumblr#beginner tips
44 notes
·
View notes
Text

Is there any reason that this is the "wrong" purchase for a beginner?
I'm looking for something I can grow into, hence the 40" length but I'm also intent on knitting gloves with my mainly handspun fingering weight yarn and hopefully this is the proper needle size for that?
I assume that I should continue to resist the call of the bamboo needles for the same reason I don't like to crochet with a bamboo hook (splintering, bending, snapping etc.)
86 notes
·
View notes
Note
Hi! I'm a very beginner conlang enjoyer, I've listened to some conlangery, read The Art of Language Invention, and watched some linguistics/conlang resources (Biblaridion) on YouTube. Can you recommend any resources about typology specifically for conlangers? Unfortunately, because I'm not a linguist, I may never be a real linguist, I just need to know enough for a conlanger (If it makes a difference, alien conlangs are my favorites)
I don't think there's so much typology resources specifically aimed at conlangers. You're going to have to engage with real linguistics textbooks and maybe even research in this hobby, but don't be scared. Beginning conlanger guides like the Language Construction Kit can help you get familiar with some terminology, and there are free intro linguistics textbooks out there, so you don't need to take a class if that's not available to you. I hope that Jessie Peterson's textbook will help some people with a proper introductory text.
If you're into really alien languages, I would suggest Logan Kearsley's blog. He's really interested in the subject beyond typologically unusual languages like Klingon and into languages that human beings simply cannot produce or that describe experiences humans cannot have. It's a very different focus than most conlangers have.
But my general suggestion as far as getting into conlanging and the research process is:
Get an intro text (or an intro Linguistics course if you can) to get the basics down.
Start reading some typology.
Start looking at grammars of languages -- as wide a variety as you can find.
Hope that helps.
15 notes
·
View notes
Text
Sewing Tips: How to Choose Needle Sizes+ Free PDF
1 note
·
View note
Text
Hey this is my first post I wanna start blogging and I’m a bit confused on how to structure wise and what I should blog about as this is my first time using tumblr ever so yea give me tips :) I don’t wanna seem rude or anything.
2 notes
·
View notes
Text
Beginners Tips for Magic: The Gathering
As you will know if you’ve started playing, Magic: The Gathering is a fascinating and rewarding card game from Axion Now Events. With Magic Arena, it’s even easier to get started with gameplay. However, when it comes to improving your game, new players often don’t know how to get the most out of their decks, and may be short on strategies to take on better opponents. This can lead to…
#beginner#beginner tips#Card Game#deck building#how to play magic the gathering#magic the gathering#master magic the gathering#mtg card game tips
3 notes
·
View notes
Text
youtube
Here's a 17 minute video from someone with hundreds of hours into the game. Great resource for beginners.
#coral island#video#beginner guide#beginner resource#beginner tips#sarah sunstone#Youtube#not a reblog
5 notes
·
View notes
Text
As an amateur seamster myself I couldn't agree more!
Here are some things I have found invaluable myself:
● vintage/old sewing books. Cannot stress how useful these are - alot of these books are wonderfully illustrated and are normally structured with beginners in mind. I learnt how to properly set sleeves from a vintage clothing pattern book. I also find it easier to learn from a book than from YouTube. I suggest hitting up your local library, retirement home or thift store for these books.
● on retirement homes/communities! If you live close to one, go and ask if they have any sewing/knitting/quilting etc, groups. If so ask if you can join, you might get a few weird looks but I guarantee you will be welcomed with enthusiasm! The knowledge you will gain is priceless, not just for sewing but life in general. (Plus the gossip you become privy to is delightful)
● adding to previous posts point on ironing, ironing is potentially the most important part of ensuring something looks good. Even a pillow case will turn out better. Another thing to note is WHAT to iron. Aka PRESS YOUR SEAMS. even if you don't think it will do anything I promise it will!
● learn to french seam. It is not as complex as it looks but it does make stuff look very professional. This is also incredibly useful for stuff that doesn't need a lining, but you don't want exposed seams. It's a lot easier than most ways of finishing seams, except perhaps just overcasting/serging the seams.
● on EQUIPMENT! Look for second-hand sewing machines for your first machine. A lot of modern machines (whilst incredibly expensive and nice to use) are 90% plastic/ electronic. Whilst there's nothing wrong with investing in a modern machine, an old vintage machine has a few perks. Aka: a lot are solid metal and will not break easily. It's also much easier to service an old machine yourself (an invaluable skill that will make your life easier). Old machines are also more intuitive to use and are all round a lot cheaper to buy than a new machine. Just make sure you can test out a machine before buying, just in case. The main downside to old machines is spare parts not being made anymore. So if something is broken, it might not be easy to replace. Unfortunately, old machines do require a lot more general maintenance, aka cleaning and oiling, so weigh the pros and cons before buying a machine.
● with machines, another thing to note is the different sewing feet. Learning the different feet and what/how they are used for is intimidating but can have such positive results. Learning how to use a zipper foot properly is daunting but god damn is it satisfying to use.
● finally! Pillowcases are the easiest and most useful beginner project. Get yourself some fun fabric and go to town! Also great for people who go big on decorative/seasonal pillows. If you want to go into quilting this is still the perfect beginner project.
All in all, have fun and happy sewing!!
Things I wish I had read in "beginner" sewing tutorials/people had told me before I started getting into sewing
You have to hem *everything* eventually. Hemming isn't optional. (If you don't hem your cloth, it will start to fray. There are exceptions to this, like felt, but most cloth will.)
The type of cloth you choose for your project matters very much. Your clothing won't "fall right" if it's not the kind of stretchy/heavy/stiff as the one the tutorial assumes you will use.
Some types of cloth are very chill about fraying, some are very much not. Linen doesn't really give a fuck as long as you don't, like, throw it into the washing machine unhemmed (see below), whereas brocade yearns for entropy so, so much.
On that note: if you get new cloth: 1. hem its borders (or use a ripple stitch) 2. throw it in the washing machine on the setting that you plan to wash it going forward 3. iron it. You'll regret it, if you don't do it. If you don't hem, it'll thread. If you don't wash beforehand, the finished piece might warp in the first wash. If you don't iron it, it won't be nice and flat and all of your measuring and sewing will be off.
Sewing's first virtue is diligence, followed closely by patience. Measure three times before cutting. Check the symmetry every once in a while. If you can't concentrate anymore, stop. Yes, even if you're almost done.
The order in which you sew your garment's parts matters very much. Stick to the plan, but think ahead.
You'll probably be fine if you sew something on wrong - you can undo it with a seam ripper (get a seam ripper, they're cheap!)
You can use chalk to draw and write on the cloth.
Pick something made out of rectangles for your first project.
I recommend making something out of linen as a beginner project. It's nearly indestructible, barely threads and folds very neatly.
Collars are going to suck.
The sewing machine can't hurt you (probably). There is a guard for a reason and while the needle is very scary at first, if you do it right, your hands will be away from it at least 5 cm at any given time. Also the spoils of learning machine sewing are not to be underestimated. You will be SO fast.
I believe that's all - feel free to add unto it.
39K notes
·
View notes
Text
Pity Party Flowcharts: Understanding how pity works for each banner
0 notes
Note
Do you have any material on artist/writer collaborations - either on the collaboration process, or on how to find a collaborator to begin with?
This is a great question, and not always one with a straight-forward answer! While many webcomic projects are solo projects for long-term logistics reasons, some webcomics follow a split of roles between writers and artists (or maybe further split for inkers/flatters/colorists/letterers). Collaborative teams like this can form in many ways, both formally or informally:
Comic creators may find more members for their team to hire from boards like Reedsy, communities like @cartoonistcoop, or hashtags events like PortfolioDay on social media
Writing and comic Discord servers can be good gathering places to make friends, learn about other peoples' projects, and get recommendations when someone has availability and interest for a collab. (Note that most creators you meet in these place will have their own projects, though, so don't go in expecting folks to immediately invest time in your work! Be respectful of their time and show interest/help out with their work too!)
RP or fan groups can be hotbeds for learning the storytelling styles of other people, and that may take comic form somewhere down the road!
Events with a deadline like anthology projects, NaNoWriMo, or Itch.io Game Jams, which often host forum and community spaces where creators can connect and collaborate for a short time and be done if it doesn't work out
Friends, spouses, and siblings often team up when they're into the same things
Some things that factor into whether or not potential collaborators will want to work with you on your comic project:
The scope of the project. Comic projects can take years, and short, deadline-driven projects can be easier to commit to than long-term ones.
Your experience. If you haven't ever finished a comic, collaborators may be cautious to work with you if they can't see concrete proof of what you're bringing to the table, or if they suspect they're going to be doing most of the work. For writers, be sure to have your ideas fairly fleshed out, and your plans as clear as possible. For artists, keep samples and portfolio pieces handy of comic work, not just illustrations. Show you know what your part entails and that you've done it before!
How compatible you are. Many great collaborations come from folks who know each other, enjoy each others' ideas, and work in a compatible way.
How much of a role they have in the creative process. Are you just looking for someone to draw your ideas? Or give you ideas to draw? Or are you interested in building something together?
Money! (though this isn't always a guarantee that the creators you talk to will have time, even if offered financial compensation)
Our best recommendation if you want more collaboration opportunities to come into your life is to see who's vibing with what you're doing in your circles, and see if there are small ways you can collaborate to test the compatibility of your work styles and get experience communicating with each other. Keep expectations clear, be ready to offer your labor to help others, and be flexible with adapting to others, adjusting your plans, or possibly contributing to projects that don't take off.
We also highly recommend this blog post of questions to ask when reaching out to hire someone. While this advice is written specifically about letterers, a lot of it applies to any member of a comic creator team!
And for more of our thoughts about the roles of Writing and Art in webcomics, check out our Jam Session podcast episode about Artists vs. Writers!
11 notes
·
View notes
Text
Video Ideas for YouTube Beginners
Starting a YouTube channel is exciting, but one of the biggest challenges for beginners is figuring out what to talk about. You’ve made the decision to create your channel, your phone or camera is ready and you’re ready to hit record but then you freeze. “What should I make my first video about?” If this sounds like you, don’t worry, you’re not alone. We have some video ideas for YouTube to help…
0 notes