#beginner sewing machine
Explore tagged Tumblr posts
Visit Tumblr Blog
Explore Tumblr blogs with no restrictions, modern design and the best experience.
Last Seen Tumblr Blogs


Fun Fact
Users from the US are the majority of Tumblr visitors.
Text
How to Choose and Use a Sewing Machine for Your DIY Fashion Projects | sewing machine for beginners
In this post, you will discover the best sewing machines for beginners and advanced sewist and how to use them effectively. Do you want to create your own garments, accessories, home decor, and more with sewing? Do you want to learn how to choose and use a sewing machine that can help you achieve your sewing goals? If so, you are in the right place. In this post, I will show you everything you…
View On WordPress
#beginner sewing machine#Beginners#Brother#denim#diy fashion#Experts#fabric#Janome#Juki#Quilting#sewing#sewing machine#sewing machine for beginners#Sewing Machines#sewing projects#sewing tips#sewing tutorial
4 notes
·
View notes
Text
I am begging people to stop buying this damn sewing machine for anyone older than 12.
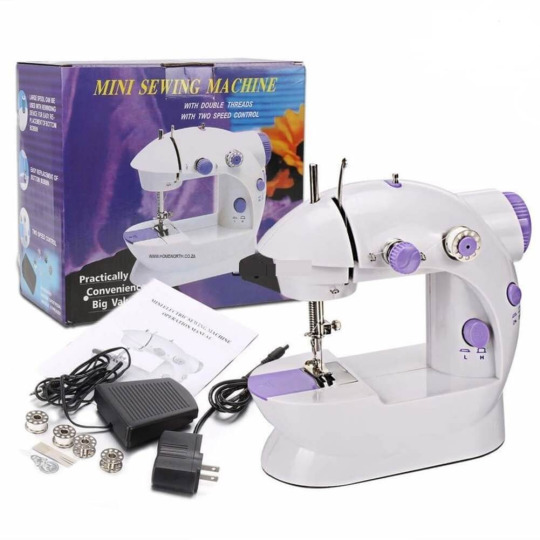
As a toy for children, it's acceptable. If you ACTUALLY want to sew something, do not get a cheap piece of crap from Walmart for $35!! You'll work on this thing for 15 minutes, it will suck, you will get frustrated, and then you'll tell yourself that you are simply incapable of sewing and that it's too complicated for you. But it's not your fault-- you are working with a child's toy. That's like giving up on driving a car because your Barbie Jeep's battery dies the first 5 minutes you're in it.
My two recommendations:
First and most recommended: You get a LIGHTLY USED modern plastic machine for cheap off Facebook Marketplace or your local sewing machine repair shop. I'm talking less than 10 years old. You ask the seller "do you use this regularly" or "has this been serviced". Try to buy from someone who has used the machine recently because they'll know its ins-and-outs. You can find a modern machine for like $30 on Facebook Marketplace from someone who has actually used it (I would not recommend Goodwill or anywhere you can't speak to the person who used it before you, if you are just starting out). One highly recommended modern machine for beginners is the Singer Heavy Duty.
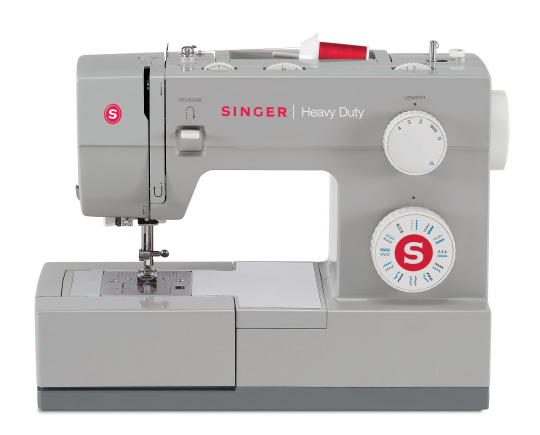
It's $200 new but you can easily find one much cheaper used. It's simple to use and will hold up to basic sewing for the time it will take you to decide whether you want to sew or not. Other modern Singers suck ass; save yourself the trouble. Go with the Singer Heavy Duty or a Brother, or even a Janome if you can find one cheap enough. Stay away from anything that's not a time-trusted brand.
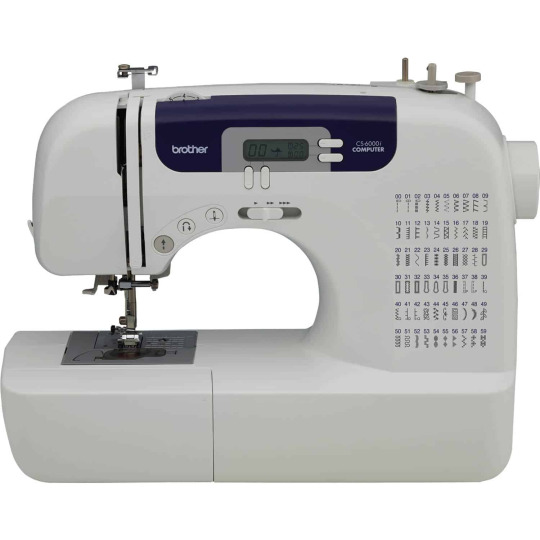
The Brother CS6000i is a decent beginner's machine.
Again, do not buy machines off eBay unless they make it CLEAR that it has been fully serviced and is in perfect working condition. They honestly aren't much cheaper used on eBay than they are new, so best to buy it from someone on Facebook Marketplace or at a sewing machine repair place.
Second recommendation: Buy a VINTAGE METAL machine that has been fully serviced or in perfect working condition. These are more difficult to find serviced, so I wouldn't recommend it unless you find one on FB Marketplace (though the one I got on eBay worked perfectly out of the box). There will be TONS of very cheap vintage machines on FB Marketplace, but the problem with these is that they've often been sitting in a cabinet for 20 years, unused. Not great for learning on. You can also buy one of these machines and have it serviced, but having a machine serviced will cost more than the machine is worth, more often than not.
There are benefits to a vintage metal machine over a modern plastic one. it will last your lifetime. It can sew through thick, difficult fabrics. They're much better looking imo. They likely won't break unless you drop them down a stairwell. However, the oldest ones only do a straight stitch, and speaking as someone who has vintage and a modern machine... the automatic buttonholer and overlock stitch are nice to have! But the vast majority of the stitching you will do will only be zig zag (for stretch knits/elastic) or straight stitch. The zig zag feature became available in most domestic sewing machines by the late 1950s.
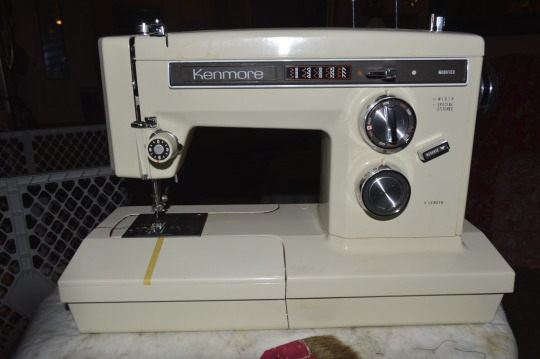
Any vintage machine made before 1970 will be fine to sew with; everything was pretty good quality back then. 1970s era Kenmores are ugly and basic but they are cheap while also being excellent machines, and they're the "newest" domestic machine you can get that's still all metal.
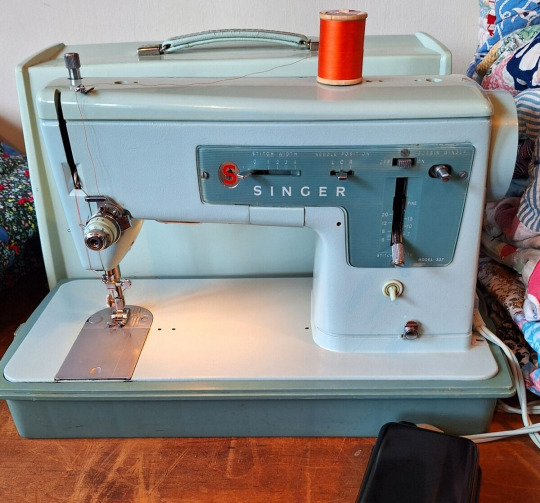
Any Singer will have easy-to-replace parts, have easily findable user manuals, and every sewing machine repairman will be able to fix them. The uglier ones in the 1960s are dirt cheap, if you make sure it's not younger than the 628 or 337. Both of these machines are the cheapest vintage all-metal Singers you'll find and they work fine (and they do zig zag stitches).

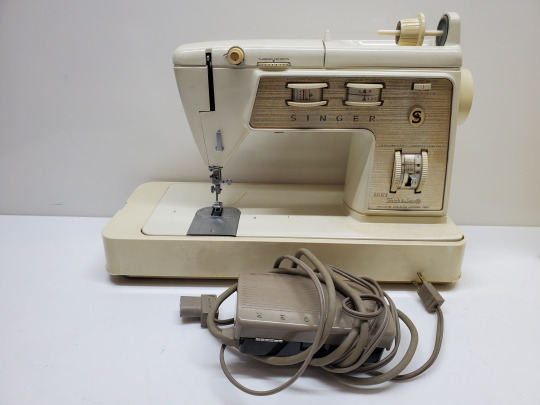
Do NOT get a Touch n Sew or Stylist made in the late 1960s or later. Generally if it has plastic buttons, it's got something plastic inside (not always, but with Singers, often). These Golden Touch n Sews are in fact Touch n Throw (away).
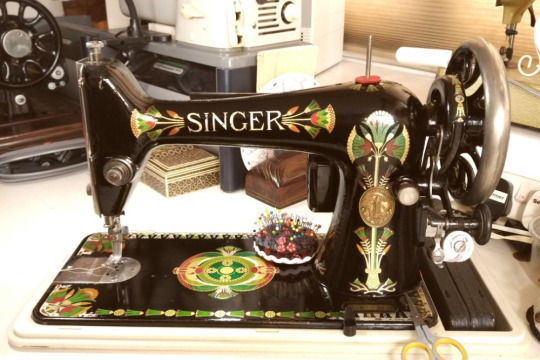
Any old black machine will be fine and very simple to use, and I think they look gorgeous, but they only straight stitch, so you won't be able to sew your own leggings on them. If you only want to make curtains, quilts, or bags or something, they will work fantastic for that. Just make sure they're serviced, as these things usually are not.
I'm going to talk to my younger, beginner self: Just because it's a used, older machine does not make it worse!
Even used modern plastic machines can work fine. It's rare that people are selling a machine as WORKING when it doesn't work. People tend to be honest about it. Usually they are selling it because they lost interest, it was given to them by a family member, or they just don't use it enough to keep around. Buying used is almost always the best, cheapest option for a beginner. Stop buying these cheapo gadgets on Amazon! They will only make you hate sewing machines.
139 notes
·
View notes
Text
You get knitters that turn to crochet and never look back.
You get crocheters that turn to knitting and never look back.
Then you get me, collecting fiber crafts like Infinity Stones
#guess who's trying to learn spinning and just finished a massive needlepoint tapestry?#also if anyone has good leads on learning to quilt as an absolute beginner PLEASE throw them in my direction#i at least know how to use a sewing machine#knitting#text post#rambly prismatic#crochet
31 notes
·
View notes
Text

#photography#beginner photographer#aesthetic#photooftheday#pnw#pnw photography#dark academia#dark aesthetic#dark acadamia aesthetic#light academia#sewing#sewing machine#craft#crafty#crafts#crafty things#craft aesthetic#academia
23 notes
·
View notes
Text
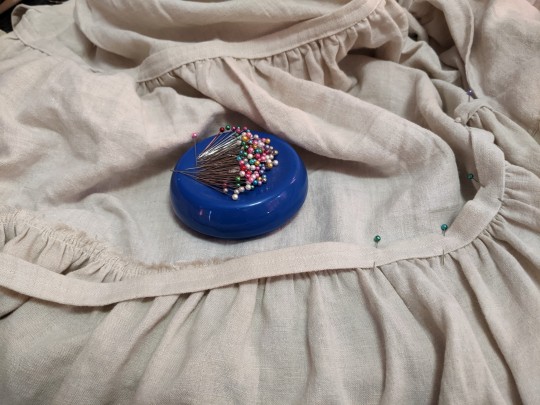
It's been almost two weeks since my last sewing update, but I have been making progress on a couple different projects, thankfully. I mentioned in my last post that I was hesitant to cut into a king-sized 100% linen bedsheet that I've been hoarding for 10+ years. I knew I wanted to make an apron, but I also knew that it wouldn't take up anywhere near the whole sheet, and I had the thought that I might be able to get two projects out of this one sheet (and the remnants of the matching fitted sheet) if I was careful about how I cut out all my pieces. Possibly a gathered tiered skirt/petticoat, along with the apron.
I measured the two long sides of the flat sheet that had identical ~1.25" deep hems, and I found that each side was 112" or just over 3 yards long, not counting the top and bottom hems. That meant if I did side seams, I could get a 6 yard wide bottom tier for the skirt and not have to do a hem at all, just use what was already there. Not the widest hemline on this kind of skirt (I have a purchased skirt with a 25 yard hem, and years ago I made a 26 yard tiered skirt out of muslin), but with this heavy weight linen it felt like 6 yards at the hem would be plenty.
Gathered tiered skirts are really just rectangles and a bit of simple math. Since the sheet's side hem determined the size of the lowest tier at 224", I figured I would do 2-to-1 gathers and make the next tier up 112" wide, and the third tier up 56" wide. A fourth tier at that 2-to-1 gathering ratio would have been only 27" wide, which wouldn't have fit over my hips, so the skirt would have 3 tiers.

I'm a short girl at not quite 5'2" and I like to wear my skirts pretty low on my hips for spoonie comfort issues, so after measuring a purchased skirt whose length I like, I decided that between 30" and 33" inches in total length would be ideal. With three tiers that length could easily be divided into tiers that are each 10"-11" tall. I added a half inch for seam allowance (but no hem allowance on the lowest tier, since I was re-using the existing hem) to get the exact measurements for each of the pieces I needed for the skirt.
I was able to tear most of my pieces, since the linen bedsheet was nicely on the grain and tore relatively cleanly, thus saving my hands from cutting all those long pieces. I had meant to cut the top tier at 14" tall so that I'd have room to turn under a nice thick waistband too -- and then I totally forgot and cut it at 12" just like the middle tier, lol. I was able to get one of the middle tier pieces and both of the top tier pieces out of the remains of the matching fitted sheet, so I only needed one middle and two bottom tiers from the flat sheet. That left me with plenty of flat sheet left over for the apron, but I'll talk more about that in my next sewing post.
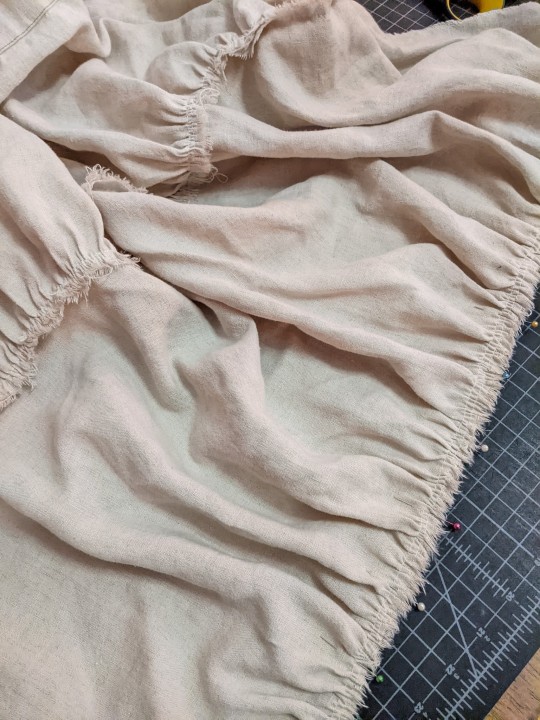
With my pieces all cut out, it was time to start the most annoying part of making a gathered tiered skirt: gathering all those tiers. I'm trying to sew with cotton thread more often these days, but for the gathers I switched back to polyester thread just for the strength. For the two bottom tier and two middle tier pieces I ran two lines of gathering stitches along the top edge, placed pins to divide each panel into quarters, and got to gathering and pinning.
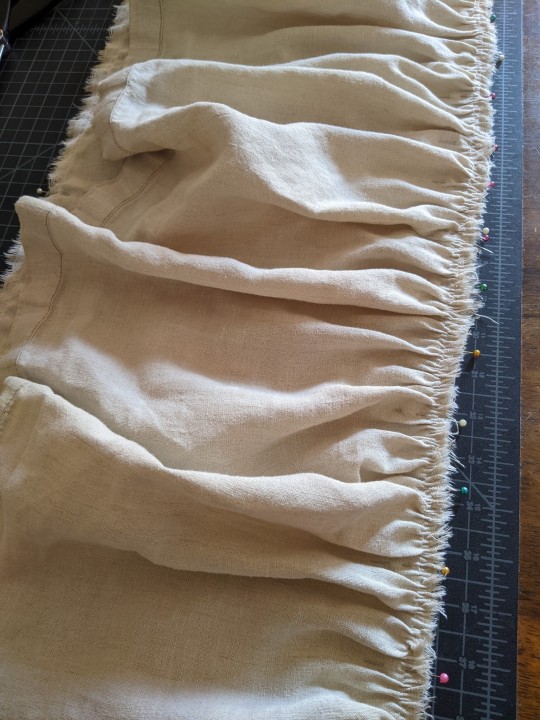
With tiered skirts I really prefer to work from the bottom up, so that I'm always attaching a gathered piece to a completely flat piece of fabric, and save side seams for last. So the bottom tier pieces got gathered up and attached to the middle tier pieces, then the middle tier got gathered up sewn to the top tier.
Since I accidentally cut my top tier pieces shorter than I'd meant to, I did play around with adding a separate waistband for the top tier to be gathered onto. But I couldn't do a full 2-to-1 gather if I wanted the waistband to pull on over my hips, and the waistband made the proportions look weird, like the top tier was too long. So I ended up cutting the waistband off after I sewed it and actually shortening the top tier even a little bit more. After turning under the top edge to enclose the raw ripped edge and then turning under 3cm (~1.2") for a waistband casing, that top tier ended up being about 9" tall, and the proportions of that look much better for some reason.
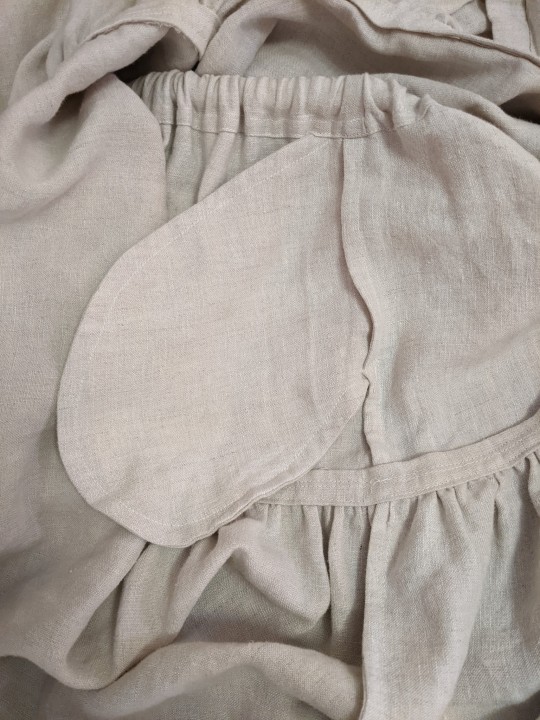
Before I sewed the side seams, I decided that this skirt needs to have pockets, of course. I knew I was planning to do French seams to protect the raw edges against unraveling, so I put the pockets in with a French seam as well.
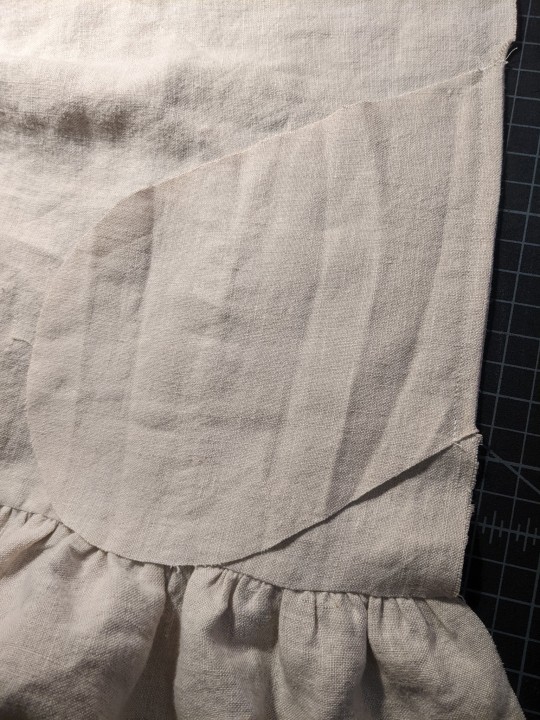
With the pockets in place, the next step was to do the side seams (including the pocket bags), being careful to match up the height of the hem and each of the tiers so everything was nice and clean and square. Then I was able to turn under that waistband casing and sew it in place -- my original plan had been put in three separate channels for narrow elastic that would result in a bit of a faux-cartridge pleating look, but actually getting the elastic strung through there turned out to be more of a pain than it was worth, so I ended up picking that out and just using a single 1" wide elastic band in the waistband casing instead.
And with that, the skirt was technically wearable, and with some fabrics I might have been happy to leave it there. But the raw ripped edges at the seams between each of the tiers worried me. I've had well-loved sewing projects just shred after many wears and washes because I left the seams unfinished, figuring I would be the only one to see the inside. Ideally I want this skirt to be in my rotation for years and years, so I decided to make the effort to finish those seams too.
My original plan had been to cover the raw edges inside with 3/4" herringbone twill tape. For some reason I was convinced that I had a bunch of it left over from a Wasteland Weekend project from 2018, only to discover that I actually only had ~3 yards left. So rather than ordering more and waiting for it to arrive (and then inevitably having some of that left over too), I decided to just make some 3/4" tape from the linen sheet itself. Since this whole skirt is rectangles on-grain and the tape wouldn't have to go around any curves, I made the tape from on-grain rectangles too, rather than bothering with proper bias tape.
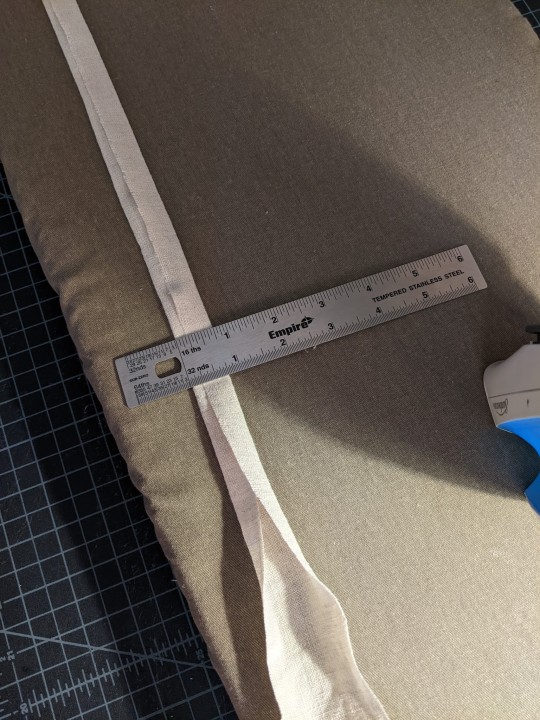
With the hem and the waistband already cleanly finished, I just needed tape to cover the ~3 yard seam between the bottom and middle tier and the ~1.5 yard seam between the middle and top tier. I tore nice straight strips, trimmed off the frayed edges, and ironed the raw edges under to give me that 3/4" width. It's three layers thick in the middle but only 2 layers thick on the sides, since it isn't a proper double-fold tape.
Then it was just an issue of pinning it over the raw edges inside the skirt -- first from the inside in roughly the right place and then from the outside to make sure it lined up with the seam well.
I stitched-in-the-ditch from the outside right where the gathers met the next tier up, and then went back and did another line of stitching just slightly up from that, using the width of my machine foot (~1cm) as a guide. That covered all the raw edges inside and reinforced the seam, and gave it a nice neat appearance from the outside.
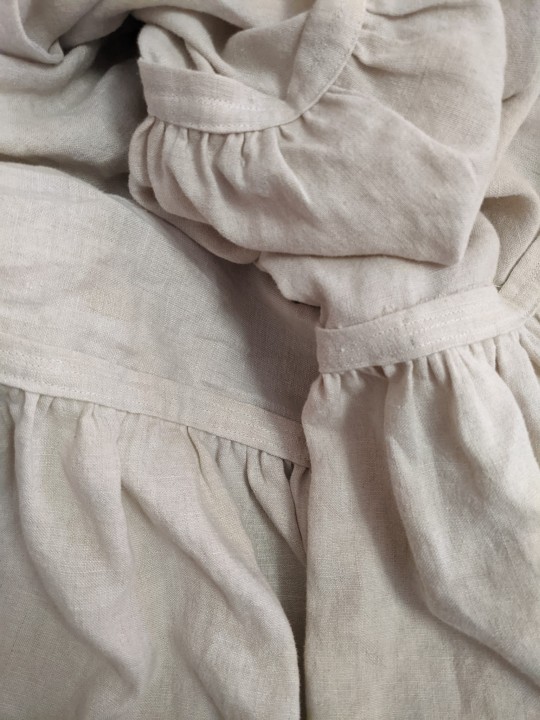
It also had the added benefit of behaving almost like cording on a corded petticoat -- the gathered seems have a lot more body and stiffness now than they did before, which gives the finished skirt a really lovely lofty structure.
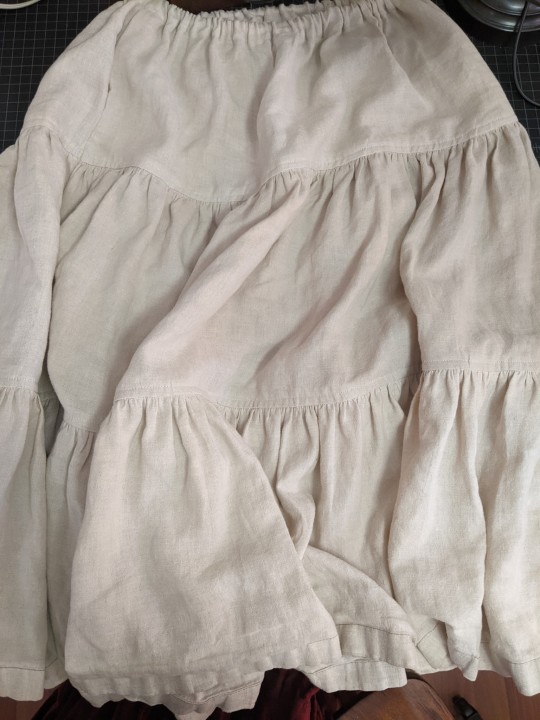
The whole skirt ended up being about 31" long, right in that 30"-33" length I had originally aimed for, and when I wear it low on my hips where it's most comfortable, it just brushes the tops of my feet.
My plan is to wear this mostly under other long skirts and dresses, more as a petticoat than a skirt on its own (tho it is heavy enough and neat enough to be worn on its own, if I want). That lofty structure from the seam finishes adds a lot of floof to my other long skirts, just barely peeking out the bottom of the purchased green skirt I originally measured to figure out the length for this one, and hiding completely under my purchased 25 yard burgundy skirt but giving it enough extra volume that it doesn't drag on the ground quite so badly.
As the colder weather sets in I'm sure this will get a lot of wear under skirts and dresses (including the several dresses I'm still planning to sew in the next couple months!), but even now in the last heat of summer it's quite comfortable to wear, since it's linen. Jack commented that it seemed like a lot of work for a skirt that won't be seen (and it did manage to remind me how much I dislike gathering long lengths of fabric), but as long as it's functional and gets used often, I feel like all the effort was worth it.
While I was putting this together, I also cut out and started assembling the apron project from the same bedsheet. Even with all those pieces cut out, I still have enough linen left over for at least one more, maybe two more projects. Next up I'm going to get to all the finishings on the apron (which will be getting its own post once it's done) and keep trucking along on the handsewn eyelets for the Lengberg Castle Bra-thing. And once those two are done, I think I just might be ready to finally start on all the dresses I want to make with my new fabric.
#sewing#tiered gathered skirt#peasant skirt#bellydance skirt#if you can sew a straight line on a sewing machine you can make this skirt#I wouldn't recommend trying to sew it by hand but it's a good beginner sewist project#the math is really easy and you can work upwards from the hem like I did or downwards from your waist measurement if you want#gathering in a 2-to-1 ratio (so the final piece is half its original width) is pretty standard but you can also do 3-to-1#bedsheets and quilting cotton are excellent options for this kind of skirt#and if you're careful with re-using hems like I did or using the finished selvedge edge of the fabric you can avoid hemming it entirely#long post#my sewing#2024 mood#linen petticoat project#linen apron project#which is actually all assembled and just needs all the hems and finishings. but that'll probably take me most of this next week I think#post on that coming eventually#and then: DRESSES
9 notes
·
View notes
Text
28 notes
·
View notes
Text
Just dumped like $70 in sewing supplies only to find I still can't fix my disappointing vintage sewing machine and it's time to upgrade/downgrade/new machine but I didn't account for that in my craft budget
Anyways recommendations for $100 sewing machines?
#sewing#beginner sewing#fabric crafts#hand sewing#tagging as such bc usually i hand sew#machine sewing#sewing machines#ok to rb
8 notes
·
View notes
Text
Today's Mending
It was another day in quarantine, but I feel like a human again, which was a blessing. So I sat up at the machine and tried to make some progress.

The machine gave me all sorts of trouble today, no matter how I fiddled with the tension and needle. The stitch lengths were twelve kinds of inconsistent and as skippy as a Labrador in a mud puddle.
I posted on Facebook, and a friend's grandma reminded me to unscrew the bottom plate and have a look at the insides.

Bleagh. Look at all that lint!
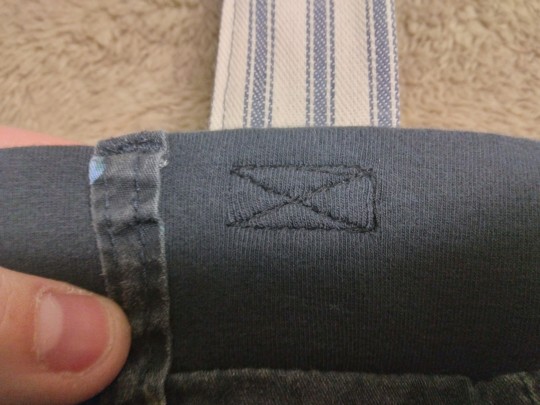
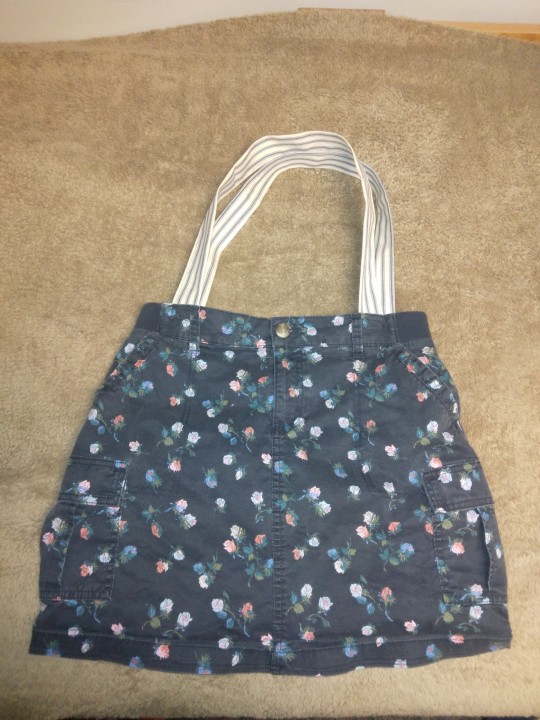
Anyway, turns out the feed dogs are a lot more consistent when they aren't fighting with felt compacted underneath them. I got the straps sewn up in short order, learned how to do that neat little x-box thing, and finished off the miniskirt tote bag!
I had a couple mending commissions that got procrastinated for ages because I needed to find patches and thread that matched. They took just a few minutes each when I actually got to them. Guess that's always the case.

My friend Isaiah had done a good job mending these, but all he had was light turquoise thread, and he was a bit self-conscious about having such a visible crotch mend. I put a patch of jersey under, just for stability's sake, and machined overtop in the closest thread I had.
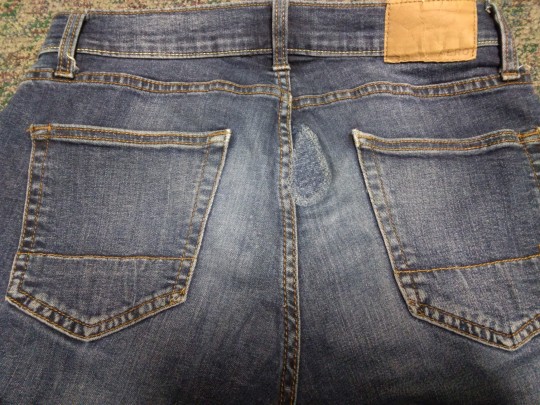
My roommate's partner's pet got ahold of some jeans and tore a raggedy hole in the important part. I trimmed down the edges, found my closest fabric, and machined all around the edges with my closest thread. The mend is still visible, but he usually wears flannels so it shouldn't be obvious. And, as I told him, "If someone does notice, you're legally allowed to kick them."
The final three projects were all for me. First up were these work pants. A couple years ago I started doing the DIY ripstop but didn't finish (time? thread? machine issues? ADHD? idk). I just had the vertical threads. They wore on each other as I walked and started tearing out really quickly. I unpicked all that old thread a while back and re-did the vertical threads, then got sidetracked (yes, again.) So today I did the rest of the ripstop. There!

I also did all the ripstop for these black summer shorts.

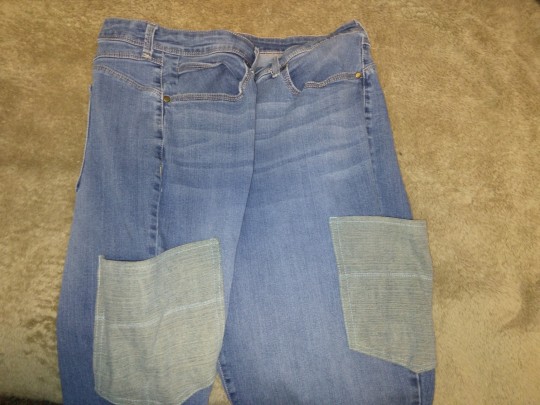
Finally, my Christmas break project was adding cargo pockets to all my pants. These less-used jeans have had pockets cut out and pinned on since then, so today I dug out fun aquamarine thread and sewed them down.
I spent the end of the day messing around with my new pillowcases, but I'll drop those when they're done. :) And, most importantly, I slept in, ate well, took my meds, didn't berate myself for lack of progress, and took a nap. All in all, a really good sick day!
#cj sews#diy#solarpunk#mending#sewing#machine sewing#beginner sewing#miniskirt tote bag#it's not waste until you waste it#use it up wear it out make it do or do without#repair your machines gang#yes she'll be going in for some professional TLC soon#in the meantime check your own sweet little workhorse for lint!
39 notes
·
View notes
Text
Sewing Machines I've Used: Ranked
I get asked about my sewing machine recs a lot, and typically I stick to recommending what I use and trust. But that’s admittedly limited! Lately, I’ve been using a lot of different sewing machines for work and figured it would be good to make a little list and ranking. The sewing machines I love The mid sewing machines The very bad sewing machines What to look for in your first sewing…
#bad sewing machines#beginninger sewing machine#budget sewing machine#sew#sew faster#sew knits with confidence#sewing#sewing 101#sewing emergencies#sewing gifts#sewing kit#sewing machine#sewing machine beginner#sewing machine budget#sewing machine cleaning#sewing machine gift#sewing project#sewing room
6 notes
·
View notes
Text

My dad got me a beginners sewing machine and I made little hearts out of my old jeans!


I’m putting little pockets on them and hanging scrap pieces!! They look cute but also messy and ugly so Ive just been calling them bad luck charms!!! It’s gonna catch all the back luck!!! 😆💖👏😁😆💖👏🥹
#sewing#sewblr#beginner sewing#charms#it’s cute#Their are so easy to make!!! and I’m gonna make so many.#my dad- my daughter wants a sewing machine to make cosplay. me- cutesy little charms🥹🤗🥰💖#I’m learning to sew
4 notes
·
View notes
Text
How to Sew Own Clothes for Beginners - Free Sewing Patterns
In this post, you will learn how to sew own clothes as beginner. Love what you see ? Support me by snagging some cool items from my shop! Every purchase helps me bring you more awesome content. Thank you! Shop Now Why Sew Your Own Clothes? Sewing your own clothes is a fantastic way to express your personal preferences and style. It offers the freedom to create unique pieces that fit you…
#Beginner-friendly sewing patterns#diy clothing#Easy Sewing Projects#free sewing patterns#How to Sew#Learn to sew#Personal preferences#Sewing journey#Sewing Machine Basics#sewing skills#Sewing Techniques#Sewing Tips for Beginners#step-by-step sewing guide
68 notes
·
View notes
Text
How to Use Brother Sewing Machine (Beginners Guide)
If you've recently purchased a Brother sewing machine, you're in for an exciting journey! This device has advanced features for your everyday sewing routine. If you love to sew clothes, this machine would be perfect. However, if you’re a beginner who is just getting started with sewing, I’ll teach you how to use Brother sewing machine in this blog.

I have done multiple projects with this sewing machine, and they all turned out great. I’ll explain each step clearly to help you stitch like a pro. So, let’s get started using the Brother Sewing machine.
Step 1: Connect the Machine to Power
As the first step, you need to connect your sewing machine to the power supply. So, grab the power cord and connect it to your sewing machine and to the power outlet on the wall. Now, turn on the power switch. After that, you can turn the power off and on as needed.
Step 2: Connect the Foot Pedal
This step is only for mechanical Brother sewing machines. Hence, if you like machines with foot pedals, you can connect them to your machine according to the instructions. You can connect them to the side of your power cable. When I was learning how to use Brother sewing machine, I had no guides, and I made lots of mistakes. But, you should take care of the important points to avoid any type of mistakes.
It is worth noting that you don’t need a foot pedal if you prefer a computerized sewing machine. In some machines, both options are available. In computerized machines, you’ll get a start and stop button in place of the pedal. Hence, it’s up to you which machine you prefer for stitching.
Step 3: Adjust the Presser Foot
To continue learning how to use Brother sewing machine, you need to keep following each step carefully. In this step, you need to turn your sewing machine off and check whether your pressor feet are adjusted or not. This presser foot helps keep your material flat during sewing tasks. The Brother Sewing machine has a huge collection of presser feet with different abilities.

You can select the pressor feet that you use. You need to lift the presser foot up on normal sewing machines to place the fabric underneath. However, if you’re using a mechanical sewing machine, it will have a lever and a needle shaft that you can lift up and down. Lastly, if you’re using a computerized sewing machine, you’ll get a button on your machine to raise or lower the foot pedal.
Step 4: Insert the Needle
After adjusting the presser foot, you need to insert the needle in your machine. To get started, take a new needle from the machine pack you’ve got. There are many sewing needles for different types of stitches.
Now, grab a screwdriver from your machine’s accessories kit. Then, find the needle shaft and the screw on the right side of the needle. After that, loosen the screw, and insert the needle into the place, and again tighten the screw. Ensure that the needle is placed correctly and securely.
Step 5: Install Your Sewing Machine
Once you’re ready with your sewing machine, find a comfortable place to sit it. Make sure that the surface is flat and stable before placing your machine. Also, keep it away from running water. Moreover, check that the power cable is long enough to reach the power outlet and that there is no extra strain on it.
While installing your sewing machine, ensure that your room has sufficient space to keep your legs comfortably on the presser foot. Otherwise, you’ll end up getting uncomfortable.
Step 6: Thread Your Machine
I hope you’re enjoying this how to use Brother sewing machine guide with me. Well, let’s move on to the next step after installing your machine. Proper threading is an important step once you install the machine. If you don’t do this step the right way, you won’t get the right stitches.

And the best part is that your sewing machine displays all the threading instructions. First of all, insert the bobbins in place. Now, thread your machine, and before that, raise the presser foot. Raising the presser foot is important to pass the thread easily.
After that, place the spool of thread on the machine and follow the instructions to thread your machine. Ensure that the thread smoothly passes through the spool, and follow every step of threading carefully.
Threading the needle in your machine can either be done manually or mechanically in some specific sewing machines.
Step 7: Start Stitching Your Projects
Finally, when you’re done threading your machine, you need to do some test stitches to understand how it works. If you have any issues, you can fix them immediately. To follow this method, take an old cloth to practice. Now, place it underneath the pressor foot and lower down the pressor foot.

Finally, choose a stitch pattern and start stitching. Different sewing machines may have different methods to select stitch styles, so it’s better to review your user manual.
Once you finish the stitching, lower the pressor foot pedal; if you have a mechanical machine, hit the Stop button and perform reverse stitching to keep the stitching secure. After that, gently take off your legs from the pedal and remove the cloth.
Conclusion
I hope you’ve learned how to use Brother sewing machine for beginners. Using a sewing machine may seem a little complicated at first, but once you get used to it, it’s quite comfortable. As you know, Brother produces different types of sewing machines, so you should always review the user manual, which is provided to help you with every step. Once you learn the right method, you’re ready to stitch anything like a pro.
#Brother Sewing Machine#How to Use Brother Sewing Machine for beginners#How to Use Brother Sewing Machine
2 notes
·
View notes
Text


after having used both these little machines on projects, i just have to say that all beginners should learn on a vibrating shuttle machine. Rotary machines will constantly give you tension issues, but vibrating shuttle machines do not give a flying fuck what your tension is, 80% of the time they figure it out. i will it be loud? yes. will it be slow? probably. will it create the most amazing straight stitch you've ever seen? always. honestly don't even want to bother with any other kind of straight stitch machine, tbh. i feel like we evolved backwards on this.
#they aren't particularly powerful so maybe on thick denims or whatever they aren't great#but man#all the time I've spent dicking around with tension problems on rotary machines and with these things you sit down and sew and they WORK#no questions no complaints#so! If you're a beginner and have no need for a zig zag stitch#get yourself one of these old baddies#they have no reverse but whatever#i just do 30 stitches per inch and it locks it just fine
2 notes
·
View notes
Text
youtube
Ever wanted to learn how to sew?
Ever look at a sewing machine and feel daunted by how to get started?
This video will help demystify the ins and outs of using a sewing machine.
The video is intended for beginners, but others who know the basics may find this video useful on how to avoid snags and loops on the bobbin thread side of their projects!
#sewing#youtube#diy#do it yourself#clothing#cosplay#sewing machine#how to sew#learn how to sew#sewing for beginners#Youtube
2 notes
·
View notes
Text
was gonna be a bum ass fujoshi and drink and get high while playing paradise but actually i will not. i'm gonna hone my skills and continue my quest to get so good at sewing that i start sewing my wardrobe
#niyah.txt#i got a mini sewing machine the other day and it's so cute...#unfortunately i fucked up and now my thread keeps getting knotted but that's okay#im a beginner we make dumbass mistakes
4 notes
·
View notes
Text
Does anyone within the USA need a sewing machine?
It’s a Pfaff 1122. Works like new, all parts included with pedal and manual.
I only used it a few times in college for my design course. The cover has some dust I tried to clean as good as possible but the actual machine is like new.
Please direct message me! $120 plus shipping. Or I can work with your offer.
#sewing#sewing machine#selling#seller#fashion designer#fashion design#college#materials#college savings#seamstress#draping#pattern making#fabric#sew#beginner sewing#student#design student#fashion
3 notes
·
View notes