#baking soda clay
Explore tagged Tumblr posts
Text
Some baking soda clay creations and tests
I've been on a creative kick recently with DIY baking soda clay. One of the things I read online was that baking soda clay creations can be colored with watercolors. Now I have heard of baking soda being mixed with gesso to make a DIY watercolor ground, so I figured there was no harm in trying out watercolors on some baking soda clay creations.

So, first off, a close-up of this lovely little goober, based off of a common rain frog. A relatively simple paint job, and the surface does take watercolor paint well, but I found that the gradient technique used in typical watercolor painting on paper doesn't work on the clay surface (I figure this is a limitation caused by lack of proper water flow over the clay surface).


Next up were some creations made out of a silicone mold. It turns out that watercolor does not penetrate very deep when applied to the surface, and so you can scratch-off/sand-off/shave-off away some areas to create a fine white line or faded parts without need for white paint.

I also tried to see if the clay could be tinted with alcohol markers (the equivalent of adding an alcohol-based dye to clay material while the clay is wet). In this case, I tried with a red marker, though I could only add so many marker strokes, and so the color of the clay turned out pink.

It seems I would need an otherwise significant amount of alcohol-based dye to get a saturated color. That said, I have seen videos where others tried to apply acrylic paint as the colorant and yet the clay becoming lighter upon drying. (The clay does start off as translucent and then dries a semi-opaque white color, so this would be expected.)
I did also read online that baking soda clay creations can also be colored with markers, so coloring with water-based and alcohol-based markers might be my next thing to try.
0 notes
Text





A Spirit Phone by Lemon Demon stimboard for anon!
♥️▪️♥️|▪️♥️▪️|♥️▪️♥️
#stim#stimboard#red stim#black stim#glitter stim#baking soda stim#crushing stim#clay cracking stim#paint stim#paint mixing stim#sparkle stim#toasted stims
41 notes
·
View notes
Text
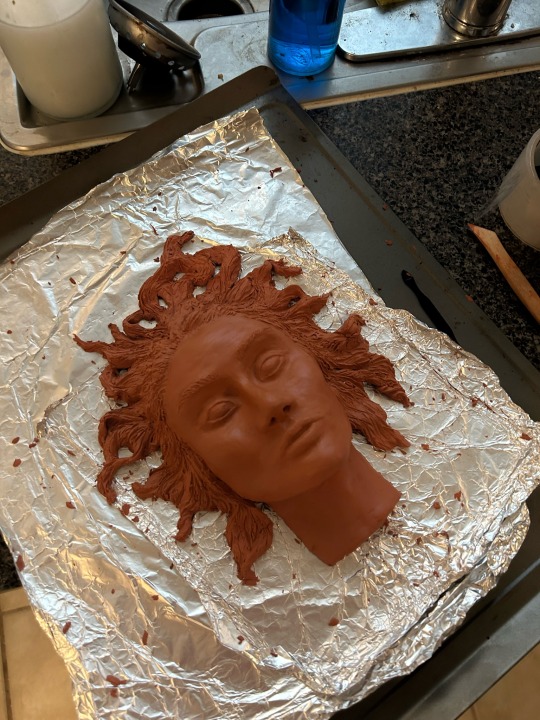
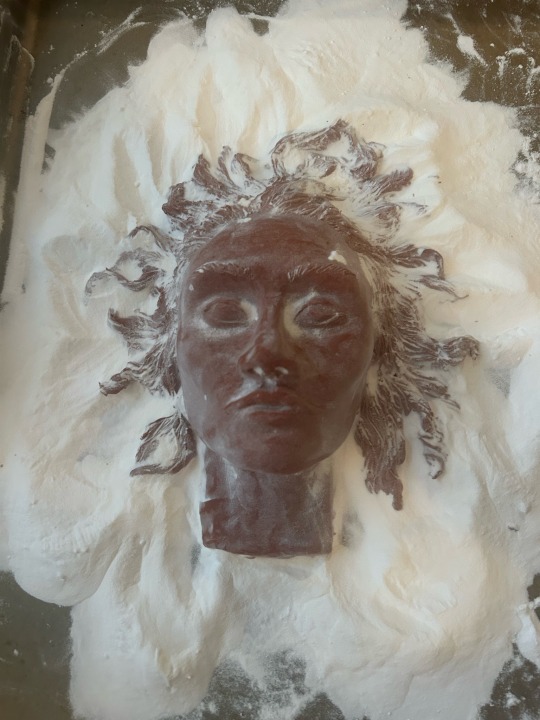
ask me about using cocaine to fire your polymer clay sculpture
1 note
·
View note
Text
Finally got around to cleaning some glass bottles ive been setting aside for crafts for months
I kept putting it off cuz for some reason I was thinking there would be a lot more steps involved when all I had to do was fill them with hot water and shake vigorously
Why did I expect that to be more complicated
#im going to wrap them in clay and bake them in the oven#i dont need them to be completely sanitized#they just need to not have sticky soda and clearly canadian residue in them#ahhh wait i remember why it seemed like a more intensive process before#i had to take the labels off those ones#and get all the sticky residue cleaned off from the labels#these ones either have the labels printed directly on the bottle or in the case of the soda bottles have labels that i dont think will be a#problem to attach clay to#i did end up putting a few of them into the recycling bin cuz they had mold in them#and it wasnt coming out with soap and hot water#so i figured those ones arent worth it#i got plenty for my purposes#i dont need to waste time cleaning mold out of them
0 notes
Text
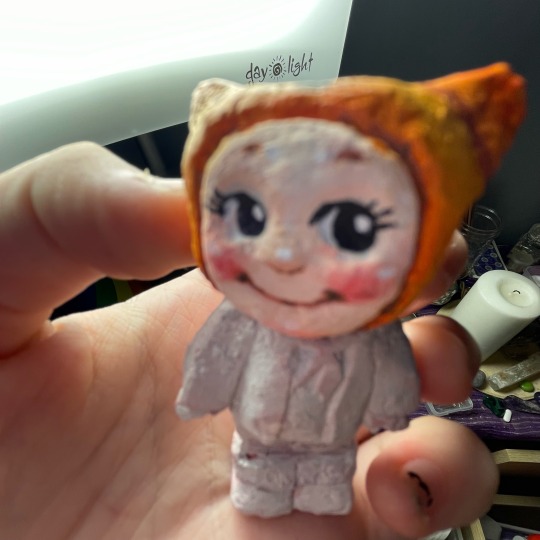
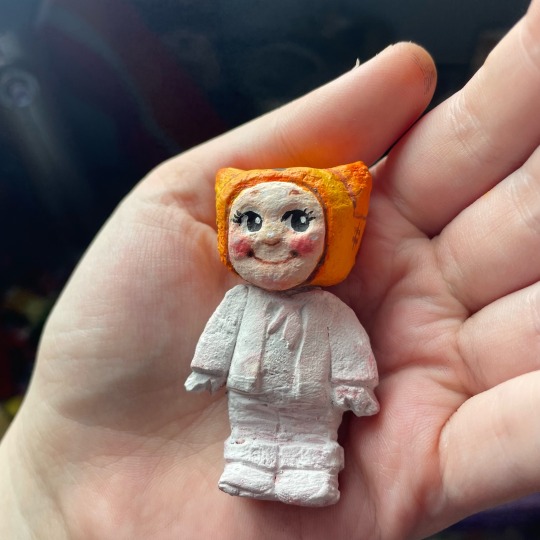
HE IS SO!!!!!!!
What if I told you guys I’m working on a Patrick sonny angel how would you feel
#I dried out my fucked up baking soda carving mixture and I’m using it as clay#inventing a new clay#scheming and plotting and planning
127 notes
·
View notes
Text
DETOX FROM THE VAX... Dr. Carrie Madej explains how to detox from the vaccine.
- Baking Soda
- Epson Salt
- Borax
- Bentonite Clay
This Dr. is amazing and she doesn't charge for her wisdom. 🤔
#pay attention#educate yourselves#educate yourself#knowledge is power#reeducate yourself#reeducate yourselves#think about it#think for yourselves#think for yourself#do your homework#do some research#do your own research#ask yourself questions#question everything#detox#dr. carrie madej
1K notes
·
View notes
Text
Flowers you gave to Gods have withered away? no problemo, reuse them!

Hello guys! I believe I made a post before in which I talked about my habit of picking up flowers for Lady Aphrodite, Lord Hermes, and Lady Athena whenever I come back home. However, since they do not have dirt in which to expand their roots and absorb water, they wither away very soon. Generally, I would advise you to not leave expired food or dried-up flowers on your deity's altar. But there comes the question
,, Jelly, what do I do with them afterward?"
Well, fear not, because I've got just the solution as your fellow devotee and flower enjoyer!
1. Make homemade Potpourri!
A potpourri is basically a jar full of flowers, fruits, spices, etc. Which you leave in your room for its scent. Once your flowers get all dry, you can make one of these and place them in your room as to fill it with scents that remind you of your deities! and it is also a way more natural alternative to room freshener. I personally follow this recipe:
– Spread your flower heads and petals on a baking sheet. – Dry your flowers in an oven at 93° Celsius (200° Fahrenheit), which may take up to two hours. – Place dried flowers in an airtight container with a lid and add two or three drops of essential oils for your ideal scent. Rose, lemon, lavender, and cinnamon are among the most common fragrances for the home. – Store for six to eight weeks to allow the flowers to absorb the essential oils.
PS: Can also be a good freshener for your altar!
2. Homemade dried flower body scrub!
I actually only found out abut this today. But, apparently, if you mix up dried flower petals with Epsom salt, sea salt, baking soda, and essential oils you can basically create a scrub! I dunno if I would recommend it to people with sensitive skin tho...
3.Scented room spray
Mix together essential oils, alcohol, and dried flowers, and BOOM natural room spray! poof a little on your altar every morning!
4. If they are roses, make rosaries out of them!
Even though rosaries can be found a lot in Catholicism, many other religions use them. Buddhists, Muslims, and so much more! and, they actually used to be made out of actual roses. @jekraftbooks has a very good tutorial on TikTok about this, but basically, you need to:
1.Take your dried roses and throw them in a blender
2.Cook them down for several days at a low temperature. Only simmering, never boil.
3.When it begins to form like a clay ball, it is ready to go! Get a cheese cloth and squeeze all the water you can out of the clay. (Keep it for later)
4.Roll them into balls. Put a needle through them to make the hole, then leave them on cardboard for a few days to dry.
5. Once they dry, they will be rough, but we need them to have a smooth texture. Use the water from step 3, then rub some oil on them to give them some shine and protection from water ✨
6.Your beads are done! congrats! make necklaces, earrings, bracelets, any type of jewelry you wish for with them! You can also dedicate them to a deity as devotional jewelry or use them for prayer. Let your creativity go wild!!
#hellenic pagan#hellenic#hermes devotee#pagan#aphrodite devotee#hermes#hermes deity#aphrodite#aphrodite deity#athena#hellenic devotion#flowers#offering#offering ideas#physical offerings
169 notes
·
View notes
Text
𝑤𝑎𝑦𝑠 𝑡𝑜 𝑠𝑡𝑎𝑦 𝑜𝑐𝑐𝑢𝑝𝑖𝑒𝑑
⌗ bake for other people, like family, friends, colleagues
⌗ watch mukbang videos, informative documentaries about internet phenomenons, history (political, fashion) crime or strange occurrences
⌗ listen to new music and learn more about the artist or the band itself, make new playlists
⌗ watch a gameplay on youtube or play childhood nostalgic video games
⌗ learn new makeup styles, hairstyles and build outfits based off of different fashion styles
⌗ get a homemade manicure
⌗ create your own website (ex. carrd)
⌗ deep cleaning: making your bed, doing laundry, going through a pile of clothing, throwing away old/expired makeup products, de-cluttering, cleaning the bathroom, deep cleaning the kitchen and the pantry by throwing away expired products, cleaning bags, boxes, wallets and pencil cases, changing the aesthetic of your bedroom
⌗ gardening or taking care of house plants
⌗ learn more about certain species of flowers, animals, subjects (like astronomy, philosophy, sociology, biology) and take notes
⌗ make a shopping list for necessities (food, cleaning supplies, hygiene necessities) and wishes (makeup, clothing, collectibles) on paper and by making pinterest boards and sections
⌗ re-watch old nostalgic movies or series (comedy anime like azumanga daioh, lucky star, nichijou, gakuen handsome and saiki k, horror/thriller and comedy movies, novelas)
⌗ read a book, whether it’s classic literature or a comic book
⌗ studying: watching videos, taking notes, reciting out loud
⌗ take an everything shower with music playing. from skincare, to hair care, brushing teeth and body care
⌗ skincare: do a face mask and a gua sha massage, learn more about your skin type and how to take care of it
⌗ make handmade gifts:
customized cds/playlists
paper crafts: stickers, bookmarks, collages, keychains with shrink paper, decorated envelopes (drawings, glitter, paint, gluing things like buttons and lace, 3d open envelope drawings), scenery stands, fake food and objects, strings, drawing posters, paper stars, paper crowns, flower bouquets, realistic camera;
clay crafts: vases, boxes, plates, bowls, spoons, jewelry holders, cups and mugs, charms, rings, playhouses, paint palettes, animal sculptures, candle and incense stands, lighter cases;
crocheting and sewing: hats, gloves, scarves, plushies, keychains, pillow covers/pillows, bags, cup stands, book cases, water bottle bags, pencil cases, creating new clothes out of old ones, mixed/leftover fabric rugs or blankets.
bracelets: patterned, beaded, with a string and buttons;
other: door handle hangers, painted wooden spoons, painted tiles, painted tea bags, pins, painted rocks, decorated journal cases, soap making, altoid wallets, decorate your phone case, hair wraps, decorate a photo frame, recycle an old candle (seashell and can candles), flags, window beads, hair accessories (decorated headbands, hairpins), decorated sunglasses, soda tab friend, bleached t-shirts, surfboard necklace, washi tape, gift baskets.
gift ideas
diy ideas when you’re bored
clay crafts ideas
cinnamon roll trinket box (just really wanted to share this one, it’s absoluty adorable ♡)
⌗ try out a new sport: ex. badminton, volleyball, dance, swimming, tennis, basketball, martial arts, athletics.
⌗ do pilates or a 1980s workout, play just dance or do a karaoke session
⌗ play a board/card game (monopoly, trivial pursuit, uno, cluedo, guess who)
⌗ take a walk and explore your surroundings
⌗ write down new recipes you haven’t tried yet including the necessary steps to make them and make a grocery shopping list of everything you need
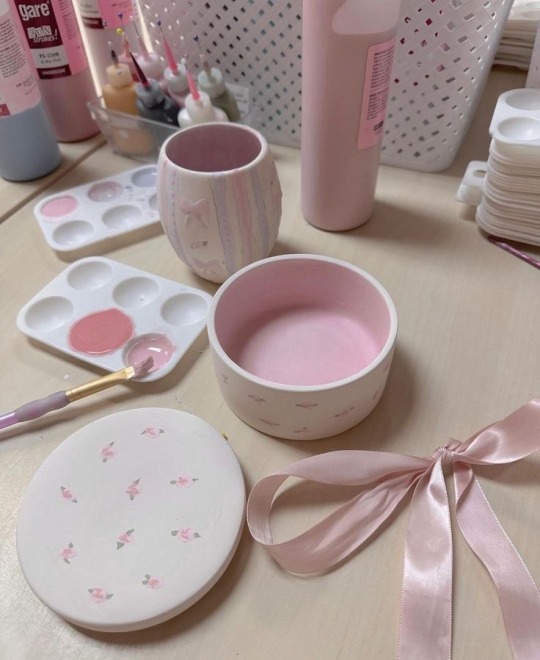

#coquette aesthetic#coquette#this is a girlblog#girlblogging#girlblog aesthetic#this is a boyblog#boy blogger#diy projects#diy craft#2014 tumblr#2014 aesthetic#2014 nostalgia#girl interupted syndrome#this is what makes us girls#hell is a teenage girl#tumblr girls#lana del rey aesthetic#lana is god#lana unreleased#lana del ray aka lizzy grant#buffalo 66#y2k aesthetic#hyper feminine#faunlet subculture#faunlet
53 notes
·
View notes
Text
Slime DIYs and tricks!


Basic Slime Recipe (for stretchy slime)
Ingredients:
1/2 cup white or clear PVA glue
1/2 teaspoon baking soda
1 tablespoon contact lens solution (must contain boric acid)
(Optional) 1 teaspoon lotion for extra stretch
Coloring, glitter, charms, etc.
Instructions:
Mix glue and baking soda in a bowl.
Add any coloring, glitter, or extras you want.
Slowly add contact lens solution while stirring.
Knead until no longer sticky.
Design Ideas & Add-Ins
Galaxy Slime – Mix black, blue, purple, and silver slimes together. Add fine glitter for a cosmic effect.
Butter Slime – Add air-dry clay to make it smooth and spreadable.
Floam Slime – Mix in foam beads for a crunchy, textured slime.
Jelly Cube Slime – Cut up makeup sponges or soft foam cubes and mix them into clear slime.
Cloud Slime – Add instant snow powder for a fluffy, drizzly texture.
Metallic or Pearl Slime – Use metallic pigments or pearlescent mica powder for a shiny finish.
Glow-in-the-Dark Slime – Add glow-in-the-dark pigment or glow paint.
Holographic Slime – Mix in holographic glitter or flakes for a dazzling effect.
Slime-Friendly Paints & Colorants
Acrylic Paint – Works well but can thicken slime, so add lotion or more glue.
Food Coloring (Gel or Liquid) – Easy to mix in, but gel works best for vibrant colors.
Mica Powder – Great for shimmery or metallic effects.
Eyeshadow or Pigments – Crush up old eyeshadow for a unique color mix.
Glow Paints – Use non-toxic glow-in-the-dark paint to make luminous slime.
Alcohol Inks – Best for clear slime to maintain transparency while adding rich color.
Avoid:
Oil-based paints (they won't mix well).
Watercolor paints (they’re too diluted).
Storage Tips
Use an Airtight Container – Keeps slime from drying out.
Keep Away from Heat & Sunlight – Heat can make slime melt and separate.
Store in a Cool, Dry Place – A drawer or plastic bin is perfect.
Revive Dried-Out Slime – Add a little warm water or lotion and knead it back to life.
Fix Sticky Slime – Add a tiny bit of contact lens solution.
Prevent Mold – If using natural add-ins (like shaving cream or cornstarch), store in the fridge and use within a few weeks.


#agere classroom#age regressor#agere positivity#agere community#sfw agere#agere blog#age regression#agere#age regressive#agere little#agere crafts#agere daycare#agere diy#autistic agere#sfw age regression#safe agere#sfw#sfw little blog#sfw interaction only#agere activities#sfw littlespace#agere board#sfw blog#agere activity#slime making#slime#slimemaking#slime for stim
24 notes
·
View notes
Text
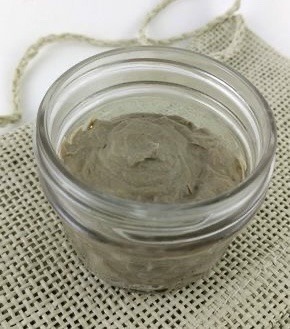
DIY bentonite clay toothpaste🪥
🧪 Ingredients:
• 2 tbsp bentonite clay
• 1 tbsp coconut oil
• 1 tbsp baking soda
• 1 tbsp water
• 10-15 drops peppermint or spearmint essential oil
• 1 tsp xylitol (optional)
• 1/2 tsp sea salt (optional)
👩🔬Steps:
1. In a glass bowl mix bentonite clay & baking soda
2. Add water & coconut oil, stirring until it has a thick, paste like consistency
3. Add essential oil & xylitol for flavor & sweetness
4. If using sea salt stir in now
5. Store in airtight container
52 notes
·
View notes
Text
A guide to get stains out of anything
As someone whose capsule wardrobe is 95% white and cares about ethical and sustainable fashion (so many of my pieces are investments) it’s important to keep my pieces maintained.
Over the years I’ve earned myself the title Queen of Stains by friends and family. I will be updating this list as I go on, remember, and discover more.
What to have in your arsenal:
Many of these things are so multi-useful they’re just good to have anyway!
Baking soda
Vinegar (i don't think it matters but white is best if you have lighter colored clothes)
Dawn dish soap
Rubbing alcohol
Hydrogen peroxide
Pink Stuff (linked here)
Old toothbrush for scrubbin'
Basics of stains:
Never put anything in the dryer unless you are happy with how removed the stain was. The heat will set the stain in and make it 1000% more difficult or impossible to remove. Air dry until you’re happy.
If a stain isn't lifting or removing, try another 15-30 minute sitting.
I usually add some baking soda to all loads of laundry to help brighten and freshen naturally - it also softens water and allows for less detergent to be needed.
The stains and their cure: (alphabetical)
Alcohol: I’ve tried this on Mikes Hard blueberry flavor but I assume it works for all alcohol. Dawn dish soap + vinegar. Let sit for 15 minutes then rinse. Then do dawn dish soap + rubbing alcohol and let sit for 15-30 minutes. Works on day-old stains. See wine for specific advice.
Blood: cold water. Agitate with your fingers. A drop or two of dawn dish soap. If you need more, cold water + hydrogen peroxide.
Chocolate: dawn dish soap + cold water. Do not/minimize scrubbing.
Dirt/Mud: Alternate dawn dish soap & rinse, with soaking the spot in hydrogen peroxide and letting sit for 15+ minutes. Wash as normal after.
Grand Canyon Dirt (or red clay based dirt): the most difficult stain I’ve had. Many applications alternating between dawn dish soap and vinegar. Let sit for 15-30 minutes. Rinse. Will require multiple applications (took me two days to get the stains out and they are still faintly noticeable since I know where they are)
Generally Oily stains like chicken grease or food: dawn dish soap + laundry detergent
Lipstick: This was on a red liquid lipstick - dawn dish soap. Try to minimize scrubbing.
Soy sauce: dawn dish soap, a dash of laundry detergent, and hydrogen peroxide. Let sit for 15-30 minutes and rinse out. May require multiple applications.
Wine (red): I’ve used pink stuff to get rid of red wine stains from white bedsheets and cream colored apartment carpet. You have to do it ASAP and follow pink stuff instructions. If you don't have pink stuff, 3 parts Hyrogen peroixde, 1 part dish soap. After sitting for 15-30 minutes, rinse in cold water.
Yellow armpits: (Blue) Dawn dish soap, baking soda paste (mix baking soda with a lil bit of water). Scrub and let sit for 15-30 minutes. Add hydrogen peroxide after first rinse if its not gone. Works amazing on fresh stains if you can wash the armpits after a hike or workout. Old stains it will depend on the fabric and if its been washed and dried yet, but will usually lessen the stain.
I will continue this list as I go, so save for future reference.
#adulting#life tips#laundry#cleaning#practical tips#chores#reblog for exposure#life skills#personal#housework
71 notes
·
View notes
Text
things people have told me as someone who has been struggling with acne (almost all types) for almost 3 years:
“why don’t you go to see a dermatologist” so unoriginalllllll🙄 like gurl, ive seen my dermatologist more than my godmother. 0/10
“but you look good with it” wtf. sorry. over politeness it’s so fake. acne it’s a literal sign that something is wrong with me. 2/10 for the effort
“try birth control” try to stfu -10/10 insufferable
“It’s because you don’t use natural products” almond mom please spare me. I’ve tried anything, even “natural remedies” don’t worry. no, I would never put a lemon on my skin. It’s fucking acid. 3/10
“its because you are stressed” my god- this comment is making me so calm already. Thank you. for nothing. you are gonna tell me that America has been discovered next?? -2/10
“You should maybe eat better” I eat better than a nutritionist. period. -5/10
“It will go away eventually” there is always hope. I’ll give you that. thanks. 7/10
“Have you tried baking soda” Fun fact: I’m not a kitchen counter. -10/10 (NEVER DO IT PLS BTW BECAUSE IT TOTALLY FUCKS YOUR PH LEVEL UP)
“go on accutane (I don’t rember how it’s called in Italian, but that)” did it. fucked up my skin by causing my dermatitis to go batshit crazy. I was scratching myself in my sleep to the point I bled. Couldn’t move my arms and neck. Too dry. You would put OIL on and it would be gone after 5 minutes. Took almost a year to recover. Going to the beach killed me, because my skin was on FIRE all the time from the salt (I guess salt water can’t cure all). 0/10
“have you tried tretinoin/retional/Benzoyl peroxide/Salicylic acid/Tea tree/lactic acid/clay mask/any AHA or BHA in general/…” yes. and it did not worked. spare me the chem lab list. 4/10
#it will be fine. I did this because it was funny in my head. after a while you get used to see your face red/purple#IT IS FOR LAUGHING AND FOR REMINDING PEOPLE TO NOT SAY THOSE LINES. spare us pls.#and now I’ve become superstitious and every time I try something new I don’t even say it. because luck it’s all I have left.#cel rambling
12 notes
·
View notes
Text

A Recipe for Love (Part 2)
Pairing: Jimin x (f.) Reader
Genre/Tags: baker/chef! jimin, baker/chef! reader, forbidden romance, angst, fluff, potential smut
Series summary: As their town announces its first-ever baking competition, Kim Y/n and Park Jimin find themselves pairing up to participate. However, the generations-old feud between their families prevents them from doing so. In order to avoid stirring up further animosity between their families, Jimin and Y/n must be secretive. Will Jimin and Y/n be able to be stealthy enough to navigate their days practising and testing out recipes for the competition, without their family members finding out?
Word count: 1.5k
Chapter Warnings: dual povs. we get to see jimins pov in this chapter
A/N: i wasnt expecting much readers for this story from the get-go but I'm pleasantly surprised. if you're enjoying this story pls let me know by leaving a comment! it motivates me to update more often<3 tyy

Part 2: A Clash of Flavors
JIMIN
Opening up a new day at Park's Bakehouse was always my favorite part of working here. I loved the scent of bread and flour filling my nose as I stepped into the bakery kitchen. There was something oddly satisfying about kneading dough into weird shapes before squishing them back into a huge pile—like a toddler playing with clay. Maybe that was what gave Park’s bread a special taste, one that couldn’t be found anywhere else.
Once the first batch of bread had finished baking and was set out on the table, and my helpers had arrived to clean up the space for the morning, I made my way to the front door. Reaching for the sign, I flipped it from CLOSED to OPEN.
That’s when I saw her.
Kim Y/N, the current manager of Kim's Kreme, the bakery just across the street from my family’s. In my opinion, she was the best manager Kim’s Kreme had ever had. But that was my opinion alone. Kim Taehyung, my best friend and fellow worker at the bakery, would would rather choke on a dry loaf of bread that ever agree to such a thing.
He hated the Kim family with a burning passion, as if he had been born into the Park clan himself. I had tried reasoning with him multiple times, but his stubbornness always won.
"Have you tasted their bread, Chim? It tastes like shit."
Whenever I pointed out that they specialized in cakes rather than bread, he would scoff, "Even their cakes taste bad."
My family adored Taehyung for his unwavering hatred toward the Kims. They admired the way he constantly tried to create new dishes and recipes to outshine them.
However, this always resulted in the most bizarre ingredient combinations, turning every culinary experiment into a disaster. Like the time he thought it was a genius idea to mix mustard, ketchup, and mashed sausages with flour, baking soda, sugar, and eggs to create a hot cake.
It was innovative, sure. But it also left almost every member of the Park family (myself included) hunched over the sink, desperately trying to rinse the horrid taste from our mouths.
I loved Taehyung, but sometimes, the boy was a little too much to handle.
And yet, as my eyes lingered on Y/N standing outside Kim’s Kreme, I couldn't help but wonder…
Did we really have to be on opposite sides of this ridiculous rivalry?

It was already late in the evening when Min Yoongi, one of my other friends, walked into the shop.
The little bell above the door chimed, pulling my attention away from the cupcakes I had been decorating with whipped cream.
"Yo, Chim!" Yoongi called out, casually strolling in. "You might want to see this."
Before I could even ask what he was talking about, Taehyung appeared out of nowhere, wide-eyed and buzzing with curiosity.
"Tae, you're going to hate this," Yoongi started, and that was all it took for Taehyung’s expression to darken.
"The Kims just dropped a new dessert."
"WHAT?!" Taehyung hollered, his voice echoing through the bakery. "I'M CALLING MR. PARK THIS INSTANT."
I barely had time to process what was happening before he started fumbling for his phone.
"Why are you calling my grandpa?" I asked, completely baffled, snatching the phone out of his grasp before he could do something ridiculous.
"How dare they drop a new dessert? This could affect our business, Chim! Are you not worried?"
I sighed, rubbing my temple. "Tae, you've always had a flair for dramatics. Can you calm down? It’s not even your business, and yet you're the one losing your mind over this."
"You don’t understand, Jimin! We must release something soon. I need to inform Mr. Park—"
"No. You are not calling Grandpa right now." I held the phone out of his reach as he tried grabbing it again. "All they did was release a new item. We still have quality. We don’t need to panic over every little thing the Kims do."
Still holding Taehyung back with one hand, I turned to Yoongi. "Hyung, how did you even find out about this?"
Yoongi shrugged, as if the answer was obvious. "I went there, of course. How else would I know?"
Taehyung gasped so loudly you would have thought Yoongi had just betrayed our entire family line.
"YOU TRAITOR!" he roared before launching himself at Yoongi. "How dare you step into enemy territory?!"
I groaned, watching as Yoongi barely dodged Taehyung’s furious swipes, his face now full of regret. The dramatic idiot would never understand. He had always been like this when it came to the Kims.
With a violent Taehyung and a flustered Yoongi causing chaos in the front, I turned back toward the kitchen. The batch of unfinished cupcakes sat abandoned on the countertop, the whipped cream starting to soften under the warmth of the bakery.
I sighed again. It was going to be a long night.

Y/N
It was a bright Thursday morning when an announcement from the mayor shook up our quiet little town. An announcement that, unbeknownst to me at the time, would set me on a path I hadn’t expected.
At exactly 10 a.m., a large poster was pinned to the town square notice board, gathering a small crowd of curious onlookers. I had been on my usual morning errand—picking up groceries for home and some additional baking ingredients for my latest experiment. The air smelled faintly of fresh bread from the nearby bakery, and the market buzzed with chatter, but my focus was on my list.
That was until a familiar voice called my name.
"Y/N, dear!"
I turned to see Mrs. Lily, my kindhearted neighbor, approaching with a warm smile. She was in her sixties and had been my grandmother’s closest companion in their younger days. Over the years, she had become a regular at our bakery, always complimenting my desserts and sharing stories of when she and my grandmother used to bake together.
"Have you seen the poster yet?" she asked, her voice carrying that usual motherly affection. "You should definitely participate."
I blinked in confusion, shifting the weight of my grocery basket in my hands. "Poster?"
Mrs. Lily simply took my wrist and led me through the crowd. "You and your brother would make a great duo for this."
Her words only deepened my curiosity, but before I could ask what she meant, we reached the center of the town square. That’s when I saw it.

My heart pounded with excitement as I read over the details. A town-wide baking competition? This was my kind of event. I could already picture it—new flavors, intricate decorations, the thrill of competing against other bakers. Baking wasn’t just a hobby for me; it was something that ran in my veins, something I had been perfecting for years. The feel of flour between my fingers, the rhythm of kneading dough, the magic of watching a cake rise in the oven—this was my passion.
And on top of that, the grand prize was too good to pass up. Unlimited baking supplies for a year? That alone would be a game-changer for our bakery.
There was just one problem.
I needed a partner.
Mrs. Lily’s earlier words echoed in my head. You and your brother would make a great duo.
Except, there was one issue—my brother, Seokjin, was abroad. He had left months ago to pursue a special course in culinary arts, and he wasn’t due back anytime soon. Without him, my options were limited. The other talented bakers in my family were either too old to qualify or simply unavailable.
For a brief second, I considered Jeon Jeongguk. He was my cousin, one of my closest friends, and, admittedly, an excellent cook—but baking? That wasn’t his strong suit. If this were a competition for eating baked goods, however, Jeongguk would have easily taken home the trophy.
With my mind now clouded in disappointment, I let out a sigh and turned away from the poster. As much as I wanted to participate, the reality was simple: without a partner, I couldn’t enter.
I adjusted my grocery basket in my grip and continued down the street. There was no point in getting my hopes up. I still had a list to complete, ingredients to buy, and a bakery to help run.
This competition might have been the perfect opportunity, but without Seokjin, it was an opportunity I couldn’t take.

NOTE: gonna clarify a few things that might be confusing here. so jungkook is y/ns cousin and he's a part of the kim family but he has the surname jeon bcs his mother who is a kim married into the jeon family (hence he took on his fathers surname). meanwhile kim taehyung is jimins best friend. his surname might be kim but he's not associated with y/ns kim family (many ppl have the surname kim in Korea it doesn't mean they are of the same family)
also wanted to point out that the timeline of the story is based on the present but their town is a bit on the traditional side which explains the town square announcements etc

<- Part 1 | Series Masterlist | Part 3 ->
#jiminie#jimin#park jimin#jimin x reader#jungkook x reader#jimin x y/n#jimin smut#jimin imagine#jimin fanfiction#jimin au#baker au#jimin ff#park jimin smut#park jimin x reader#jimin bts#jimin moodboard#park jimin fanfic#forbidden romance#bts jimin#y/n#park jimin x y/n#bts#bts imagine#bts fanfic#bts au#chef au#bakery owners
9 notes
·
View notes
Text
Dinosaur Agere Ideas 🦖
Dino Dig Excavation: Set up a sandbox or designated area in your backyard for a dinosaur dig. Hide toy dinosaur bones, fossils, and eggs in the sand, and use small shovels and brushes to excavate discoveries.
Dino Costume Party: Organize a dinosaur-themed costume party where participants dress up as their favorite dinosaurs. Encourage creativity by providing dinosaur masks, tail accessories, and face paint. You can also incorporate dinosaur-themed games, such as pin the tail on the T-Rex or a dino dance-off.
Dino Movie Marathon: Host a movie marathon featuring classic dinosaur films such as Jurassic Park, The Land Before Time, and Ice Age: Dawn of the Dinosaurs. Set up a cozy viewing area with blankets, pillows, and popcorn for a fun movie night experience.
Dino Science Experiments: Conduct dinosaur-themed science experiments that are both educational and entertaining. For example, you can make a baking soda and vinegar volcano erupt like a dinosaur, create fossil imprints using clay and plastic dinosaur toys, or simulate a dinosaur's bite force using everyday objects.
Dino Adventure Nature Walk: Take a nature walk in a local park or forest, but with a dinosaur twist. Create a scavenger hunt where you search for specific plants, rocks, and natural features that could have existed during the time of the dinosaurs.
Dinosaur Puzzle Play: Gather a collection of dinosaur puzzles of varying difficulty levels and spend some time piecing them together. Whether it's a simple wooden puzzle for beginners or a challenging jigsaw puzzle for more advanced puzzlers, solving dinosaur puzzles can be both relaxing and rewarding.
Dinosaur Stuffed Animal Tea Party: Host a tea party for your favorite dinosaur stuffed animals. Set up a table with cups, saucers, and pretend tea sets, and invite your plush dinosaur friends to join you for a delightful afternoon tea party. Don't forget to serve dinosaur-shaped cookies or snacks!
Dino Storytime: Curl up with a cozy blanket and a pile of dinosaur-themed storybooks for a dino-rific storytime adventure. Choose books with colorful illustrations and engaging dinosaur tales to spark the imagination and create a magical storytelling experience.
Dino Dress-Up: Put together a dinosaur-themed dress-up box filled with dinosaur costumes, hats, and accessories. Encourage imaginative play by dressing up as your favorite dinosaur character and going on pretend dino adventures around the house or backyard.
Dino Dance Party: Create a dino-themed playlist with catchy songs like "The Dinosaur Stomp" or "Dinosaur Boogie" and have a dance party in your living room. Dress up in your favorite dinosaur costume or pajamas and dance around to the music like a happy little dinosaur.
Dino Snack Time: Prepare some dinosaur-themed snacks like dinosaur-shaped sandwiches, fruit skewers with dinosaur-shaped fruit pieces, or dinosaur-shaped cookies. Enjoy these tasty treats while watching a dinosaur-themed movie or TV show for a fun and delicious snack time experience.
Dino Coloring Book: Provide a dinosaur-themed coloring book filled with cute and friendly dinosaur illustrations for coloring. You can also include dinosaur-themed coloring pages to download and print, allowing for endless coloring fun.


#agere#age regression#sfw agere#sfw littlespace#age regressor#sfw age regression#agereg#age dreaming#sfw little blog#agere blog#ciao lovelies#ciaolovelies#agere class#agere classroom#agere daycare#agere school#agere little
35 notes
·
View notes
Text
TOTK Cooking Pot Diorama
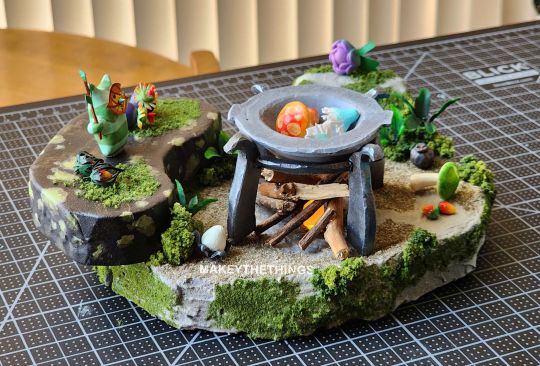
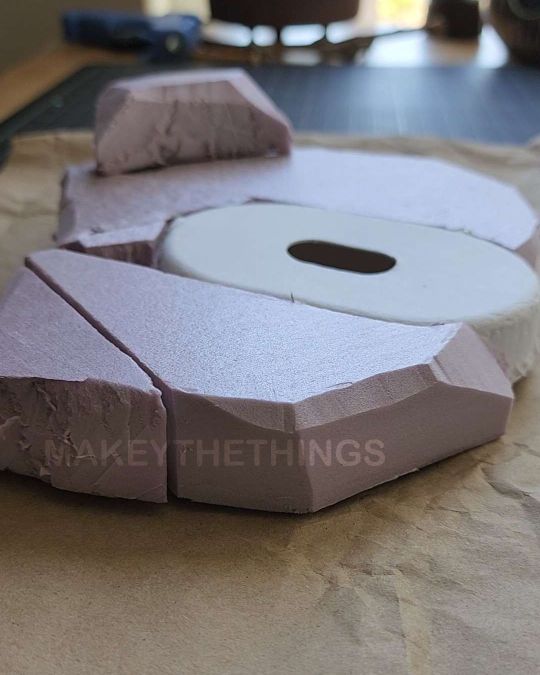
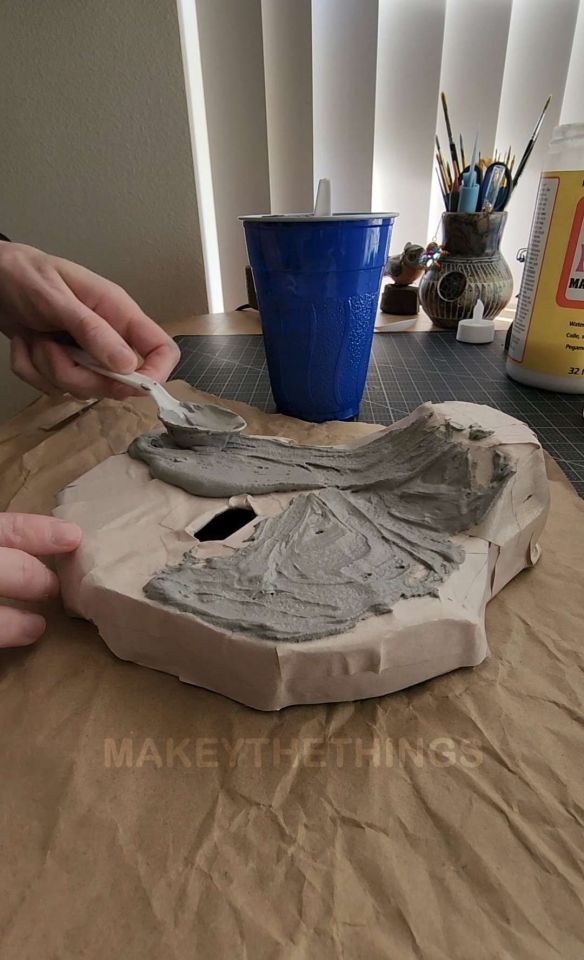
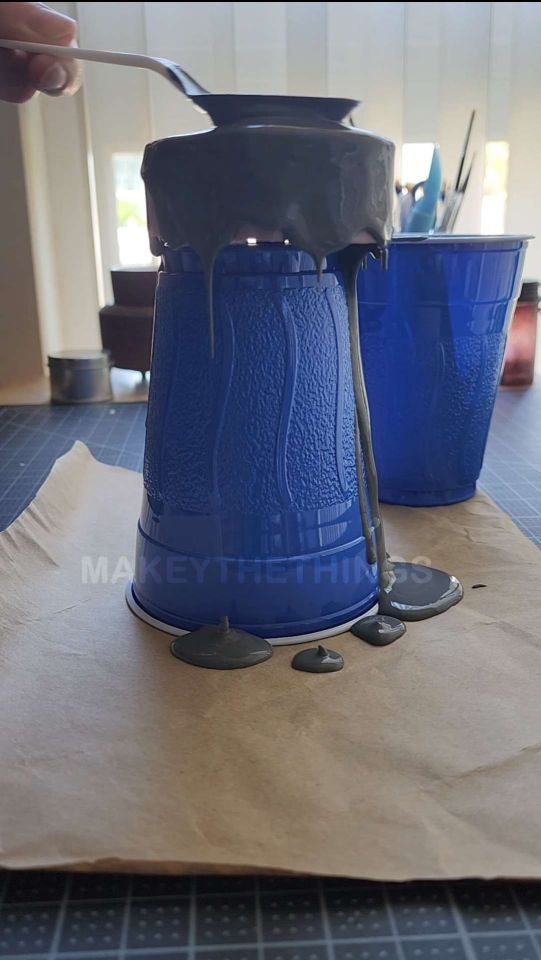
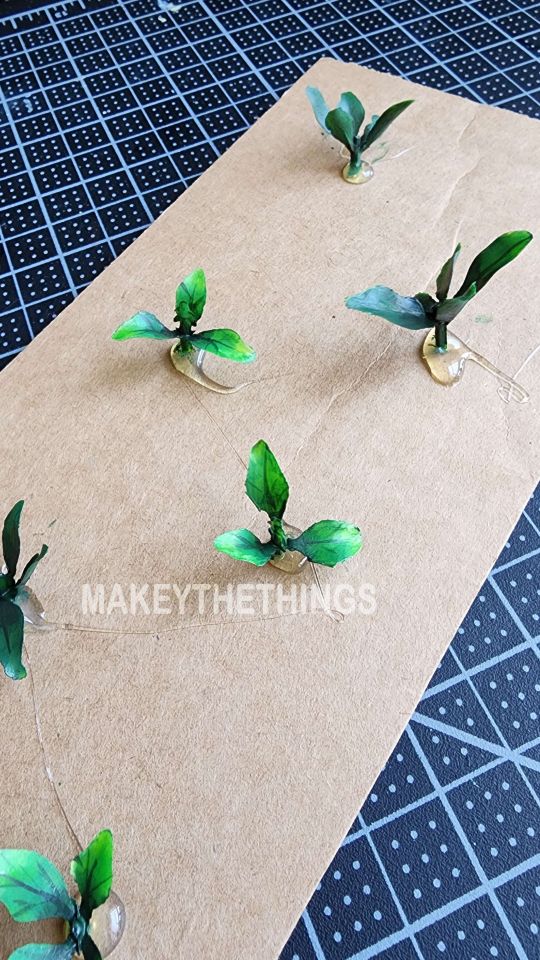
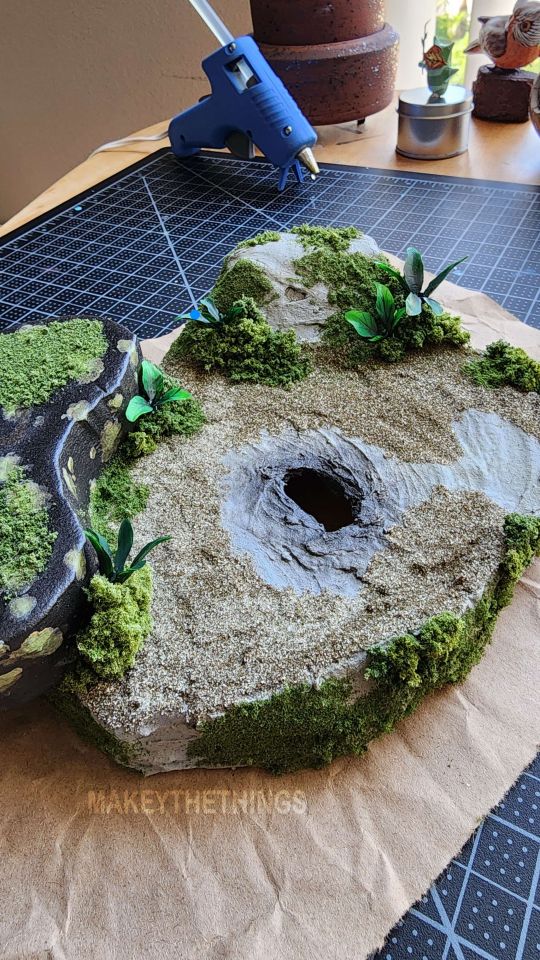
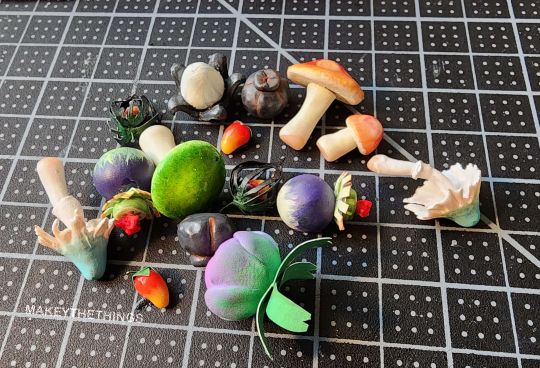
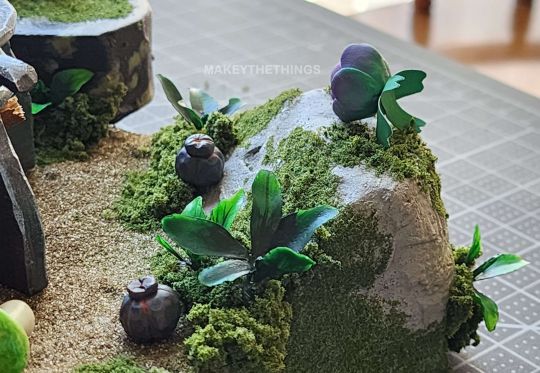
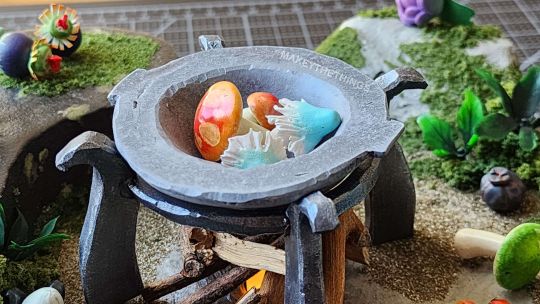
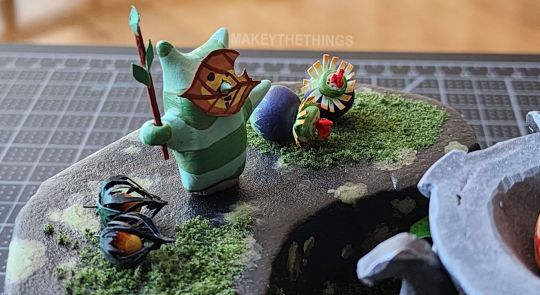
Part way through last year, I finished my cooking pot diorama based on Legend of Zelda: Tears of the Kingdom/Breath of the Wild. I love both of these games so much and creating something to memorialize them with has been on my mind for a while. With it complete, it's about time I did a write up on the process (I've also gotten a tiktok and have video versions of the build there that I'll link.)
The Ingredients
All of the little ingredients for the cooking pot are made either entirely or mostly of polymer clay. This was my first experience with the material and I've learned a good amount from it!
For most of these I sculpted the shape I wanted and once baked, I painted the desired colors with acrylic paint. Some pieces, like the Fire Fruit and the Bomb Flowers, I painted card stock and shaped it to create some of the more delicate elements. For pieces like the mushrooms, I made the stem and caps separately and then superglued them together once baked. The Cooking Pot
The cooking pot and its base are made entirely of polymer clay and painted with acrylic paint. I scrounged up some sticks from outside, sterilised and cut them to size, then hot glued them together to make a campfire.
The Base
The base is a mix of cardboard trash pieces and foam cut and glued together. I did this because the central cardboard piece had a premade hole where I could house the tea light I intended for the campfire.
I decoupaged strips of paper over the base with mod podge to hide all the gaps and cracks and then used a layer of thick baking soda paste (baking soda + mod podge + paint color of choice) to create a more rocklike texture over that. I also had a piece of foam intended to mimic the floating island rocks that come crashing to the ground throughout TOTK and I poured a wetter, thinner coating of the same baking soda paste on that. I touched up both with some painted-on details for natural color variation and then it was time for flocking!
I poured a mixture of sand and brown flocking onto the lower parts of the base, then did a second pass with fine green flocking. I built up areas with large clumps of green foliage flocking. I wanted to give some plant variation, so I sanded and painted some aquarium plants to better match the color scheme and added those randomly around the base. More Links Here's some (but not all) of the videos I've made related to this! Silent Shrooms from TOTK Cooking Pot Base Part 1 TOTK Cooking Pot Complete!
#diorama#miniatures#korok#totk#loz#legend of zelda#tears of the kingdom#breath of the wild#crafting#makeythethings
46 notes
·
View notes
Text
The amount of comments I got on my carved clay frame tiktok upset about me “ not just using drywall compound “ or normal air dry clay or whatever was Crazy!!! Like why were people SO pressed that I mixed paint and baking soda together and glooped it on a canvas
N e ways this is what I have so far for the carved frame for my joe painting tee hee
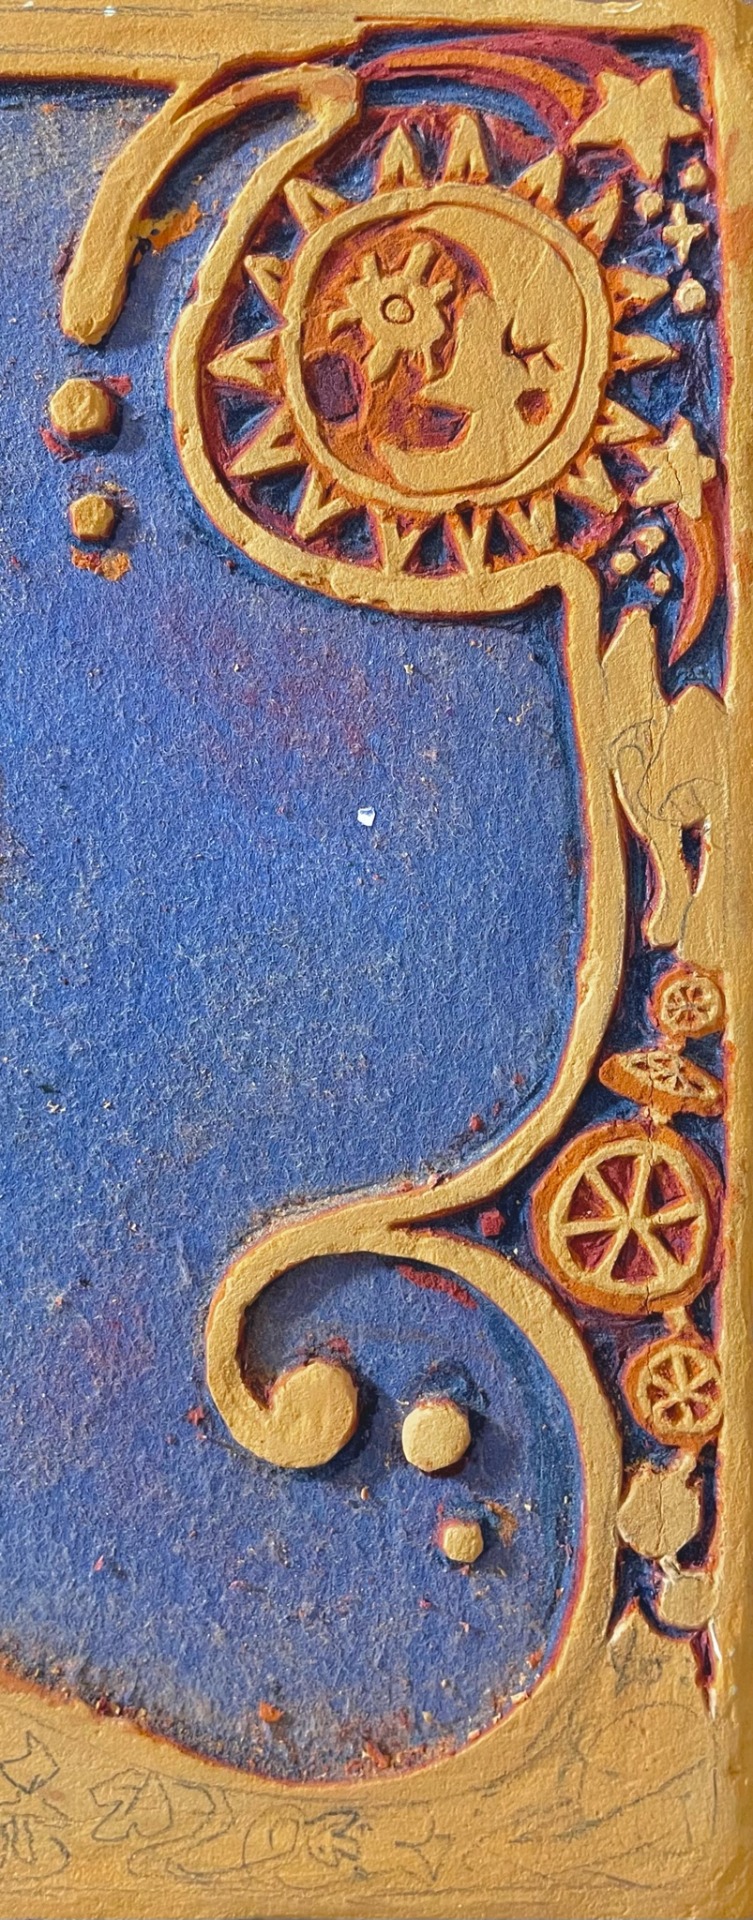
#I did different colors each layer this time :3#also#idc if that lady claimed she was a professional sculptor you canNOT carve hardened ass air dry clay#my mixture is nice and soft#I don’t want anymore lino carving tool accident
189 notes
·
View notes