#backupbuddy
Explore tagged Tumblr posts
Visit Tumblr Blog
Explore Tumblr blogs with no restrictions, modern design and the best experience.
Last Seen Tumblr Blogs


Fun Fact
BuzzFeed published a report claiming that Tumblr was utilized as a distribution channel for Russian agents to influence American voting habits during the 2016 presidential election in Feb 2018.
Text
ওয়ার্ডপ্রেস ওয়েবসাইট নিরাপদ রাখবেন যেভাবে
যারা ওয়ার্ডপ্রেস দিয়ে ওয়েবসাইট তৈরী করেছেন কিন্ত সাইটের নিরাপত্তা নিয়ে চিন্তিত, তারা চাইলে সহজেই তাদের ওয়েবসাইটের নিরাপত্তা বৃদ্ধি করতে পারেন। কিছু টিপস্ এবং প্লাগইন দ্বারা সাইটের নিরাপত্তা বৃদ্ধির আলোচনা করা হলো, আশা করছি ওয়ার্ডপ্রেস দ্বারা তৈরীকৃত ওয়েবসাইটে স্বত্বাধিকারীদের উপকারে আসবে। হোস্টিং যেকোন ওয়েবসাইট নিরাপত্তার প্রধান শর্ত হচ্ছে ভালো হোস্টিং ব্যবহার করা। তাই হোস্টিং কেনার সময়…
View On WordPress
#2FA#BackupBuddy#BackWPUp#Brute Force#Solid Security#Updraft Plus#VaultPress#WordFence#অথিন্টিকেশন#আপডেট#ক্লাউডফ্লেয়ার#পাসওয়ার্ড#প্লাগইন#ব্যাকআপ#ম্যালওয়্যার#সিকিউরিটি#হোস্টিং
0 notes
Photo

New Post has been published on https://themesnulled.us/backupbuddy-v8-8-1-back-up-restore-and-move-wordpress/
BackupBuddy v8.8.1 - Back up, restore and move WordPress
0 notes
Text
How to Protect Your WordPress Site from Malware or Hackers?
WordPress is used by millions of websites for blogs, businesses, and online stores. However, because it’s so popular, it’s often a target for hackers and malware. If you have a WordPress site, it’s important to take steps to keep it secure. Here’s a simple guide to help you protect your site from hackers and malware.
How to Protect WordPress Site from Malware or Hackers?
Follow this step list given below to protect WordPress site from malware or hackers
1. Always Keep WordPress Updated
WordPress regularly releases updates to fix bugs and improve security. Hackers often look for websites running old versions of WordPress or outdated plugins, so keeping everything updated helps keep them out.
How to Update:
Check for updates in your WordPress dashboard regularly.
Go to the Dashboard > Updates section and install any available updates for WordPress core, themes, or plugins.
By staying updated, you’re less likely to have security holes in your site that hackers can use.
2. Use Strong Passwords and Change Them Often
Hackers can easily guess weak passwords like "123456" or "admin." To keep your site safe, use strong, unique passwords and change them every few months.
Tips for Strong Passwords:
Use a mix of uppercase and lowercase letters, numbers, and symbols.
Don’t use simple information like your name or "admin."
Consider using a password manager to create and store complex passwords securely.
Strong passwords are one of the simplest ways to add security to your website.
3. Limit Login Attempts
Hackers often try to break into websites by guessing the login password over and over. You can protect your site by limiting the number of login attempts a person (or bot) can make.
How to Limit Login Attempts:
Use plugins like Limit Login Attempts Reloaded or WP Limit Login Attempts.
These plugins lock out users after a certain number of failed login attempts.
This makes it much harder for hackers to keep guessing passwords.
4. Enable Two-Factor Authentication (2FA)
Two-factor authentication adds another layer of security. In addition to entering your password, you’ll also need to input a code sent to your phone or email. Even if someone knows your password, they won’t be able to log in without this extra code.
How to Set Up 2FA:
Install a plugin like Google Authenticator or Two-Factor.
Set it up by scanning a QR code and linking your account to an app like Google Authenticator or Authy.
This ensures that only you can access your site, even if someone steals your password.
5. Use a Security Plugin
A security plugin can protect your WordPress site from different types of attacks, like malware or brute force attempts. These plugins act as your site’s security guard, offering tools like firewalls and malware scanning.
Recommended Security Plugins:
Wordfence Security: Includes a firewall and real-time monitoring.
Sucuri Security: Provides malware removal and a website firewall.
iThemes Security: Offers brute force protection, backups, and two-factor authentication.
Using a security plugin adds strong layers of protection against hackers.
Also Read - What Is Domain Status? What does this mean, & Why should I know?
6. Back Up Your Website Regularly
Even with good security, things can sometimes go wrong. That’s why it’s important to back up your site regularly. If your site gets hacked, a backup will let you restore everything quickly without losing important data.
How to Back Up Your Website:
Use backup plugins like UpdraftPlus or BackupBuddy.
Store your backups in safe places like Google Drive, Dropbox, or a remote server.
Schedule backups daily or weekly, depending on how often you update your site.
Regular backups help ensure you won’t lose everything if something goes wrong.
7. Choose a Secure Hosting Provider
Your web hosting service plays an important role in your website’s security. Some hosts offer strong security features that help protect your site. Make sure to choose a hosting provider that values security.
What to Look for in a Hosting Provider:
Regular backups
Malware scanning and removal
Firewalls
SSL certificates
DDoS protection
Popular and secure WordPress hosting services include SiteGround, Bluehost, and WP Engine.
8. Use HTTPS and SSL Certificates
SSL (Secure Socket Layer) encrypts the data between your website and your visitors. This protects sensitive information, like passwords or credit card numbers. Websites with SSL certificates also have a secure URL that starts with "https://."
How to Install an SSL Certificate:
Most hosting providers offer free SSL certificates with Let’s Encrypt.
You can use plugins like Really Simple SSL to set it up quickly.
SSL certificates keep sensitive data safe and make your site more trustworthy.
9. Remove Unused Themes and Plugins
Unused plugins and themes can create security risks, especially if they aren’t updated. Even if they’re deactivated, they can still be a weak point. It’s best to delete any plugins or themes you don’t use.
How to Delete Unused Themes/Plugins:
Go to your Dashboard > Plugins or Appearance > Themes.
Deactivate and delete anything you no longer need.
This reduces the number of places where hackers might try to get in.
10. Monitor Your Site for Suspicious Activity
It’s important to keep an eye on your site for any unusual behavior. This could include sudden spikes in traffic, unknown files appearing on your server, or unauthorized users trying to log in.
How to Monitor Your Site:
Use a security plugin to track things like failed login attempts and changes to important files.
Regularly check your hosting account for unusual activity.
Review your website users to make sure no unauthorized accounts have been added.
By staying alert, you can catch potential threats before they do any serious damage.
Conclusion
Protecting your WordPress site doesn’t have to be difficult. By following these simple steps—keeping WordPress updated, using strong passwords, installing security plugins, and making regular backups—you can greatly reduce the risk of your site being hacked or infected with malware.
#OZOHosting#lowest price hosting in india#Cheap web hosting jaipur#cheap shared web hosting india#free web hosting india#affordable linux web hosting india
2 notes
·
View notes
Text
How You Can Secure Elementor Website Builder

Introduction
Elementor is one of the most popular tools for building websites with WordPress. It’s powerful, easy to use, and allows anyone whether you’re a beginner or an expert to create beautiful websites. But just like any tool, if you don’t secure it properly, your site could become vulnerable to hackers and cyberattacks.
In this post, we’ll guide you through simple yet effective steps to secure your Elementor website. We’ll also explain how WordPress website development services can help ensure your site stays safe and runs smoothly.
Why Security Matters for Elementor Websites
When you build a website with Elementor, you're working with WordPress, a platform that powers millions of websites worldwide. While WordPress is user-friendly and highly customizable, it's also a target for hackers because of its popularity. Elementor, combined with WordPress themes and plugins, gives you flexibility, but it can also open doors to vulnerabilities if not properly secured. That’s why using reliable WordPress website development services to help secure your site is always a smart move.
Easy Steps to Secure Your Elementor Website
Choose a Secure Hosting Provider Your website’s security begins with the hosting provider you choose. Go for a hosting company that offers secure server environments, SSL certificates, automatic backups, and other essential security features. Managed WordPress hosting providers are a great choice as they often include extra layers of security built into the plan.
Keep Everything Updated One of the easiest ways to keep your Elementor website secure is by ensuring that WordPress, Elementor, your themes, and plugins are all up to date. Updates often include patches for security vulnerabilities, so don’t skip them. Regularly check for updates in your WordPress dashboard and apply them as soon as they’re available.
Use Strong Passwords and Two-Factor Authentication (2FA) Weak passwords are an easy target for hackers. Always use strong, unique passwords for your WordPress admin and other accounts. To further protect your site, enable two-factor authentication (2FA). This adds a second layer of security by requiring a code sent to your phone or email, making it harder for unauthorized users to log in.
Limit Login Attempts Protect your login page from brute-force attacks by limiting the number of login attempts. This way, even if someone tries to guess your password, they won’t be able to break into your site after a few failed attempts. Many WordPress security plugins allow you to set up this feature easily.
Install a Security Plugin There are several excellent security plugins for WordPress that can help you protect your site. Plugins like Wordfence, Sucuri, and iThemes Security monitor your website for malware, block malicious traffic, and provide alerts if anything suspicious happens. Installing one of these plugins adds an extra layer of protection to your Elementor website.
Back Up Your Website Regularly Regular backups are a lifesaver if something goes wrong. In case of a hack or data loss, you can restore your website quickly. Many hosting providers offer automated backups, but you can also use backup plugins like UpdraftPlus or BackupBuddy to schedule regular backups and keep them safe.
Secure Your WordPress Login Page The login page is a common target for hackers. You can make it harder for them by changing the default login URL. There are plugins like WPS Hide Login that allow you to do this with just a few clicks. It’s a small change that adds an extra layer of security to your site.
Use HTTPS with SSL Encryption Make sure your website is served over HTTPS, which encrypts the connection between your site and its visitors. This helps protect sensitive information like passwords and credit card details from being intercepted by hackers. Most hosting providers offer free SSL certificates, so make sure to activate it for your site.
Delete Unused Themes and Plugins Unused themes and plugins are potential security risks because they may have vulnerabilities that could be exploited. After finishing your website with Elementor, go through your themes and plugins and remove anything you don’t need. This keeps your website lean and less prone to attacks.
Work with a WordPress Development Company For enhanced security, consider working with professional WordPress website development services. A custom WordPress development company can ensure your website is built with best-in-class security measures. Whether it’s through custom themes, secure plugin development, or regular security audits, professional services can help keep your website safe from day one.
Conclusion
Securing your Elementor website doesn’t have to be complicated. By following these simple steps of keeping your website updated, using strong passwords, installing security plugins, and working with WordPress website development services you can significantly reduce the risks of hacking and ensure that your site stays protected. If you’re unsure where to start or need expert help, consider partnering with a Custom WordPress development company to handle the security details for you.
#Elementor Security#WordPress Website Security#WordPress Development Services#WordPress Plugin Security#Custom WordPress Development#WordPress Development Solutions#WordPress Website Development#WordPress Security Tips
0 notes
Text

Keeping your WordPress site up to date is essential for security, performance, and new features. However, the idea of updating WordPress can be nerve-wracking for many site owners because updates sometimes break the site, causing plugins or themes to malfunction. If you've been hesitant to update your WordPress site for this reason, don't worry. In this article, we'll guide you through the steps to update WordPress without breaking your site, ensuring a smooth and seamless process.
If you want to learn how to master WordPress development and confidently handle updates, consider enrolling in the WordPress Development Course at CADL in Mohali. This course will help you become proficient in maintaining and developing WordPress websites.
1. Why Updating WordPress is Important
Before we dive into the steps, it’s crucial to understand why you should keep your WordPress site updated:
Security: WordPress is one of the most popular content management systems (CMS), making it a target for hackers. Updates often contain security patches that protect your site from vulnerabilities.
Performance Improvements: Updates frequently include performance enhancements that make your site faster and more efficient.
New Features: WordPress core, themes, and plugins are regularly updated to provide new functionalities and features that improve the user experience.
Bug Fixes: Updates also fix any bugs or issues found in previous versions, helping your site run smoothly.
2. Prepare for the Update
Before you start updating your WordPress site, preparation is key. Here are the steps to follow:
Backup Your Website
Before any update, create a full backup of your site, including all your files and the database. This ensures that if anything goes wrong during the update process, you can restore your site to its previous working state. You can use plugins like UpdraftPlus or BackupBuddy to make the backup process easy.
Files to backup: WordPress core files, theme files, plugin files, and uploads.
Database to backup: This includes all your content, user data, and settings.
Test the Update in a Staging Environment
A staging environment is a copy of your live site where you can test changes and updates without affecting the real site. Many web hosting providers offer built-in staging environments, but if yours doesn’t, you can create one using plugins like WP Staging. Test the updates in this environment to see if anything breaks before applying them to your live site.
Check Compatibility
Before updating, check that your themes and plugins are compatible with the latest version of WordPress. Some plugins or themes might not work well with the new version, and this could lead to issues. You can check plugin and theme compatibility in the WordPress dashboard under the "Plugins" and "Themes" sections.
3. Steps to Update WordPress Safely
Once you’ve prepared, it’s time to update your WordPress site. Follow these steps for a smooth and safe update:
Step 1: Update Plugins First
Before updating WordPress core, it’s a good idea to update your plugins first. This ensures that all the plugins are compatible with the latest version of WordPress when you update it.
To update your plugins:
Go to Dashboard > Updates.
Scroll down to the Plugins section.
Select the plugins you want to update, then click Update Plugins.
Step 2: Update Themes
Next, update your theme(s). If you're using a custom-built theme, make sure you have a backup of any changes you've made because updates might override those changes.
To update your theme:
Go to Dashboard > Updates.
Scroll down to the Themes section.
Select the theme you want to update, then click Update Themes.
Step 3: Update WordPress Core
Now that your plugins and themes are up to date, you can update WordPress core safely. Updating the WordPress core is the most crucial step, as it’s where things could potentially go wrong if not done correctly.
To update WordPress core:
Go to Dashboard > Updates.
If an update is available, you will see a notification saying “An updated version of WordPress is available.”
Click on Update Now.
WordPress will automatically update itself, and you’ll see a confirmation screen once the update is complete.
4. Post-Update Checklist
Once the update is complete, follow these steps to ensure everything is running smoothly:
Step 1: Clear Cache
If you’re using a caching plugin like W3 Total Cache or WP Super Cache, clear the cache after the update to avoid loading any old versions of your files or database.
Step 2: Check Your Site
After clearing the cache, visit your site and test its functionality. Ensure that all pages load correctly, check your forms, and test any interactive elements like sliders or contact forms.
Step 3: Test Plugins and Themes
Go through your plugins and themes to ensure they’re working as expected. If anything seems broken, you might need to revert to your backup or deactivate incompatible plugins and find alternatives.
Step 4: Restore from Backup if Needed
If something went wrong and your site is not functioning properly, don’t panic. You can always restore your website from the backup you created before the update. Use your backup plugin to revert your site to its previous version.
5. Best Practices for Future Updates
Now that you’ve successfully updated WordPress, here are some best practices to follow for future updates:
Set Up Automatic Backups: Always have regular automatic backups set up so that you’re prepared for any future updates or issues.
Update Regularly: Don't wait too long between updates. The longer you wait, the more likely you are to encounter compatibility issues between WordPress, plugins, and themes.
Monitor Plugin and Theme Compatibility: Always check the changelog or developer notes of plugins and themes before updating to ensure they’re compatible with the latest WordPress version.
Conclusion
Updating WordPress without breaking your site might seem daunting, but by following the steps outlined in this article, you can ensure a smooth and stress-free process. Regular updates keep your site secure, performant, and feature-rich, so it’s essential to stay on top of them.
If you're looking to become a WordPress expert and want to learn how to manage updates, build custom themes, and develop plugins, consider joining the WordPress Development Course at CADL in Mohali. Our course will equip you with the skills and knowledge to handle all aspects of WordPress development, including updates, with confidence.
0 notes
Text
WordPress Data base Smoothing out
In the enormous normal movement of development of the web, WordPress rules as one of the clearest stages for building area. Its adaptability and solace have driven huge number of individuals and relationship to take on this content association stage (CMS) for everything from individual web diaries to complex endeavor areas. Taking into account everything, as a WordPress site fills in size and complex nature, its edifying record can change into a test to keep improved and judicious. In this article, we will investigate best practices for restoring your WordPress enlightening record, which will help with additional making site execution and keep it pushing forward conclusively precisely true to form. Dominios EC
Why is data base improvement focal?
The WordPress informative social occasion is the attribute of mix of the structure, where all basic site information like posts, pages, comments, subject and module settings, and more are made due. After some time, this enlightening grouping can amount to abundance data, break, and various lacks that have some command over site execution. This is where data base smoothing out turns out to be perhaps the central part . Pushing your WordPress edifying social occasion participates in several benefits, including: Better site execution: A refreshed enlightening report stacks and answers speedier, achieving more bound load times and a smoother client experience.
Further made security: By cleaning and animating your data base, you clear out potential feeble parts that could be exploited by engineers and other security bets.
Lower server resource use: An overall data base requires less server resources for run, which can decrease working with costs and further encourage site adaptability.
Works with posts and migrations: An ideal and illustrated educational arrangement is even more clear to back up and move to new servers or conditions.
Now that we grasp the significance of data base improvement, we ought to see several key practices to achieve it.
Perform standard posts Going before playing out any smoothing out on the WordPress illuminating combination, taking a full scale help of the site is critical. This ensures that in case of any issues during the improvement cycle, the site can be reliably restored to a past basic state. Contraptions like UpdraftPlus, BackupBuddy, or the mysterious help decisions in the web working with control board can be used to constantly perform changed posts.
Clean the enlightening arrangement Standard useful record cleaning is pulverizing for hold your enlightening file reasonable and freed from insignificant data. This affiliations taking out old post fixes, comment spam, old login logs, and other vaporous data. Modules like WP-Advance or WP-Clear can be used to play out this task consistently and safely.
Advance instructive record tables Instructive variety tables can become separated critical length, controlling site execution. Using a data base upgrade module like WP-DBManager or WP-Clear can help with smoothing out enlightening grouping tables, disposing of unused space and fixing data to encourage adequacy also.
Using an overseeing structure Executing a holding arrangement can fundamentally decrease the stack on your data base by managing brief copies of unendingly made pages. This diminishes the need to separate the edifying rundown on each page interest, which completely further makes site execution. Hitting overseeing modules coordinate WP Super Save, W3 Full scale Hold, and WP Rocket.
Keep modules and subjects reestablished Outdated modules and subjects could contain security inadequacies and petty code that can forebodingly impact site execution. Keeping all modules and subjects vivified to their most recent blends ensures that your site is shielded from potential security risks and benefits from the latest show and smoothing out overhauls.
Limit how much post empowers WordPress thusly saves changes of every single changed post or page, which can achieve a beast improvement of data in the instructive blend after some time. Restricting how much saved changes or destroying them interminably out can help with reducing the size of the data base and work on its show. This ought to be conceivable by adding code to the wp-config.php archive or by using modules like Change Control.
Crush unused modules and subjects After some time, it is normal for WordPress site owners to offer a doorway various modules and subjects to pick different issues. In any case, on the off chance that these modules and subjects are not conclusively used, they can continue to consume data base room and tone down site execution. It is head to consistently move toward the speedy design of presented modules and subjects and crash any that are not used. This ought to be conceivable from the WordPress manager board, under the Modules and Centers piece, where irritating things can be deactivated and killed.
Use a quality web working with provider WordPress enlightening collection execution can likewise be affected by the web working with environment your site page is on. Picking a quality web working with provider that offers fast, WordPress-overhauled servers can hugely impact your page's show. Plus, picking a working with plan that hardens tasteful resources, for instance, circle space, Squash, and move speed will ensure that your data base can skillfully run.
Execute server-level improvement Despite WordPress-express updates, server-level changes can correspondingly be executed to empower edifying combination execution likewise. This can harden portraying limits, for instance, the memory accommodated MySQL, the referencing support size, and the repeat of changed posts. Regardless, it's major to see that making server-level changes could require advanced express data and access, so it's fitting to visit with your working with provider or a plans head going prior to completing any overhauls.Dominios Screen execution and make changes relying upon the circumstance
WordPress data base improvement is definitely not a one-time, static coordinated effort, yet rather a consistent effort that requires standard checking and changes. It is sincere to use execution seeing instruments, as find out about Appraisal, Pingdom, or contraptions worked with into your web working with control board, to screen website page and edifying blend execution. If show issues are seen, for instance, slow heaping times or edifying social affair messes up, it is fundamental to research the explanation and make changes as crucial for additionally enable execution.
WordPress informational outline update is an essential part to ensuring ideal site execution and a brilliant client experience. By following the kept up with strategies suggested in this article, WordPress site owners can keep their enlightening groupings extraordinary, skillful, and secure, achieving speedier stacking times, better flexibility, and a lower likelihood of execution issues. Frame that instructive record improvement is a dependable worked with exertion and requires standard thought concerning keep your site at its perfect.
0 notes
Text

8 Critical Steps to Secure Your WordPress Website
In an era where cyber threats are constantly evolving, ensuring the security of your WordPress website is paramount.
A compromised website can lead to data breaches, financial losses, and damage to your reputation.
This comprehensive guide outlines eight critical steps to fortify your WordPress site against potential security threats.
1. Keep WordPress Core, Themes, and Plugins Updated
One of the most fundamental yet crucial aspects of WordPress security is keeping everything up to date. WordPress regularly releases updates that patch security vulnerabilities and fix bugs.
Enable automatic updates for minor WordPress releases
Regularly check for and install major WordPress updates
Update themes and plugins promptly
Remove any unused themes or plugins
Pro tip: Before updating, always back up your site to prevent potential data loss.
2. Implement Strong Password Policies
Weak passwords are one of the easiest ways for hackers to gain unauthorized access to your site. Enforce strong password policies by:
Using a combination of uppercase and lowercase letters, numbers, and special characters
Implementing a minimum password length (at least 12 characters)
Encouraging the use of password managers
Enabling two-factor authentication (2FA) for all user accounts
Consider using plugins like "WP 2FA" to easily implement two-factor authentication on your site.
3. Secure Your WordPress Login Page
The login page is often the first target for brute force attacks. Enhance its security by:
Limiting login attempts
Implementing CAPTCHA
Changing the default login URL
Using SSL to encrypt login credentials
Plugins like "Wordfence Security" can help implement many of these features.
4. Use SSL Encryption
SSL (Secure Sockets Layer) certificates encrypt data transmitted between your website and its visitors, protecting sensitive information from interception.
Install an SSL certificate on your website
Force HTTPS for all pages
Update internal links to use HTTPS
Set up 301 redirects from HTTP to HTTPS
Many hosting providers offer free SSL certificates through Let's Encrypt.
5. Implement Regular Backups
While not a direct security measure, regular backups are crucial for disaster recovery in case of a successful attack.
Set up automated daily or weekly backups
Store backups in a secure, off-site location
Test your backup restoration process regularly
Plugins like "UpdraftPlus" or "BackupBuddy" can automate this process for you.
6. Harden WordPress File Permissions
Proper file permissions prevent unauthorized users from modifying your WordPress files.
Set directories to 755 (drwxr-xr-x)
Set files to 644 (rw-r--r--)
Set wp-config.php to 600 (rw-------)
Be cautious when changing file permissions, as incorrect settings can break your site.
7. Use a Web Application Firewall (WAF)
A WAF acts as a shield between your WordPress site and potential threats, filtering out malicious traffic before it reaches your server.
Choose a reputable WAF provider (e.g., Cloudflare, Sucuri)
Configure the WAF to block common attack patterns
Regularly update WAF rules to protect against emerging threats
Some managed WordPress hosting providers include WAF as part of their service.
8. Monitor Your Site for Malware and Vulnerabilities
Regular security scans can help detect and address potential issues before they're exploited.
Use security plugins that offer malware scanning (e.g., Wordfence, Sucuri)
Implement file integrity monitoring
Set up alerts for suspicious activities
Regularly review your site's error logs for unusual patterns
Consider using external security services for more comprehensive monitoring and faster threat detection. While focusing on security, it's important to remember that a well-optimized website is often a more secure website.
Large, unoptimized images can slow down your site, making it more vulnerable to certain types of attacks and potentially harming your SEO rankings. To address this, consider using a WordPress image optimizer plugin.
Conclusion
Securing your WordPress website is an ongoing process that requires vigilance and regular maintenance.
By implementing these eight critical steps, you can significantly reduce the risk of security breaches and protect your valuable digital assets.
Remember, no security measure is foolproof, and new threats emerge constantly.
Stay informed about the latest WordPress security best practices and be prepared to adapt your security strategy as needed.
By prioritizing security, you're not just protecting your website – you're safeguarding your business, your reputation, and your peace of mind.
0 notes
Text
Simple Steps to Resetting Your WordPress Site

If your WordPress site isn’t functioning properly or you want a fresh start, resetting it might be your best option. For a detailed breakdown of the process, how to reset a WordPress site offers everything you need.
In this post, we’ll explore why you might want to reset your site and provide simple instructions for how to do it.
Why Reset Your WordPress Site?
Here are a few reasons you might want to reset your WordPress site:
Starting over: Resetting allows you to rebuild your site from scratch.
Resolving persistent issues: If your site is plagued by errors or conflicts, resetting may fix them.
Creating a test environment: Developers can use resets to test different themes or plugins.
Step-by-Step Guide to Resetting Your WordPress Site
1. Backup First
Before resetting, back up your site’s data using plugins like BackupBuddy or UpdraftPlus.
2. Install the WP Reset Plugin
The easiest way to reset your site is by using the WP Reset plugin:
Go to Plugins > Add New in the dashboard.
Search for "WP Reset."
Install and activate the plugin.
3. Reset the Site
Once the plugin is activated:
Go to Tools > WP Reset.
Type "reset" in the confirmation box and click Reset Site.
Your site will be reset, but themes and plugins will remain installed, although deactivated.
What Happens Post-Reset?
After resetting:
All content (posts, pages) is deleted.
Plugins and themes are still available but deactivated.
WordPress settings are restored to default.
Alternative Options
Instead of a full reset, you might:
Restore a previous version from a backup.
Manually clean up unused plugins, themes, and content.
Conclusion
With the help of the WP Reset plugin, resetting your WordPress site is a quick and simple process. Be sure to back up your data beforehand to avoid losing anything important!
1 note
·
View note
Text
Raising WordPress Expertise: Helpful Tips & Tricks with Eliora
Mastering WordPress can seem like a daunting task, but with the right guidance and a few insider tips, you can elevate your skills and make the most out of this versatile platform. Eliora, a seasoned WordPress expert, shares her top tips and tricks to help you enhance your WordPress expertise.

1. Leverage Themes and Plugins Wisely
Themes and plugins are the backbone of WordPress customization. Eliora recommends selecting themes that are lightweight and well-coded to ensure your site runs smoothly. “Choose themes from reputable sources like the WordPress repository or well-known developers,” she advises. For plugins, less is more. “Install only the necessary plugins and ensure they are regularly updated to avoid security vulnerabilities.”
2. Optimize for Speed and Performance
A fast website not only improves user experience but also boosts your SEO ranking. Eliora’s go-to tip for speed optimization is using a caching plugin. “WP Rocket and W3 Total Cache are excellent choices,” she notes. Additionally, compressing images with plugins like Smush or ShortPixel can significantly reduce load times.
3. Enhance Security Measures
Security should be a top priority for any WordPress site owner. Eliora suggests using security plugins such as Wordfence or Sucuri to protect your site from malicious attacks. “Regularly update your WordPress core, themes, and plugins,” she emphasizes. Implementing strong passwords and two-factor authentication adds an extra layer of security.
4. Master the Block Editor (Gutenberg)
The Gutenberg editor has revolutionized content creation in WordPress. Eliora recommends getting comfortable with this tool to unlock its full potential. “Explore reusable blocks to save time and maintain consistency across your posts,” she says. Learning keyboard shortcuts and utilizing advanced blocks can also streamline your workflow.
5. SEO Best Practices
Search Engine Optimization (SEO) is crucial for driving traffic to your site. Eliora’s top SEO tips include using an SEO plugin like Yoast or Rank Math to optimize your content. “Focus on creating high-quality, relevant content and use keywords strategically,” she advises. Don’t forget to optimize your meta descriptions, headings, and alt text for images.
6. Regular Backups
Backing up your site regularly ensures you can recover quickly from any mishaps. Eliora recommends using backup plugins such as UpdraftPlus or BackupBuddy. “Schedule automatic backups and store them in a remote location like Google Drive or Dropbox,” she suggests.
7. Utilize Analytics
Understanding your website’s performance is key to making informed decisions. Eliora advises integrating Google Analytics with your WordPress site to track visitor behavior and site metrics. “Use the insights gained to refine your content strategy and improve user engagement,” she recommends.
8. Stay Updated with WordPress News
WordPress is constantly evolving, with new updates, features, and best practices emerging regularly. Eliora encourages joining WordPress communities and forums, subscribing to newsletters, and following industry blogs. “Staying informed will help you adapt quickly and keep your site ahead of the curve,” she says.
9. Customize with CSS and HTML
To truly make your WordPress site stand out, learning some basic CSS and HTML can be incredibly beneficial. Eliora suggests starting with simple customizations like changing font sizes or colors. “Even a little bit of coding knowledge can go a long way in making your site unique,” she adds.
Conclusion
Raising your WordPress expertise requires continuous learning and practice. By following Eliora’s tips and tricks, you can optimize your site for performance, security, and user experience. Remember, the WordPress community is vast and supportive, so don’t hesitate to seek help and share your knowledge as you grow.
0 notes
Text
A Smooth Journey: WordPress to Shopify Migration
Are you thinking about making the switch from WordPress to Shopify? You're not alone! Many business owners and entrepreneurs are moving their online stores to Shopify, seeking a more streamlined, efficient, and user-friendly platform. This blog will guide you through the WordPress to Shopify migration process, explaining the reasons for making the move, the steps involved, and tips for a smooth transition.
Are you thinking about making the switch from WordPress to Shopify? You're not alone! Many business owners and entrepreneurs are moving their online stores to Shopify, seeking a more streamlined, efficient, and user-friendly platform. This blog will guide you through the WordPress to Shopify migration process, explaining the reasons for making the move, the steps involved, and tips for a smooth transition.
Why Migrate from WordPress to Shopify?
Ease of Use
One of the primary reasons for migrating from WordPress to Shopify is the ease of use. While WordPress is a powerful content management system, it often requires a steep learning curve, especially if you need to be tech-savvy. Shopify, on the other hand, is designed specifically for e-commerce and offers an intuitive, user-friendly interface.
Integrated E-commerce Features
Shopify comes with built-in e-commerce functionalities that are either missing or need to be added via plugins in WordPress. Features such as inventory management, payment gateways, shipping options, and customer accounts are seamlessly integrated into Shopify, making it a comprehensive solution for online stores.
Security and Reliability
Security is a critical concern for any online business. Shopify is a hosted platform, meaning that it takes care of security measures, including SSL certificates, PCI compliance, and regular updates. In contrast, with WordPress, you are responsible for securing your site, which can be daunting and time-consuming.
Customer Support
Shopify offers 24/7 customer support, ensuring that help is available whenever you need it. This is particularly beneficial for business owners who may encounter issues outside of regular business hours. WordPress support, while available, often depends on the specific theme or plugin developers, which can vary in responsiveness.
Preparing for Migration
Evaluate Your Current Site
Before you begin the WordPress to Shopify migration process, it's essential to evaluate your current site. Identify the core functionalities you need to retain and any content that needs updating. Make a list of all the plugins and customizations on your WordPress site, as you'll need to find Shopify equivalents or alternatives.
Backup Your WordPress Site
Backing up your WordPress site is crucial before making any changes. This ensures that you have a copy of your current site in case anything goes wrong during the migration process. You can use plugins like UpdraftPlus or BackupBuddy to create a full backup of your site, including all files and databases.
Choose a Shopify Plan
Shopify offers several pricing plans to fit different business needs and budgets. Take some time to review the features of each plan and choose the one that best suits your business. If you're unsure, you can start with the basic plan and upgrade as your business grows.
Set Up Your Shopify Store
Once you've chosen a plan, it's time to set up your Shopify store. Shopify offers a 14-day free trial, allowing you to explore the platform and get a feel for its features. During this trial period, you can start configuring your store, adding products, and customizing the design to match your brand.
Steps to Migrate from WordPress to Shopify
1. Export Content from WordPress: The first step in the WordPress to Shopify migration process is to export your content from WordPress. This includes products, customers, and orders. You can use plugins like Cart2Cart or LitExtension to automate this process. These tools help transfer your data seamlessly from WordPress to Shopify, reducing the risk of errors.
2. Import Content to Shopify: After exporting your content, the next step is to import it into Shopify. Shopify provides an import tool that supports CSV files, making it easy to upload your data. Ensure that all your product details, customer information, and order history are accurately imported to avoid any discrepancies.
3. Customize Your Shopify Store: Once your data is imported, it's time to customize your Shopify store. Choose a theme that aligns with your brand and customize it to your liking. Shopify offers a wide range of themes, both free and paid, catering to various industries and styles. You can also use Shopify's drag-and-drop editor to make design changes without needing any coding skills.
4. Install Necessary Apps: Just like WordPress has plugins, Shopify has apps that extend its functionality. Browse the Shopify App Store to find apps that meet your needs, such as email marketing, SEO, and social media integration. Installing the right apps can enhance your store's performance and provide additional features for your customers.
5. Set Up Payment Gateways: Setting up payment gateways is a crucial step in the migration process. Shopify supports multiple payment gateways, including Shopify Payments, PayPal, Stripe, and more. Choose the payment options that best suit your business and ensure they are properly configured to accept payments from your customers.
6. Test Your Store: Before launching your new Shopify store, it's essential to test everything thoroughly. Check that all your products are displayed correctly, test the checkout process, and ensure that all links and images are working. Testing helps identify and fix any issues before your customers visit the new site.
7. Redirect Your Domain: To avoid losing any SEO rankings and ensure a seamless transition for your customers, you need to redirect your domain to your new Shopify store. This involves setting up 301 redirects from your old WordPress URLs to the new Shopify URLs. Shopify provides a URL redirect tool to help with this process, ensuring that visitors to your old site are automatically redirected to the corresponding pages on your new site.
8. Launch Your Store: After thorough testing and setting up redirects, it's time to launch your new Shopify store. Announce the launch to your customers via email and social media, letting them know about the improved shopping experience. Monitor your store closely after the launch to address any immediate issues that may arise.
Tips for a Smooth Migration
Plan Ahead
Planning is crucial for a successful WordPress to Shopify migration. Outline each step of the process and set a timeline for completion. This helps ensure that you don't miss any critical tasks and keeps the migration on track.
Maintain SEO
Maintaining your SEO rankings is vital during the migration process. Use SEO tools and plugins to analyze your WordPress site's current SEO performance and replicate the same settings in Shopify. Pay special attention to meta tags, alt texts, and keyword usage to retain your search engine rankings.
Communicate with Your Customers
Keep your customers informed about the migration process. Let them know in advance about the upcoming changes and any potential downtime. Clear communication helps manage customer expectations and ensures a smooth transition.
Test, Test, Test
Testing is essential at every stage of the migration process. Regularly test your store to ensure everything is working correctly. This includes checking for broken links, verifying payment gateways, and ensuring that all products are displayed accurately.
Utilize Shopify Resources
Shopify offers a wealth of resources, including tutorials, forums, and customer support, to help you during the migration process. Take advantage of these resources to address any questions or issues that arise. Joining the Shopify community can also provide valuable insights and support from other store owners who have undergone similar migrations.
Conclusion
Migrating from WordPress to Shopify can seem like a daunting task, but with careful planning and execution, it can be a smooth and rewarding process. The benefits of Shopify, including its ease of use, integrated e-commerce features, and robust security, make it an attractive option for online store owners looking to enhance their business.
By following the steps outlined in this guide and keeping the tips in mind, you can ensure a successful migration that minimizes downtime and preserves your SEO rankings. Oyecommerz can help with a smooth migration from WordPress to Shopify.
Embrace the new opportunities that Shopify offers and look forward to a more efficient and user-friendly platform for your online store.
Ready to make the move? Start your WordPress to Shopify migration today and take your e-commerce business to the next level!
You can also read.
0 notes
Photo
When developing a WordPress website, there are several core features and best practices to consider to ensure a robust, user-friendly, and secure website. Here are the key features: 1. User-Friendly Navigation • Custom Menus: Easily create and manage menus. • Breadcrumbs: Enhance navigation with breadcrumb trails. • Search Functionality: Utilize built-in or enhanced search features. 2. Responsive Design • Mobile-Friendly Themes: Choose themes that are responsive out-of-the-box. • Responsive Plugins: Ensure plugins and widgets are mobile-compatible. 3. Performance Optimization • Caching Plugins: Use plugins like W3 Total Cache or WP Super Cache. • Image Optimization: Utilize plugins like Smush or ShortPixel. • Minification: Minify CSS, JavaScript, and HTML using plugins like Autoptimize. 4. Content Management System (CMS) • Gutenberg Editor: Use the block editor for easy content creation. • Custom Post Types: Create custom post types for different content needs. • Media Library: Efficiently manage images, videos, and other media. 5. Security Features • Security Plugins: Install plugins like Wordfence or Sucuri for enhanced security. • Regular Updates: Keep WordPress core, themes, and plugins updated. • SSL Certificate: Ensure your site has an SSL certificate for HTTPS. 6. SEO Optimization • SEO Plugins: Use plugins like Yoast SEO or All in One SEO Pack. • XML Sitemaps: Automatically generate sitemaps with SEO plugins. • Clean Permalinks: Set up SEO-friendly URLs. 7. Analytics and Reporting • Google Analytics Integration: Track website performance with plugins like MonsterInsights. • Dashboard Widgets: View analytics directly from the WordPress dashboard. 8. Social Media Integration • Social Sharing Plugins: Use plugins like Social Warfare or ShareThis. • Social Feeds: Display social media feeds with plugins like Smash Balloon. 9. Contact and Support Options • Contact Form Plugins: Use plugins like Contact Form 7 or WPForms. • Live Chat: Integrate live chat with plugins like Tawk.to or LiveChat. • FAQs: Create an FAQ section using custom post types or plugins. 10. High-Quality Content • Engaging Text: Write clear and engaging content. • Multimedia Integration: Easily add images, videos, and other media. 11. Accessibility • WCAG Compliance: Use themes and plugins that support accessibility standards. • Accessibility Plugins: Implement plugins like WP Accessibility. 12. E-commerce Functionality (if applicable) • WooCommerce: Install and configure WooCommerce for online stores. • Product Management: Manage products, categories, and inventory. • Payment Gateways: Integrate various payment methods. 13. Regular Maintenance • Backup Solutions: Use plugins like UpdraftPlus or BackupBuddy for regular backups. • Maintenance Mode: Utilize maintenance mode plugins when performing updates. 14. Customization and Flexibility • Themes and Page Builders: Use customizable themes and page builders like Elementor or Divi. • Custom Widgets and Shortcodes: Enhance functionality with custom widgets and shortcodes. 15. User Management • Role Management: Assign different roles and permissions. • Membership Plugins: Use plugins for membership sites if needed. By incorporating these core features, a WordPress website can be highly functional, secure, and user-friendly, providing a positive experience for both administrators and visitors #wordpresswebsitefeature #wordpresswebsite #wordpressdevelopment #wordpressinraipur #landingpagewebsite #wordpresslandingpage #paramwebinfo
0 notes
Text
Which is the Best WordPress Backup Plugin for you?
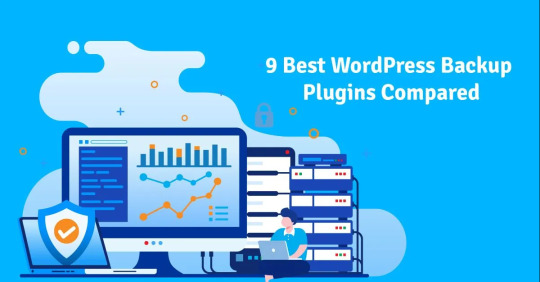
In the vast world of WordPress, one of the most critical decisions you'll make is choosing the right backup plugin. It's like picking the lock for your digital safety vault. With numerous options available, each boasting its own set of features and benefits, the decision can be overwhelming. But fear not, we're here to help you navigate through the maze of backup plugins and find the perfect fit for your needs.
Before we delve into specifics, let's understand why having a reliable backup plugin is crucial for your website's well-being. 9 Best WordPress Backup Plugins here. Your website is your digital storefront, and just like any physical store, it's vulnerable to various risks such as hacking, server crashes, or accidental data loss. A backup plugin ensures that you have a safety net to fall back on, allowing you to restore your site swiftly and minimize any potential damage.
Now, let's explore some of the top WordPress backup plugins and what sets them apart:
1. UpdraftPlus
UpdraftPlus is a powerhouse when it comes to WordPress backups. With over 3 million active installations, it's a favorite among users. It offers scheduled backups, remote storage options like Dropbox and Google Drive, and seamless restoration. The premium version takes it a step further with features like incremental backups and multisite support.
2. BackupBuddy
If reliability is your top priority, BackupBuddy is worth considering. This premium plugin provides comprehensive backup options, including scheduled backups, offsite storage, and even site migration. It also comes with additional security features like malware scanning and repair, making it a complete package for safeguarding your website.
3. VaultPress
VaultPress, brought to you by Automattic, is a premium backup and security service that offers real-time backups, automated restores, and security scanning. Although it's a paid service, its ease of use and reliability make it a worthwhile investment for peace of mind.
4. BackWPup
BackWPup is a free backup plugin that doesn't skimp on features. It allows you to schedule backups, store them on various remote destinations, and even optimize your database. The pro version offers additional perks like priority support and multisite compatibility.
5. Duplicator
Duplicator is not just a backup plugin; it's a powerful migration tool too. It simplifies the process of duplicating, cloning, or migrating your WordPress site. With manual and scheduled backup options and various storage choices, Duplicator is a versatile solution for site administrators.
6. WP Time Capsule
WP Time Capsule takes a unique approach with incremental backups, reducing server load and ensuring faster backups. It seamlessly integrates with cloud storage services and offers hassle-free setup for your peace of mind.
7. BlogVault
BlogVault is more than just a backup plugin; it's a complete security suite for your WordPress site. It provides real-time backups, one-click restores, and automated security scans. With a staging environment for testing changes, BlogVault is a developer's dream come true.
8. BackUpWordPress
For those who prefer simplicity, BackUpWordPress is a straightforward backup plugin that gets the job done. With automatic backups of your entire site and flexible storage options, it's a reliable choice for beginners and experts alike.
9. Jetpack Backup
Jetpack Backup, part of the Jetpack plugin suite, offers automated daily backups, one-click restores, and easy site migrations. With additional security features like downtime monitoring and malware scanning, Jetpack Backup is a robust solution for your WordPress site.
Conclusion
In conclusion, the best WordPress backup plugin for you depends on your specific requirements and preferences. Whether you opt for a free plugin with essential features or invest in a premium service with advanced functionality, the key is to choose a plugin that gives you peace of mind. Evaluate each option carefully, considering factors like reliability, ease of use, and support.
0 notes
Text
Overstappen naar een nieuwe host: tips voor Wordpress gebruikers

Ben je klaar voor een frisse start met je WordPress-website? Overstappen naar een nieuwe host kan aanvoelen als een grote stap, maar met de juiste tips wordt het een fluitje van een cent. Laten we samen met Flexamedia duiken in de wereld van hostingmigraties en zorgen dat jouw overgang vlekkeloos verloopt.
Allereerst, het kiezen van de juiste hostingpartner is cruciaal. Met een breed scala aan hostingbedrijven op de markt, is het belangrijk om een betrouwbare host te vinden die snelheid, veiligheid en uitstekende klantenservice biedt. Flexamedia blinkt uit in deze aspecten en biedt pakketten die specifiek zijn aangepast aan de behoeften van WordPress-gebruikers.
Voor de daadwerkelijke migratie is het van belang om eerst een volledige back-up van je website te maken. Dit garandeert dat geen enkel stukje data verloren gaat tijdens het proces. Dan komt het moment van de overdracht; afhankelijk van je technische vaardigheden kun je kiezen voor een handmatige migratie of gebruikmaken van een plugin die het werk voor je doet. Wees er echter op bedacht dat hoe comfortabel een plugin ook lijkt, een handmatige check van alle gegevens na de migratie onmisbaar is.
Eenmaal overgestapt, is het tijd om je domeinnaam te wijzen naar je nieuwe hostingomgeving. Hierbij komen DNS-instellingen kijken en wellicht wat wachttijd totdat de wijzigingen wereldwijd zijn doorgevoerd. Geduld is een schone zaak, maar met Flexamedia aan je zijde heb je altijd een team van experts klaarstaan om je door elk technisch dilemma te loodsen.
Denk ook aan de SEO-implicaties van je migratie. Een nieuwe host kan je laadtijden verbeteren, wat gunstig is voor je zoekmachine ranking. Maar let op dat je URL-structuur en interne links consistent blijven om te voorkomen dat je ranking daalt.
Overstappen naar een nieuwe host met Flexamedia betekent meer dan alleen een technische verandering; het is een investering in de toekomst van je online aanwezigheid. Met deze tips en de deskundige ondersteuning van Flexamedia, ligt een succesvolle overstap binnen handbereik.

Waarom overstappen naar een nieuwe host?
Je bent al een tijdje bezig met je WordPress-website en je begint te merken dat de laadtijden torenhoog zijn, de ondersteuning van je host te wensen overlaat en de kosten niet meer in verhouding staan tot wat je krijgt. Het is tijd om te overwegen over te stappen naar een nieuwe host. Bij het overstappen naar een nieuwe host voor je WordPress website zijn er verschillende factoren om rekening mee te houden. Het is geen eenvoudige taak, maar met de juiste voorbereiding en tips kan het een soepele overgang worden die je website naar een hoger niveau tilt.
Backup maken van je WordPress-website
Voordat je begint met de overstap naar een nieuwe host is het cruciaal om een volledige backup te maken van je website. Dit omvat je database, alle WordPress-bestanden, thema's, plugins, media en andere uploads. Er zijn verschillende plugins beschikbaar zoals UpdraftPlus en BackupBuddy die dit proces automatiseren en zorgen voor een veilige kopie die je kunt herstellen mocht er iets misgaan.
Kiezen van de juiste host
Het selecteren van een nieuwe hostingprovider is een belangrijke beslissing. Je wilt een host vinden die betrouwbaar is, goede klantenservice biedt en servers heeft die geoptimaliseerd zijn voor WordPress. Kijk naar beoordelingen, vergelijk prijzen en controleer of ze features bieden zoals een one-click WordPress installatie, automatische updates en dagelijkse backups. Een goede host kan de prestaties en veiligheid van je website aanzienlijk verbeteren.
Overzetten van je website
Als je eenmaal een backup hebt en een nieuwe host hebt gekozen, is het tijd om je website over te zetten. Dit kan handmatig door je bestanden en database te exporteren en te importeren bij je nieuwe host, of soms biedt de nieuwe host een migratieservice aan die dit voor je kan doen. Zorg ervoor dat je alle instellingen dubbelcheckt en dat je website correct is geconfigureerd op de nieuwe server.
Domeinnaam wijzigen en DNS updaten
Wanneer je overstapt naar een nieuwe host, moet je ook je domeinnaaminstellingen bijwerken. Dit betekent het wijzigen van de DNS-records om naar de nieuwe server te verwijzen. Dit proces kan enige tijd in beslag nemen vanwege DNS-propagatie, waarbij het tot 48 uur kan duren voordat de wijzigingen wereldwijd doorgevoerd zijn. Zorg ervoor dat je dit tijdig doet en controleer regelmatig of je website correct wordt geladen vanaf de nieuwe server.
Testen van je website na de overstap
Na de overstap is het belangrijk om je website grondig te testen. Controleer of alle pagina's correct laden, of alle media zichtbaar is en of alle links werken. Het is ook een goed moment om de snelheid van je website te testen en te zien of er verbeteringen zijn ten opzichte van je oude host. Maak gebruik van tools zoals GTmetrix of Google PageSpeed Insights om te zien waar verdere optimalisatie mogelijk is.
Voordelen van overstappen naar een nieuwe host bij Flexamedia
Verbeterde websiteprestaties: Een snellere laadtijd verbetert de gebruikerservaring en helpt bij zoekmachineoptimalisatie.
Uitstekende klantenservice: Toegang tot deskundige hulp wanneer je het nodig hebt zorgt voor minder stress en downtime.
Geavanceerde beveiligingsmaatregelen: Bescherm je website tegen hackers en malware met state-of-the-art beveiligingsfuncties.
Optimale serverconfiguraties: Servers speciaal ingericht voor WordPress zorgen voor een stabiele en snelle website.
Concurrerende prijzen: Krijg meer waar voor je geld met betaalbare hostingpakketten die aan al je wensen voldoen.
Gratis migratieservice: Bespaar tijd en moeite met een soepele overgang verzorgd door professionals.
Conclusie
Overstappen naar een nieuwe host kan aanvoelen als een grote stap, maar het kan de performance, beveiliging en betrouwbaarheid van je WordPress-website aanzienlijk verbeteren. Door de juiste voorbereidingen te treffen, zoals een volledige backup maken en je domeininstellingen aanpassen, kun je een soepele overgang waarborgen. En met de dienstverlening van Flexamedia ben je verzekerd van een host die niet alleen aan je technische eisen voldoet, maar ook uitstekende ondersteuning en service biedt. Dit alles leidt tot een betere website-ervaring voor jou en je bezoekers. Begin vandaag nog met het plannen van je overstap en ontdek de voordelen van een host die met je meegroeit.

Meest gestelde vragen
1. Hoe kies ik de beste nieuwe hostingprovider voor mijn WordPress-site?
Ah, de zoektocht naar de perfecte nieuwe woning voor je digitale kind, je WordPress-site. Het voelt een beetje als een huis bezichtigen, nietwaar? Je wilt een plek die veilig is, ruimte heeft voor al je meubels (lees: website content), en natuurlijk niet te vergeten, een goede buurt (oftewel: snelle en betrouwbare servers). Kijk bij het kiezen van een nieuwe hostingprovider naar zaken als uptime-garanties, klantenservice (want wie houdt er niet van een helpende hand op onmogelijke uren?), en natuurlijk compatibiliteit met WordPress. Let ook op de beschikbare pakketten en of ze schaalbaarheid bieden voor als je site de volgende online sensatie wordt. En vergeet niet de recensies te checken; het is net als bij restaurants, de beste tips komen van mensen die er al een keer hebben 'gegeten'.
2. Wat zijn de stappen om mijn WordPress-site succesvol te verhuizen?
Stel je voor, je pakt je digitale verhuisdozen en bent klaar voor de grote overstap. Maar waar begin je? Ten eerste, adem in, adem uit, het komt goed. Begin met het back-uppen van je website. Dit is je verzekeringspolis, mocht er iets misgaan. Vervolgens kies je de held van het verhaal, je nieuwe hostingprovider. Zodra dat geregeld is, exporteer je je WordPress-database en bestanden en importeer je deze naar je nieuwe host. Werk je DNS-instellingen bij om te wijzen naar je nieuwe adres in het wereldwijde web. En voilà, na wat testen en het oplossen van de onvermijdelijke kleine glitches, ben je gesetteld in je nieuwe online huis.
3. Hoe kan ik downtime voorkomen tijdens het overstappen van host?
De horror van een offline website, het is als een feestje geven en vergeten de deur open te doen voor je gasten. Om dit te voorkomen, plan je de verhuizing tijdens de uren dat je bezoekersaantal het laagst is, meestal diep in de nacht. Zorg dat je de nieuwe hosting helemaal inricht voordat je de oude uitzwaait. Test alles dubbel en dwars, en houd de champagne nog even dicht tot je zeker weet dat alles soepel draait. Je kunt ook gebruikmaken van tijdelijke URL's om je site te testen zonder de live versie te beïnvloeden. En vergeet niet je gebruikers op de hoogte te houden; een kort onderhoudsbericht kan wonderen doen voor hun geduld en begrip.
4. Moet ik mijn domein verhuizen samen met mijn WordPress-site naar de nieuwe host?
Je domein verhuizen is als het doorgeven van je nieuwe adres aan de postbode. Het is niet strikt noodzakelijk om het samen met je website te verhuizen, maar het kan het leven wel een stukje makkelijker maken. Als je domein en hosting bij dezelfde provider zijn, heb je alles op een plek, wat het beheer eenvoudiger maakt. Maar als je liever je domein gescheiden houdt voor welke reden dan ook, is dat natuurlijk ook prima. Het belangrijkste is dat je de DNS-instellingen aanpast zodat ze naar je nieuwe hosting verwijzen. En wees je ervan bewust dat het verhuizen van een domein ook wat tijd in beslag kan nemen, dus plan dit goed.
5. Hoe zorg ik ervoor dat mijn SEO-ranking behouden blijft na het overstappen naar een nieuwe host?
SEO, je digitale reputatie, wil je zeker niet kwijt. Om je harde werk te beschermen, zorg je voor een vlekkeloze verhuizing; geen gebroken links, geen eindeloze laadtijden en zeker geen grootse veranderingen in je website structuur. Update je sitemap en dien deze opnieal in bij Google Search Console om te laten zien dat je er nog steeds bent en klaar voor actie. Houd een oogje in het zeil voor 404-fouten en fix ze sneller dan je "waar is mijn schilderstape" kunt zeggen tijdens een echte verhuizing. En vergeet niet, consistentie is sleutel, dus houd je URL's waar mogelijk hetzelfde. Met deze tips blijft je SEO-ranking zo stabiel als een oude eik.
Flexamedia
Visit for more: https://flexamedia.nl/webhosting/
adres: Guntersteinweg 377, 2531KA Den Haag Phone: 085 902 67 00
Facebook: https://www.facebook.com/flexamedia LinkedIn: linkedin.com/company/flexamedia/
1 note
·
View note
Text
How can I create a backup of my WordPress?
To create a backup of your WordPress website, follow these steps:

Use a Backup Plugin: Install and activate a reliable backup plugin such as UpdraftPlus, BackupBuddy, or VaultPress. These plugins offer easy-to-use interfaces and automate the backup process.
Configure Backup Settings: Once the plugin is activated, configure its settings according to your preferences. You can schedule regular backups (daily, weekly, monthly), choose what to include in the backup (files, database, or both), and select where to store the backup files (cloud storage, FTP, email, etc.).
Perform Manual Backup: If you want to create an immediate backup, most backup plugins allow you to perform a manual backup with just a few clicks. Simply navigate to the plugin's dashboard and initiate the backup process.
Verify Backup Completion: After the backup process is complete, verify that the backup files have been successfully created and stored in the designated location. You should see confirmation messages or logs indicating the completion of the backup.
Store Backup Files Securely: It's crucial to store your backup files securely to prevent data loss. If you're using cloud storage, ensure that your account is secure and that only authorized individuals have access to it.
Test Backup Restoration: Periodically, test the backup restoration process to ensure that your backups are viable and can be used to restore your website in case of emergencies. Most backup plugins provide a restoration feature that allows you to restore your website from a backup with ease.
Monitor Backup Status: Regularly monitor the backup status to ensure that backups are being performed as scheduled and that there are no errors or issues. Set up notifications or alerts to be informed of any backup failures or abnormalities.
By following these steps, you can create a reliable backup of your WordPress website to safeguard your data and ensure business continuity. This is crucial, especially for a website development agency or website design and development company in MD, as they handle numerous client websites and need to maintain the integrity and security of their projects. Website Creative Services can also benefit from regular backups to protect their assets and maintain client satisfaction.
0 notes
Text
0 notes
Text
The Ultimate Guide to WordPress Backup Plugins

Backing up your WordPress site is a critical task that shouldn't be overlooked. With a plethora of plugins available, finding the right one can be daunting. To help you make an informed decision, we've reviewed the best WordPress backup plugins. For a detailed breakdown, visit our guide on the best WordPress backup plugins.
The Necessity of a Backup Plugin
In an era where digital security is paramount, having a reliable WordPress backup and restore plugin can save you from data loss due to hacking, server issues, or human error. Let's explore some of the top options available.
Best Backup Plugins for WordPress
UpdraftPlus WordPress Backup Plugin
The UpdraftPlus WordPress backup plugin is highly regarded for its comprehensive feature set, which includes scheduled backups and cloud storage options. It's a versatile tool suitable for both beginners and advanced users.
BackupBuddy
BackupBuddy offers a full suite of tools for backup, restoration, and migration. It's an excellent choice for those needing a robust WordPress backup and restore plugin that covers all bases.
BackWPup
For those looking for a WordPress backup plugin free of charge, BackWPup provides essential functionalities, including backups to various cloud services. It's a great option for budget-conscious users.
Duplicator
More than just a backup tool, Duplicator also facilitates site migrations. It's ideal for developers and site owners who need to clone or move sites efficiently.
Jetpack Backups
Jetpack Backups integrates seamlessly with the Jetpack suite, offering real-time backups and easy restoration. It's a convenient choice for users already utilizing Jetpack's other features.
Choosing the Right Plugin for 2024
As we move forward into 2024, selecting the best WordPress backup plugin is more important than ever. The UpdraftPlus WordPress backup plugin remains a strong contender due to its extensive features and user-friendly interface. However, other plugins like BackupBuddy and Duplicator also offer specialized features that may better suit your needs.
Free vs. Paid Plugins: What to Consider
While free plugins like BackWPup provide adequate basic features, premium plugins often include advanced options like real-time backups and dedicated support. The decision between free and paid plugins will depend on your specific requirements and the complexity of your website.
Conclusion
In conclusion, choosing the best free WordPress backup plugin 2024 or a premium solution depends on your specific needs and budget. A reliable backup plugin is essential for protecting your site and ensuring you can recover quickly in the event of a problem. Whether you opt for a free or premium solution, make sure it meets your site's needs and provides reliable backups.
0 notes