#backpacking guide for beginners
Explore tagged Tumblr posts
Visit Tumblr Blog
Explore Tumblr blogs with no restrictions, modern design and the best experience.
Last Seen Tumblr Blogs


Fun Fact
69% of Tumblr users are millennials.
Text
Have you ever driven via White Sands National Park’s picturesque route? Which picturesque journeys in New Mexico are your favorites? Have you ever been to White Sands, NM?
White Sands National Park is one of the best-known locations in the Land of Enchantment. Encompassing 275 square miles of white gypsum sand dunes, this is the largest of its kind in the world. And while you can explore this white sandy desert on foot, you may also want to enjoy a scenic drive through White Sands National Park in New Mexico as well.
#backpacking guide for beginners#best travel blogs#destination guide carmel#adventure travel blogs#destination guide santa maria valley#california adventure tips#female travel bloggers#world travel guide#thailand travel guide#europe travel blog#White Sands National Park in New Mexico
3 notes
·
View notes
Text
A Beginner’s Guide to Backpacking: Tips and Essentials : Newsera21 :
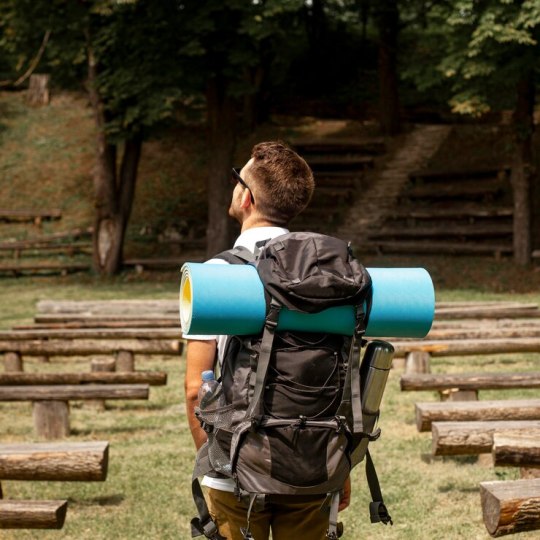
Whether you’re venturing into the great outdoors or exploring vibrant cities, backpacking tips and tricks offers a unique experience that allows you to immerse yourself in different cultures, connect with locals, and create lasting memories. here’s a beginner’s guide -
https://www.newsera21.com/a-beginners-guide-to-backpacking-tips-and-essentials/
0 notes
Text
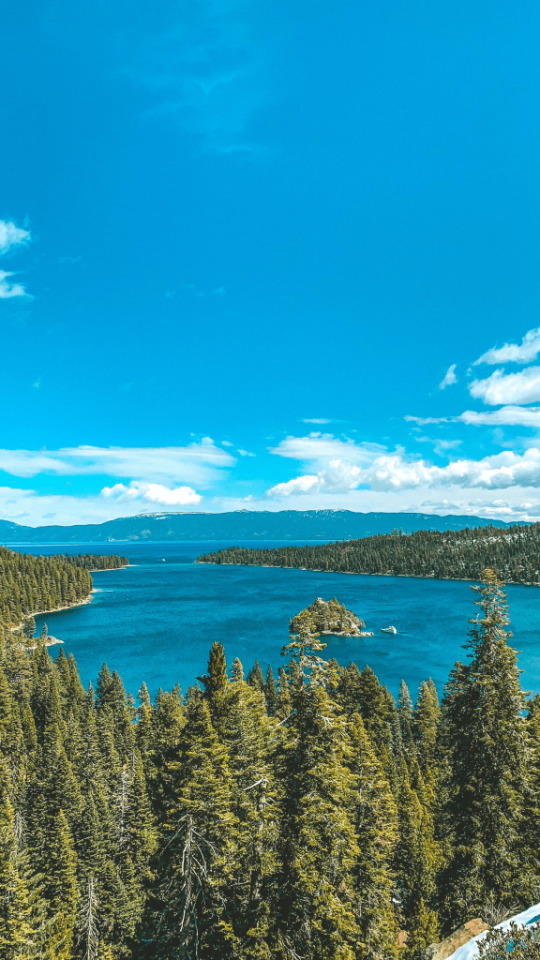
Unleash Your Adventure Spirit: A Comprehensive Hiking Guide to Lake Tahoe
Welcome to the ultimate guide to hiking in Lake Tahoe! Whether you’re a seasoned trekker or lacing up your boots for the first time, Lake Tahoe’s scenic trails offer an invigorating blend of breathtaking views and challenging terrains. Discover hidden gems, encounter diverse wildlife, and bask in the natural beauty of this outdoor paradise. Get ready to embark on an awe-inspiring journey through…
View On WordPress
#Adventure Travel#backpacking Lake Tahoe#beginner&039;s guide to hiking#hiking gear#hiking guide#hiking in nature#hiking safety#hiking tips#hiking trails#Lake Tahoe exploration#Lake Tahoe hiking#Lake Tahoe wildlife#mountain hiking#nature walks#Outdoor Adventures#Scenic hikes#Tahoe adventure#Tahoe wildlife#trails in Lake Tahoe#wilderness adventure#wilderness exploration
0 notes
Text
Libraries and Adult Lonliness
As we all know, making friends as adults is hard. And while the internet has made it easier to make friends with people around the world, actually meeting people you can meet with on a regular basis and just hang out with us tough. The common answer to meeting new people is to find people who are interested in the same stuff as you. As such, finding places to meet new people who may have similar interests to you is important. And that’s why I think the library is a great resource!
As a children’s librarian, one of the things I try to point out to parents when they come in to sign their kids up for the library is that we offer adult programs too. Obviously we have book clubs - my library has 4 different book clubs for people who read different types of books. I’ve posted about it before with knitting/crochet circles. But for people who have or want to explore different interests, and meet new people via that new interest, you may want to check your local library to see their programming. For example:
Hiking: Many libraries offer things like hiking kits. These can be things such as maps for local trails, hiking sticks, a water resistant backpack, binoculars, bird guides, and the like. But some libraries having hiking clubs, such as the Poughkeepsie Public Library Distruct in NY.

Language Learning: Many libraries have access to language learning platforms such as Rosetta Stone or Mango Languages. But many other have dedicated classes where adults can come and learn languages. If you’re in L.A. county, the public library offers classes in beginner Russian, Chinese, Korean, Italian, Armenian, etc!
Music: there are many libraries that have maker spaces where you can go and record music. There’s one in the Newark Library and at a branch of the Brooklyn library. There are also ones that allow you to check out instruments. But there are also ones where you can receive free music lessons, such as the Dallas Public Library (this program was online during the pandemic but is now also offered in person!)
youtube
I could keep going.
Singing, dancing, theater, yoga, sketch comedy, creative writing, RC Cars, foraging, cemetery tour groups, jewelry making, baking, woodworking, painting, etc. If you have a niche interest or would like to get into a niche interest, there is a chance your library has had or will have a program about it. And if you’re looking to meet new people, it is a great place to start.
56 notes
·
View notes
Text
Ultimate Guide to Trekking in Nepal for Adventure Lovers (2025)
Introduction to Trekking in Nepal
Nestled in the heart of the Himalayas, Nepal is a paradise for adventure lovers. With its towering peaks, lush valleys, and rich cultural heritage, trekking in Nepal offers an experience like no other. Whether you’re a seasoned trekker or someone looking to dip your toes into the world of hiking, this country has something magical waiting for you.
Imagine standing at the base of Mount Everest—feeling both small and mighty as you gaze up at the world’s highest peak. Picture winding through ancient villages where time seems to stand still while locals go about their daily lives. The trails here are not just paths; they lead you through history, spirituality, and breathtaking natural beauty.
But when should you embark on this journey? What are the best treks in Nepal that will leave lasting memories? And how can you prepare yourself for such an adventure? This ultimate guide will answer all these questions and more so that your Himalayan trekking experience is unforgettable!

Best Time to Visit and Trek in Nepal
The best time for trekking in Nepal is during the spring (March to May) and fall (September to November). These seasons offer clear skies, mild temperatures, and stunning views of the majestic Himalayas.
Spring brings vibrant blooms across the trails. The weather is generally pleasant, making it ideal for both seasoned trekkers and beginners. You can immerse yourself in nature’s beauty while enjoying moderate temperatures.
Fall presents another excellent opportunity. The post-monsoon clarity allows breathtaking panoramas of snow-capped peaks. Trekking enthusiasts flock to popular routes like Everest Base Camp and Annapurna Circuit during this period.
Monsoon season from June to August should be avoided if possible. Heavy rainfall makes trails slippery and can lead to landslides. Winter trekking is challenging due to extreme cold, but some adventurous souls embrace it for solitude amidst snow-covered landscapes.
Popular Treks in Nepal
Nepal is a treasure trove of trekking adventures, catering to all levels of experience. Among the best treks in Nepal, the Annapurna Circuit stands out for its stunning mountain views and diverse landscapes. This trek offers a unique blend of lush valleys and high-altitude vistas.
The Everest Base Camp trek remains iconic, drawing thousands each year. It leads trekkers through picturesque villages and alongside the mighty Khumbu Glacier. The sense of achievement upon reaching base camp is unmatched.
For those seeking solitude, the Langtang Valley Trek provides breathtaking scenery away from bustling trails. Here, you’ll encounter ancient Tibetan culture amidst magnificent peaks.
Shorter options like Ghorepani Poon Hill Trek are perfect for beginners or those short on time yet looking for panoramic sunrise views over the Himalayas. Each trail showcases different facets of Nepal’s natural beauty and rich cultural heritage, making them unforgettable experiences.
Preparing for Your Trek: Physical and Mental Fitness, Packing List
Preparing for your trek in Nepal involves both physical and mental fitness. Start training several weeks before your journey. Activities like hiking, jogging, cycling, or swimming can build endurance. Focus on strengthening your legs and core to handle the varying terrain.
Mental resilience is just as important. Trekking can be challenging, both physically and emotionally. Practice mindfulness techniques to help manage stress during long hikes.
Creating a comprehensive packing list ensures you have everything you need without overloading yourself. Essential items include breathable clothing, sturdy hiking boots, a reliable water bottle, and a durable backpack. Don’t forget trekking poles; they can significantly ease the strain on your joints.
Include first-aid supplies for minor injuries along with sunscreen and insect repellent to protect against harsh conditions. A good camera will help capture stunning landscapes—the memories are worth it! Stay organized to make your adventure smoother from start to finish.
Permits and Expenses for Trekking in Nepal
Trekking in Nepal isn’t just about stunning vistas; it’s also about understanding the logistics. Before you embark on your adventure, securing the right permits is essential. Most trails require at least two types: the TIMS (Trekkers’ Information Management System) card and area-specific permits like those for the Annapurna or Everest regions.
Costs can vary widely based on your chosen trek and personal preferences. Budget trekkers might spend around $30 to $50 a day, covering meals, accommodation, and guides. Meanwhile, trekking with a more luxurious touch could skyrocket expenses to over $100 daily.
Don’t forget additional costs such as travel insurance, gear rental if needed, and entrance fees for national parks. It's wise to plan ahead so you're financially prepared for an unforgettable experience among the majestic Himalayas.

Safety Tips for Trekking in Nepal
Trekking in Nepal offers breathtaking views, but safety should always come first. Start by acclimatizing properly to avoid altitude sickness. Ascend gradually and listen to your body.
Stay hydrated throughout your trek. Carry enough water and consider using purification tablets if necessary. Dehydration can impact your energy levels quickly.
Navigating the trails requires awareness of changing weather conditions. Always check forecasts before heading out, as storms can arise unexpectedly in the Himalayas.
It's wise to travel with a reliable guide or as part of an organized group. Local guides know the terrain well and can provide support during emergencies.
Ensure you have comprehensive travel insurance that covers trekking activities. This provides peace of mind against unforeseen events like injuries or cancellations while exploring these stunning landscapes.
Cultural Experience and Local Communities Along the Trails
Trekking in Nepal is not just about conquering heights; it’s a journey into the heart of vibrant cultures. Along the trails, you'll encounter diverse ethnic groups, each with unique traditions and lifestyles.
As you pass through quaint villages, local communities greet trekkers with warm smiles and traditional hospitality. Engaging with locals offers insights into their daily lives, from farming to crafting intricate handicrafts.
Don’t miss the opportunity to savor authentic Nepali cuisine prepared by families eager to share their culinary heritage. Dishes like dal bhat and momo are not only delicious but also tell stories of the land.
Participating in festivals or rituals can be a transformative experience. You'll witness colorful celebrations that reflect age-old customs and beliefs that thrive amidst nature’s grandeur.
Connecting with these communities enriches your trekking adventure immensely. It fosters respect for different ways of life while creating lasting memories along your path through the Himalayas.
Accommodation Options During Treks
When trekking in Nepal, accommodation options vary widely depending on the trail and region. Tea houses are the most popular choice for trekkers, providing a cozy bed and meals. These basic lodges offer a chance to connect with fellow adventurers.
For those seeking more comfort, some treks feature eco-lodges or boutique hotels that blend local charm with modern amenities. These can provide a refreshing respite after long days on the trails.
Camping is another exciting option for Himalayan trekking enthusiasts. Setting up camp under starlit skies adds an adventurous flair to your experience. Just make sure you have proper gear if you choose this route.
Many trekkers appreciate homestays as well, which allow for deeper cultural immersion. Staying with local families enhances your understanding of their traditions while enjoying authentic Nepali hospitality during your journey through these stunning landscapes.
Responsible Tourism: How to Minimize Your Environmental Impact
Responsible tourism is essential for preserving the stunning landscapes of Nepal. As you embark on your trekking adventure, consider leaving no trace. This means taking all your trash with you, including food wrappers and biodegradable waste.
Stay on designated trails to protect delicate ecosystems. Straying off path can lead to soil erosion and harm local flora.
Using refillable water bottles helps cut down plastic waste. Water purification tablets or filters can keep you hydrated without contributing to pollution.
Support local communities by purchasing handmade goods instead of mass-produced items. This not only enriches their culture but also provides them with sustainable income.
Engaging respectfully with locals promotes cultural exchange while ensuring that traditions are honored rather than exploited. Always ask permission before taking photos, as this simple act shows respect for their privacy and heritage.
By being mindful during your trek, you contribute positively to both nature and the people who call these beautiful mountains home.
Conclusion
Trekking in Nepal offers an unparalleled adventure for those seeking the thrill of nature’s beauty and cultural richness. Each path leads you through breathtaking landscapes, from lush valleys to towering peaks. As you embark on your journey, remember that preparation is key—both physically and mentally.
The best time for trekking in Nepal varies depending on the trek, but generally, spring and autumn provide optimal conditions. Familiarize yourself with popular treks like Everest Base Camp or Annapurna Circuit to find what suits your interests best.
Equipping yourself with the right gear can make all the difference during your expedition. And don’t forget about permits and expenses; understanding these helps avoid surprises along the way. Prioritize safety by following local guidelines and staying aware of weather changes.
Engaging with local communities enriches your experience, allowing you to appreciate diverse cultures while supporting their livelihoods responsibly. With various accommodation options available—from tea houses to lodges—you can choose what fits your style without compromising comfort.
Practicing responsible tourism ensures that these stunning trails remain unspoiled for future adventurers. Your choices matter; every step contributes toward preserving this beautiful environment.
Embrace each moment of your Nepali trek—the challenge, the scenery, and the connections made along the way create memories that last a lifetime. Prepare well and let Nepal's majestic mountains inspire you!
2 notes
·
View notes
Text
anyway another game update. because the last one isnt done
1. hardrock version
so, last few entries, i talked about getting silkworm and backpacks. turns out these things arent on my version of tfc. its on the hardrock version that requires you to boil your water, added a temperature system, and i think it also has tornados and piranhas? its much harder than the one i played. pro tip: if your installing the mod, dont just install tfc. i had a hard time with a lot of recipes because the tfc field guide on its own isnt very detailed. i got a lot better once i installed the essential beginner modpack that include map and coord help and JEI support to look up crafting recipes. even the harder version like hardrock was actually a modpack i believe.
tfc actually had a lot of version like tfc tng that only covers 1.18+ update, 1.20 current version, tfc plus, tfc hardcore, even the old original versions like 1.7.10 that came out ten years ago. the rule is, when in doubt, check field guide on github, install JEI mod, or ask their discord.
2. welding
anyway, back to the game. since my thatch bed is done and all i have to do is wait for the alpaca to be ready to shear again, i decided to make an anvil.
welding is an evil mechanic. the charcoal forge is evil too. i swear watching the copper ingot heats up is like watching water boil. but then if i look away and do something else the copper gets too hot and disappears. i lost quite a bit of ingots during the trial and error process. it is quite satisfying to see my first double ingots though. and crafting some bellows helped lot in making the forge heats up faster, and once you got it handled down, you slowly gets used to it and it becomes easy.
and then, you got your first copper anvil.
smithing is more fun and less tedious, because its a mini-game. but if there's one thing i want to automate, its that. more motivation for me to start making windmills. but then i realized the gear box needed to harness mechanical powers are made of brass, a metall alloy so i might have to do a lot of smithing manual anyway. fml
but seriously, smithing isnt as bad as welding things in a stone anvil. the waiting game isnt as horrible. i think, all the trouble i got just for my new copper boots and copper shields are worth it. im actually planning to do a helmet, but i dont have enough copper right now.
you know, i've been thinking of making a beginner's welding/smithing guide because there is a lot of ppl complaining abt it. i think once you got it handled its fun, but the documentation are hard to get through if youre very much a beginner gamer. i might not help ppl do a perfectly forged item (yet) but i can make crafting a copper anvil less of a pain in the ass.
3. farming / food
i might have made a mistake in moving after my base burned down. my place is cold. it has some very bright summers and spring, but its snowing more times in the year than it is sunny. its good for a steady supply of deer meat, but not good for farming.
but i still have quite a bit of a harvest. its so much that i need to make an extra food container and some of the crops rot because i just cant eat everything in time even when i mix everything up in soups and sandwiches. i can preserve and pickle things up more but i need vinegar and it requires sugar which grow from sugar canes and it doesnt grow in my area and maybe i also need to make jams so i have to make a jar but then that requires glassworking and turns out i need to craft a blowpipe and that requires. iron. and smithing on the anvil. astagfirullah.
back to farming, i can at least mitigate the short planting and growing season by using fertilizers to make things grow faster. which is where the crop rotation part came in. fertilizers have different ratio of phosphorus, potassium, and nitrogen, while plants require just one of said nutrients. if i keep planting the same type of seed in the same farm soil, the nutrients that affect its growth will slowly deplete along with the crop yield over time while the other nutrients that could be used to double the yield and make faster growing time are left unused in the soil. there is also the matter of some plants being more resistant to cold weather like cabbages and barleys. i might need to make a excel sheet arranging the most efficient crop rotation and the best way to get as much out of the short planting season of my base's cold climate.
(to be continued because this has gotten too long already!)
3 notes
·
View notes
Text


Nonfiction Thursday: Drawing Picks
100 Buildings & Architectural Forms by David Drazil
Featuring more than 600 sketches depicting a vast array of architecturally and culturally significant buildings, bridges, towers, monuments, and more, Draw Like an 100 Buildings and Architectural Forms is a must-have visual reference for student and aspiring architects, artists, illustrators, and urban sketchers.
This contemporary step-by-step guidebook demonstrates fundamental art and architectural concepts like proportion, perspective, and spatial relationships as you learn to draw a wide range of important residential, commercial, historic, and cultural buildings, bridges, towers, and other structures from all over the world and from ancient to modern - all shown from a variety of perspectives and scales. Each set of illustrations takes you from beginning sketch lines to a finished drawing. Author David Drazil’s classic drawing style will make this a go-to sourcebook for years to come.
How to Draw Bold Manga Characters by Ebimo
Elevate your manga drawings to the next level with help from a Japanese professional!
Manga drawing expert and author Ebimo is an action film junkie who taught herself to draw by studying martial arts films. In this book, she brings those techniques, tips, and tricks to you! Learn how to draw every detail of exciting action characters - from the muscles used in fight scenes to the 3-D arc of a flying frontal kick.
What sets Ebimo apart is her fusion of the basics of figure drawing and proper posing with cutting-edge digital-age illustration and coloration techniques. Artists working on paper or a screen will learn to bring greater depth and complexity to their characters with these expert tutorials.
Modern Fashion Illustration by Holly Nichols
After graduating from college with a BFA in Studio Art, Holly Nichols sought a way to merge her love of fashion with art. Her sketchbook and napkin doodles of designer duds became refined drawings that she now creates with her beloved artist markers. She uses her fashion-inspired illustrations to engage her audience of more than 1 MILLION Instagram followers in both the fashion and art communities.
Modern Fashion Illustration is a how-to book that offers the art of fashion illustration step-by-step, and how to promote it in today’s world of social media. It also includes a collection of whimsical fashion illustrations by the author, featuring illustrations waiting to be colored in by novices and practiced illustrators alike.
Sketch Your World by Kimiko Sekimoto
An inspiring, interactive guide for drawing people, places, food, and things you come across in your travels.
This book offers aspiring urban sketchers a series of 40 step-by-step lessons showing you how to draw everything from the meal you ordered at a café to a map of highlights from your latest road trip. You'll get all the tips and advice you need for drawing what you see during your day and while out and about. This beginner's guide is the perfect companion to toss into your backpack, artist's tote, or portfolio along with your sketch journal and pens!
#art books#art#drawing#nonfiction books#nonfiction#reading recs#reading recommendations#book recommendations#book recs#library books#tbr#tbr pile#to read#booklr#book tumblr#book blog#library blog#readers advisory
5 notes
·
View notes
Text
So there’s a woc outdoors group for the pnw and I signed up for the backpacking trip and it’s a beginner one bc I haven’t done that before and I got in and I’m sooo excited that was one of my goals for my 30th birthday lmao
Also nervous bc it’s all strangers and guides and all that but at same time what an adventure haha
#a group of beginners make me less nervous bc I’m always self conscious about how slow I hike#I fractured an ankle a couple years ago and so I’m avoiding injuries and evan just zooms
3 notes
·
View notes
Text
Unplug & Unwind: The Ultimate Kasol-Kheerganga Trek Experience
If you’re looking to escape the chaos of city life and reconnect with nature, the Kasol-Kheerganga Trek is your perfect getaway. Tucked away in the Parvati Valley of Himachal Pradesh, this scenic trail is a dream for backpackers, adventure lovers, and peace seekers alike.
🌲 Why Kasol?
Known as the "Mini Israel of India," Kasol is a quaint village located on the banks of the Parvati River. The calm vibe, vibrant cafes, and welcoming locals make it a great starting point for any Himalayan journey. It’s a haven for those looking to experience a blend of culture, food, and nature.
🥾 The Trek to Kheerganga
The real adventure begins when you start your 13 km trek to Kheerganga. With towering pine trees, gushing waterfalls, and views that leave you speechless, the trail is as rewarding as the destination. Whether you're an experienced trekker or a beginner, the moderate difficulty makes it ideal for all.
🧘♀️ At the Top
Once you reach Kheerganga, you're welcomed by lush meadows, panoramic views, and most importantly—natural hot springs. Soak your stress away in the warm waters while the snow-capped peaks look on. Many believe the hot springs have healing properties, and whether that’s true or not, the experience is truly therapeutic.
🏕️ Stay & Food
You’ll find cozy campsites with all basic amenities. Campfires, starry nights, and simple Himachali meals turn this trip into a soul-refreshing retreat. It’s a place where conversations flow as freely as the mountain air.
🚐 Plan Your Trip with Pack and Explore
At Pack and Explore, we handle everything—from transport to trekking guides, meals, and stays. All you need to do is pack your essentials, lace up your shoes, and show up with a sense of adventure.
📅 Best time to visit: April to June & September to November 🎒 Trip duration: 2 nights / 3 days 💰 Budget-friendly packages available
Ready to hit the trails? Let the mountains call you! 📞 Contact us or visit www.packandexplore.in to book your next trek.
0 notes
Text
I have carefully curated a collection of our favorite products, including hiking gear, travel accessories, and much more, to make your travel experiences even better. From high-quality backpacks and sturdy tents to portable chargers and versatile clothing, we have everything you need to make your next adventure unforgettable. Browse MY selection today and get ready to embark on your next journey in style!
#europe travel blog#adventure travel blogs#thailand travel guide#backpacking guide for beginners#world travel guide#best travel blogs#female travel bloggers#destination guide santa maria valley#destination guide carmel#california adventure tips
0 notes
Text
Hampta Pass to Chandratal—Are You Packed Yet?

Hampta Pass Trek: An Epic Adventure through Shifting Landscapes
If you’re craving a trek that flips the script with every mile, the Hampta Pass trek is your go-to Himalayan drama. Nestled between the lush green Kullu Valley and the starkly cold desert of Lahaul, this trail serves serious contrast—the kind that leaves you speechless and slightly out of breath (both from beauty and altitude).
From Manali, this 5-day, 35-kilometre journey takes you from pine forests to glaciers, river crossings to flower-laced meadows. With an altitude of around 14,100 ft, the trek is rated easy to moderate—perfect for beginners with grit and seasoned trekkers who want a diverse route without needing an oxygen tank.
Hampta Pass Trek Package: Budget-Friendly Thrills in the High Himalayas
Let’s face it—treks can be expensive if you go DIY. But a solid Hampta Pass trek package gives you the full experience without burning a hole in your backpack.
Here’s what most curated packages include:
Duration: 4 Nights & 5 Days from Manali or 6 Nights & 7 Days from Delhi
Inclusions: All veg meals, tents, safety equipment, permits, certified guides, and internal transport
Cost: Starting from ₹5,999 only
Support Crew: Certified trek leaders and helpers with medical kits and backup plans for emergencies
Why stress over logistics when someone else can carry the metaphorical map while you soak in the views? Plus, most packages include a visit to Chandratal Lake, the sparkling jewel of the Lahaul valley, on the final leg of the journey.
Manali Hampta Pass Route: From Green Dreams to Snowy Realities
Every great tale needs a compelling beginning, and Manali Hampta Pass delivers. The trail kicks off with a drive from Manali to Jobra, from where your feet take over the journey. The typical route looks like this:
Day 1: Manali to Jobra to Chika
Day 2: Chika to Balu ka Ghera
Day 3: Balu ka Ghera to Hampta Pass to Siagoru
Day 4: Siagoru to Chatru, drive to Chandratal Lake (conditions permitting)
Day 5: Return to Manali
The trek’s highlight—crossing the actual Hampta Pass—is an adrenaline spike. You ascend through snow, marvel at 360° views of the valleys below, and descend into a completely different ecosystem. It’s like switching worlds in the middle of a hike.
Hampta Pass Trek in June: Nature at Her Most Generous
If there’s a time when the mountains seem to be in a good mood, it’s June. Doing the Hampta Pass trek in June means hitting the seasonal sweet spot. Here’s what makes this time so spectacular:
Flora: Wildflowers blanket the meadows around Chika and Jwara
Snow: Still enough snow on the pass to make you gasp, but not enough to block the route
Streams: Full-bodied and clear—perfect for a soul-cleansing splash
Crowds: Just beginning to rise, but not yet overwhelming
You’ll experience snowfields, lively rivers, and blooming trails—all within the same week. No filters needed; this trek edits itself.
Best Time for Hampta Pass Trek: Timing is Everything
Let’s cut to the chase—the best time for Hampta Pass trek is from mid-June to mid-September. But if you want the full cinematic package (snow, flowers, clear skies), June and early July are your golden windows.
Here’s a quick seasonal breakdown:
June – Early July: Lush greenery, vibrant flowers, snow patches still intact
Mid-July – August: Rains begin; trails can be tricky due to landslides and slippery patches
September: Clear views, less snow, drier terrain—ideal for photographers
Avoid October onwards unless you enjoy hypothermia. Seriously.
Final Thoughts: One Trek, Infinite Emotions
The Hampta Pass trek is more than just a journey—it’s a full-blown story arc with rising action, plot twists, and a breathtaking climax at Chandratal Lake. With affordable Hampta Pass trek packages, a route that kicks off from Manali, Hampta Pass, and the seasonal beauty of the Hampta Pass trek in June, this adventure writes itself into your memory forever.
And if you’re wondering about the best time for the Hampta Pass trek? It’s whenever your heart feels ready, but the mountains say June is just about perfect.
So pack that backpack, lace those boots, and let the Himalayas do the rest. They're waiting.
#explore#nature#nature core#wanderlust#adventure#artists on tumblr#writeblr#universal adventures#writing#Hampta Pass Trek#Hampta Pass Trek in June#Manali Hampta Pass#Best Time for Hampta Pass Trek
0 notes
Text
Dubai Desert Adventure: A Thrilling Escape into the Arabian Sands

Dubai is known for its luxurious lifestyle, futuristic architecture, and man-made marvels. But beyond the glittering skyline lies an untouched realm of golden sands and natural wonder — the vast Arabian Desert. A Dubai desert adventure offers the perfect break from urban buzz, giving travelers a chance to explore nature, heritage, and adrenaline-pumping activities in one exciting experience.
Whether you're an adventure junkie or a cultural explorer, the desert has something magical for you.
What Is a Dubai Desert Adventure All About?
A Dubai desert adventure is a guided journey through the mesmerizing Arabian desert, combining thrilling rides with cultural immersion. Think roaring across dunes, riding camels under a setting sun, and enjoying live performances at a traditional desert camp.
This type of experience is ideal for:
Families
Solo travelers
Couples
Adventure seekers
Culture lovers
Top Attractions in a Dubai Desert Adventure
1. Dune Bashing
Hold on tight as your 4x4 speeds across towering dunes, drifting and diving through steep slopes. Professional drivers perform jaw-dropping maneuvers that make this a desert rollercoaster.
2. Camel Riding
Take a peaceful ride through the sands on the “ship of the desert.” It’s the perfect way to connect with the region’s Bedouin roots and enjoy panoramic desert views.
3. Quad Biking
Craving control and speed? Jump on a quad bike and blaze your trail across the open desert. It's easy to ride and suitable for beginners and experienced riders alike.
4. Sandboarding
Glide down silky slopes like a snowboarder in the snow — but way warmer! This fun-filled activity is perfect for all ages.
5. Desert Camp Experiences
As the sun dips, enjoy an evening filled with:
Henna painting
Shisha lounges
Fire shows & belly dancing
Traditional Tanoura performances
A delicious BBQ buffet under the stars
Why Choose a Dubai Desert Adventure Over Other Tours?
Here’s what makes this experience one-of-a-kind:
Scenic Beauty: Endless dunes, dramatic skies, and desert silence offer natural beauty like nowhere else.
Rich Culture: Learn about Emirati traditions, taste authentic Arabic food, and witness age-old desert customs.
Adrenaline & Relaxation: Get your thrill fix with dune rides and wind down with a calm sunset or desert campfire.
Family-Friendly Fun: Safe, well-organized tours ensure that kids and adults alike enjoy their time in the desert.
When’s the Best Time to Go?
Dubai’s desert is open all year, but weather does matter:
Best Season: November to March
Pleasant temperatures
Clear skies and perfect sunset views
Ideal for full-day or overnight desert adventures
Summer Months: April to October
Early morning or late evening tours recommended
Many operators offer shorter, cooler packages during these months
What to Pack for Your Desert Adventure
Keep it comfortable, light, and safe:
Lightweight clothing (long sleeves for sun protection)
Sunglasses & a scarf (keffiyeh) for dust
Closed-toe shoes or sports shoes
Sunscreen and lip balm
Power bank or extra phone battery
A small backpack for essentials
Conclusion: Your Adventure of a Lifetime Awaits
A Dubai desert adventure is more than a tour — it’s an immersive journey through the heart of the UAE. From adrenaline-packed dune bashing to the serenity of a camel ride at sunset, every moment in the desert offers something to remember.
Whether you’re seeking thrills, looking to explore Arabian culture, or just want a break from the city — the desert delivers it all. So, gear up, step into the sand, and let Dubai show you a side that’s wild, wonderful, and unforgettable.
Ready to feel the pulse of the desert? Book your Dubai desert adventure today and make memories that will last a lifetime!
#Dubai desert adventure#desert safari Dubai#Arabian desert experience#dune bashing Dubai#quad biking in Dubai#sandboarding#camel ride Dubai#adventure tourism Dubai
0 notes
Text
Top Outdoor Gear for Novices and Experienced Adventurers

Venturing into the great outdoors is one of the best ways to refresh the mind, body, and soul. Whether you’re just beginning your journey into nature or have been exploring wild terrains for years, the importance of the best outdoor equipment can’t be overstated. It’s the difference between a smooth, enjoyable adventure and one filled with avoidable discomforts.
In this blog, we’re diving into the best outdoor equipment that caters to both beginners and seasoned adventurers. This guide blends practical choices, expert favorites, and smart buys—all with real-life usability in mind.
Why Investing in the Best Outdoor Equipment Matters
Whether you’re setting up a tent under the stars or hiking through a foggy trail, your experience depends on what you carry. The best outdoor equipment not only enhances safety and comfort but also adds efficiency to every move you make.
For beginners, the right gear builds confidence. For seasoned explorers, it helps you go farther, lighter, and smarter.
1. Backpacks That Do More Than Just Carry
A great backpack is your travel companion. Look for ergonomic, water-resistant designs with multiple compartments. The best outdoor equipment in this category includes:
Beginner pick: 40L lightweight daypacks with hydration compatibility.
Pro choice: Modular backpacks with adjustable load-bearing systems and reinforced frames.
2. Tents: Your Home in the Wild
A tent should be easy to set up, weather-resistant, and ventilated. The best outdoor equipment brands now offer pop-up models for newbies and four-season shelters for experts.
Beginner pick: Instant setup dome tents.
Pro choice: Ultralight backpacking tents with storm flaps.
3. Sleeping Bags and Mats
Rest is non-negotiable outdoors. The best outdoor equipment for sleep should insulate well and be easy to pack.
Beginner pick: All-season sleeping bags with temperature ratings of 20°F and up.
Pro choice: Mummy-style bags with compression sacks and inflatable sleeping pads.
4. Navigation Tools That Keep You on Track
You don’t want to get lost, even with GPS. The best outdoor equipment includes:
Beginner pick: Smartphone-compatible GPS trackers and basic compasses.
Pro choice: Multi-functional GPS handheld devices with topographic maps.
5. Cookware: Eat Well Wherever You Are
No one enjoys a cold or uncooked meal after a long day outdoors. The best outdoor equipment for cooking includes:
Beginner pick: Portable stove kits with wind guards and fuel canisters.
Pro choice: Compact titanium cookware and efficient alcohol stoves.
6. Hydration: Never Run Dry
Water is life, and the best outdoor equipment ensures you never run short of it.
Beginner pick: BPA-free water bottles with built-in filters.
Pro choice: Gravity-fed water filtration systems and hydration bladders.
7. Footwear Built to Go the Distance
Shoes make or break your outdoor trip. Invest in the best outdoor equipment for your feet.
Beginner pick: Waterproof hiking shoes with ankle support.
Pro choice: Gore-Tex lined boots with Vibram soles.
8. Lighting: Because Darkness Doesn’t Wait
Being caught in the dark is never ideal. The best outdoor equipment for lighting offers durability and long battery life.
Beginner pick: LED headlamps with basic brightness settings.
Pro choice: Rechargeable high-lumen headlamps with red-light mode.

9. Weather Protection: Jackets & Layers
Conditions can change fast. The best outdoor equipment includes moisture-wicking and insulated outerwear.
Beginner pick: Lightweight rain jackets.
Pro choice: 3-in-1 layer systems with windproof and waterproof technology.
10. Multi-tools and Survival Kits
Versatile tools are a must. The best outdoor equipment comes in compact kits designed to solve multiple problems.
Beginner pick: Basic Swiss army knives.
Pro choice: Tactical multi-tools with pliers, fire starters, and rescue whistles.
Bonus Picks for First-Timers & Experts
Dry Bags: Keeps your electronics and clothes moisture-free.
Trekking Poles: Great for balance and knee support.
Portable Power Banks: Essential if you’re using GPS or headlamps.
First Aid Kits: Pre-packed and labeled for quick response.
Emergency Blankets: Lightweight and body-heat reflective.
These extras may not always be top-of-mind but are undeniably part of the best outdoor equipment list, especially when conditions get unpredictable.
Tips to Choose the Best Outdoor Equipment
Test before you trek – Try out gear in your backyard or during a short hike.
Go modular – Choose gear that works across seasons and terrains.
Buy once, use long – Quality matters more than fancy features.
Weight vs. function – Light is great, but not if it sacrifices durability.
Final Thoughts
Whether you're sleeping under a starlit sky for the first time or scaling high peaks for the hundredth, your adventure is only as good as your gear. With the best outdoor equipment, nature becomes a place of comfort, not challenge.
Smart packing, quality gear, and understanding what fits your level make all the difference. The right equipment gives beginners the confidence to explore and seasoned adventurers the tools to push further.
So, before your next journey, take a moment to invest wisely in the best outdoor equipment—because nature’s calling, and you deserve to answer with gear you can count on.
0 notes
Text
Varkala Travel Guide – Kerala Tour Package from Delhi
Varkala is more than just a beach town—it’s a soul-soothing escape wrapped in cliffside beauty, spiritual vibes, and coastal charm. Tucked away in Kerala, this tranquil destination blends ancient traditions with a laid-back beach culture, making it a must-visit for every traveler craving something both rejuvenating and adventurous.Image Source: Trip Advisor

Introduction to Varkala
Unlike other beach destinations in Kerala, Varkala boasts a unique geological formation—a majestic cliff running alongside the Arabian Sea. The dramatic drop from the lush green clifftop to the golden beaches below is both scenic and symbolic.
Varkala isn’t just about views. With the help of a curated Kerala Tour Package, travelers get to experience the perfect mix of spirituality, leisure, and nature.
Historical and Cultural Background
Varkala’s roots run deep. It’s home to the sacred Janardanaswamy Temple, believed to be over 2,000 years old. Many pilgrims visit Papanasam Beach to perform holy rituals. Today, It has evolved into a backpacker-friendly beach destination where yogis, solo travelers, and wellness seekers converge.
When booking your Kerala tour package from Delhi, ensure Varkala is on the itinerary—it offers both spiritual insight and beach bliss.
How to Reach Varkala
By Air: Land at Trivandrum International Airport (45 km away). Taxis and buses are easily available.
By Train: Varkala Sivagiri Station is well-connected to Kochi, Trivandrum, and Chennai.
By Road: KSRTC buses and taxis from nearby cities like Kollam make the journey pleasant and affordable.
Want a hassle-free plan? Go for a Kerala tour package from Delhi that covers transfers, stays, and sightseeing.
Best Time to Visit Varkala
October to March is the best time to visit, with cool breezes and perfect beach weather.
April to June sees hot and humid weather but fewer crowds.
July to September brings monsoon magic—ideal for Ayurvedic healing and greenery lovers.
Book your Kerala Tour Package accordingly to match the season that suits you best.
Top Attractions in Varkala
Varkala Beach: Stunning cliff views, ideal for sunbathing and swimming.
Papanasam Beach: A holy site where many perform ancestral rituals.
Janardanaswamy Temple: A spiritual landmark worth visiting.
Sivagiri Mutt: A peaceful pilgrimage site founded by Sree Narayana Guru.
Explore all this and more with a Kerala tour package from Delhi designed to show you Varkala’s best.
The Varkala Cliff Experience
The cliff is Varkala’s heart—lined with cafes, yoga studios, and street shops, all overlooking the Arabian Sea. Sunset walks here are unforgettable, especially with a coconut in hand.
Don’t miss this on your Kerala Tour Package, especially if you love offbeat beach towns with chill vibes.
Adventure Activities in Varkala
Paragliding off the cliffs
Surfing lessons for beginners
Stand-up paddleboarding and kayaking
All these can be easily added to your customized Kerala tour package from Delhi for a thrill-packed holiday.
Yoga and Wellness
Join drop-in yoga classes or stay in wellness retreats like Prana Varkala or Shiva Garden. Varkala is perfect for a detox of the body and mind.
Such experiences are best arranged through a well-planned Kerala Tour Package.
Where to Stay in Varkala
Budget Stays: The Lost Hostel, Maya Hostel
Luxury Resorts: Gateway Varkala, Hindustan Beach Retreat
Cliffside Homestays: Authentic and scenic options
Get the best deals on stays through this Kerala tour package from Delhi.
Where to Eat in Varkala
Kerala Sadya, Puttu & Kadala Curry, Fish Molee – all must-tries
Top Cafes: Trattorias, InDa Café, Juice Shack
Your Kerala Tour Package can include local food experiences as well.
Shopping and Ayurveda
Buy Ayurvedic oils, cotton clothes, and handcrafted souvenirs on the cliff. Also, indulge in authentic Ayurvedic treatments at centers like Santhigiri Ayurveda.
These healing experiences are often part of a curated Kerala tour package from Delhi.
Day Trips & Hidden Spots
Anchuthengu Fort
Kappil Backwaters & Edava Beach
Ponmudi Hills for a cool escape
Looking for more than beaches? This Kerala Tour Package includes day trips to serene spots near Varkala.
Nightlife & Local Culture
Beach Shacks: Candle-lit dinners and light music
Live Events: Check boards for local gigs
Festivals: Temple festivals, Onam, and traditional art performances
These cultural events bring the real essence of Varkala, best explored with a local guide from your Kerala tour package from Delhi.
Travel Tips
Modest dress outside beach areas
Stay hydrated and carry sunscreen
Solo travel is safe but avoid secluded beaches at night
Book a Kerala Tour Package to travel worry-free with safety and comfort.
Conclusion
Varkala is a rare coastal gem—calm yet adventurous, sacred yet beachy. From dramatic cliffs to yoga retreats and temple towns, it’s Kerala at its finest.
If you’re planning a soulful coastal escape, this Kerala tour package from Delhi is your ticket to discover Varkala and beyond.
0 notes
Text
Essential Packing List for an Unforgettable Big Sur Backpacking Adventure

Embarking on a Big Sur backpacking journey promises a thrilling outdoor experience, filled with rugged cliffs, towering redwoods, and breathtaking coastal views. Whether you're an experienced hiker or a beginner, having the right gear is crucial to fully enjoy this incredible destination. From the best trails to packing essentials, this guide will help you prepare for your unforgettable adventure in Big Sur.
To explore more details and plan your journey, read our comprehensive guide at Big Sur Backpacking: The Ultimate Adventure.
Why Big Sur is a Backpacker’s Dream
Big Sur offers a combination of coastal beauty and mountain terrain that is unmatched anywhere else in the U.S. Whether you’re trekking through Pfeiffer Big Sur State Park or the rugged Ventana Wilderness, every step offers a new view to marvel at. The vast landscapes, wildlife, and solitude make Big Sur a perfect destination for those who love exploring the wilderness.
Best Trails for Backpacking in Big Sur
Pfeiffer Big Sur State Park Trails
Ventana Wilderness Trail
Bixby Creek Trail
Limekiln State Park Trail
These trails offer a variety of experiences, from ocean views to dense forests. Whether you want a challenge or a more relaxed route, Big Sur has something for every hiker.
For detailed packing tips, trail information, and safety advice, visit Big Sur Backpacking: The Ultimate Adventure.
0 notes
Text
Resistance Band Workouts: A Comprehensive Approach to Home Fitness
Stuck at home and tired of skipping workouts? Wondering if those stretchy resistance bands can really replace your gym gear? You’re not alone—and the answer might surprise you.
Resistance bands have taken the fitness world by storm. They're affordable, portable, and incredibly effective. Whether you’re a beginner, a busy parent, or just someone who prefers working out without heavy equipment, resistance bands might just become your new favorite workout buddy.
Let’s break down everything you need to know in this complete, beginner-friendly guide.

1. What Are Resistance Bands?
Think of resistance bands as your portable gym. These stretchy bands, made from rubber or latex, provide resistance as you stretch them, which helps strengthen muscles just like weights do. They come in different shapes, colors, and resistance levels to suit various exercises and fitness goals.
2. Why Choose Resistance Bands Over Weights?
Ever tried carrying dumbbells on vacation? Not fun. Resistance bands, on the other hand, fit into your backpack, purse, or even a pocket. Plus, they’re joint-friendly, safer for beginners, and great for controlled, slow movements. They're perfect if you're just starting out or want to add variety to your usual routine.
3. Types of Resistance Bands
Not all bands are created equal. Here are the main types:
Loop Bands: Ideal for lower body exercises.
Tube Bands with Handles: Great for upper body workouts.
Figure 8 Bands: Excellent for arm and chest workouts.
Therapy Bands: Flat and thin—used for rehab and light exercises.
Pick the type based on the workout you’re aiming for.
4. Benefits of Resistance Band Workouts
Portable and Space-Saving
Budget-Friendly
Suitable for All Levels
Improves Flexibility and Mobility
Engages Stabilizer Muscles
Supports Progressive Overload
"Resistance bands are like the Swiss Army knife of fitness tools—lightweight, versatile, and powerful."
5. Getting Started: What You Need
You don’t need a full gym setup. Just grab:
A few bands with varying resistance levels
A door anchor (optional, for upper body moves)
An exercise mat (for comfort)
Water bottle (hydration is key!)
6. Safety Tips Before You Begin
Inspect Bands Before Use: Look for tears or weak spots.
Control Your Movements: Avoid snapping or jerky motions.
Secure Your Anchor Points: Whether under your feet or behind a door.
Warm Up First: A few minutes of light cardio can prep your body.
7. Full-Body Resistance Band Workout Plan
Here’s a quick full-body circuit to get you started:
Squats (Lower Body) – 15 reps
Band Rows (Back) – 12 reps
Overhead Press (Shoulders) – 12 reps
Glute Bridges (Glutes) – 15 reps
Russian Twists (Core) – 20 reps
Repeat the circuit 2–3 times based on your fitness level.
8. Upper Body Workouts With Resistance Bands
Target your arms, chest, shoulders, and back:
Bicep Curls
Tricep Extensions
Chest Flys
Shoulder Raises
Band Pull-Aparts
Focus on slow and controlled movements to get the most out of every rep.
9. Lower Body Workouts With Resistance Bands
Say hello to leg day without dumbbells:
Lateral Band Walks
Squats with Band
Standing Kickbacks
Hip Abductions
Glute Bridges
Add a loop band around your thighs to fire up your glutes and hips.
10. Core Workouts Using Resistance Bands
Who doesn’t want a stronger core? Try these:
Band-Resisted Bicycle Crunches
Seated Band Twists
Plank With Band Rows
Kneeling Crunches
Dead Bugs with Bands
These moves are great for stability, posture, and injury prevention.
11. Stretching and Mobility with Resistance Bands
Resistance bands aren’t just for strength—they’re excellent for recovery too:
Hamstring Stretch
Shoulder Stretch
Quad Pulls with Bands
Thoracic Spine Opener
Stretching with resistance helps improve flexibility and range of motion.
12. Tracking Progress and Staying Motivated
Keep things fresh:
Log your workouts
Increase reps or resistance weekly
Join online resistance band communities
Celebrate milestones (big or small)
Progress might be slow at first, but consistency pays off.
13. Resistance Bands for All Fitness Levels
From total beginners to seasoned athletes—bands work for everyone.
New to fitness? Start with light resistance.
Intermediate? Add variety and frequency.
Advanced? Try time-under-tension and complex moves like banded pushups or pull-ups.
14. Common Mistakes and How to Avoid Them
Letting the band snap back: Always control the return phase.
Using the wrong resistance: Start light and move up.
Poor form: Use mirrors or record yourself to check.
Mistakes are part of the process—learn and move on.
15. Final Thoughts: Are Resistance Bands Enough?
Absolutely. If your goal is to get stronger, move better, and feel healthier, resistance bands can do the job. They’re not just a "backup" tool—they’re a main player in smart, sustainable fitness.
So next time you think about skipping your workout—grab a band and get moving. Your body (and future self) will thank you.
FAQs
1. Can you build muscle with resistance bands? Yes! Resistance bands provide the tension muscles need to grow, similar to weights. Consistency is key.
2. How often should I do resistance band workouts? Start with 3–4 times a week, allowing for rest days in between.
3. Are resistance bands good for weight loss? They help burn calories and build muscle, both of which support weight loss when paired with a healthy diet.
4. Which resistance bands are best for beginners? Look for light to medium resistance loop or tube bands. Many sets come color-coded for easy selection.
5. Can seniors use resistance bands safely? Absolutely. They’re low-impact and joint-friendly—perfect for maintaining strength and mobility with age.
#physical health#health & fitness#health ( height and weight ) scales#health tips#health and wellness#resistance bands#workout bands#gym rubber bands#power bands#exercise bands#resistance belts#fitness rubber bands#Gym bands
1 note
·
View note