#automated screencapping
Explore tagged Tumblr posts
Text
From a thread by Twitter user @mykola:
Ok, so, the following thread is going to be dense. I have a model of what I call "Identity Trauma" that is not exclusive to Neurodivergent people but so common among us that almost nobody can actually see it. Let me tell you a story.
When you are an infant, and you have needs that other people don't understand, nobody will be able to meet those needs. And so you grow up, from a very early age, with the empirical, evidence-based understanding that parts of you are not valid. Those parts don't shut up, tho!
Maybe you're an Autistic kid whose hearing is so hypersensitive that it's physically painful to you to be around your (large, joyful, boisterous) family. Maybe you're ADHD and your emotions are so strong that Everything! Feels! Extreme! Always! Whatever it is? It's not welcome.
And like, you try over your early life to communicate to people about this thing. And they don't believe you. They tell you "sometimes people are loud when they're happy, it's ok, don't be scared!" or they tell you "stop with the dramatics, you just want attention."
Every attempt to inhabit your full self is somehow curtailed, cut short, and you receive anywhere from a tiny bit to a WHOLE LOT of Shame for it. This leads to cognitive dissonance: do you listen to the part of you that says "this can't continue", or your caregivers?
(And remember, you're like six.)
The choice, for a sadly enormous percentage of us, is to trust our caregivers. They assure us we're fine. They assure us everyone deals with this, that if we just try a bit harder then we'll be okay. That part of us that's screaming? We start to wall it off.
It turns out we've got a lot of really useful construction material laying around in the form of shame. Every time that pain tries to get out? It gets shamed back in. So we just finish the process, seal it in.
Bliss.
Relief.
We can't hear the screaming anymore. We can now focus on making sure we trust our caregivers, instead. Except. By walling off that voice, that pain? We've walled off our relationship to our body. But something VERY IMPORTANT lives there: our identity.
Your identity is who you are. It's everything you know to be true, everything you value, everything you feel. It's the name for the sum total of the enormous Thing that you are. One part of that thing is letting you know about unmet needs. But it does so much more.
It answers every question you need to ask yourself. How does it answer them? By thinking about it? No. It uses embodied, somatic, axiomatic knowledge. This is important, read this a few times: It is not cognitive. It doesn't feel like thinking. It feels like feeling.
[…]
Emotions are one of the ways our body communicates with us. With one exception, emotions are signals from your body to your self. That exception is shame.
Shame is the only emotion that originates externally. Shame comes from other people instructing us to feel it. That's it. And if you are cut off from your body? It is literally the only emotion you are really in touch with. And so you organize your WHOLE LIFE around it.
Listen, this model I'm describing? This is codependency, right? Because what's happening: your "core" self, your embodied axiomatic somatic source of truth, is gone. So your identity is not grounded in your body. Where is it grounded? In the approval of those around you.
If you're dealing with this shit, I will now perform a magic trick and tell you something about yourself that you will realize you have always known but that nobody has ever pointed out before. There's a special class of relationship in your life. It's not friend, parent, lover or anything else you'll find a hallmark card for, although it frequently coexists with some of the people in these roles. But the special class of relationship you have is that set of people that you trust to tell you who you are. You have complicated feelings about them.
These are the people that you have tasked, often without their knowledge or their consent, to serve as the grounding for your sense of identity. They are your surrogate embodied self. And they hold unfathomable power over you. (This is why we are so susceptible to abuse.)
Healing is in part about taking back those parts of you that you have invested in other people. That was never a gift to them, that was not about love -- that was an abdication of your responsibility to be a PERSON. It's not your fault. You didn't know. Your self was taken.
#the psyche#useful reframings#open to feedback on the formatting here‚ honestly#originally i was just going to put every tweet in as a link and let tumblr do its automated screencap-and-transcribe thing#but i found all the extraneous visual noise (repeated username‚ &c) really fucking distracting#so hopefully this is a decent balance of readable and clearly-not-mine#anyway some of this was old news to me but i did find the particular framing of it compelling
22 notes
·
View notes
Text
Here's part of timeline of artificial intelligence over the next couple decades:
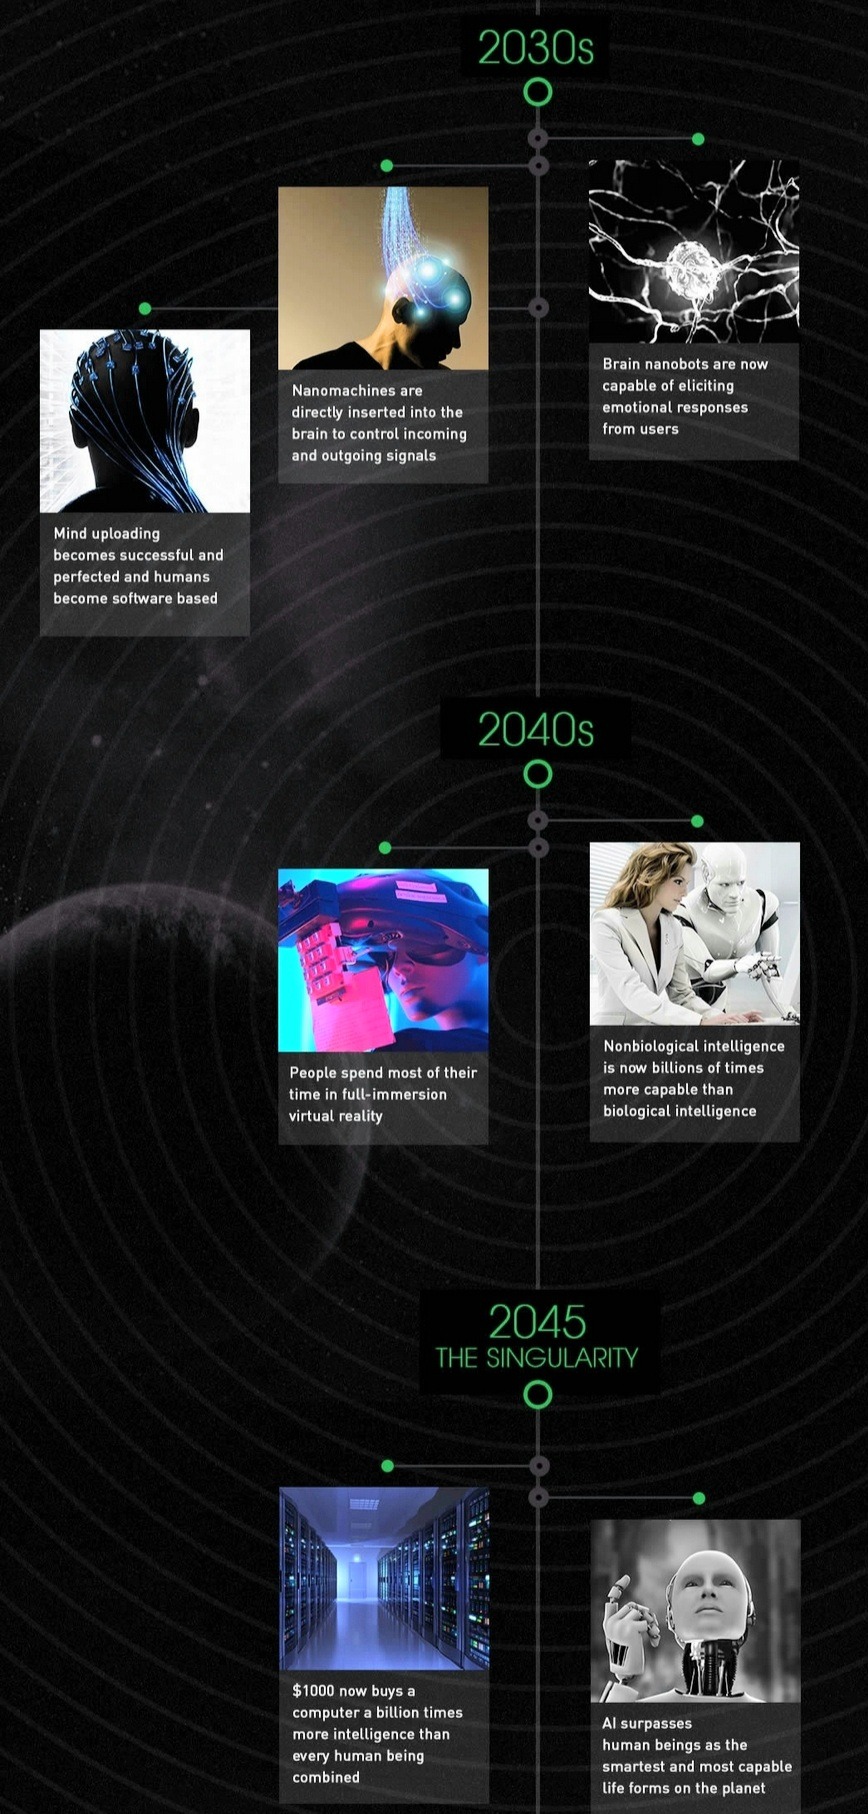
"The Dawn of the Singularity" timeline suggests we'll welcome the Technological Singularity in 2045!
Idk I think if you aren't going to do the work of becoming a technical observer and trying to understand the nuances of how these models work (and I sure as hell am not gonna bother yet) it's best to avoid idle philosophizing about "bullshit engines" or "stochastic parrots" or "world models"
Both because you are probably making some assumptions that are completely wrong which will make you look like a fool and also because it doesn't really matter - the ultimate success of these models rests on the reliability of their outputs, not on whether they are "truly intelligent" or whatever.
And if you want to have an uninformed take anyway... can I interest you in registering a prediction? Here are a few of mine:
- No fully self-driving cars sold to individual consumers before 2030
- AI bubble initially deflates after a couple more years without slam-dunk profitable projects, but research and iterative improvement continues
- Almost all white collar jobs incorporate some form of AI that meaningfully boosts productivity by mid 2030s
284 notes
·
View notes
Text
Arcane art prints!!

(guess who's my favourite)
Below will have all the info on the artists/where to buy/reviews

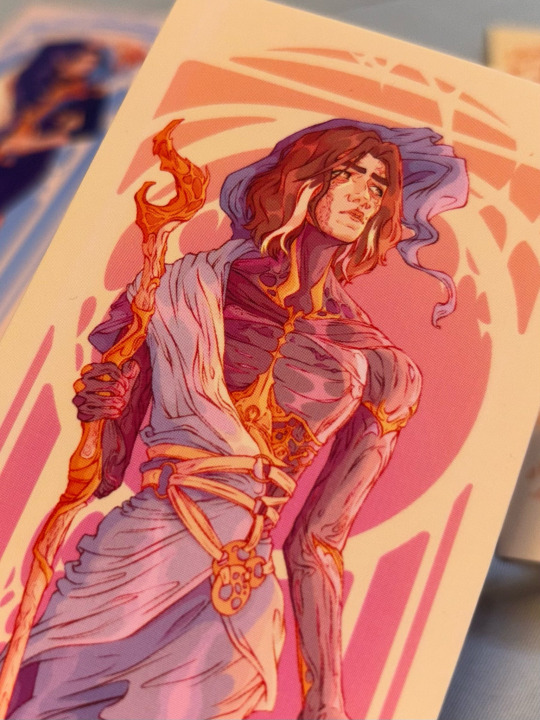
The Gay People Bookmarks - These are from @peachesobviously on Etsy. The quality of these are amazing. They're thick and like... soft. They feel so so nice and look great.
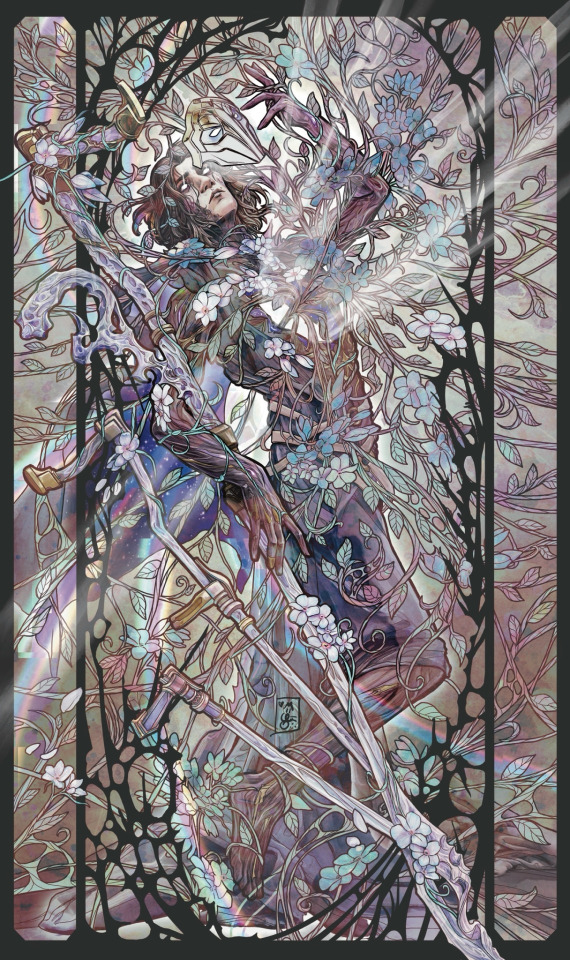

This gorgeous print is from @kingcael from their Ko-fi shop :) This came super fast and is so so pretty. Nice, glossy paper. I love staring at it and finding more and more details.
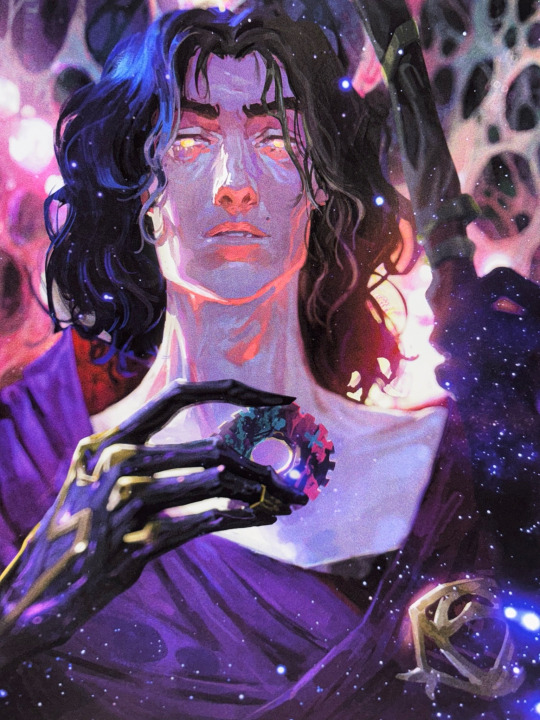
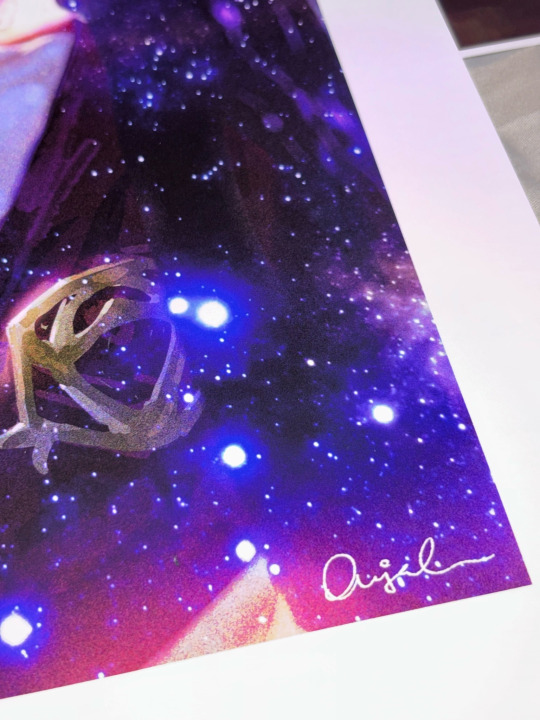
This masterpiece is from @petitesieste aka Arcanescribbles :) Check out her Instagram to see this art in HQ. I'm so happy to own her work now. This is a gorgeous piece from inprnt. The colours and details are amazing. (Scribs, you should post this art on here)

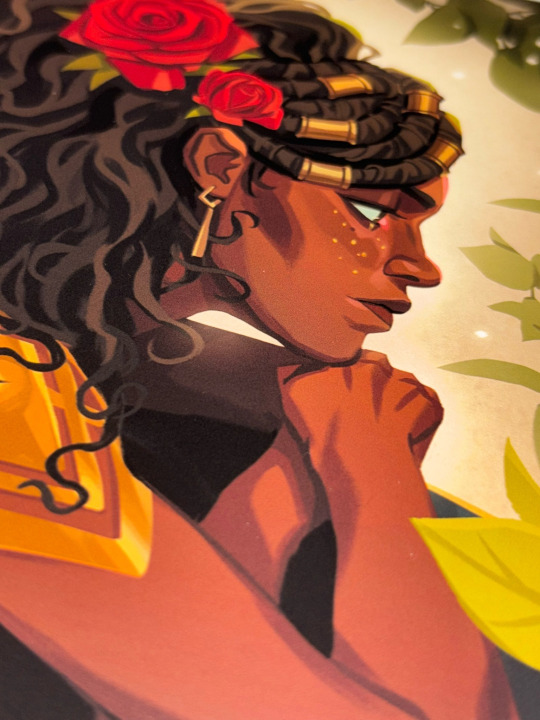
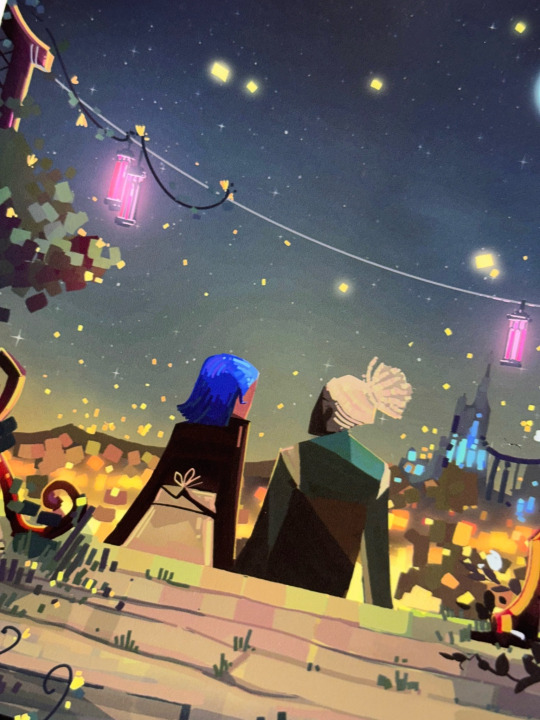
I have some miscellaneous stuff from inprnt. This is my second time purchasing from inprnt. Their shipping can get expensive and I'm not a huge fan of the texture of the paper on my fingers. But they look gorgeous. The colours are so vibrant and the image quality is great.
"Please don't let them see me" is from Pob Pob's carrd
"Blonde Viktor" is from @minherald (inprnt link)
The two screencap studies are from Bishipls on Instagram.
Mel is from @hansoeii (inprnt link)
Timebomb is from Kaapicino (gorgeous work)
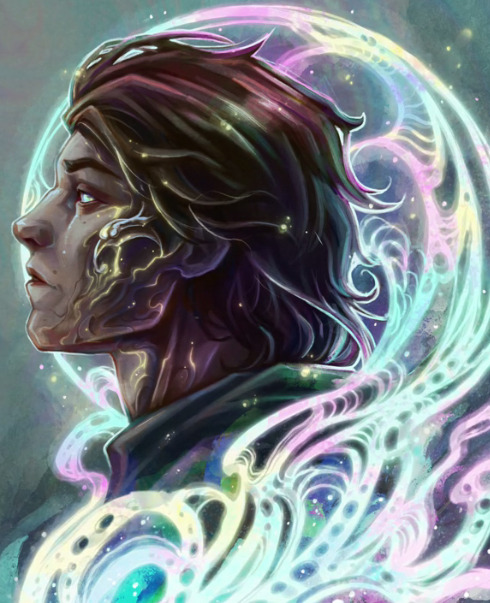
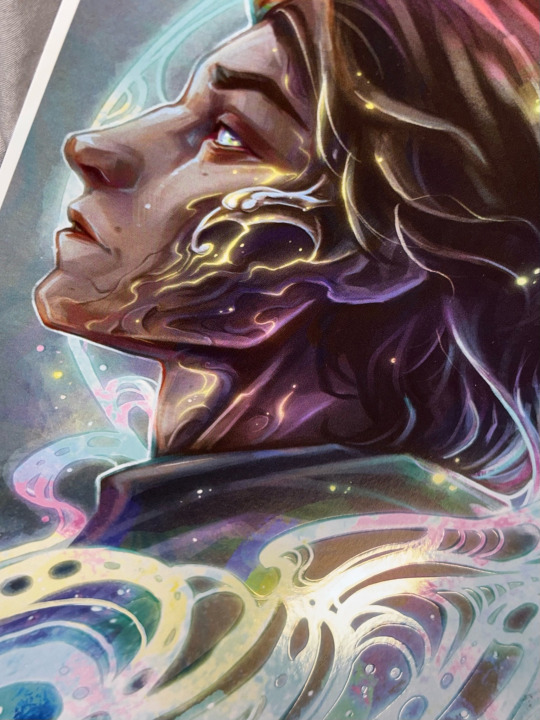
(sorry for the shit screenshot but you'll just have to go to their page to see it in HQ :)
From @cerealism on Etsy. I fucking love this. The colours of it are gorgeous. The embossing is incredible. Such high quality. They've got some jayvik art (and BG3 if that's your thing) on there too!

Works from Dandy Angelica. These are beautiful prints. Such care was put into my package. I got a personalized email saying my order was on it's way (rather than an automated one). Truly so sweet. If my shrine wasn't already too big, I'd gladly order again. Here's their Instagram for more stunning work! Tons more Viktor art (and more! Like BG3) (also the eye art is a holographic sticker :D)
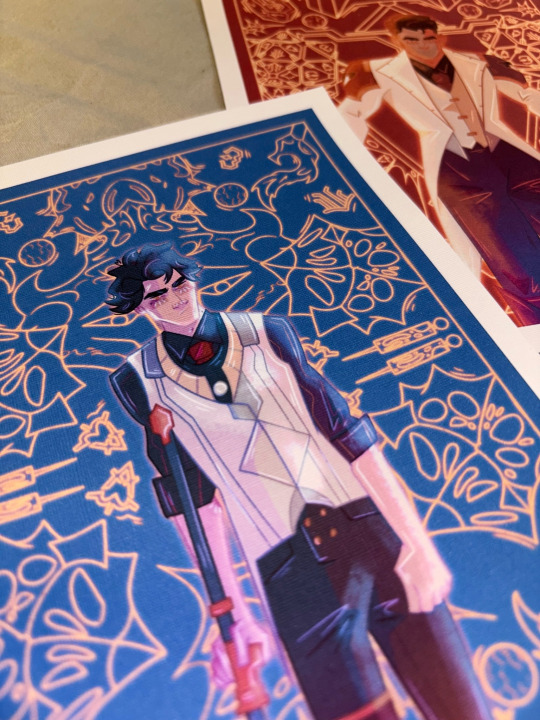
Prints from ohmsnwattsonart on Etsy. These are just incredible. The texture on these prints are amazing. They're not smooth or glossy like other prints, but they're just delectable. I fucking love them. They look so good too. Check out their Etsy for other cool art (Arcane, Marvel, SW, etc) <3
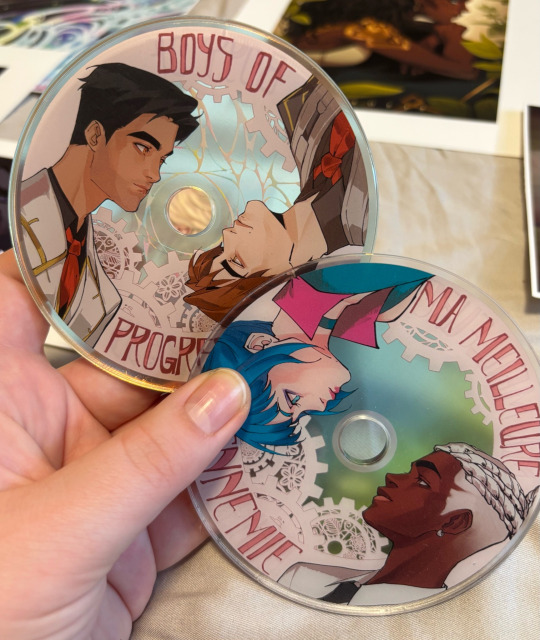
Acrylic coasters from jjolee. Here's her carrd to get to her socials and Etsy! These are very nice and not a single cup has touched them because they're too pretty to use! So they sit on my shelf :)
And last, but not least:
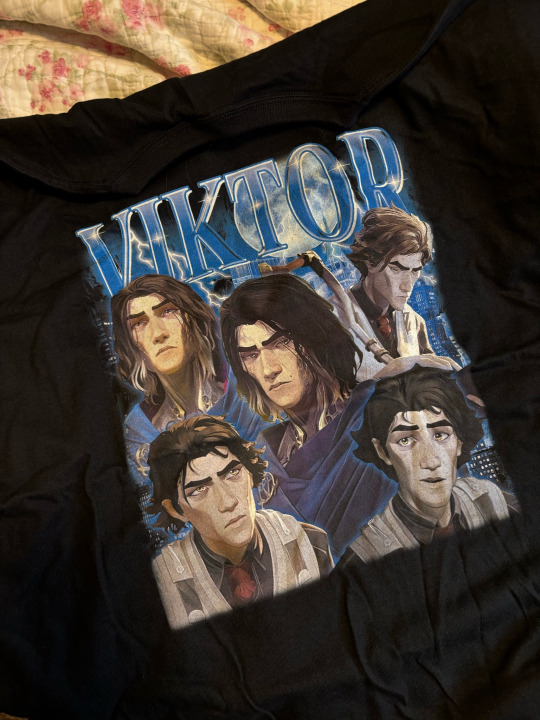
This stupid fucking shirt from Etsy. Which I was hesitant to buy from in case the quality would be shit. But it's pretty nice! Let's hope it holds up in the wash :)
I didn't wanna buy the Glorious Ovulation/Jesus/Hozier one. They're too obscure and I'm already too socially awkward to confidently wear this one outside. But. I'm so happy with it. It's so dumb. Plus the shirt will fold over or crinkle and then he'll look ssilly or scared.
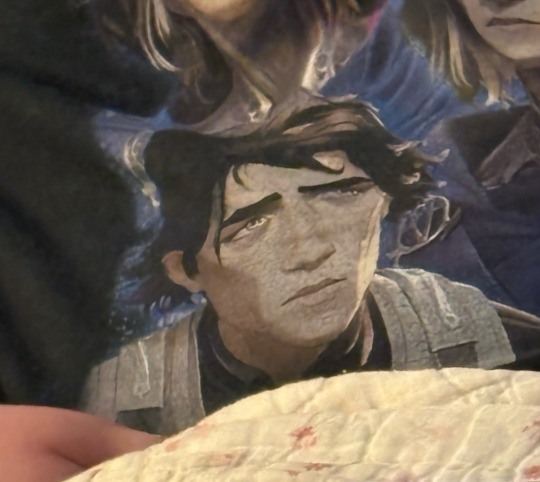
That's all! Support artists however you can. RIP my credit card and my wall space. Especially because I still want. So much more. Please pray for me that I don't lose the hyperfixation now that I've got my shrine all sorted.
#Arcane#Arcane fanart#Viktor arcane#Jayce Talis#Jayvik#viktor#timebomb#caitvi#mel medara#support small creators#artists on etsy#inprnt#artists on tumblr#art prints
79 notes
·
View notes
Text
Blinkie.World coding and efficiency
Hi everybody. Thank you all for the support on my last post! I literally only just got on Tumblr, and I already feel very loved and supported. This is a very nice community for sure. It makes me happy to see so many people excited about it. And to every person saying they'd love their blinkies to be included... bold of you to assume you're not already on my radar! When I say I'm collecting every blinkie, I mean EVERY blinkie! The only exceptions are immoral ones like proship and anti equal rights. Even if I'm already getting blinkies from you guys, I do appreciate everyone sharing/ pointing them out to me. It helps me to be sure I've got as many as I can! So, thanks you guys. You're all very kind.
Anyhow, since there seems to be interest in Blinkie.World, I'm sharing a little more about it. This is about how the site's being made physically, both explaining it and trying to think of ways to improve the process. Also a bit on the workflow side of things. If that's not of interest to you then you can go ahead and give this one a skip. This one's probably a bit boring for most people, but if you are interested... then onto the post!
Someone mentioned that they hope I have automation for making the site, since it seems like a lot of work. I've done what I can to help this go efficiently, but at the end of the day, I am just doing it by hand. Last time I showed what the code looks like per blinkie, which is this:
<a href="" target="_BLANK">
<img src="" alt="" title="Credit: . ID: """></a>
<!--Categories: -->
<!--Screencap: -->
That is the actual code I use. I copy and paste this every time, then enter in the details. I'm not sure that counts much as automation, but at least I'm not out here typing that over and over. This is an example of what a blinkie looks like coded in:
<a href="https://web.archive.org/web/20030406002318/http://mywebpage.netscape.com/antikao/pinkieblinkiepage1.html" target="_BLANK">
<img src="https://lonelycoconut.neocities.org/blinkie%20site/pink%20blinkies/Calvin%20%20%20Hobbes.gif" alt="Calvin + Hobbes" title="Credit: Pinky Blinkies. ID: "Calvin + Hobbes""></a>
<!--Categories: Pinky Blinkies, pink/, cartoons/, comics/, calvin and hobbes/, calvin/, hobbes/, kidcore/, animals/, mammals/, tigers/ -->
<!--Screencap: https://lonelycoconut.neocities.org/blinkie%20site/Screencaps/Pinky%20Blinkies.png -->
That is an actual snippet from the site! First is the link to the creator (and yes, it HAS to be the creator, not a reposter of any kind), and a target="_BLANK" which makes the link open in a new tab. Next is the image link. Each image is named the same as the text on the blinkie. That way, I type what the blinkie says, then copy and paste that to the image name, alt text, and image description (title). Then is the title. If you don't know, a title for an image in HTML is text that appears when you hover your mouse over an image. So, for each hover text (title), it says the name of the creator, then a caption of the blinkie's text (since they're often hard to read). After that is </a>, which closes the link, making only the image linked to the source.

After the link and image, there are the comments. In HTML, a comment is text that's in the code but doesn't appear or affect the website itself. It's usually just notes to self. The first comment is categories. First I put the creator, then the color category it is sorted in, and lastly every other category it's in. You'll also notice that each category listed has a slash after it. The reason is, when I put a slash after a category, that means it's already added to that category page.
Below that is the screencap. This is an image showing the creator, every blinkie they have made, and their terms if any. Here's this specific screencap if you want to see how that looks. I go in and screenshot all the pages I need, then combine them all in Photoshop, then name it after the creator, upload it to Neocities, and finally add the screencap image link below every blinkie by that creator! And, that's how I fill in the code for a blinkie!
So, yeah, this is definitely a lot. I'm sure I could benefit from more ways to speed up the process, but I don't know much else I can do. It's mostly copy pasting and routine. There are some other things I've done to help though, and that's browser extensions!
One I use is called Download All Images, which as you can assume, downloads all images on a page! You can also specify what kind of images you want to download. What I do is set it to add every gif that is 150x20 pixels (or bigger if I see that there are big blinkies on the page).
I also use GifsOnTumblr. If you've ever tried downloading gifs on Tumblr, you'd know Tumblr is a little weird about it. It always saves as a gifv, so you have to open the image link, then change the end of the link from gifv to just gif, click enter, THEN it downloads as a gif. It's not that hard, but let me tell you, now that I have an extension that makes it download as a gif immediately, it saves more time than you'd think!
That's about all I've figured out as far as maximizing efficiency here goes. If anyone else has any advice/ideas, I'd love to hear it! I've been at this since October (give or take, I'm not 100% on that), and as for the workflow, I'm wondering a bit how long it will take before all the blinkies I have are online. It seems like years for sure, but I think I can handle it if I'm slow when I need to be. As in, if I'm tired then I'll stop. I'm not going to treat it as something I HAVE to do, because then I'll burnout most definitely. I'm being chill about it. Especially since I'm currently on break from another huge project, believe it or not.
Just a few months ago, I burnt out from my other project, which is an animated music video I've been animating for almost two years (in which I initially planned out in 2020, started it in 2021, burnt out, cancelled it, then decided to try again and start it all over in 2023 and since). My point is, I'm very ambitious, often to a fault. I'm a workaholic. (I'm also ADHD, so I think being a workaholic is me overcompensating for it, at least partially.)
Because of that, I'm going out of my way not to take this too seriously. It's a passion project, and if it's not fun, then it's not a passion project, then what am I doing it for? Even so, my ambition cannot be held back! When I get excited on a project, I grind like crazy. I'm not scared by the idea of something taking a long time. I want to do this. I'm happy I'm doing this. I'm not going to pretend it's not a lot of work, but working is what I do! It's how I'm built. When I don't work, I feel like I start to loose it. It's not a matter of IF I work, it's a matter of WHAT I work on (and the intensity).
So, despite the somewhat daunting nature of such a big project, it makes me happy, and if it stops making me happy, then I'll stop doing it. It's as simple as that. That's about my feelings on the workload side of this. I can handle it, and if I'm wrong and I can't handle it, then that's okay too. But if anyone has any advice or ideas on how to make this process faster and/or easier, I'm more than open to hear it! (But don't give me ergonomics advice. I promise you I do every ergonomic thing in the book lol.)
27 notes
·
View notes
Text
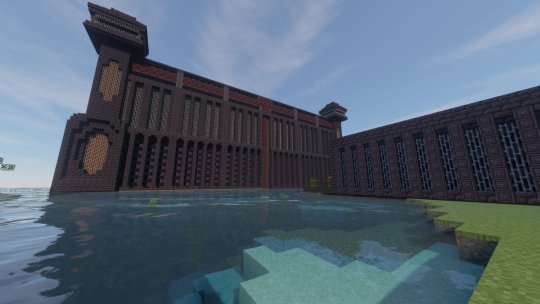
Pandora's Vault
Builder : Awesamdude
Series : DSMP
Propaganda :
- its so big. Its so so big. Look at a map of the dsmp. Its just a black void bigger than l'manburg was.
- You look at it and you just know it's something terrible. the obsidian walls, lava, the iron. It's just there. In the middle of the ocean. It does not fit in and its scary.
- the AMOUNT of redstone and functions it go is AMAZING. the only way to enter is through a portal that then leads u to the nether and has to be manually activated again by the warden. So to enter you literally NEED the wardens permission. All the bridges and all the door. It's so fucking cool man what can I say. The amount of security.
- the lore that happened inside pandora as well. Pandoras arc was the best arc of the whole of dream smp and I stand by that. There is so so much to unpack.
Sam and Dream could have just built some shitty obsidian box and called it a prison, but no they made PANDORAS VAULT
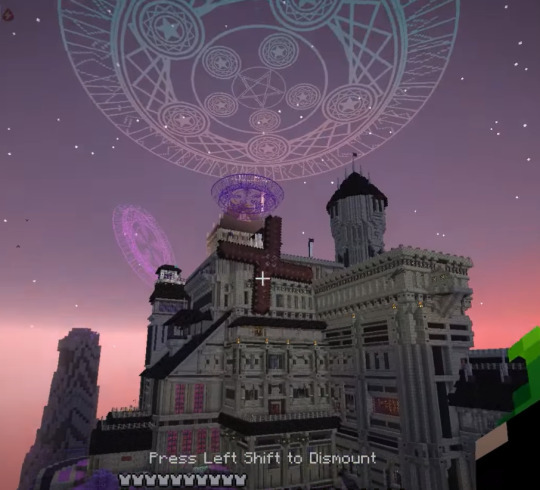
The Everdusk Castle
Builder : ToAsgaard
Series : ATM Spellbound Series
Porpaganda : this place is built in another dimension (the Everdusk), it's gigantic (extends about 50ish blocks further down past where i was able to grab a good screencap), and it's fully detailed inside. not in like a "some stuff here and there" or "there are redstone machines" -- every single room is detailed out, often with visuals corresponding to the mod being used, any automated setups are given a ton of visual flair to fit with the theme of the base, there's even automation setups that serve as visual rooms (the Botania automation room uses Kekimuras and is set up as a banquet hall! it's so cool!!). i think about it constantly. ToAsgaard's builds are consistently drop-dead gorgeous (his soulsborne-inspired Celestial Journey/Betweenlands base and gigantic multi-piece Sevtech Ages base are both fantastic) with ridiculously intricate detailing and really cool modded automation setups. his Celestial Journey base, Carcosa was a close second for me -- but its power lies in all that detailing and isn't nearly as screencappable from the outside. Asgaard's an amazing builder both on the megabase and microdetail levels, incredible at standard modded automation and at doing things the fun way. he's been inactive for a few years now but i still adore his stuff, and this seemed like a good way to show off an absolutely spectacular builder that otherwise people might not know about.
Taglist!
@10piecechickenmcnugget
@choliosus
@biro-slay
@betweenlands
@xdsvoid
235 notes
·
View notes
Text
Hate the new desktop layout that the staff is experimenting with? Dreading the idea/possibility of reblog chains going away via collapsible reblogs? Any other features or changes that you do not like? Send them your feedback with a Support form!
1. Go to https://tumblr.com/support.

2. Choose the "Feedback" category.
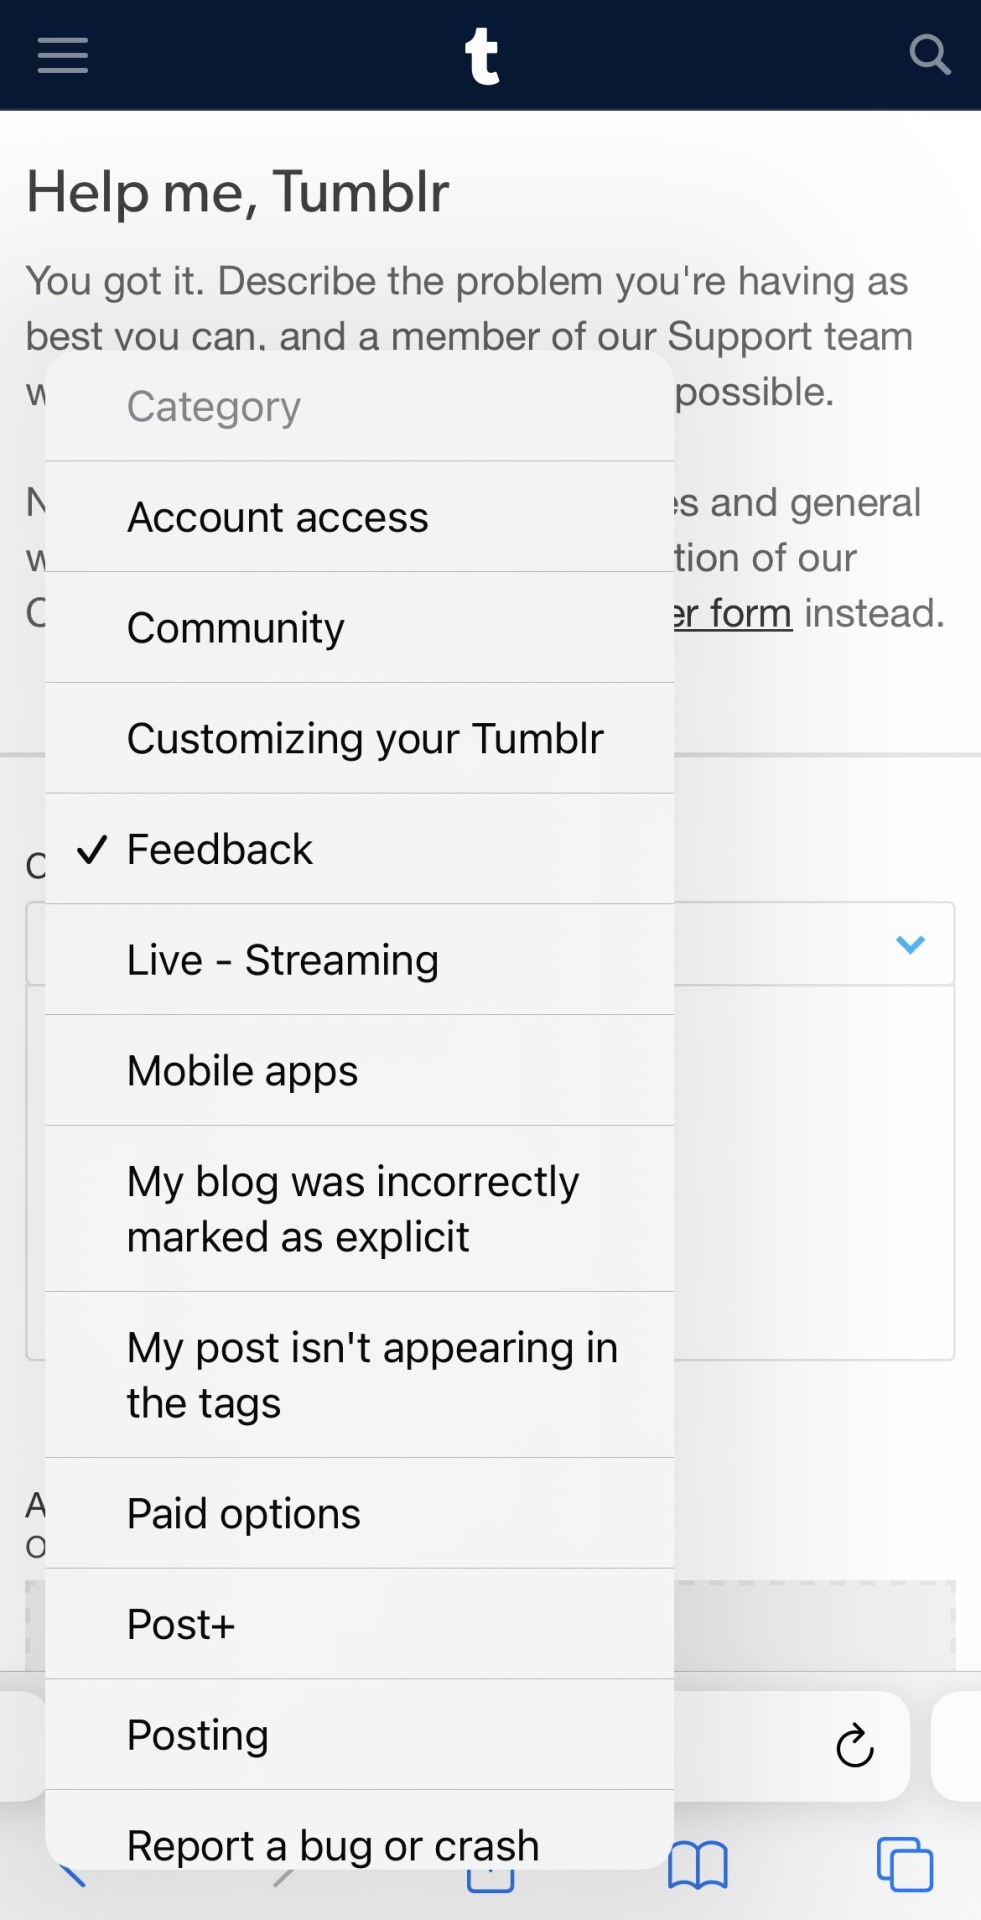
3. Fill out the big "The more details, the better" box below your chosen category with whatever feedback or criticisms you want to share. Please keep in mind that you should NOT use this as an excuse to be rude or condescending towards the staff, no matter how annoyed you are at them at making these meaningless changes.
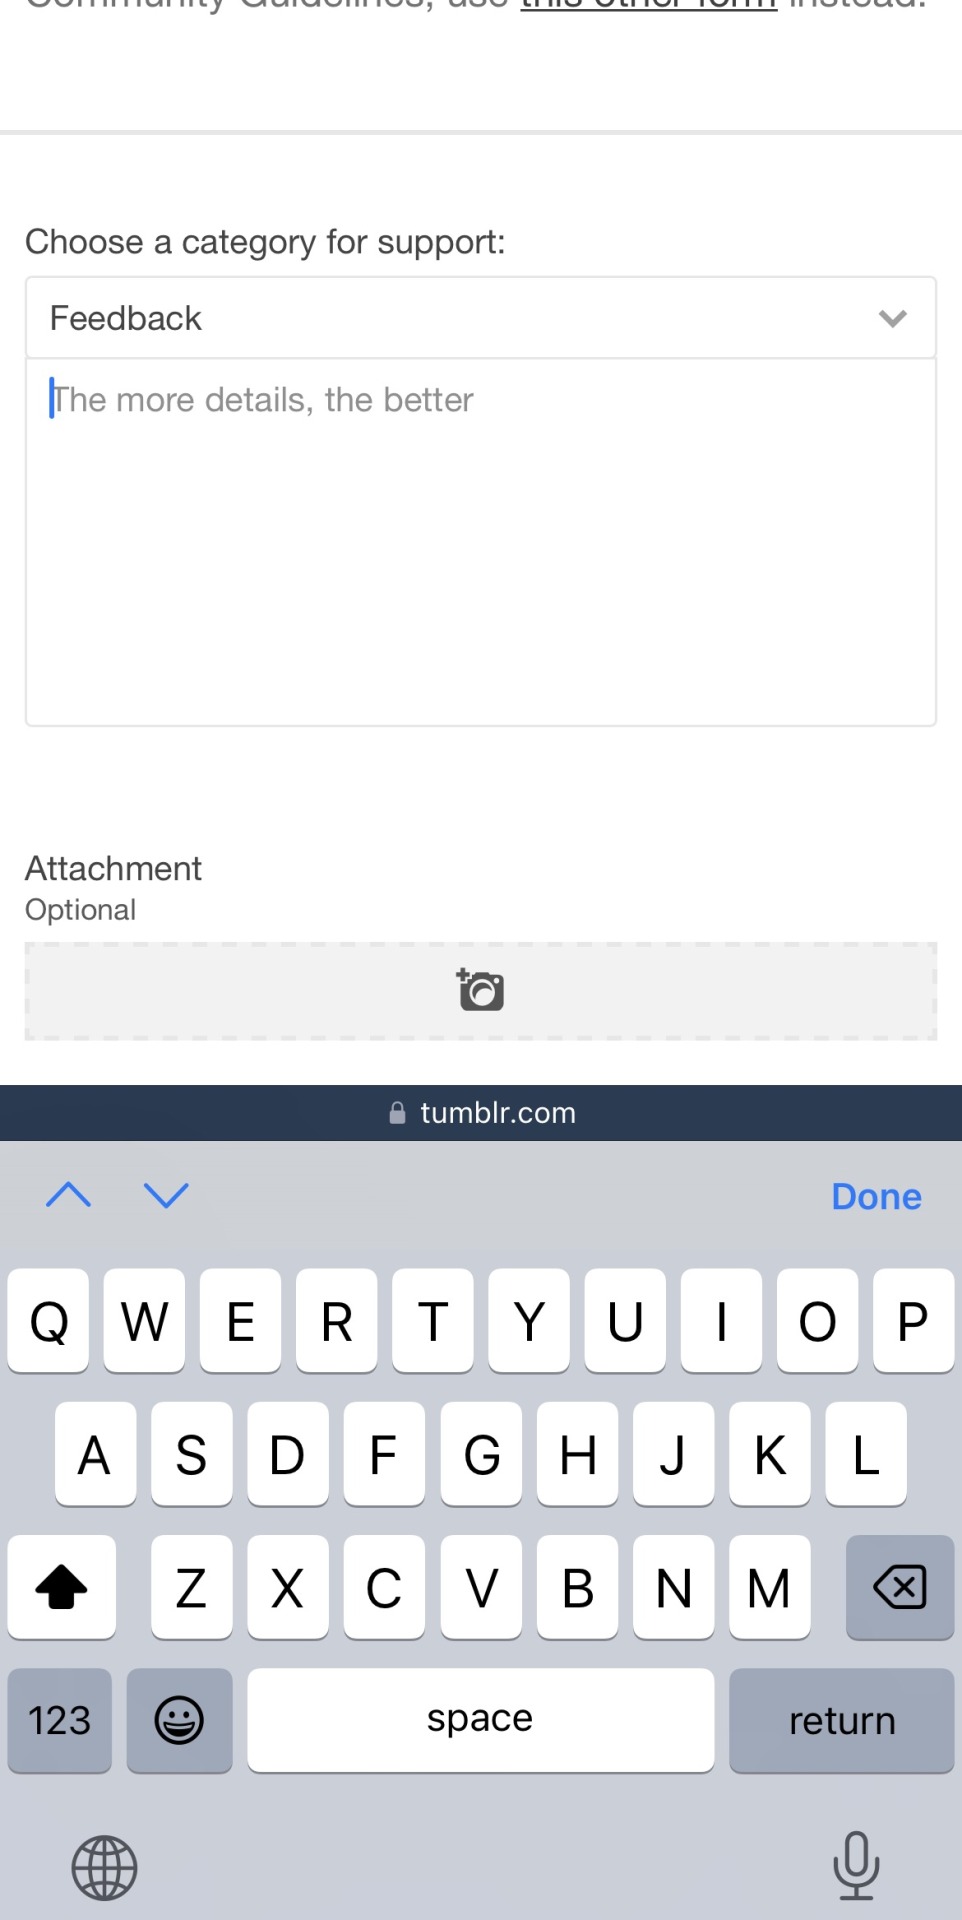
4. If you are able to, provide them with an image to help give the staff and support team a better idea of what you're talking about. The support form only allows one image, so if you have more than multiple images that you want to include, compile them all into a single, organized image file to share.
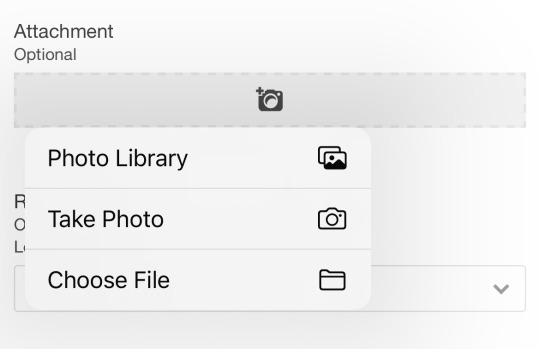
5. Choose whether or not it's relevant to your blog. I leave it as "None selected" because every feedback I share and issue/bug I report is typically regarding what's affecting the Tumblr userbase as a whole.

6. Not providing a screencap for this step for obvious privacy reasons, but make sure your account email listed in the form is the same one you use to log into your account with.
7. Prove to reCAPTCHA that you're not a robot and send your support form.
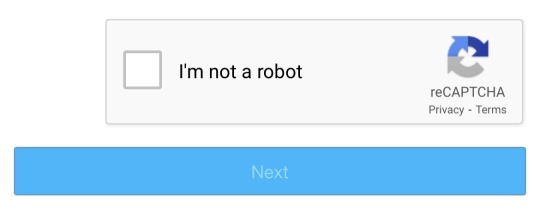

(Make sure to double check by seeing if your email inbox received an automated message from the support team.)
And that's it! It is that easy to share your feedback to the staff. Remember the various instances the staff rolling back on some of the questionable changes made to the mobile apps? It was because of these feedback forms; sending them has a larger change of them getting noticed by them instead of tagging staff and support in posts and reblogs.
#my post#tumblr#tumblr staff#tumblr support#tumblr feedback#tumblr dashboard#tumblr update#tumblr changes
256 notes
·
View notes
Text
Opting out of some digital marketing
I work in IT.
Today I discovered some marketing stuff that led me to Retention dot com. (I choose not to link to the site.)
This screencap tells you all you need to know.

This pisses me off.
The site mentions Klaviyo, which I'd never heard of, so I googled it and ended up at Klaviyo dot com. This is part of Klaviyo's sales pitch to businesses: "Our marketing automation and unified data platform fuels faster growth".
Fuck all of these companies.
The good news is that USAmericans can opt out of Retention's network.
I don't know about other countries. In theory Retention's website should have information on that.
4 notes
·
View notes
Text
Voiceplay-adjacent Visuals: Far Over The Misty Mountains Cold and I See Fire
Yep, you're getting a two-in-one today! Think of it as an Easter treat!
I wasn't sure if I would have much to say about Misty Mountains, but I did want to talk about I See Fire, and felt like I couldn't talk about one without the other, so I'm combining them into one post!
Geoff's cover of Far Over The Misty Mountains Cold was uploaded on July 4th, 2021, and it's currently the most popular video on his channel, with over 20 million views! The song features in the movie "The Hobbit: An Unexpected Journey", and was also in the original book by JRR Tolkien (though note I haven't read any of the books or seen any of the films, so my expertise in that regard is limited). Let's go!

(Love a good title intro)
This was filmed at Pattycake Productions Studios, and though I can't confirm it, I would not be surprised if this set has been used in a Voiceplay video at some point as well
Also let's take a closer look at those outfits; they look familiar, don't ya think?


Same shirt/top thing! With the silver rings in a diamond pattern!
(Btw massive shoutout to Rick Underwood (again) for hair and makeup, I can still barely believe that all 4 people in this video are Geoff tbh (and shoutout to Geoff himself for both editing and acting, because both those things help as well!))
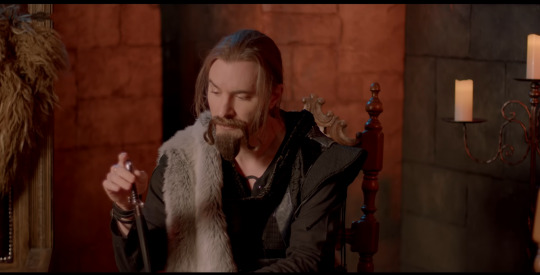
The grey fur thing reminds me of what Geoff was wearing in My Mother Told Me, but I don't think it's the same
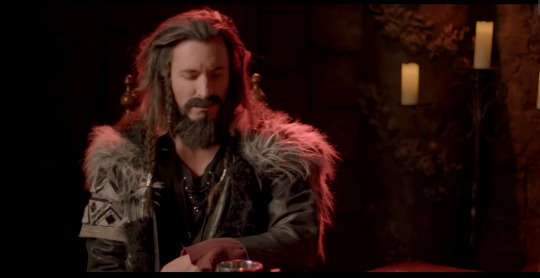
Oh and here's the other half of Layne's outfit from My Mother Told Me! See the fur and the patterned sleeve cuff thing? It's the same!


Not the best picture, as I just went through my screencaps from previous posts, but yes the chestplate thing that Lead Geoff is wearing in Misty Mountains was also worn by Cesar a couple of years later in Valhalla Calling!

Group shot!
Also love how second-from-the-right Geoff (idk what character he's meant to be, don't @ me) is fiddling with his little knife/sword/dagger for practically the whole video

The smug look of "the note I'm about to hit will shake your speakers and vibrate your internal organs!" 😝

And that's Far Over The Misty Mountains Cold! Told you I didn't have a lot to say about it, but it provides a good foundation for the second video I'll be talking about in this post!
Geoff's cover of I See Fire was released on the 10th of June, 2023, almost 2 years after his cover of Misty Mountains. (What is it with Geoff/Voiceplay doing follow-up "sister" videos two years later? 😅) "I See Fire" was actually originally performed by Ed Sheeran (Geoff takes it in a fairly different direction vocal-wise of course (though not completely without high parts!)), and plays at the end of the second Hobbit film, The Desolation of Smaug. Again, not familiar, but I recommend watching this video if you want a bit more insight into the characters that Geoff portrays!
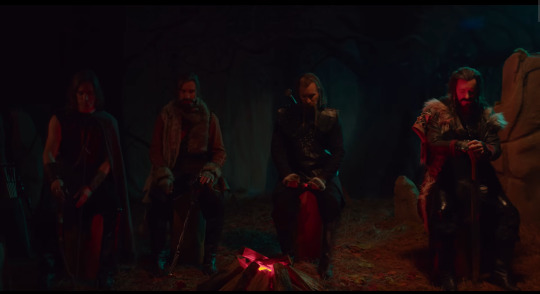

Guess who got credited with lighting automation for this one? Go on, guess! It's the one and only Eli Jacobson again!
(Oh and also apparently that's a "carpet" of real pine needles on the floor? Goddamn the dedication)

These two are from the Misty Mountains video! (The one on the right here is apparently Thorin Oakenshield)

Although Lead Geoff is playing a different character here to the one he played in Misty Mountains, he's wearing the same chestplate (the one Cesar wore in Valhalla Calling). (Also love the continuation of Lead Geoff being the one with little to no facial hair 👌)
(Also you can see his white-grey streak in this one!)

I mean the lighting choices really make this one. Well done Eli!
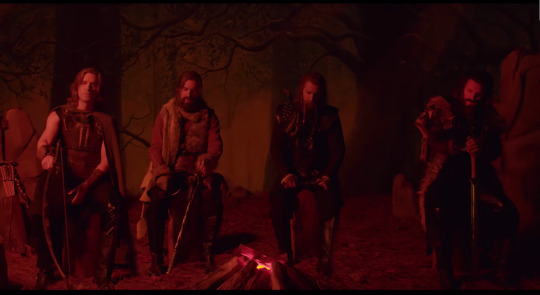
Like goddamn look at this!
(Oh and for the record, I'm still in partial denial about everyone except Lead Geoff actually even being Geoff here 😂)
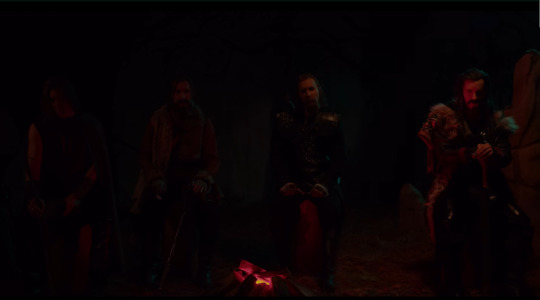
Okay, well didn't have a ton to say about that one either, but with two videos in one post, it makes a decent length, so hope you enjoyed this Hobbit double-feature!
Some people are wondering if Geoff will at some point make a cover from the third Hobbit movie, The Battle Of The Five Armies, to round out the trilogy, so to speak. Bets are on The Last Goodbye, which I'm listening to right now out of curiosity, and oh Geoff could do gorgeous things with it, make no doubt about it. But we'll just have to wait and see (hopefully not wait too long though!) Next post will probably be a longer one, but also lots of fun! Stay tuned!
#geoff castellucci#far over the misty mountains cold#misty mountains#misty mountains cold#I see fire#acaplaya analysis#voiceplay-adjacent visuals
3 notes
·
View notes
Text
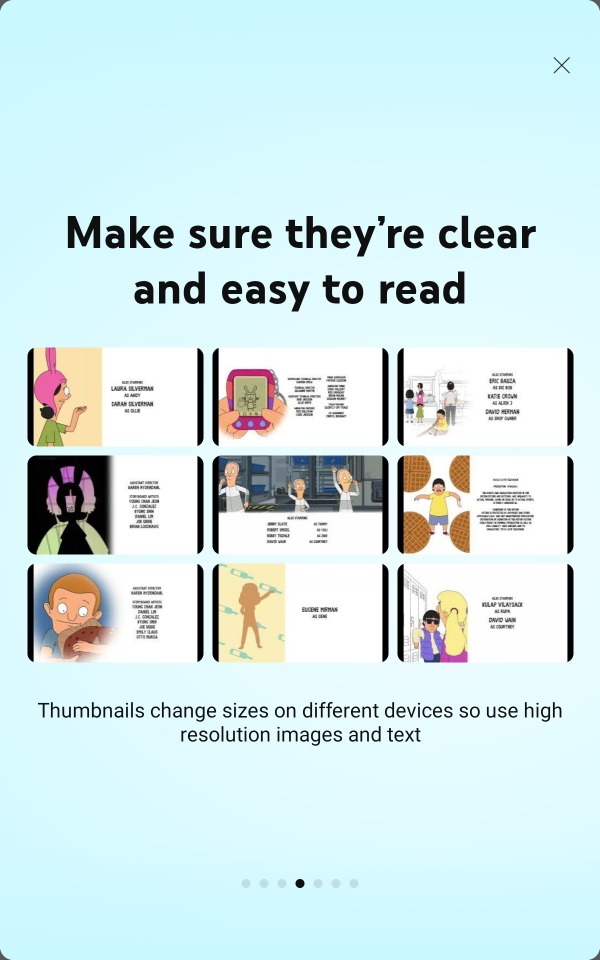
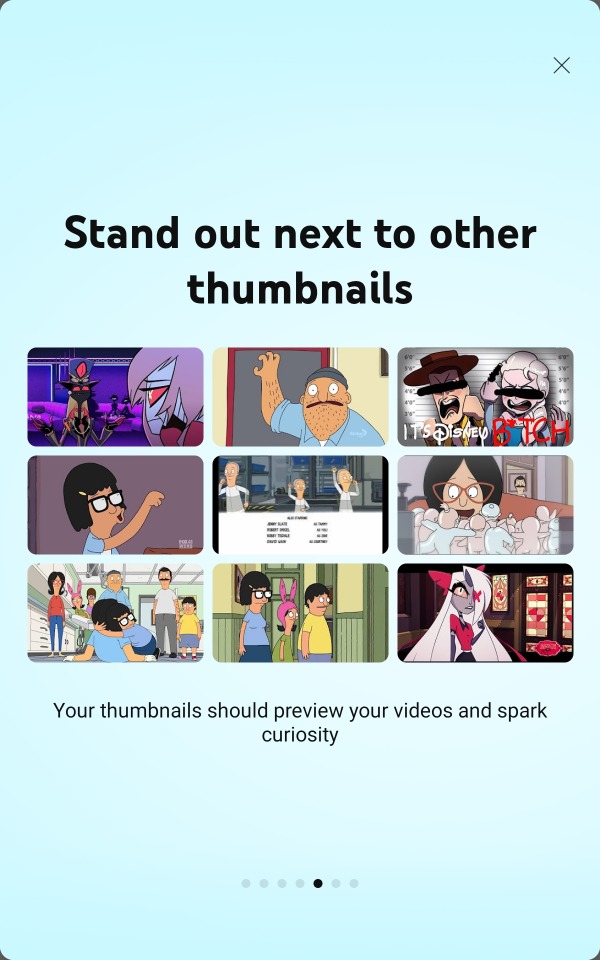
really enjoying these "helpful tips" youtube is giving me for thumbnails to reach broader audiences. No im going to continue using automated thumbnails that are just random screencaps of the end credits of episodes. anymore effort than that would not be worth it <3
also those videos aren't doing well bcuz of the thumbnails they're doing well because people wanted to listen to the SONGS that the actual video is about nobody is looking at the thumbnail. they're all the same!!!!!!
#my only rule for thumbnails for these videos is that each other has to be a unique screencap of the episode so that they're easier#to tell apart at the glance. but that was more relevant in the earlier seasons when the outros would look almost identical#now the show kind of does that for me#txt
3 notes
·
View notes
Text
Yeah actually to throw another spanner in the works more than any art 'theft' I hate AI because of the underpaid real people acting as mechanical turks for it to all actually work.
Datasets have to be curated and fully tagged which means people acting as mods seeing horrid things and people doing mechanical turk work of tagging 5000 pictures a day of cat with collar facing right because everyone uploaded their pictures as ginger or black cat but not important details like how many paws are visible or what direction the cat is looking.
There is a building filled with people looking at your Tesla's live camera and tagging each misread sign, railing and pedestrian. It'd be more ethical to hire a human to be your driver, even a remote person in Mumbai driving from their computer at local taxi rates.
You've heard about machine learning trained on AO3, let's talk about the people who were paid pennies to read bad smut to exclude idk, spelling mistakes or bad idioms or find words that mean one thing irl and a pairing in fandom.
I learned yesterday that for every piece of normal my little pony art: screencaps merch and fanart there are 4 pony porn arts. If they scraped a user curated gallery, there will only be a small percentage of smut that is marked safe. If they scraped deviantart, twitter or reddit. Some poor bastards were paid less than a dollar a day to remove the bad stuff so typing my little pony into those generators doesn't have hentai or a toy being violated.
That's the real price of 'AI', schoolkids tagging pictures as unpaid internships, housewives and disabled people transcribing audio for pocket money, code monkeys and moderators with untreated PTSD.
I know someone who was working on integrating machine learning into twitter for hate speech detection: it involves human labour and tons of it because machines can't tell the difference between brothers ragging on eachother and a stalker. They can't tell when an oven is for baking or antisemitism.
That's what they're working on right now, automating moderators which is just outsourcing cheap moderators who aren't called moderators because they're training a machine learning model except they're doing everything a moderator does and worse.
4 notes
·
View notes
Text
This last comment: there are whole accounts on instagram that just repost content from here (screencaps of course) and post it there for engagement. I’m pretty sure it’s just some kind of automated process, no humans behind the accounts.
I always go check on the tumblr accounts that are there, rather than giving the bot any time of day.
It IS true that being on here gives you a tumblr accent. This morning my mother asked me something and i replied "i don't know i've never heard these words in that order" and she nearly choked laughing. It wasn't even that funny
188K notes
·
View notes
Text


Cellbit Castle
Builder : Cellbit, lirc, Foolish, richarlyson
Series : QSMP
Propaganda : It was built when Cellbit's character (q!Cellbit) had a villain arc. Underneath it, there are five rooms dedicated to elements from Cellbit's rpg system "Ordem Paranormal". The castle interior is fully decorated and also features fanart of q!Cellbit and his husband q!Roier (played by Roier). The two live there qith their son Richarlyson. Q!Foolish has a secret room in the castle's walls called the Grandma Room.
The Everdusk Castle
Builder : ToAsgaard
Series : ATM Spellbound Series
Porpaganda : this place is built in another dimension (the Everdusk), it's gigantic (extends about 50ish blocks further down past where i was able to grab a good screencap), and it's fully detailed inside. not in like a "some stuff here and there" or "there are redstone machines" -- every single room is detailed out, often with visuals corresponding to the mod being used, any automated setups are given a ton of visual flair to fit with the theme of the base, there's even automation setups that serve as visual rooms (the Botania automation room uses Kekimuras and is set up as a banquet hall! it's so cool!!). i think about it constantly. ToAsgaard's builds are consistently drop-dead gorgeous (his soulsborne-inspired Celestial Journey/Betweenlands base and gigantic multi-piece Sevtech Ages base are both fantastic) with ridiculously intricate detailing and really cool modded automation setups. his Celestial Journey base, Carcosa was a close second for me -- but its power lies in all that detailing and isn't nearly as screencappable from the outside. Asgaard's an amazing builder both on the megabase and microdetail levels, incredible at standard modded automation and at doing things the fun way. he's been inactive for a few years now but i still adore his stuff, and this seemed like a good way to show off an absolutely spectacular builder that otherwise people might not know about.
Taglist!
@10piecechickenmcnugget @biro-slay @betweenlands
39 notes
·
View notes
Text
The Future of Work: How AI and Automation are Redefining Job Roles and Business Models
New Post has been published on https://thedigitalinsider.com/the-future-of-work-how-ai-and-automation-are-redefining-job-roles-and-business-models/
The Future of Work: How AI and Automation are Redefining Job Roles and Business Models


In our professional practice, we have encountered two polarized opinions about AI and its impact on job roles and business models. One side is concerned about unemployment rates spiking and artificial intelligence taking over, while the other believes that AI won’t bring any significant changes and will end up being a bubble.
As 64% of CIOs place high hopes on using AI to elevate their business operations and evolve enterprises, understanding the strong capabilities and limitations of the technology becomes particularly important. Can artificial intelligence truly introduce brand-new business models, or are these expectations rooted in bias?
As always, the true answer lies somewhere in between.
Every technological revolution has been followed by the transformation of job roles and workplace routines. The evolution of AI promised to rapidly change workplaces and drive societal changes. As it turned out, AI didn’t impact society as expected, but society can and should impact AI.
The slowdown in LLM development and the continuous reports of AI hallucinations make it clear that the AI systems we know today are not just far from perfect — they don’t deliver what was expected, and the developers know it. It’s important to understand that the problem is not with artificial intelligence but the hype around it. Instead of slowing down and focusing on improving existing features, developers started aiming for the next goal. As a result, many potential problems remained underexplored and overlooked, causing numerous issues, such as Google experiencing a $100 billion share drop because its Bard AI made a factual error that nobody checked.
These results show that if AI needs control and monitoring to perform basic tasks, it’s too early to trust it with complicated tasks. Many job roles require deep insight, critical thinking, and flexibility that artificial intelligence lacks — and this won’t change any time soon.
As the former head of the AGI readiness group at OpenAI said, the real efficiency of AI is going to be the result of a robust dialogue between businesses, governments, industry voices, professionals, and citizens. Currently, this conversation has yet to get started, and it will require full participation from everyone concerned.
AI in business models: exploring the current value
While the era of AI-driven business models isn’t something we should expect in a year or two, there is no denying that artificial intelligence has significantly impacted the way companies operate and manage their workflows.
In general, it all boils down to three supporting pillars of any enterprise:
1. Data analytics
The more connected we are, the more data comes our way. This is particularly true for enterprises — each year of the business journey generates multitudes of data pools, documents, papers, and screencaps. Each of these bits offers immense value, but it has to be found first. For human experts, mining for and organizing all that data would take months, if not years. However, for artificial intelligence, it’s a matter of days, if not seconds. By diving deep into large volumes of data, sorting them out, and organizing them — including unstructured data — AI connects vital information with employees, decision-makers, and executives, erasing data bottlenecks and enabling sharper decision-making at every level. With AI, the history and entire view of the enterprise journey become much clearer, adding more certainty and helping business leaders realize what milestones they’re at and where they need to be in the future.
2. Customer interactions personalization
With customer experience quality in the US hitting an all-time low, reducing response time, enabling personalized interactions, and addressing client concerns as rapidly as possible have never been more important for enterprises. However, meeting these goals means taking in every single piece of customer data: demographics, purchase history, brand interaction frequency, and many other factors. A task of that scale is too much for a call center or support team to handle, but it is a routine activity for an AI assistant. By working in tandem, AI-powered platforms, and human employees can deliver superior customer service by instantly researching individual client histories and addressing their specific needs. Such an approach provides the levels of personalization and empathy customers look for in a brand, strengthening their relationship with the vendor and nurturing loyalty.
3. Risk management
Risk management is a constant and unchanging pain point for enterprises — and it will always stay that way. The more intense the business landscape, the more scenarios executives need to evaluate to properly assess financial and reputational risks. Some evaluations are based on critical thinking and experience, while others require tremendous amounts of historical data to reveal patterns. In the latter case, artificial intelligence offers immense help by handling anomaly detection, identifying patterns, and detecting suspicious behavior. These capabilities relieve pressure from managers, analysts, and executives, allowing them to identify threats before they emerge — and prepare accordingly.
The future of AI business models: stay tuned for more
One of the most important points to take into account is that the types of AI-powered business models will remain undefined until the full value of artificial intelligence is discovered. With business leaders still on the fence about calculating AI ROI, there is a need for exploration and research.
The adoption of artificial intelligence is no small change; it introduces a completely new workflow. Therefore, business leaders need to gain a good understanding of that workflow, identify its KPIs, and determine what makes it different from previous routines — and deduce transformational value based on their analysis.
For instance, in many cases, AI doesn’t just improve enterprise processes — it creates new ones that allow reaching desired outcomes. But to maximize the value of these outcomes and lay the foundation for brand-new models, any enterprise would need three integral components: the process, the technology, and the people using it.
#adoption#AGI#ai#ai assistant#AI hallucinations#AI systems#AI-powered#AI-powered business#Analysis#Analytics#anomaly#anomaly detection#approach#artificial#Artificial Intelligence#automation#bard#Behavior#Bias#billion#Business#call center#change#cios#Companies#continuous#customer data#customer experience#customer service#data
1 note
·
View note
Text
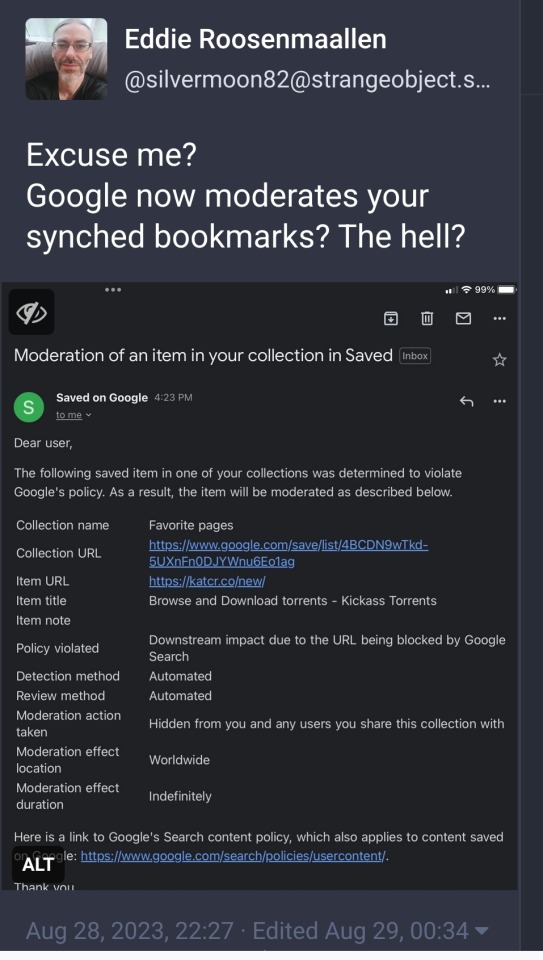
[ID: Mastodon post by Eddie Roosenmaallen (@ silvermoon82@ strangeobject.space)
Excuse me? Google now moderates your synched (sic) bookmarks? The hell?
Text is followed by screencap of an email titled "Moderation of an item in your collection in Saved." Email claims that a saved item, the Kickass Torrents website, violates Google's policy due to its URL being blocked by Google Search. Detection and review was automated, the item is now hidden from user and any other person they share the collection with, with a location of 'Worldwide' and a duration of 'indefinitely'. Email also provides link to Google's Search content policy, which content saved on Google also falls under
Posted 22:27 August 28th 2023, edited 00:34 August 29th 2023
End ID]
50K notes
·
View notes
Text
Long post. Press j to skip.
I AM SICK OF THE STUPID AI DEBATES, does it imagine, is it based on copyrightable material, are my patterns in there?
That's not the point.
I briefly got into website design freelancing (less than 3 months) before burn out.
The main reason was that automation had begun for generating stylesheets in somewhat tasteful palettes, for automatically making html/xml (they really haven't learned to simplify and tidy code though, they just load 50 divs instead of one), for batch colourising design elements to match and savvy designers weren't building graphics from scratch and to spec unless it was their day job.
Custom php and database design died with the free bundled CMS packages that come with your host with massive mostly empty unused values.
No-one has talked about the previous waves of people automated out of work by website design generators, code generators, the fiverr atomisation of what would have been a designers job into 1 logo and a swatch inserted into a CMS by an unpaid intern. Reviews, tutorials, explanations and articles are generated by stealing youtube video captions, scraping fan sites and putting them on a webpage. Digitally processing images got automated with scripts stolen from fan creators who shared. Screencaps went from curated processed images made by a person to machine produced once half a second and uploaded indiscriminately. Media recaps get run into google translate and back which is why they often read as a little odd when you look up the first results.
This was people's work, some of it done out of love, some done for pay. It's all automated and any paid work is immediately copied/co-opted for 20 different half baked articles on sites with more traffic now. Another area of expertise I'd cultivated was deep dive research, poring over scans of magazines and analysing papers, fact checking. I manually checked people's code for errors or simplifications, you can get generators to do that too, even for php. I used to be an english-french translator.
The generators got renamed AI and slightly better at picture making and writing but it's the same concept.
The artists that designed the web templates are obscured, paid a flat fee by the CMS developpers, the CMS coders are obscured, paid for their code often in flat fees by a company that owns all copyright over the code and all the design elements that go with. That would have been me if I hadn't had further health issues, hiding a layer in one of the graphics or a joke in the code that may or may not make it through to the final product. Or I could be a proof reader and fact checker for articles that get barely enough traffic while they run as "multi snippets" in other publications.
The problem isn't that the machines got smarter, it's that they now encroach on a new much larger area of workers. I'd like to ask why the text to speech folks got a flat fee for their work for example: it's mass usage it should be residual based. So many coders and artists and writers got screwed into flat fee gigs instead of jobs that pay a minimum and more if it gets mass use.
The people willing to pay an artist for a rendition of their pet in the artist's style are the same willing to pay for me to rewrite a machine translation to have the same nuances as the original text. The same people who want free are going to push forward so they keep free if a little less special cats and translations. They're the same people who make clocks that last 5 years instead of the ones my great uncle made that outlived him. The same computer chips my aunt assembled in the UK for a basic wage are made with a lot more damaged tossed chips in a factory far away that you live in with suicide nets on the stairs.
There is so much more to 'AI' than the narrow snake oil you are being sold: it is the classic and ancient automation of work by replacing a human with a limited machine. Robot from serf (forced work for a small living)
It's a large scale generator just like ye olde glitter text generators except that threw a few pennies at the coders who made the generator and glitter text only matters when a human with a spark of imagination knows when to deploy it to funny effect. The issue is that artists and writers are being forced to gig already. We have already toppled into precariousness. We are already half way down the slippery slope if you can get paid a flat fee of $300 for something that could make 300k for the company. The generators are the big threat keeping folks afraid and looking at the *wrong* thing.
We need art and companies can afford to pay you for art. Gig work for artists isn't a safe stable living. The fact that they want to make machines to take that pittance isn't the point. There is money, lots of money. It's not being sent to the people who make art. It's not supporting artists to mess around and create something new. It's not a fight between you and a machine, it's a fight to have artists and artisans valued as deserving a living wage not surviving between gigs.
#saf#Rantings#Yes but can the machine think#I don't care. I don't care. I really don't care if the machine is more precise than the artisan#What happens to all our artisans?#Long post#Press j to skip
4 notes
·
View notes
Text
This is part of why I hate that we’re calling everything “AI” these days. Like the context added in the screencap says, “AI” applies to so many things these days that it has become difficult to distinguish what it’s SUPPOSED to mean. You could practically call it all “magic” and it would have the same denotative weight, since we don’t really seem to care what “AI” actually means these days.
Now, I’m no programmer, but “Artificial Intelligence” is supposed to mean the ability for a computer to mimic human intelligence. Not just as in “process large amounts of data,” but as in make complex and nuanced decisions based not only on information, but on moral, ethical, and even personal considerations. As far as the modern day is concerned, and as far as I know, we don’t have that yet.
What we DO have is “machine learning,” which is when you can “train” a program to recognize patterns and output favorable results. That’s it. We have programs that can process very large amounts of information, based on inputs provided by humans, to output specific results. In the SIMPLEST construction, we have automated programs. And I’m so tired of any automated technology being lazily slapped with an “AI” label just because it draws attention. We have wildly impressive technology at our fingertips, but people don’t seem to care about the actual technology, they just want to hear about how people are using this new dark magic “Artificial Intelligence.”
They made a program to recognize where the angles of the (human made) art were so that it could put their (human made) lines there in a (human made) 3D production operating at a high FPS, because it would be difficult to hand-draw those lines in each frame for a feature-length film. It’s very impressive technology. But labeling it “AI” just muddies the waters regarding how they trained it and what they asked it to do and how it works. Primarily because “AI” is such a meaningless term at this point and it has (rightfully, in many cases) become associated with art theft and creative bankruptcy.

#my comment#my thoughts#rambling#rants#can we all shut the fuck up about ai?#i’m so tired of hearing about ai#i think the technology is insanely impressive but it is not a fucking holy grail#and it is NOT ACTUALLY ARTIFICIAL INTELLIGENCE#artificial intelligence is a meaningless term these days
71K notes
·
View notes