#app icon optimization
Explore tagged Tumblr posts
Text
BRAIN BLAST (Update Assistant Edition)
#kismet talks#backfirewall_#OKAY SO#im on my 2nd run for achievement reasons#and. i had some more possible ideas for my eventual Update Assistant design#quite a few ppl react to your appearance with varying degrees of '🤨 you look....'#which gives me the impression that you Dont Look Like the others to some degree#+ OS9 saying you look like a punk#during the Update Protocol intros/vids. there's repetition of rectangles & the U icon#i wanna have at Least one of those aspects in my design somewhere#like i said before. i also wanna have the white - blue - black - gray colors that are Also seen on a lot of Update stuff#for the loading bar#it went from black bars to a Solid Blue Bar#that + OS10's appearance makes me wanna have a darker blue as a More Prominent color in the palette#(i wanna incorporate OS10 design aspects in general tbh)#i wanna go for that 'optimized minimalism to save system energy for a temp app/process' vibe#BUT#i also have a Lot of features that i wanna incorporate djgjsjfk#lots to ponder.
2 notes
·
View notes
Text
Mastering Mobile App Localization: The Ultimate Guide

#In an increasingly globalized world#mobile app localization is crucial for developers aiming to expand their reach and connect with international markets. Localization involve#content#and functionality to suit different languages#cultural nuances#and regional preferences. This comprehensive guide will walk you through the steps of effective mobile app localization#ensuring your app resonates with users around the world.#1. Understand Your Target Audience#Before diving into localization#it's vital to thoroughly understand the markets you are targeting. Research the languages spoken#cultural norms#legal requirements#and local technologies. This foundational knowledge will guide your localization strategy and help you prioritize which elements of the app#2. Internationalize Your App#Internationalization is the process of designing an app's architecture so that it can support multiple languages and regions without requir#text directions (like right-to-left scripts)#local date and time formats#and numerical values. Preparing your app in this way simplifies the subsequent localization process.#3. Localize Content and UI#The next step is to translate and localize the app’s content and user interface. This goes beyond mere translation; you must also adapt gra#icons#and layouts to align with local customs and expectations. It’s advisable to work with native translators who understand the linguistic subt#4. Adapt to Local Regulations and Legal Requirements#Different markets may have specific legal standards regarding data privacy#digital transactions#and censorship that can affect your app. Ensure that your app complies with local laws and regulations to avoid legal issues and build trus#5. Test and Optimize for Local Markets#Once localized#thoroughly test your app in each target market to catch any issues with translations#or functionality. Consider conducting usability tests with local users to gather feedback and understand their user experience. Use this fe
0 notes
Text
ao3 icon gifs: edwin and charles
for ao3 icon gifs that are of other dbda characters, see here
About a month ago I discovered that you can have gifs as your Ao3 icon and so obviously I’ve had one since then. It’s a bit of an acquired look but I’ve come to enjoy it and have been wanting to make a collection of icons for anyone to use.
I went through my most popular posts, as well as some of my favorite gifsets and spent some time resizing, optimizing, and for some, adjusting the colors a bit, to make sure they fit in the super small file limits for Ao3 icons (under 500kb), and still look okay.
There’s about 50, and most of these are 120px squares, which is a bit bigger than the 100px square that Ao3 recommends. I mostly did this because Ao3 makes your icon bigger in the comment section and on your profile, so it's nice if it’s a bit larger than 100px. That being said, they will not look very good in this post. They are itty, bitty gifs and as such, they are really pixelated.
To download, I recommend using tumblr desktop, opening the gif in a new tab, and then in the url where it says “.gifv” delete the ‘v’ so that it says “.gif” at the end. Only then can you download the gif properly.
If you’re on the mobile app, tumblr will often compress the gif. I recommend opening the post in your phone browser instead of the app, and then following the same instructions for desktop. This way, you’ll get the best looking file for your icon :)


row 1: charles cricket bat ep 1 | charles "yes i can crow, you'll see" | charles "i left it back at the office"


row 2: charles "i'll make you my friend eventually" | charles "an evil seagull" | charles imitating edwin ep 4


row 3: charles "is that right?" | charles cricket bat ep 6 | edwin indignant ep 2


row 4: edwin "do not get used to it" | edwin "what is a handjob?" | edwin crying in hell


row 5: charles "i'm here to rescue you" | ep 8 hug pt 1 | ep 8 hug pt 2


row 6: charles post-hug hand on heart | ep 5 hug | edwin post-hug hand on heart


row 7: (potential couples icons) charles on tube | edwin on tube | edwin "perhaps we should follow up with this molly character"


row 8: (potential couples icons) edwin smiling at charles ep 1 | charles smiling at edwin ep 1 | charles "molly character" reaction


row 9: edwin staring wistfully ep 4 | charles talking to crystal ep 4 | charles "right edwin?" ep 4


row 10: edwin gasp ep 4 | edwin violet gif ep 1 | edwin violet gif ep 1 (pink edition - inspired by @idliketobeatree)
116 notes
·
View notes
Text
VIDEO GAME: MARVEL'S SPIDER MAN
Quicoy, Aaron Arvie F. BSIT - 1A
OVERVIEW

Ref: TheRadBrad - Marvel's Spider-Man Start Menu (PS5,PC)
Marvel's Spider-Man: Remastered is a remastered version from one of the best PS4 exclusive superhero games that was released back on 2018. The remastered version developed by Insomniac Games in collaboration with Marvel, and optimized for PC by Nixxes Software, Marvel's Spider-Man Remastered on PC introduces an experienced Peter Parker who’s fighting big crime and iconic villains in Marvel’s New York. At the same time, he’s struggling to balance his chaotic personal life and career while the fate of Marvel’s New York rests upon his shoulders.
Ref: https://store.steampowered.com/app/1817070/Marvels_SpiderMan_Remastered/
PROTAGONIST

The game follows Peter parker A.K.A Spider-Man who has been the friendly neighborhood superhero for eight years. He is now an experienced superhero balancing his personal life and duties as Spider-Man. The plot of the game revolves around Peter Parker's battles with various villains, such as Kingpin, Mister Negative, Shocker and many more. The game narrative is emotionally charged, focusing on Peter's relationships, and his struggles with his responsibilities, and the constant burden of being the friendly neighborhood Spider-Man.
Web-Swinging Through the Skies of New York City

Ref: TheRadBrad - Marvel's Spider-Man Start Menu (PS5,PC)
One of the best features of the game is the web-swinging mechanics. Insomniac Games nailed the feeling of soaring through New York city as Spider-Man. With each we swing, you can feel the speed, momentum, freedom, and strength of Spider-Man has. Whether you're on a mission or simply roaming the open world of Manhattan, web-swinging will always be one of the things to enjoy.
The game also adds parkour and wall-crawling mechanics that feel seamless, making navigation more dynamic. And when you get tired of swinging? There’s always the option to use fast travel, which even includes fun cutscenes of Spider-Man taking the subway.
Spider-Man Suits!

Ref: https://www.youtube.com/watch?v=AZMH90R2OMk
One of the most best aspects of the game is the wide variety of Spider-Man suits you can unlock. Each suit has it's own power and abilities and it looks cool. Whether you’re wearing the Sam Raimi Spider-Man suit from the classic movie Spider-Man from 2002, the classic Spider-Man suit, or the slick Spider Armor, there’s always a suit that feels right for the moment. Plus, the suit mods and skill trees let you customize Spider-Man’s abilities to match your playstyle.
57 notes
·
View notes
Text
ts4 in hq | tutorial
this tutorial is for nvidia graphics card users only.
download & install geforce experience
open the geforce app and hover over the sims 4 in the games & apps panel. select the details option.
click the wrench icon beside the optimize button in order to customize your resolution settings.
from the resolution dropdown menu, select your desired resolution. mine is set to the highest dynamic super resolution of 3840x2160. be kind to your rig when making a selection and don't push too far if you don't think your computer can handle it.
from the display mode dropdown menu, select windowed borderless. i use this setting because i'm able to alt+tab out of ts4 to my desktop or other windows i may have open.
click apply and you're good to go. next time you launch your game it will open with these settings. should you change the resolution settings in your game for whatever reason, you'll need close the game and start from step #2 again for the game to display properly with these settings.
130 notes
·
View notes
Text
A-Café (Update #25) - Community Discussion
Good morning everyone! I know it's been a while since I've posted, but I'm finally back with another community update. In the first part, I'll be giving a brief overview of where we're at in terms of project progress. Then, in the second half, we'll discuss a new development in app accessibility.
Without further ado, let's begin!
1) Where are we at in the project currently?
A similar question was asked in the A-Café discord recently, so I figured I'd include my response here as well:
Right now we’re reworking the design of A-Café, both visually and architecturally. The initial planning and design phase of the project wasn’t done very thoroughly due to my inexperience, so now that I’m jumping back into things I want to ensure we have a solid prototype for usability testing. For us that means we’ve recently done/are doing a few things:
analyzing results from the old 2022 user survey (done)
discussing new ideas for features A-Café users might want, based on the 2022 user survey
reevaluating old ideas from the previous app design
making a new mock-up for usability testing
Once the mock-up is finished, I plan on doing internal testing first before asking for volunteer testers publicly (the process for which will be detailed in an upcoming community update).
2) Will A-Café be available for iOS and Android devices?
Yes! In fact, the first downloadable version of A-Café may no longer be so device-specific.
What do I mean by that? Well, in the beginning, the plan for A-Café was to make two different versions of the same app (iOS and Android). I initially chose to do this because device-specific apps are made with that device's unique hardware/software in mind--thus, they have the potential to provide a fully optimized user experience.
However, I've since realized that focusing on device-specific development too soon may not be the right choice for our project.
Yes, top-notch app performance would be a big bonus. But by purely focusing on iOS and Android devices for the initial launch, we'd be limiting our audience testing to specific mobile-users only. Laptop and desktop users for example, would have to wait until a different version of the app was released (which is not ideal in terms of accessibility).
Therefore, I've recently decided to explore Progressive Web App development instead.
[What is a Progressive Web App?]
A Progressive Web App (or PWA) is "a type of web app that can operate both as a web page and mobile app on any device" (alokai.com)
Much like a regular mobile app, a PWA can be found through the internet and added to your phone's home screen as a clickable icon. They can also have the ability to work offline and use device-specific features such as push-notifications.
Additionally, due to being web-based applications, PWAs can be accessed by nearly any device with a web browser. That means regardless of whether you have an iOS or Android device, you'd be able to access the same app from the same codebase.
In the end, a PWA version of A-Café should look and act similarly to an iOS/Android app, while also being accessible to various devices. And, due to having only one codebase, development of PWAs tends to be faster and be more cost-effective than making different versions of the same app.
To be clear, I haven't abandoned the idea of device-specific development entirely. We could launch iOS/Android versions of A-Café in the future if demand or revenue end up being high enough. But as of right now, I don't believe doing so is wise.
[What Does this Mean for me as a User?]
In terms of app installation and user experience, not much should hopefully change. I'd like to have A-Café available on both the Apple App Store and Google Play Store.
There will also be the option of searching for A-Café via your device's web browser, and then installing it on your home screen (iOS devices can only do so using Safari). We will likely rely on this method until we can comfortably ensure user access to A-Café on the Apple App Store and Google Play Store.
-------------
And that's it for now! Thank you for reading this latest community update. For more insight into the development process, consider joining the A-Café discord. If you have any questions or concerns regarding this post, we would love to hear your input in the comments below. See you later!
26 notes
·
View notes
Text
Ubuntu 22.04 Customization - Version 3.0
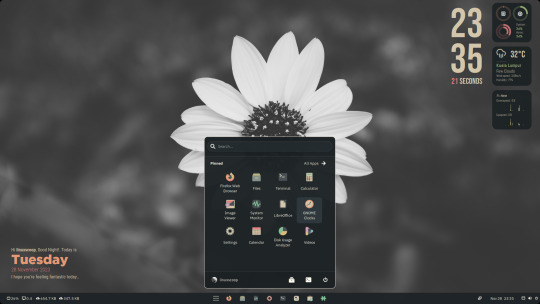
Hey Ubuntu enthusiasts! 🐧✨ Dive into the ultimate customization experience with Ubuntu 22.04 Version 3.0! 🌈 Here's a glimpse of the magic we've woven into our desktop:
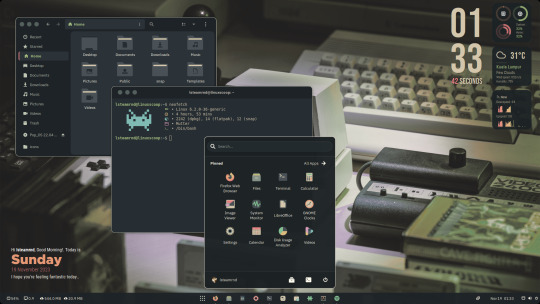
🎨 Everforest Color Scheme Magic: Witness seamless application of the Everforest color scheme across themes, icons, and cursors, giving your Ubuntu a fresh and vibrant look!
🖥️ Desktop Layout: Optimized for productivity! A sleek single panel at the bottom with the main menu in the center—effortless navigation at your fingertips!
⌛ Conky Widget Awesomeness: Stay in the loop with real-time updates on clock, CPU, RAM, weather, network, and the current audio or music track, thanks to our Conky widget on the desktop.
🔧 Additional Setups:
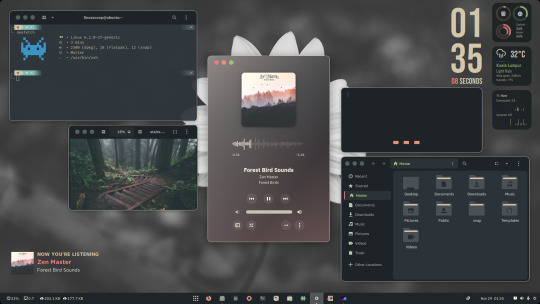
🔄 ZSH and Powerlevel10k: Elevate your terminal game!
🌈 Everforest GNOME Terminal: Bringing color harmony to your command line.
🦊 Everforest Firefox Theme: A consistent aesthetic across your browser.
🚀 Flatpak Applications: Streamlined installation for your favorite apps.
📊 Command-line Apps: Enhance your Ubuntu experience with cava, htop, cmatrix, and neofetch.
🎨 Customize Plymouth: Make your boot experience as unique as you are!
📥 Download Resource Files and Documentation:
Resource Files: Download Here for Documentation: Check it out
🎬 Watch the Final Result and Tutorials:
🌟 Final Result Video: See it here
📽️ Tutorial Video: Learn how
🛠️ Additional Setups Video: Get inspired
Customize your Ubuntu 22.04 like never before! 🚀✨ Share your personalized desktops with us using #UbuntuCustom3_0. Let's make Linux uniquely yours! 🌟💻
#Ubuntu 22.04#Linux#GNOME Shell#GNOME#Open Source#Desktop Cutomizations#Linux Desktop Customizations
44 notes
·
View notes
Note
I'm finding lots of inconveniences with the Neue post format and on mobile compared to the old system. Primarily in how tags work. I have several long tags that I use semi frequently (once every week or two), but not daily, and I have to manually type them out almost every time (ex: +#I am crossover loving trash #my precious gem child [and show titles, ect]). Why aren't constantly repeated tags showing up in suggestions as I type? And do they have to make everything lowercase? it's quite clunky.
Answer: Hey, @lightanddarklove!!
So, first things first. The post format has nothing to do with tags. Instead, this seems like an issue with how tags are being suggested, which we already have folk behind the scenes looking into. We agree that this is not optimal—and hope to have this resolved sooner rather than later.
If you’re having trouble with Tumblr for Android, try the following:
Log out and then log back in.
Visit the Applications area of your device settings. Select the Tumblr app and clear the cache and data.
Reinstall the app, making sure you’re using Android OS 7.0 or higher. You can get the newest version at https://market.android.com/details?id=com.tumblr, but the Google Play store will offer you the latest version that can run on your phone’s particular OS.
Try both a cellular data connection and a Wi-Fi network to see if there’s any difference between the two.
If you’re having trouble with Tumblr for iOS, try the following:
Restart the app. Slowly slide the screen up about 10% until all open apps appear, then slide the Tumblr application upwards until it clears from the screen.
Log out of your Tumblr account and then log back in. You can log out by tapping the account tab (the little human), then the gear icon, then “General settings,” and then “Log out.”
Reinstall the app, making sure your device is running iOS 15 or later. Please note that iOS 15 or newer is required to receive the most recent updates. Find the latest version here.
If you’re still having trouble with the suggested tags, on either platform, then please send us a screen recording of the issue so we can check in more detail.
Thanks for your question!
47 notes
·
View notes
Text
Maximize Sales with the Iconic - Countdown Section
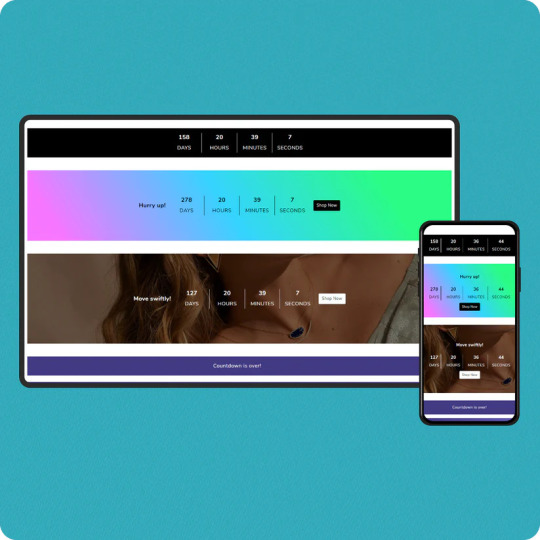
Creating urgency is a proven strategy to drive conversions, and Iconic - Countdown Section is here to help! This Shopify theme section features a countdown timer, designed to grab customer attention and motivate purchases.
If you’re looking to showcase exclusive deals or promotions, this tool is your go-to for boosting sales and customer engagement.
What is the Iconic - Countdown Section?
The Iconic - Countdown Section is a customizable timer that you can embed in your Shopify store. Designed to create a sense of urgency, it encourages shoppers to act quickly, whether it's for limited-time deals, exclusive offers, or upcoming product launches.
This tool isn’t just functional—it’s a proven psychological tactic. Urgency pushes customers to make quicker decisions, reducing cart abandonment and increasing sales.
Benefits of Using the Countdown Section
Boost ConversionsThe ticking clock motivates customers to act fast, creating a fear of missing out (FOMO). Use it for flash sales, seasonal discounts, or countdowns to new arrivals.
Enhance Customer EngagementInteractive elements like countdowns grab attention, making your store more engaging and memorable.
Highlight Special OffersShowcase time-sensitive promotions prominently and encourage bulk purchases during the limited timeframe.
Customizable DesignMatch the countdown's style to your store’s theme. Whether you prefer bold, minimalistic, or colorful designs, Iconic offers flexibility.
Mobile-ResponsiveThe countdown section is optimized for all devices, ensuring your offers look fantastic on both desktop and mobile.
How to Use the Iconic - Countdown Section
Choose Your GoalDecide whether to use the countdown for flash sales, promotional events, or product launches.
Set the TimerCustomize the start and end time for your offer. Adjust fonts, colors, and alignment to suit your store's branding.
Promote StrategicallyPlace the countdown on your homepage, product pages, or cart pages to capture maximum attention.
Monitor PerformanceUse Shopify analytics to track sales spikes and refine your strategy for future campaigns.
Why Choose Iconic for Your Shopify Store?
The Iconic - Countdown Section is more than just a timer; it’s a sales-boosting powerhouse. Backed by an intuitive interface, it integrates seamlessly into any Shopify theme, ensuring smooth operation without compromising on speed or design.
Whether you’re running a small business or managing a high-traffic store, this section fits perfectly into your sales strategy.
Learn More with Our YouTube Video!
Want a step-by-step guide on setting up the Iconic - Countdown Section? Watch our comprehensive YouTube tutorial and become a pro in no time!
youtube
Watch Now
Take Your Store to the Next Level
Create urgency, drive conversions, and maximize sales with the Iconic - Countdown Section. This feature isn’t just a timer—it’s your key to unlocking a new level of customer engagement and revenue.
If you want to download the Shopify app Iconic Sections, click here for more themes like this. Transform your store with expertly designed sections to boost sales and engagement effortlessly!
If you’re looking for expert Shopify development and customization, is here to help. We specialize in creating tailored solutions for Shopify stores, ensuring your success in the competitive e-commerce world.
Get started today and let the countdown begin!
5 notes
·
View notes
Text
"Duel! The Summoners' Summit!" Version 3.7 Update Maintenance Preview

Dear Travelers,
Our developers will soon begin performing update maintenance. While the update maintenance is in progress, Travelers will be unable to log in to the game. Please take note of the update time and schedule your game time accordingly.
After this is complete, the game will update to a new version. We recommend that Travelers install this update over a Wi-Fi connection.
〓Update Schedule〓
Update maintenance begins 2023/05/24 06:00 (UTC+8) and is estimated to take 5 hours.
〓How to Update Game Client〓
PC: Close the game, open the Genshin Impact Launcher, and click Update.
iOS: Open the App Store and tap Update.
Android: Open the game and follow the directions on-screen.
PS5™ and PS4™: Highlight Genshin Impact from the Home Screen, press the OPTIONS button and select "Check for Update."
Please do not hesitate to contact Customer Service if you encounter any issues installing the new version. We will do our very best to resolve the issue.
〓Compensation Details〓
Maintenance Compensation: Primogems ×300 (60 Primogems for every hour the servers are down)
〓Scope of Compensation〓
Maintenance Compensation: Travelers who reach Adventure Rank 5 or above before 2023/05/24 06:00 (UTC+8).
Please claim before the end of Version 3.7.
Our developers will distribute compensation to Travelers via in-game mail within 5 hours after the update maintenance is finished. The mail will expire after 30 days, so don't forget to claim the attached compensation in time.
For more update details, including bug fixes and other compensation details, please see the Version Update Details notice to be posted at 2023/05/24 07:00 (UTC+8).
〓Update Content Overview〓
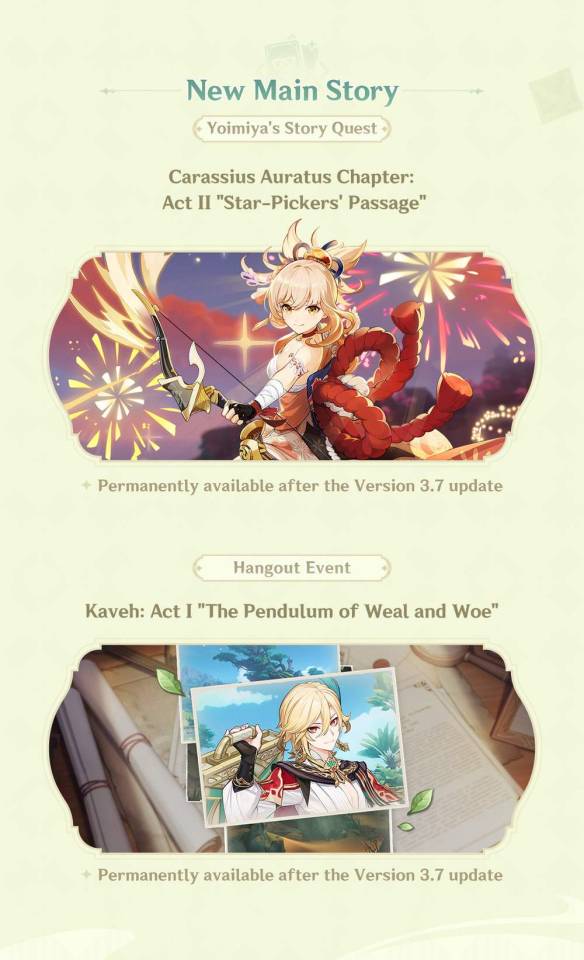
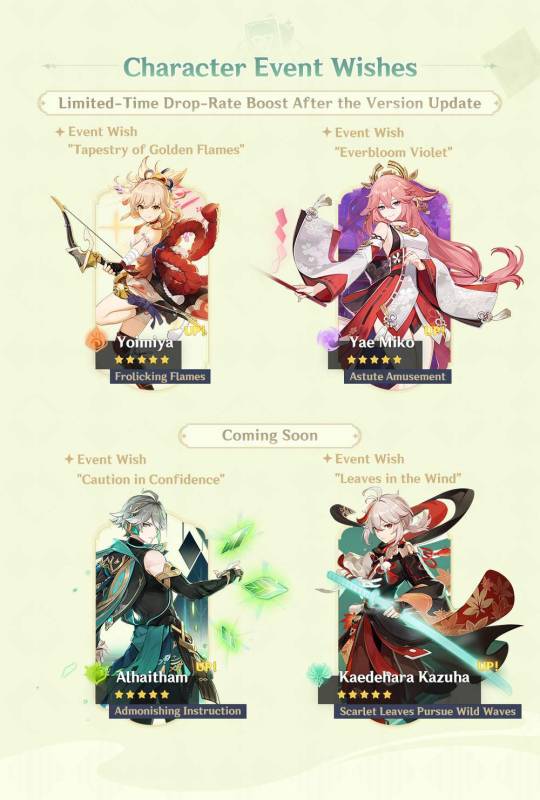
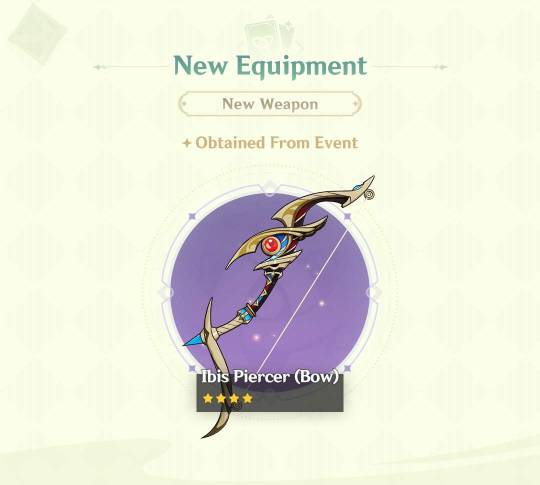
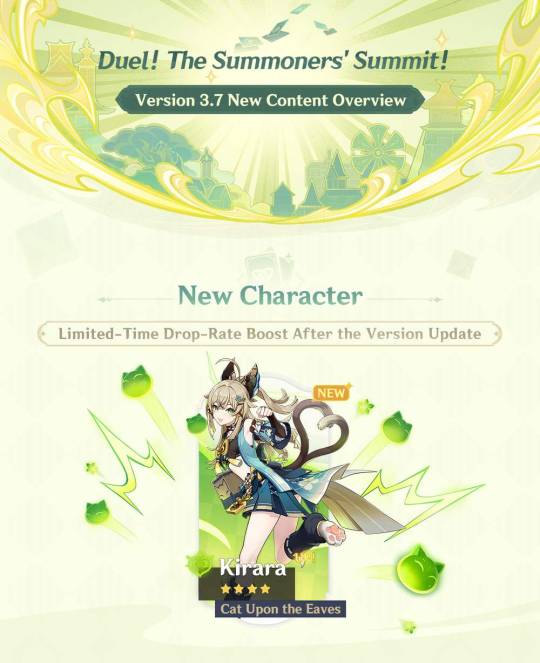
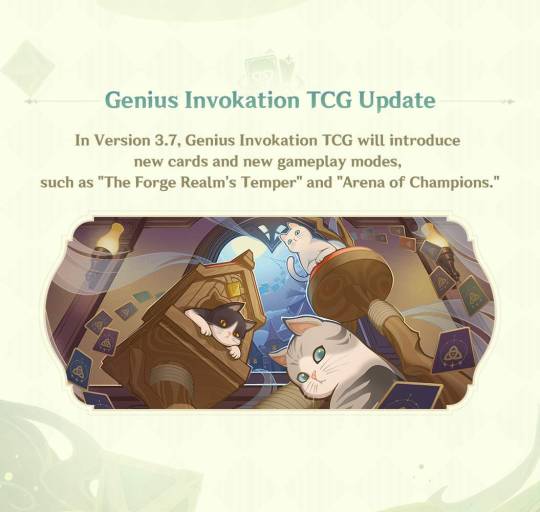
〓Adjustments & Optimizations〓
● Genius Invokation TCG
Optimizes the icons generated by Normal Attack "Frostflake Arrow" of Character Card "Ganyu" and Combat Status "Sparks 'n' Splash" of Character Card "Klee."
Optimizes the defeat menu presentation in Genius Invokation TCG.
Optimizes certain description texts and punctuation in Genius Invokation TCG.
Changes the status name "Normal State" of the card "Winged Dendroshroom" to "Aerial Superiority" in Genius Invokation TCG challenge.
Optimizes the effects described of Combat Status "Inspiration Field" for the Character Card "Bennett" in Genius Invokation TCG: After Bennett equips "Grand Expectation," the DMG increase requirements of "Inspiration Field" will be changed from "If this character has at least 7 HP" to being always active. The description of the "Inspiration Field" created by Bennett with "Grand Expectation" equipped is different from one created by Bennett with "Grand Expectation" unequipped.
Adjusts the effects of the Talent Card "Undivided Heart" used by Character Card "Ganyu" in Genius Invokation TCG: Ganyu will no longer get the +1 Cryo DMG effect after equipping this card.
Adjusts the number of charges required and DMG dealt by the Elemental Burst of Character Card "Ganyu" in Genius Invokation TCG: The number of charges has been increased from 2 to 3 and the Cryo DMG dealt has been increased from 1 to 2. The other effects of this Character Card remain unchanged.
Adjusts Elemental Skill Hydro DMG dealt by the Character Card "Fatui Mirror Maiden" in Genius Invokation TCG: "Deals 3 Hydro DMG..." is now adjusted to "Deals 2 Hydro DMG...".
Adjusts the effect and description for Summon "Ushi" summoned by the Character Card "Arataki Itto": "When your active character receives DMG, Arataki Itto gains Superlative Superstrength" is now "When your character takes DMG, Arataki Itto gains Superlative Superstrength."
Adjusts Event Card "Send Off" in Genius Invokation TCG: "Choose one Summon on the opposing side and destroy it" is now "Choose one Summon on the opposing side and cause it to lose usages by 2."
Adjusts the effect of the Equipment Card "Lithic Spear" in Genius Invokation TCG: Now even defeated characters will be included in the calculations.
When your Character Cards include "Maguu Kenki," all non-Cryo Elemental Dice will be used first for Elemental Tuning and playing your hand in Genius Invokation TCG.
Adds rules and descriptions relating to concepts such as "Defeated," "Food," "Calculation Order," "Charged Attack," and "Plunging Attack" for Genius Invokation TCG.
Adjusts the description detailing "Charged Attack" in Genius Invokation TCG. After the update, the description is as follows: Before your Action Phase, should the total number of your Elemental Dice be even, your Normal Attack will be considered a Charged Attack.
Adjusts the "Other Rules" tab in Genius Invokation TCG Rules into the "Other Rules" and "Special Entry" tabs.
Invitation Duels will now take place in the all new Invitation Duel Room for Genius Invokation TCG.
● Audio
Optimizes the sound effects for character footsteps when they walk across different surfaces.
Optimizes the sound performance of certain quest NPCs.
Optimizes the English, Korean, and Japanese voice-overs for certain characters along with the English and Japanese voice-overs for certain quests.
Adjusts the Korean voice-over related to certain items.
Optimizes the music switching performance when skipping the cutscene animations of Trounce Domain "The Realm of Beginnings."
● System
In the "Adventurer Handbook," "Commissions" and "Embattle" tabs now support pushing the right gyroscope on the controller to view more of the text.
Upgrades the background blur function in the "Paimon Menu > Take Photo" system.
Adds voice lines of the Elemental Skills of "Sprout of Rebirth" Collei (Dendro), "Treasure of Dream Garden" Dori (Electro), and "Admonishing Instruction" Alhaitham (Dendro) in their "Profile / Voice-Over" pages.
*This is a work of fiction and is not related to any actual people, events, groups, or organizations.
"PlayStation", "PS5", "PS4", "DualSense", "DUALSHOCK" are registered trademarks or trademarks of Sony Interactive Entertainment Inc.
#genshin impact#genshin impact updates#genshin impact news#official#genshin impact 3.7#wow i'm so not excited about this update#i don't play tcg i'm just here for alhaitham at this point#hopefully fontaine will wow me enough to get me back into it
58 notes
·
View notes
Text
Version 1.5 "Astra-Nomical Moment" Pre-Download Available & Update Notice
Pre-Download Available Now

Dear Proxies,
Version 1.5 is now available for pre-download. Proxies can follow the instructions below to download part of the files in advance. This will allow you to access the game faster once the update maintenance ends.
[Pre-download Period]
2025/01/20 12:00 (UTC+8) – 2025/01/22 05:50 (UTC+8)
[Pre-Download Details]
● PC
The pre-download file is about 9 GB.
● Mobile (Android and iOS)
The pre-download file is about 4 GB.
Due to the large size of the download, please ensure that you have sufficient space on your device and that you download the files using Wi-Fi.
※ The Voice Pack(s) installed on the client will affect the space required for the pre-download.
[How to Pre-Download]
● PC
Open the HoYoPlay Launcher, and the "Pre-Download" icon will appear next to the "Start Game" button. Click the icon to begin the download.
※ PC users can continue playing the game during the pre-download.
● Mobile (Android and iOS)
Open the game and tap the "Pre-Download Resources" icon in the bottom-right corner of the screen to start downloading.
※ Mobile users will not be able to play the game during the pre-download. Please plan your pre-download time accordingly.
In addition, the dev team is scheduled to perform version update maintenance. During this time, you will be unable to log into the game. Please stay tuned for info related to the game update.
[Version Update Time]
2025/01/22 06:00 (UTC+8): We estimate this will take five hours.
For details on aspects such as new gameplay, optimizations, bug fixes, and compensation, please look out for future version update info.
[Version Update Compensation]
Server Update Compensation: Polychrome ×300
Server Update Compensation Eligibility: Proxies who reach Inter-Knot Lv. 4 before 2025/01/22 06:00 (UTC+8).
Server Update Compensation will be issued via the in-game mail after the update has been completed. The claim deadline is before the end of Version 1.5.
[How to Update]
Once the update maintenance starts, Proxies can follow the in-game instructions to update their game.
● PC
Exit the game, restart, then select update.
● Android
After entering the game, follow the in-game pop-up instructions to complete the update.
● iOS
Go to the App Store and select update.
● PS5™
Open the PS5™ home screen > Highlight Zenless Zone Zero > Hold down the Options button on your controller > Check for updates.
>> Official Hoyolab post <<
3 notes
·
View notes
Text
ao3 icon gifs: various characters and cinematography
for ao3 icon gifs that are of edwin and charles, see here
(also i anticipate making another batch eventually with some gifs of jenny and the night nurse, as well as more of monty, niko, and the cat king)
About a month ago I discovered that you can have gifs as your Ao3 icon and so obviously I’ve had one since then. It’s a bit of an acquired look but I’ve come to enjoy it and have been wanting to make a collection of icons for anyone to use.
I went through my most popular posts, as well as some of my favorite gifsets and spent some time resizing, optimizing, and for some, adjusting the colors a bit, to make sure they fit in the super small file limits for Ao3 icons (under 500kb), and still look okay.
There’s about 50, and most of these are 120px squares, which is a bit bigger than the 100px square that Ao3 recommends. I mostly did this because Ao3 makes your icon bigger in the comment section and on your profile, so it's nice if it’s a bit larger than 100px. That being said, they will not look very good in this post. They are itty, bitty gifs and as such, they are really pixelated.
To download, I recommend using tumblr desktop, opening the gif in a new tab, and then in the url where it says “.gifv” delete the ‘v’ so that it says “.gif” at the end. Only then can you download the gif properly.
If you’re on the mobile app, tumblr will often compress the gif. I recommend opening the post in your phone browser instead of the app, and then following the same instructions for desktop. This way, you’ll get the best looking file for your icon :)


row 1: ep 1 cinematography | ep 1 cinematography | tragic mick


row 2: ep 1 cinematography | ep 1 cinematography | george's "i'm free" bloopers


row 3: cat king "ennui" | cat king "why the fuck are you here" | esther finch ep 3


row 4: crystal ep 4 | crystal "wow edwin, an apology" | niko ep 4 "thank you"


row 5: monty ep 5 | monty ep 5 | monty ep 6


row 6: charles and monty ep 6 | niko and edwin ep 4 | the cat king as charles ep 4
#dead boy detectives#dbda#crystal palace#niko sasaki#the cat king#tragic mick#esther finch#monty finch#monty the crow#mygifs#dbdagifs
74 notes
·
View notes
Text


Not an art post like usual, but I wanted to make an edit of the Nintendo Music key art! The original focuses entirely on first party (made in house at Nintendo) series, but I felt that Pokemon, Fire Emblem, and Kirby (second parties, made between Nintendo and another company) would be nice to see on the logo!
I replaced Donkey Kong cuz I felt like it'd look best to be three, three, and three. Ten would make the logo a bit uneven, despite being an even number- Donkey Kong is so deeply connected to the Mario series that I feel he can kind of be put under the same umbrella, so I believed he was the optimal pick to replace (sorry DK)
Even though Three Houses isn't on the service, I used Byleth as I felt 3H is the most iconic Fire Emblem game, and then I put Lyn because Blazing Blade is on the app already. Pokemon has the SV starters and Kirby uses his Star Allies art, to reflect the games on the service!
These are what I personally view as Nintendo's main nine series, so I wanted to make this edit! Hope you all like it!
#nintendo#nintendo music#super mario#the legend of zelda#animal crossing#splatoon#pokemon#kirby#fire emblem#pikmin
2 notes
·
View notes
Note
i hope this isn't weird to ask, but I've been taking a bunch of pictures in Splatoon and I kinda want to start editing them, but I currently only have an android phone and no computer, do you have any editing apps you'd recommend? Also any tutorials on how to use them (I have like, very very minor experience in stuff like Photoshop but not much else)
hmmm well i also started out just with my phone so you should be fine!
i don't think my process was the most optimized, but i'll share it anyway.
(this is going to be under a read more since it ended up being long)
I used ibis paint x when i started out, which is a free drawing app available on pretty much every mobile device. It may take some getting used to all the buttons on there(it took me a while to learn) but i would think you could find a tutorial online for the basic functions of everything. The way i learned was by just messing with every button to see what they did and figuring it out slowly from that.
And here are the steps as to how i edited:
take the image you want to make transparent(if you don't want to make your own transparents yet mine are free to use and there are official transparent renders of certain characters as well that you can easily find on inkipedia)
just import it into your new drawing
take the eraser tool and manually erase the background.
If needed: try to redraw any parts that are missing/were obscured by other things in the image(such as items in the foreground or word bubbles if it's a manga panel). this was sort of easy for me to start to get a basic hold of since i draw already. If you don't feel confident with this, just choose an image where the character is fully visible.
In a new layer(underneath the character one), add your background.
In a new layer(above the character one) add any particle affects or the like.
You're finished!
You can also draw extra decorations (like hearts and stars) manually with the brush tool! Make sure it's on a separate layer so as not to permanently affect anything else if you decide you don't like it!
I also think canva may have a mobile app version? I have a paid version of it through someone else that i use on the website version, and i can give a tutorial for how i work in that as well. I don't know how the free version compares, but it should be pretty similar?
In canva i do the following:
select the 500x500 logo option if you want to make an icon, or another size if you want something else.
Press uploads, then upload your picture.
once you have the image you want on your canvas, click on it and select "edit photo"
choose "bg remover" and let it do its thing.
once its done loading, if there are any errors click on bg remover again and fix them with the erase and restore options.
Add a background and extra details and there you go!
I find the last step to be a lot easier in canva since it comes preloaded with a ton of options as long as you know what to look for!
Also note: i DON'T like canvas bg remover tool. it is inaccurate and kinda dumb so i would just do the transparents manually through ibis if i was you. i just dont have any other option rn. If you choose to do the transparents in ibis make sure you click "save image as transparent png" when you are downloading it so you can upload it to canva.
As for how i choose what to do and all that, i can try to explain some things that work for me.
lets use this image of dedf1sh for example:

lets say i wanted to make an icon with this. what wuld i use for backgrounds and such?
for starters: colors. Take a color that's already on the characters design/associated with them and then look for things that match that color scheme.
so some examples of that:


some other things to use would be things associated with the character. so for dedf1sh it would be subways, djs, music, the 80s aesthetic of octo expansion, sanitization, etc.
so here's how i would incorporate things like that:


but just a character and a image can (sometimes) be boring to me, so i like to add extra things as well.
theres always my tried and true: the white shape
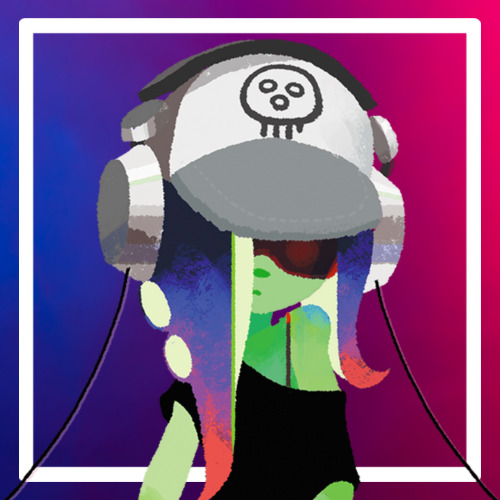
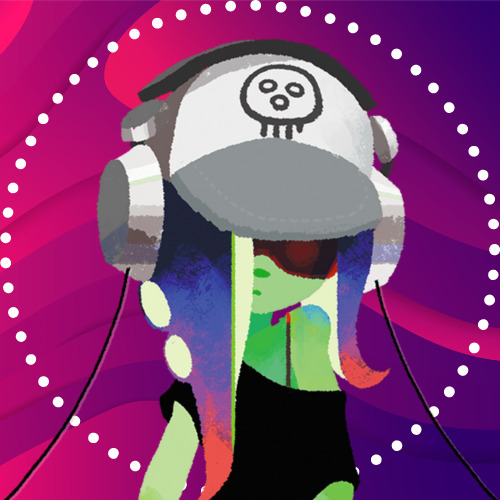

you can use any shape and any color really, i just default to white squares a lot since i think it looks clean. variations like a neon affect can also be a fun way spruce things up a bit!
borders of all kinds also work well to add some more stuff:


and extra little shapes like hearts and stars can be fun!


and things like glitch effects, blurs, monochrome/other color filters, etc can can also make things interesting:

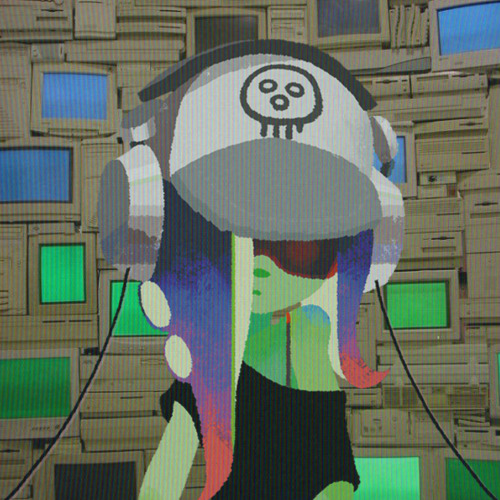

put all of this together with a theme and you can make some other cool things! stuff like seasons, colors, aesthetics, pride flags, and more can all be fun themes to make things around and thats how i end up with icons like these:
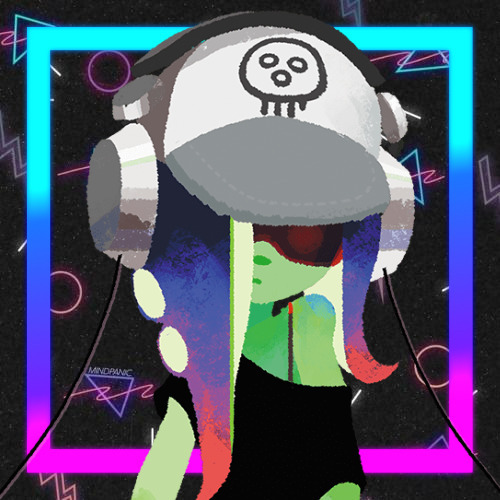


you can also make things that aren't icons (obviously) but i don't have as much experience with that.. i would just say to try and make sure things feel balanced when working with a bigger canvas? don't have everything cluttered up in one area. and be aware of the sizings of what you are using. you don't want things to end up being too small.
here some examples of other stuff ive done outside the 500 x 500 ratio:


and thats all i can think of to say right now!
i would work first on familiarizing yourself with whatever you choose to work in, and i would look at other people's work to get inspiration as well!
and if anyone else has any suggestions for better/more efficient ways to do any of this feel free to add on! this is just my personal process, and im sure everyone uses something different. so try new things and find what works for you!
(also i am not proofreading all this if there are problmes someone let me know)
(also also if anyone, especially the person who sent the ask, has any questions feel free to ask)
Happy creating and if you ever feel like sharing feel free to tag me!
11 notes
·
View notes
Text
Using Cash App: How Much Money Can I Send?
Cash App, a revolutionary digital payment platform, simplifies money transfers, purchases, and investments with ease and convenience. However, understanding Cash App sending limits is essential to make the most out of its services. This article provides a comprehensive breakdown of how much money you can send using Cash App, the factors influencing these limits, and how to increase them.

What Are Cash App Sending Limits for Unverified Accounts?
When you first sign up for Cash App, you’ll have default sending and receiving limits as an unverified user. These limits are relatively modest to ensure security and prevent fraudulent activities.
Cash App Weekly Sending Limit: Unverified accounts can send up to $250 per week.
Cash App Monthly Receiving Limit: You can receive up to $1,000 per month.
These limits reset on a rolling basis, meaning they are calculated over the last seven days for sending and the last 30 days for receiving. If you try to send or receive more than these amounts, Cash App will prompt you to verify your identity.
How to Verify Your Identity on Cash App
To unlock higher limits, you need to verify your identity. This process is simple and only takes a few minutes. Follow these steps:
1. Open the Cash App: Navigate to the home screen.
2. Enter Your Details: Provide your full name, date of birth, and the last four digits of your Social Security Number (SSN).
3. Submit Additional Documentation (if required): In some cases, Cash App may request additional documents, such as a government-issued ID, to complete the verification.
Once verified, your sending and receiving limits will significantly increase.
What Are Cash App Sending Limits for Verified Accounts?
After completing identity verification, Cash App dramatically raises your sending and receiving limits:
Cash App Daily Sending Limit: You can send up to $7,500 per transaction.
Cash App Weekly Sending Limit: The weekly sending limit also increases to $7,500.
Cash App Receiving Limit: Verified accounts can receive unlimited funds, making it perfect for personal and business use.
How to Check Your Current Sending Limit
Checking your sending limit is crucial to avoid failed transactions. Here’s how you can check it:
1. Open Cash App: Navigate to your profile icon.
2. Tap on “Limits”: You’ll see the current limits for your account, including sending and receiving caps.
3. Review Your Verification Status: Ensure your account is verified to maximize your limits.
Factors Affecting Sending Limits on Cash App
Several factors influence the amount of money you can send via Cash App, including:
1. Account Verification: Verified accounts enjoy higher limits than unverified ones.
2. Transaction History: Regular and legitimate usage can lead to better transaction privileges over time.
3. Linked Bank Accounts or Cards: Linking a verified bank account or credit/debit card can further optimize your transaction capabilities.
How to Increase Your Cash App Sending Limit
If you’ve reached the maximum limit and need to send more, here are the steps to increase your Cash App limit:
1. Ensure Your Account Is Verified: Verification is the first step toward increasing your limits.
2. Contact Cash App Support: If your needs exceed the standard verified limits, contact Cash App support for assistance. While rare, they may consider your request for a custom limit.
3. Link a Bank Account or Debit Card: This adds credibility to your account and ensures smoother transactions.
Cash App Fees for Sending Money
Cash App generally doesn’t charge fees for standard personal transactions. However, there are exceptions:
Instant Transfers: A fee of 0.5% to 1.75% is charged for instant deposits to your bank.
Credit Card Transactions: Sending money via credit card incurs a 3% fee.
Business Transactions: If you have a Cash App for Business account, a 2.75% fee applies for receiving payments.
Understanding these fees can help you avoid unnecessary charges and manage your finances efficiently.
Common Issues and Solutions for Sending Money on Cash App
Users may encounter problems while trying to send money. Here are common issues and how to resolve them:
1. Exceeded Limits: If you’ve reached your Cash App limit, verify your identity to increase it.
2. Insufficient Balance: Ensure your Cash App balance or linked bank account has sufficient funds.
3. Network Issues: Poor internet connectivity can cause transaction failures.
4. Suspicious Activity: If Cash App detects unusual activity, it may temporarily block transactions. Contact support for assistance.
Tips for Safe Transactions on Cash App
1. Double-Check Recipient Details: Ensure you’ve entered the correct Cashtag or phone number.
2. Avoid Scams: Only send money to people you trust and verify their identity before transferring funds.
3. Enable Security Features: Use two-factor authentication and notifications for every transaction to stay secure.
Frequently Asked Questions About Cash App Sending Limits
1. What happens if I exceed my Cash App sending limit?
If you exceed the Cash App limit, Cash App will decline the transaction and prompt you to verify your identity.
2. Can I send $10,000 in one transaction on Cash App?
No, the maximum you can send in a single transaction as a verified user is $7,500. For higher amounts, consider splitting the payments or using other methods.
3. How long does it take to verify my Cash App account?
Verification typically takes 24-48 hours. Ensure all provided information is accurate to avoid delays.
4. Are there limits for receiving money on Cash App?
Unverified accounts can receive up to $1,000 per month, while verified accounts have no receiving limit.
5. Does Cash App charge for exceeding limits?
No fees are charged for exceeding limits, but transactions will fail until you verify your account or wait for the limits to reset.
Conclusion
Cash App is a versatile platform for managing your finances, but understanding its sending limits is key to avoiding transaction issues. Verifying your account unlocks higher limits, ensuring you can send and receive funds seamlessly. By following the tips outlined in this guide, you can optimize your Cash App experience.
2 notes
·
View notes
Text

🔍 Conduct User Research: Identify your audience's preferences, behaviors, and pain points. Use these insights to design an interface that meets their needs effectively.
1️⃣ Simplify Navigation: Easy-to-find menus and features.
2️⃣ Consistent Design: Uniform colors, fonts, and icons.
3️⃣ Fast Performance: Quick load times, minimal lag.
4️⃣ Touch-Friendly: Large buttons, easy tapping.
5️⃣ Clear CTAs: Standout buttons with strong action words.
6️⃣ Readable Text: Legible fonts, good contrast.
7️⃣ User Feedback: Instant responses to actions.
8️⃣ Real User Testing: Gather feedback, and make improvements.
9️⃣ Accessibility: Features for users with disabilities.
🔟 Minimalistic Design: Avoid clutter, and focus on essentials.
Ready to enhance your app’s user interface? Contact us today to discuss how we can optimize usability and engagement through intuitive design practices! 📱✨
WhatsApp: https://wa.me/918985992323
3 notes
·
View notes