#aadhaar card application
Explore tagged Tumblr posts
Visit Tumblr Blog
Explore Tumblr blogs with no restrictions, modern design and the best experience.
Last Seen Tumblr Blogs


Fun Fact
28.6 is the average number of monthly visits per US mobile user.
Text
Can You Get a Personal Loan with an Expired Passport?
Introduction
A personal loan is a flexible financial tool that helps individuals meet various financial needs, from medical emergencies to home renovations and debt consolidation. However, lenders require specific documents to verify an applicant’s identity and financial stability before approving a loan. One of the common documents used for identification is a passport. But what happens if your passport has expired? Can you still apply for a personal loan with an expired passport?
In this guide, we explore whether you can get a personal loan with an expired passport, alternative documents you can use, and tips to improve your chances of approval.
Is an Expired Passport Acceptable for a Personal Loan Application?
Lenders require valid identity and address proof to process personal loan applications. While a passport is widely accepted, an expired passport is not considered a valid form of identification. Most banks and financial institutions will not approve a loan application if the only document provided is an expired passport.
However, some lenders may still consider an application if:
✔️ The expired passport is accompanied by another valid government-issued ID (e.g., Aadhaar Card, PAN Card, Voter ID). ✔️ The applicant has a strong credit history and stable income. ✔️ The bank allows additional verification methods such as an employer certificate or recent utility bills.
🔹 Tip: Always check with your lender about their documentation policies before applying for a personal loan.
Alternative Documents You Can Use Instead of an Expired Passport
If your passport is expired, you can provide other valid documents for KYC (Know Your Customer) verification. The following documents are commonly accepted by lenders:
1. Identity Proof Alternatives
📌 Aadhaar Card – One of the most widely accepted identity proofs. 📌 PAN Card – Required for financial transactions and tax verification. 📌 Voter ID – Government-issued identity proof for Indian citizens. 📌 Driver’s License – A valid government-issued photo ID.
2. Address Proof Alternatives
📌 Aadhaar Card – Contains updated residential details. 📌 Utility Bills (Electricity, Water, Gas, etc.) – Usually accepted if not older than 3 months. 📌 Bank Passbook or Statement – Should include the current residential address. 📌 Rent Agreement – Must be registered and valid.
🔹 Tip: If your passport has expired, ensure you have at least one valid ID and address proof before applying for a personal loan.
Eligibility Criteria for Getting a Personal Loan Without a Valid Passport
Even without a valid passport, you can still apply for a personal loan if you meet the following eligibility criteria:
📌 Age Requirement: 21 to 65 years 📌 Employment Status: Salaried or self-employed 📌 Minimum Monthly Income: ₹15,000 – ₹25,000 (varies by lender) 📌 Credit Score: Preferably 700+ for better approval chances 📌 Valid Identity Proof: Aadhaar, PAN, or Voter ID 📌 Valid Address Proof: Aadhaar, utility bills, or rent agreement
🔹 Tip: A strong credit profile and stable income can help compensate for the lack of a valid passport.
How to Apply for a Personal Loan Without a Valid Passport
Step 1: Choose the Right Lender
Compare personal loan offers from different banks, NBFCs, and fintech lenders.
Check eligibility criteria for KYC documents.
Step 2: Gather Alternative KYC Documents
Ensure you have a valid Aadhaar Card, PAN Card, or Voter ID for identity verification.
Provide a recent bank statement, utility bill, or rent agreement for address proof.
Step 3: Complete the Loan Application Online
Visit the lender’s website or mobile app.
Enter your personal, financial, and employment details.
Upload alternative KYC documents instead of a passport.
Step 4: Loan Approval & Disbursal
Once your documents are verified, the loan is approved instantly.
The approved loan amount is credited to your bank account within 24-48 hours.
🔹 Tip: Some lenders offer pre-approved loans where KYC verification is minimal, making the process faster.
Best Banks & NBFCs Offering Personal Loans Without a Passport
1. HDFC Bank Personal Loan
✅ Loan Amount: ₹50,000 – ₹40 lakh ✅ Interest Rate: 10.50% – 17.00% p.a. ✅ Tenure: Up to 6 years ✅ Processing Fee: 1% – 2.5% 📌 Best For: Instant approval for salaried employees with valid Aadhaar or PAN.
2. ICICI Bank Insta Personal Loan
✅ Loan Amount: ₹50,000 – ₹25 lakh ✅ Interest Rate: 10.75% – 19.00% p.a. ✅ Tenure: Up to 7 years ✅ Processing Fee: 1% – 2% 📌 Best For: Fast digital approval process with alternative KYC.
3. SBI Xpress Credit Personal Loan
✅ Loan Amount: ₹50,000 – ₹20 lakh ✅ Interest Rate: 9.75% – 12.50% p.a. ✅ Tenure: Up to 7 years ✅ Processing Fee: 0.5% – 1% 📌 Best For: Government employees and pre-approved customers.
Things to Consider Before Applying for a Personal Loan Without a Passport
🔹 Compare Loan Offers – Interest rates, tenure, and processing fees vary between lenders. 🔹 Check EMI Affordability – Use a personal loan EMI calculator before applying. 🔹 Beware of Hidden Charges – Processing fees, late payment charges, and prepayment penalties. 🔹 Maintain a Good Credit Score – A higher score increases approval chances.
Final Verdict: Can You Get a Personal Loan Without a Valid Passport?
✅ Yes! An expired passport alone may not be accepted, but you can use other valid documents like Aadhaar, PAN, or Voter ID. ✅ Best Alternative: Apply with a valid Aadhaar Card and bank statement for faster approval. ✅ For Instant Loan Approval: Consider lenders like ICICI Bank, HDFC Bank, or SBI.
For expert financial guidance and the best personal loan offers, visit www.fincrif.com today!
FAQs
Q1: Can I apply for a personal loan with an expired passport? No, but you can use Aadhaar, PAN, or Voter ID as alternative documents.
Q2: Do I need a passport for a personal loan in India? No, most banks accept other KYC documents such as Aadhaar and PAN.
Q3: How can I improve my chances of loan approval? Maintain a good credit score, provide valid income proof, and apply with a reputed lender.
Get a Personal Loan Today – Even Without a Valid Passport!
#finance#personal loan online#fincrif#bank#personal loans#loan services#personal laon#loan apps#personal loan#nbfc personal loan#Personal loan#Personal loan without passport#Loan eligibility without valid passport#Personal loan KYC requirements#Can I get a loan with an expired passport#Alternative documents for personal loan#Loan application without passport#Aadhaar card for personal loan#Personal loan documentation process#Banks offering loans without passport#How to apply for a personal loan without a valid passport?#Can an expired passport be used for a personal loan application?#Which banks offer loans without requiring a passport?#Best alternatives to passport for a personal loan application#Personal loan approval process without a passport
0 notes
Text
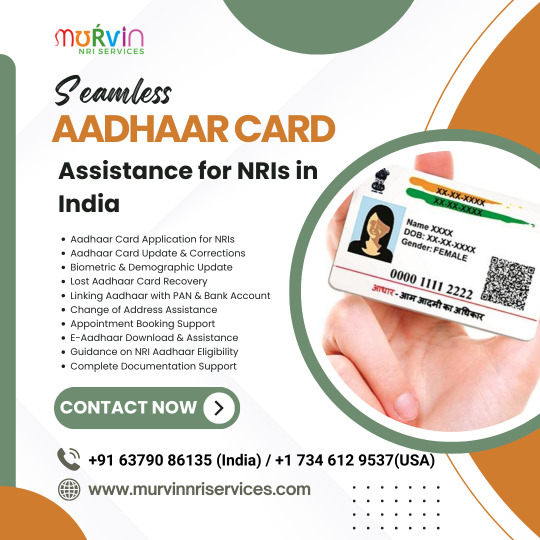
Seamless Aadhaar Card Assistance for NRIs in India
Murvin NRI Services offers seamless Aadhaar card assistance for NRIs in India, ensuring hassle-free application, updates, and documentation support.
#Aadhaar card assistance for NRIs#Murvin NRI Services#NRI Aadhaar application support#Hassle-free Aadhaar registration#Aadhaar update services for NRIs#Identity verification for NRIs#NRI documentation services#Expat Aadhaar card process#Aadhaar enrollment assistance#Legal identity support for NRIs
0 notes
Text
Big e-Aadhaar revamp on the cards! No more photocopies of Aadhaar card required, updation to become easy; check top steps

The Unique Identification Authority of India (UIDAI) is set to revamp e-Aadhaar, introducing a QR code-based system to eliminate need for physical copies. Updates, excluding biometrics, will be automated through integrated databases, reducing center visits.
Big e-Aadhaar revamp soon! In the coming weeks, a new QR code-based application will eliminate the need for Aadhaar card physical photocopies to be submitted. Users can share digital versions of their Aadhaar, choosing between complete or masked formats.By November, the Unique Identification Authority of India (UIDAI) is also planning to introduce a streamlined procedure that will significantly reduce visits to Aadhaar centres for updation.Except for biometric submissions, updates to address and other information will be automated through integration with various official databases. These include birth certificates, matriculation records, driving licences, passports, PAN cards, PDS and MNREGA systems.This initiative aims to simplify the process for citizens whilst reducing fraudulent document submissions for Aadhaar registration. Additionally, discussions are in progress to incorporate electricity bill records to enhance user convenience.Also Read | ITR filing FY 2024-25: Several changes in Form 16! Top things salaried taxpayers shouldn’t missUIDAI's chief executive officer Bhuvnesh Kumar has informed TOI about a newly developed application, with approximately 2,000 out of one lakh machines already utilising this new system."You will soon be able to do everything sitting at home other than providing fingerprints and IRIS," he said.e-Aadhaar Revamp: Explained in Top PointsThe application will enable users to update personal details including addresses, telephone numbers, names and incorrect birth date corrections.The introduction of QR code-based Aadhaar transfers between mobile devices or applications is considered essential for preventing misuse, with potential applications ranging from hotel check-ins to identity verification during rail travel. "It offers maximum user control over your own data and can be shared only with consent," Kumar said.The system can additionally be implemented by sub-registrars and registrars during property registration procedures to prevent fraudulent activities.Kumar indicated that UIDAI is working with state governments to incorporate Aadhaar verification for individuals registering properties, aiming to reduce instances of fraud.UIDAI has commenced discussions with CBSE and additional examination boards to facilitate biometric and other data updates for children, which needs to be completed during two age brackets: between five and seven years, and between 15 and 17 years. They are planning a dedicated campaign to address the pending updates, which include eight crore cases for the first update (children aged five to seven years) and 10 crore cases for the second update.Additionally, UIDAI is collaborating with various organisations, including security agencies and hospitality establishments, to extend Aadhaar services to entities where its use is not mandatory.Stay informed with the latest business news, updates on bank holidays and public holidays.
25 notes
·
View notes
Text
Get Money in Minutes: Instant Cash Loan in Dehradun Without the Wait
Financial emergencies don’t knock before arriving. Whether it's a sudden hospital bill, urgent travel, business crisis, or rent due tomorrow, instant cash loan Dehradun services are the lifeline for those who need fast financial help. The good news? You don’t need to beg banks or wait for days anymore. Now, you can get a Dehradun personal loan in 1 hour—quick, simple, and entirely online.
Dehradun is no longer just a city of hills and education hubs—it’s now a growing economy where salaried professionals, freelancers, and small business owners constantly need working capital. And this rising demand is driving the rapid rise of instant loan Dehradun options that make borrowing frictionless.
Let’s break down how you can apply for a Dehradun personal loan, what the eligibility is, and why this is the fastest way to access funds in the city.
Why an Instant Cash Loan in Dehradun is a Game-Changer
Let’s face it—banks are slow. From filling long forms to waiting in queues, the traditional personal loan process is outdated. What if you could bypass all that?
An instant cash loan Dehradun delivers exactly what the name promises—instant money directly in your account, without any physical paperwork or branch visit.
Here’s why it works:
100% online loan process
Disbursal within 60 minutes of approval
Loan amounts ranging from ₹10,000 to ₹5,00,000
No collateral or guarantor required
Flexible tenure from 3 to 36 months
If you need money now, then a Dehradun personal loan in 1 hour is your smartest move.
Who Can Apply for an Instant Loan in Dehradun?
Eligibility is simple and designed to include a wide range of applicants. Whether you're employed, self-employed, or a gig worker, instant loan Dehradun options are open to you if you meet the following:
For Salaried Individuals:
Monthly income of ₹15,000 or more
Minimum age: 21 years
Must be employed with a registered company
Resident of Dehradun with valid address proof
For Self-Employed:
Business operating for at least 1 year
Minimum annual income ₹2,00,000
Valid GST/ITR proofs
Must have a Dehradun residential or business address
Even if you have a moderate credit score, many NBFCs and lending platforms still process Dehradun personal loan applications quickly.
How to Apply for a Dehradun Personal Loan in 1 Hour
Forget branch visits and manual forms. Applying for an instant cash loan Dehradun is now a 5-step process you can complete from your mobile.
Here’s the step-by-step breakdown:
Visit a trusted lending platform like FinCrif
Enter your loan amount and tenure
Complete KYC with Aadhaar and PAN
Upload documents (salary slips, bank statement)
Get approval & e-sign loan agreement
Funds will be transferred directly to your bank account within 60 minutes post-verification. Some lenders even offer Dehradun personal loan in 1 hour via instant pre-approval for eligible candidates.
Documents Required for Instant Loan Dehradun
The document checklist is minimal. Here’s all you need to apply:
Aadhaar Card
PAN Card
Bank account statement (last 3–6 months)
Salary slips or income proof
Passport-size photo
Address proof (utility bill, rent agreement, etc.)
If you apply via Aadhaar e-KYC, your loan approval can be completed in just a few minutes. It’s the fastest way to get a Dehradun personal loan without any delays.
If you want structured repayment and lower interest, then instant loan Dehradun clearly wins.
Top Uses of Dehradun Personal Loan
The beauty of a personal loan is that it doesn’t come with restrictions. Lenders don’t question why you’re borrowing, which gives you total freedom.
Here are the top reasons why people in Dehradun take instant loans:
Medical emergencies
Travel or vacation booking
Wedding expenses
Education or coaching fees
House rent or security deposit
Vehicle repairs
Debt consolidation
If any of these hit close to home, then a Dehradun personal loan could be your safety net.
Loan Disbursal in Just 1 Hour – Myth or Reality?
It’s real—and it’s happening every day for thousands of Dehradun residents. The rise of AI-based credit evaluation systems, e-KYC, and instant documentation has transformed how lenders operate.
Most reputed platforms now offer Dehradun personal loan in 1 hour by pre-approving profiles based on salary accounts or previous credit history. As long as your documents are in order, you can receive funds the same day—often within 30 to 60 minutes.
Tips to Maximize Instant Loan Approval in Dehradun
Want to boost your chances? Follow these steps:
Keep your CIBIL score above 700
Avoid applying for multiple loans at once
Maintain a stable job or consistent income
Provide accurate documentation
Choose a loan amount you can repay easily
These simple steps ensure that your instant loan Dehradun doesn’t just get approved but gets disbursed without delay.
The Bottom Line: Apply Now, Solve Now
Time is money—and when emergencies strike, every minute counts. The rise of instant cash loan Dehradun services is empowering people to take control of their finances without unnecessary delays or judgment.
services is empowering people to take control of their finances without unnecessary delays or judgment.
So why wait for the bank manager’s call when you can solve your problem right now?
Whether you need ₹10,000 or ₹5 lakh, whether it’s for 3 months or 2 years—your perfect Dehradun personal loan is just a few clicks away.
Apply now. Get money in 1 hour. Solve it today, not tomorrow.
2 notes
·
View notes
Text
A Step-by-Step Guide to Home Loan Application Processes in India
Buying a home is a dream for many people in India, and taking a home loan is often the most practical way to make this dream come true. While the process may seem complicated initially, breaking it down into simple steps can help you understand what to expect and prepare accordingly. Whether purchasing an apartment, a villa, or a plot in a large project like Godrej MSR City in Shettigere, knowing how to apply for a home loan can save time, reduce stress, and even help you get better loan terms.

Step 1: Check Your Eligibility
Before applying for a home loan, check your eligibility based on your age, income, job type, existing liabilities, and credit score. Most banks and NBFCs (Non-Banking Financial Companies) offer online eligibility calculators. A good credit score (typically 750 and above) increases your chances of approval and may help you get better interest rates.
Tip: If you're buying a plot or home in a reputed project like Godrej MSR City in Devanahalli, lenders are usually more willing to approve loans due to the builder's credibility and clear legal documentation.
Step 2: Choose the Right Lender
Compare banks and housing finance institutions based on interest rates, processing fees, prepayment terms, and customer service. Consider both fixed and floating interest rate options and choose what suits your long-term goals.
Step 3: Gather the Required Documents
Prepare the following documents before applying:
Identity Proof: PAN card, Aadhaar card, or passport
Address Proof: Utility bill, voter ID, passport
Income Proof: Salary slips (for salaried) or IT returns (for self-employed)
Bank Statements: Last 6 months' statements
Property Documents: Agreement to sell, allotment letter, or builder-buyer agreement
Employment Proof: Offer letter or employment certificate (for salaried individuals)
If you're purchasing a home in an established township like Godrej MSR City in Bangalore, the builder often assists with documentation and coordination with banks, making this step easier.
Step 4: Submit the Loan Application
You can apply online or visit the bank branch. Fill out the home loan application form and attach all necessary documents. Pay the processing fee, which typically ranges from 0.25% to 1% of the loan amount.

Step 5: Loan Processing and Verification
Once the application is submitted, the lender will verify your documents and may conduct a personal discussion to confirm your repayment ability. They will also evaluate your credit score and verify your employment and income details.
Step 6: Property Valuation and Legal Check
The bank will inspect the property to ensure it has a clear title and matches the legal and construction norms. This includes a site visit and checking RERA registration, building approvals, and sale agreements. Reputed projects like Godrej MSR City already have these legal clearances, which speed up the process.
Step 7: Loan Sanction and Offer Letter
Once everything checks out, the lender will issue a sanction letter mentioning the loan amount, interest rate, tenure, EMI, and terms. Read this carefully before accepting.
Step 8: Loan Agreement and Disbursement
After you accept the offer, the bank will ask you to sign the loan agreement. Once signed, the loan is disbursed — either in full (for ready-to-move homes) or in stages (for under-construction projects). The disbursement is often linked to construction progress if you're buying in a phased township like Godrej MSR City in Shettigere.
Bonus Tips for a Smooth Home Loan Experience
Keep Your Credit Score Healthy: Avoid delays in existing EMIs or credit card payments.
Plan Your Budget Wisely: Factor in down payment, registration charges, and interior costs.
Use Builder Tie-Ups: Many top builders, including Godrej Properties, have tie-ups with leading banks for quick processing and better rates.
Read the Fine Print: Before signing, understand prepayment, foreclosure, and late payment charges.

Conclusion
Applying for a home loan in India is a well-defined process; being prepared can make it much easier. If you are considering a home or plot in Bangalore, especially in fast-developing areas like Devanahalli and Shettigere, choosing a project like Godrej MSR City can simplify the home loan process due to its transparency, clear documentation, and builder-bank relationships.
youtube
#godrej properties#apartments#real estate#bangalore#north bangalore#Youtube#godrej msr city#godrej shettigere#godrej devanahalli#godrej msr city shettigere#godrej msr city devanahalli
2 notes
·
View notes
Text
Thinking of Starting a Business? Here’s How to Incorporate a Company in India
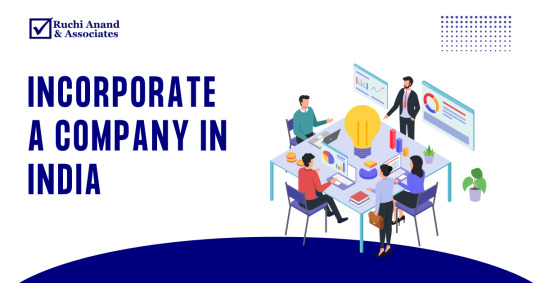
Looking to incorporate a company in India? Whether you're a startup founder, foreign investor, or a seasoned entrepreneur, understanding the incorporation process is essential. India’s robust legal infrastructure, growing economy, and startup-friendly policies make it an attractive destination for business establishment. In this guide, we’ll walk you through the key steps, legal requirements, types of company structures, and post-registration compliances to help you get started confidently.
Why Incorporate a Company in India?
Setting up a company in India offers several strategic advantages:
Legal recognition and structured business operations
Limited liability protection for shareholders
Enhanced brand credibility and trust
Eligibility for government incentives and funding
A distinct legal identity separate from its owners
India's corporate framework ensures flexibility, transparency, and investor confidence, making it a solid foundation for both domestic and foreign ventures.
Types of Companies You Can Register in India
Choosing the right structure is crucial. Here are the most common types of company formations in India:
Private Limited Company (Pvt Ltd)
Suitable for startups and SMEs
Requires 2 directors and 2 shareholders
Offers limited liability and a separate legal entity
Public Limited Company
Ideal for large businesses planning to raise capital from the public
Requires a minimum of 3 directors and 7 shareholders
One Person Company (OPC)
Best for solo entrepreneurs
Requires just 1 director and 1 shareholder
Offers full control with limited liability
Limited Liability Partnership (LLP)
Combines flexibility of partnership with benefits of a company
No minimum capital required
Suitable for professionals and service businesses
Sole Proprietorship / Partnership
Easiest to start but not a separate legal entity
No limited liability protection
Documents Required for Company Registration
For Indian Citizens:
PAN Card and Aadhaar Card
Address Proof (Utility bill or bank statement)
Passport-sized photograph
For Foreign Nationals:
Notarized & apostilled passport
Address proof
Valid visa and entry details (if incorporating while in India)
Office Address Proof:
Utility bill, rent agreement, or NOC from the property owner
Step-by-Step Process to Incorporate a Company in India
Obtain Digital Signature Certificate (DSC) Required to digitally sign incorporation documents.
Apply for Director Identification Number (DIN) Mandatory for all proposed directors.
Name Approval (RUN Service) Reserve your company name via the MCA portal.
File Incorporation Forms (SPICe+) Submit key incorporation forms with MoA, AoA, and supporting documents.
Get PAN, TAN & GST Registration PAN and TAN are allotted with the COI. Apply for GST if applicable.
Receive Certificate of Incorporation (COI) Issued by the Ministry of Corporate Affairs (MCA), including your CIN.
Post-Incorporation Compliance Checklist
Once your company is registered, ensure timely compliance with:
Opening a corporate bank account
Appointing a statutory auditor within 30 days
Filing the commencement of business (Form INC-20A)
Conducting board meetings and maintaining proper records
Filing annual returns and income tax
Incorporating a Foreign Company in India
Foreign nationals, NRIs, or foreign entities can incorporate through:
Wholly Owned Subsidiary
Joint Venture (JV)
Branch Office
Liaison Office
Note: FDI is permitted under automatic or approval route depending on the industry sector.
Key Benefits of Incorporating in India
Access to Startup India benefits and tax exemptions
Increased investor trust and fundraising ease
Limited liability and legal continuity
Structured corporate governance and tax planning
Frequently Asked Questions
1. How long does it take to incorporate a company in India? Typically, 7–10 working days if all documents are accurate and complete.
2. Is there a minimum capital requirement? No, India does not mandate a minimum capital to register a company.
3. Can foreigners incorporate a company in India? Yes, with proper documentation and compliance with FDI norms.
4. What is the typical cost of incorporation? Costs range from ₹5,000 to ₹25,000+, depending on company type and professional fees.
Need Help Incorporating Your Company?
Our expert team offers end-to-end support for company incorporation in India — from choosing the right structure to handling documentation, legal formalities, and compliance.
Contact us today to kickstart your business journey in India
#Incorporate a company in India#Company registration process India#Private limited company registration#How to start a company in India#Foreign company registration in India
2 notes
·
View notes
Text
MHT CET Admit Card 2024: How to Download, Details, and Exam Day Guidelines

Introduction
The MHT CET Admit Card 2024 is an essential document for candidates appearing in the Maharashtra Common Entrance Test (MHT CET). Issued by the State Common Entrance Test Cell, Maharashtra, the MHT CET Admit Card serves as an entry pass for candidates to take the examination. Without this document, candidates will not be permitted to enter the exam hall. This article provides a comprehensive guide on the MHT CET Admit Card 2024, including its release date, download procedure, important details, and exam day guidelines.
MHT CET Admit Card 2024 Release
The MHT CET Admit Card 2024 is expected to be released a few weeks before the examination. Candidates who have successfully registered for the MHT CET exam can download their admit card from the official website. The release date for the MHT CET Admit Card will be announced on the official website, so candidates are advised to check regularly for updates.
How to Download MHT CET Admit Card 2024
Downloading the MHT CET Admit Card 2024 is a straightforward process. Follow these simple steps to obtain your admit card:
Visit the official website of MHT CET: cetcell.mahacet.org
Click on the link for MHT CET Admit Card 2024.
Enter your login credentials, such as application number and password.
Verify the details and click on the 'Download Admit Card' button.
Save and print the MHT CET Admit Card 2024 for future reference.
Candidates must ensure that they download and print multiple copies of the MHT CET Admit Card to avoid any last-minute hassles.
Details Mentioned on MHT CET Admit Card 2024
The MHT CET Admit Card 2024 contains crucial details about the candidate and the examination. After downloading, candidates should verify all the information carefully. The following details will be mentioned on the MHT CET Admit Card:
Candidate’s Name
Roll Number
Application Number
Exam Date and Time
Exam Center Address
Candidate’s Photograph and Signature
Exam Day Instructions
If any discrepancies are found, candidates should immediately report them for correction.
Documents Required at the Exam Center
Along with the MHT CET Admit Card 2024, candidates must carry the following documents to the exam center:
A valid photo ID proof (Aadhaar Card, PAN Card, Voter ID, Driving License, or Passport)
A printed copy of the MHT CET Admit Card
Passport-size photographs (as per registration requirements)
Failure to present these documents may result in disqualification from the examination.
Correcting Errors in MHT CET Admit Card 2024
In case of errors or discrepancies in the MHT CET Admit Card 2024, candidates should follow these steps to rectify them:
Contact the official helpline or email the MHT CET authorities.
Provide relevant details such as application number and correct information.
Submit a request for correction before the deadline.
Download the corrected MHT CET Admit Card once the changes are made.
Timely correction of errors ensures a hassle-free experience on the exam day.
Exam Day Guidelines
To avoid any confusion on the exam day, candidates must adhere to the following guidelines:
Arrive at the exam center at least 30 minutes before the scheduled time.
Carry the MHT CET Admit Card 2024 and a valid ID proof.
Follow the dress code mentioned in the official instructions.
Avoid carrying prohibited items such as electronic gadgets, calculators, and study materials.
Follow all COVID-19 guidelines, if applicable.
Strict adherence to these guidelines ensures a smooth examination process.
Conclusion
The MHT CET Admit Card 2024 is a crucial document for candidates appearing for the entrance exam. It is essential to download, verify, and carry the MHT CET Admit Card along with the necessary documents to the exam center. Candidates must stay updated with the official website for important announcements related to the admit card. Following the exam day guidelines will help candidates have a stress-free experience. Make sure to keep multiple copies of the MHT CET Admit Card 2024 and prepare well for the exam
2 notes
·
View notes
Text
BOSSE Best Open School In India
Sikkim’s BOSSE (Board of Open Schooling and Skill Education) is regarded as one of India’s top open schooling boards. It is renowned for its adaptable teaching methodology, which allows students to complete their coursework at their own pace. In accordance with the BOSSE Act of 2020, the Government of Sikkim established the Board of Open Schooling and Skill Education (BOSSE). It is intended to give students who are unable to attend traditional schooling access to flexible and reasonably priced education.
Read More- NTT Full Form (Nursery Teacher Training): Eligibility, Duration, Syllabus, Scope
Principal Aspects of BOSSE
1. The Government of Sikkim established the Recognized Open School Board in accordance with the National Education Policy (NEP) 2020.
2. Flexible Learning System: This system enables students to complete their skill-based senior secondary and secondary (10th) courses at their own pace.
3. Equivalent to Other Boards: BOSSE certificates are approved for competitive tests, government employment, and postsecondary education.
4. Broad Subject Offerings: Provides academic, career, and skill-based courses.
5. Multiple Exam Attempts: Students are free to take tests at their convenience, broken down by subject.
6. Career Opportunities: Accredited for professional courses, government and private employment, and higher education.
Why is BOSSE India’s Best Open School?
Government Recognized Board:
The Sikkim government approves BOSSE (Board of Open Schooling & Skill Education) and follows the National Education Policy (NEP) 2020.
Flexible Learning for All:
BOSSE offers open learning, which is perfect for athletes, working professionals, and students with disabilities. Study from anywhere, at your own pace.
Wide Range of Courses:
BOSSE provides Secondary (Class 10), Senior Secondary (Class 12), and various skill-based courses to help build your future.
Equal to CBSE, ICSE & State Boards:
BOSSE certificates are valid for higher education and jobs. They are treated the same as CBSE, ICSE, and other state board certificates.
Affordable Education:
BOSSE charges lower tuition fees than most private schools. It makes quality education accessible to everyone.
For whom is BOSSE the best option?
• Students who, for personal reasons, were unable to finish their regular education.
• Professionals in the workforce who wish to finish their tenth or twelfth grades.
• Future college attendees who require acknowledged open education.
• Students with disabilities, artists, and athletes require flexible schooling.
Admissions for the April/May 2025 exam session are being accepted by the Board of Open Schooling and Skill Education (BOSSE) as of February 10, 2025. For secondary education (Class 10) and senior secondary education (Class 12), as well as a variety of skill-based courses, BOSSE offers flexible educational programs.
Important Information:
• Deadline for Admission: Applications for the April/May 2025 tests are now being accepted. To prevent late fees, it is best to finish the admissions process as soon as possible.
• Qualifications: Secondary (Class 10): Applicants must be at least 15 years of age. It is not necessary to have any prior formal schooling. Both a self-declaration of basic literacy and a legitimate proof of age are required.
Senior Secondary (Class 12): Candidates must have earned a Class 10 diploma from an accredited school.
• Documents Needed:
For Class 10 Admission:
Proof of Date of Birth (e.g., Birth Certificate, Aadhaar Card)
Previous Academic Records (if any)
Identification Proof (e.g., Passport, Aadhaar Card)
Passport-size Photographs
Proof of Residence
12th open board 2025 – For Class 12 Admission:
Class 10 Certificate from a recognized board
Identification Proof
Passport-size Photographs
Proof of Residence
Admission Process:
Check Eligibility: Ensure you meet the criteria for the desired program.
Fill Application Form: Complete the application form available on the BOSSE official website.
Submit Documents: Upload the required documents during the application process.
Pay Fees: Submit the applicable fees as per the chosen program.
Confirmation: After processing, BOSSE will provide enrollment details.
BOSSE is a flexible study alternative, offering official recognition and broad acceptability for both further education and employment, which makes BOSSE (Board of Open Schooling and Skill Education), Sikkim, one of the top open schools in India. Flexible Learning has enabled many students to learn at their own pace, making it ideal for athletes, working professionals, and those who have dropped out. Valid for Higher Education and jobs with BOSSE certificates are accepted by universities, government jobs, and competitive exams (UPSC, NEET, JEE, SSC, etc.) and are equivalent to those from the CBSE, ICSE, and state boards. The primary objective of BOSSE (Board of Open Schooling and Skill Education) is to promote education and equal opportunities in society.
1 note
·
View note
Text
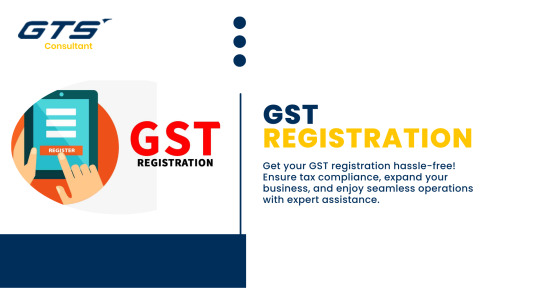
Simplifying GST Registration: A Comprehensive Guide by GTS Consultant
Introduction
With the economy adopting a dogfight-like pace, organisations face the need to become agile enough to grow unhindered. As goods and services tax (GST) is one of the most important reforms in the Indian tax system, it means the inclusion of indirect tax in a single tax. Understanding and filling the GST Registration is the dire straits that every company will have to face because it is to operate within the law and take the advantage. Holding a reputable GTS Consultant AB, with a past period of more than 12 years of combine experience. We are combining our expertise to offer businesses a hassle- free expedition.
In this blog, we will provide an in-depth look at GST registration, its importance, process, benefits, and the expertise GTS Consultant brings to the table.
What is GST Registration?
The identification of goods and services that require a business to be in line with local legislation by obtaining registration under the GST Act is called the process of GST registration. It authorizes the entities to not only collect tax from their clients but also to claim Input Tax Credit (ITC) for the taxes that were paid on their purchases. Depending upon the limit of the prescribed turnover or the activities engaged in, the businesses are obliged to get registered for GST
Who Needs GST Registration?
GST registration is mandatory for:
Businesses with Aggregate Turnover:
₹20 lakhs (₹10 lakhs for special category states): For service providers.
₹40 lakhs (₹20 lakhs for special category states): For goods suppliers.
Interstate Suppliers: Businesses involved in the interstate supply of goods and services.
E-commerce Operators: Platforms facilitating sales of goods and services.
Casual Taxable Persons: Individuals undertaking occasional transactions involving the supply of goods or services.
Input Service Distributors: Businesses distributing input tax credits to their branches.
Documents Required for GST Registration
For the smooth registration process, be sure to gather the following documents:
PAN Card: It's essential for the business and for the owner and owner(s) of the business to have a PAN card.
Proof of Business: This along with partnership deeds, incorporation certificates, as well as, registration certificates.
Identity and Address Proof of Promoters: The Aadhaar card, the passport, or the voter ID should be provided.
Business Address Proof: Lease agreements, contract transit costs, or utility bills.
Bank Account Details: One may use the copy of a canceled cheque, a bank statement, or a passbook copy.
Digital Signature: It is required to be electronically signed prior to online submission.
Authorization Letter: For the account signatories that are authorized to, if applicable.

Benefits of GST Registration
Legal Compliance: Penalty prevention and adherence to Indian tax laws.
Input Tax Credit (ITC): The ITC claim should be able to reduce the total tax burden by this method.
Market Expansion: GST registration will help in the inter-State sales and e-commerce trade.
Credibility: A registered GST number enhances the credibility of a business and makes it more trustworthy in the eyes of their clients.
Ease of Doing Business: One consolidated tax system offers several advantages such as easier filing of tax returns and tax payments.
Why Choose GTS Consultant for GST Registration?
GTS Consultant, located in Bhiwadi, Alwar, Rajasthan is a determined and particular accounting and tax services company dedicated to offering the best services Imagine why the companies would trust us:
Expert Guidance: Our group of skilled public accountants and chartered accountants guarantees a mistake-free and effective GST registration.
Comprehensive Support: From preparation to submission and post-registration help, we include each and every part of it.
Time-Saving: You focus on your operations, we refine your registration business process.
Cost-Effective Solutions: Services of high rank at budget prices.
Client-Centric Approach:We will customize our services so that they match your requirements and bring you the best possible benefits.
Frequently Asked Questions (FAQs)
1. What is the penalty for not registering under GST?
A penalty of the greater of ten percent of the tax due or ten thousand rupees is paid for non-registration. If a taxpayer evades tax on his own volition, DRI is supposed to impose a penalty equal to the tax that was evaded, i.e. 100%
2. Can I voluntarily register for GST?
Yes, turnover not reaching the requirement limit, businesses can choose to register at their own discretion and thus gain great benefits such as ITC and market credibility.
Contact GTS Consultant Today
Certainly, getting through the GST registration process be a hard time, however, if your partner is GTS Consultant, you can rest assured you will be guided thoroughly through the process. Be it a new business venture or an already existing set up, we, the team at GTS Consultant, will get you the best service by ensuring that we register you without pain points.
Reach us at:
Address: TC-321-325, R-Tech Capital Highstreet, Phool Bagh, Bhiwadi, Alwar (RJ) - 301019
Email: [email protected]
Website: Explore our services and resources on our official website GTS Constultant india
2 notes
·
View notes
Text
GST Registration Services in Delhi by SC Bhagat & Co.
Navigating the complex web of taxation in India can be daunting, especially for businesses looking to remain compliant and grow in a competitive market. SC Bhagat & Co., a trusted name in tax consultancy, offers top-notch GST registration services in Delhi to make the process seamless for businesses of all sizes. Whether you are a startup, SME, or a large corporation, GST registration is a crucial step in ensuring your business stays compliant with India's tax laws.
Why GST Registration is Important? The Goods and Services Tax (GST) is a value-added tax levied on the supply of goods and services. GST has simplified the tax structure by replacing numerous indirect taxes like VAT, Service Tax, and Excise Duty. Here are a few reasons why registering for GST is essential:
Legal Compliance: Businesses with an annual turnover of more than ₹40 lakhs (₹20 lakhs for special category states) are legally required to register for GST. Failure to comply can result in heavy penalties. Improved Credibility: GST registration increases your business’s credibility in the eyes of customers, suppliers, and investors. It shows that your business adheres to the laws and operates transparently. Input Tax Credit: Businesses registered under GST can claim input tax credit on purchases, reducing the overall tax burden and increasing profitability. Expansion Opportunities: With GST, businesses can easily expand to other states in India, as the unified tax system eliminates the hassle of complying with multiple state taxes. Why Choose SC Bhagat & Co. for GST Registration Services? As one of Delhi's leading tax consultancy firms, SC Bhagat & Co. is well-versed in the intricacies of GST laws and regulations. Here's why partnering with us for GST registration is the best choice for your business:
Expert Guidance Our team of experienced tax consultants ensures that you understand every step of the GST registration process. From assessing your eligibility to filing the necessary documents, we guide you through it all.
Hassle-Free Process We make GST registration easy by handling all the paperwork and documentation required for the process. You no longer need to worry about missing deadlines or submitting incorrect information.
Quick Turnaround Time is money, and we understand that delays can cost your business. At SC Bhagat & Co., we ensure a quick and smooth registration process, minimizing any disruptions to your business operations.
Post-Registration Support Our services don’t end with registration. We offer ongoing GST compliance support, helping you with return filings, audits, and other GST-related queries to keep your business on the right side of the law.
Affordable Pricing Our GST registration services in Delhi are competitively priced, ensuring you get the best value for your investment. We believe in offering quality services without breaking the bank.
The GST Registration Process Here’s a brief overview of the GST registration process that our team will handle for you:
Determine GST Applicability: Based on your business turnover and nature, we assess whether you are liable to register for GST. Collect Necessary Documents: We help you gather all the required documents like PAN, Aadhaar, business address proof, bank account details, and other necessary information. Submit Application: We submit your GST registration application online and ensure all details are accurate. Obtain GSTIN: After verification, your business will receive a unique GST Identification Number (GSTIN), which will be used for all future GST filings and transactions. Post-Registration Services: Once registered, we continue to support your business with GST return filing, audits, and compliance updates. Documents Required for GST Registration To make the process even smoother, here’s a list of documents you’ll need to register for GST:
PAN Card of the business or owner Aadhaar Card of the authorized signatory Proof of business address (rental agreement, property papers, utility bills) Bank account details (cancelled cheque, bank statement) Business incorporation certificate or partnership deed Digital Signature Certificate (if applicable) Why Delhi Businesses Need GST Registration Delhi is a bustling hub of commerce, and businesses here often engage in inter-state and international trade. GST registration not only simplifies tax compliance but also streamlines business operations by reducing the burden of dealing with multiple state-level taxes. With the right tax consultants, you can easily manage your GST obligations while focusing on growing your business.
Contact SC Bhagat & Co. for Professional GST Services If you’re looking for reliable GST registration services in Delhi, SC Bhagat & Co. is your trusted partner. With years of experience in tax consultancy, we offer tailor-made solutions for businesses across sectors. Let us handle your GST registration and compliance needs so you can focus on what matters most—growing your business.
#gst#accounting firm in delhi#taxation#accounting services#direct tax consultancy services in delhi#tax consultancy services in delhi#taxationservices#remittances
4 notes
·
View notes
Text
Your Complete Guide: How to Apply for the ACCA Course in India
The Association of Chartered Certified Accountants (ACCA) is one of the most sought-after global certifications for aspiring finance and accounting professionals. It is internationally recognized, making it a top choice for students looking to build a successful career in finance, accounting, and auditing. If you're in India and are interested in pursuing the ACCA course, here’s a step-by-step guide on how to apply.
Step 1: Check Eligibility Criteria
Before applying, ensure that you meet the eligibility requirements for the ACCA course. Typically, candidates who have completed their 10+2 with a minimum of 65% in Mathematics/Accounts and English and 50% in other subjects are eligible. Graduates in commerce or related fields may also be eligible for exemptions from some exams, depending on the university they attended.
Step 2: Register for ACCA
To apply for the ACCA course in India, you first need to register on the official ACCA Global website. The registration process is straightforward:
Visit the ACCA official website.
Navigate to the ‘Apply Now’ section and fill out the registration form.
You will need to provide personal details, educational qualifications, and other relevant information.
Once the form is submitted, you will receive a confirmation email with details of your ACCA student account.
Step 3: Submit Required Documents
To complete your registration, you will need to upload scanned copies of the following documents:
Proof of Identity: Passport, Aadhaar card, or any other government-approved ID.
Educational Certificates: Marksheets and certificates from your 10+2 and graduation (if applicable).
Passport-sized Photograph: A recent digital photo.
Make sure all documents are clear and meet the specifications mentioned on the ACCA website.
Step 4: Pay the Registration Fee
After submitting your documents, the next step is to pay the ACCA registration fee. The fee can be paid online through a secure payment gateway on the ACCA website using a credit/debit card or other accepted payment methods. Once payment is made, you will receive an official confirmation of your enrollment in the ACCA program.
Step 5: Start Your ACCA Journey
After completing your registration and fee payment, you can access your ACCA account, where you’ll find details about the exam schedule, study resources, and more. You can then plan your study schedule and register for the ACCA exams.
NorthStar Academy: The Best Option for ACCA Coaching
Choosing the right coaching institute is crucial to your success in the ACCA course. NorthStar Academy is the best option for ACCA coaching in India, offering comprehensive study materials, expert faculty, and flexible learning schedules. With a proven track record of success, NorthStar Academy ensures that students are well-prepared for their ACCA exams and can confidently pursue their career in global finance.
In conclusion, applying for the ACCA course in India is a simple, step-by-step process. With the guidance and support of NorthStar Academy, you can ensure a smooth application process and be on your way to achieving your ACCA certification.
2 notes
·
View notes
Text
Get the Financial Boost You Need: How an Upwards Personal Loan Can Help You Today
In today’s fast-paced world, financial challenges can arise without warning. Whether it’s a medical emergency, sudden travel plan, education expenses, or just the need for extra cash to tide over the month, getting timely help is crucial. That’s where an Upwards personal loan becomes a reliable and efficient solution. With a quick process and a customer-centric approach, you can easily apply loan via Upwards without the long wait or piles of paperwork.
If you’re on the lookout for an instant loan by Upwards, this guide covers everything you need to know — from eligibility and documentation to the benefits and tips for a smooth Upwards loan application process.
What Makes an Upwards Personal Loan Stand Out?
Unlike traditional loans that often involve extensive checks and prolonged approvals, the Upwards personal loan is crafted for modern-day borrowers. It offers hassle-free access to credit with minimum documentation and a tech-enabled platform that puts you in control.
When you apply loan via Upwards, you are stepping into a borrowing experience that is digital, transparent, and user-friendly. The entire process — from checking eligibility to disbursal — is streamlined so that you can get funds when you need them the most.
Benefits of Choosing an Instant Loan by Upwards
Here’s why thousands of borrowers are choosing an instant loan by Upwards over conventional lending routes:
1. Fast Approval and Disbursal
With Upwards, speed is everything. Once your Upwards loan application is approved, the funds are transferred directly to your bank account within 24-48 hours, sometimes even sooner.
2. 100% Online Process
There’s no need to visit a branch or handle physical paperwork. The Upwards personal loan can be availed entirely online, from your smartphone or computer.
3. Flexible Loan Amounts
Whether you need ₹20,000 or ₹2,00,000, you can apply loan via Upwards for an amount that matches your requirement, with repayment tenures that range from a few months to a couple of years.
4. No Collateral Required
One of the biggest advantages of an instant loan by Upwards is that it is unsecured — no need to pledge your assets or worry about guarantors.
Who Can Apply for an Upwards Personal Loan?
The eligibility for an Upwards personal loan is simple and inclusive. Salaried individuals working in recognized companies across Tier 1, 2, and 3 cities in India are eligible. The platform primarily focuses on middle-income earners, making it accessible to a large population.
Typical criteria include:
Minimum age of 21 years
Monthly income of ₹15,000 or above
Stable employment for at least 6 months
A valid bank account and PAN card
If you meet these requirements, you can easily apply loan via Upwards within minutes.
How to Complete the Upwards Loan Application
Filling out the Upwards loan application is designed to be simple, user-friendly, and quick. Here’s how the step-by-step process works:
Visit the Upwards platform or download the app.
Register using your mobile number and verify with OTP.
Enter basic personal details like name, address, income, employer, and PAN card.
Upload documents digitally — no physical submission needed.
Get instant approval status based on your profile.
Receive funds in your account upon successful verification.
The process to apply loan via Upwards can be completed in under 15 minutes, saving you time and effort.
Documents Required for Instant Loan by Upwards
While the Upwards personal loan offers flexibility, a few documents are necessary to verify your identity and income:
PAN Card
Aadhaar Card or Voter ID
Salary slips (last 3 months)
Bank statement (last 3-6 months)
Employment details or offer letter
These documents are uploaded securely, and the platform uses encryption to ensure your data remains private and protected during the Upwards loan application process.
Real-World Use Cases of an Upwards Personal Loan
Whether you’re facing an emergency or planning something exciting, an instant loan by Upwards can be the solution. Here are some common scenarios where borrowers have benefited:
1. Medical Emergencies
In critical moments, there’s no time to arrange finances. Many users apply loan via Upwards for hospital bills, surgeries, or unexpected medical costs.
2. Wedding or Celebration Costs
Indian weddings are expensive, and not everyone has savings ready. An Upwards personal loan can cover venue booking, catering, and decoration expenses.
3. Debt Consolidation
Juggling multiple debts? Streamline your finances by taking a single instant loan by Upwards to pay off other liabilities and reduce your stress.
4. Home Renovation
Thinking of giving your home a makeover? From furniture to paint and new appliances, you can apply loan via Upwards to fund your dream home update.
Tips for a Successful Upwards Loan Application
To maximize your chances of approval and get the best terms on your Upwards personal loan, keep the following tips in mind:
Maintain a good credit score: A score above 700 improves your chances of approval and may lead to lower interest rates.
Avoid multiple applications: Sending loan requests to different lenders can negatively affect your credit profile.
Provide accurate details: Ensure your personal and financial data is correct to avoid delays.
Use the loan responsibly: Always borrow what you can repay comfortably.
By preparing ahead, your Upwards loan application is more likely to be approved quickly and on favorable terms.
Interest Rates and Repayment Terms
Interest rates on an Upwards personal loan depend on various factors like credit score, income, and city of residence. Typically, rates range between 1.5% to 2.5% per month. Repayment is done in EMIs, and you can choose a tenure that suits your financial comfort.
Always read the terms before you apply loan via Upwards to understand any processing fees or prepayment charges involved.
What Sets Upwards Apart From Other Lenders?
With a growing number of digital lenders in the market, what makes the Upwards personal loan so unique?
Focus on Middle-Income Borrowers: Upwards specializes in serving people who may not have access to traditional bank loans.
High Approval Rates: Thanks to their advanced credit assessment model, the approval rates for an Upwards loan application are higher than many competitors.
Excellent Customer Support: Users often praise the support team for resolving queries quickly and effectively.
Transparent Policies: No hidden fees or vague terms. When you apply loan via Upwards, you know exactly what you’re signing up for.
Frequently Asked Questions
Q1: How quickly can I receive funds after the Upwards loan application is approved?
Most users receive the amount within 24 to 48 hours after document verification.
Q2: Can I prepay my Upwards personal loan without penalties?
Yes, Upwards allows prepayment. However, check the loan agreement for any applicable charges or conditions.
Q3: Is there a mobile app to apply loan via Upwards?
Absolutely. The Upwards app is available on both Android and iOS, making the Upwards loan application process even more convenient.
Q4: What if my application is rejected?
If your Upwards loan application is rejected, you can reapply after improving your credit score or income profile. The platform may also suggest alternatives.
Final Thoughts
The Upwards personal loan is a modern solution for those who need fast, reliable financial support without the bureaucratic hassles of traditional lenders. Whether it’s a sudden expense or a planned purchase, you can confidently apply loan via Upwards and get the cash you need in no time.
With a simple application process, digital documentation, and flexible repayment options, an instant loan by Upwards can be the financial lifeline you’re looking for. So, the next time life throws a curveball, don’t stress — just open your phone and start your Upwards loan application journey.
#personal loan#loan apps#fincrif#nbfc personal loan#personal loan online#bank#personal loans#loan services#finance#personal laon#Upwards personal loan#Upwards loan application#Instant loan by Upwards#Apply loan via Upwards#Upwards online loan#Upwards loan for salaried#Instant approval Upwards loan#Quick personal loan Upwards#Best loan app Upwards#Digital personal loan Upwards#Apply for Upwards personal loan#Instant cash loan Upwards#Paperless loan by Upwards#Low interest personal loan Upwards#Fast disbursal Upwards loan#Personal loan without collateral Upwards#Personal loan eligibility Upwards#Upwards loan EMI options#Secure personal loan Upwards#Trusted personal loan app Upwards
2 notes
·
View notes
Text

Steps to Legally Transfer Property to a Wife After Husband’s Demise: A Complete Guide
Losing a loved one is always difficult, and dealing with legal formalities in the aftermath can be overwhelming. One of the key concerns for a surviving spouse is the transfer of property after the husband's demise. In this comprehensive guide, we will explore the necessary steps to legally transfer property to a wife, preparations before property transfer, essential documents, and how to navigate the legal process.
Also Read: Wife's Property Rights After Husband's Death
Preparations Before Property Transfer
Before initiating the process of transferring property after a husband's demise, certain preparations are necessary to ensure the process goes smoothly. Proper preparation can prevent delays and avoid disputes among legal heirs.
Gather All Relevant Documents
Start by collecting all the relevant documents that will be needed during the transfer process. These include:
The husband’s death certificate.
The original property documents (sale deed, title deed, etc.).
Identification proofs of the wife and other legal heirs.
Marriage certificate to prove the wife’s relationship with the deceased.
Any existing will, if applicable.
Review Debts and Liabilities
Check if the property is free from encumbrances or loans. If the property is mortgaged, you may need to settle the outstanding loan or arrange for the loan to be transferred in the wife’s name.
Understand the Type of Property
Determine whether the property is self-acquired or ancestral, as different laws may apply. Also, check if the property is jointly owned, as this can simplify the transfer process.
Essential Documents for Property Transfer
To ensure a smooth property transfer, you will need to submit a set of important documents to the authorities. Here is a list of essential documents required for transferring property to the wife:
Death Certificate: A copy of the husband's death certificate issued by the local municipal authority.
Legal Heir Certificate: If there is no will, this certificate identifies the legal heirs of the deceased.
Succession Certificate: Required for movable assets like bank accounts and shares.
Will (if available): If the husband left a will, submit a copy along with the probate order.
Marriage Certificate: To establish the wife’s legal relationship with the deceased.
Property Ownership Documents: The title deed or sale deed of the property.
Identification Proofs: Aadhaar card, PAN card, or voter ID of the wife and other legal heirs.
Tips for Organizing Your Estate Affairs
Proper estate planning can help reduce confusion and ensure the smooth transfer of assets. Here are a few tips:
Create a Will: A well-drafted will can simplify the property transfer process for surviving family members.
Update Legal Documents: Regularly update ownership records, nominee details, and any outstanding loans.
Discuss with Family: Make sure your loved ones are aware of your property and estate arrangements.
Seek Legal Advice: Consult with a lawyer to ensure that your estate planning is legally sound.
The Legal Process of Property Transfer
The legal process of property transfer depends on whether the deceased left behind a will or not. Let's explore both scenarios.
If the Husband Left a Will:
File for Probate: Probate is the legal process through which a will is authenticated by the court. This process involves submitting the will to the district or high court, depending on the value of the property.
Executor Transfers Property: Once the probate is granted, the executor named in the will transfers the property to the wife.
Mutation of Property: The wife needs to apply for the mutation of property in her name by submitting the probate order and relevant documents to the local municipal authority.
If There Is No Will (Intestate Succession):
Obtain Legal Heir Certificate: The wife will need to apply for a Legal Heir Certificate to establish her legal right to the property.
Apply for Succession Certificate (for Movable Property): In cases involving movable assets, the wife must obtain a Succession Certificate from the court.
Mutate the Property: Once the legal heir certificate is obtained, the wife can apply for the mutation of the property in her name.
How to Initiate the Process of Transfer
To initiate the process of transferring property after the husband’s demise, follow these steps:
Get the Death Certificate: Obtain the husband’s death certificate from the local municipal authority.
File for Probate (if there is a will): Submit the will to the court to get it authenticated through probate.
Apply for Legal Heir Certificate: If there is no will, submit an application to the local revenue or civil court to obtain the Legal Heir Certificate.
Submit Necessary Documents for Mutation: Provide all required documents to the land revenue office or municipal authority to mutate the property in the wife’s name.
Probate and Its Role in Property Transfer
Probate is the judicial process of validating a will in court. It is required to ensure that the will is legally binding and that the executor can proceed with the transfer of property. Probate is necessary in some states, such as Maharashtra and West Bengal, even if the will is undisputed. The process involves:
Filing the will in court.
Verifying the will's authenticity.
Granting the executor the right to distribute the deceased's assets.
Factors Affecting Property Transfer
Several factors can affect the smooth transfer of property:
Existence of a Will: The presence of a valid will simplifies the process.
Legal Disputes: Disputes between legal heirs can delay the transfer.
Outstanding Loans: If the property has a mortgage, the loan must be settled before the transfer.
Debts and Liabilities Impacting Transfer
Before transferring property, it’s crucial to settle any outstanding debts or liabilities on the property, such as:
Home Loans or Mortgages: The wife must either repay the loan or transfer it to her name.
Unpaid Taxes: Property taxes or other dues must be cleared before the property can be transferred.
Joint Ownership and Rights of Survivorship
If the property was jointly owned by the husband and wife, the process of transfer is simpler. In such cases:
The wife becomes the sole owner of the property automatically upon the husband’s death, thanks to the right of survivorship.
The only legal requirement is to mutate the property records to reflect the change in ownership.
Step-by-Step Guide to Transfer Property
Here is a quick step-by-step guide to transferring property:
Obtain the death certificate.
Gather all property and legal documents.
File for probate (if necessary).
Apply for Legal Heir or Succession Certificate (if no will exists).
Submit documents for mutation to transfer property ownership.
How to File the Deceased’s Will
To file the deceased's will, follow these steps:
Locate the Will: Ensure that you have the original copy of the will.
Submit to Court for Probate: File an application with the local court to initiate the probate process.
Provide Executor Information: Include details about the executor named in the will.
Navigating Inheritance Laws and Regulations
India has different inheritance laws based on religion. Understanding these laws is crucial to determining how property is distributed:
Hindu Succession Act, 1956: Governs Hindus, Buddhists, Jains, and Sikhs.
Muslim Personal Law (Shariat): Governs Muslims.
Indian Succession Act, 1925: Applies to Christians, Parsis, and Jews.
Tax Implications and Considerations
When property is transferred, tax implications must be considered:
Inheritance Tax: India does not have an inheritance tax, but stamp duty and capital gains tax may apply.
Capital Gains Tax: If the wife decides to sell the inherited property, she may be liable for capital gains tax on the appreciation of the property value.
Understanding Estate Taxes and Exemptions
While India does not levy an estate tax, inheriting property may still involve taxes such as stamp duty and registration fees during the transfer process. These taxes vary depending on the state and property value.
Tips for Minimizing Tax Burden on Inherited Property
To minimize the tax burden on inherited property:
Consider holding onto the property for a longer period to reduce capital gains tax.
Explore exemptions under the Income Tax Act, such as Section 54, for reinvestment in another property.
Common Challenges and Solutions
a) Disputes Among Heirs
Disagreements among legal heirs can delay the property transfer process. If disputes arise, the wife may need to file a partition suit or negotiate a settlement.
b) Missing Documents
If property documents are missing, apply for certified copies from the land registry office or municipal authority.
Dispute Resolution Among Heirs
If disputes arise among heirs, mediation or legal intervention may be required. Courts can intervene to ensure fair distribution under the applicable succession laws.
Avoiding Delays in Property Transfer
To avoid delays, ensure that all necessary documents are in order and that no outstanding debts or legal disputes exist. Engaging a lawyer early in the process can help smoothen the procedure.
Conclusion
Transferring property to a wife after a husband's demise can be a complex and emotional process, but by following the correct legal procedures and preparing the necessary documents, the process can be made smoother. Whether a will exists or not, understanding the legal framework, tax implications, and the steps involved will help ensure a seamless transfer of ownership, allowing the wife to secure her rightful inheritance with ease. If in doubt, consulting with a legal expert can provide additional clarity and assistance.
#Transfer Property from Husband to Wife After Death#legal services#legal advice#family law#legalhelp#legal consultation
2 notes
·
View notes
Text
Loan against property for purchasing agricultural land

Purchasing agricultural land is a significant investment for farmers, agribusiness entrepreneurs, or individuals looking to diversify their assets. However, the high costs associated with acquiring agricultural land often necessitate external financial assistance. One of the most effective financing options available is a loan against property (LAP). This article delves into the concept, benefits, and considerations of availing a loan against property for purchasing agricultural land.
What is a Loan Against Property?
A loan against property is a secured loan where individuals or businesses pledge their property as collateral to obtain funds from financial institutions. The pledged property can be residential, commercial, or industrial. The loan amount sanctioned typically depends on the market value of the property and the borrower's repayment capacity.
Key Features of LAP for Agricultural Land Purchase
High Loan Amount: Since LAP is a secured loan, lenders often approve higher loan amounts, enabling borrowers to finance significant agricultural land purchases.
Flexible Tenure: LAP offers repayment tenures ranging from 5 to 20 years, making it convenient for borrowers to plan their finances.
Lower Interest Rates: Compared to unsecured loans, LAP comes with relatively lower interest rates, making it an affordable financing option.
Multipurpose Use: While LAP can be availed for various purposes, using it to invest in agricultural land is a common and beneficial application.
Eligibility Criteria
Eligibility for LAP varies across financial institutions. However, some common criteria include:
Ownership of Property: The applicant must own property that can be pledged as collateral.
Income Stability: Regular income from employment, business, or other sources is essential to prove repayment capacity.
Credit Score: A good credit history increases the chances of loan approval and favorable terms.
Documents Required
Here are some essential documents typically required to apply for LAP:
Proof of Identity: Aadhaar, PAN card, or passport.
Proof of Address: Utility bills, Aadhaar, or ration card.
Income Proof: Salary slips, bank statements, or Income Tax Returns (ITR).
Property Documents: Title deed, property valuation report, and no-objection certificate (NOC).
Benefits of Using LAP for Agricultural Land Purchase
Access to Larger Funds: With higher loan amounts, borrowers can invest in prime agricultural land without straining their finances.
Investment Opportunity: Agricultural land is a long-term asset with the potential for appreciation, making it a sound investment choice.
Tax Benefits: In some cases, the interest paid on LAP used for agricultural purposes may qualify for tax benefits under specific provisions of the Income Tax Act.
Retaining Ownership: Borrowers retain ownership and usage rights of the pledged property during the loan tenure.
Points to Consider Before Availing LAP
Loan-to-Value Ratio (LTV): Financial institutions usually offer 50-75% of the property’s market value as the loan amount.
Interest Rate Variations: Compare interest rates from multiple lenders to secure the best deal.
Prepayment Charges: Check for any penalties on prepayment or foreclosure of the loan.
Legal Restrictions: Ensure there are no legal constraints or zoning laws affecting the agricultural land you intend to purchase.
Repayment Discipline: Defaulting on repayments can lead to the loss of the pledged property.
Conclusion
Apply loan against property is a viable financing option for purchasing agricultural land, offering substantial funds at affordable interest rates. However, potential borrowers must conduct thorough research, compare lenders, and evaluate their financial capabilities before committing to a LAP. By doing so, they can leverage this financial tool to make a significant investment in agricultural land, potentially reaping long-term benefits.
1 note
·
View note
Text
Demystifying the Process of GST Registration
Navigating the world of taxation can often feel like traversing a labyrinth, especially for business owners. However, understanding and complying with the Goods and Services Tax (GST) registration process is crucial for businesses operating in India. In this guide, we'll unravel the complexities surrounding GST registration, making it easy to grasp and implement for your business needs.
1. Introduction to GST Registration
Before we delve into the intricacies of the registration process, let's grasp the fundamentals of GST registration. GST, introduced in India in 2017, aims to streamline the taxation system by amalgamating various indirect taxes. GST registration is the process by which businesses register themselves under this unified tax regime.
2. Importance of GST Registration
2.1 Compliance with Tax Laws
First and foremost, GST registration is a legal requirement for businesses whose turnover exceeds the prescribed threshold. By registering for GST, businesses ensure compliance with tax laws, avoiding penalties and legal consequences.
2.2 Access to Input Tax Credit
One of the significant benefits of GST registration is the ability to claim Input Tax Credit (ITC). Registered businesses can offset the taxes paid on inputs against the taxes collected on outputs, reducing their overall tax liability.
2.3 Legitimacy in Business Operations
GST registration lends credibility and legitimacy to business operations. It provides a unique identification number, known as the GSTIN, which is essential for conducting business transactions seamlessly.
3. Understanding the GST Registration Process
3.1 Eligibility Criteria
Before initiating the registration process, businesses must determine their eligibility for GST registration. Generally, businesses with an annual turnover exceeding the prescribed threshold are required to register for GST.
3.2 Documentation Required
To complete the GST registration process, businesses need to provide certain documents and information, including PAN card, Aadhaar card, proof of business ownership, bank account details, and address proof.
3.3 Step-by-Step Registration Procedure
The registration process involves several steps, including online application submission, verification of documents, and issuance of the GSTIN. Businesses can register for GST through the GST portal by following a simple and user-friendly registration interface.
4. Conclusion
In conclusion, GST registration is a critical aspect of tax compliance for businesses operating in India. By understanding the importance and intricacies of the registration process, businesses can ensure legal compliance, access input tax credit, and foster legitimacy in their business operations.

Follow Our FB Page: https://www.facebook.com/bizadviseconsultancy/
2 notes
·
View notes
Text

In order to operate a toy drone in India, you must:
A Unique Identification Number (UIN) will be assigned to your drone once it has been registered with the Directorate General of Civil Aviation (DGCA). All drones, with the exception of those in the nano category, which weigh less than 250 grams, are obliged to have this.
Obtain approval before taking to the air using the Digital Sky Platform. Except for flights in the nano category flown below 50 feet and flights in the micro category flown below 200 feet, this is a requirement for all flights.
The following steps will help you register your drone and get a UIN:
Create an account on the DGCA website.
Choose "Register Drone" from the drop-down menu after clicking the "Drone Registration" tab.
Fill in the necessary information, including your contact information, the characteristics of the drone, and its intended application.
Upload a copy of your passport or Aadhaar card.
Make the registration payment.
You'll get a UIN when registering your drone. This UIN must be attached to your drone before you may fly it.
You must: in order to get approval to fly through the Digital Sky Platform.
Make an account on the Digital Sky Platform website.
The "Hobby Flight" option can be found by clicking the "Apply for Flight Permission" page.
Include the necessary information, such as your location and flight schedule.
Send your application in.
Your application will be evaluated by the Digital Sky Platform, and if your flight plan satisfies all safety requirements, you will be given permission to fly.
Keep in mind that these are merely the general authorizations needed to fly a toy drone in India. Depending on the particular drone you're using and the area where you're flying it, there can be additional requirements. It is essential to continually check the DGCA website for the most recent information on drone laws.
1 note
·
View note