#Tape and Needle and Scissors and Thread And
Explore tagged Tumblr posts
Text
Reading Books: Project Gutenberg for books with no copyrights, Internet Archive for a lot of books published more than 5 years ago, and second-hand bookstores can carry inexpensive gems of stories. When all else fails, when it's out-of-print, not in any stores or libraries, 🏴☠️. I'm not too familiar with audio books, but I know there are some floating around YouTube, and of course, many fiction podcasts are free.
Plants: Many people will let you take cuttings if you ask, especially if they're pruning. Plant containers can be made from large enough cans from groceries that you may already have or can ask from friends.
Drawing: Paper - any paper, even cheap notebook paper - and any pen or pencil will do. Research about natural dyes so you can produce colors from plants, kitchen scraps, and boiling water. Learn about lake pigments (bottle, baking soda, alum, coffee filter/cloth) so you can make them last longer. Make a quill pen, or a dip pen from wood or straw. Or paint with mud and a stick you picked up outside. I'm not a cop.
Writing: Pen and paper. Word document. Notes app.
Bookbinding: Paper, needle, thread, something that can punch holes (e.g. a nail). It doesn't even need to use crispy clean paper or have a fancy hard cover. Look at junk journaling and use junk you're going to throw away anyway.
Journaling: Cheap notebook, a pen, and your life. Tape or glue if you'd like to insert things like tickets or photos.
Scrapbooking: See bookbinding and junk journaling once more. Scissors, adhesives, a pen.
Sudoku: Lots of free sites online.
Cooking: You already have your groceries.
Photography: If you have a phone with a camera, you're good. There's enough tutorials online on how to make it work. And you don't need to reach professional-level quality - if it looks good for you then it's good.
Learn new things: languages, how to ID plants, bugs, and birds, coding, improving your penmanship, touch-typing. Make notes of things in your life in a cheap notebook - learn how to do visual representations of information, such as mind maps. Learn how to sew via YouTube tutorials, grab a needle and cheap thread, and mend worn clothes or turn cheap bargain bin pillowcases into an eccentric outfit or bag.
Every fun post on here that encourages people to have hobbies/be creative always gets an avalanche of "Some people are poor Karen" type reactions and respectfully, you're all super annoying. I've never lived above the poverty line and this is a list of hobbies I have that were cheap or entirely free:
Read books: Go to the library, lend a book from a friend
knitting, crochet, embroidery: Get some needles from the bargan store and ask around, people have leftovers from projects they'll happily give you. Thrift stores also often carry leftover fabric and other supplies. And talk about your hobby loud enough and an old lady will show up and gift you their whole collection, because there are way more old ladies with a closet full of wool than there are grandchildren who want to take up the hobby.
Origami/paper crafts: get some scrap paper and scissors, watch a youtube tutorial
walking: put on shoes open door
pilates/yoga/etc: get a mat or just use your carpet, watch a youtube tutorial
Houseplants: look online for people that swap plant cuttings. There are always people giving out stuff for free to get you started. If you're nice enough you'll probably get extra
gardening: You're gonna need some space for this one of course but you can just play around with seeds and cuttings from your grocery vegetables.
aquarium keeping is a bit of an obscure one but I got most of my stuff second hand for cheap or free and now I have a few thousand euro worth of material and plants.
drawing/art: You get very far just playing with bargan store materials. I did my entire art degree with mostly those.
writing: Rotate a cow in your head for free
cooking: again one you can make very expensive, but there are many budget recipes online for free. Look for African or Asian shops to get good rice and cheap spices.
Join a non-profit: Cities will have creative organisations who let you use woodworking machines or screen presses or laser cutters or 3D printers etc etc etc for a small fee. Some libraries also lend out materials.
candle making: You need some molds (cheap), wick, two old cooking pots for au bain marie melting and a ton of scrap candles, ask people to keep them aside for you.
a herbarium, flower pressing: Leaves are free, wildflowers too, ask if you can take from peoples gardens.
puzzles: thrift stores, your grandma probably
Citizen science: look for projects in your area or get the iNaturalist app
And lastly and most importantly: Share! Share your supllies, share your knowledge. Surround yourself with other creative people and before you know it someone will give you a pot of homemade jam and when you want to paint your kabinet someone will have leftover paint in just the right color and you can give them a homemade candle in return and everyone is having fun and building skills and friendships and not a cent is exchanged. We have always lived like this, it's what humans are build to do.
And all of it sure beats sitting behind a computer going "No stranger, I refuse to let myself have a good time."
Anyway I'm logging off bc I'm making some badges for a friend who cooked for me and then I'm going to fix some holes in everyones clothes.
#there is no shortage of things to do even without money#sol speaks#like if you can regularly access tumblr a LOT of other things are open
20K notes
·
View notes
Note
Do you carry any other fun and whimsical things in your purse besides the brass measuring tools? can we see them??
"What do I carry in my purse" is actually a really long answer! Not very whimsical though.

I don't carry a very large purse but it is actually jam-packed with stuff. Obviously the usual—credit cards, ID, badge, money, car keys.
But the rest is taken up by a tidy little lineup of things that are useless 99% of the time and crucial 1% of the time. Some of it (most of the top row) floats loose in my purse; most of the bottom row packs into the little bag there. My sketchbook du jour is usually carried separately.

So: top row:
Sketchbook and the little brass drafting tools, which I carry inside the sketchbook, and also a little metal ruler that has honestly become redundant.
Then, a bunch of pens and marking tools: A ballpoint, some pencils, paint pen, permanent marker, white gel pens, white paint pen, white mechanical pencil, and eraser. This varies depending on what I'm working on and what I've absently left in the wrong place.
Some lip gloss, hand sanitizer, concealer, chapstick, nail polish, and heavy lotion (clay dries your hands out SO hard) and a hair pin. Usually there are several sword shaped hair pins also; I took them out while working on a project and they'll migrate back when I'm done.
Headphones, a couple knives, and a tiny foldable gerber multitool. A little flat card multitool, with a heavy needed shoved into its case also, and a pack of clear sticky notes.
A two-port USB brick; I usually also carry a power bank but it's charging in the car right now.
My change purse and my wallet, which is just the IDs; my actual cards are in a pocket in the purse that also has a little nail kit. My car keys, which have a bottle opener and a combined window breaker-seatbelt cutter, a 64 gig USB key, and keys to my studio, house, garage, and the courthouse.

The bag itself is metal mesh, which means it’s durable but also somewhat see-thru.
That little tin is a tiny first aid kit, which probably I should have unpacked, but it's got bandaids, bandages, skin tape, blistex; antiseptic, itch, and burn cream; eyedrops; several small packets of common meds (tylenol, advil, etc) and a little folded chart for meds, since I’m terrible at remembering which can be taken with which; a breath mask. There's also a razor and some safety pins tucked in there. It's held shut with a hair tie.
There's some single-use earplugs and some zip ties, some more eye drops, and a tiny vial of liquid breath mint.
A deck of mini playing cards.
A tiny sewing kit--needles, pins, earring backs and pin backs, some heavy black thread on a bobbin, a measuring tape, and some foldable scissors. There's a couple glasses screws in there from before I had Lasik.
Another little multitool, some binder clips, a tiny level, a 120 gig USB, and some bobby pins.
Matches and a lighter, a flat pen, and coils of 20 lb fishing line, picture wire, and monofilament, as well as two short USB cords.
A tide pen and a glasses screwdriver.
The bag contains cardboard strips with several yards of tape: Electrical, packing, scotch, duct, gaff, and skin tape. Superglue. A spare piece of heavy cardboard to use as a cutting surface if needed.
An Xacto knife with the blade reversed (learned my lesson after jamming my hand into my bag and taking a chunk out of a finger when a springloaded switchblade opened itself) and spare blades.
Some more clear sticky notes and a tiny lined notebook for when I just need scratch paper.


My car actually includes two slightly different emergency bags—one for regular roadside emergencies (including emergencies in blizzard weather) and one for camping emergencies, and a bit more of an extensive first aid kit.
1K notes
·
View notes
Note
Okay I have a request if you could do it, btw I love your bat bros writings
What about how would batboys be if the reader was a tailor?
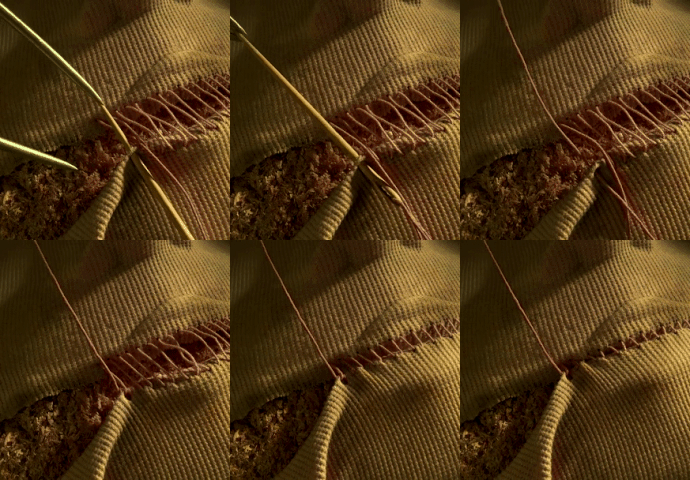
You're Their Seamstress/Tailor (Batboys)
------------------------------------------------
Dick: You had bent over, and since Dick was feeling cheeky (pun intended), he swatted your ass.
"I will choke the life out of you with my tailor tape, Grayson." You smacked his arm with a laugh and a smile.
"Hey, you do it to me all the time and it's not my fault you tailor your pants so well to your body."
You roll your eyes before measuring his hips, having to slightly press your face to his stomach.
"Hey there, do I gotta pay extra or does that come included in my fitting?" He remarks, being a smartass as per usual.
You finished up measuring him and started working on his suit, at some point while watching tv he passed out on your couch. You grabbed a blanket and covered him up before returning to your work tailoring his suit. He had a gala to go to and navy really brought out his blue eyes especially when paired with a baby blue tie. The color combination was so simple but it always made him look so handsome.
"God- Fuckin- Shit! Fuck me!" He had slept for a few hours but woke suddenly when he heard you cuss.
"You okay?" He asked with concern as he pushed the blanket off him and got to his feet before quickly making his way over to you.
"Yeah, I- I'm okay, I just sliced my finger open with the scissors." You got up and rushed over to the sink and let the cold water run over it. Dick was quick to grab the first aid kit to bandage your finger.
"It's alright fingers tend to bleed a lot." He said as he noticed the worry and pain on your face. Dick opened the triple antibiotic that has pain relief, thankfully. He dried your finger, put the antibiotic on it and then the little Spongebob bandaids youd picked out which made you smile. You had always thought it was worth the extra couple cents to get themed bandaids cause they gave a smidge of dopamine as well as protection for your finger. Having Star Wars, Hello Kitty or Spongebob bandaids did a lot to help you and others feel a little bit better after an accident.
Dick kissed your finger over the bandaid as he looked into your eyes. "My- My mom always said if you kiss it, it'll heal quicker. I know it's bullshit but little things like that help a lot when accidents happen." Remembering how his mom would kiss his boo boos when he was a kid, he didnt talk about her much so when he brought her up it was heart-warming to know he trusted you with that.
"Thats why I get the themed bandaids! Its the little trivial things that mean a lot." You smiled as you were so glad he had the a smiliar outlook as you.
--------------------------------------------------
Jason: It was very unsurprising when it came to how rough Jason was on everything from his guns to his jacket, to his boots so it was almost weekly that you were fixing something of his.
"Jay, how do you even tear this area?" You said as you held up the jacket that had definitely seen better days, a massive hole in the upper bicep.
"Easy, I've been working out." Jason says being a complete smartass, which you suppose is a good thing, considering if he wasn't, you would know there was something wrong with him.
"Hardy Har Har." Giving him an annoyed smirk flipping him off before grabbing your needle and thread. Unfortunately, a lot of the things that Jason needed patched up had to be hand-sewn, and so you painstakingly spent hours fixing any little holes he had.
"Angel, you know that's not nice." He laughs as he quickly quips back at you, sitting in the desk chair next to you, spinning around.
"I know, that's why I said it." You grabbed his chair and stopped him from spinning. "With the damage being the way it is, I'm most likely going to have to hold on to this for a couple of days, but I did work on something for you."
You put the jacket down so you could get back to it later and got up from your seat. Expecting him to get up and follow, but of course, him being him, he decided that it was a good idea to roll the desk chair across the floor behind you. You rolled your eyes and opened the cabinet to a fairly badass and upgraded suit.
"I worked with Lucius to improve a few things; the fibers are thicker but still breathable and light. Kneepads, chest plate, bracers and the helmet is the same design as before, but we added a better filtration system and a heads-up display on the helmet so you can track blood and run an analysis of whatever you need. The cargo pants are more tear resistant, the jackets new material but the old design." You ran him through all the little bits and pieces of the upgrades, and he almost looked in shock.
"You just did this? Like I didn't even need to ask you, you just did... I have been wondering about a new suit." The smirk that always seemed to lace his tone seemed to slip, now laced with appreciation. "How do you know I needed all this stuff?"
"Well, I talked with Bruce and Barbara on exactly what you needed technology wise and then I spoke to Lucius about the way you fight and things that are tearing and such. Considering he's done so much work with Bruce I figured he would know best and we got it figured out. If you end up not liking something let me know and we'll tweak it as needed."
"Holy shit, this is just..." He stands up from the desk chair and pushes it away from him a little bit. The wheels roll against the tile of the floor as he gazes at his new suit. "No, Angel. I have a feeling this is gonna be amazing." He grabs youand gives you a big hug, In this moment he felt so cared for and so appreciated as he squeezed you a little. "You're a goddamn genius, Angel."
----------------------------------------------------
Bruce: You worked with Lucius on Bruce's suit, working with him on design and functionality. You and Bruce were arguing, the two materials he wanted to pair would make his suit heavy in the rain and he wasn't listening.
"You know what, do it your way, Bruce. Cause you're always right." You stared into his ocean blue eyes with annoyance and anger. Usually those eyes mean the world and could bring you to your knees but right now all you felt was annoyance and irritation.
"I will." He said it with a bit of a smartass tone, he was glad you backed down because he wasnt used to being questioned by anyone.
Guess what happened? The dumbass's suit was too heavy, and he ended up falling off a three-story building.
Thankfully, he's okay but now youre taking care of him. You didn't need to tell him I told you so, he knew he was wrong. While he was passed out in his bed you fixed up his suit and replaced the material that made it so heavy.
Bruce was never one for customizing his things too much but you knew how much he cared about his parents and sewed a small black rose into the undershirt of his suit. It was something he may never see or notice but it felt right considering how often he'd place roses where his parents were killed in Crime Alley, it was like they'd be with him at all times.
Bruce found it months later and immediately thought of you. He'd been thinking of you a lot and he realized how much you truly care about him by doing such little things like refill the water bottles in the batmobile and clean his suit without him asking. He sent you black roses as a thank you so you knew he saw it.
"You do so much for everyone and my family wouldnt be nearly as safe without you. I cant thank you enough. Let me take you out to dinner when you have time. - BW"
Your heart lept into your chest, you and Bruce bumped heads but it was in the same way an old married couple did, you both wanted what was best for the other. Bruce didnt want that other material cause he knew it'd be a pain for you to sew, even if he wouldn't tell you that. You wanted him safe, he knew that but you'd been busting your ass for the whole Batfamily so he asked for the other material even if in the end it did make him look stupid and dislocated one of his shoulders.
So due to that, he could at least get you to take you on a date, he needed a break too and it would be nice to get out and get away from all his kids to spend time with someone he was growing quite fond of.
----------------------------------------------------
Tim: When it came to upgrading Tim's gadgets it was a pain in the ass because he always needed the newest tech and a way to upgrade it. Fortunately, when it came to the gadgets he handled that himself or he had Lucius help with it.
When it came to the suit itself it didn't need to be upgraded unless it had some serious degradation and it was getting to that point, it had holes and rips everywhere.
"No, Tim. We cant talk about it later." You spoke to him through comms as he was on patrol.
"I'm a little busy." You could hear the wind on his cape as he glided over and through the city.
"You're always busy, Tim. The suit needs upgrades and if we dont get to them now it'll be too late. If you dont wanna miss a night of patrol then we need to do it now."
"Alright, Jesus. Why do you always gotta be right?" He said with a easy-going joking tone as he landed on a roof somewhere and there was the sound of the rain patting down onto his cape.
"So I was thinking maybe some titanium coated armor, it'd be stronger but definitely wouldnt add much weight...then maybe we could keep the boots but the pants wear too quickly-"
"Yeah, all that sounds good. I trust you but I gotta go, just do whatever you want." He said as it sounded like he started fighting a group of thugs. "I gotta go, getting my ass handed to me over here. You know? Normal stuff." He said with a laugh.
You worked like a mule trying to get his suit together, referencing his measurements and the sketch you had done several versions of trying to figure which looked the best and was the most functional. Tim bounces around like a ping pong ball so you just put the new suit in place of the old one so he could try it when he got around to it.
"Hey, have you seen this suit?! This is amazing!" He asked you as if he didn't already know you made it yourself.
"I'm glad you like it." You smiled as you worked on other garments.
"I could kiss you, this is so amazing! I- I- I mean...Um, yeah. Thank you." He says as he quickly leaves the room in his suit before his face matches the red on the new chest piece.
----------------------------------------------------
Damian: Being Bruce's son meant Damian would regularly have to attend galas. Damian wasnt so rough on his armored suits so mainly he needed to commision you for suits and the like.
He wasn't very talkative or sociable but secretly it was your favorite thing to do to dress up Damian like your own little Ken doll. Of course he'd never tell you but something about you lighting up everytime he needed something tailored just made his black heart just a very shades lighter.
"Mmm hmmm hmmm." You hummed to your music, your headphones on as to not disturb Damian while you fitted him with the new suit you had just finished but minutes before he walked in.
"You know you don't have to do that?"
"What?" You asked a bit concerned that you'd upset him in some sorta way.
"You can play your music out loud. I don't mind." He wanted to let you in and he could see how much you relaxed after he said that.
"I um- I don't know if you'll like it." You said concerned as you fiddled with your tailored tape.
"Well, we don't know if I will if you dont show me." Damian was in uncharted territory on talking to people and getting to know them but this felt good?
"I'm just listening to the Arcane soundtrack for this last season. It was so good." You almost started rambling but stopped, you liked Damian and didnt want him to think you were weird by going off about your interests.
"Yeah, it was pretty good, I really didn't expect that ending..."
"No, No, No! Wait! I haven't finished it. I just- I haven't had the chance. I'm on like episode four or five." You stopped him before he went on and accidentally spoiled it.
"Oh, so you haven't even got to the big parts then..."
"No, I've been working on your suit." You said as you smoothed the suit over his shoulders. The suit is a beautiful deep burgundy, the collars black with a black tie and white undershirt, simple but unique. He looks stunning, your hands held his wrist as you put on his cufflinks for him.
"We'll, I um..." Holy shit he was nervous, he'd not done this in ages...and he was never nervous but he wanted to make a good impression. He took a deep breath. "Hey, why don't you and I watch the last episodes together? Like make it a night tomorrow or something? I mean- Actually... do you have time tonight?"
"Tonight? I thought you were busy with the gala." You asked him, you didnt wanna say yes then make him feel obligated when he was actually meant to be somewhere else.
"I was but Jason and Dick can deal with it. I'd rather spend my night here with you if that's okay." You turned your face away from him as it was probably obvious that your heart was beating in eyes like an old cartoon.
"I'd love that." Your eyes glancing up at his a lot less nervous and a lot more hopeful.
That night was full of a lot of emotion from the show and you ended up a sobbing mess against his chest, thank goodness he'd changed out of the suit otherwise it would be soaked with your tears. He held you all through it and by the end of the night he was sure he was crushing on you.
-> Masterlists <-
#batboys#batboys x reader#jason todd x reader#jason todd#damian wayne x reader#dick grayson x reader#red hood x reader#red hood#tim drake x reader#batman x reader#damian al ghul x reader#damian al ghul#damian wayne#bruce wayne x reader#red robin x reader#dick grayson#nightwing x reader
768 notes
·
View notes
Text
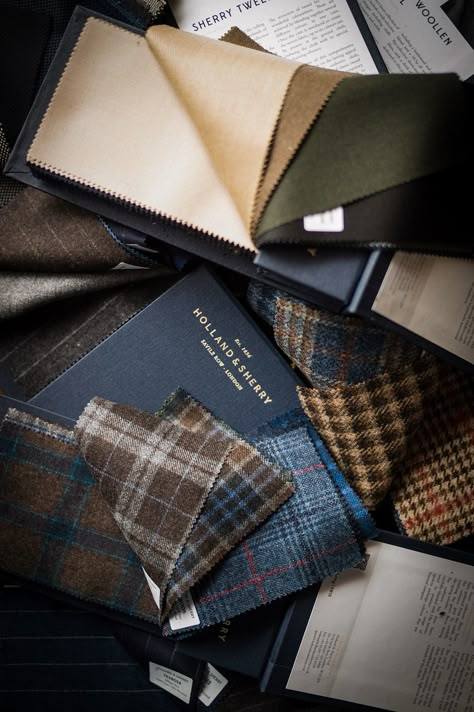
Tailor!Nanami considers the cutting table an altar. Every precise cut of fabric laid out in perfect symmetry whispers of meticulous care, gentle hands, guiding and soothing. Chalk lines drawn and respected along the finest of materials, pincushions standing proud to serve to his right, and needles organised neatly in rows in their wooden drawers by his legs, hidden along with the sharpest of scissors and the longest of measuring tapes — a place for everything and everything in its place.
Indeed, the way he moves, with grace, urged by muscle memory and not his senses, speaks of countless stories, amalgamations, of his time spent dedicating himself to the craft. From sweeping the floors as a boy to being a stand-in mannequin as a teenager, and then now, to owning his very own temple, cleaned and dusted only with the most loving of hands, he is a man in his elements, born again, tethered to a noble calling, serving a purpose beyond himself.
This is more than a profession; it is a way of life.
Professions could be learned through textbooks and seminars. What he does is a skill, a talent, bestowed upon by the Heavens and cultivated only through years of hard work, defined by pricked fingers, of late nights, calluses, of exploring the shape, size, feel, scent and sound of every part of a suit until he saw each one he birthed not as mere items of clothing, but rather as armour.
Barriers to the skin, the weak flesh beneath, and covering the fragile soul from the chilling cruelty of the world, he rebukes the thought that a suit is a luxury, a thing reserved for the wealthy or something to be hidden away, deep in closets.
It is a necessity.
Of course, he thinks not of himself as an artist. Only a vessel. The sacred ideas course through his veins, fuelling him with life. His eyes do not see what could be, only what should be. Those long, nimble fingers do not yearn to feel anything but wool, cotton and linen. It is the rhythmic sounds of a mechanical heartbeat, whirring as it threads fabric together, that he hears and would only ever want to hear.
Tailor!Nanami does not want for more than he believes great powers have designed for him.
That is, until he hears the chime of the bell and his eyes dart from the plaid trousers he’s sewing to a new customer. An utterly foreign creature. One that so very clearly does not belong amongst the items of a time long past that it forces a laugh out of him.
Your curious gaze meets his. His heart stops.
An angel visits him.
And Tailor!Nanami dares not to ignore the calling of the gods for a new purpose.
#jjk x reader#jjk drabble#nanami x reader#nanami drabble#nanami fic#nanami x you#jjk x you#jjk fluff#nanami fluff
493 notes
·
View notes
Text
Chemise Sewalong January 2025
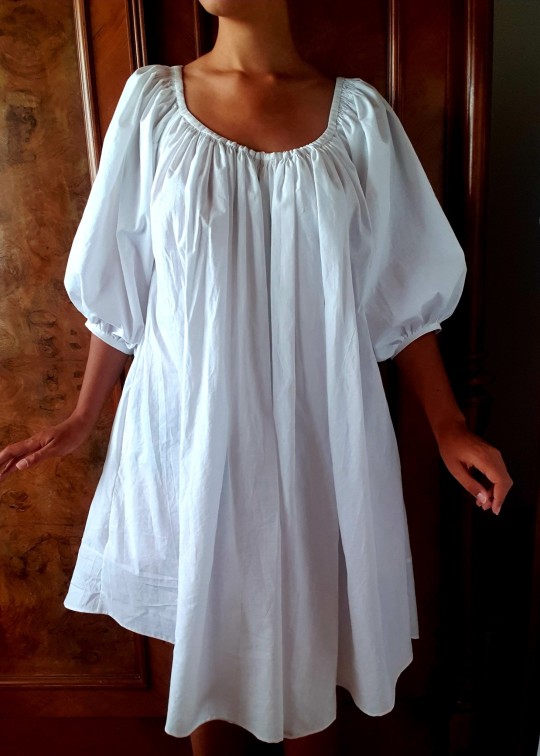
Step Zero: Materials
Here's a list of materials in advance to give people the time to find fabric. We’ll do some measurements so we know how much fabric we need and get the preliminaries out of the way.
What you are definitely going to need:
Fabric
Thread
Needles
Fabric scissors
Pins
A measuring tape
A ruler or flat edge to draw straight lines
What will make this project a lot easier:
Tailor’s chalk or other method to mark lines on your fabric
A safety pin, loop turner, lacing needle or other method to get a thread through a channel
An iron and ironing board - I would say this is a necessity but not everyone has one and you can make a chemise without, it will just be harder and won’t look as crisp.
A thimble - in the long run it will make you sew quicker and be better for your hands
A sewing machine (I am intending to handsew this because not everyone has a sewing machine, but if you do have access to one and want to be done quickly, do the long seams on a sewing machine and glory in the speed of modern technology)
A cutting mat, quilting ruler and rotary cutter – This thing is all squares and triangles and quilters have got squares and triangles figured out
If you’re used to inches, keep a converter handy because my brain is used to centimeters
How much fabric do I need?
A lot. The chemise panels use the full width of the fabric. Decide if you want your chemise to knee length, to the floor or something in between. Then decide if you want full length sleeves or half sleeves.
I’m making long poofy sleeves but a kneelength skirt.
The calculation: my neck to knee is 120cm, my full arm length is 60cm shoulder to wrist (including 5cm extra for poof), so the length of fabric needed is 120+120+60=3 meters exactly.

What kind of fabric?
For the type of fabric I’d recommend cotton or linen for the historic feeling, but go with whatever brings you joy and isn’t stretchy. It needs to be light enough you can gather it up without it getting bulky and not terribly prone to fraying so you won’t go insane while sewing
Go with what is available and sparks joy as long as it’s a light fabric that gathers down nicely. (Thin sheets or table cloths can definitely be used for this). I’m going to use a fuchsia silk I’ve been saving for the airiest dress in existence.
tl:dr – procure 3 to 4 meters (145/150cm wide) of non-stretchy fabric of a lightness and colour that you would like to wear. Wash it, iron it and congratulate yourself on being super productive.
#chemise sewalong 2025#a talia original#talia's adventures in dressmaking#historical costuming#historybounding#use the chemise sewalong 2025 tag for to show off your fabric#I'm available for any questions
284 notes
·
View notes
Text


The furry jacket tutorial
Hello to make this jacket you’ll need scissors, a sewing machine, sewing needle, thread, a zipper, drawstring elastic measuring tape, a marker, paper, and three fabrics(I picked two cottons and a kinky fabric for the fur but feel free to use any kind)

I’ll be referring to my fabrics as 1, 2, and 3


We’ll start by drawing and cutting out our pattern, pattern piece one is 3.5 inches wide and 3 inches tall, piece two is 7 inches wide and 3 inches tall, and piece 3 is is 14 inches wide and in the middle at 7 inches it’s 6 inches tall

The sizes were picked by measuring my adult furby(model) Buck so feel free to change it for different sized furbies

Put all there pieces on there fabric and cut you’ll need 2 cuts of pattern piece one from fabrics one, two and three, you’ll need one cut of pattern piece two from fabrics one and two, lastly you’ll need 2 cuts of pattern piece three from fabric 3 DON’T FORGET SEAM ALLOWANCE IT WILL FUCK YOU OVER (🫶🏾I did around 1 inch of seam allowance)

Layer fabric from pattern piece one in the order of one, two, three, just like the picture it’s important( also if it’s heard to tell fabrics one and two have their good sides facing each other)

Then sew all pieces like this
Ok and that’s it’s for step one I’ll make another post for what’s nexts
200 notes
·
View notes
Text
Texas Honey
Joel Miller x Female Reader
Summary: The story of how Joel Miller fell in love with Y/N, a girl sweeter than Texas honey.
TW: Joel is smitten, age gap, mentions of infected people/death.

Y/N was only five years old when the Cordyceps brain infection began to spread. She was lucky enough to make it into the Boston Quarantine Zone with both of her parents and her grandmother.
Her parents had quickly established a reputation for themselves in the smuggling community. They were brave enough to go where few people went and the items they had were highly sought after.
Joel thought they were stupid.
Those people had a kid at home and they were putting themselves in danger for absolutely no reason. Nobody was shocked when they were eventually torn apart by infected while on some ridiculous run.
Y/N was understandably devastated, but it was bound to happen at some point or another. After the death of her parents, Joel hadn't heard anything from her or her grandmother.
He didn't see Y/N again until sixteen years later, she had grown into a beautiful young woman and he was almost caught off guard. Y/N had recieved medical training during her time in the QZ and many people turned to her when they were sick or injured.
FERDA officials would be suspicious of certain injuries and some individuals had nowhere else to go. Y/N had quickly converted a section of her apartment into a clinic of sorts and people came to her at all hours for medical care.
Joel found himself on her doorstep when he sliced his hand open while he and Tess were on a run. He had wrapped it in duct tape to stop the bleeding, but he knew that he needed stitches.
Y/N was kind and gentle with a feather light touch as she cleaned his wound before stitching it closed. He watched her closely as she worked, delicate and meticulous as she pushed the needle through his skin.
"How long have you been doing this?" Joel asked.
"I've been working with one of the doctors since I was fourteen. He said he wanted to pass on his knowledge to someone who cared and I guess that's me," She said, picking up a pair of scissors and snipping the thread.
"Is your grandma still around?" Joel asked.
"She is. Did you know her?" Y/N questioned, pulling out a small roll of gauze.
"Knew your parents more, but your grandma was always a nice lady," He said.
Y/N carefully wrapped his hand, she cut the gauze and tore off a piece of tape before taping it in place.
"I have no idea what you cut yourself on, so I want to see you again in a few days, okay?" Y/N questioned, he nodded.
"Thanks," Joel muttered, standing up from the table.
"Wait, Joel... I-I'm sorry if I'm putting you on the spot, but if you and Tess are going on a run anytime soon I can come with you. My medical training can be really helpful, I'm not the best shot, but I'm fast and a good climber," Y/N said.
Joel stared at her for a moment, "Where's this coming from?" He asked.
She huffed, tears gathering in her eyes as she crossed her arms, "I need ration cards," She admitted softly.
"How bad off are you?" Joel questioned.
"I haven't eaten in two days... I have enough for my grandmother, but I don't know what else to do and I won't let her go hungry because of me," She said shakily.
"Sweetheart, I know you might think it's a good idea, but it isn't. The world out there is dangerous and you can lose your life in a second," Joel said.
Y/N nodded, "I understand... I'm sorry for bothering you, Joel," She mumbled, wiping away a tear quickly as it rolled down her cheek.
Joel felt incredibly guilty for refusing her help, but he couldn't be the one who got her killed. He wouldn't.
"Honey, listen. I can help you out, alright?" Joel said, reaching into his pocket and pulling out a stack of credits.
"Joel, no, I can't just take your credits," She said quickly, resting her hand over his.
"I haven't even done anything to earn them, it's wrong," Y/N added.
"You stitched me up," Joel stated.
"That's nothing," Y/N said dismissively.
"Your big heart is making you go broke, babygirl. Take the credits, I have plenty," Joel said, counting out a stack and placing them in her palm.
He closed her fist around the crumpled bills, "Take 'em," Joel said.
Y/N hesitated before reluctantly nodding, "Okay," She said softly.
"Ill see you in a few days. Make sure you eat somethin', alright?" Joel said.
She nodded again, "Thank you, Joel. You don't know how much this means to me," Y/N said shakily.
"You deserve it," Joel stated.
Y/N watched him leave her apartment, closing the door behind himself before she looked down at the pile of credits he had left for her.
Maybe Joel Miller wasn't all bad.
He had a reputation in the QZ, but she couldn't imagine someone so evil being capable of such kindness. Y/N was able to eat for the first time in days and she would always owe him for that.
...
Joel had seen Y/N on multiple occasions since that initial exchange, she always greeted him with a smile that made him want to melt. Y/N had always been the sweetest thing, she never complained and she had an awful habit of putting everyone else first.
Joel couldn't think of a time where he'd seen her be ungrateful, angry or irritated. She was always happy and willing to help, dropping whatever she was doing in order to care for someone else.
Joel had one hell of a soft spot for her.
He would never admit it, but he would move heaven and earth for that girl. Y/N was a genuine ray of sunshine and people tended to take advantage of her.
Joel would always remember the day when Y/N started avoiding him. He had a bad feeling and the second he saw her, he knew exactly why she had been staying away.
Her face was covered in bruises and her lip was split, Joel had to do everything he possibly could to keep himself calm. Joel tilted her head up and examined the damage, her lip trembled as she turned her head away from him.
"Who did this to you?" He asked, tone scarily calm.
Y/N sniffled, body trembling as tears welled up in her eyes, "His name is Trevor. H-he came looking for pills and I've never had them, but he kept saying that I did. He trashed the apartment and took a bunch of supplies," Y/N said.
"I want you to go find Tess," Joel instructed.
"No, Joel, you can't hurt him," She said shakily.
"I won't hurt him, I promise. I'm just gonna get your stuff back," Joel stated.
He wouldn't hurt the kid. He'd kill him.
"Go get Tess and tell her to stay with you until I get back," Joel said.
Y/N hesitated before reluctantly stepping out of the apartment and rushing off to go and find Tess. Joel stood in the apartment, silently seething as he waited for her to return before he could punch the punk's teeth down his throat.
Joel knew of the guy, he was an asshole and he definitely deserved to be beaten within an inch of his life. Y/N came back with Tess following closely behind her, she was obviously worked up and wanted to make it better.
"Joel," Tess started.
"I'm just gonna talk to the kid. I need you to stay here and keep an eye on her while I'm gone," Joel said.
Tess huffed, "Fine, but keep the conversation short," She advised, Joel nodded.
He left the apartment and came back two hours later with everything that had been taken from her along with a set of seriously bruised knuckles.
Tess had always known that he cared about Y/N, but the lengths he was willing to go to for her still shocked Tess. Y/N was not a person who would ever stand up for herself and Joel quickly slipped into that role for her.
Joel was incredibly hesitant when Y/N kept insisting on joining them on runs outside the QZ. She wouldn't accept his ration cards without doing something to earn them and he was struggling to keep her from venturing outside the safe zone.
Y/N eventually went to Tess and they came to him as a united front and he knew that he wouldn't be able to argue his way out of it. Y/N joined them on a few simple runs, she brought a pack of medical supplies but she was also surprisingly agile and quick.
Y/N helped them cut their travel time in half during certain runs when she was able to get through a tiny space and clear away debris for them. She didn't like using guns, but she was pretty good shot and it made him feel better about bringing her out of the QZ.
Joel always had Tess slip some of his cut of the ration cards in with Y/N's and she teased relentlessly him for it. Joel wanted to help Y/N without her knowing he was helping, she wouldn't accept the funds otherwise.
When Joel passed Tess a small stack of ration cards for her to add into Y/N's cut, she smirked.
"Softie," Tess teased, taking the cards.
"Shut up," Joel muttered, shoving his stack of cards into his pocket.
"Why don't you bring the cards to your girlfriend this time, huh?" Tess said, holding out Y/N's ration cards to him.
"She's not my girlfriend," He stated.
"Bet you'd like her to be," Tess grinned, wiggling her eyebrows at him.
...
Joel went to deliver the ration cards to Y/N, his stomach dropped when he saw her sitting out in the hallway. Y/N was crying, body curled up against the wall with her arms wrapped tightly around herself.
Joel made his way over to her, "What happened? Is it your grandma?" He questioned, she nodded.
"I came back from my shift and she was in bed. I-I thought she was sleeping but then I realized that she- she wasn't," Y/N hiccuped, breath catching in her chest as tears rolled down her cheeks.
"Take a breath," Joel instructed gently, kneeling down in front of her.
Y/N took a shaky breath before continuing, "She wasn't breathing and she was cold. I tried to help her, but sh-she was already gone, Joel," Y/N said with a sob.
"I'm so sorry, honey," Joel said.
"She was all I had," Y/N mumbled shakily.
Joel looked into the apartment as two men made their way towards the door carrying a body bag.
Joel stood up, "C'mere," He said, holding out his hands to her. Y/N took his hands and Joel pulled her to her feet, he wrapped his arms around her and held her body close to his chest.
Joel turned his back to the doorway, blocking her line of sight as the men carried her grandmother's body away to be burned. Y/N wrapped her arms around him, her hands gripping onto the material of his shirt. Her lip trembled, a fresh wave of tears rolling down her cheeks as she sobbed.
"You did everything you could for her, sweetheart. You gave her the best years she could've had," Joel assured.
"Sh-she died alone, Joel," Y/N said shakily, tears soaking into his shirt.
"I'm sorry, honey. She was a good woman," Joel said, rubbing his hand over her back gently.
Y/N slowly managed to calm herself down, reluctantly pulling away from his embrace. Her eyes were red, her cheeks were damp and her skin was blotchy. Joel cupped her cheeks, gently wiping the tears from her skin.
"Joel, can I stay with you tonight? I don't want to go back in there," Y/N said softly.
"Of course, honey," He nodded, hands dropping from her cheeks.
"You can say no if you want to," Y/N mumbled.
"Why would I ever say no to you?" Joel questioned.
"I just wanted you to know that you don't have to say yes," Y/N said.
"Don't worry about it, sweetheart. You can stay with me for as long as you need," He assured.
"Thank you, Joel," Y/N nodded.
He walked her down the hallway to his apartment, unlocking the door and allowing her to enter first. He watched her as she looked around the room, lingering in the middle of the apartment awkwardly.
Y/N had never been in his apartment once in the years that they'd known each other. Joel always came to her apartment while she looked after her patients and her grandmother.
"You can have the bed, I'll take the couch," Joel said.
"I'm not kicking you out of your own bed," Y/N replied.
"I'll be fine. It's one night," Joel assured, moving over to the couch.
"Why don't we just share the bed? I mean, we've slept next to each other before," Y/N offered tentatively.
It was true. They had slept beside each other on multiple occasions while outside the QZ. They had even shared a sleeping bag once or twice, but Joel still hesitated.
"I-I'm sorry, that was a really stupid thing to say," Y/N muttered, realizing that she may have overstepped.
"No, it's alright, we can share the bed. Just don't be clingin' onto me, alright?" Joel said.
"I won't, I promise," Y/N nodded.
That night, they fell asleep on opposite sides of the bed but woke up in each other's arms. Her body was pressed up against his side, her arm thrown across his stomach and her leg slotted between his. Her head rested on his chest and his arm had found itself wrapped around her waist, holding her close to him.
Her skin was warm and her hair was soft when it brushed lightly against his chin as she shifted. Joel knew he needed to get up soon for his shift, but he couldn't bring himself to leave quite yet.
He wanted to spend every second he could in her arms and he was reluctant to leave her. Y/N seemed to feel the same way, gravitating towards him after the loss of her last surviving family member.
Y/N started to come around his apartment almost every day after the passing of her grandmother. She cooked for him and Tess, cleaning the apartment and had even started doing his laundry.
Y/N had a need to be needed after all those years caring for her grandmother. She had never experienced life without being a caregiver and she felt like she didn't have a purpose now that her family was gone.
Y/N stood at the stove in his apartment, heating up some soup in a pot on a hot plate. She scooped it into a bowl before placing it in front of Joel at the table.
"Thanks, honey," He said, she smiled.
"Tess, do you want any?" Y/N questioned.
"No, I'm good," Tess said, shaking her head.
"Okay, well, I'm gonna run back to my apartment. I have a few people coming to see me today," Y/N said.
"You're not gonna eat?" Joel questioned.
"No, I'm not hungry but I didn't want you to go without. The hot plate is off, but it should keep the rest warm until you're done," She said, Joel nodded.
Y/N stepped out of the apartment, closing the door behind herself gently. Tess stared at Joel across the table as he started to eat silently, he didn't acknowledge her but he could feel her eyes on him.
"She your little housewife now or something?" Tess questioned.
"Leave her be," Joel stated firmly, leaving no room for argument.
Joel would be happy if Y/N spent the rest of her life with him in his apartment. If she needed to cook and clean to feel useful, he'd let her.
This incredible person had chosen to care about him and he needed it more than he was willing to admit. Y/N was a light in his life and he loved her more than anything.
Maybe he would eventually come clean about his feelings, but he was content with the way that things were.
For now.
#joel miller x y/n#joel miller x you#joel miller x reader#joel miller#joel miller imagine#ellie the last of us#the last of us imagine#tess the last of us#the last of us#tlou#joel x reader#joel miller x original character#joel miller x oc#joel miller x female oc#joel miller x female reader#joel miller x f!oc#joel miller x f!reader
286 notes
·
View notes
Text
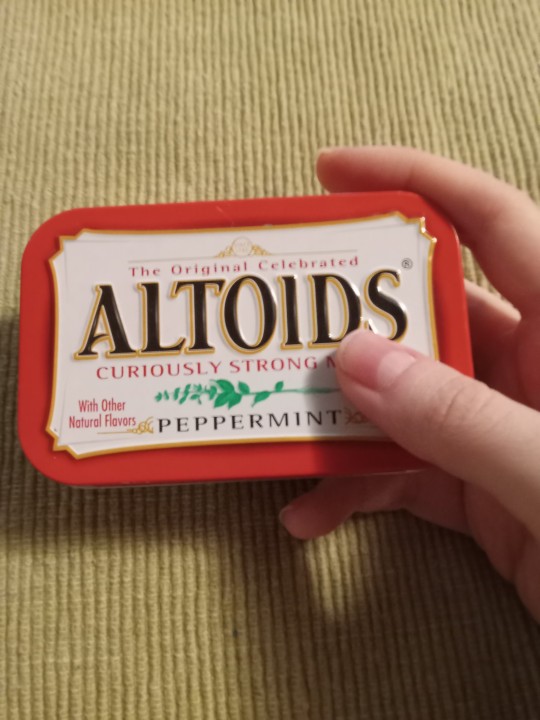
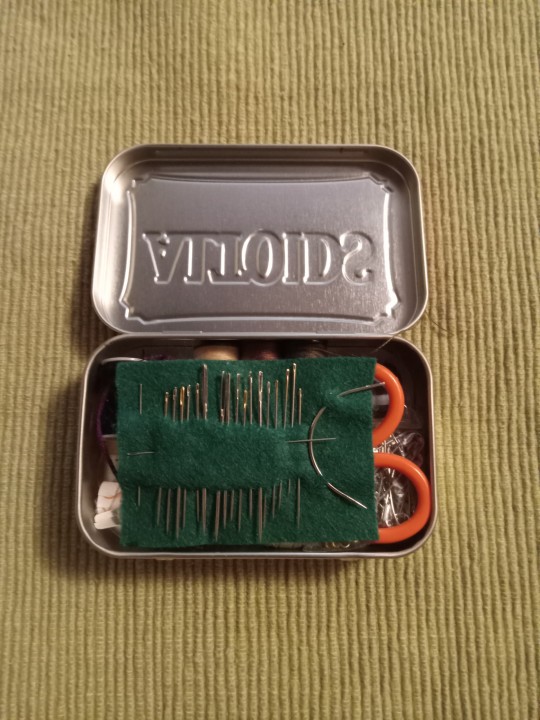
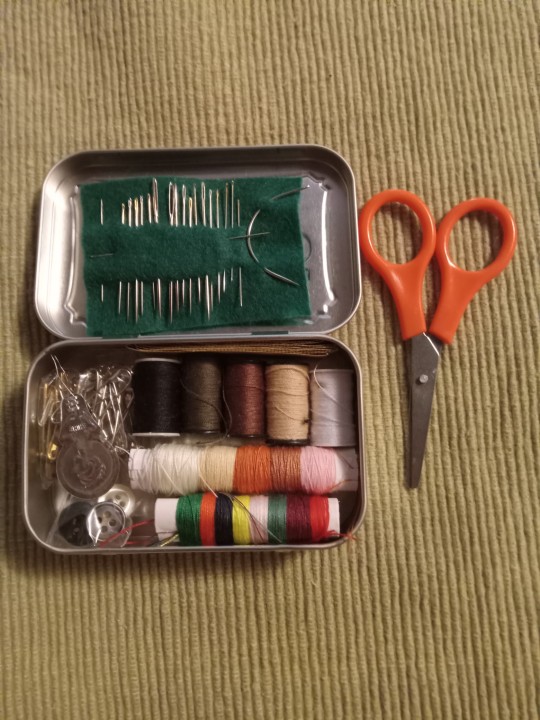
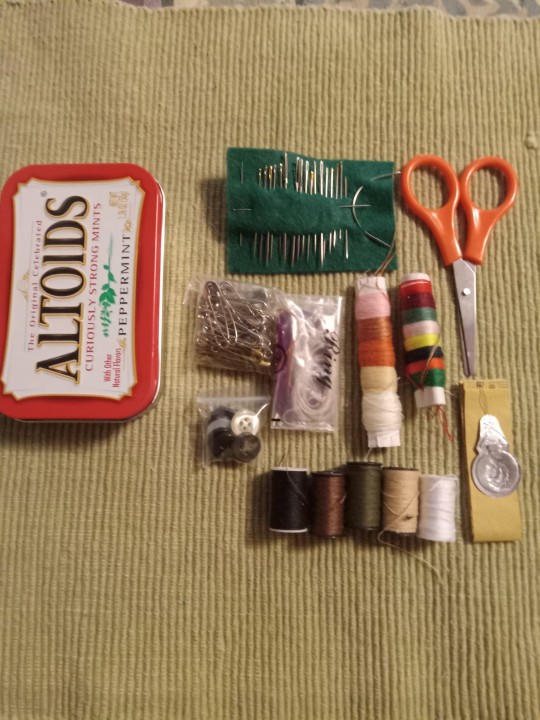
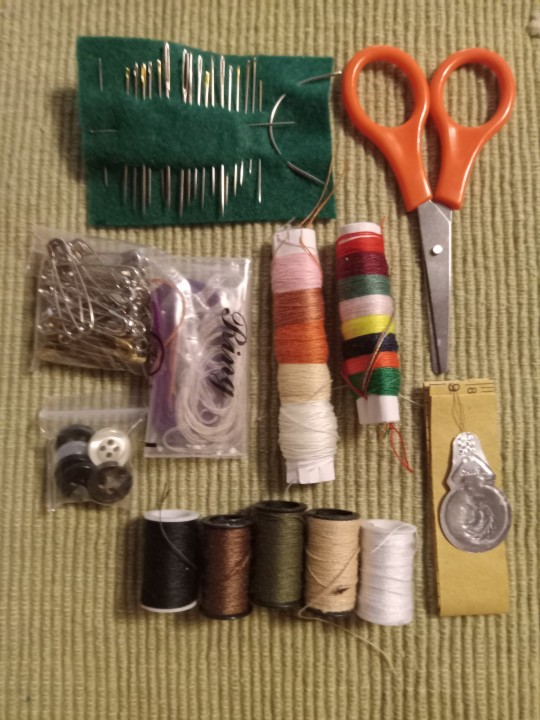
I upgraded my altiods tin sewing kit! (More details are in the image ID)
I added more needles, safety pins, thread, and a sharp pair of thread scissors just small enough to fit inside the tin. There's usually two needle threaders in here but one is in use atm. And there's enough stuff inside to fit perfectly so that the lid can close all the way and nothing slides around so that's nice
I am gonna post my little altiods tin emergency chronic pain/migraine kit within the next few days as well so keep an eye out for that if you're intrested
[ID: various pictures of a metal altoids tin, about 3.5 inches by 2 inches, with sewing supplies inside. A little bag of silver safety pins, varying colors of thread on 5 small spools, more colors of thread wrapped around two small rolls of paper and inside a small plastic bag, a folded piece of paper measuring tape, a small pair of orange thread scissors, a needle threader, and some buttons inside a little bag. There are varying sizes and types of sewing needles that are stuck in a small rectangular piece of green felt that fits on top of everything inside the tin. It has sharps, darning needles, embroidery needles and one curved needle.
The colors of thread included are: light pink, a muted rusty orange, white, a few shades of light brown and off white all wrapped around one piece of rolled paper. The other paper rool has more vibrant saturated colors including red, blue, yellow, dark green, and orange. The little bag had extra recycled pieces of thread i salvaged from other projects that are long enough to still be used. And the colors on the 5 small spools are black, dark mossy warm green, dark brown, light brown and white. End ID]
#solarpunk#solarpunk diy#solarpunk aesthetic#punk#punk diy#sustainability#recycling#upcycling#hopepunk#ecopunk#diy#hand sewing#sewing#hatchet makes stuff
720 notes
·
View notes
Text
Get ready for Terror Camp’s workshops!
Planning to attend our two NEW workshops? Whether you’re making your very own version of the Peglar Papers or brushing up on your mending techniques, here’s what you’ll need to take part…
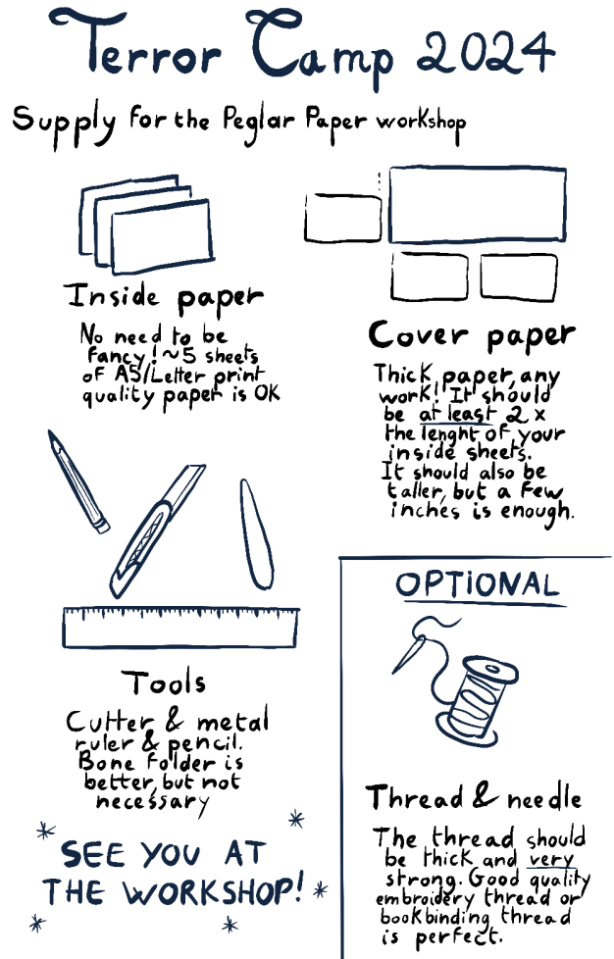
For Friday’s Bookbinding workshop, run by @strogoff-era, you’ll need:
Inside paper: No need to be fancy! Around 5 sheets of A5/Letter print-quality paper.
Cover paper: Thick paper. It should be at least twice the length of your inside sheets. It should also be taller; a few inches is enough.
Tools: Cutter & metal ruler & pencil. Bone folder is better but not necessary.
(Optional) Needle and thread: The thread should be thick and very strong. Good quality embroidery thread or bookbinding thread is perfect.

For Sunday’s Mending workshop, run by Hannah J. Haverkamp, you’ll need:
¼ yard (23cm) of cotton fabric (any quilting weight cotton or basic muslin is fine)
Tools: Pins, a needle, a ruler, fabric scissors (or suitably sharp)
Embroidery floss
One button
Small pieces of contrasting fabric - 5 pieces at least 5x7" (cotton)
2 yards (1.8m) of 3/4" soft ribbon or fabric tape for edge binding and ties
We’ll be making one of the three decorative motif patterns above! Printable PDF and cutting instructions to come soon.
❄️ Don't forget to register!
We can’t wait to see you there in two weeks' time! 🥰❄️
106 notes
·
View notes
Text
self-surgery | "not everyone makes it out"
april is the cruelest month day 19
characters: living weapon, handler
warnings: cursing, stitching someone's leg
870 words
~
Living Weapon stumbles into the small apartment, dropping his keys on the side table next to the door. He slams the door behind him and slides the deadbolt, then the chain, and finally the slide lock.
He leans against the door and slides down it, knees drawn up to his chest as his stomach heaves. He lurches forward, emptying his stomach of its few contents, and his head falls back against the door.
“Fuck,” he whispers, holding his head in his hands. “Fuck fuck fucking fuck.”
He splays his legs out in front of himself and presses a hand over the quick-bleeding gash on his leg, trying to put enough pressure on it to stop the bleeding.
“That’s not gonna work,” He says, almost scolding himself.
He exhales in puffs and puts his hand up on the side table, using it to help him up. “Come on,” he mutters, gritting his teeth, “Come on!”
He pushes himself to his feet and limps to the kitchen. The lightbulb flickers for a few seconds before staying unlit and he stares up at it, wishing he had just changed it that morning when it flickered.
He opens the junk drawer and pulls out his lantern instead of the lightbulb sitting next to it. It takes a few clicks of the knob, but the lantern turns on and emits enough light for Living Weapon to work with.
He grabs the first-aid kit from under the sink and falls back on one of the chairs around the table.
With practiced movements, Living Weapon opens the kit and pulls out the gauze, suture kit, and iodine.
He uses the scissors from the kit to cut his pants a few inches above the gash and opens the bottle of iodine. He pours some into his palm and rubs it all over his hands, making sure to cover his fingers well. Then, he pours some on the gash, making sure it covers the entire area.
The light turns on in the hallway and Living Weapon looks up as he opens the suture kit.
“Living Weapon?” Handler yawns, walking into the kitchen, eyes closed. “I didn’t think you’d be home tonight.”
She lowers her arms and opens her eyes, then rushes to his side. She takes the suture kit from his hands and sets it on the table, “What the hell happened?”
He shrugs, “Had some business to attend to.”
“I told you to stop fucking fighting. You’re going to get killed one of these days.” She scolds, washing her hands in the sink. “Most people don’t make it out, I don’t know how you’ve made it this long.”
She pats her hands dry with a paper towel and sits down on the seat closest to him, scooting it just a little closer. She pulls his leg onto her lap and finishes peeling open the suture kit. She bends over to examine the gash and sucks a breath in through her teeth.
“This one’s going to take a long time to heal.” She holds the suturing needle in her hand and starts stitching him up.
He stares at the ceiling and tries to ignore the needle threading through his skin, but Handler snaps at him with her free hand, “Hey.”
“What?” He asks, looking down at her.
“Promise me you’ll stop fighting.”
He shakes his head, “I can’t.” he sighs and chews on his lip until he draws blood, “I know that…not everyone makes it out. Trust me, I fucking know. But…”
He trails off, watching as Handler ties off the remaining suture thread and cuts it close to the knot. She opens the cabinet under the sink and throws the needle in the sharps box and looks back at him.
She deflates, “One day…you won’t come back. And it’ll be your fault.”
With shaking hands, she opens the gauze pack and places it on top of the sutures, then she rips a few pieces of tape to put on the edges.
With trembling fingers, Living Weapon takes the tape from her and presses it on top of the gauze, making sure all corners are taped against his skin.
“Thank you for helping me,” He whispers, looking at her through lowered lashes. “I’ll take a break at least. Wait until this heals and then a little longer probably. I just…I’m not ready to give it up. That was such a big part of my life and now…it’s over.”
She scoffs and bunches all the trash up in her fist, “You want to be fighting for your life again?”
“No!” he blurts. “I just…”
She cuts him off, “You miss getting your teeth knocked in. Enjoy having broken limbs. Love having to stitch yourself up in the middle of the night?”
“I can’t explain it. It’s just like it’s part of me. I don’t know what else to do. It’s like there’s no me when I don’t…” his voice is barely above a whisper, like he’s scared to admit it to himself, let alone Handler.
She tosses the handful of trash away and turns her back on him, “You need to find a better way to cope. Because I can’t keep doing this, you’ll be on your own next time.”
#aprilisthecruelestmonth#whumpee#handler caretaker#living weapon whumpee#living weapon whump#self surgery#not everyone makes it out#whump#whump fic#whump writing#living weapon#my writing
36 notes
·
View notes
Text
Beginner Sewing Equipment
So! I’ve seen enough of you in my notes now going “ooh I wanna take up sewing”, so I thought I’d start giving some tips for how to do that. And the thing that comes first with any hobby is equipment. It can be a bit of an outlay at first, which is daunting when you’re not even sure you’ll enjoy it. However you honestly can get away with the bare-bones amount of equipment - further tools make it easier, but aren’t necessary straight up.
If you start on a small project, the only things you’ll really need are:
Pack of basic needles
Dressmakers pins
A spool of thread
Seam ripper / unpicker
The fabric/material you’re working with (for the love of all that is holy don’t start with velvet or faux fur they are the devil incarnate in textile form).
Then once you go “yeah ok I’m kinda enjoying this”, I recommend adding:
An iron!! This is not only to keep fabric flat, but to press seams, and help with edges. Hopefully you already have one as a household item. (If you don’t have an ironing board, lay some towels down on a table).
A pair of fabric scissors. I cannot stress enough that if you can you should buy the expensive ones it makes such a difference. (In the meanwhile, paper scissors can *technically* work they just don’t work WELL).
Dressmakers tape (before you have one of these, use a piece of string and a common ruler to do the measurements)
Tailors chalk / some kind of washable pen (a normal pencil can do the trick at first - the area where you’re marking often ends up on the ends of a seam, and can’t be seen on the finished garment).
A thimble (good for hand sewing thick wools or other dense fabrics)
A long ruler for patterning (a broom handle is an acceptable substitute for a while though)
That’s it, those are the items I use for 90% of my projects! Any other equipment will likely be specialised, which you can then buy on a needs-basis.
(The only other thing is a sewing machine, but that’s going to be a personal means thing; they are not a cheap piece of equipment! See if you can borrow one from a friend or family member to start with).
#sewing#sewing tips#beginner sewing#crafting#medieval reenactment#medieval#medievalcore#medieval history#history#historical reenactment#sca#i’ll be on my merry way now
434 notes
·
View notes
Note
Hello!! I was wondering if you'd consider writing a Walter O'Brien (Scorpion) x reader oneshot where reader is also a genius and Walter's partner and has gone 'down the rabbit hole' as they call it at Scorpion (a.k.a. Hyperfocused on some project to the point of forgetting to eat/drink/sleep/interact with the outside world)
Thanks!
Fabric was strewn across the room. Ribbons, scissors, measuring tape, and thread were scattered on the floor. Needles were nestled in (Y/N)'s shirt and would occasionally stab them. But that didn't matter. All that mattered was the mannequin in front of them and the 1750s dress they were trying to recreate.
It started out as a normal day in Scorpion. Walter and his team were working downstairs on a case and (Y/N) was upstairs watching Doctor Who on the TV they convinced Walter to put in. It was about 8:30 that morning when Walter came up the stairs to let (Y/N) know they had been called away to meet Gabe somewhere-(Y/N) couldn't remember where-and gave them a small kiss on the cheek before leaving.
The base was quite except for episode (Y/N) was watching. It was one of their favorites, The Girl In The Fireplace. As they watched, they couldn't help but admire the dress Madame de Pompadour wore every time she was on screen.
It can't be that hard to make a dress like that, (Y/N) thought to themselves. So they got to work. They found a nearby fabric store and rushed over. Searching through the seas of fabric, they couldn't find the right materials for the dress. They finally gave in and asked a worker, who was glad to help. Together they found the right fabric and the right colors. The employee took the fabric to the registers while (Y/N) found a sewing kit, a sewing machine, and a mannequin.
At last they had all that they needed and they went back to Scorpion. They lugged the materials into the base and set them on the floor. (Y/N) rushed upstairs with the fabric, missing the clock that read 11:49 a.m. It took them three trips to get everything upstairs but they weren't ready to stop now.
They grabbed the fabric and scissors and began to cut. Hours went by as (Y/N) cut, sewed, cut again. Carefully placing each piece of fabric and pinning it down. There was blood on the fabrics and some on the scissors from the amount of times (Y/N) had poked themselves with a needle. Tired of losing their pin cushion, they had resorted to sticking them in their pants and shirt. Their laptop was open to almost twenty different websites about what fabric was used in 18th century France, patterns, Doctor Who trivia, how to sew videos and other things (Y/N) thought they might need.
It was 1:24 in morning when Walter and his team came home. They were exhausted from the running and fighting after trying find the missing painting from the local art gallery. The base was quite except for the sound of curses and a sewing machine.
"Is (Y/N) still awake?" Paige asked, looking upstairs.
"Gotta be. Unless someone broke in," Toby said.
Walter started moving towards the staircase. "I'll check it out. Paige, will you heat up some food? I have an idea of what's going on."
Paige nodded and headed towards their makeshift kitchen. Sylvester went with her while Happy and Toby made their way to the couch.
Walter glanced around at the mess covering the entire upstairs area. He looked over at (Y/N), the paused TV show, and smiled. He gently placed a hand on (Y/N)'s shoulder.
They jerked and twirled to face the intruder, wielding a needle for protection. Walter lifted his hands in surrender, the smile not leaving his face.
"Walter! Don't do that!" (Y/N) exclaimed, dropping the needle.
"Sorry, my intention wasn't to scare you. How long have you been working on this?"
(Y/N) looked at clocked. "I.... don't know. I was watching Doctor Who when you left and I wanted to try making Madame de Pompadour's dress so I went shopping and I've been working since."
Walter sighed. "You haven't taken a break." It wasn't a question but (Y/N) nodded.
"Come, Paige is heating up some food and after you eat we can take a shower and go to bed."
"That sounds nice but I just realized I really have to pee so I will join you downstairs shortly." Without waiting for a response, (Y/N) hightailed it to the nearest bathroom while Walter started making his way downstairs.
"Where's (Y/N)?" Happy asked, watching her boss come down without his partner.
"Bathroom. They got stuck in the rabbit hole."
The team nodded in understanding. There had been plenty of times that they got stuck in that hyperfixation and needed someone to pull them out.
(Y/N) came down not too long after and wrapped their arms around their boyfriend. "Thanks for taking care of me."
Walter pulled (Y/N) in closer and pressed a kiss to the top of their head. "I'll always look after you."
#writer#fanfic#scorpion#walter o'brien#walter o'brien x reader#scorpion x reader#scorpion x you#x reader#scorpion tv show
30 notes
·
View notes
Text
Hi so um
Remember when I said I was gonna doodle Addisons x WALL-E AU bots

This is my new child, Orange Addison / TA-LR. I've signed the adoption papers, They're my baby now. I was gonna doodle more today but got excited with TA-LR. They're a tailor that mends clothing and fabrics around the ship such as bedsheets, banners, and towels! There are multiple TA-LR bots ^-^
TA-LR stands for 'Tailoring And Linen Repair'
They have four arms - one made with scissors, one with a needle, one with various threads that they can use (can be changed and swapped out for other colours) and one with a general all-purpose hand / claw thing that they use for holding items or using a measuring tape. They roll around on one wheel to get around, and they can extend themselves from that wheel to reach higher areas. The monocle is for viewing things closer in their field of vision (like threads to snip :3)

Also made some automated voiceline things they'd say because. You see, well..... I am unwell about TA-LR. Pack it up boys, I've made the perfect specimen, nothing I ever draw will ever outdo this /j
Oughhhhhhhhhh Addisons x WALL-E AU Orange Addison I love youuuuuu, no matter what AU I put them in they always end up being my favourite even if this one isn't supposed to be MY specific Orange (Banner)

Also compared to the height of the average human / my Orange Addison..... baby. Baby size. TA-LR is baby.
Still gonna make other Addisons + Spamton as bots!! But for now... my son\(^o^)/
#art#digital art#drawing#digital artwork#fanart#technically an orange addison but at this point its just an oc since wall-e is so vastly different from deltarune#oc#oc drawing#oc art#original character#my art#addisons#orange addison#(technically)#robot oc#wall e#wall e oc#wall-e oc#woof bet not a lot of people have used those tags before tbh
27 notes
·
View notes
Text
🧵 Sewing 101: Essential Knowledgee
(Because every stitch counts!)
1️⃣ Must-Have Tools
Fabric scissors (never use them on paper!)
Seam ripper (your best friend for mistakes)
Pins & needles (sharp for wovens, ballpoint for knits)
Measuring tape (because "eyeballing it" leads to chaos)
Iron (pressing = professional results)
Pro Tip: Buy quality thread – cheap thread breaks and sheds!
2️⃣ Fabric Basics
TypeBest ForDifficultyCottonQuilts, bags, beginners★☆☆LinenSummer clothes, napkins★★☆KnitT-shirts, stretchy clothes★★★Silk/SatinLuxe garments, slips★★★★
Always prewash fabric – shrinkage ruins lives.
3️⃣ Stitch Savvy
Straight stitch: Your everyday workhorse
Zigzag: Stretchy fabrics & finishing edges
Backstitch: Secures seams (don’t skip this!)
French seam: Fancy hidden finish
4️⃣ Beginner Projects
Tote bag (master straight lines)
Pillowcase (learn corners & hems)
Scrunchie (10-minute win)
Elastic-waist skirt (intro to garment-making)
5️⃣ Pro Tips
✔ Press as you go – it’s the secret to polished pieces ✔ Change needles often (every 8-10 hours of sewing) ✔ Use the right foot (zipper foot = game changer)
💀 Common Mistakes
Not testing stitches on scrap fabric
Cutting without checking pattern direction
Skipping the iron (crimgey puckered seams)
Why Sew?
Save money (repair > replace)
Reduce waste (upcycle old clothes)
Boost creativity (wear your art!)
8 notes
·
View notes
Text
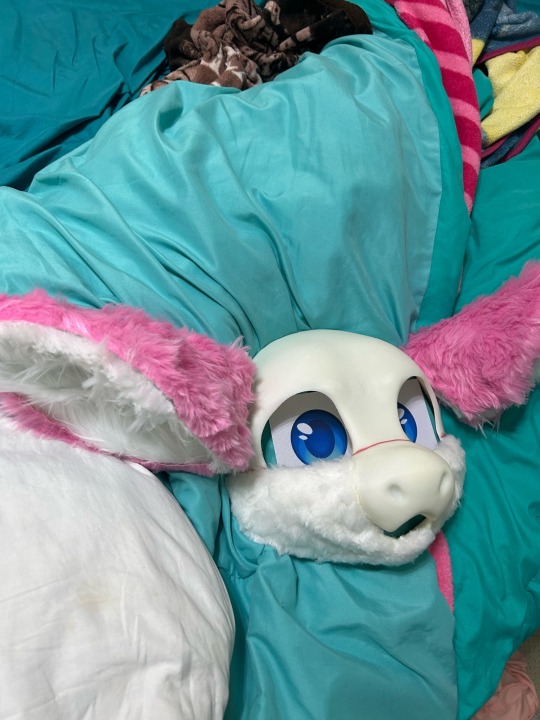
How to build your first fursuit head for ~$100 USD (2023)

What’s good furries? I’m sure a lot of you have a fursona and want to make your first fursuit. I recommend starting with a partial just in case you mess up or fall out of the hobby. It’s also less expensive!
This tutorial will only cover the head. I haven’t made any of the other stuff and I’m probably going to buy it online premade because I’m lazy.
1.) Have a reference sheet for your fursona.
If you are an artist, draw (the best you can) a reference sheet of your fursona from the front, side, and back. I made a little turnaround animation for mine, but this is not necessary.
Not an artist? Don’t want to draw? Commission someone to do it for you. I recommend Etsy, but you can find furry artists with open commissions all over the internet.
No money for commissions? You might be out of luck. Ask a friend or draw it the best you can. Alternatively, you can edit someone else’s fursona reference sheet to make it look like your fursona. Yeah, it’s stealing. Just don’t post it and act like it’s yours 👍
You can also go into the Roblox game, Catalogue Avatar Creator, and assemble something that looks kind of like your fursona. Take a screenshot of it from the front, side, and back, then go into a photo editor (I recommend IbisPaint or MediBang Paint, they are both free) and add in your special details.
I recommend not making your first fursuit super complicated or some kind of rare species. But you do you. It will just be really hard.
Also determine what style of fursuit you want. Toony? Kemono? Realistic? (I don’t recommend realistic for your first fursuit but you do you). This will be important later.
2.) Find Shit to Build It With
Once again, I recommend Etsy. You’ll need:
+ all the fur colors you need (try 2-3)
+ eye mesh
+ 3D printed mask
+ hot glue gun and hot glue sticks (dollar store)
+ needle and thread (dollar store or Walmart)
+ balaclava
+ styrofoam head
+ fabric scissors
+ extra foam pieces for ears or horns
Assemble all of that. It should be around $80-120 USD.
Your 3D printed mask is the most important thing. Another reason to get a relatively common species. Mine was a dragon. Remember the fursuit style you picked earlier? Search on etsy “3d printed [style] [species] furry mask” and you should be able to find one. You can also get pre-made foam heads. I don’t recommend trying to make your own head base, because A) it’s hard and B) those materials cost more money.
This shit will take a while to come in so don’t get too excited about it. My mask took like a month because it came from Germany.
3.) Mark the Color Spots on your Head Base
Basically just take a sharpie and outline the different color regions on your headbase. You can also use a pencil if you’re a pussy /j
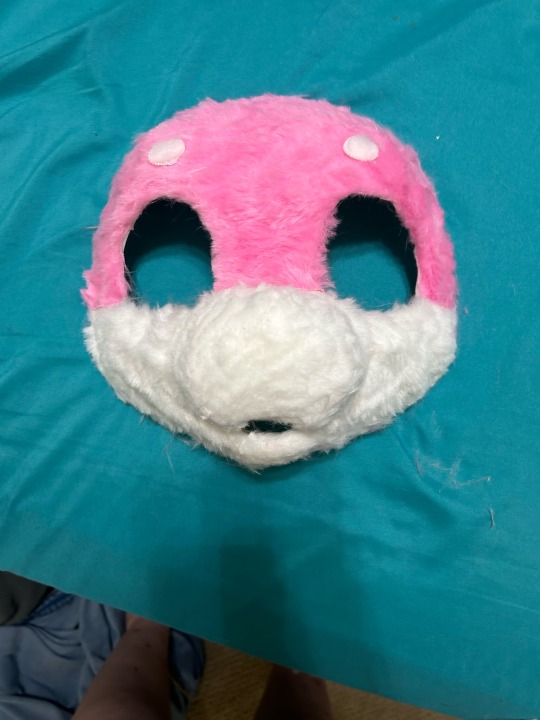
4.) Uhhhh Eyeball That Fabric Pattern and Hot Glue the Pieces to Your Headbase
Some people use duct tape to make a pattern. That did not work for me! So I eyeballed it. Made some mistakes. That’s okay.
5.) Trim Down the Fur Length
Most people use clippers for this but I didn’t want to buy any and I didn’t know how to use them so I did it VERY CAREFULLY with scissors.
6.) Fill in the Cracks Between Your Hot Glue Seams With Loose Fur
Look at all this damn fur on the floor! If only there was something to do with it!
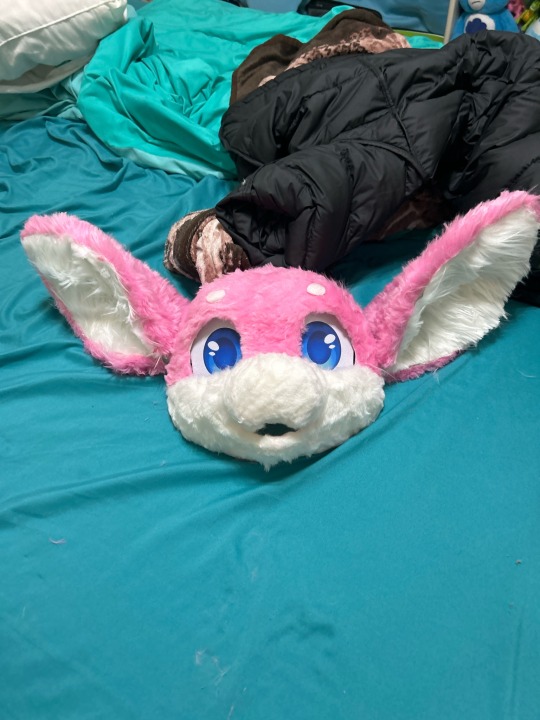
Put hot glue between the super visible seams where you hotglued different pieces of fabric next to each other, then pack in some of that loose fur. Cut it down if it’s too long. The seams will be less visible.
7.) Hot Glue the Eye Mesh Behind the Eye Holes
VERY CAREFULLY hot glue this so your character isn’t cross-eyed. You can try follow-me eyes but I didn’t do that with mine.
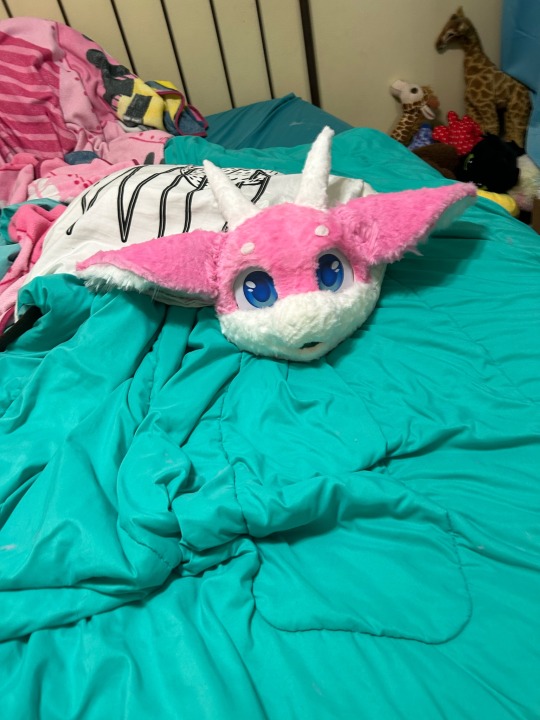
8.) Add Your Extra Details
You know like whiskers or plastic teeth or a tongue or anything else you want to put on there.
Now you’re done with the mask part.
9.) CAREFULLY Hot Glue Your Balaclava to the Inside of the Mask
The eye hole should be where your eye mesh is so that you can see out. Also make sure some of the balaclava is glued to the top of the mask.
10.) Weigh Down Your Styrofoam Head With a Heavy Rock
Or put it on a stand. Or hot glue it to the table. Whatever works.
11.) Put the Balaclava that you Glued to the Mask on the Styrofoam Head
Pretty simple. The reason we weighed down the styrofoam head is because the front of your mask will be heavy and make it fall over while you’re trying to work.
12.) ????? Put Fur On the Balaclava
You’ll also need to like add some fur connecting the sides of the mask to the balaclava. Hard to explain. You’ll probably figure it out?
13.) Trim that Fur and Put the Trimmings in the Seams Like Before
14.) Take it off of the Styrofoam Head
You may need to cut a slit in the back of the neck of your fursuit head. Not only will it help get the styrofoam head out, now your head can get in and out too!
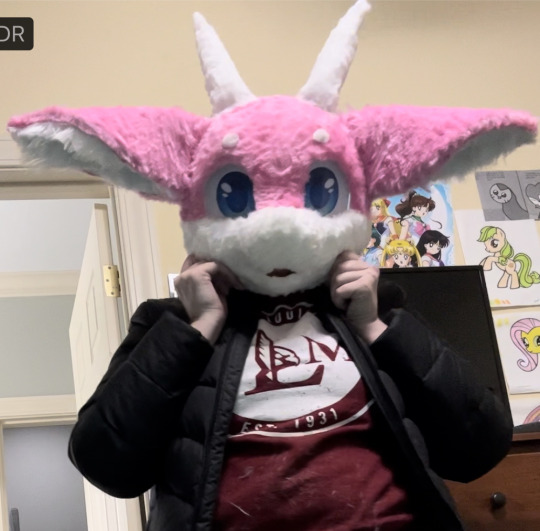
15.) Put it on
Edit it if something is wrong. It might feel crooked but it’s probably not.
16.) Enjoy!
Hopefully this was helpful! This is how made mine.
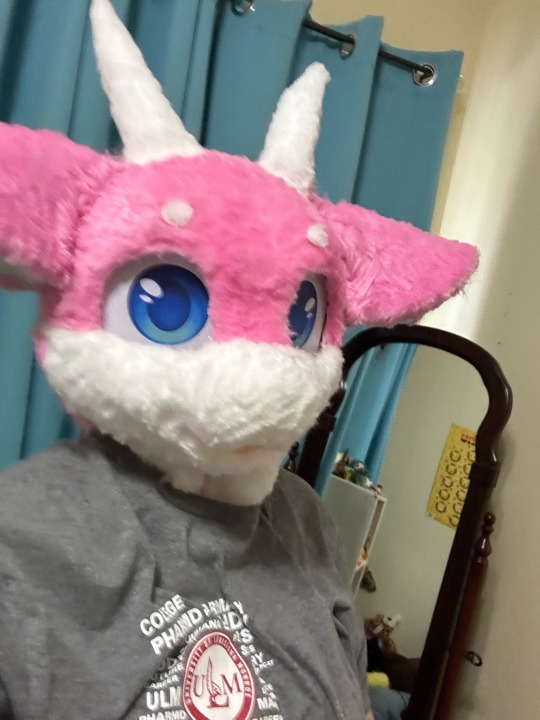
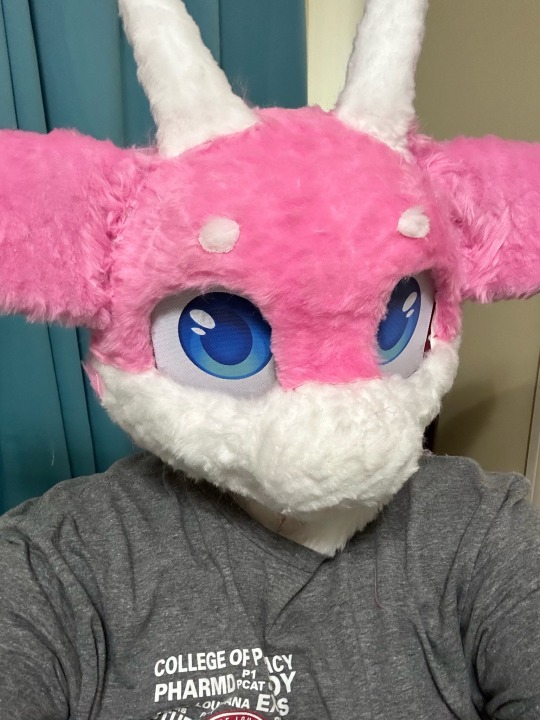
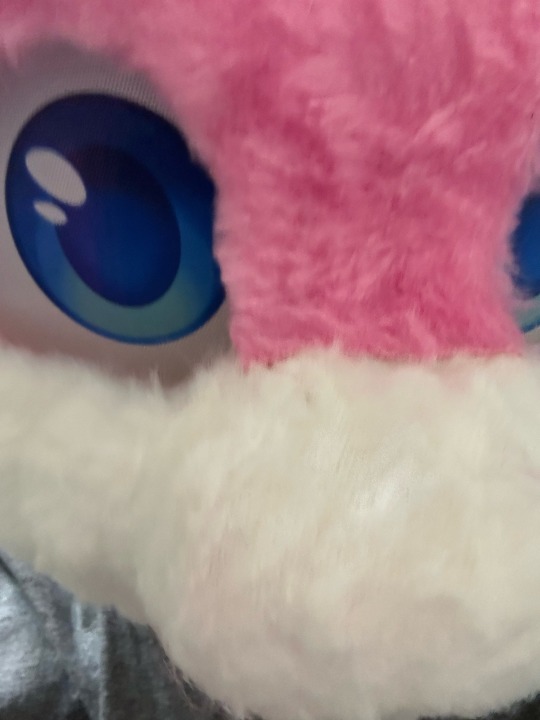

#furry community#furry anthro#furry#furry fandom#fursuit head#fursuit#first fursuit#fursuit making#tutorial#fursuit tutorial#partial fursuit#fursuit partial#maximilliansblogstuff
141 notes
·
View notes
Text
Time for another lace style...
We will eventually get around to learning all of these, which one do you want to learn first?
Also we have many more styles planned, these are just the styles we have good tutorial resources for so far.
These styles all require some specialty tools/supplies, which I've listed below the cut in case that's a deciding factor for people. Pretty much everything can be DIY'd or repurposed from some other common objects, and this information will be shared as part of the lace-along :)
Bobbin lace:
Thread (e.g. sewing thread, embroidery floss) (edit by mod Rex: crochet cotton or perle cotton preferable for beginners)
Bobbins (24 for the sampler we will do)
Bobbin lace pillow
Pattern printed or drawn out
Pins with small heads (a whole lot of em)
(edit by Mod comfy: I dipped my toes in this already, you can use clothespins as bobbins (basically everything that holds some thread and can be moved around comfortably), and some sturdy cardboard as a pillow. Your "pillow" just needs to be sturdy enough to keep the pins in place for the time you work on the lace, so if you have a couch pillow that could work, go for it)
Drawn thread lace:
Plain-woven linen or cotton fabric, with large enough threads you can comfortably see individual threads at a comfortable working distance
Sewing thread in the same colour as your fabric
Fine blunt-tipped needle
Fine tipped scissors or seam ripper and a steady hand
Lacis/ filet lace
Sturdy thread/ twine/ crochet cotton
Netting shuttle/ netting needle
Netting gauge/ mesh stick (e.g. dowel, knitting needle, smooth popsicle stick or similar)
Blunt tapestry needle
Some method of tensioning the net for embroidery: mesh frame/ embroidery hoop/ stiff paper to tack net down to
Needle lace:
Paper pattern printed or drawn out
Backing fabric (e.g. sturdy medium weight calico) (will not be part of finished piece)
Sticky backed plastic/ clear packing tape
Lace thread (e.g. crochet cotton, perlee, stranded cotton, silk thread)
Regular sewing thread in a contrasting colour for tacking down pattern (will not be part of the finished piece)
Sharp needle to tack down pattern
Blunt needle to make lace
Tweezers
Fine tipped scissors
Thimble (optional)
Sprang:
Sprang frame (e.g. empty backless picture frame, DIY frame made of sticks, two dowels tied to sturdy objects an appropriate distance apart)
Sturdy cord or crochet cotton
Smooth dowels/rods, 4-6 of them?
#lace race 2024#lace along#lacemaking#lace making#bobbin lace#drawn thread lace#lacis#filet lace#needle lace#sprang#poll
89 notes
·
View notes