#Pan Flavoured Cashews
Explore tagged Tumblr posts
Visit Tumblr Blog
Explore Tumblr blogs with no restrictions, modern design and the best experience.
Last Seen Tumblr Blogs


Fun Fact
In 2020, 27% of US Tumblr users had an annual household income of over $100,000.
Text
Savoring Pan Flavoured Cashews: A Journey Through Aromatic Delights
The Essence of Pan: A Traditional Treasure
Pan, a popular chew in India, is a fragrant mix of betel leaf, areca nut, catechu, slaked lime, cardamom, and various other spices. This blend has been savored for centuries due to its refreshing and aromatic properties. Traditionally enjoyed after meals, pan is known for its ability to cleanse the palate and leave a lingering, pleasant taste.
For more information: "Savoring Pan Flavoured Cashews: A Journey Through Aromatic Delights"?- FoodNutra
A Culinary Fusion: Cashews and Pan Masala
The fusion of pan masala with cashews brings an innovative twist to traditional flavors. Cashews, renowned for their creamy texture and mild taste, serve as the perfect canvas for the vibrant spices of pan masala. The cashews are coated with a mixture that includes the essence of betel leaf, the warmth of cardamom, and the earthy tones of catechu. The result is a snack that not only captures the essence of pan but also preserves the crunchiness of cashews, creating a delightful contrast of textures.
Sensory Delights: Aromas and Tastes
Savoring pan-flavored cashews is a sensory journey. As you bring a piece to your lips, the aroma of betel leaf and cardamom wafts through the air, teasing your senses. The initial crunch reveals the creamy interior of the cashew, which is infused with the complex and aromatic flavors of pan masala. Each bite is a harmonious blend of spicy, earthy, and sweet notes, creating a taste sensation that is both exotic and familiar.
A Cultural Icon: More Than Just a Snack
Pan-flavored cashews are not just a snack; they are a cultural icon. They represent the essence of traditional Indian hospitality, often served to guests as a gesture of warm welcome. The act of offering pan-flavored cashews is not merely about sharing a snack; it’s about sharing a piece of cultural heritage, a tradition that has been passed down through generations.
Modern Variations: Pan Flavored Treats Beyond Cashews
The popularity of pan flavors has transcended traditional snacks. Today, you can find pan-flavored desserts, chocolates, and beverages. Chefs and culinary enthusiasts are experimenting with pan-infused recipes, adding a unique twist to the culinary landscape. From pan-flavored ice creams to pan masala cocktails, the aromatic allure of pan continues to inspire creative culinary innovations.
A Culinary Adventure Awaits
Savoring pan-flavored cashews is not just a snack; it’s a culinary adventure. It’s an opportunity to explore the rich and diverse flavors of India, to experience the fusion of tradition and innovation on your taste buds. With each bite, you are transported to the bustling streets of India, where the aroma of pan masala mingles with the air, creating an atmosphere of vibrant sensory delights.
Pan-Flavored Cashews: A Gourmet Indulgence
As the culinary world embraces diverse flavors and innovative combinations, pan-flavored cashews have found their place as a gourmet indulgence. Their unique blend of traditional spices and premium cashews elevates them to a level of sophistication. Whether served at upscale events or enjoyed with a glass of fine wine, pan-flavored cashews have become a symbol of culinary refinement, enticing food enthusiasts and connoisseurs alike.
Health Benefits and Culinary Creativity
Beyond their delightful taste, pan-flavored cashews bring a host of health benefits to the table. Cashews are rich in healthy fats, protein, and essential minerals, making them a nutritious choice for snacking. When infused with the aromatic spices of pan masala, they offer a wholesome treat that satisfies both the taste buds and nutritional requirements.
Moreover, health-conscious chefs and home cooks are experimenting with pan flavors in various dishes. From salads to sauces, the aromatic notes of pan masala enhance a wide array of recipes, adding depth and complexity to culinary creations. This experimentation showcases the versatility of pan flavors, highlighting their potential in the evolving landscape of gourmet cuisine.
Cultural Reverence and Social Bonding
In the cultural context of India, pan holds a unique place. It’s not just a flavor; it’s a symbol of social bonding and cultural significance. Sharing pan-flavored cashews is a gesture of hospitality and camaraderie, a tradition that brings people together. Whether shared among friends during festivities or offered to guests as a gesture of respect, these flavorful cashews foster connections and create memorable moments.
The Art of Pairing: A Culinary Symphony
The aromatic richness of pan-flavored cashews opens the door to a world of pairing possibilities. These flavorful treats complement an assortment of beverages, from traditional masala chai to contemporary cocktails. Their spicy undertones harmonize with the warmth of tea and the complexity of wines, creating a culinary symphony that dances on the taste buds. The art of pairing pan-flavored cashews with beverages showcases the nuanced interplay of flavors, making every sip and bite a delightful experience.
A Feast for the Senses
Savoring pan-flavored cashews is not merely a gustatory experience; it’s a feast for the senses. It’s an exploration of aromas, a celebration of tastes, and a journey through cultural heritage. With each bite, you are not just enjoying a snack; you are immersing yourself in the centuries-old tradition of pan masala, reimagined for a modern audience.
So, the next time you relish the aromatic delights of pan-flavored cashews, remember that you are partaking in more than just a culinary indulgence. You are embracing a cultural legacy, savoring the creativity of modern gastronomy, and delighting in the intricate dance of flavors that make every moment a memorable, sensory celebration.
In the world of snacking, pan-flavored cashews stand as a testament to India’s culinary creativity. They invite you to indulge in the exotic, to savor the aromatic, and to embark on a journey through the rich tapestry of Indian flavors. So, the next time you reach for a handful of these delightful treats, remember that you are not just snacking; you are immersing yourself in the aromatic delights of a culture that celebrates the art of flavor in every bite.
For more information: "Savoring Pan Flavoured Cashews: A Journey Through Aromatic Delights"?- FoodNutra
0 notes
Text

Miso Pumpkin Cheesecake
[[MORE]]
Base
1 cup pecans 1 cup walnuts 1 cup dates, pitted and chopped ¼ tsp ginger ¼ tsp sea salt
1 tbsp white sesame seeds 1 tbsp black sesame seeds 1 tbsp pure maple syrup 1 tbsp melted coconut oil (ideally butter-flavoured)
Grease or line a 9-inch springform pan.
Place the; pecans, walnuts, dates, ginger, and sea salt in a food processor. Process until crumbly. Add the; white and black sesame seeds, maple syrup and melted coconut oil. Briefly process again until you have a well-combined sticky mass.
Transfer batter to prepared pan. Spread out evenly and press down firmly. Set in fridge while you prepare the filling.
Filling 2 cups raw cashews 2 cups canned pumpkin the cream from one can of full-fat coconut milk ½ cup pure maple syrup ½ cup melted coconut oil (ideally butter-flavoured) 2 tbsp miso paste 1 tsp caramel extract 1 tsp cinnamon ¼ tsp sea salt Place all the ingredients into a high-speed blender. Blend as many times as needed to reach a smooth and creamy consistency. (Scraping down sides between blends.) Transfer filling to prepared base. Spread out evenly. Place in freezer to set. (Ideally overnight.) Transfer to fridge for a few hours before serving.
#vegan cheesecake#vegan pumpkin cheesecake#miso pumpkin cheesecake#vegan miso pumpkin cheesecake#vegan holiday desserts#unique vegan desserts#unique pumpkin desserts
8 notes
·
View notes
Text


vegan mac & cheese casserole
A lot of vegan mac & cheese recipes will really emphasise the use of vegan cheese, which often can be a bit of a let-down form both a flavour and texture perspective. THIS mac & cheese recipe is technically not a cheese sauce, because the emphasis is actually on butternut pumpkin. But for comfort, satisfaction, satiation, and flavour, I honestly haven't found a better one. I love that it's got a secret veggie hit, and heats up well while also tasting better the day after (more on this in a moment).
The sauce (to coat ~400g of pasta and serve 4 people):
380g butternut pumpkin (steamed, boiled, or microwaved until soft)
50g cashews (softened by soaking in boiling water)
Handful of sage leaves
Olive oil
1 brown onion, diced
2 garlic cloves, minced
1 vegetable stock cube
4tbsp nutritional yeast
Salt & cracked black pepper to taste
Very optional: grated vegan cheese of your choice! For this, I used a smoked variety
Cook the macaroni before or while preparing the sauce, and make sure to reserve some of the starchy pasta water (about a large ladle).
Heat some olive oil in a frying pan or casserole dish, and when it's hot, fry the sage leaves until they are darkened and crispy. Remove the leaves and drain them on a cloth or paper towel, and use the sage-flavoured oil to soften the onion. Once soft (not coloured) add the minced garlic and cook until fragrant. Garlic can burn quickly, so be careful!
Add in the softened butternut pumpkin and cashews, along with the stock cube and the reserved pasta water. Cook while stirring until the stock cube is dissolved. This is also a good point to add the vegan cheese (if using) and stir it through until melted or softened.
Transfer the mixture to a food processor or blender, or use a stick blender if that's what you have. Season with salt and pepper to taste, and add in the nutritional yeast. Blitz the mixture until it makes a thickened, smooth sauce (or leave it a little chunky if you prefer).
You can just mix it with the pasta and serve it like that, with some of the crispy sage leaves on top. However, I chose to mix the sauce with the pasta and crispy sage leaves, and put it in a casserole dish, then let it sit in the fridge for dinner the next night.
Before putting it in the oven, I grated extra smoked vegan cheese over the top, and laid over some extra sage leaves then drizzled it all with olive oil. I baked it in a 190C oven until the top was crispy and the pasta was heated through again.
I sprinkled some garlic salt over my serving, and cracked some extra pepper on top, and had a comforting weeknight meal that saved me a lot of time and energy when I got home from work.
This recipe is slightly adapted from Speedy Bosh! by Henry Firth and Ian Theasby.
7 notes
·
View notes
Text
Veggie lasagna with kohlrabi pesto and kohlrabi carrot salad
These are basically 2 and a half recipes in one, so I try to group the respective ingredients together to make it more comprehensible.
You need: for the salad: - 1 big or 2 smaller kohlrabi - 2-3 carrots - 1 cup of yoghurt or crème fraiche - 2-3 table spoons of honey or molasses - 1-2 table spoons of white balsam vinegar - salt and pepper
for the lasagna and the pesto: - 10 lasagna sheets - cheese for covering - ca 50 g of hard cheese (pecorino, parmigiano or mountain cheese), grated - 1 can of chopped tomatoes - 1 package of tomato puree - 2 onions - garlic (the amount is YES, so at least 3 cloves) - cooking oil for the bolognese - 2 big carrots or 3 smaller ones - 2 table spoons of tomato paste - the leaves of the kohlrabi plus some more leaves if you can get them - ca 50 g of butter or cooking oil - 200 ml milk or plant-based cooking cream - 50-100g white flour - 150 g cashews - salt, pepper, Italian dried herb mix For the salad 1. remove the leaves from the kohlrabi, rinse both under cool water, put aside leaves. 2. peel the kohlrabi and grate it roughly. Repeat procedure with the carrots. Put both in a salad bowl. 3. mix remaining ingredients in a cup until evenly combined, add to bowl, mix vigorously and cover with a lid to let it sit in the fridge until you're done with the lasagna and the flavour has intensified. Continue with the lasagna and pesto 1. remove stems from the leaves an put aside (you can sautee and fry them but the taste is not to everyone's liking), chop leaves into strips. 2. fill water in a kettle and bring it to a boil, pour into pot and add leaves, let them sautee for 2-3 minutes until they change colour and you can smell them. Pour water away or pour it in a bucket for watering your plants when cooled down (our keep it to make stock), but empty the pot because you'll need it but we'll get to that. 3. peel 2 garlic cloves and crush them. Put sauteed leaves, garlic cloves, 1-2 table spoons of cooking oil, hard cheese and cashews into a blender. Blend until homogenous, add water if too thick. Add twice as much salt as you think is good and as much pepper. Pesto is done! 4. peel and chop the onions and 2 more cloves of garlic, cut the remaining carrots into very fine cubes or just into bite sized pieces (5mm-1cm cubes) if you're not willing to spend 15 minutes cutting carrots. I was, so they are very fine. 5. heat some oil in pan on low to medium heat, add the veggies you just chopped and let them brown very slightly, also add 2 table spoons of tomato paste. Grease a casserole in the meantime. 6. melt some butter in the pot from the pesto procedure. When it has liquefied, add flour little by little while stirring continuously until it has become pasty. Continue stirring until flour begins to change colour, stir in the milk and keep stirring until it has become slightly viscous and begins bubbling a little bit. I know this is not the real Bechamel sauce, but it's good enough and doesn't take long to make. If you want, you can add a little nutmeg. Take away from heat and add pesto from the blender, mixing it evenly. 7. the pan with the veggies should be beginning to brown now, pour in a can of chopped tomatoes and tomato puree and stir to get any stuff sticking to the pan off. Add salt, pepper and a generous sprinkle of dried herbs. Let simmer until liquid has reduced a little bit. 8. time to assemble the lasagna! Take your casserole and a ladle, and ladle one portion of the red sauce into the casserole. Cover with lasagna sheets and don't be afraid to break them into pieces to make them fit! Continue with green sauce, which you cover with more red sauce. Then another layer of lasagna sheets and so on until your sheets are used up or you run out of sauce. The final layer should be of sauce, regardless, which you cover with the non-hard cheese. 9. put lasagna into oven at 180°C/356°F and let it bake for ca 30-35 minutes on the middle rack. If your casserole is very full, I advise you to put a baking tray under it to prevent sauce or cheese from dripping down while the lasagna sheets expand during baking. While it is baking, you can use the time to clean your kitchen or at least put all the stuff you've used into the dishwasher and wipe the surfaces. :D Then, you're good to go to enjoy a hearty and filling meal that serves 3-4 people. Tip: you can add sunflower seeds to the tomato sauce for some extra crunch. You can also fill any remainders of sauce (depending on how much it turns out to be) into airtight containers and keep in the fridge for up to 4 days for some ready-made sauce that only needs heating.
#mutantenfisch cooks#recipe#vegetarian cooking#kohlrabi#a word of advice: try to get fresh kohlrabi#it tends to get wooden when stored too long
9 notes
·
View notes
Text
Coconut Jaggery Fudge
Coconut jaggery fudge is a delectable dessert that combines the natural sweetness of jaggery with the richness of coconut. Picture the ideal balance of sweetness and earthiness in every bite. With its nutritious ingredients, this melt-in-your-mouth dessert is not only a treat for the taste buds but also a healthy indulgence. With layers of flavours, this fudge gives a tropical take on traditional candies, whether it is consumed as a special celebratory dessert or as an afternoon snack. In this blog, we’ll explore how to prepare this delightful and sweet coconut jaggery fudge with a trusted recipe from the exporter of sunflower oil.
Ingredients:
Grated coconut – 2 cups
Grated jaggery – 1 cup
Cardamom powder – ¼ tsp
Milk powder 150 grams
Sugar 100 grams
Ghee – 2 tbsp
Oil – 1 tbsp
Water – ¼ cup
Cashews – 2 tbsp (chopped)
Almonds – 2 tbsp (chopped)
Raisins – 1 tbsp
Poppy seeds – 1 tsp
Himalayan pink salt – a pinch
Method:
Heat ghee and oil in a pan. Add chopped cashews, almonds, raisins, and poppy seeds. Roast until golden and set aside.
In the same pan, add grated jaggery and water. Let it melt on low heat, stirring occasionally.
Once the jaggery syrup reaches a sticky consistency, add the grated coconut and mix well.
Stir continuously and add cardamom powder, Himalayan pink salt, and milk powder to enhance the texture.
Mix in the roasted nuts and cook until the mixture thickens and leaves the sides of the pan.
Grease a tray with ghee, pour the mixture, and spread evenly.
Let it cool slightly before cutting into squares or desired shapes.
Once completely cooled, store in an airtight container.
Your delicious Coconut Jaggery Fudge is ready to be savoured!
About TNEO: Tamil Nadu Edible Oils is one of the leading cooking oil manufacturers and manufacturer of lamp oil in Tamil Nadu. As the best exporter of lamp oil in Tamil Nadu, TNEO is committed to delivering quality, affordable, and light in texture. The refined oil from TNEO is fortified, making it an ideal choice. For premium quality cooking oil or lamp oil choose TNEO.
0 notes
Text
How to Use Leftover Rice to Make a Quick and Flavorful Fried Rice

We’ve all been there—sitting with a bowl of leftover rice that somehow never got finished the night before, and wondering what to do with it. But here’s the secret: leftover rice is golden when it comes to making a quick, flavorful dish. So, if you’re craving something that’s spicy, savoury, and just the right amount of crispy, then it’s time to transform your leftover rice into a mouthwatering Indian-style fried rice!
Fried rice, in its simplest form, is a one-pot meal that can be whipped up in no time, and the beauty of it is you can throw in whatever you have lying around in your fridge. What makes it even more exciting is the chance to infuse those bold, aromatic Indian spices, and when you throw in a pinch of KBM Masala (our secret touch), you’re bound to turn the most basic ingredients into a burst of flavour.
Let’s dive right into how you can make this easy fried rice recipe with your leftover rice and a handful of everyday ingredients!
1. Prep Your Ingredients
The first step to any great fried rice is prep. Start by gathering your leftover rice (about 2 cups), and make sure it’s not too wet—dry rice works best to give that crispy texture we all love. If your rice is clumpy, just break it apart gently with your hands or a fork.
Now, think of your veggies. You can use anything from peas, carrots, onions, bell peppers, or even some leftover cooked chicken or paneer. The more colourful, the better!
Add some garlic and ginger to give that signature punch. Chop them fine and get them ready to hit the pan.
2. Heat Up That Pan
Take a large pan or wok (we’re channelling our inner chef here) and heat it up with a generous drizzle of oil. Once it’s hot and sizzling, throw in your garlic, ginger, and chopped onions. Sauté until they soften and become golden—this is where the magic begins. You’re already starting to smell those flavors fill the air.
Read More: Sendha namak benefits
3. Toss in the Veggies
Next up, add your chopped veggies into the pan. Start with the firmer ones like carrots and bell peppers, and then add the softer ones like peas. Stir fry them for a couple of minutes until they’re slightly tender but still vibrant.
Now, here’s where you’re going to take your fried rice from ordinary to extraordinary: KBM Masala. Sprinkle in a teaspoon or two of our aromatic masala mix and let it coat the veggies. You’ll notice how quickly the spices start to bloom, creating a tantalising fragrance that will make your mouth water. This magical blend of spices brings that signature Indian touch to the homemade fried rice recipe, making it rich, flavorful, and unforgettable.
4. Add the Leftover Rice
Time to bring the leftover rice into the mix! Gently add your rice to the pan, breaking it up if needed. Now, stir everything together—making sure the rice gets a good mix with all the veggies and spices. This is where the magic of quick fried rice happens. Allow the rice to sizzle a little bit on the bottom of the pan, so it crisps up just enough.
If you like your fried rice a little more flavorful, drizzle a small amount of soy sauce or a dash of vinegar to balance the heat and spice.
5. Finish with a Flavour Boost
Once everything is perfectly mixed and the rice has that golden, crispy edge, turn off the heat. Finish off with a sprinkle of fresh cilantro or a squeeze of lime to bring that refreshing zesty kick. For an added punch, a sprinkle of roasted cashews or peanuts will give your dish that satisfying crunch.
6. Serve and Savour!
That’s it! In just 15-20 minutes, you’ve transformed a humble bowl of leftover rice into a flavorful fried rice recipe that’ll have everyone asking for more. Serve it up hot, and watch it disappear as everyone gathers around for a bite.
Also Read: Best dal makhani masala
Why KBM Masala?
The key to making your fried rice truly pop lies in the spices, and with KBM Masala, you can be sure that you’re using only the best, most authentic flavours. Whether it’s the perfect blend of cumin, coriander, garam masala, or turmeric, our masalas are crafted to bring out the rich, deep flavours of Indian cuisine in every dish. A pinch of KBM Masala makes all the difference, turning your simple fried rice into something extraordinary!
So, next time you find yourself with leftover rice, remember—it’s not just leftovers. It’s an opportunity to create something unforgettable. Give it a little love, a little KBM Masala, and you’ll have a meal everyone will ask for again and again!
Source: https://kbmfoods.com/blogs/blog/how-to-use-leftover-rice-to-make-a-quick-and-flavorful-fried-rice
0 notes
Text
South Indian Lemon Rice Recipe (Instant Pot)
Introduction One of the classic South Indian dishes is lemon rice, or "Elumichai Sadam" in Tamil. It is a household favourite due to its zesty lemon touch, fragrant tempering, and vivid flavours. This Instant Pot version of Lemon Rice is the perfect solution for anyone seeking a quick lunchbox idea, a hearty supper, or a tasty side dish. Let's get started on how to quickly make this flavourful, tangy dinner in your Instant Pot.

Why Make Lemon Rice in an Instant Pot? When it comes to cooking quickly and effectively, the Instant Pot is revolutionary. The Instant Pot allows you to: - Its pressure-cooking capability saves time. - Preserve the vibrant flavours of the spices and lemon. - Without worrying about burning or overcooking, cook rice to perfection.
Ingredient List The following ingredients are needed:
1.To Cook Rice: -One cup of sona masoori or basmati rice -Two cups of water -Half a teaspoon of salt -One teaspoon of optional oil to keep things from sticking
2.For Tempering: -Two teaspoons of oil, ideally sesame or coconut oil -One teaspoon of mustard seeds -One teaspoon of cumin seeds -Two to three dried red chillies -One or two slit green chillies -Ten to twelve curry leaves -One tablespoon of split Bengal gramme, or chana dal -One tablespoon of broken black gramme, or urad dal -Half a teaspoon of hing (asafoetida) -Half a teaspoon of powdered turmeric -Add salt to taste. 3.Last Touch: -One or two lemons' juice (modify to taste) -Garnish with fresh coriander leaves. -Cashews or roasted peanuts (optional, for crunch)
Step-by-Step Recipe
Step 1: Cook the Rice
Rinse rice until water runs clear.
Add rice, water, salt, and oil to the Instant Pot.
Pressure cooks for 5 minutes; natural release for 10 minutes.
Fluff rice and let it cool.
Step 2: Prepare the Tempering
Sauté mustard seeds in oil until they splutter.
Add cumin, chilies, curry leaves, chana dal, urad dal; sauté until golden.
Mix in asafoetida and turmeric.
Step 3: Combine and Flavor
Mix rice with tempering and lemon juice.
Adjust salt as needed.
Step 4: Garnish and Serve
Garnish with coriander and nuts.
Serve warm with papad, yogurt, or pickle.
Tips for Perfect Lemon Rice
Fresh Lemon Juice: For a bright flavour, always use freshly squeezed lemon juice. chill Rice: To prevent breaking, let the rice chill a little before mixing. Spice Control: Modify the chillies to your preferred level of heat. Flavour Twist: For more depth, try adding sliced ginger or grated coconut.
Conclusion
This South Indian Lemon Rice recipe, inspired by the flavors you’d find at Barbqnite, is a quick, delicious, and versatile dish perfect for any occasion. Its tangy and aromatic profile pairs wonderfully with a variety of sides or can be savored on its own. Try this recipe to bring a slice of South India to your kitchen, and let us know how it turns out in the comments below.
FAQ
1. Can I use brown rice instead of white rice? Yes, you can use brown rice, but keep in mind that brown rice requires more cooking time. If using brown rice, set the Instant Pot to cook for 22-25 minutes on manual mode, and allow for a natural pressure release.
2. Can I make this without an Instant Pot? Yes, you can! Cook the rice separately in a pot or pressure cooker and prepare the tempering in a pan. Then, combine the rice with the tempering and lemon juice.
3. Can I skip nuts if I have allergies? Yes, you can skip the peanuts and cashews if you have allergies. The recipe will still taste delicious without them.
4. Can I use lime juice instead of lemon juice? Yes, lime juice works just as well as lemon juice for this recipe. It will give a slightly different flavor but will still be refreshing and tangy.
5.How can I make this dish spicier? Increase the amount of green chilies or dried red chilies in the tempering. You can also add a pinch of red chili powder or ground black pepper.
0 notes
Text
Are There Healthy Versions of Mango Pancakes?
Many of us enjoy mango pancakes as a tasty tropical treat, but because of the added sugars, processed flours, and thick toppings, they frequently come with a guilt-ridden side. The good news? Mango pancakes come in healthy varieties that are equally, if not more, delicious! You can still enjoy this dessert-like dish without sacrificing your health objectives by making a few easy changes and adding some inventive ingredients.
1. Selecting the Proper Flour
Traditionally, refined all-purpose flour—which is deficient in nutrients—is used to make pancakes. Use substitutes such as these for a healthier base:
Whole wheat flour: Packed with fibre, it prolongs feelings of fullness.
A gluten-free alternative that is high in protein and good lipids is almond flour.
Oat flour: Rich in nutritional fibre and simple to prepare at home.
These flours give your mango pancakes distinctive flavours and textures in addition to increasing their nutritious content.
2. Use Natural Sweeteners Instead
You might not need more sugar because mangoes are naturally sweet, especially in season. But if you'd like a bit more sweetness, try using:
A hint of natural sweetness can be added with honey or maple syrup.
An alternative with a lower glycaemic index is coconut sugar.
To keep it completely natural, use mashed dates or bananas.
Compared to refined sugar, these alternatives offer more nutrients and avoid blood sugar spikes.
3. Accept the Healthy Fats
Because of the butter or oil used, pancakes can frequently seem weighty. Swap them out for more healthful fats such as:
For a subtle, tropical taste that goes well with mango, use coconut oil.
Avocado oil has heart-healthy properties and a neutral flavour.
Healthy fats help keep your pancakes fluffy and moist while also being better for your heart.
4. Include Ingredients Packed with Nutrients
You may add additional nutrient-dense items or superfoods to your mango pancakes to make them even healthier:
Flaxseeds or chia seeds for fibre and omega-3 fatty acids.
For extra protein, try plant-based or Greek yoghurt.
Use protein powder to make a post-workout pancake that will satisfy both your muscles and desires.
Pureed spinach for a surprising health boost without sacrificing taste.
5. Use Smarter Cooking
Use a non-stick pan or lightly coat with cooking spray to make pancakes instead of frying them in too much oil or butter. This technique gives you a gorgeously browned pancake without adding extra calories.
6. Nutritious Finishing Touches
Mango pancakes' healthfulness depends on the toppings. Think about these healthy substitutes for sweet syrups or whipped cream:
For a natural flavour boost, use fresh mango slices.
For creaminess, add a dollop of Greek yoghurt without sugar.
Nuts such as pistachios, walnuts, or almonds can be added for crunch and good fats.
Cashew or almond butter drizzles for extra protein.
In addition to improving the meal's overall nutritional profile, these toppings also improve its flavour.
7. Make it suitable for vegans
Mango pancakes can be readily modified for anyone who would rather eat plant-based foods. Use plant-based milk, such as almond or oat milk, in place of eggs, and use coconut yoghurt as a garnish. Flax eggs are made from a blend of flaxseed meal and water.
8. Pay Attention to Portions
Pancakes can be high in calories if eaten in big quantities, even when they are made healthy. Don't overindulge; instead, limit your portion size to what will satisfy your hunger. For a well-rounded dinner, serve your mango pancakes with a green smoothie or a side of fresh fruit.
Yes, it is possible to produce healthier versions of mango pancakes, and they taste just as good and are quite simple to prepare! You can make this traditional delicacy guilt-free by combining healthy ingredients, natural sweeteners, and thoughtful toppings. These healthy mango pancakes will be a success with your taste buds and your body whether you serve them as a dessert or indulge in them on a weekend morning. So, get your ingredients together and make some delicious tropical food today!
Chekkodans is the only place to go if you're wanting the ideal mango pancake. The most delicious mango pancakes can be found online at Chekkodans, which is well-known for its commitment to flavour and quality. Their pancakes, which are made with excellent ingredients and fresh, luscious mangoes, have the ideal sweetness and texture balance, making each bite feel like a tropical getaway. Chekkodans guarantee that every pancake is prepared to please your taste buds while maintaining its healthfulness, whether you're craving a sweet treat or a morning treat. Chekkodans are distinguished by their dedication to freshness and convenience. You may enjoy these delectable mango pancakes delivered right to your house with their simple online ordering system, guaranteeing that they arrive in optimal condition. Additionally, their menu accommodates a range of tastes by providing choices for people looking for healthier substitutes or unusual flavour combinations. Mango pancakes from Chekkodans are an experience as much as a meal. Therefore, Chekkodans makes it simple to savour this exotic treat whenever and wherever you choose, whether you're organising a special brunch or just indulging yourself.
0 notes
Text
Make Authentic Chicken Biryani at Home
Biryani with chicken as a dish is a perfect blend of the richness of spices with the texture of basmati rice and succulent chicken, creating a flavourful experience that wins hearts across the globe. From the spicy layers of Hyderabadi Chicken biryani to the subtle fragrance of Lucknowi biryani, each variant brings to the table its own unique flavor profile.
Let’s dive into the different recipes of chicken biryani and subtle techniques of how to cook chicken biryani and learn how to prepare these different types of chicken biryani at home, ensuring that you can master the art of chicken biryani like a true master chef.
1. Hyderabadi Chicken Biryani Recipe

Ingredients:
· 500g chicken, cut into bite size pieces
· 2 cups basmati rice (soaked for 30 minutes)
· 2 large onions, thinly sliced
· 2 tomatoes, chopped fine
· 1 cup fresh yogurt
· 2 tablespoons fresh ginger-garlic paste
· 4-5 green chilies, slit
· 1/2 cup chopped fine mint leaves
· 1/2 cup chopped fine coriander leaves
· 2 teaspoons red chili powder
· 1 teaspoon turmeric powder
· 2 teaspoons garam masala
· 2 teaspoons biryani masala
· 6-7 strands of saffron soaked in 2 tablespoons warm milk
· 1/4 cup of ghee or clarified butter
· Whole spices: 4-5 cloves, 2 bay leaves, 1-inch cinnamon stick, 3 green cardamoms, 1 black cardamom, 1 teaspoon cumin seeds
· Salt to your taste
Preparation:
1. Marinate the Chicken: Mix the chicken pieces with yogurt, ginger-garlic paste, red chili powder, turmeric, biryani masala, salt, half of the chopped mint and coriander leaves, now cover and refrigerate for at least 2 hours or preferably overnight.
2. Cook the Rice: In a large pot, boil water with salt and whole spices. Add the basmati rice and cook it until it's about 70% done, now drain the water and set the rice aside.
3. Preparing the Fried Onions: Heat the ghee in a pan and fry the sliced onions until they turn slightly golden brown. Now drain on paper towels and set aside.
4. Assembling the Biryani:
· In a heavy-bottomed pot, layer the marinated chicken at the bottom.
· Add a layer of the half-cooked rice over the chicken.
· Sprinkle fried onions, the remaining mint and coriander leaves, saffron milk and a bit of ghee.
· Repeat the layers until all ingredients are used up while finishing with a rice layer on top.
5. Cooking (Dum Method):
· Seal the pot with a tight-fitting lid or seal it with dough or aluminum foil.
· Now cook on high heat for 5 minutes then reduce the flame setting to low heat and cook for 30-35 minutes. Alternatively, you can place a heavy pan/ tawa below the biryani pot and cook on low heat to ensure even cooking without burning.
· When done, let it rest for 10 minutes before opening the lid.
6. Serve:Gently mix the biryani before serving. Enjoy your biryani with raita or a side of salan.
2. Lucknowi (Awadhi) Chicken Biryani Recipe
Ingredients:
· 500g chicken, cut into small bite size pieces
· 2 cups basmati rice
· 1 cup fresh yogurt
· 2 large onions, finely sliced
· 2 tablespoons of fresh ginger-garlic paste
· 1/4 cup fresh milk
· 10-12 cashews
· 1/4 cup ghee
· 2 tablespoons rose water
· 1/2 cup chopped fresh mint and fresh coriander leaves
· Whole spices: 2 bay leaves, 4 cloves, 2-inch cinnamon stick, 3 green cardamoms, 1 mace, 1 teaspoon black cumin seeds
· Salt to taste
Preparation:
1. Marinate the Chicken: Marinate chicken with yogurt, fresh ginger-garlic paste and salt. Set it aside for at least 2 hours.
2. Cook the Rice: Parboil the basmati rice in salted water along with whole spices to say about 70% then drain and keep aside.
3. Cook the Chicken: Heat the ghee in a pan, fry the onions until golden brown, then remove and crush half of them into a coarse paste. In the same ghee now add marinated chicken and cook until it's half done.
4. Prepare Cashew Paste: Soak the cashews in warm milk for 15 minutes, then grind them into a smooth paste.
5. Assemble the Biryani:
· In a heavy-bottomed pot, first spread a layer of chicken at the bottom.
· Next layer it with the flavored par-boiled rice.
· Now drizzle the cashew paste, rose water, crushed fried onions, mint and coriander leaves.
· Repeat the layers until all ingredients are used, finishing with a layer of rice on top.
6. Cooking (Dum Method):
· Seal the pot tightly with a lid, dough or foil.
· Cook on low heat for 30-40 minutes, which is the traditional dum technique.
7. Serve:Serve hot with a side of the tasty Lucknowi raita.
3. Kolkata Chicken Biryani

Ingredients:
· 500g chicken, cut into bite size pieces
· 2 Boiled eggs
· 2 cups basmati rice soaked for 30 minutes
· 2 large potatoes, peeled and halved
· 2 large onions, thinly sliced
· 1 cup fresh yogurt
· 1/2 cup ghee
· 2 tablespoons fresh ginger-garlic paste
· 4-5 green chilies, slit
· 1 tablespoon of rose water
· 1 tablespoon of kewra water
· 1 teaspoon of sugar
· 1/2 teaspoon of nutmeg powder
· 1/2 teaspoon of mace powder
· Whole spices: 4-5 cloves, 2-inch cinnamon stick, 4 -5 green cardamoms, 2 bay leaves
· Salt to your taste
Preparation:
1. Marinate the Chicken: Marinate chicken with yogurt, fresh ginger-garlic paste, green chilies, salt and a little ghee. Refrigerate this for at least 2-3 hours.
2. Fry the Potatoes: Fry the halved potatoes in ghee until they turn golden. Set them aside.
3. Cook the Rice: Boil the rice with whole spices until they are 70% done, now drain and set aside.
4. Cook the Chicken: In a large pot, heat the ghee and fry onions until they turn golden brown. Remove and keep them aside, now in the same ghee, add the marinated chicken and cook until it's half done.
5. Assemble the Biryani:
· Layer the fried potatoes at the bottom of the pot.
· Now add the half-cooked chicken and then layer with parboiled rice.
· Sprinkle fried onions, nutmeg, mace powder, rose water, kewra water and sprinkle a bit of sugar over the rice.
6. Cooking (Dum Method):
· Seal the pot with a tight lid, dough or foil.
· Cook on low heat for 30-35 minutes using the traditional dum technique.
7. Serve: Serve with boiled eggs on top which is a signature of Kolkata biryani.
4. Mughlai Chicken Biryani
Ingredients:
· 500g chicken, cut into bite size pieces
· 2 cups basmati rice soaked for 30 minutes
· 1 cup fresh yogurt
· 2 large onions, thinly sliced
· 1/4 cup fresh cream
· 1/4 cup ghee
· 2 tablespoons fresh ginger-garlic paste
· 1/2 teaspoon saffron soaked in warm milk
· 2 tablespoons rose water
· 2 tablespoons kewra water
· Whole spices: 4-5 cloves, 2 bay leaves, 1-inch cinnamon stick, 3 green cardamoms
· Salt to your taste
Preparation:
1. Marinate the Chicken: Mix chicken with fresh yogurt, ginger-garlic paste and salt. Marinate for at least 2 hours and set aside.
2. Cook the Rice: Parboil the basmati rice about 70% with whole spices, now drain and set aside.
3. Prepare the Chicken: Fry the onions in ghee until they turn golden brown. Remove and set them aside, now in the same ghee, cook the marinated chicken until it starts to release oil. Add the fresh cream and cook until the chicken is done.
4. Assemble the Biryani:
· Layer the chicken at the bottom of a heavy pot.
· Next add a layer of rice.
· Now, sprinkle saffron milk, rose water, kewra water and fried onions.
5. Cooking (Dum Method):
· Seal the pot tightly with dough or aluminum foil.
· Cook on low heat for 30-40 minutes using the traditional dum technique.
6. Serve: Serve with a side of raita.
Final Thoughts
Cooking chicken biryani at home is a rewarding experience, especially when you master the intricate techniques of marinating, layering and the dum process. Whether you prefer savoring the spiciness of Hyderabadi biryani, the subtlety of Lucknowi, the simplicity of Kolkata, or the richness of Mughlai, each of these recipes brings something unique to your table.
With patience and practice, you can recreate these flavors at home, impressing your family and friends with your culinary prowess...and you know that for all your biryani cravings you can always call or order online Charcoal Eats, the biryani peopleand have any of your favorite biryani delivered hot and delicious right on your doorstep!
0 notes
Text
Unraveling the Magic of Chicken Tikka: A Culinary Journey Through India's Flavourful Delight
Indian cuisine is a tapestry of flavours, colours, and aromas that tantalise the senses and leave an indelible mark on the palate. Chicken tikka stands out as a beloved classic that has captivated taste buds worldwide among the varieties of dishes that grace its diverse culinary landscape. In this culinary journey, we delve deep into the origins, ingredients, and preparation of this quintessential Indian delicacy, exploring the magic that makes chicken tikka a timeless favourite.

The Origins of Chicken Tikka:
Chicken tikka traces its roots back to the Indian subcontinent, where it emerged as a popular dish in the culinary repertoire of the Mughal Empire. Influenced by Persian cooking techniques, Mughlai cuisine introduced the art of marinating meat in a blend of spices and yoghurt before cooking it in a tandoor, a traditional clay oven. This method imparted a unique flavour to the meat and rendered it tender and succulent, laying the foundation for what would later become known as chicken tikka.
The Ingredients:
At the heart of chicken tikka lies a harmonious blend of spices that infuse the meat with its distinctive taste. Key ingredients include ginger, garlic, cumin, coriander, turmeric, and garam masala, each contributing its own depth of flavour to the marinade. Yoghurt acts as a tenderiser, helping break down the meat's proteins and ensure a moist and flavorful end result. Additionally, the use of Kashmiri red chilli powder lends chicken tikka its vibrant red hue, adding visual appeal to its already tantalising aroma.
The Preparation Process:
Preparing chicken tikka is a labour of love that requires patience and precision. It begins with the marination of bite-sized chicken pieces in a mixture of spices, yoghurt, and lemon juice, allowing the flavours to penetrate the meat and develop over time. Once marinated, the chicken is threaded onto skewers and cooked in a tandoor until it is charred and tender. The result is a mouthwatering medley of flavours and textures that embodies the essence of Indian cuisine.
Variations and Regional Influences:
While chicken tikka is traditionally cooked in a tandoor, modern adaptations have made it accessible to home cooks worldwide. Grilling, baking, or pan-searing are standard methods used to replicate the smoky flavour of the original dish, making it versatile and adaptable to different cooking environments. Furthermore, regional variations such as murgh tikka (chicken marinated in a spicy yoghurt sauce) and malai tikka (chicken marinated in a creamy mixture of cashew paste and spices) showcase the diverse culinary landscape of India, each offering a unique twist on the classic dish.
The Global Appeal:
Chicken tikka's capacity to bridge cultural divides and unite people via a shared love of food accounts for its international popularity. Indian food lovers from many walks of life have come to appreciate chicken tikka, which can be found in sophisticated restaurants in New York City as well as on the streets of bustling Mumbai. Its strong tastes, fragrant spices, and easy yet elegant preparation are what make it so well-liked and unique in the food world.
In summary, chicken tikka is a culinary masterpiece that perfectly captures the rich history and wide range of flavours of Indian food. It is more than just a meal. Chicken tikka has earned its status as a timeless classic that never fails to delight and inspire, having come from its modest beginnings in the royal kitchens of the Mughal Empire to its broad popularity on dinner tables throughout the globe. Thus, experience the magic of chicken tikka and relish every bite of this tasty treat the next time you yearn for a taste of India.
1 note
·
View note
Text
The Cultural Significance of Pan Flavoured Cashews? - FoodNutra
In the heart of India’s vibrant culinary heritage, a unique fusion of tradition and taste has emerged, captivating palates around the world: Pan Flavoured Cashews. These delectable treats, marrying the richness of cashews with the aromatic allure of traditional pan masala, are more than just snacks. They are cultural ambassadors, carrying the legacy of centuries-old practices and intricate flavors. Let’s delve into the rich cultural significance that Pan Flavoured Cashews hold in the tapestry of Indian traditions.
For more information: The Cultural Significance of Pan Flavoured Cashews? - FoodNutra
Outline of the Article
I. Introduction
Introduce Pan flavored cashews as a unique and culturally significant snack.
Highlight the cultural diversity and historical background of Pan flavored cashews.
II. The Origin and Heritage of Pan Flavored Cashews
Explore the historical roots of Pan flavor and its significance in various cultures.
Discuss the traditional methods of preparing Pan flavored cashews and their importance in heritage.
III. Pan Flavored Cashews: A Culinary Tradition
Explain how Pan flavored cashews are incorporated into traditional cuisines.
Discuss the significance of Pan flavored cashews in festive and celebratory occasions.
IV. The Symbolism of Pan Flavored Cashews
Explore the symbolism attached to Pan flavored cashews in different cultures.
Discuss the rituals and traditions involving Pan flavored cashews in social gatherings.
V. The Modern Appeal of Pan Flavored Cashews
Describe the popularity of Pan flavored cashews in the modern culinary world.
Discuss innovative recipes and uses of Pan flavored cashews in contemporary cuisine.
VI. Health Benefits and Nutritional Value
Outline the nutritional benefits of cashews and Pan flavor components.
Discuss the health advantages of consuming Pan flavored cashews as part of a balanced diet.
VII. Making Pan Flavored Cashews at Home: A Cultural Experience
Provide a step-by-step guide on preparing Pan flavored cashews at home.
Encourage readers to embrace the cultural experience of making Pan flavored cashews themselves.
VIII. The Social and Community Aspect of Pan Flavored Cashews
Discuss the role of Pan flavored cashews in social bonding and community events.
Explore how the snack fosters connections and camaraderie among people.
IX. Pan Flavored Cashews in Global Cuisine
Explore the international presence of Pan flavored cashews in diverse cuisines.
Discuss fusion dishes and culinary innovations incorporating Pan flavored cashews.
X. Conclusion
Summarize the article’s key points, emphasizing the cultural significance and global appeal of Pan flavored cashews.
Encourage readers to appreciate the rich cultural heritage behind Pan flavored cashews and explore their culinary diversity.
Bold the Heading of the Second Table using Markdown language:
The Cultural Significance of Pan Flavoured Cashews
I. Introduction
In the tapestry of global culinary delights, Pan flavored cashews stand out as a culturally significant and delectable treat. Rooted deeply in tradition and celebrated across diverse cultures, these cashews offer more than just a snack; they embody centuries-old customs, social connections, and the artistry of flavors.
II. The Origin and Heritage of Pan Flavored Cashews
To truly appreciate Pan flavored cashews, one must delve into their origins. The infusion of Pan, a cherished flavor in various cultures, with the creamy goodness of cashews has a rich historical background. Originating from ancient recipes passed down through generations, Pan flavored cashews have become emblematic of cultural heritage.
III. Pan Flavored Cashews: A Culinary Tradition
In culinary traditions worldwide, Pan flavored cashews play a pivotal role. From traditional recipes handed down in families to elaborate feasts during celebrations, these cashews find their way into a multitude of dishes. Their unique taste adds depth to both sweet and savory creations, making them a staple in cultural cuisines.
IV. The Symbolism of Pan Flavored Cashews
Beyond their culinary prowess, Pan flavored cashews hold symbolism in various cultural contexts. Often used in rituals, social gatherings, and religious ceremonies, these cashews signify prosperity, hospitality, and togetherness. Their presence in important life events marks the significance of these tiny, flavorful delights.
V. The Modern Appeal of Pan Flavored Cashews
In the contemporary culinary landscape, Pan flavored cashews continue to capture the imagination of chefs and food enthusiasts alike. Their versatile nature allows them to be integrated into fusion dishes, desserts, and beverages, adding a touch of cultural heritage to modern gastronomy. The blend of tradition and innovation makes Pan flavored cashews a popular choice among food connoisseurs.
VI. Health Benefits and Nutritional Value
Amidst their cultural significance and delightful taste, Pan flavored cashews offer a range of health benefits. Packed with essential nutrients and Pan’s unique flavor components, these cashews provide a wholesome snacking option. Their nutritional richness aligns with the growing demand for healthier snack alternatives.
VII. Making Pan Flavored Cashews at Home: A Cultural Experience
For those keen on embracing cultural traditions in their own kitchens, making Pan flavored cashews at home is both a culinary adventure and a cultural experience. The process, steeped in tradition, allows individuals to connect with the heritage of Pan while creating a snack that reflects cultural richness.
VIII. The Social and Community Aspect of Pan Flavored Cashews
In social settings, Pan flavored cashews foster connections and camaraderie. Whether shared among friends, offered to guests, or enjoyed during community events, these cashews create a sense of belonging. The act of sharing Pan flavored cashews becomes a cultural exchange, enhancing social bonds.
IX. Pan Flavored Cashews in Global Cuisine
Beyond regional boundaries, Pan flavored cashews have found a place in global cuisine. Their unique flavor profile and cultural significance have led to their incorporation in diverse culinary traditions. From Pan flavored desserts to innovative main dishes, these cashews continue to enrich the global gastronomic scene.
X. Conclusion
In essence, the cultural significance of Pan flavored cashews goes far beyond their delightful taste. They carry the legacy of generations, the spirit of togetherness, and the artistry of cultural diversity. As we indulge in the nuanced flavors of Pan flavored cashews, let’s savor not just the taste but the heritage and stories they encapsulate. Let’s celebrate the cultural richness they bring to our tables and embrace the world of Pan flavored cashews with a newfound appreciation.
For more information: The Cultural Significance of Pan Flavoured Cashews? - FoodNutra
1 note
·
View note
Text
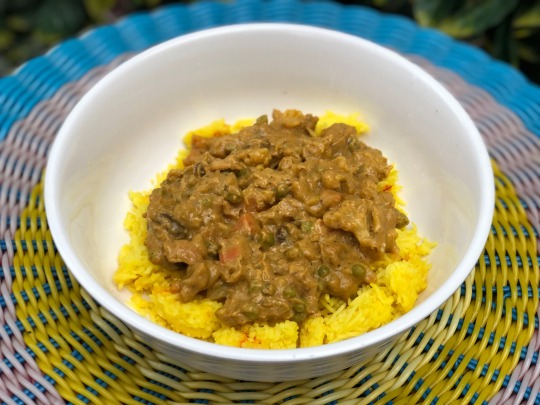
Veggie Korma
[[MORE]]
1 tbsp butter-flavoured coconut oil 1 onion, peeled and chopped
1 tbsp garlic paste 1 tbsp ginger paste
2 cups tomatoes, chopped
1 tbsp coriander 1 tbsp cumin 1 tsp garam masala 1 tsp cardamom 1 tsp turmeric 1 tsp fennel powder 1 tsp Kashmiri red chili powder 1 tsp sea salt
1 cup raw cashews 1 can coconut cream 1 tbsp maple syrup
Heat coconut oil in a large saucepan over medium-low heat. Sauté onion for several minutes. Stir in the garlic paste and ginger paste and sauté for another minute or two.
Stir in the tomatoes and cook for about five minutes, stirring frequently. Add the; coriander, cumin, garam masala, cardamom, turmeric, fennel, chili powder, and sea salt. Cook for several more minutes, stirring frequently. Turn heat off. Allow to cool.
Place cooked tomato mixture into a high-speed blender. Add the raw cashews, coconut cream and maple syrup. Blend until smooth and creamy.
2 tbsp butter-flavoured coconut oil
1/2 head of cauliflower, chopped 1 1/2 cup sweet potatoes, peeled and chopped 1 1/2 cup carrots, peeled and chopped 2 cups vegetable bouillon 1/2 cup raisins
1 cup green peas 1/2 cup roasted cashews, chopped 1 tbsp cilantro paste a pinch of hing (asafoetida)
Heat coconut oil in a large saucepan over medium-low heat. Make sure it coats the bottom of the pan. Add the; cauliflower, sweet potatoes and carrots. Pour the pureed sauce over top. Stir in the vegetable bouillon and raisins. Turn heat to high. As soon as mixture begins to bubble turn to low heat and simmer for about 15 minutes, stirring frequently. When veggies are fork tender, turn heat off.
Stir in the; green peas, roasted cashews, cilantro paste and hing. Allow to sit for a few more minutes to heat the peas. Ladle over basmati rice.
#veggie korma#vegan veggie korma#vegan indian#vegetable korma#vegan vegetable korma#korma#vegan curry#vegan stew#curry#vegetable curry
9 notes
·
View notes
Text
Banana Cake recipes for beginners by Cake Bites
Ingredients:
Banana: Banana is the star of the cake. Need approximately four overripe bananas.
Flour: You can use whole wheat flour, Pastry flour, or all-purpose flour.
Baking soda and baking powder: Make sure that they are fresh
Oil: You can use coconut oil, olive oil or melted butter.
Nuts: Any crushed nuts can be used, like almond, cashews or pecans.
Dry Fruits: Dry fruits add extra sweetness to the cake. You can use any dry fruits.
Flavourings: You can add any flavours.
Optional Ingredients: Chocolate flakes, coconut flakes and other ingredients can be delicious to the cake.
How to make:
Preheat the oven to 180 degrees celsius 350 degrees fahrenheit. Mash 4 medium overripe bananas with a fork to a consistency. The consistency should be without any chunks, so you can also use a blender. Add 1⁄4 cup of any neutral flavoured oil, ½ cup of sugar and 1 teaspoon of vanilla to the mashed bananas and stir well. Oil mix with the mashed banana and the sugar dissolves completely. Sieve 1 1⁄2 cup of flour, ½ teaspoon of baking soda, ½ teaspoon of baking powder and a pinch of salt directly to the bowl. Fold the dry ingredients thoroughly into the wet ingredients. Add some water depends on the texture and quality of the wheat flour. Chop ten walnuts, then add and mix. You can also add raisins, cashew nuts or any nuts and dry fruits of your choice. Pour the butter into a greased rounded cake pan. Then bake in the preheated oven for 45 to 50 minutes. Then transfer to a wire rack to cool completely. When cooled, slice and serve your Eggless banana cake. You can enjoy your tasty and delicious eggless banana cake. For more recipes visit our website: http://cakebites.42web.io/
0 notes
Text
Artichoke Pizza: You should Try these five best healthy vegan pizza recipes

Artichoke pizza is a healthy vegan meal idea for you. It can give you loads of nutritional benefits. This article takes you through the artichoke, its health benefits and five amazingly delicious artichoke vegan pizza recipes.
Artichoke is a plant food of Mediterranean origin used for centuries due to its marvellous health benefits.
Artichokes are loaded with nutrients and high in fibre, protein, and antioxidants. Among the nutrients are folate, copper, magnesium, vitamin C, niacin, riboflavin, potassium, phosphorus, and vitamin B6.
Artichokes are low in fat, and it has a positive effect on cholesterol levels in several ways. It prevents the formation of cholesterol, and it can also effectively enhance the distribution of cholesterol within the body.
It can reduce blood sugar levels, control blood pressure, and prevent cancer formation while helping improve liver health, digestive health and irritable bowel symptoms.
They can be steamed, baked, boiled, grilled, roasted, or sautéed. You can also prepare them stuffed or breaded, adding spices and other seasonings for extra flavour.
Both the artichoke leaves and the heart can be eaten.
Once cooked, the outer leaves can be pulled off. You can remove the edible flesh from the leaves by pulling them through your teeth.
Once the leaves are removed, carefully spoon out the fuzzy substance called the choke until you reach the heart. You can then scoop the heart to eat alone or atop pizza.
Here are the five best vegan pizza recipes with artichoke for a delicious, mouthwatering meal.
1. Delightful Vegan Spinach Artichoke Pizza with Creamy Artichoke White Sauce
- The vegan spinach pizza recipe combines creamy white sauce, garlic, lemon, and chilli.
- The pizza crust is baked with wilted spinach, caramelised shallot slices, quartered artichokes, vegan 'parmesan,' and chilli toppings.
Artichoke White Sauce:
- The white sauce is made with a blend of artichoke hearts, chickpeas, soaked cashews, garlic, lemon, capers, miso, and spices.
- The sauce is pureed into a silky perfection and used as a pizza base.
Pizza Preparation:
- The recipe recommends using prepared pizza dough and a pizza stone to achieve a crisp bottom and a puffed crust.
- Before baking, the dough is topped with the artichoke white sauce, dressed spinach, sliced shallots, and quartered artichokes.
Baking and Serving:
- The pizza is baked in a preheated oven at 500°F for 12 minutes, resulting in a puffy and golden brown crust.
- Before slicing and serving, the finished pizza is garnished with chilli flakes and vegan 'parmesan'.
2. Recipe for Vegan Artichoke Pizza with Tomato and Salad
- The combination of toppings in this vegan artichoke pizza, including red bell peppers and onions, is delectable.
- Thin slices of fresh tomatoes between the sauce and the cheese can enhance the summery flavour provided by fresh basil.
Companion to Pizza:
- The best companion for this vegan artichoke pizza or almost any kind of pizza is a big salad filled with mixed greens, tomatoes, peppers, carrots, cucumbers, and your favourite salad dressing.
- Adding plenty of beans or chickpeas to the salad can boost the meal's protein content.
Vegan Cheese:
- Vegan cheese, especially one that melts well, adds a vast yum factor to plant-powered pizza but isn't entirely necessary.
- Mozzarella-style shreds are the best for vegan pizza, and using half mozzarella and half spicy pepperjack can add a great kick.
Preheat the oven to 425º F. Heat the oil in a frying pan, add the onion and garlic, and sauté until golden. Add the bell pepper and artichoke hearts. Saute until soft, remove from heat and cover.
Place the crust on a pan. Spread the marinara sauce, tomatoes and cheese on the crust.
Bake for 10 minutes until the cheese is well melted, and spread the mixture from the pan over the surface and oven for another 2 to 3 minutes longer. Once removed from the oven, sprinkle with sliced basil leaves before serving.
3. Homemade Vegan Artichoke Pesto Pizza Recipe
Vegan Artichoke Pesto Pizza:
This Vegan Artichoke Pesto Pizza is a delicious dinner option with homemade pesto, seasonal vegetables, and tender baby artichokes that add love and taste to your dinner table.
Ingredients for this pizza include vegan pizza dough, cooked baby artichokes, sliced mushrooms, shaved asparagus, vegan pesto, vegan mozzarella, and optional red pepper chilli flakes.
The pizza dough can be made using homemade or store-bought dough.
You can prepare the pesto by blending soaked cashews, garlic, pine nuts, nutritional yeast, olive oil, lemon juice, basil, greens, water, salt, and pepper until smooth. Before making the pesto, soak the cashews in warm water for 30 minutes.
Recipe Preparation:
- For the pizza, preheat the oven to 450F. Roll out the dough, spread the pesto, add mozzarella, layer vegetables, sprinkle with additional mozzarella, chilli flakes, salt, and pepper, then bake at 450F for 14-16 minutes.
4. Artichoke vegan pizza with peppers and olive
You can use homemade pizza dough or a store-prepared one.
Preheat the oven to gas 7, 240°C, fan 220°C. Place 2 floured baking trays (or pizza stones, if you have them) in the oven to heat through.
Spread 2 tbsp passata over each base, then top with the artichokes and peppers. Stir the sundried tomato paste into the houmous, then dot it over the pizzas. Finish with the olives and capers.
Carefully transfer the pizzas to the hot baking trays and bake for 8-10 mins until the crust is golden. Serve each pizza scattered with rocket leaves and a drizzle of basil oil.
5. Homemade Pizza Recipe with Flavorful Veggies, Fresh Basil, and Artichoke
- Piled with flavorful veggies like peppers and artichokes
- Fresh basil takes it over.
Veggie Pizza Recipe Ingredients:
- Pizza dough, Cornmeal, Pizza sauce, Asiago, pecorino, and mozzarella cheese, Roasted red peppers, Artichoke hearts, Red onion, Jalapeño pepper, Extra-virgin olive oil, Fresh basil leaves
Making this vegetarian pizza recipe:
- Use homemade dough or a store-prepared pizza crust and spread on the sauce. Pizza sauce can be created simply as a no-cooking method. Add all the ingredients, tomato, oregano, olive oil, and salt, and blend until a creamy base is achieved.
Add the cheese and vegetables.- roasted red pepper is a classic vegetarian topping with thinly sliced onion that gives a unique soft, sweet taste. Add sautéed mushrooms, sliced olives, or mini broccoli florets if you want a variation. You can make your pizza drizzling by adding extra virgin olive oil.
- Bake at 500°F until the pizza crust is golden brown and the cheese and toppings are browning to 10 to 13 min.
In summary, you can try these simple artichoke pizza recipes that add a load of nutritional value as well as a delicious taste. It's a healthy choice for everyone in your family. You can use canned artichoke hearts to make your pizza delicious and enjoyable.
https://kit.co/Isanka/artichoke
0 notes
Text
Banana Cake recipe for beginners
Ingredients:
Banana: Banana is the star of the cake. Need approximately four overripe bananas.
Flour: You can use whole wheat flour, Pastry flour, or all-purpose flour.
Baking soda and baking powder: Make sure that they are fresh
Oil: You can use coconut oil, olive oil or melted butter.
Nuts: Any crushed nuts can be used, like almond, cashews or pecans.
Dry Fruits: Dry fruits add extra sweetness to the cake. You can use any dry fruits.
Flavourings: You can add any flavours.
Optional Ingredients: Chocolate flakes, coconut flakes and other ingredients can be delicious to the cake.
How to make:
Preheat the oven to 180 degrees celsius 350 degrees fahrenheit. Mash 4 medium overripe bananas with a fork to a consistency. The consistency should be without any chunks, so you can also use a blender. Add 1⁄4 cup of any neutral flavoured oil, ½ cup of sugar and 1 teaspoon of vanilla to the mashed bananas and stir well. Oil mix with the mashed banana and the sugar dissolves completely. Sieve 1 1⁄2 cup of flour, ½ teaspoon of baking soda, ½ teaspoon of baking powder and a pinch of salt directly to the bowl. Fold the dry ingredients thoroughly into the wet ingredients. Add some water depends on the texture and quality of the wheat flour. Chop ten walnuts, then add and mix. You can also add raisins, cashew nuts or any nuts and dry fruits of your choice. Pour the butter into a greased rounded cake pan. Then bake in the preheated oven for 45 to 50 minutes. Then transfer to a wire rack to cool completely. When cooled, slice and serve your Eggless banana cake. You can enjoy your tasty and delicious eggless banana cake.
0 notes
Text
Paneer Kali Mirch
Paneer is another versatile dish. Bland when eaten raw and versatile when added flavours, paneer is an Indian cottage cheese. Listed at the top of every Indian menu are all three-course meals: appetiser, main course, and dessert. It is not only a dish that is served at home, but it can also be made at home. In this blog, we’ll prepare a perfect paneer kali mirch recipe that goes with roti or chapati, along with sunflower oil manufacturers in Tamil Nadu.
Ingredients:
Cubed paneer
Kewra or rose water - 1 tsp
Medium or large onion - ½ cup chopped
Ginger - ½ inch chopped
Garlic - medium cloves 3 chopped
Green chillies chopped - Acc. to preference
Cashew nuts - 10
Javathai/Jaadipathir - 1 or 2
Cloves - 2
Cardamoms -2
Cinnamon - 1 inch
Full-fat curd (beaten) - ¼ cup
Bay leaf - small size 1
Red chilli powder - Acc. to preference
Shahi jeera - ½ tsp
Oil
Garam masala - ¼ tsp
Coriander powder - ¼ tsp
Salt as per taste
Black pepper - crushed
Water
Instructions
Begin with preparing the onion paste.
In a heavy-bottomed pan, add a tablespoon of oil. Once it is hot, add the cinnamon stick, cardamoms, cloves, and mace strands and sauté until it crackles.
Add the chopped onion and sauté until it turns a light golden brown on medium heat.
Once light golden brown, add the ginger, green chilies, garlic, and cashew nuts.
Mix until it is golden brown. Once done, remove from heat and mix it in a blender.
Add water to grind it into a smooth, fine paste.
In the same saucepan, add 2 tablespoons of oil, and once it is hot, add the bay leaf and shahi jeera and let it crackle and become fragrant.
Now add the onion paste and sauté it for 4-5 minutes till the oil separates from the paste. Add the crushed black pepper and sauté for a minute.
Now add the spice powder and sauté till it mixes very well.
Remove it from the heat and let it cool down. Now add the whisked curd and quickly stir till it mixes well with the onion paste. Now add water and mix well.
Now, on medium heat, simmer the gravy till oil specks on the top. If the gravy thickens, add water.
Now add the paneer cubes and mix well. Switch off the heat and add 2 tablespoons of cream.
Lastly, add a teaspoon of kewra or rose water and garnish with crushed black pepper, mint leaves, or coriander leaves.
Paneer Kali Mirch is ready to be served with chappati, roti, or naan.
About Sundew Sunflower Oil:
Tamil Naadu Edible Oils is one of the leading refined sunflower oil manufacturers that produces premium-quality oil for cooking. As one of the best cooking oil manufacturers in Tamil Nadu, TNEO is committed to delivering quality oil that is affordable as well as light in texture. The refined oil from TNEO is fortified with vitamins and essential fatty acids, making it an ideal choice for all age groups. The oil is versatile and enhances the taste of every dish and every cuisine effortlessly. Choose sunflower oil from TNEO, one of the best sunflower oil manufacturers in India, to make tasty dishes.
#sunflower oil manufacturers in tamilnadu#refined sunflower oil manufacturers#sunflower oil manufacturers in india
0 notes