#OBD II
Explore tagged Tumblr posts
Text
Limp mode in cars
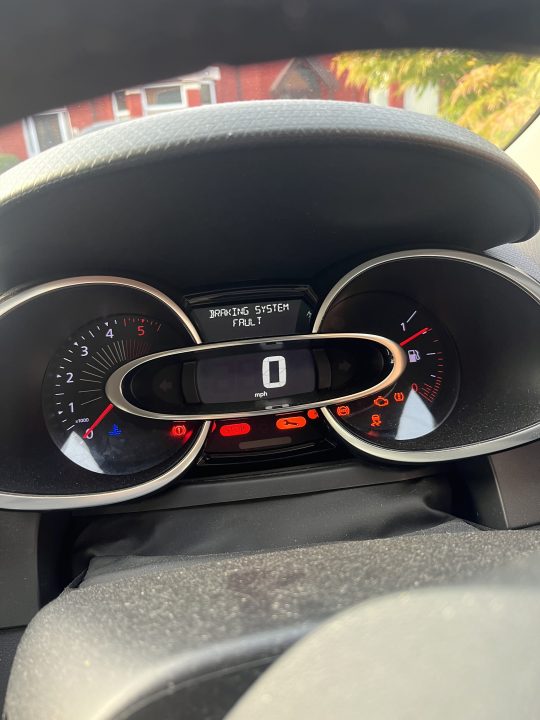
Now let’s talk about limp mood in cars A car dashboard experiencing limp mode. “Limp mode” in cars refers to a restricted operating condition often triggered by a serious problem with the engine or transmission. It’s a protective measure to prevent further damage. Limp mood once activated would limit the vehicle from accelerating above 30mph to 40mph depending on the brand of vehicle this is to…
View On WordPress
#Asoro Automotive#Automotive Computerized Diagnostics#Automotive Diagnostics#Automotive Electrical#Automotive Repair#Automotive Repairs#automotive workshop#check engine light#Computerized Diagnostics#ECU#Electronic Control Unit#OBD II#on-board diagnostics#onboard Diagnostics#Warning Lights
0 notes
Text
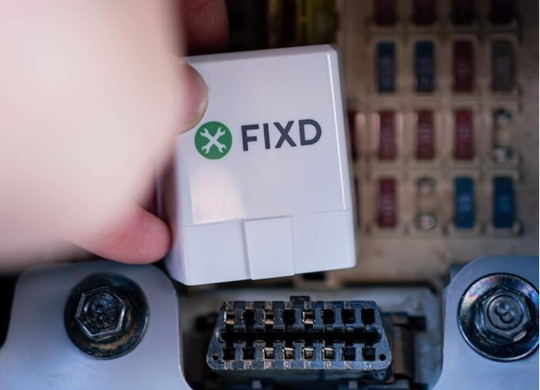
Bluetooth OBD2 Scanner and Car Code Reader for iPhone & Android
The FIXD car scanner and OBD app instantly translates 7000+ engine fault codes into plain English on your phone. Wireless Bluetooth connection. Set up in minutes. No car knowledge needed.
2 notes
·
View notes
Text
Ghid Complet: Coduri de Eroare OBD2 BMW
Informatii generale Modulul de comandă a motorului (ECM) încorporează funcția de autodiagnosticare. Indicatorul de defecțiune (MIL) se va aprinde dacă se înregistrează anumite defecțiuni. ECM funcționează în modul backup dacă senzorii nu funcționează, pentru a permite vehiculului să fie condus în atelier. Codurile de eroare pot fi afișate numai prin utilizarea unui instrument de scanare…
#B0111#B0131#B1109#B1214#C1E21#C1E22#coduri eroare BMW#coduri eroare OBD-II#diagnoză BMW#e81#e84#e90#e91#e92#P0087#P0171#P0174#P0300#P0301 - P0306#P0420#P0430#p0700#P0730#P0741#Seria 1#Seria 3#Seria 5#X3#X5#Z4
0 notes
Text
Ancel AD310 Classic Enhanced Universal OBD II Scanner – Your Essential Car Diagnostic Tool
Meta Description: Quickly diagnose and troubleshoot car issues with the Ancel AD310 Classic Enhanced Universal OBD II Scanner. This user-friendly and reliable scanner provides accurate readings to keep your vehicle in top shape. Keeping your car in peak condition is crucial for both safety and performance. The Ancel AD310 Classic Enhanced Universal OBD II Scanner is an invaluable tool that gives…
0 notes
Text
The importance of computer-generated diagnostic testing for your Renault vehicle
Keeping your Renault in optimal condition has become relatively easier with the help of advanced computer-generated diagnostics. This advanced technology helps mechanics identify and fix issues with your car quickly and accurately. Your Renault has an OBD-II port, which is usually found under the dashboard. Connecting a diagnostic scanner to this port lets our mechanics read diagnostic trouble…
#Accurate diagnostic testing for Renault engine performance#Advanced computer diagnostic testing for Renault vehicles#Benefits of computer diagnostics for Renault cars#car engine repair#car repair#Car service#car service center melbourne#car tips#Emission and performance checks with Renault diagnostics#How computer-generated diagnostics work in Renault vehicles#How long does a Renault computer diagnostic test take?#Importance of OBD-II port in Renault diagnostic testing#Prevent costly repairs with early Renault diagnostics#Quick and accurate Renault diagnostic testing#Renault computer diagnostics for transmission issues#Renault mechanic near me#Renault service Centre Melbourne#Renault service centre with advanced diagnostic tools#Renault service Melbourne#Routine Renault maintenance with diagnostic testing#Specialized Renault diagnostic tools and trained mechanics#Why choose our Renault service centre for diagnostics?
0 notes
Text
A Beginner’s Guide to OBD-II and DTC Codes: What You Need to Know

Understanding the basics of On-Board Diagnostics II (OBD-II) and Diagnostic Trouble Codes (DTCs) is essential for anyone looking to maintain and troubleshoot their vehicle efficiently. This guide aims to provide a comprehensive introduction to these crucial automotive diagnostic tools, making it easier for beginners to grasp the fundamental concepts.
What is OBD-II?
OBD-II is a standardized system implemented in most vehicles manufactured from 1996 onwards. It monitors various aspects of the vehicle's performance, including engine operation, emissions, and other critical functions. The primary purpose of OBD-II is to ensure vehicles meet emission standards and help in diagnosing issues.
Key Features of OBD-II:
Standardized Interface:
All OBD-II equipped vehicles have a universal diagnostic port, usually located under the dashboard.
Continuous Monitoring:
The system continuously monitors the vehicle's components and systems to ensure they operate within the prescribed parameters.
DTC Generation:
When a fault is detected, the system generates a Diagnostic Trouble Code (DTC) to help identify the issue.
Understanding Diagnostic Trouble Codes (DTCs)
Diagnostic Trouble Codes (DTCs) are codes that the OBD-II system uses to report issues detected in the vehicle. Each DTC is a five-character code that provides specific information about the nature of the problem.
Structure of DTCs:
First Character - System Identifier:
P (Powertrain): Engine, transmission, and associated accessories.
B (Body): Airbags, climate control, and seat functions.
C (Chassis): Brakes, suspension, and steering.
U (Network & Vehicle Integration): Communication issues within the vehicle’s network.
Second Character - Code Type:
0: Generic code (applicable to all OBD-II compliant vehicles).
1: Manufacturer-specific code.
Third Character - Subsystem Identifier:
Indicates the subsystem involved, such as fuel, air, or ignition.
Last Two Characters - Specific Issue:
Provide a detailed description of the problem within the subsystem.
Common DTCs and Their Meanings
Here are some common DTCs that you might encounter:
P0171: System Too Lean (Bank 1)
P0300: Random/Multiple Cylinder Misfire Detected
P0420: Catalyst System Efficiency Below Threshold (Bank 1)
P0442: Evaporative Emission System Leak Detected (small leak)
P0455: Evaporative Emission System Leak Detected (gross leak)
Detailed Explanation of Common DTCs
P0171: System Too Lean (Bank 1)
Indicates that the air-fuel mixture is too lean. Possible causes include:
Vacuum leaks
Faulty fuel injectors
Issues with the mass airflow sensor
P0300: Random/Multiple Cylinder Misfire Detected
Signifies multiple cylinders are misfiring. Causes might be:
Worn spark plugs
Faulty ignition coils
Fuel delivery issues
P0420: Catalyst System Efficiency Below Threshold (Bank 1)
Suggests the catalytic converter is not performing efficiently. Potential causes:
Damaged catalytic converter
Faulty oxygen sensors
Exhaust leaks
P0442: Evaporative Emission System Leak Detected (Small Leak)
Indicates a small leak in the evaporative emission control system. Common causes:
Loose or damaged gas cap
Small leaks in the fuel system
P0455: Evaporative Emission System Leak Detected (Gross Leak)
Points to a large leak in the evaporative emission system. Possible causes:
Disconnected or faulty hoses
Broken gas cap
How to Read and Interpret DTCs
To read and interpret DTCs, follow these steps:
Connect an OBD-II Scanner:
Plug the scanner into the vehicle’s OBD-II port, typically located under the dashboard.
Turn on the Ignition:
Switch the vehicle’s ignition to the "ON" position without starting the engine.
Retrieve the Codes:
Follow the scanner’s instructions to retrieve the stored DTCs.
Interpret the Codes:
Use the scanner or a reference guide to decode the meaning of each DTC.
Diagnose and Repair:
Based on the codes, diagnose the issue and perform the necessary repairs.
Advanced OBD-II Diagnostics
Beyond basic code reading, advanced diagnostics can provide deeper insights into vehicle performance and issues.
Freeze Frame Data
Freeze Frame Data captures the vehicle’s operating conditions at the moment a DTC was triggered. This data includes:
Engine RPM
Vehicle speed
Fuel trims
Coolant temperature
Live Data Stream
A Live Data Stream allows real-time monitoring of various sensors and systems while the vehicle is running, helping identify intermittent issues that may not trigger a DTC.
Mode 6 Data
Mode 6 Data provides results from the onboard diagnostic tests for specific components and systems, offering detailed information on the performance of sensors and other parts.
Essential Tools for OBD-II Diagnostics
Effective OBD-II diagnostics require the right tools. Here are some commonly used tools:
OBD-II Scanners: From basic code readers to advanced tools with live data and freeze frame capabilities.
Multimeters: For testing electrical components and circuits.
Vacuum Gauges: To diagnose vacuum leaks.
Smoke Machines: Useful for identifying leaks in the evaporative emission system.
Best Practices for OBD-II Diagnostics
To ensure effective OBD-II diagnostics, follow these best practices:
Regularly Check for Codes: Periodically scan for DTCs to catch issues early.
Maintain Your Scanner: Keep the software of your OBD-II scanner up-to-date.
Document Findings: Record the DTCs and diagnostic steps taken for future reference.
Understand Manufacturer-Specific Codes: Be aware that some codes are manufacturer-specific.
Stay Informed: Continuously educate yourself on new diagnostic techniques and tools.
Conclusion
Understanding and utilizing OBD-II and DTC codes is fundamental for anyone looking to maintain their vehicle efficiently. By learning how to read and interpret these codes, and using the right tools and techniques, you can diagnose and address issues effectively, ensuring your vehicle’s optimal performance and longevity.
1 note
·
View note
Text
These Are The Essential Tools That Every DIY Mechanic Should Have
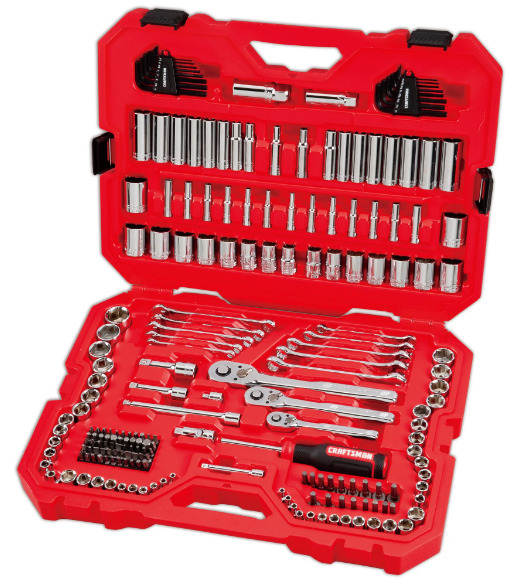
Having a basic set of tools for a DIY mechanic is essential. In this article I'll try to give the most comprehensive list I can think of at least for basic tools.
Even if you’re not a seasoned ASE certified mechanic and only do occasional work on your vehicle, there’s still plenty of tools that you should own. You’d be surprised at just how useful some tools are at things around the house and not just for working on a car. In this article I’m going to try to go through a comprehensive list of tools that every DIY mechanic should have. Now, I already know…
View On WordPress
#Adaptors#Auto Maintenance#automotive#car-maintenance#Creepers#Extension#Jack#Jack Stand#OBD II Scanner#Ratchet#Screwdrivers#Socket#Tools#Torx Bits#vehicle-maintenance#Wrenches
1 note
·
View note
Text
OneNETnews INVESTIGATES: The Enhanced Car Sound Device of 'RevKingz' raises eyebrows amid overpranking concerns online [EXCLUSIVE]
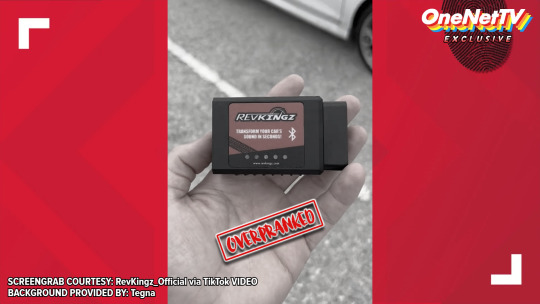
WATERTOWN, NEW YORK -- In an age where social media trends can catapult a product to fame or infamy, it's no surprise that a relatively obscure device like "RevKing" would draw its public attention.
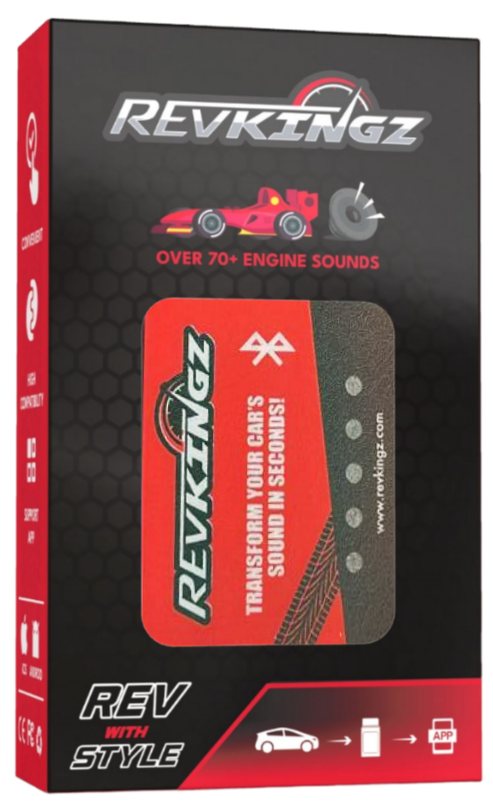
(FILE PHOTO COURTESY: RevKingz website)
This compact device claims to transform the sound of a car's engine via a Bluetooth pairing through the OBD-II port, and it sparked a wave of viral TikTok videos (whose owned by ByteDance), leaving many online consumers wondering whether it's genuine or just another product of a severe internet hoax culture.

(STOCK PHOTO COURTESY: MakeUseOf website)
The OBD-II port (On-board Diagnostics) founds itself in the spotlight as car enthusiasts and influencers demonstrate "RevKing" on TikTok, revving their cars' engines and producing exhilarating sounds with just a tap on their smartphones. RevKingz, the independent company behind the product, touts it as a quick and easy way to enhance the auditory experience of your own car, but as the exclusive investigation revealed to our news team of OneNETnews, this newfound social media sensation raises more questions than answers.

(STOCK PHOTO COURTESY: Google Images)
Several TikTok videos have recently gone viral, showcasing RevKingz in action. Users have shared multiple video clips that seem to illustrate how the device can transform an ordinary car's engine noise into a superior thunderous roar. However, amidst the fanfare, critics and skeptics on both TikTok and The X Network (formerly Twitter and owned by the X Corporation) have emerged, challenging the authenticity of these viral videos.
Many of the videos have faced allegations of being uncut or edited, raising concerns about the legitimacy of the product and the viral sensation that has become. The videos' widespread dissemination of social media was made challenging to discern genuine user experiences from potential pranks or cleverly orchestrated marketing stunts.
The notion of overpranking, where pranksters use social media to deceive, confuse or manipulate their audience, is not new. While the aforesaid pranks can be entertaining and harmless, they can also cross ethical boundaries and even become serious issues, according to Dr. Stephanie Sarkis of Psychology Today. Overpranking often involves exploiting the gullibility of online audiences, thereby risking the spread of misinformation or deception. In the case of RevKingz, the viral nature of these videos and the divisive discussions surrounding their legitimacy underscore the potential harm overpranking can cause.

Social media platforms like TikTok have become breeding grounds for content that blurs the line between authenticity and deception. With billions of users and rapid video sharing capabilities, content can quickly go viral real fast, fueling trends and sometimes leading to the marketing promotion that are not as advertised neither the free or paid car product placements online. Platforms like TikTok should consider their role in curbing deceptive content, while consumers must exercise a discerning eye when encountering viral trends.
As the RevKingz phenomenon continues to make waves on social media, the investigation delves deeper into the authenticity of the device and the videos that can legally promote it. An investigative team of OneNETnews will scrutinize these claims made by RevKingz and explore the experiences of users who have purchased and tested the product. In the era of overpranking and internet hoaxes, it is essential to separate fact from fiction, ensuring consumers make informed decisions about the products they choose to purchase.
While the RevKingz product may genuinely enhance the sound of a car's engine, its rise to fame through TikTok's viral platform was created an environment ripe for skepticism.
The world of social media and consumer trends is ever-evolving, and as such, the responsibilities of companies, influencers and consumers are increasingly intertwined. As we navigate the world of viral sensations and overpranking, it is crucial to remember that in the age of social media, not everything is as it seems to them.
FULL DISCLOSURE: TikTok is strictly not affiliated on this social media platform, nor sponsoring a car product device.
SCREENGRAB COURTESY: RevKingz_Official via TikTok VIDEO BACKGROUND PROVIDED BY: Tegna
SOURCE: *https://revkingz.com/pages/about-us [Referenced Mini Biography via RevKingz website] *https://www.tiktok.com/@revkingz.com/video/7212063609080565038 *https://www.tiktok.com/@revkingz.com/video/7212314084853779758 *https://www.tiktok.com/@revkingz.com/video/7227483818654043434 *https://www.tiktok.com/@revkingz.com/video/7238266490481429806 *https://www.tiktok.com/@revkingz.com/video/7245690209722223918 *https://www.tiktok.com/@revkingz.com/video/7260562674528881963 *https://www.tiktok.com/@revkingz.com/video/7281340779304439082 *https://www.tiktok.com/@revkingz_official/video/7286110175830854945 *https://www.tiktok.com/@revkingz_official/video/7288711657591770400 *https://www.tiktok.com/@revkingz_official/video/7289816701594635552 *https://www.tiktok.com/@revkingz_official/video/7290929137890495777 *https://www.tiktok.com/@revkingz_official/video/7290986257801399584 *https://revkingz.com/products/revking [Referenced Product Listing via RevKingz website] *https://www.makeuseof.com/tag/obd-ii-port-used/ [Referenced Excerpt Article via MakeUseOf news bureau] *https://en.wikipedia.org/wiki/On-board_diagnostics *https://www.quora.com/What-are-some-situations-a-prank-becomes-a-serious-issue and *https://www.psychologytoday.com/intl/blog/here-there-and-everywhere/202203/don-t-be-gaslit-social-media-pranksters [Referenced Blog Article via Psychology Today]
-- OneNETnews Team
#OneNETnewsInvestigates#new york#TikTok#product placements#social media#viral#fyp#business news#compact device#on-board diagnostics#OBD-II#overpranked#prank#RevKingz#awareness#car#exclusive#first and exclusive#OneNETnews
0 notes
Text
How to Add Smart Key to 2019 Ford Explorer Using IM608 PRO 2?
Here’s a step-by-step guide on how to program a new smart key using the Autel IM608 Pro II as a demonstration:
1. Connect the IM608 Pro II tablet to the OBD port of the vehicle.
2. Go to the IMMO section on the tablet and select “Accept.”
3. Choose “Ford” from the options provided.
4. Select “Automatic selection” to let the device automatically detect the vehicle model.
5. Click on “Read” to retrieve information from the vehicle.
6. Confirm the prompt by selecting “OK.”
7. Choose “Smart key” and then select “Yes” to proceed.
8. Perform an immo status scan and erase any existing codes if necessary.
9. Select “Add key” and click “Start” to begin the key programming process.

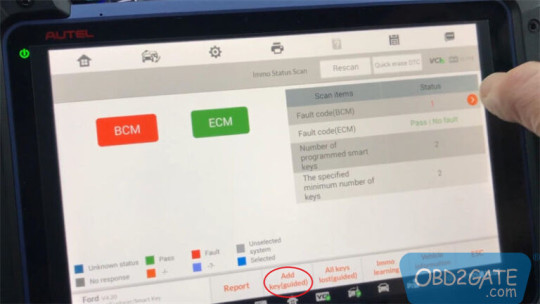
Note: This procedure does not erase existing keys. 1. During the process, the instrument panel may temporarily turn black, which is normal. 2. Turn the ignition to the ON position or open and close the driver door once. 3. Wait for approximately 3–10 minutes for security access. 4. The device will display the number of learned keys (e.g., “Learned keys: 2”). 5. Place the smart key that you want to program into one of the following locations:
In the armrest box
In the cup holder
In the glove box
6. The device will prompt you to wait while it learns the key. 7. Once the learning process is complete, the device will indicate the current number of keys (e.g., “Current number of keys is 3”). 8. If you have another key to program, press “Yes” to continue learning additional keys; otherwise, press “No” to complete the process.
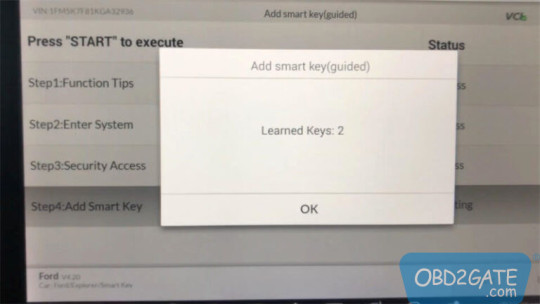
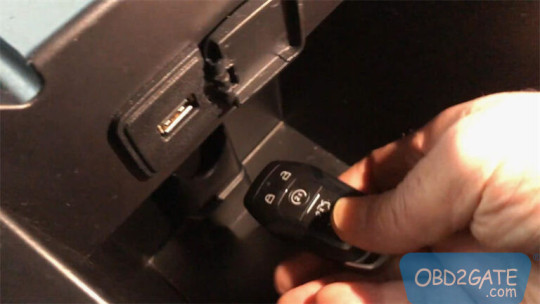
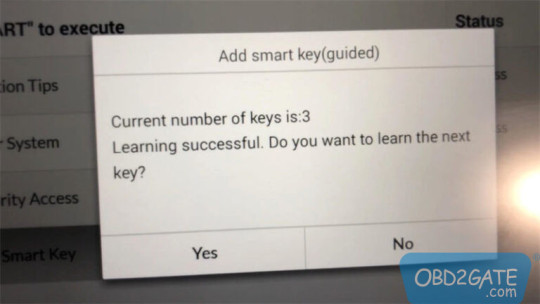
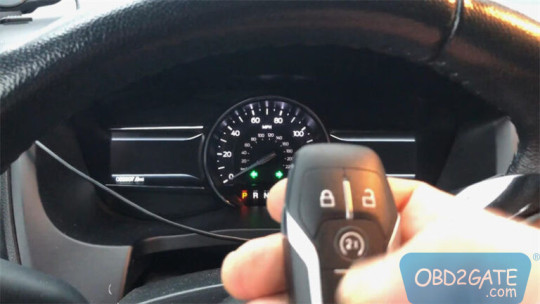
Test the newly programmed key to ensure it functions properly. Congratulations! You have successfully added a smart key to your 2019 Ford Explorer using the OBD method.

0 notes
Text
I found my OBD-II reader and managed to get the check engine light to turn off.... By just clearing the code.
I should probably actually go check on the part that actually threw the code in the first place. But it's cold outside and the light has stayed off so far.
2 notes
·
View notes
Text
7 Incredibly Useful Check Engine Light Tips for Small Businesses
For small businesses that rely on vehicles for daily operations, the check engine light (CEL) can be a frustrating and costly issue. Whether you own a fleet of delivery vans, rideshare vehicles, or service trucks, understanding and addressing the check engine light effectively can save time and money. If you're searching for "car repair near me" or "auto repair near me," here are seven useful tips to keep your business vehicles running smoothly and minimize downtime.
1. Don’t Ignore the Check Engine Light (CEL)
Many small business owners make the mistake of ignoring the check engine light, hoping it will turn off on its own. However, the CEL is an early warning system for potential problems that can escalate if left unaddressed. If your business vehicles are frequently on the road, timely action is essential to avoid expensive repairs and unexpected breakdowns.
2. Use a Diagnostic Tool for Quick Answers
Investing in an OBD-II scanner can help you quickly determine the cause of the CEL. These scanners provide error codes that indicate issues with the engine, transmission, or emissions system. If you’re unfamiliar with these codes, a professional mechanic in Vancouver can interpret them and recommend the necessary repairs.
3. Check for Common Issues First
Before rushing to a repair shop, check for simple causes like a loose or damaged gas cap, which can trigger the CEL. Ensuring your gas cap is tightly sealed can sometimes turn off the warning light without needing further repairs. If the light remains on, it’s time to seek professional assistance.

4. Find a Reliable Auto Repair Shop
Finding a trusted car repair near me or auto repair near me can save your business significant money in the long run. Regular maintenance and prompt repairs prevent minor issues from turning into costly breakdowns. If you're in the Vancouver area, look for a specialized check engine light repair Vancouver service to diagnose and fix the issue efficiently.
5. Keep Up with Regular Maintenance
Routine maintenance, such as oil changes, spark plug replacements, and air filter checks, can prevent the CEL from coming on. Small businesses should establish a maintenance schedule to keep their vehicles in peak condition. Partnering with a reliable mechanic in Vancouver can help keep track of necessary services.
6. Act Fast if the Light is Flashing
A steady CEL typically indicates a less urgent issue, but a flashing check engine light signals a severe problem that requires immediate attention. Driving with a flashing CEL can cause severe engine damage, potentially leading to costly repairs or even complete engine failure.
7. Consider Professional Check Engine Light Repair in Vancouver
If your business is based in Vancouver, seeking a professional check engine light repair Vancouver service can save you time and ensure accurate diagnostics. Many repair shops offer quick turnaround times, helping small businesses minimize vehicle downtime and keep operations running smoothly.
Conclusion
For small businesses that rely on vehicles, the check engine light should never be ignored. Whether it's a minor issue like a loose gas cap or a more serious engine malfunction, addressing the CEL promptly can prevent costly repairs and disruptions. Searching for auto repair near me or mechanic Vancouver can help you find the right professional for the job. Regular maintenance and professional diagnostics are key to keeping your business vehicles in top shape and ensuring long-term reliability.
#Check engine light#check engine light repair vancouver#car repair near me#auto repair near me#Mechanic Vancouver
2 notes
·
View notes
Text
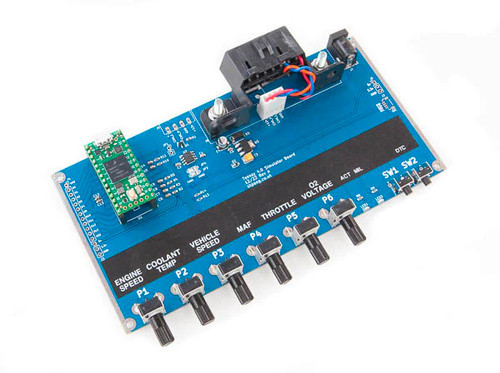
Know OBD2 Before You Start That Development Project
OBD2, or Onboard Diagnostics Second Generation, is a vehicle diagnosis system found in modern cars and trucks. The OBD2 system collects data from sensors and other monitoring devices, which are then examined by the vehicle's engine control unit (ECU) to determine whether any issues need to be addressed. Problems with the engine, gearbox, emissions system, and others, are among the most common faults that OBD2 can discover.
6 notes
·
View notes
Text
Engine Repair Instruction Full Guide
Engines are the heart of any vehicle, powering everything from your daily commute to long road trips. Knowing how to repair an engine can be a game-changer, whether you're an enthusiast who loves getting your hands dirty or someone looking to save money on mechanic bills. This guide will walk you through the entire process of engine repair, from diagnosing problems to reassembling your engine and ensuring it runs smoothly.

Understanding the Basics of an Engine
Before diving into the repair process, it’s crucial to understand how an engine works. Most vehicles use an internal combustion engine, which combines fuel and air, ignites it, and transforms that explosion into mechanical energy.
Components of an Internal Combustion Engine
The main components include:
Cylinder Block: The engine's core where combustion occurs.
Cylinder Head: Houses the valves and spark plugs.
Pistons: Move up and down to create the force needed to turn the crankshaft.
Crankshaft: Converts the pistons' up-and-down movement into rotational motion.
Camshaft: Controls the opening and closing of the valves.
Valves: Regulate the flow of fuel and air into the engine and exhaust gases out.
How an Engine Works: A Simple Explanation
An engine works by pulling in a mixture of air and fuel, compressing it, igniting it with a spark (in gasoline engines), and then expelling the exhaust gases. This cycle—intake, compression, power, and exhaust—happens in each cylinder and repeats hundreds of times per minute.
Tools and Equipment Needed for Engine Repair

Whether you're performing a basic repair or diving into more complex work, having the right tools is essential.
Essential Tools for Basic Repairs
Socket Set: For removing and tightening bolts.
Wrenches: Different sizes for various engine parts.
Screwdrivers: Flathead and Phillips for screws and clips.
Pliers: For handling wires and small parts.
Torque Wrench: Ensures bolts are tightened to the correct specifications.
Specialized Equipment for Advanced Engine Work
Engine Hoist: For removing the engine from the vehicle.
Cylinder Hone: Prepares cylinders for new piston rings.
Compression Tester: Checks the health of each cylinder.
OBD-II Scanner: Diagnoses engine codes and issues.
Safety Gear and Precautions
Gloves: Protect your hands from cuts and chemicals.
Safety Glasses: Shield your eyes from debris.
Work Boots: Offer protection against heavy parts or tools.
Diagnosing Engine Problems
Accurately diagnosing engine problems is the first step in any repair process. Understanding the symptoms can save time and prevent unnecessary work.
Common Symptoms of Engine Issues

Check Engine Light: Indicates a problem detected by the car's computer.
Strange Noises: Knocking, tapping, or grinding sounds can signal internal damage.
Excessive Smoke: Blue smoke might mean burning oil, while white could suggest a coolant leak.
Loss of Power: Often linked to fuel or air delivery issues.
Step-by-Step Diagnostic Process
Listen and Observe: Note any unusual sounds, smells, or behaviors.
Check Engine Light Codes: Use an OBD-II scanner to retrieve error codes.
Perform Compression Test: Assesses the health of your engine’s cylinders.
Inspect Fluids: Look for contamination or leaks in oil, coolant, and other fluids.
Step-by-Step Guide to Reassembly
Prepare Your Workspace: Ensure that your workspace is clean, organized, and well-lit. Lay out all the parts and tools you'll need in the order of reassembly. Keep the engine manual handy for specific torque specs and sequences.
Install the Crankshaft: Place the crankshaft back into the engine block, ensuring it is seated correctly. Use assembly lube on the main bearings to prevent damage during the initial startup. Torque the main caps to the manufacturer's specifications.
Insert the Pistons: Install the pistons and connecting rods. Be sure to align the piston rings correctly and use a ring compressor to insert the pistons into the cylinder bore. Attach the connecting rods to the crankshaft and torque the rod bolts to spec.
Install the Camshaft and Timing Components: If your engine uses a timing chain or belt, install it according to the timing marks on the camshaft and crankshaft gears. This step is crucial for ensuring the engine's valves open and close at the correct times.
Attach the Cylinder Head: Place the cylinder head gasket on the engine block, followed by the cylinder head. Torque the head bolts in the correct sequence and to the proper specifications. This ensures a good seal and prevents head gasket failure.
Install Valves, Lifters, and Pushrods: If applicable, install the engine's valves, lifters, and pushrods. Make sure they are properly aligned and that the lifters are seated correctly in their bores.
Reassemble the Valve Train: Install the rocker arms and adjust the valve lash according to the engine manual. Proper valve lash is critical for engine performance and longevity.
Reattach External Components: Begin reattaching external components like the water pump, oil pump, timing cover, oil pan, and intake manifold. Replace any gaskets and seals during this process to prevent leaks.
Reconnect the Fuel and Ignition Systems: Reinstall the fuel injectors, spark plugs, and ignition wires. Ensure all electrical connections are secure and properly routed to avoid short circuits or malfunctions.
Final Checks: Before moving on, double-check all connections, bolts, and components. Make sure nothing is left loose or unconnected.
Applying Proper Torques and Specifications
Every engine has specific torque settings for each bolt. Over-tightening can strip threads or warp components, while under-tightening can lead to leaks or parts coming loose. Use a torque wrench and follow the manufacturer's specifications closely.
Double-Checking Work for Mistakes

It's easy to miss a step or make a mistake during reassembly. Double-check your work:
Ensure all components are installed in the correct order.
Verify all bolts are torqued to spec.
Check for any leftover parts or tools in the engine bay.
Testing the Repaired Engine
With the engine reassembled, the next step is testing it to ensure everything is functioning properly.
Preparing for Initial Startup
Before starting the engine, perform a few preparatory checks:
Prime the oil system: This can be done by cranking the engine with the fuel system disabled until oil pressure is achieved.
Fill the engine with fresh oil and coolant.
Double-check all electrical connections and fuel lines.
Checking for Leaks and Unusual Noises

Once you start the engine, pay close attention to any unusual noises or leaks:
Oil Leaks: Check around the oil pan, valve covers, and front and rear seals.
Coolant Leaks: Inspect the radiator, hoses, and water pump area.
Unusual Noises: Listen for knocking, tapping, or whining sounds, which could indicate an issue with the timing components or internal parts.
Fine-Tuning and Adjusting the Engine
After the initial startup, the engine may require some adjustments:
Timing Adjustments: Use a timing light to set the ignition timing.
Idle Speed: Adjust the idle speed according to the manufacturer’s specifications.
Fuel Mixture: On carbureted engines, you may need to adjust the air-fuel mixture for optimal performance.
Common Engine Repair Mistakes to Avoid
Engine repair is complex, and mistakes can be costly. Here are some common errors to watch out for:
Misalignments and Incorrect Torques
Misaligned timing components can lead to poor engine performance or damage.
Incorrectly torqued bolts can cause leaks, parts failure, or engine damage.
Overlooking Small Parts and Connections
Small parts like washers, clips, or gaskets are easy to overlook but crucial for preventing leaks and ensuring proper function.
Electrical connections: Double-check that all sensors and connectors are properly seated.
Skipping Diagnostic Steps
Skipping steps in the diagnostic process can lead to unnecessary repairs or missed issues. Always perform thorough diagnostics before and after repairs.
Maintaining Your Engine After Repair
Proper maintenance is key to ensuring the longevity of your newly repaired engine.
Importance of Regular Maintenance
Regular maintenance, such as oil changes, air filter replacements, and coolant checks, is essential to keep your engine running smoothly and prevent future problems.

Tips for Extending Engine Life
Use high-quality oil and filters.
Avoid hard driving until the engine is fully warmed up.
Regularly check and maintain fluid levels.
When to Seek Professional Help
While DIY repairs can save money, some issues are best left to professionals, especially if you encounter complex problems or lack the necessary tools and expertise.
Dealing with Advanced Engine Repairs
Some engine repairs are too complex for the average DIYer. Here's when to consider professional help:
Understanding When It’s Beyond DIY
Extensive internal damage: Cracked blocks or severely worn bearings usually require professional expertise.
Advanced electrical issues: Problems with engine management systems often need specialized diagnostic tools and knowledge.
Overview of Complex Repairs: Timing Belt, Engine Rebuilds
Timing Belt Replacement: Involves precise alignment of engine components and is critical for preventing engine damage.
Engine Rebuilds: This is a time-consuming and complex task that often requires professional machining and specialized tools.
Working with a Professional Mechanic
When the repair is beyond your capabilities, working with a professional mechanic ensures that the job is done correctly and safely. They have the tools, experience, and resources to handle complex engine repairs.
Cost Considerations in Engine Repair
Engine repair costs can vary widely depending on the scope of work, parts required, and whether you do it yourself or hire a professional.
Estimating Costs for DIY vs Professional Repair
DIY Repairs: Typically cost less but require an investment in tools and time.
Professional Repairs: Can be expensive but come with the assurance of experience and often a warranty.
Budgeting for Tools, Parts, and Time
Consider the cost of any special tools or equipment you might need, as well as the cost of replacement parts. Factor in the time required, especially if the vehicle is your daily driver.
Understanding the Cost of Mistakes
Mistakes can be costly. Stripping a bolt, breaking a part, or incorrect assembly can lead to additional expenses. Always weigh the risks before starting a major repair.
Conclusion
Recap of Key Points
Engine repair is a rewarding but challenging task that requires careful planning, the right tools, and attention to detail. Whether you’re fixing a minor issue or performing a complete rebuild, following the correct procedures is crucial for success.
Encouragement for DIY Enthusiasts
For those who love working on their vehicles, engine repair can be a satisfying and cost-effective way to maintain your car. With patience and persistence, even complex repairs can be tackled with confidence.
Final Thoughts on Engine Repair
Always approach engine repair with a clear plan and the right resources. Don’t hesitate to seek professional help when needed, and remember that regular maintenance is the best way to avoid major repairs.
FAQs
How do I know if my engine needs repair?
Common signs include unusual noises, excessive smoke, loss of power, and a check engine light. Regular diagnostics can help catch issues early.
Can I repair my engine without professional help?
Basic repairs like replacing gaskets or sensors can often be done at home with the right tools. However, more complex tasks like engine rebuilds may require professional expertise.
What are the signs of a failing engine?
Signs include knocking noises, excessive oil consumption, smoke from the exhaust, and persistent overheating.
How long does it take to repair an engine?
The time required varies greatly depending on the complexity of the repair. Simple repairs might take a few hours, while a full rebuild could take several days or longer.
2 notes
·
View notes
Text
From Engine to Electronics: Proper Diagnostic Techniques for Resolving Maserati Problems

Maserati, the epitome of Italian luxury and performance, is renowned for its stylish design and high-performance capabilities. However, like any high-end vehicle, Maserati can encounter a range of issues, from engine troubles to electronic malfunctions. Proper diagnostics is crucial in maintaining the health and performance of these sophisticated machines. This article will guide you through the common problems Maserati face and the proper diagnostic techniques to resolve them.
Common Maserati Problems
1. Engine Issues
Maserati engines are marvels of engineering, but they can develop problems over time. Common engine issues include:
Misfires and Rough Idling: This can be caused by faulty spark plugs, ignition coils, or fuel injectors.
Overheating: Often due to a malfunctioning cooling system, such as a failed water pump or a clogged radiator.
Oil Leaks: These can originate from various seals and gaskets, leading to low oil levels and potential engine damage.
2. Transmission Problems
Maserati transmissions are designed for performance but can experience:
Slipping Gears: This could indicate worn-out clutch plates or issues with the transmission fluid.
Delayed Shifts: Often due to problems with the transmission control module or low fluid levels.
3. Electrical and Electronic Failures
Modern Maseratis are equipped with advanced electronics that can sometimes fail, including:
Dashboard Warning Lights: These can indicate issues ranging from simple sensor failures to serious engine problems.
Infotainment System Glitches: Problems with the touch screen, navigation, or audio system are not uncommon.
Diagnostic Techniques
1. OBD-II Scanner
The On-Board Diagnostics II (OBD-II) scanner is an essential tool for diagnosing Maserati problems. It can read error codes from the car's computer, providing insight into various issues.
How to Use: Connect the OBD-II scanner to the port located under the dashboard. Turn on the ignition and follow the scanner’s instructions to retrieve the error codes.
Interpreting Codes: Each code corresponds to a specific problem. For example, P0300 indicates a random/multiple cylinder misfire, while P0128 points to a coolant thermostat issue.
2. Visual Inspection
A thorough visual inspection can reveal obvious issues such as leaks, damaged components, or worn-out parts.
Engine Bay: Check for oil leaks, loose connections, and the condition of belts and hoses.
Undercarriage: Inspect for fluid leaks and damage to the exhaust system.
Electrical Connections: Look for corroded or loose battery terminals and wiring issues.
3. Multimeter Testing
A multimeter is useful for diagnosing electrical issues in a Maserati.
Battery Voltage: Measure the voltage across the battery terminals. A healthy battery should read around 12.6 volts when the car is off and around 14 volts when running.
Sensor Checks: Test various sensors, such as the oxygen sensor or mass airflow sensor, to ensure they are functioning correctly.
4. Compression Test
A compression test helps diagnose internal engine problems such as worn piston rings or valves.
Procedure: Remove the spark plugs and insert a compression gauge into each cylinder. Crank the engine and note the pressure readings. Low or uneven readings indicate internal engine issues.
5. Professional Diagnostic Tools
Maserati dealerships and specialized repair shops use advanced diagnostic tools that can access proprietary systems and provide more detailed information.
SD2/SD3 Diagnostic Systems: These are specialized tools used by Maserati technicians to diagnose and program vehicle systems accurately.
Diagnostic Software: Tools like Xentry or PIWIS can interface with Maserati's electronic systems for comprehensive diagnostics.
Addressing Common Issues
1. Engine Repairs
Misfires and Rough Idling: Replace faulty spark plugs, ignition coils, or fuel injectors. Regular maintenance and using high-quality fuel can prevent these issues.
Overheating: Ensure the cooling system is functioning correctly by checking the water pump, radiator, and thermostat. Flushing the coolant system periodically is also recommended.
Oil Leaks: Identify the source of the leak and replace the necessary seals or gaskets. Regularly check oil levels and change the oil according to the manufacturer's recommendations.
2. Transmission Solutions
Slipping Gears: Inspect and replace worn clutch plates and ensure the transmission fluid is at the correct level. Consider a fluid change if necessary.
Delayed Shifts: Diagnose and repair issues with the transmission control module or solenoids. Regular transmission servicing can prevent many of these problems.
3. Electrical Fixes
Dashboard Warning Lights: Use an OBD-II scanner to identify and address the underlying issue. Reset the warning lights after repairs are completed.
Infotainment System Glitches: Perform software updates and check for any loose connections or faulty components. In some cases, a complete system reset may be required.
Conclusion
Proper diagnostics are essential for maintaining the performance and reliability of your Maserati. By using the right tools and techniques, you can identify and resolve issues promptly, ensuring your luxury car continues to deliver the driving experience it was designed for. Regular maintenance and timely repairs are key to keeping your Maserati in top condition, from the engine to the sophisticated electronics.
#maserati car#maserati car diagnosis#maserati service center#maserati car maintenance#maserati car mechanic
2 notes
·
View notes
Text
TEMEDA- PT 30 ELD - Electronic Logging Device + Cable - HOS & FMCSA Compliant - Easy to Install - New (PT30+Green 9 Pin Round Cable). Features & detailsUS based, Miami, FL, we keep stock.Bluetooth Low Energy (BLE) wireless interface. Large capacity storage for offline operations. Integrated engine diagnostics and antenna. *J1939, J1708/J1587, and OBD-II connections and more. *Reads engine diagnostics data straight from the truck/vehicle *Works with any and all compatible ELD/HOS apps. *Works with any cell phone or tablet with Bluetooth. *Easily plug in or unplug as needed to be compliant with the DOT, department of transportation. *Customizable behavior to match customer requirements

2 notes
·
View notes
Text

Take the guesswork out of your vehicle's dreaded check engine light! The AUTOPHIX 3210 Bluetooth OBD2 Enhanced Car Diagnostic Scanner can save you time, worry, and even costly repairs down the road. Read and diagnose your check engine light, understand the severity of the issue, and clear fault codes in a blink of an eye. The AutoPhix also features more functions compared to other scanners, including I/M Readiness, Battery Health Check, Freeze frame, O2 sensor test, On-Board Monitoring, Evap system test, Performance Test, Data Stream, and Diagnostic reports, a handy Google search button, and a Built-in OBD II Fault code look-up library.
Check my shopping network https://www.tripleclicks.com/tcsearch/category:7
#autotest, #automotoveelectrical,#enginetest, #enginecomputer #enginecomputertest,#bluetoothautotest,
5 notes
·
View notes