#Nanopi
Explore tagged Tumblr posts
Photo

だいぶ前に Allexpress で購入した Nanopi-Hat 型の MMDVM 基板で WPSD を利用しているが、久しぶりに Update を行ってみると DMR,YSF,M17 などの Mode Status のインジケーターが「赤」で 複数のリグから送信するも反応なし。。MMDVM 基板不良の確認のた���に Pi-star をインストールして切り分けてみる。。最新の Pi-star Nano で起動してみると動作するが。。。U...
0 notes
Text
Pixelmatrix Combo von Oxocard: So programmierst du die 5x5 LED Matrix

Die Pixelmatrix Combo von Oxocard ist ein faszinierendes Tool für alle, die gerne mit LEDs arbeiten und kreative Projekte umsetzen möchten. Diese 5x5 RGB LED Matrix lässt sich direkt in den Mikrocontroller stecken und besticht durch ihre einfache Programmierbarkeit über einen leistungsstarken Online-Editor. Ganz gleich, ob du Anfänger oder fortgeschrittener Entwickler bist – die Pixelmatrix bietet dir unzählige Möglichkeiten, um beeindruckende Lichtanimationen und interaktive Projekte zu gestalten. https://youtu.be/cx_w1wLY_MY In diesem Beitrag zeige ich dir, wie diese RGB LED Matrix aufgebaut ist, wie sie mit der Oxocard verbunden wird und wie du sie sowohl mit NanoPy als auch mit Blockly programmieren kannst. So kannst du Schritt für Schritt eigene Projekte entwickeln und das volle Potenzial der Pixelmatrix Combo ausschöpfen.

RGB Pixel auf der Pixelmatrix Combo

Pixelmatrix Combo mit Oxocard Connect

Vorderseite - Pixelmatrix Combo mit Oxocard Connect
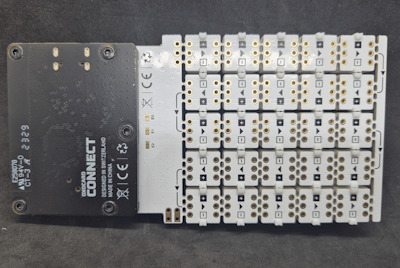
Rückseite - Pixelmatrix Combo mit Oxocard Connect Hinweis: Dieses Produkt wurde mir vom Entwickler der Oxocard auf der Maker Faire 2024 in Hannover kostenlos zur Verfügung gestellt. Meine Meinung und Bewertung des Produkts basieren jedoch ausschließlich auf meinen eigenen Erfahrungen und sind unabhängig von dieser Bereitstellung.
Vorstellung des Oxocard Connect Mikrocontrollers
Für den Betrieb und die Programmierung der Pixelmatrix Combo benötigst du den Mikrocontroller Oxocard Connect. Dieser kleine ESP32 mit USB-Typ-C Schnittstelle und Farbdisplay dient als Schaltzentrale.

Oxocard Connect

Oxocard Connet mit LED auf Breadboardmodul Der Vorteil der Oxocard Connect ist, dass diese in einem fertigen Gehäuse untergebracht ist und durch die seitliche Schnittstelle kannst du verschiedene Module anschließen und programmieren. Der Code wird dabei nicht auf dem Mikrocontroller gespeichert, sondern auf dem eingesteckten Modul. Das hat den Vorteil, dass man mehrere Schaltungen mit dem Mikrocontroller aufbauen und beliebig wechseln kann, ohne dass man zuvor die Pins zurücksetzt. Wenn du mehr über diesen Mikrocontroller erfahren möchtest, dann empfehle ich dir einen Blick in den Beitrag Oxocard Connect enthüllt: Neue Horizonte für kreative Köpfe welchen ich dir dafür bereits veröffentlicht habe.
Lieferumfang und Aufbau der Pixelmatrix Combo
Zum Lieferumfang der Pixelmatrix Combo gehört neben der Platine mit den 25 RGB NeoPixel welche seriell verbunden sind noch ebenso 25 Kappen, welche als Diffusor dienen, denn diese NeoPixel können sehr hell und grell sein. Die Helligkeit der NeoPixel LEDs lässt sich auch im Code manipulieren.

Stand von Oxocard auf der Maker Fair 2024 Auf der Maker Faire wurde gezeigt, wie multifunktional diese Matrix eingesetzt werden kann. Auf dem Bild siehst du einen Ball, welcher mit dieser Matrix aufgebaut wurde und auch das Herz ist recht einfach möglich.
Beispielprogramm auf dem Modul
Wie erwähnt befindet sich der Code nicht auf dem Mikrocontroller, sondern auf dem Modul welches du in den Mikrocontroller steckst. Auf der Pixelmatrix Combo befindet sich ein kleines Beispiel, welches die Zahlen von 9 bis 0 in unterschiedlichen Farben anzeigt.
Programmieren der Pixelmatrix in NanoPy
Der Editor NanoPy ist ein Online-Editor, welcher dir kostenfrei unter https://editor.nanopy.io/ zur Verfügung gestellt wird, der Mikrocontroller Oxocard Connect verfügt über einen ESP32, welchen wir wiederum via WiFi anbinden. Im oben verlinkten Video erläutere ich dir im Detail, wie du die Pixelmatrix Combo in NanoPy mit der Oxocard Connect in NanoPy programmierst. Nachfolgend möchte ich dir diese Schritte mit Bildern aufzeigen. Aufbauen der WiFi-Verbindung für die Programmierung über NanoPy Wenn du den Mikrocontroller über die USB-Typ-C Schnittstelle mit Strom versorgst, startet das System automatisch. Im Hauptmenü kannst du den Menüpunkt 'WiFi' auswählen. Von dort aus wählst du dein lokales WLAN-Netzwerk aus der Liste der verfügbaren Netzwerke. Im nächsten Schritt gibst du das Passwort mithilfe des kleinen Joysticks ein, indem du die einzelnen Zeichen auswählst. Um den Vorgang abzuschließen, bestätigst du deine Eingabe, indem du das Feld 'OK' unten rechts auswählst. Der Mikrocontroller wird nun eine Verbindung zu deinem WLAN herstellen. Sobald die Verbindung erfolgreich ist, kannst du alle weiteren Schritte, wie die Programmierung über NanoPy, bequem durchführen. Diese stabile WiFi-Verbindung ist entscheidend, um den Mikrocontroller mit dem Online-Editor zu koppeln und Programme drahtlos auf das Gerät zu laden.


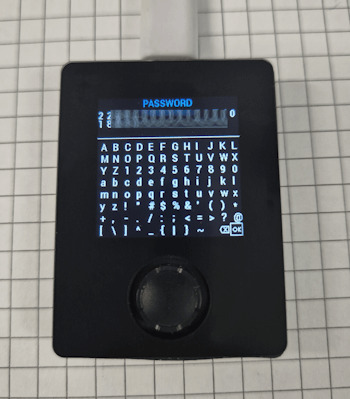
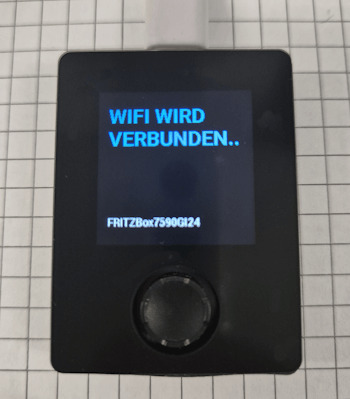
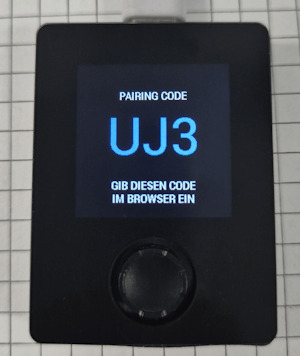
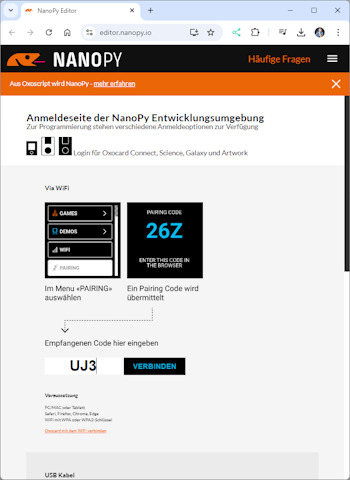
Verbinden zu NanoPy Nachdem die WiFi-Verbindung erfolgreich hergestellt wurde, kannst du den Mikrocontroller mit NanoPy verbinden. Dazu wählst du im Hauptmenü des Mikrocontrollers den Eintrag 'PAIRING'. Nun öffnest du auf deinem PC den Browser und gehst zur Adresse https://editor.nanopy.io. Dort wirst du aufgefordert, den Pairing-Code einzugeben, der dir auf dem Display des Mikrocontrollers angezeigt wird. Gib diesen Code in das entsprechende Feld auf der Website ein, um die Verbindung herzustellen. Sobald die Verbindung erfolgreich aufgebaut wurde, wird das Display des Mikrocontrollers geleert. Du bist nun bereit, deinen Mikrocontroller direkt über den Browser zu programmieren und kannst auf alle Funktionen von NanoPy zugreifen. Diese einfache und schnelle Verbindungsmethode ermöglicht es dir, Programme drahtlos und in Echtzeit auf deinen Mikrocontroller zu übertragen.

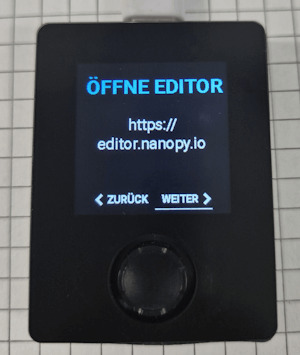
Ansteuern der NeoPixel Die NeoPixel auf der Pixelmatrix sind wie im folgenden Bild angeordnet. Du beginnst oben rechts mit dem Index 0 und endest unten links mit dem Index 24. Wichtig zu beachten ist, dass die NeoPixel zeilenweise nummeriert sind. Das bedeutet, nach dem letzten Pixel einer Zeile wird der Index in der nächsten Zeile an derselben Seite fortgeführt – es wird also nicht umlaufend nummeriert.

Anordnung der NeoPixel auf der Pixelmatrix Combo von Oxocard Die Programmiersprache für die Oxocard Connect im NanoPy ist Python, jedoch eine sehr spezielle Version, welche für die Oxocard optimiert wurde, daher findest du zusätzliche Features welche dir die Arbeit deutlich erleichter. Im nachfolgenden kleinen Beispiel aktiviere ich die Neopixel in allen vier Ecken in unterschiedlichen Farben. #initialisieren der NeoPixel initDigitalLeds(C_PIN_01, 25, C_LED_TYPE_WS2812) #setzen des Modus für die Farben der NeoPixel setDigitalLedMode(C_LED_MODE_GRB) #aktivieren der NeoPixel mit Index 0 in der Farbe grün setDigitalLed(0, 0, 100, 0) #aktivieren der NeoPixel mit Index 4 in der Farbe blau setDigitalLed(4, 0, 0, 100) #aktivieren der NeoPixel mit Index 24 in der Farbe rot setDigitalLed(24, 100, 0, 0) #aktivieren der NeoPixel mit Index 20 in der Farbe gelb setDigitalLed(20, 100, 100, 0) #setzen der Status & Farben der NeoPixel applyDigitalLeds() Der Code lässt wie erwähnt die vier NeoPixel in den Ecken in unterschiedlichen Farben aufleuchten. Mit dieser Logik und so wenig Code können wir nun unterschiedliche Formen, Buchstaben und Zahlen darstellen.

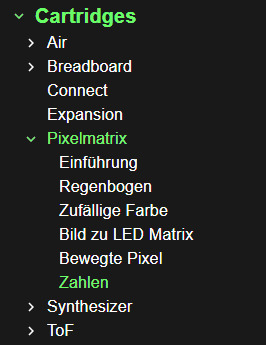
Pixelmatrix Combo mit aktivierten NeoPixel Beispiel - Zahlen & Buchstaben auf der Pixelmatrix anzeigen Du findest im NanoPy Editor viele Beispiele zu den vorhandenen Cartridges, unter anderem auch für die Pixelmatrix. Eines der Beispiele ist die Darstellung von Zahlen (siehe Screenshot rechts).
Aufbau der Anzeige eines Buchstabens In meinem Fall habe ich die Zeile in ein Bitmuster maskiert, d.h. jede Stelle in dem digitalen Wert repräsentiert einen Status der LED in der Zeile. Die Pixelmatrix hat 5 Spalten und 5 Zeilen. Daraus resultiert eine Bitmuster wie folgt: 0b01110, 0b01010, 0b01110, 0b01010, 0b01010, #Buchstabe A Jede Zeile ist hier durch ein Komma getrennt und somit ist es recht einfach Zahlen und Buchstaben mit diesem einfachen Muster zu erstellen. Das fertige Programm zum Anzeigen von Zahlen und Buchstaben Nachfolgend das fertige Programm zum Anzeigen von Zahlen und Buchstaben auf der Pixelmatrix von Oxocard. #initialisieren der NeoPixel initDigitalLeds(C_PIN_01, 25, C_LED_TYPE_WS2812) #setzen des Modus für die Farben der NeoPixel setDigitalLedMode(C_LED_MODE_GRB) digits = #Alle RGB NeoPixel deaktivieren def clearMatrix(): for index in setDigitalLed(index, 0, 0, 0) def checkLed(row, index)->bool: return row & (1 int: innerCounter = count for index in : innerCounter++ if checkLed(row, index): setDigitalLed(innerCounter, 0, 0, 100) else: setDigitalLed(innerCounter, 0, 0, 0) return innerCounter rowCount = -1 count = -1 for row in digits: rowCount++ if rowCount % 5 == 0: count = -1 delay(500); count = displayDigit(row, count) applyDigitalLeds() Read the full article
0 notes
Text
so my dad is the kinda guy who has Linux Distro Opinions and i grew up getting razzed for, idk, using ubuntu and not red hat. i wasn't really paying attention to anything other than that if i used linux he couldn't as effectively block me from seeing literally anything he didn't like — i've always been very practical about my tech choices, lol.
but i just passed him my old macbook which i bought off work bc he wants to get into developing for ios, and it's his first apple product (it was mine, too). and my god he's messaging me through the entire setup process. "why no nz english". "what is the keychain for". "should i encrypt my drive". and i'm realizing rapidly that in some ways i did overtake him in the last fifteen years.
he can't touch-type. he has no idea how to set up a password manager. he has two dozen m.2 ssds with various linux installations on them but the older i get the more it seems clear to me that he made it part of his personality without knowing much about everything around it.
and, well: he hasn't kept up to date. he still knows more about a lot of things than i do, but i've got much more strongly held opinions and a hell of a lot more curiosity, especially as he's gone from reading local right-wing mags to breitbart and full on conspiracy far-right shit. i work much more closely with foss on a daily basis than he does. i trust the government less than he does, which is a feat, and am far more comfortable navigating information security than he is. i can't code like he can, but i'm the one with the nanopi cron job pet project. my experience with tech is piecemeal as heck and i don't have the right vocab to sound like i know what i'm doing. but i'm not an asshole so my networks are wider. my experience is wider, bc i did most of papa's tech for some time. bc i like to go to infosec cons and talk to people. bc i work with websites and he's a telco guy.
idk. it's weird! he Works In Tech in a way that i don't. all my life i've seen him as an opinionated, educated guy, and in a lot of ways he's corncobbing himself before my eyes. not that he hadn't already done that given the conspiracy shit but, you know, this is the one arena where i still ask him for advice, and here we are. it's me. i've successfully become my own dad, and he needs me more than i need him.
#tony muses#i remembered that this kinda post is what a personal tumblr is for so here we are ig#hello friends.
8 notes
·
View notes
Text
DIETPI RELEASES 8.12 COMES WITH A NEW IMAGE FOR THE NANOPI R6S AND THE RADXA ROCK 5B
Version 8.12 of this Linux distribution targeted for SBCs was released by DietPi this month. The inclusion of compatibility for the OKdo ROCK 5B and NanoPi R6S SBCs is particularly noteworthy. The latest top-of-the-line Rockchip RK3588 SoC with quad Cortex-A76 and quad Cortex-A55 is included in the ROCK 5B. In comparison to solutions like Debian, Raspberry Pi OS, and Armbian, what makes DietPi attractive as an operating system for both higher-end and lower-end SBCs is that it places a major emphasis on being the most efficient. Smaller binary size, less RAM utilization, and better performance are the results of this.
2 notes
·
View notes
Text
my Christmas list
SILENCE (an actual lack of human presence)
onions, mushrooms, carrots, celery, and canned tomatoes
a FriendlyElec NanoPi R5S before tariffs hit
0 notes
Photo

Крошечный одноплатный компьютер NanoPi Zero2 оснащён портом 1GbE и коннектором М.2
Команда FriendlyElec, по сообщению ресурса CNX-Software, пополнила ассортимент одноплатных компьютеров моделью NanoPi Zero2: это одно из самых компактных на рынке устройств данного типа, сочетающих процессор с архитектурой Arm и ОС на ядре Linux. Размеры изделия составляют 45×45 мм, масса — 16,1 г. Основой новинки служит процессор Rockchip RK3528A, который содержит четыре ядра Arm Cortex-A53 с частотой 2 ГГц и графический блок Arm Mali-450 с поддержкой OpenGL ES1.1, ES2.0, OpenVG 1.1. Возможно декодирование видео H265/H264 в формате 4Kсо скоростью 60 к/с. Объём памяти LPDDR4/LPDDR4X — 1 или 2 Гбайт.
Подробнее https://7ooo.ru/group/2024/09/14/307-kroshechnyy-odnoplatnyy-kompyuter-nanopi-zero2-osnaschen-portom-1gbe-i-konnektorom-m2-grss-341062207.html
0 notes
Text
RaspberryPi’s as a brand are ridiculously overpriced right now due to supply constraints, but there are a wide variety of alternatives. If you’re planning to use a wired connection and only use it for PiHole purposes, the Libre Le Potato is still nicely inexpensive. FriendlyElec has a ton of options, with the NanoPi M4 being the most Pi-standard, and some of these, like the FriendlyElec R5S (multi 2.5g ethernet!), are much more capable than the RaspberryPi standard-bearers. OrangePi and BananaPi’s are more direct knockoffs, though I’ve mixed feelings about them.
That said, non-RaspberryPi install processes may be a little more annoying if you’ve never used Ubuntu before. (Uh, or even if you had; for a while, FriendlyElec had their Officially Supported Distro on a google drive.)
The big advantage to the Pi-like form factor is simply that it takes a tiny amount of power, and takes a tiny amount of space, and in some jurisdictions this adds up. A 5w computer costs a thirtieth of a 150w computer in terms of electricity, and while that while that’s maybe fifty or a hundred bucks bucks on the east coast, there’s parts of the west coast where that will be closer to three hundred.
That said, you can buy used mid-form factor machines pretty cheap these days. A used Dell Optiplex 9020 will probably set you back 100-150 USD, plus the cost of a disk drive, and generally runs 10-20 watts. If you’ve got the space, it’s a nice compromise -- and far easier to update down the road to act as a local game server, or to operate a file share and backup system.
((Seriously, consider a local Nextcloud config, if your selection has a full disk drive rather than a microSD. Having differential backups on a local computer is a nice option!))
Because Raspbian cannot be upgraded across version WHY U DO THIS
Raspbian doesn’t let you do distro upgrades for the same reason groups like MXLinux are sporadic about it; they break pretty often -- I’ve destroyed handfuls of Ubuntu installs through ‘supported’ distro-upgrades -- and your machine won’t last that long, anyway.
((MicroSD cards have notorious reliability problems after about 10k-100k writes, so you usually get about two to three years of ‘normal’ use.))
Which is a horrible reason, except for all the others.
If you didn’t plug it in, and need to setup the wifi, there’s magic incantations to attach it to the wifi and to be quite blunt, I forget what they are.
Officially, for Raspbian, set wpa_supplicant.conf on the MicroSD card to contain:
country=“Your Two-Letter-Country-Code”
ctrl_interface=DIR=/var/run/wpa_supplicant GROUP=netdev network={
ssid="YOUR_NETWORK_NAME"
psk="YOUR_PASSWORD"
key_mgmt=WPA-PSK
}
In practice, I’ve managed to get it to work literally once across several dozen attempts. And the Ubuntu-specific version is even worse. The correct answer is to borrow an HDMI monitor and a keyboard for a few minutes to get initial setup completed.
((And you'll want your Pi-hole connected via wires to your router anyway. Will make things a lot less obnoxious.))
Apropos of nothing
If you are the techiest person in the house (and for many of you, this is not techy at all), today is a good day to build a pihole thanks to Google's new TLDs.
For the record, this straight up stopped Dad from getting computer viruses when coupled with the Ublock browser extension, so I will volunteer my time to get you set up. We will find an evening and do a Zoom call. I am serious.
Prerequisities:
Before you start, this will be way way easier if your router has a magic way to:
Set static IP addresses
Set a custom DNS server
If you can't do this, I'm not saying you're stuck, but there's some non-obvious failure modes and maybe it's time to buy a better router.

Parts:
Raspberry Pi 4B. 2GB if you just want to set and forget, 8GB if you want to do more things on this than just your pihole (Coughs in a MarioKart box) -> https://www.raspberrypi.com/products/raspberry-pi-4-model-b/
Spare USB-C charger if you don't have one already. I'm a fan of https://www.amazon.com/Argon-USB-C-Power-Supply-Switch/dp/B0919CQKQ8/ myself
A microSD card at least UHS class 3 or better. 32 is fine for just a pihole, I have a 512 in some of mine that I use for more stuff. https://www.tomshardware.com/best-picks/raspberry-pi-microsd-cards
Some method of flashing the card if you don't have one (Some come with SD to micro-SD adapters, if not a USB to SD/micro-SD adapter is about $10 off Amazon)
If you really feel like going nuts, go buy yourself an Argon case and then very very carefully never ever install the software for the fan that does nothing. The value is entirely in having a big giant brick that is self-cooling. If you want to play MarioKart, I would consider this a requirement. https://www.amazon.com/Argon-Raspberry-Aluminum-Heatsink-Supports/dp/B07WP8WC3V
Setup:
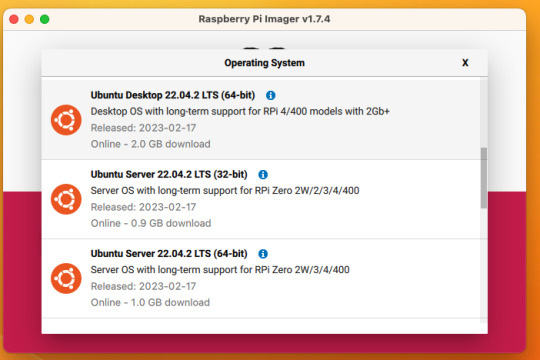
Do yourself a favor and ignore all the signs telling you to go get Raspbian and instead go grab an ISO of Ubuntu 64-bit using RPi Imager. Because Raspbian cannot be upgraded across version WHY U DO THIS
Download Rpi Imager, plug the microSD card into your computer,
Other General Purpose OS -> Ubuntu -> Ubuntu 22.04 LTS
So now you have an operating system on an SD card.
Assemble the case if you bought one, plug in the SD card, power supply, ethernet cable if you have one or mouse and (mini) HDMI cable if you don't. If you bought that Argon case, you can just plug a keyboard (server OS means no mouse gang; In this house, we use the Command Line) and HDMI cable into the Pi. Turn it on.
Gaining access
The end state of this is that your pi is:
Connected to the internet by cable or wifi
You can SSH to it (Also not scary)
If you plugged in an ethernet cable, once it's done booting (1-2 minutes?), you should be able to ssh to "ubuntu@<the IP of the system>". Look it up in your router. It may make sense to give the static IP NOW to keep it stable.
If you've never used SSH before, I think the standard is Putty on Window or you can just open a terminal in Mac. (And if you know enough Linux to have a Linux computer, why are you reading this?)
If you didn't plug it in, and need to setup the wifi, there's magic incantations to attach it to the wifi and to be quite blunt, I forget what they are.
Your username is ubuntu, your password is ubuntu and then it will ask you to make a new password. If you know the meaning of the phrase "keypair-based access", it may make sense to run `ssh-copy-id` at this point in time.
Router settings (part 1)
Give your new Pi a static IP address, and reboot your pi (as simple as typing in `sudo reboot`).
Open a new SSH session to the pihole on the new address.
Installing pihole
Open up an SSH session and
curl -sSL https://install.pi-hole.net | bash
This is interactive. Answer the questions
When it's done, on your other computer, navigate to <the ip>/admin

Login with the password you just set. Router settings part 2
Give your new Pi a static IP address then point your router at that address
Set the DNS servers to the static IP
Then ensure you're blocking something. Anything.
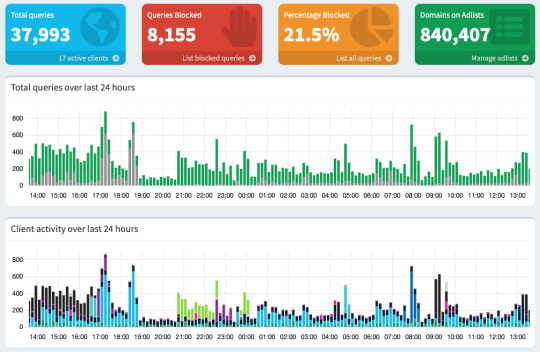
Then do what you want to do. You'll probably need to whitelist some sites, blacklist some more, but the main thing is going to be "Adding more list of bad sites". Reddit has some lists.

And... enjoy.
/But seriously, there's some stuff to do for maintenance and things. I wasn't joking about the pair setup.
2K notes
·
View notes
Link
Maybe you missed it? NanoPi R6S Review Reviewing the features, specs, and product highlights of the FriendlyELEC CM3588 NAS Kit. FriendlyELEC CM3588 NAS Kit FriendlyELEC CM3588 NAS Kit is based on the Rockchip RK3588 board, which has four M.2 Key-M sockets. These sockets have a PCIe Gen 3 x1 interface and can support 2280 NVMe SSDs or other M.2 PCIe modules. This unique feature provides excellent flexibility and high-performance storage solutions. The CM3588 Core system-on-module is used in conjunction with the CM3588 NAS SDK board. This board has various features including a 2.5GbE RJ45 connector, HDMI 2.1 video outputs, HDMI 2.0 video input, MIPI DSI and CSI connectors, USB 3.0/3.1 ports, and a 40-pin GPIO header for expansion. FriendlyELEC CM3588 NAS Kit Part No.1: Core board | Interfaces Part No.1: Carrier board | Interfaces Specifications [wptb id=1000029166] Software Support When comparing the NanoPi R6S router to the NanoPC-T6 SBC, it is impressive to see the distinct features of both devices. FriendlyELEC provides a wide selection of software choices including Debian 11, Ubuntu 22.04, Android 12 TV, FriendlyWrt 21.02/23.05 (OpenWrt derivatives), and OpenMediaVault images. Each of these options is built upon a cutting-edge Linux 6.1 LTS kernel, ensuring users have a robust and reliable groundwork to build upon. Practical applications The RK3588(S) hardware platform from Rockchip sets the stage for an exceptional server rack solution. With its CM3588 Core board and CM3588 NAS Kit, this combination offers an unbeatable foundation for transforming your home or office into a powerful server. What's more, you'll have the advantages of OpenWrt and OpenMediaVault images at your fingertips, equipping you with all the essential tools for seamless NAS device management. You can find all the essential images and instructions to begin on the CM3588 Core board's wiki. Furthermore, it is worth noting that there is a specialized wiki available for the CM3588 NAS SDK carrier board. There, you will have access to comprehensive specifications and convenient links to schematics, PCB layout, and mechanical files. Price and Availability You can purchase the package, which includes a core board with 4GB of RAM and a carrier board, for just $130. You can upgrade the RAM options to either 8GB or 16GB by paying an extra $15 for each choice. Moreover, there will soon be an upcoming metal case available.
0 notes
Text
GitHub - inindev/nanopi-r5: stock debian arm64 linux for the nanopi r5c & r5s
0 notes
Text
mod name is cosmetics mod pack by evergreen and nanopi

i got this accessories mod and the fact that you can have a little snatcher plush is so fucking cute
20 notes
·
View notes
Photo
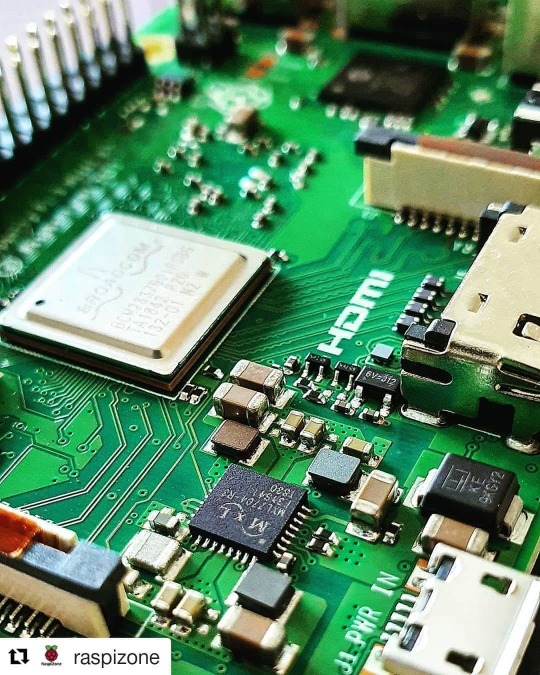
#Repost @raspizone (@get_repost) ・・・ ‼️More in @raspizone‼️ 👉 👉Follow @redeszone 🔥🔥 Check my YouTube Channel 🤯 📷@jay.makwana #raspberry #raspberrypi #raspberrypi4 #raspberrypi3 #raspberrypi2 #raspberrypizero #icetower #raspberrypicomputemodule #orangepi #bananapi #odroid #nanopi #rockpi #beaglebone #pine64 #arduino #linux #raspbian #raspizone https://www.instagram.com/p/CCVbpebp-Ae/?igshid=4qo77ixly6ws
#repost#raspberry#raspberrypi#raspberrypi4#raspberrypi3#raspberrypi2#raspberrypizero#icetower#raspberrypicomputemodule#orangepi#bananapi#odroid#nanopi#rockpi#beaglebone#pine64#arduino#linux#raspbian#raspizone
3 notes
·
View notes
Text
LED-Würfel: Zufallszahlen auf der Pixelmatrix darstellen

In meinem vorherigen Beitrag 'Pixelmatrix Combo von Oxocard: So programmierst du die 5×5 LED Matrix' habe ich bereits die Grundlagen und Möglichkeiten der Pixelmatrix vorgestellt. In diesem Beitrag möchte ich nun einen Schritt weiter gehen und zeigen, wie du mit der 5 × 5 LED Matrix einen digitalen Würfel programmierst, der Zufallszahlen anzeigt. Dieses Projekt eignet sich hervorragend, um die Programmierung von Zufallszahlen und die Ansteuerung der LEDs in einem kreativen Projekt zu kombinieren. https://youtu.be/RADOEflnNDs Hinweis: Dieses Produkt wurde mir vom Entwickler der Oxocard auf der Maker Faire 2024 in Hannover kostenlos zur Verfügung gestellt. Meine Meinung und Bewertung des Produkts basieren jedoch ausschließlich auf meinen eigenen Erfahrungen und sind unabhängig von dieser Bereitstellung.

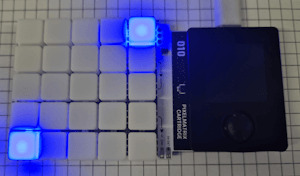
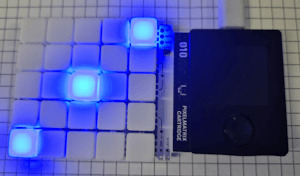

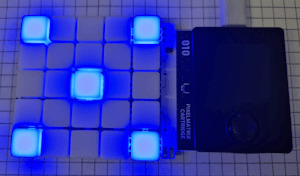
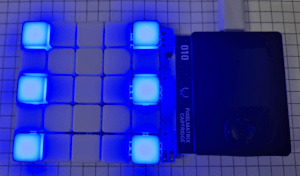
Bezug der Pixelmatrix von Oxocard
Die in diesem Beitrag verwendete Pixelmatrix bekommst du für derzeit 49 CHF (ca. 52 €) unter https://oxocard.ch/. Zu dem Set gehört neben der Pixelmatrix noch der Mikrocontroller Oxocard Connect, welchen du für diese Cartridge benötigst. Rechts ist die Pixelmatrix Cartridge, da ich den Mikrocontroller bereits besitze, benötigte ich nicht das komplett Set.
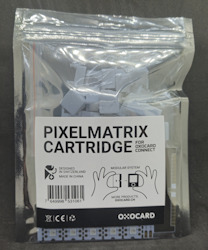
Pixelmatrix von Oxocard
Programmieren der Oxocard Connect in NanoPy
Den Mikrocontroller kannst du in NanoPy via Python programmieren. Die Entwicklungsumgebung NanoPy ist sehr leistungsstark und bietet für erfahrene Entwickler sehr viele nützliche Features, welches man in anderen Editoren für Mikrocontroller schmerzhaft vermisst, zum Beispiel ein Debugger.
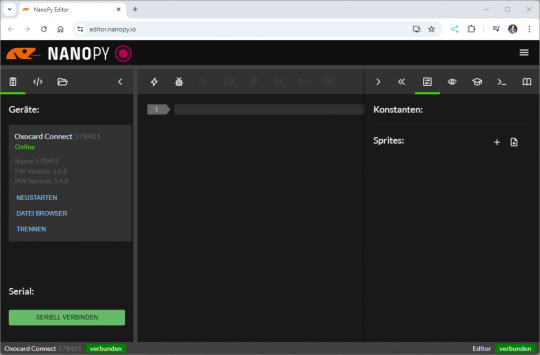
Editor - NanoPy für die Oxocard Connect Programmieren eines Würfels mit der Pixelmatrix & der Oxocard Connect Bevor wir mit der eigentlichen Programmierung starten, schauen wir uns an, wie man die Pixelmatrix programmiert. Jeder NeoPixel hat einen Index, welcher oben rechts beginnt und unten links endet.

Anordnung der NeoPixel auf der Pixelmatrix Combo von Oxocard Mit der Funktion setDigitalLed können wir dann über diesen Index die LED ansteuern und einen RGB Wert übergeben. #aktivieren der LED mit Index 1 und setzen der Farbe blau setDigitalLed(1, 0, 0, 100) Theoretisch können wir jeden Farbwert verwenden, hier empfehle ich dir die Seite https://htmlcolorcodes.com/, auf welcher du recht einfach einen solchen Wert generieren kannst. Bitmaskieren der Zeilen Da wir die sechs möglichen Werte des Würfels auf der Pixelmatrix anzeigen wollen, gibt es hier mehrere Lösungen. Der wohl einfachste Weg ist ein Array mit 25 Werten für jeden Wert, das ergibt dann 6 Arrays welche wir je nach ermittelter Zufallszahl verwenden. Theoretisch spricht nichts gegen diese Lösung, denn es ist sehr unwahrscheinlich, dass ein neuer Wert hinzukommt, jedoch ist diese nicht optimal. Wir können auch jede Zeile in ein Bitmuster maskieren und so durch eine 0 und 1 den Zustand jedes NeoPixel abbilden. Im nachfolgenden Beispiel stelle ich die Augenzahl 1 dar, es sind alle NeoPixel deaktiviert außer das Mittlere in der dritten Zeile. digits = Wir benötigen zusätzlich noch eine Funktion, welche uns den Status des Neopixels liefert. Ich definiere hier, dass ein Bitmuster eine Zeile (in Englisch row) ist und als zusätzlichen Parameter übergebe ich den Index pro Zeile. Als Rückgabewert erhalte ich ein true, wenn der NeoPixel aktiviert werden soll, andernfalls ein false. def checkLed(row, index)->bool: return row & (1 bool: return row & (1 bool: return row & (1 Read the full article
0 notes
Text
गीक-फ्रेंडली Elec NanoPi R5S
गीक-फ्रेंडली Elec NanoPi R5S
इस ब्लॉग के लंबे समय के पाठकों को पता चल जाएगा कि मैंने अतीत में कई FriendlyArm/FriendlyElec बोर्डों की समीक्षा की है, लेकिन कुछ समय के लिए चीजें शांत हो गई हैं (Covid ने मदद नहीं की)। खैर, ऐसा लगता है कि वे फिर से सक्रिय हो गए हैं – एक नई WiKi साइट और एक नया बोर्ड। ��ेरे पास बॉक्सिंग संस्करण है और मैं अपने रास्ते पर हूं आपको उनकी वेबसाइट पर निर्देशित करें गहरे विवरण के लिए… इस बीच, मुझे इनमें से…

View On WordPress
0 notes
Text
NanoPi vs Raspberry Pi0
Come scegliere il lampone migliore 😂, and the winner is ... scoprite chi vince tra raspberry Pi0 e NanoPi
0 notes
Photo

Miniature ARM Quad Core Cortex-A7 Development Board Supports Ubuntu And Android
The NanoPi NEO is an ARM-Processor-based development board designed and released by FriendlyARM for hobbyists, makers and electronic fans. The board's dimension is only 40 x 40 mm.
It is open source, and it works with Ubuntu MATE, Debian, and more Linux variants.
https://copperhilltech.com/blog/miniature-arm-quad-core-cortexa7-development-board-supports-ubuntu-and-android/
0 notes
Text
NanoPi-M3: 8 blazing cores, but... // Review
NanoPi-M3: 8 blazing cores, but… // Review
The NanoPi-M3 has 8 1.4GHz ARM cores. That’s all well and good, but can you actually use this small SBC? (more…)
View On WordPress
1 note
·
View note