#I usually start colouring by making everything one colour and then making clipping layers above it.
Explore tagged Tumblr posts
Text

I have no business trying to draw at the moment so here is my current WIP. I've really enjoyed putting together my vision of a "Hive Disciple"...
This is Lûstra, Traitor Prince. Castigated son of La'zaar, punished beyond all reckoning and reduced to a moribund, wormless husk. In his blessed renewal he guards the Pyramid that has become the Leprosarium's "Grave of Shapes".
#Only just started colouring him in...#He'll be less plain after I get through that...#Wrote for a while in my Notes a few days ago. Decided to draw him.#blackwax art#This is a draft from last night. Maybe I will continue this piece today? I can see better than yesterday.#I am unsure how to implement the colouring yet. I have a nice shade of black picked out but I don't know how to add it.#I usually start colouring by making everything one colour and then making clipping layers above it.#I chose white as a base layer because pallour is a standard of La'zaar's Hive.#OC: Lûstra
2 notes
·
View notes
Note
That last piece aaaaaaaah beautiful and sweet, really captures how Lav feels about Randy :D
Also I love how you colour and shade everything, how do you do it? Do you think you could record a speed paint or something? What brushes do you use? Canvas size? How do you painstakingly colour within the lines? What device do you use?
Sorry for so many questions in one ask, I’m really curious lol. Hope you can answer these! No rush :3
First off, thank you so much!
I use Procreate on iPad, which has a handy-dandy little feature where it automatically records everything you do on a canvas, and you can create a time lapse of it. So, yes, I can give a speed paint. :3
(Yes I painted this specifically for this ask.) For comics (and this painting sample), I use a canvas that's 1813X2263. For doodle dumps and other less dedicated projects, I use a 1955X2357 canvas, rotating as I want or need to. If I have a bigger project I want to do, I start with Procreates "Square" canvas default (2048X2048) and crop as I need to as I work.
I've been sticking to this Jingsketch brush set for a while now, though I've modified some to make them more comfortable. As of now the set is free to download. (There appears to be a larger Jingsketch set that costs about $15--I may get that someday lol)
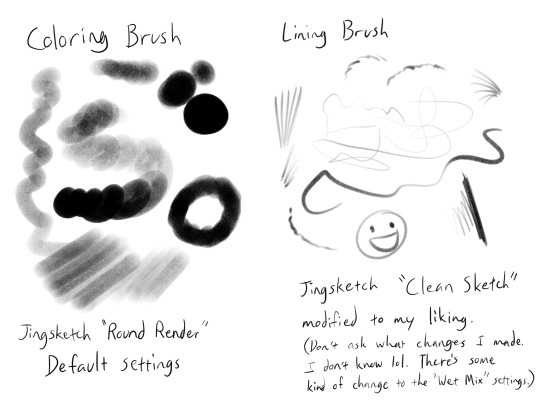
For smudging of shadows and markings, I use the Jingsketch "Jittery Smudge".
Alright, prepare for a thorough rundown of the time lapse. X3
As for how I color, the video shows my two most used methods. I do the Momo method when I want it to look a little neater or smoother, and the Midas method for when I don't care how unpolished it looks and just want to show a colored image.
For flats (the solid red seen in the video) I do it on a layer under the lines. I usually put all the flats on one layer, but this time I did their flats on separate layers for demonstration purposes, and merged them once they were both filled.
For Momo, I colored by drawing just inside the lines, erasing what went outside. Then used a Freehand (or equivalent) selection tool to fill in the inside. This is the more time consuming but smooth of the two methods, in my opinion.
For Midas, I specifically drew the outer lines thicker so that I could use the "automatic" (I guess that's "wand" in other programs? I'm not sure) selection to do a quick fill. This method will usually leave the colors with a hard, semi-unappealing edge. (Feathering the selection a little or smudging the flats can probably help with that, but I don't do that very often.)

What I do is select the OUTSIDE of the lines, expand the "Selection Threshold" so that it barely selects JUST outside the lines, then invert the selection so that it filles everything INSIDE the lines. With this method you need to be careful to get all the negative zones as well--I didn't think about demonstrating that in this painting, so here a mini-tut on that.
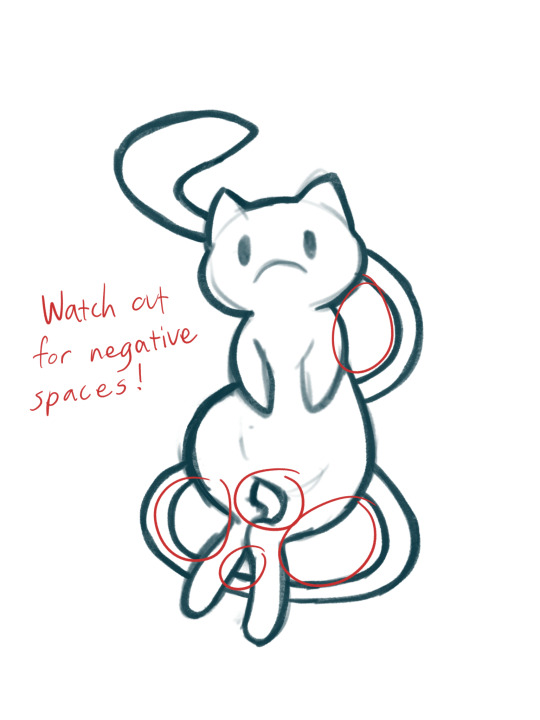

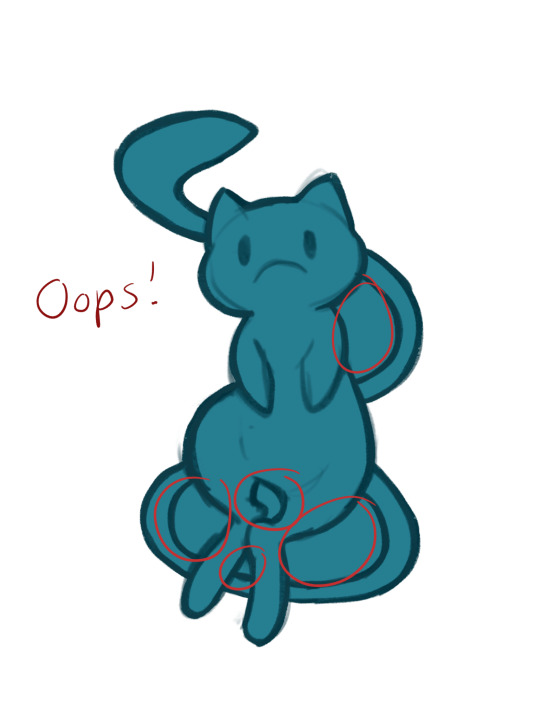

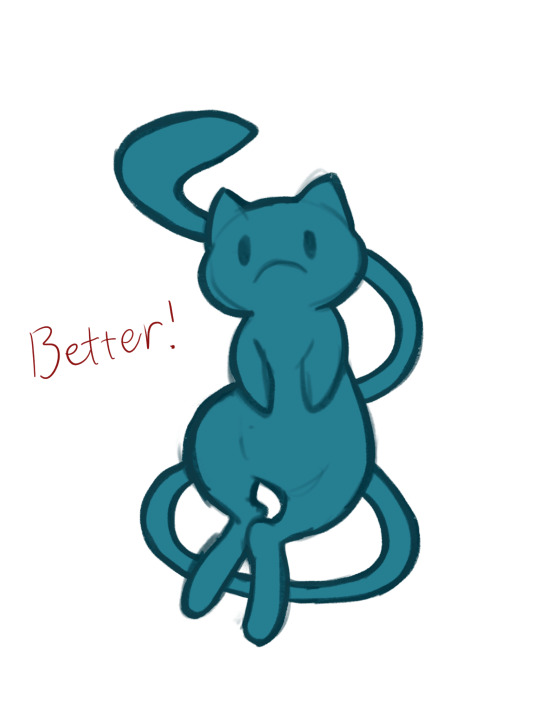
For the actual colors, I usually do each color on a separate layer set as a "Clipping Mask" to the flats layer. Eyes usually get a layer of their own--The iris colors and pupil (if present) get the Clipping Mask treatment until I'm satisfied with them and merge them into one eye layer.
For shading, I'll fill an entire layer, still Clipped to the flats, with my color of choice, usually set it to the Multiply blend mode, and adjust the opacity as I want. I usually shade the main body separately from the eyes, but try to match the blend mode and opacity settings.
For more high-effort projects, I'll fill a layer with a solid color under the shadow layer but above all the other colors so that I have a better idea of the shapes. Colors like on Midas here can really badly mess with the perception of the shapes and shadow locations. I may also add more Multiply layers if necessary.
And that's my lengthy and extensive look into how I paint~ Keep in mind this is MY process, and I admit I work in a rather quick, dirty, and even somewhat lazy way. So take what you will from this, and go arting as YOU please! ^w^
94 notes
·
View notes
Text
GIF MAKING IN PS
i've never done anything like this before so hope it makes some kind of sense.
so before you get into making gifs first thing so will need is some sort of editing software (i use ps 2022) and some raws obviously. most of the shows i gif are on yt so its pretty easy to get them and you can use any kind of yt to mp4 converter.
so once you have all of this i guess we can get started!!! on a daily basis i do not follow all these steps because you can easily turn them into actions on ps, which means that it would take just seconds. so although it may look lengthy its pretty simple

the first step to making gifs is importing the raws. you first want to go to file>import>video frames to layer. this will open up your file explorer from where you can choose your desired file. you may want to make sure your file isn't an mkv one but an mp4 before you do this. also if your raws are large, perhaps a whole episode or longer than 30 minutes, it might help to trim it down beforehand to make it easier to work with.

once you select your file, this window will open up. here, you can move the sliders to select the exact part of the clip you want for your gifs. (when files are larger, it would be more difficult to capture smaller parts of the clip using the sliders) although optional, selecting the limit to every 'x' frames will help reduce the size of your gifs while not making it look too choppy. i do 'every 2 frames' for regular scenes and leave it unchecked for anything in slow-mo. more than 2 usually makes the entire thing look sped up and choppy so i wouldn't recommend it. although it depends on the raws ideally you want something around 80 frames for one gif.
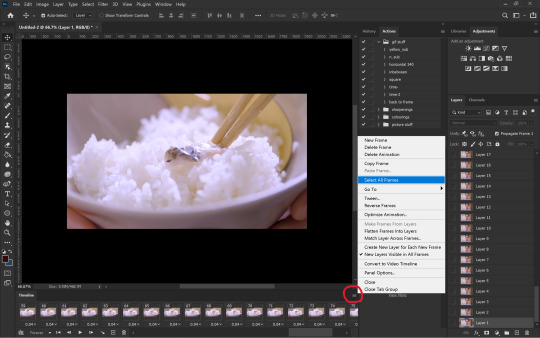
once you press okay on the above step, your workspace will open up and from here we can start making the gif. the first step would be to set the time delay. this is two ensure that the gif doesn't look sped up. for this you want to first select all the frames as shown above.
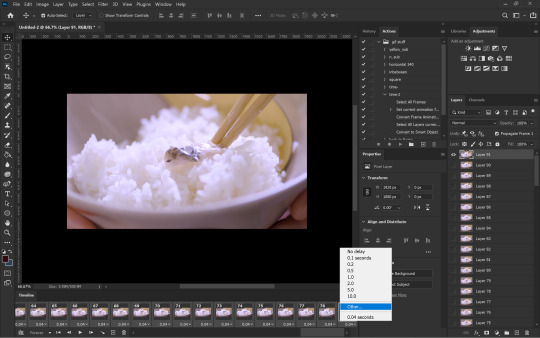
next, you can click on the downward arrow on any frame to change the time delay. i usually prefer 0.07s which you can set in other...
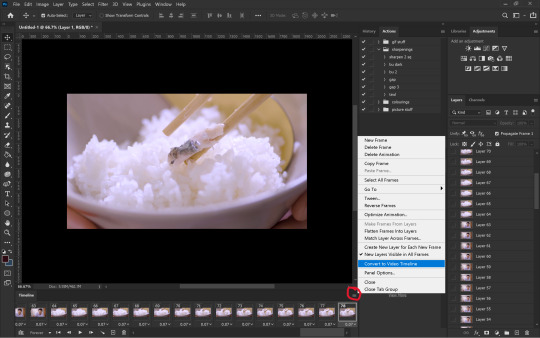
once you've set the time delay, you have to convert the frames into timeline as shown above.
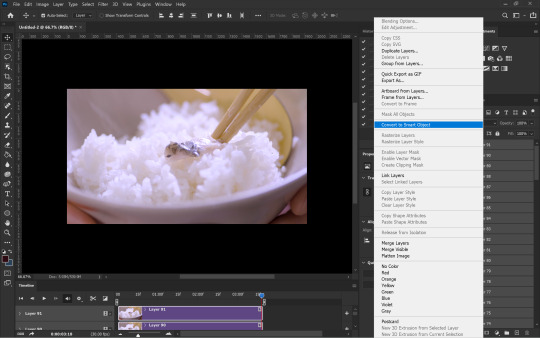
now that you have your timeline as seen on the left side, all you have to do is convert everything into a smart object. for that you have to first select all the layers using the shortcut Ctrl+Alt+A and then right-click on the layers followed by convert to smart object
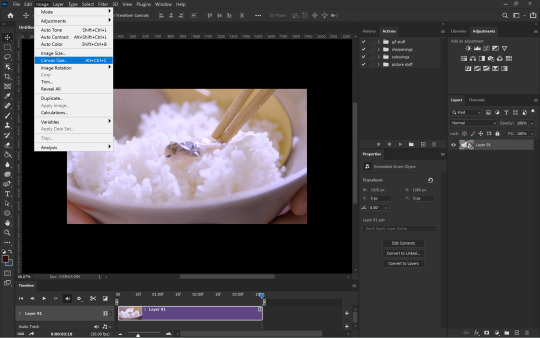
now you can see that the many layers have been converted into one layer making it easier to work with. the next step is to resize the gif. the original dimensions would make the gifs too large to fit tumblr's size limit, this can be done by going to image>canvas size
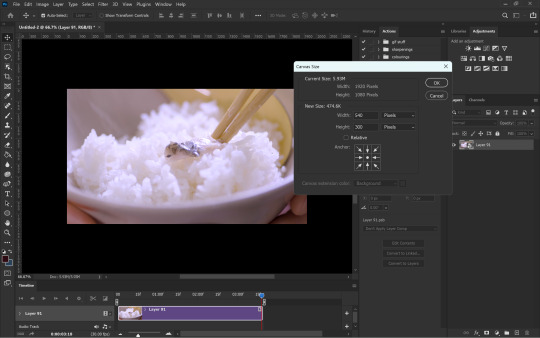
to ensure that tumblr does unnecessarily crop your gifs you want to make sure width is always 540px if there's going to be only one gif in a row. the height can be anything depending how you want your gif to look.
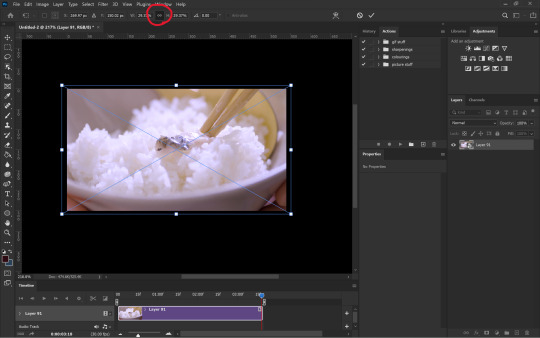
you can adjust the gif onto the new canvas using Ctrl+T to transform the layer. always ensure the height and width are linked to make sure you don't squeeze the image weirdly.
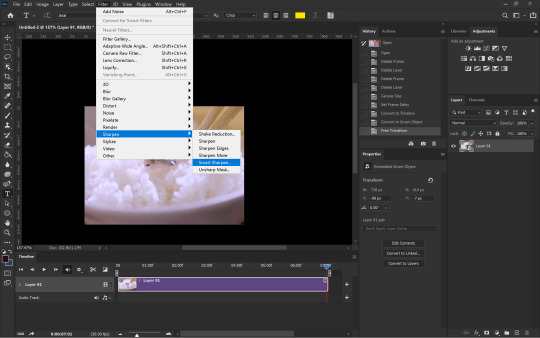
after resizing the gif, i next sharpen the gif (which is my least favourite part). you can sharpen by going to filter>sharpen>smart sharpen while the noise filter is in filter>noise>add noise
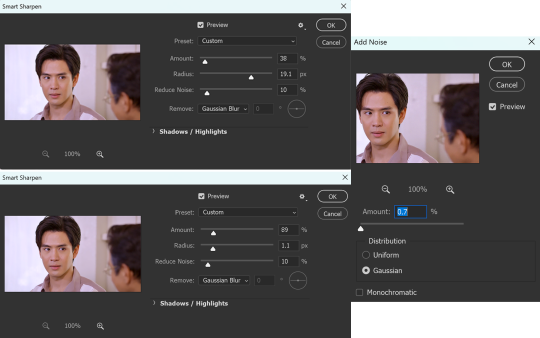
although i don't always stick to the same sharpening, these are the settings i use the most.
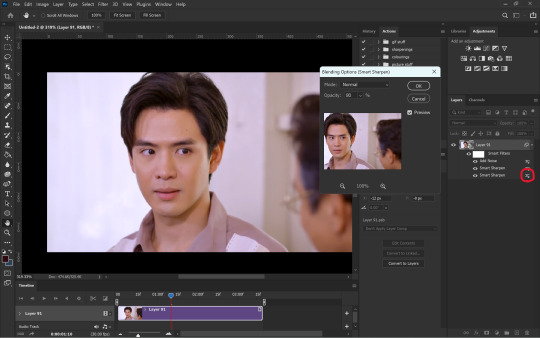
once i'm done with the sharpening i like to soften the first smart sharpen filter. for this i change the blending option of the first filter to 80%. this is entirely optional.
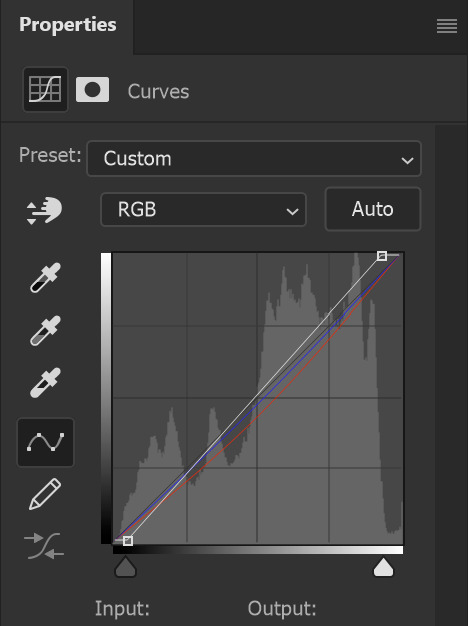
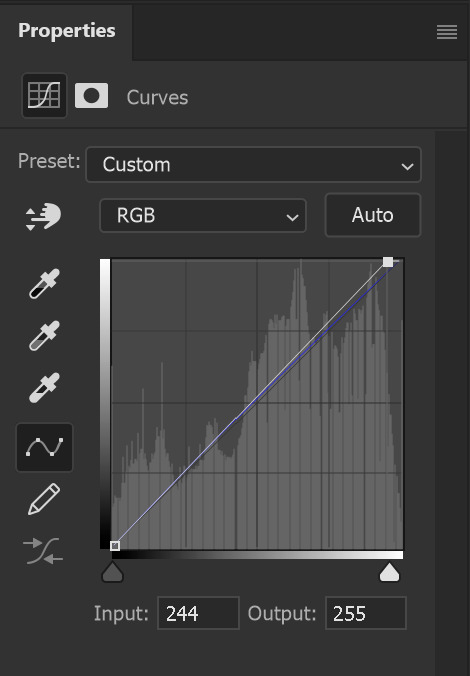
once sharpening is done, you can colour and edit however you like using any of the adjustment layers. i mostly prefer curves and selective colour. these are the curves i used for this particular gif to remove the purple/redness it had going on. in RGB mode the white slider adds brightness and the grey one darkness/contrast. then you can individually use the red, green and blue modes to adjust the colours. i only used selective colour here to adjust the skin tones a bit so i haven't added that.
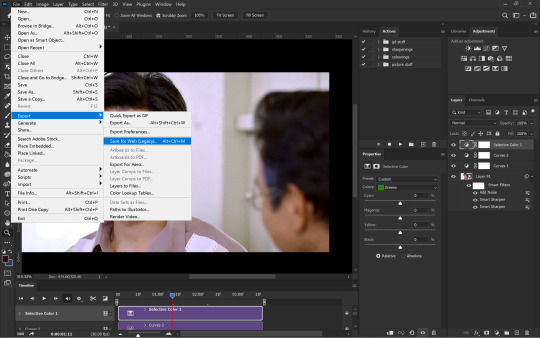
once done with colouring all you have to do is export the gif from file>export>save for web (legacy)
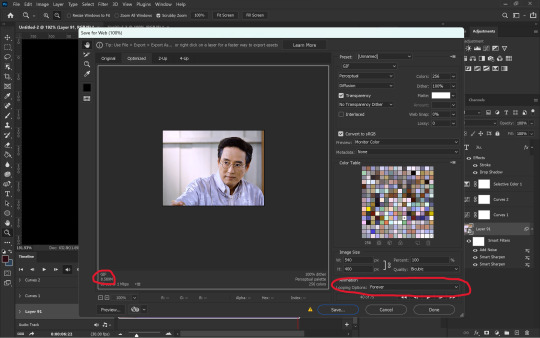
in the last window you have to make sure your looping is forever and that your gif is below 9.5MB. although tumblr says max gif size is 10MB, at least for me nothing over 9.5MB uploads.

and THAT'S IT (i say after a whole one page essay) your gif is ready!!! honestly i don't know if this is the easiest or most convenient method but this is just how i do it. also i use actions for everything other than colouring so it isn't as time consuming as it looks. you can also set shortcuts for importing and exporting to save time. this can be done from edit>keyboard shortcuts
since you made it to the end here is an extra bit on captioning
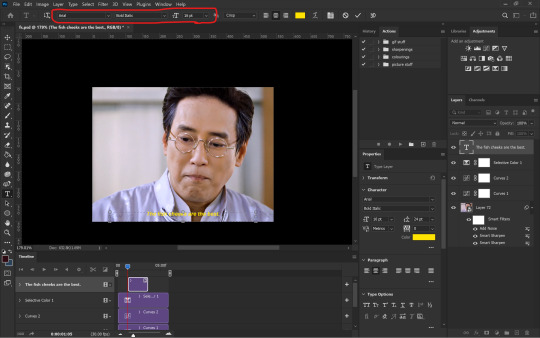
you want to start with a normal text layer and center it at the bottom of the gif. i use arial bold italic in size 16. next to make it look better we can add an outline and shadow to it through the layer style. and you can open up this window either by clicking the fx option at the bottom right or double-clicking the text layer.
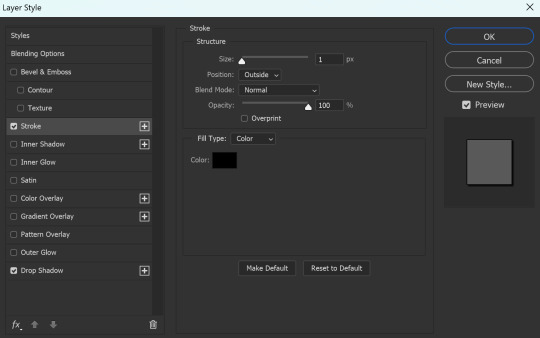
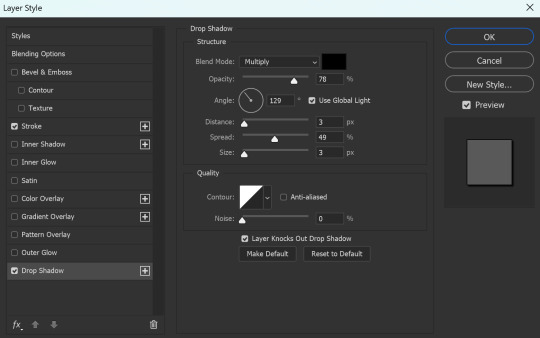
these are the settings i use for the stroke as well as the shadow
now it is ACTUALLY the end!!!
#gif making#ps tutorial#gif making tutorial#photoshop tutorial#hope this makes some sense 😭#i made the important stuff bold so that you don't have to necessarily read through the whole thing#i had to go take a look at my actions cause i had actually forgotten my settings in the first place
90 notes
·
View notes
Note
Hi, first of all, I love your art. I really admire your sense of posing and simple but great colour schemes.
I would love to get some advice from you. The light source in your recent Despair Sisters posts is directly above, do you have any tips or advice on shadowing in this light source? I love such impressive lighting, but it's hard to imagine what the shadow will look like. Any advice would be greatly appreciated!
Thanks ❤❤
I don't usually get asked for tips, so I am sorry if my explanations are confusing
the most easiest (for me) way of shading is to do it before doing base colour.
I usually do two layers of shading with the same colour (dark purple) but different opacity (depending on how the result)
and if you are asking specifically on my recent post, I just Fill everything with purple, since it is more shade

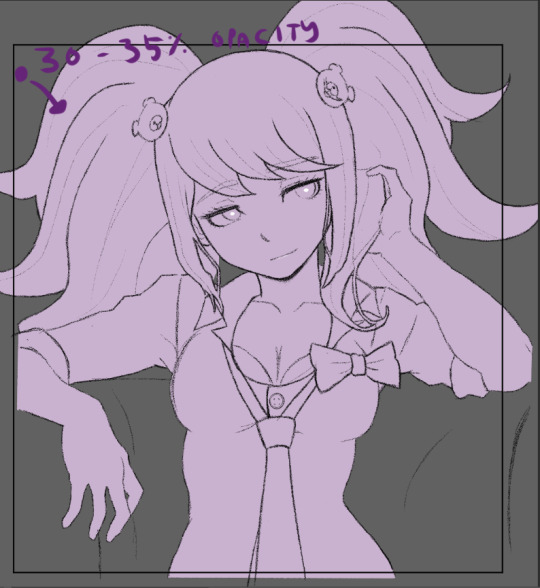
then just erased the part that light should go, starting from the top or where the light source shine. then adjust/erased/add more details


some people use the mask tool for this. I usually use it if I want a more blend effect, but for this one, I don't use it because I am lazy
then add another layer above this shade layer with the same colour and more or less the same opacity with the first one , and add in where shadow can be darker usually where something overlap like skin below hair, or somewhere lower

the layer panels look like this for me (2 different layers of shade inside a layer folder), and set the folder mode to multiply. I am just lazy to name my layers

I don't know why my Junko one had a folder inside a folder, but usually it will look like this

then, hide your shade folder and proceed to do the base colour


For context, I used a white colour to colour Junko first as a guide to clip my other layer so it won't fill outside the guide white colour. and screen is for me to adjust how the colour will look like (sometimes different screen like phone or monitor have different effect on the result, depending on the mode your monitor is in : cool or warm or etc) notice that the shade folder is hidden,
I am so lazy that I don't name my layers which will make it hard to find a specific layer with errors
then unhide the shade folder.

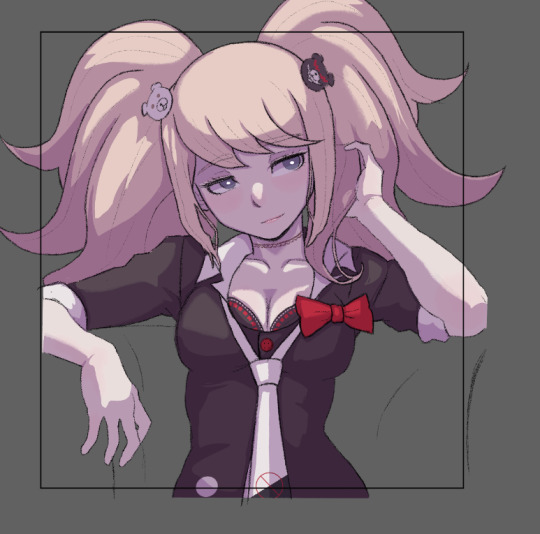
Then just add in a bit of light details depending on your taste
I hope this help you (not to confusing since this is how I find myself comfortable with)
6 notes
·
View notes
Photo

Hey hey hey! I did a little tutorial for some friends and decided to post it here if someone needs it!
This doesn't contain directions on how to prepare your gifs and convert them into video timeline. Let me know if you need a tutorial on that!
We will use video timeline for this. Frankly, I’m not sure how you can do it with frame animation. I know it can be done, but I haven’t attempted it in years. 😁
1. Decide what scenes to use. Consider length because all the small gifs within the big one need to be the same length. I have chosen 2 seconds for mine. I’d recommend somewhere around 2-3sec max as you have the big gif to add to the overall length of the gif, which would increase your size. Think about framing of the scenes too – you need to be able to see the character well, as it will take up a small portion of the screen. Or make sure what you’re using is easily distinguishable. For the big gif, I recommend a scene with incremental movement.
2. Choose your size and ratio. For this gif, I have chosen to do a square, 450x450. Usually I would go larger, but it all depends on how long the gif is, how many elements and all the things that would up its size. This gif came out surprisingly small (around 5MB), so if you do something similar, you can definitely start bigger and then downsize if necessary.
3. You need a shape to clip your scenes to. For a more details tutorial, check out this. Long story short, make a grid of 9 square shapes using the rectangular tool.

You have to do some math, and I’m gonna use my size to demonstrate. The size of my gif is 450x450. I need 3 squares per size, so that means 450/3. But we need space in between the small squares so it can imitate an actual tumblr gifset as opposed to one gif. I have added 3px divides. So you have width/height of 450; you need 2 division between the squares. So 3px x2 = 6, 450px-6px = 444px, 440px/3 (number of squares on each side) = 148px each. Click on the rectangular tool than click once on the screen. In the dialogue box for the size of your shape write the number you’ve just calculated aka 148px x 148px.
Click ok. Move the square the far corner. Create another one – align it in the middle, then a third in the other corner. Then copy all three 2 times and create 2 more rows like so:

Now select all the shapes, right click and “Merge shape”. It’s important you merge them as shapes, not rasterize them because if you rasterize them, they won’t be vectors anymore, which means resizing would impact the quality and the clean edges.

Now move the big shape to the bottom of the layers panel and we will clip all of our scenes to it.
4. Your big gif, or your big scene will come first. Cut it to be a little longer than you need, you’ll see why later. If your scene is like mine, with something coming into focus, make sure it focuses around the middle of the length. The smaller gifs we will add, will fade into the big one, therefore you won’t be able to completely see it if it’s just coming into focus. Clip your scene to the grid by either holding alt and click on the lower border of the layer in the layers panel, clicking ALT + CTRL + G, or going to the layer options and selecting ‘Create clipping mask’. (you can find all of this in the tutorial in the link above)
5. Now we can work on the small scenes. Clip all of them to the grid using the same method as above. You might notice this happening, as everything is clipped to the grid and move it to the place you want it to be:

Don’t worry, here’s how you can fix it. Use the (Rectangular) Marquee tool and select your small gif through the divisions around it. Don’t select the shape itself, because that might leave a jagged edge afterwards. Select like so:

Now press the mask tool at the bottom of the layers panel (or go to Layer – Layer Mask – Reveal Selection) and done! Repeat with the rest. Align your small gifs and add Fade to all of them from this menu on the Timeline, click this:

You can adjust the duration of the fade here:

I have made mine 0,5s. Now drag to the small gifs and drop to apply. Drop on both ends. Your gifs should look like this:

6. Now to make the whole gif a seamless loop. Select your big gif. Choose a frame you would like to begin with, but leave around a second of footage before it. Now cut the scene at the place you would like it to start, move that 1 second of footage that is in front of it to the very back, and move the big gif to the start of the timeline.

The visible length of the gif should be around 2 sec, so make sure your object is not just going into focus on second 2, but rather as I said earlier in the middle. Move your smaller gifs so that the end of their transition (fade) matches the end of the big gif. I have added one frame to the end of my big gif, just in case.

Now align the beginning of the big gif we cut to the end of the small gifs. No when you play the gif, that little part at the end will create the illusion of a seamless loop. You can cut any part that is not visible. And you’re done! This is how to do the basic structure.

Now if you want to add colouring:
First, I’d recommend scenes that are similar in lighting and colour so you can use one colouring for all. I have chosen scene like that for my gif, but some still needed a little adjustment. Basically what you do is use masking to fix the colouring of certain areas. Kaz and Inej were a little dark compare to the rest. I made a curves adjustment layer, adjusted it the way you like it, then using the (Rectangular) Marquee tool again select around the two scenes and click mask. You can use this for all the colouring. If you use something that has any kind of opacity, clip it to the layer so that the divisions between the gifs stay nice, clean and transparent.
Basically all you need is clipping and masking lol. Happy editing,
#i am sure this is riddled with spelling mistakes but i am too tired to care#sorry yall#hope this helps anyway#im sorry i didnt have more pics#tumblr doesnt let me#gif tutorial#gi#tutorial#photoshop#photoshop tutorial
286 notes
·
View notes
Note
📝 ok how do you add more than one gif/moment in one gif? like in some of your veronica in every episode gifsets or when you do the outfits one? i can't find a good tutorial also if you have a tutorial to how you did the side bar, that would be awesome. i am trying not to send you a 10000000 things bc you are so talented and i love you sfm!
okay, i’m going to do a little tutorial on how i use layer masks and clipping masks to get ‘multiple gifs in one’ and i hope that will answer your questions!
we’ll start with the basics of getting several smaller gifs together to make one:
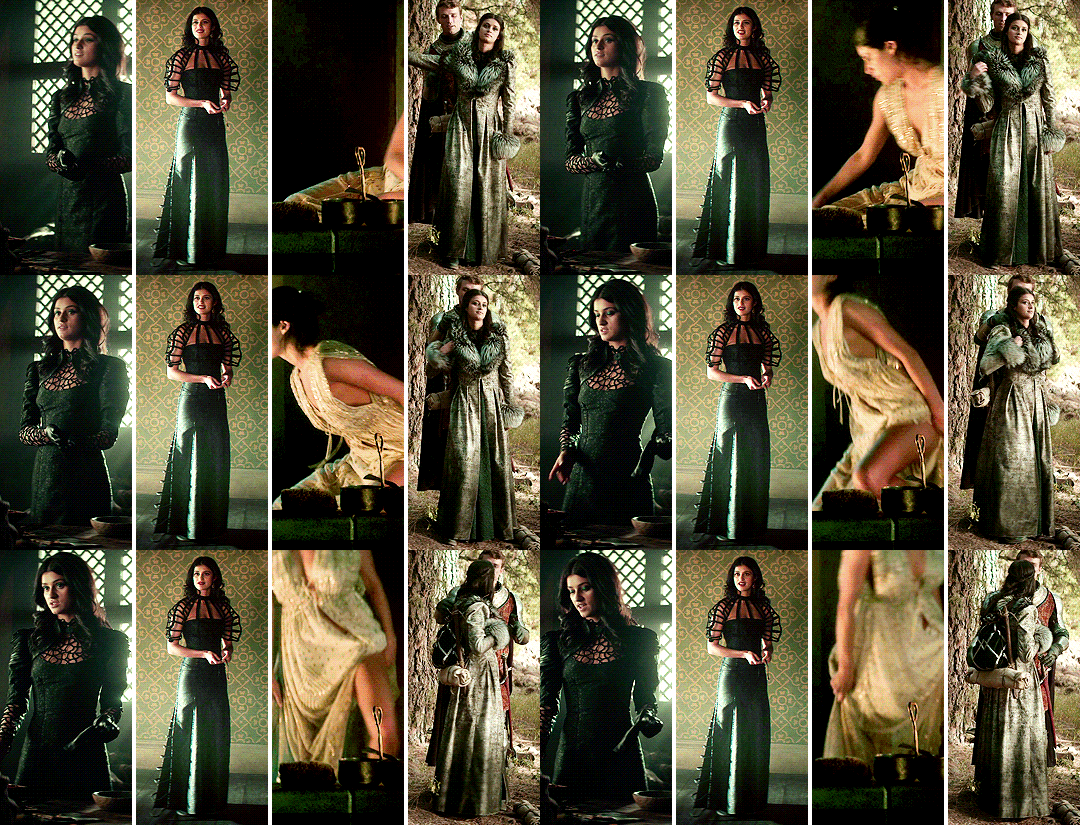
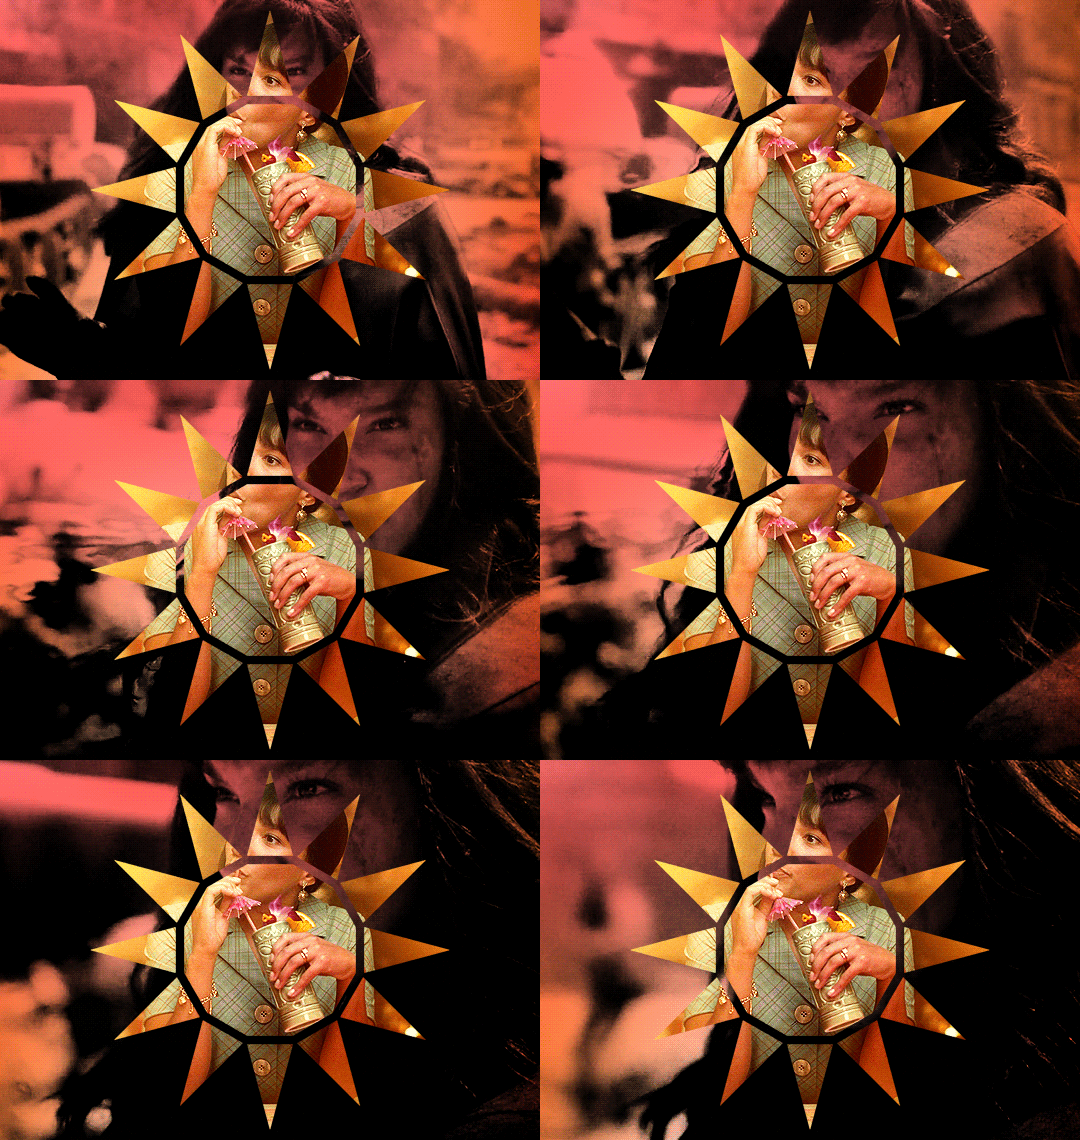
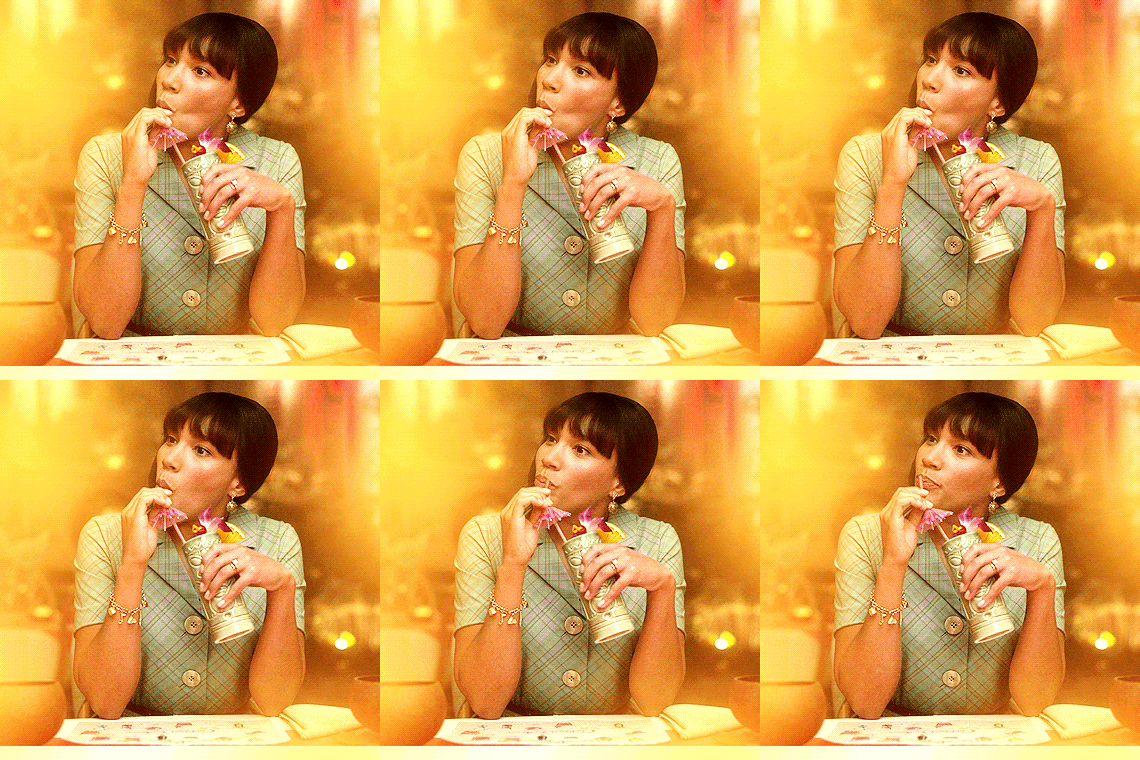
and then i shall build from that and explain how i use clipping masks in sets too to create something like this:
SEVERAL GIFS IN ONE:
so we’re going to use layer masks to create the four-in-one gif. you can apply this method for any square/rectangular gifs, so for example if you want to put five gifs in a line instead you can adjust the sizing and make that work.
the most important thing is to first work out what size you want each gif to be. i like to map it out with black rectangles first so i know exactly what size i’m using and that the spacing between each one still works (tumblr has a spacing of 4px so i just maintain that throughout my mapping). so these are a size of 132x275px:

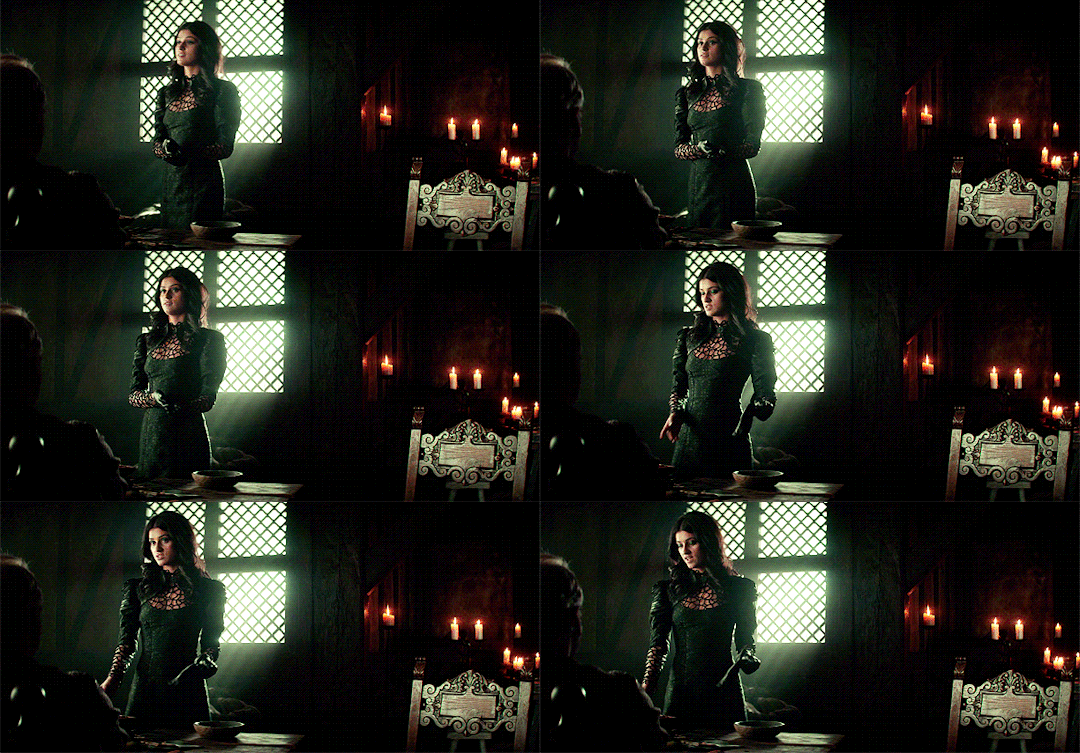
now i know exactly what size i’m using, i can get started! first you’re just going to make your gif as you usually would with your usual colouring:
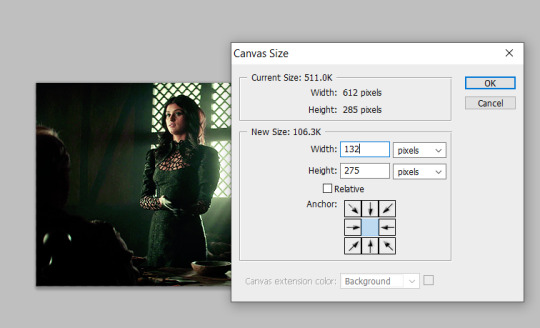
i’m then going to go to image > canvas size and resize this to the 132x275px size i decided on earlier:
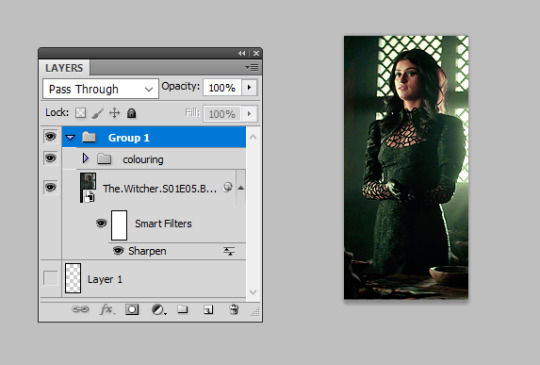
that’s then given me the size that i want! you can move this gif layer around to then sit nicely in your new canvas so it’s centred nicely, and then i put all of my layers into one single folder on the layers panel.
i’m then going to select the canvas using the rectangular marquee tool so that the entire canvas shape is selected (this is really important or the area you want to mask will not be defined), and then add a layer mask as so:
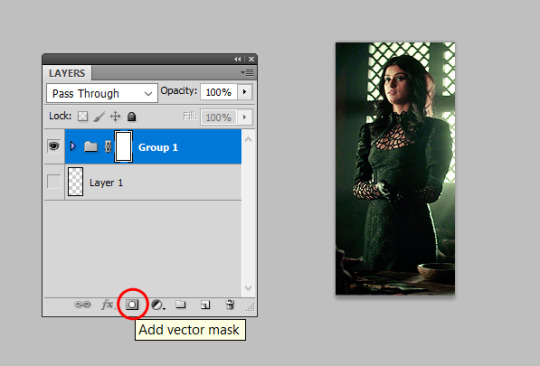
this will effectively ‘set’ your gif at those exact dimensions. i’m then going to go back to my image > canvas size and alter the canvas to the size i want the final gif to be at, for this one i’ll alter the width to 540px as that’s tumblr’s ideal width size:
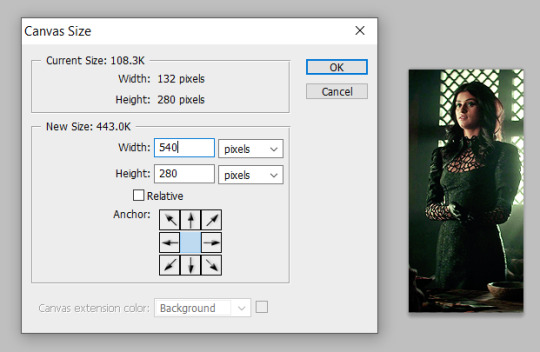
you can now move this gif along to place it where you’d like on this canvas, so i just repositioned this to the very left hand side so it’s the first gif in the row:
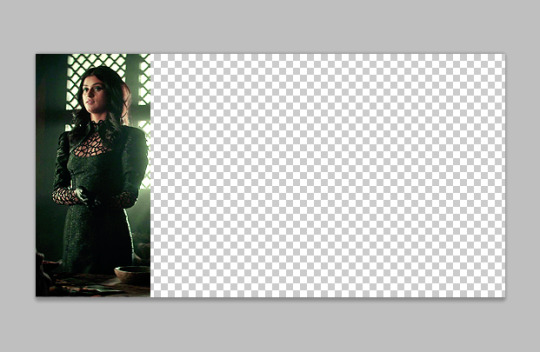
you can then repeat this for all your other gifs! top tip: make all your gifs the same length of caps for ease. it is possible to adjust your gif length using the timeline on the animation window if need be, but it’s a lot easier if you just make all your gifs the same number of frames. when all the other gifs are done, we get this:
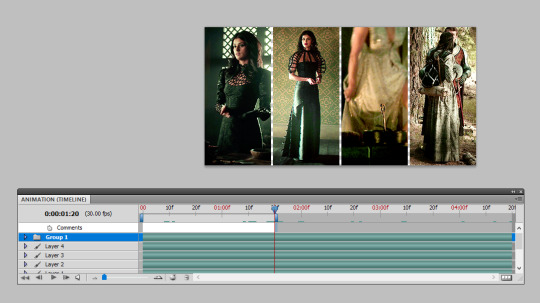
as you can see, i didn’t make all these gifs the same number of caps so i’ve just dragged the time bar at the top along to the place where my shortest gif runs out when i press play. then i can save and ta-da, all done!

USING OTHER SHAPES:
unfortunately the above technique only works when using rectangles/squares as other shapes do not have the exact sizes to enter in. so i’m going to introduce you to how i use other shapes to create several gifs in one, say hi to clipping masks!
i’m going to make my gif once again and colour it as i usually would:
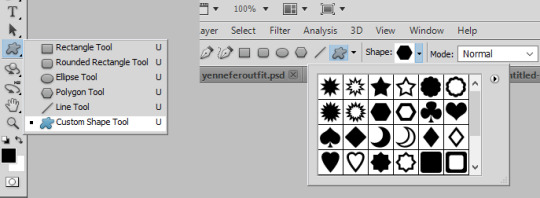
then i’m going to insert a shape. now, there are two ways to do this! firstly, photoshop has custom shapes you can use under the ‘custom shape tool’ window, then going to shape and choosing from the options. you can then drag this onto your gif to insert the shape you want at the size you want:
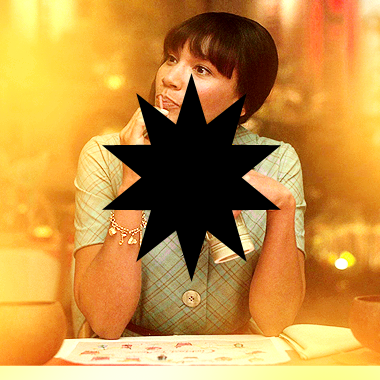
the other option is you can generally find good geometric shapes available for free use on the web. searching for ‘geometric sun’ for example brings up a lot of great shapes to play with, make sure you add ‘clear background .png’ to your search and it brings you to a lot of resource sharing sites that will allow you to save these shapes as cut-outs.
here i found the cut-out i wanted, re-sized it and pasted it on top of my gif like so:
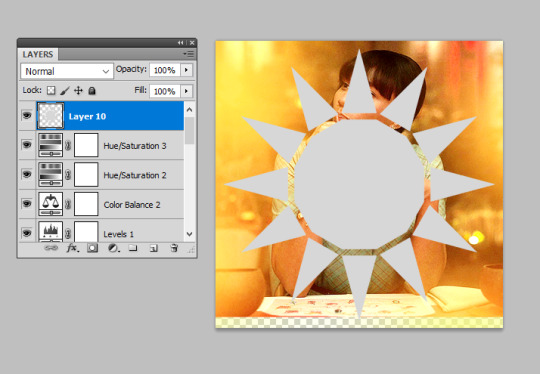
now for the fun part! you need to reposition this shape layer so that it goes at the very bottom of all your layers. make sure you have absolutely nothing within a folder as well (this is important for speedy clipping masks!).
once it’s at the bottom of everything, i’m going to right-click on the gif layer and then select ‘create clipping mask’ on the drop-down menu:
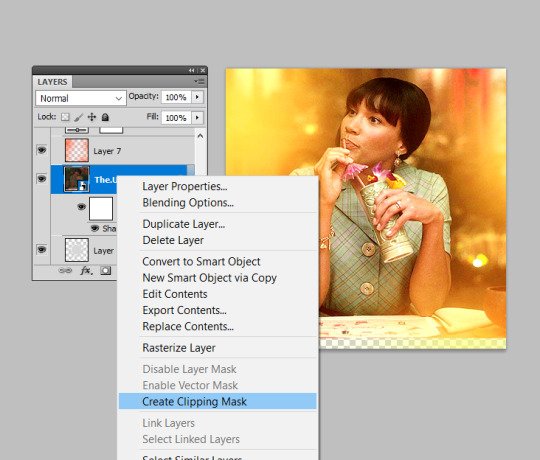
and this will clip your gif to the shape! you then need to select all your colouring layers (just control shift and click on the very bottom layer then very most top layer) and then also right-click and select ‘create clipping mask’ to clip it in the same way. this will not work if any of them are in folders, so remove any layers from folders first! you can then continue to make edits to these colouring layers (just double check any new ones you insert are clipped!) until you are happy with your shaped gif like so:

i then drag and dropped this gif on top of another gif i’d made (similarly to how i’ve outlined in the several gifs in one section) to create the shape as a statement on the gif:

to create gifs like my sidebar, i’ve just repeated this shaping several times over and dropped them onto a ‘background gif’ to create the overall pattern i wanted. it is really helpful to just have a play around with just plain shapes to get your layout sorted before you make them into gifs. for example, i made a template for my sidebar gif first so that the size and layout of all the triangles were exactly as i wanted before i giffed anything! you can then just copy and paste these shapes to use as your clipping masks.
THE END
i hope this makes sense and is helpful, layer masks and clipping masks can seem like complete wizardry when you first start using them but you’ll soon learn how to get your head around them and experiment. if you have any further questions as always, please do let me know :)
#katiectalksalot#fyeahps#completeresources#itsphotoshop#gif tutorial#tutorial#tutorials#(bc i can't remember if my tag is plural or not)#ps help#i feel like i ramble on for ten million years with these cos i'm really worried i'll just be that person#who's like 'you know the thing!' and everyone's like '... but what thing?'#but i hope this helps you out lovely!#*15k
916 notes
·
View notes
Text
From planning to posting, share your process for making creative content!
To continue supporting content makers, this tag game is meant to show the entire process of making creative content: this can be for any creation.
RULES: When your work is tagged, show the process of its creation from planning to posting, then tag 5 people with a specific link to one of their creative works you’d like to see the process of. Use the tag #showyourprocess so we can find yours!
Thanks for tagging me @candicewright
I’m tagging @aikakuu��� and this piece
@italiansoda and this piece
I don’t have anyone else to tag on tumblr orz....
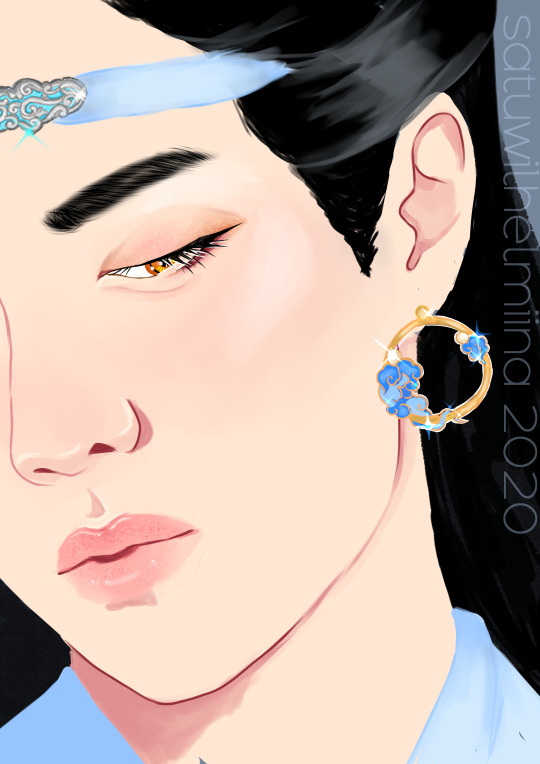
You can reblog the original Lan Zhan piece here
So the process for this started when I saw an instagram ad for these earrings. My brainrot went “oh. lan zhan” and I just decided to draw him with them.

I didn’t really have a pose in mind yet, so I just set out to search for images of Yibo I could use to kind of inspire me in that way and came across this one:
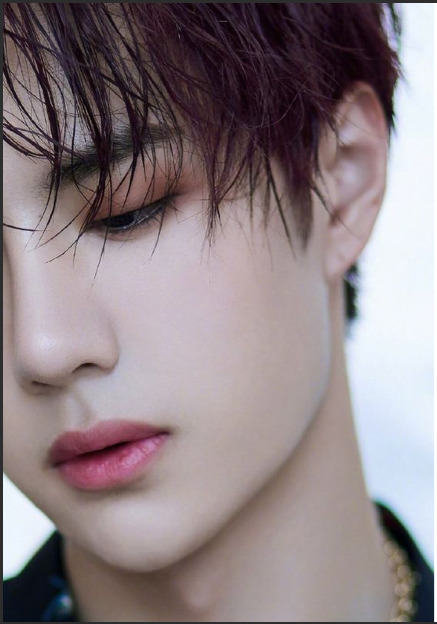
I thought this was perfect. It’s such a good closeup that will allow me to really just work on some of my favourite things in close-up portraits, and it will allow me to also showcase the earring. It’s obviously from a photoshoot for something, and the idea of earring model Lan Zhan was really delicious.
So with this image I started sketching in clip studio paint.

I like to use the default design pencil brush for sketching, just in case anyone wants to know haha. After the sketch I set about making a colour palette. I usually colour pick from images and then adjust them so that the colour is a bit more vibrant.

Usually when I start colouring I start with the skin. I tend to render most of it. I use the following brushes usually:

Every brush apart from the last one is a default brush in the software. I use the last one when I do “lineart”, so usually anything with a harder, non-blended edge in the image.
Obviously the skin here is after I’ve already fully rendered it. The shimmery eyeshadow and the shimmer on the lips was added last, after everything else had been finished. Other than that it was fully rendered before I moved onto other things.
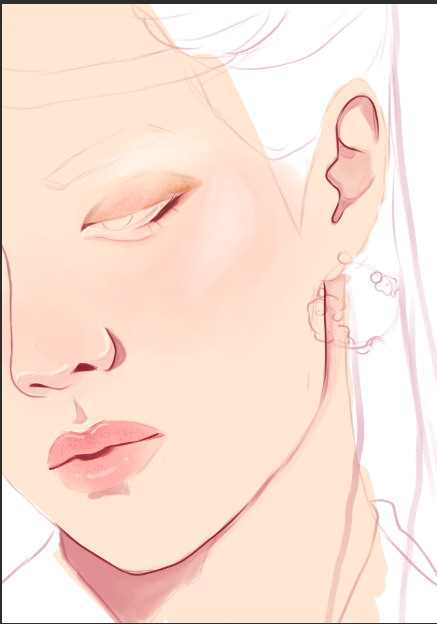
The next step for me is always the eyes. When I’m drawing close-up portraits I use like 5000 layers for the eyes. The first one is the sclera and the colour of the pupil
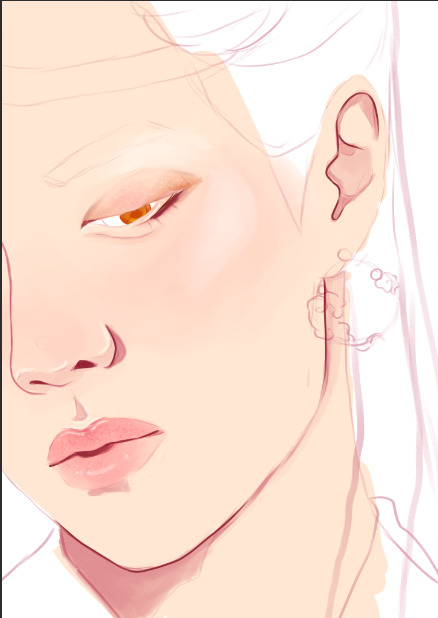
After that I usually draw the lashes. In this case the upper and lower lashes are on separate layers.
Up next is the pupil and the effects. The pupil is on a separate layer between the upper and lower lashes.

Above the pupil layer, below the upper lashes is the effects layer, it is set to Add (glow)
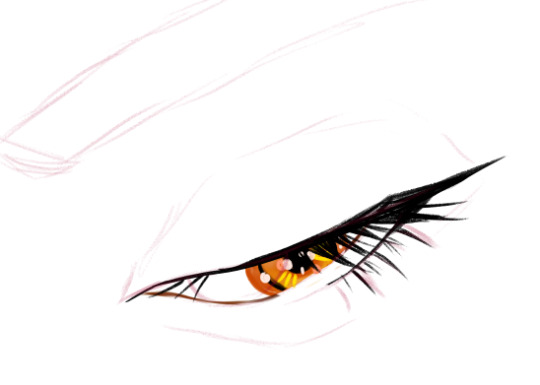
Usually for these effects I pick colours that match other bits in the drawing. In this case it is golden because of the golden earrings and the fact that lan zhan as amber eyes.
After this I add a layer of white lineart below the layer of upper lashes and on top of the pupil
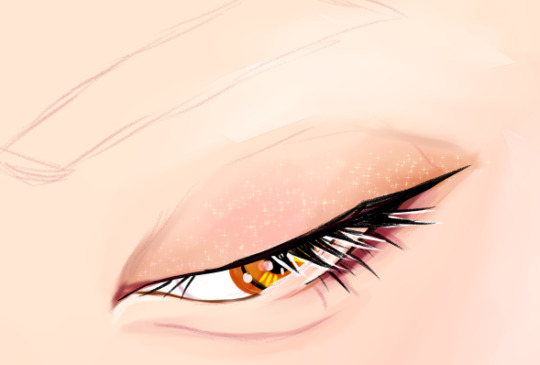
(You can see the “eyeshadow�� look below in these layers as well. This was mostly done using the emphasise texture brush and I think the default oil paint brush. )
After that come the eyebrows and hair. For eyebrows I usually draw a black caterpillar that loosely follows the shape of the eyebrow and then blend it until the colour is a translucent grey. After that I use the brush I use for lineart to draw some individual hairs

For hair I usually do flat colours first and then add some variation with either the flat marker brush or an effects brush I got when I downloaded a massive pack of hair texture brushes. For this one I think I used the flat marker and strangely enough the fingertip blender.

After this I drew the headband and the earrings. The process for all of them is simple: flat colour first with the turnip brush and then shading with the emphasising texture brush and maybe some lines with the random brush that has a korean name (see the brushes I regularly use).

There is also a separate add (glow) layer on top of these that I’ve used to add some sparkles!


There’s also a layer of white lineart that I used to make sure the earring pops out of the background a bit

After all this I went and added the sparkle on the eyelids and lips.

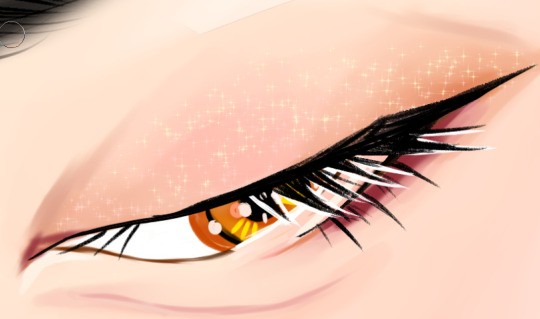
I think the brush I use for this is a default brush but I’m not quite sure anymore.
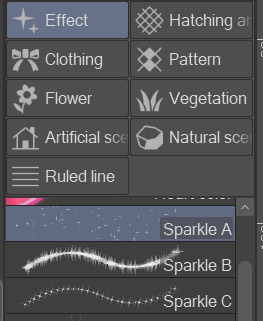
In any case, I use a combination of the sparkle a, b, and c brushes.
The last step is the background and the clothes. For this piece they were super simple, basically just flat colour.
And that’s it!!
67 notes
·
View notes
Text
Tenderness and Ferocity | 6. The Last Day
Pairing: Winter Soldier!Bucky Barnes x Hydra!Reader Fic Synopsis: The Winter Soldier is starting to make stupid mistakes in the field, which is Bucky's way of trying to wrest back control and sabotage his handlers. Hydra brings a new doctor to figure out what's wrong with him and fix it. As she spends time with him, she becomes fond of the Winter Soldier, and he becomes fond of her. Bucky has other ideas. Or, a fic in which the Winter Soldier is the good guy and Bucky is actually the bad guy. Warnings for this chapter: Angst, some Violence Word count: 1858 Read on AO3: [link] [Previous Chapter] [Fic Masterlist] [Next Chapter]
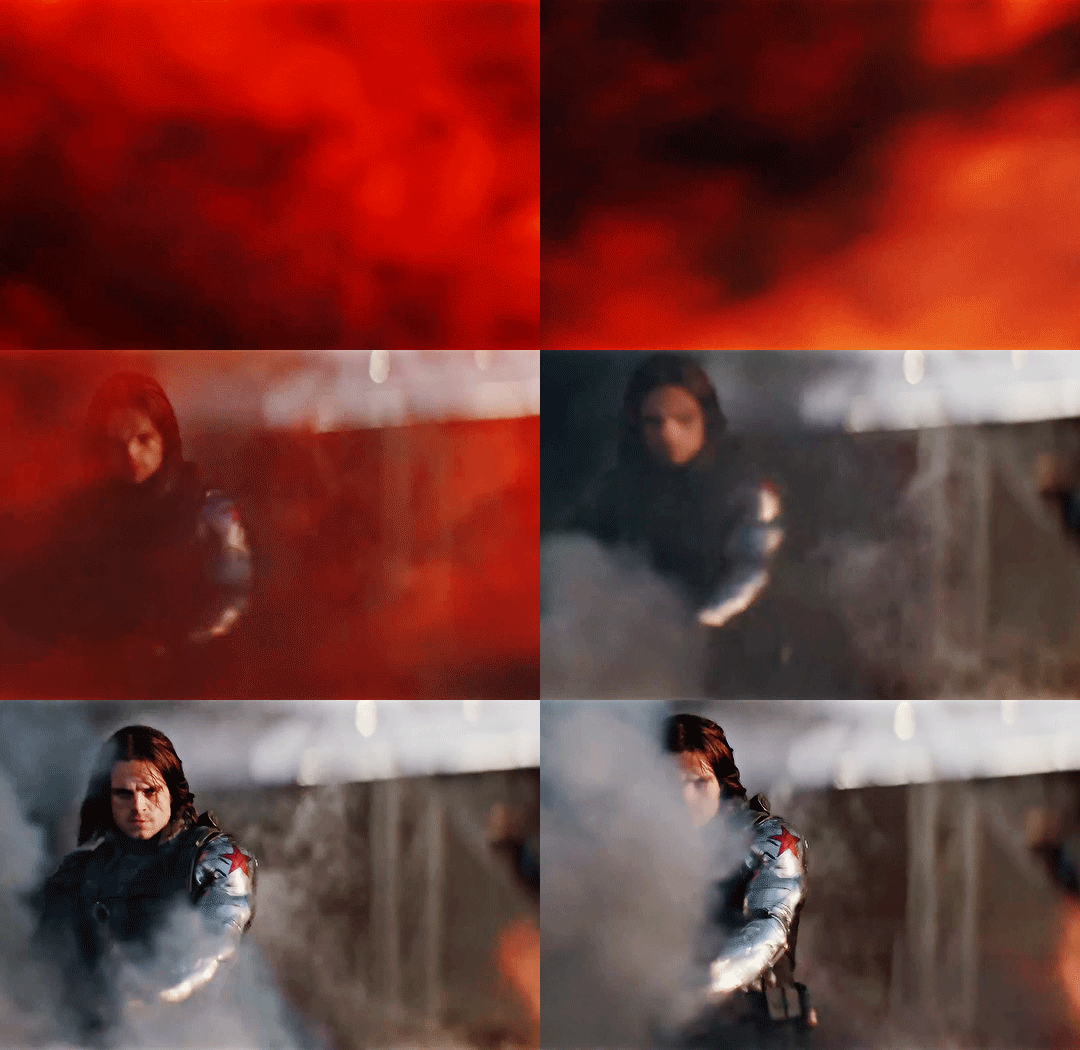
"To get everything you want is not a good thing. Disease makes health seem sweet. Hunger leads to the appreciation of being full-fed. Tiredness creates the enjoyment of resting."
— Heraclitus
She wasn't supposed to be in the office on that day, at that hour. She spent all of the previous day mismanaging her tasks and various paperwork to create the plausibility of needing overtime. It was easy enough to convince one of her friends to drive her to the Headquarters, and she picked one that had no family just in case Hydra got overzealous… later.
One small mercy was that the whole building was mostly empty, except for the bare-bones of military personnel and the medical staff getting the Asset ready. They were due to fly him out late at night, and the sun was low in the sky.
The few staff who were there were surprised to see her, but she reassured them with easy smiles and a ditzy attitude that everything was fine. The Director was still in a meeting, said Suzi at the front desk, but he'd been there for hours and should be out any minute. And the Asset? "In his cell."
She went into her office like it was any other day, put on her lab coat, put her things the same place she usually did, and took only what she needed.
The way to the Soldier's cell was something she had mapped out a few days ago, first out of curiosity, then determination — and while she was at it, took note of a few more interesting pathways through the facility. The only thing to worry about were the guards.
"I'm here for a final evaluation before he's in the field."
"We weren't informed about that."
"Then go ahead and call the Director. I'm sure the Standard Operating Procedures are foremost in his mind."
The two guardsmen looked at each other, silently goading the other to pick up the radio while she nervously twirled a syringe with one hand, clenched a well-loved page in her pocked with the other.
"Go on, call him."
"…Door opened."
Her Soldier was waiting on the bed in his frightening black gear, hands clenched, feet apart, looking ready to pounce. He must have heard her coming a corridor away, and once he finally saw her there, his face broke into the most brilliant smile.
She grinned and snuck in the corner, right beneath the view of the camera. Silently, she beckoned him closer and uncapped the syringe, nodding to the men outside. He subdued them easily enough and, without even asking what she was thinking, followed her out: down the winding corridors, through parts stuck in reconstruction, in and out of the large dark meeting rooms she had the keys for.
They inevitably met a few guards on patrol, which the Asset could hear much in advance. When he first stopped her, arm out and hard which nearly took the wind out of her, she was frightened for a moment that he'd changed his mind. But he kept his eyes straight ahead, and she could tell by looking at him that he was listening intently.
With a feline slink, he stepped back and kept her behind him, further, further, into the doorway of a locked room while he holstered the guns they took from his keepers. She held onto him and steadied her breath against his back while he waited, silent as a statue, for the right moment. The men reached and passed them by, only just noticing him when it was too late — when one had his neck broken and the other was knocked out.
"Turn." he told her. She faced the wall without thinking and only heard a fleshy crack as he caved in the man's skull. Then he took her hand in his and led her away.
When there were too many at once, five of them approaching from somewhere to the left, he had them both crouch down in wait until the targets passed by the mouth of their corridor. They probably couldn't even see her, a minuscule target shielded behind him, as he steadily took them down with a shot to the head before they could even reach for their coms. The sound echoed through the emptiness, but she assured him they were almost out.
Within minutes, they reached a long white corridor, more civilian looking than the rest. At its end, an open door leading to a vast field and rows of jeeps and busses.
"We've made it." she laughed breathlessly, looking up to find him still tense and alert but smiling with her.
One leaping step after another and suddenly, in one breath, he was out. He had been out before, of course, but never like this. The coolth of the evening in early spring soothed his flushed skin as he walked out over the blackened earth and melting snow, a pale sun dipping beyond the horizon.
The Soldier already eyed a vehicle that looked good for the terrain, easy to hijack, small enough to be dumped somewhere once they were far enough away to start covering their tracks. He turned around to see her catching her breath as she took in the sight of him with pride, and relief, and some fear. She threw a chain of keys at him and he caught it mid-air.
"They're colour-coded with the jeeps. If you go South, in 15 miles there's an apartment complex. That's where the staff lives, keep driving. There are trackers on all the cars, but they stop transmitting beyond a 70 mile radius. Nearest settlement is 90 miles South-Southwest, an old fishing town."
"What?"
"The gate behind you, further that way, it'll be locked by now but the hinges are old and rusted."
"Why are you telling me this?"
"So you can escape, of course."
"But you're coming with me."
"I can't."
It was then that he noticed she hadn't stepped a foot outside, standing in the doorway at the very edge, one hand holding onto the frame. The rest of the facility was open behind her, a hungry maw empty and quiet.
"What do you mean you can't? Come with me."
"I took a oath. I can't leave my post unless dismissed or dead." she recited with chill equipoise.
Just like in the bad old days, the Soldier felt madness creeping in. "Then why let me go?"
"Hydra serves a noble goal, but what they were doing to you was wrong. They've never understood that, because they don't want to, because it's not convenient right now."
In the distance, through layers of concrete, he could hear them shouting to each other, panicking, having found the bodies. It wouldn't take long for them to figure it out.
"You know what they'll do to you…" he said, coming closer and just about ready to grab her but stopping, for now, right in front. The heat radiating off his body kept the evening breeze away and warmed her.
She felt the same horror he felt, but just shook her head. "I have to keep my honour."
"You don't need honor, you're just a dame!"
She cracked a smile at his odd choice of words, the unintended slight washing over her, 'just a…'. "Then why does it matter what happens to me?"
He placed his arms on either side, crowding her in the doorway and poised to pull her out. The shouting was always getting closer, she should start to hear it soon. "Because you're mine."
The smile paled from her lips and he thought he had finally gotten through. She looked around, searching for something and moved slightly closer, almost in his arms… And then a wall of metal bars came up at the push of a button, her sad face left in its penumbra. He gripped them instantly and started pulling.
"It's no use, even your arm isn't enough to break them." she consoled, placing her hands on his fists as much for his benefit as for her own. But he wouldn't let go and obstinately shook his head, mute with anger and going through any number of wild schemes in his head that could break her out.
"You know… I've always loved perfection, which is so well embodied in you." she spoke, leaning forward and holding his gaze. "They couldn't destroy you. They could only displace you, for a while. They can't destroy me either." she tried to comfort him. "Nothing can be destroyed. So don't worry."
He wanted to argue with her that it wasn't the same thing at all, that she was crazy, that it could be so bad, so much worse than she could imagine. As if reading his mind, she smiled and shook her head, and gave him a small kiss from between the bars. Then she turned around in a white flutter and ran away, down the corridor, further inside, the echo of her high heels clipping on the concrete drowned out by his angry shouts. She disappeared around the corner to the right, head kept intently down and not daring to look at him again. She kept one hand in her pocket, secretly caressing that white page with the clock he'd drawn for her.
The Soldier shook at the cage that stood in his way until he heard the boots and rattling of ammo one door away, and a gate opening further afield, outside. When the first shot rang and hit above his head, he turned and emptied what was left of a cartridge into the guardsman without even thinking. Then in an instant, one thoughtless instinct moved his body to the vehicle he had picked earlier. He planned to go back for her, but a thought in his head said: Later. The black car keys went in, just like she said, and he quickly found himself driving away. Now he just needed to find another way into the building. Sure, later.
One hand on the steering wheel, he took aim at the hinges of the closed gate in front and blew them loose enough for him to speed through and break it open, while shots rang out behind him. Maybe it was the air or the temperature outside, but he suddenly noticed just how heavy his left arm was, how cold, and how rigid. He didn't mean to drive very far, just far enough that he'd be out of sight and could circle around another way. He had to go back for her. Just a little bit later.
He navigated the half-frozen terrain to cross the 70 miles in well under an hour, the sound of his pursuers long faded away. He ditched the car in an overgrown ravine, and by midnight he reached the sleepy town she'd mentioned. His heart could finally afford to shrivel in his chest at the realisation that he hadn't gone back, and she wasn't there.
She must have known this place, must have seen once what he was seeing now, stepped on the same dirt road, breathed a different air under the shelter of the same sky — once, longer ago, before she knew him. His feet carried him on as his mind stayed behind and he struggled with himself, and with the burden of her last request — to not worry anymore.

Tagging: @chipilerendi @themaskismyface
#Bucky Barnes#Bucky Barnes imagine#Bucky Barnes fanfiction#Bucky x reader#Bucky Barnes x reader#Bucky x you#Bucky Barnes x you#Bucky x OFC#Bucky Barnes x OFC#Winter Soldier fanfiction#Winter Soldier x reader#James Buchanan Barnes#The Winter Soldier#Winter Soldier#Bucky Barnes angst#Tenderness and Ferocity#bv;fanfiction#I am sorry#on that note if you noticed in the masterlist one of the themes for this fic is heroism? yeah it isn't Bucky being heroic#it's her#I wanted to write a heroic evil female and I did
72 notes
·
View notes
Text
Golden/Alone
The Engineer’s Adventures
1-1 • 1-2 • 2 • 3 • 4
For: @autumnleaves1991-blog Writer Wednesday. I am aware that today is Thursday; this was longer than I expected! Pairing: Captain Christopher Pike x F!Reader (no Y/N) Warnings: violence, references to violence, drug use (kind of), minor character death WC: 7.3k words Tag list: @jusvibbbin - to be added to my Pike x Reader Taglist please let me know <3 A/N: The Engineer is back! And why does she go on away missions? WHY? I genuinely had so much fun writing this. I hope you enjoy!
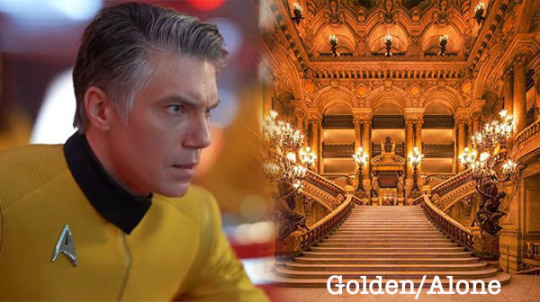
“If I were piloting, Number One, I would have flown us through the eye of that storm cell. We would have gotten here quicker,” Chris jokes to Number One as they unstrap themselves from the co-pilot and pilot’s seats, respectively.
“And that is precisely why I was flying and not you, Captain. We may have been slower, but I got us here in one piece.”
“Lieutenant, back me up here. My flying was great in that speeder on Eloma.”
“You kept us ahead of our pursuers, yes sir,” you say with a smile.
“And staying ahead of pursuers is not a valuable skill in an atmosphere like this one where we are not being pursued,” Number One states with some finality, as she presses the control to open the back of the shuttle and extend the ramp.
You are on Caylara, for what you hope will be a boring mission. The captain and Number One, along with security officer Ensign James, are here to open negotiations for Caylara to join the Federation.
You are here because of the atmosphere – it is notoriously difficult to traverse. You can’t transport living things through it, unless you want them to be merged, dead, or both, and even flying through it is a challenge because of the electrical storm layers. There are windows of time when it’s safer, when shuttles and communications can get through, and windows when they can’t.
At Louvier’s instruction you had prepared a shuttle (and a backup – you don’t like to take chances) to travel through the atmosphere. Standard procedure for Caylara was to have an engineer accompany the shuttle to perform any repairs needed on the ground. You had tried to argue your preparations were good enough that you wouldn’t be needed, but Chris had seen straight through you.
“You find diplomacy boring and you don’t want a repeat of Eloma. That’s what’s really going on here, isn’t it?” His mouth had twisted into that smile you found irresistible, and even though you pouted, adopting your best puppy-dog expression, he had just laughed. “It’s all right. I won’t make you go to the reception. I won’t even make you wear your dress uniform. You can stay with the shuttle.”
You hang back as the captain and Ensign James pass you, Chris brushing his hand against yours as he passes. You smile a little, and get your tricorder out – you need to check to make sure the shuttle didn’t get damaged and will be all right to make the return trip. You look down the ramp as you scan, seeing the Caylarans for the first time as their delegation greets the away team.
They are very tall. You estimate the shortest is well over two metres and they tower above the away team, even over Ensign James who is tall for a human. But given the slightly lower gravity of Caylara their height isn’t surprising, you think. They have skin varying from very pale through to olive toned. Their faces are smooth but they have scales around their hairline extending down to the rest of their bodies. Well, their hands, at least. They are wearing long robes.
Your tricorder beeps as the away team starts to move away; there seems to be a charge buildup in one of the EPS controllers, but that’s all and it’s an easy fix. You pop the relevant panel and discharge it, without shocking yourself for once, and replace the panel.
Then there’s nothing left to do but wait. The reception is due to last two, perhaps three hours – short enough that you’ll be able to make your return trip through the atmosphere with time to spare before the current window closes.
You’ve brought some reading, of course, but first you want to get to the bottom of why the EPS controller picked up a charge. You take it as a personal insult, really – you were sure you had accounted for everything from the data you were given to prepare. However, when you compare the preliminary data with the scans the shuttle took as it went through the atmosphere you can clearly see the discrepancies. You’re puzzled for a moment – but of course you had enhanced the sensors to the latest specs when you adapted the shuttle, and you don’t know how old the original readings you were working with were. You almost wish Chris had piloted you through the storm cell; then you would have more data to work with.
You busy yourself combining the shuttle’s readings with your existing model, and calculating how much it was off by. After some time you are pretty sure you’ve got to the bottom of where the charge came from, and you modify the shuttle so that it doesn’t happen again.
You also think you may be able to make predictions with your new model, and perhaps refine your timings for the atmospheric windows. The Caylarans know the timings pretty accurately, but you aren’t at the stage of sharing data on that level as yet.
You run a new set of scans, and frown – there’s only ninety minutes until the window closes. You compare with the original estimates and—
Hang on. When did it get so late? You were supposed to be on the way back by now.
“Shuttle Hubble to away team? Come in please?”
Silence.
“Shuttle Hubble to Captain Pike?”
More silence.
Silence when you try to call Number One and James, too.
“Enterprise to Hubble. Come in, please.”
“Shuttle Hubble here, Lieutenant Spock. I was just about to call you – I have lost contact with the rest of the away team. They should have been back here by now, but they aren’t.”
“I have also tried to contact the captain but to no avail. Three unknown craft have appeared in the system, and have locked weapons on to us and the planet. They are not responding to hails. I have placed the Enterprise on yellow alert and raised shields. We cannot get a sensor lock on individual life signs through the atmosphere, and—”
“They’re firing some sort of energy weapon!”
“Taking evasive action!”
“Lieutenant, I—” Spock sounds uncharacteristically strained as he’s interrupted by what sounds like an overloading console.
“I understand. I’ll look for them. I’ll keep you updated.”
“Thank you, Lieutenant. Enterprise out.”
That’s it, you think.
You’re on your own.
You take a deep breath: what do you need? Communicator. Tricorder. Emergency medkit.
Phaser.
You put the medkit in a backpack, and since there’s space you add a water bottle and some emergency rations. You clip the tricorder to a utility belt, and holster the phaser, set to stun. Your communicator goes in your pants pocket; you’ve got your usual tools in your jacket.
Then you remember your terrible luck with communicators, so you grab a spare and shove it in your backpack. That should do it. You can’t carry the kitchen sink and you don’t have time to keep second guessing yourself.
Okay. Plan: find the away team, bring them to safety.
You exit the shuttle and shut the ramp – you don’t need strangers damaging it.
You take in your surroundings next. The shuttle has landed in the grounds of a large building, elevated on a hill in the middle of a city. It’s only three or four storeys high, but quite wide, and you think it extends back a long way. There are decorative metal accents spaced at regular intervals – lightning conductors, you realise, as you head toward the most important looking doorway – you see burnt grass at their bases. This building isn’t tall, but it is the tallest around; the atmosphere must affect Caylaran architecture, you think.
There’s no one around, which surprises you; shouldn’t there be guards?
You push the door and it opens with a whisper. Inside is the most ornate room you have ever been in. The walls are gold coloured stone, there are dozens of columns in mottled golden marble, and there are decorations finished with real gold leaf everywhere. There are bronze statues and hundreds of warm coloured lights. The ceiling is as decorated as the walls, and the whole effect is beautiful. Imposing. Stunning. Overwhelming.
But again, no one is here. You get your tricorder out, but you can’t resolve anything. Perhaps something is blocking the scan? You look at the stairs. The steps are high, designed with Caylarans in mind, and go up before dividing. There are flights down, too. There are corridors to the left and right, and you have to take a moment to weigh all your options. The largest doors are ahead, though, up the main staircase and over. Perhaps that’s where you would take guests that you wanted to impress?
You think back to what you read on Caylara in your mission briefing as you climb the stairs. Their head of state is Crown Princess Nanren, but although the title remains the same, a princess many generations ago passed laws to end the hereditary monarchy. Now a new crown prince or princess is elected for life when the previous one dies, and you think they have an elected senate too.
Beyond that, you don’t really know anything, you think as you reach the top of the stairs. You cross the landing, trying to stay aware of your surroundings. And as you look down the stairs, you lock eyes with the first person you’ve seen.
A guard is sitting on the ground next to the doors. He’s armed, and the stairs in front of him show signs of having been fired on. But he’s slumped back, his green-blue swirled eyes staring up at you.
“Why’s it so dark? I can see you in the dark. Why did you bring the dark with you? You shouldn’t—” he tries to lift his weapon, and you draw your phaser, but his head lolls and he closes his eyes, dropping the weapon in front of him.
That was unsettling.
You proceed slowly down the stairs, but he doesn’t move again. You kick his weapon away and get your tricorder out. You’re not a medic, this isn’t a medical tricorder, and you don’t know much about Caylaran physiology, but you do have field medic training and you can see that something is terribly wrong. You scan him, and then the air. It seems like there are traces of a molecule around that your tricorder program flags up as having features in common with known hallucinogens. It didn’t flag up on your general scan so it’s probably dissipated enough that it won’t affect you, but still you wish you’d put on an EV suit. There’s no time to second guess yourself now, though.
You put the tricorder away in favour of the phaser, and you gently push the next door open.
If you thought the foyer was large, this room is even larger. It’s all gold again, and should be as beautiful, but it looks like there’s been a fight in here and furniture is in haphazard piles on the floor. It makes you think of playing forts with your cousins in your grandparents’ house as a child. You’re not a strategist but you can easily see that these piles aren’t much better than that – they provide barely any cover.
You pick your way over gilded chairs and past carved wooden tables inlaid with gold, keeping an eye out. About a quarter of the way into the room, under a table with two chairs on top you see a Caylaran. She looks young, wearing what looks like it could be a staff uniform – it’s a plain warm toned brown dress with an embroidered hem, far less fancy than the delegates who had welcomed the others of your team. She’s staring straight ahead, hugging her knees to her chest, rocking back and forth. She pays you no attention as you kneel down by her.
“What’s your name?” You ask, softly.
“My name is Lararen and I’m going to kill the queen, going to kill the queen, going to kill the queen. My name is Lararen and I’m going to kill the queen, then the Genai are going to kill me.”
She smiles broadly as she finishes her little song, still staring vacantly straight ahead, and you shudder. You shake her shoulder and she blinks, slowly, but she doesn’t move.
You straighten up, thoughtfully, wondering what the Genai are. Some sort of bogeyman, or an alien race? Not that it matters.
Next you find a pair of guards, asleep, holding hands. You move their weapons out of sight and continue through.
But then you find a dead Caylaran. He looks like someone important, but his red robe embroidered with a golden floral patten has a scorch mark right in the middle of his chest. You’re not sure if that killed him, because there’s a pool of blood beneath him too. Either way, you think as you close his grey-purple eyes, he probably didn’t deserve whatever it was. You take a moment to pay your respects before moving on.
You don’t find any more dead bodies in this room, but you find several more Caylarans, either sleeping or talking nonsense. One male asks you where your flowers are, and tries to give you some from a fallen flower arrangement, but most of the rest are just scared.
You think they probably have good cause, as you push another door open. You pick it because the largest number of guards were close to it, so you figure it probably leads somewhere important.
It leads on to a stair well, small but lavishly decorated with tapestries, depicting Caylarans standing in outdoor scenes, sometimes with animals you don’t recognise. They deaden the sound of your footsteps as you climb the tall stone stairs.
Then two things happen: you pause as you notice one of the hangings is moving a little at the bottom, as though in a breeze. And then you hear voices above you.
“She’s not up here,” says a female voice, annoyed. Lucid.
“Well she’s definitely not down there.” The second voice is male. Defensive. “I’ve got a message from Alara. She wants us to look again.”
“Fine. But I want it noted for the record that this is a waste of time,” the first voice says, sounding suddenly quieter – she’s probably passed through a doorway.
“Like anyone cares, Nerela,” the second voice says. You risk a peek up the stairwell. You don’t get a good look as the second person disappears through the door, but they are definitely not Caylaran – he has blue skin.
You lean against a tapestry. There are aliens here, separate from your away team. There are aliens in orbit, too. The odds are good that they’re the same species. And “she” must be the crown princess. But what are they planning?
Regardless, you still need to find your people. It’s been half an hour; you could get back to the shuttle faster if you went straight there, but there isn’t much time left in this window.
You eye the tapestry again. You’re definitely not going to follow the aliens, and this breeze must be coming from somewhere. You push it aside.
This door is the first plain thing you’ve seen in the building. It stands slightly ajar – hence the breeze – and it’s painted beige to match the stonework, but otherwise it’s featureless. It swings as quietly as all the other doors when you push it, but it has some kind of bolt on the other side. Interesting. You try to work it, but you can’t. You think of the tools in your jacket; you could probably figure it out, but no. There’s no time. You push the door to, making sure it’s as shut as it can be, and continue.
You must have entered the service part of the building, you think, as you walk along a corridor. This is functional and plain, like the door. You feel a little more comfortable here; if you’d been interested in fancy, you would have joined the command track. Or Diplomatic Corps. You get your tricorder out again, but it doesn’t show you anything still and you didn’t expect it to. But then you approach a door, and hear whimpering from the other side.
You have your hand on your phaser as you push the door open. It’s dark compared to the rest of the building; there is a small window but there’s not much light coming through the Caylaran atmosphere right now. You take a moment to let your eyes adjust, then head toward the whimpering.
The room is small; some kind of office, perhaps? There’s a desk in the room, and behind it—
“Number One?” She’s crying. Number One is sitting on the floor crying, hair a mess, dress uniform dirty, cradling Ensign James in her lap.
You can barely believe it, but you squat down, reaching for your tricorder. You can see James breathing, at least. You look around, but Chris isn’t anywhere to be seen.
“Number One?” You scan them both. They both have traces of the drug in their systems, but a lot less than the guard you scanned earlier. As your eyes adjust you can see though that James has hit his head; there’s blood in his hair and on Una’s uniform. He’s also been hit by a energy discharge, but to the side.
“Una? What’s wrong?”
“I failed everyone. I didn’t protect my captain. What first officer doesn’t protect her captain? They’re going to throw me in the brig. They’re going to court martial me. I lost my captain, and he’s dead, I—”
Suddenly you’ve had enough. You slap her, hard. “Number One!”
“Lieutenant! What did you just—”
“Oh my goodness! I’m sorry, I—you—” You breathe. “Are you all right?” You strip your backpack off for your medkit. You’re going to need to try to bring Ensign James round.
“I—I’m not sure. I don’t know what happened; everything was normal and then suddenly it wasn’t. I was so scared, Lieutenant. It was—I can still feel it. But it doesn’t feel like me.” She shakes her head, eyes still a little wide, and you pass her the water bottle. She takes a drink as you inject Ensign James with a hypospray. He starts stirring immediately, which is good, but you still think he needs a proper exam to rule out any brain problems.
“Una, you’ve got fifteen minutes to get back to the shuttle with Ensign James. There are alien ships attacking the Enterprise, and I’ve seen aliens here too. I think they may be called the Genai. You go down the corridor, down the stairs, through the big room, through the foyer, and out. Do you think you can do that?”
“Back to the shuttle. Genai.” She shakes her head again, blinking a few times. She squares her shoulders. “Yes, I think so. I can. What are you going to do?”
“I’m going to find the captain. You can tell the computer to run on autopilot, if you need to – I updated the climate model, so the computer should be able to handle it.”
Together you help Ensign James to his feet.
“Do you have your communicator still?”
“I don’t,” James is still groggy as he pats himself down.
“I do,” Number One brings her communicator out and opens it. “Number One to Enterprise, come in please.”
Static.
“I think there’s a blocking field throughout this building. The tricorder isn’t working for some things either. You’d better get going.”
“Good luck, Lieutenant.”
“Thanks. You too, Commander.”
You put your medkit away as Number One and James leave. You’re relieved that they’re both okay, and you’re confident in Una, now she recognises her fear isn’t hers.
Back in the corridor you check the door to make sure Una shut it. You push it, but it’s locked. Weird. You could probably unlock it, but you don’t want to go that way anyway.
You turn your back on the door and continue along the corridor. Number One had said the captain – had said Chris – was dead. But he can’t be. She wasn’t, and you think she only had blood from Ensign James on her uniform. But... what if he is?
If he is, you do your duty as a Starfleet officer first. Find his body. Survive. Get out of here. Then mourn him second.
You pass three locked doors on the corridor, but the last opens to more stairs. Still functional, but just going down this time. You go down, listening, hand on you phaser.
Back on the ground floor – you think, but it could be a mezzanine level – there are several rooms that are open.
You go into the first one, hand still on your phaser. It’s a bedroom, and there’s a Caylaran male cowering in the corner, wearing the service uniform.
“Have you come to end it?” He asks, staring past you. You don’t answer, but your heart aches; you think he means his life. The next room is empty, bed neatly made up.
You listen at the door to the third room, and you think you hear breathing. You push the door open slowly. You don’t see anyone at first, but as you head into the room you see the edge of a gold robe, protruding out of what must the en-suite. You think you’re getting a feel for Caylaran fashion, and this is easily the fanciest thing you’ve seen so far. The robe is made of gold fabric, whereas all the others you’ve seen have been colours embroidered with gold. This one has gold and silver embroidery, and multicoloured gemstones picking out the centres of the flowers.
“Crown Princess Nanren?” Your pitch your voice low. Gentle. You remember how Chris spoke to you on Earth in the past, when you were panicking, and try to convey that calm, that confidence, to her. And in that moment you know you can no longer focus on looking for him. If this is the crown princess, more hinges on you looking after her.
“Crown Princess? I’m a Lieutenant from the Enterprise. From Starfleet – the Federation. I’m not a dream or a nightmare. I’m here to help. Will you come out?”
“The Genai are here. They’re going to kill me. I—I can’t—”
“We will find somewhere you can call your people. I will look after you. We will call in your people and they will deal with the Genai.” General Order One doesn’t apply here, you think. Not if the Genai are already interfering. Not that you care about diplomacy anyway. You’ll do what’s right now, and face the consequences later.
“I don’t—Why aren’t they here already?”
“I don’t know, Crown Princess. But we will figure it out. Please trust me.” You put all your belief into your tone, all the hope you still have left... and she steps forward.
She looks every bit the princess. She is tall, even compared to the other Caylara you’ve seen, and her dress is as exquisite as you expected from the tiny part you’d seen. You wonder, briefly, how many she has like that and how many months, perhaps years, it took to sew. She has a gauzy golden cloak hanging behind her, also embroidered, and her dark hair is braided and pinned up into an elaborate style. The only things that are not Princess-like about her are her purple-blue swirled eyes. They are wide, and anxious.
You recall your briefing notes, and bow. “Princess,” you say, staring at the floor.
“Arise,” she replies, and there’s the ghost of a command tone there. Good.
You straighten, looking up at her again, and pause. This is not how you dress if you might need to make a run for it.
You exhale, surveying the room. It’s a bedroom – a staff bedroom.
“Princess, I can get you out of this, I think. But first... you need to change.”
You find staff robes in the wardrobe that fit her, even if they’re a touch short. And sensible shoes. You have to sit her on the bed to take her hair down, but, you reflect with a little smile that she can’t see, taking her pins out is not unlike taking tiny components out of a circuit board.
“You get used to it, you know,” she says as she stands after you’ve finished. “The pomp and ceremony. The robes. People expect it of their princess, and you get used to it.”
“They are lovely,” you say, following her gaze to where her robes are hung up. “But we should get moving. Where can we call your people?”
“That sort of thing is in the wing on the other side of the Room of State,” she says. Right. The other side of that big room. Of course. And there’s a locked door between you and it.
Even so you retrace your steps. She’s much faster up the stairs than you, and you think bad thoughts about differing alien physiologies. But then, she would find the chairs on the Enterprise a bit small, you think. And the beds.
Soon you’re on the corridor with the door at the end, and you finger your jacket’s zipper as you get closer – it’s time for you to brush off your lock-picking skills. You hope the lock is easy like the ones on Eloma.
But the princess pushes the door and it opens with a whisper.
You can’t say anything. But you thank your lucky stars for small favours.
“Let me,” you say, as you approach the bottom of the stairwell. “If anything happens, go back the way we came.” You look the princess in the eye and she nods.
You crack the door open the tiniest bit, and you hear a voice.
You turn back to the princess, reach out and take her hand. You know it isn’t protocol but you squeeze gently, feeling the scales on her skin and a ring round her finger, hoping the touch will keep her calm.
You push the door open again.
“—everywhere. Yes. Me personally. I don’t care what you—yes I know scanners aren’t working. I wish you hadn’t got voice comms back. But she’s not here; she must be on your floor. Fine, Nerela. She could be in the south wing. No don’t come down here, you idiot. Go round. Ugh. Put Yaima on. Yes tell Nerela she’s being a pain. No, they’re still with our vessel, so she can’t be in the garden. It’s the storm cycle; of course we can’t—To the East, yes. I’ll see you there. But tell Nerela she’s done after this. No I don’t care. Alara out.”
You hear footsteps stalking down the room, getting closer. Your heart is in your mouth, one hand on your phaser, as you hold your breath. The steps falter slightly... and then they continue. You stay frozen until you can’t hear them anymore, then you give it a minute after that before you move the door.
The Room of State has changed since you saw it last; almost all the furniture has been pushed to the sides of the room, apart from a chair cushion in the middle of the floor; that’s what made Alara miss her step.
You take a step forward, and the princess follows, still holding your hand. She gasps, and you follow her gaze; at the end of the room are rows of Caylarans, lying on the floor. You look around, but the coast seems clear. You take your tricorder out one-handed, and you scan them. From here you can pick out their life signs – they may be unconscious but they’re still alive.
“They’re okay. They aren’t dead. Probably stunned with an energy weapon.” You feel the princess relax, and you drop her hand. “We can take care of them later. You need to show me where to go.”
She nods, and you follow her across the room and through the door on the other side. You have time to check on the way across: Number One and James aren’t there. Neither is the captain.
The stairwell on the other side is like the first, except this has paintings rather than tapestries, and your footsteps are louder as you climb.
“I don’t know who any of them are,” the princess says, looking at the paintings on your way up. “I suppose I should, but... they’re not my ancestors, I suppose. Just... predecessors. In a way.”
You resist the impulse to shush her.
On this stairwell a painting opens to the service corridor. You take the lead going through, but the corridor is empty. And when the princess shuts the door, you hear its lock click.
You walk along the corridor, listening carefully, but you can’t hear any signs of life. You have to hustle to keep up with the princess, but you push a couple of doors as you pass them. They’re both locked.
The stairs down at the other end of the corridor carry on further than they do on the other side, and your calves are beginning to ache when you reach the bottom. Your discomfort doesn’t matter, you tell yourself. It’s cooler down here, and you think you must be underground. Some kind of bunker.
“My real office is in my suite. My ceremonial office is downstairs, but this”—she opens the second door you reach—“is for emergencies.”
The office is dark as you go in, but she presses a control and it lights up. You close the door behind you and look around. Unlike the other rooms off the service corridors, this one is lavish once again. The wallpaper has gilded highlights, and the desk is made of a golden brown hardwood and is intricately carved. There’s no window since you’re underground, but the light fittings are made of bronze and remind you of the statues in the foyer. You realise the room is probably this nice in case the princess needs to do an emergency broadcast – her surroundings will still look the part.
The princess sits at the desk, pressing her palm to a sensor. A computer apparatus lifts up, and she enters some commands. You walk round the desk and stand a little way to her side, as a Caylaran man appears on the screen. His expression is blank, confused.
“Is this some kind of joke? At such a time? Using Princess Nanren’s—wait—”
He frowns, tips his head to one side.
“Your highness, is—is that you? The Genai—we were sure they’d killed you. That’s what they said. And the blocking field is on so we couldn’t scan—we had no idea—I—” He closes his eyes and bows his head.
“I am so sorry, your highness. I didn’t want to risk your people on a dangerous mission with no intelligence if you were already dead. But I should have trusted in you, and not believed the Genai without proof.”
Staff robe or not, Crown Princess Nanren straightens up and looks every bit the princess once again.
“Arise. Guard Leader Daymen, I am glad to see you. Please do not apologise; the time for analysing our decisions and learning from this situation is not yet here. First I must survive, and you must take back the palace. The Genai are still here; they have a vessel in the garden and people throughout the palace. Our people have been drugged; most are in the Room of State, but there are likely others dispersed through the palace.”
“They have three vessels in orbit too, I think,” you say, quietly.
“They have vessels in orbit too, although”—she presses a control, and a little data window appears—“they won’t be able to send any reinforcements through the atmosphere for a few more hours. What do you need to retake the building?”
“I will bring my guards now, highness. If you could turn the blocking field off it would make things safer, but—no. You are the most important. Enact the safe-room protocol, and remain where you are until we secure the building.”
“I may be able to lower the blocking field. But I shall keep safe. Do you have any news of our Federation guests?”
“Their shuttle left before the window closed. I was unable to talk to their ship at that time, but...” his expression goes thoughtful. “We use a limited range of communication frequencies. The Genai in orbit could have blocked them.”
You nod to yourself; the Caylaran frequencies had been in your briefing, and they were very different to Federation ones. The blocking field in the Palace was wide-band, but it would take too much power for a block like that over a bigger area. Much more sensible to just block the Caylaran frequencies.
“Thank you. May the skies protect you, Guard Leader.”
“May the skies protect you, highness.” He bows once again and cuts the connection.
“Lieutenant, thank you for all you have done for me so far. May I ask this last favour?”
“To take down the field? Of course, your highness. What do I need to do?”
She slides a ring off her finger and hands it to you. It’s a very narrow band of gold with a small red stone set on it. It’s big for you, though, so you slip it on to your thumb.
“You can use that to gain access to the systems. The security office is down the corridor to the right.”
“Lock the door behind me, your highness.” You smile as you turn to go.
“May the skies protect you, Lieutenant.”
“And you too.” You go through the door, closing it behind you. You hear a loud thunk a moment after you do; it sounds like more than a lock – probably blast doors. At least she’s safe, you think. Even if that means you’re alone.
You wonder about Chris, and where he could be. You have to hold on to hope, don’t you? You can’t think... no. You mustn’t. Instead you think about what he would do in your place. You think he’d be cautious. You’re nearly at your goal, but if you don’t succeed people could get hurt if the Caylaran Guard can’t tell who is who, or where they are. You’ve heard people complain about security officers being trigger happy; you think it’s probably the same for the Guard.
And you’re in a strategically important part of the palace; you don’t know how many Genai there are but they’ll probably find this area eventually. You draw your phaser, and make sure you walk quietly.
There is only one door left between you and where the corridor splits, when you hear a voice. The door opens a little, and you freeze. The voice is familiar – one of the Genai.
“—last time, no. I genuinely, and I am completely sincere on this, do not care what Alara thinks. Not even a tiny little bit! She missed this entire section! Yeah whatever, Yaima, you go tell her what I said. But when I find the Queen—Crown Princess, whatever, and she doesn’t, she’s the one that’ll get fired, not me! Nerela out!”
The door slams open, and Nerela stomps out. It’s her or you, but you are ready and she is not. Her black eyes widen as she sees you, and her weapon is in hand, but before she can aim you shoot. She grunts as she falls back, stunned.
Happily, Genai are shorter than Caylarans, although Nerela is wearing high heeled boots which make her look taller. You drag her back into the room she came out of, take her weapon and communicator and leave her lying in the recovery position. You shut the door behind you and it clicks a second later.
You shake your head; the doors are one mystery too many. You put Nerela’s weapon in your phaser holster, and tuck her communicator into your belt. Then you head to the right, toward the security office.
The first thing you notice as you push the door open are the screens. Dozens of them. The second—
“Chris?” He’s frowning, pointing a phaser at you. He looks at you like he can’t believe his eyes. Like you’ve stepped out of a nightmare.
“Chris it’s me. I’m real. I’m really here.” You take a careful step through the doorway, keeping eye contact with his bloodshot blue eyes, letting the door close behind you.
“You don’t need to be afraid any more.” You think about what Number One had said. “This fear... it isn’t really you.” You stoop down and put your phaser on the floor. You take Nerela’s weapon and put that on the floor too. And as you do, something clicks into place in your mind.
“Chris, you’ve been helping me, haven’t you? Locking doors to keep me safe? To help me get where I needed to go?”
“I’ve been so... afraid. I—I needed to keep her—to keep you safe.” He relaxes his grip on his phaser a little, and you reach for your tricorder.
“You were drugged, Chris.” You scan him. “Number One and James are safe, they got a lower dose than you.” A much lower dose, you realise, looking at the numbers. “I sent them back to the shuttle and they returned to the Enterprise. I’m going to end all this, get us home. But I need you to stop pointing that phaser at me.”
He looks at his hand, holding the phaser, then back at you.
“But is she—are you real?”
Your heart melts for him. You haven’t said these words, but you’ve felt it for a while. And—you worried, you genuinely worried, that you would never get to say them. This may not be the moment you planned, but he has to believe you.
“Chris, I love you. I’m real.”
“I—” he drops the phaser, and it clatters to the floor. The next thing you know you’re in front of him, arms around him, holding him. You can’t think; you can speak. You just hold on, letting your body feel his warmth, his solidity. You may not have been drugged, but you had been so afraid
. After a moment he puts his arms around you, too, and you just stay there for a moment more. Holding him. Letting him hold you.
As much as you’d like to forget everything else right now, you still have a job to do. You pull back, take hold of his hand, and look at the security console. You can see feeds of the Room of State, the foyer, the other rooms you’ve been in, and other places, too. Beneath the monitors is a schematic; this is how Chris was locking and unlocking the doors, you realise. But how did he have the credentials to do so?
You look at the desk and see a ring like the one the Crown Princess gave you, nestled in a groove.
“How did you get that?” You ask.
Chris frowns. “I was in that big room, but I was so afraid. I came through the door. Went upstairs. Along the corridors. Looking for somewhere safe enough. I got here and the Caylaran... we struggled, he tried to shoot but I took his weapon.” You follow his gaze to an energy weapon on the ground. “Then he ran. And I stayed. I could see everything. Not get caught out. And then I saw you.”
You squeeze his hand, and work the controls with your other hand. There is a glyph that looks like a shield; you turn it off. You check your tricorder – finally you can detect life signs. Both Caylaran and Genai. As you do, Nerela’s communicator chirrups to life.
“Nerela? I swear, if this was you—! You have the worst timing! The Caylaran guard are here. Put the blocking field back up immediately. That’s an order! Nerela? Nerela, answer me! Ne—”
It lapses into static for a moment. Then silence.
“The Guard are here, Chris. As soon as the atmosphere clears we can go home.”
*
When you return to the Enterprise you go to the captain’s quarters. You know he won’t be there, but you need the sense of his presence. His smell.
Chris had to stay on the planet to complete the original negotiations and help deal with the Genai; the drug’s effects had faded by the time the atmosphere was passable again, and you’d got some water and rations into him. Spock came down and stayed, but you had only left Chris because he ordered you to.
You have a shower, put on one of his sleep shirts, and curl up on the sofa under his throw blanket to write your report.
*
“Sweetheart?” You wake up to Chris kneeling in front of you, hand on your shoulder. His hair is damp and he’s out of his uniform. Your brow creases for a moment – you don’t remember him using that endearment for you before.
“Chris,” you say, stretching. Pushing the throw away, and leaning into his touch. “You’re back.”
“I am.” His mouth quirks into a smile. “There was a lot to sort out; it seems the Genai and the Caylara have a dispute over a world on a system between them. The Genai thought if Caylara joined the Federation, we would take their colony from them. They thought if they disrupted the negotiation and killed Crown Princess Nanren, either we would give up, or the Caylarans would be too afraid to continue.” He moves his thumb along your shoulder.
“Spock put the fear of God into the Genai in orbit. I’m not sure how,” he adds, at your incredulous look, “but they and the Caylarans have requested mediation. And now the Genai want to work towards joining the Federation, too.”
“I wish they’d chosen to talk to us first,” you say, frowning. Thinking of the dead Caylaran. “These breakthroughs always seem to come at such a cost.”
“They do,” he says, gathering you into his arms. Holding you against him.
You stay in his arms for a while, just breathing. But eventually he pulls back, and moves to sit beside you.
“You were amazing today. You’ll be getting a commendation, but Crown Princess Nanren wanted me to convey her thanks, too. You saved her life.” He reaches into his pocket, then leans forward and fastens a chain round your neck. It’s delicate, golden, and from it hangs the ring that she had lent you for the computer. That you had given back before you left. “She wanted you to have this. But she thought a necklace might work better.”
You shake your head, taking hold of the ring. “Saving her was as much you as me, Chris. Locking those doors.”
He looks at you, thoughtful. “I don’t think so. I—I have never felt fear like I did today. Now I look back at it I can tell it wasn’t real, but at the time, seeing you on those screens, moving with purpose, helping our people and the Caylarans... you gave me hope.”
He pauses, blue eyes meeting yours. Hand reaching out to touch your face.
“When we were down there... I remember what you said to me. I love you too.”
You lean forward, meeting him for a kiss, gentle at first but it goes passionate almost immediately, both of you pouring your feelings for each other into the connection between you. You didn’t know it could feel like this, you think, before he pulls you into his lap and thoughts flee away.
*
“Lieutenant, I want to thank you.” Number One says, sitting at her desk. “I was not myself down on Caylara, but you did yourself proud. You saved us.”
“You’re welcome, Commander.” You smile. “I’d say any time, but right now I’d be happy if I never left the ship again.”
“That being said, if you tell anyone—”
“If I tell anyone you were crying, I can expect to spend the next month of duty shifts degaussing the transporter with a microresonator?”
“Oh that’s a good one. I must remember that. Yes. You will be degaussing, Lieutenant.”
“Understood.”
#writer wednesday#Christopher Pike#Christopher Pike x Reader#Captain Pike#writings of the girl from outer space#fanfic#fanfiction#Star Trek Discovery#Star Trek Strange New Worlds#The Engineer's Adventures
45 notes
·
View notes
Note
Hi, I was just wondering how you make your icons different shapes? For example the brush ones or the circular ones, do you use a templater or?
Hi there! I’ll put this under a cut since it got a bit long with pics and everything! 🥰
I’ve included:
How to use a template for a shape
How to make your icon pop out of the template
How to make your own template
Part one: How to use a template for a shape
So if you want the icon to just be a certain shape, that’s pretty simple. You can make the icon as usual, save it, and then open it again like so:

Then open your shape, (for example I use the ones from this pack). What you want to do for this particular part, is make sure the shape is white (as in, #ffffff. If it’s not completely white, it won’t work!) and the background is black (#000000). Drag it across to your icon cap like so:

What you want to do now is copy it, and paste it into a layer mask on your cap. You can click on the layer mask by holding down alt on windows, (or option on mac I think!) and then pasting it, ctrl/command v, like so:

You can now turn the top layer off, and when you click back on the cap, it is done! Voilà! 🥰

Just make sure to save it as a .png file! Files saved as .jpg cannot read transparency, and the edges around the shape will show up as black or white, rather than transparent!
But as you can see, this isn’t like the icon I posted in the pack of this same cap:


Part two: How to make your icon pop out of the template
This is a little more complicated, but not overly so!

Start off with your cap in your base size, whatever that may be, mine is 150x150px. As you can see I’ve moved the cap up from the bottom - this will be helpful with the “sticking out” part, and it doesn’t matter that it’s not touching the edge, as we’re going to be erasing those parts anyway.
Next, you want to get your gradient, texture, and the shape ready underneath your cap, like so:

Make sure the shape is at the bottom, because we’re going to clip everything else onto it using a clipping mask (shift, select the three layers above the shape, right click, create clipping mask):

As you can see this looks similar to what we did before, with the non-pop out cap. Next you want to duplicate your cap layer, to get this:

Now we need to erase the excess parts of the cap we don’t need! So add a layer mask to both caps, and paint out the bits we don’t want to see:

As you can see now, the bottom of the cap is no longer showing in the outer circle, and the top of his head is peeking out! I like to add a soft light layer of whatever colour the background is over the top of the cap, just to make the colours of the icon overall more cohesive. Make sure you clip it down to the top duplicate of your cap, otherwise it will ruin the transparency of the icon.

Now we can go ahead and save as a .png like before!

Part three: How to make your own template
This is pretty simple! To start, search for what shape you would like. On Google you can set the search to “Creative Commons licences” to find pictures you can use for free, or websites like unsplash have plenty too. I decided to search for “paint swipe” and got this:

Then, similar to what we did in part one, we want to make sure the shape is white, and the background is black. To do this, I used a black and white gradient to make sure it was the correct colours. Then I adjusted the scales to ensure the shape was completely black. After merging the gradient and the shape, I inverted it, to ensure the shape was white and the background was black.


Then, as in part one, all you need to do is drag it onto your cap, adjust to your liking, and then copy and paste it onto a layer mask on top of your cap (it’s easier to adjust the positioning before you paste it onto the layer mask, which is why I do it that way first!)


Feel free to use the icon if you made it this far! I hope this was helpful. If you have any more questions, drop me a message 🥰
123 notes
·
View notes
Note
Feel free to ignore this if you want, but how do you make your edits? I really want to do the same to create my oc's, but I wouldn't even know where to start.
I don’t mind teaching people the basics of how I do my edits, let’s start!
So, I use Paint Tool Sai, so everything I do is based around that. You don’t need Paint Tool Sai, but I don’t know how you could do it on other programs so you can either just get a free copy or play around and figure out the specifics for yourselves.
Now, let’s say I’m editing Ruby’s Atlas outfit, I’d need a screenshot of her, preferably one from the Atlas Arc!

Obviously, if it has a background like this with multiple people that I don’t feel like editing or don’t want, I’ll have to find a different background to put my finished edit on. Otherwise, I can just put the finished Ruby back on and carry on editing out any bits that can’t be hidden.
Open up Paint Tool Sai and first matter of business is... shrinking the head.
Yeah, I don’t know why, but the heads on the female bodies are always so dispropotionately big, especially when compared to the men. It can lead to some wierd shots like this:

Seriously, her head is twice the size of his. Someone tell CRWBY that women’s skulls are not sexually dimorphic, we all have the same skulls.

Fortunately, Ruby doesn’t need to be shrunk much in this specific screenshot, plus a bigger head is typically for younger characters and makes her look younger than everyone else, if it wasn’t for every woman having this head shape that it.
But on some of my edits, especially my Ruby and Aurora one, I had to shrink their heads by like a third, it was horrendous.
After a good deshrinking, set the layer the ss is on at around 50%, it doesn’t really matter so long as you can see the lines you’re about to draw. I don’t have a drawing tablet, and the arthritis means that it’s too painful and uncomfortable to draw, so I just use a mouse.

Word of advice, here. It’s okay if your lines aren’t super clean, what’s important is you’ve laid the base down for the cleaner lines to be put on later. But here, you do have to put in extra work if you want a different body type since RWBY doesn’t offer much in terms of diversity. For Eirian, I have to physically draw the muscles for her since Ruby has none, so I would suggest either having some familiarity with drawing on your own or have plenty of references to guide you.
Okay! With the main sketch lines down, we move on to cleaning everything up! Set the sketch layer to around 50 - 60% opacity, or until you can see your lines over it but can still make it out from the screenshot.
On a lineart layer, choose the lineart tool and make sure it’s 0.7 width. I use 4 for drawing, but using this very skinny width makes it appear more like an actual RWBY model than just a drawing over it.

When you’re done with that, it should look like this! In the layers section, you’ll notice two new lineart layers as well. You have a main one for most of the lineart since the colour won’t change, but for the highlights, lips and eyes, it’s best to have them on a separate one underneath the main one.
The reason for this is because, once you change the colour of the lines later on during colouring, having them all on one layer means that the coloured lines overlap on the black outlines, which doesn’t look nice. The highlights in the eyes should be on the layer beneath the main one, and the layer for the lips and eyes themselves should be on the layer under that. Any other details you might wanna add that have a coloured lineart should go on that layer too.
Once the lineart is done, we have one more thing to do before we get to the next stage. Pressure tool.
It’s not hard to find on the tool bar, it’s right between edit and select, but I use this to make the lines flow more seemlessly rather than stop abruptly. When you select the pressure tool, simply pinch any ends of lines on your edit, like strands of hair or the fold lines on Ruby’s cape.

It should look something like this when you’re done! Compress all the lineart together and move on to the next step: lighting.
Before we can get to colouring, we need to put done the lines for the lighting. First, determine where the source of light is coming from, and put down all the lines that would happen from that light source. Also, make sure the colour of your shadows lines are not black, so you can distinguish them from the base lines. I usually gross a mid tone grey.

Like this! Once all the lineart is done and its all on one layer, we can move on to colouring.
I used to just simple cell shading like Maya RWBY, but I’ve moved more towards detailed shading so it’s easier to give it more texture and such. I have a colour pallete handy, and colour using four different colours: the base, highlights, base to shadow, and the actual shadow.
For example, with Ruby’s skin tone, her colour pallete would look like this:

[Highlight, base, base to shadow, and shadow]
With the select tool, select all the area you want to colour in. Obviously, don’t do the shadow areas first, they gotta go on after. Add the base colour first, and then do the highlights like this;

With the blur tool, simply blend it together until it’s all blended together:

Like this. Repeat with the base to shadow colour, going along wherever the shadow lines touch the skin.


Next is simply doing the shadows on the face.

With your colour tool, simply click the grey shadow lines with the shade colour selected and they’ll turn that colour.

I add blush to my edits so they have more colour to their cheeks. The colour of the blush depends heavily on the person’s skin tone, so I do it by taking the base, darkening it while upping the saturation, and moving a bit closer to the end beginning of the spectrum where red should be.

The blush layer (the one currently selected) should be above the skin layer so that you can just clip it onto the skin. This means you don’t have to reselect every part of the face just to do the blush.

Slap the blush colour on like this and then blend until it’s as natural as you like.

It should look like this once everything is done, and you changed the lip line to the colour of the lips! You can do this for most textures, changing it up when you need to (i.e. cell shading for metal with more harsh highlights, leather has bright highlights that aren’t blended completely together with the base colour).
A problem with having the lines so thin is that, while colouring, the colours can tend to “bleed” if a layer with a lighter colour is next to a layer with a darker colour, and the lighter layer is on top of the darker layer. If you just make sure all the darker colours are above lighter ones, it should be fine.
Now, with hair, it’s a bit different to how I colour everything else, especially two toned hair like Ruby’s.
Rather than just highlighting the base part, I highlight all of it (save for the hair spike but that’s just because I don’t need to two tone that and it’s just get in the way).

Once selected, I put the base hair colour down and then the colour of the tips, before I put blend it all together..


The highlights and the first shadows are on separate layers.

Since Ruby’s hair is two toned, we have to put the highlights on an overlay setting so that it changes depending on what the colour is underneath. Blend it in

Repeat with the first shadows layer, making sure its separate from the base and the highlights layers. Also, set the shadows layer to overlay for same reasons as the highlights layer.


Now for the shadows, deselect all of the hair and then select all the parts of the shadows only.

Once all selected, make a new layer for the shadows and colour it all a very dark version of the hair’s base colour, near enough to black without being black since we want it to be tinted a colour.

After making sure the shadows layer is clipped to the hair layer, like we did with the blush, we can delete all the grey lines where the shadows are. You can easily do this by holding Alt while on the lineart tool and simply click the lines to delete them.

Now set the shadows layer to around 50% opacity so the shadows match colour to the hair.

Now, rather than use the blur tool, we use the gaussian tool instead. It’s not a tool that comes with Paint Tool Sai, so here’s my settings on a customised water brush:

With the Gaussian tool, just blend the shadows with the hair until it looks like softer shadows rather than harsh lines like on the face.

And that’s it for the hair! If the character’s hair is just one colour, you don’t need to do any settings on the highlights or the shadows, but the process is the same after!

Now that we have Ruby done, it’s time for the eyes! My most favourite part and the one I have to do last, otherwise I’ll do them and then abandon the project.
Note: The sclera (White parts) layer should be below the lashes but above the skin layer, since we’ll be turning the grey lines to white once done. The highlights layer should be between the sclera and the lashes, while the irises layer should be between the sclera and the highlights.
If you want the highlights to pop more, make the sclera an off white instead of pure white, while the highlights are pure white. It makes them stand out more.
Similar to the skin pallete, the eyes should have a base, highlights, shadows, and a darker colour for the pupils. Ruby’s pallete would be like this:

Now, with the bottom half of the eyes selected, fill it in with the base colour.

Then simply colour in some highlights at the bottom.

And blend together!

After that, just add in the shadows and recolour the lines.

With the irises, I always colour them in a very dark tone of the eye colour, similar to how Yang’s are coloured in canon! Recolour the pupil’s colour line, and the lines around the iris itself.

And that’s how to colour in the eyes!
Now that Ruby is done, we just have to give her a background! If you picked a good screenshot, you can just put the person back on it and edit out anything peeking out from behind them, but this specific screenshot has a lot of people in the background that looks way different to how Ruby is coloured, so I’ll have to find another one.
If you can find one of just a background, great! Slap the character on and move to the next stage, but a lot of the screenshots on the wiki are either too cluttered or just not right, so I’m gonna have to do a lil’ trick I constantly do when characters won’t get out of the way.

A screenshot like this, with a character far away and plenty of background, is a good enough one for this.

Take a part of it and stretch it out, you can make it seem like the person is part of the set. Obviously, you need to get a pretty good chunk, otherwise it could look pixelated and just not great.
Since Ruby still looks like she’s not part of the set, she needs to have a filter put over to adjust her lighting. The best way to get the lighting to match the scene is to find a character from the OG screenshot, and colour pick the colour off any white parts of their body. You’ll always find white on their person since everyone’s scleras are white.
Once you have the filter colour, clip a new layer on top of your character layer like so:

Change the layer setting to Multiply and then paint it on the character!

With the filter on, you can adjust it with some darker and lighter so it looks like the light is shining on her.

And there we go! There’s other little tricks that I do, like making the character’s eyes glow in the dark like with Blake and Ruby, or the Maiden’s fire eyes like in my Aurora piece, but this post is already so long. If people wanna learn how to do those, I can make another tutorial to help!
38 notes
·
View notes
Text
So, you cant live the "cottagecore life"?
I am here to tell you that you can!
Wether you're poor, living in the city with no garden or terras, living abroad, have a disability, are poc or still living with your birthgivers, cottagecore is also there for you.
IMO cottagecore (and the like) is about appreciating the smile things in life. Nursing a plant, watching the sun carress the surface, enjoying rain drops falling down, finding fun and love in small acts like cooking, baking, sewing, knitting, gardening, painting,etc. U dont need grand architecture, expensive technology or 'cheap thrills' if you seek small thrills in the simple things. U dont have to like ALL things (I hate crocheting but I like seeing others enjoy it), but I think nearly everyone has a little bit of cottagecore in them. (If smn disagrees with my view, that sounds like a them problem)
So, having lived in cities, suburbs and only very briefly the countryside. Having had a nice income and no income at all and spending a lot of time on how to find these small joys, I will share some tips on how to incorporate some cottagecore into your life
No garden? Not even a terras? Windowsills are your best friend. They are great place for some plants, herbs and regrowths. Some plants dont even need direct light and can stand on your table/desk/shelf
Don't have money for plants? The world is out there! Even the grayest most concrete city I've lived in had some uncontrolled shrubs or weeds growing. Weeds are just as much awesome plants and calling them weeds feels like discrimination? I prefer wildlings. Anyway, you have to be a little more carefull if you go scavenging plants because of private property and hygiene but it is a good excuse for an adventure and remember to bring gloves and take enough surrounding soil to ease the transition of your scavenged treasures. Daisies and dandelions in grassy patches are easy, pretty starters. Love them.
Now you got the plants but not the money or availability of pots? Fear not, almost everything can be a pot. Soda bottles, milk cartons, jugs, chipped mugs, food trays, cardboard packages if lined with some plastic/alu foil,...you might want to put some holes in the bottom to let the water run trough. Put a plate or tray under it. If you need the 'pot' to be raised I found that bottle caps and empty tea lights can do the trick often.
You did get your gruby hands on some store bought plants? Cool, maybe they come in a brown/black plastic pot? You can paint it and reuse. I do recommend to put the plant from that pot in a bigger recipient cuz store plants are usually put in just-big enough pots with lots of fertilizer to keep them looking fresh for sales but they cant survive them longterm. The pots can still be used for smaller plants though. Some plantshops also have a recycle bin for these pots. You can sneak some of them with you. They won't really care
For all the above plant holders, u might think 'it will look ugly, all that plastic and non-unity. If that bothers u, u can paint them, glue them with nice colours or newspaper, make a fun craft project from it. Newspaper, glue and acrylics can hold for quiet some time!
Name tags can be crafted out of popsicle sticks, branches, writing on cobbles, etc.
Regrowths. Propagate some plants, herbs, vegetable. Cheap and fun. Internet is full of tutorials on how to propagate.
Idigenous climate and plants are your best friends. Research the practices of your ancestors/the native settlers. Learn from their lessons and mistakes. You might want to check google books and archive.org for reading/loaning old books about your region.
Sos sewing kits can be your hero if you dont have a sewing shop nearby. All u really need is needle, thread and scissors and you can get started on small projects. Dont aim for a ball gown from scratch though but you can refurbish old/ugly/cheap clothes with a small travelling sos sewing kit.
No fabrics? Use old clothes, blankets, tabletops, curtains or some scarfs. I've found no place yet where I can't buy some scarfs. They are basicly long, rectangular fabrics that can be used for some sewing projects like plushies, head band, tops, pillow covers, etc.
No kitchen? No bake recipes, microwave recipes, what to make in a water kettle etc. Many before you have suffered the lack of a kitchen, including yours truly!
Wall decoration. Print old photos, press leaves or flowers or herbs, calligraph, paint, draw, etc.
No money to buy fancy frames? Not allowed to drill in the wall? Tape and sticky hooks can hold some light weight deco. Tape some paper clips to the wall to hold photos, maps, botanical drawings,...
Laminators are too expensive for my liking. For smaller things you can use tape. Stick it on, fold the tape double, cut. You just laminate a flower. Cut it out, make a frame from leftover paper or cardboard or not, hang it. For the larger things you can us stronger plastic from folder splitters, packing, those slide in things u have to put your front page/homework into. Squash it in between 2 layers and tape/glue/staple/paperclip it together.
No signing voice? Just talk to your plants! The CO2 will do them good.
You dont have to spent money on a plant water diffuser thing. Any mechanical spray thing will work like parfume bottles, sunscreen spray bottles, etc. Make sure they are clean inside before using.
Dont feel bad about plastic flowers
Dont feel bad, ashamed or like you have a short coming for not achieving the ultimate cottagecore aestethic cuz 1. It is an aestethic no one has it. It is meant for inspiration, relaxation and feel good vibes 2. Everybody has as much right to relate to any -core as any other next person. 3. If you enjoy it, it has fulfilled its purpose. Enjoy!
If I think of sth else I will add it. If anyone else has an idea please reblog it with an addition.
Dont hesitate to ask any questions!
#cottagecore#forestcore#garden#gardencore#nature#naturecore#flowercore#forest#cryptidcore#elfcore#everybody welcome#witch tips#tips#life hacks#crafts#craftnotcrap#plants
199 notes
·
View notes
Note
Hello! May I ask how you draw? I'm currently learning how to myself and would be highly interested into a step to step process by you! Like from sketch to the done thing (no color necessary)
Hello there!
I dunno how I feel about showing how I work/giving advice to someone who’s learning (and I say it as a pro artist who went through years of traditional art education) because when I do the illustrations you see here on my tumblr I BREAK THE RULES you’d learn though life drawing routine, and give in to bad habits, and my methods are rather unplanned and chaotic which makes it difficult to pinpoint significant stages. But I used my portable potato to take some photos during working on my last piece, so I’ll throw it here with a bit of an explanation of what’s going on.
Before I begin - and because you’re about to look at a mess of a WIP - I’d like to give you some general advice that generally makes life easier when you draw (again, things that I learned in traditional arts education - another artist might advise you the complete opposite, dunno!)
Work holistically. Forget them satisfying-to-look-at clips on instagram showing someone produce a hyperrealistic portrait starting from an eye, with each and every element emerging being finished before they proceed to another part. It takes a lot of talent, yes, but these are ppl redrawing a photo in a kind of a mechanical manner. Most artists don’t work this way. Especially if you’re working without a reference, or if you’re doing a life drawing - your process will be layering and changing and finding what works best to give an impression of what you’re drawing rather than reproduce the exact image, and your artwork is likely to look messy most of the time.That said: don’t start with the details. Don’t spend too much time on a particular part while neglecting others. Your goal is to keep the whole piece at the same level of ‘finished’ (even though it’s unfinished - do I make sense?) before you’re confident that everything is where it should be and proceed to the details. So sketch out the composition first. See how things fit, what’s the dynamics. You’ll save yourself from limbs sticking out from the frame, odd proportions etc etc.
Because it’s a game of relationships between different parts of the picture/scene. I ask you not to worry about finishing a single element before laying out the rest because you’ll find that said element will look different once the other part appears! For instance - you might think that the colour you picked for a character’s hair is already very dark. But once you’re done with the night sky background, you’ll find that it’s in fact too light, and doesn’t work well with the cold palette. You’ll have to revisit different parts of the image as you go to balance these relationships and make the picture work as a whole.
Give an impression of something being there without actually drawing it ‘properly’- because details are hard, mate. You’ll see that my lineart usually has hardly any, and my colouring is large unrefined stains, but the finished thing looks convincing. Like, fuck, I can never focus on how Crowley’s eyes are really shaped. So I just turn them into large glowing yellow ellipses crossed by a line, and heard no protests so far.
Don’t panic if you messed up (you probably didn’t anyway). It might turn out to be a completely unnoticeable mistake - because, remember, things work together to balance each other, so another finished off prominent element will probably drown that badly placed line that looked so visible and out of place a second ago.
It might not look good before it’s finished. I’m mostly immune to it after years of drawing, and my recent illustrations all follow a specific method (ykno, my sunset glow effects and all that) so I can kinda predict the next stage. But I do my linearts on a specially picked crap paper, I don’t bother erasing the smudged graphite, and it looks messy af until I make the background white in Photoshop. Conclusion: you might have a moment of doubt as you work through a piece, but try to break through it - I often suddenly start to like what I cursed a minute before! - and try to finish it even if it’s meant to be bad. This way, looking through your past pieces, you’ll see the progress. And trust me, I can’t even look at my art from literally three months ago. It’s normal.
Now, pics! The sketches are paler in real life, but I increased the contrast a little so you can see something.
1. Laying out the composition!
I wanted to just show them kissing, but I got carried away due to some Art Nouveau inspiration. As you might have noticed, most of my illustrations are quite self-contained (ykno - they look like a sticker on a plain background). So I wanted a tight swirl bordered by Aziraphale’s wings creating a sort of rounded, yin-yang like bubble around them. Consequently I made the whole composition revolve around their heads.

2. Adding more details to the sketch. It’s messy af. It will be messy until I’m done. It’s fine.
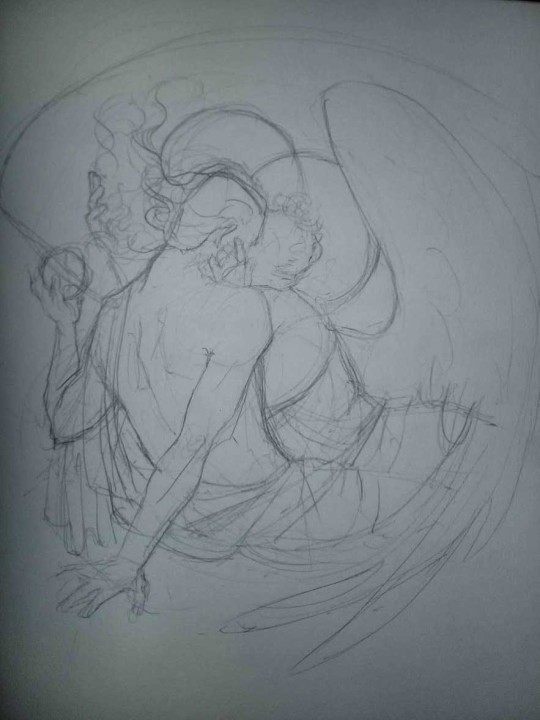
3. These are the fineliners I use for the linearts! They are made by Uni-ball and come in light and dark grey. I also sometimes use the guy on the left - ‘Touch’ sign pen by Pentel, when I want more brush-like, wider strokes. I work in grey because when I scan it and do my usual boring trick with sunlight highlights - which is an Overlay mode layer in Photoshop - the highlights ‘burn out’ the lines too and make them vanish a little, and the lighting effect gets more striking. I also like to use the light grey ones to make something look pencil-y without actually using pencil, because pencil fucking smudges.
4. It smudges! So because I am right handed, I start inking from the right hand side, no matter how tempted I am to do their faces first.
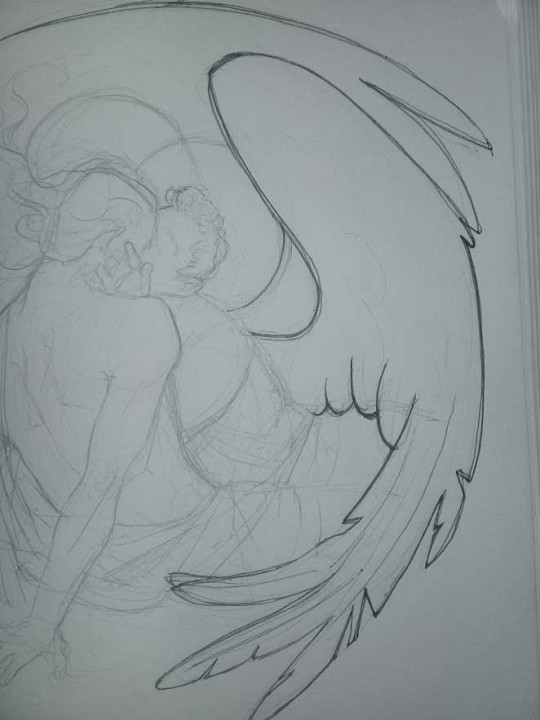
5. You can see the composition directions here. I made it intuitively, but ofc some ppl actually use grids etc to lay out their drawings.
6. See how pale ans thin the lineart was at first? I kept adjusting it as new inked parts were appearing. It starts to look nice and consistent now!
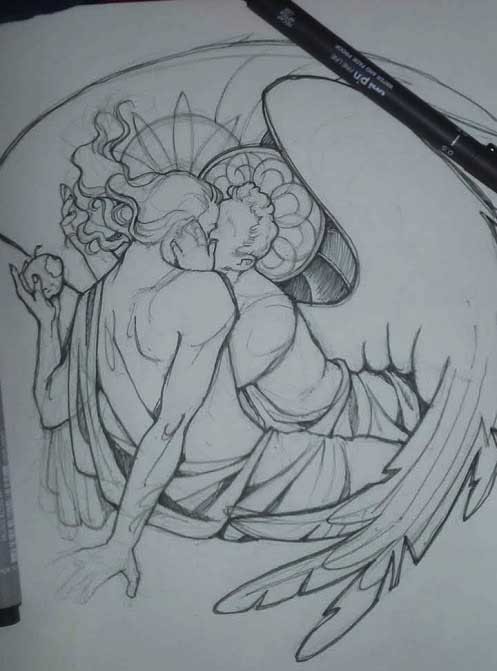
7. Finished lineart? There are some mistakes which I later corrected in PS. Notice that Aziraphale’s face has hardly any details on it - I tried to make the drawing suggest his expression rather than risk overdoing it.
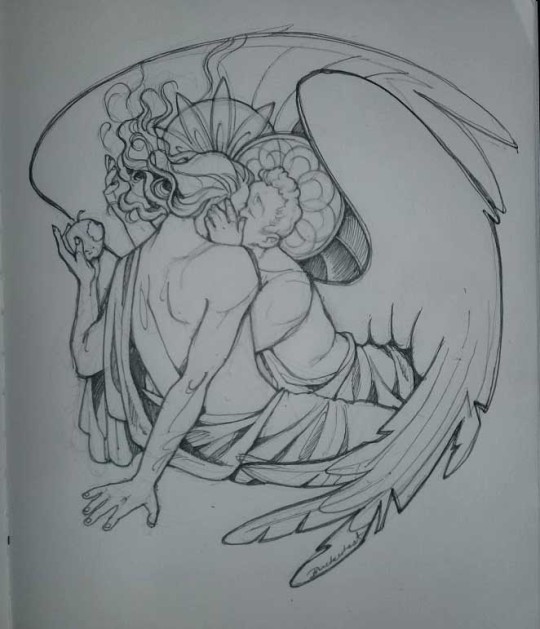
8. Photoshop time!! You can totally do what I did here even if you don’t have a graphic tablet. I used Curves tool to enhance the lineart, then Quick Selection Tool to select the background around around my sticker-like piece and filled it white (on a new layer ofc). I keep this white layer on top of the layer order so it works as a mask as I colour. I decided I did not like the hatching shading underneath Aziraphale’s halo, so I erased it with a Stamp tool (because I wanna keep the textured grey fill my crap paper naturally gives me!). It’s done roughly but won’t be visible once the thing is coloured.
9. And the reason why I keep the grey shade instead of easily getting rid of it by using Curves/Levels is because when I set this layer to Multiply mode and colour underneath, it gives me this nice desaturated look like from an old cheap paper comic page. It works as a natural filter! But of course I can’t do bright colours this way, so all my glowing highlights happen ABOVE the lineart layer - on a separate layer in Overlay mode!
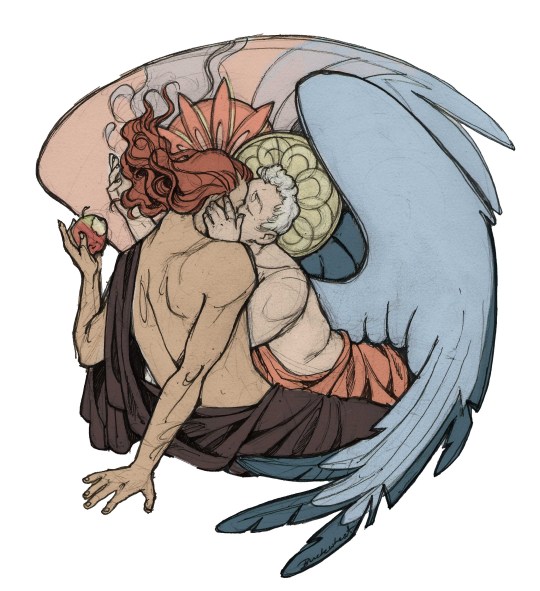
Finished thing here!
_____
Commission infoBuy Me a Coffee - help me with my transitioning expenses!Prints and stickers and things on my Redbubble!
#ask the buckwheat#long post#tutorial#drawing advice#drawing tutorial#good omens#ineffable husbands#good omens fanart#good omens art#my illustrations#doodles#toastedbuckwheat
1K notes
·
View notes
Note
Do you have any art tips or a step by step on how you color??
Please its ok if you wont
sure, i can give a tiny bit of insight on how i colour. Under the readmore:
At this point of my personal understanding, i would say colouring is just two things: 1) making sure your colours look good together, and 2) lighting (if u decide to even do lighting/shadows, that is)
The 1st one you can achieve by doing palette studies based on photographs or other ppls art, or by doing trial and error, or apparently by learning colour theory (im too dumb to understand it) and also applying digital tricks like overlay layers and also fiddling with hue/sat/brightness/contrast until it looks good to you. Below is my latest Audrey drawing without the overlay layer (left) and then with the overlay layer (right).
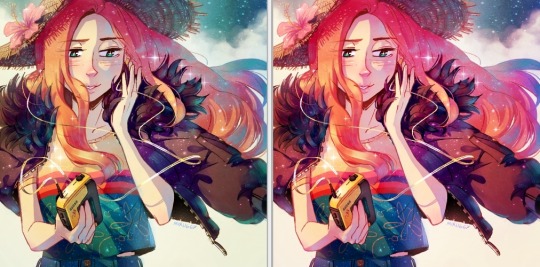
It’s magic, right!? I’m so used to having an overlay layer in every drawing now that these days i just slap one on before i even start colouring lmao. usually 20-50% opacity, usually a saturated orange or pink and then i’ll adjust as i go. mostly i just do trial and error like fitting wooden toy shapes into the right holes - my brain will go “ding!” when the arrow on the hue gauge hits a colour that looks good to my eyes.
The 2nd one, lighting, is more complex. I always say “lighting is everything” because to me it IS...it can control the entire mood of the picture. Where is the light? Is it hard or soft? is there a secondary light? What emotion are u trying to convey? and then how can you execute it? how would light look on THIS object compared to THAT object? A big part of lighting is being able to visualize your drawing in 3D. Once you can do that, you can lay down the light and shadows quite naturally depending on where your light source is. this ties into the way you DRAW things tho (like, u have to already be thinking about 3D while in the drawing stage) so i dont wanna get into it since this post is about colouring.
Lately I’ve been p lazy and doing all my major shadows on a single layer, set to “Shade” on sai (it might be something diff on other programs idk), 42% opacity (for this particular piece), and clipped to my folder of colour layers. So that means almost all my actual colour layers are just flat colours! Here’s my main shadow layer all by itself without any base colours (left), and then shadows + base colours (right):
sometimes i’m already thinking about lighting while im still sketching the picture. sometimes i’m already thinking about lighting before i even start to draw. For this particular pic I ended up with 5 different layers for lighting: 1) all shadows (42% opacity Shade layer); 2) some extra shadow under her hat (72% opacity Shade layer), which then allowed me to create the cool hat texture by simply erasing bits of this layer 3) a soft angelic backglow coming from behind her. this layer goes somewhere above the lineart layer to give the illusion of light spilling in front of her and fading out her edges; 4) secondary blue reflective light coming from the....sky im presuming, but mostly because i just felt like the drawing needed some blue lol; 5) a 55% opacity overlay layer containing a trace amount of vignette in 3 of the corners + an extra glob of light just to the right of her cuz i was experimenting with different instagram filters near the end and found one i rly liked and tried replicating it on sai 😂 Here’s the picture with only my main shadow layer (left) vs the picture with all 5 lighting layers (right):
The pic on the right makes her look more like she is Somewhere. I think I could’ve pushed the depth even more but i wasn’t confident enough. And sai doesn’t have blur tool :(
I also always have at least one layer that i name “extra”. The Extra layer goes on top of the colours/shadows/lineart layers, but under the overlay/glow layers. This is for extra details (including extra LIGHTING details) that I wanna add like extra sparkles, extra straw hat strands, hair strands, hair shine, zipper shine, etc all for that “extra” touch of realness. I don’t do all this stuff at the end, though. I have my Extra layer created pretty early on and i go back to it and add to it when I need to. Here’s what it would look like without the Extra layer (left), and with it (right). Try to find all the extra bits i listed:

One last note is i don’t colour one thing at a time. Before I start, I slap on all the base colours and all the shadows super roughly, just to check if my lighting and colour choices look good TOGETHER and make the entire composition look good. no point in spending hours rendering all the lighting and shadows on the character’s hair if in the end u decide there was actually a better lighting design u could’ve gone with. So here’s the rough colouring plan I made for myself before i started rendering for real:
im not sure if this was useful at all but i hope it was interesting at least! if you want to see my actual chronological process for colouring you can watch the gif of wips i compiled here: [link]. You’ll notice that i edit my lines as i colour. I think it’s good to be adaptable, and to be ready to go back and change ur lines to benefit your lighting, colouring, and overall look of the piece.
Also here’s the finished version of the pic: [link]
#Anonymous#miruask#miru art#tutorial#there's a lot more i didnt mention#i didnt mention my texture layers#cuz i felt too ashamed lol im just a sham artist using textures and overlays and texture overlays#textures can absolutely make ur colouring look interesting tho so try some out!#i didnt use a texture for the hat tho i did that all on my own and im proud#i also didnt mention locking ur lineart layer and colouring the lines themselves#but thats such an age old technique that im sure everyone already knows it
32 notes
·
View notes
Note
How do you make your Jikook comics ? Does it take a long time? Do you have a tutorial
Oh gosh... I’m so basic when it comes to the fundamentals of comic creation.. but ill do my best to explain it for you :)
Basically, I start with a general idea of what is supposed to happen and what I want the panels to look like - and a blank page that is always the same size, I use 1700 by 2800. Then I start mapping out the panel outlines.


When I do this I try to think of what the characters will be saying in each box, how much space I want each moment or image to take up (usually bigger images appear to be more important or a focal point), as well as if the panels are attractive. If you having trouble with layouts I recommend looking at other comics to see what kind of paneling other people use.
Once I’m done with paneling I start a new layer and do a really rough sketch of what each box is supposed to hold. Usually, people will map in their speak bubbles but I’m too lazy for that - although it does help to do that.

After that, I basically just, finish my rough draft, which usually takes the longest cause that's the actual like - drawing part. And then I’ll start my line art. (I'm using an actual comic page to show you so I don't have to draw the one I stated above)

Once line art is done I create folders for each character and background, and start with the base colour. Then I shade, work on facial features, colour the background, add any lighting features.(Im not going to go into great detail for this because that would be a drawing tutorial and you asked for a comic one - I must stay on track.)

Once I’m done the drawing/colouring part I map out the text, then I make the bubbles and then I write the clean text. This is also usually when I add little effects like movement strokes or extra text.


Everything I use to create my comics is part of the drawing program I use - Clip studio - but Medibang which is free works just as well (its what I used to use until recently.) Comics usually take a couple of days - generally, I give it 1 day per page. So if you see a 4 page comic, it will take me 4 or more days to complete.
Anyways this is a really quick and simplified explanation - let me know if there is something particular that you wanted to know about. I hope this helps :)
51 notes
·
View notes
Note
hiii abby!! can you post a tutorial for how you make edits like your latest one? the url edit fro taylorswifh? it’s so prettyyy
♡ edit tutorial for this edit, requested by anon ♡
hiii so! this is quite long, but that’s because I wanted to capture my whole entire process to hopefully help you! I used photoshop (2018) for this tutorial, and all the resources I used are listed here (everything except for photoshop is free)! I’ve sort of split this tutorial up into sections, by the different steps. thank you and have a lovely day!! ♡
so before I begin, I always think about the edit, like what I want the final outcome to look like (or if I don’t know what that’ll look like yet, what direction I want it to go in, the main themes/ideas/colour schemes that I have). I personally love using a minimalist range of colours, all of them being light and pastel (that’s just my personal liking though). I also consider the main themes or ideas that I want to translate through my edit. you also need to have the passion and desire to edit, I’ve learned that there’s nothing more draining than editing when you really don’t want to. so I think that you should think about all these things before starting!!
tip; put on some music, it gets your creativity and thinking flowing if you’re in a good mood ldkjkl
so! when creating the edit; first of all, I created a new document in photoshop - 540 x 300 pixels for this specific edit (just because that shows up as high quality on tumblr, but it doesn’t really matter!) when you click ‘create’, a white canvas should open up.
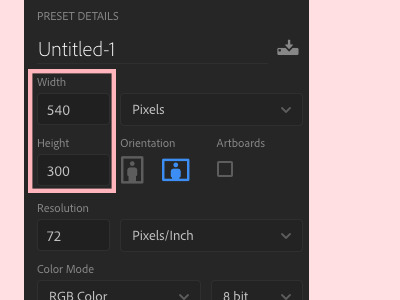
— creating the book
next! I used a book psd for my edit, which you can find and download here!! so I just opened that psd up (a psd is just a photoshop file that has like all the layers in place so it’s not just one photo);
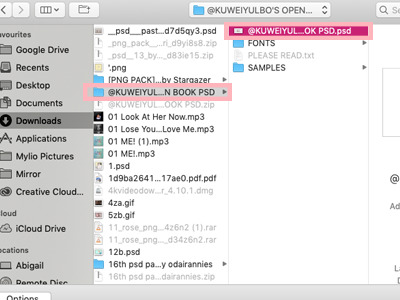
when you open the file up, this is how it should look (well not really, because I’d edited it to look like this, but it should have this general layout);
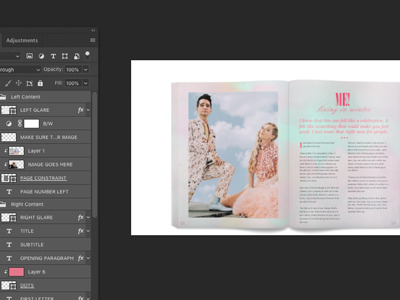
now what you have to do is sort of literally drag the file out and then, drag all the layers from that file into your white canvas, like this;

— giffing
I just wanted to quickly mention that giffing is definitely an optional step. I do it in pretty much all of my edits, but I wouldn’t recommend it if you’re just beginning to edit, because giffing takes the most time and it can be really draining and messy if not done right ldkjd.
to create my gifs, I use youtube videos, which I download through 4k video downloader (it’s really simple with 4k, you just have to copy the youtube link and paste it into the app!). so to open up a video, go to ‘file’ then ‘import’ and finally ‘video frames to layers’;
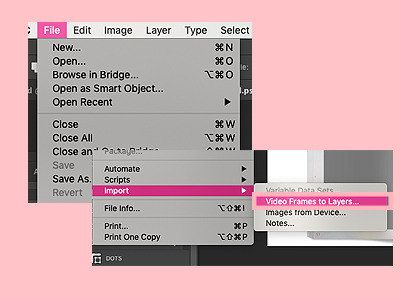
once you’ve chosen the video you want to use, open that up (don’t know why that’s so blurry dlkjdlj but you get the idea);

now this should pop up! make sure it’s on ‘selected range only’ and then use the toggles at the bottom to select the specific part of the video that you want to use (I usually gif about 20 frames because it’s sooo much work for me to do more than that lkdjldj)
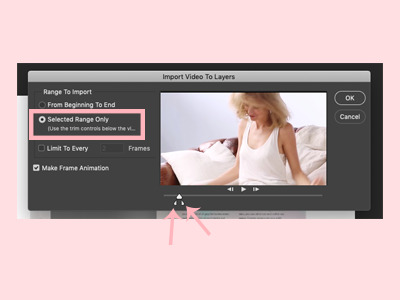
when you’re in the file, go to ‘window’ then ‘timeline’ for the gif to show up frame by frame;
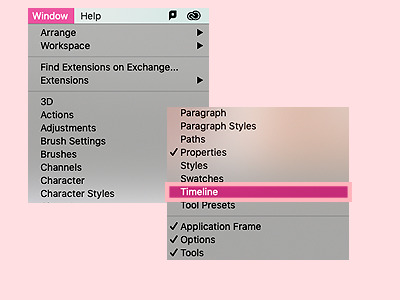
now highlight the specific frames that you want by literally dragging across them with the timeline bar at the bottom. then click the three bars on the top right of the bar, and click ‘copy frames’;

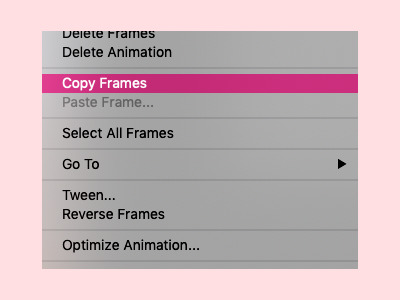
now go back to your book psd file, and at the timeline bar at the bottom, click ‘create frame animation’;
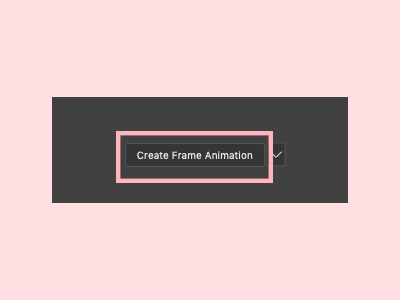
click on the three bars on the top right of the timeline bar and paste the frames over the selection;
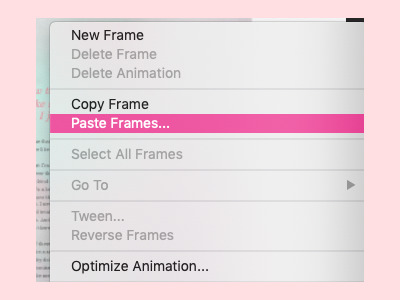
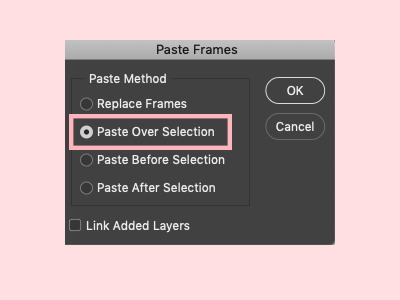
your file should now look something like this! to resize the gif, just press command + t and adjust it from there!
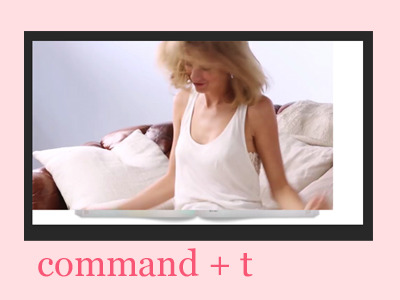
now to give it the effect that it’s a part of the book, you have to create a clipping mask (so it sort of clips onto the book layer like a paper clip). to do this, select all the layers of the gif, drag it right above the layer that you want to clip it onto (the page constraint layer in this case). then right click the gif layers and click ‘create clipping mask’;
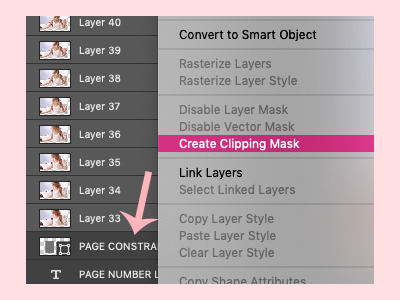
as a result, your layers should now look like this. you can use command + t again to adjust the gif size;
tip; press command + g to group the layers together so they take up less space!

now, with your gif, this step is pretty tiring and takes forever dlkdjl, but for the layer to show up in every frame of the gif, you have to click on the box button on the left of each layer so that an eye shows up. you can also press the eye button at the top of the settings, in the unify bar, so that it stays visible throughout the entire gif. I don’t know if I’m explaining it properly dlkdjl but just go through every layer and press the box so an eye shows up.

sometimes the unify button doesn’t work for some reason, and you’ll have to manually go through every single frame just to click on the eye button. it’s excruciating, but it’s worth it in the end lkdjdl
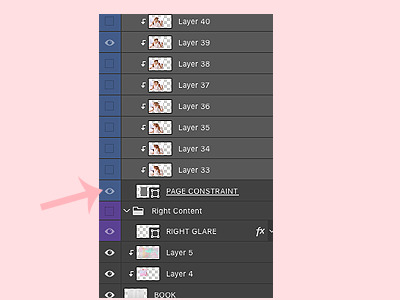
this is how your edit should look now!

now what I do is apply a psd (sort of like a filter) so it looks softer and prettier! these days, all of the psds that I apply come from this lovely pack!

in the same way that you dragged your book psd in, drag the psd *folder* into your edit;
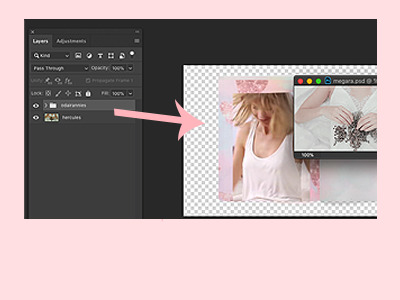
your edit should now look like this!
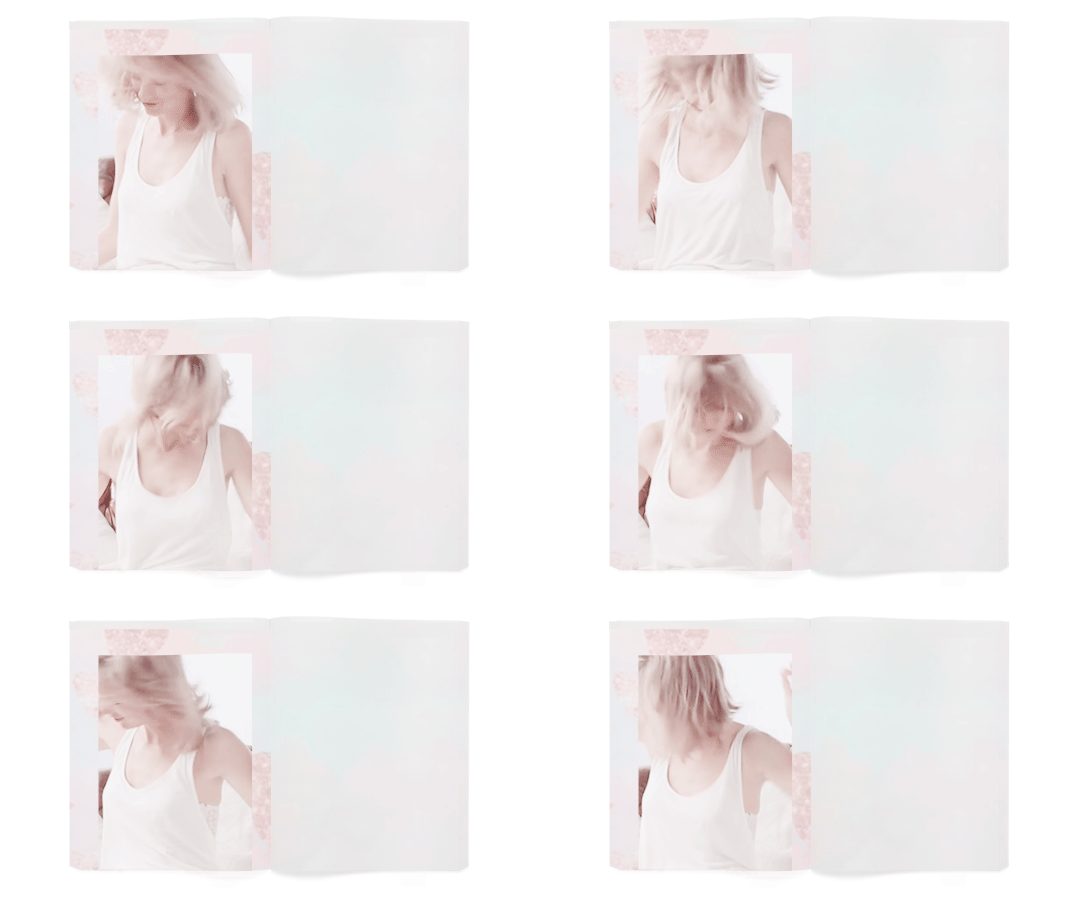
— adding the photo
now’s the fun part! you can add whatever you want to, but what I did in my edit was I cut out a photo of taylor. now what you can do if you’re running short of time is find a transparent photo of taylor on google or on deviantart, but if you want to take the time to actually crop the photo out like me (even though I’m horrible at it), here’s how I do it! first find the photo you’d like to crop out. I usually use taylorpictures, they have the most high quality photos of taylor!
so find the photo you want to use, copy it;

then just paste it into your edit;

use command + t again to adjust the size;

and now to crop it out, what I do is use the quick selection tool, which is this button right here;
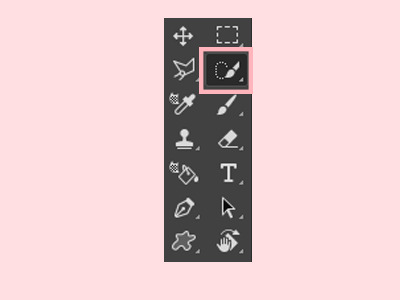
in this mode, you can easily just select the part of taylor that you want to cut out (that sounds weird lkjd);
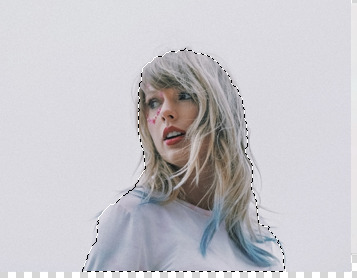
at the top, there should be a bar with a number of buttons, one of them being ‘select and mask’;

if you click on that, you should be taken to another page, similar to this;

now you can play with the settings on the right, then press ‘ok’ when you’re happy with it (the numbers change for each photo and your style, it entirely depends on how you want it to look);

now you should be back to your edit, click on the ‘add layer mask’ button on the bottom left of your page;
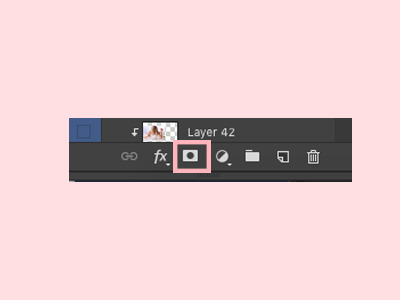
and taylor should now be cropped out from her background!
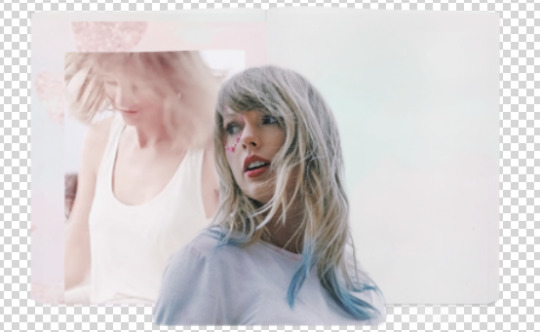
make sure all the layers are below the psd pack, including the photo of taylor that you just cropped out;


now for the colouring!! ‘selective colour’ is your best friend, and you can find that button here, in your adjustments (if you can’t find your adjustments, go to window > adjustments);
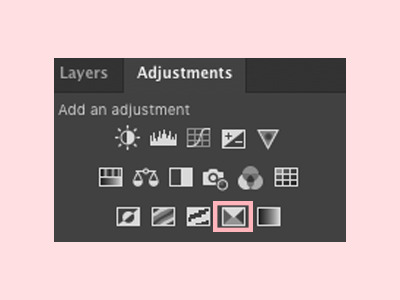
add a clipping mask (by right clicking the layer and clicking ‘create clipping mask’) of the selective colour onto the layer you want to colour, so that it only affects that one layer;

then on the selective colour panel, you can adjust the specific colours in that layer to your liking;
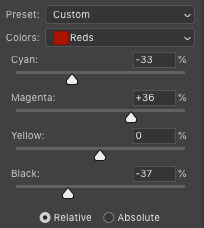
in addition, you can press command + u to change the whole colour scheme, saturation and lightness of the layer. make sure to press ‘ok’ when you’re done;

basically just play around with the colouring until you’re happy with it!

if you want it to look more realistic, you can also play around with the effects (I use layer effects all the time, they’re the best) on the layers bar, so the layer blends into the layers below it, like this;
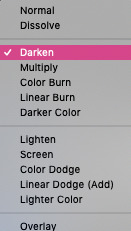
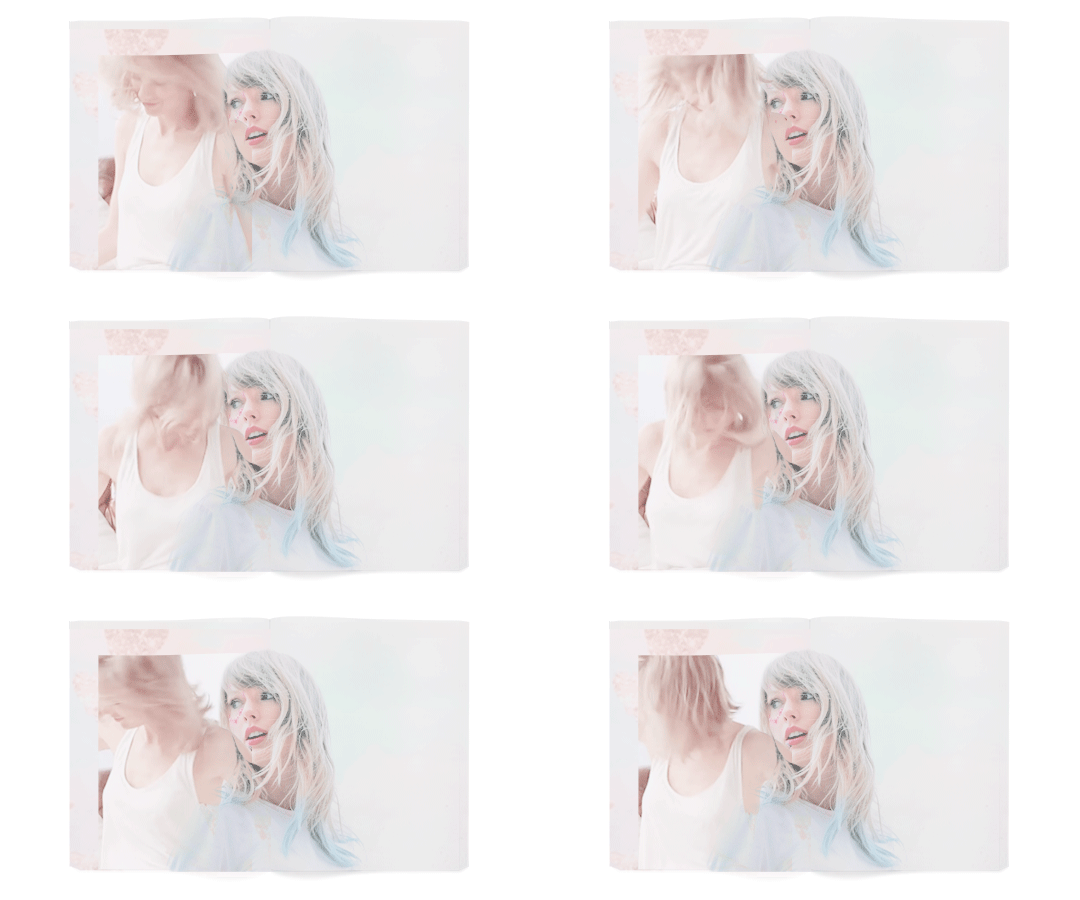
— adding decoration
now you can decorate your little piece of work with whatever you’d like to, such as a background colour (layer > new fill layer > solid colour) ;

a texture (textures are honestly so amazing and you can find them all over tumblr and google; like you can search the word ‘texture’ up and then paste it into your edit);

I usually place my texture at the top of the edit, then use one of the effects to blend it into all the layers;
final embellishments!! this step is optional you can add anything else that you’d like to, such as pngs (you can search these up on google and paste them into your edit, or find psd packs on tumblr and drag them in). again, you can add selective colour and a layer effect to these layers;
tip; finding already transparent images saves sooo much time, so try doing that instead of cropping the image out.
text;
tip; use a new layer for each line!
and so on. the flowers that I used come from this pack and the wax seal stamp comes from this pack from the beautiful @newrcmantlcs!! my main advice is to just play around with everything till you’re happy with it. don’t be afraid of deleting something or starting over completely if you’re not.
— giffing again
now to control the speed of the gif, highlight all of the frames, then click on the tiny dropdown button and change the speed to however fast or slow you want each frame to be. I usually make mine 0.1 seconds, but it’s completely up to you (and worth testing it out to see what speed you prefer!)
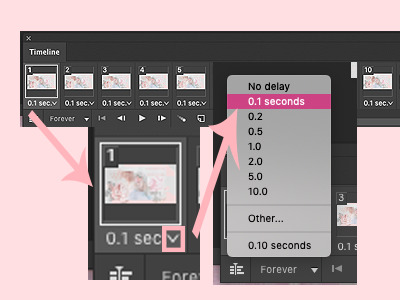
when you’re happy with everything, it’s time to sharpen it! first, you have to convert the frames to a video timeline, and do this by clicking on the button on the bottom left of the timeline bar.
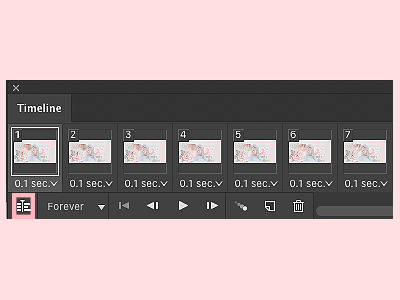
your timeline should now look like this. everyone’s process is different, like some people like to start off their whole edit with a video timeline, but I find it a lot easier to start with a frame animation then convert it when I’m done with everything.
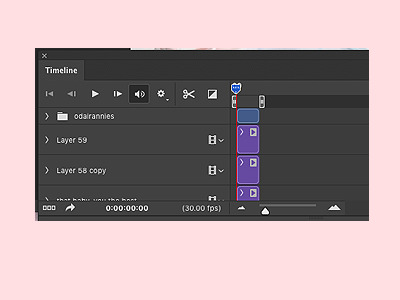
now to sharpen (in this case at least, sometimes I add a grainy effect instead) it, highlight the layers that you want to sharpen;
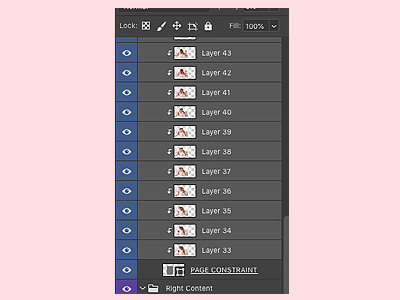
then click filter > convert for smart filters. this will turn your layers into one layer.
tip; if you do something you don’t like, command + z!!
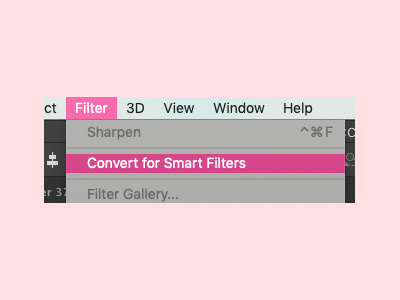
now go to filter > sharpen > sharpen;
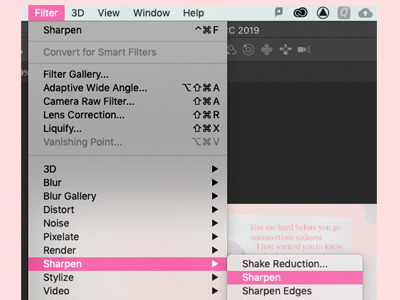
and your gif should now be sharpened! you can simply go to filter > sharpen if you want to sharpen a layer that isn’t a gif. play around with your edit a bit more until you’re happy, and finally, add a watermark if you’re going to post it online!

finallyyyyy! to save, go to file > export > save for web, if it’s a gif. if it’s a static photo, just click ‘save as’!

and yayyyy, you just finished an edit!!!!!
ahhh so this was my tutorial on how I created this specific edit, I hope it helped! If you create something similar or follow this tutorial, I’d loveee to see it; so if you post it on tumblr, you can tag me with #tuserabigail, or you can just dm me!
my process usually isn’t this rigid or precise, I usually edit on a tangent and in cluttered daydreams, it’s never like “oh, I have to make a gif now” or “ahh it’s time to add a texture!” so really, it’s just about playing around with your edit until you like it! it’s definitely okay to skip some steps or do things in a different order, because like I said, everyone has a different process, and this was just mine for this one specific edit (my process changes all the time too ldkdljk)
anyway, I hope this helped, and thank you!! ♡
125 notes
·
View notes