#Craft tutorials
Explore tagged Tumblr posts
Text
Matryoshka Dolls: A Timeless Art Form
This post is another one on art forms from around the world. So far, we have explored Street Art, Mexican Folk Art, Chinese Kites, Japanese origami, the Sand Drawings of Vanuatu, Kintsugi from Japan, and Egyptian and Papyrus paintings. You can go back and read those posts if you missed them. Today we want to learn about Russian Matryoshka dolls. They are an emblem of Russian folk culture and…

View On WordPress
#acrylic painting#art and craft#art forms#artisan crafts#artistic expression#birch wood#collectible dolls#craft tutorials#creativity in art#Cultural Art Forms#cultural crafts#cultural symbols#DIY Matryoshka#doll making#family heirlooms#folk art#folk patterns#handmade dolls#linden wood#nesting dolls#painting techniques#Russian heritage#Russian Matryoshka dolls#Russian souvenirs#traditional Russian crafts#varnishing techniques#wood carving
5 notes
·
View notes
Text
#Top 10 DIY Crafts Educational Accounts on TikTok for Learning Crafting#DIY Crafts#Craft Learning#TikTok Creators#Craft Tutorials
0 notes
Text
#asmr relax#asmr#oddly satisfying#diy#tutorial#do it yourself#tutorials#crafts#diy ideas#diy projects#easy diy#origami#video tutorial#craft#diy videos
121K notes
·
View notes
Text
Hello! I’m a maker of the once popular 3D wire mandala trinket from the 90’s era. During those “ancient” times, people would often enjoy this as a nifty hair piece, or fashionable bracelet. Nowadays it is more commonly used as a fidget toy and/or desk ornament. What makes this special is its hyper-versatility and the freedom of being able to use this however you can imagine.
I invite you to discover my handmade Fidget Blooms, and browse my hundreds of styles and colours favourited & reviewed by thousands of happy customers. Very demurely, use code TUMBLR at checkout for a special discount. Thank you for discovering my art, I do hope you enjoy it! :)
“The entire point of life is to take chances on dreams that seem crazy to most but feel like destiny to you.” -Timothy Shriver
I wanted to share this quote as it relates to my journey as an artisan specializing in wire art. It is a statement about pursuing one’s passion, even when others might find it unconventional or risky, as long as it feels personally meaningful and aligned with one’s purpose. <3
PS: 90s kids, don’t forget to take that Ipuprofen today for that back pain. XD
#artists on tumblr#90s nostalgia#tickle my brain#dopamine decor#random cool#de stigmatize fidgets#visual stim#crafts#video tutorial#witchcraft they say#handmade on Etsy#stress relief art#rainbow horizon x dark grey wire x standard size
660 notes
·
View notes
Text
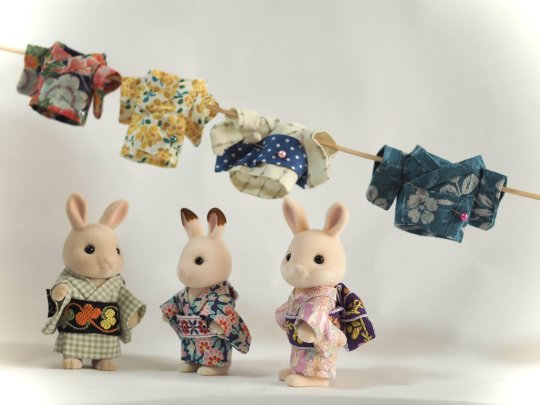
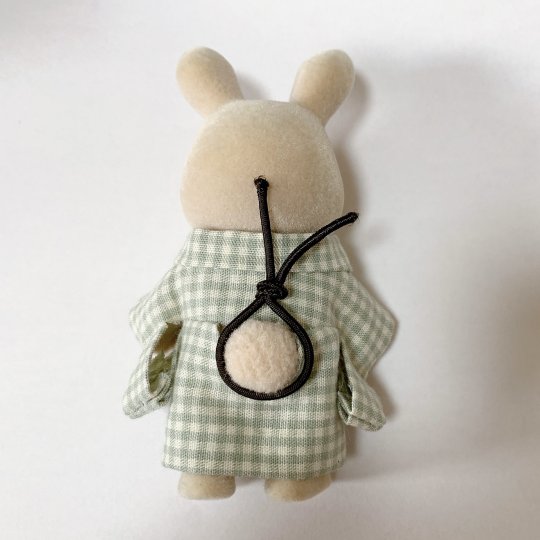
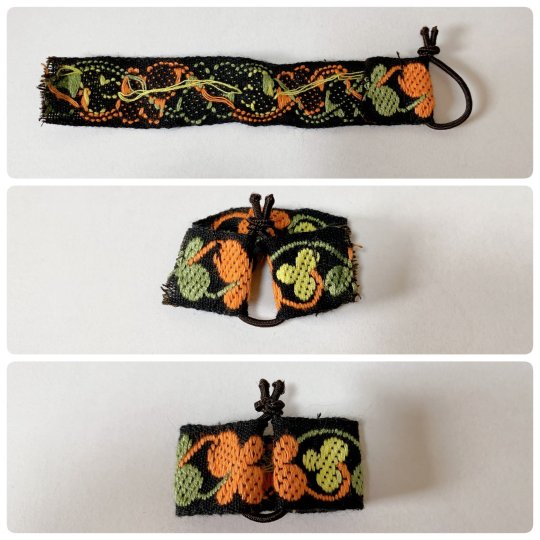
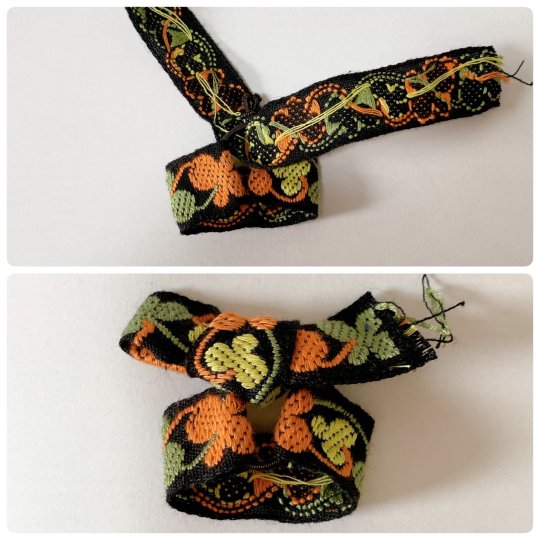
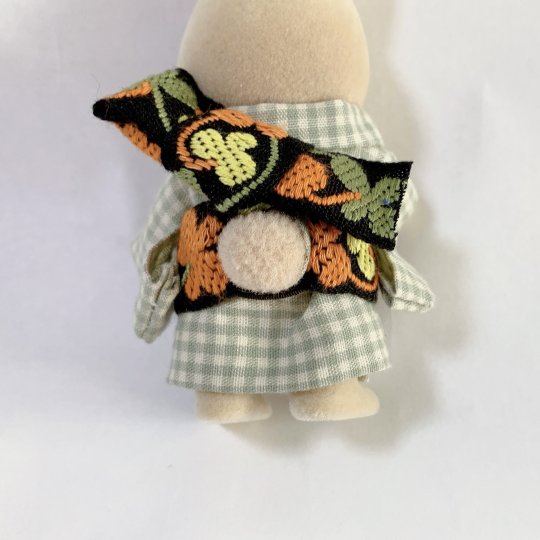
To complete past diy kimono dressing for Sylvanians Families/Calico Critters I shared before (see 1 / 2), here is a new step by step by @haluchobin to create cute easy to put on obi :
Tie a thin elastic into a loose loop around the tail
Slip both ends of a ribbon through the loop and sew into place
Tie another ribbon around the elastic covering the knot. Style it into a bow, you can try to mimic real musubi if you want
Put on the finished obi and enjoy!
#japan#art#craft#sylvanian families#doll#figurine#doll clothes#sylvanian family clothes#diy#step by step#tutorial#kimono#obi#着物#帯
1K notes
·
View notes
Text
hey punkz here's a tut for wrist cuffs/bracelets since some of u are new 2 tha scene

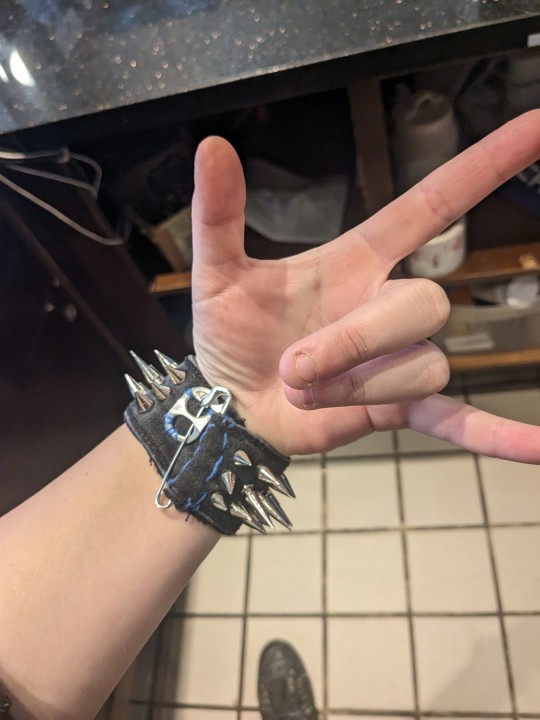
written out 4 ease of access
HOW TO: WRIST CUFFS DIY
Step 1: Old Jeans Waistband
- Cut off waistband from rest of pants
Step 2: Cut to Wrist Size (X2)
- measure around your wrist and cut
Step 3: Add Closure
-button + buttonhole or safety pin + soda tab works best imo
- Sew down soda tab to one side, safety pin to other
Step 4: Add Hardware
- good options are spikes, more safety pins, more soda tabs, staples, chains, and whatever else you can find
Step 5: SHOW OFF!!!!
feel free 2 add any other tuts on this thread or tag #punk tutorials
2K notes
·
View notes
Text
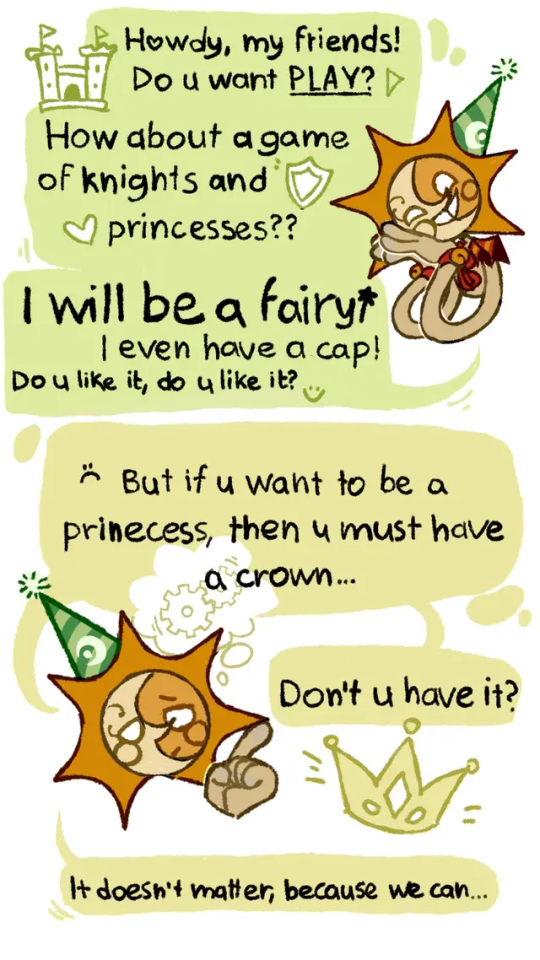
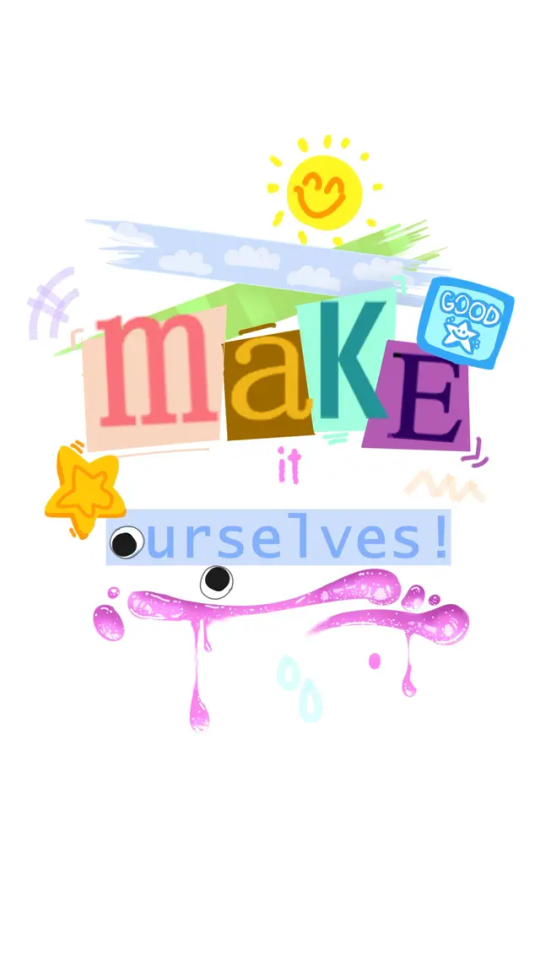
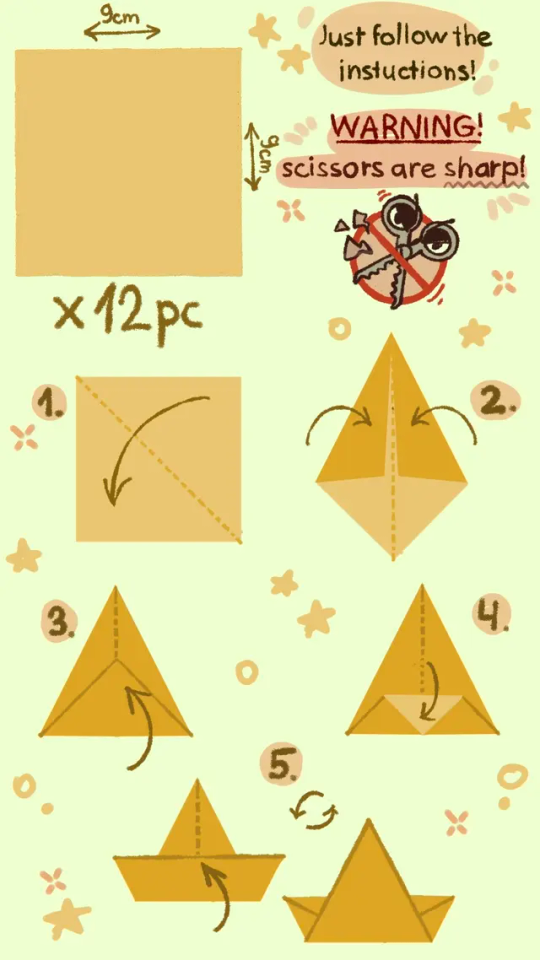
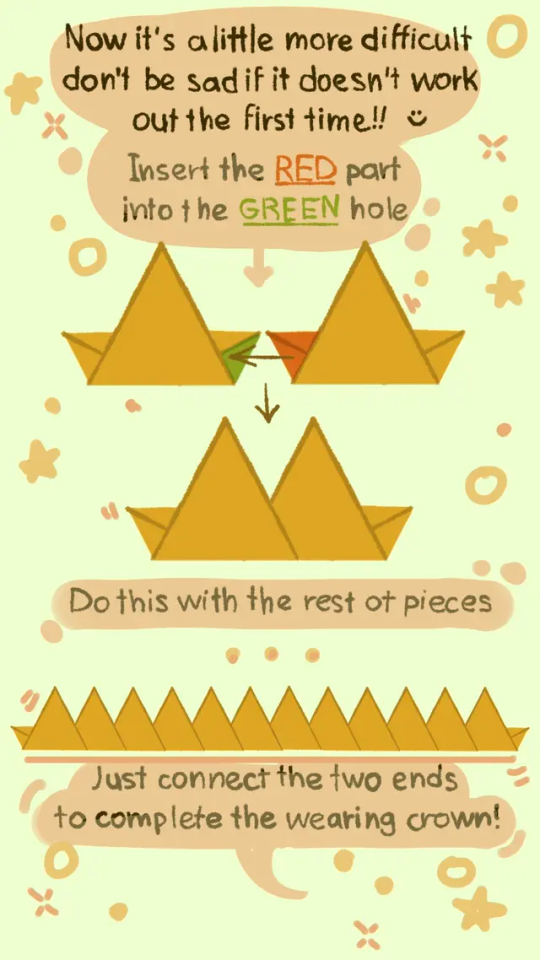
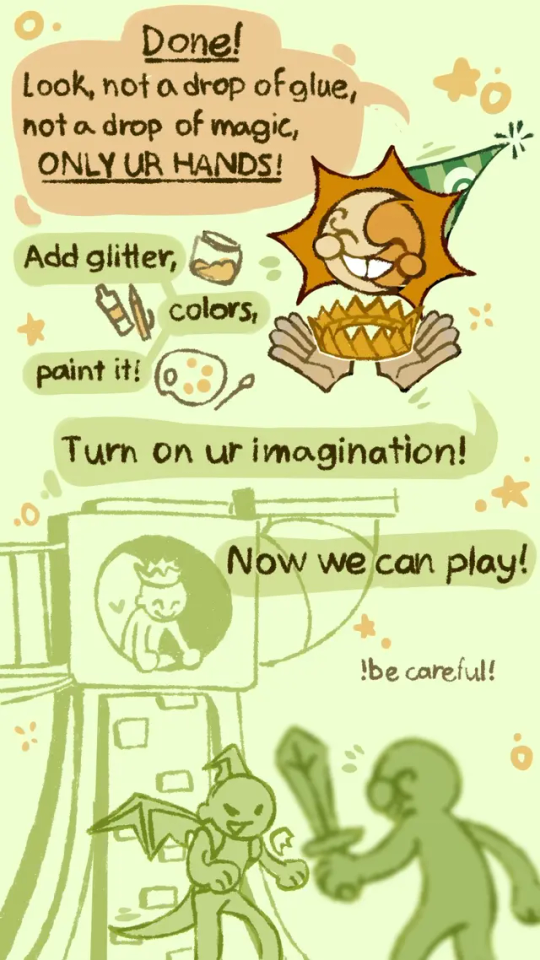
Some old childish shit (I love that and I love Sun so much, someone please treat me like this)
Paper crown tutorial 👑:P
#please treat me like this I'm begging u#hur hur hur hur hur#sundrop#sun#fnaf 9#fnaf 9 security breach#sun fnaf#sun fanart#fanart#tutorial#origami#origami tutorial#crown#paper craft#paper crown#so much tags
2K notes
·
View notes
Text
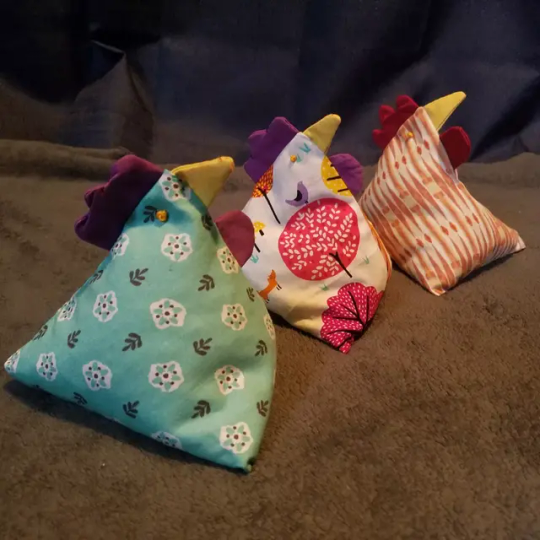
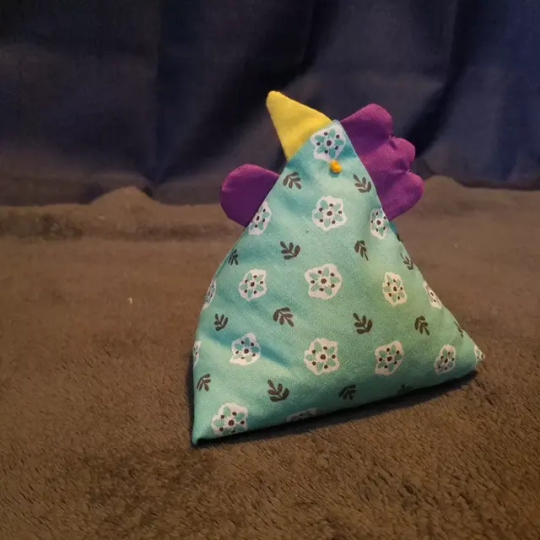
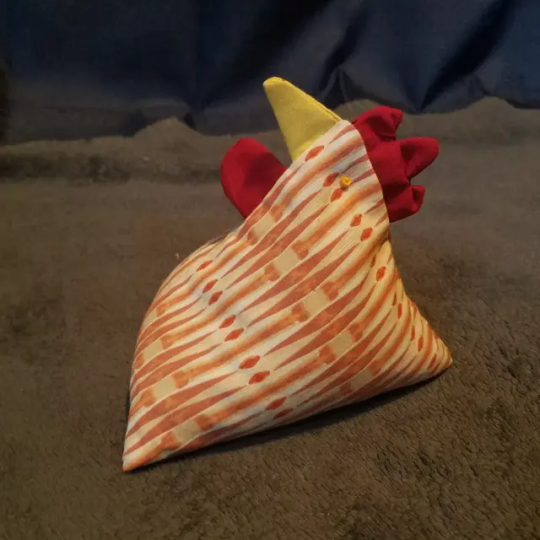
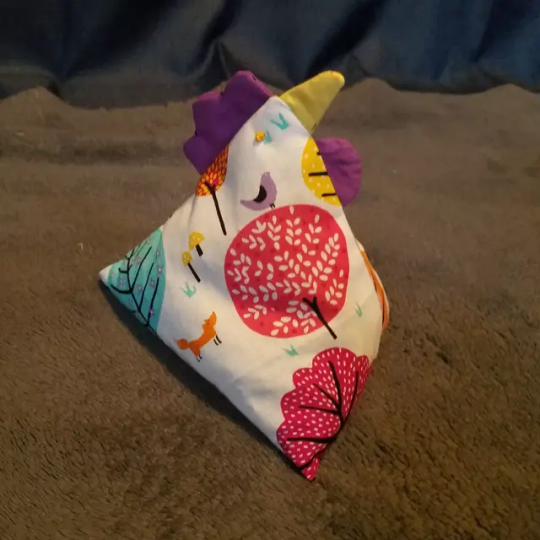
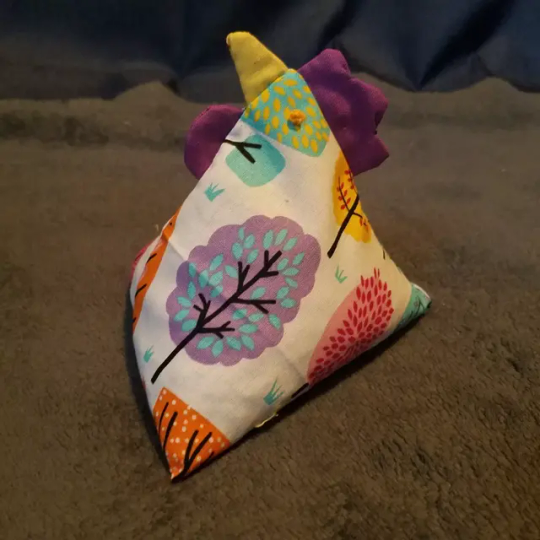
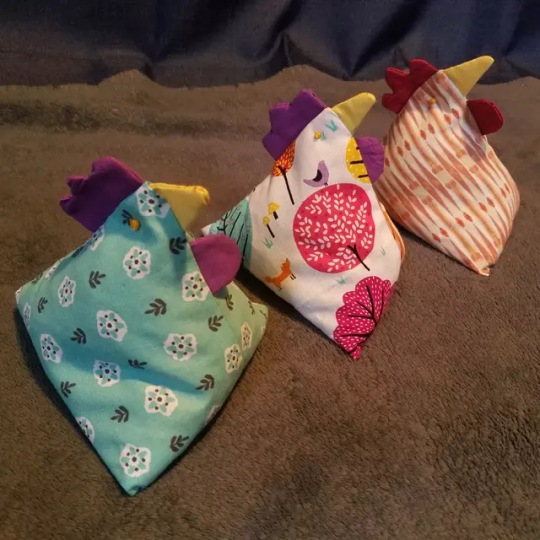
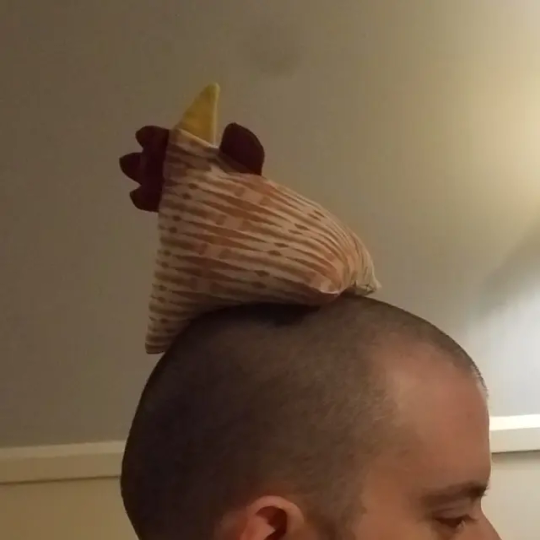
Forgot to post these simple little chicken hacky sacks/heat packs i made for my siblings for christmas. 100% cotton and filled with sunflower seeds (the chickens did NOT appreciate me borrowing from their stash but i was out of rice) so they can be heated up for hand warmers or to ease aches and pains
(or for balancing it on your head i guess)
#brother why#chickens#tiny fluffy dinosaurs#the BEST animals#chickenblr#sewing#hacky sacks#they are so easy to make#maybe I'll make a tutorial if i make some more#arts and crafts#textiles#makenna made a thing
1K notes
·
View notes
Text
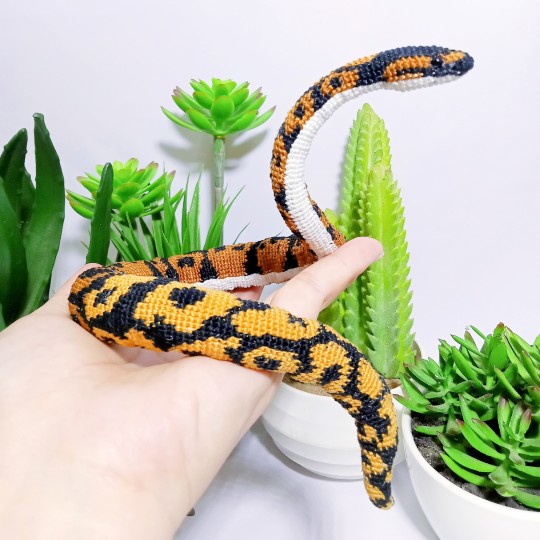
Hello, everyone! 👋
I wanted to share with you all a pattern, which is an amigurumi crochet ball python snake. You can find the free tutorial on my YouTube channel and the PDF pattern on my Etsy shop.
Thank you so much for stopping by and have a great day! 😊
819 notes
·
View notes
Text
Wednesday, November 29.
You reap what you sew.
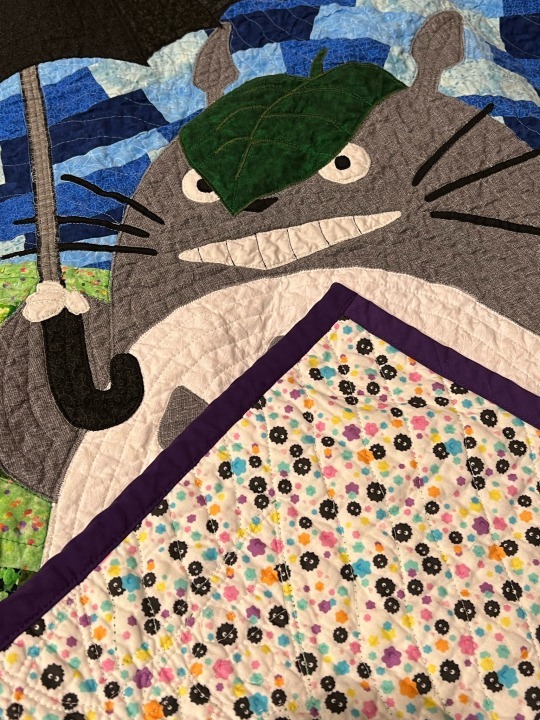
Never have truer words been spoken. But they come as good news for Tumblr's sewing community, however, who have been sewing some absolute delights. Some real œuvres d'art. Some winner-winner chicken dinners.
As luck would have it, #sewing is trending. And it's trending right now, so we have reaped a selection of these very dinners for your eyes only. We have then asked ourselves just what did we do to deserve y'all, and your resplendent talents.
#today on tumblr#sewing#sew#sewblr#crafts#sewing machine#crafting#sewing project#textile arts#crochet#sewing patterns#sewing tutorial#sewing tag#craftblr#contemporary art#artists#artists on tumblr
1K notes
·
View notes
Text
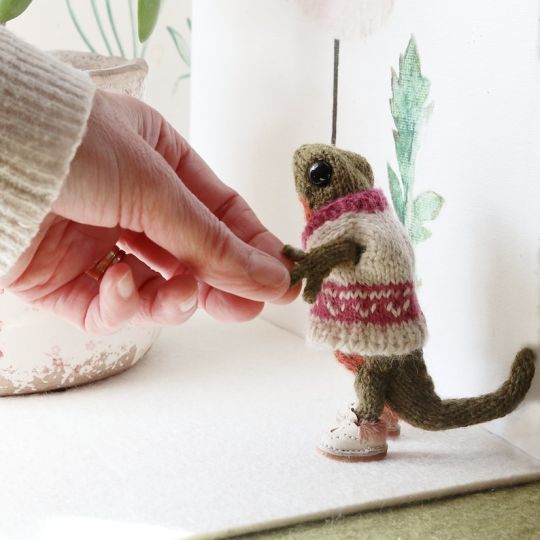
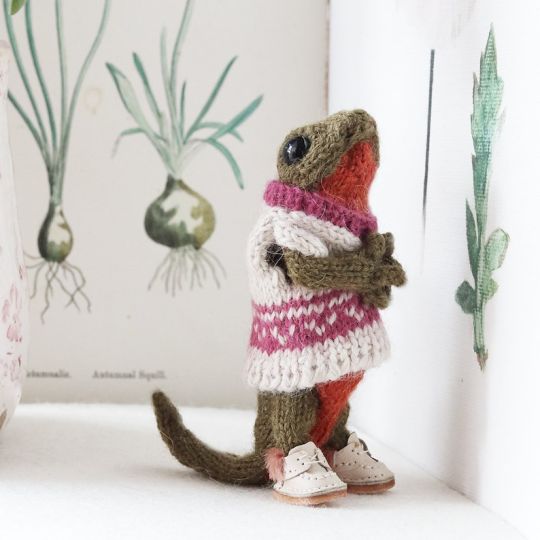
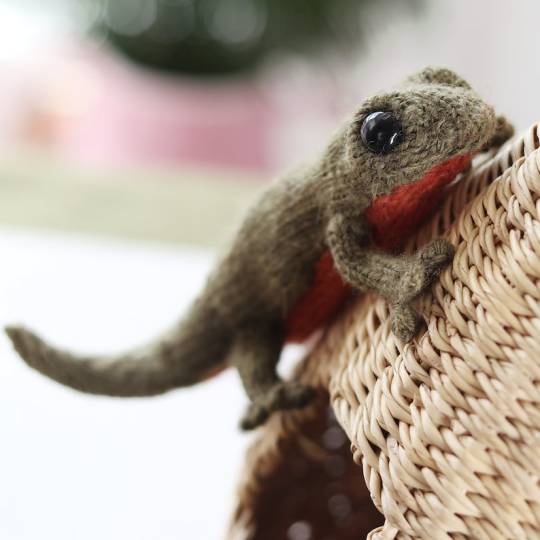
Newt Knitting Pattern by DotpebblesKnits
#DotpebblesKnits#newt#knitting pattern#knitting patterns#knitting pdf#knitting download#knitting tutorial#pdf download#pdf pattern#pattern pdf#craft#diy
576 notes
·
View notes
Text

screw it hits ur haikavetham with the dnp crafts beam
nothing more invigorating than drawing something that caters to my brain only (plus the four people who this caters to i hope u enjoy). something about holding the knife your loved one used to carve out your heart with one hand and holding their hand in the other all while an ominous presence looms behind you reminded me of them idk
#kavetham#haikaveh#alhaitham#kaveh#genshin impact#what do i tag this…..#dan and phil crafts#tagged reluctantly#thank u DanAndPhilCRAFTS - Slime tutorial for one of the fav haikavethams i’ve drawn this year🙏
715 notes
·
View notes
Text
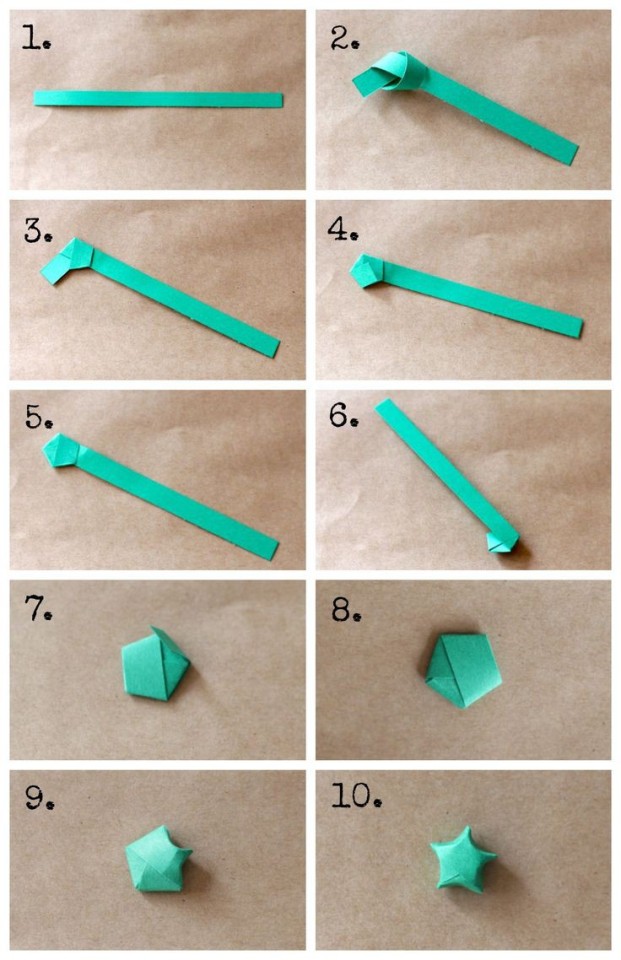
➩ Tutorial on a Paper Star 🌱
#tutorial#paper stars#paper star#star#papercraft#paper art#origami#aesthetic#greencore#green aesthetic#handmade#diy#crafts#starcore#design#art#goblincore#goblin aesthetic#green#green goblin#fairycore
1K notes
·
View notes
Text
I MADE A DIY PIN TUTORIAL!!!
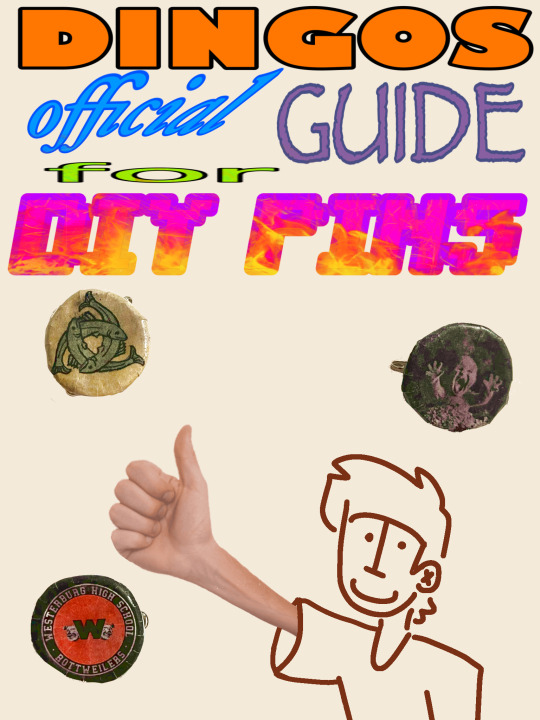
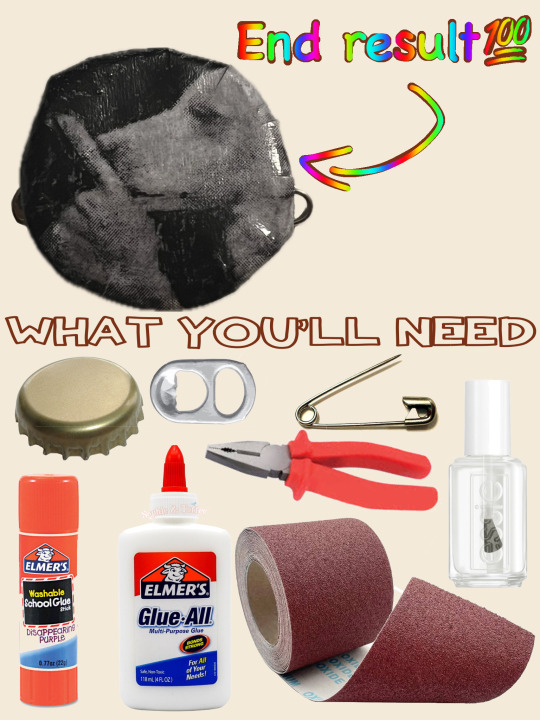


hope you enjoy :-)
397 notes
·
View notes
Note
Hi! I just saw your quilted butterflies photo, and I was wondering if you would willing to share how to make them, or link to a tutorial? They're gorgeous and I'd love to try, but i don't know the right search terms to find those, i think.
Oh absolutely! Everyone needs an easy craft to do right now. This will be a photo tutorial, so if you need a video the search terms are "origami butterfly bookmark". The instructions will be pretty similar.
*If you are using a sewing machine a single butterfly should take between 15-30mins, and if hand stitching my guess is ~1hr
Tools: -2 Scrap fabrics or 2x fat quarters, one for the main/outer fabric, one for the inner contrast -I recommend quilting cotton, though any easily ironable, non-stretch fabric will work -ruler and marking tools -scissors OR rotary cutter and mat -Pins (if desired) -Thread in a matching OR contrast colour - depending on preference -Iron and Ironing board - You can use a piece of cotton folded into a thin pad in a pinch as long as it's flat!
Step 1: Cut out two rectangles. You can make the butterflies as big or small as you'd like, as long as it's in keeping with the 2:3 ratio. For me, I like to use 4" x 6" rectangles. Use your marking tools to mark out the rectangle on the back/wrong side of the fabric, then cut them out!
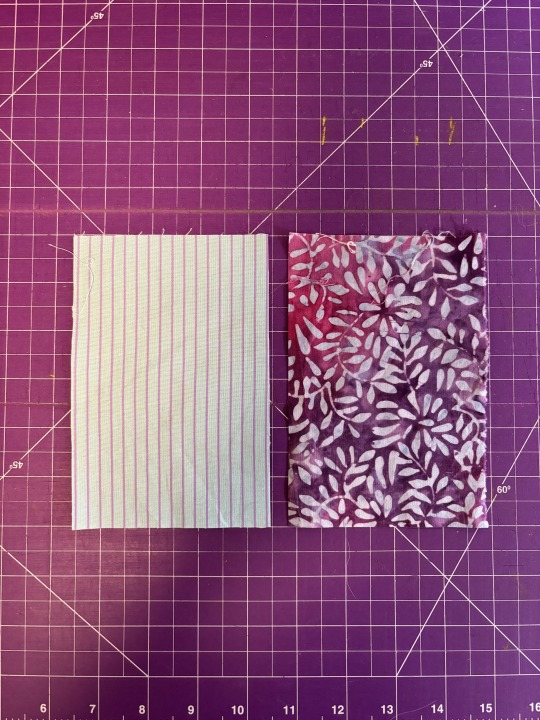
Step 2: Put the rectangles on top of each other, with right/patterned sides facing each other. Make sure all your corners and edges line up. Pin in place if using pins. (in this example one of my fabrics has the pattern on both sides of the fabric)
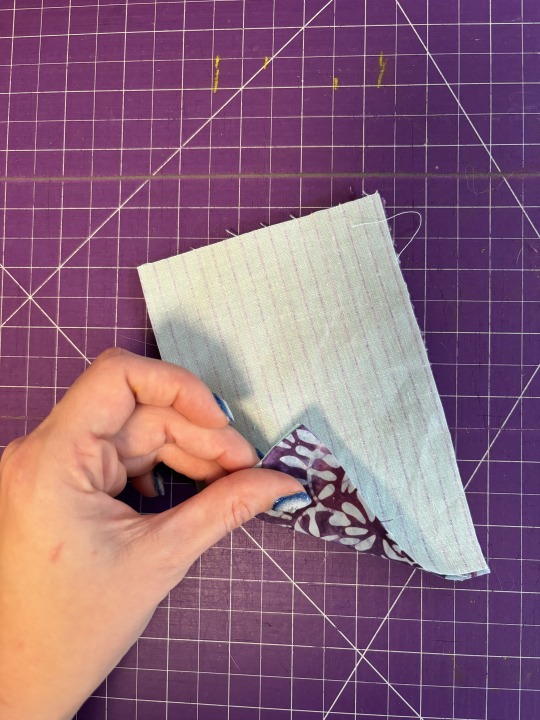
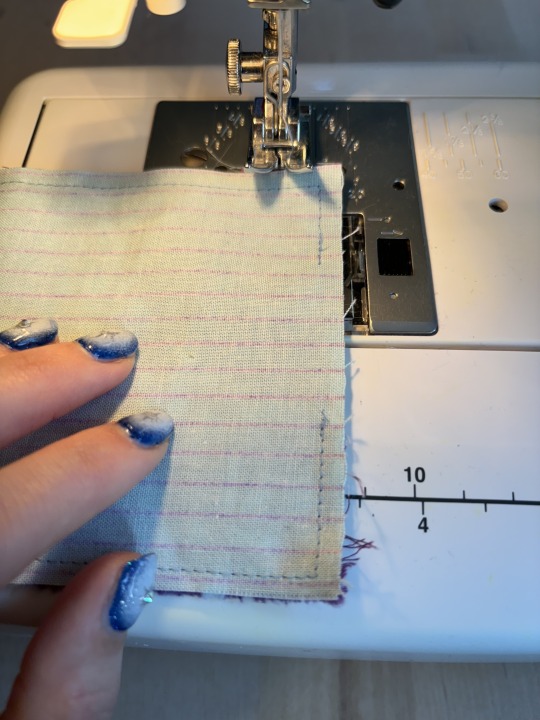
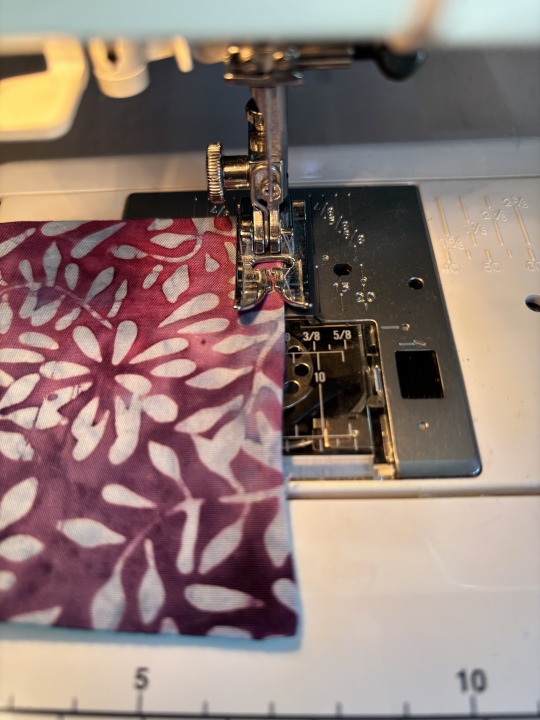
Step 3: Sewing! Mark a 2" gap on one of the short edges. If using hand needle mark out 1/4" distance from the edges. Sew. If using a machine, line up the edge with the 1/4" inch mark and sew. (Image is completed stitching, not placement on machine)
Step 4: Trim the corners without cutting into the stitching line, then flip the fabric inside out through the 2" gap you left. Make sure to stick your finger or something blunt but pokey -like a chopstick- into the corners to make sure they are nice and crisp!
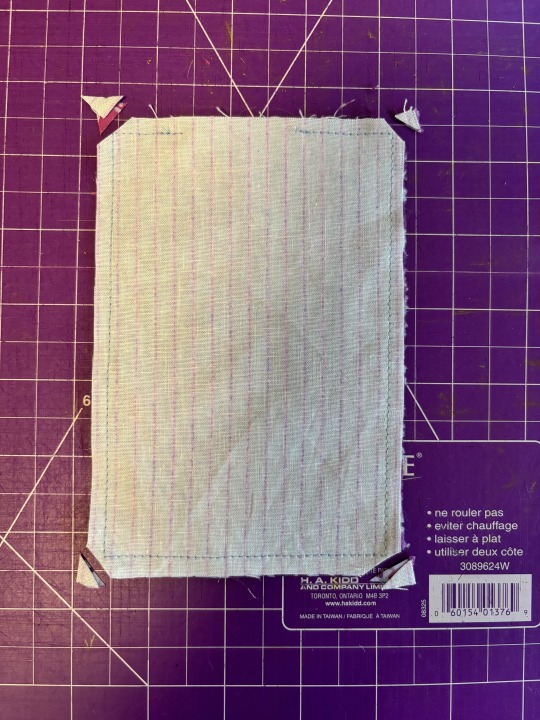
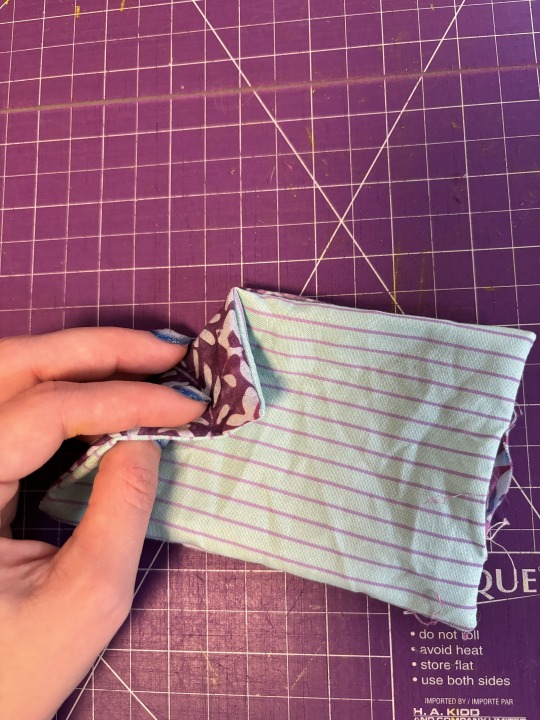
Step 5: Press all your frustrations out by pressing that fabric! Get it nice and flat and crisp! Make sure you've folded in the edges of the 2" gap to match the seam allowance of the already-sewn edges before you press. Then, if hand sewing, slipstitch the gap closed. If using a machine, set your fabric at a 1/8" distance and sew around the edges, effectively closing the gap and giving you a lovely topstitch detail.
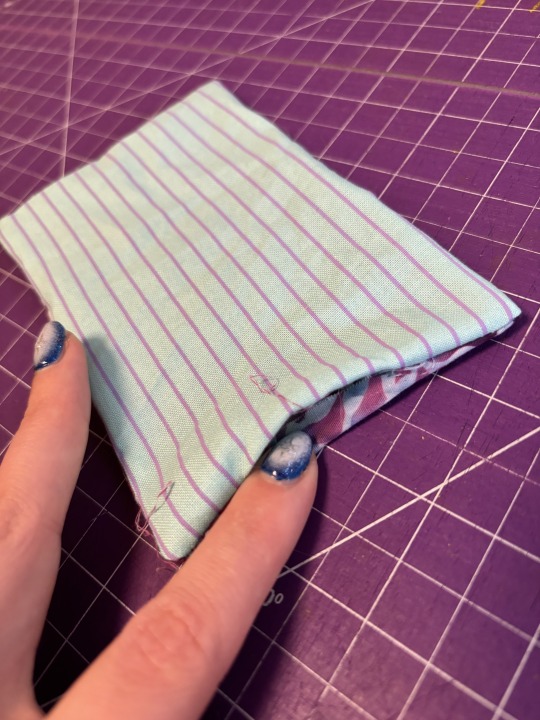
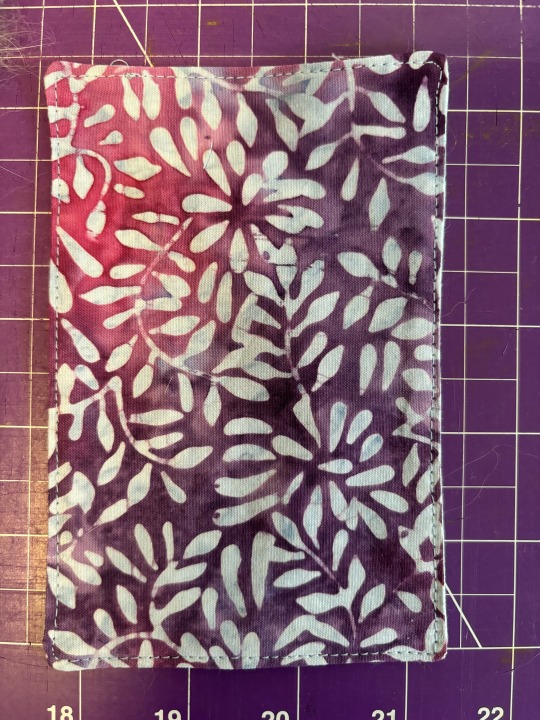
Step 6: Let's start folding! First move we're going to make is folding it in half, bringing the short edges together. Keep in mind, whichever fabric is on the outside will be the main fabric of your butterfly, and what is on the inside will be the contrast! Press hard! Then, make sure the edges you just brought together are facing you for the next step.
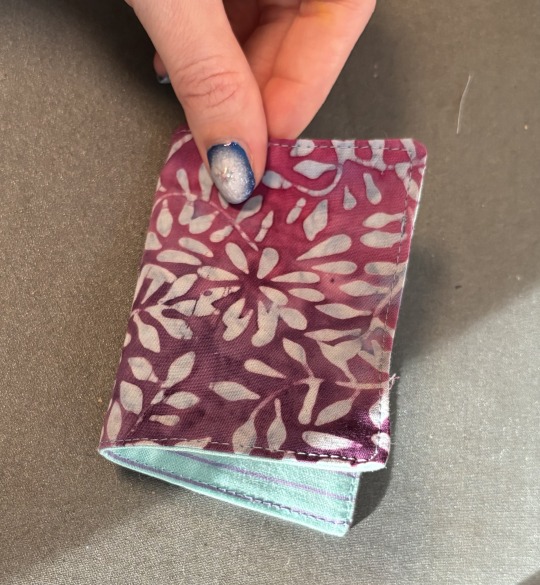
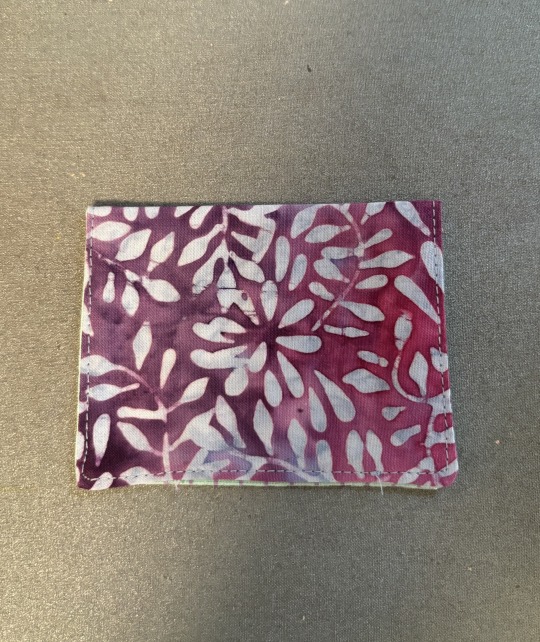
Step 7: Take the top fabric of the right open edge and bring it to the left side of the open edge. It will tent up in the corner, use this and press that tent down until you have what looks like a triangle of the outside fabric on top of two rectangles of the contrast fabric. Press! (I forgot to take pics of the whole process with the first one, don't mind the fabric switch).
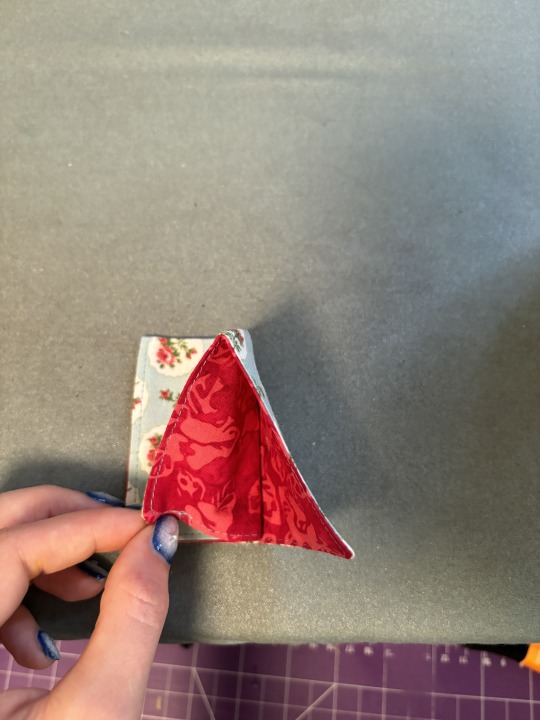
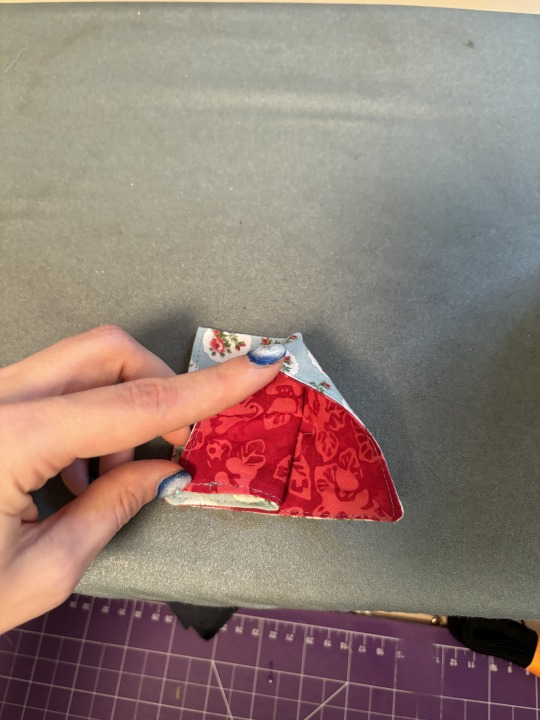
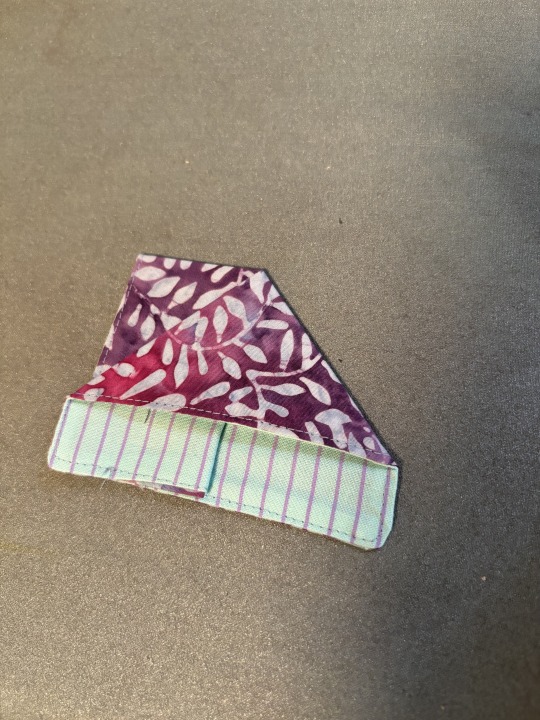
Step 7.5: Flip your butterfly and repeat step 7 on the other side until you have a strange looking triangle like this.
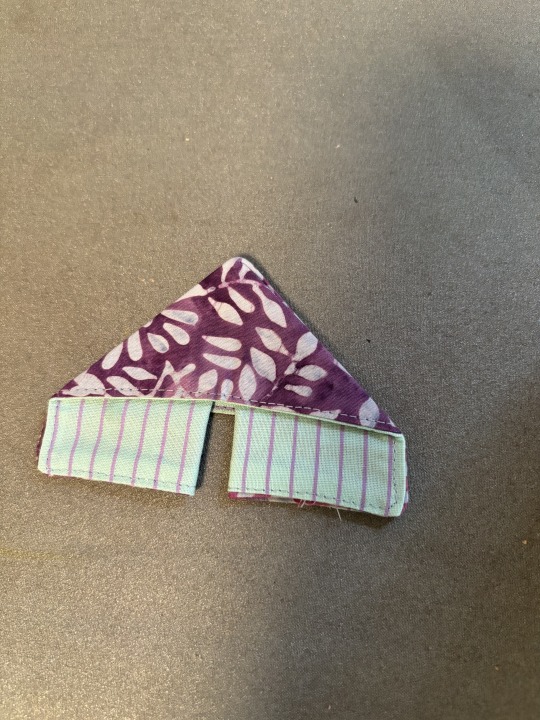
Step 8: Take the inner corners of the contrast fabric and fold it up towards the outer fabric. The bigger this fold, the more contrast fabric you will see in the final butterfly. Press.
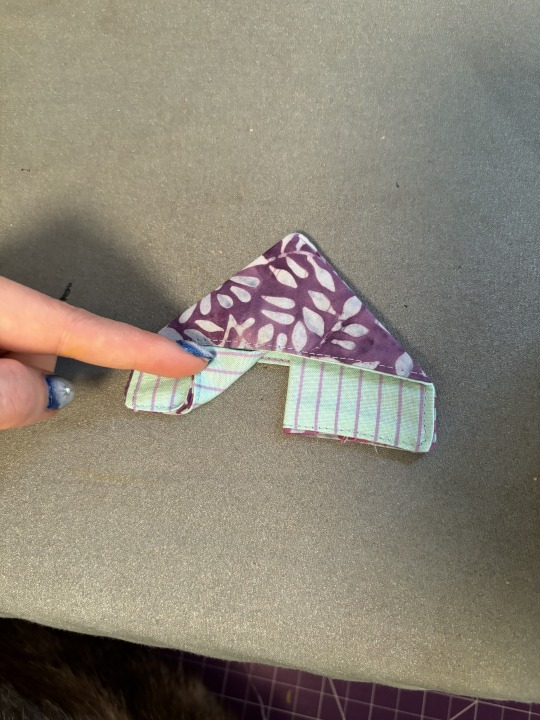
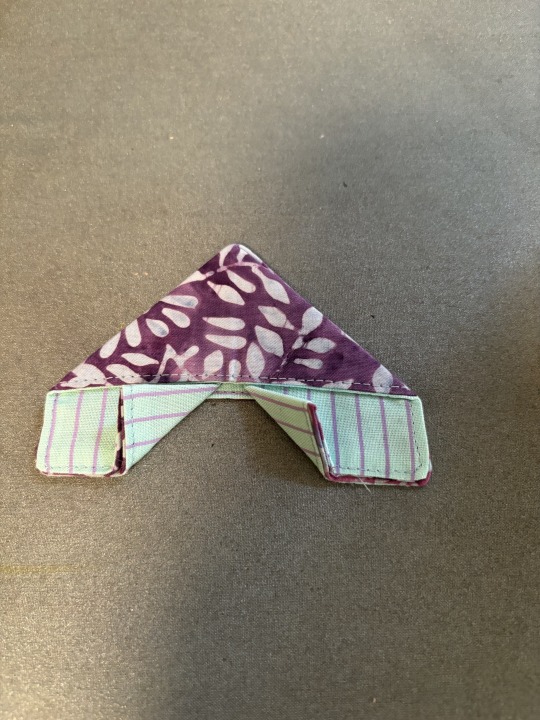
Step 9: Take the tip of one of the corners you just pressed up and bring it back to it's original position. Do not press. Gently press down on the tip of the corner, letting the fabric unfold. The butterfly wing should unfold, with the contrast fabric showing in the centre. Adjust until you have as much contrast showing as you'd like, then press hard. Repeat on the other side.
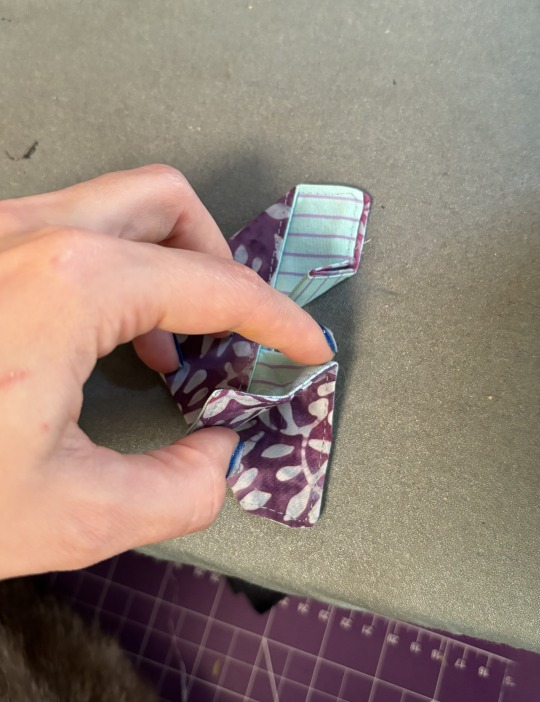
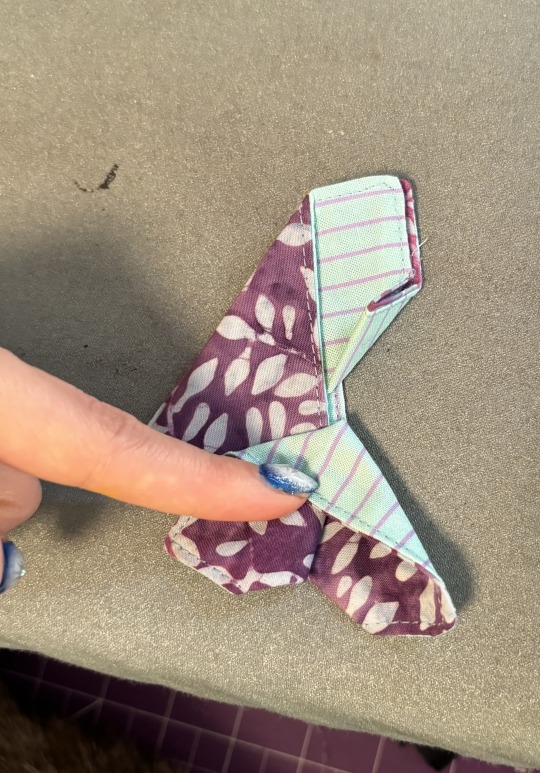
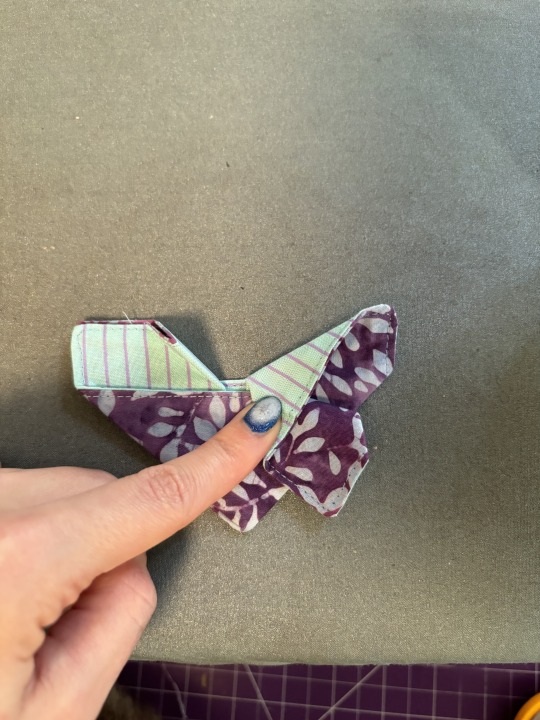
Congratulations!! You now have a butterfly!! You can make a garland, stick them on hairclips, or simply put them on your windowsill to keep you company! If you want to ensure that your butterfly doesn't unfold, you can add a small hand stitch in the centre of the two triangles that make up the "body" of the butterfly right along where the topstitching is.
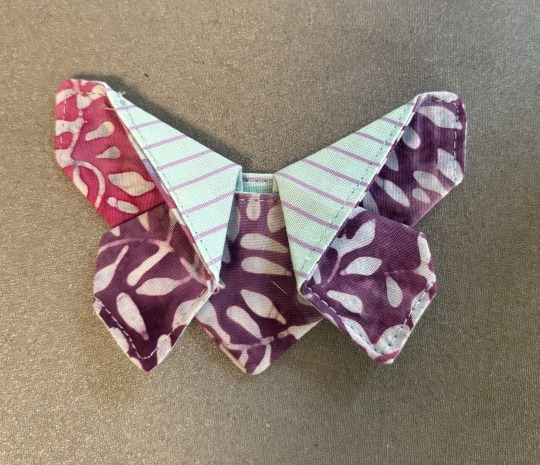
Hopefully this was clear to follow, but if you have any questions, let me know!
202 notes
·
View notes
Text
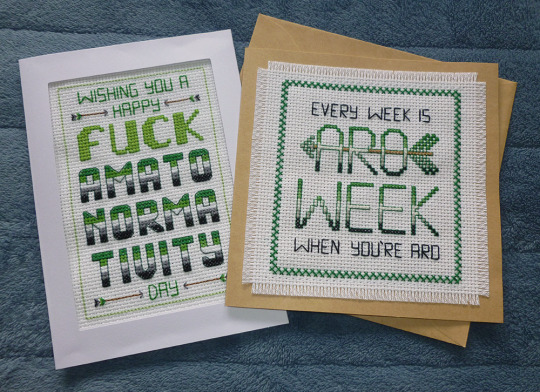
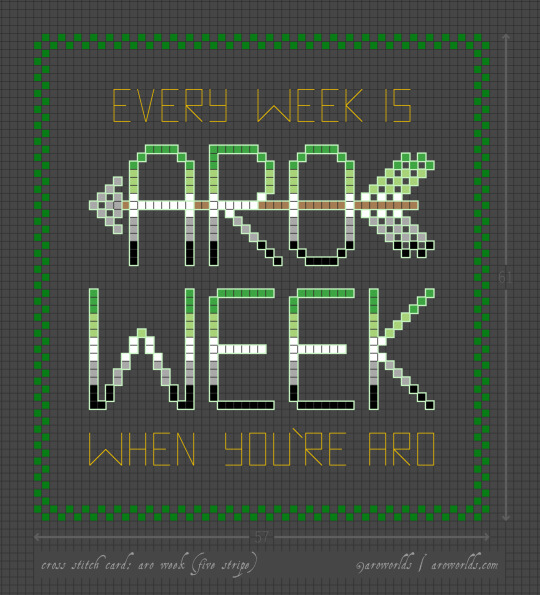

This Aro Week, I've made cross-stitched card designs perfect for gifting to your favourite slightly-snarky aromantic.
The free tutorial includes patterns, card and fabric dimensions and a materials run-down as well as instructions on attaching an aida swatch to cardstock and other border techniques.
#aromantic#aro week#cross stitch#aro feels#aromantic feels#amatonormativity#pride crafts#sewing#embroidery#needlecraft#needlework#green aro pride flag#typographic art#typography#arrows#aro symbols#aro symbolism#link#aro worlds wordpress#tutorial#image description in alt text#text in image#long post
389 notes
·
View notes