#Check out our new Green Screen Tutorial on how to make a photo in Green Screen by Doink
Explore tagged Tumblr posts
Note
How do you make the manga caps transparent?
oh, i have been waiting for this question.
before i start, i’d like to say that i make all of my transparents on my iPhone. my tool of choice? my finger, and the app ibispaint x. i’m sure there are quicker and better ways to make transparents (scratch that: i know there are quicker and better ways to make transparents), but this way is fun for me. feels a bit like i’m coloring a coloring book.
the tutorial is under the cut because i go into quite a bit of detail!
alright, here we go!!

(i blocked out everything in this image outside of the part that we actually care about, because this is a page from a recent chapter.)
STEP 1: alright, so we got a page from the manga with this adorable little shinsou, which we’re going to make transparent. ideally, get a page that has solid black lines, and that doesn’t have little stray fuzzy bits outside of the lines. otherwise your life just becomes a whole lot harder. the reason i prefer not to do earlier chapters is because the website that i use to get pages doesn’t have good quality images of the first hundred or so chapters, and i’m too lazy to find another website. so what we’re gonna wanna do is…

STEP 2: crop the manga page to the part you actually care about! you can also do this in the app that i’m going to use, but i just prefer to do with the photos app. nice and easy.

STEP 3: when you open ibispaint x, there’ll be three options, “my gallery”, “collection”, and “online gallery”. pick “my gallery”, and it’ll take you to a screen that looks something like what’s pictured above. click that fancy little plus button indicated in the image to start a new canvas!
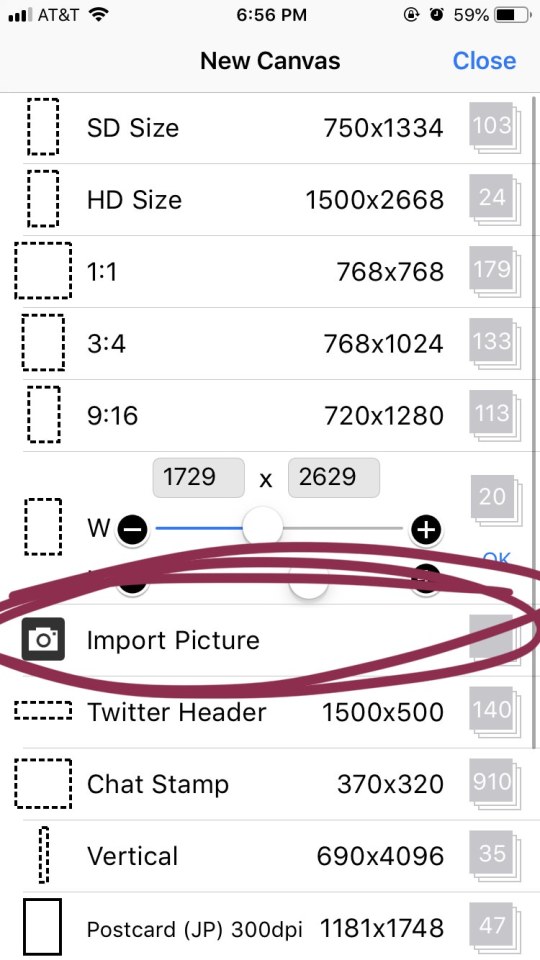
STEP 4: the option you want to pick is import picture.

STEP 5: alright, there’s our shinsou! we’re just gonna click on him, pretty easy, right? also yes, i have an album on my phone dedicated solely to manga caps that i plan to make transparent.

STEP 6: the moment you click the image, it’ll take you to a canvas and ask if you want to extract the drawing. you’re going to hit “OK”, because extracting the drawing makes it so that all the white areas in the image become transparent, leaving only the black and grey.
NOTE: this won’t quite work properly if the background isn’t pure #ffffff white! if you are making a transparent from someone else’s manga cap, make sure that the manga cap has pure white values. if it does not, there will be a very light, barely detectable film of nearly transparent grey values, but it isn’t full transparency. this means if someone uses your transparent over something like…say, a solid colored background, the colored background will appear darker in the final image. there’s a way to get rid of this film, but it’s hard to explain, so please ask me if you want to know how to do this. heroacacaps is a very popular blog that editors get their manga caps from, but their images do not have a pure white background. (it’s kind of funny, i can often spot when someone made their transparents using a manga cap from heroacacaps.)
OPTIONAL STEP: if you are using ibispaint x for importing anything that you don’t want to make transparent, then 99% of the time, you are going to want to hit “cancel”. also, this ONLY works well for black and white images, and trying it on a colored image with make the image turn monochrome. you can still use it on some colored images with white backgrounds, but it you need a few extra steps to make it work (hint: clipping layers, if you know how to use those. duplicate the extracted layer until it is completely black without creating black values outside of the lines, and merge the layers down into one layer. clip the original image over this layer. ask me if you ever want me to go further into detail!)
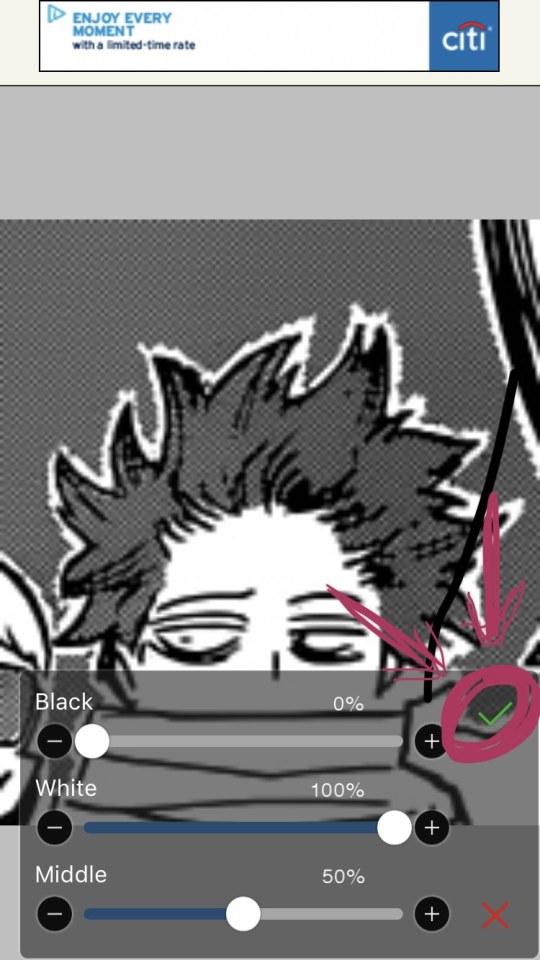
STEP 7: once you hit “OK”, this will pop up!! if you are using a good image where the lines are solid black values, the default option will be perfect for you.
click the green checkmark once you’re satisfied with the appearance of the image!
OPTIONAL STEP: you can manipulate these numbers if you need to. i find this useful for making the lines on sketches clearer. increasing the black percentage makes middle grey values appear darker, and decreasing the white percentage makes middle grey values appear lighter. the white percentage cannot be lower than the black percentage. i’m…not quite sure how to explain what the middle percentage manipulates, but you can mess around with it and see what happens.

STEP 8: so we’ve got the image on the canvas, but now we have a bunch of stuff in the background. to get rid of it, hit the little brush icon, and click the eraser icon. if you’re not sure what the eraser icon looks like, the next image has an image of it in the location where the brush icon was.
next, just…use your finger (or a stylus if you’re fancy) and erase away all of that outside stuff!
OPTIONAL STEP: some manga caps require the extra step of drawing any parts that were covered by things like text bubbles and other characters. it’s sometimes the most tiring part of the whole process, and i can’t really tell you how to do it. you just have to experiment with the available tools. there are lots of brush options you can try to imitate the way the lines look, if you click the button to the right of the brush icon, and there are also (painful and tedious) ways to replicate more complicated textures. i often have to do this step which is why i have an entire goddamn tag dedicated to transparents i needed to patch up.
if there was only one reason i had to pick for why you should respect the people who give you manga caps without backgrounds for you to use in their edits, it’s because a lot of times, they patch up manga caps without any comment. some replicate the actual style so well that you’ll have never realized that the person you got the manga cap from added in their own bits. here’s an example. this transparent? it took an hour. just look at the original, and consider how many different areas are covered by text. imagine how many different textures and lines that have to be replicated.

STEP 9: alright! now we’re ready to actually make this sucker a proper transparent image. this image is actually just lines, and if you stop here, you’ll only have the outline of the image! what we’re going to have to do is take parts that we don’t want to be transparent, and color them white. unfortunately, this is the bulk of the work, most of the time. to do this while still keeping the outline intact, we’ll have to use layers. hit the button with the rectangles stacked on top of each other to open the layers menu.
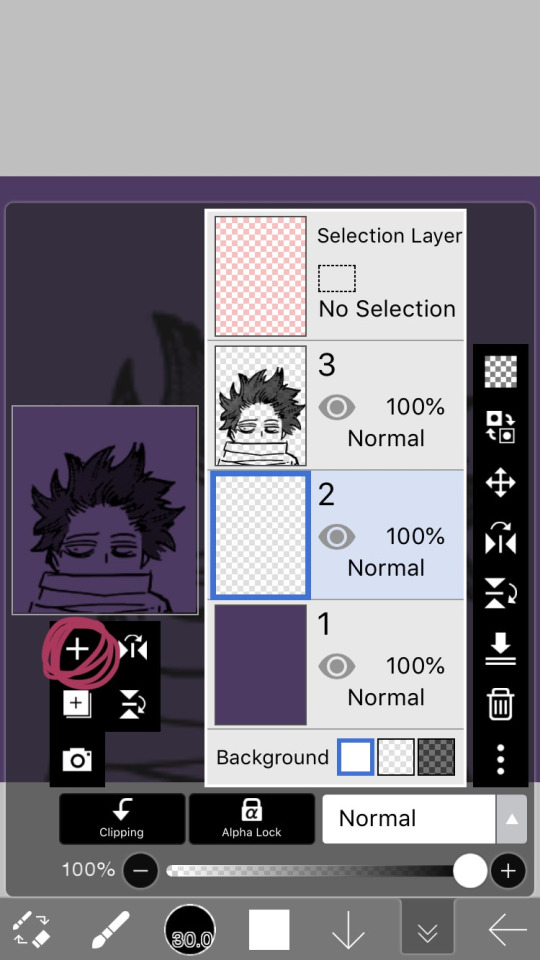
STEP 10: hit the plus button to create a new layer, and make sure to move it underneath the layer with the manga cap. i actually like to make two layers, with the lowest one having a color that’s dark, but not too dark. this added layer makes it easier for me to see what i’m coloring, and i really recommend it. if you don’t do this, you’ll have to hit one of the checkerboard patterns next to the word “Background” located underneath the layers. ideally the darker one, it’s easier to see the white on it.

STEP 11: hit the eraser icon and click the brush icon again to be able to draw! and now, it’s just simple coloring. if you’ve ever used a coloring book, then this might evoke feelings of nostalgia within you, because this is basically just a glorified digital page of a coloring book.
i like to color the parts closest to the line first with a small brush size capable of getting in corners (use the little slider next to the text that says “4.8″ in the image to change the brush size). it’s not that helpful for a transparent as simple as this, but more complicated transparents with lots of corners to color make this step a blessing. or maybe that’s just me.

STEP 12: aaaaand finish coloring all of it, with a bigger brush size. if you colored near the lines first like i mentioned in the previous step, then this will feel a lot more like using a coloring book than the previous step.
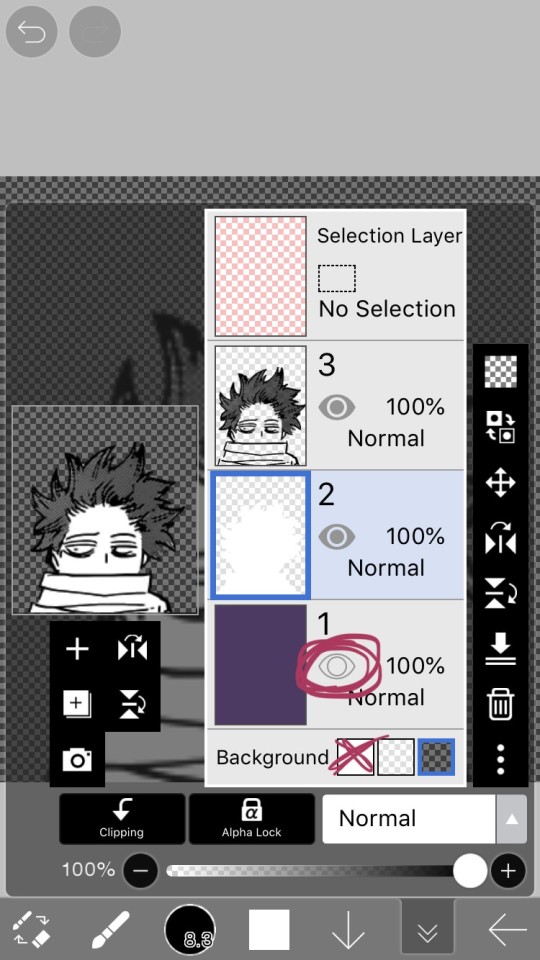
STEP 13: alright! if you used a colored layer underneath to help you see the white, then you’re going to want to hit the little eye button on the colored layer to make it invisible. after all, we do want the image to be transparent.
STEP 14: next, there are three background options underneath the list of layers, next to the word “Background”. if you want your image to actually be transparent, do not pick the solid white option. pick either of the checkerboard options, both will give you a transparent image.
STEP 15: you’re done! now just to save the image. click the little arrow pointing left on the bottom right of the screen. this will exit you out of the canvas, and back to your gallery.

STEP 16: click the button indicated in the above image.
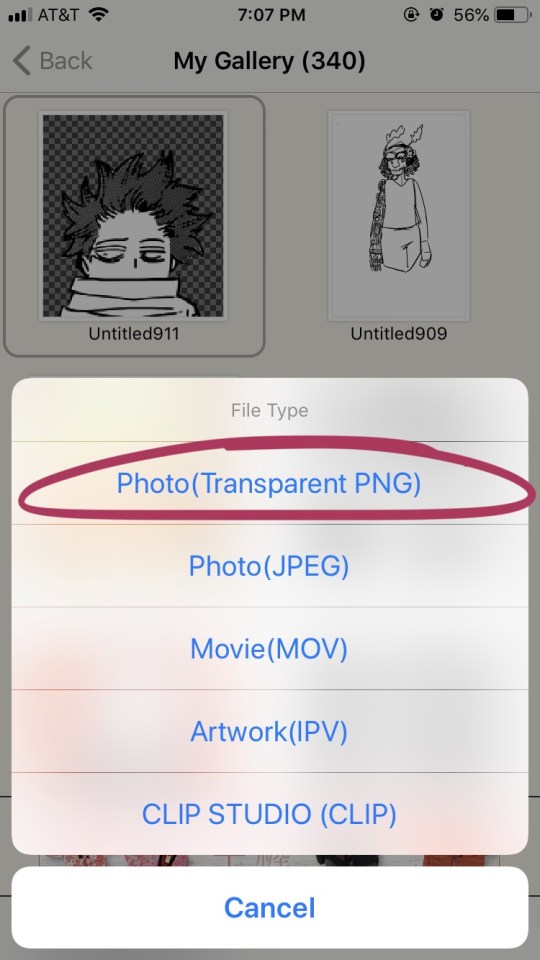
STEP 17: the above will pop up, click “photo (transparent png)” to save the image as a transparent image.
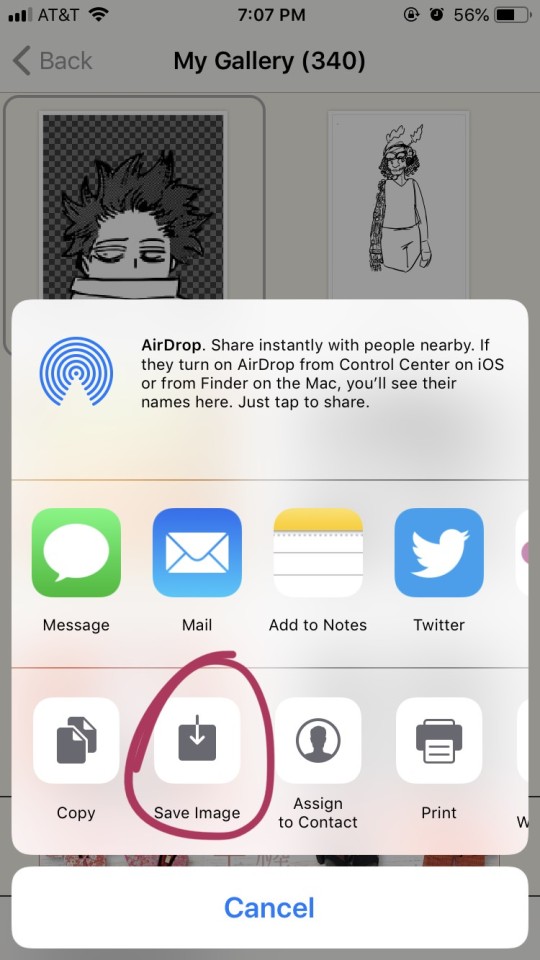
STEP 18: click save image!
and that’s it. you should have yourself one gorgeous transparent in your photos. i would probably suggest checking the image to make sure that it isn’t transparent in areas that you don’t want it to be.
210 notes
·
View notes
Text
Microsoft Movie Maker Download For Mac

Introduction of Windows Movie Maker Download:
Windows Movie Maker Download can be the right choice for you if you want to edit videos. The easy options and easy configuration lets anyone edit their videos quickly. Many of us think about video editing Windows Movie Maker Download. Those who are professionals or have good knowledge of editing video they do that. Now those who don’t know how to edit videos they can’t.
For this reason, Windows Movie Maker download can be helpful for them. You don’t need to be professional in video editing. But how can you download it? Here we will guide you about ‘Windows Movie Maker download.’
HD Movie Maker is a pretty simple, yet effective video-editing and movie-making app. If you want to make and edit a family video, school project presentation, or a short product presentation video, HD Movie Maker shall do it for you. The app lets you make movies from photos, music and video clips. Microsoft movie maker free download - Animoids 3D Movie Maker, Ephnic Movie Maker for Mac, Photo to Movie, and many more programs.
About Windows Movie Maker:
Windows Movie Maker download information can be necessary information for you for editing. Many of us wish to capture a beautiful and lovely video. Sometimes, after catching a video, we wish we could edit our video, which would have been better. But not knowing much about editing and seeing all those complicated options in other apps, we don’t proceed further. In that case, we want simple, understandable, and straightforward software for video editing for us.
For this reason, the name of ‘Windows Movie Maker’ software can be a good suggestion for you. You have seen different video editing software that is hard for editing and not free. But ‘Windows Movie Maker’ is simple, better audio quality, and lastly, it is free. Plus, you don’t have to be a ‘pro’ to edit your video on this excellent software.
Thus, we recommend you Windows Movie Maker download. But before knowing about Windows Movie Maker download, first, let us know about the software. On September 14, 2000, the initial release of ‘Windows Movie Maker’ was introduced with the ‘Windows Me.’ The ‘Version 1.1’ was included in Windows XP a year later and supported creating WMV 8 files and DV AVI. The ‘2.0 version’ got an introduction as a newer update in 2002 that added several new features. The ‘Version 2.1’ was a minor update included in the ‘Windows XP’ in Service Pack 2. The ‘Windows Movie Maker’ in older Windows XP Media Center Edition 2005 had more impressive options. In 2009 an upgraded version of this software was renamed as ‘Windows Live Movie Maker,’ then introduced as a ‘Beta‘ version. Plus, in 2009, it was introduced as an independent product as ‘Windows Live Essentials’ officially.
Why is Windows Movie Maker, right?
Windows Movie Maker is a useful software where those who used it earlier knows the benefits and cause. Many people in 2020 still search and download the Windows Movie Maker on their PC. YouTubers or project video makers can make high-quality videos with better audios. Also, it offers tons of features with simple options. However, let us see the following reasons why ‘Windows Movie Maker’ is so right.’
Windows Movie Maker is simple, easy to edit videos & one thing; it offers 130 effects.
Users will be able to make excellent and high-quality videos.
Consists of good sound quality.
It has a green screen feature where the background can be changed easily.
Compatible for Windows Vista,7,8,8.1, and 10.
Finding Website for Windows Movie Maker:
For Windows Movie Maker download, you will be able to find different websites available out there. Though on the ‘Microsoft’ website page, the Windows Movie Maker can be unavailable. But, other than the ‘Microsoft’ website, you may be able to find it on other websites. Windows Movie Maker download is free. Some websites have extra cost that is not real Windows Movie Maker and its scam. Because this software is completely free. To get the real version, you have to be careful about those websites that claim free-trial & have extra costs. Some may even claim the 2020 version that is not the original one. Please remember there is no 2020 version of this software because Microsoft discontinued it after 2017. But, you can find the older version as classics or as ‘Windows Essentials.’
Again, you may find some websites that allow downloading & contains the real free Windows Movie Maker. Plus, these websites will allow you to download Windows Movie Maker free of cost. You have to search carefully because some websites don’t have the originals while some have. The websites which don’t have Windows Movie Maker nay have removed it. Or else they may have changed the link & so it is not workable now. Thus, if you want to download the windows movie maker for free, you need to find these websites. However, you may see ‘Windows Movie Maker classics’ written on some websites. That is the real and original Windows Movie Maker software. We provided a link here to help you with Windows Movie Maker download free of cost and safety. You can download from this safely, & it is free of malware. Even it also has a tutorial.
Windows Movie Maker Download:
For Windows Movie Maker download, you have to follow the following steps. We will guide you through these steps-
Downloading the software:
When you find the website where your software is free, check-up, and browse the whole website. Many of the websites will generally contain ‘Windows Movie Maker’ or ‘Windows Movie Maker Classics.’ Some include other pages or take you to new pages. You will go up to finish and will standby there for a few minutes or two. You need to click the ‘Download’ option. There will be some delay till it is downloaded just after tapping a legit link to your software.
Opening the Setup File of Movie Maker after download
Completing the download, the ‘Windows Movie Maker’ setup file should be opened up after your download. The download takes several minutes. Then, to open this, you have to ‘double-click’ on the ‘setup-all’ file. You will find the file in your PC’s default download location.
Selecting the Options
Just clicking two times on the ‘setup-all,’ till the other options come, you have to wait a bit. When a box containing ‘setup-all’ appears, you tap the option ‘Yes.’ After clicking on the right, it will start the Installation window of ‘Windows Movie Maker.
Clicking on the ‘Show-Details’ option
In order to view the details, you have to select on the option’ Show-Details.’ In your window you can search it on the left corner and in the bottom side. Selecting this, we will see a bar will appear in front of us. There we can see the progress in percentage will be visible. Moreover, the bar shows you the required information on what program the software is now installing.
Some other procedures:
Wait till the installation is complete:
After previous procedures and seeing the details, you will wait to install the software ‘Windows Movie Maker’. Generally, this software needs to install that has to be the first task. It will be helpful if you wait until such tasks complete the installation. You can proceed that time when you can see the program name changed. The program name will later switch to a different task like the ‘Mail.’
‘Start-Menu’ Opening:
It takes several minutes of waiting but the process is still remaining. The task will continue but some other things will go on. So, you will open up the ‘Start Menu’ in this following step. We can find the ‘Start Menu’ in the bottom portion and on the left-corner of your screen. After being able to find it, clicking the logo looks like ‘Windows,’ this will open up your ‘Start Menu’.
Searching the Windows Movie Maker after download and starting installation:
When you will open the ‘Start Menu,’ you will search out by typing the ‘Windows Movie Maker‘ on your PC.When your typing is done the PC will search for you the installed software on your PC.
Clicking the ‘Windows Movie Maker’ file:
After the search is complete, & your software is in front of your screen, select ‘Windows Movie Maker.’ For opening the window of the ‘Windows Movie Maker’ conditions & terms, this will be helpful. So, you have to find a ‘camera reel icon.’ You gonna see it over the ‘Start Menu’ of your respectable windows. Then just click that after you see it and the task is done.
The terms and conditions of installation window:
We included this section as some don’t know what to do here. Here you will do the following steps. During installation you will follow them.
Accepting Options
Search for an option that is named as ‘Accept’ and select on that ‘option.’ After selecting the option of acceptance, the program or software will open up. If software does not open even after accepting, then you should repeat above, procedures number-1,2,3 & lastly 4. You have to remember here one thing that is, ‘without opening the file do not close or stop installation.’
Closing the tab of the installation
After getting all of these above steps complete, the installation step will be complete. The ‘Installation’ window will open up with a message saying ‘Finished.’ You will select on the ‘Close’ option that can be seen on the right and down side. Then confirming your decision you can now easily advance with the opening of ‘Windows Movie Maker.’
So, following the above processes plus steps your task is complete about ‘Windows movie maker Download.’
Installing All of Windows Essentials in Windows 10
It is an essential option for those who are using Windows 10 now. Windows 10 is latest version of Windows and many of them cannot run ‘Windows Movie Maker’ in Windows. Again, most of the programs like Windows Movie Makers, Windows essential programs are not installable in windows 10. Again many of them can’t find it in Microsoft page because it was discontinued after 2017. But you can download ‘Windows Movie Maker’ that is Windows 10 compatible. To make this compatible with Windows 10, you have to click on the “Install all of the Windows essential.” You will find it on upper side of the screen. This will make the Windows Movie Maker compatible with windows 10. You can download from here.
Frequently Asked Questions & Answers:
Is Windows Movie Maker cost free or trial ?
Ans: Actually, Windows Movie Maker download is totally free. Some websites have extra costs that is not real Windows Movie Maker and its scam. Because this software is completely free. To get the real version, you have to be careful about those websites that claim free-trial & have extra costs. But, the older version of 2012 can be found as classics or as ‘Windows Essentials.’ Again, you may find some websites that allow downloading & contains the real free Windows Movie Maker.
Is ‘Windows Movie Maker’ usable in 2020?
Ans: Yes, of course. Windows Movie Maker download is possible in 2020. Though, may be a little bit difficult to get this cool software. But, if you want to use this, you just have to carefully browse it all over the internet.
Did it release any latest version recently? Is there any latest version of the Windows Movie Maker software?
Ans: No, Microsoft didn’t release any Windows Movie Maker recently. So, there is no latest version of this software.
Which company invented the ‘Windows Movie Maker’ software?
Ans: Microsoft took the first initiative, created the windows movie maker, and released it first in 2000. After that, Microsoft included this with the other two newer versions of windows.
Conclusion:
We tried our best to give you every type of information through this writing ‘Windows Movie Maker download.’ There were some easiest way & available tricks in our sleeve to guide about Windows Movie Maker download. We gave you the most notable steps for making the software compatible with Windows 10. In this article our readers will get all the details and needed infos of Windows Movie Maker download. If you face difficulties, then it would be helpful for you to save it. We hope you find it useful. Besides, keep following our website for more amazing tips.
Moviemaker software allows users to develop quality videos by using video editing and video creation tools. User-generated videos are fast replacing mainstream media outlets. With contemporary media platforms like YouTube and Facebook gaining more usage, video editing is fast becoming popular. In this regard, software developers are putting out moviemaker software each day. This makes it difficult to choose the best program for producing great videos.
Related:
Virtual Dub
While creating movies was dubbed a task of the most experienced moviemakers a long time ago, Virtual Dub changes this belief system by being the simplest moviemaker that anyone can use. Best for creating movies of different file formats, this solution can help you take your money project to the next level.
Ephnic
The beauty of this solution is its simplicity. So, users who are looking for a solution that’s a little more simpler in terms of the user interface, yet with high quality interface, can depend on this solution for their movie making requirements. Even if you are just a new moviemaker, this tool will do the work for you.
NAWMAL
Whether you want to make a short movie for your friends, edit a song you and your friends just did or you are doing a movie assignment, NAWMAL will do the job for you. Because NAWMAL guarantees the best results, it is the best software that you can trust for your movie production.
Movie Maker Software for Windows
Windows Movie Maker is a popular video editing tool, especially for Windows users. The program has quite useful features including video transitions, audio tracks, Auto Movie, Video Effects, and timeline narration. You can also add credits, titles, and subtitles with Windows Movie Maker software. The drag and drop capability makes it easy for you to add videos to the editing tab. You can add new transitions and effects or modify existing ones using XML codes. What’s more, Windows Movie Maker allows you to share your videos directly to your favorite social media platforms.
Wax
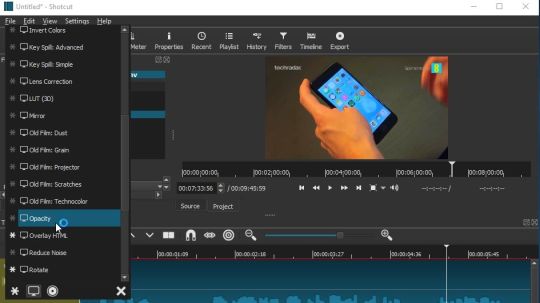
Kizoa Online Movie Maker and Video Editor
Movie Maker Software for Mac
Adobe Premiere Pro video editing software that works well for both hobbyists and professionals. It is a stand-alone application, which means it is a plug and play affair. With this app, you can create quality 2D and 3D special effects and even add them to other video editors. You can even plug-in this software with Wax movie maker.
Movie Maker Software for Linux
Avidemux video editor is designed for your simple filtering, cutting, and encoding tasks. The video editor supports various file types and is available free for Linux, Mac OS X, Microsoft and BSD. You can automate tasks using job queue and let the powerful scripting features take control.
What is Movie Maker Software?
Microsoft Windows Movie Maker Free Download
Movie Maker Software is a content creation platform that is compatible with all operating systems with the GNU license. The free open source program has many up-to-the-minute features such as character animation capabilities, modeling tools based on modifier concepts and node based materials.
The software also allows you to have live preview, audio mixing, filters, speed control, transitions, adjustment layers and more.
Video Editor allows users to combine various media types like videos, audio files, and photographs into one out-put file. The video editing and compositing software can handle 16 audio channels per track.
More to that features like key smoothers, UV and Chroma Keying and hue adjustments to guarantee exemplary quality video output are present in many software.
Benefits of Movie Maker Software
They make video editing much easier with numerous simple keyboard short cuts. The moviemaker software uses some cool features to edit your videos as has garnered a reputation for being one of the best software for windows. The program fully supports FLV, MPG, and WMV files just to mention but a few.
Free Mac Movie Maker Download
The world is fast adopting user generated media especially videos and pictures. Using video editing tools will give your videos and images the quality they need to be attractive.
Free Microsoft For Mac Downloads
A simple video can actually be the break you need to earn money. Platforms like YouTube enable users to monetize their videos whenever they are used in online marketing campaigns.
Windows Movie Maker For Mac
Related Posts

0 notes
Photo

Use Elementor Template Kits to Create a Custom WordPress 404 Page
Even the best website will throw a 404 error from time to time, so why not use this error to your advantage?
You might take this opportunity to entertain visitors with a humorous or quirky 404 page that really showcases your personality. Or perhaps you try to re-engage disappointed visitors by highlighting all of your website’s most important and interesting content.
You might even use your 404 page as a tool to drive conversions and secure additional sales, by offering a discount code as an apology—or even a reward for “finding” your 404 page!
In this series, our mission is to create a 404 page that people won’t mind visiting. In the first part, I showed you how to add the popular Elementor plugin to your WordPress website. We then used Elementor to quickly and easily create a 404 page using a ready-made template, before building a completely custom 404 page, without using a template.
WordPress
How to Create a Custom 404 Page With WordPress and Elementor
Jessica Thornsby
In this follow-up post, I’ll show you how to access hundreds of 404 page designs, using Elementor and Envato Elements.
Web Design Made Easier, With Template Kits
Why restrict yourself to one template, when you can install an entire template kit?
Elementor template kits, as found on Envato Elements, are themed collections of templates that provide all the pages your website could possibly need, including the homepage, Contact Us page, blog, archive, About Us page, and much more.
If you want to mix and match, then template kits also provide stand-alone blocks that you can drag-and-drop into your page layouts, to create your own unique designs.
Template kits can take the pain out of designing and building a WordPress website. Simply choose your kit, generate all the required pages, make a few customizations, and then connect these pages together—and congratulations, you have a new website!
Alternatively, you can use template kits to enhance an existing website, by adding designs and layouts that give your website an entirely new look and feel, with minimal effort.
Envato Elements provides a wide range of professionally-designed template kits, ranging from flexible, multipurpose templates to industry-specific kits that were designed with your niche firmly in mind—whether that’s pet boarding, skin care, digital marketing, ice cream, or anything in between!
What Is Envato Elements?
Envato Elements is a monthly subscription that provides access to all the plugins and add-ons that we explore throughout this tutorial, plus more than 900,000 additional resources! Along with Elementor template kits, these include graphic templates, premium WordPress themes and plugins, stock images and video, online courses, and more!
You get unlimited, royalty-free access to all of these assets with an Elements subscription.
WordPress
34 Reasons Envato Elements Is Great for WordPress Developers
Daniel Strongin
How to Create a 404 Page With Elementor Template Kits
In this section, I’ll show you how to create a 404 page, using the Envato template kit of your choice. Since we’re working with a full template kit, after completing this section you’ll have access to a range of complimentary templates covering all the most common webpages—perfect, if you like your new 404 page so much that you decide to extend its design to other areas of your website!
To create a 404 page using Envato Elements, first head over to the Envato Elements website.
Find the template kit that you want to use and select Download. In my screenshots I’ve opted for the KickStart template kit. You’ll be prompted to either choose a new project, or add this kit to an existing project. Then your chosen kit will download automatically.
Now log into your WordPress website.
In WordPress�� left-hand menu, select Templates > Add New and select Import Templates.
Next click Choose file and select the zip file that you just downloaded and select Import Now. After a few moments, you should see all the templates that are included in your chosen kit.
Towards the top of the screen, select Add New. Then open the Template type dropdown and select Single.
Open the Select post type dropdown and select 404 page. Give your template a unique name, and then select Create template. In the subsequent popup, click My Templates, then find Page - 404 and select its accompanying Insert button.
Elementor will now load the Kickstart 404 template.
If you’re happy with how this page looks out-of-the-box, then you can publish it immediately. However, Elements templates are easy to customize, so let’s look at a few easy changes that you can make to your 404 template.
Add Your Own Text
Elements templates such as the KickStart 404 template often include boilerplate text that you can replace with your own, custom messaging. To change any of the text in your 404 page just click to select the text that you want to update. Then, in the Elementor Panel, replace the stock text with your own messaging.
Link to Your App Store and Google Play Listings
If you have a mobile app, then the KickStart 404 template has Google Play and App Store graphics that can encourage people to download your app.
By embedding your app’s links in these images, you can drive people towards your Google Play and App Store listings:
Click to select the image where you want to embed your link.
In the Elementor Panel, open the Link dropdown and select Custom URL.
Enter the URL for your app’s Google Play or App Store listing.
Repeat the above steps if your app is available on both Google Play and the Apple App Store.
Twitter, Facebook & Instagram: Adding Social Accounts
Do you have a social media following? Regardless of whether you promote your website on Facebook, Twitter, Pinterest, LinkedIn, or all of the above, you should consider adding links to all of your social media profiles.
By adding social links to your 404 page, you can gain some additional followers, while also reinforcing your brand and creating a consistent look and feel across your website.
To add social links to your 404 template, first find the Social Icons widget in the Elementor Panel. Drag and drop this widget into the section where you want to display your social media links. By default, Social Icons features the icons for Facebook, Twitter and YouTube.
To edit the social icons, select the Content tab from the Elementor panel.
If you want to remove Facebook, Twitter and/or YouTube from the default Social Links widget, then click their accompanying X icon. To add more social media icons, click Add Item.
Once you have your icons, you need to link each icon to your corresponding social media profile. In the Elementor Panel, click to expand the first social media section.
In the Link field, copy and paste the appropriate link, for example linking the Twitter icon to your website’s Twitter profile.
Rinse and repeat for every social account that you want to feature on your 404 page.
Access Hundreds of Template Kits
You can access hundreds of template kits on Envato Elements—or you can browse, preview, and import any of these templates without ever leaving your WordPress account.
If KickStart has you eager to explore additional Envato Elements Template Kits, then in this final section we'll setup the free Envato Elements WordPress plugin. Once this plugin is installed, you’ll be able to access the entire Envato library from inside your WordPress account.
To setup the Envato Elements WordPress plugin:
In WordPress’ left-hand menu, select Plugins > Add New.
Search for the Envato Elements–Photos & Elementor Templates plugin. When this plugin appears, select Install.
Select Activate.
Next, you’ll need to link this plugin to your Envato Elements subscription. In WordPress’ left-hand menu, select the new Elements item.
In the toolbar, select Connect Elements Account.
In the subsequent tab, enter your Envato Elements username and password, and then click Sign In.
Now, whenever you’re building a webpage in the Elementor Editor, you’ll see a brand new icon: the green Envato logo.
Click this icon, and you’ll be able to browse, preview and import any template from the Envato Elementor library.
Want More 404 Page Designs? Try These 7 Template Kits
Envato Elements provides template kits for every niche, ranging from fitness, to fashion and beauty, photography, real estate and everything inbetween. However, if you’re looking for a template kit that provides a beautiful, feature-packed 404 page, then we’d recommend checking out the following 7 template kits:
1. Phoenix: A Bold and Beautiful Website Design
The Phoenix template kit boasts a distinctive, minimalist design, and its 404 page is no exception!
Phoenix’s 404 page fits seamlessly with the other templates in this kit, which are all based around a landscape photograph. This 404 page keeps things streamlined by only including a short 404 message and a Go Back link.
2. Style Your eCommerce Store, With Samex
Looking to launch an online store, using WordPress, WooCommerce and Elementor?
The Samex template kit comes packed with eCommerce-themed features, including live Ajax search, product filters, and multiple product gallery options, plus support for wishlists and Product Quick View.
The Samex template kit also provides an eye-catching 404 page.
This 404 template features a Search bar, ensuring that customers can always search your product catalog—even from your 404 page!
3. Restaurant Template: A Feature-Rich 404 Page
The foodie-themed Restaurant template kit is perfect for promoting your bar, cafe or restaurant, but would also be ideal for other areas of the hospitality industry, such as hotels and tourist attractions.
This 404 page continues the template’s distinctive yellow and olive color scheme.
In addition to the usual 404, Contact Us, and Single Post templates, the Restaurant kit also provides templates that are specifically aimed at the hospitality industry, including Book a Table and Menu templates.
4. Sell Your SEO Services, With Onum
Do you offer SEO (Search Engine Optimization) services? Maybe you’re a digital marketing agency or freelancer, or perhaps you’re an SEO specialist?
However you’re involved in the world of SEO, Onum has the templates you need to promote your services, including 8 homepage layouts, 3 header layouts and 3 footer layouts.
Of course, Onum also has a 404 page.
This 404 template reflects Onum’s distinctive blue and orange color scheme.
5. Wendy: A Multi-Store WooCommerce Theme
If you’re looking for a WooCommerce-ready template kit, then Wendy is designed specifically for WooCommerce-powered online stores.
To help convince customers to splash out on your products, Wendy provides Product Quick View and product image zoom, plus the ability to filter products based on size, color and material.
If visitors do wind up on your 404 page, then they’ll have everything they need to navigate back to your “main” website.
Wendy’s 404 page provides a link to your website’s homepage, plus a Search bar that visitors can use to browse your product catalog.
6. Start Your Own Crypto-Trading Business, With ITok
If you’re an ICO advisor, Bitcoin expert, or operate any kind of crypto-trading consultancy, then the distinctive ITok template kit is designed with your business firmly in mind.
The ITok template kit features a bold color scheme and modern design. The 404 template is distinct, but the ITok header and footer elements help tie the 404 page into the rest of the ITok template kit.
Although designed specifically for the cryptocurrency industry, ITok would also be a good fit for other digital businesses, including SEO consultancies, website design and development agencies, and digital marketers.
7. Cafe No.1: A Streamlined Hospitality Kit
Cafe No.1 is a sleek template kit that’s perfect for promoting your hospitality business, especially cafes and coffee shops! This template kit makes heavy use of header images, and its 404 page is no exception.
Since it’s aimed at the cafe, bar, and restaurant scene, it’s no surprise that the Cafe No.1 kit includes templates that are specifically designed for the hospitality industry. The Cafe No.1 template kit provides the usual About, Contact, and FAQ templates, but it also provides some unique foodie-themed templates, including Reservations, Reviews, and Menu.
Conclusion
In this article, we’ve touched on a few of the Template Kits you can add to your WordPress website, but Envato Elements has hundreds of professionally-designed templates for you to choose from.
To find out more, check out the Envato Elements website, or purchase your subscription today.
WordPress
Create Websites Fast With the Elements Plugin for WordPress
Ashraff Hathibelagal
WordPress
34 Reasons Envato Elements Is Great for WordPress Developers
Daniel Strongin
by Jessica Thornsby via Envato Tuts+ Code https://ift.tt/31GYSsk
0 notes
Text
How to Enable Instagram Dark Mode (+ Facebook, Twitter, Pinterest & YouTube)
Instagram Dark Mode has been available for a few months now, but have you taken advantage of it yet?
Instagram Dark Mode enables you to “turn the lights out” and use the app with a black color scheme. It’s also available for Facebook, Twitter, Youtube, and even Pinterest now! Here’s a quick guide on why you could consider making a switch and how to do it:
How to Enable Instagram Dark Mode (+ Facebook, Twitter, Pinterest & YouTube)
Is Dark Mode Better For Your Eye Health?
This might come as a surprise to you, but Dark Mode was the default mode for decades in the early days of computing. Remember those Matrix-like green-on-black monitors? Those were known as monochrome monitors, which were black due to the phosphor coating inside the screen.
It’s been a long time since manufacturers last painted monitors with phosphor, but some people still swear by dark mode. Apple has been offering dark mode feature since September 2019, announcing that this new dramatic look is not only better for photo and video editing, but is also easier on your eyes. Many thus believe that Instagram Dark Mode, too, is more gentle on your eyes.
However, you should know that this is simply not true.
There’s a wide array of human experience that keeps that from being true for everybody. There’s no science showing that dark mode is any easier on the eyes than normal mode, so it’s still up for debate. In fact, it’s the duration of use or the brightness of your screen that might affect your eye health, says Dr. Euna Koo, an ophthalmologist at the Stanford Byers Eye Institute. Research actually shows that “blue light”, which is part of the light spectrum made of short, high-energy wavelengths, is a typical factor in eye fatigue, so adjusting your display to warmer (or yellower) tones could do the trick (here’s a tutorial on how to do this for iOS).
In addition to that, people get dry eyes from not blinking for long periods, as we tend to stare at the screens literally forgetting to blink often enough. Typically, any human being blinks 15 times a minute, but it can decrease as low as 3.6 when we’re gazing at our phones or computers — causing serious eye fatigue and dryness. That can further contribute to having headaches and even blurred vision. The solution lies in taking more frequent breaks from your screen time and simply not forgetting to blink — as simple as that!
The Real Benefits of Dark Mode
So, what are the real benefits of dark mode?
For starters, Dark Mode is trendy. Memes, Twitter quotes, etc., are often displayed in Dark Mode on Instagram now, so it could be wise to keep up with trends if you want to resonate to a young audience.
Secondly, Dark Mode is good for your battery life, as the swaths of black areas in dark themes conserve battery. Which means you can scroll Instagram for longer, if needed!
🤓
In October 2019, Adam Mosseri, Head of Instagram, announced that Dark Mode is now available for Instagram too:

If you’re looking to make the switch, keep on reading to learn how for both iOS and Android:
How to Switch on Instagram Dark Mode for iOS
If you want to start running Instagram in Dark Mode, you need to make sure your device’s operating system is updated to iOS 13 first.
For that, go to your Settings → Software Update. There, you’ll be able to see which software version is currently running on your Apple device and if you need to update your system.

Once you’ve ensured you’re up-to-date with your iOS software, open the Settings app again to enable Dark Mode. Go to Display and Brightness and select Dark, instead of default Light, mode:

There, you can also turn on Automatic Mode, which would automatically switch to Dark Mode at sunset and back to Light Mode at sunrise. Up to you!
Having done that, now that you’ll go to Instagram, your favorite app will display in the new black theme!

If not, fret not.
If you see that the Instagram Dark Mode isn’t enabled, then you probably need to check if you have the latest version of the app.
Head to the App Store and search for Instagram. If you’re running an old version, you’ll see a suggestion to make an update. Once that’s done, you’ll be able to run Instagram on Dark Mode!
Remember: iOS Dark mode impacts all of your apps, not just Instagram. You won’t be able to select it for specific apps only. This means that once Instagram Dark Mode is switched on, you’ll automatically see the change enabled on other apps that also have Dark Mode compatibility — like Twitter or Pinterest.

For apps like FB Messenger or YouTube, you’d have to switch Dark Mode on manually. For Messenger, go into your app first and click on your own profile picture in the top left corner. There, you should be able to make the switch with a click of a button:

For YouTube, head into your Account settings, click Settings and enable the Dark Theme option right there:

How to Switch on Instagram Dark Mode for Android
To enable Instagram Dark Mode, make sure your device is updated to Android 10. Similarly to the previous steps, also don’t forget to check you have the latest Instagram version, too!
Then, follow these quick steps to start running your Android device on Dark Mode:
Go to Settings → Display → Advanced. From there, select Dark from the Device theme menu:

Et voila! Now Dark Mode will automatically start to run both on your phone and all compatible apps — that include Instagram 💪
Bonus 1: Enable Dark Mode on Threads
If you started using Threads already, Instagram’s messaging app for close friends, you can use Dark Mode there as well, which, unlike on Instagram, is more personalized. This new app allows you to choose between different modes of darkness, making it more adjusted to your own preference.
When you tap the Home button in the top left corner of the app, go to Themes. There, you’ll see a variety of display options available during Daylight, Twilight, Midnight, Aurora, and Sunrise. Once you’ve set your theme in Threads, it will override the Dark or Light Mode that you’ve selected from your phone — which means that all the other apps will run on Light or Dark Mode, but Threads will run on whatever theme you set!

Bonus 2: Get Dark Mode on Iconosquare
Did you know that Iconosquare offers Dark Mode too?
Well, if you didn’t, now you do!
To enable dark mode on Iconosquare, go to My account → Settings → Themes.
There, you can easily switch between the classic white theme or the new dark theme. Don’t forget that these display settings affect all of your Iconosquare accounts on the browser of your choice, and these settings are only visible to you. Meaning, if you have a team of people using Iconosquare, your display settings won’t overlap with theirs.

Conclusion
Turning on Dark Mode does have some benefits, so it’s worth trying out the feature yourself to see if you like the new look. After all, how else would you know?
Have you tried Instagram Dark Mode yet? Leave a comment to let us know!
https://growinsta.xyz/how-to-enable-instagram-dark-mode-facebook-twitter-pinterest-youtube/
#free instagram followers#free followers#free instagram followers instantly#get free instagram followers#free instagram followers trial#1000 free instagram followers trial#free instagram likes trial#100 free instagram followers#famoid free likes#followers gratis#famoid free followers#instagram followers generator#100 free instagram followers trial#free ig followers#free ig likes#instagram auto liker free#20 free instagram followers trial#free instagram followers no#verification#20 free instagram likes trial#1000 free instagram likes trial#followers instagram gratis#50 free instagram followers instantly#free instagram followers app#followers generator#free instagram followers instantly trial#free instagram followers no survey#insta 4liker#free followers me#free instagram followers bot
0 notes
Text
Everything you need to know about Instagram throughout 2019
Since its launch in 2010, Instagram Application added so many features to benefit both users and marketers. Let’s see what the 2019 updates were, and how they benefitted businesses globally.

In January 2019, Instagram introduced a new feature where the user can post to multiple accounts at once. While sharing any post, the user got a new option to “Post to Other Accounts”; click on the link (https://bit.ly/2sQza5Y) to know all the details on how this update works. This has been very beneficial for users handling several accounts. Rolling out this feature to provide a better experience for people who often post to multiple accounts. This is especially of value to accounts targeted to the same community.
When IGTV standalone app was launched in 2018, the company thought that the feature will compete on very high standards. CEO, Kevin Systrom, stated that “It was time for video to move forward and evolve”. Unfortunately, the results weren’t as expected. Therefore, the IGTV app was linked to Instagram and the company launched the “Post a Preview” option in February 2019. This will make the first 60 seconds of the video uploaded as IGTV to appear in Instagram’s home feed as a preview before redirecting the users to the full video; you can find here (https://bit.ly/2QJ4FXm) everything you need to know regarding this update. People tried to benefit from the new update as much as possible by grabbing users’ attention during the first minute of the video and without having them leave the Instagram app. Accordingly, views on IGTV videos increased by 300-1000%, proving that this new feature was not a failure.
Mercedes Benz USA, started to use this feature in 2018, by sharing two videos; and 9 videos were uploaded on IGTV during 2019. However, a huge global campaign was launched in March 2019, as part of the company’s CSR, #WomensHistoryMonth. Mercedes Benz shared a small documentary about one of the most successful rally drivers worldwide, Ewy Rosqvist, who won the Argentinian Grand Prix in 1962 by beating the record speed. The purpose of this campaign was to remind all women that they have no limits. The video shared created a huge buzz and gained 197,736 views and 287 comments; which was the highest number of engagements among all shared IGTV videos. The social campaign united Mercedes-Benz with Matchbox and the NGC Project, and it continued by sharing 2 additional videos related to the same topic throughout 2019, to change the perception of girls relating to cars.

In March 2019, Instagram Shopping was released and made users’ lives way easier. In this fast-paced life, people search for the most rapid way to do everything, and shopping through Instagram saves a lot of time. Users, scrolling through their home feed, can simply tap on the product, where a pop-up window appears with the product photo and price, along with a “Shop Now” button that will redirect them to the landing page where they can immediately buy it. On the other hand, Instagram Shopping was very beneficial for businesses as well, because they had the possibility to market their products directly on the post or story without having to link them to the bio. Also, businesses increased traffic on their websites through this strategy, considering that Instagram now has 1 billion active users. Additionally, brands that don’t have a good SEO positioning, doubled their effort to increase brand awareness and brand recognition through Instagram. Users in Lebanon, KSA, and UAE benefited from this feature starting May 2019.
In June 2019, Instagram’s “Paid Partnership” update was launched. No doubt that influencer marketing is booming day after day. Influencers give credibility to the brand they promote, they can help the business target new audiences by creating more authentic connections with them. Accordingly, businesses are benefiting from the “Paid Partnership” feature to raise brand awareness by previewing the content on the non-followers feed. This new feature helped influencers disclose when a post is sponsored and helped businesses gather insights about how their sponsored content campaigns performed. It’s important to mention that “Paid Partnership” can extend branded campaigns’ lives and make them more popular. You can visit (https://bit.ly/300pKRt) to know everything related to the promotion process. For instance, one of the biggest campaigns using Paid Partnership during 2019, was for Khloe Kardashian and Coca-Cola. The media personality posted a picture of her drinking from a can of coke and wrote “Not an ad” in the caption. This post received a very high number of reach and engagements, proving that paid partnerships between brands and influencers are a win-win situation for both parties.
In July 2019, Instagram tested hidden likes features. Likes were no longer available to followers, yet the content creator can still see the number of likes each post received. Facebook CEO, Marc Zuckerberg stated, “You can see who liked a photo or video, you can tap through to see the list, and if you have the time you can add them all up yourself”. Instagram tried to do this to promote a positive environment within its community to shed light on the content itself rather than the number of likes. Sometimes people don’t post a picture because they’re afraid it won’t get enough likes. With this new feature, the quality of each post shared mattered more than the number of engagements. This can be beneficial for emerging accounts because sometimes users judge the quality of the product marketed based on the number of likes posts are getting on Instagram. Click on the link (https://bit.ly/35vzQuK) to see how this feature could help the social media community be more personalized and less judgmental.

In September 2019, the “Paid Promotion” feature was also added to IGTV channels. To know how Instagram is trying to push more traffic to IGTV, you can visit (https://bit.ly/37xehvk). People used to add their videos to their stories so that anyone who sees the story can swipe up and be redirected to the full video on IGTV. With the new “Paid Promotion”, accounts were able to access more people within their targeted audience. More users could watch videos about their favorite topics (gym, cooking, make up tutorial, motivational speeches, spiritual teachings…). The new feature was of value in terms of shopping as well, because businesses started promoting their products through long videos and provided users with all the needed details in one single video.
In October 2019, Instagram introduced customizable stories, where users can change the color of a story by simply holding your finger on the screen to replace the default background with something else. Users can also add music to their stories as a sticker, but this feature is exclusively available in selected countries because Instagram likes to roll out its updates slowly to minimize congestion and tech issues. Therefore, the update will be soon available everywhere.
In addition to all the above added features, Instagram introduced a few stories’ updates: the “Moment Countdown”, “IG Stories mentions”, and the “Close Friends”.
Moment countdown is a very interesting way to create a buzz for certain information about your account (birthday, anniversary, wedding date, proposal…). However, businesses benefitted too from the countdown in stories to build hype around their brand (new product line extension, a new branch, announcing winners for a certain competition…). Using a countdown usually excites the followers about what is the content creator up to. Any client planning to introduce a new product can benefit from the “Moment Countdown”.
Instagram stories’ mentions were launched in 2019 and proved to be effective on individual and business levels. It has helped people widen their total number of followers by appearing in other accounts’ stories, in both cases. For a business account, mentions play a major role in increasing brand awareness and brand recognition especially when a famous blogger/influencer uses a certain product and tags the brand in the story. The active followers who see the story will check the tagged account out of curiosity and might follow the account which will eventually increase the fanbase. On another hand, reposting a story is always a win-win situation for both accounts. In fact, using this feature benefits every client in the user-generated content strategy. For example, when Body Masters reposts a story from one of the users, the latter will be featured on a known page and might have an increase in his total number of followers, and the gym gives an authentic image about itself.
And finally, the “Close Friends” feature that allows users to specify who gets to see their stories. Now users can share something with a specific group of people, refer to this link (https://bit.ly/2ZVET6L) to know how. They can create a group of close friends who will see a green ring around the story in the tray at the top of the feed. It’s a visual signal that the user has shared something more privately with his friends, and it should stand out from the standard pink-purple gradient rings. Additionally, brands can create fan clubs or VIP lists in which people can opt-in to receive additional posts or customized offers only for them.
In fact, these new updates have benefitted all businesses. For our clients, Body Masters can benefit from IGTV to post long workout videos inside the gym to convey a credible message to their followers. Gyms are sharing more and more workout or tutorial videos to teach beginners how to train safely on one hand and to grab athletes’ attention on the other.
Americana bakeries and So Fresh can also use IGTV to share cooking sessions on their Instagram feed. Accounts related to food can always benefit from IGTV long videos, to share recipes and cooking sessions, because these types of posts attract people’s attention and interest them. Even if the target audience are not chefs or people who cook – but everybody likes to watch food-related videos especially if the content is appealing.
As we mentioned earlier, Instagram Shopping is a great strategy to reach new users within the target audience. Accordingly, Nova Waters can, for example, use Instagram Shopping to reach more people and sell more. If used in the correct way, this feature can be a great USP (Unique Selling Proposition) for the company.
Moment countdown in stories can be of value to any client planning to introduce a new product or launch a competition. For instance, Americana Bakeries is planning to do a product line extension by introducing Pizza. Therefore, they can share Moments Countdown stories to excite the users.
Yara Fakhreddine Social Media Executive Mindshare MENA
Sources:
Instagram picture link: https://bit.ly/2tWMMN5
Picture link: https://bit.ly/2ZC5i9p
Benjamin Chacon; You Can Now Post to Multiple Instagram Accounts at the Same Time; January 10, 2019; https://bit.ly/39SvXUe
Benjamin Chacon; IGTV Views are Suddenly Skyrocketing: Is It Finally Becoming Cool?; February 27,2019; https://bit.ly/2QClBz4
Nariman Zouheiry; Instagram releases shopping tag feature in Lebanon; May 2, 2019; https://bit.ly/2MJPvAe
Benjamin Chacon; Everything You Need to Know About Instagram’s New Paid Partnership Feature; October 15, 2017; https://bit.ly/2ZGMPbJ
Osmond Chia; Why is Instagram kes?; November 24, 2019; https://bit.ly/2SDHzEr
Casey Newton; Instagram adds ‘close friends’ to let you share stories to a more limited group; Nov 30, 2018; https://bit.ly/36wSvri
0 notes
Text
12 Best Instagram Story Apps to Create Amazing Content

Instagram stories have outdone their competitor Snapchat since copying the feature in 2016. Now, as of January 2019, there were 500 million active daily users on Instagram Stories.
It's the tool that influencers have stated that they get the most engagement from — allowing you to share content that disappears in just 24 hours, now with the option to turn them into highlights, a lifetime.
With so many brands using Instagram stories, how can you stand out?
The quality and content of your Instagram stories matter, but to create eye-catching stories, you'll need the right tools to do it.
I've listed the 12 best apps made for Instagram stories and trusted by professionals and brands alike.
This article will be covering the following topics to give you well-rounded advice to jump-start your Instagram story skills:
Best Instagram Story Apps for Videos
Best Instagram Story Apps for Graphics
Best Content Ideas for Instagram Stories
Best Brands with Amazing Instagram Story Content
Best Instagram Story Apps for Videos
1. VSCO

Available: for Android & IOS
VSCO is a personal favorite for influencers looking for filters and editing tools for images to post on their feed. Did you know they also offer video editing features for Instagram stories as well?
Hint hint, it comes with a paid account, but it's worth it. It helps to maintain your brand's aesthetics and gives it a professional touch that's up to par with Adobe tools.
2. Videoshop
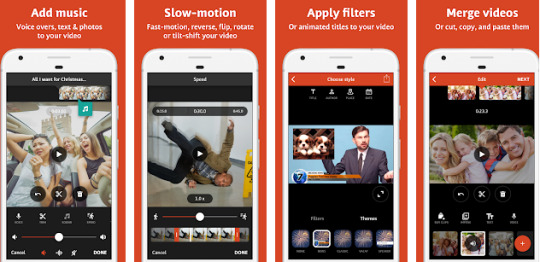
Available: for Android & IOS The Videoshop app is ranked in the top video editing apps when it comes to Instagram video editing for stories and feed.
Simply add your recorded clip to the app and trim or resize your video. You can also add music, voice-over sound effects, slow motion, filters. Take it a step further and merger video or photos.
Once you've finished editing your photos or videos and share it on Snapchat, Instagram, Facebook, YouTube, Vimeo, Dropbox, Whatsapp or by email.
3. Filmmaker Pro
Available: for IOS
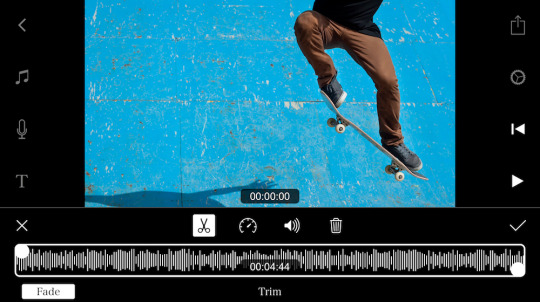
An iPhone app favorite for anyone who wants to edit videos a bit more technical than iMovie or Clips. Once you've uploaded your video to the app, you can edit videos in landscape (16:9), portrait (9:16) (Instagram story size), and square (1:1) (Instagram feed). You're not limited to videos, you can also edit photos for your Instagram stories.
Add a color gradient to your video, replace green screens with new backgrounds, add transitions, text, and audio (music and narration) -- with all these abilities, you have full control over your Instagram story’s final look. There is a monthly cost, but the features are worth it.
4. InShot
Available: for Android & iOS
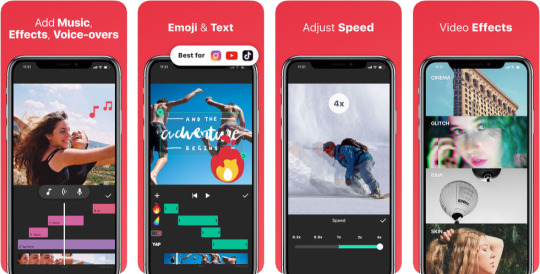
You shouldn't be surprised to see the InShot Video Editor on our list of tools to use for Instagram stories. You've probably seen a few videos on social media with the watermark logo at the bottom right corner.
This app allows you to place your video in different ratios so you can easily resize, crop or take your design further and use a colored background, built-in templates or photo collages to make your video pop on Instagram.
5. Lifelapse

Available: for Android & iOS
Lifelapse is an alternative to Instagram's hyper-lapse, but the twist is you can also edit and create content-worthy animations, not to mention helpful tutorials, stock music, a built-in time, speed adjustments and much more.
6. Foodie
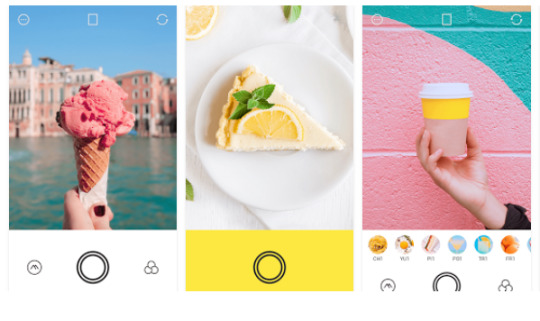
If you're a food brand or influencer and you're looking for an app that's made for you, Foodie is it. The name of the app alone is a winner. It allows you to add over 30 filters; editing tools specifically made for food images and videos allowing you to capture those yummy moments effortlessly.
It does have a few limits when it comes to editing like aspect ratio, so make sure to upload the video or image in the desired ratio you'd like to upload.
Need help with your social media marketing?
Book a free call to learn how our team of marketing experts can help you create high converting ads campaigns today!
Best Instagram Story Apps for Graphics & Tools
1. Canva
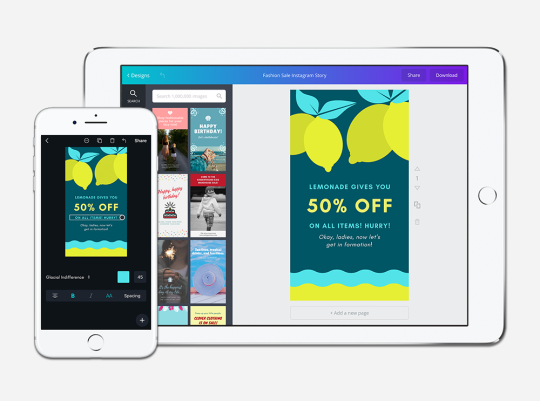
Available: Desktop, Andriod & iOS
This tool is a personal favorite of mine when it comes to creating content and Instagram stories for Wishpond's own Instagram.
Canva allows you to create graphics, videos, and GIFs all tailored for your Instagram story. Choose from several beautiful templates with an easy-to-use editor to drag, drop, filter, and design your Instagram story as you like.
2. Adobe Spark Post
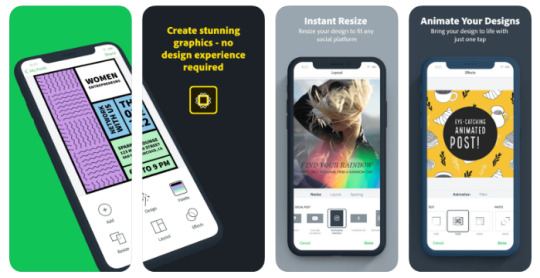
Anything Adobe puts its name on either has a steep learning curve, is a creative’s go-to, is a gateway to exceptional content or all of the above.
That being said, if you're looking for something a bit more technical to get all the little details right, Adobe Spark Post is your app. It allows you to add not just filters but effects, sizing, coloring and editing tools on par with Photoshop and Lightroom. You can also convert photos into GIFs or videos ready to upload to your Instagram stories.
3. Wave.video

Available: Desktop version only
Wave.video falls smack in the middle of Canva and Adobe Spark Post. It's the tool you use if you're looking for an online video maker and editing tool that offers user-friendly experience with just the right amount of technical tools to give your video that finishing look.
Upload and export your videos with text overlay, effects, animations, and stunning transitions between the clips. You can also resize your video if you'd like to reuse it later for another platform.
The best thing about wave.video is that it has full integration with Facebook, Youtube, Twitter, Hubspot, Wistia, Dropbox, Google Drive, and Vimeo so that you can share or upload your videos in one click.
4. Font Candy
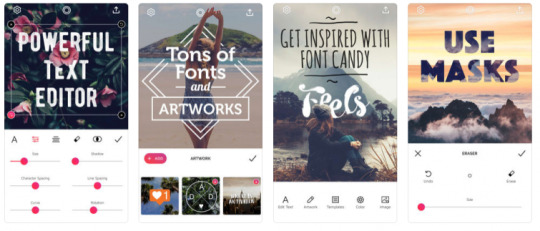
Available: Android and iOS Maybe you're looking for something not so technical, and just need to do something simple like adding text overlays to your videos or captions -- why not use Font Candy?
This app provides loads of fonts, editing, and adjustments like text curving, opacity adjuster, and shadow controls to design your Instagram stories.
5. Unfold
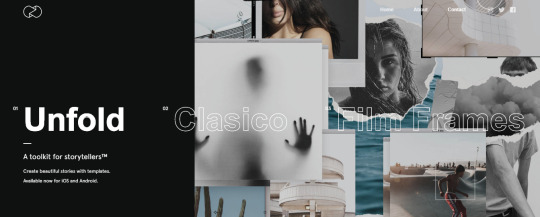
Available: iOS or Android
Unfold has been on the rise since 2017 and has been named by Refinery 29 as "the must use Instagram story app."
Choose from a wide range of Insta-worthy templates that allow you to seamlessly post aesthetically-pleasing content that fully align with your brand look and feel.
6. A Design Kit

Available: iOS
Created by the fantastic lifestyle and content creators, A Beautiful Mess, and A Color Story, so you know you're in good hands. A Design kit is a graphic designing tool perfect for IG stories.
It allows you to add stickers, textures, color, and font directly on your Instagram stories. You also have 120+ designs and templates to choose from so you can spice up your stories in style.
Bonus: CutStory
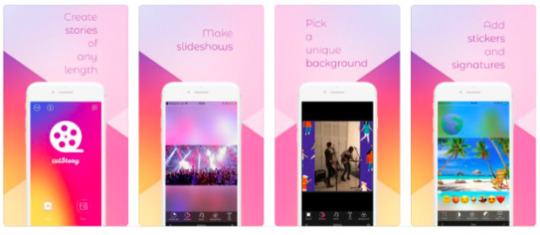
Available: iOS only
Have you ever gotten so caught up in the moment recording your Insta stories that your video ends up way longer than you expected? Don't worry; we've all been there.
Because Instagram only allows you to upload 15 seconds of video and 7 seconds to video-photos, that's where Cut Story comes in. It gives you the power to divide or section your long videos into a series of shorter clips.
Granted, Instagram does do this for you automatically when you upload a longer than a 15-second clip, but Cut Story gives you more control over where and when you cut your clicks.
Best Content Ideas for Instagram Stories
Sometimes coming up with content ideas for your next story can be a head-scratcher. Below is a list of 7 easy-breezy content ideas you can use for your own Instagram story!
Pick, choose, and reuse as you like:
1. Show Behind the Scenes
Give followers a sneak peeks at what goes on behind the scenes of your products or team. Show off your daily shenanigans so that followers feel a part of your brand. You don't have to go into details like your ingredients or retailers. Take a look at Vogue International as they showed followers around the office gave mini-tours or insight on their current or past projects.
Instagram Story Example:Vogue International

2. Give Product Updates
Keep customers updated on new product launches with your Instagram stories and save them in your Instagram highlights so they can re-watch the update in case they missed it.
Instagram Story Example:Herbivore Botanicals
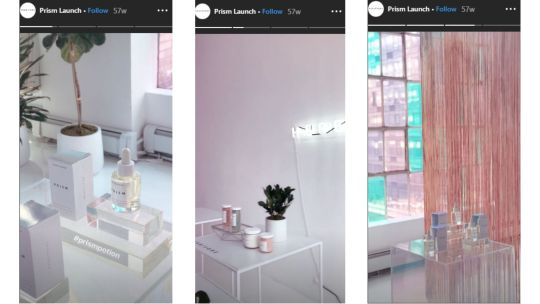
Herbivore Botanicals is a skincare product company that prides itself on its plant-based products. They create a story every time a new product is launched. The story above is a cover of their in-store launch for their Prism Exfoliating Glow Potion.
3. Share A Story
If your brand covers stories or advice, you can use your Instagram stories to well, share stories and advice. This can be about your own brand story, customers, or other people in your industry. I find that The New York Times does a great job of creating short and engaging stories on local and international celebrities and activities.
Instagram Story Example:New York Times

4. Online Tutorials
Hubspot found that 72% of customers would rather learn about a product or service by way of video. The same goes for your Instagram stories. People consume videos or stories to learn about your products and your brand.
Instagram Story Example:Mike's Mighty Good

Mike's Mighty Good Noodles has a wide range of organic ramen noodles. To keep their foodie followers excited and engaged, they create step by step tutorial on delicious and easy dishes they can create at home. This can range to your typical crushed red pepper, shrimp and parsley ramen bowl or meaty beef ramen burger.
5. Post Interview & Tips
If you have interviews, add it to your story. This could be a short Q&A, detailed conversations, or highlights of things that stood out and made an impact with your viewers.
Instagram Story Example:Ted Talk

We've all watched a TED Talk or two. Well, if you're interested in seeing a series of 15-sec TED Talks, you can check their Instagram stories. They're mainly videos highlighting commonly asked questions for experts in the field.
6. Highlight Customers & Reviews
Over a third of Instagram users have used their mobile to purchase a product online, and 60% of users use Instagram to seek out and discover new products.
Instagram Story Example: Cesta Collective
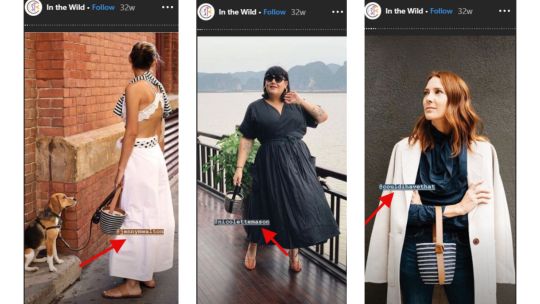
When you add customer reviews and highlights to your Instagram stories, you allow shoppers to see real people enjoying or using your product. Customer reviews allow your shoppers to imagine the product as their own and build your brand’s credibility, making them more likely to buy one for themselves.
7. Brand/Influencer Collab
Let the world know about your collaboration with another brand or influencer on a product. 70% of Instagram users watch stories daily so if followers missed the update via your feed, adding it to your story allows you to increase exposure.
Instagram Story Example:Topo Designs

10 Best Brands with Amazing Instagram Story Content
Need more inspiration for your Instagram stories? I've got you covered. Here are Insta-worthy accounts that provide some of the best Instagram stories, highlights, videos, and ads.
1. Brit + Co
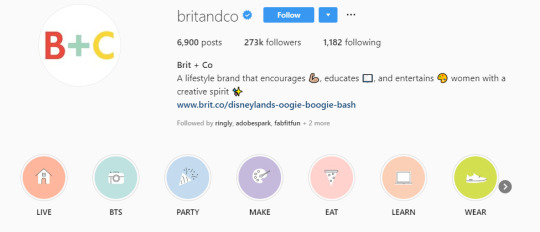
Overview: If you're looking for an account that is a shining example of having a solid brand identity and color coordination, look no further than Brit +Co. The aesthetics are consistent, and you can undoubtedly identify the brand on Instagram with or without a logo present.
Looking for a way to revamp your Instagram to reflect your brand? I found this guide by Hootsuite on How to Create a Unique Instagram Aesthetic that Fits Your Brand very helpful.
2. Oats Overnight
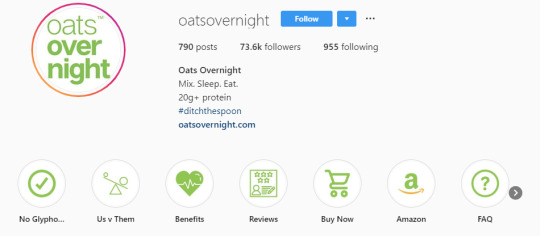
Overview: Oats Overnight, you might be giggling at the name, but the Instagram content is sure to amaze you. Their Instagram story/highlights made this list because it embodies a FAQ and makes the buyer's journey from awareness to purchase effortless.
Stories cover: Us v Them (comparing themselves to competitors), benefits, customer reviews, an easy buy-now option, and much more.
The key to a successful Instagram is to be mindful of the content you create and place for followers and potential customers to see. This means having a profitable Instagram strategy in place to capture them. Remember that your social media platforms are also marketing funnels.
3.Billie

Overview: Billie is full of fun, quirky, and oddly satisfying stories and content. They’ve built their following and sales on their online brand personality, which is what makes the brand so unique.
Sit down and take the time to figure out who or what is your brand's personality so it can shine easily through your stories. Hint: It can even inspire your next Instagram’s content ideas.
4.Huffington Post
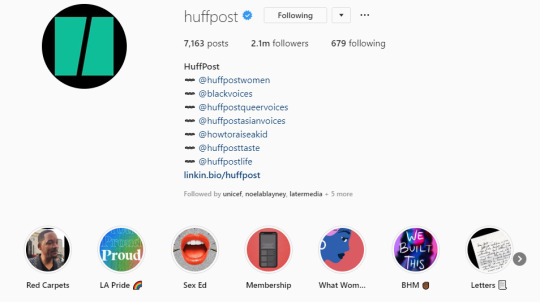
Overview: Building a community around your Instagram is also another ingredient to Instagram success. Take Huffington Post; they use their stories to highlight topics and people who are important or relevant to their readers.
Wait, what do stories have to do with building a community, that's a pretty far reach?
When people first land on your page, the check three things: your bio, feed, and story highlights. Each of these speaks to your brand values and brand positioning.
If you post highlights that connect with your viewers, you're able to build a virtual rapport that sparks an interest, connection and adds a new follower to your account.
5.Harvard Business Review
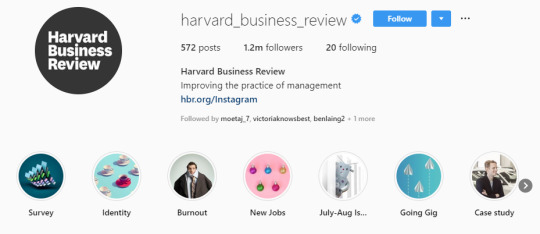
Overview: If you're a writer or magazine that's looking for Instagram story content ideas, you can check the Harvard Business Review. They make mundane topics seem exciting and alluring with 15-second videos and graphics. You can go through and learn how to apply these ideas to your content.
6.Red Lobster
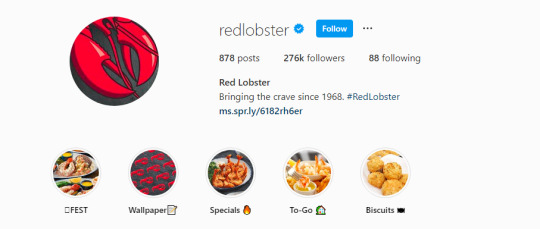
Overview: Red Lobster and Buzzfeed are two brands with foodie friendly Instagram story content and highlights. Each more delicious and tasty than the next. A critical insight is that they spend time providing quality images of their food not only in their feed but stories.
7.Equinox
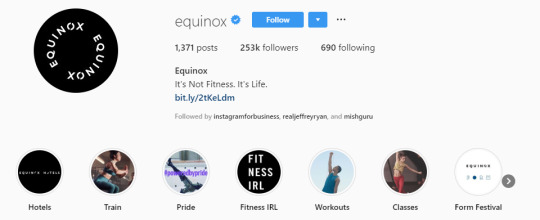
Overview: Equinox is a fitness brand that knows how and what type of content engages followers. Their stories highlight the lifestyle of its core followers before, during, and after their workout, making them one of the best Instagram accounts to learn from for gym and fitness lifestyle content.
8.KL Polish

Overview: If you're looking for ideas on more product-focused Instagram stories, I found that this brand, KL Polish, has an effortless outline of product highlights.
Why does this brand make this list?
Simple: it has a unique method of showing off its product but in a way that still allows the viewer to feel that it's more about the customer than the brand. This type of Insta-marketing is always a plus because it translates to shoppers that the product is all about them.
9.Pottery Barn
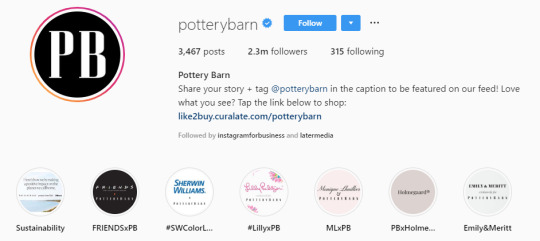
Overview: Pottery Barn has numerous collections for every type of DIY home decorator. Instead of shoppers leaving their Instagram account to find collections, they can scroll through their stores or highlights and see what they'd like. From there the customer can either choose what they want to buy before moving on to the website or use the Instagram checkout feature.
10.Curated by Facebook
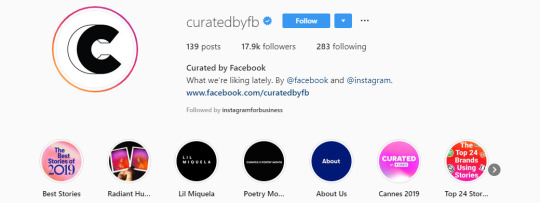
Overview: I recently found this account on my Instagram scrolling frenzies. It's an Instagram account for IG stories from brands around the world. Each IG story is selected by the Facebook and Instagram team themselves, so you know you're getting the best of the best when it comes to Instagram stories.
Conclusion
Instagram stories are essential to big brands. You can see a lot of marketers adding Instagram stories to their Instagram marketing strategy.
Now you have the tools to create professional and stunning stories up to par with these brands. Here are the 12 of the Best Instagram Stories Apps to Create Amazing Content:
1.VSCO 2.Videoshop 3.Filmmaker Pro 4.InShot 5.Lifelapse 6.Foodie 7.Canva 8.Adobe Spark Post 9.Wave.video 10.Font Candy 11.Unfold 12. A Design Kit
Did I miss a tool on this list, or do you see your favorite in the top 12? Drop a comment below and tell me why it's your go-to Instagram story tool.

Related Articles:
15 Awesome Examples of Instagram Posts that Drive Sales
20 Tactful Instagram Tips You're Missing Out On
How to Create a Winning Instagram Marketing Strategy
The Ultimate Guide to Instagram Marketing for Retailers and Brands
from RSSMix.com Mix ID 8230801 https://ift.tt/2mBMFTy via IFTTT
0 notes
Video
youtube
Green Screen Broadcast Tips and Ideas!
One of the most popular projects that students create with Green Screen by DoInk is a Broadcast. The broadcast topic can be the news, weather or personal interviews. We often get questions on how to set them up. So we are including helpful examples to show you how easy it can be to create a broadcast. The example above from Camille Nunnenkamp and her students just uses a green fabric background and then the students switch out the Green Screened images to coordinate with their topics. You can see the set up at the end of the video in their blooper section. Remember good lighting and a tripod are really important for a quality broadcast. In this example they use a regular desk from class in front of them. You can also use the layers to place a Green Screened desk in front of the students. An example of that is in the photo at the bottom of this post.
We have included three helpful blogs on broadcasting, to give you some ideas from other educators and their experiences:
Green Screens on the iPads from Inquiry over iPads
Weather Project blog from Expect the Miraculous
General Broadcasting blog with more tips and ideas from Love to Teach.
You can find some excellent broadcasting backgrounds at:
Free Virtual Sets on YouTube
How to Download Discovery Ed Videos to use in DoInk Green Screen app
70+ Sources of Royalty Free Stock Photos
Download Creative Commons Videos from YouTube for Class Projects
Six Top Sources for Free Images, Video and Audio
Pixabay
Photos for Class
Last but not least, we have included another video tutorials and photo in this post on how you can make very simple or even a more advanced broadcasting projects. For even more ideas, check out our Pinterest page on broadcasting examples. We hope these ideas give you some inspiration for your next Green Screen broadcast!
Video below is a weather forecast tutorial from EdTech Infusion
youtube
Image below from Inquiry over iPads

0 notes
Text
Fly Safe with DJI — 8 Tips on How to Use Your New...

Phantom 3 by Aldryn Estacio
Is there anything better than spending time with your family and friends, an open fire crackling nearby, sharing stories from the year gone by? Or the excuse to indulge in some casual gluttony at special Christmas dinner with recipes passed from generation to generation? And let’s not forget the all important Christmas tree and the presents underneath!
Many of you are going to be receiving a DJI drone this holiday and we want to make sure you know how to get the best out of your new companion. These eight tips will get you set up and ready so your first flight is as amazing as you’ve imagined it.
1. Inspect your aircraft and batteries
Before you head out to fly, make sure that the batteries in your remote controller and aircraft including any spares are all fully charged. You never want to have to land just when you’ve found a beautiful scene to film or photograph, and batteries sometimes are not completely accurate when showing their charged status. To avoid any such worries, charge your batteries over night or wait until they are all fully charge, and then head out and fly.
Check that all propellers are securely mounted to the motors and that none of them are damaged or worn. Inspect the rest of the aircraft and replace or repair damaged parts before flight. In case you need spare parts, they are available from the Official DJI Online Store with quick and safe shipping.
2. Calibrate your compass before taking off
Before you take off from a new site, you should always calibrate your compass. Each location has slightly different electromagnetic profiles and for best performance and most accurate positioning, you should calibrate for each specific location. Calibrating is easy — simply use the DJI GO app and follow the on-screen instructions. This will include how to calibrate the GPS in horizontal and vertical directions by rotating it around each axis.
To take full advantage of DJI’s safety features, including Return Home and position stabilization, wait for a strong GPS connection before taking off. Your take off position will then automatically be recorded as the Home Point and you will be able to use the convenient Return to Home button any time you feel it’s time to land.
3. Fly in open, outdoor areas
Always choose a wide open area for every flight, well away from people and property. Head out to a large field or similar open space, with no or few trees and buildings. This way, you can more easily focus on learning to operate your aircraft and take your mind off having to precisely control the aircraft to avoid trees and other obstacles.
4. Do not fly over or near people and animals
Another thing to keep in mind when you choose where to fly is to make sure that it isn’t crowded with either people or animals as a measure of safety. Though small and harmless, drones may still scare or irritate people and animals that are not used to seeing them. We want to make sure that our products have a positive impact on everyone they touch, so please be mindful of others when flying.
5. Fly no higher than 400 ft or below structures
In the U.S., the maximum allowed height for flying commercial drones is 400 ft., so as to not interfere with the aircraft in the regular airspace. It is also advised that you do not fly under any type of structures as that may cause magnetic interference that disturbs the compass in your drone. It could also block or degrade the GPS signal and make you lose contact with your aircraft.
6. Maintain your line of sight
Even though the Phantom 3 series of drones are capable of flying distances up to 3 miles (5km), you should still be careful to maintain a line of sight to your drone at all times. If you fly behind obstacles such as buildings or mountains you can easily lose orientation or have difficulty returning home when your batteries start to deplete.
7. Be aware of orientation and maintain full control
To make it easier for yourself, take off with the aircraft oriented with the green lights facing yourself and the camera facing forward. This way, it will be much easier for you to know where the camera is pointed when you want to capture a video or photo. You can also turn on Course Lock to lock the camera’s direction, making it even easier to fly and capture footage.
The DJI Phantom and Inspire 1 series are incredibly easy to use thanks to the deeply integrated software and hardware and the smart functionality in the DJI GO app. However, you should still make sure to always have full control over your aircraft, even when using automatic functions such as auto-takeoff and auto-landing. Keep both hands on the control sticks to maintain control throughout each flight.
8. Coming soon: Local flight regulations in DJI GO
Our recently announced Geospatial Environment Online (GEO) system that will be included in an upcoming version of the DJI GO app shows information about local flight regulations, temporary flight restrictions and No Fly Zones. Once the new version is launched you can use GEO to make yourself familiar with local regulations each time you fly at a new site. It’s a quick and easy way to ensure that you always know that you’re in compliance with laws, so that you can relax and focus on flying.
…
There are many ways to get better at flying. You can subscribe to the DJI Tutorials channel on YouTube to automatically receive new tips and tricks on how to best fly and capture aerial footage. You can also use DJI GO’s built-in flight simulator to get to know the controls and functionality of your drone from the comfort of your home, so that you save time and learn even more quickly. Finally, you can practice the maneuvers in DJI’s Pilot Training Guide to perfect your skills and gain confidence in flight.
That’s all for now. If you have any further questions on how to operate your new DJI drone, head over to our Fly Safe page or visit the DJI Forum and ask our great community. Have a great holiday and enjoy your new flying camera!
Source: Fly Safe with DJI — 8 Tips on How to Use Your New...
1 note
·
View note
Text
16 Desk Decor Ideas for Your Cubicle or Home Office
In need of new desk decor ideas for your home office? You’ve come to the right place. While many have recently made the transition to working from home, even if you aren’t used to it, there are some simple ways you can make your space simultaneously more productive and comfortable.
Not only are these home office desk ideas budget-friendly, they’re also stress-free and easy to implement in large and small spaces – all it takes is a little creativity and self expression. You’d be surprised how little touches like picture frames or plants can add new life to your work space and give you a much-needed boost to get through the day. Plus, taking the time to map out your space the way you want is a great way to stay productive through days of endless meetings and projects.
We’ve rounded up 16 of our favorite desk ideas for the home office that’s sure to give you some inspiration as you decorate and organize:
1. Use Unique Accents to Define Your Space
The first thing you’ll want to keep in mind when thinking of ideas for your desk decor is that even the small accessories can dictate your work space vibe. To create a sense of much-needed tranquility, a decorative sculpture can remind you to stay calm when you feel overwhelmed with tasks and everyday stressors. Or, if you want that ultra mod Silicon Valley office vibe, minimalist-style home accents are the perfect choice. Just remember, keeping it to just one or two items is key for honing in on a look while keeping your desk free of distracting clutter.
2. Build a Trendy DIY Terrarium With Succulents
Give your eyes a break from the computer screen with a pop of vibrant greenery. It’s a refreshing sight for tired eyes, and plants have been shown to boost your mood Since succulents are easy to care for and don’t require a lot of sunlight, they make the perfect work space companion. With some extra time around the house, be sure to give this fun DIY Terrarium a try.
3. Keep Yourself on Track with a Stylish Wall Clock
Wall clocks are a practical choice that might not seem exciting, but practical doesn’t have to mean boring. There’s a variety of wall clocks out there and, chances are, there’s one that fits your style perfectly – whether you’re a fan of sleek modern lines, traditional rich hues or beachy-chic flair. It’ll also help you stay on track with your deadlines and team check-in meetings.
4. Make it Personal with Your Favorite Memories
A smile can really make all the difference. Personalize your work space with photographs of your friends, family, pets or memorable moments. Good desk decor isn’t only about aesthetics, but about what makes you feel happy – so surround yourself with good memories to make work more enjoyable, and give those memories a worthy home tucked inside picture frames.
5. Create a Chic DIY Mousepad
If you like getting crafty, then you’ll love this desk decor project. Give your plain old mousepad a totally new look with fabric and spray adhesive in a few easy steps:
First, find a fun fabric that resonates with your style.
Trace the diameter of your mousepad onto the back of the fabric.
Cut carefully and use the spray adhesive to attach atop your old mousepad.
How easy is that? If you love the look of gold metallic polka dots, follow Lovely Indeed’s tutorial here.
6. Decorate With Motivational Messages
Hang up decor with motivational messaging for that little extra push on days you may be feeling unproductive. Whether it’s a simple “be happy” mantra or a quote that brings you joy, there’s plenty of ways you can display an uplifting message or two by your desk.
To recreate this clipboard art gallery look, you can use gorgeous free printables by Craft-o-matic. She took plain clipboards and painted the silver hardware in gold – so you can customize the look with your favorite colors.
Also keep in mind that motivational messaging isn’t restricted to just quotes or phrases – a picture says a thousand words, after all. Hang up a scenic landscape to whisk you away into your creative sweet spot, or consider a piece with artistic expression that reminds you of your dreams and aspirations.
7. Increase Focus With Inspirational Colors
White walls are fresh and clean, but too much white can actually inhibit creativity. Scientific studies have shown that colors can impact our productivity, and that bland gray, beige and white offices can create feelings of sadness and depression. Ick.
You don’t have to worry about going all out with the paint though – a couple pieces of wall art can do wonders for your desk space. Keep the creative ideas flowing at your desk with colors that help improve efficiency and focus and your overall well-being, such as blue, green or purple.
8. Add Dimension With Wallpaper
It’s not your mother’s wallpaper. The quality, styles and ease of use have really improved over time, and nowadays you have a sizable selection to choose from. Going for an urban-chic look? There’s faux brick wallpaper for that. Want to show off your worldly bohemian flair? There are so many vibrant patterns to browse. It’s the perfect solution for a hassle-free accent wall.
9. Organize in Style with Unique Bookends
If you’re a bibliophile, this is sure to rank as one of your favorite desk decor ideas. Keep your favorites and the books on your “to-read” list proudly displayed and within reach. A pair of bookends keeps your literary treasures neatly at bay, all while showing off your personality.
10. Keep Pens and Pencils at Hand
Have you ever been prepared to start working, only to get distracted by a mess? It’s easy to let things get out of control when you don’t have proper desk organization and you’re now home more than ever. Luckily, these trendy boxes neatly conceal all of your small trinkets so your desk area doesn’t become chaotic. Keep them close by for added style and functionality to your desk. Or, you can use small decorative baskets without lids to easily locate and grab what you need.
11. Keep Yourself Calm with Candles
Creative desk ideas don’t have to be purely visual. In fact, scent in your work environment can also have a big impact on your productivity. Keep your mind in the zone with scented candles housed in stylish holders. Lemon, jasmine, cinnamon, peppermint and rosemary are popular scents for boosting both mood and productivity. If you want to personalize candle holders with your own unique spin, consider glass holders. You can easily decorate the exterior or even fill the bottom with interesting textures, like natural rocks for a zen feel.
12. Bring Life to Your Desk with Plants and a Classy Vase
There’s a reason why indoor plants are so popular: they not only improve air quality, but they’re also shown to reduce stress, boost your mood and are nice to look at – of course it had to make our list of best home office desk ideas.
Once you’ve found your ideal plant or plants (be sure to check whether they’re pet safe or not if you’ve got furry friends), pair it with a stylish vase that can hold freshly cut flowers or stand out as an accessory of its own. You can just as easily fake a green thumb with pretty faux flowers in a set of small vases for the same effect.
13. Increase Storage Space With a Monitor Stand
Give your neck, and your desk space, a break with a monitor stand. This frees up your desk’s surface area, allowing you to slide papers, note pads or desk organizer tools underneath your computer monitor.
14. Illuminate Your Space With a Luminous Lamp
It’s desk decor that’s just as bright as you are. Whether you’re blessed with plentiful natural light or have an office space tucked away without windows, you could always benefit from better lighting – especially for extra light. Little pops of gold are always trendy, and integrate beautifully with all kinds of decor styles.
15. Arrange the Essentials on a Stylish Tray
One of the best things about working from home is that you don’t have to stay in one place all day. On a whim, you can take your work with you to your cozy sofa, your patio space or the kitchen bar. Make movement easy by arranging all your essentials, such as pens, notepads and a laptop charger, on a decorative tray. It looks great and makes transferring rooms a simple affair.
16. Elevate Your Decor Accents With Floating Shelves
Desk space is precious, especially if your home office is smaller. A great way to maximize the square footage you have is by installing floating shelves. They’re easy to DIY, and they make it easy to organize your essentials. Display your favorite books and home accents, and add hooks to hang small jars from – what an innovative way to store pens, paper clips and more.
If you’re not the type to whip out the hammer and measuring tape, then this ready-to-hang golden metallic wall shelf just might strike your fancy. With four slots to display your favorite home accents and store your office necessities, this fabulous find will help clear off desk space and inject cool style, all in one.
Did any of our desk decor ideas speak out to you? We’d love to see photos of your new home office. Since working from home for many of us might become the norm for the foreseeable future, make it your own productivity hub that works best for you. The important thing is to remain productive and focused wherever you find your work space.
Make sure to share the inspiration on Instagram with the hashtag #MyAshleyHome – it might just be our next featured post.
The post 16 Desk Decor Ideas for Your Cubicle or Home Office appeared first on XO Ashley.
fromhttps://blog.ashleyfurniture.com/16-creative-home-office-desk-decor-ideas/
0 notes
Text
Count ‘em up: 100 things we announced at I/O ‘19
Another I/O is in the books! We played in sandboxes, watched eye-popping product demos and listened to AI-powered music. But the fun isn’t over! In case you missed it, here are 100 announcements we made at I/O:
Hardware
1. Hold the phone! Our new smartphones—the Pixel 3a and Pixel 3a XL—hit the shelves this week, bringing together all the essential Google features at a lower price ($399 for the 5.6-inch display and $479 for the 6-inch model). 2. Good things come in threes, like Pixel 3a’s color options. Choose from Purple-ish, Clearly White and Just Black. 3. And no matter what color your phone is, it has the same great Pixel camera. Capture shots in portrait mode and HDR+, or use Night Sight to take magical photos in low light (think outdoor concerts, swanky restaurants or night hikes with friends). 4. To add to the creativity, Time Lapse is coming to Pixel 3a. Soon you can capture an entire sunset within a few seconds of video. 5. All-day battery, baby! The Pixel 3a charges seven hours of battery life in 15 minutes and full battery can last up to 30 hours. 6. Squeeze the Pixel 3a to get the Google Assistant to send texts, find directions, set reminders and a lot more—simply by using your voice. 7. Hi, who’s there? The Google Assistant’s Call Screen feature (available in English in the U.S. and Canada) gives more information about who’s calling before you even answer your phone. Best of all, it helps save you from robocalls once and for all. 8. The Pixel 3a is protected against new threats with three years of security and operating system updates. 9. It also comes with the custom-built Titan M chip to help protect your most sensitive data. 10. All Pixel phones will get a preview of AR in Google Maps. So the next time you're getting around town, you can see walking directions overlaid on the world itself, rather than looking at a blue dot on a map. 11. Say hello to Google Nest. We’re bringing the Home products and Nest brand together to create a helpful home. 12. We welcomed the newest member of the Google Nest family: Google Nest Hub Max. Hub Max has a 10-inch screen, premium stereo sound, a camera with built-in Nest Cam features and the power of Google Assistant. 13. Live Albums on Nest Hub Max lets you select pictures of family and friends from your Google Photos to be displayed on the screen. 14. The built-in Nest Cam helps you keep an eye on things at home. You can turn the camera on when you’re away and check on things right from the Nest App on your phone. 15. The camera on Hub Max also lets you make video calls and leave personalized messages with Google’s video calling app, Duo. 16. If you’re listening to music or watching a cooking tutorial, turn down the volume with a wave of your hand. With Gestures, you simply have to look at the Nest Hub Max and raise your hand to pause media. 17. The home view dashboard lets you control all your connected devices from one dashboard—and the Google Assistant now controls more than 30,000 smart devices from 3,500 brands. 18. Similar to Voice Match, you have the option to enable Nest Hub Max’s Face Match feature that recognizes who’s using the device and shares the most relevant information, like their calendar and estimated commute time. 19. We shared our new privacy commitments, explaining our security and privacy options for Google Nest products. 20. There’s a green light on the front of Hub Max that indicates when the camera is streaming. In addition, you have multiple controls to disable camera features, like the Nest Cam and Face Match. 21. Hub Max will be available in the U.S., U.K. and Australia this summer. 22. Google Nest Hub, formerly Google Home Hub, is now available in 12 more countries—Canada, Denmark, France, Germany, India, Italy, Japan, the Netherlands, Norway, Singapore, Spain and Sweden. 23. And our prices are lower: Google Nest Hub available in the U.S. for $129, and starting today Google Home is $99 and Google Home Max is $299.
Assistant
24. The Assistant is now on more than one billion devices, available in more than 30 languages across 80 countries. 25. The next generation Assistant will run on-device and answer queries up to 10 times faster, with almost zero latency. It will come to Pixel phones later this year. 26. Keep the conversation going. Now with Continued Conversation, you can make several requests in a row without having to say “Hey Google” each time. 27. We’re extending Duplex to the web to help you complete tasks faster. Just ask the Assistant, “Book a car with for my next trip,” and it will figure out the rest. 28. Sound the alarm! You can now stop a timer or alarm that you set on Google Home speakers and Smart Displays by simply saying, “stop.” 29. Help is on the way! With a new feature called Personal References, the Assistant will better understand you and reference to the important things in your life. Say you’ve told the Assistant which contact “Mom” is. You can then ask, “Hey Google, what’s the weather like at my mom’s house this weekend?” and get the answer without any additional details. 30. Choose your next recipe to try, event to attend or podcast to listen to with Picks for You. This Assistant feature draws from past searches and other contextual cues to give you more personalized results. 31. Over the coming weeks, you’ll be able to access all of the helpfulness of the Assistant directly within Waze. 32. Take advantage of Google Assistant Driving Mode when you’re behind the wheel. The new dashboard automatically starts when you’re driving and displays the most relevant activities like navigation, messaging, calling and media. 33. It’s easier to use the Assistant to control your car remotely, so you can adjust your car’s temperature, check your fuel level or make sure your doors are locked without leaving the house. 34. Control your Assistant data and make privacy choices that are right for you from the “You” tab in your Assistant settings. 35. Ever Googled a “how-to” question? We’re giving content creators easy-to-use developer tools so in the coming months when you ask, “Hey Google, how do I install a dog door?” you’ll get a helpful step-by-step experience from a trusted source like DIY Networks. 36. The Assistant can now help you do specific things in some of your favorite apps. For example, you can say, “Hey Google, start my run in Nike Run Club.” 37. Game makers can now take full advantage of developing for Smart Displays' interactive screens, so you'll start seeing more games that combine voice, visuals and touch.
AI and ML
38. And the winner is…we unveiled the 20 Google AI Impact Challenge grantees who are using AI to address societal challenges. 39. We’ve made progress on flood forecasting in India. Now we can better use AI to predict flood timing, location and severity across 90 percent of India, and share that information with Google Public Alerts. 40. Two bands took the stage at I/O—with a little help from machine learning. Both YACHT and The Flaming Lips worked with Google engineers to create music with Magenta, our AI tool for artistic creativity 41. Check out our new PAIR Guidebook, an external toolkit that will help ML practitioners make better, user-centered decisions when building with AI. 42. We’re taking the same AI research that makes our products better and using it to enhance user privacy. Federated learning allows Google’s AI products to work better for you, and work better for everyone, without collecting raw data from your devices.
Google News and Search
43. Now it’s easier to stay in the know. The technology that powers Full Coverage in Google News is coming to Search to better organize search results for news-related topics and give you the context you need to understand a story. 44. When you search for a news topic, you’ll have the option to see different points of a story—from a timeline of events to the key people involved—and surface a breadth of content including articles, tweets and even podcasts. 45. In the coming months, we’ll start including podcasts in Google Search results so you can listen to podcasts directly from the search results page or save an episode for later.
Augmented Reality and Google Lens
46. Seeing is believing! Soon you’ll be able to view 3D objects right from Search and place them into your own space. 47. Lens now provides more visual answers by using AR to overlay useful information and content onto the things you see. For example, if you see a dish you’d like to cook in an upcoming issue of Bon Appetit magazine, you’ll be able to point your camera at a recipe and have the page come to life and show you exactly how to make it. 48. Lens can help you decide what to order. Just point your camera at the menu, and Lens highlights which dishes are popular, right on the menu. Tap on a dish to see photos and snippets of reviews from Google Maps. 49. Now, you can point your camera at text and Lens will automatically overlay the translation right on top of the original words—it works in more than 100 languages. 50. Say what? When you point your camera at text, Lens can now read it out loud. You can also tap on a specific word to search for its definition. This feature is launching first in Google Go, our Search app for first-time smartphone users.
Privacy
51. You’ll start seeing your Google Account profile icon appear more prominently across all Google products, so takes just one tap to access your privacy and security settings. 52. Now we’re making it easier to manage your data in Maps, the Assistant and YouTube (coming soon). For example, you'll be able to review and delete your location activity data directly in Google Maps, and then quickly get back to your directions. 53. New auto-delete controls for Location History and Web & App Activity allow you to choose to automatically and continuously delete your data. 54. We’re expanding Incognito mode—the option in Chrome that clears your browsing history after every session—to more of our products, including Maps. 55. Thanks to federated learning, Gboard has improved predictive typing as well as emoji predictions across tens of millions of devices. 56. We’ve built security keys directly into your Android phone, giving you easier and more convenient protection against phishing attacks. This is rolling out to all devices running Android 7.0 and above.
Android
57. Android Q’s newest features are centered around innovation, security, privacy and digital wellbeing. 58. A new gesture-based navigation lets you easily move between tasks and utilize a bigger screen. 59. Android Q has tools for developers to build cool apps for foldable phones and 5G, opening up new possibilities for experiences like gaming on your device. 60. Live Caption will automatically caption media playing on your phone—like videos podcasts, audio messages, even stuff you record yourself—across any app. 61. Smart Reply is getting even smarter! Not only will your phone show suggested replies, it’ll also help you take action, like opening addresses from a text message in an app like Maps. 62. You asked, we listened! Android Q brings Dark Theme. You can activate in Settings, or by turning on Battery Saver. 63. We’re bringing privacy to the top level of Settings so you can find all the important controls in one place. 64. Android Q arms you with new permission controls so you can share your location (or not) with apps on your own terms. 65. Time for a time out? With the new Focus Mode, you can get things done without distraction, by selecting the apps you want to stay active and pausing everything you don't. 66. And to help children and families find a better balance with technology, we’re making Family Link part of every device that has Digital Wellbeing, starting with Android Q. 67. Signed, sealed, delivered! There’s a new way to deliver important updates. With Project Mainline, we can update core OS components without a full OS update. 68. All Android devices with Q—including phones, tablets, TVs, and Android Auto—are required to encrypt user data. 69. Some of these features are available today in Android Q Beta which is available on 15 devices from 12 manufacturers (in addition to all Pixel phones). 70. Android Q brings lots of new emoji, including 53 new non-binary designs for emoji that Unicode defines as "genderless.” 71. Buckle up! Android Auto’s new design coming out this summer will help you get on the road faster, show you useful information at a glance and simplify common tasks while driving. 72. Now media developers will be able to build new entertainment experiences for Android-powered infotainment systems. 73. With Tiles on Wear OS by Google you have more swipeable access to things right from your wrist like your goals, next event, weather forecast, heart rate and timer. 74. Android TV platform now has more than 140 pay TV partners, 6 of the 10 top smart TV OEMs using the Android TV platform; and more than 5,000 apps and games in its ecosystem.
Chrome
75. It’s now easier to share files between Linux, Android, and Chrome OS using file manager. 76. Android Studio on Chrome OS helps you optimize your apps for Chrome OS—directly on your Chromebook. 77. All Chromebooks launched this year will be Linux-ready right out of the box. 78. We have more user transparency and controls, like improved cookie controls and more restrictions for fingerprinting across the web.
Ads
79. With the option to bid on tROAS, advertisers will soon be able to automatically pay more for users who are likely to spend more in apps, and pay less for users likely to spend less. 80. We’re teaming up with eight agencies http://bit.ly/2PWq1jx —Vidmob, Consumer Acquisition, Bamboo, Apptamin, Webpals, Creadits, Kaizen Ad and Kuaizi—to provide advertisers end-to-end creative development and consultation services. 81. We’ll be expanding a new monetization program, called Open Bidding, to all publishers later this year so developers can automatically maximize the value of every impression automatically. 82. New transparency tools across browsers http://bit.ly/2V2slpT will give people greater visibility into the data that Google uses to personalize ads. 83. We also launched new AdMob tools for developers that help give more control over ad content, easily access metrics and quickly identify and remove bad ads.
Accessibility
84. Project Euphonia is using AI to improve computer's' abilities to understand and transcribe a diverse set of speech patterns, including impaired speech. 85. Live Relay uses on-device speech recognition and text-to-speech conversion to allow the phone to listen and speak on people’s behalf while they type. 86. Project Diva is a research effort that makes Google Assistant more accessible for people with disabilities.
More developer announcements
87. We’re launching a preview for Local Home SDK that lets smart home developers bring a new level of speed and reliability to smart home devices. 88. The next version of our Maps Android SDK is now available for public beta. It’s built on a common platform with the Google Maps mobile app, which means better performance and feature support. 89. A new Google Maps Platform integration with deck.gl will make high-quality data visualizations at scale possible. 90. We’re unifying our efforts around third-party connected home devices under a single platform for developers. Now we’ll be delivering a single consumer and developer experience through the Works with Google Assistant program. 91. We introduced updates in ARCore to Augmented Images and Light Estimation— features that let you build more interactive, and realistic experiences. 92. Scene Viewer is a new tool that lets users view 3D objects in AR right from your website. 93. Android development will become increasingly Kotlin-first.
94. We released 11 new Jetpack libraries and open-sourced an early preview of Jetpack Compose, a new unbundled toolkit designed to simplify UI development. 95. Android Studio 3.5 Beta is available for download and includes improvements in three core areas: system health, feature polish and bugs. 96. Flutter 1.5 includes hundreds of changes in response to developer feedback, including updates for new App Store iOS SDK requirements, updates to the iOS and Material widgets, engine support for new device types, and Dart 2.3 featuring new UI-as-code language features. 97. We released the first technical preview of Flutter for the web. 98. Our in-app updates API is out of beta. Now people can install updates without ever leaving the app. 99. New metrics and insights in the Google Play Console help developers better measure app health and analyze performance. 100.A new change is coming to Chrome Canary to help image-heavy websites can load more quickly.
Publicado en Official Google Blog http://bit.ly/2VYg36k vía IFTTT
0 notes
Text
"Count ‘em up: 100 things we announced at I/O ‘19"
Another I/O is in the books! We played in sandboxes, watched eye-popping product demos and listened to AI-powered music. But the fun isn’t over! In case you missed it, here are 100 announcements we made at I/O:
Hardware
1. Hold the phone! Our new smartphones—the Pixel 3a and Pixel 3a XL—hit the shelves this week, bringing together all the essential Google features at a lower price ($399 for the 5.6-inch display and $479 for the 6-inch model). .2. Good things come in threes, like Pixel 3a’s color options. Choose from Purple-ish, Clearly White and Just Black. 3. And no matter what color your phone is, it has the same great Pixel camera. Capture shots in portrait mode and HDR+, or use Night Sight to take magical photos in low light (think outdoor concerts, swanky restaurants or night hikes with friends). 4. To add to the creativity, Time Lapse is coming to Pixel 3a. Soon you can capture an entire sunset within a few seconds of video. 5. All-day battery, baby! The Pixel 3a charges seven hours of battery life in 15 minutes and full battery can last up to 30 hours. 6. Squeeze the Pixel 3a to get the Google Assistant to send texts, find directions, set reminders and a lot more—simply by using your voice. 7. Hi, who’s there? The Google Assistant’s Call Screen feature (available in English in the U.S. and Canada) gives more information about who’s calling before you even answer your phone. Best of all, it helps save you from robocalls once and for all. 8. The Pixel 3a is protected against new threats with three years of security and operating system updates. 9. It also comes with the custom-built Titan M chip to help protect your most sensitive data. 10. All Pixel phones will get a preview of AR in Google Maps. So the next time you're getting around town, you can see walking directions overlaid on the world itself, rather than looking at a blue dot on a map. 11. Say hello to Google Nest. We’re bringing the Home products and Nest brand together to create a helpful home. 12. We welcomed the newest member of the Google Nest family: Google Nest Hub Max. Hub Max has a 10-inch screen, premium stereo sound, a camera with built-in Nest Cam features and the power of Google Assistant. 13. Live Albums on Nest Hub Max lets you select pictures of family and friends from your Google Photos to be displayed on the screen. 14. The built-in Nest Cam helps you keep an eye on things at home. You can turn the camera on when you’re away and check on things right from the Nest App on your phone. 15. The camera on Hub Max also lets you make video calls and leave personalized messages with Google’s video calling app, Duo. 16. If you’re listening to music or watching a cooking tutorial, turn down the volume with a wave of your hand. With Gestures, you simply have to look at the Nest Hub Max and raise your hand to pause media. 17. The home view dashboard lets you control all your connected devices from one dashboard—and the Google Assistant now controls more than 30,000 smart devices from 3,500 brands. 18. Similar to Voice Match, you have the option to enable Nest Hub Max’s Face Match feature that recognizes who’s using the device and shares the most relevant information, like their calendar and estimated commute time. 19. We shared our new privacy commitments, explaining our security and privacy options for Google Nest products. 20. There’s a green light on the front of Hub Max that indicates when the camera is streaming. In addition, you have multiple controls to disable camera features, like the Nest Cam and Face Match. 21. Hub Max will be available in the U.S., U.K. and Australia this summer. 22. Google Nest Hub, formerly Google Home Hub, is now available in 12 more countries—Canada, Denmark, France, Germany, India, Italy, Japan, the Netherlands, Norway, Singapore, Spain and Sweden. 23. And our prices are lower: Google Nest Hub available in the U.S. for $129, and starting today Google Home is $99 and Google Home Max is $299.
Assistant
24. The Assistant is now on more than one billion devices, available in more than 30 languages across 80 countries. 25. The next generation Assistant will run on-device and answer queries up to 10 times faster, with almost zero latency. It will come to Pixel phones later this year. 26. Keep the conversation going. Now with Continued Conversation, you can make several requests in a row without having to say “Hey Google” each time. 27. We’re extending Duplex to the web to help you complete tasks faster. Just ask the Assistant, “Book a car with for my next trip,” and it will figure out the rest. 28. Sound the alarm! You can now stop a timer or alarm that you set on Google Home speakers and Smart Displays by simply saying, “stop.” 29. Help is on the way! With a new feature called Personal References, the Assistant will better understand you and reference to the important things in your life. Say you’ve told the Assistant which contact “Mom” is. You can then ask, “Hey Google, what’s the weather like at my mom’s house this weekend?” and get the answer without any additional details. 30. Choose your next recipe to try, event to attend or podcast to listen to with Picks for You. This Assistant feature draws from past searches and other contextual cues to give you more personalized results. 31. Over the coming weeks, you’ll be able to access all of the helpfulness of the Assistant directly within Waze. 32. Take advantage of Google Assistant Driving Mode when you’re behind the wheel. The new dashboard automatically starts when you’re driving and displays the most relevant activities like navigation, messaging, calling and media. 33. It’s easier to use the Assistant to control your car remotely, so you can adjust your car’s temperature, check your fuel level or make sure your doors are locked without leaving the house. 34. Control your Assistant data and make privacy choices that are right for you from the “You” tab in your Assistant settings. 35. Ever Googled a “how-to” question? We’re giving content creators easy-to-use developer tools so in the coming months when you ask, “Hey Google, how do I install a dog door?” you’ll get a helpful step-by-step experience from a trusted source like DIY Networks. 36. The Assistant can now help you do specific things in some of your favorite apps. For example, you can say, “Hey Google, start my run in Nike Run Club.” 37. Game makers can now take full advantage of developing for Smart Displays' interactive screens, so you'll start seeing more games that combine voice, visuals and touch.
AI and ML
38. And the winner is…we unveiled the 20 Google AI Impact Challenge grantees who are using AI to address societal challenges. 39. We’ve made progress on flood forecasting in India. Now we can better use AI to predict flood timing, location and severity across 90 percent of India, and share that information with Google Public Alerts. 40. Two bands took the stage at I/O—with a little help from machine learning. Both YACHT and The Flaming Lips worked with Google engineers to create music with Magenta, our AI tool for artistic creativity 41. Check out our new PAIR Guidebook, an external toolkit that will help ML practitioners make better, user-centered decisions when building with AI. 42. We’re taking the same AI research that makes our products better and using it to enhance user privacy. Federated learning allows Google’s AI products to work better for you, and work better for everyone, without collecting raw data from your devices.
Google News and Search
43. Now it’s easier to stay in the know. The technology that powers Full Coverage in Google News is coming to Search to better organize search results for news-related topics and give you the context you need to understand a story. 44. When you search for a news topic, you’ll have the option to see different points of a story—from a timeline of events to the key people involved—and surface a breadth of content including articles, tweets and even podcasts. 45. In the coming months, we’ll start including podcasts in Google Search results so you can listen to podcasts directly from the search results page or save an episode for later.
Augmented Reality and Google Lens
46. Seeing is believing! Soon you’ll be able to view 3D objects right from Search and place them into your own space. 47. Lens now provides more visual answers by using AR to overlay useful information and content onto the things you see. For example, if you see a dish you’d like to cook in an upcoming issue of Bon Appetit magazine, you’ll be able to point your camera at a recipe and have the page come to life and show you exactly how to make it. 48. Lens can help you decide what to order. Just point your camera at the menu, and Lens highlights which dishes are popular, right on the menu. Tap on a dish to see photos and snippets of reviews from Google Maps. 49. Now, you can point your camera at text and Lens will automatically overlay the translation right on top of the original words—it works in more than 100 languages. 50. Say what? When you point your camera at text, Lens can now read it out loud. You can also tap on a specific word to search for its definition. This feature is launching first in Google Go, our Search app for first-time smartphone users.
Privacy
51. You’ll start seeing your Google Account profile icon appear more prominently across all Google products, so takes just one tap to access your privacy and security settings. 52. Now we’re making it easier to manage your data in Maps, the Assistant and YouTube (coming soon). For example, you'll be able to review and delete your location activity data directly in Google Maps, and then quickly get back to your directions. 53. New auto-delete controls for Location History and Web & App Activity allow you to choose to automatically and continuously delete your data. 54. We’re expanding Incognito mode—the option in Chrome that clears your browsing history after every session—to more of our products, including Maps. 55. Thanks to federated learning, Gboard has improved predictive typing as well as emoji predictions across tens of millions of devices. 56. We’ve built security keys directly into your Android phone, giving you easier and more convenient protection against phishing attacks. This is rolling out to all devices running Android 7.0 and above.
Android
57. Android Q’s newest features are centered around innovation, security, privacy and digital wellbeing. 58. A new gesture-based navigation lets you easily move between tasks and utilize a bigger screen. 59. Android Q has tools for developers to build cool apps for foldable phones and 5G, opening up new possibilities for experiences like gaming on your device. 60. Live Caption will automatically caption media playing on your phone—like videos podcasts, audio messages, even stuff you record yourself—across any app. 61. Smart Reply is getting even smarter! Not only will your phone show suggested replies, it’ll also help you take action, like opening addresses from a text message in an app like Maps. 62. You asked, we listened! Android Q brings Dark Theme. You can activate in Settings, or by turning on Battery Saver. 63. We’re bringing privacy to the top level of Settings so you can find all the important controls in one place. 64. Android Q arms you with new permission controls so you can share your location (or not) with apps on your own terms. 65. Time for a time out? With the new Focus Mode, you can get things done without distraction, by selecting the apps you want to stay active and pausing everything you don't. 66. And to help children and families find a better balance with technology, we’re making Family Link part of every device that has Digital Wellbeing, starting with Android Q. 67. Signed, sealed, delivered! There’s a new way to deliver important updates. With Project Mainline, we can update core OS components without a full OS update. 68. All Android devices with Q—including phones, tablets, TVs, and Android Auto—are required to encrypt user data. 69. Some of these features are available today in Android Q Beta which is available on 15 devices from 12 manufacturers (in addition to all Pixel phones). 70. Android Q brings lots of new emoji, including 53 new non-binary designs for emoji that Unicode defines as "genderless.” 71. Buckle up! Android Auto’s new design coming out this summer will help you get on the road faster, show you useful information at a glance and simplify common tasks while driving. 72. Now media developers will be able to build new entertainment experiences for Android-powered infotainment systems. 73. With Tiles on Wear OS by Google you have more swipeable access to things right from your wrist like your goals, next event, weather forecast, heart rate and timer. 74. Android TV platform now has more than 140 pay TV partners, 6 of the 10 top smart TV OEMs using the Android TV platform; and more than 5,000 apps and games in its ecosystem.
Chrome
75. It’s now easier to share files between Linux, Android, and Chrome OS using file manager. 76. Android Studio on Chrome OS helps you optimize your apps for Chrome OS—directly on your Chromebook. 77. All Chromebooks launched this year will be Linux-ready right out of the box. 78. We have more user transparency and controls, like improved cookie controls and more restrictions for fingerprinting across the web.
Ads
79. With the option to bid on tROAS, advertisers will soon be able to automatically pay more for users who are likely to spend more in apps, and pay less for users likely to spend less. 80. We’re teaming up with eight agencies http://bit.ly/2PWq1jx —Vidmob, Consumer Acquisition, Bamboo, Apptamin, Webpals, Creadits, Kaizen Ad and Kuaizi—to provide advertisers end-to-end creative development and consultation services. 81. We’ll be expanding a new monetization program, called Open Bidding, to all publishers later this year so developers can automatically maximize the value of every impression automatically. 82. New transparency tools across browsers http://bit.ly/2V2slpT will give people greater visibility into the data that Google uses to personalize ads. 83. We also launched new AdMob tools for developers that help give more control over ad content, easily access metrics and quickly identify and remove bad ads.
Accessibility
84. Project Euphonia is using AI to improve computer's' abilities to understand and transcribe a diverse set of speech patterns, including impaired speech. 85. Live Relay uses on-device speech recognition and text-to-speech conversion to allow the phone to listen and speak on people’s behalf while they type. 86. Project Diva is a research effort that makes Google Assistant more accessible for people with disabilities.
More developer announcements
87. We’re launching a preview for Local Home SDK that lets smart home developers bring a new level of speed and reliability to smart home devices. 88. The next version of our Maps Android SDK is now available for public beta. It’s built on a common platform with the Google Maps mobile app, which means better performance and feature support. 89. A new Google Maps Platform integration with deck.gl will make high-quality data visualizations at scale possible. 90. We’re unifying our efforts around third-party connected home devices under a single platform for developers. Now we’ll be delivering a single consumer and developer experience through the Works with Google Assistant program. 91. We introduced updates in ARCore to Augmented Images and Light Estimation— features that let you build more interactive, and realistic experiences. 92. Scene Viewer is a new tool that lets users view 3D objects in AR right from your website. 93. Android development will become increasingly Kotlin-first.
94. We released 11 new Jetpack libraries and open-sourced an early preview of Jetpack Compose, a new unbundled toolkit designed to simplify UI development. 95. Android Studio 3.5 Beta is available for download and includes improvements in three core areas: system health, feature polish and bugs. 96. Flutter 1.5 includes hundreds of changes in response to developer feedback, including updates for new App Store iOS SDK requirements, updates to the iOS and Material widgets, engine support for new device types, and Dart 2.3 featuring new UI-as-code language features. 97. We released the first technical preview of Flutter for the web. 98. Our in-app updates API is out of beta. Now people can install updates without ever leaving the app. 99. New metrics and insights in the Google Play Console help developers better measure app health and analyze performance. 100.A new change is coming to Chrome Canary to help image-heavy websites can load more quickly.
Source : The Official Google Blog via Source information
0 notes
Text
How to Enable Instagram Dark Mode (+ Facebook, Twitter, Pinterest & YouTube)
Instagram Dark Mode has been available for a few months now, but have you taken advantage of it yet?
Instagram Dark Mode enables you to “turn the lights out” and use the app with a black color scheme. It’s also available for Facebook, Twitter, Youtube, and even Pinterest now! Here’s a quick guide on why you could consider making a switch and how to do it:
How to Enable Instagram Dark Mode (+ Facebook, Twitter, Pinterest & YouTube)
Is Dark Mode Better For Your Eye Health?
This might come as a surprise to you, but Dark Mode was the default mode for decades in the early days of computing. Remember those Matrix-like green-on-black monitors? Those were known as monochrome monitors, which were black due to the phosphor coating inside the screen.
It’s been a long time since manufacturers last painted monitors with phosphor, but some people still swear by dark mode. Apple has been offering dark mode feature since September 2019, announcing that this new dramatic look is not only better for photo and video editing, but is also easier on your eyes. Many thus believe that Instagram Dark Mode, too, is more gentle on your eyes.
However, you should know that this is simply not true.
There’s a wide array of human experience that keeps that from being true for everybody. There’s no science showing that dark mode is any easier on the eyes than normal mode, so it’s still up for debate. In fact, it’s the duration of use or the brightness of your screen that might affect your eye health, says Dr. Euna Koo, an ophthalmologist at the Stanford Byers Eye Institute. Research actually shows that “blue light”, which is part of the light spectrum made of short, high-energy wavelengths, is a typical factor in eye fatigue, so adjusting your display to warmer (or yellower) tones could do the trick (here’s a tutorial on how to do this for iOS).
In addition to that, people get dry eyes from not blinking for long periods, as we tend to stare at the screens literally forgetting to blink often enough. Typically, any human being blinks 15 times a minute, but it can decrease as low as 3.6 when we’re gazing at our phones or computers — causing serious eye fatigue and dryness. That can further contribute to having headaches and even blurred vision. The solution lies in taking more frequent breaks from your screen time and simply not forgetting to blink — as simple as that!
The Real Benefits of Dark Mode
So, what are the real benefits of dark mode?
For starters, Dark Mode is trendy. Memes, Twitter quotes, etc., are often displayed in Dark Mode on Instagram now, so it could be wise to keep up with trends if you want to resonate to a young audience.
Secondly, Dark Mode is good for your battery life, as the swaths of black areas in dark themes conserve battery. Which means you can scroll Instagram for longer, if needed!
🤓
In October 2019, Adam Mosseri, Head of Instagram, announced that Dark Mode is now available for Instagram too:

If you’re looking to make the switch, keep on reading to learn how for both iOS and Android:
How to Switch on Instagram Dark Mode for iOS
If you want to start running Instagram in Dark Mode, you need to make sure your device’s operating system is updated to iOS 13 first.
For that, go to your Settings → Software Update. There, you’ll be able to see which software version is currently running on your Apple device and if you need to update your system.

Once you’ve ensured you’re up-to-date with your iOS software, open the Settings app again to enable Dark Mode. Go to Display and Brightness and select Dark, instead of default Light, mode:

There, you can also turn on Automatic Mode, which would automatically switch to Dark Mode at sunset and back to Light Mode at sunrise. Up to you!
Having done that, now that you’ll go to Instagram, your favorite app will display in the new black theme!

If not, fret not.
If you see that the Instagram Dark Mode isn’t enabled, then you probably need to check if you have the latest version of the app.
Head to the App Store and search for Instagram. If you’re running an old version, you’ll see a suggestion to make an update. Once that’s done, you’ll be able to run Instagram on Dark Mode!
Remember: iOS Dark mode impacts all of your apps, not just Instagram. You won’t be able to select it for specific apps only. This means that once Instagram Dark Mode is switched on, you’ll automatically see the change enabled on other apps that also have Dark Mode compatibility — like Twitter or Pinterest.

For apps like FB Messenger or YouTube, you’d have to switch Dark Mode on manually. For Messenger, go into your app first and click on your own profile picture in the top left corner. There, you should be able to make the switch with a click of a button:

For YouTube, head into your Account settings, click Settings and enable the Dark Theme option right there:

How to Switch on Instagram Dark Mode for Android
To enable Instagram Dark Mode, make sure your device is updated to Android 10. Similarly to the previous steps, also don’t forget to check you have the latest Instagram version, too!
Then, follow these quick steps to start running your Android device on Dark Mode:
Go to Settings → Display → Advanced. From there, select Dark from the Device theme menu:

Et voila! Now Dark Mode will automatically start to run both on your phone and all compatible apps — that include Instagram 💪
Bonus 1: Enable Dark Mode on Threads
If you started using Threads already, Instagram’s messaging app for close friends, you can use Dark Mode there as well, which, unlike on Instagram, is more personalized. This new app allows you to choose between different modes of darkness, making it more adjusted to your own preference.
When you tap the Home button in the top left corner of the app, go to Themes. There, you’ll see a variety of display options available during Daylight, Twilight, Midnight, Aurora, and Sunrise. Once you’ve set your theme in Threads, it will override the Dark or Light Mode that you’ve selected from your phone — which means that all the other apps will run on Light or Dark Mode, but Threads will run on whatever theme you set!

Bonus 2: Get Dark Mode on Iconosquare
Did you know that Iconosquare offers Dark Mode too?
Well, if you didn’t, now you do!
To enable dark mode on Iconosquare, go to My account → Settings → Themes.
There, you can easily switch between the classic white theme or the new dark theme. Don’t forget that these display settings affect all of your Iconosquare accounts on the browser of your choice, and these settings are only visible to you. Meaning, if you have a team of people using Iconosquare, your display settings won’t overlap with theirs.

Conclusion
Turning on Dark Mode does have some benefits, so it’s worth trying out the feature yourself to see if you like the new look. After all, how else would you know?
Have you tried Instagram Dark Mode yet? Leave a comment to let us know!
https://growinsta.xyz/how-to-enable-instagram-dark-mode-facebook-twitter-pinterest-youtube/
#free instagram followers#free followers#free instagram followers instantly#get free instagram followers#free instagram followers trial#1000 free instagram followers trial#free instagram likes trial#100 free instagram followers#famoid free likes#followers gratis#famoid free followers#instagram followers generator#100 free instagram followers trial#free ig followers#free ig likes#instagram auto liker free#20 free instagram followers trial#free instagram followers no#verification#20 free instagram likes trial#1000 free instagram likes trial#followers instagram gratis#50 free instagram followers instantly#free instagram followers app#followers generator#free instagram followers instantly trial#free instagram followers no survey#insta 4liker#free followers me#free instagram followers bot
0 notes
Text
What are Luminosity Masks? Free Action and Video
What are Luminosity Masks?
By
Chris Ewen Crosby
If you are using Adobe Photoshop to edit your photos, or you know others who do, then you’ve probably heard the word luminosity masks thrown around quite a bit. So what is all the fuss about? Truth is, luminosity masks are a great tool to assist you in making targeted selections so adjustments focus on only portions of the image. In this tutorial I’m going to touch on what a mask is, then what luminosity masks are, and finally how to create a Photoshop action to quickly create luminosity masks for all your images. After reading the tutorial, check out a short video on all these subjects and don’t forget to download my free Photoshop Action to try out.
Masks
Before we talk about luminosity masks let’s first talk about what a mask is. In photoshop, a mask can be used to reveal or hide any type of layer or adjustment. Portions of a layer that are masked will be shown and those that are unmasked will be hidden. When you add a mask to a layer it is traditionally white. The white color in a mask reveals the layer 100% and black would hide it 100%. Values between white and black will change the intensity of how much the mask is revealing the layer, much like layer opacity and fill. For example, if we had a grey mask, the layer masked would be revealed at 50%. Below you can see an example of what a mask is. On the right of the image you’ll see the layers panel in photoshop. I have a photo, named background, that I have created a new layer on top of, called layer 1. I filled layer 1 with the color red and then added a mask to it.
The white box that you see next to layer 1 is a layer mask . The mask is white, which means that it is showing 100% of my red layer above the layer below.
To better illustrate the effects a mask has you can brush on the layer mask using the color black. I chose the brush tool, selected a round brush, and a soft hardness. Make your brush opacity 100% and flow %100. Then I selected black as my foreground color and made some brush strokes on the masks, which you can see in the image below.
Now that I have painted black on the white mask, areas that are black are no longer showing the red layer and allowing the image below it to be shown. Furthermore, as we discussed earlier, values in between white and black are somewhat faded. Looking at the edge of my brush strokes, you’ll notice that my soft brush with a low hardness has created values of grey. Those grey values are softening the red layer and you’ll see a small gradient along the edge of my brushing.
Hopefully from this basic illustration you have an idea what a mask is and what it does. If you need more instruction you can find lots of basic instruction out there. Masks can be used in several ways in photoshop, but what we are going to talk about luminosity masks.
What is a luminosity mask?
A luminosity mask is a mask made based upon the luminance values of an image. Photoshop can create masks that target the different luminance values of an image so that we can adjust only those parts that we want to. An example of this would be targeting the lightest, darkest, or mid luminance values of the image. You can refine masks to target more or less of an image. The possibilities are endless once you have better understanding of how to use them. Before you can create and see a luminosity mask you must first choose any image with good tonal range, meaning both light and dark tones. Choose one of your own and open it in photoshop to follow along. To see a luminosity mask you must first open up the channels panel in photoshop. If you aren’t sure where it is, click on the window menu at the top of the screen and make sure channels is checked. Below you can see the location of my channels panel and where open the panel. Yours is probably located next to your Layers panel on the right. I’ve moved mine to the left as it is more convenient for my editing workflow.
Once you’ve opened and located your channels panel you will see 4 layers or channels, RGB, Red, Green, and Blue. By clicking on the Blue Channel layer you can see what a luminosity mask is based upon the blue color in the image. White is where there is more blue, and black is where there is less blue. See the image below.
To create a masked based up on the colors in the image click on the RGB channel. You should now have all the channels selected since RGB is all the channels together. With the RGB channel selected we can make a selection by holding down CTRL (CMD on Mac) and clicking on the RGB Channel. If you’re doing it right you should see a box attached to your cursor. After clicking you should now see a selection made on your image, or “marching ants” as they are called. See the image below.
You should notice that the selection is not of 100% of the image, but is surrounding the brighter parts of your image only. This selection is the brighter luminance values in the image. With this selection made, we can create a mask of the selection by clicking the “Save Channel as Selection” button at the bottom of the channel panel. The button looks like a square with a circle in the middle. See image below.
Once clicked a new layer, or channel is created in the panel, called “Alpha 1”. This is our first luminosity mask of the 50% brightest parts of the image. Click on the Alpha 1 layer to see how the mask appears. It should look something like the image below, where the brightest parts of the image are white and darkest parts of the image are black.
Remember how a mask works, the whitest parts will be revealed more and darkest parts will be hidden. So if I were to use this mask, the layer that I am masking would only effect the brighter parts more than the darker parts.
If your mask has come out where the darkest are brightest then you must double-click on the quick mask tool, located just below the color selectors on the toolbar to the left. From the prompt that appears make sure that “Masked Areas” is selected and not “Selected Areas”. Hit ok and go back and try to make your first channel again.
The Alpha 1 channel, is our first luminosity mask and I rename it to Lights 1 as it is focused on the lighter parts of the image. We can create more masks by lessening this selection or by “intersecting” this selection. To do that you must have the Lights 1 mask selected, CTRL or CMD and click on Lights 1. Once selected hold down CTRL + Shift + Alt (CMD + Shift + Option on Mac) and click on the Lights 1 again (You should see a box with an X near your cursor if holding the right buttons). You should notice the selection change and be a smaller selection, but still focused on the lighter parts of the image. Save the new selection as a channel or mask and a new Alpha Channel should appear. Rename this to Lights 2 and click on it to see the new mask. See image below.
Notice how Lights 2 is a darker mask with less of the image masked, but still weighted to the lighter tones of the image? You can continue refining or lessening the mask using the same process and create Lights 3, 4, 5, 6, 7, etc. It’s up to you how many you create.
You can also create masks for the dark tones. Make a selection of your Lights 1 mask, CTRL or CMD and Click. Now invert that selection by holding CTRL or CMD with Shift, then hit the letter “i” while holding those. The selection should be inverted and the darks of the image are now selected. Save this selection as a mask and rename it to Darks 1. See the image below.
Now your have a mask that is more white in the dark parts of the image and less white in the brightest parts. You can again intersect or lessen your darks selection the same way we did for the lights. I usually make at least 5 masks for both lights and darks.
You can also make masks for the mid tones of an image as well. Create those by making Lights 1 your selection and intersect (CTRL + Shift + Alt or CMD + Shift + Option on Mac) Lights 1 with Darks 1. You should get a error message telling you that no pixels will be visible, just click OK. That message is telling you that you will not see any marching ants because the selection is so faint, trust that it is there. Now create a new mask and rename to Mids 1. You should now have a mask similar to what you see below.
Your Mids mask is a selection that doesn’t select the brightest or darkest tones of the image. Creating more mid tone masks is a bit different from Lights and Darks however. If you intersect or lessen the selection you’ll get a darker version of Mids 1. For brighter versions, hold CTRL or CMD and Shift while clicking on Mids 1 to add to the selection.
Once you’ve made all of your masks you should have Lights 1-5, Darks 1-5 and Mids 1-5, or whatever you chose. You can combine all these masks in many ways by intersecting, adding to, or subtracting from each other to create masks that target very specific tonal ranges, such as upper and low mids.
So by now you’re probably asking yourself, “all this mask creation for every image I edit?” Yes, but not manually! Let’s talk about how to automate the whole process so it takes just a few seconds to create all your masks.
How to make a photoshop action
A photoshop action is used to help automate most processes is photoshop. Essentially it records every change that you make, such as keystrokes or any layer change. Whatever you do while recording your action, photoshop will record and duplicate when the action is played again. So what I have done is created an action for making my luminosity masks. You can download mine and try one out by clicking HERE. If you’d like to create your own it’s really quite easy to learn and may help you down the road.
First, open your actions panel is photoshop, if you aren’t sure where it is, go to “Window” and make sure “Actions” is checked.
In the actions panel first create a new folder, rename it, I chose “LumMask.” Then with that new folder selected click create new action in the action panel and name the Action Luminosity Masks, then hit Record. You’ll notice now that a red record button is now illuminated at the bottom of the Actions panel, saying that it’s recording. If you aren’t quite ready, hit the square stop button. Once ready hit the record button again. You can stop or start recording as you chose.
Before you start recording make sure that you’re ready to make all your luminosity masks without making any extra keystrokes or errors. Extra keystrokes may increase the time to make the masks, but only a small amount. Once you’re ready to record, hit the record button and begin making your luminosity masks, just as we did earlier. Once you’ve made all of the masks hit the stop button and your action is complete.
Test your action by first deleting all of your channels. Then in the Action panel, click on the action your created inside the folder and hit the Play button. Photoshop should now create all of your masks quickly. If something didn’t come out right, you can delete or add steps to the action, or just try to record the action again.
If you aren’t getting it right you can always download my FREE ACTION. To install it, click on the box in the top right of the Action Panel and chose “load actions” Locate the action where it was saved and open it. A new folder called “LumMask” should appear in the actions panel. Expand the folder and click the “Luminosity Mask” action, then hit play. The action will create all of your luminosity mask for you.
Conclusion
Luminosity masks may seem a bit difficult to wrap your head around at first, but once you are able to create luminosity masks you can start to play with them and you’ll find that they are actually quite easy to use. The hard part comes with what types of layers you are going to use them with. If you are trying to improve your editing, which I’m sure you are if you are reading this, then you need to learn about luminosity masks and need to learn how to use them. I’d love to hear your thoughts on this tutorial and answer any questions you might have. Feel free to drop a comment at the bottom of this article. If you don’t see the comment section click here and then scroll to the bottom. I appreciate it. I hope that you found this tutorial helpful. If it’s hard for you to follow along while reading, try out a video version of this tutorial on YouTube.
If you are looking for further instruction on the use of luminosity masks, I have full workflow tutorials and 1 on 1 training available on my website. In my latest tutorial I use the image from this article and edit from RAW to finished product. I demonstrate how I use luminosity masks in my workflow and many other techniques to bring your image to life. See a before and after of the full edit below.
SUNSET WORKFLOW TUTORIAL - Full Adobe Photoshop and Lightroom workflow
See a gallery below of images created using Luminosity Masks. All are images available for purchase in my shop, click an image to see about printing.
$(window).load(function() { $(".sqs-gallery-block-stacked").twentytwenty(); });
#photography#photographer#landscape#tutorial#Luminosity Masks#Photoshop#Adobe#mask#masks#creating#Photoshop Action#learn#learning#how#to#action#chris ewen crosby#adobe#luminosity#free#youtube
0 notes
Text
An Overview of WordPress 5.0 and the New Block Editor
WordPress 5.0 was released on December 6th, 2018, replacing the classic content editor with the new block editor, also referred to as Gutenberg.
The easy-to-learn, user-friendly block editor has a lot of options for people who want more flexibility over their design. Improvements were made on the back end to help ease and streamline design, which creates better-looking content for the viewer. The block editor has also solved some annoying design issues that came along with the classic editor. The almost-non-existent learning curve is good news for WordPress newbies, but the block editor also speeds up the process for pros.
A WordPress 5.0 overview wouldn’t be complete without talking about the new default theme, Twenty Nineteen. This theme is specifically made to work with the block editor. Newbies should experiment with the Twenty Nineteen theme to get a well-rounded experience. You can always switch to another theme once you’re ready to create something that’ll go live.
Classic Editor vs. Block Editor
The classic editor was a text editor that resembled Microsoft Word in terms of its formatting buttons.
The pillars of this WordPress 5.0 overview are the content blocks. The new editor uses content elements in blocks to add content to your post, design the layout and easily move the blocks around however you want.
There are blocks for all sorts of content, including audio, images and galleries, lists, paragraphs, and videos.
If you can’t find what you’re looking for in the native editor, there are plugins you can install, too, like Advanced Gutenberg, Atomic Blocks and Stackable. You’ll be able to access blocks for creating a post slider, adding testimonials and featuring content.
Getting Started with the Block Editor
If this is your first WordPress 5.0 overview, it’s important to know that you’ll have the option to test the new block editor or stick with the classic editor.
Even if you do update (which we recommend), there’s still a way to use the classic editor through 2021.
When you use the block editor for the first time, there’ll be a walkthrough to help you learn the ropes.
If you switch to the block editor and then decide to switch back, hover over Plugins on the left sidebar and click Add New. Search for “Classic” on the top right. This is the plugin you want to install:
Click Install Now, then Activate. Now, when you go to your posts, you’ll see the classic editor. To switch back to the block editor, go to Plugins and then click Deactivate under Classic Editor. Now you’ll see the block editor when you go to a post.
Benefits of the Block Editor
The block editor makes it easier to create aesthetically-pleasing, modern posts, and you can go heavy on the multi-media if you want. According to WordPress, other benefits include doing more with fewer plugins, having your website work across all devices and screens, and creating blog posts that closely resemble your website.
The classic editor required you to install a plugin for certain content types, like tables. With the block editor, these content types come standard.
If you create websites for clients, the block editor lets you create a custom, reusable block. Clients can then add content on their own without damaging the look of the website.
There are benefits for developers, too:
Using the Block Editor
In this part of our WordPress 5.0 overview, we’ll go through the basics of how to use the block editor when creating a post. You can also use the block editor to create a page.
Create a New Blog Post
Go to Posts in the left sidebar, then click Add New. That will bring up a blank blog post page with the block editor. It doesn’t look like much yet, but you’ll quickly see how to use it.
Adding and Arranging Blocks
The first block, which is standard on every post, is the title. Just click Add Title to start typing.
To get to the block below the title, which is a text block, you can either click it with your mouse or use the tab key.
You don’t have to use text here, though. Click either the plus sign in a circle on the left side or one of the icons on the right side, which symbolize table, photo and text.
Clicking the plus sign on the left brings up the most used blocks and a search bar to find one that isn’t listed. Scroll down to see blocks grouped by category, too.
You can also add a block between two blocks. Hover over the block below where you want to add a block and move your cursor to the top center of the block. A plus sign will appear, letting you add a block here the same as you do elsewhere.
Alternatively, you can click on any block and then open the advanced settings in the toolbar. You’ll have the option to add a block either above or below the block you’re currently on.
If you want to rearrange the order of the blocks, hover over the block, which will show up and down arrows. Note that you can’t move a block above the headline at the top of the post.
If you want to know what type of block you’ve added, clicking on it will show the type of block on the top right.
Customizing Your Blocks
Let’s add text to the first block under the headline. As you start typing, a toolbar will pop up. There are also several settings on the right for further customizing the text. I enlarged the font, made it bold and white, and gave it a black background.
I then decided to remove the text and add a photo instead.
Just like with the text, you can access a toolbar and settings specific to this type of media.
Also, there are advanced toolbar sidebar settings you can play with. Access them by clicking the three vertical dots.
If you prefer to have this toolbar at the top of the editor, click the three vertical lines on the top right of the page and then check Top Toolbar.
If you want to get rid of the sidebar customization options, click Hide Block Settings in this menu. This will give you cleaner interface to work with.
Creating Reusable Blocks
When you create a block that you love or that you know you’re going to use over and over, you can save it. Click the block, open the advanced toolbar settings and choose Add to Reusable Blocks.
You can then title the block and save it. When you want to insert the saved block into a post, add a block as normal, scroll to the bottom of the menu and select Reusable. This will show all of the blocks you’ve saved and let you add them to your post.
To edit a block, click Manage All Reusable Blocks.
Removing Reusable Blocks
Let’s say you create a reusable block that you no longer want saved. Opening the toolbar settings gives you the option “Remove from Reusable Blocks.” However, choosing this doesn’t just un-save the block from Reusable Blocks, it removes the block from this post and any posts or pages it’s on.
Choosing Manage All Reusable Blocks also doesn’t give you the option to un-save the block as reusable while still keeping it in your posts.
For now, the safest bet is to keep all of your reusable blocks, even if you don’t use them anymore. You can rename them something like, “Unused 1” and “Unused 2” for organization.
Deleting Content Blocks
To delete a block, just click on it and press delete on your keyboard. You can also pull up the advanced settings and click Remove Block. What you don’t want to do is what I accidentally did: think you’re still clicked on a block and choose Move to Trash on the right sidebar – this trashes the entire blog post.
Helpful Blocks to Check Out
The new block editor makes it much easier to add certain types of content that the classic editor struggled with. We wanted to make sure our WordPress 5.0 overview talked about three blocks that solve previous design problems.
Buttons
Before, adding a button meant either using a plugin or writing HTML. Now, you can choose the Button block, add your text and a link, and customize the colors and style.
Multiple Columns
This may be my favorite block because you can create side-by-side content or a magazine-style post. The Columns block lets you make two columns, which you can then add all types of content to: images, lists, text, etc.
Columns are separated into blocks, just like the rest of the post. By clicking on the plus sign, you can decide what type of content you want there.
I added headers to both columns, created a list on the left and then added green font with a drop cap on the right.
Side-by-Side Image and Text
One thing that was always a pain with the classic editor was formatting text next to an image. The block editor has a block specifically for that, called Media & Text (if you search for it, use the ampersand – writing “and” doesn’t bring it up).
You can add an image and then text next to it, and the size of the text will change depending on how much is written per line. You can edit this in the sidebar settings if you want.
Document Options and Publishing
Since the right sidebar now includes block customization options, you may wonder where the metadata settings went. Just click Document on the top to access them.
Certain plugins will show up above the this menu. For example, my Yoast SEO plugin is accessible here.
In Conclusion
In this post we’ve shown you how to use WordPress 5.0’s new block editor. If you’d like to go a bit deeper, check out this article on how to create Gutenberg templates. And of course, be sure to check back every day for more WordPress tutorials and resources. If you have any questions about today’s post, please drop us a line in the comments below.
Featured Image via supercaps / shutterstock.com
The post An Overview of WordPress 5.0 and the New Block Editor appeared first on Elegant Themes Blog.
😉SiliconWebX | 🌐ElegantThemes
0 notes
Text
How to Purchase Cryptocurrencies
This tutorial will discuss how to buy cryptocurrencies on OpenBazaar, a decentralized marketplace which never ever has platform fees and doesn't need signing up an account. You'll learn how to purchase cryptocurrency with a various cryptocurrency, such as Bitcoin. At the moment OpenBazaar does not support people purchasing cryptocurrency with routine fiat cash such as US Dollars or Euros, though it's a feature that will ideally be supported in the future.
Here's a video tutorial describing the process:
Step # 1: Download OpenBazaar
Visit OpenBazaar.org and click on the installer link for your os. When the installer file is downloaded, open the file and it will begin the process of installing OpenBazaar.
Step # 2: Select cryptocurrency
You will be asked which cryptocurrency you desire to utilize. This is the cryptocurrency that you will pay with as a purchaser, or get as a seller. This is not the currency that you want to purchase.
At the moment OpenBazaar users are restricted to utilizing only one cryptocurrency at a time, and can just pick BTC, BCH, or ZEC. In the near future users will be able to use numerous currencies at the very same time, and will have LTC, ETH, and other coins available to use.
Action # 3: Total Onboarding
Go through the onboarding procedure and go into whatever details you select. If you want to remain private then keep the randomly produced name designated to you. Choose the currency you wish to have actually prices displayed in; you'll desire this to be the currency that you most typically use so that the prices of products and services are familiar to you.
Read the terms of service, and if you agree then accept them.
You're now up and running on OpenBazaar, so let's find some cryptocurrency listings. Click the "Discover" button on the leading right of the customer (the blue tent). After choosing a search company, you'll now see great deals of listings on the network. To filter down to only cryptocurrency offerings, utilize the search company's filters on the left. You'll now see a list of cryptocurrencies for sale. Find what you desire and click on the listing to view it.
Action # 5: Buy the cryptocurrency
It's advised that you discover a supplier who has a "Verified Mediator" on their listings. This means you will be able to choose escrow from a credible third celebration. You can inform if they use a validated moderator by searching for a little orange badge below the seller's name.
Now that you've found some crypto you wish to buy, click the "Trade now" button to start the checkout procedure. You'll need to go into a getting address for the funds you're purchasing. As in the example listed below, if you're purchasing Decred then you'll need to put in a Decred address that you manage where the seller will send the cryptocurrency you buy.
Then pick payment type. Unless you fully trust the supplier, you need to utilize a moderated payment with a verified mediator. Go into the quantity you wish to buy, then review your order and click "Pay." You'll now see the payment screen.
Step # 6: Send out Payment
Once you've placed the order you now require to spend for it. There are 2 methods to pay in OpenBazaar. One is by scanning the QR code on a mobile wallet or copying the information on the payment screen into a different wallet and sending out payment. The other approach is using the internal OpenBazaar wallet.
If you don't want to utilize a separate wallet, or you try using an external wallet and you get a mistake message, then it's finest to use the internal OpenBazaar wallet and click the "Pay from Wallet" button.
Prior to you can pay from the OpenBazaar wallet, you'll need to money it. To do this, click the wallet button, then in the wallet user interface click "Receive Loan." This will show a QR code and address you can use to fund the wallet. Keep in mind that you'll need to wait for one verification on the blockchain before the funds are spendable.
To spend for orders you've currently put, click "Purchases" in the dropdown menu on the leading right (your profile photo) and after that click the specific order.
Once payment has actually been sent you'll see a green check mark appear and it's now approximately the vendor to satisfy your order.
Step # 7: Inspect your order
To examine your order, click on "Purchases" in the dropdown menu on the top right (your profile image) and then click on the specific order. You'll see a bar showing the progress of the order.
When the seller satisfies the order you must see it showing "satisfied," and the vendor ought to send verification such as a transaction hash to prove they sent out the funds to the address you provided. Get in the deal hash into a block explorer to verify, or just inspect the wallet where you expected the funds to be sent out. If you have actually gotten them, leave an evaluation and close the order out. It's crucial that you do complete the order, otherwise the funds will not be released from escrow and the seller will be forced to open a disagreement to declare their funds.
If you do not receive the funds in a reasonable period, message the seller to ask why. If you get no reaction after a while or something else is incorrect with your order, you can pick to open a disagreement with the moderator by clicking the "Disagreement Order" button when viewing the order in your purchases.
OpenBazaar is also a platform for goods and services. While you're waiting for the vendor to send your brand-new coins, have a look at what the market needs to offer.
Now you know how to acquire cryptocurrencies independently and with no fees using OpenBazaar.
Get involved with our community on Slack and Reddit and make even a little purchase on OpenBazaar today to see what you think! If you're unsure where to start, you can take a look at the official OpenBazaar stores-- BTC Shop and BCH Store and make a small contribution or score some excellent OpenBazaar gear!
0 notes
Text
Lightweight Migrations in Core Data Tutorial
This is an abridged from our book Core Data by Tutorials, which has been completely updated for Swift 4 and iOS 11. This tutorial is presented as part of our iOS 11 Launch Party — enjoy!
When you create a Core Data app, you design an initial data model for your app. However, after you ship your app inevitably you’ll want to make changes to your data model. What do you do then? You don’t want to break the app for existing users!
You can’t predict the future, but with Core Data, you can migrate toward the future with every new release of your app. The migration process will update data created with a previous version of the data model to match the current data model.
This Core Data migrations tutorial discusses the many aspects of Core Data migrations by walking you through the evolution of a note-taking app’s data model. You’ll start with a simple app with only a single entity in its data model.
Let the great migration begin!
When to Migrate
When is a migration necessary? The easiest answer to this common question is “when you need to make changes to the data model.”
However, there are some cases in which you can avoid a migration. If an app is using Core Data merely as an offline cache, when you update the app, you can simply delete and rebuild the data store. This is only possible if the source of truth for your user’s data isn’t in the data store. In all other cases, you’ll need to safeguard your user’s data.
That said, any time it’s impossible to implement a design change or feature request without changing the data model, you’ll need to create a new version of the data model and provide a migration path.
The Migration Process
When you initialize a Core Data stack, one of the steps involved is adding a store to the persistent store coordinator. When you encounter this step, Core Data does a few things prior to adding the store to the coordinator. First, Core Data analyzes the store’s model version. Next, it compares this version to the coordinator’s configured data model. If the store’s model version and the coordinator’s model version don’t match, Core Data will perform a migration, when enabled.
Note: If migrations aren’t enabled, and the store is incompatible with the model, Core Data will simply not attach the store to the coordinator and specify an error with an appropriate reason code.
To start the migration process, Core Data needs the original data model and the destination model. It uses these two versions to load or create a mapping model for the migration, which it uses to convert data in the original store to data that it can store in the new store. Once Core Data determines the mapping model, the migration process can start in earnest.
Migrations happen in three steps:
First, Core Data copies over all the objects from one data store to the next.
Next, Core Data connects and relates all the objects according to the relationship mapping.
Finally, enforce any data validations in the destination model. Core Data disables destination model validations during the data copy.
You might ask, “If something goes wrong, what happens to the original source data store?” With nearly all types of Core Data migrations, nothing happens to the original store unless the migration completes without error. Only when a migration is successful, will Core Data remove the original data store.
Types of Migrations
In my own experience, I’ve found there are a few more migration variants than the simple distinction between lightweight and heavyweight. Below, I’ve provided the more subtle variants of migration names, but these names are not official categories by any means. You’ll start with the least complex form of migration and end with the most complex form.
Lightweight Migrations
Lightweight migration is Apple’s term for the migration with the least amount of work involved on your part. This happens automatically when you use NSPersistentContainer, or you have to set some flags when building your own Core Data stack. There are some limitations on how much you can change the data model, but because of the small amount of work required to enable this option, it’s the ideal setting.
Manual Migrations
Manual migrations involve a little more work on your part. You’ll need to specify how to map the old set of data onto the new set, but you get the benefit of a more explicit mapping model file to configure. Setting up a mapping model in Xcode is much like setting up a data model, with similar GUI tools and some automation.
Custom Manual Migrations
This is level 3 on the migration complexity index. You’ll still use a mapping model, but complement that with custom code to specify custom transformation logic on data. Custom entity transformation logic involves creating an NSEntityMigrationPolicy subclass and performing custom transformations there.
Fully Manual Migrations
Fully manual migrations are for those times when even specifying custom transformation logic isn’t enough to fully migrate data from one model version to another. Custom version detection logic and custom handling of the migration process are necessary. In this tutorial, you’ll set up a fully manual migration to update data across non-sequential versions, such as jumping from version 1 to 4.
Throughout this tutorial, you’ll learn about each of these migration types and when to use them. Let’s get started!
Getting Started
Download the starter project for this tutorial — UnCloudNotes. Unzip it and open it in Xcode.
Build and run the app in the iPhone simulator. You’ll see an empty list of notes:
Tap the plus (+) button in the top-right corner to add a new note. Add a title (there is default text in the note body to make the process faster) and tap Create to save the new note to the data store. Repeat this a few times so you have some sample data to migrate.
Back in Xcode, open the UnCloudNotesDatamodel.xcdatamodeld file to show the entity modeling tool in Xcode. The data model is simple — just one entity, a Note, with a few attributes.
You’re going to add a new feature to the app: the ability to attach a photo to a note. The data model doesn’t have any place to persist this kind of information, so you’ll need to add a place in the data model to hold onto the photo. But you already added a few test notes in the app. How can you change the model without breaking the existing notes?
It’s time for your first migration!
A Lightweight Migration
In Xcode, select the UnCloudNotes data model file if you haven’t already selected it. This will show you the Entity Modeler in the main work area. Next, open the Editor menu and select Add Model Version…. Name the new version UnCloudNotesDataModel v2 and ensure UnCloudNotesDataModel is selected in the Based on model field. Xcode will now create a copy of the data model.
Note: You can give this file any name you want. The sequential v2, v3, v4, et cetera naming helps you easily tell the versions apart.
This step will create a second version of the data model, but you still need to tell Xcode to use the new version as the current model. If you forget this step, selecting the top level UnCloudNotesDataModel.xcdatamodeld file will perform any changes you make to the original model file. You can override this behavior by selecting an individual model version, but it’s still a good idea to make sure you don’t accidentally modify the original file.
In order to perform any migration, you want to keep the original model file as it is, and make changes to an entirely new model file.
In the File Inspector pane on the right, there is a selection menu toward the bottom called Model Version. Change that selection to match the name of the new data model, UnCloudNotesDataModel v2:
Once you’ve made that change, notice in the project navigator the little green check mark icon has moved from the previous data model to the v2 data model:
Core Data will try to first connect the persistent store with the ticked model version when setting up the stack. If a store file was found, and it isn’t compatible with this model file, a migration will be triggered. The older version is there to support migration. The current model is the one Core Data will ensure is loaded prior to attaching the rest of the stack for your use.
Make sure you have the v2 data model selected and add an image attribute to the Note entity. Set the attribute’s name to image and the attribute’s type to Transformable.
Since this attribute is going to contain the actual binary bits of the image, you’ll use a custom NSValueTransformer to convert from binary bits to a UIImage and back again. Just such a transformer has been provided for you in ImageTransformer. In the Data Model Inspector on the right of the screen, look for the Custom Class Name field, and enter ImageTransformer. Next, in the Module field, choose Current Product Module.
Note: When referencing code from your model files, just like in Xib and Storyboard files, you’ll need to specify a module (UnCloudNotes or Current Product Module depending on what your drop down provides) to allow the class loader to find the exact code you want to attach.
The new model is now ready for some code! Open Note.swift and add the following property below displayIndex:
@NSManaged var image: UIImage?
Build and run the app. You’ll see your notes are still magically displayed! It turns out lightweight migrations are enabled by default. This means every time you create a new data model version, and it can be auto migrated, it will be. What a time saver!
Inferred Mapping Models
It just so happens Core Data can infer a mapping model in many cases when you enable the shouldInferMappingModelAutomatically flag on the NSPersistentStoreDescription. Core Data can automatically look at the differences in two data models and create a mapping model between them.
For entities and attributes that are identical between model versions, this is a straightforward data pass through mapping. For other changes, just follow a few simple rules for Core Data to create a mapping model.
In the new model, changes must fit an obvious migration pattern, such as:
Deleting entities, attributes or relationships
Renaming entities, attributes or relationships using the renamingIdentifier
Adding a new, optional attribute
Adding a new, required attribute with a default value
Changing an optional attribute to non-optional and specifying a default value
Changing a non-optional attribute to optional
Changing the entity hierarchy
Adding a new parent entity and moving attributes up or down the hierarchy
Changing a relationship from to-one to to-many
Changing a relationship from non-ordered to-many to ordered to-many (and vice versa)
Note: Check out Apple’s documentation for more information on how Core Data infers a lightweight migration mapping: http://ift.tt/1xZ62ki
As you see from this list, Core Data can detect, and more importantly, automatically react to, a wide variety of common changes between data models. As a rule of thumb, all migrations, if necessary, should start as lightweight migrations and only move to more complex mappings when the need arises.
As for the migration from UnCloudNotes to UnCloudNotes v2, the image property has a default value of nil since it’s an optional property. This means Core Data can easily migrate the old data store to a new one, since this change follows item 3 in the list of lightweight migration patterns.
Image Attachments
Now the data is migrated, you need to update the UI to allow image attachments to new notes. Luckily, most of this work has been done for you.
Open Main.storyboard and find the Create Note scene. Underneath, you’ll see the Create Note With Images scene that includes the interface to attach an image.
The Create Note scene is attached to a navigation controller with a root view controller relationship. Control-drag from the navigation controller to the Create Note With Images scene and select the root view controller relationship segue.
This will disconnect the old Create Note scene and connect the new, image-powered one instead:
Next, open AttachPhotoViewController.swift and add the following method to the UIImagePickerControllerDelegate extension:
func imagePickerController(_ picker: UIImagePickerController, didFinishPickingMediaWithInfo info: [String: Any]) { guard let note = note else { return } note.image = info[UIImagePickerControllerOriginalImage] as? UIImage _ = navigationController?.popViewController(animated: true) }
This will populate the new image property of the note once the user selects an image from the standard image picker.
Next, open CreateNoteViewController.swift and replace viewDidAppear(_:) with the following:
override func viewDidAppear(_ animated: Bool) { super.viewDidAppear(animated) guard let image = note?.image else { titleField.becomeFirstResponder() return } attachedPhoto.image = image view.endEditing(true) }
This will display the new image if the user has added one to the note.
Next, open NotesListViewController.swift and update tableView(_:cellForRowAt): with the following:
override func tableView(_ tableView: UITableView, cellForRowAt indexPath: IndexPath) -> UITableViewCell { let note = notes.object(at: indexPath) let cell: NoteTableViewCell if note.image == nil { cell = tableView.dequeueReusableCell( withIdentifier: "NoteCell", for: indexPath) as! NoteTableViewCell } else { cell = tableView.dequeueReusableCell( withIdentifier: "NoteCellWithImage", for: indexPath) as! NoteImageTableViewCell } cell.note = note return cell }
This will dequeue the correct UITableViewCell subclass based on the note having an image present or not. Finally, open NoteImageTableViewCell.swift and add the following to updateNoteInfo(note:):
noteImage.image = note.image
This will update the UIImageView inside the NoteImageTableViewCell with the image from the note.
Build and run, and choose to add a new note:
Tap the Attach Image button to add an image to the note. Choose an image from your simulated photo library and you’ll see it in your new note:
The app uses the standard UIImagePickerController to add photos as attachments to notes.
Note: To add your own images to the Simulator’s photo album, drag an image file onto the open Simulator window. Thankfully, the iOS 11 Simulator comes with a library of photos ready for your use.
If you’re using a device, open AttachPhotoViewController.swift and set the sourceType attribute on the image picker controller to .camera to take photos with the device camera. The existing code uses the photo album, since there is no camera in the Simulator.
Where to Go From Here?
You can download the final project from this tutorial here.
The full chapter in the Core Data by Tutorials book follows up this Core Data migrations tutorial with a series of more complex migrations. In the full book chapter, you’ll walk through creating a mapping model with entity and attribute mappings from one version to the next. You’ll also learn about custom migration policies, and how to migrate non-sequential data models.
Here’s a taste of what’s in the book:
1. Chapter 1, Your First Core Data App: You’ll click File\New Project and write a Core Data app from scratch! This chapter covers the basics of setting up your data model and then adding and fetching records.
2. Chapter 2, NSManagedObject Subclasses: NSManagedObject is the base data storage class of your Core Data object graphs. This chapter will teach you how you customize your own managed object subclasses to store and validate data.
3. Chapter 3, The Core Data Stack: Under the hood, Core Data is made up of many parts working together. In this chapter, you’ll learn about how these parts fit together, and move away from the starter Xcode template to build your own customizable system.
4. Chapter 4, Intermediate Fetching: Your apps will fetch data all the time, and Core Data offers many options for getting the data to you efficiently. This chapter covers more advanced fetch requests, predicates, sorting and asynchronous fetching.
5. Chapter 5, NSFetchedResultsController: Table views are at the core of many iOS apps, and Apple wants to make Core Data play nicely with them! In this chapter, you’ll learn how NSFetchedResultsController can save you time and code when your table views are backed by data from Core Data.
6. Chapter 6, Versioning and Migration: As you update and enhance your app, its data model will almost certainly need to change. In this chapter, you’ll learn how to create multiple versions of your data model and then migrate your users forward so they can keep their existing data as they upgrade.
7. Chapter 7, Unit Tests: Testing is an important part of the development process, and you shouldn’t leave Core Data out of that! In this chapter, you’ll learn how to set up a separate test environment for Core Data and see examples of how to test your models.
8. Chapter 8, Measuring and Boosting Performance: No one ever complained that an app was too fast, so it’s important to be vigilant about tracking performance. In this chapter, you’ll learn how to measure your app’s performance with various Xcode tools and then pick up some tips for dealing with slow spots in your code.
9. Chapter 9, Multiple Managed Object Contexts: In this final chapter, you’ll expand the usual Core Data stack to include multiple managed object contexts. You’ll learn how this can improve perceived performance and help make your app architecture less monolithic and more compartmentalized.
And to help sweeten the deal, the digital edition of the book is on sale for $49.99! But don’t wait — this sale price is only available for a limited time.
Speaking of sweet deals, be sure to check out the great prizes we’re giving away this year with the iOS 11 Launch Party, including over $9,000 in giveaways!
To enter, simply retweet this post using the #ios11launchparty hashtag by using the button below:
Tweet !function(d,s,id){var js,fjs=d.getElementsByTagName(s)[0],p=/^http:/.test(d.location)?'http':'https';if(!d.getElementById(id)){js=d.createElement(s);js.id=id;js.src=p+'://platform.twitter.com/widgets.js';fjs.parentNode.insertBefore(js,fjs);}}(document, 'script', 'twitter-wjs');
We hope you enjoy this update, and stay tuned for more book releases and updates!
The post Lightweight Migrations in Core Data Tutorial appeared first on Ray Wenderlich.
Lightweight Migrations in Core Data Tutorial published first on http://ift.tt/2fA8nUr
0 notes