#BlueStacks
Explore tagged Tumblr posts
Text
Xadia on Bluestacks
I just downloaded Bluestacks 5, a mobile games emulator. I am pleased to report that "The Dragon Prince: Xadia" game works on there. (I had to tweak the graphics settings a few times for the environments to load correctly, though. You will also have to set your own keybindings.)
Good news for those who would rather play this game on PC!
15 notes
·
View notes
Text
I got my paid digital copy of Dragon Quest 5 Mobile running on my PC, which is connected to my TV. And I just got WASD controls working on it. This is the power of Bluestacks.

#bluestacks#emulation#dragon quest#dragon quest 5#mobile gaming#RPGs#roleplaying games#square enix#yuji horii
3 notes
·
View notes
Text
Getting Minecraft's New TikTok Cape (Even If TikTok Is Blocked In Your Country)

The browser version doesn't display any of the prompts, forcing anyone who wants the cape to use the app.
For me, the issue with this was that I live in a country where TikTok is restricted, and the app seems to use some very convoluted methods to determine user's location, meaning I couldn't just use a VPN like with the desktop version. I also didn't want to install the app on my phone.
Here's what worked for me (all the steps starting from 3 are supposed to be done in the emulated space):
1. Install BlueStacks 5 Pie 64-bit,
2. Open BlueStacks X, from there, run App Player (icon that looks like layers of something stacked together in the bottom left corner),
3. I suspect that this step doesn't do anything, but disable use of location (Settings app > Personal > Location > Use location),
4. Log into Google Play Store using the app,
5. Download a VPN (in my case it was VPN.lat) from Google Play Store and connect to a server in a country where TikTok isn't blocked or restricted,
6. Close or force stop Google Play Store (Settings > Device > Apps > Google Play Store > Force Stop) before opening it again (it should act as if you are in a different country now, but you can try clearing storage in the settings in case it doesn't),
7. Download TikTok (it appears that once you begin downloading you can turn off VPN until it's done),
8. Make sure your VPN is on and log into TikTok (preferably with an account you can sacrifice to potential shadow ban) using an e-mail and a one-time code (for me, using a phone number resulted in a message about running out of attempts from the very beginning, and entering a password was not possible due to a non-existent problem with the internet connection).
Yes, apparently, I like chromatic aberration that much. No, I don't have a TikTok account, I used my friend's abandoned one. The last part is important as I've heard that using a VPN can send you into shadow ban.
6 notes
·
View notes
Text
Twistunes Flick in Bluestacks
How to do the tap and flick in twisted wonderlands starsending twist tunes in bluestacks.

1: Open game controls

2: Click ‘Custom Editor’

3: click and drag ‘Swipe’ onto your screen. (Use ‘tap spot’ to get the normal tap)

4: Drag it to the side of the screen you need, click the direction you want to swipe in and push the button you want to use for it on your keyboard.

5: Click and drag this arrow to resize it and make it smaller, position at the side of the screen.

6: Now click the gear icon. (THIS IS IMPORTANT)

7: It will open a new window, click the FALSE setting on ‘Swipe and hold” and change it to true.


8: Now click save, and click the X at the top right to close the editor.

Remember what button you assigned because it dose not stay on the screen like the normal tap.

Now just use your normal taps for the circles, and use your new button for the arrows.
#Twst#twisted wonderland#screenshot#screencap#bluestacks#emulator#tutorial#starsending#flick#twist tune
25 notes
·
View notes
Video
youtube
Hey Look this POWER TRIO - Gods have fun (PAPA BiG WOLF) ERIC DARMOiSE
2 notes
·
View notes
Text
Dungeon Hunter 6 vs. Dungeon Hunter 5: A New Era of Mobile RPG Gaming
Introduction
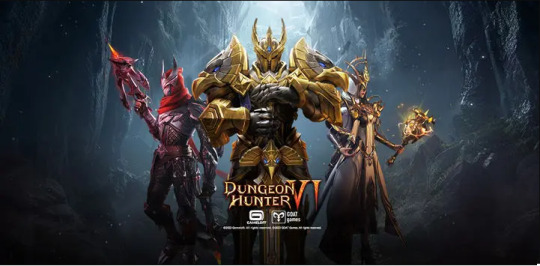
The world of mobile gaming has come a long way, and one genre that has consistently pushed the boundaries of what's possible on smartphones and tablets is the action RPG. Gameloft, a prominent developer in the mobile gaming industry, has been a key player in this field, known for its Dungeon Hunter series. Dungeon Hunter 5 took the series to new heights, and many fans have eagerly awaited its successor, Dungeon Hunter 6. In this blog post, we'll compare these two games, exploring the differences, improvements, and what each brings to the table.
Graphics and Visuals
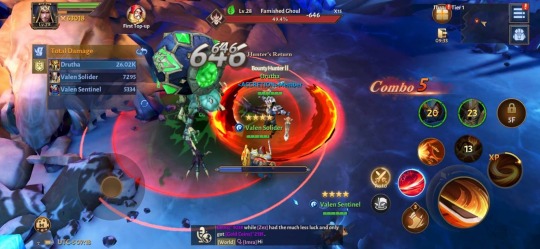
One of the most immediate differences you'll notice between Dungeon Hunter 5 and Dungeon Hunter 6 is the graphics and overall visual quality. Dungeon Hunter 5 was no slouch in this department; it featured impressive 3D graphics with well-detailed character models and environments. However, Dungeon Hunter 6 takes this to a whole new level.
Dungeon Hunter 6 boasts improved textures, more detailed character designs, and better lighting effects. The overall visual fidelity is remarkable, making the game feel more like a console or PC title than a mobile game. This upgrade in graphics is crucial in immersing players in the game world, providing a more captivating experience.
The character models in Dungeon Hunter 6 are not only more detailed but also more expressive, adding depth and personality to each hero and enemy. The environments are lush and beautifully crafted, with intricate designs and dynamic lighting that breathe life into the game world. Whether you're exploring a dense forest, a dark dungeon, or a sprawling city, Dungeon Hunter 6's graphics make every corner of the game visually engaging.
Gameplay and Combat

Both games are action RPGs at their core, but Dungeon Hunter 6 refines and expands upon the gameplay elements introduced in Dungeon Hunter 5. Dungeon Hunter 5 featured real-time combat with various weapon types and skills. Players could assemble a team of heroes and customize their abilities and equipment.
Dungeon Hunter 6 continues this tradition but offers more fluid and dynamic combat. The game introduces new abilities, weapons, and a revamped skill system. The combat feels more responsive and allows for a wider range of strategies, making it even more engaging. The game's user interface has also seen improvements, making it easier to manage your character and party during intense battles.
The tactical depth of Dungeon Hunter 6's combat is something that sets it apart from its predecessor. Players must consider their team composition, skill synergy, and enemy weaknesses to succeed in the game's tougher challenges. The addition of new abilities and weapons opens up countless playstyle possibilities, ensuring that players can tailor their characters to suit their preferences.
Character Customization and Progression
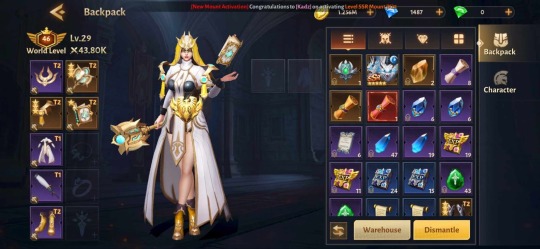
Character customization and progression are essential aspects of any RPG, and both Dungeon Hunter 5 and Dungeon Hunter 6 excel in this regard. In Dungeon Hunter 5, you could equip and upgrade your heroes with various gear and weapons, each offering different stats and bonuses. The game also had a crafting system, which allowed players to create powerful equipment.
Dungeon Hunter 6 builds upon this foundation by introducing an even more extensive gear system, including new sets and legendary items that can drastically alter your character's playstyle. The progression system has been reworked to be more intuitive and rewarding, ensuring that players feel a sense of accomplishment as they advance through the game.
The crafting system in Dungeon Hunter 6 has been expanded and refined, allowing players to not only create powerful gear but also customize it to suit their preferred playstyle. This level of customization adds depth to character development, making it more satisfying to fine-tune your heroes to perfection.
Multiplayer and Social Features
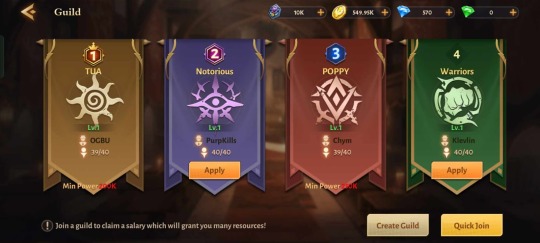
Dungeon Hunter 5 introduced multiplayer modes where players could team up with friends or join guilds to take on challenging co-op missions or engage in competitive PvP battles. These features were well-received and added a social aspect to the game, which encouraged players to collaborate and strategize together.
Dungeon Hunter 6 continues to emphasize the social element with improvements to the multiplayer and co-op aspects of the game. Guilds have become more significant, offering additional benefits and more exciting challenges. The PvP aspect has also seen enhancements, making it more competitive and engaging for those who enjoy facing off against other players.
The guild system in Dungeon Hunter 6 is more than just a social feature; it's a vital aspect of the game's progression. Being part of a guild opens up opportunities for collaborative gameplay, including guild events and challenges. Guilds can work together to achieve common goals, making the social aspect of the game more rewarding.
The PvP mode in Dungeon Hunter 6 has evolved to be more competitive, thanks to the refined combat system. Balanced matchmaking ensures that players face opponents of similar skill levels, promoting fair and engaging battles. The leaderboards and seasonal rewards add an extra layer of motivation for those who want to prove their worth in the arena.
Story and Setting

The Dungeon Hunter series has always had a strong fantasy setting with a rich lore and intriguing storylines. Dungeon Hunter 5 featured a compelling narrative with various quests and missions that delved into the game world's history. It was a significant step forward for the series in terms of storytelling.
Dungeon Hunter 6 does not disappoint in this department. The game's story is more immersive, with deeper lore and more character development. The quests and missions are well-crafted and add to the overall narrative, making players feel more invested in the game's world and its characters.
The lore in Dungeon Hunter 6 is not just background information; it's an integral part of the game world. The developers have put in the effort to create a rich and immersive setting, with every quest and mission contributing to the player's understanding of the world and its inhabitants. This level of storytelling adds an emotional connection to the game, making players care about the fate of their heroes and the world they inhabit.
Monetization and In-App Purchases

Monetization is an essential consideration in mobile gaming, and both Dungeon Hunter 5 and Dungeon Hunter 6 utilize in-app purchases to generate revenue. Dungeon Hunter 5 had a free-to-play model with optional in-game purchases for various items and resources. Some players found the in-app purchases to be somewhat intrusive, while others appreciated the option to progress faster through the game.
Dungeon Hunter 6 maintains a similar model, but it has fine-tuned the in-app purchases, making them feel less necessary for progression. This strikes a better balance, ensuring that both free players and paying players can enjoy the game without significant disparities in power or advancement.
The in-app purchases in Dungeon Hunter 6 are primarily focused on cosmetic items, convenience, and speeding up progression. While they provide benefits, the game doesn't create a pay-to-win environment, allowing skill and strategy to be the determining factors in success. This approach is more player-friendly and encourages a fair competitive landscape.
Conclusion
In comparing Dungeon Hunter 6 and Dungeon Hunter 5, it's clear that Gameloft has continued to push the boundaries of what's possible in mobile gaming. Dungeon Hunter 6 offers a superior visual experience, more dynamic gameplay, and improved character customization and progression. The enhanced social features, deeper storytelling, and refined monetization model make it a worthy successor to Dungeon Hunter 5.
Dungeon Hunter 5 set the bar high for mobile action RPGs, and Dungeon Hunter 6 has raised that bar even further. Whether you're a longtime fan of the series or a newcomer looking for an engaging and visually stunning RPG, Dungeon Hunter 6 is undoubtedly a game worth exploring. So, pick up your weapon, gather your party, and prepare to embark on an epic adventure in the world of Dungeon Hunter. The evolution from Dungeon Hunter 5 to Dungeon Hunter 6 marks a new era in mobile RPG gaming, and it's an exciting journey that no mobile gamer should miss.
2 notes
·
View notes
Text
Magis TV – Descarga y disfruta en TV, móvil y PC
Magis TV es una plataforma de streaming diseñada principalmente para dispositivos Android, pero también se puede utilizar en una PC mediante emuladores de Android. Sin embargo, es importante tener en cuenta que al usar Magis TV en una computadora, podrías enfrentar problemas como lag, cierres inesperados o fallos en la ejecución, lo que podría afectar tu experiencia de visualización. A continuación, te explicamos cómo puedes usar Magis TV en tu PC y algunos emuladores recomendados para ello.
Cómo usar Magis TV en PC
Para utilizar Magis TV en una computadora, necesitas instalar un emulador de Android, que creará un entorno Android en tu PC. Uno de los emuladores más populares es BlueStacks, pero también hay otras opciones como NoxPlayer y MEmu Play. Aquí te explicamos los pasos básicos para configurar Magis TV en tu PC usando BlueStacks:
Descarga el emulador: Visita el sitio web oficial de BlueStacks y descarga la versión compatible con tu sistema operativo (Windows o Mac).
Descarga el APK de Magis TV: Dirígete al sitio oficial de Magis TV y descarga el archivo APK de la aplicación.
Instala el APK en BlueStacks: Abre BlueStacks y accede al "Administrador de Medios". Selecciona la opción "Importar desde Windows" y elige el archivo APK de Magis TV que descargaste. Luego, instala la aplicación desde la sección "Recientemente Añadido".
Ejecuta Magis TV: Una vez instalada, regresa a la pantalla de inicio de BlueStacks y haz clic en el ícono de Magis TV para comenzar a usarla.
Emuladores recomendados
Además de BlueStacks, existen otros emuladores que puedes utilizar para ejecutar Magis TV en tu PC:
NoxPlayer: Ofrece un entorno personalizable y soporta configuraciones de audio avanzadas. También incluye funciones de macros, lo que te permite automatizar tareas como grabar programas.
MEmu Play: Es ideal para reproducir videos en alta definición, ya que soporta resoluciones de hasta 4K y ofrece una salida de audio de baja latencia.
LDPlayer: Es una opción ligera y eficiente, especialmente diseñada para juegos, pero también funciona bien para aplicaciones de streaming como Magis TV.
Requisitos mínimos del sistema
Cada emulador tiene sus propios requisitos mínimos de hardware. Por ejemplo, BlueStacks requiere al menos 4 GB de RAM y 5 GB de espacio libre en el disco duro, mientras que NoxPlayer necesita 1.5 GB de RAM y 2.5 GB de espacio en disco. Asegúrate de que tu PC cumpla con estos requisitos antes de instalar cualquier emulador.
Solución de problemas
Si encuentras problemas al usar Magis TV en tu PC, como fallos en la ejecución o cierres inesperados, puedes consultar las guías de solución de problemas proporcionadas por los emuladores. También puedes contactar al soporte técnico de Magis TV enviando un correo electrónico a [email protected]
En resumen, Magis TV es una excelente opción para ver contenido en streaming, y aunque está diseñada para Android, puedes disfrutarla en tu PC utilizando emuladores como BlueStacks, NoxPlayer o MEmu Play. Solo asegúrate de que tu sistema cumpla con los requisitos mínimos y sigue los pasos correctos para una instalación sin problemas.
#MagisTV#Streaming#AndroidEnPC#EmuladoresDeAndroid#BlueStacks#NoxPlayer#MEmuPlay#DescargarMagisTV#MagisTVAPK#VerTVEnPC#PlataformaDeStreaming#SolucionDeProblemasMagisTV#RequisitosDelSistema#ComoUsarMagisTV#MagisTVColombia#MagisTVEcuador#MagisTVVenezuela#InstalarMagisTVEnPC#EmulacionDeAndroid#ReproduccionDeVideoEnHD
1 note
·
View note
Text
What are good alternatives to Bluestacks? Like I always knew it was kinda shit but like the ai bullshit, forcing stupid startup apps on launch and this like currency popup or spend $10 get $10??
0 notes
Text
I installed the latest version of bluestacks and that shit is lagging like a grandma with parkinson. Live A Hero lagging so bad it crashes sometimes. Can't even connect to the ether stone shop. Even Tokyo Afterschool Summoners is a bit laggy but getting better somehow. Like? How do you "improve" something, and make it worse? I verified everything I could. My settings are exactly the same. Nothing has changed, but for some reason, bluestacks is lagging. Now I have to do some complicated crap to get back to the previous version and hope it doesn't fucking lag. Even the app store is lagging! Incompetence at its finest there.
"Oh! But you should play mobile games on your phone!" Buy me a phone then, skank. "Maybe your computer isn't strong enough!" I know. Buy a better computer, skank.
Yes, I'm angry. Sorry for ranting.
0 notes
Text

Yu-Gi-Oh! Duel Generation https://twitch.tv/qbren Generation I Beta β bracket is on! Duel new decks from all oldschool duelists, Breach into Gen II β bracket & encounter a whole host of new enemies & strategies!
1 note
·
View note
Text
GETTING CRAZY NEWS FOR INTERNET
1 note
·
View note
Text
Video on how to run Android Apps on Windows with BlueStacks
Run Andriod Apps on Windows with BlueStacks
youtube
View On WordPress
#Andriod#Andriod Apps#bluestacks#Microsoft Windows#Run Android Apps on Windows with BlueStacks#Windows#Windows 10#Windows 11#WSA#Youtube
0 notes
Link
How To Install Android 11 On Bluestacks
0 notes
Text
Cari tahu emulator mana yang paling cocok dengan laptop/ pc miliki kamu sobs,,
0 notes
Text
How to Fix BlueStacks Problems
Error 1: Incompatible Windows Settings Error Message
While using the Android 11 (Beta) or Nougat (32-bit) versions of BlueStacks 5, you will get the “incompatible Windows settings”pop-up message. Also, you can get an error message that reads; your Operating System is not supporting Nougat 32-bit/Android 11 (Beta) when creating a new Instance. This happens on the Windows system with Hyper-V, which has enabled Microsoft’s hardware visualization product.
Solutions to Fix the Issue
The first method is to utilize a different version of the BlueStacks emulator. Move to the official BlueStacks download page and hit the Download a specific version tab. Choose either Nougat 64-bit or Pie 64-bit; these versions support Hyper-V.
If you wish to use the latest version of Android (Android 11 Beta), you must disable Hyper-V on the system. Launch the Control Panel, hit the Programs tab, and pick Turn Windows features on or off. On the menu, untick Hyper-V, Windows Hypervisor Platform, Virtual Machine Platform, Windows Sandbox, and Windows Subsystem for Linux. You should restart the PC. Launch BlueStack to check if it works.
Sometimes, users might also need to disable Memory Integrity. Move to the Setting tab, choose Privacy & Security> Windows security, and tap the Open Windows security button. Next, navigate to Device Security, hit the Core isolation details tab, and turn off Memory Integrity. Note that this service helps stop attacks via malicious code, so turn off this service at your own risk. If you do not wish to take a chance, choosing a BlueStacks version compatible with Hyper-V is best.
A quicker method to turn off Hyper-V on your device is through the Command Prompt. Write “cmd” in the search box and tap the Run as administrator button in the menu. Then write “bcdedit /set hypervisorlaunchtype off.”
BlueStacks emulator also eases the procedure by offering a .exe file that users can download and use to disable Hyper-V.
Error 2: Device isn’t Compatible with this Device Message When Installing Apps
Sometimes, users may get a “device is not compatible with this device” message while downloading apps via the Play Store in BlueStacks.
Solutions to Solve the Error
The best method to solve this issue is to change the device profile. In the BlueStacks emulator, launch the Settings menu under Predefined profile, move to Device, and select another device from the list. You can try different options until you get a device profile where you do not see the incompatibility error.
Also, you can clear the Google app data to solve the problem. Launch the System apps on the home screen and hit Settings (note: these are Android settings). Hit the Apps tab and launch the Play Store. Tap the Storage button and choose the Clear app data option. After confirming the selection, you can install the problematic app.
Error 3: Installation Failed or BlueStacks not Opening Error
Users may get error codes when installing or running a game on BlueStacks or launching the app. A few users also encounter a problem when installing BlueStacks.
Steps to Fix the Error
If you have issues downloading or launching BlueStacks, confirm that your computer fulfills the lowest requirements of the app. This includes an Intel or AMD processor, Windows 7 or higher, 5GB of free storage, 4GB of RAM, updated graphics drivers, and computer administrator access. Of course, the lowest requirements might not provide the best experience. BlueStacks suggests a computer with Windows 10 or higher, an Intel or AMD multi-core processor with a one-thread benchmark score of more than 1000, SSD storage, a Broadband Internet connection, and 8GB of RAM.
Confirm that you have enabled Virtualization on your computer. A straightforward method to check is by utilizing the Task Manager. Write Task Manager in the search box, or hit the Ctrl + Shift + Esc keys to open it. Move to the Performance tab, and you will see Virtualization: Enabled. If you have disabled it, you must enable virtualization to utilize BlueStacks. The procedure relies on your computer manufacturer.
If you cannot open BlueStacks, dedicate more RAM to the app and CPU cores. Launch the BlueStacks Multi-instance Manager and hit the Settings tab. Navigate to the Performance tab and choose High (4 cores) under the CPU allocation tab and High (4GB) under the Memory allocation tab. BlueStacks suggests the settings for the graphic-intensive games. If users can open BlueStacks but have difficulty launching a game, they can switch the allocation within the app. Launch the BlueStacks setting, move to the Performance tab, and select these settings. Also, you can pick the Custom option and allocate more RAM and cores, but confirm that you do not allow all the RAM and CPU cores to BlueStacks. Also, choose the High-Performance option from the performance mode list. Hit the Save Changes tab and relaunch the app.
The anti-virus program of your device can also interfere and create installation issues with BlueStacks not launching.
Error 4: Error 2318 When Uninstalling BlueStacks
A few users obtain an error message (error 2318) when uninstalling BlueStacks. This issue generally pops up due to corrupted registry keys.
Solutions to Resolve the Issue
BlueStacks provides a dedicated Uninstaller program you will get in the installation folder. It may be better to utilize this program to uninstall BlueStacks instead of doing this via the settings menu on Windows.
The Windows Installer program may be a problem, but users can restart it. Write “cmd” in the search box to launch Command Prompt and hit Run as administrator from the menu. In Command Prompt, write net stop msiserver to stop Windows Installer, then write net start msiserver to reboot the service. After this, try uninstalling BlueStacks like other Windows apps and check if it has fixed the issue.
If the issue is due to corrupted registry keys, users can remove them. Launch the Registry Editor (write reg in the search box). You may need to backup the registry to avoid the problems. Choose the Files options and hit the Export tab in the toolbar. Give the name of your backup file and choose the All option in the Export Range box. After this, hit Ctrl + F to launch the search window and write bluestacks. Delete every visible BlueStacks registry key.
Error 5: Hardware Decoding isn’t Accessible on BlueStacks
While utilizing hardware decoding, the GPU of the computer is essential to provide compressed textures and typically offers a better gaming experience. However, some users encounter the grayed-out hardware decoding option and are unavailable or do not utilize the dedicated GPU even when chosen.
Remedies to Fix the Issue
This could be an issue with hardware compatibility. Users of AMD GPUs report issues when using hardware decoding, while users of NVIDIA GPUs do not face this issue as much. Contact BlueStacks customer support to ensure whether the dedicated GPU will permit hardware decoding.
Settings issues can also be why the hardware decoding is unavailable.
Confirm that you have set up all for BlueStacks to utilize your dedicated GPU. Move to the BlueStacks settings, choose Graphics > GPU in use, and turn on Prefer dedicated GPU. Once you relaunch BlueStacks, you will see your dedicated GPU in this section.
Also, you can change settings via Windows. Look for Graphics settings in the search box or hit Settings > System > Display > Graphics and choose the Browse option under the Graphics performance preference tab. In the location search section, look for the folder where you have installed BlueStacks, choose HD-player.exe, and hit Add. When added, select BlueStacks on the menu and tap Options. Choose High Performance (with a dedicated GPU) and save the setting.
Hardware decoding is not accessible with DirectX. Move to the BlueStacks settings tab, hit Graphics > GPU renderer, and choose the OpenGL option. Select the Hardware decoding option from the ASTC textures menu on the Graphic setting screen. If your dedicated GPU is incompatible, you will get a “Hardware decoding isn’t available” error pop-up in this section.
Error 6: Google Play Store Login Problems
Users encounter some problems when logging into the Google Play Store on BlueStacks. While a few login errors have particular solutions, the best way to solve this issue is to clear the app cache. Launch the System Apps folder in BlueStacks, move to the Settings tab, tap Apps > Play Store > Storage, and hit Clear cache.
Solutions
Having a problem on the loading screen when logging in or a ” Could not sign-in error: The anti-virus program in your device may interfere with BlueStacks running properly. Configure the program utilizing the right settings.
Black/white login screen: This occurs when your graphics setting on BlueStacks does not match the system specifications. Navigate to the BlueStacks settings tab, choose the Graphics option, and change settings such as Graphics engine mode, interface renderer, and Performance mode to other options. Reboot BlueStacks and check if the issue goes away.
“Authentication required/Validate it’s you” issue: If you get this issue, clear the Google Play app cache and delete the Google account before signing in again. To delete the Google account, move to the System app tab and hit Settings > Account. Choose your account and tap the Remove Account option. Return to the previous screen, tap Add account, and specify the login credentials.
“This device is not Play Protected” issue:This issue generally shows if you use a custom device profile. Navigate to BlueStacks settings > Phone, move to Select a predefined profile, and choose any of the phones from the list.
How to sign in without a Gmail account: You can access BlueStacks with a non-Gmail account but must open a Google account connected to that email address. Move to the Google website and hit the Sign-in tab at the top. Tap the Create Account button. Specify your information and choose the Use currency email account instead option. Provide the non-Gmail address and follow the validation procedure. After setting up the account, you can sign in to BlueStacks with this email account.
Error 7: BlueStacks is Slow
BlueStacks might be resource-heavy, based on what applications you are using, and there are situations when you find it laggy or slow.
Tips to Solve the Problem
Users can enhance the performance of BlueStacks by allocating more RAM and CPU cores to the app. Hit BlueStacks settings > Performance and select High (4 cores) and High (4GB). Also, you can choose Custom to select more RAM and cores, but do not allocate all RAM and CPU cores to BlueStacks. Confirm that you have set High performance in the Performance mode list.
Anti-virus programs can also create performance issues.
Ensure you have enabled Virtualization to get the best experience.
Also, you can enhance performance by empty RAM. Launch Task Manager by hitting Ctrl + Shift + Esc and close the idle or unwanted apps in the background. Apps such as Google Chrome are a notable issue in this regard. Choose the app you need to close and hit the End task button.
Error 8: Can’t Install APK Issue
You can get a “Can’t install APK” error message if the app or game you are installing is not compatible with the Android version of BlueStacks you are using. It will happen if you use the older versions, such as Android Pie 32-bit.
Tricks to Fix the Error
The way to play a game or utilize an app that is not compatible is by opening a new instance with the latest version of Android. Launch the Multi-instance Manager ( a three-layer tab at the right, two above the gear icon), hit the Instance tab, and choose Fresh instance. Select the latest Android version from the available list, like Android Nougat (64-bit) or Android 11 (Beta). If you haven’t installed these, you must download a few additional files and choose settings like memory allocation, CUP allocation, performance mode, resolution, and others for this new instance. Tap Download to generate a new instance, then hit Start on the Multi-instance Manager page. Now, you must be able to install the APK with issues.
Some Common BlueStacks Problems
BlueStacks features a weekly running list of issues and bugs that it solves so that users can check to see the solution for their issues.
Advertisements
about:blank
REPORT THIS AD
Users with Mac can encounter the “System extension blocked” error. Older Macs with M1 processors, MacOS 13 Ventura, and Macs running MacOS 12 Monterey do not support BlueStacks. Users can report an error by tapping the “?” icon in the BlueStacks app window and choosing the Report a problem option. Choose the issue type, specify other information, and hit the Submit a Report button. Also, you can download the BlueStacks 5 Log Collection Tool to offer an issue log if you encounter problems with BlueStacks not downloading or launching.
Source:https://hariguide.com/how-to-fix-bluestacks-problems/
0 notes