#Baking recipe
Explore tagged Tumblr posts
Visit Tumblr Blog
Explore Tumblr blogs with no restrictions, modern design and the best experience.
Last Seen Tumblr Blogs


Fun Fact
There were a total of 171.5 billion posts on Tumblr in 2019.
Text

𓅰 𓅬 𓅭 𓅮 𓅯 hiiiii folks :) 𓅰 𓅬 𓅭 𓅮 𓅯
todays just a little one-off for a recipe a friend shared to me, that im now sharing with you. i really miss this cooking series but affording enough ingredients to try new recipes, workshopping and failure and wasted material, is expensive. and things have been getting harder to afford. still we persist, and this is a recipe i've tested and tried to great results
today we'll be makin some chocolate crinkle cookies!
(As always you can find the cooking instructions and full ingredient list under the break-)
MY NAMES CROSS NOW LETS COOK LIKE ANIMALS
SO, “what goes in to chocolate crinkle cookies?” YOU MIGHT ASK
All-purpose flour
Baking soda
Baking powder
Salt
Cocoa powder
3 Eggs*
Vanilla extract
Brown Sugar*
Espresso powder
Bakers chocolate*
Unsalted butter
Confectioners sugar, for coating
thats the original recipe at least. i made some substitutions
I didn't have brown sugar so it got replaced with equal amounts cane sugar
I didn't have eggs so i replaced them with apple, thoroughly beaten until similar texture
I didn't have bakers chocolate but did have hot chocolate, so I used 1 Ibarras Chocolate puck chopped up
AND, “what does chocolate crinkle cookies taste like?” YOU MIGHT ASK
soft, crumbly, moist
halfway between pudding and brownie and cookie, smack dab in the middle of the taste triangle
the confectioners sugar holds up really well, it doesnt sink in and form a dull crust like it would on a cake powdered too soon
extremely chocolately
when it was made for me and a group of people everyone raved about it
when i made it for myself and a group of people everyed raved about it
its fuckin good and easy
when youre taking it out of the oven, it will look and even smell a bit raw, which is scary for people like me who are terrified of undercooking dough. but i suppose the density and letting them sit until Completely cooled (not just cooled to the touch!) lets them finish baking at a much lower temp internally?
oh and be sure to space them out pretty far apart, they expand more than youd think. and if youre having trouble scooping and transferring them to the pan, put a dish of confectioners sugar out and keep coating your hands in it between scoops, it helps to keep them from sticking.
-----------------------------------------------------------------------------------------------------------
From start to finish it took about 2 hours to start eating, but most of that was cook time and then letting them cool completely. an hour max was spent in the kitchen working on things. Im bad at spacing things due to wanting to fit as much product as possible in as small a space, so this created about 12 cookies the size of my hand? roughly.
but yeah! if youre the type to struggle with brownies i highly suggest this as an alternative, due to the many similarities but the harder to fuck-up-ed-ness because its guaranteed to cook through and doesnt need to form a crust.
this is a an easy 10/10 (with 1 being food that makes one physically sick and 10 being food that gives one a lust for life again.) Its hard to beat. i hope youre having as lovely a time as one can, be sure to hold onto eachother.
🐁 ORIGINAL RESIPPY TEXT BELOW 🐁
Ingredients:
1 cup all-purpose flour
1 teaspoon baking powder
¼ teaspoon baking soda
½ teaspoon salt
½ cup unsweetened cocoa powder
3 large eggs*
a dash of vanilla extract
1 ½ cup brown sugar*
4 teaspoon espresso powder-
4 oz unsweetened bakers chocolate*
4 tablespoon unsalted butter
For coating;
½ cup confectioners/powdered sugar
Replaced brown sugar with cane sugar
Replaced eggs with 6oz apple mush
Replaced bakers chocolate with one Ibarras puck
Method:
Adjust oven rack to the middle and preheat to 325. Line 2 baking sheets with parchment paper.
Whisk flour, baking powder, baking soda, salt, and cocoa powder together.
Whisk eggs, vanilla extract, brown sugar, and espresso powder together in a separate bowl.
In a third smaller bowl place bakers chocolate and butter, microwave for 1 minute at a time and stir afterward until its melted together. Should take about 2-4 minutes.
Whisk the melted chocolate/butter mixture into the egg bowl until combined. Fold this into the flour bowl until no dry streaks remain.
Let the dough sit at room temp for about 10 minutes.
Place the granulated sugar and powdered sugar into a bowl. Scoop your hands into the mixture and then scoop balls of dough into tiny uniform size balls. Try to coat evenly.
Place the dough balls on the prepared baking sheets, evenly spread, there should be about 10 cookies per sheet.
Bake the sheets for 12 minutes, rotating halfway through. The cookies should look puffed and cracked and the edges have begun to set, but the center is still soft (cookies will look raw between the cracks and seem underdone).
Remove from the oven and let the cookies cool completely on the sheet before removing or eating.
25 notes
·
View notes
Text
Strawberry Mousse Cake
(+ explanations on how to do other flavors like apricot, passion fruit, etc)


Ingredients Lists
Biscuit
2 eggs
60g sugar
24g flour
24g corn starch
Strawberry Mousse
250g strawberry puree
5 gelatin sheets (~2.5 teaspoon of gelatin powder)
3 egg yolks
75g sugar
100ml milk
150ml heavy cream
Strawberry insertion & glazing
250g strawberry puree x2
5 gelatin sheets x2
75g sugar x2
Other
Lots of strawberries
Material
Baking circle (20cm ø)
Cooking thermometer
Rhodoid band (optional)
Instructions
Strawberry puree
If you don't have strawberry puree, you can make in the following way.
For 1kg of clean and cut strawberries, add 200ml of water, put in a blender and blen everything into a fine puree.
Biscuit
Seperate the yolks and the white of the eggs.
Beat/whisk the yolks and half of the sugar until they take a fluffy texture and whitens in color (example video but it can be done faster with an electric whisk).
Beat/whisk the whites and the other half of the sugar until they become fluffy (example video but add sugar at the start).
Put the whites, the yolks, sieved flour & starch together in one big bowl.
Mix gently until it's all homogeneous. Don't mix to fast or over mix, or you'll loose some trapped air inside the cake.
Prefeat your oven at 170°C.
On a baking sheet, make a circle of the size of your baking circle.
Bake for 15min.
Once cooked, place the biscuit at the bottom of the baking circle (place your rhodoid just before then).
Strawberries
Remove the strawberry stems and cut them in half in their length.
Put the strawberries on the wall of your baking circle or on the rhodoid band.
Make sure the strawberries are suction glued into the walls of the baking circle/rhodoid.
Strawberry Mousse
Put the gelatin sheets in cold water to rehydrate the gelatin.
Beat the yolks and sugar together until it becomes fluffy and whitens in color.
Put the milk on the stove and once it boils, pour it on top of the yolks, and mix well with a whisk.
Put everything in a sauce pan and cook until it reaches 83°C and put off the stove/heat.
Add in the rehydrated gelatin.
Once the gelatin has molten, add in the strawberry puree
Mix with a whisk for 5min to make sure it stays fluffy.
Let the mousse cool down until room temperature.
Once at room temperature, beat/whisk the heavy cream until it becomes a well done whipped cream.
Add in the strawberry egg mix, and mix everything gently until it is homogeneous.
Pour half into the baking circle.
Store the baking circle in the fridge, keep the mousse at room temperature.
Strawberry Insertion
Put the strawberry and sugar together in a sauce pan and let the sugar melt into the strawberry.
Add the rehydrated gelatin in, and mix until it has molten.
Take a circular baking pan slightly smaller than the baking circle, and cover it with food wrap.
Wait until the mix has cooled down a bit, and pour it in the pan.
Store in the fridge.
Once both the mousse & the insertion has gelified, put the insertion on top of the mousse.
Pour in the rest of the mousse on top of everything and store in the fridge.
Strawberry glazing
Proceed in the same way as the insertion until step 2 included.
Wait for the glazing mix to cool down to room temperature, but before it has hardened.
Once the mousse has finished hardening, pour the glazing on top.
Store in the fridge until everything has hardened properly.
Remove the circle and the rhodoid.
Notes & Advices
You can do the mix for insertion & glazing together in advance. If it has hardened, 30s in the microwave, and it'll melt down again.
Alternatives
This works with other fruits. With that recipe you can do:
Strawberry
Apricot, peach,...
Raspberry, blackberry, blueberry... (any kind of wild berries)
Passion Fruit
Rose hip
Probably many others.
However some modifications may be required:
For sour fruits, or fruits that become sour as they cook (apricot, passion fruit), you may need to add 25g of sugar into the insertion and glazing, and add 75g of sugar in the milk while making the mousse.
If the puree/juice is very liquid, like with passion fruit, add an extra gelatin sheet for the mousse.
For all of those flavors mentioned before but strawberry & passion fruit, you will neeed to cook the fruit with the water before blending. Sieve the puree for raspberry/blackberry/passion fruit/rose hip, remove the stone before the cooking for apricot/peach. Add 400ml of water per kilo for rosehips instead of 200ml. For passion fruit, add no water.
Example of an apricot & passion fruit mousse cake I have done:


#baking#baking recipes#recipes#recipe#baking recipe#cake#dessert#mousse#mousse cake#strawberry#strawberry mosse cake#apricot#strawberry cake#apricot cake#peach#peach cake#passion fruit#passion fruit cake#blackberry#blueberry#raspberry#rose hip
51 notes
·
View notes
Text
Best brownies I've ever made. 10/10, recommend highly.
23 notes
·
View notes
Text
apple pastries :)
heres the recipe for some apple pastries i made today !! they are perfect for an autumn picnic :D
makes: 6 - 10 pastries
oven temp: 200C
ingredients:
2 apples
ready made pastry ( puff pastry recipe coming soon)
1 egg (for egg wash
sugar
cinnamon
recipe:
cut apples horizontally into slices all the way through the core
using a small cookie cutter, take the cores out of each apple slice
wrap each slice in pastry, by lopping the pastry around the edge and through the hole in the middle
egg wash the pastry and sprinkle with a mix of sugar and cinnamon
bake for around 12 minutes
#autumn recipe#fall recipe#autumn#apples#apple recipe#pastries#pastry recipe#baking#baking recipe#recipe#recipes#cooking#apple and cinnamon
66 notes
·
View notes
Text
Apple and Nut Parcels

These Apple and Nut Parcels, filled with deliciously Autumnal flavours, make a beautifully seasonal dessert to end your Sunday Lunch. Have a good one, friends!
Ingredients (serves 3):
5 medium Ribston Pippin apples, rinsed
1 teaspoon Mixed Spice
1 1/2 tablespoon unsalted butter
1 heaped tablespoon good Chestnut Honey
1/4 cup pecans
1/4 cup hazelnuts
6 brik pastry circle (paper thin Tunisian pastry discs resembling filo)
6 tablespoons good Chestnut Honey
Peel, core and dice Ribston Pippin apples, and place apple dices into a medium bowl. Sprinkle with Mixed Spice, tossing well to coat; set aside.
In a small saucepan, melt butter over a low flame. Once melted, remove from the heat, and stir in Chestnut Honey. Set aside.
In a small frying pan over a high flame, toast pecans and hazelnuts until just browned and fragrant. Remove from the heat and allow to cool, before chopping the nuts roughly.
Preheat oven to 180°C/°F.
Line a baking tray with baking paper. Set aside.
Lay a brik pastry circle onto your work surface. Brush generously all over with Honey butter. Lay a second brik circle on top, pressing gently.
Spoon a cup of the spiced apple dices in the centre of the pastry disc. Sprinkle with chopped pecans and walnuts, drizzle genenrously with 2 tablespoons Chestnut Honey, and wrap the pastry to form a parcel. Place it onto prepared baking tray, seam and edges down.
Repeat with remaining brik pastry circles, spiced apple dices, chopped nuts and Honey, saving a few of the chopped nuts, until you have three beautiful parcels.
Brush them with a little of the Honey butter, and place baking tray in the middle of the hot oven. Bake, at 180°C/360°F, 20 to 25 minutes, until a nice golden brown colour.
Remove from the oven, and brush parcels with remaining Honey butter.
Serve Apple and Nut Parcels hot, sprinkled with chopped pecans and hazelnuts.
#Recipe#Food#Apple and Nut Parcels#Apple and Nut Parcel recipe#Apples#Ribston Pippin Apples#Apple Tree#Apple Harvest#Ribston Pippin Apple Tree#Mixed Spice#Butter#Honey#Chestnut Honey#Pure Honey#Raw Honey#Pecans#Hazelnuts#Nuts#Brik#Brik Pastry#Dessert#Dessert recipe#Baking#Baking recipe#Autumn#Autumn recipe#Autumn recipes#Sunday Lunch#Sunday Lunch recipe
9 notes
·
View notes
Text

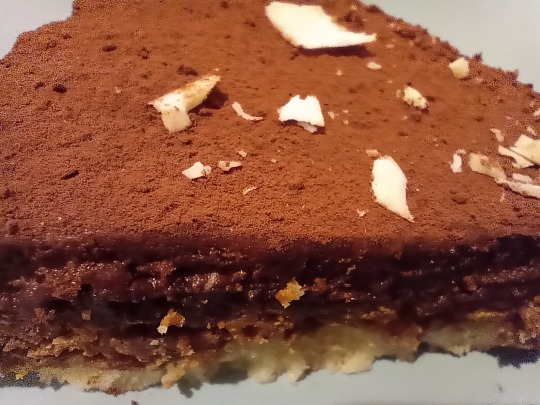
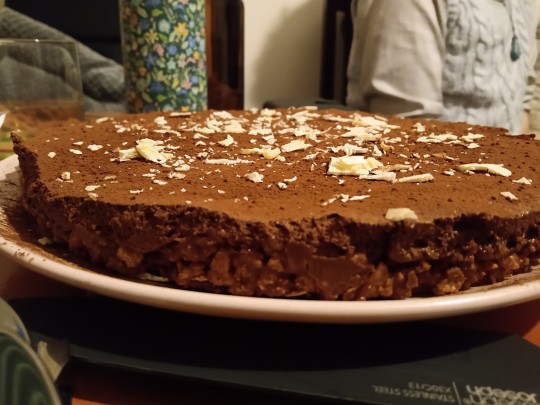
Trianon cake recipe
Recipe for the cake I've been making! It has chocolate, praline and a hazelnut biscuit. I'll add pictures for visual help later, and possibly some adjustments for quantities/ingredients, but the link contains the recipe both for the cake and for the homemade pralin/praline paste if you need, and it's a solid recipe as it is.
I think it could also be made gluten-free, so I'll experiment with that and add the ingredients/proportions needed in later (but tbh it's probably just replace the flour in the biscuit base with additional hazelnut flour and use gluten-free cornflakes).
Upon googling to make sure trianon is the proper name, it looks like this is a smaller and less rich variation of it (the mousse in this recipe uses only eggs, not whipped cream, and there's less of it), but I enjoy it and it's still close.
If you make it I hope you enjoy it :) It's my favorite cake
#baking#cake#cake recipe#baking recipe#chocolate cake#trianon#idk why im tagging all this its not like i aspire to be a baking blog but hey#i do want to share the food#so
35 notes
·
View notes
Text


Mini Blueberry-Lemon Poppy Seed Muffins with Buttermilk | ThePracticalKitchen.com
#mini muffins#lemon blueberry#blueberry lemon#blueberry#muffins#baking#baking recipe#the practical kitchen#recipes
9 notes
·
View notes
Text
my spouse and i have this poor bitch dessert we call " the apple thing" and it goes like this:
get an apple, cut it up into little bits, probably diced
you don't have to peel it if you don't want to, but my spouse likes it peeled. i, on the other hand, do not mind the peel
stick the cut up pieces in a large mug
plop a tablespoon of sugar in the mug, then a tablespoon of flour, then a tablespoon of butter, then sprinkle whatever amount of cinnamon your heart desires. stir it to the best of your ability, but the butter will probably not be soft. that's fine.
microwave it for like. 30 seconds. stir it after that, then microwave for 30 seconds again. stir once more, then nuke it again for perhaps 30 - 60 more seconds.
eat it, be comforted by the warm apple, the perfect portion, the cozy cinnamon, the sweetness of the sugar, the relative ease of preparing such a small but satisfying treat
#dessert#food mention#recipe#baking#budget meal#budget dessert#budget#cooking#baking recipe#the apple thing#aj writes#text post#mug recipe#mug cake
36 notes
·
View notes
Text
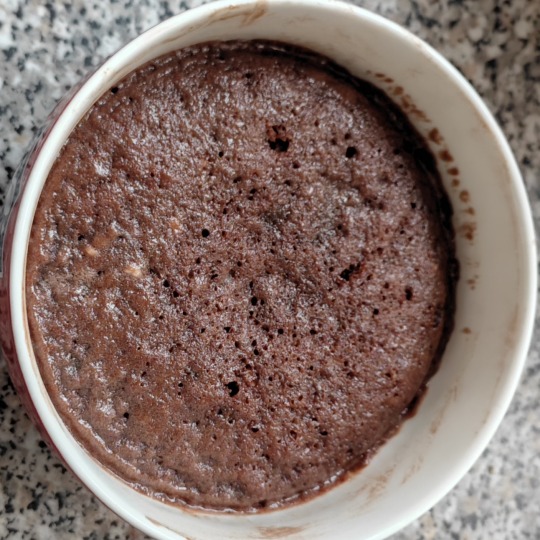
Microwave brownies

Ingredients:
plain flour (6 tbsp)
brown sugar (6 tbsp)
cocoa powder (3 tbsp)
salt (pinch)
milk (6 tbsp)
butter (3 tbsp)
chocolate chips
other toppings

Instructions;
1. Add plain flour, brown sugar, cocoa powder, a pinch of salt and milk in a bowl
2. Melt butter and also add it
3. Mix up, then add in chocolate chips and any other toppings, i like to add chopped hazelnuts
4. Microwave on 800w for 2 minutes.
5. Serve!
As always, feel free to add extra toppings
8 notes
·
View notes
Text
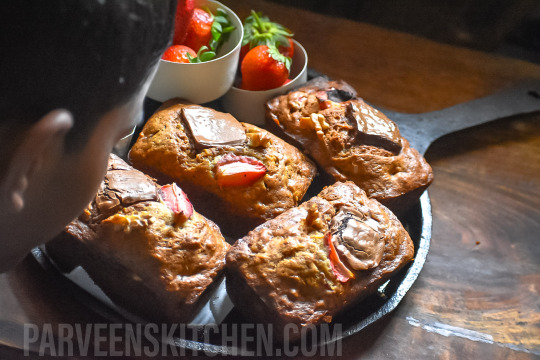
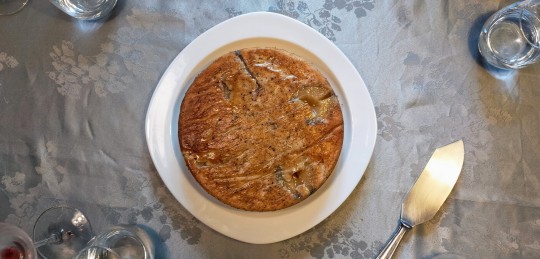
Everything Good Banana Bread Mini Loaves
Title: Mini Delights: Everything Good Banana Bread in Adorable Loaves. Welcome to a delightful twist on the classic banana bread – the Everything Good Banana Bread in mini loaves! These cute, individual servings are made with a blend of wholesome ingredients that will tantalize your taste buds. Join me on this baking adventure as we create these heavenly mini banana breads filled with fresh…
View On WordPress
#All-Purpose Flour#Baking Adventure#Baking Enthusiast#Baking Powder#Baking Recipe#Banana#brown sugar#Chocolate Chunks#Coconut oil#delicious#dessert#easy recipe#eggs#Everything Good Banana Bread#Food blog#fresh strawberries#Homemade#Mini Loaves#Miniature Baking#sea salt#Sweet treats#Vanilla#Walnuts#White Sugar
8 notes
·
View notes
Text


wnjoy ur bananan bread!!!! 🙏🙏
2 notes
·
View notes
Text
Blackberry Mousse Cake


Ingredients Lists
Biscuit
2 eggs
60g sugar
24g flour
24g corn starch
Bkackberry Mousse
500g blackberry puree
12 gelatin sheets (~2.5 teaspoon of gelatin powder)
6 egg yolks
150g sugar
200ml milk
300ml heavy cream
Blackberry insertion & glazing
250g blackberry puree
5 gelatin sheets
100g sugar x2
Other
Lots of blackberries
Material
Baking circle (20cm ø)
Cooking thermometer
Rhodoid band (optional)
Instructions
Blackberry puree
If you don't have blackberry puree, you can make in the following way.
For 1kg of clean blackberries, add 200ml of water, and cook until the blackberries have turned soft.
Sieve with a food mill to keep all the juice & flesh, and leave the seeds out.
Biscuit
Seperate the yolks and the white of the eggs.
Beat/whisk the yolks and half of the sugar until they take a fluffy texture and whitens in color (example video but it can be done faster with an electric whisk).
Beat/whisk the whites and the other half of the sugar until they become fluffy (example video but add sugar at the start).
Put the whites, the yolks, sieved flour & starch together in one big bowl.
Mix gently until it's all homogeneous. Don't mix to fast or over mix, or you'll loose some trapped air inside the cake.
Prefeat your oven at 170°C.
On a baking sheet, make a circle of the size of your baking circle.
Bake for 15min.
Once cooked, place the biscuit at the bottom of the baking circle (place your rhodoid just before then).
Blackberry Mousse
Put the gelatin sheets in cold water to rehydrate the gelatin.
Beat the yolks and sugar together until it becomes fluffy and whitens in color.
Put the milk on the stove and once it boils, pour it on top of the yolks, and mix well with a whisk.
Put everything in a sauce pan and cook until it reaches 83°C and put off the stove/heat.
Add in the rehydrated gelatin.
Once the gelatin has molten, add in the blackberry puree.
Mix with a whisk for 5min to make sure it stays fluffy.
Let the mousse cool down until room temperature.
Once at room temperature, beat/whisk the heavy cream until it becomes a well done whipped cream.
Add in the blackberry egg mix, and mix everything gently until it is homogeneous.
Pour half into the baking circle.
Store the baking circle in the fridge, keep the mousse at room temperature.
Blackberry Insertion
Put the blackberry pureee and sugar together in a sauce pan and let the sugar melt into the blackberry.
Add the rehydrated gelatin in, and mix until it has molten.
Take a circular baking pan slightly smaller than the baking circle, and cover it with food wrap.
Wait until the mix has cooled down a bit, and pour the 2/3 in the pan, and the other half in a bowl than can go in the microwave.
Store in the fridge.
Once both the mousse & the insertion has gelified, put the insertion on top of the mousse.
Pour in the rest of the mousse on top of everything and store in the fridge.
Blackberry glazing & decoration
Once the last layer of mousse has hardened, pour a thin layer of glazing with the leftover of the insertion. If it has gelified, 30s in the microwave will liquify it back.
Once the layer is poured, add the blackberries on top for decoration.
Put in the fridge for a bit until the last layer has hardened. Then just remove the baking circle and enjoy~
#baking#baking recipes#recipes#recipe#baking recipe#cake#dessert#mousse#mousse cake#strawberry mosse cake#strawberry cake#blackberry#blackberry cake
25 notes
·
View notes
Text
if you’re craving chocolate muffins after the olympic muffin man videos, jordan the stallion on tiktok has the recipe for you
100K notes
·
View notes
Text
Maids of honour
Recipe under the cut !! Maids of honour are shortcust pastry with cake on top, with a jam filling !
Makes: 12
Oven temp: 180C
Ingredients for pastry:
125g plain flour
62g hard margarine
cold water
pinch of salt
Ingredients for cake:
50g soft margarine
50g self-raising flour
1 medium egg
50g caster sugar
Recipe!!
preheat oven
make pastry by rubbing in the flour, margarine and salt, then adding cold water until a dough is formed
cover pastry and allow it to chill
roll out pastry and use a fluted cutter to line 12 bun tins. Chill the pastry cases for 10 minutes
make the cake topping by creaming together the margarine and sugar, then mixing in the egg, then fold in the flour
add a teaspoon of jam to each of the pastry cases
top the pastry cases with cake mix, and make sure to spread it evenly
bake for 15 minutes and decorate with icing sugar
4 notes
·
View notes
Text
Maple Pear and Hazelnut Cake
This Thanksgiving, I am also baking a cake. Not just any cake, though! A moist and light Maple Pear and Hazelnut Cake that celebrates this year's harvest in the garden, and is a delicious mouthful of Autumn comfort! Happy Thanksgiving, friends!
Ingredients (6 to 8):
1 ½ tablespoon unsalted butter
1/2 cup hazelnuts
1 cup Pears in Whisky Syrup + 1/4 cup of the Whisky Syrup
2 cups plain flour
1 teaspoon baking powder
½ teaspoon bicarbonate of soda
¼ teaspoon salt
¼ cup caster sugar
4 eggs
1/3 cup hazelnut milk
1/4 cup pure (Grade A) Canadian Maple Syrup
Preheat oven to 160°C/320°F. Butter a 20cm/8” cake tin; set aside.
In a small saucepan, melt butter over a low flame. Once melted, remove from the heat. Set aside.
Toast hazelnuts in a small frying pan over a high flame, a few minutes until just fragrant. Remove from the heat and allow to cool.
Save four beautiful Pear halves, and place them, cut side down at the bottom of prepared cake tin. Dice the rest of the Pear halves; set aside.
Blitz toasted hazelnuts in a food processor, until you have a fine enough powder (resembling coarse meal).
In a large bowl, combine flour, ground hazelnuts, baking powder, bicarbonate of soda, salt and caster sugar. Give a good stir with a wooden spoon.
Dig a well in the middle of the dry ingredients, and break in the eggs. Give a good and gentle stir, gradually adding hazelnut milk, melted butter, Maple Syrup and Whisky Syrup until just combined.
Then, gently fold in Diced Pears, until just combined.
Gently spoon batter evenly over the Pear halves. Place cake tin in the middle of the oven, and bake, at 160°C/320°F, 45 minutes, until a toothpick inserted in the middle of the cake comes out clean.
Remove from the oven, and allow to cool in the tin, about 15 minutes, before turning out onto serving plate.
Generously brush with Maple Syrup.
Serve Maple Pear and Hazelnut Cake warm or at room temperature, with glass of chilled Champagne.
#Recipe#Food#Maple Pear and Hazelnut Cake#Maple Pear and Hazelnut Cake recipe#Pear Cake#Pear Cake recipe#Cake#Cake recipe#Baking#Baking recipe#Hazelnuts#Toasted Hazelnuts#Pears#Pears in Whisky Syrup#Pears in Syrup#Pear Harvest#Williams Pear#Flour#Baking Powder#Bicarbonate of Soda#Salt#Sugar#Caster Sugar#Maple Syrup#Canadian Maple Syrup#Butter#Hazelnut Milk#Cake Pavlova and Pudding#Thanksgiving#Thanksgiving recipe
7 notes
·
View notes
Text
Source: beth_thefirstyear on Instagram
I have four muffin tips for making bakery style muffins at home.
Tip number one:
Rest your batter for 15 minutes in your mixing bowl after you make it. This is gonna allow the starch molecules to swell and absorb, creating the thicker batter and the thicker batter is known for doming!
Tip number two:
Fill your muffin holes with at least six to eight tablespoons of batter. That’s like a heaping half cup okay. You want them super full so they’re gonna create that dome.
Tip number three:
Kinda goes along with tip number two. You’re only gonna fill every other hole in your muffin pan. And why we do that - that’s so the muffins that are baking can spread and dome without running into their neighbors. Because when they run into their neighbors they get like square edges but we want perfect dome circles.
Tip number four:
You’re to bake your muffins at a high temperature initially. That’s gonna be 425*F for the first seven minutes. And then keep them in the oven and lower the temperature to 350*F for the remaining bake time. Starting the muffins off at a high temperature initially allows the muffins to rise rapidly and it sets the outer surface of the muffin, producing a dome shape.
There you have it. My four muffin tips for creating bakery style muffins.
23K notes
·
View notes