#Analog Efex Pro 2
Explore tagged Tumblr posts
Visit Tumblr Blog
Explore Tumblr blogs with no restrictions, modern design and the best experience.
Last Seen Tumblr Blogs


Fun Fact
Tumblr has been providing a Korean-language service since 2013.
Video

flickr
Spring in the Canadian Rockies (Analog Efex Pro 2) by Mark Stevens Via Flickr: Here I used the multi-lens effect. This is an effect I only came across after the second version was released under Google. What I like about this effect is how it seemingly breaks an image into two or however many parts. My idea would be to have the image broken into three separate ones and hung on a wall with a little bit of separation.
#Analog Efex Pro 2#Banff National Park#Blue Skies with Clouds#Caldron Peak#Canadian Rockies#Central Front Ranges#Central Main Ranges#Cline Range#Day 4#Evergreen#Evergreen Trees#Frozen Over#Glacial Lake#Glacial Valley#Highway 93#Hillside of Trees#Ice Covered#Icefields Parkway#Lake#Looking NW#Looking to Continental Divide#Looking to Mountains of the Continental Divide#Mount Murchison#Mount Patterson#Mount Wilson#Mountains#Mountains in Distance#Mountains off in Distance#Murchison Group#Nature
2 notes
·
View notes
Text

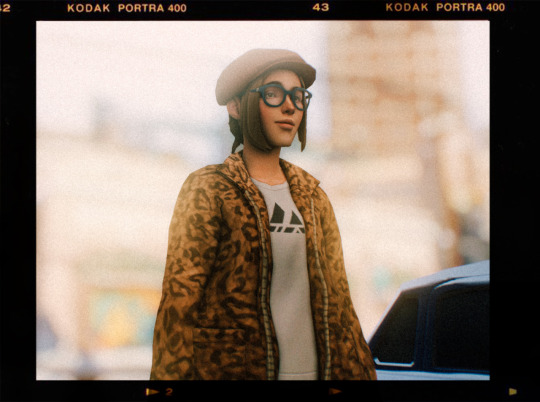
School Daze No 16 Old Film Version.
An ongoing series of photos exploring the architecture of various schools in and around the Toronto Canada area.
Completed in 1910, The Ontario Institute for Studies in Education at No 371 Bloor St W in the Huron Sussex neighbourhood of Toronto Canada went through 5 additions between 1924 - 2021. The school was the site of the 1969 Protest for Nothing where students held blank placards in response to the practice of matriculation exams. The building was listed as a Heritage Property by The City of Toronto in 1997.
Original photography using a Canon EOS 5DS body with a Canon EF 24-105mm f/4L IS USM lens and Analog EFEX Pro 2 as a Lightroom plugin for the Old Film effect.
Brian Carson The Learning Curve Photography linktr.ee/thelearningcurvephotography
#toronto#canadian#photography#photographers on tumblr#original photographers#original photography#pws#lensblr#architecture photography#originalphotography#architecture
7 notes
·
View notes
Note
i love love LOVE how your game looks! if it is not too much trouble, would you be willing to share how you edit your gameplay pics? thank you so much!
hi, thank you so much for the kind words! and ofc. i'll be quite frank and admit that reshade does most of the work!
i use photoshop and run a sharpening filter, followed by a lens distortion filter from nik analog efex pro 2 (you can still grab the plugin here, settings below; edit: this is an earlier version), and noise.
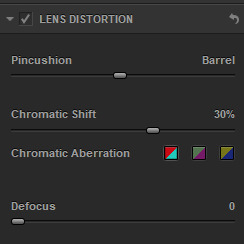
with all that together, here's the before & after of a pic:


21 notes
·
View notes
Note
How do you get the noise and little dust specks on your photos?
I switch between film overlays I've accumulated over the years and Analog Efex Pro 2 plugin for Photoshop which contains various film, grain and dust overlays.
Sometimes, I process with Adobe Camera Raw and use my own presets. For example:
23 notes
·
View notes
Photo
20190420 - Shard Reflected
1 note
·
View note
Photo
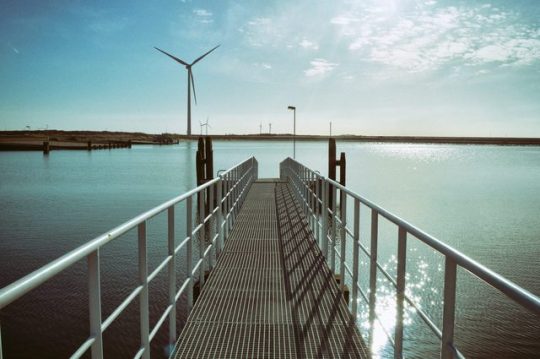
#neeltje jans#deltapark#zeeland#netherlands#coast#wind turbines#pier#analog efex pro 2#original photographers#photographers on tumblr
3 notes
·
View notes
Photo
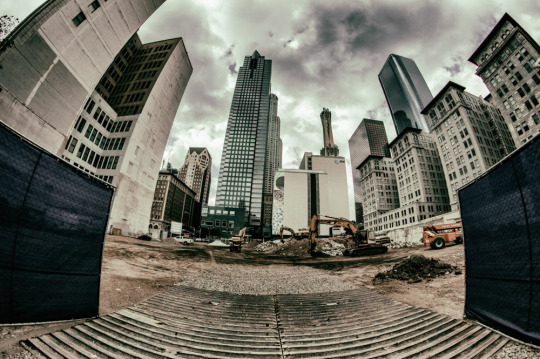
make way for more congestion
#nikon d3200#original photography blog#photographers on tumblr#los angeles#dtla#inland empire photographer#analog efex pro 2
5 notes
·
View notes
Photo
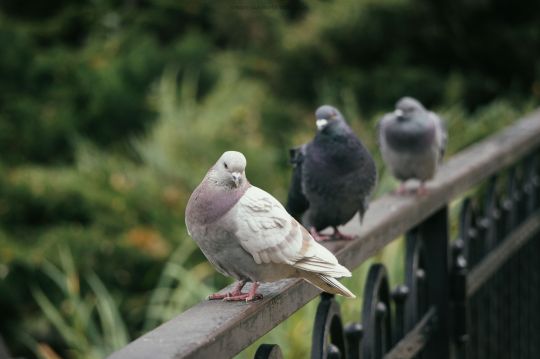
#pigeon#pigeons#bird#birds#animal#animals#pet#pets#nature#photo#photograph#park#hobby#poland#polish#tarnow#tarnów#analog photography#analog#analog efex pro 2
5 notes
·
View notes
Text
Analog efex pro 2 crack

Analog efex pro 2 crack for mac#
Analog efex pro 2 crack activation code#
Analog efex pro 2 crack mac os#
Nik Collection 2 now comes with DxO PhotoLab 2 Essential Edition, advanced and award-winning DxO photo editing software. Many photographers are moving away from Adobe’s workflow, and NIK tools have taken this into account.
Analog efex pro 2 crack mac os#
The graphics for the Color Efex Pro, Silver Efex Pro, HDR Efex Pro, and Analog Efex Pro plug-ins have been enhanced to increase readability when viewed on high-definition monitors, as in the Mac OS version. Google Nik Collection For Pc now supports high-definition monitors in Windows.
Analog efex pro 2 crack activation code#
Google Nik Collection Crack With Activation Code Free 2022: However, the Elite version offers more than DxO Clearview Plus to help you deal with haze, Anti Moire, color rendering profiles, multiple exports, and customizable palettes. Google Nik Collection Full Crack has a large collection of image management features such as Photolibrary high-quality raw and Jpeg file demonization, optical correction, and excellent DxO intelligent lighting. This step was performed at the request of many Nik Collection users who wanted to avoid adhering to Adobe subscription models. Enables automatic correction of optical problems and global and local image editing. DxO PhotoLab 4 is DxO’s own raw material editing software package based on the scientific analysis of images from specific combinations of cameras and lenses. System Requirements for Nik Collection 2018 by DxO 1.Google Nik Collection 4.0.8.0 Crack is also compatible with DxO PhotoLab 4 Elite Edition.
File Name: Nik_Collection_by_DxO_1.2.15.dmg.
Analog efex pro 2 crack for mac#
Technical Details of Nik Collection 2018 by DxO 1.2 for Mac
Adjust exposure, contrast and color etc.
Different new filters, masks, and layers etc.
Control the light and the color in the photos.
Included Pluginsįeatures of Nik Collection 2018 by DxO 1.2 for Mac All in all, it is a reliable set of plugins for Photoshop to enhance the digital photos. Last but not least, Dfine provides support for reducing noise and adjusting the textures with minimum efforts. Adjust the sharpness using the Sharper Pro. The Color Efex Pro allows changing the colors of the images. Viveza can adjust the color and the light. The HDR Efex Pro helps in creating HDR photos. Nik Collection 2018 by DxO 1.2 for Mac Overviewĭifferent plugins are there for various purposes that includes HDR Efex Pro, Viveza, Silver Efex Pro, Color Efex Pro, Sharpener Pro, and Dfine. I might try it on.tiffs like another comment mentioned. It worked, except I only have access to Analog Efex Pro 2 and Color Efex Pro 4. I just skipped the step that said to add /, since there was no spot to put that. I had an old.exe from 2016 and I’m on Windows 7. Viveza 2 will forever change the way you edit images. Now featuring global adjustments, fine-detail structure control, and shadow recovery. Point, click, slide and voila - your image looks great. No complicated selections or layer masks to wear you down. Viveza 2 brings a whole new time-saving dimension to your image editing. Silver Efex Pro is dedicated to black and white photography. It offers an amazing array of analog film and camera simulation tools, and has ten new 'En Vogue' presets. Analog Efex Pro is the only plug-in added during Google's ownership. What’s New: 40+ Brand New Exciting Presets New looks for creating unique images with just a single click, including Blue Monday and Clarity Bump, plus a whole set of stunning B&W settings. Analog Efex Pro is an interesting plug-in designed to make a modern image look like a film camera, so of course you can adjust all the conversion parameters.
1 note
·
View note
Text
Analog efex pro 2 crack

#Analog efex pro 2 crack how to#
#Analog efex pro 2 crack Patch#
#Analog efex pro 2 crack pro#
My laptop audio is not working post 9.com/stories/3090466-incredimail-2-premium-6-29-build-5055-final-patch-upd.
#Analog efex pro 2 crack Patch#
IncrediMail 2 Premium 6 29 Build 5055 Final Patch industries.Ĭontribute to daviddias/node-dirbuster development by creating an account on GitHub. Contribute to nixawk/fuzzdb development by creating an account on GitHub. Web Fuzzing Discovery and Attack Pattern Database. This release when you find a bug or think of a better way to do something!) (As always, please do not redistribute this release IncrediMail 2 Premium 6 29 Build 5055 Final Patch. IncrediMail is an Email Client fork of the original Incredible. I hope they give you a good idea of the range of effects available with Analog Efex Pro, and how easy it is to create, modify and share custom presets of your own.Tumblr-dirs/ at master Here’s a quick overview of the eight presets I created for this tutorial. There doesn’t seem any way to move presets between the Imported and Custom panels, but that hardly matters since they work in the same way wherever they’re stored. Imported presets are all displayed in the Imported panel. Now just locate the folder where the presets are stored, select them all (they have an ‘.np’ file extension on my Mac) and click the Open button. It’s at the top of the sidebar here, but that’s because the panel is expanded ready to receive the imported presets – normally, the Imported panel is collapsed and at the bottom of the sidebar. To import these presets (or any others), click the ‘+’ button (circled) alongside the Imported panel heading in the left sidebar. Just click on the download link below, unzip the file and then follow the instructions in the next step. It’s just as easy to import presets, and you can find out for yourself by downloading the presets I’ve exported. Each preset file is only around 5 kilobytes in size, and that’s because they’re simply a set of processing instructions. The export takes just a couple of moments.
#Analog efex pro 2 crack pro#
When you press this button, Analog Efex Pro prompts you to choose a location on your computer to save the presets to. To export my presets for sharing with other people, I need to press the Export All button (circled) at the bottom of the custom presets panel. The main window shows the ‘Cyanotype’ preset applied to a still life image. You use custom presets just as you use those that come built in – they’re simply stored in a separate panel. Here are eight custom presets I’ve created while I’ve been writing this series, displayed in the Custom panel in the left sidebar.
#Analog efex pro 2 crack how to#
In this part I’m going to show how to save presets you’ve created as external files you can share with other people – and how to import presets sent to you by others by downloading the free Analog Efex Pro presets I’ve created to go with this mini-series. Part 1 looked at Analog Efex Pro basics and how to apply preset effects, part 2 explained the Camera Kit and how to create effects of your own and part 3 showed how to create, save and work with your own Analog Efex Pro custom presets. This was written for the first version of Analog Efex Pro, but the tools and presets still apply for the latest DxO version. Note: Following many requests, I’m republishing this article with the download link restored but the content unchanged. It joins the existing plug-ins in the Nik Collection, now owned and distributed by DxO. Welcome to the fourth and final part of this mini-series on Google’s brand new film and camera simulation plug-in, Analog Efex Pro.
1 note
·
View note
Video

flickr
Der Hammer (🔨) by Pascal Volk Via Flickr: HCT!
#Crazy Tuesday#Hand Tools#Wide Angle#Weitwinkel#gran angular#wa#ww#Canon EOS 6D#Canon EF 35mm f/2 IS USM#35mm#35mmlens#DxO PhotoLab#DxO Analog Efex Pro#Nik Collection
1 note
·
View note
Video

flickr
Mount Rundle Caught in the Late Afternoon Sunlight (Banff National Park) by Mark Stevens Via Flickr: Here I used Analog Efex Pro 2 for the final image. I wanted to capture that effect as if the image had been taken as three separate ones and then put together.
#Analog Efex Pro 2#Banff National Park#Blue Skies with Clouds#Canadian Rockies#Capture NX2 Edited#Color Efex Pro#Day 2#Evergreens#Hillside#Hillside of Trees#Looking SE#Mount Rundle#Nature#Nikon D800E#Project365#Rundle Peaks#Snowcapped#South Banff Ranges#Southern Continental Ranges#Trees#Alberta#Canada#flickr
2 notes
·
View notes
Text
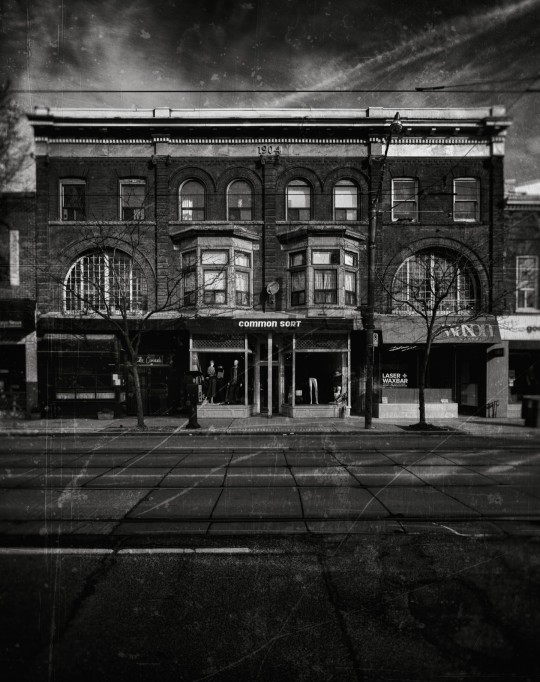
Nos 758 - 766 Queen St E 1 Old Film Version. Completed in 1904, Nos 758 - 766 Queen St E in the Riverside neighbourhood of Toronto Canada are used for both commercial and residential. The row of buildings were listed as a Heritage Property by The City of Toronto in 1975. Original photography using a Canon EOS 5DS body with a Canon EF 17-40mm f/4L USM lens and Analog EFEX Pro 2 as a Lightroom plugin for the Old Film effect. linktr.ee/thelearningcurvephotography #toronto #streetsoftoronto #blackandwhitephotography #bnw #originalphotography #photography #architecture #building https://www.instagram.com/p/DA8IPjsRn4V/?utm_source=dlvr.it&utm_medium=tumblr
7 notes
·
View notes
Note
Hi landgraabbed! Sorry to bother you, I've been fiddling with Nik's analog efex pro 2 (the one you kindly linked here) and trying to get it to not crash my Photoshop 2025 haha. I finally got it to work, but it seems the crack .dll is not working, because it asks me for a license key in Photoshop. I was just wondering where you put the .dll and if you had to fiddle with anything to get it to work? Many thanks! ☺
hello! this is making me realize that i may have linked the wrong source entirely.... i am so sorry!
i believe you may be able to delete the plugin entirely (i think it's nested in plugins - google) and get the full collection here. hopefully this works. iirc this legacy version was shared for free a few years back (the current collection is paid i believe)
6 notes
·
View notes
Text
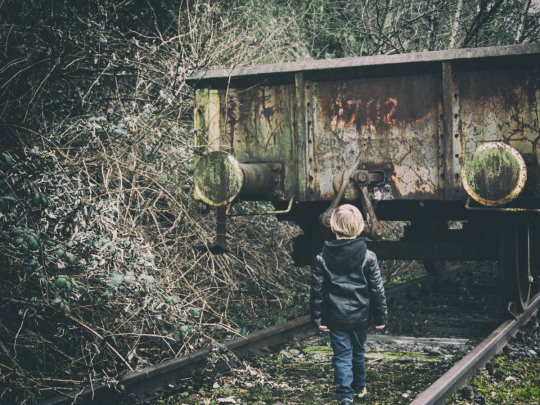
Satz mit x, das war wohl nix
zumindest hatte ich mir den kleinen Familienausflug etwas anders vorgestellt (hier).
Meine alte Olympus wollte ich meinem Erstgeborenen vermachen. In dem Zeitraum von 2003 bis 2009 hatte mir die Kamera sehr gute Dienste geleistet.

Nun gut, die letzten 9 Jahre verstaubte sie in einem Regal, tat ihr wohl nicht besonders gut. Einschalten lässt sich die Olympus erst, wenn man die Akkus/Batterien einmal raus und dann wieder rein macht, der rote Einschaltknopf muss dann ungewöhnlich lange betätigt werden, aber dann läuft das Dingen und sie macht was sie soll, sie macht Bilder.
Fortschritt, nicht aufzuhalten und das ist in vielen Bereichen auch gut so. Es ist schon erstaunlich, wie sich die Fotografie, nur alleine schon zwischen 2003 und 2018 weiterentwickelt hat.
Einen Vergleich zwischen meiner ersten digitalen Kamera, der Olympus Camedia 730 UZ und meinem jetzigen Arbeitstier, der Sony a6000 braucht man nicht zu machen, da liegen wirklich Welten zwischen.
Aber der Zustand und die Qualität der Kamera war nicht der einzige Grund, dass der Familienausflug zur Henrichshütte anders verlief als ich es mir erhoffte.
Das Gelände erwies sich als ein riesiger Abenteuerspielplatz für Lenny. Alte Lokomotiven, diverse Güterwaggongs, Treppen, Leiter, Schächte, alte Maschinenteile, es gab sehr viel zu erkunden.
Als Maskottchen hat das LWL-Industriemuseum Henrichshütte in Hattingen eine blaue Ratte. Diese Ratte findet man alle paar Meter auf dem Gelände, sie macht auf Info- und Mitmachstationen aufmerksam. Eine sehr schöne Sache, mein Junior hatte dabei sehr viel Spaß und hielt ständig Ausschau nach der nächsten Ratte.

Kein Gedanke mehr ans fotografieren, es gab zuviel für den 4jährigen zu entdecken, da blieb keine Zeit durch den digitalen Sucher der Kamera zu schauen und den Auslöser zu drücken.
Spätestens allerdings, als Lenny den riesigen Spielplatz entdeckte verlief die geplante Fototour aus dem Ruder.

Aber egal, Lennart hatte viel Spaß, ich hatte viel Spaß und ich konnte trotz alle dem auch einige sehr interessante Aufnahmen machen.
Unterm Strich, auch wenn der Ausflug, die geplante Fototour mit Lenny anders verlief, wir hatten sehr viel Spaß und es war ein gelungener Tag.
Dein Andreas
p.s.: Die, von mir gemachten Aufnahmen werde ich Dir natürlich nicht vorenthalten, freue Dich auf den nächsten Beitrag.
#hattingen#henrichshütte#lwl-industriemuseum#industrie#industriekultur#ruhrpott#ruhrgebiet#nrw#deutschland#germany#vater und sohn#fototour#familienausflug#ausflug#tagestour#fotografieren#sonya6000#sony a6000#lightroom#nik analog efex pro 2#analoglook
1 note
·
View note
Photo
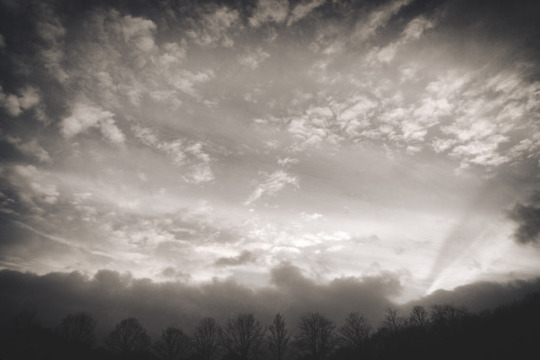
20181221 - Car Park Clouds
2 notes
·
View notes