#Acrylic Foam Tapes
Explore tagged Tumblr posts
Visit Tumblr Blog
Explore Tumblr blogs with no restrictions, modern design and the best experience.
Last Seen Tumblr Blogs


Fun Fact
12.7% of mobile users access Tumblr.
Text
Why Acrylic Foam Tapes Are a Game Changer for Automotive and Construction Industries
In all of a sudden vehicle and creation tires, movement is vital to encourage execution, execution, and strength. One new jump-forward thing that has accumulated incomprehensible interest is acrylic foam tape. These adaptable tapes have come to be a basic helper for gatherings in view of their super handle, strength and adequacy under tough spots.
Benefits of Acrylic Foam Tapes in various Endeavors:
Inside the auto locale, Acrylic foam tapes are continuously changed in accordance with accumulated parts which unite trim parts, body parts and window seals. These tapes offer superb handles as a result of substrates which solidify steel, plastic and glass, which is vital for ensuring the strength and insurance of vehicle outlines. They're a green decision instead of an ordinary mechanical catch, offering a cleaning subject matter expert, a more crucial and captivating choice. Additionally, acrylic tapes acclimatize vibrations and shocks, diminishing quarrel and further making standard vehicle support. This seeks after them a bewildering decision for soundproofing and streamlining the utilizing appreciation.

Acrylic Foam Tapes
Revamp your progression with acrylic foam tapes:
Inside the creation locale, acrylic tapes are crucial for assignments close by remaining sheets, protecting materials, and fixing joints considering their energy and flexibility. Those tapes capacity liberal association with both indoor and outside surfaces, even in horrendous climate conditions. Acrylic tape's top-notch compressibility and flexibility assist with filling openings, further encourage security, and update the power productivity of homes. Moreover, its affirmation from UV bars, drenched state, and temperature changes make it ideal for private and business creation drives.
Acrylic foam tape makers' commitment to innovative sorts of progress:
Acrylic foam tape manufacturers are perseveringly refreshing the improvement after this thing to convey better beautiful things with meandered forward properties. These levels of progress incorporate better handling capacities, better environment obstruction, and, incredibly, more earth-captivating plans. Through continually redesigning the presentation of acrylic foam tape, those makers are assisting adventures close by auto and headway with meeting the referencing states of state-of-the-art errands.
Conclusion:
Acrylic foam tapes are changing each vehicle and creation district by offering strong, adaptable, and enduring through managing an enormous gathering of uses. considering the went on with the progress of Acrylic foam tape manufacturers, those tapes will remain mindful of going most likely as an impetus for change, remembering progress and further creating efficiencies for those fundamental undertakings.
0 notes
Text
All of the above
@thorne-5658
INGESTED not just chewed on to clarify lol. based on real responses from my groupchat
#and glass#and anything plastic#mechanical pencil springs#dried acrylic paint#drywall#magnets#flocking moss#tape#rubber cement#once when I was like 6-7 I ate a pillow filled with foam beads#mother did NOT like that one#tree moss#tree bark#sticker paper#candle wax#cheap plastic quarter machine jewelery#pleather book cover#rubber bands#the plastic lining of a ziploc bag#i’m sure there’s more#ehveerivv
16K notes
·
View notes
Text
UV Cured Acrylic Foam Tapes Market Trends Rising Demand in Construction and Building Applications
UV-cured acrylic foam tapes are gaining significant attention across various industries due to their strong adhesive properties, versatility, and ability to offer durable bonding solutions. With advancements in manufacturing technologies and growing demand across sectors like automotive, construction, and electronics, the UV-cured acrylic foam tapes market is experiencing notable growth. These tapes are used for bonding, sealing, and cushioning, which makes them highly desirable in several applications.

UV Cured Acrylic Foam Tapes Market Trends: Growing Demand in Automotive Industry
The automotive sector is increasingly adopting UV-cured acrylic foam tapes for bonding applications. These tapes provide superior bonding strength and are essential in reducing the use of mechanical fasteners, thereby enhancing vehicle aesthetics. With the growth of electric vehicles and lightweighting trends, the demand for UV-cured acrylic foam tapes is anticipated to rise, contributing significantly to market expansion.
UV Cured Acrylic Foam Tapes Market Trends: Rising Demand in Construction and Building Applications
In the construction and building industries, UV-cured acrylic foam tapes are used for mounting, sealing, and weatherproofing applications. Their resistance to UV radiation and ability to withstand extreme temperatures makes them an ideal choice for both residential and commercial buildings. As infrastructure projects grow worldwide, the demand for these tapes is expected to increase.
UV Cured Acrylic Foam Tapes Market Trends: Advancements in UV Curing Technology
The UV-cured acrylic foam tapes market is benefiting from advancements in UV curing technology. This innovation improves the curing process, making it faster and more efficient. As manufacturers continue to innovate in the field, these tapes are becoming even more reliable and cost-effective for a variety of applications, which will likely propel market growth.
UV Cured Acrylic Foam Tapes Market Trends: Expansion in Packaging Industry
The packaging industry is increasingly utilizing UV-cured acrylic foam tapes for sealing, fastening, and product protection. These tapes offer high adhesive strength and are used for secure packaging, ensuring that products are safely transported without damage. As global trade continues to grow, the demand for such tapes in packaging is expected to rise.
UV Cured Acrylic Foam Tapes Market Trends: Focus on Eco-Friendly Solutions
Sustainability is a key focus in today’s manufacturing landscape, and the UV-cured acrylic foam tapes market is not immune to this shift. Manufacturers are moving toward eco-friendly formulations, such as water-based adhesives, to create more sustainable products. This eco-conscious shift is expected to play a significant role in the market’s future.
UV Cured Acrylic Foam Tapes Market Trends: Integration with Smart Technologies
As industries move toward smart manufacturing, the integration of smart technologies in adhesive products is becoming increasingly common. UV-cured acrylic foam tapes are being optimized for smart applications, including self-monitoring and real-time performance analytics. This trend is likely to see further growth as the demand for high-tech solutions increases.
UV Cured Acrylic Foam Tapes Market Trends: Rising Use in Electronics Industry
The electronics sector is another significant driver of the UV-cured acrylic foam tapes market. These tapes are used for assembly, bonding, and sealing of sensitive electronic components. With the rapid pace of innovation and the increasing production of consumer electronics, demand for these tapes in this sector is expected to continue to grow.
UV Cured Acrylic Foam Tapes Market Trends: Customization and Tailored Solutions
Customization is becoming a prominent trend in the UV-cured acrylic foam tapes market. Manufacturers are offering tailored solutions to meet the specific requirements of various industries, including automotive, electronics, and construction. The ability to customize tape thickness, adhesive strength, and durability is contributing to the market’s growth as it caters to diverse applications.
UV Cured Acrylic Foam Tapes Market Trends: Increasing Adoption in Green Building Projects
The growing trend of green building and eco-friendly construction practices is driving the demand for UV-cured acrylic foam tapes. These tapes are often used in energy-efficient buildings for their insulating properties and ability to reduce energy consumption. As sustainable construction practices continue to grow, the market for UV-cured acrylic foam tapes will see an uptick in demand.
UV Cured Acrylic Foam Tapes Market Trends: Demand for Lightweight Solutions
As industries focus on reducing product weight, UV-cured acrylic foam tapes are gaining traction due to their lightweight nature and strong adhesive capabilities. They are replacing traditional bonding methods, such as mechanical fasteners, due to their ability to provide a lightweight solution without sacrificing strength or durability. This trend is especially prominent in the automotive and aerospace industries.
Conclusion
The UV-cured acrylic foam tapes market is witnessing a period of rapid growth, driven by advancements in technology, rising demand across various industries, and increasing focus on sustainability. As the market evolves, innovations in curing technology and eco-friendly products will shape the future of the industry. The continuous adoption of these tapes in automotive, construction, electronics, and packaging sectors suggests a bright future ahead for UV-cured acrylic foam tapes.
#UV Cured Acrylic Foam Tapes Market#UV Cured Acrylic Foam Tapes Market trends#UV Cured Acrylic Foam Tapes#UV Cured Acrylic tapes#UV Cured tapes#UV Cured tapes products
0 notes
Text
When it comes to bonding applications that require strength, durability, and flexibility, Acrylic Foam Tape is a top contender. Whether for automotive, construction, or industrial uses, this double-sided tape is known for its exceptional performance.
0 notes
Text

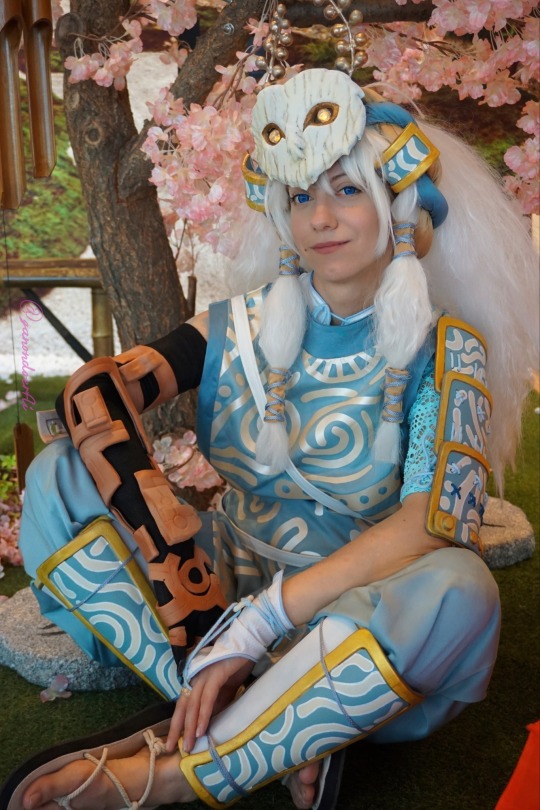
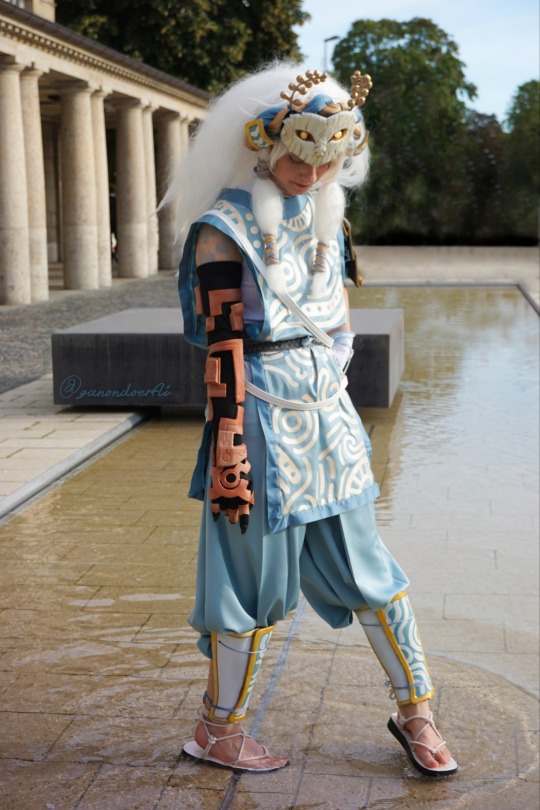
I'm so excited to share my most recent cosplay from Connichi 2023!
Cosplay made and worn by me (@ganondoerfli)
Character: Link from The Legend of Zelda - Tears of the Kingdom
Armor Set: Mystic Set
Photos taken by my BFF: @ithilcelevon
Date of photos: 2023-09-12
Reference picture:
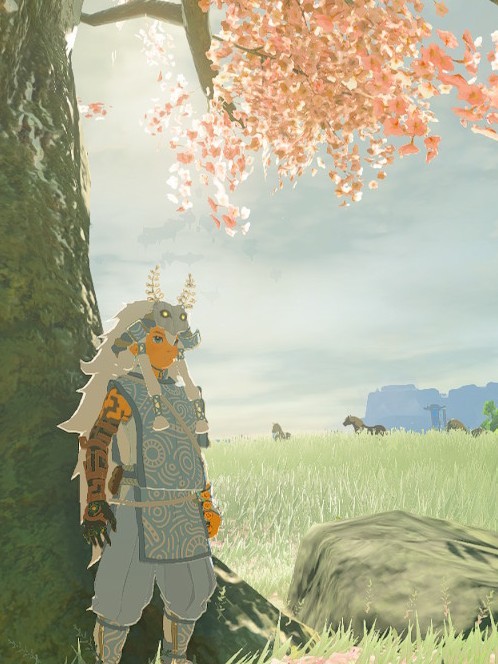
Keep reading for more details on the making of the cosplay props:


🌸The Satori mask🌸:
I made this mask using worbla on a foam base. The LEDs I used inside the eyes were taken from LED tea candles. They give the light a cool flickering effect.
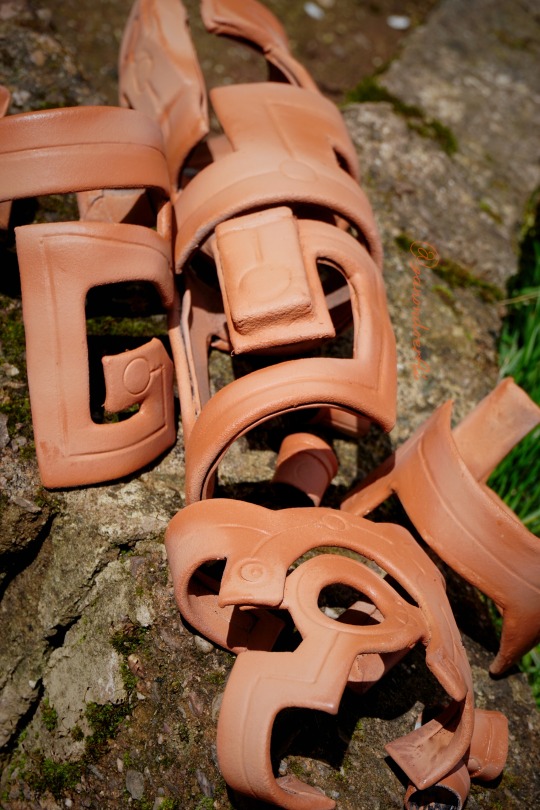
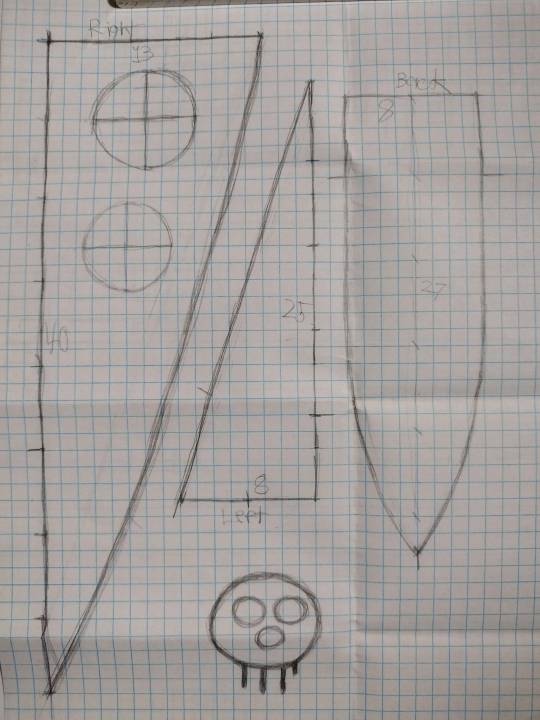
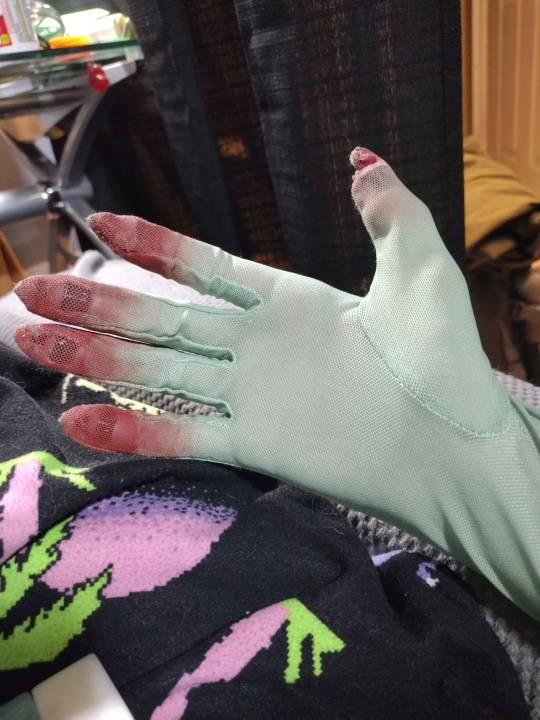
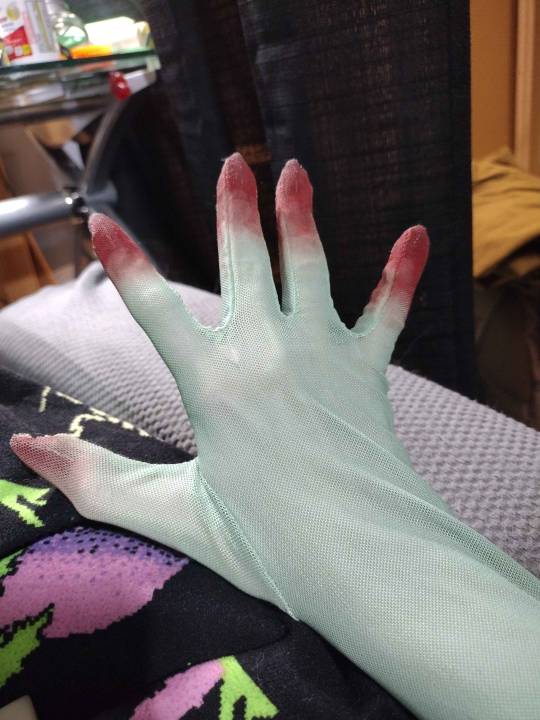
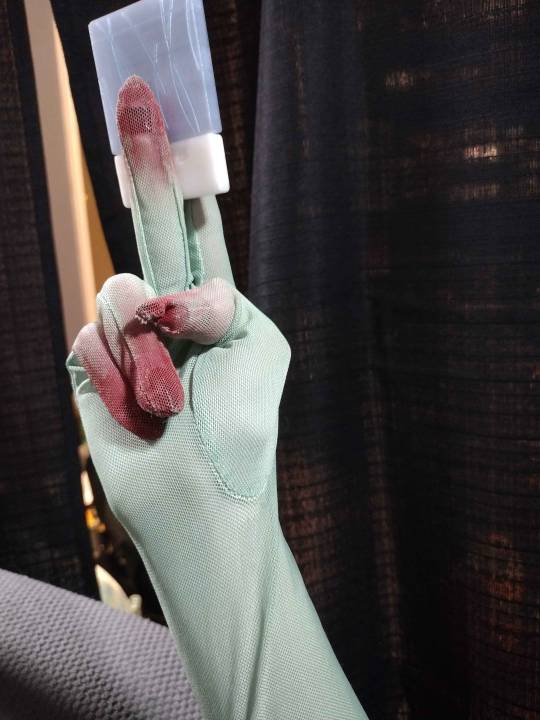
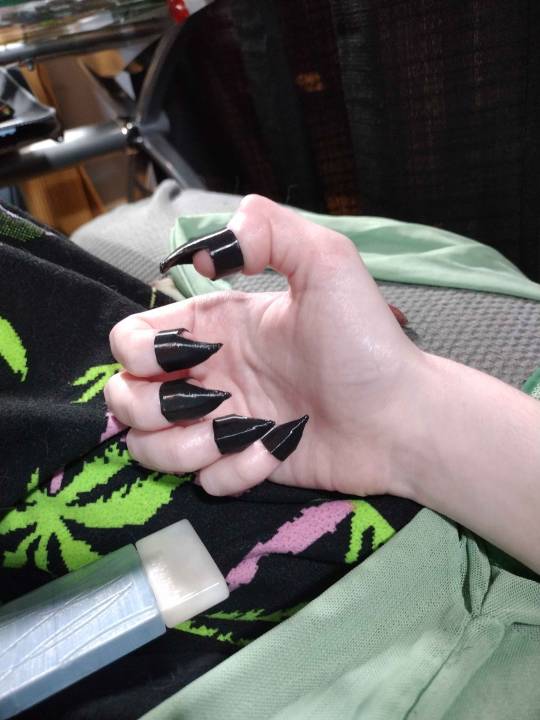
🌸The right arm🌸:
For Rauru's right arm I wore the runes on top of a scaly glove.
-> First I sewed the glove from a very textured jersey fabric.
-> Then I added some artificial nails on top, which I modified to look like claws.
-> In order to construct the pattern for the runes, I actually had to create a makeshift cast of my arm first. For this, I wrapped my whole arm in newspaper and crepe tape. After cutting the cast open and removing it from my arm, I filled it with more newspaper to make it sturdy enough to work with.
-> This paper cast of my arm was perfect for constructing the pattern, since it could be rotated in any direction (as opposed to my real arm🙃)
-> Using the finished pattern, I made the runes from foam rubber and worbla and shaped them with heat. I painted them using terra-cotta spray paint.
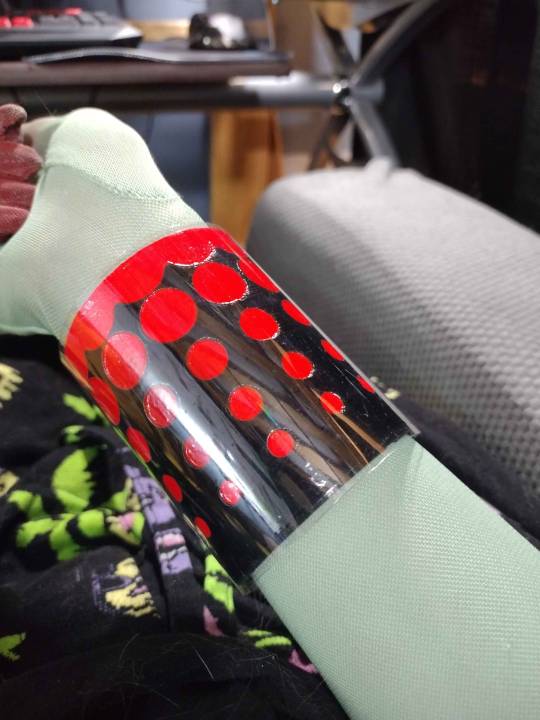
🌸The clothing🌸:
I used satin fabric for a nice and flowing look on the clothes.
In order to recreate the shimmering pattern on the robe, I used heat transfer vinyl.
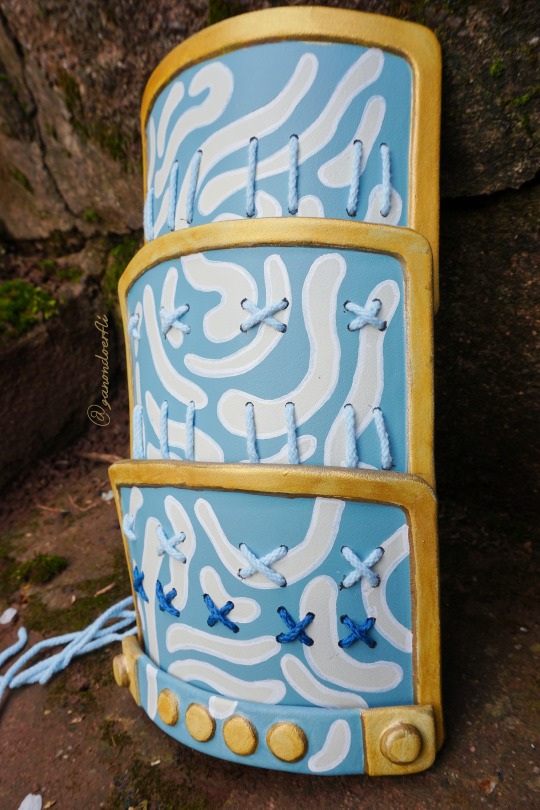
🌸The armor🌸:
All armor pieces are made from foam and worbla. I've been using this technique for many years, it really works great! The armor pieces were then painted with lacquer and gold acrylic paint.
Making this cosplay was a lot of fun!
Tears of the Kingdom offers so many beautiful designs and outfits.
I can't wait to make more from this game! <3
#the legend of zelda#tears of the kingdom#totk#cosplay#tloz totk#loz#Link#zelda cosplay#zelda#my stuff
546 notes
·
View notes
Text


Finished and hung © Peter Solarz
From the ceiling, morphing uap: wood, wire, styrofoam, foam clay, vintage jewelry, Suzi finds, flow acrylic, polyurethane, metallic paint, Gorilla double sided mounting tape 9-21-2024, 1:01 pm.
#artists on tumblr#abstract painting#abstract#abstract sculpture#sculptors on tumblr#sculpture#uap#ufo#aliens and ufos
41 notes
·
View notes
Text
So I was wanting to dye my hair pink midwinter so it’d fade my spring, I’ve been meaning to make another skull mask, it was supposed to snow the third week of January and somehow Technoblade always seemed to end up in the snow. Therefore. Things happened. I was only intending to take photos of it, but then I heard this song and my brain just went MMMM THIS SCENE AND THIS SCENE AND THIS SCENE AND- so I made a short. Or at least it was intended to be a short, but for some reason, YouTube won’t upload good audio, which is annoying, because tumblr doesn’t like high res imaging. Regardless, I’m really, really happy with this. Also here’s the slightly shortened youtube version if anyone’s interested.
Here’s the concept art for the costume beside what it actually turned out as. Material list below cut.


Mask: foam core which is a staple, but I tried duck masking tape instead of regular scotch tape in hopes the paint wouldn’t peal off it’s held up so much better thus far. Tusks and teeth are cosclay. Then acrylic paint and I don’t remember what the clear coat is called.
Crown: also foam core, but I did use scotch tape for it. Not as happy with it because there are a lot of creases, but I was too lazy to try and find a different medium. Painted with an oil based gold paint which actually covered very well and I barely used any of it.
Actual Mouth Tusks: also cosclay with acrylic paint for the white and the same oil based gold for the tusk cap thing.
Cloak: red fleece that I weathered with acrylic paint (and painted myself and the kitchen floor in the process), and long pile fleece for the hood lining. The buttons are cosclay that I, again, painted with the same gold. And the chains I just bought in bulk off amazon cuz I’ll probably use it again.
Corset Belt: some random faux leather I had leftover from a former project, and the laces are just ribbon.
Sword: a friend made it for me forever ago, and it’s just been lying around.
Shirt: a random find from Goodwill that I about shrieked at when I found.
Pants: I can’t remember where I got them, I’ve had them for a while, they’re just high waisted corduroy.
I really wanted glasses, but I couldn’t find the ones was planning to use. Which is obnoxious. Because Techno deserves to see. But it’s not supposed to snow again for a while, so unfortunately, no glasses.
Also, this is the first time I’ve wished I had long hair since I cut it off almost three years ago because aesthetically it would have been really nice, but I’m less hung up on that than I am the glasses lol
#cosplay#ava art#me#sewing#foamcore#technoblade#minecraft cosplay#technoblade cosplay#techno cosplay#techno#techno fanart#technoblade fanart#short film#I guess?#technoblade never dies#one of us#technoblade tribute#I mean I suppose that’s what it is#c!techno#also yes#this was the red fabric Nugget was playing with lol#young artist#small artist#artists on tumblr#digital art#regular style#mcyt#mcyt fanart#mcyt cosplay#mossypidder motion
128 notes
·
View notes
Text
Acht (Dedf1sh) Cosplay Rundown


feel free to copy or take inspiration :]
assembly instructions and print settings/materials for 3d printed parts are on thingiverse (headphones) (other parts)
models designed by me are in brackets in the materials list
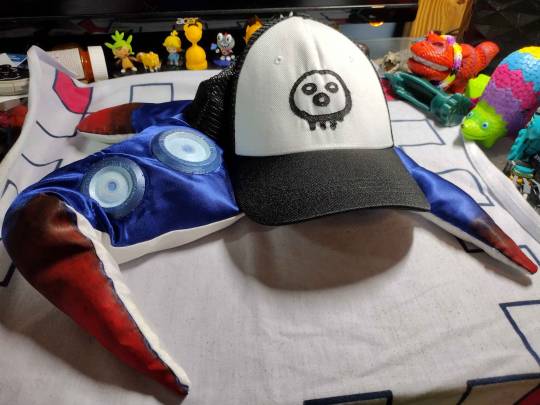
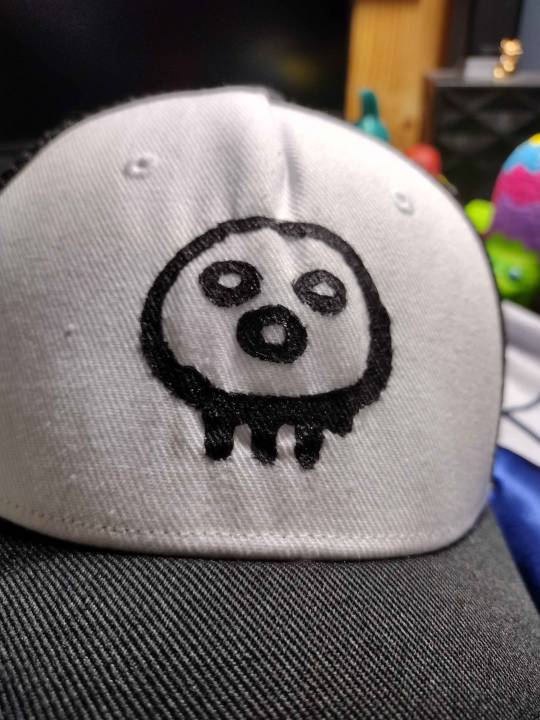
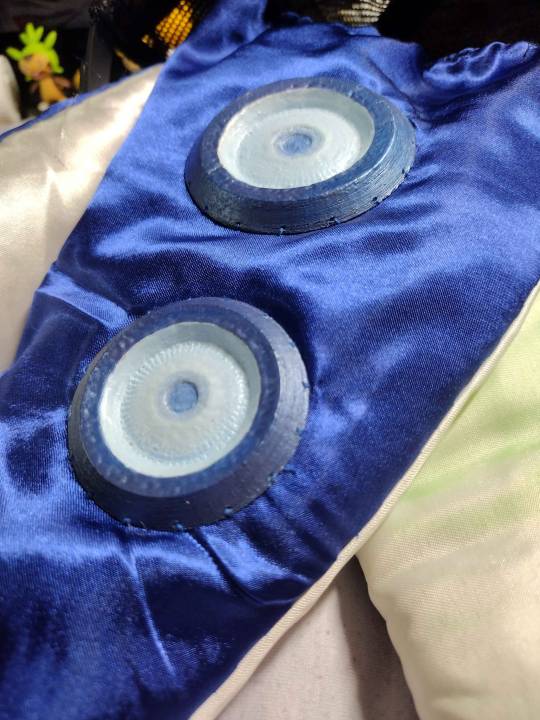
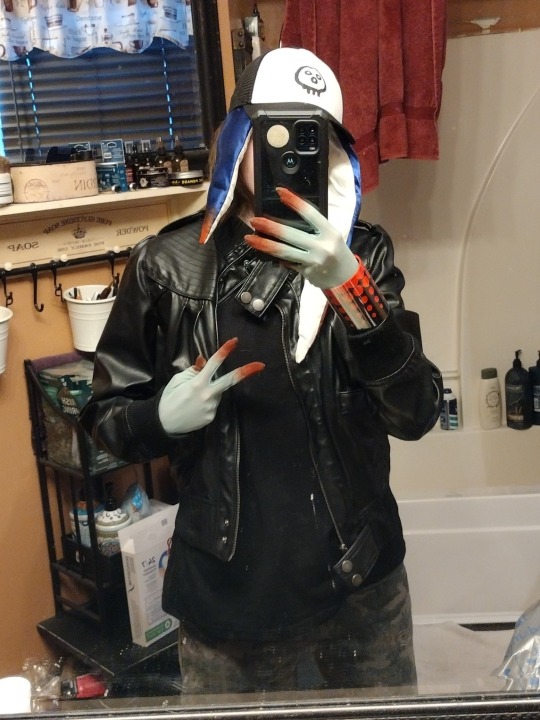
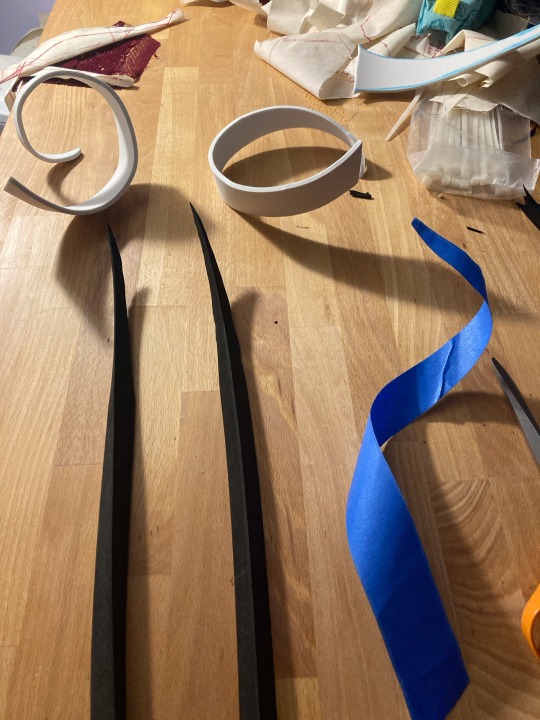
Hat/Tentacles
black trucker hat with blank white front panel
[dedstencil.stl]
fabric paint
shiny indigo fabric
less shiny white fabric
glow-in-the-dark pigment powder
polyfill
metal marbles (to weight the ends so they hang properly)
two of [octosucc.obj] in different sizes
acrylic paint
conveniently enough i've had this hat hanging on my door for years. i got it with N from pokemon in mind but i never actually did that cosplay ¯\_(ツ)_/¯

here are the sketches i based my patterns on (1 square=1 cm). don't forget to add seam tolerances
Headphones
full details on thingiverse (mudmouth not included)

Arms
mesh bolero with built-in gloves
rit dye
fabric paint
10 of [finger_claw_vase.stl] in varying sizes
i wear claws under the gloves, but sometimes i'll wind up taking them off after a while since they can get uncomfortable and they make it hard to use my phone :/
Bracelet
[acht_bangle_vase.stl]
acrylic paint
glow-in-the-dark pigment powder
glossy clear coat
a cut up mello yello bottle
packing tape
eva foam

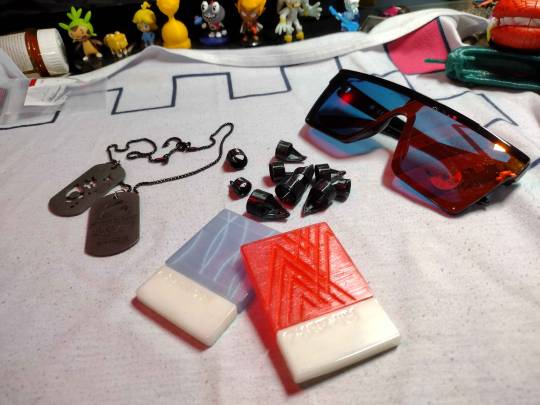
Misc. Doodads
red mirror shades
color chips
necklace chain
[acht_tag_jelleton.stl]
[acht_tag_ident.stl]
[acht_tag_hook.obj]
did you know that acht gives eight a mobility chip in the trailer but a power chip in the actual game? bc i didn't notice until after i'd already finished making the mobility one. so i've got a spare chip i guess
the dogtags were kind of a spur-of-the-moment creative liberty. i had the jelleton one sitting around from some experiments with composite filaments, and while i was brainstorming a way to incorporate acht's cool fish hook into the cosplay without needing to actually get my ears pierced it all sorta clicked together. i made the ident tag shortly afterwards and swiftly forgot what the text says :P
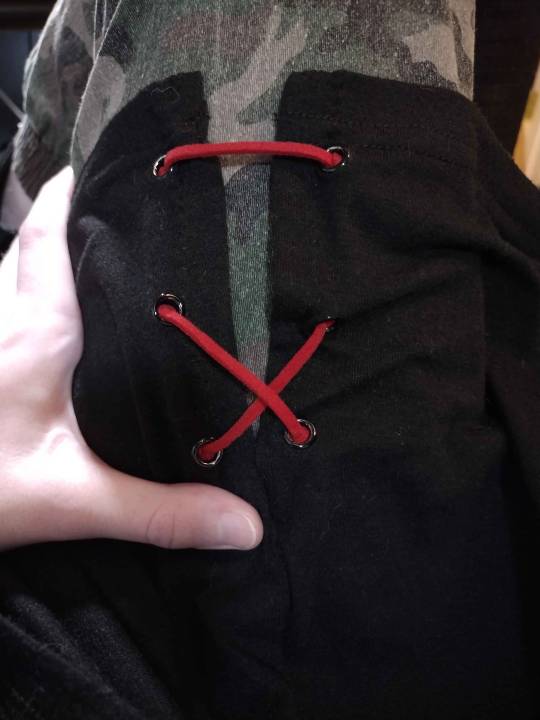
the rest of it
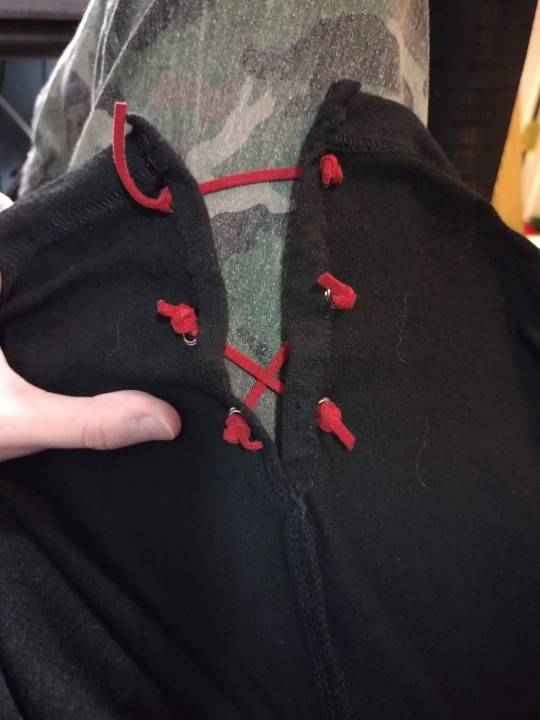
dress tunic thingy
metal eyelets
red string
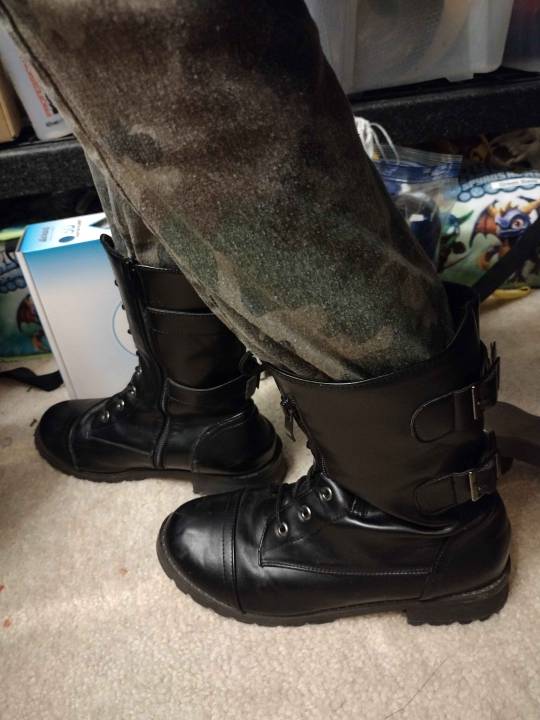
camo pants
combat boots
i skimped on accuracy in favor of comfort for the lower half ¯\_(ツ)_/¯ the dress is more of a shirt, i added comfy pants bc i hate wearing colored tights (or god forbid painting my thighs green), and shorter boots bc more accurate ones are expensive as hell. plus any heel higher than this makes walking feel like playing qwop (skill issue). speaking of which does it bug anybody else how long acht's feet are on their in-game model or is that just me
idk if it counts as part of the cosplay but i also add a leather jacket when my arms get cold. i think it goes hard
To-Do:
ink the shaved streaks onto the hairnet
swap out the red leather cord for something less stiff
see if beans would work better than marbles
hand bandages?
single pointy tooth?
make a pre-sanitized version so i don't have to scrub off face paint every time
#i'll probably make more posts like this for other cosplays as i pull them out for cons#this time it's acht. because they're the one i'm the most autistic about rn. insert achtism_creature.jpg here#cosplay reference#splatoon#dedf1sh#acht mizuta#colossalcon#hewk babbles
29 notes
·
View notes
Text
let's make fearne horns!
a step-by-step tutorial for making foam horns for cosplay

this was originally posted to twitter last year, but since twitter’s decided to ram itself through a brick wall repeatedly for some reason, i’m reposting here.
materials/supplies:
wire (the hardware store kind, not the flimsy jewelry kind. you want it bendable but sturdy enough to hold whatever size horns you’re making.)
craft foam/eva foam (thickness depends on project needs)
triangular foam dowel
tape or paper for patterning
barge cement (or other brand contact cement)
foam clay
plastidip spray
acrylic paints
gloss spray
heat gun
scissors
paint brushes
something to wrap horns around depending on curl needs
headband or something else to attach the horns to for wearing
the process:
1️⃣ pattern horn curl using tape or paper. mine is going to be a long triangle shape along it’s top face.
2️⃣ cut out of craft foam & trim/taper triangular foam dowel to match. cut wire to match this length plus a couple extra inches for attaching to a headband later on.
3️⃣ carve valley into dowel & glue wire into it using barge cement. tape is helpful for holding the wire down while it dries. be sure to follow glue instructions for use which usually requires good airflow/ventilation in the space! for me, that means opening the window, turning on a fan, and wearing a mask to avoid fumes.

4️⃣ glue foam dowels to craft foam.

5️⃣ spiral horns carefully around a cylinder, heat forming tips where wire can’t reach. the hardest part here is to get both sides even. (i think i used a wooden dowel or a curtain rod for my spirals??)

6️⃣ fill gaps between dowel & craft foam with foam clay, using finger + water to smooth it out. if you want to add any ridges or scars to your horns, do it once this part is dry and before the next step—but i wanted mine to be smooooth.

7️⃣ once dry (give it a couple days just in case), heat seal with a heat gun & spray with plastidip. do multiple coats to get all the angles because spirals are WEIRD!
8️⃣ paint with acrylics.
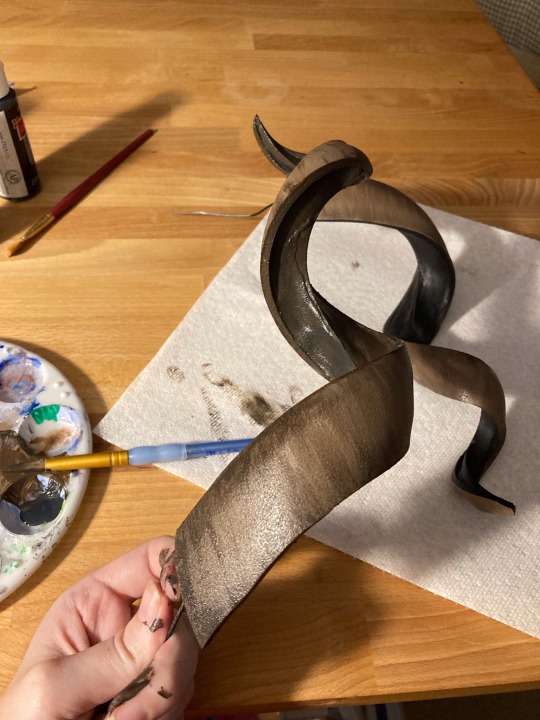
9️⃣ gloss spray!
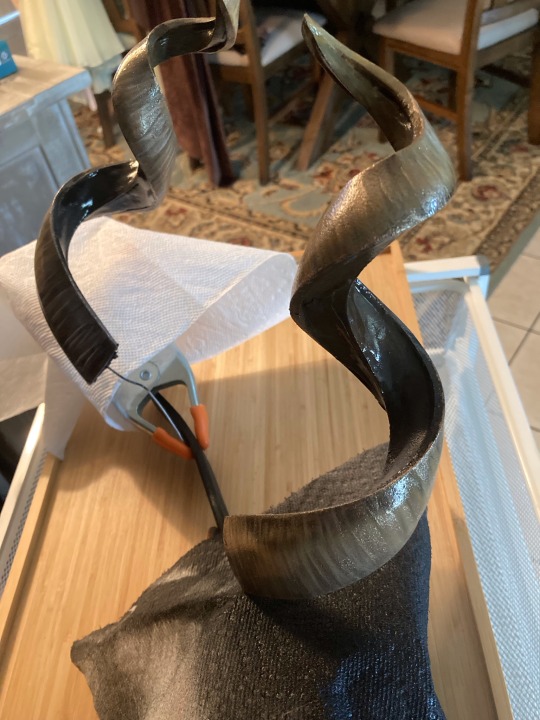
🔟 using the bit of wires sticking out, attach to a headband or wig to wear! mine actually poke through my wig and attach to a headband that sits inside the wig which fearne’s ears also attach to.

i hemmed and hawed over how to approach these originally because i know most folks would either 3d print them or do a proper full craft-foam pattern, but i’m crap at cutting craft foam and i hate sculpting digitally and ALSO don’t have a 3d printer. so i did it my way! and it was fun!! plus, the final horns are super lightweight which makes them great for wearing all day! the flexibility of the wire also allows them to have some pose-ability which can be nice for photos to make sure they’re visible.
202 notes
·
View notes
Text
Factor Builds a Poltergust!
Part One
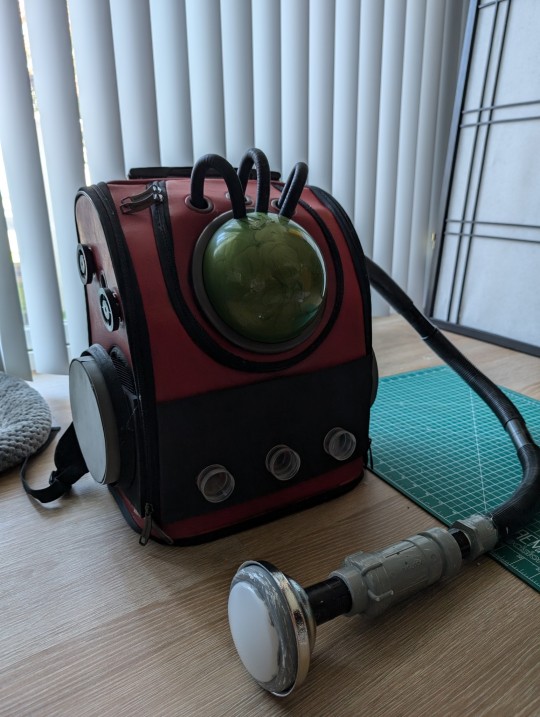
Poltergust?! In my kitchen?! At this time of year?!!
More probable than you might think.
For those who didn't see this post a few days ago, I've been building a prop Poltergust. I've got a costume to go along with it, and both are at the point where I can step out to an event right now and feel proud of myself.
After I find fingerless gloves and give the vacuum tube a couple more coats of paint, of course.
So, how did I do it? Why should you care about a ghost vacuum that can't actually suck things up? Well, I'm about to tell you the process I've gone through this week to get this bad boy ready, because I did a decent job documenting my steps and I wasn't just about to not share something like this.
Ready?
Here we go!
Disclaimer
This is not a tutorial. I am not in the business of giving Poltergust workshops. This is just me documenting my process, which you're free to riff off of for your own uses, but this is in no way a step-by-step instructional. This is what I got after gleaning two walkthroughs online and distilling them into something my artsy ass can manage. If I tried to pass this off as a tutorial in real life, I'd probably get fired.
If you do reference this for your own purposes, make sure to wear gloves, put down cardboard and other protective coverings, and do your work in a well-ventilated area. It should go without saying, but do not let your pets into this shit.
With that being said, let's get into the base of this whole thing.
The Base
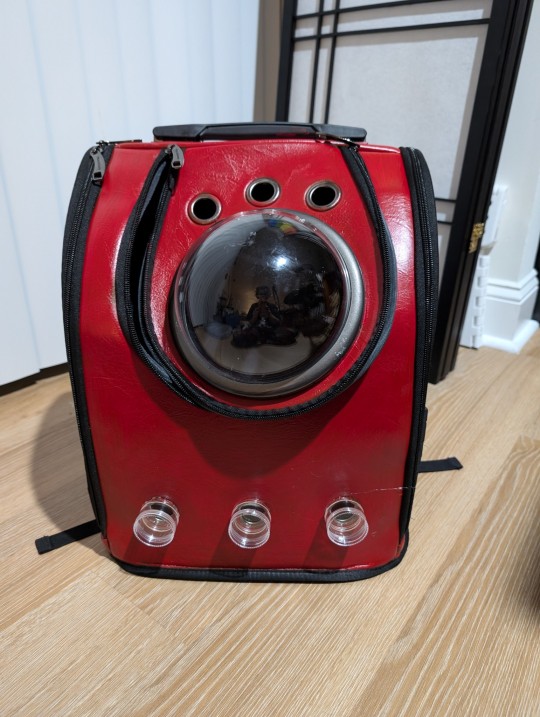
Not gonna lie, this whole idea started with a cat carrier. It's been with me for several moves now, and neither of my cats have taken to it. Needless to say, I was ready to give this thing purpose.
The carrier I have has a bubble in the front, several panels to zip and unzip, and appears to be made of some kind of leather. With this in mind, I prepared the surface for painting by using a deglazer. If you can't find any (or you run out early like I did), some strong isopropyl alcohol and a bit more elbow grease will also do the trick.
Next, I went with some leather acrylic paint. It went on nicely and dried quickly, so I did a couple of coats.
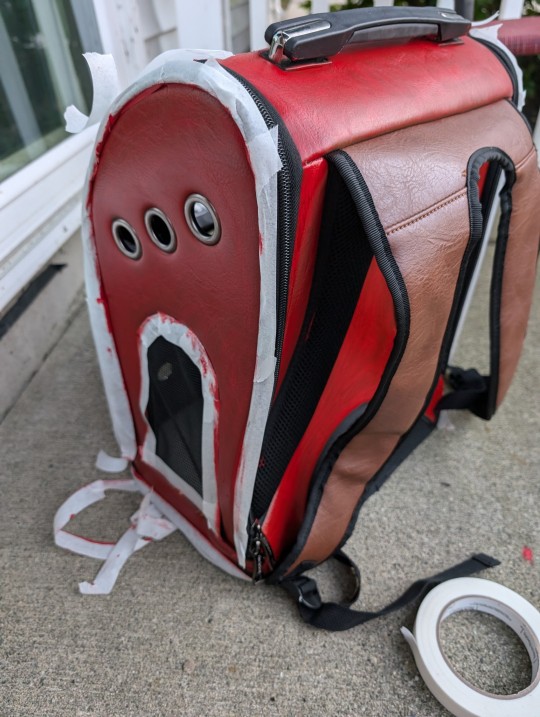
As you can see in the picture above, this carrier had a nice black trim to it that I wanted to preserve as much as possible—hence, drafter's tape. I also left the straps as is, since E. Gadd has a thing for leather straps on his devices.
After the paint was good and dry, I sprayed the whole thing a couple times over with a clear topcoat. I might've picked something semi-glossy (I really don't remember), but so long as it's clear and sprayable, it'll work.
I did get a little bit of topcoat on the bubble, but this really won't matter in the long run.
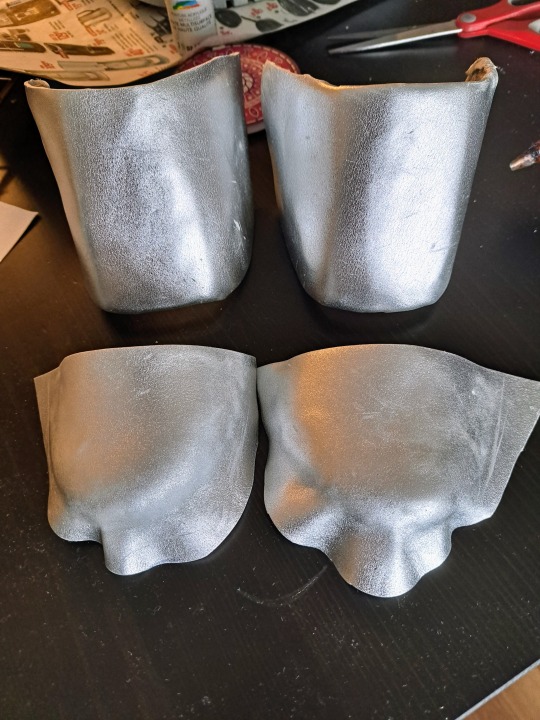
Panels and Wheels
Each Poltergust I've come across has a set of wheels or cylinders on the sides. Seeing as this was a consistent choice, I figured I'd cook something up to cover the side panels of my base.
Each wheel piece is based on a wooden circle (mine are about 6.5" in diameter). From there, I glued a smaller foam disc onto the center, and then covered each disc in gray foam for a smooth look.
While waiting for that to dry, I then took a triangular dowel of EVA foam and painted that black. One calculation for the circumference of the inner circle later, and I had the outer rims for these pieces. For error's sake, I rounded up.
End result?

Snazzy. Now to apply this and the other panels onto the base. I chose a thicker piece of black foam for the accent paneling, which also went under these circles. However, I didn't immediately glue all this on.
Instead, I went to work on some other doodads.
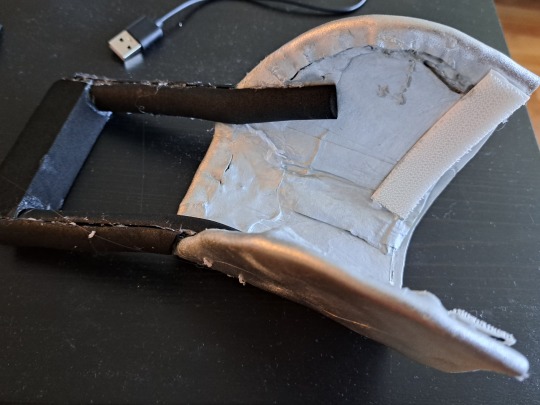
Doodads, part one
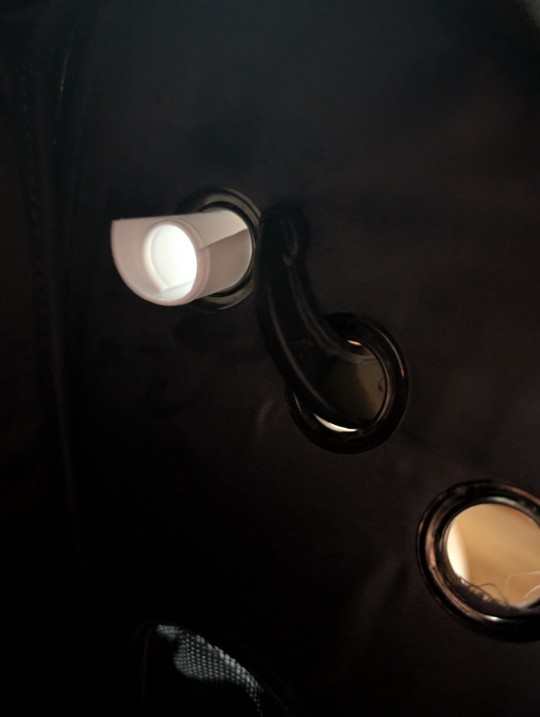
There are a number of holes on the cat carrier. They come in sets of three, are ringed with metal, and were probably intended to provide airflow to my spoiled little fur babies. For the Poltergust, though, these holes provided opportunities for additional decorations.
All of these holes were 1" in diameter, which made some of my choices awfully convenient.
First off: bottom three. These are the reason I held off on gluing the panels. I wanted to cap them and put some lights behind them. Some little jewelry organizers did the trick, and provided a nice serrated edge that I used many times in this build.
Now, this photo is a bit out of order. I got a bit impatient and glued the side panels and these things on before I did the topcoat. As a result, I sprayed them a bit. Again, I like to think this works out in the end.
At this point, I was ready to take my foam and do all sorts of measurements and shit to get it all to perfectly align. And then I realized...
Foam is impressionable, and these suckers are serrated.
With that, I pressed my front panel into the circles, carved out the holes, and was able to slide it on just like that.

From there, I eyeballed and trimmed it down before gluing. And I got the circles hooked up as well.
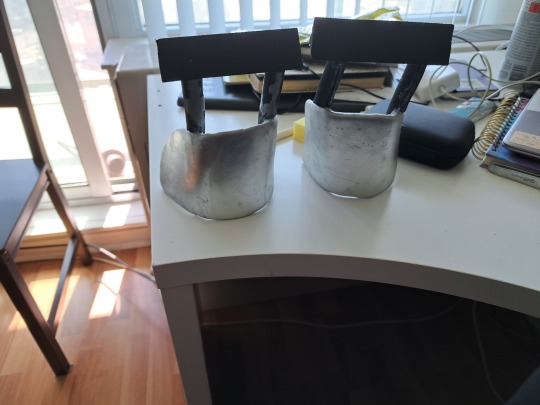
Doodads, part 2
I came across some black desk feet that, with some nuts and a piece of foam glued in for good measure, made for some nice button-looking things on the side panels. Because I needed to work on the tube, though, this won't get applied until closer to the end.
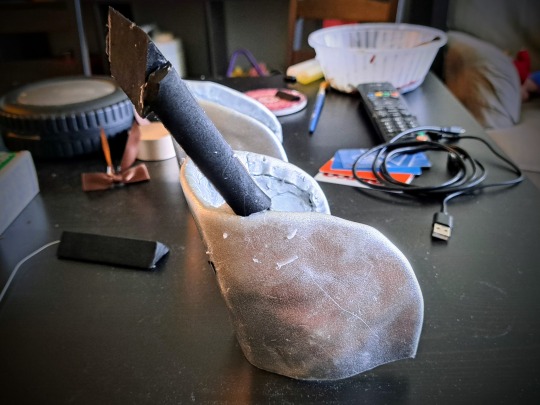
The Tube and the Tools
The bones are good, but what about the tube? The means by which a ghost goes from outside to within?
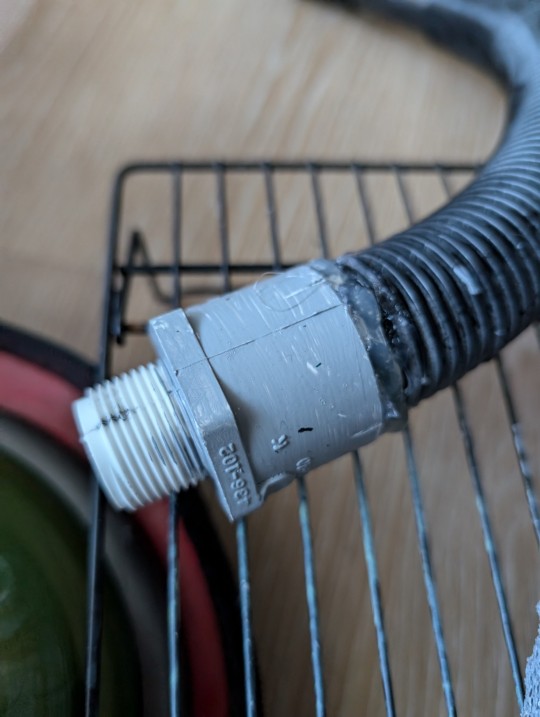
This, along with lights and other device pieces, required a trip to the hardware store. Believe it or not, I spent quite a bit of time in the plumbing section for this stuff. Kinda funny when you think about it.
Anyway, tube. I went with a drain and bilge tube/pipe thing because it was long and flexible—not to mention easily cuttable with a hacksaw. It's attached to the Poltergust with a metal closet rod support, which again, was about the diameter I needed.
All good, right? Wrong!
That tube wasn't just gonna go into the hole nice and neat. After getting the metal circle around the tube, I cut some slits into it to cheat my constraint, further forcing it in by applying sealant to the circle and clamping that shit down.
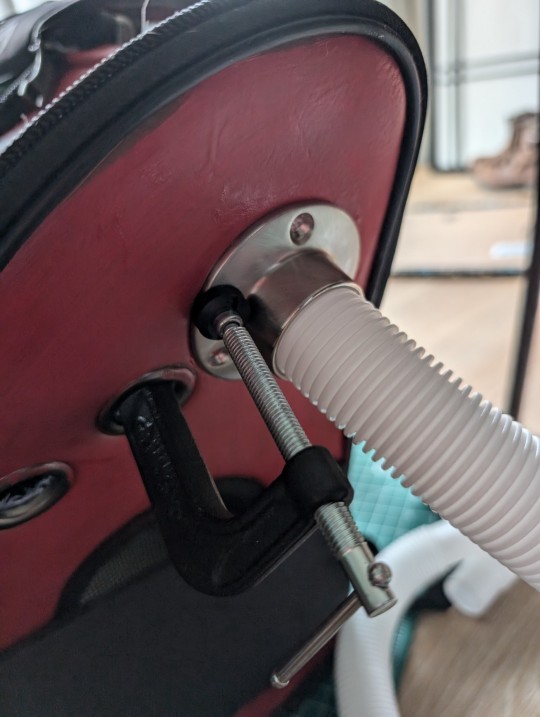
Hot glue is nowhere near strong enough for this part. Given that it's metal, on the most vertical slope, and is gonna get tugged around a bit, I opted for sealant. Please keep in mind this shit is strong, so let it cure outside.
Since the sealant takes a while to cure, we can pretend I got everything in one trip and get started on the flashlight attachment. I found this PVC pipe thing that had a slideout bit of pipe, and something about the way it felt in my hand screamed "comically big flashlight". With that, a bell drain cap thingie, a puck light, and some paint later, I had Luigi's flashlight, ready to screw in or change out with a nozzle (which isn't built as of posting. I'm tired and it's daunting and I want to go back to writing.)
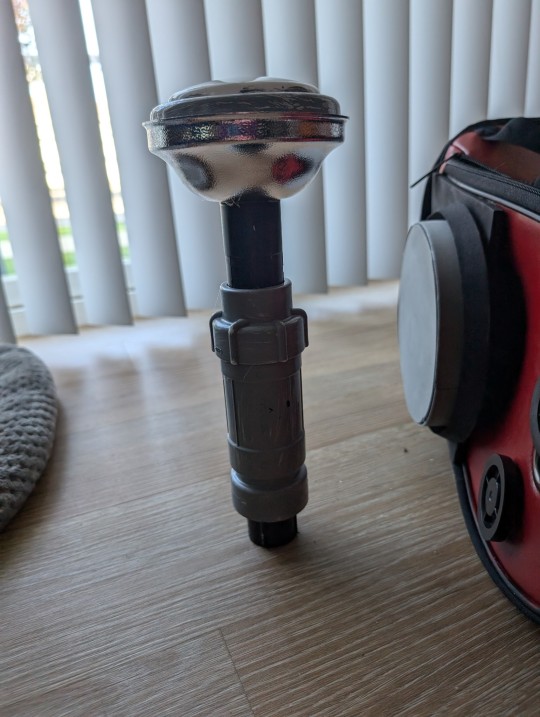
But like, wow. I'm a bit screwed when the batteries die, but for this? This is beautiful. See that black bit at the bottom? That's meant to screw into the thing pictured below.
Which, fine, there is a bit of a time skip with this top. But the whole idea is to stuff it with sealant, follow up with hot glue, and put it on the end of a trimmed down, painted bilge tube. To paint the tube, stick the whole Poltergust in a trash bag, poke a hole in it, and feed the tube through. Tape up anything loose, get that spray paint, and spray.
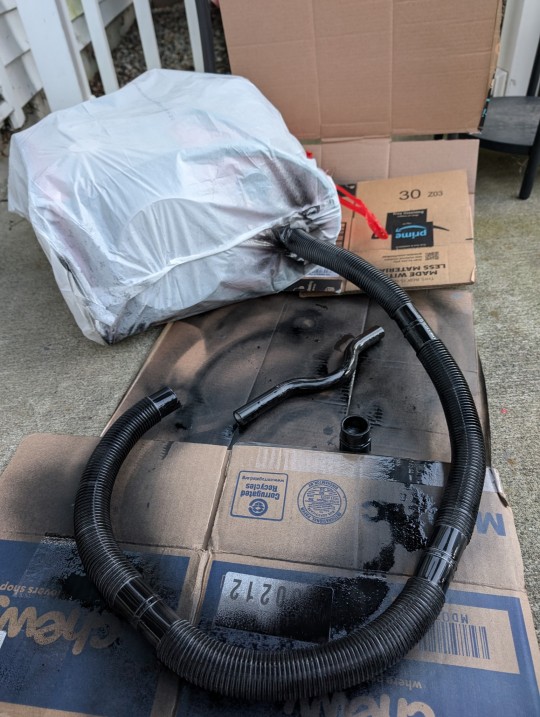
Rule of thumb: do not assume any of my steps are chronological. I'm going off of categories to make a bit of sense out of my madness. A lot of parts were painted in batches because I was waiting on something else and I wanted to save time.
But, once things are painted, glued, and sealed, the worst of the work is over.
That being said, we are far from over. I'd keep going, but Tumblr on mobile won't let me do more than ten pictures, so keep an eye out for the inevitable reblog featuring part two!
#super mario bros#smb#luigis mansion#poltergust#e gadd#cosplay props#cosplay#diy craft#converting stuff around my house#luigi#trust the process#hey guess what Nintendo#i have a poltergust now#luigis mansion dark moon#luigis mansion 3#factor makes
17 notes
·
View notes
Text
Acrylic Double Sided Tape and PVC Foam Tapes: The Dynamic Duo for Interior & Exterior Applications
Concerning trustworthy indoor and out of doorways pastes, double sided acrylic tape and PVC foam tape are two of the most flexible and green decisions in the business community. These tapes are central gadgets for a spread of occupations, from creation and vehicle work to local complex design and signage.
Adaptability of Acrylic Double Sided Tape:
Acrylic double sided tape is known for its strong paste properties, offering a durable bond without the use of nails, screws, or tumultuous pastes. Made from acrylic texture, this tape has extraordinary security from UV radiates, temperature changes, and dampness, making it ideal for indoor and outside packs. Whether you are mounting extravagant features, putting pictures, or offsetting signs and incidental effects, double sided acrylic tape continues with its decency under a repercussion of natural conditions, guaranteeing getting through grasp and a smooth, cleaned look. PVC Foams Tape: A bendy, shock Penetrable entryway:
PVC Foam Tapes:
PVC Foam Tapes, of course, are delivered to offer versatility, cushioning and sound assurance. Made with a compressible foam community, those gatherings shape a delicate solid areas for yet among surfaces, reducing vibration, commotion and power incident. P.V.C foam tape is perfect for fixing openings and joints in doorways, windows and vehicle parts. Its exceptionally extraordinary compressibility makes it best for indoor and outside applications where a strong seal is a legitimately big deal to further develop security or guard in opposition to normal effects.

Acrylic Double Sided Tape
Joining power and adaptability for max in everyday execution:
At the point when used all in all, Acrylic double sided tape and p.v.c foam tape shape an extreme pair that meets each your holding and fixing wishes. Whether it's a DIY task, vehicle fix, or present day show-stoppers, those tapes give unmatched execution and predominant grasp, cushioning, and natural resistance. Their blend of fortitude and versatility makes them essential for indoor and outdoor show-stoppers.
Conclusion:
In overview, the exceptional homes of Acrylic double sided tape and PVC Foam Tapes supplement every single other, making them ideal for an expansion of activities. Their strong bond, versatility, and strength make them a should have in any expert or DIY tool compartment.
#Acrylic Double Sided Tape#Double Sided Pet Tape#PVC Foam Tapes#Eva Foam Tape#Polyethylene Foam Tape Roll#Acrylic foam tapes
0 notes
Text
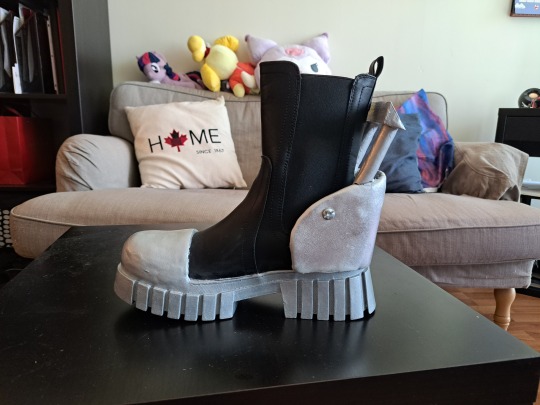
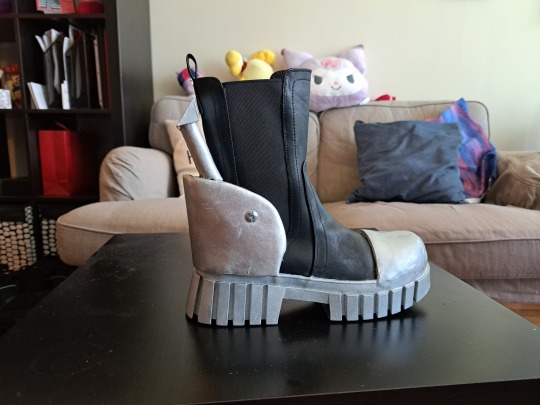
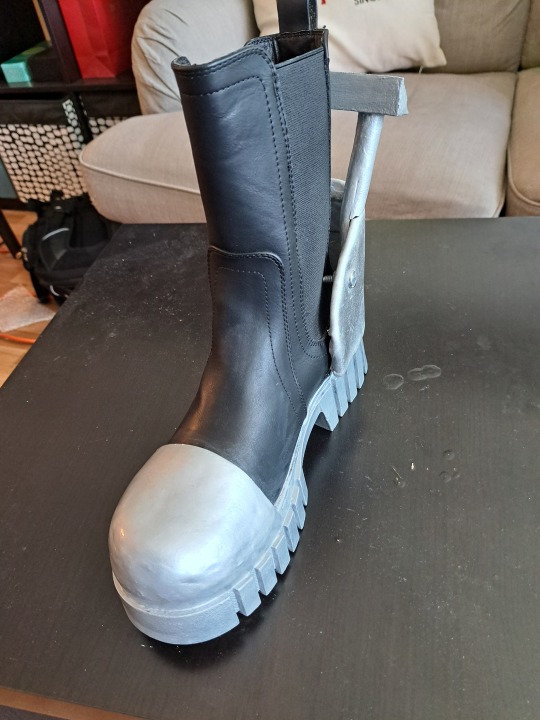
Infinity Train Boots!
Made these a while back as part of my Simon cosplay, must have been almost a month, but I didn't post the process!
(EDIT: hey I did some fixing up of my cosplay which you can see here in this post!)
Not actually sure if anybody would care because it's so niche, unlike my Spider-Gwen suit, but I did write about how I did the Infinity Train harpoon pack, so I'll discuss this too!
STEP 0: Acquire reference pictures:


Yep, pretty straightforward.
Note that Simon's boots have an extra bar/strap thingy, whereas Ryan and Min-Gi's do not.
I didn't include it because it kinda looks ugly and I didn't know how fragile the strap might be.
NEXT!
STEP 1: Acquire Boots!
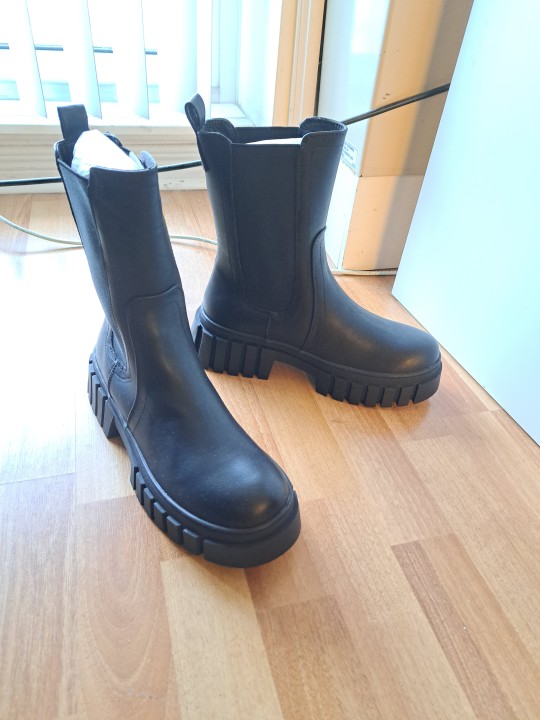

I got these MIA boots from Journeys Canada. They only cost around 60 bucks which is a bit pricey for cosplay, but I'm not about to go thrift shopping when I'm in a time crunch and I can just order online and get free delivery within 2 days. (Also these days 60 bucks for boots from a retail store is considered cheap. Inflation is nasty.)
They came with these cardboard thingies inside to keep the structure of the boots. They have "left" and "right" written on them in Chinese which was helpful for me when I got a bit confused about which side was which.
Save those for later. You'll need them.
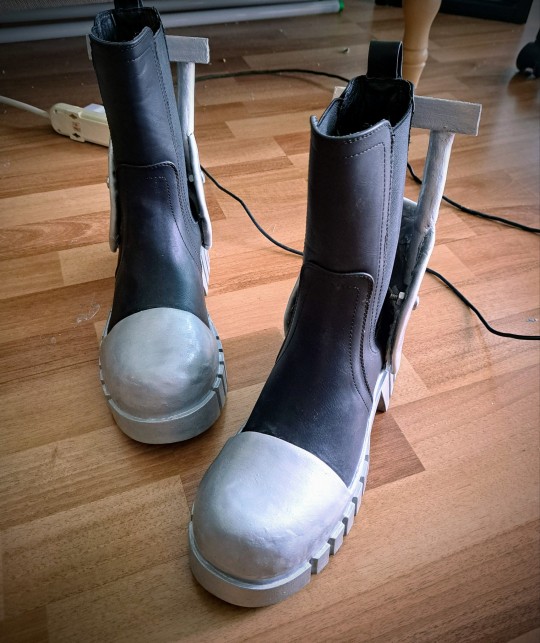
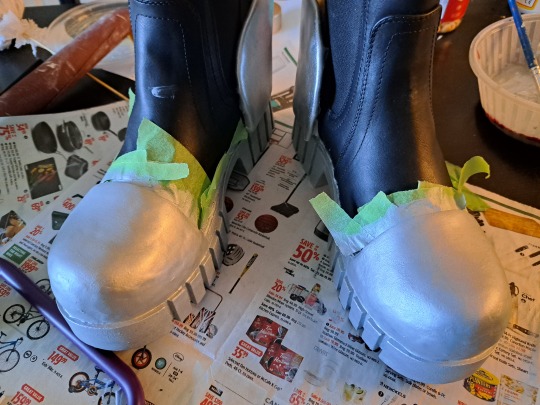
STEP 2: Paint the soles silver
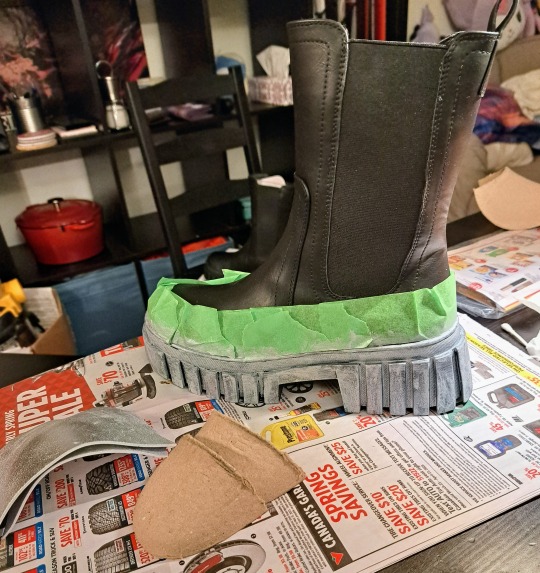
Literally any acrylic silver paint works. May take several layers. Make sure to put masking tape around the top edge of the soles.
I didn't use a primer on the base but you probably should. Any white acrylic paint or Gesso would do and you wouldn't need like 8 coats of silver. Do as I say not as I do.
And make sure to seal everything with a varnish or mod podge!
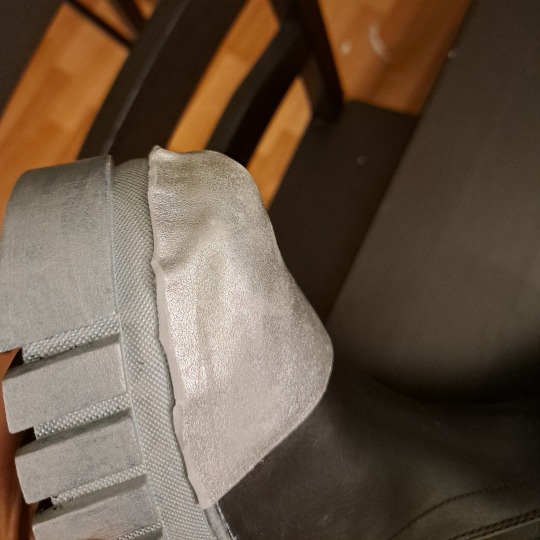
Here are also the cut toe caps and some silver craft foam. The craft foam was kind of a mistake I'll get into it soon.
STEP 3: Make toe caps
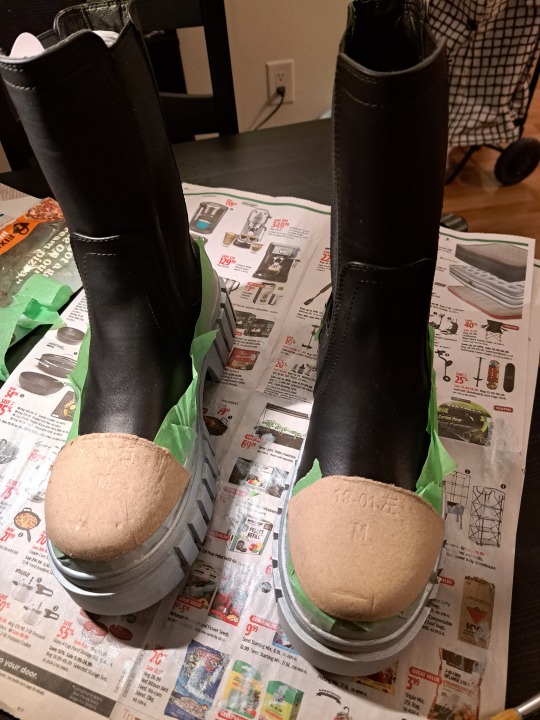
Here's me making sure the placement is good.
I glued the craft foam onto the cardboard caps, and then I was thinking "well the little bit hanging over it isn't going to be a problem, nope! I'll just glue them down and it'll blend right in!"
HAHAHAHA. WRONG.
STEP 3.1: Fuck up the toe caps because you were winging this and you have no idea how crafting materials work you idiot
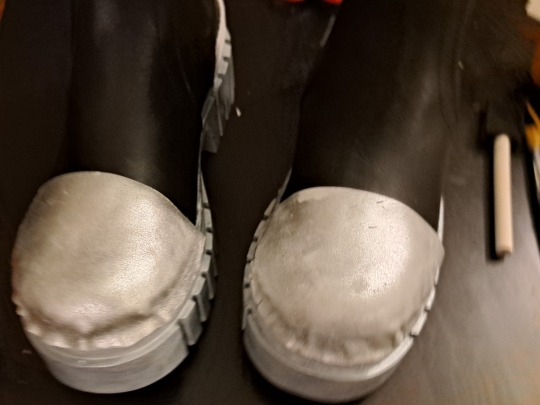
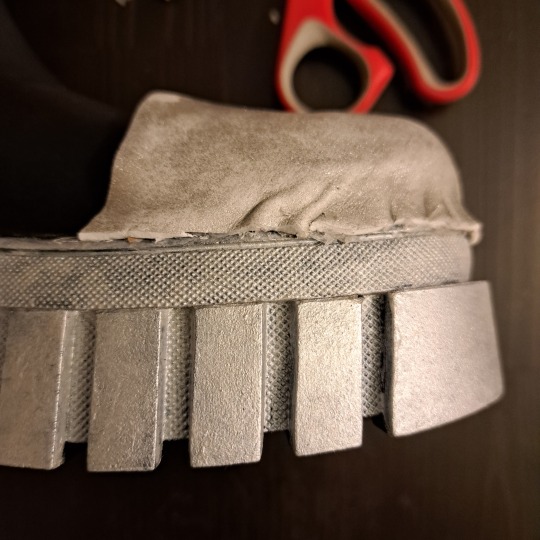
GROSS. DISGUSTING. VILE.
The hot glue melted the craft foam and now it's got this weird melty edge all around it that's all goopy and shit. Anyway you dont want your boots to look fucked up, you want them to look smooth like polished steel, or whatever they were made of in the show.
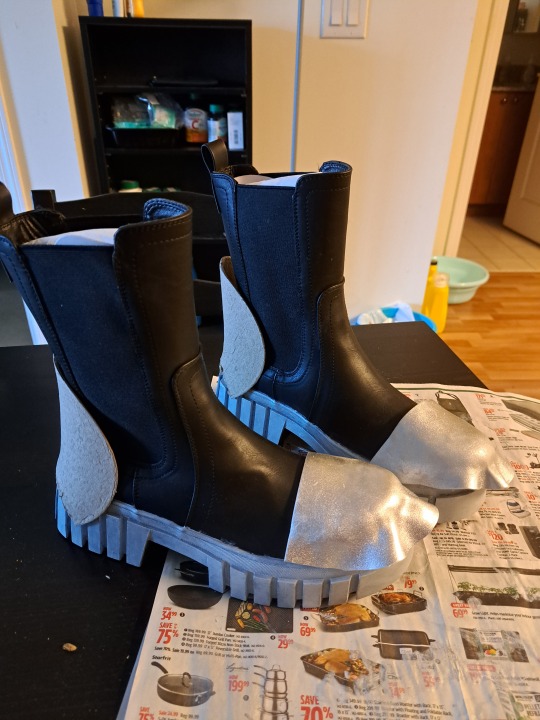
STEP 3.2: Fix toe caps
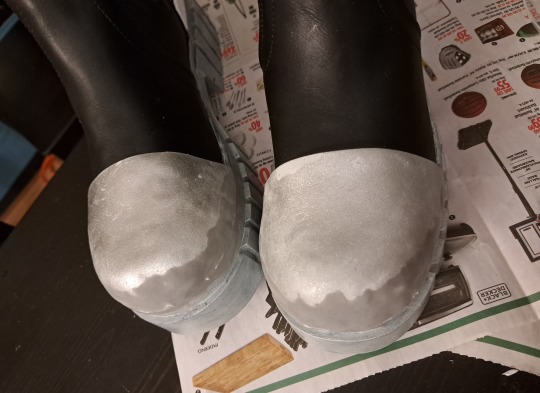
Everything can be fixed with Model Magic and acrylic paint! (and seal your paint with a sealant again!)
I just took some model magic (a type of lightweight air dry clay from Crayola, the cheapest you can get. Other more legit craft supply brands make similar materials as well), and squished it into the ugly bits, making a mostly seemless transition from craft foam to clay to sole.
TIP: to make model magic smooth before sanding, dab your fingers in some water to smooth it out! This also works for Paperclay as well if you decide to use a more higher end type of air dry clay.
STEP 4: Make the back metal thing that goes around the heel
So I did this kinda in tandem with the toe caps which is why the pics will look a little out of order but essentially, I took the parts of the cardboard that I cut off, and I cut them in half, put some other cardboard in between, and then sandwiched the thing in metallic craft foam.
This time it was a bit more successful because I was able to hide the weird gross melted edges on the inside. Also paint that shit silver!
Now you can glue the "heel caps(?)" directly to your boots, but I decided to use stick-on velcro instead so they're kinda removable, and may be easier to transport or clean or something? ehhh.
STEP 5: Make those handle things
So I also hit a bit of a snag with these. I ordered EVA foam dowels with a semi-circle cross-section as well as a triangular one, but I quickly realized they would be too flimsy sticking out like that unless I put something hard in between them.
So this isn't pictured, but I got some thin crafting wire from Dollarama and just bent them into L shapes, and glued the smaller dowels around them. I also shoved them into the bigger down and glued it down.
You can also see from these pictures that that leaves a weird gap in between the smaller dowels. Again I just used model magic to cover them up. There's probably a better solution but this was the one I went with.
I also lengthened the top "handle" part eventually because it looks better that way. (Please ignore the mess on my desk >_<)
Then I just paint them silver like everything else!
COMPLETE!
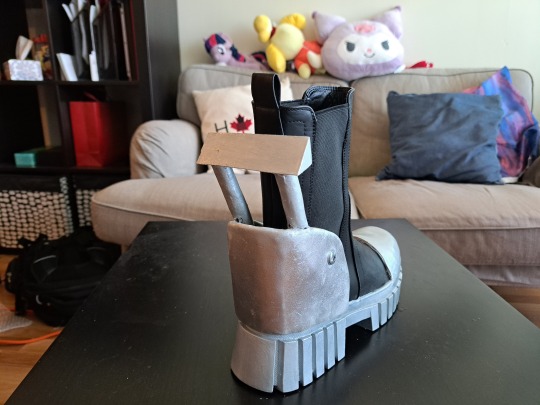
The nut and bolts are actual nuts and bolts. Since the base was just craft foam and cardboard, you can poke a hole in them easily and insert the bolt.
Hope you found this helpful! Or are just willing to indulge me and my notes on my silly crafting journey!
#cosplay#infinity train#infinity train cosplay#simon laurent#ryan akagi#min gi park#tutorial#crafting stuff#i have no idea what im doing#but it worked out#infinity train book 3#infinity train book 4#stuff i made#diy
241 notes
·
View notes
Text
UV Cured Acrylic Foam Tapes Market Trends Revolutionizing Construction and Assembly Processes
The UV cured acrylic foam tapes market has shown significant momentum in recent years, primarily driven by innovations in adhesive technology and the growing demand for versatile, high-performance bonding solutions. These tapes are designed with acrylic foam and cured using ultraviolet light, offering enhanced bonding strength, durability, and resistance to harsh environmental factors. As industries seek more efficient and reliable solutions for bonding and sealing applications, UV cured acrylic foam tapes are emerging as a preferred choice.

Key Trends Driving the UV Cured Acrylic Foam Tapes Market
Technological Advancements in Adhesive Solutions
One of the most prominent trends in the UV-cured acrylic foam tapes market is the continued evolution of adhesive technology. Manufacturers are focused on developing tapes with superior bonding strength, higher resistance to temperature fluctuations, and improved UV stability. This has resulted in the introduction of specialized UV-cured acrylic foam tapes tailored for a variety of applications in automotive, electronics, and construction. These advancements are helping to meet the increasing demand for high-performance bonding solutions, particularly in industries requiring durable, long-lasting adhesion.
Sustainability and Eco-Friendly Materials
As sustainability becomes a more significant concern across industries, the UV-cured acrylic foam tapes market is also undergoing changes to reduce its environmental impact. Manufacturers are increasingly using eco-friendly materials and developing processes that reduce energy consumption during production. UV curing, in particular, is considered a more energy-efficient curing method compared to traditional heat-based curing processes. This contributes to lower emissions and less resource consumption, making UV-cured acrylic foam tapes an environmentally friendly choice for companies aiming to meet sustainability goals.
Expanding Applications in the Automotive Industry
The automotive industry is one of the largest adopters of UV-cured acrylic foam tapes, with applications ranging from exterior bonding, sealing, and mounting to interior trim and noise reduction. The trend toward lightweight, fuel-efficient vehicles is driving the demand for tapes that provide strong, reliable adhesion while minimizing the weight of the final product. These tapes are also preferred for their ability to bond dissimilar materials, such as metal, glass, and plastics, which is essential in modern automotive design. As electric vehicles (EVs) and advanced vehicle systems continue to evolve, the demand for high-performance adhesives is expected to increase.
Increasing Demand in Electronics and Consumer Goods
Another major trend influencing the market is the rising demand for UV-cured acrylic foam tapes in the electronics and consumer goods sectors. These tapes are widely used in the assembly of electronic devices such as smartphones, computers, and televisions. They offer high-strength bonding for components like screens, touch panels, and internal parts, as well as excellent resistance to moisture and temperature variations. As consumer electronics become more sophisticated, there is a growing need for advanced adhesive solutions that provide clean, efficient, and durable bonding. The trend toward miniaturization in electronic devices also contributes to the increasing use of UV-cured acrylic foam tapes.
Focus on Enhanced Durability and Performance
Durability is a key factor driving the adoption of UV-cured acrylic foam tapes in several industries. These tapes provide exceptional resistance to UV light, moisture, chemicals, and temperature extremes. Manufacturers are focused on enhancing these properties further, allowing UV-cured acrylic foam tapes to perform in even the most challenging environments. This trend has led to the development of tapes that offer long-term performance in applications such as outdoor signage, building materials, and heavy-duty industrial equipment.
Global Expansion and Market Growth
As the global demand for UV-cured acrylic foam tapes increases, manufacturers are expanding their presence in emerging markets. The growth of industries such as construction, automotive, and electronics in regions like Asia-Pacific, Latin America, and Middle East & Africa is driving demand for high-performance adhesive solutions. In particular, rapid industrialization and infrastructure development in these regions are expected to further boost market growth. To meet this demand, manufacturers are investing in regional production facilities and expanding their distribution networks to ensure a consistent supply of UV-cured acrylic foam tapes worldwide.
Customization and Tailored Solutions
Customization is another growing trend in the UV-cured acrylic foam tapes market. Manufacturers are increasingly offering tailored adhesive solutions to meet the unique needs of different industries. Customizable features include varying levels of thickness, bonding strength, and resistance to specific environmental factors. This trend allows manufacturers to create bespoke products for clients in diverse sectors, from automotive and construction to electronics and consumer goods. As industries continue to evolve, there will be an increasing need for highly specialized adhesive products that cater to specific applications.
Challenges in the UV Cured Acrylic Foam Tapes Market
Despite the rapid growth and technological innovations, the UV-cured acrylic foam tapes market faces several challenges. One major obstacle is the high cost of production compared to other types of adhesive tapes. The use of advanced materials and UV curing technology often requires higher initial investments, which can make these tapes less affordable for smaller manufacturers. Additionally, while the market is expanding globally, companies must navigate regulatory challenges related to environmental standards and manufacturing processes.
Conclusion
The UV-cured acrylic foam tapes market is evolving with strong growth driven by technological advancements, sustainability, and a broadening range of applications. As industries demand more durable, high-performance adhesive solutions, manufacturers are meeting these needs with innovative products designed to withstand extreme conditions while promoting environmental responsibility. Moving forward, the trend of sustainability, coupled with global expansion and technological advancements, will shape the future of this market, offering new opportunities for companies and consumers alike.
#UV Cured Acrylic Foam Tapes Market#UV Cured Acrylic Foam Tapes#UV Cured Acrylic Foam Tapes Market trends
0 notes
Text
Panamax tapes high-quality acrylic foam tape for strong, durable bonding in various applications. Ideal for automotive, construction, and industrial uses, our acrylic foam tape provides excellent adhesion and weather resistance. Explore our range now!
0 notes
Text

Break down of my melon soda float prop for my Sailor Jupiter Bunny Suit build. You could easily tweak this for any other drink prop and the majority of materials were sourced from Daiso, including the tray it velcros to so it's fairly low budget.

Materials:
-Desired cup/glass for drink (I would advise sticking with plastic versions for weight and safety reasons) -Plastic ice cubes -Masking or Washi tape -Clear seed beads or Caviar beads in multiple sizes -Clear craft glue -Super glue -UV Resin & alcohol dye OR Stain Glass window paint (Gallery Glass would be my rec) - Some sort of thin, clear plastic sheeting I used part of a salad container -*Muddle spoons or straw or similar decor (polymer clay sprinkles, glitter, any sort of inclusion) -*Foam clay & an ice cream mold or scoop if you want to make a float -*Acrylic paint -*Velcro or Magnets if you would like to stick to a prop tray that you can also remove for photos
*= optional materials
‼️ SAFETY ADVISORY ‼️
If you choose to use UV resin for this you must have proper PPE. That means gloves, respirator with appropriate filters, mixing cups, well filtered workspace, and knowing how to properly dispose of scrap. Do not pour it down drains, please cure all runoff or extra fully before disposing of in household waste. Resin that is still in it's liquid state must be disposed of in chemical waste, this includes paper towels or anything else used to "clean up". You can take a moment to read more here or do your own googling for proper precautions before getting started.

The first thing I did was make my ice cream scoop since it needed to cure for a few days. I found this great little scoop mold I shaped the foam clay too and froze for a bit. Once it was firm enough to remove I set it by a window to dry. Then worked on making a clear plastic base that would fit inside my glass and act as the "top" of my "liquid".


When the base was done and fit snugly to my glass I primed my dry ice cream scoop in glue. This was partly to keep a barrier over the blue foam so the color didn't leach, and partly to give the acrylic paint something to bite into without being absorbed by the foam. Then it was painted a nice shade of vanilla and glued to the plastic base with craft glue. I poked two holes on the underside to also add a pair of short metal flat head wire supports to make sure it didn't peel off. The supports themselves were set with super glue, a bit overkill I know.

Between my paint layers drying I was also puzzle piecing in ice cubes in the glass to see what combination looked the most appealing. However, it also needed to accommodate that clear plastic base so there was constant test fittings. The trick here with fit is you want the cubes to fit snug vertically but not touching the sides of the cup too. You need that wiggle room for the UV resin/window paint. If it rattles around on the sides a bit that would be ideal.

When I found a composition that worked I carefully super glued each cube only where it touched the other cubes. Sometimes superglue oxidizes a little funny on clear surfaces and it can leave a sort of foggy buildup. In those instances you can wipe it away with an alcohol swab to keep things looking clear. As with the step before I keep checking the fit to the glass to make sure I have proper clearance to keep the base level.


When my cubes were one weird unit the fun began! I mixed some different sized clear seed beads (you can also use caviar beads) in some clear pva glue. You want a more dry mixture so it helps to let it set up a bit and get sort of gummy. The idea is replicating how bubbles accumulate in carbonated drinks, so keeping it at points where you would imagine they would get trapped under cubes helps. Of course so does referencing an actual drink lol. I just piled on and semi sculpted the beads in chunks and waited for them to cure.


Of course this same bubble detail was added to the clear base under the ice cream scoop as well. This time just around the perimeter of the scoop. At this point I realized I was forgetting something, the cherry! It is actually an earring I lose the pair to lol. I also cut out a small slot in the plastic base to fit a straw through. On the right you can see how everything looks at this last and final test fit before the "soda" portion was added. The washi tape was used to keep the inner lip clean of UV resin later, but also to mark where my base should be resting.

Putting the cubes and top layer to the side I got to mixing my UV resin. As a point of reference I used just under 1 jumbo tube of the Daiso clear resin which is around 20g or .70oz of product. I mixed some liquid pigment to the shade of green I wanted and got to pouring. Keeping the tape on I poured all of my resin in and kept turning my glass for even coverage. Once that was good to go I sat outside for about 5 minutes slowly turning the glass in direct sun until the resin set enough to stop moving. At this point the washi tape was peeled off. Then I left in on my porch to finish curing in the sun until the following day. The cup will get warm to hot depending on the volume of UV resin so please be mindful. If you were to use window paint I would build up the color over a few days in thin coats and like a silicone brush. When the cup was fully cured I fit my cubes back in and the clear base, and added the straw to the little divot to make sure it all fit well. It did so I went ahead and removed the straw and added some super glue to the top most cube that laid flush against that little sheet of plastic and pressed the ice cream scoop on the base firmly into place. Once it was in I slipped the straw through the divot on the side and mixed a little more green resin that was poured around the ice cream scoop to seal it all in. Then it was once again left on my porch for a full day. If you were doing this in window paint a thick layer on top and texture it to look more like a drink. Though do to it's want to self level there may be some mild resistance until it starts to set up. When my prop was fully cured I added some velcro to the base so it would stick to my drink tray and be peeled off for photos not pictured lmao. Badda bing badda boom it was done!

Lightweight, fun to make, and fairly low budget this is a prop you could make with things from most dollar stores not just Daiso. Personally I think the dollar tree two part acrylic champagne flutes would be perfect for this.
#my cosplay#Cosplay WIP#cosplay prop#prop drink#fake food#melon soda#melon soda float#Bunny Suit#I have been trying to get the explanation for this together since last July/August so lmao here we are
25 notes
·
View notes
Text
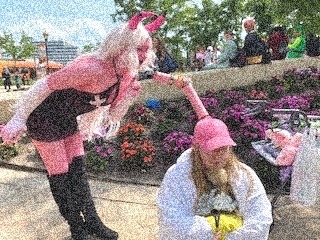
MASTER SHAKE'S STRAW FOR COSPLAY
EVA foam (I used 6mm thickness) first time using Eva foam? https://youtu.be/dN3NHy7Asqc?si=xw5WCLOEKci1tYAp
youtube
youtube
Contact cement (for EVA foam)
Respirator and/or a well-ventilated area like outside
Heating gun or an iron
Exacto knife/Hobby knife
Kwik seal
Clear Plasti dip
Acrylic Paints
—————————————
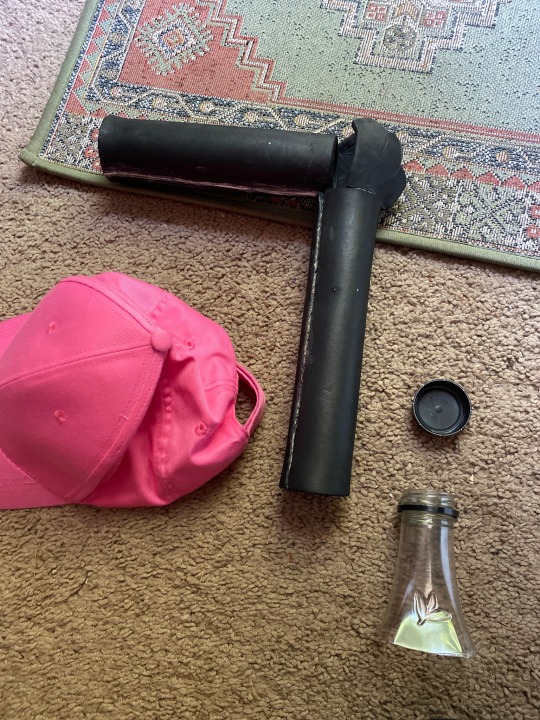
Pink structured baseball cap (Velcro backing works best imo)
Lipton ice tea bottle
Needle and thread
Scissors
—————————————-
If you have prior experience with using Eva foam this is relatively a light project. Eva is great for armor and prop cosplay, it’s light and durable. If this is your first time using Eva foam I highly recommend watching KamuiCosplay on YouTube she goes over the basics and what you need to know about Eva foam, heat sealing it and priming it.
This is my first time making a step-by-step thing, i don't have every photo for each step due to being in a time crunch.
EDIT: for cosplay something called like the 5 foot rule (someone please correct me if I’m wrong) where it’s you make something big enough to be noticeable from a couple of feet or more because thats how far away people are going to see you at a con.
____________________
Inside of hat
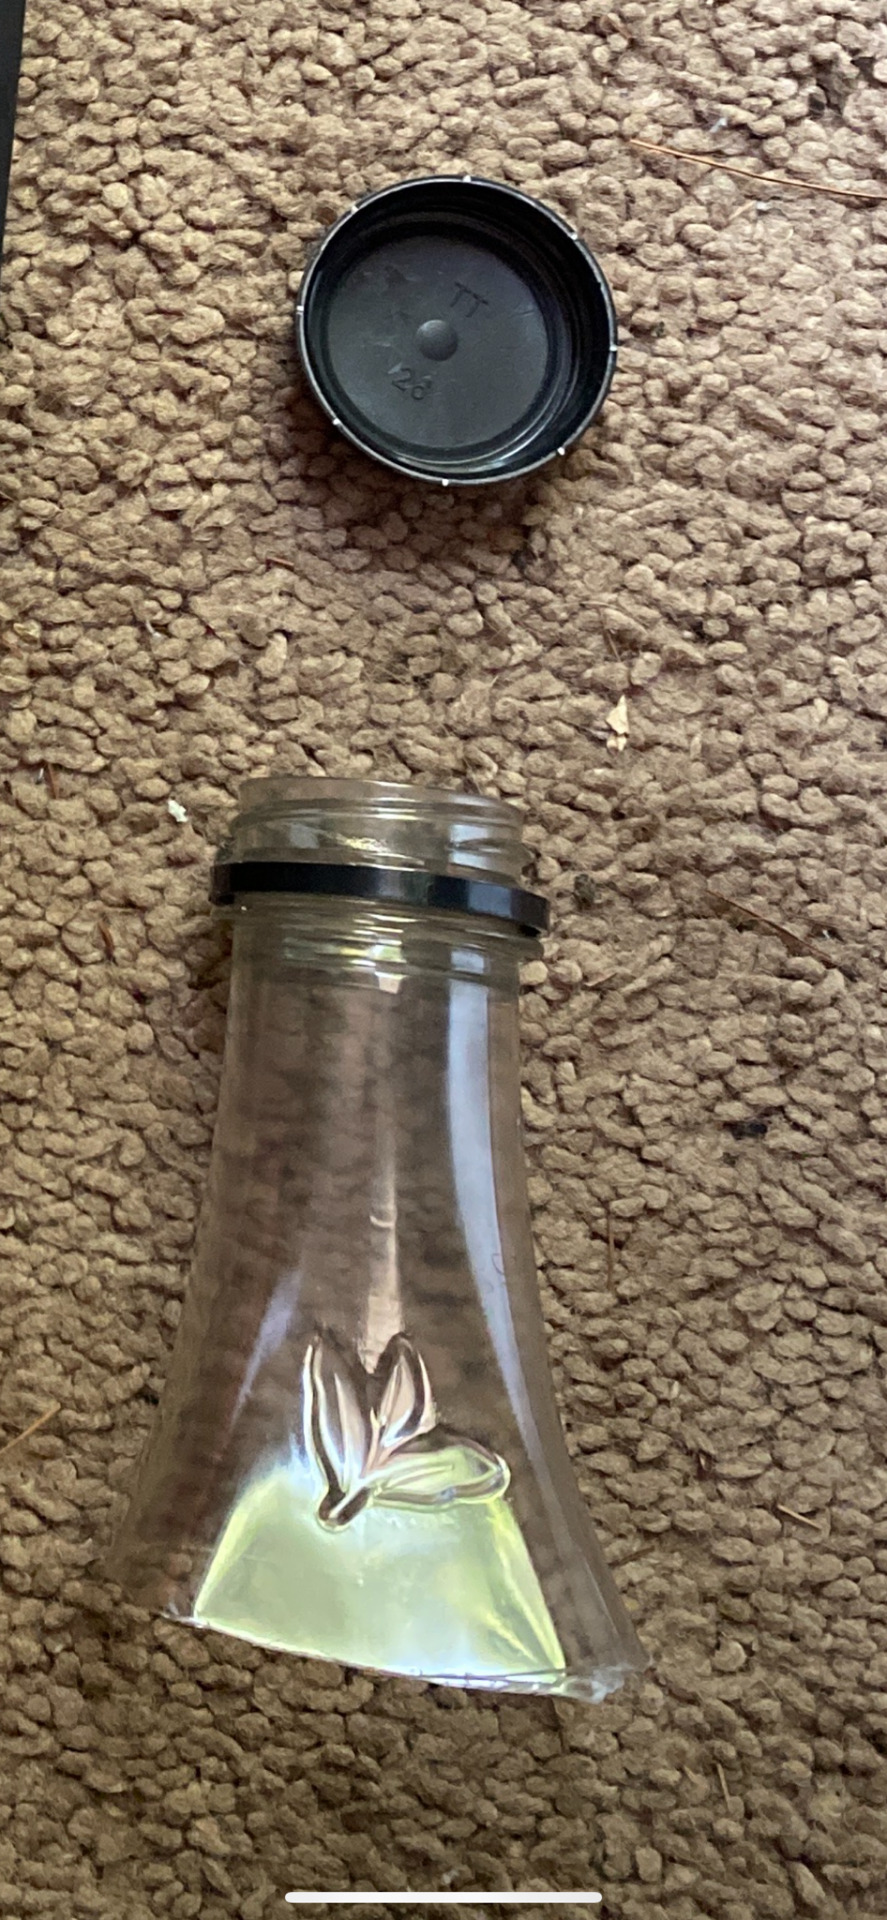
1 Empty Lipton iced tea bottle (using the neck up from the bottle)
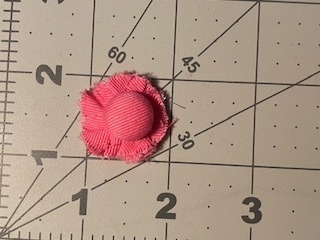
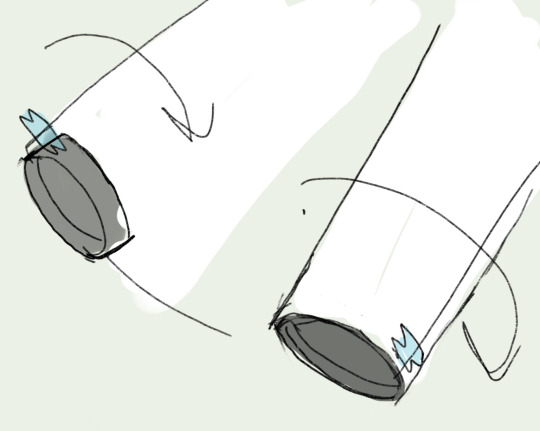
Extremely important to not lost the cap and to keep the rest of the lid and twist part intact along with the long neck of the bottle (cut the neck just above the body of the bottle) The circumference of the cap will be used to measure the circumference of entirety of the straw. I am not good with math so what i did was tape the edge of a piece of paper and gently rolled it until it met with the paper again
The neck of the bottle will be cut into 4 sections length wise; these flat sections will lie inside of the hat and on top of your head. This is where to use a heating gun or an iron. In my case I only had an iron available to me. So, I took parchment paper between the iron and the plastic and heated it and bending them back one by one. Be sure to either sand or heat the cut corners so they don’t cut into you or the hat. I was under a time crunch so most of this prop was half assed
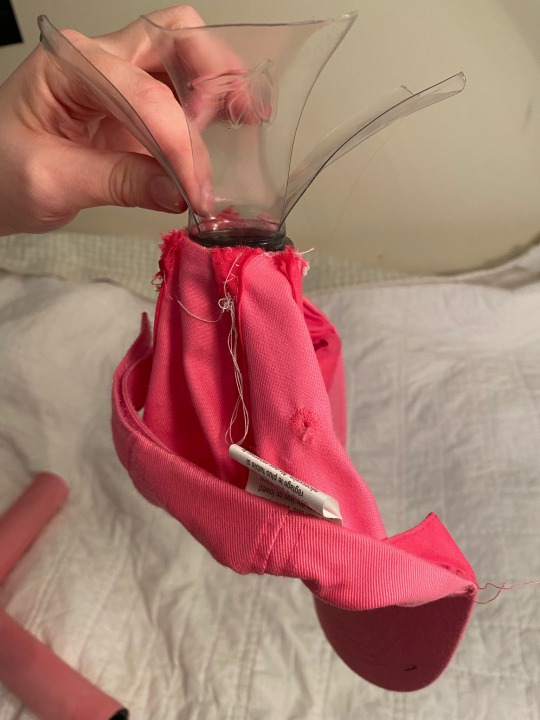
The flat parts will be used for support and keeping the straw upright
The twist and cap part of bottle will be used as a base to hold the straw in a “up” position
Very important to have a structured hat, it will help give support.
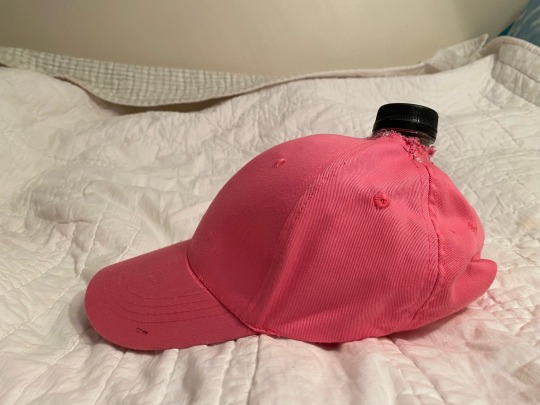
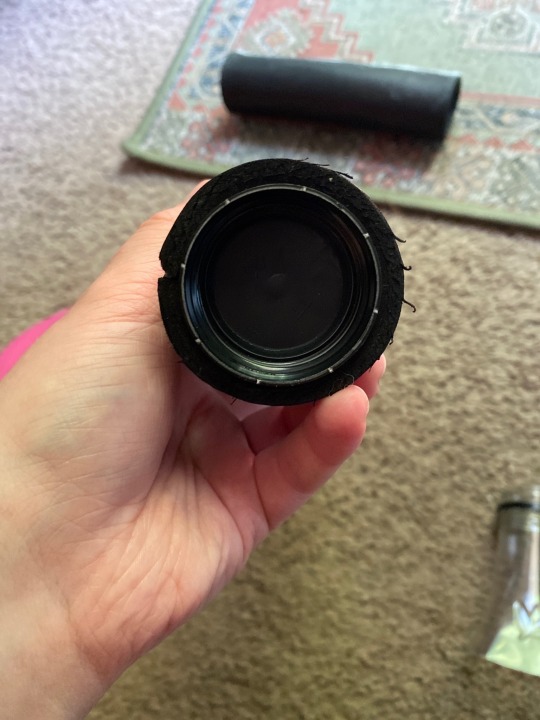
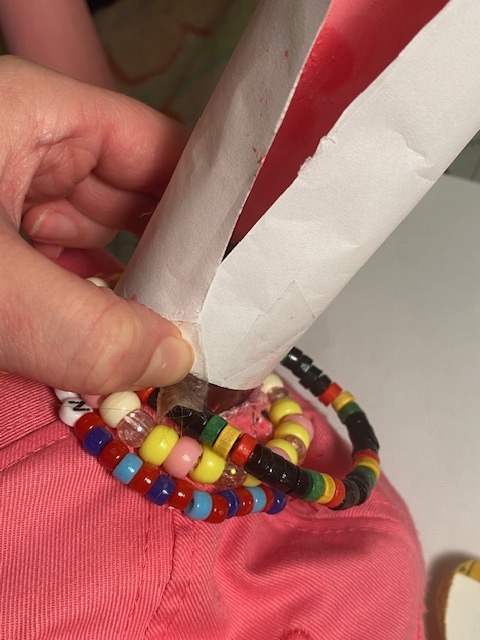
The button on the hat will be cut out, It seems small BUT this is where the bottle will be pushed through the hole in the hat.
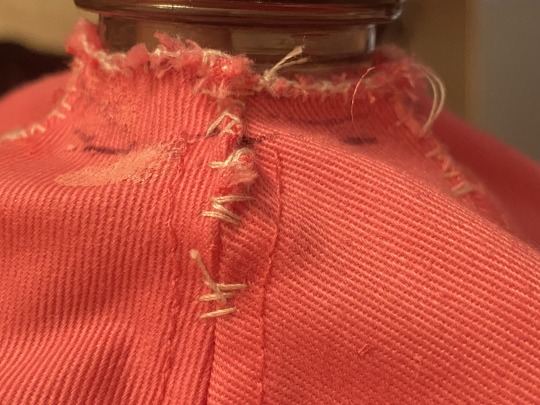
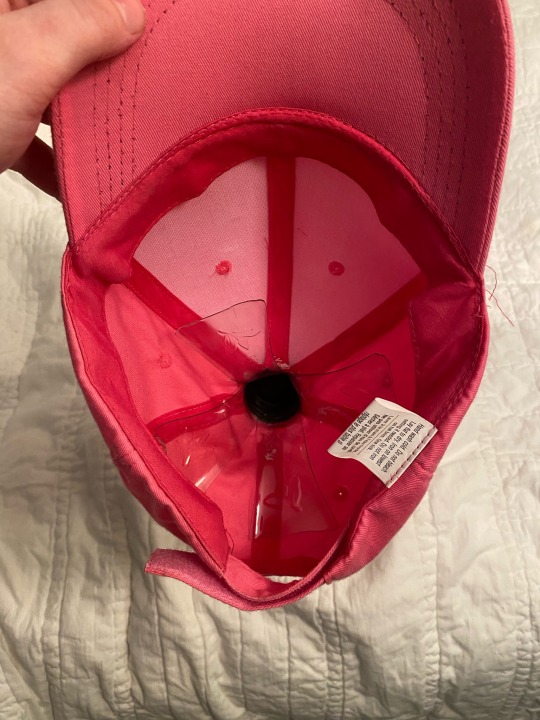
After a hole is cut, much smaller hole than the circumference of the cap. This will be so the hat will be fitted around the neck of the bottle. Push the top of the bottle through so it’s just the twist part showing. KEEP THIS IN WHILE SEWING. Start to stitch below the cut to keep the seams of the hat secure and together.
heres how to start a knot: Basic Hand Sewing - Tying a Starting Knot (youtube.com)
heres how to finish off with a knot: Basic Hand Sewing - Tying a Finishing Knot (youtube.com)
i did the blanket stitch so the hat was fitted around the neck of the bottle. like the picture above the plastic support is now fitted onto the hat. So, if the hat gets knocked off of you or anything the prop will still be in one piece!
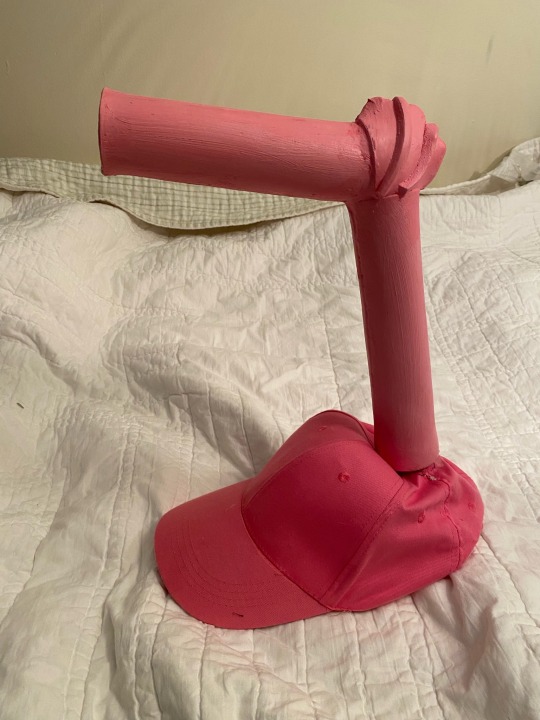
Building the straw
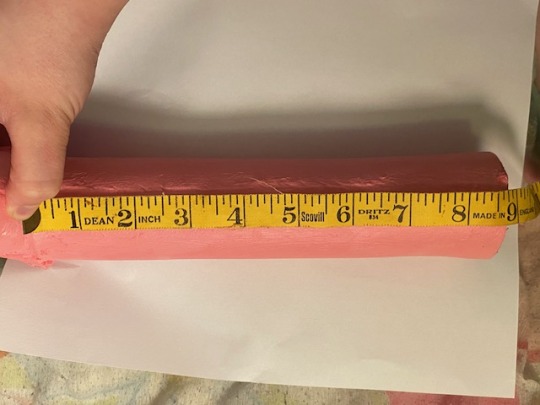
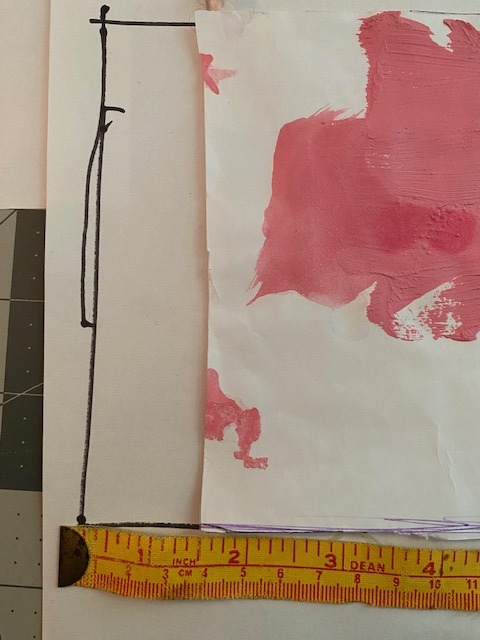
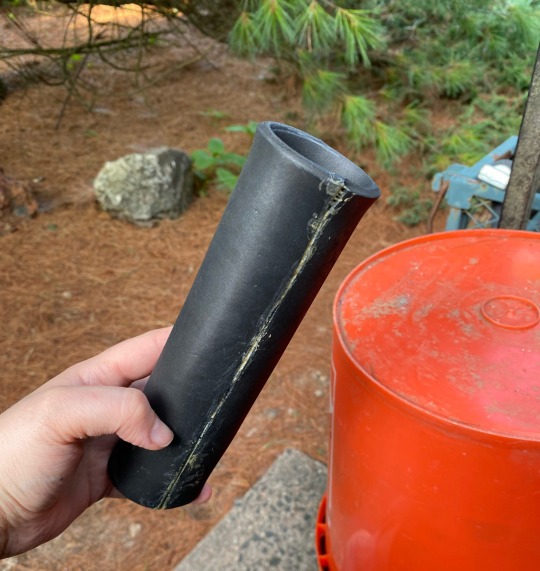
The foam will shrink a bit due from the heat making make a snug fit on the cap. When this happens, after the contact cement has been applied and the foam has been shaped to your desirer Kwik seal is good for filling those cracks in. when the whole thing is glued together there will be some spaces where the bendy part meets the top straw, i honestly filled it with a bunch of Kwik seal and painted it over. Once it's all glued this is where Plasti Dip comes in, it help seals in the foam from the acrylic paints. it takes a few layers of Plasti Dip i think i used 2-3 layers with 30 mins in between dry time. I also diy some metallic paint with eyeshadow to make it glisten in the sun.
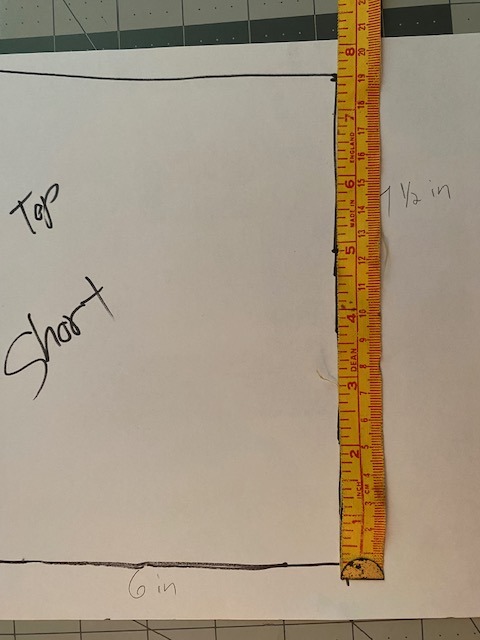
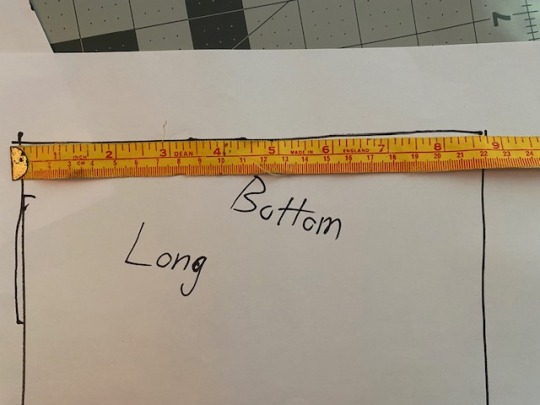
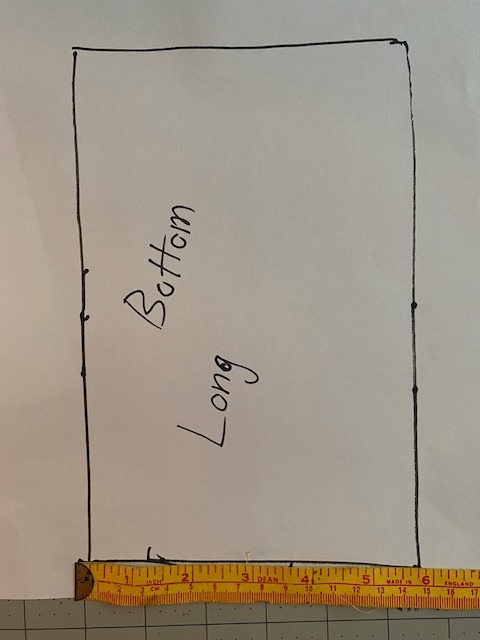
Below are the mesuments of how long the bottom and top straw should be. (8 inches and 3/4ths) 9 inches basically VVVVV
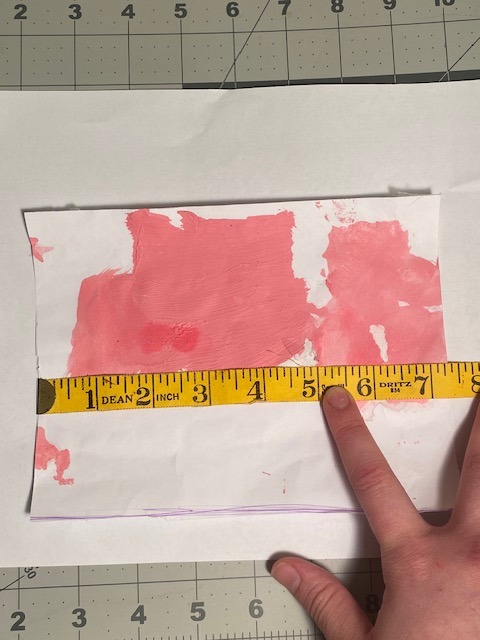
this is the bottom half of the straw (7 1/2 inches to make it easier)VVVVVV and the bend of the straw, it will be 2 pieces. I really struggled with the bendy part. if anyone else finds a better way to make it please tag me ill add it onto this
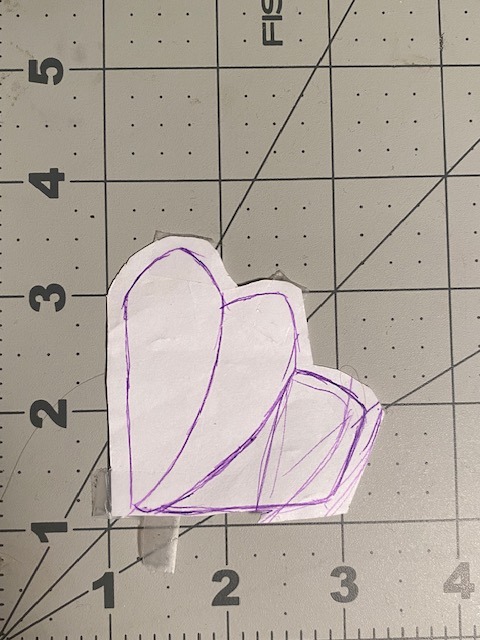
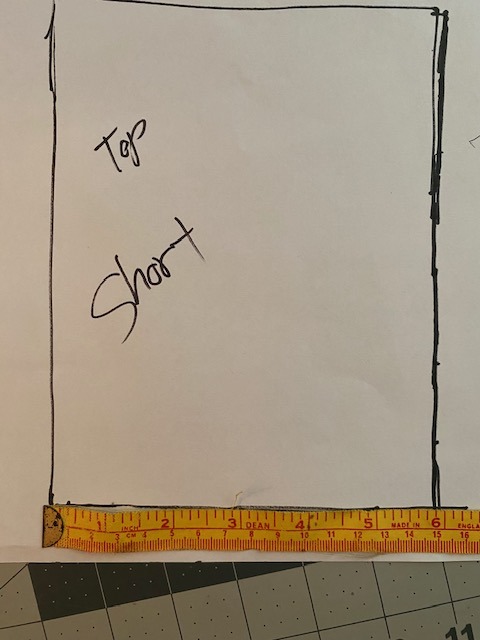
the top half of the straw is short so when the straw is glued inside the "bendy" part of the straw so it may seem shorter when all put together. I don't remember much of putting the straw together to due outside stressors and con crunching
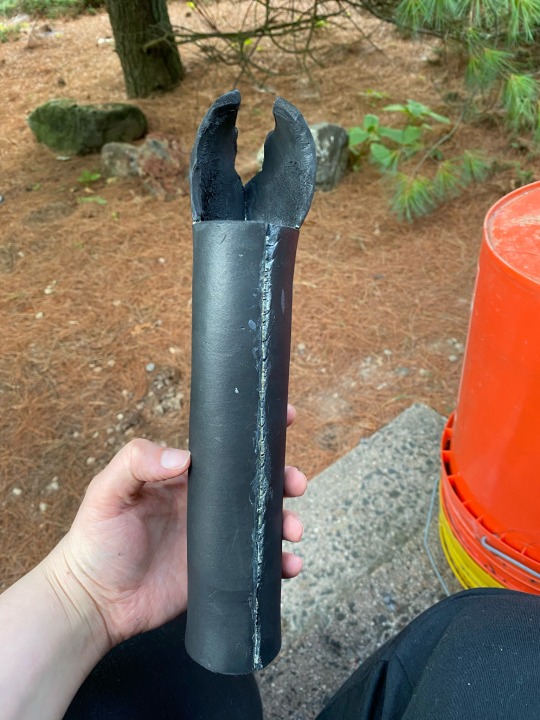
After the foam has been cut heat it up, you should see it seal itself. when its hot get it into a round tubelike shape, it make take a few times depending on what tool you're using (heating gun or iron) MAKE SURE YOU DO NOT MELT THE CAP!! while its still warm fit the cap in one end of the straw so it keeps that shape. i did not glue the straw to the cap. the foam will be tight enough for it NOT to need glue and now if needed it can be broken down for easier storage.
but it was basically heat shaping the bend of the straw, it was 2 sperate pieces that were beveled inward, heated and shaped and then glued. after that the upper straw piece was inside and when it was ready, it was heated and then glued finally. I glue some scrap pieces of foam on the bend to give it more wrinkles,,,i honestly don't know why i did that i was already mentally checked out
Sooo i think thats it for the tutorial. Hopefully i covered everything best I can. Feel free if you guys have found better ways to build this prop, all i ask is that DONT put it behind a paywall and please tag me/credit me when sharing and reposting.
It’s not required but is appreciated if you leave a kofi for me https://ko-fi.com/zimvatt
#Youtube#eva foam#cosplay#cosplay props#master shake#aqua teen hunger force#athf#cosplay tutorial#athf master shake#demonpikmin#kofi#buy me a kofi#props#cosplaying#convention#aqua teen forever#art#artists on tumblr
13 notes
·
View notes