#ANY of my computer documents to look at for reference and notes means i'm ?? actually??? writing whatever the fuck out of order scenes
Explore tagged Tumblr posts
Note
What do you mean by digital cleaning?
It's something I've been working on more this year because I had a bit more travel than usual so couldn't do actual home cleaning, but I always take a couple of days in the Month Of Cleaning where I'm focused on my digital life. It's good to make your physical home a comfortable place for yourself, but it's also good to recognize that we have "digital" homes that need attention. And often this is at least less physically demanding, so it's good to keep it in your back pocket for days when you're mentally okay but physically too tired or sore to do more of that kind of work.
In the shortest possible terms, digital cleaning is just making sure that your phone, computer, socials, and other digital "presences" are organized in a way that you find helpful, and that you take a moment to either answer those messages you've been putting off or give yourself amnesty on doing so.
This tends to make a lot of people extremely anxious in a way ordinary physical space cleaning doesn't, so I'm going to put the rest of it behind a cut...
So when I say digital cleaning, I refer to stuff like going through my likes on Tumblr and clearing them out, going through my drafts and turning them into queued posts, answering my asks. I spend time in my email inboxes, either responding to messages or removing them. I am not an "inbox zero" kind of guy, but I like to keep the read-but-not-answered messages to a minimum, and towards the end of the year that usually means a clear-out and amnesty. I clean my Google Drive -- delete old files I uploaded for others, move documents I'm no longer using into an archive, move documents I want to work on into a central work folder. I go through my catch-all folder on my hard drive and organize it; I sort through the year's photos and organize those, partly to archive them and partly because I make a scrapbook from them each year. I don't usually have a ton of tabs open but often have more than I'd like, so I go through them all and either read, bookmark, or get rid of them.
I look in my phone's file tree to make sure I delete files I don't need (mostly menu downloads, Restaurants Stop Making Your Menus PDFs Challenge 2K24) and I sometimes go through each app on my phone, make sure I still use it, and make sure it's set how I want it. If this sounds like a nightmare, bear in mind that I very rarely put apps on my phone to start with -- I think my mother has more apps open at any given time than I have apps on my phone ever.
Everywhere I clean, I look for files named things like "notes" or "deal with" or "random" and move them all into one place so that whatever is in them, I can sort through it and make sure it goes somewhere permanent. Logins go in the login/password spreadsheet I keep, addresses go into my contacts, story notes go into a "fiction scraps" file, random thoughts either get moved into a journal file or put into drafts to become Tumblr posts, etc.
If this sounds like I might have some kind of compulsion disorder, I get that; when I explain my digital hygiene systems a lot of people look at me like I'm spouting a mad but harmless conspiracy theory. But it's something I used to have to do periodically even before I created National Clean Your Home Month, because otherwise I could never find anything, and everything was just...harder. As I once told a boss who admired my organizational skills, "It was this or endless chaos."
Putting addresses into my contacts list means I always know that the addresses I have for my friends are up to date. Putting logins into a spreadsheet means that five minutes spent now will not result in five weeks of procrastination later because I can't find the login and can't do anything else until I do that. Going through my email and archiving old conversations means not only can I find them easily when needed, I don't have to look at them the rest of the time. Sometimes I even go through my various wish lists and remove old/purchased items, or clear out all my "save for later" carts.
There's no doubt this is stressful, but like every part of NaClYoHo, it's broken down into smaller tasks; I don't have to look at my computer and organize everything on it all in one day. I can answer a few asks, then sort photos (something I find very soothing up until the moment I Don't), then read and delete some emails, then I'm done for the day. I can spread "answer or file all your work emails" out over a couple of days. I can maybe empty out my Likes but just turn the ones I actually want to reblog into drafts for now and deal with them later in the "drafts" phase of cleaning. And if I don't manage to empty out my inboxes, at least they're emptier than they were.
I'm struggling this morning with having put a bunch of physical cleaning on the to-do list but not feeling physically up for it, so I did what I felt capable of doing (measuring cabinets for new shelf liners mainly) and later today I might sit down and start building this year's photobook. Or not -- I have to code Radio Free Monday, sort out a prescription and possibly go pick it up, plus a very full day of work and a couple of afternoon appointments I can't shirk, so today may simply be a "get through the day" kind of day. That's okay too; some days the spirit is willing but the schedule is full.
160 notes
·
View notes
Note
Do you have tips on uploading trad art to tumblr and not having it look scuffed as all hell 😭😭😭 your art looks great pls share your secrets
Aaaa, thank you! I actually decided to shift my focus back to traditional art very recently and it means a lot to hear that ;; I hope this helps you and anyone else with similar questions!!
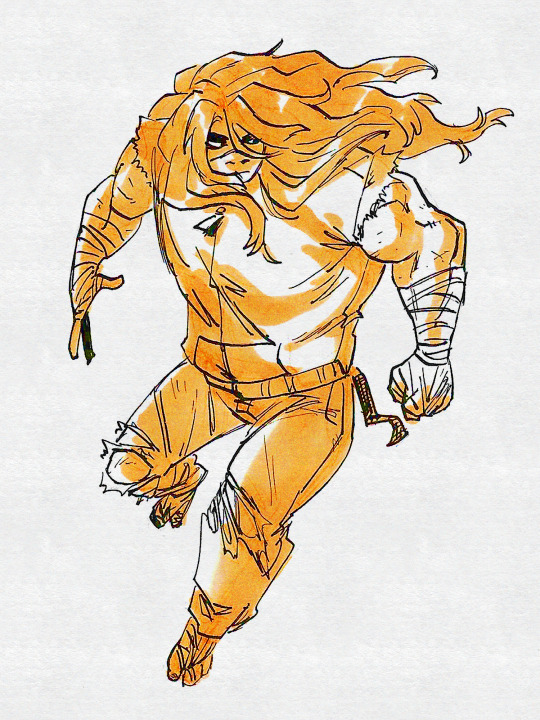
So I have two methods that I usually rely on when capturing my traditional art. The first one is kind of limited, but it is faster and more accessible. For these demonstrations, I'm going to use a colored sketch of my OC, Brinley. Step One: Taking Your Photo! All you'll need for the first method is your phone. What you want to do first is to find an area with nice, even lighting- the less warm, the less you'll have to correct later, so the closer to daylight, the better. In fact, using the light outside is a great way to capture your art! Note: If you are in a place with very cool lighting you will also have to correct the colors, but in my experience, cooler light is easier to work with. Position your artwork so it's illuminated with the light source directly in front of you. If it is behind you, it will be harder to get your shadow out of the shot. The spot I was in had my light source behind me, so my arm covered it a bit.
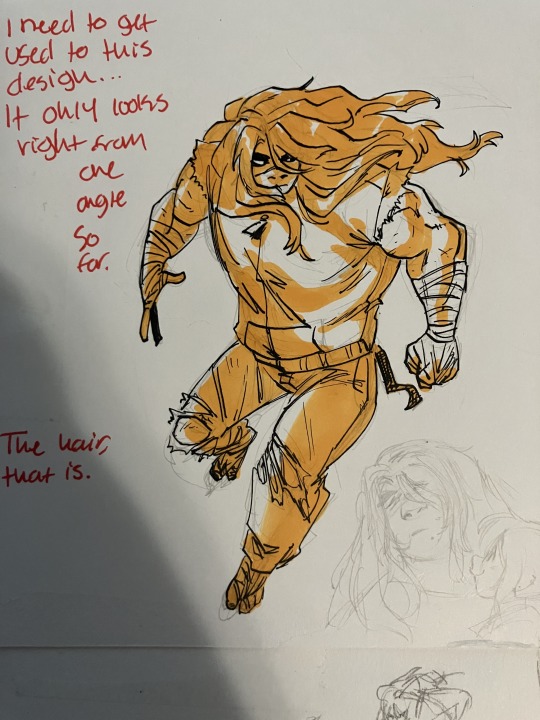
I repositioned myself to a spot with the light source in front of me instead, and I was able to get a nicer shot.
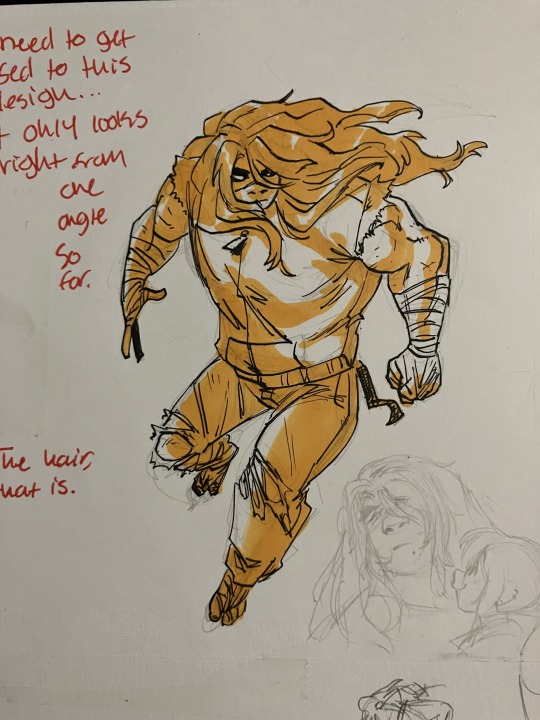
Keep your phone as level as possible over your drawing, and as close as possible without your phone going out of focus.
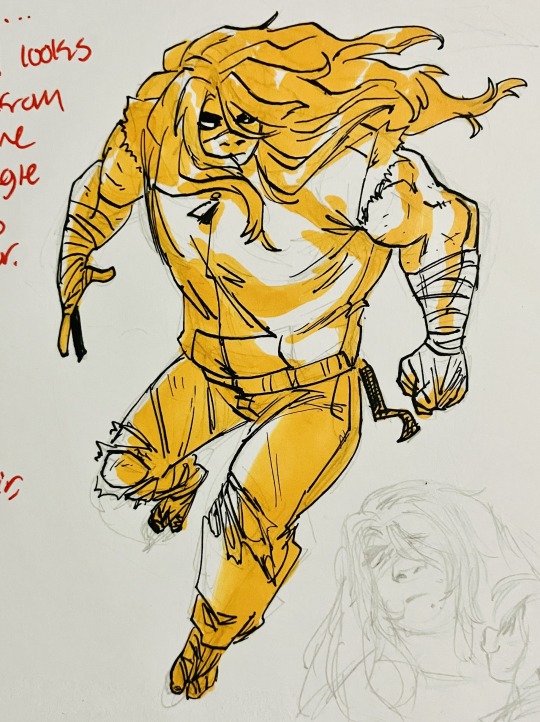
And now the first step is done! Step Two: Editing Your Photo! This is where everything starts to come together! Firstly, crop your drawing to your preference. I try to keep the negative space around my art as even as possible. IPhones have a handy feature where you can choose an even aspect ratio, so that will help keep things simpler if you want. Next, all you have to do is mess with the settings until you get it how you want it to look. Filters can help it to look more cohesive. I like to keep the art close by me to reference so I can get it to look as close to real life as possible. Note: black and white art is the easiest to edit due to the high contrast. Finished! Congrats! Your art is ready to post! Here's what my sketch looked like after I added a vivid filter and then messed with the settings.
The second method can be a bit more difficult, but the results always look better than just taking a photo. What you'll need is a computer (I think you can also use an ipad- any device will work as long as it can connect to the scanner), a scanner and any art/photo editing software. Step One: Scanning! The scanner I use is technically used for office work, but can be used to scan photos, therefore the quality is very much in the middle. There are scanners that are used purely for scanning high quality images of art and photography that will produce much better results on the initial scan, but this works just fine! There are also stores and other places where you can scan your work even if you don't own a scanner. First, make sure your art is as flat as possible and in the middle of the scanning bed. It doesn't have to be perfectly straight as it can be edited later, but if it isn't flat or it's on the edge of the bed, it will end up blurry in some areas or completely cut off. After that, go to your device and set the resolution to at least 300 dpi to guarantee a high quality scan, and then begin. This is what my sketch looked like after the initial scan.
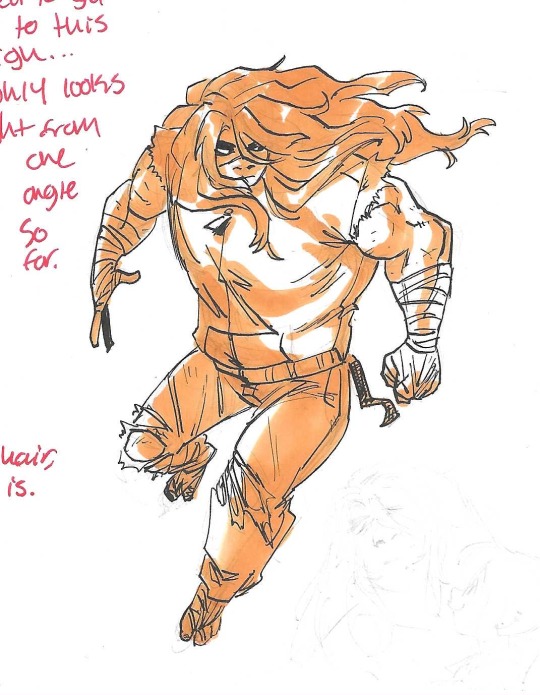
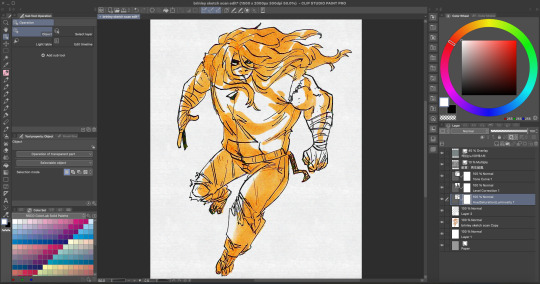
Now we can move onto the next step! Step Two: Editing! You may have noticed that the colors are very washed out- scanners that aren't optimized for art and photos tend to do this, but with some editing, it'll look great! After opening it in CSP and selecting a canvas size, it's ready to edit! Note: Opening the image directly will automatically set the document's dpi to 72. Idk if that's a constant for other programs, but this means the overall image quality will be very low, so the picture has to be imported into a higher quality document with dpi set to 300 manually. I usually just copy and paste it into another document. Level correction is your friend! That's the correction layer I use the most when editing and it does the most heavy lifting, usually. After that, I sometimes edit the saturation. Since this is a digital method, you can edit your drawing however you want! You can fix some mistakes this way, or completely change things. There were notes and a sketch next to this drawing that i didn't want, so i painted over them with white- since i edited the level correction to up the exposure, the painted areas are indistinguishable from the background. Finally, I add either a gradient map for cohesion or fiddle with the tone curve until I'm happy with the final product. Once again, I like to keep the original art next to me while I'm editing for reference. (And then after that I might add a noise filter or some other effect, LMAO) Finished!! And now you have your scanned art!
These are all the editing layers I used!
Like with anything, trial and error are very important! You'll get better at editing art over time, so don't be discouraged if it doesn't look like you wanted it to the first time. Thank you for the ask, bye!!!!!!!
#tutorial#art tips#art tutorial#art tutorials#art resources#drawing tips#traditional drawing#traditional illustration#traditional art#art help#tutorials#resource#references#useful#marker art#copic markers#copicsketch#copicdrawing#copicillustration#tips#tips and tricks#art how to
24 notes
·
View notes
Text
This is long but there's a tl;dr at the end.
So I messed with this in Krita (The setting there is under Settings > Configure Krita > Color Management, same name). I didn't find any desaturation in my less-than-scientific tests, but I'm on Windows and some others have said it's less pronounced there.
The Krita ICC Profiles Documentation has some information on what each of these options actually do. I'll summarize and add some notes here:
Perceptual squishes the color space of the work file into that of the format you're exporting to. This preserves differences between colours but will distort and desaturate colours if you're exporting into a more restricted space. I'm guessing that's what's happening here, and that different (sometimes really bad) handlings of colour space + exporting are the reason for this issue.
Absolute Colorimetric "will attempt to retain all the correct colors at whatever cost, which may result in awful looking colors." It sounds like it could work a bit better for converting back into the original space, but I think handling inbound images is a separate setting.
Relative Colorimetric is in between the two above, trying to match colours as much as possible without messing up the relative appearances as much. Sounds good but execution is likely to vary.
Saturation retains the saturation values as much as possible, but this can come at the expense of hue changing, meaning it's not optimal for refs either if your personal colour space export fuckery also affects hue.
My point here is, the Perceptual setting isn't necessarily the problem on its own. I'm far from an expert but I'd say it's more of an issue with exporting into a more restricted space and the program not being able to put the colours back to their original state when you import the image again. You're squishing it and the program doesn't stretch it out again because it probably doesn't know if the file was squished or how.
I'm not sure why you're getting such a restricted space when you export it. That's weird and not covered by this setting. The "Expression Color" setting you mentioned might be what's fixing this or it might be a deeper issue with the mix of settings only acting as a bandaid fix. It could be a matter of your device's display settings and the program factoring them into decisions when you don't want them to do that.
Discord and Toyhouse are another matter entirely. If you're getting desaturated images there it's probably due to how they're handling images on their servers and there's less you can do. I'm surprised Toyhouse would be doing it to a noticeable extent, given its purpose, so I suspect it loops back around to whatever's going on with your device. Especially if it's the exact same effect as with perceptual on.
If it's only happening on those sites and not some others, you might have a workaround. I don't know whether Toyhouse allows external links as the source of your images, but if it does you could upload the images elsewhere and include them through links and see if that helps. Otherwise you might be able to just export them even more saturated until it looks right on your target. With some tweaking you may be able to find a constant amount and add a layer that oversaturates it that much. This will be an issue if you hit the ceiling for colours.
If there aren't any sites that aren't fucking with the colours again it's probably stuff your computer is doing to it before uploading.
ALSO! I don't know your workflow but you probably shouldn't be recursively saving/exporting your reference images in general. That's piling on the colour space conversions and every other form of degradation you get from conversions. I'd recommend using a work file as a colour reference (as in, the type of file you do the drawing in, with layers and such) and sticking to one rather than picking from recent drawings. I HOPE the work file isn't being affected by all this because if it is you need an exorcist.
TL;DR:
Perceptual Setting isn't the only issue
Saturation isn't a perfect fix
THAT level of colour change is really weird
It's probably related to stuff on your device/display settings
Perceptual crushes the colours and your program isn't turning it back to its old state
Uploading to a host site that doesn't fuck with the image as much and linking to it might work, if there are any sites that aren't fucking with it.
If nothing else works, oversaturating it to get it about where you want it with the reductions might work.
Don't recursively convert/save/export refs. Use a work file for that or use a png but don't overwrite the png from anywhere other than the work file to prevent excessive degradation.
Hope something here helps you out. This is a really bad situation and I hope one way or another you find a workaround.


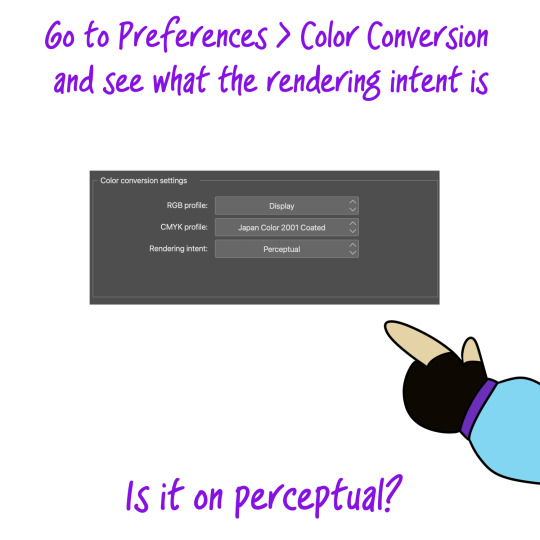


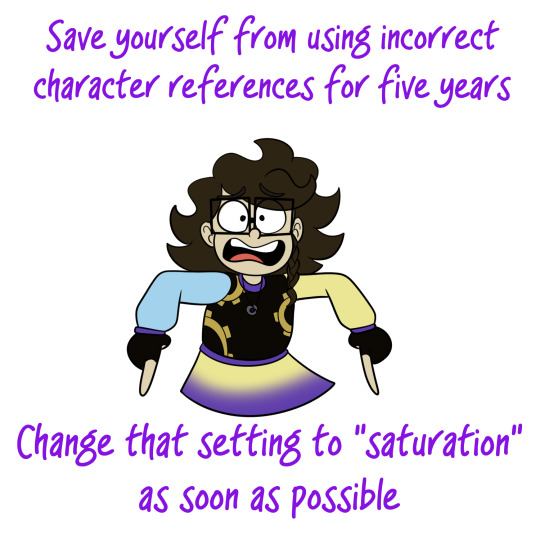
Just to make a point, every time I finished a panel of this I would export it as a PNG on the perceptual setting and use it as a color reference for the next panel
IT'S BAD
PLEASE CHECK YOUR COLOR SETTINGS
EDIT: If you're still having problems, it might help to switch from "Save/Save as" to "Export (as a) Single Layer". Just. Make SURE the box labeled "Expression Color" is set to RGB. I've been messing with this all day, and it looks like this combination of settings will allow exported PNGs to maintain their colors perfectly. To you. So far both Discord and Toyhouse still only display desaturated images and I cannot for the life of me figure out why
#long post#sil.txt#art program stuff#psa#I haven't read through the entirety of the colour space stuff. There's a lot of it that's about interactions with other art programs#or with printing. which isn't really the issue here and you aren't getting full transparency on what colour space you're exporting to.#I spent a literal hour writing this whoops
70K notes
·
View notes
Text
Episode 203: Good Mother
Sorry so late this week!! I had a deadline for work that kept me away from this early in the week, and Tumblr has been mean tonight. Kudos to @tasyfa for helping me with some of the transcripts while I was stuck working!!
EPISODE SUMMARY:
Determined to regain control of her life in the aftermath of Noah’s death, Isobel (Lily Cowles) makes a risky choice despite its potential consequences. Meanwhile, Alex (Tyler Blackburn) and Michael (Michael Vlamis) work together to unravel the mystery surrounding the night Nora’s (guest star Kayla Ewell) spaceship crashed in 1947. Elsewhere, Liz (Jeanine Mason) makes a surprising confession when Cameron (guest star Riley Voelkel) shows up looking for answers about Max (Nathan Dean). Heather Hemmens, Amber Midthunder and Trevor St. John also star. Jeffrey Hunt directed the episode written by Deirdre Mangan & Carina Adly MacKenzie (#203.) Original airdate 3/30/2020.
DETAILS:
Aliens in the crash are always portrayed as wearing all white.
There's also a silvery gleam on the faces of Nora and Louise following the crash.
Harlan Manes (first introduced in the alien autopsy scene in 1x07) and Hector Valenti (first mentioned in the pilot by Jesse Manes, but visually introduced here) are shown as having both a partnership and a difference in perspective, with Hector being more sympathetic to the aliens from the start - it mirrors what we know about Jim and Jesse's relationship.
Mysterious alien figure in white hood (probably played by Nathan Parsons, but unlikely to actually be Max (see @latessitrice meta) touches Nora's shoulder and she looks pained, then attacks and burns Hector alive, before disappearing into thin air.
Nora is shot in her shoulder.
Liz sent Alex to find Michael at the cave.
The pods "regenerate cells at the same rate as they degrade" keeping them in stasis. The theory of the electrical current is that it will speed up the regeneration so instead of stasis, Max might improve.
Searching for info about Nora led Alex to a sophisticated firewall, which meant that someone was trying to hide information about her.
Jenna's fake energy drinks are called "Speed Demon"
Mimi DeLuca says she was "nowhere" (and then she looks up at the stars). She was wearing the same nightgown and robe as when she disappeared (white...like the aliens in 1947), but instead of bare feet, she had on a pair of elaborate blue and white cowboy boots
Jenna told Sheriff Valenti that Mimi recited the plot from the film Starship Troopers during the car ride into town "like she lived it", with all the voices, but did not provide any information about where she’d been. Sheriff Valenti implies that this is typical behavior from Mimi.
Michael says he's been parked at the pony for a few weeks. Maria says that Mimi was gone for a month. That means that another 2 weeks have passed. (I.e., Max has been dead for 6 weeks now.)
Maria says that they found her mom on I-40 (by the Roswell sign). Also in 2x01 Rosa indicated that she and Liz were on I-40 when they saw Flint - Rosa put together that it was the most direct route to Area 51...however, I-40 does not go through Roswell. In fact, it is over 100 miles from Roswell to I-40 (north on 285). However, it is the most direct route to Area 51 from Roswell.
Isobel points out that Mimi DeLuca waking up in the desert with no memory is similar to what happened to her when Noah took over her body. Michael doesn't believe that they are the same situation though.
Rosa is about to drink spiked coffee when Liz brings her the art supplies. After Liz leaves, she pours it out without drinking it.
Isobel is packing up all of the photos of her and Noah (most look like vacation photos). She hesitates on the photo of them with Max at the wedding that we previously saw in 2x01 at Noah's funeral.
Isobel's baby is now 7 weeks (consistent with the other time frames) and is now the size of a blueberry.
Isobel drinks the rest of the alien death serum and immediately gets cramps/pain in her womb. And then Max's hallucination appears.
Isobel tells not!Max that she has been microdosing with the serum for weeks (2 weeks, based on the timeline) and it hasn't worked.
Not!Max does tell her to call Kyle (i.e, her subconscious knows she should, but she's not listening).
Michael tells Jenna that Max is in Mexico (at first).
Mimi is "hydrated and healthy" and she never felt unsafe.
She thinks she was only gone for a night, coming to see Maria when Jenna found her.
Maria asked Mimi whether Jenna lent the boots to her and Mimi declared they were hers
Liz is surrounded by monitors with alienesque symbols on them (or maybe just The Science!) See photo:
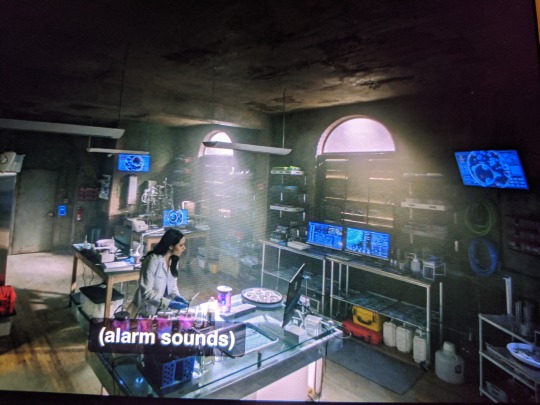
When the alarm sounds Liz looks at her computer screen and reacts - likely a security camera.
When Alex arrives at the Bunker and sees the binder left for him, the computers are on and there is a map showing. See photo:
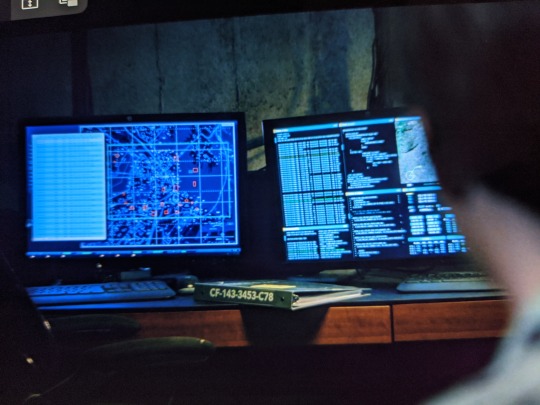
I tried to figure out what city it is on his computer screen, but no luck. If anyone figures it out, send me an ask & let me know & I'll blast it out!
The 3-ring binder left for Alex, which looked approx. ¾ full with paper documents, was marked on the front:
CAULFIELD * A4N
352-6553 NMG
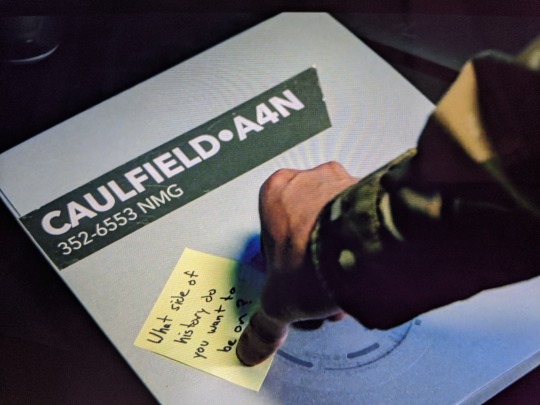
The text was white on a dark green background that appeared to be a printed label that had been affixed to the front of the binder. The body of the binder was light grey, with a partially shaded circular diagram in the lower center of the front that appeared to be part of the binder itself rather than a later addition like the label.
The Post-It note left on the binder for Alex said, "What side of history do you want to be on?"
There was also a marking on the spine of the binder: CF-143-3453-C78. This is probably a file or record reference, with CF standing for Caulfield. The reference would be visible when the binder was housed on a shelf, allowing easy identification.
When Alex flipped open the binder, the visible portion of the top page read as follows:
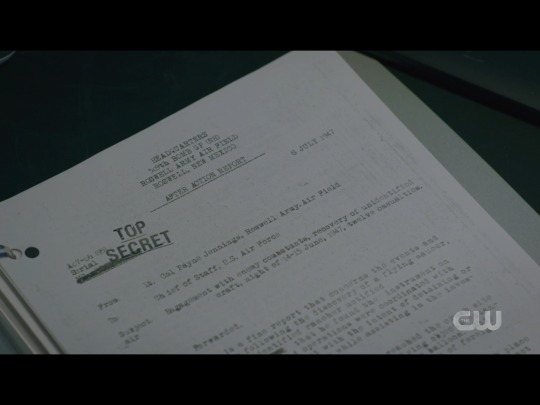
HEADQUARTERS
509th BOMB GP (NH)
ROSWELL ARMY AIR FIELD
ROSWELL, NEW MEXICO
_ _ _ _ _ _ _ _ _ _ _ _ _ _ _ _ _ _ _ _
Forwarded.
A07-06 (95) 8 JULY 1947
AFTER ACTION REPORT
Serial
[blacked out text with underscoring] [TOP SECRET stamp]
From: Lt. Colonel Payne Jennings, Roswell Army Air Field
Subject: Engagement with enemy combatants, recovery of unidentified craft, night of 14-15 June, 1947, twelve casualties.
[offscreen] is a fine that concerns the events and
[offscreen] following the discovery of a flying saucer,
To: Chief of Staff, U.S. Air Force
[offscreen] dentified rancher notified
[offscreen] [blacked out text] that he found the instrument on
[offscreen] operations were coordinated with
[offscreen] with the intent of detaining or
[offscreen] while assisting in the inves-
[offscreen] reached the crash site
[offscreen] ing object’s entan-
[offscreen] balloon. Ship
[offscreen] of foreign
[offscreen] place
Liz explains The Science to Jenna:
"3 years ago I hypothesized that if I introduced a rare protein to destroyed stem cells they'd regenerate. And I was right. My team in Denver brought dead cells back to life. Rat cells, but, I mean, still, the applications are immeasurable… until our study got shut down. They said it's for ethics reasons, but I think it's because it threatened big pharma. Then a few weeks ago, Kyle found that the pods contain a sort of alien cousin to my regenerative protein. When Max healed Rosa, his electric charge amplified the process. If we can replicate that, then, we can accelerate his recovery, so, I am testing out pig hearts to see…" discussion about pig hearts/human hearts/different kinds of smart…
Liz says she has a few hours before she has to "record the electromagnetic charge interval"
Jenna says that Liz reminds her of Charlie.
Charlie used to rant about gene therapy
Jesse says he requested no visitors until "his brain starts to follow his orders".
He keeps periodically hitting the morphine drip with Alex in the room, though he was ignoring it before Alex got there.
Jesse describes the opening scene of the episode. And then tells Alex "Tripp was never the same".
Rosa's art:
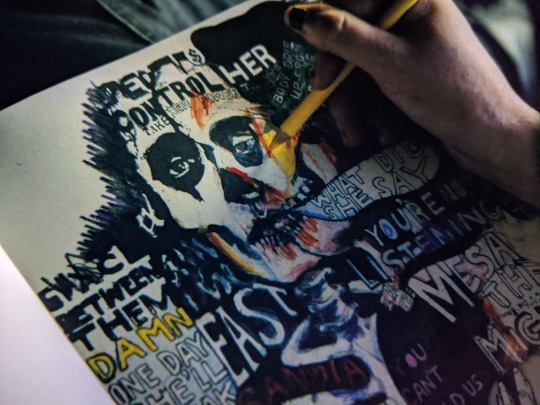
Among the quotes on her collage are:
Body drie up from ...
What did she say
You're no listening
Control her Take her power
I am the Mesa the mighty
Nothing but a muddy trickle
You can't hold us
Sandia
Between them... Damn... One day she'll…
East
Rosa hears Max call out to her (while awake) "Rosa! Help! You're the only one!"
Jenna says that her dad brought her and Charlie to Roswell when they were kids. That they were obsessed with the crash and aliens and the X-Files and it was the perfect trip. It's why she came to Roswell after leaving the military. "It was like trying to go back in time, somehow."
"Time Travel really messed with you. I am eight years older than my older sister. She used to be my hero. She was kinetic, disruptive, cool. Now that I'm an adult I'm pretty sure she's bipolar, and she needs help. And if I try to save Max I'm letting Rosa twist in the wind, so, hence the wine ready in my drawer."
Maria is going through a box labeled "Mom's Stuff" in the Pony when she sees Rosa.
"I'm turning into my mom. I lost time at the gala...Michael's hand...I'm seeing things!"
What Valenti says about Noah's death:
"The M.E., Dr. Holden, listed Noah's cause of death as cardiac arrest due to lightning strike. (note: cardiac arrest = heart attack. Same way Max died.). No other abnormalities were listed. But that's not consistent with the crime scene photos. You see these ligature marks on his wrists and ankles. …. These marks are consistent with zip ties. And these with struggling against police-issue handcuffs. Like Max's.".
Isobel blames it on their sex toys.
What Max said to the grocery clerk "¿Tienes carne sin preservativos?" (Meat without a condom).
About Max's nightmare:
"You remember when I used to come in and sleep on your floor?"
"You used to have a nightmare. You were alone in a cold, dark room and there was something… You couldn't get up. You were…"
"Chained to the floor. I'd wake up all freaked out and run to your room."
Rosa's nightmare:
"I need your help, Rosa."
"Look, I'm not gonna help you die. I have been drinking so that I don't dream."
"I know that."
"It's like you're getting stronger. I hear you now when I'm awake."
"You're right. Something is making me stronger. I feel things. That's why I'm calling for you. Something is wrong with Isobel. Even in the pod I sense it. She's dying. Please."
Liz thinks that Max was able to reach out to save Isobel because the electricity is making him stronger in the pod.
Maria confessed to her mother that she had thought she might be getting sick too, Mimi said Maria would not get lost because she was protected, and reached for the resin pendant with the anti-alien pollen flower that Maria was wearing as usual. When Mimi seemed to go to sleep, Maria removed the necklace and placed it on her mother.
Flashing back to the night of the crash, Nora seems to be tying down the tarp on the back of the truck when Tripp approaches her. He feigns an offer to assist her and then grabs her and orders his men to move in so that they can take her and the truck back to base. Louise appears and black-canary-screams to push them away (sound waves, I presume). She is shot in the stomach/chest. Nora pulls her into the truck and drives them away.
The newspaper clip Michael found is dated October 12, 1948, two days before Nora was captured.
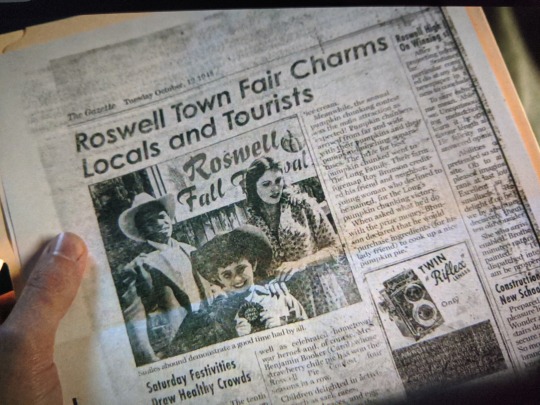
Newspaper transcript:
Last scene - Nora is clearly driving the truck with her powers, as she has both her arms around Louise. They approach a cabin and we're introduced to Roy Bronson, who offers to help.
Roswell Town Fair Charms Locals and Tourists
Photo caption: Smiles abound demonstrate a good time had by all.
Saturday Festivities Drew Healthy Crowds
Second column under photo:
...well as celebrated hometown war heroes, and, of course, Mrs. Benjamin Booker (Carol) whose strawberry Chile pie has won the Roswell Pie Contest four seasons in a row.
Children delighted in activities such as sack races.......
Top of 3rd column:
...ice creams.
Meanwhile the annual pumpkin chunking contest was the main attraction as expected! Pumpkin chunkers arrived from far and wide with their pumpkins and their pumpkin-lurching apparatuses. The prize for best pumpkin chunked went to the Long Family. Their farm foreman Roy Bronson credited his friend and neighbor, a young woman who declined to be named, for the Long's pumpkin chunking victory.
When asked what he'd do with the prize money, Bronson declared that he would "purchase ingredients (for his lady friend) to cook up a nice pumpkin pie".
MUSIC:
Dame - Holy Moly
Tommee Profitt feat. Fleurie - Hurricane
32 notes
·
View notes
Note
Hi Jodie! Do you have any tips on painting flora and making it look realistic/believable? In the sense it does in your paintings, of course. Your flowers/leaves always look SO good and I can't stop staring at them even if it's as dark as in your latest piece. I'm afraid mine always look like... blobs :D Thanks for any advice :) ♥
Hello Nonnydrops!I will try and answer this as best I can. I am actually always worried that my environments are never up to snuff so this ask made me smile.Short answer, I crib a lot from John Waterhouse. I actually have the Lady of Shalott above my computer in an attempt to absorb even a small piece of his greatness ha ha. He has great tonal contrasts, knowledge of form and confident brush work.
Something I always used to fall victim to when tackling a volume of leaves or flowers (anything small and ornate too) was to try and handle them piece by piece. Individually. Rather than see the overall shape or how the light falls over the mass of the tree or shrub, I would get caught up in an attempt to render every single cell ha ha. Not only is it a bloody tedious and thankless way to work but it’s not at all representative of how we actually see the world. It’s Hyper. If you’re struggling with form, I’d highly recommend you get out there in the great big nowhere with a camera, your phone is fine, and a sketchbook ( by all means a sandwich too - Treat your self!) and take some visual notes. Gather some reference. I’d recommend both because a camera can document fairly accurately for later but a sketchbook will help you see like a painter. It will help better your understanding of the forms you want to replicate and help you reduce things down to lights and darks. To really simplify. I recommend working on small paper with a large brush/pencil to help with reduction initially.
They don’t need to be masterpieces by any stretch of the imagination but they really helped me wrap my head around the less is more approach. I was forced to see the over all picture. The masses. I hope this helps a little bit. Sorry it’s in usual ramble form rather than anything formalised!Good luck with your Fauna
72 notes
·
View notes