#//I want to get better at photography and composition
Explore tagged Tumblr posts
Visit Tumblr Blog
Explore Tumblr blogs with no restrictions, modern design and the best experience.
Last Seen Tumblr Blogs


Fun Fact
In 2020, 27% of US Tumblr users had an annual household income of over $100,000.
Text
My keychains arrived ♡


This was my first time ever getting merch of my own OC, and it feels so surreal to own it irl 😭💖
I immediately put her together with Carla <3
therewasntashinonefromthesameserieswiththesamesize
#//I want to get better at photography and composition#。✧.*🖤aequalis noctis#。✧.*🥀something to tell you#diabolik lovers#diabolik lovers fandom#dialovers#otome#otome game#diabolik lovers oc#diaboys#dialovers oc#carla tsukinami x oc#carla tsukinami
126 notes
·
View notes
Text
not a callout by any means, but I just wanted to leave a note so that everyone is aware- this is AI

Sara Shakeel
#sara shakeel uses AI in most of her work#not exclusively- she does some photomanipilation and collages as well that do not use generative AI#she’s one of the better artists who utilizes AI in her work imo#and I do feel it’s appropriate to call her an artist because I know her talent and experience extends far beyond prompting#she manages to get some really nice composition and style that I don’t see in a lot of other AI ‘art’#but y’know. it’s less the aesthetics most of us were concerned about and more the ethics of it all#anyways I’m trying to say no shame for reblogging this or believing it’s photography or photomanipilation#like it’s really pretty and super convincing as far as AI goes#but I know a lot of us are concerned about AI in art spaces and would want to know#I typed photomanipulation wrong both times. I’m aware of the typo but tumblr mobile would make me rewrite the entire tag to fix it and. no
416 notes
·
View notes
Text

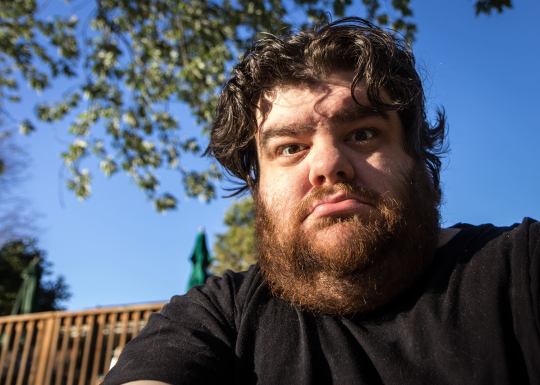
I think this question is the most asked one I see from people starting their photography journey.
They upgrade from their smartphone and get a nicer camera and lens and then wonder why their photos don't look much different.
A fancy camera opens up more possibilities and gives you great control. Lenses are creative tools that allow myriad perspectives. But a paintbrush does not paint a picture for you.
The answer to the question is light and effort.
The better the light, the less effort required. The worse the light, the more effort required. But you always need both to get a good photo. And you need a lot of both to get a spectacular photo.
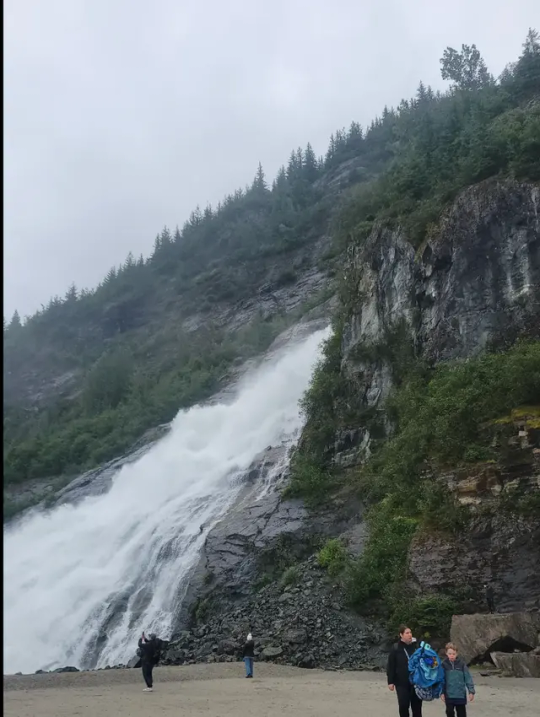
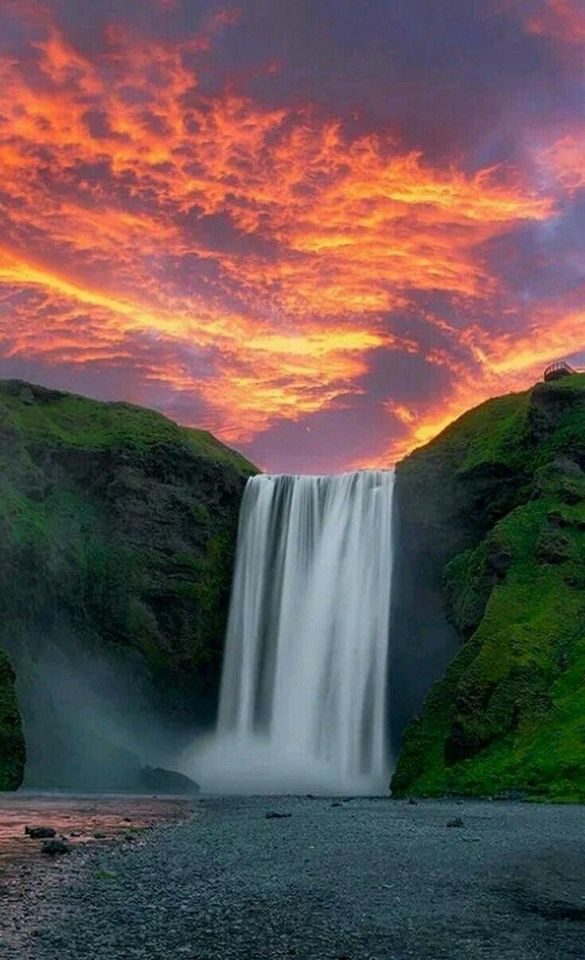
Imagine this photo taken in the same overcast light as the waterfall above.

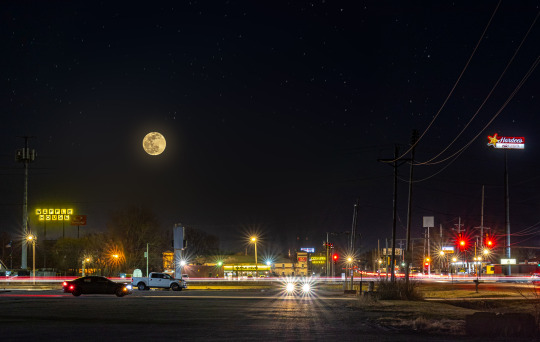
That would be the world's most boring parking lot photo.
But because the light was so beautiful I was able to pull out my smartphone and get a great shot. No fancy camera required. But I knew my phone was limited so I took three photos for a panorama. And I captured everything in RAW format to make sure I didn't lose any dynamic range or color information. This required a lot of extra post processing to combine everything and edit the colors close to what my eyeballs saw.
The light made things much easier. I just had to point the camera in the direction of the sunset. But effort was still part of the equation.
The best light is at...
Sunrise.

Sunset.

Or at night (tripod required).
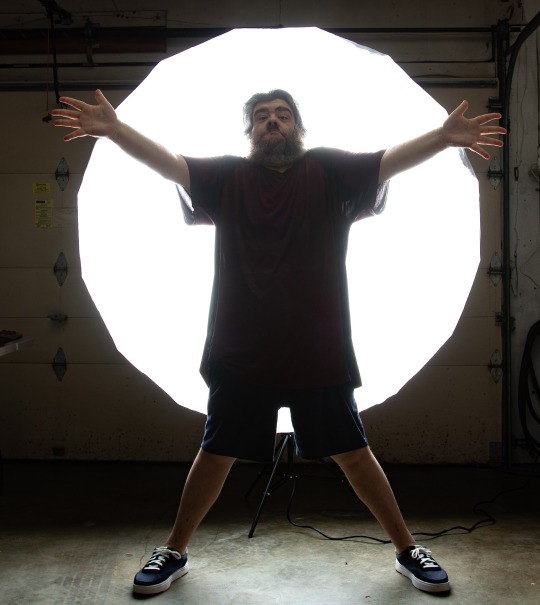
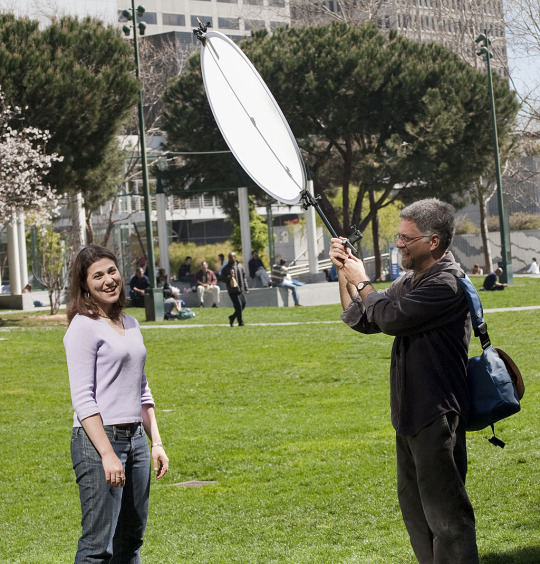
Or... bring your own light.
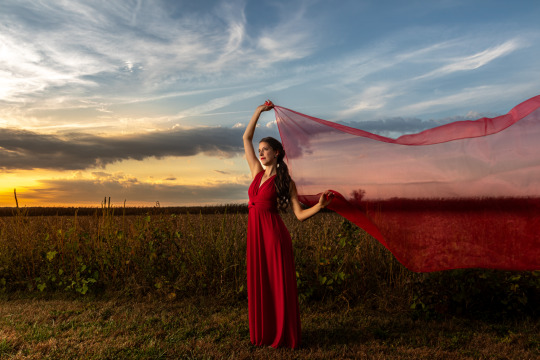
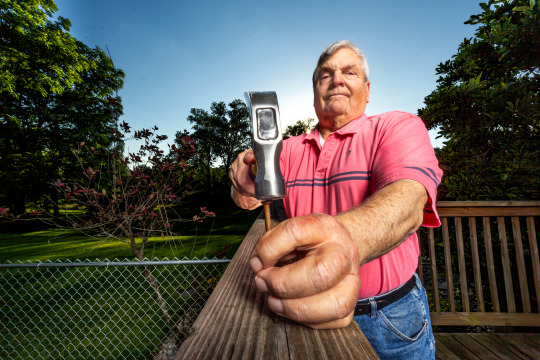
I had a sunset but my friend was in the dark so I employed my gigantic 7 foot umbrella.
Good photographers often plan their shots in advance. They will scout locations (Google Maps is your friend), take test shots to find the best composition, and then wait until the light is magical to get their shot. There are some landscapists who return to a spot continuously until conditions are perfect. I've heard of some who spend a year or more to get the photo they desire.
I knew I was going to be near the Arch. I used Google Maps to figure out a cool vantage point. I hauled my tripod a few blocks to that spot. And then my heart sank a little...

They turned the lights off.
The lights that illuminate the Arch confuse migrating geese in September. I still took the photo. And it's okay. But I didn't have the light I wanted. So I'll have to go back another time when geese aren't screwing everything up.
I'll have to put in that effort.
I understand you cannot always plan ahead. If photographers need to get a good shot spontaneously in bad light, they have to go above and beyond to elevate the photo.
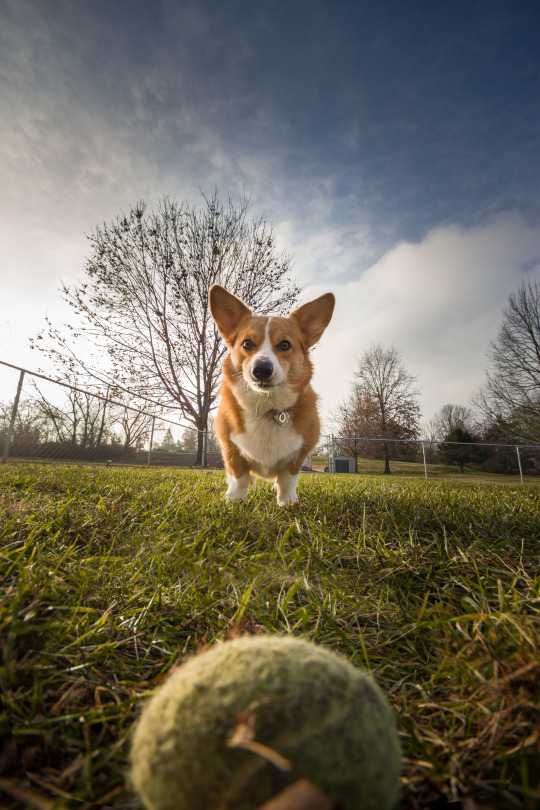
They might have to find an interesting perspective.

Perhaps use an atypical lens.
Long exposure.
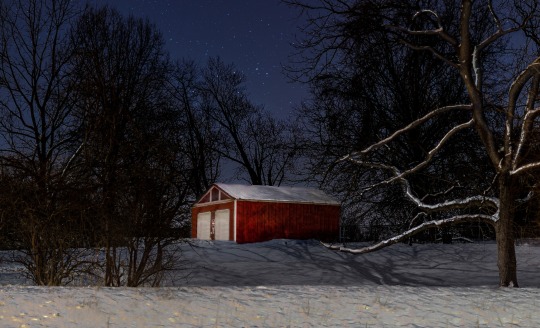
Or they can incorporate an interesting subject. A model. An old barn. Fungus.


Think about foreground, midground, and background. If you have a dull background, increase interest in the foreground or midground. Or both.
Again, the worse the light is, the more effort you have to put in to compensate. You might find yourself lying on the ground or dangling over a cliff.
Another option is to bring your own light. Overcast days can actually look quite compelling if you light a subject and then underexpose the background. This can bring out a lot of details in the clouds that would otherwise get lost in a natural light exposure.

(not my photo, source unknown)
Sometimes the prettiest days make the most boring photos. Sunlight at high noon is very hard to work with photographically. Especially if you have people in the photo. Hard shadows tend to not be flattering.
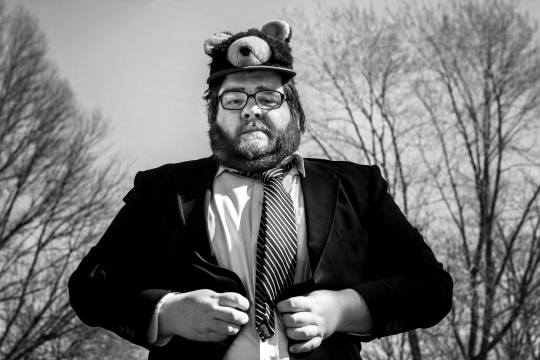
Black and white can sometimes make harsh sunlight look cool.
Or you can add a fold-up diffuser to help soften things.

All of this is to say... you cannot take a fancy camera to a waterfall on an overcast day and expect it to do all of the work. You are just going to end up with a flat looking snapshot. You have to put thought into your photos. You need a bag of tricks you can pull from at any moment. And you have to be willing to go the extra mile if you don't have the light you want.
For a waterfall at sunset, you can just put it dead center and call it a day.
(photographer unknown)
But if you have an overcast day with boring light, you're gonna need to effort your ass off.
This photographer put the camera near the ground, found a great composition, included cool foreground/midground elements, and used long exposure to make the water silky.
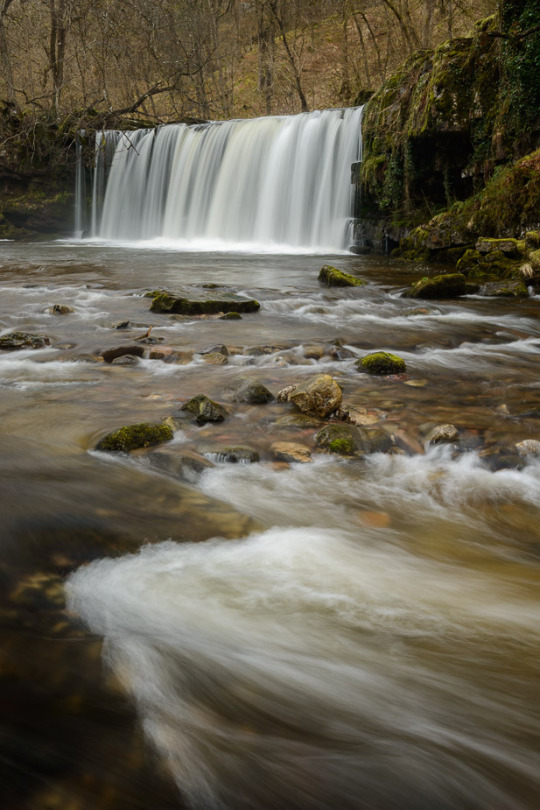
(Stephen Spragg)
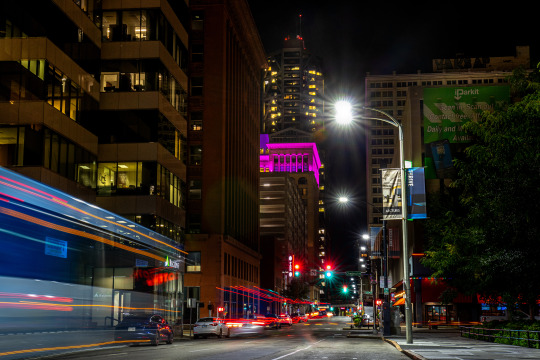
There is also the option to combine maximum light with maximum effort.
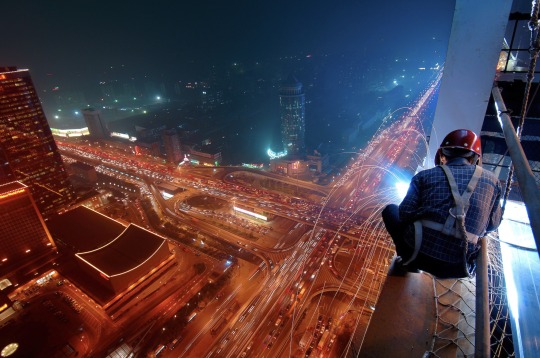
This is by famed photographer, Joe McNally. He shot at night. There is a hidden flash off to the right of the worker. He used a wide lens to get a unique perspective. He used long exposure to get light trails from the cars below. Oh, and he is hanging off the side of a building.
Light and effort. Light and effort. Light and effort.
And, as always, the third secret ingredient is... education.
Education will help you leverage light and effort more so than any camera or lens. Don't just learn the open chords. Learn those ones where you have to stretch your pinky out super far while barring the low F.

Sorry, I used to play guitar and a metaphor slipped through.
Free photography education...
Tony & Chelsea 7 Hour Course Karl Taylor Free Introduction to Photography
2K notes
·
View notes
Text
All the nice places we couldn’t go


Tommy Conlon x Reader oneshot
Summary: Tommy Conlon stumbles across a childhood friend, Y/n, from high school after years apart. Y/n is an aspiring photographer, determined to build a portfolio for a local competition—one final chance to prove her work matters. But as they reconnect, old promises resurface, and Tommy remembers the vow he made long ago, to take her to all the nice places they couldn’t go.
A/n: I’ve never written for Tommy Conlon before or even any non Peaky blinder characters, so do forgive me if I represented Tommy a little different than his cannon version!
Word count: 5k
Content includes: Mention of Abuse, fighting
It was an ordinary day for the soon-to-be MMA fighter in training, Tommy Riordan Conlon. Training and sweating from day till night, punching and kicking like his life depended on it—which it did. He had a competition to win, and he was going to win it. That was the plan. That was the goal. And once Tommy Conlon had his mind set on the prize, nothing else mattered.
He trained with his father, Paddy Conlon.
He never liked his father all that much. Paddy had been abusive and absent—especially when Tommy’s mother was sick and dying. But the only person Tommy trusted enough to train him now was the very man who broke him. Paddy had been his trainer and coach back in high school. And through all those years, Tommy couldn’t recall a single moment of happiness while doing something he was supposedly good at.
He didn’t even know what he was training his ass off for. Wasting his energy and blood over a competition that might not mean anything in the end. If he won—then what? His life was still already decided. And winning wouldn’t change the things that had already happened.
But still, The moment he heard about the upcoming tournament, all he knew was that he had to win.
Maybe—just maybe—it would give him a reason to keep going.
Tonight, Tommy trained alone as usual. He had thought about bringing his father along, but decided he couldn’t stomach the tension that day being around the old man. Paddy had been trying to fix things—mend his relationship with Tommy and his older brother Brendan—but Tommy didn’t believe that was possible anymore. Some things were too broken to be fixed.
What’s the point in trying to make things better, when all you’ve known your whole life is betrayal and disappointment?
Tommy wasn’t interested in useless connections. Or any kind of connection, really.
He ducked low to dodge the swinging bag in front of him, trading punches and kicks, grunting through every blow.
Meanwhile, you sat near the gym’s entrance, waiting for your older brother. He’d been coming to this small Pittsburgh gym for months now. You weren’t there to train—God, no. You had zero interest in the sport or the fitness community. You were here with one goal: to take pictures of your brother, the ring, the atmosphere, and maybe some of the other fighters in action.
You were submitting a portfolio for a local photography competition, and you really wanted to win. First place meant getting your work featured in a local magazine—and a nice cash prize to go with it.
You were already an aspiring photographer, though you never considered yourself particularly gifted. There were always flaws you noticed in your own work—composition, lighting, timing. But despite everything, you still kept taking pictures. Something inside you made you try, even when you didn’t know why.
Maybe, if you won—you’d finally prove yourself worthy of something.
You fell in love with photography the day your grandmother gave you a camera for your sixteenth birthday. You remember your very first shot: your father, slouched in his armchair with a beer in one hand and a newspaper in the other. And even though the lighting was bad and the angle was slightly crooked—the photo came out beautiful. At least, to you.
That camera became your escape to your dull life. You took pictures of everything and everyone. Your older brother had left for college, and you were stuck at home with your parents most of the time. He rarely came home—only for birthdays or Christmas, but by then he was gone again.
He had gone off to study biomedical engineering, but only to appease your father. In truth, he’d always loved boxing. Ever since he was a kid. But your father always dismissed it —“There’s room for hobbies,” he’d say, “but hobbies won’t get you anywhere.”
So your brother had snuck off in secret to train. Lied about having after-school classes. He found a small gym and started sparring with other aspiring boxers. After getting his master’s degree, he kept up the lie—working at the hospital and tending to others during the day, competing in underground matches by night.
And you? You got the same treatment.
The moment you expressed an interest in photography, your father tore you down. Criticized every photo you took.
“Not sharp enough”
“Too dark.”
“Nothing special.”
No picture was ever good enough. Nothing you did ever was. Even when you gave up photography to pursue a business degree just to make him proud—he found new ways to make sure that you knew you were useless.
Now, as you wandered around the gym aimlessly with your camera strapped around your neck, snapping candid shots of the space, you noticed a man off in the far corner—alone. You lowered your camera slightly, tilting your head. Why was he by himself instead of with the rest? Maybe he didn’t like working out around others. But he quickly slipped out of your mind as you moved on, trying to find something worth capturing. The light wasn’t great. The space felt uninspired. You reviewed your camera roll, deleting half the shots without hesitation. Nothing felt good enough.
You sighed. Today just wasn’t your day.
You were about to tell your brother you wanted to head home when your eyes drifted back toward the far corner. That same man. Still there. But now, as you looked closer—Your breath caught in your throat. It was him.
Tommy Riordan Conlon. A boy you once knew in high school��a long time ago.
“Tommy?”
The man in the sweat-drenched black shirt looked up from where he stood, hands braced on his knees. His eyes softened slightly as recognition dawned on him.
“Y/n?”
You gasped, your lips parting just a little in disbelief.
He remembered you?
Your body froze. Your hands were starting to get clammy. You swallowed a huge thick lump in your throat and tried your best to speak, even as your vocal cords refused to cooperate.
“Haven’t seen you in a long time. What’ve you been up to?” you asked, trying to sound casual. Like nothing had ever happened. But it was hard to be casual with someone who’d basically changed the most important years of your life.
Tommy wiped the sweat from his temples with a cloth pulled from his pocket. He hesitated—like he always did before talking. Maybe he was choosing his words carefully. Or maybe he just didn’t like talking about himself. He never had anyway.
“I’ve just been training,” he said finally, brushing his hair back. “Nothing much. What about you? Still taking pictures, huh?” he said pointing to your camera.
Your eyes widened slightly at the mention of your camera. “Oh—yeah, I still do photography. I’m actually here for a competition. Local portfolio thing.”
Tommy nodded. “Yeah? Ain’t much to take here, but I’ll leave that judgment to you.”
You laughed nervously. “I came with my brother. Thought I’d get some shots of him… and maybe anything else that looked, y’know, photo-worthy.”
Tommy took a long swig from his water bottle, his chest rising and falling with fatigue. “How many you taken so far? Sorry, I ask too many questions.”
You shook your head quickly. “No! No, you’re good. Really. I’ve taken a lot, but I’ve deleted just as many. I dunno… it’s hard to be satisfied with any of them. But—here, take a look if you want.”
You moved toward him, lifting your camera to show the screen. Your shoulders brushed briefly—both of you flinching just a little at the contact. It had been so long. And yet your body still remembered him.
You looked away quickly, lowering your gaze to the camera. “Sorry, Tommy.”
He didn’t say anything at first, just studied the photos as you clicked through them. You stopped on the last one—a sharp, mid-punch shot of your brother in stance.
You turned toward Tommy, who was already looking at you.
“So…what do you think? I think it’s okay.”
He looked away for a second, then back again. “I think it’s beautiful. You always had that eye. You take something ordinary and make it extraordinary.”
Your heart jumped. It was something he used to say back in high school—when you were still learning, still scared, still clinging to every bit of encouragement. He would hold your camera, look at your work, then say it with a softness in his eyes that never quite matched the roughness of his voice. Maybe, just maybe, the Tommy you knew hadn’t changed that much after all.
“Really? Wow. Thank you, Tommy. That means the world.”
Your eyes lingered on his for a moment—warm, familiar. Both of you locked in something quiet and invisible, until the tension pushed you apart again. You looked away, and so did he.
Tommy scratched the back of his neck. “Umm… I’m training for a competition too. The MMA tournament. I plan to win it—get all the money.”
Your head snapped up, eyes wide. “MMA? Oh my god, Tommy—that’s amazing!” you said, practically squealing with excitement for an old friend.
The joy in your voice caught him off guard. He felt his muscles relax, just a little—like he hadn’t heard anyone be that happy for him in a long time. He licked his lips nervously, eyes darting around the gym again. Collecting his thoughts, his breath, anything to ground him.
Being this close to you was making him short-circuit.
“Hey, uh—Y/n… ain’t that your brother over there?” Tommy nodded toward the ring. “I think he’s about to spar with that guy.”
You turned your head. There he was—your brother, stepping into the ring across from a tall guy with a flat mohawk.
“C’mon, Mad Dog! Don’t go easy on him,” the other man barked, who you assumed was Mad Dog’s coach. He massaged his fighter’s shoulders, amping him up.
Mad Dog? You blinked. He sounded strong.
And it turned out, he was.
Within seconds, Mad Dog delivered a bone-jarring punch straight to your brother’s ribs. You flinched. Every strike after that made him stumble, crouch, fall—no matter how hard he tried to get back up. Even when he defended himself, arms up and tight, Mad Dog still found a way to get through. Another jab. Then followed by another. The final hit forced your brother to surrender.
You couldn’t tell if he needed immediate help or if this was just normal for fighters. Either way, you weren’t breathing.
A warm hand landed gently on your shoulder.
“Don’t worry about him,” Tommy said quietly. “He’ll be fine.”
It was exactly what you needed to hear. His voice, his presence—it settled something in you. You nodded and hurried over to your brother, who now sat on the bench, a damp cloth draped over his eyes, chest heaving.
“You alright?”
“Y-yeah… that guy’s insane,” he groaned.
He pulled the cloth off—and froze. Tommy was standing right in front of him.
“Tommy? Is that you? Jesus… it’s really you! How’ve you been, man?”
Tommy nodded awkwardly, eyes flicking around the gym like they always did when attention was on him. “Uh… yeah. Been good.”
“He’s training for MMA,” you added proudly.
Your brother’s grin widened. “No shit? That’s amazing, Tommy.” He clapped him on the back. “Good for you.”
Tommy stayed quiet, but his eyes were fixed on the ring again. Mad Dog’s coach was now scanning the gym, calling out for someone else to spar with his fighter. But no one stepped forward.
“I’ll fight him,” Tommy said suddenly, voice low. “If no one else wants to.”
Your brother whipped his head around. “Tommy—no. You saw what he did to me. Don’t.”
Mad Dog smirked from across the ring. “If he wants to try, be my guest.”
The coach sighed, eyeing Tommy. “Alright then. Let’s see what you’ve got, boy.”
Without hesitation, Tommy stepped into the ring. No prep. No warm-up. Just quiet focus. You watched as he stood in a fighting stance, heart hammering. But something told you he’d be fine.
Tommy struck first—swift and sharp. A kick to Mad Dog’s side sent the man staggering. When he rose, Tommy was already there, fists landing fast and brutal. You bit your lip, watching through your lens as the two collided over and over.
Every punch made you flinch. But it was beautiful, in a strange, haunting way. Two men, drenched in sweat, in a silent war for dominance.
And then—Mad Dog was down.
You raised your camera, zeroed in on Tommy’s face—panting, fierce, glowing with intensity—and snapped the shot. He looked like a monument.
The flash startled him. He turned, brow creased, eyes finding you.
“Oh—shit! Sorry, Tommy. I should’ve asked. I’ll delete it if you want.”
He walked toward you slowly, eyes still locked on the camera.
“Nah. Don’t delete it. Let me see.”
Hands trembling slightly, you flipped to the photo and held it out. Tommy stared at it for a long moment. Then looked back at you.
“Looka good. You made me look good. And I’m fuckin’ ugly.”
You laughed. “No you’re not, Tommy. You looked amazing out there.”
And he smiled. A real one. It made your chest ache.
Your brother, now dressed again, came out of the locker room—expecting to see the fight still happening, only to find Mad Dog on the ground and people helping him up.
“Wait… did you win, Tommy?” he asked.
Tommy just nodded, humble.
“Fucking hell,” your brother muttered with a proud grin.
Suddenly, Mad Dog’s coach waved Tommy over.
“I should probably go talk to him,” he said.
You nodded and watched him walk away, still dazed by what had just happened.
“We’ll leave soon,” your brother said. “Just gotta grab my stuff. Wait here, yeah?”
“Alright.”
Your brother and Tommy disappeared, and you sat down, scrolling through your photos again—eyes landing on the one you took of Tommy.He didn’t even have to try to look good. It almost annoyed you, how he couldn’t see how beautiful he was.
You were just working up the courage to ask him to be your model when his voice called out, but figured it was probably too late since your brother was already walking towards his car or maybe too soon for two old friends who’d only met after forever.
“Y/n.”
You looked up. Tommy was walking toward you again, scratching the back of his neck like he always did when he was nervous.
“So, uh…”
“I was wondering if maybe you’d wanna meet up sometime. Y’know… since we haven’t seen each other in like what? 10 years?.”
Your cheeks flushed pink as you fidgeted with your sleeves. You’d wanted to ask him the same thing. You’d been trying to find any trace of him online for years—social media, old threads, anything. But he had vanished. Until now.
“Of course, Tommy.” You smiled. “Actually… I was gonna ask if you’d be my model for the competition. If not, we can just hang out, talk, whatever works.”
He blinked, surprised. “Oh—yeah. I mean, I could be your model or whatever. If you think I’m, uh… worthy. I don’t really know what to do, though.”
“You don’t have to do anything,” you said softly. “Just be yourself.”
You handed him your phone and he typed in his number. The two of you stood in silence for a beat—taking it all in. Neither quite believing this was real. Even after all this time, there was still something between you. But also, something unspoken, something fragile—an invisible thread neither of you knew how to pull yet.
Your brother waved at you from across the gym, motioning toward the car. You didn’t want to leave. You wanted to stay. But you would see him again. You knew you would.
“You should probably go,” Tommy said gently. “I’ll text you when I get back, promise.”
You nodded slowly. “Yeah… I’ll see you soon, Tommy.”
As you walked off, you turned around one last time, he was still looking at you. He gave a small, thoughtful wave, lowering his head with that soft shyness he never quite outgrew. You smiled to yourself sheepishly and waved back jogging to your brother’s side as he urged you into the car.
On the ride home, your heart was full of motion. You watched the world blur past the windows—streetlights, trees, people. And somewhere in your chest, you hoped like hell that Tommy would text you. Not because you didn’t trust him.
But because it had been so long since anyone ever meant it when they said they would.
Your brother’s car pulled up in front of your place just after 9 p.m. The sky was dark, and your body felt heavy—but your head was still buzzing. The whole drive home, he’d been talking about the fight, about how insane Tommy was, about how maybe he needed to start training harder. You barely heard anything he said
You were thinking about the photo. About Tommy’s voice. About the way he’d looked at you right before you left.
You mumbled a quick thanks and shut the car door, rushing inside, tossing your bag down without even bothering to turn on the main lights. Your camera was still around your neck.
And then—your phone buzzed.
You didn’t even make it past your bedroom door before unlocking it.
Tommy Conlon: Hey. It’s me. You still want that model or what?
You let out a breath you didn’t know you were holding.
Still in your jeans and jacket, you threw yourself down onto your bed face-first, then rolled over and typed back fast:
You: Of course I do. I was hoping you’d text first, actually. Free tomorrow afternoon? Golden hour?
Your heart pounded. You watched the little dots appear. Disappear. Reappear. Then finally:
Tommy Conlon: Golden hour sounds nice. Just tell me where.
And if I gotta bring snacks or just my awkward ass.
You laughed into your pillow, cheeks warm, legs kicking a little against the blanket like you were sixteen all over again.
You sat up just enough to reply:
You: Just bring yourself. And maybe a hoodie. It’s gonna be chilly. I’ll send the address.
Tommy Conlon: Alright. I’ll be there.
And just like that, It was actually happening. You looked at the camera still hanging around your neck, heart buzzing all over again.
You barely slept.
Every time you shut your eyes, you saw him—his face through your lens, the way he looked after the fight, the way he smiled when he said you made him look good. You kept replaying the sound of his voice reading your name.
By morning, your camera was already charging, your clothes were laid out, and your room smelled faintly like fresh coffee and nerves.
You stood in front of your mirror holding up outfit after outfit—first your “cool artist” look, then your “I-didn’t-try-that-hard” sweater, then something in between. You didn’t want to look too dressed up. But you also didn’t want to look like you just rolled out of bed.
God, why am I thinking about this so hard? you scolded yourself, throwing the hoodie back onto the chair.
Eventually, you settled on something simple and soft. Comfortable. Warm enough for the chill in the air. You pulled your hair back, then messed it up again. You checked your camera three times. Battery full. Memory card clear. Everything was ready.
Still… your hands wouldn’t stop fidgeting.
It wasn’t just the shoot. It was him.
It was that invisible thread between you both—the one that felt like it could either snap… or hold if you let it.
The sun was just starting to dip when you arrived at the location—a quiet stretch of overgrown field behind a shut-down rec center. Rusted bleachers sat untouched, wild grass curled around the old fence posts, and the light was melting golden across everything like honey.
It was perfect. Lonely but beautiful,
You adjusted your camera strap, checking the settings for the fourth time as you paced. He hadn’t texted that he was here yet, but your heart was already speeding like he had.
Then—you heard gravel crunch. Tommy.
He was walking toward you in that familiar, heavy kind of stride. Hands in the pocket of a black hoodie, hood up over his messy hair. His shoulders looked even broader under the sweatshirt. His eyes met yours, and the corner of his mouth tugged in something that almost looked like a smile.
“Hey,” he said, stopping a few feet from you. “Hope I’m not late.”
You shook your head. “You’re right on time.”
You tried not to show how weirdly breathless you felt. He looked good. That quiet, rugged kind of good. Like someone who didn’t know the effect he had.
“You sure this is the spot?” he asked, looking around at the peeling paint and weeds.
“Yeah,” you said softly, lifting your camera. “I like places like this. Feels like… something people forgot, but it’s still trying to be beautiful.”
Tommy nodded slowly, his gaze flicking around again.
“Alright. What do you want me to do?”
You smiled gently. “Just stand there for now. Don’t think too hard.”
He huffed a breath, a nervous kind of laugh under his breath. “That’s kinda all I do. Think too hard.”
You lifted the camera to your face.
“Then stop thinking. Just look at me.”
And it hit you—just how intense his eyes were. Not angry. Not cold. Just focused. Like he was trying to figure something out about you without asking.
Click.
You stepped sideways. “Now… turn a little to your side and just walk normally, Yeah. Look out toward the field.”
He did as you said. The light caught the edge of his jaw. You swore the wind shifted just right to make his hoodie fall back slightly, revealing more of his hair, the side of his neck.
Click.
“You doing okay?” you asked, gently lowering the camera.
He looked over at you, brow slightly raised. “I feel like an idiot just standing and walking here.”
You chuckled. “You don’t look like one. I promise.”
“You say that ‘cause you’re behind the camera. You got all the power,” he teased.
You smirked. “Exactly. So shut up and pose.”
He huffed again, but there was a softness behind it now.
After a few more photos, you walked up to him, showing him one of the shots on the screen.
His eyes scanned the image. Then he frowned—barely.
“Don’t like it?” you asked.
“No, it’s good. Just… I don’t know. I look too soft.”
You looked up at him.
“That’s why it’s good.”
He held your gaze for a second longer than he probably meant to. There it was again. That invisible thread. You lifted the camera back up. “Alright. Try sitting down over here—on the edge of the bleachers.”
He followed your direction, hands on his knees, eyes cast downward at first. The sky behind him was bleeding orange and gold.
Click
You didn’t tell him to smile. His face, even resting, said everything.
After a while, You both sat on the edge of the bleachers, your camera resting in your lap. The sky had shifted from gold to blue-gray, the wind growing cooler now that the sun had dipped below the trees. For a while, neither of you said anything. You just let yourselves sit there, shoulder to shoulder.
Tommy’s hands were clasped in front of him, His hoodie sleeves were pushed up slightly, revealing the curve of his forearms. He was staring out at the field like there was something out there he couldn’t name.
You looked over at him, lips parting, then closing again. Your fingers tightened slightly around your camera. You weren’t sure if you should ask. But it had been sitting in your chest like a stone ever since that night at the gym.
“Can I ask you something?” you said quietly.
“You just did.”
You smiled faintly, despite the nerves. “What happened? I mean… after high school. You just—disappeared.”
The silence stretched long between you as you looked down to your feet, “Sorry. You don’t have to answer. I just… always wondered.”
“My mom got sick.”
“I left with her,” he continued. “She didn’t want to die there. Didn’t want to be near him. So we packed what we could and drove west. Stayed with some family friends for a while.”
His jaw clenched, “She died not long after we got there.”
You stayed quiet. The way he said it, like it was something he hadn’t said out loud in years. Maybe ever.
“I joined the Marines a year later,” he said. “Needed to get the fuck out. Needed to do something that made sense. I figured if I could fight for something else, maybe I wouldn’t feel like I’d already lost everything.”
Your throat felt tight, maybe feeling a little upset that he kept it away from you. But then again, who were you to be upset at his decision?
“I didn’t tell anyone,” he added, eyes still fixed on the horizon. “Not Brendan. Not my dad. Not you.”
“Why?” you asked softly.
He finally turned to look at you.
“Because I didn’t think anyone would care.”
Your heart cracked in half, feeling yourself getting more upset.
“I would’ve cared,” you whispered.
Tommy didn’t say anything. But he looked at you like he believed it—and like that belief hurt.
You wanted to reach for his hand, but you couldn’t, stopped by the invisible wall between the two of you.
You both sat in silence again, the air heavier now—but not unbearable. Just full of things that had never been said.
Suddenly you remembered.
Flashback — High School
You were sixteen, and your camera was still new, hanging from your neck with a bright yellow strap. The film was cheap, the lens a little scratched, but to you, it was magic.
You and Tommy sat behind the old gym building, near the school, leaning back against sun-warmed bricks. He had a split lip from a fight two days earlier. You had a scratch on your arm from your father slapping your camera out of your hands when he saw the newest roll.
“You should stop taking pictures if it gets you in trouble,” Tommy had muttered, gazing at the cracked pavement.
You shook your head, biting down the sting in your throat. “It’s the only thing I’m good at. And he hates it.”
Tommy turned to look at you then—his eyes were darker than the bruises on his face.
“Fuck what he thinks.”
You blinked at him, surprised by the sudden heat in his voice.
He took a deep breath, then added quieter, “One day…When I get outta here, I’m gonna take you somewhere nice. Not this shit town. Real places. Good light. Big skies. You’ll take pictures so beautiful it’ll shut him the fuck up.”
You laughed softly. “That sounds impossible.”
“It ain’t,” he said, dead serious. “You deserve to go somewhere that don’t make you feel like you’re small.
He reached out and tugged gently at your camera strap, just enough to pull the camera into his hand. He turned it toward you and squinted through the viewfinder.
“You’re the only thing that looks good in this place anyway,” he muttered, then snapped the photo.
Present
You turned your head to look at him—older, bruised, tired—but still that same boy, somewhere underneath all that hurt.
“ You remember when you said you’d take me to nice places?”
Tommy looked over at you. His expression shifted—almost like a wince. Like it hurt to remember that moment.
“Yeah, I do”
“And now here we are,” you smiled. “Maybe this isn’t Venice or New York or whatever, but…”
You gestured toward the field. The golden light now long gone, replaced with deep blue shadows and a soft, humming silence.
“It’s a nice place”
You looked down at your hands, resting in your lap, your fingers fidgeting with the lens cap of your camera. You could feel the weight of his gaze on you.
And then, gently and hesitantly—his hand reached for yours.
Callused fingers brushed over your knuckles before settling around them, his grip was firm but unsure, like he didn’t quite know if he was allowed. He exhaled, slowly. Like he’d been holding that breath for years.
“I meant it, y’know,” he said.
“That day behind the gym,” he murmured. “When I said I’d take you to all the nice places… places where you’d finally feel like you mattered.”
His voice wavered, just slightly, “I still want to do that.”
“But not just for you,” he added, more softer now. “For me, too. Maybe I need to see those places more than I thought. I want to see them with you”
You swallowed hard, throat full of things you couldn’t say yet, you squeezed his hand tightly.
“You’re already doing it, Tommy,” you whispered.
“This is one of them.”
His thumb brushed lightly over the back of your hand, “I know I fucked up back then,” he said. “I letft without a word. Didn’t think I deserved to come back.”
“But I wanna try again, Y/n. I wanna do right by you this time.”
His eyes met yours, steady— and it gentler than you’d ever seen them, more than you remembered.
Everyone always said Tommy was like the moon. Cold and distant. And always drifting in his own orbit. But not to you. To you, Tommy Conlon was the sun. Your sun.
When he smiled, it was the brightest star. When he spoke, his voice was the sweetest morning dew—warm and aching with things he didn’t know how to say properly.
“I should’ve taken you with me,” he said. “Back then. I wanted to. I thought about it more times than I can count, believe me.”
You stared at him, your heart breaking and blooming all at once.
He swallowed, his thumb brushing gently over your knuckles now.1
“But I’m here now. And if you’ll let me… I’ll take you.”
His voice cracked slightly, but he didn’t look away.
“To all the nice places we couldn’t go.”
#tom hardy fanfiction#tom hardy#Warrior#tommy conlon#tom hardy x reader#Tommy conlon x reader#tom hardy x you#Tom hardy fanfic#Warrior 2011#Tommy conlon x you
80 notes
·
View notes
Note
Can I get headcanons for the TEC boys with a reader who’s good at art?
Never A Frown With Golden Brown

Summary: TEC x Artist! Reader
TW/CW: mentions of crime scenes
A/N: Good news, guys! REQUEST ARE NOW BACK OPEN!
Knocked out the majority of my queue, so fill free to request anything (as long as you read my DON’Ts first! <3
Reblogs are appreciated!

- Bill isn’t a muse, and he told you as such
- Anytime it was time for portraits for school, his mom was too poor to pay the extra money (though it became more obvious it’s because she didn’t want to have any reminders of him)
- It would be no different with you. He spotted you during art class actually paying attention to the assignment, and scoffed
- “You know, there are better ways to put your normie brain to the use”
- You simply pretended not to hear him as you continue to draw the still life in front of you
- Overtime, you would catch him watching you draw, paint, photograph, even write sometimes. He got red faced and mad when you pointed it out, but that didn’t stop him
- In fact, you just made him more curious. He’ll admit: your inking was acceptable, you knew how to compose a shot and he guessed your coloring was alright
- You probably drew him Major Violence with Battle Broad for his birthday, and he just held onto the piece of paper like it would be lost forever if he didn’t
- Will stuff every doodle/unfinished drawing you’ve threw out over the years. Will get pissy if you point this out, saying that “YEAH! Well, maybe I want to draw better than you!”
- I actually think he does know how to draw, just doesn’t apply himself. If he’s feeling generous, he’ll return the favor by drawing you in a notebook and tear it out for you
- Would die of embarrassment if he was asked to be your muse for photography. Of course he’s going to agree to, just that it’s embarrassing he’ll be seen in this light! DUH!
- (Later on, would ask if you have any copies he could take home)
- It’s weird being admired like this. He’s only seen this with artists from a long gone era…not with his pimply nerdy self
- ….but maybe he’ll accept it. Maybe.

- Josh saw you drawing for the journal club. They needed a cover, and you were the “art kid”, so you were made to take the burden of it
- He likes to think he’s artistic himself (writing wise), but the way you effortlessly blended in the watercolor onto the paper…it entranced him
- He stayed up all night writing the “perfect” sci fi story for you to visualize. Maybe you can draw it like Frank Frietrzza, or even Jack Kirby
- Slides it in your locker and hopes for the best.
- Waits a couple of days, and calls himself foolish for even thinking someone of you fallible (while also stating that “you couldn’t handle the caliber of my art skills!”)
- It isn’t until he sees you also slip in a visualization of the drawing that he was sold!
- Loves to watch you in art class while you produced the most beautiful landscapes within just your imagination
- Wants to hear about your process at all times and would get giddy hearing you talk
- Secretly? He’s jealous. He can never seem to get the ideas in his head right onto the paper. It’s like a mental block for him or something.
- So, he may or may not steal some of your drawing ideas from you. Will adamantly claim he didn’t, but you knew. You always knew
- I’m you can get past that, maybe you two could be a creative writing duo
- Josh takes control of the writing; you take control of the illustrations
- It’s a weird harmony of sorts, but it works nevertheless

- For Pete, I think he would actually like a photographer
- I don’t know why, but staring at movies all times of the day means he has a keen eye when it comes to the little details
- Saw you at the darkroom while you were about to finish up. He (sort of) followed to the light and watched you examine the last photograph
- Woah…even in black and white, you know your stuff! That lighting really hits the plants well, and the composition almost wraps said plants into something…monstrous
- You end up catching him in the act, but unlike the others, he just continued to stare…creepy
- When he got home, he spread out his favorite horror films and capture every one of his favorite shots (probably stole a camera or used a shitty camcorder)
- Maybe asks you if you can take shots like this (yes, he be one of THOSE people who want free requests)
- He’s a little sleaze ball as well. The type that would BEG you to go into crime scenes and take pictures of everything, but especially the bodies
- If not…maybe a portrait of himself? Probably never got one because his parents were too poor to get one themselves
- Since Pete’s also a creative person (FXS), those “self portraits” are him in his zombie crawl look
- Internally kicking his feet when he gets them done, but acts all tough when you asked his opinion on it
- Even if you guys did break up, he still has them, sometimes even looks at them when he’s feeling bitterly nostalgic

- Jerry would love a sculptor. Someone who can seemingly make fantastical stories with just a piece of clay and such
- You met because he accidentally destroyed one of said sculptures. You were letting it air dry and Jerry was tripped up by some bullies (or even the club), crashing right down onto one of them
- After helping him clean up, he started to also notice your other work on the ground and WOAH! Is that Xena the Princess Warrior?!
- Didn’t have time to stick around, but would watch you sculpt during free time in art class
- The way your hands meticulously move around the clay itself…how it made these blobs into impossible shapes…fascinating
- It distracts him every day of his life. Even at club he’s starting to feel flustered when thinking about you and your work
- Will eventually ask if he could watch you up close while you sculpt
- He’s a romantic at heart (a little). Absolutely red faced and flustered watching you. He’s never met anyone this talented since…well, forever, really
- I think you could inspire him to create a little. “Checks out” (stalks) your profile and tries to replicate some of your more simpler pieces
- It’s…something, but he’s trying, alright?
- Would bond making mini figurines of DnD characters and keeps them up his shelf to admire
- He loves his artistic S/O so much <3
#welcome to eltingville#the eltingville club#eltingville club#bill dickey#eltingville bill#eltingville#bill eltingville#the eltingville club bill#pete dinunzio#bill dickey x reader#eltingville pete#pete dinunzio x reader#the eltingville club pete#pete eltingville#the eltingville club josh#josh levy x reader#eltingville josh#josh eltingville#joshua levy#josh levy#jerry stokes x reader#jerry eltingville#the eltingville club jerry#eltingville jerry#jerry stokes#tec x reader
126 notes
·
View notes
Text
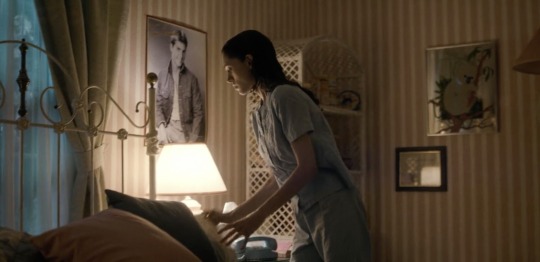
rating things owned by nancy elizabeth wheeler
because she’s got a lot of little things. mostly they are very cute and strange little things.
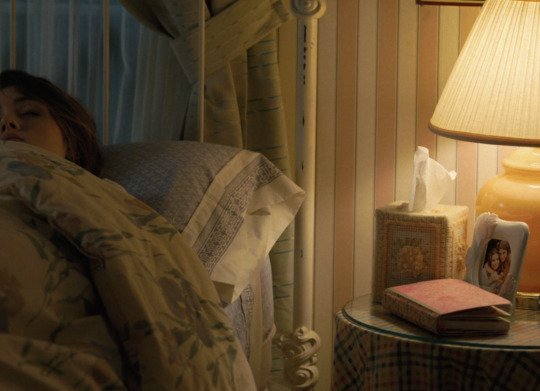
starting off strong we have the prettiest tissue box in the world. 9/10, i think if i were sick it would make me feel better to have such a nice tissue box.
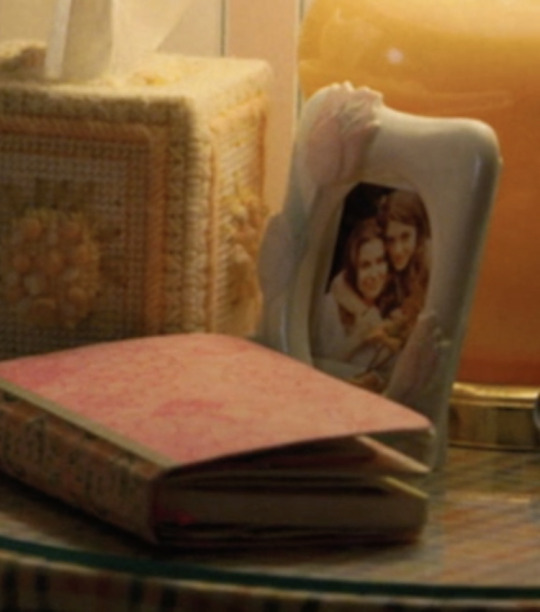
i’m fairly certain this is her diary beside it because her diary looks pink in the upside down version of her bedroom. so this is probably it? 11/10, i want to read it so bad. and very sweet pic with mom—7.5/10.
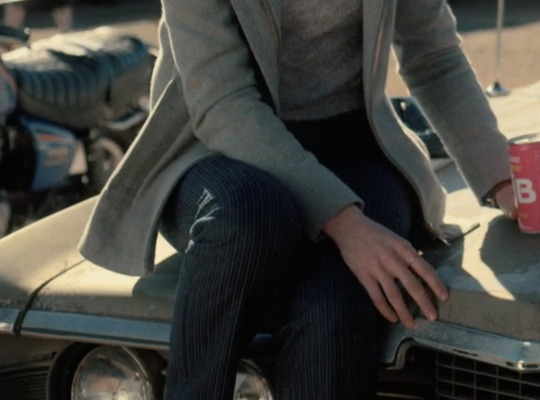
next up these pinstripe pants !! 10/10 i love them so much. oh and the index finger ring is there obviously, 8/10, such a consistent piece of her character.
a ribbon for being the bestest girl ever in the world. 10/10. also the card of cardinals: 6/10, probably just a christmas card or something rather than a symbol of her love for birds. but i still like it.
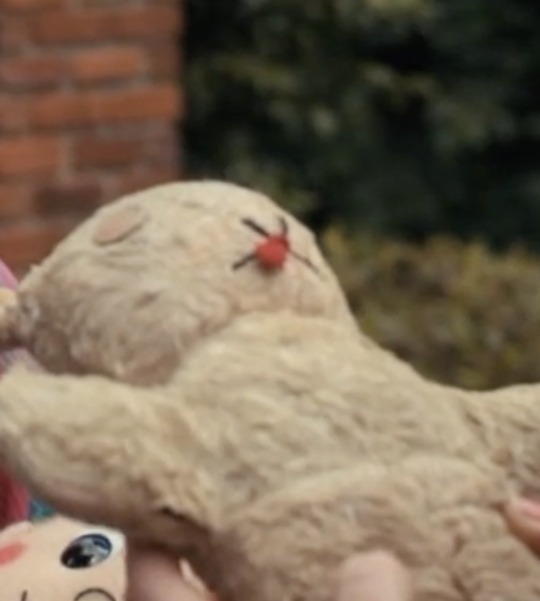
mr rabbit gets 11/10 for the name alone. and why does he look dead. i love him. he’s me.
descent from xanadu: QUITE LITERALLY 0/10. at first i was SO excited to cheer her on for reading a sex and drugs book at school but as it turns out? bizarre and gross. seems to go heavy on nonconsensual stuff. i snagged a free pdf and command f’d for whore and bitch. lots of results obviously (one use of c*ck crazy bitch…lovely). it seems men in this book say a lot of sexist stuff that the women pretend to hate but love which i can’t imagine is great for a teenage girl to consume. also just not sexy at all.
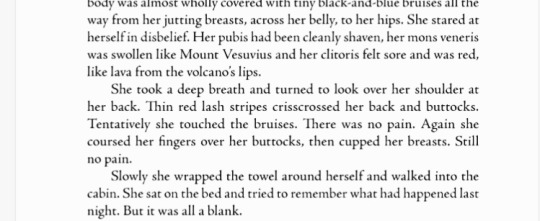
literally so bad, and this is not the worst of it.
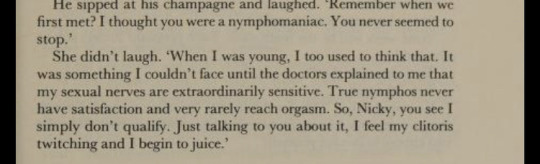
sooo bad. the author was what 70 (??) writing that his female character got clinically DIAGNOSED with being a slut for every guy she comes in contact with. i know options for sexy literature were probably limited at this time but…please go check out something else. i wanna bonk her on the head with this book (paperback) and hug her. you don’t need to read this to be cool and sexually aware. moving on.
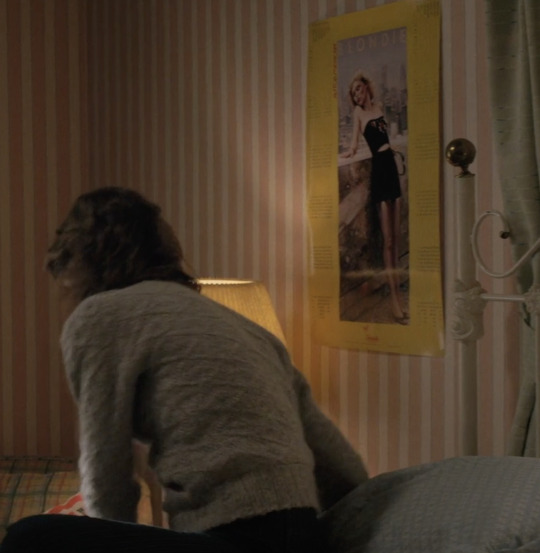
on the other side of that, the blondie calendar gives us a sense of the GOOD media she’s consuming!! a 10/10 no questions asked. we don't really get to see many of her hobbies or interests outside of investigation so this is a much appreciated detail.

of course like all good things in life the blondie calendar does get replaced. its replacement is what i will call Weird Antinaturalist Art Piece #1 seen in her room in s4. i give it a 4/10 because idk what’s going on really.
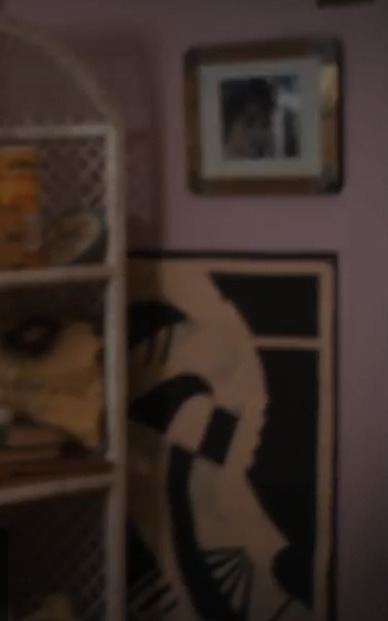
and here is a very crunchy screencap of Weird Antinaturalist Art Piece #2 from s4 which i will give a 5/10. note the boyfriend typical photography above it, for sure a 10/10.
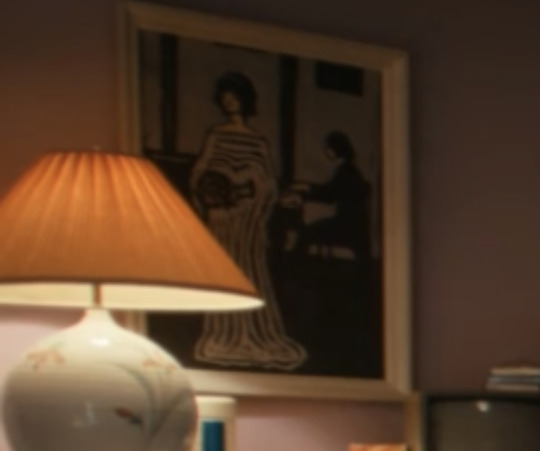
there is also Weird Antinaturalist Art Piece #3 which gets an 8/10 because i like the composition and the piano player. where did she get this and why. interior decoration is her passion.
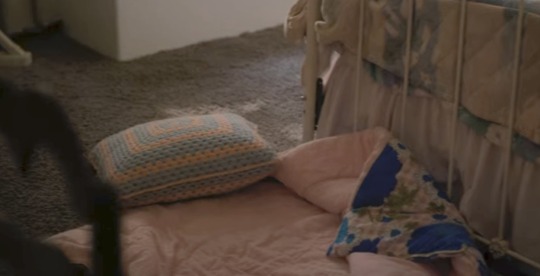
the sleeping bag and crochet pillow setup. 7/10. would take a cat nap here.

pluto!! 15/10, the best mickey mouse character i would say. i hope her cousin is taking good care of him.
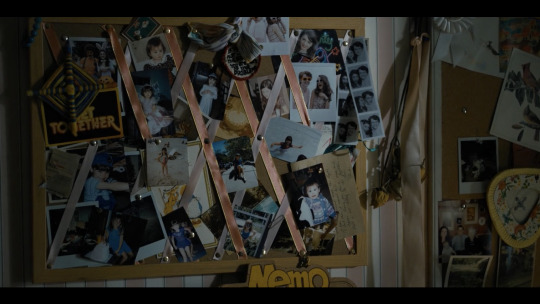
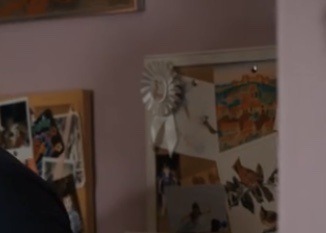
bulletin board 10/10. i love how obvious it is that she has had this up for forever. probably a nice constant in her life.
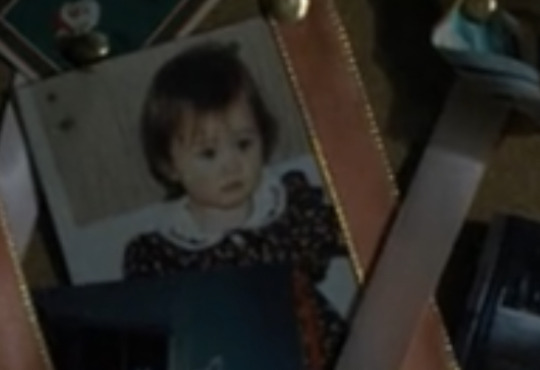
and my favorite pic up there is this precious one. look at herrr. 5000/10.
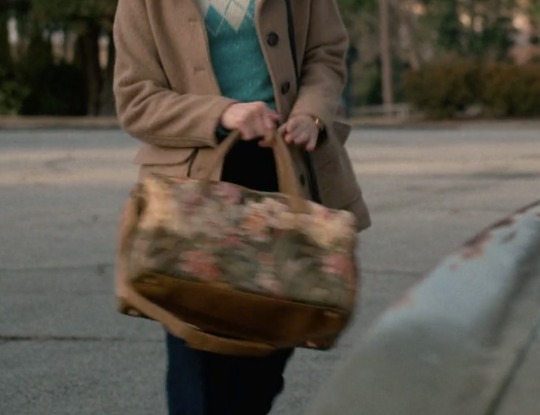
her floral weekender bag. 6/10, i like it, but not as much as i like the speedwalk and the toss into the backseat. she was SO ready for her lab takedown road trip.
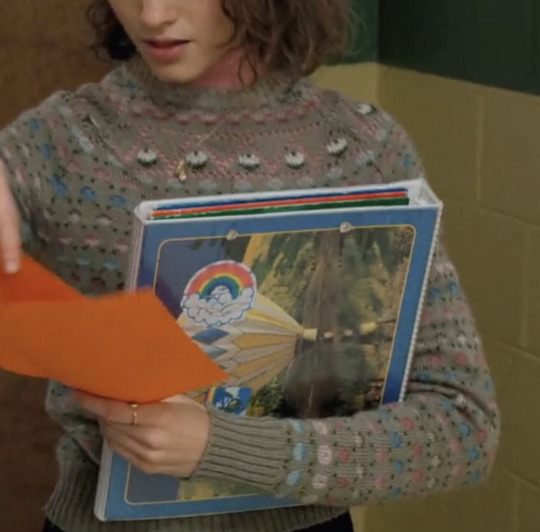
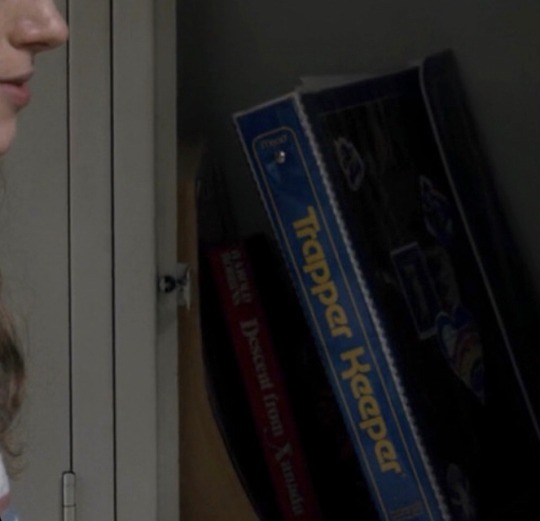
trapper keeper is a 9/10 because they probably put anything and everything on trapper keepers back in the day and yet still she chose this lovely understated hot air balloon. elegant.
tom cruise poster is 1000000/10 actually. she is so loyal to that man. actually though not a great pic of him all things considered so maybe i give it a 999999/10. (i love it so much because i know for a fact that jonathan byers works proactively to never acknowledge this poster, because he is more mature than that.) (he is not more mature than that, in fact he is a little pouty about mr cruise.)
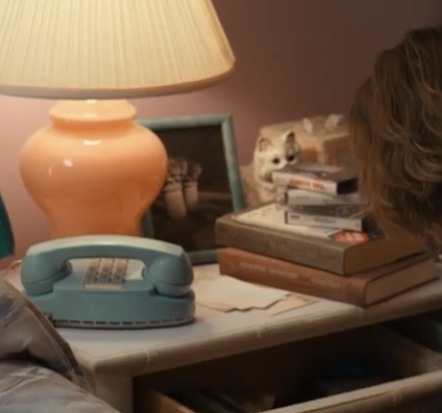

KITTY FIGURINE. 10/10. i thought it was just in s4 but i found it on her other nightstand in s1. very very adorable. i imagine it is now one of the first things she sees in the morning (well that and her blue telephone: 8/10) which is bizarre and cute. the mixtape drawer gets a 10/10 for reasons that i don’t think i need to get into.
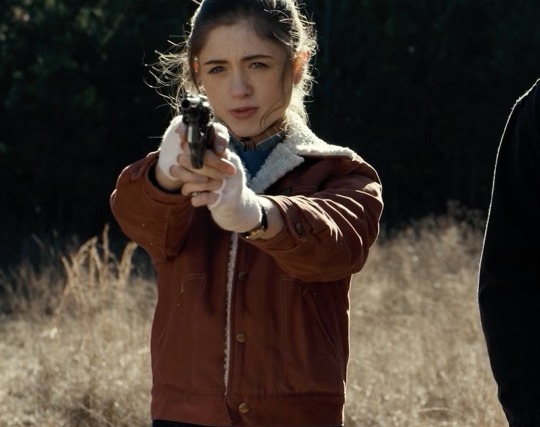
white fingerless gloves! 10/10. so chic for monster hunting.
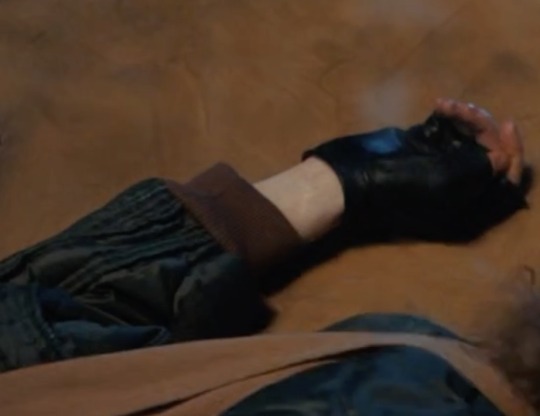
black fingerless gloves from s4. hmmm 3/10, they're cool i guess but they don’t feel very nancy and the white ones are so much better. especially because you may get the splatter effect of monster blood on them in a battle scenario, which would be badass.
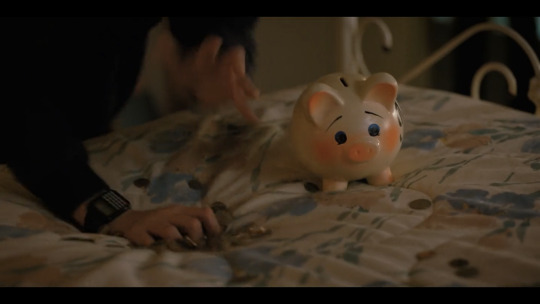
piggybank (with her name on the side). 2/10 unfortunately i don’t like him. he looks at me like i took out his whole pig village and i just need some quarters. also did she paint this herself? in that case, 3/10 for customization lol.
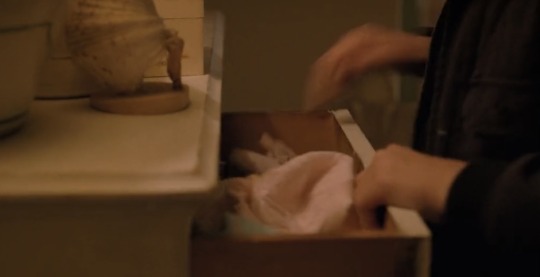
pastel underwear drawer: 10/10. her committment to the hollistic aesthetic and color palette of her room is impressive here. it was a good idea to use this drawer as a deterrence against her little brother and a money hiding place but clearly he has no manners and is a THIEF.
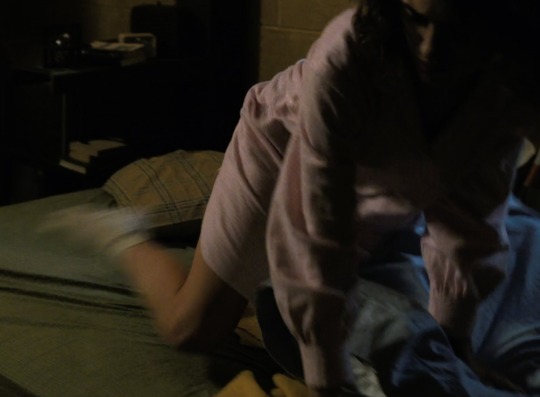
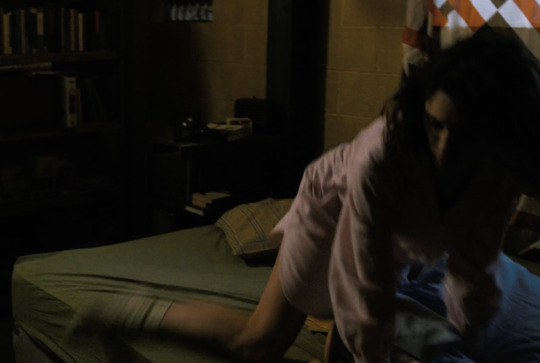
STRIPED SOCKS. 10/10. i realize it's hard to see because she's moving so fast (slow down he is not going anywhere) but they are indeed stripey even though i would have guessed solid white. and wow what good sleeping socks. stripes are just cozier. hope she got lots of sleep in those.
#long post#bedroom analysis#stranger things#nancywheeleredit#character analysis#nancy wheeler#karen wheeler#mike wheeler#stranger things details#jancy#< target audience#jonathan byers#jonathan x nancy#screencaps#ballet slippers necklace coming in part 2
125 notes
·
View notes
Text
Fun facts about my TWST prefect, Rosalie
No real story here. I just wanted to share some facts about the girl you'll see in some stories I write. Also, I am a HUGE OC yapper so if you're ever curious, feel free to ask in the ask box! :D

1.) She's had her pink hair since she was 15 but she often used box dye much to Vil's horror. She also cuts her pixie cut herself too but originally (and much to Vil and Crewel's horror) she used kitchen scissors to get it and later school scissors. Thankfully Vil and Crewel HEAVILY drilled in the importance of proper hair care and they gave her a razor and barber sheers.
2.) Her original design looked a lot different and she was originally supposed to have more of a timid personality. I ended up going with a more boyish design so she wouldn't get detected considering that NRC is an all-boys school (No shame to anyone who has a more girly design for their OCs or Prefects. It's just a personal preference of mine and I just get super stubborn about canon details and what would work for her)
This was her prototype design (Like a lot of characters, I used a Picrew for the design). Some things remained the same like her pink hair, olive eyes, her round glasses, and her beauty mark near the corner of her eye but she is definitely a far cry from her original design. No lie, she looked really cute with it but she's definitely the OC that went through A LOT of changes both in looks and in personality. I do think Canon!Ro would definitely want to befriend her but Proto!Ro would be terrified of her.

3.) Both in English and in Japanese, her voice HC has always been Doll from Black Butler. Matter of fact, I always imagined Rosalie with a very heavy Cockney accent that would slip out whenever she would get angry, or whenever she's around her brothers, sister, or her old caretaker. Whenever she's talking with friends or speaking a little quicker than normal, you can hear her drop her common RP accent she had to learn and you can hear the little traces of her actual accent slip through.
4.) She's a composite character so there isn't really a certain Disney character that she was based on. I will say though, Haruhi Fujioka, OG Mickey Mouse (the shorts where he's a chaos gremlin), Mary Poppins, and Thomas O'Malley were big inspirations for her personality.
5.) Minus Grim, Ace was actually the first person to figure out her gender followed by Deuce and Malleus. Ace and Deuce were completely by accident (during the Heartslabyul sleepover in book 1, Ace walked in on her changing and Deuce followed suit after hearing them screaming) while with Malleus, she was the one who slipped out her real voice and he heard her in Ramshackle's garden in Book 2 (curse the fact that fae have better hearing!).
6). Rosalie has been dancing ballet since she was a little kid but quit taking classes when she was 15 do to schooling reasons. The style she does is a bit more on par with Russian style due to her teacher being from there. She still has a bunch of spare pairs of pointe shoes and she always makes sure to practice as well as do her stretches to keep her body well-conditioned.
7.) Originally, Rosalie never had much of an interest in photography but playing around with the ghost camera fueled her interest in it. Of course, Rook was always happy to give her tips to help with getting the right angle and waiting for the proper moment. Now she acts as the school newspaper's photographer. Her favorite subjects to photograph are her dorm, abandoned ruins whenever Malleus takes her on night walks, and Grim when he's in a food coma.
8.) Her brothers are based off of Scat Cat and his band from The Aristocats. The five of them are also in a jazz band as well and Ro herself learned to play the trumpet from the ringleader of the gang, Sergei (unfortunately, I don't have artwork of any of them! 😭). Their names are as follows, Sergei, Jamie, Alfie, Jialun, and Misha.
9.) Aside from the first years and Diasomnia, Rosalie also has a pretty strong bond with Vil, Rook, and Azul. Vil often gave her tips to care for her hair, skin, and health especially since he found out that she's a ballet dancer. Rook bonded with her through trying to hone her skills in photography. As for Azul (despite the very odd friendship they have and the fact that he repoed her dorm in book 3) he would sometimes see Rosalie studying in the lounge while she's having tea but due to merfolk's love of music, they would recommend each other music since they're both fans of jazz and they both listen to a wide variety of music.
10.) Some of Rosalie's favorite dishes (especially her favorite, bulalo) are from The Philippines. While she herself isn't Filipino, the woman who looked after her since she was a child is half-Filipino and before the O'Malleys adopted her, she gave her a notebook containing all of her recipes so she could make them herself.
11.) Her original surname before being adopted by her first family was "Bess" (her bio mother's surname). She unfortunately went through five more last names before the O'Malleys became her forever home.
12.) Speaking of her mother, her bio mother was twisted from Edgar Balthazar. Only, thing is that I did make her a lot more arrogant and greedy compared to him especially when her ex-boyfriend (twisted from Madame Adelaide) gave his daughter all of his inheritance when it comes time for him to pass away.
13.) I actually NEVER intended for her and Malleus to be a couple and I originally just had them be close friends. Still, whether it was through events or the canon story, I really loved the dynamic Malleus and the MC had. What's also funny is that her sister met the same fate when I began shipping her with a certain con-man fox. Although alternate partners I thought of for Ro were Sebek and Ace.
14.) If you were to ask her about her gender identity, she has a very "eh" opinion of gender as a whole and feels like anyone should present themselves in a way that feels comfortable, but she's always viewed herself as a cisgender girl. Although, due to her rather boyish looks, she does sometimes get mistaken for a guy but she just shrugs it off.
15.) As for her attraction, she's on the AroAce spectrum. More on the grey sides for both but unsure of the proper microlabel. Malleus was the first (and in the future only) person she's ever felt any romantic affection towards.
16.) Out of all of the teachers, she trusts Professor Trein the most while Crowley, the least (especially after the events of Book 4 and all the times he made her do his dirty work while trying to survive in the musty, dusty, dilapidated dorm that HE placed her in!)
17. Although if there is one thing she's glad the headmage did for her even if it was to save his ass from a scandal of accidentally summoning a girl into an all-boys school, it was to prepare ALL the stops so make sure she's never found out by the entire school as well as give her special "care packages" every month. Thank goodness Trein's a single father and knows about what it's like dealing with teenage girls...
18. Rosalie is a MASSIVE fan of thrifting and antiquing. Back when she was still in Second Star (the first foster home she stayed in), clothes from charity shops were all that she could afford but she likes mixing and matching different styles and patterns to make something her own. I would say the decades she dresses the most often are the 60s (mostly taking a bit of inspiration from the Teddy Boy subculture), 70s, 80s, and early to mid 90s as well as copying some of the makeup styles from those eras. Matter of fact, one the thing she wants to do with Vil is take him thrift shopping in the rich neighborhoods since you can get some amazing authentic pieces there.
19. Ro can actually see somewhat okay without her glasses but it's not as good compared to when she has them on. I'd say her vision is around 20/40
20. Grim is definitely the person she cares about the most (as much as she lovingly refers to him as a stinky cat and playfully pokes fun at him) but as much as Grim often gets her into trouble, she really developed a huge soft spot for him and same could be said with him. It was to the point where even the thought of being without him or him being taken away again is enough to keep her awake at night.
#twisted wonderland#disney twisted wonderland#disney twst#twst#meet my mc#meet my ocs#twst oc#twst yuusona#rosalie o'malley#oc: rosalie#20 facts about my ocs#oc lore#twisted wonderland oc#disney twst oc#twst prefect#disney twst prefect#ramshackle prefect#prefect ro#rosalie the alley cat
26 notes
·
View notes
Text
INTERVIEW / ARTICLE
‘I’m from Glasgow – the swearing came naturally!’ The full uncensored history of The Thick of It
Sun 18 May, 2025
By Tim Jonze
It was the political satire that gave us omnishambles, pet asbos and the terrifying Malcolm Tucker. Two decades on, creator Armando Iannucci and stars including Peter Capaldi and Rebecca Front lift the lid on its chaotic creation

Peter Capaldi as Malcolm Tucker from The Thick of It. Composite: BBC/Mike Hogan
Twenty years ago this month we were plunged straight into the middle of an omnishambles. It was a moment in time when petrified politicians lurched from crisis to crisis, scrambling desperately to control the narrative as their endless gaffes derailed even the vaguest attempts to change this country for the better. But am I talking about the tail-end of the Blair years or the televisual tour-de-force that was Armando Iannucci’s The Thick of It?
It could be either. It could even be right now – such was the show’s prescient genius. This was a satire that didn’t just mimic the government’s calamities but seemed somehow to foresee them. Over its seven-year run, The Thick of It came up with farcical policies that the government went on to adopt (pet asbos, anyone?), coined new words in the dictionary (the aforementioned omnishambles) and, in Malcolm Tucker, created one of the great malevolent forces of British comedy. Here’s how they did it …
Armando Iannucci, creator The idea for The Thick of It came after I’d done a 2004 documentary about Yes Minister for the BBC. I rewatched every episode and realised that all the topics it covered were still relevant: Europe, the threat of terrorism, austerity … everything! But I also noticed that the power dynamics had shifted. In the mid-Blair years it felt like it was less about the minister being thwarted by their senior civil servant and more about the ministers coming under constant pressure from No 10 and its enforcers to stick to the agenda.
Adam Tandy, producer For a while it was just called “Westminster-based Comedy”.
Iannucci I got in touch with politicos, ex-ministers, former civil servants, political journalists, insiders, outsiders. I said: “I’m not here for scandal, I want the boring stuff!” I wanted to know who gets in first, who’s last to leave, what is the relationship with civil servants, who would take a call from the Daily Mail? And the big revelation for me was how much the country was being run by 22-year-olds. Cabinet ministers were bringing in these junior spads because they thought they were so clever and bright but actually they were just confident. They’d never fixed a car or bought a house or really done anything complicated. Which is why you’d get a lot of these ideas that only sounded good on paper like “beacons of excellence” and “hospital clusters”.

Office politics … (from left) James Smith, Chris Addison, Rebecca Front, Peter Capaldi and Joanna Scanlan in The Thick of It. Photograph: BBC
Jamie Cairney, director of photography Armando’s opening gambit was: this cannot be like a traditional BBC comedy. He wanted to forget all of the Hollywood drama conventions. One of his reference points was The News from Number 10, a documentary about Alastair Campbell which was really messy because everything’s running at a million miles an hour. And another reference point was [Danish drama] Festen, the first Dogme 95 film. He even said: “I want you to try and adhere to the Dogme 95 vows of chastity” – things like “cameras must be handheld” and “you can only use natural light”. Very anti-establishment stuff!
Iannucci BBC Four had a small budget, I think less than £100k. They said: what can you do with it? The constraints of the budget actually helped. It forced me to be quite experimental.
Ian Martin, swearing consultant I was doing a satirical website with my brother Paul called martian.fm, and one of the things I wrote every week was this thing called Hansard Late. It was written in the style of the proceedings of the House of Commons, but it was also very sweary, like “I would respectfully ask the Honourable Gentleman to shove it up his cock” or whatever. I got an email saying: “Hi, I’m Armando Iannucci, your stuff makes me laugh, want to do some stuff for me?”. Obviously I thought it was a spoof!
Iannucci I wanted something that felt like you were eavesdropping on something you’re not meant to see. That’s how we came up with the title: you are really in the thick of it.
Peter Capaldi, played director of communications Malcolm Tucker It was hard to get any details about it. I asked if there was a script and they said no. That doesn’t give you very much confidence, does it? What are we supposed to do if you don’t have a script? Armando said just improvise. OK, well, I hated improvising because generally improvising means that the person with the biggest ego gets the biggest part. The only reason I hung on in there was because I really liked Armando’s previous work.
Sarah Crowe, casting director I’d worked with Armando before on Partridge and so whenever I’d see people try out for other things like theatre or commercials, I’d make a little note to say “Armando would like”. The cast came from all different places: kids’ television, theatre, standup … I’d even cast Alex Macqueen, who played Julius, in an Utterly Butterly commercial! I’d seen Peter in a sitcom; it wasn’t a very good one, but I remember thinking he was quite Mandelson-esque.
Iannucci We hadn’t written Malcolm as Scottish, we’d just written someone trying to keep his aggression in and then when he’s prodded too many times it bursts out. I actually had Peter down as a very gentle kind of soul, as he is in real life. But, as he tells it, he turned up in a bad mood that day.
Capaldi I met Armando and Adam in a little studio in Soho. I was pissed off when I went in. It was not a good period for me. I’d gone to an audition at Television Centre that morning for a little part and I knew everybody in the room. I thought, why am I going on tape with all of you people that I’ve worked with before?
Tandy When Peter came in, I think he was on the verge of giving up acting. We were running slightly behind schedule and Sarah Crowe, our casting director, actually had to pop out of the casting session to try to persuade him to stay.
Sarah Crowe: Peter kept saying “I’m terrible at improvisation. I’m going to embarrass you, I’m going to embarrass myself. I had to really cajole him to come in. But he wasn’t alone in being reluctant. I remember someone actually walked out, saying “call me back in when you bother to write a script.”
Iannucci I said to Peter I will be a cabinet minister and your job is to persuade me to go … and then at some point just stop being nice. He did it and it was frightening. I thought: “There’s Malcolm Tucker”.
Capaldi I remember very clearly the moment where I “got it”. The minister said: “Well, can I come back?” and I said, “It’s not fucking Coronation Street, you can’t come back!” I thought: Oh, that’s what it is.
Iannucci Peter channelled Harvey Weinstein and lots of quite lippy LA agents. It wasn’t meant to be Alastair Campbell. It was more about this group I’d heard about called “the enforcers”. They would fan out from No 10 and go around the ministers saying: “This is the line, this is what you can say, this is not what you can’t say.”
Joanna Scanlan, played director of communications Terri CoverleyAs I understand it, Armando invented the character of Terri after our audition. He hadn’t thought of her before so I must have talked myself into an entirely new character. Most of what I created as Terri was from when I worked at the Arts Council England. There were people there who’d move from job to job within the arts without ever understanding what it was they were trying to create.
Iannucci I saw Chris Langham do a docudrama about George Orwell and it was such a nuanced, humane, believable performance – but with this slightly hangdog feel to it. I thought he would be perfect to play the minister [Hugh Abbot].
Martin Armando sent me the first three scripts for The Thick of It and said: “Look, just sprinkle your shit everywhere.” I didn’t know what to do. The writers were Jesse Armstrong, Simon Blackwell and Tony Roche – massive, massive figures in the world of comedy. I just stared at the script for about half an hour thinking: “You can’t improve [Peep Show and future Succession creator] Jesse Armstrong!” Especially not if you’re some flailing wanker. The breakthrough was when I changed a line of Malcolm’s from “Don’t bother he’s fucking useless” to “He’s about as much use as a marzipan dildo”. I said: “Is that the sort of thing you’re after?” And Armando said: “Yes, very much so.”

Communication breakdown … James Smith, Joanna Scanlan and Chris Addison in series two of The Thick of It. Photograph: Everett Collection/Alamy
Scanlan I always got very frustrated because Terri had to have a blow-dry in the morning. And I’d be watching all these blokes [male members of the cast] descending on Armando as soon as he walked on the floor, like petitioning for their lines or ideas to go into something. I’d want to do the same but be there thinking: “I’m stuck in this fucking chair!” I felt really irritated by that.
Cairney On the first day of filming, Armando came over and said: “Move the camera more, make it more messy.” I thought I was being messy! So some of the messiness was deliberately overdoing it. It took us a few days to get there. Ben Wheeler, a brilliant DOP who was operating the other camera, turned to me and said: “Well, we’re never going to work again after this.”
Tandy I could only afford to give three and a half days to each episode. That’s not a long time to shoot half an hour. And so everything was shot in the old Guinness factory off the A40 in west London.
Scanlan The building was derelict. There was no funding. It felt guerrilla, like Armando was trying to get away with something the BBC wouldn’t necessarily have sanctioned.
Iannucci I wanted to try to lose all those traditional grammars of filming. So it was like a news crew turning up at a cabinet meeting. They’re not going to let you film it all again – it’s up to you to find the footage.
Capaldi Filming is a very traditional process – you do a master shot and then the closeups. Armando threw all that out of the window. He said: “You come on to the set, it’s lit, you can go wherever you like, we don’t rehearse, off you go!” The cameras had to follow us. They didn’t have any preparation. They wouldn’t know where anyone was going. A scene would tend to go on for ages. When they said cut, you’d be exhausted. But it was a fabulous experience. I think all of us who worked on the show never looked back from that because that way of working was so radical.
Iannucci We filmed it on the fly: handheld cameras, radio mics, no leads attached. I said to the cast: even if you leave the room we’re still recording you, we can hear what you’re saying, so you’re never off. There was nowhere to hide.
Tandy For the first series I’d heard about a device that they’d been using in the States, this five-channel sound recording device. It meant we could mic up all of the actors and record all of the conversations happening in an office at the same time. That device was probably the thing that made The Thick of It possible.
Cairney Armando would edit the sound first – the words were the most important thing for him. Then the editors would throw some pictures in and see what stuck with the audio. If you go through the episodes with a magnifying glass there’s some extremely bad continuity there. Hair will change, coffee cups will suddenly be refilled, but Armando didn’t give a shit about any of that. And nobody noticed which proved that it didn’t actually matter!
Capaldi Armando was great at finding these moments in the character’s eyes and faces that conveyed the chaos and the stress and delight of what they were going through.
Scanlan Before getting the role I had a Saturday job at an estate agency in Dulwich. My boss there told me one day that if I wanted to earn a bit of extra cash I could join these focus groups. She said: “You’re an actress, just say you are who they’re looking for! Say you’re a married housewife with three kids at Dulwich College or something.” So I went and did it and got my 50 quid. I mentioned the focus group to Armando. He was laughing and ended up turning the story into the second episode.
Martin There was this synchronous thing going on where we would float a policy and then literally the next week one or other of the parties would announce the same thing. I think how it happened was that the spads and the writers of The Thick of It were trying to work out the exact same problem: the money’s run out so what can we say that won’t cost anything but will sound good and keep us in the headlines?
Iannucci In the first series there’s that scene in the back of a car where they’re trying to come up with policies on the way to make an announcement. We were actually in the back of the car going to the next location so I said: “Why don’t we just film you trying to come up with new policies?” Three of them which made it into the final cut actually became law within a couple of years! James Smith [who played Glenn Cullen] came up with “Why doesn’t everyone have to have a plastic bag of their own?” There was pet asbos, which I think happened quite soon after. And Chris Addison [who played Olly Reader] came up with the national spare room database, which became the bedroom tax. I remember James Purnell, who was culture secretary at the time, saying to me: “I’ve been in the back of that car”.
Tandy After the first two seasons, which were only three episodes each, Armando came to me with a plan to do an extended run. We got a commission to do 10 more episodes. And then it started to go wrong.

Going down? … Chris Addison, James Smith, Joanna Scanlan, Rebecca Front and Peter Capaldi. Photograph: Everett Collection Inc/Alamy
In November 2005, Chris Langham was arrested in connection with paying to access indecent and abusive images of children on the internet. Six months later he was charged with 15 counts of downloading indecent images of children.
Iannucci It was difficult with Chris because he was charged but there wasn’t a trial. I decided to not make a judgment until there was a judgment. I didn’t realise the trial would take over 18 months. That’s why we did two one-hour specials where Hugh was referred to but wasn’t in it. But then he was found guilty so it became very clear.
Tandy When Chris was found guilty we had to recast. That’s when Rebecca joined us.
Rebecca Front, played social affairs secretary Nicola Murray The first time I watched The Thick of It, I thought: “Blimey, this is good.” I didn’t know they were casting or even making another series. I had a conversation with Armando and he said they were going to do another and halfway through it I thought: “Hang on, is he offering me something?”
Iannucci Nicola was the thing Malcolm hated the most, which was a minister who actually believed in something. Most of that third season was her ambitions being gradually whittled away.
Front They didn’t know that much about my character at the beginning, just that they liked the idea of it being a woman and a backbencher who had been promoted beyond anyone’s expectations. And so one of the inspirations for Nicola Murray was very much me! Armando asked if I was politically minded and I told him that I had formed our sixth-form debating society. I actually did think of going into politics because I had really strong opinions about certain things like nuclear disarmament. Nicola is basically me if I’d had my life ruined by politics.
Iannucci The show is a window into bullying culture. In several episodes Malcolm explicitly states that he is a bully. He pulls people apart. You wouldn’t be allowed to operate like that today. I’m sure it’s still highly charged and people shout at each other but I don’t think that single-minded, laser-like destruction of people’s personalities would be tolerated.
Front I’d never met Peter before. I knew him mainly as Malcolm Tucker. My first impression was of this charming, gentle man. I thought: “Oh, he’s absolutely gorgeous.” And then we did a little bit of improv and he immediately turned into Malcolm. It was terrifying. A total physical change.
Capaldi Did I feel like I was scaring people? No, they all scared me! They’d all been to Oxford and had been on telly for years. I was just a guy from bands in Glasgow who ate curries and drank lager.
Front It’s weirdly easy to distance yourself from the script. You think: “They’re not saying that about me, they’re talking about Nicola.” However, I do remember improvising in a rehearsal room and Peter saying: “What are those fucking boots, you’re not a fucking cowgirl!” and me thinking, “Those are my actual boots, I only bought them last week!”
Iannucci Did we ever overstep the line? Actors came into it knowing that they were going to be in line for lots of visual takedowns. But we would check in case they thought: “No I don’t want someone saying that about me on national television.” Chris [Addison] was described as looking like a Quentin Blake cartoon … but I think he rather liked that one.
Front It was easy to act terrified and cowed but nobody wants to see a woman being terrified by a bully. So I thought let’s see what happens if I stand up to Malcolm, and I think immediately it started to be funnier because it was no longer just Peter shouting at somebody. You want at least one Tuckering per episode, but that can’t be the whole relationship. So Nicola ends up constantly doing things that she knows will piss him off.
Capaldi All Malcolm’s doing is his job, you know? The idea that he’s monstrous … he’s horrible to people, but he’s moving the government’s agenda forward.

Mad for it … Peter Capaldi and Chris Addison in series two of The Thick of It. Photograph: Everett Collection/Alamy
Front I hope people can sympathise with Nicola because she really gets trampled by it. She goes in with all guns blazing, but really by the end of her first episode she’s already been chewed up and spat out.
Iannucci A lot of junior spads see Malcolm as an ideal to aim for. But if you analyse any episode it’s always: something small happens that’s bad, then Malcolm comes in, makes it worse, and then leaves blaming everyone else. So how is he good in any way? It’s like when Dominic Cummings came in. People said he’s an amazing communicator and an amazing strategist … but the Covid crisis had no strategy and terrible communication.
Martin Some of the lines you wouldn’t do now. They’re a tiny bit misogynistic and tiny bit homophobic. I was always a bit uncomfortable with that stuff.
Iannucci It’s a stupid, macho, testosterone-fuelled environment, slightly thuggish. But it’s all verbal. These people wouldn’t last 10 seconds in an actual fight. They probably don’t even go to the gym because they haven’t got time. They just drink lots of coffee from 5am and shout … it’s a stupid and frankly inefficient way of working. And then when they all leave politics they all talk about mental health and do lots of charity work in big thick jumpers!
Scanlan At the beginning, before Rebecca came in, I was the only woman. I wouldn’t say I was frightened, but they were all a foot taller than me. I was on my own with these tall men and thinking: “How do I get heard in this world?” It did get quite aggressive and braying with that masculine energy. One day it went too far. People were throwing insults around that you just wouldn’t do in an office. Armando stopped the improvisation and said: “That’s not truthful.” He was brilliant like that.
Front One of Armando’s great gifts is that he can push things a very long way and yet stay just the right side of it. It comes, I think, from him having a very strong moral compass. The joke always comes from the right direction.
Martin I’ve always felt a bit sorry for Terri. I even remember apologising to Jo at one point. She was the butt of so many jokes. She was roundly criticised by everybody right from the very first episode until the very last one she appeared in. It was always “she’s fucking useless, I hate her” and everything. And yet she was no more incompetent than the people complaining about her.
Tandy I’d seen some Ofcom research that said that people were less bothered by swearing now than they had been. So I thought, well, it’s a digital channel, we’ll probably get away with it. We actually got very few complaints about language. So I’m glad I held my nerve.
Capaldi I think because I’m from Glasgow the swearing came very naturally. Sometimes a “fucking” in the middle of a sentence can propel it forward with a new energy. But often I would swear because I couldn’t remember my lines. It would take a fucking minute or two for me to fucking remember the line that I fucking forgot. So I would be searching desperately for the line … and then it would fucking arrive!
Martin I think the BBC quite liked the mythology of me being hired as a “swearing consultant”. The idea that they’d solemnly brought in this kind of craftsman of the swear. It did rankle with everybody else a little bit because they all did excellent swears, too.
Tandy There was one occasion where there was a particular swear that was judged to be offensive and we were asked to make an edit quite late in the day. I think it might have been the word “gash”, which was replaced with the word “cave”. That’s sort of worse, isn’t it?
Martin Great swearing is all about getting the balance right. It’s no different to writing poetry, a novel or a stupid haiku. All the lines I loved were by other people. I loved “Tinker Tailor Soldier cunt” – that was a Simon Blackwell line.
Tandy Sometimes it was awful. There was one episode where we had I think well over 100 uses of just the F word. That’s not including the other swearwords. But then they said: “Do you think you could take what you do with The Thick of It and turn it into a feature film?” We thought about it for about, I don’t know, 15 seconds. And then In the Loop came together within the next 18 months, which is very quickly for a feature film.
Iannucci In the Loop made sense because The Thick of It arose after the invasion of Iraq, where everyone across the board at the time was saying: “This will be an almighty mistake,” and yet it went ahead anyway. I was intrigued as to why it is that someone can do that and get away with it and not be stopped, even though we’re in a democracy with an opposition and a kind of shared responsibility. So what’s happened that has meant No 10 can drive through anything it wants?
Scanlan I loved our trip down to Eastbourne for the party conference in series three. That was my most enjoyable day. Which is ridiculous because I’m basically just saying I like going on holiday, which is very much what Terri would say.
Front My favourite moment? I liked it when Nicola has a breakdown during the party conference. It was fun to film, actually. We established that, like me, she is prone to panic attacks … so it felt entirely honest that she would jump up and down on the cushions like that. I thought: “I know if I do this it will make Armando laugh.”
Tandy I remember when we did the inquiry episode, Armando and I basically arranged it so that only the people on the panel had the full script. They didn’t even get to meet the cast regulars, who were appearing as witnesses, beforehand.
Capaldi I love the idea of playing husks. Malcolm loved his job, he was addicted to it. But I think when it’s all over and he’s in the back of the car after leaving the police station, he’s relieved that the shit is over. His last words to the press are “It doesn’t matter” … because it doesn’t matter! The world continues stumbling to oblivion irrespective of what he thinks.
Cairney That whole final scene was emotional to shoot. We got a closeup on Peter’s face and drove around for about 15 minutes thinking this would be an amazing shot to run really long. And in true Thick of It style, Armando cut it after about five seconds: “Malcolm Tucker’s done. Let’s move on.”

State of play … Pearce Quigley and Peter Capaldi in series three of The Thick of It. Photograph: Everett Collection/Alamy
Tandy To begin with, politicians were quite cagey about the show. Whenever you met them they would say: “Oh I don’t watch that thing,” but they absolutely did – they were able to quote you huge chunks of it!
Iannucci Ed Miliband used the word “omnishambles” and David Cameron said the opposition were like “an episode of The Thick of It”. I thought: if politicians are now embracing this then it’s time for something else to start challenging them back.
Tandy I think it did have an effect on the Westminster bubble. I don’t know if it was a very good one, though, because I think it sort of normalised slightly loutish behaviour.
Iannucci Did it change anything? I don’t know. If it awoke people into thinking: “How can we change things?” then that would be a good thing. But 20 years on, it hasn’t exactly led to a better politics, has it?
Scanlan It was the last gasp of a time when there was still some respect for politicians. Arguably The Thick of It played a role in the de-escalation of respect for politicians.
Crowe It was a defining career moment for some people and a reinvention for others.
Capaldi After The Thick of It I realised that my voice had become more sinister. It got a bit lower, a bit stranger.
Martin I’d had a miserable 90s, chugging along doing bits and bobs as a musician and journalist. The Thick of It absolutely saved me. It couldn’t work now. There’s no shame any more, is there? I mean, in the early episodes you had characters saying: “For God’s sake, please don’t tell me you’ve lied to a committee!” The idea that someone’s career could be at stake over a lie they told to parliament has no traction now. People do it all the time. Blatantly.
Iannucci Has it stood the test of time? I’ve never gone back and watched it. I’ve had people message over the years saying we should make a Brexit one or a coronavirus one … but we never did things around specific incidents. We set it in a parallel world where some of these things sort of happened but were bound up with things that were completely made up, so that it wouldn’t date.
Peter Capaldi: People often ask if Malcolm’s going to move into podcasting. It might be good for him to do a kind of country podcast, actually, where he wanders around the countryside, meeting people he can’t fucking stand, like farmers.
Scanlan It’s a show that really appeals to 15- and 16-year-olds. They’ll say: “Are you Terri from The Thick of It?” So it’s given me a strange lifeline into youth culture.
Capaldi Three people came up to me yesterday in Soho to say it was their favourite programme. I met Brian Cox [Logan Roy in Succession] the other day and he told me with great delight that people come up to him and ask him to tell them to fuck off. I didn’t like to tell him that I’ve been doing that for 20 years now.
#the guardian#2025#the thick of it#malcolm tucker#armando iannucci#rebecca front#adam tandy#ian martin#joanna scanlan#jamie cairney#interview#article#peter capaldi
16 notes
·
View notes
Note
Apologies if you've answered this before, but I was looking through your asks and couldn't find anything.
Do you have any advice on how you take such good screenshots of your game? You have such a knack for lighting, having variety of shots, and making them immersive.
This is so sweet. Thank you! 🥰
If I'm being honest, it's 90% vibes and gut feelings for me. I don’t have any formal background in filmmaking or photography, and everything I know is by sheer osmosis. There’s a lot of fancy terminology to describe why certain image compositions look better than others. I admire and respect anyone who purposefully keeps that in mind. But I am definitely not that person. I think I’ve watched enough film and TV, though, to subconsciously be doing the "right thing" - or at least what looks right to me.
That being said, I think the best way to improve is practice. If you spend enough time doing something you'll obviously get better at it, even if you don't realize it at first. So the most important thing is to give yourself the patience to grow and the freedom to experiment! At any rate, here are some things I've learned that will maybe be helpful to others.
Camera Tricks: We all know the camera in TS4 can be a little wonky at times. I use Buckley's camera mod. It hasn't been updated in eons but still works as far as I can tell. It gives you more freedom with movement, and I've found it especially helpful for getting shots that are lower to the ground.
Now that I've realized how sneakily useful first person camera can be, I also take advantage of that all the time. There's the trick of making your Sim look in a specific direction. (This works with poses and gameplay actions, by the way! For example, I used it to turn Caleb's head toward Lilith while he was trimming the bonsai tree.) There's the Dutch angle trick explained in this video. This is great for moments of disorientation and unease. I also just straight-up used first person camera to convey Helena's confusion upon waking after being turned.


Also, saved camera positions are your best friends. You can save up to five positions using CTRL+5-9. Then you just click the corresponding number to return to that position. I've used these for so many reasons. By taking two shots in the same position and Photoshopping them together, I've been able to edit Sims in (like Vlad below), fix accessory clashes (the book was in the hat category, so Lilith couldn't actually wear it at the same time as the towel on her head), and to pose Sims in open doorways (Helena had to walk through the door to open it for the Vatores, so I shot both halves separately).


Zoom: I love smashing that zoom button, whether it's zooming way in or way out. Zoomed out shots are perfect for establishing setting or as interstitial shots during a long conversation when you don't want to always focus on Sims' faces. They're also great for the draaama. Extreme close-ups are great for emphasizing emotion or a tiny but significant detail. Playing around with the extremes of zoom is one of the best ways to achieve shot variety!


Focus: I don't think Reshade is a necessity for good visual storytelling, but it does make certain things easier. I rely a lot on depth of field shaders to pull focus in shots. I like using cinematic depth of field especially in conversations to blur some characters while emphasizing others. I feel like this helps ground conversations because it reminds us there are multiple participants instead of always zeroing in on the speaker alone. Another way to play with focus is to allow the angle to mirror the emotions of the conversation. It's an older shot, but I always liked how Caleb seems to cower beneath Lilith's bat form here even though she's technically smaller. And in the recent conversation between Lilith and Helena, I kept the camera to Lilith's back to emphasize her vulnerability and discomfort and put the focus on Helena's reaction to it.

Framing/Angles: I do this by pure instinct, honestly, and have gotten better at getting it right on the first shot over time. I used to take half a dozen shots of the same pose from different angles and choose the best one. Nowadays, I'm quicker to commit and often take only one shot. I've learned that if something immediately tickles my brain, it's usually the way to go. I usually angle shots so that the characters aren't looking directly at camera, as it seems more natural that way. On the other hand, sometimes the direct to camera look can actually work in more confrontational or unsettling moments.


Environment: If I can help it, I don't do my own builds. In some ways, this is a disadvantage because I have to set up the scene within a space that wasn't specifically catered to it. On the other hand, it makes for fun little surprises, like the ability to peek in through a skylight or frame two characters within perfectly placed archways. I like using objects and structures to create interest when I can. I often don't discover things like this until I'm pulling the camera around and randomly happen upon them. I definitely recommend navigating all around to see what you've got to work with before committing to any specific angle. You might find one you didn't even think of!


Lighting: I do what I can with the game's lighting. I avoid placing ceiling lamps or at least turn the brightness down much lower, and I don't usually turn all the lights on in a room at once. I tend to change the color to one of the warmer golden hues to avoid a stark white that washes everything out. I always like when I can get some sources of light into frame because it adds a lot to the ambience. But I've also been using Relight on all of my posts lately. It's an addiction, and it truly makes all the difference. I'll use it to give light sources a stronger glow so they stand out more and also to create shadows on Sims' faces. It's also very good for flashlights and computer screen glow!


After having self-indulgently written all this, I'm not sure how much is usable advice versus rambling musings. I find it hard to give storytelling "tips" because so much of it feels innate and personal and hard to put into generalized terms. I also don't want to imply that every one of my shots is perfect or that there aren't a million other ways to go about achieving good results. But thank you to anyone who's made it this far, and I hope you found it worthwhile. 💕
34 notes
·
View notes
Note
Recently I took a panorama of the Pittsburgh skyline at night that got a positive response. That was done on the spur of the moment with an iPhone. I want to do that again and more, but this time with a dedicated camera setup. It's been years since I've had one, so I'm basically starting over again. I'm mostly interested in getting day and night cityscapes, and maybe the carryings-on at this year's Anthrocon. Would you have any particular knowledge to pass on as I set off on this journey?
Since you didn't specify a budget I'm going to assume it is in the $10K range.
And you're probably thinking I'm going to suggest a Leica. Every dentist and his brother (who is also a dentist) gets a Leica. But I just can't take a camera brand seriously when they charge you an extra $2200 for the privilege of not being able to shoot in color.


Sure, you can hit a single button in Lightroom to get B&W and save some money, but then you won't be able to brag about how limiting yourself to only shades of gray has opened up new artistic pathways in your brain while a clueless person responds in mumbles during their root canal.
What you really want for your landscapes is a Hassie.

They were the first camera on the moon! How could you *not* want a Hasselblad? That is some camera gorgeousness right there. And it's so reasonably priced*!
*compared to their previous $40,000 camera systems.
And if you are doing landscapes with the Hassie you'll need a nice wide angle lens to go with it. This one is actually quite affordable*!
*compared to their previous $8000 lenses.

Can we all agree that is a work of art? They even use their H logo as the knurling.

That is just so... extra. And I love it.
Out of the entire alphabet I've heard Hs give you the best grip.
Man, I almost wish I was a dentist just so I could buy a fancy camera.
Sorry... I was just having a little fun.
I never get to recommend the super cool expensive cameras. Because, ya know, the economy and the fact that only dentists have Hasselblad money.
You probably think I'm being silly but there actually is an entire community of dentist photographers keeping the high end camera market alive.
Okay, let's get started...
Landscape Buying Guide
Opening Thoughts
For landscapes I would highly suggest a full frame camera and a high quality wide angle lens.
Full frame has several advantages but it is not necessary. You can go with a smaller sensor like APS-C and get great images. Personally I would not go any smaller, but there have been some great landscapes taken on micro 4/3 and even smartphones. Technique, knowledge, experience, and composition will usually win the day over a camera, but having a nice camera makes things a lot easier.
At this point, with full frame options being very affordable now, the main reason to get a smaller sensor is if you want a smaller system that is easier to carry for extended periods and easier to pack when traveling. Or if you aren't sure you want to take on photography as a hobby, you can get an old APS-C DSLR for under $200 to learn with and test out.
So if you need a very cheap OR very compact system, APS-C and Micro 4/3 might be worth considering, but a bigger sensor will cause less frustration most of the time.
Froggie Note: The expensive Micro 4/3 and APS-C systems are the compact ones. The cheap systems are about as bulky as full frame.
The biggest advantages to full frame are low light shooting, lens selection, and field of view. Full frame cameras have many, many more lenses to choose from. And since the sensor is bigger, it is much easier to get a wider field of view that is often needed for landscapes. And the high ISO noise performance tends to be better on full frame.
However, you can use full frame lenses on APS-C camera bodies within the same ecosystem. They just get a little... zoomier. Roughly 1.5x zoomier. A 35mm acts like a 50mm, for example. So if you want to spend a little less now you can get an APS-C camera with a full frame lens and then upgrade to full frame later on without having to buy a new lens. Full frame lenses work on APS-C bodies but not the other way around.
Most landscapists have a really solid 16-35mm lens and that covers almost all of their needs. So I would suggest something comparable. Please don't get suckered into some crazy 18-300mm superzoom. Just get the focal range you need for the photos you want to achieve.
A purpose-built lens always outperforms one that was made to do everything.
As far as where to get used gear, I highly recommend using KEH or MPB when buying used camera bodies. They check every device and offer between 3 and 6 months warranty to make sure the device won't crap out on you. Lenses are typically a lot more robust and a safer thing to buy on eBay or Facebook Marketplace if you can find a better deal. But the security of having a warranty and a return apparatus if something goes wrong might be worth the extra price when using these two sites.
I am going to recommend Canon, Nikon, and Sony systems. I feel they have the most complete ecosystems with gear that spans all budget ranges. I'm not saying there aren't good cameras from other brands, but you have to remember every camera has an ecosystem surrounding it. There are accessories and upgrade paths and niche lenses that may not be available with other brands. I think Fuji has some tempting options and if you like the look of vintage film photography, their emulation options are quite stunning. Their cameras are also quite attractive and have very satisfying knobs. But I still can't recommend them unless you have a specific reason for wanting their gear.
Just remember that for every Canon DSLR I recommend there is a comparable Nikon option available as well. There are more lenses for a Canon full frame DSLR body than any other brand with Nikon coming in a close second.
So if you choose not to go mirrorless yet, the Canon and Nikon DSLR camera ecosystems are immense and have tons of gear and accessories available to go with them. And since used gear holds up really well, those ecosystems will survive for decades.
Should you buy a mirrorless camera or a DSLR?
Mirrorless cameras are the latest camera technology for interchangeable lens camera systems. At this point they are superior in every aspect and they continue to improve year by year. Because of that, used DSLRs have plummeted in price. This allows people greater access to a starter ILC (interchangeable lens camera) without a significant investment. You can get professional quality images on either format, but mirrorless has a shallower learning curve and much better automatic modes.
The in-body image stabilization (IBIS) stabilizes *every* lens and the eye tracking autofocus make "focus and re-compose" extinct. These are huge selling points for a lot of people. With IBIS you can take photos with up to 2-4 second shutter speeds without a tripod. And never missing focus on a human or animal or bird is pretty cool too.
DSLR camera bodies are no longer being designed by most of the major manufacturers. Thankfully Canon and Nikon developed plenty of bodies and lenses, so you will always have options and upgrade paths. But you will not be able to upgrade to systems with the latest advanced features.
The best DSLRs available are probably the Nikon D850 and the Canon 5D Mark IV. That is as good as it will ever get. The technology ends there. So if you want to enter an active camera ecosystem then you will have to get a mirrorless camera.
DSLR Camera Systems
Full Frame DSLR Camera Bodies
Canon
If you buy a used DSLR, there are some very affordable full frame options. In fact, the classic much-praised budget full frame Canon 6D can be had for under $300 right now.

This is an old camera. It has no fancy features. It only has 20 megapixels. It just does what it says on the tin. But it has a big sensor and a *ton* of really cool lenses available for it.
If you are specifically looking to create really high resolution panos, you could also look at the 50 megapixel 5DS R for around $1000.

There is a community of landscape pano-maniacs that love to create "gigapans" that have endless amounts of detail where you can zoom in and find new details in every photo. I was only able to create a 120 megapixel photo, but you can still find things like people starting a campfire and a dude fishing and a truck on a far off bridge. So even though this seems expensive for a DSLR, you are looking at another thousand bucks to find anything with more megapixels than this bad boy, so it is quite a good deal relatively speaking.
Nikon
Probably the best DSLRs ever made were the Nikon D800 series and you can get the Nikon D800 for $464.

This is a newer camera than the 6D with more megapixels (36) and a better sensor. It also has a more modern autofocus system and about 3 more stops of dynamic range which can come in handy for landscapes. This is an incredible camera for this price.
APS-C DSLR Camera Bodies
If you aren't sure you want to commit to this hobby, you can look into a Canon APS-C sensor body like the Canon Rebels and Canon 60D through 90D models and get good results.
And there are many Nikon DX APS-C bodies that would be great starter cameras as well. If you get a Nikon, you'd have an upgrade path to the D800 if you get hooked by the photography bug. I would miss a few very special Canon lenses like the 100mm f/2.8L macro and the 400mm f/5.6 telephoto but I'm sure I could figure out some reasonable Nikon alternatives that would do roughly the same thing.
Canon APS-C
There is a Canon 60D for $139 right now that would be perfectly adequate for landscape work on a tripod.

That was my first camera and I took some very nice photos with it. Only 18 megapixels but it has a very convenient flippy screen which was really helpful for a disabled photographer trying to get low angles.
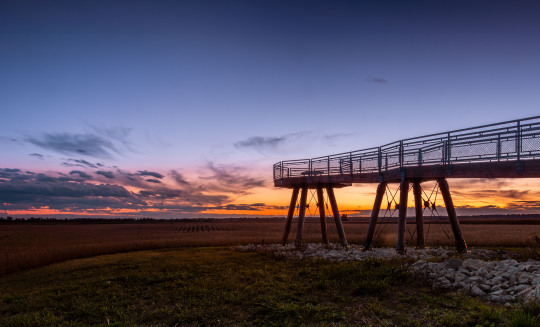
This was in 2014 and I didn't know what I was doing but that is a pretty stellar-looking sunset for a (now) $140 camera.
Nikon APS-C
And the Nikon D3400 would be a great option as well at around $184.

You get some extra megapixels (24) and it is a bit newer than the Canon. I get the sense that used Nikon DSLRs give you more value for your money right now but I don't have a large enough sample size to confirm that.
Full Frame DSLR Lenses
Froggie Note: I am recommending full frame lenses even if you choose an APS-C DSLR body so you have an upgrade path. But also very few purpose-built APS-C lenses had superior glass. Just remember, crop sensor APS-C cameras add ~1.5x to your focal length. So a 16-35mm will have the equivalent field of view of a 24-50mm lens. Still quite acceptable for landscapes, but you may benefit from doing panoramas more often. And if you upgrade to full frame down the road, you'll already have the ideal lens.
Canon DSLR Lenses
If you get the 6D or another Canon you could pair it with the beloved-by-landscapists Canon 16-35mm f/4L.

Honestly, it is blowing my mind you can get that combo for under $600. Me from 12 years ago is super jealous right now.
If you are worried you might need something to work in lower light and still want a zoom, the f/2.8L starts at around $434.

This might be the most famous landscape lens of all time. Kinda boggles the mind how many gorgeous vistas this thing has captured the light of.
If you can live without the zoom, you could get a much sharper prime lens that can also be used in even lower light. A used Sigma 24mm f/1.4 Art lens is $439 would be a fantastic option.

24mm is still a very good focal length for landscapes and the sharpness of this lens lends well to panoramic stitches. Seriously, these art lens are so freaking sharp. Although 35mm is typically preferred for most street photography, I think this would do great for that purpose as well. It couldn't do close up portraits, but 3/4 and full body portraits would look great. I also love this focal length for doggos. It enlarges their heads a bit which enhances adorable-ness.
Though I probably wouldn't recommend the 24mm on APS-C for landscapes as it would put you near a 40mm full frame equivalent field of view.
Nikon DSLR Lenses
And on the Nikon side of things you could get the Nikkor 16-35mm f/4 for $399.

This is a great lens too. Very comparable to the Canon L glass. And paired with that D800 you would have a better shooting experience than with the 6D if it fits within your budget.
It's a little harder to find, but you can also get that same Sigma 24mm f/1.4 Art lens for Nikon at around $528 used on Amazon and in the $400 range on KEH and MPB when it is available.
The older and softer Nikkor 28mm f/1.8 is a little more affordable and easier to find.

What if you are not a dentist but are willing to save up for something a little nicer?
Enter the world of...
Mirrorless Camera Systems
Sony currently has my favorite ecosystem of mirrorless cameras and lenses and they are consistently ahead of the other brands as far as technology and features. In fact, many other manufacturers use Sony sensors. They literally supply their competition with their own tech. They are also pretty good about updating firmware—even with older models. So I feel like Sony has a lot of future-proofing advantages over other brands. Sony has a great selection of 3rd party lenses like Sigma, Tamron, Viltrox, Laowa, Samyang, etc. These lenses often have nearly the same optical quality as Sony's G Master lenses at a fraction of the price.
Full Frame Mirrorless
Currently, I think the best value full frame mirrorless camera for landscapes would be the Sony a7R III.

This is very nearly a top-of-the-line landscape camera for a little over $1200.
That might sound like a lot, but I want to be clear...
This isn't just decent. This isn't "good enough." This is a spectacular professional grade full frame camera.
10 years ago you could spend $6500 for a *worse* camera. 5 years ago you could spend $3000 for a *worse* camera.
It can do every genre of photography except for maybe fast paced sports/action. It has an amazing 42 megapixels—which are not necessary but they do make editing and printing a lot less of a headache. The file sizes can get a little big, but storage is a lot cheaper than it used to be.
Oh, and it can be used for professional quality 4K video work too.
The a7R III comes with all of the modern bells and whistles including in-body stabilization (IBIS) so you can handhold at very slow shutter speeds. It has one of the best autofocus systems—complete with eye tracking. But not just human eyes! Dog eyes. Cat eyes. Bird eyes. If it has an eye, the Sony can probably lock focus on it. And it has an admirable 10 fps burst shooting mode.
APS-C Mirrorless
If you want to enter the Sony ecosystem but can't afford full frame quite yet, you could do the a6400 for about $600.

You still get the eye-tracking and the in-body stabilization, but you will lose some image quality at higher ISOs due to the smaller sensor size. However, you can get the same full frame E-mount lenses for it and upgrade to a bigger sensor later on and not have to buy new lenses.
Mirrorless Landscape Lenses
I think a good value landscape lens would be the very impressive Tamron 20-40mm f/2.8.

This is a newer lens so there aren't many deals on used options yet. But this is still a great price for the quality and versatility you get. You will never regret spending a little more on glass.
The 20mm range can fit an entire cityscape in the frame without needing to do a panorama. But if you zoom to 40mm and mount the camera vertically, you could stitch together several photos to get well over the 100 megapixel range.
Also, the 40mm focal range is long enough to do street photography and even head & shoulder portraits. The wide f/2.8 aperture combined with the high-ISO friendly full frame sensor and in-body stabilization means you can shoot in very low light without a tripod. You can also get some great pictures of stars if you travel to someplace with minimal light pollution.
The cheapest landscape zoom lens I could find was the Sony 16-35mm f/4 at $384.

It's one of Sony's older lenses and may not take advantage of all of the a7R III's pixels, but it would be a good option to get you started in this system and upgrade the lens later on.
Mirrorless Prime Lenses
Zoom lenses are great but you have to spend more to get tolerable quality. Kit zooms can be softer than even the tiny plastic lenses on your phone. So a great way to stretch your budget is to get multiple fixed focal length "prime" lenses. Primes can be built inexpensively while still having good low light performance and decent sharpness.
For instance, you could start with something like the Tamron 20mm f/2.8 for $175. And if you want to do more than landscapes you could add the Sony 50mm f/1.8 for $170 later on. Cheap primes will outperform any of those mediocre kit zoom lenses in that same price range. You lose some versatility and have to deal with the pain of changing lenses or zooming with your feet, but sometimes a tight budget demands a little pain.
There is also a higher quality 3rd party wide angle prime lens that is very popular right now. The Viltrox 16mm f/1.8 is only $549 and the reviews say it has similar quality to lenses 3 times its price.
If you have to choose between a better camera body or a better lens, a good lens will help your photos more than a fancy camera body.
Froggie Note: These are examples. You should always do your own research before making a major technological purchase. This post could be a year old by the time you see it and there could be new stuff that is better. But all of the principles I tried to convey should hopefully guide you to a good decision. Also, feel free to message me if you want to ask about specific gear you are considering purchasing.
More Resources
This is my Encyclopedia of Lens Terms which is a helpful primer in understanding all of the wonderful and different lens options available on ILCs.
This is my buying guide for low budget used DSLRs. Similar to this post but less geared toward landscapes.
And this guide for getting decent landscape photos with any camera.
This is a free tutorial that teaches you everything you need to get started with an ILC system.
youtube
And this free tutorial by Karl Taylor is quite good as well.
70 notes
·
View notes
Text
🤩 ARTIST SPOTLIGHT: SKABRAM.builds Hello everyone! It's time to direct the spotlight toward our community members, and today we will get to know better SKABRAM.builds!
"Hi everyone, I’m Bram and I live in the Netherlands.
I rediscovered LEGO when my oldest son got his first set about 2,5 years ago. Soon I found out about digital building LEGO and got hooked building MOC’s of one of my favorite things: birds. I created some of my favorite birds to display in our house and published the building instructions for others to build. That was all I did until LEGO announced the Icons Kingfisher set. It got me thinking about sharing my own bird builds too.
This idea got kickstarted when I got tagged in a photo where someone used my instructions for a bird build. Apparently there was a little search for brick built birds in nature photos. I got in touch and was encouraged to participate. Since I already have some years experience with wildlife photography this seemed fun. I emptied my camera bag, filled it with my bird models and went to a local park. And here we are…
I see my photography as the final touch of my MOC. I spend a good amount of time designing and building the model, getting it out in it’s natural habitat feels like a logic last step. I try to get as close to the real bird and it’s environment as possible and aim to create realistic photos. My approach is the same as in my wildlife photography: I want to show the bird and some of its surroundings. These surroundings are important since they tell a lot about a bird and it’s behavior and habitat. Since I’m shooting a LEGO model this is a lot easier than with real birds, so I got plenty of time to focus on composition. I often try to get on eye level with my subject and to find interesting colors or lines that complement the composition. Most of my images are composed using the rule of thirds.
I prepare my photos not extensively. I think about the posing and what I might need for it (string, stand or extra LEGO parts) and throw everything in my bag when I go outside.
I don’t take a model of a coastal bird to the forest, but besides that it’s just looking for the right opportunity. Working with natural light and shooting without a tripod makes everything very flexible.
My 50-400mm lens is very versatile, so I can shoot real birds and LEGO ones during the same walk. The higher aperture (4.5-6.3) of this lens is no deal breaker since I often shoot with higher aperture to include more of the surroundings.
The hardest part might be getting the model posed right. It’s not always easy to find the right branch to clip the feet on (not all branches are in system…) and wind should not be underestimated when shooting around water (yes, I had to fish). Sometimes someone is holding a loose branch with a bird model up so I can get the right image. To compensate for the inevitable movement here I increase my shutter speed (which is already high because I shoot handheld).
Combining my love for wildlife photography and LEGO has been a bliss thus far. Working with static models and a lighter lens has it’s advantages! The gear i use is a Sony A6700 Tamron 28-75mm 2.8 Tamron 50-400mm 4.5-6.3 Tamron 150-500mm 5.0-6.7 (used for wildlife only) I do have a simple Rollei tripod, but only use it inside."
Thank you for accepting our invitation and let the community knows you better!
If you want some insights on the exclusive picture and for a better view of the others, head to our blog at https://brickentral.net/.
- @theaphol, Community Outreach Manager
#lego#lego photography#brickcentral#toy photography#afol#legophotography#toyphotography#photography tips#brickcentral member#lego birds#moc
41 notes
·
View notes
Note
I wish you didn't feel like shit, I hope it gets better soon.
I'm so excited to be watching your solar photography project. I have a twelve year old DSLR and a cardboard solar shield I bought for the 2017 eclipse and used again in the 2024 eclipse and have always meant to get out and use between celestial events because there's something absurd and wonderful about staring into the sun and seeing its face; it's this blinding disk, a glowing dime behind the clouds that leaves blue-white electric spots on the insides of my eyelids, too overwhelming and big and bright to look at, but with a little sheet of film and some cardboard and foam cutouts and an ebay camera, I can see it. I can look upon the face of god and see scars.
I'm an atheist, and I don't much understand religion, but sun worship makes sense even without mythology - it's an unimaginably big ongoing explosion that's the only reason any of us are here, of course that would knock someone to their knees and make them crane their head back in wonder.
I love seeing the way that you've captured it, that it fascinates you, that you share it with us.
I keep thinking of the pink backdrops of your composites and smiling; why have I only ever used black? There are whole rainbow of colors out there, colors I only have because of the sun, why use the one that makes it look more stately and distant, the default, the one that mimics space - the pink doesn't try to hide your hand in compositing, it shows that you put these images here, together, that you saw the sun and framed it softly.
I'm sorry you feel like shit.
You make my life better just by existing as a stranger on the screen, as someone putting together pretty pictures of the vast familiar strangeness of our solar system. I put my batteries on the charger and pulled my tripod out of the closet today because the art that you are making made me want to make art too.
Thank you for reminding me to fall to my knees, crane my head back, and wallow in wonder.
Okay I feel like you really get it haha
My wife can vouch for this, when I'm taking pictures of the sun every day I talk to her like somewhere between a cat I'm trying to befriend and a woman I want to treat me in disgusting ways. The sun is so breathtakingly beautiful, and it's quite funny how people seem to not think of the star we see literally every day. I told my therapist I was annoyed it was cloudy because I couldn't use my telescope and she laughed and said it's daytime though and I was like um!!!!!
There was a tumblr poll a bit ago where they asked if the sun loves us or hates us or has no feelings and then the same question about the moon, and obviously the majority voted that the moon loves us and the sun has no feelings, and it drove me completely insane because obviously the sun loves us. the sun loves us limerently, obsessively, in a way that demands not just attention but devotion, worship, breathless ceaseless restless desire
I hope you get out to take some solar pics soon :)
and yes I love using pink backgrounds for all my astrophotography stuff. It's a nice fairly neutral high contrast colour against most kinds of pictures I'll be taking of objects in the sky. Pink is also my favourite colour in case everyone who has ever seen me couldn't tell, but I think a fair few faint pastels would work as really nice contrast backgrounds for astrophotography - mint green, ice blue, lemon yellow
9 notes
·
View notes
Text
Tips for making good doll/toy photos with minimal budget- A huge post
When I started my outside blog Teatime Tangents and Toys (dot blogspot dot com), I was kind of just there as a reviewer, but I have always been a creative deeply invested in visual media so the eventual demand came to make pretty photos of my dolls and other toy subjects, for to explore their aesthetics and stories and give my blog some attractive pictures to highlight posts with and make you wanna read 'em. It's become the primary focus of my blog passion now, with photo ideas being a huge driver toward what I want to discuss. As such, I've spent a lot of time developing my skill in photographing and designing images of dolls from a home setup without a spacious studio or the budget or talent for stop-motion quality sets. I thought I'd discuss what I've gotten from this experience. My body-model custom Maudie (say hi on her post; she's kind of a staple) will demonstrate for a few photos.
All of this and most of my blog (save for edited digital compositions) is done on my Samsung phone camera. I do not have Photoshop. I'm not covering digital art stuff I've done in this post, but the program that's carried me this far, even when I really ought to have been doing things another more sensible way, is the free software Inkscape.
Level 1: Basic presentation; no staging.
If you purely want to show off a subject as a standalone piece to say it's cool and you like it, then it's entirely about focus and lighting. You want your subject to be legible and represent a true-to-life appearance so your audience sees what you see.
This is not your goal if you want to show off your subject.

This photo is taken in low light with deliberately low focus. If I tried to post this on Instagram saying "look at my doll she's so cute", she'd absolutely flop and would not do numbers. (Then again, I feel like I've been more widely validated on Tumblr in a week than I have on Insta in three years. My thanks to the lovely gremlins here.)
You can get surprisingly far with the phone camera even in suboptimal shooting conditions, however. Say a criminal was sitting by the lamp's light switch and was gonna throw me out the window if I didn't shoot with this exact setup...I could still get a better picture by making sure the focus was right and then tweaking the color temperature and brightness in the photo editor.

Still not perfect, of course. I could have tried even more for focus, and you can still tell this is a low-light photo.
Don't listen to the impulse to just use the flash for everything. That is Satan whispering in your ear.

Yes, it's bright and clear, but there's something uncanny, just a little, in my eye. The super stark shadow thrown behind Maudie makes the lighting feel as artificial as it is, and the flash doesn't actually brighten the scenery that much. Flash should be used for effect, not for neutral presentation.
Generally, the frustrating truth is that natural daylight really is ideal illumination for photography, but you can't tell it to stay around or reschedule it, so you have to be mindful of the seasons and light timing of your area, as well as extenuating weather that messes it up. Getting a good neutral full-room light should be sufficient for cases where natural daylight isn't available.
I get by with this artificial room-light setup pretty often, and it can be edited fairly well to match daytime photos if I want.


Sometimes I forget to turn off the warm bedside lamp, though, which subtly and disagreeably messes with the shadows and tint a bit.

My desk is neutral enough to serve as a non-distracting background. If you're on the next level of neutral display, you may have a sheet of paper unrolled from wall to floor to serve as a featureless white backdrop to put your subject on, which can be shot and boosted to make for a white void of isolation, but I don't have that right now and I'm okay without it.
Level 2: Pretty portraits
If you don't want to stage a scene but want a good picture, there are two big things to bring in--lighting design and backgrounds.
The very simplest background for a portrait, for me, is just black. While pure white is common in basic presentation, black is a dramatic, appealing option for a more artsy picture, and comes in handy if you work with spooky subjects like I do.
If you want an easy black background, what you're gonna want to do is buy a black craft board or deconstruct a cardboard box or something and paint it--just any reasonably rigid panel you can easily pick up and put down and lean against anything without it crumpling or slumping to the floor. If you paint your board, it does not have to be the blackest black, and go ahead and flip Anish Kapoor off, because you can easily darken the shadows and black out the backdrop in post with your phone editor. (The blacker the backdrop with the base shot, though, the less the rest of the image will be boosted in contrast when editing it darker. If the background isn't dark enough, you'll be boosting the shadows and contrast of the whole picture and changing the image significantly by the time the backdrop is a black void in the phone editor.) You can also color over spots with black digitally to tidy up the effect.
I also sometimes use a black velvet costume cape as the backdrop, but it attracts fur in my cat household like crazy and the logistics of hanging it are often obstructive and frustrating.
Here, however, I exploited the fur attraction by using pieces pilled on the cape to create the bubbles of this "underwater" shot as an in-camera effect!

Black cloth is easier to lay under the standing subject's feet than to hang vertically behind them, but this is useful to let the whole figure be photographed against black--otherwise, the surface they're standing on may not be part of the void. Two black boards at a right angle, a board behind and a cloth below, or a board behind and an already-black surface below can create a full black void background. If your subject has a lot of black coloring and you don't want their silhouette to be too absorbed into the background, you can light them just a little bit to catch the edges of their hair and clothes or sculpt or whatnot and make them more separate from the black void behind them.
If you want to have the subject as just a head on black background, most dolls are small enough to fit into a black sock that can cover their body and isolate their head, which will black out into pure shadow along with the background in post. Otherwise, wrapping with other black fabric is an option.

And I can't say enough for colored/patterned fabrics and printed craft papers to make a portrait more lively.


Every month, I'm liable to get another batch of printed paper sheets that suddenly are relevant to one of my subjects, though many return in circulation as useful designs. The really big sheets of printed/patterned paper, or matte-texture wrapping papers, are also treasures for staging larger pictures with. Most wrapping papers are glossed, which can be tricky to photograph.
Draped fabric and visible folds can be your background if that's your desired effect.

Next is lighting. I use small light sources (a mini desk lamp, a color-changing remote-control night light, a headlamp with multiple brightnesses and a red setting, and a blacklight flashlight) to affect the coloring and light angle of a photo. This can make pictures look lush, dramatic, warm, cold, sinister, or eerie depending on your coloring and how you light something.


Color can also be drawn out of regular light sources by using a colored sheet as a filter over the bulb. If I want two colored lights interplaying, I use the nightlight on one color and can add in the desk lamp with construction paper over the LED for another color.

The best way to color a light source would be colored cellophane sheets that wouldn't dim the light, so I'll need to look into that.
Black-and-white photography is sexy as hell when you've done something cool with your lighting, so always test a black-and-white edit or shoot of a setup if you've done lighting stuff!


As a human, your available hands should be limited to two maximum, so wrangling your lights can be difficult alongside your camera. Having lights rigged on poseable arms or stands or a tripod for your camera can help make sure everything is working as you want. I'm still working on that.
You can also use candles for lighting, though they typically don't illuminate as starkly or dramatically as you might hope, and they have an obvious fire risk. Still, in some circumstances, even paired with colored light...

(The cauldron is the candle).
Blacklight is always fun when you have a subject that pops under it, but the phone camera hates it and good damn luck making your pictures look like what you're actually seeing. If you find success, though, it's great.

The last thing is phone filters. Download the free ones available to create a palette you can scroll through in the edit. Any picture could perhaps be transformed and elevated by a specific filter effect.
Level 3--Scene Staging
So you want to show an actual scene with story or sense of place. Well, this can be done! My first tip is generally to favor indoor environments to set photo concepts in, just because those are easier to stage, outdoors has a lot of scenery that obviously belies the scale of the toy, and you might unjustly look like a creep carrying your dolls around and taking photos where people can see you. I also like working with the indoors because you can exploit a living space to create your "set" and reduce your work. Look for details and textures in the building you live in, and architectural features that could be reinterpreted for doll-scale scenery. For example, this bathroom set for Sadie to summon Bloody Mary in consisted of furniture crafted myself and poster-board walls, but the floor is the actual floor of my bathroom.

If you have room corners in your house you can use for room corners in tiny scale, use them.

Walls can be changed with printed paper temporarily hung up for photos' sake, or else you can make foam-board walls to set the parameters of your photoshoot room and paint or paper them how you like. Remember, you're only shooting for the camera frame. It doesn't have to be real. This was my horror barbershop setup on the inside, with a red windmill blade outside the window.

And this was the outside of the cardboard wall.

Only one blade of the mill was made, and the window was frosted cling wrap with stretched yarn forming the panes.
Furniture can be sourced through dollhouse avenues. Most fashion dolls and Living Dead Dolls fall in the 1/6 scale, and big doll brands typically have bespoke furniture you can source for very easy set dressing matched to them. Small dolls are typically 1/12 scale, and some dolls are irregular scales and hard to set for. Use these two common scales as search terms when looking for options if you've gotten something that seems compatible. There are other established dollhouse scales which are smaller. These scales have range and the proportions and style of the doll can affect how some furniture works. LDD and Monster High are very different shapes and MH furniture doesn't easily cross over to LDD.
Some furniture can easily be crafted or faked at home by assembling parts together. Tables are really simple so long as you have a reasonably sturdy panel and something to stand it on. Oven-bake clay slabs and wooden dowel legs also work well for tables. At my jankiest, I even put a ribbon spool on some Tinker Toys and glued some fabric to shape on top of it for a circular table I needed! With any set dressing, the more details you can include, the better the image will scan. Think about what's around you in real environments and use fabrics and doll accessories and whatever human-scale objects you can repurpose and reframe to make a scene more elaborate and believable. In the bathroom photo above, I used doll accessory pieces to show bathroom amenities selling the location better. In the barbershop, I used a Create-a-Monster doll as a macabre coat rack, included a door to the shop, and a sink and a broken mirror. The living room before that was dressed with multiple dollhouse pieces. Arrange and add and test photos and compositions to see what looks best.
If you do shoot outside, look for walls and natural features that are good for staging a setting with. It's harder to create outdoor "sets", but you can find small scenes in nature and buildings, and with creativity, you can do great things. If you have the opportunity to go "on location" during travel, embrace it!


You can also fully cheat the scenery and put your toy in front of a photo on a screen, but the size of the screen vastly limits the proportions of doll to background.


(If I could go to space just to photograph a Martian troll doll, there really wouldn't be any stopping me.)
I'm not the person to give technical advice on composition and framing (how to arrange the subject in the frame of the camera and make the tableau work inside the rectangle). Do look up the rule of thirds for basic official guidance, but I've really kind of eyeballed things myself this whole time based on instinctual "that looks good" or "that's not right".
Level 4: Insanity
Don't have an underwater? Make an underwater out of a tub in your basement, tie that doll sucker down with fishing line, and use colored dye powder to cloud the tank and hide the edges!
Make a whole tea table setting for your dolls! Five unique times!
Wait for snow and stage an icy pond by digging a hole and covering it with glass!
Build your dolls snowmen!
Edit your dolls into scenery digitally!
Paint whole fanart pieces and use them as physical props in your photoshoot!
Reflect your ghost characters off glass and stage the reflection in the scene (Pepper's Ghost effect; look it up!)
Turn your photos into dollhouse props and then turn the dollhouse into photo scenery!
Sculpt props themed on a character and photograph just those rather than the toy they're crafted for!
Remove vampires from reflections!
Write in-universe fictional documents staged as photographic visual recreations, like old newspapers!
(These are all things I've done, have published or will publish, and have run out of space to show in this post--it's there on Teatime Tangents and Toys. Good lord.)
Side discipline: Toy posing
This could come in at any level I've discussed, but some toys are easier to display than others. Fashion dolls are top-heavy and skinny-legged (and could have wobbly knees like poor Maudie), making it difficult to stand them unassisted, and staging could require some clever props to lean them on or some reworking so they'll be stable enough to shoot with. Some dolls stand easily but pose less and require their own workarounds to display well. Watch out for hair; it is so easy to miss some distracting stray strands in photos until after you've packed up the shoot, and scrutinize all of your shots to make sure there aren't unwanted elements spoiling the take before it's too late. Take multiple shots with minor variations if you're unsure about some setups just so you have options you can sift through in the edit, or even easy ways to test filters and experiment with extra pictures.
Conclusion
You don't need much budget to create prettier photos that still don't reward you much on Insta honestly get people on Tumblr feral-shrieking their excitement (thank you sincerely to everyone who has so far; it is the most enriching thing.) If you know how to light and focus and jazz up a space a little, you'll go a long way. Then again, developing skill will draw you into the photos becoming a genuine budget-ensnaring creative pursuit roping you into projects you never dreamed of--BUT you will be making great things from them!
#photo tips#doll photography#toy photography#miniature photography#doll collector#doll review#monster high#living dead dolls#photo advice#photo art#pretty photos#horror imagery#low budget art#dollblr
14 notes
·
View notes
Note
Frogworth! I have a question about how photography circles might view this, and I hesitate to ask reddit because it can be so... Well, you know.
But, in online painting/drawing circles, it's typically viewed as unprofessional to allow any shadow to show in a picture of a traditional piece of artwork, like a painting, ink drawing, sketch, etc. Is it the same in photography circles?
I ask because I think it's fun to play with allowing light and shade of the natural world to intrude on the drawn picture, especially when it Emphasizes the tone and emotion of the piece.
I'm definitely still gonna do it no matter what because I like how those techniques emphasize my work, but I AM curious how you lot view it!
I'll be honest, I am not entirely sure what you are referring to. So if you could maybe give more context or examples, that might be helpful.
But I am happy to talk about the importance of shadows in photography. And hopefully by telling you everything I know about shadows, I will answer your question by accident.
Shadows are vital to most photography. One case I think of when shadows are a problem is if you are using lighting from multiple angles. This can cause some unattractive shadows forming in many directions.
(The following examples are not my photos except for the last one.)
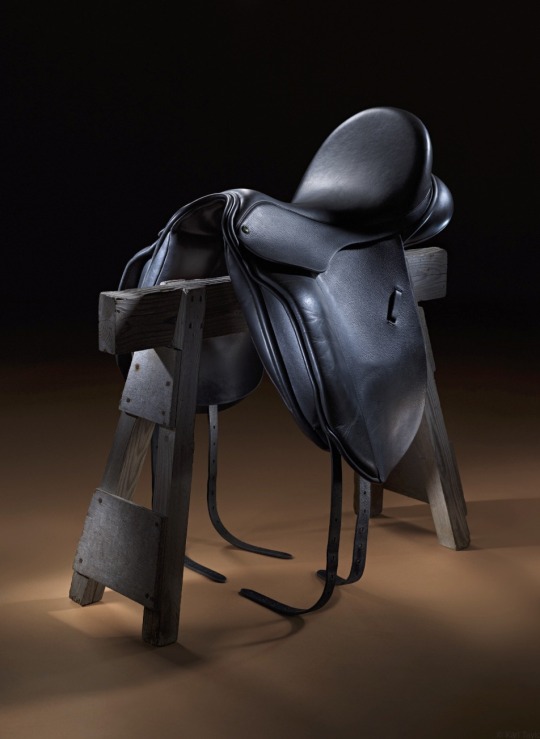
It's kind of a trade off. If you want sculpting light, you just have to accept the cluster of shadows.
And another example might be in a photo with a lot of dynamic range. If you have a bright sky and dark shadows, the camera may not be able to expose for both. So you have to choose which to prioritize.


Or you can do an HDR composite and combine multiple photos.

I would say for natural light genres, black and white photographers specialize in using shadows for their benefit. In many cases, they make the shadows their main subject.

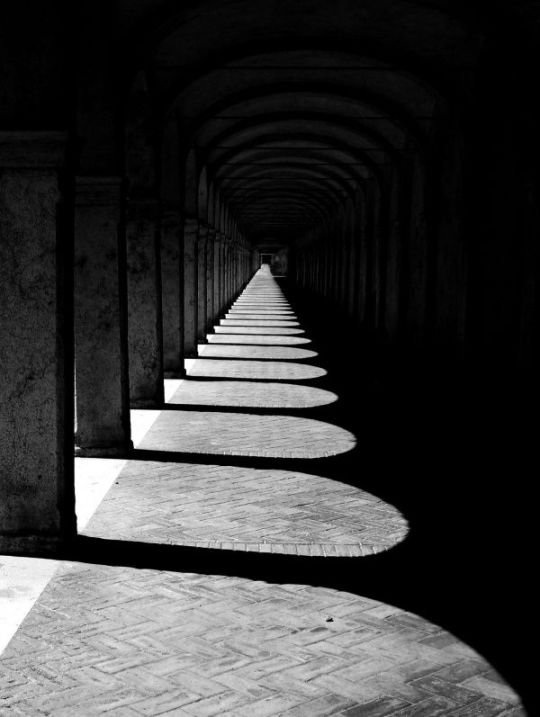
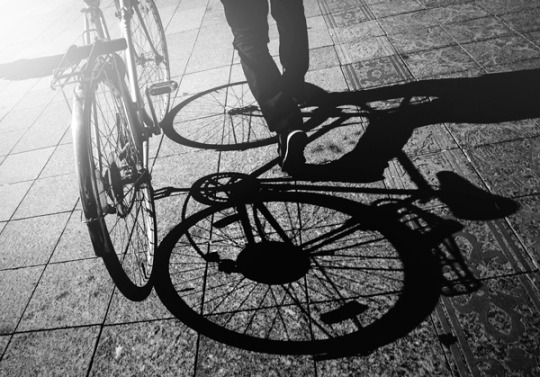
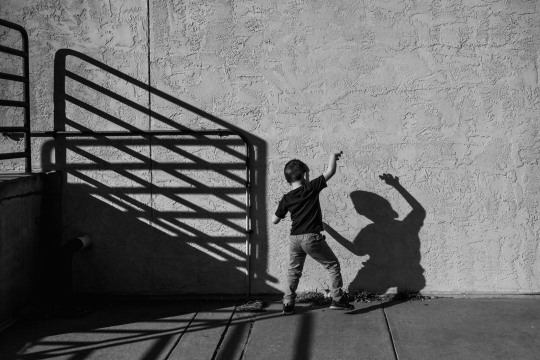
Studio photographers will talk about using hard or soft light. Hard light (small light source) reveals texture, soft light (large light source) hides it. Neither is better or worse, it just depends on the context. But another way to think of this is by the shadows created.
Soft light produces graduated shadows that slowly fall off and hard light produces sharp shadows.

In a product photography context, this showcases two very different styles.
Hard light photographers use very bright lights on giant light stands in order to get a very small light source as far away from the product as possible. They might even angle the donut-shaped flash tube sideways to make the light a tiny bit smaller. The goal is to get the sharpest, crispest shadows possible.
You can do this with the sun at high noon or on the moon, but those aren't very convenient circumstances. Otherwise you need a studio with a 20 foot ceiling and a giraffe boom light stand. The farther away the light is, the smaller it is, the crisper the shadows.
The other style is graduated lighting—where shadows get more and more transparent over a given distance. This is done by shining a hard light into diffusion so you make the light source very big, but it is brighter in the center and darker around the edges, enhancing the shadow fall off.

If you are really clever, you can combine the two styles.

The chrome caps have graduated shadows but the containers produce sharp shadows. This is done through the magical lighting technique of... taking two photos and combining them in Photoshop.
Sorry, can't violate physics.
In portrait light, playing with shadows is usually the best way to add dramatic effect. One of the most famous lighting setups is Rembrandt Lighting, modeled after the painter's oft-used technique. The goal is to get a triangle patch of light on the shadow side of the face.
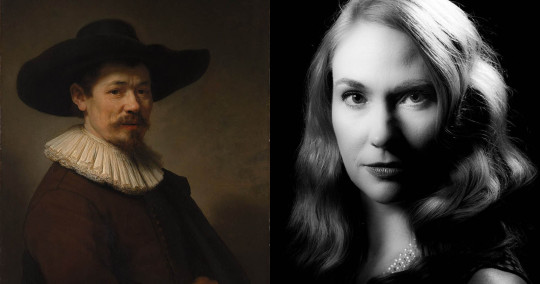
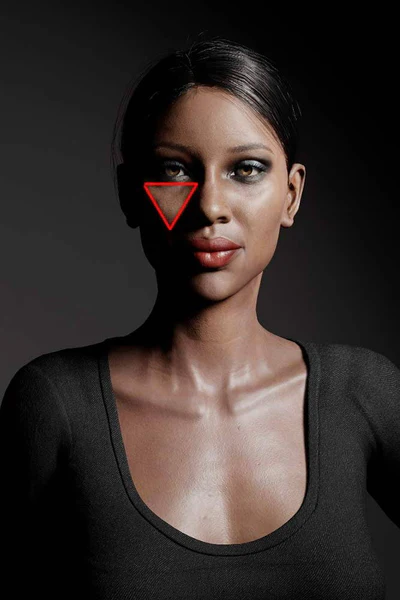
But more advanced lighting setups will use shadows in all sorts of cool ways to add drama.
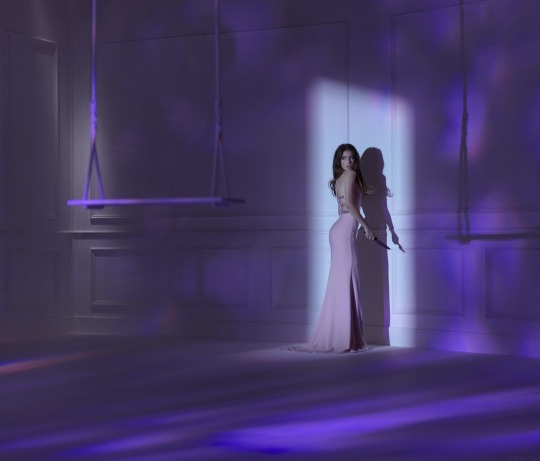


But one of my favorite tricks involving shadows is colored ambient fill light. Fill light is a technique where you raise or lower the intensity of the ambient light to make shadows lighter or darker. Typically this is done by shooting a light into the ceiling, making the entire room brighter. But you can also use soft boxes, reflectors, or gobos (a black, light absorbing material).
You still have the bright main light as the dominant source, but by raising the ambient intensity you can lighten any shadows.

To make this more fun, you can make the fill light a specific color. Either with an RGB source or a color gel. And then any shadow in your photo will tint that color.

I wish I could teach this technique to YouTubers because many of them just blast a colored light from off to the side and it can look pretty harsh.
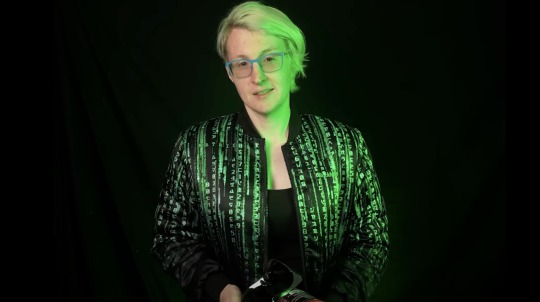

Edge lighting should not encroach that far onto the face. And if it does, doing a fill light technique is going to look a lot smoother and more natural. Or just a giant softbox could work. (I don't mean to pick on Jessie, this was just the first example I could remember.)
You can even do a colored main light and a shadow fill and then the transition between the two will be a third color. In this case, magenta key, blue fill, and a purple transition.
And then finally there is the absence of shadows. This is what ring lights are *actually* intended for. They surround the face in all directions to eliminate as many shadow areas as possible. This is often seen as very flattering because it hides skin texture and pores, which is why it is popular for makeup tutorials.
Playing with shadows is a huge part of photography. A lot of beginner studio photographers will only think about adding light. When you start thinking about the shadows, that is when you graduate to the next level of light design.
Light reveals and shadows dramatize.
92 notes
·
View notes
Note
i've just been starting to get into photography, specifically photographing plush! do you have any tips on getting a good photo? specifically how to get unique ideas for pictures with your plush! there's only so many times i can take pics at the local park XP i absolutely adore all your pics with henry and rainbowkitty, the composition and lighting are so stellar everytime!! thank you so much!!
long response oops ❤
awh thank you!!! that's so cool ur getting into plushie photography, it's def a super fun hobby! ^__^ i think the most important thing is just to take LOTS of pics even if you don't intend to post them. figuring out what angles capture your plushies expressions and silhouette best is the easiest way to get good composition i think!
as for coming up with ideas, i tend to do 3 things:
1. henry and rainbowkitty are always with me, so anything I want/have to do they're gunna do too. like if i want to bake, they're gunna help bake, if i'm gardening they help me garden etc. i like doing photoshoots so they feel involved.
2. i think about seasonal stuff that would be fun for them to do. like fall: playing in the leaves, pumpkin spice coffee, dressing up for halloween. spring: easter egg hunting, planting flowers. things like that c: pics for any holiday are always really fun too and easy to get inspiration for cause all the events, decorations or traditions!
3. i am always out looking for plushie sized things. i don't really go out of my way to find specifics, a lot of the time i just see an object that would be perfect for a photoshoot i never would have thought of, like the picture of henry and rainbowkitty mailing letters to santa i only thought of when i saw the little mailbox! and in general props add a lot to a picture or allow you to be more creative, and express the actions the plushies are doing better. like henry and rainbowkitty picking berries with a little basket, or gardening with a little watering can not only makes them feel more involved and happy but also gets the point of the pic across better i think. someone can look at it and immediately know what is happening. which can be important depending on the style/vibe ur going for.
sorry for the long explanations, i figured more info is better than less lol but i hope something in there is helpful to you!! good luck with your photography, i bet ur pics will be awesome! c: ❤❤
11 notes
·
View notes
Note
huge admirer of your art style and your skill, seriously, you are insanely talented. do you have any tips or suggestions for someone who is a beginner/wants to improve?
dfhgkl thank you so much! honestly feel like im quite detached technical-wise so i don't know what tip would be useful to starting artists vs beginners vs intermediate. so here's something that everyone can find useful instead: its important to surround yourself with things that inspire you. so like, artists you wanna osmosis artstyle from, art masters who share their processes, photography accounts you'd like to study compositions of, and peers that uplift each other etc. i used to collect ragnarok online art cards and pokemon TCGs to stare at when i was a kid and copy them. now i have pinterest boards for drawing inspirations and follow some Riot artists who posts their splash art painting timelapses. i don't have tiktok nor subscribe to reels, but i find most who use them only use the format for algo purposes and aesthetic vs showing their creative processes for educational puposes. long formats are better. for a more tangible art tip, idk. whenever you buy a sketchbook, go open it in a random page and doodle whatever. dont be afraid to get messy
49 notes
·
View notes