Half of her is a sweet collection of sunshine, a circus of craziness and laughter, and definitely a go-getter. Half of her is made with oddities and uncertainties. Follow how she's still finding out what she wants in life and what the world could offer to her.
Don't wanna be here? Send us removal request.
Text
Bacolod 2020: Lakawon Island and The Ruins (Budget + Itinerary)

Our plane touched down Iloilo International Airport the same time the sun fell behind the horizon. As night deepened, we continued our way to Iloilo Port since we will hop on a boat going to Bacolod. Fortunately, when we arrived by 7 pm, FastCat was still open and operating until its last boat ride at 8pm. It took us more than 2 hours sailing across the sea, but it was definitely more hours of unending laugh and asaran with each other. Oh, how I miss travelling with them.


We quickened our pace and rode a jeep going to our hotel as the rain splattered the moment we set foot at Bacolod Port. By that time, we were definitely hungry (we haven’t eaten anything yet since there were no stores open at the port), so we decided to eat at Jollibee at 11pm – the only fastfood near our place that’s open 24 hours. Hooray! It has been a really, really loooong day for us and we found ourselves asleep by 1 am, not to mention that we need to wake up by 4am (hello, 3 hrs of sleep!) for our Lakawon Island trip.
Travelling to Lakawon Island Resort
Yet another mode of transportation again, the next morning, we rode a taxi going to Bacolod North Bus Terminal to catch a bus going to Martisan Crossing. An hour after, around 6:30 AM, we alighted and transferred to a tricycle going to the Cadiz Viejo Port – here’s to never ending commute!

Our tricycle driver dropped us off in front of the Lakawon Ticketing Office, it’s not as luxurious as you might think it is. It’s like a mini barangay hall with sari-sari stores outside. It is just a small air conditioned room with desktops for registration.
Eman and I entered the room so he can register the four of us and choose a nipa hut (which is mandatory by the way). Then, we paid a total of P2,200 – P720 for our entrance fee, P800 for the boat fee, P80 for terminal fee, and P600 for our accommodation (umbrella hut). On top of that, you need to get a Cash Card and load it with the amount that you think you will consume at the island since they are using cashless method. But don’t fret as you can redeem the remaining balance of the card after.
While waiting for the first trip of the boat, we had our breakfast at the carinderia beside the office. There was a drizzle that morning making the mood a bit gloomy. Finally, around 7:50 am, we settled ourselves on the boat going to the island, ready for our first adventure!
Lakawon Island

After 20 minutes, we arrived at Lakawon Island. Before we even have the chance to put our things at our rented umbrella hut, of course, we did a photoshoot at the iconic bridge. What else do you expect us to do? HAHA here for Instagram photos! :D We also spent an hour laughing our asses off while taking a picture on the swing under the bridge because ang taas niya sis hirap na hirap sila umakyat hahaha (di ako nag attempt, by the way).


Unfortunately, the Tawhai Floating Bar was closed for renovation that time. It made me sad since that’s one of the reasons why I wanted to visit Lakawon Island. I already imagined myself relaxing on the bean bags, chilling while staring at the open sea, drinking cocktails in broad daylight, and soaking myself with some ocean salty air. Hay, okay next time.


We indulged ourselves playing in the white sand for a while, but didn’t really swim since it was low tide that time, and have our lunch by 11 AM. The sinigang was so good, so remember to order it if you’re planning to go here.

By 12 noon, we decided to go back to still have time to visit The Ruins. On our way back, there’s a couple who offered us to ride with them (they have a car!) and luckily, they dropped us off exactly at our hotel (medj sketchy pa ako nung una but they are so nice and it was their tradition to offer rides for the tourists daw). That saved us waiting time for the bus, fares, and hours on the road.

The Ruins
After freshening up at the hotel, we booked a grab going to The Ruins and spent nearly an hour to admire the beauty of its remnants.


Just like the Temple of Leah in Cebu City and the Taj Mahal in India, The Ruins was built as a testament of love for his wife. The remains of the burnt mansion is a majestic sight to behold. The architecture of the mansion is fascinating and there is something striking about this grandiose structure bathing in daylight. Though, it’s nicer to visit at night because of the lights that set the mansion into a different mood.

There’s an entrance fee amounting to P100 for adults, P70 for Senior Citizen and Persons with Disability, P60 for Students, and P20 for Children below 8 years old. Sadly, there will be an event the next day so some parts of the place are already decorated.

Going to Iloilo
By 4 PM, we went back to our hotel to get our luggage and went straight to Bacolod Port to catch up on the boat schedule going to Iloilo.
ITINERARY

Day 0 - Going to Bacolod

Day 1 - Lakawon Island + The Ruins
11 notes
·
View notes
Text
Siquijor and its Exquisite Charm
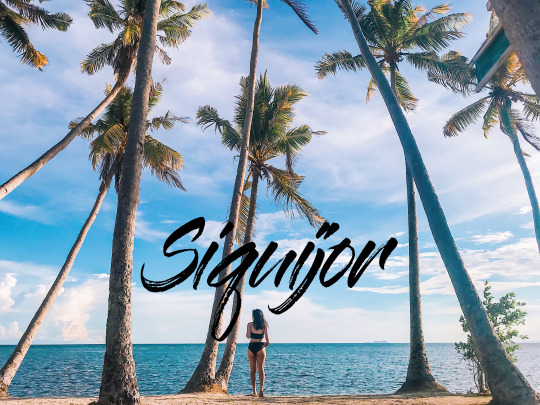
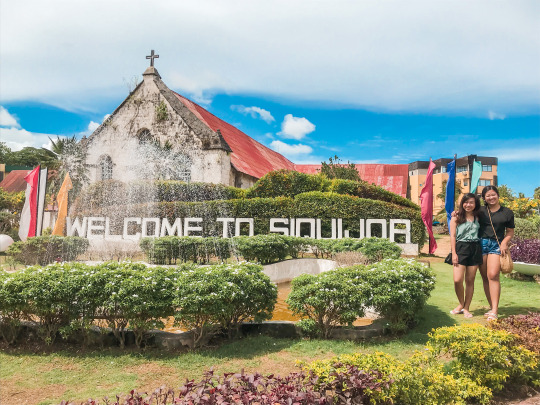
It was a cold, rainy, and cloudy kind of morning when we arrived at Dumaguete Airport. After a peal of thunder, we decided to take a tricycle going to Dumaguete Port. We touched down Siquijor after an hour of ferry ride and rode a tricycle again to reach our hotel.
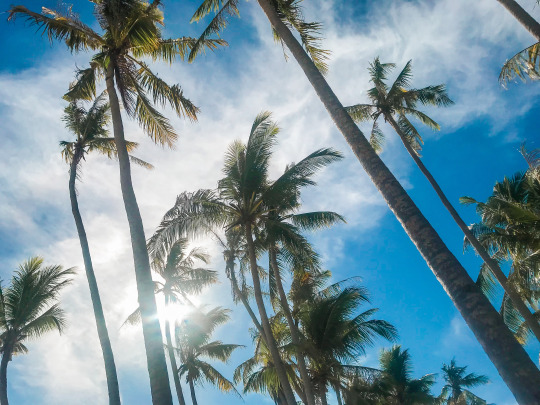
Palm trees swayed gently in the breeze, fresh air filled my lungs and my eyes felt refreshed with the lush of greens around me. Siquijor might be notorious for black magic, mystic, and sorcery, but I got a sense of serenity in this place.
For an island known for witchcrafts and folklores, Siquijor boasts its exquisite charm with its unspoiled palm-fringed beaches, scenic water wonders, and laid-back setting.
HOW TO GET THERE
We booked our flight to Dumaguete because this is the closest airport with frequent flights from Cebu Pacific and Philippine Airlines.
From Dumaguete-Sibulan Airport, charter a tricycle or a cab to get you to the port. Several ferries like Oceanjet, Montenegro Lines run as early as 7:00 am until 4:30 pm going to Siquijor which fare ranges from P130 to P240.
From Siquijor Port, there are a lot of tricycle drivers you can rent to bring you to where your accommodation is. Tricycle is the usual mode of transportation in the area so tourists normally prefer to hire tricycles for the island tour.
WHERE WE STAYED
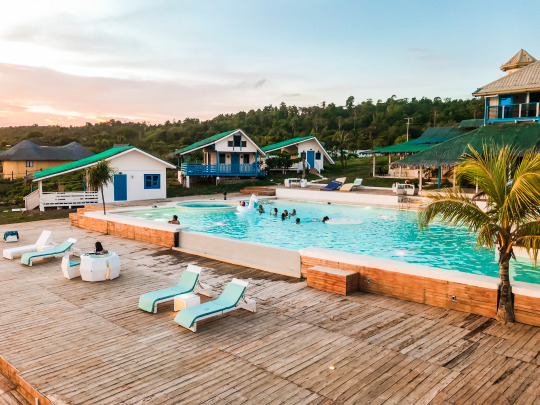
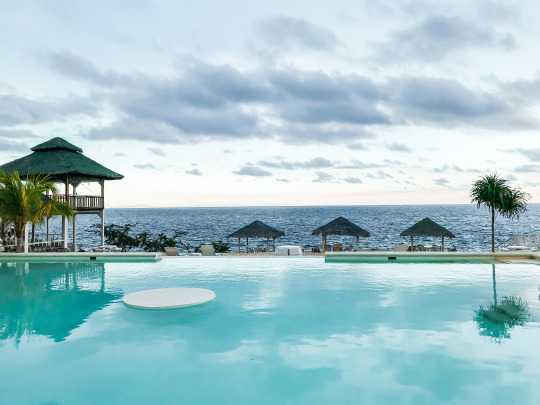
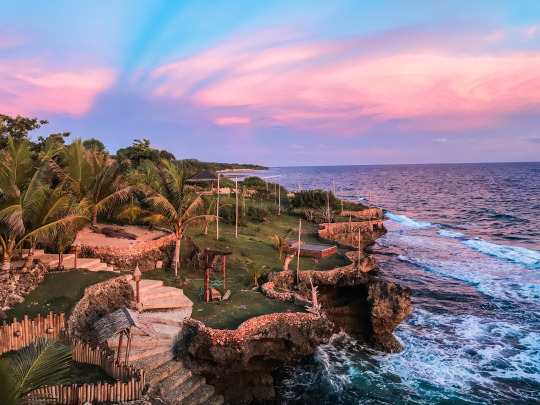
Located in San Juan area, Eastern Garan Seaview Resort offers an amazing cliff top views and not to mention a super chill vibes with its outdoor swimming pool and beach front view (and incredible sunset!!!).
PLACES TO VISIT
Siquijor, located in the Central Visayas, is the third smallest province in the Philippines, thus can be toured in one day only. It is locally known as “Esla del Fuego” because of its mystical fireflies.
We rented a tricycle for the whole day tour around the island.
CENTURY-OLD BALETE TREE
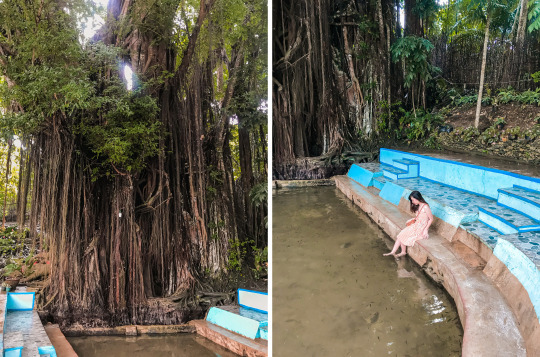
Believed to be enchanted up to this day, the 400-year-old Balete Tree lies in Lazi which is considered to be the oldest and biggest in the province of Siquijor. Apart from being said that mythical creatures live in Balete Trees, what makes it really mystical is that a natural spring flows right underneath the tree. If you’re up for a quick foot spa, just dip your feet and let the fish doctors nibble around your feet!
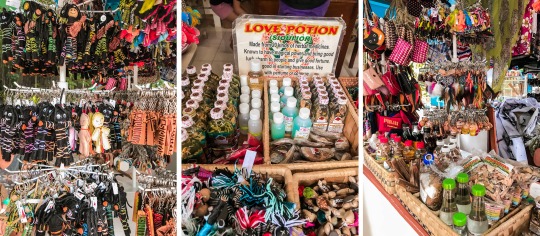
There are stalls that sell some souvenirs, voodoo dolls, and love potions!
CAMBUGAHAY FALLS
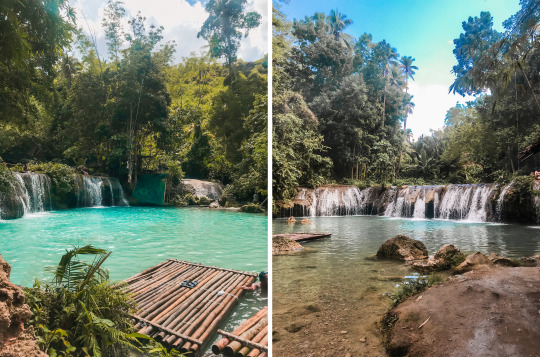
Less than 200 steps going down, you will be mesmerized by Cambugahay Falls’ clear and turquoise warm water originating from natural spring. Lots of locals and tourists go here and enjoy making their sway to the falls.
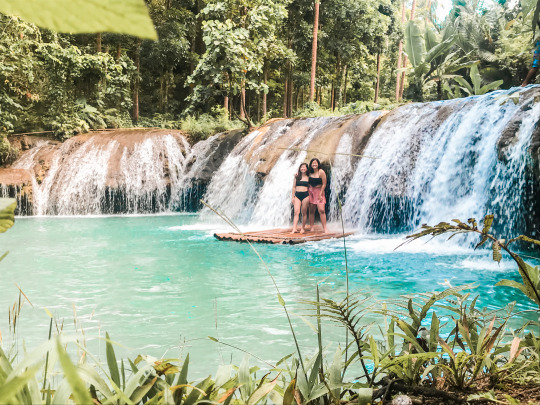
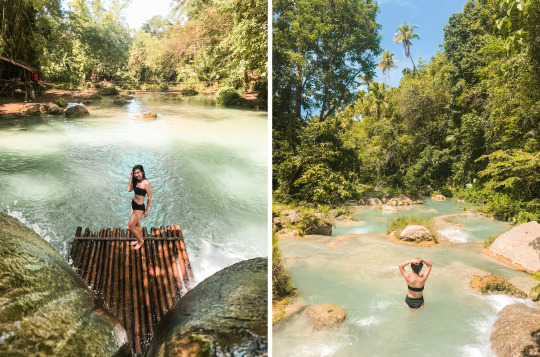
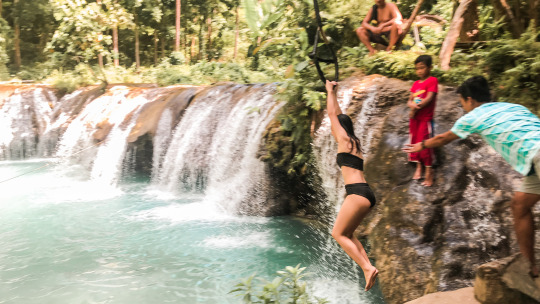
This falls has a three-tiered level, the top and middle which usually serve as swimming areas and the bottom and the largest as the jumping site. It usually gets crowded in the afternoon but just a tip, the top tier is the least crowded area where you can do unlimited swings for only 20 pesos.
SALAGDOONG BEACH
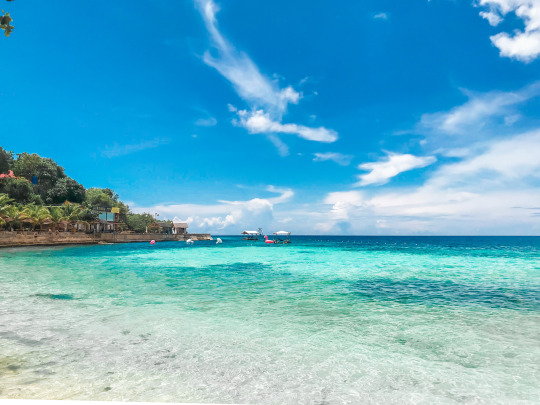
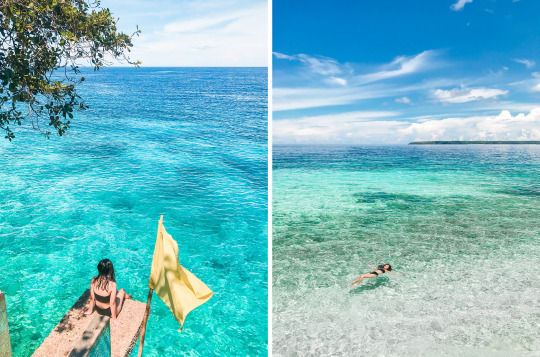
Ahhh, I have to say that this is my favorite place in Siquijor! You will be lured with its magnificent stretch of translucent blue waters and fine white sand. Salagdoong Beach is also famous for its cliff diving area with almost 35 feet high, waiting for adrenaline junkies and daredevils to take the plunge straight into the water.
GUIWANON SPRING PARK
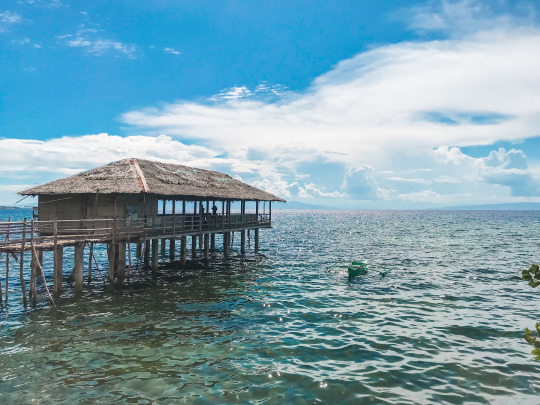
Guiwanon Spring Park is a mangrove preservation and protection area which is managed by the fishermen and environment organization in this community.
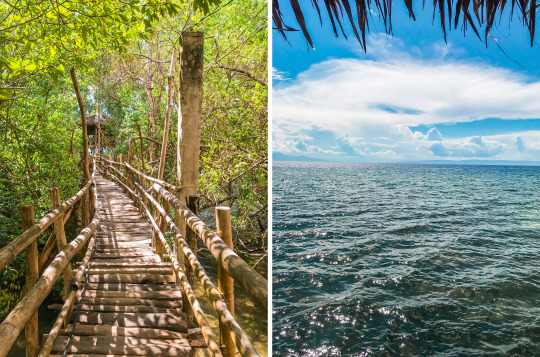
A minute of walk on wood and bamboo bridges, you will be led to an open area or seminar hall which offers a magnificent view of the sea with a crisp, fresh air, surrounded by a lush mangrove forest. This sanctuary is a refreshing stop with an entrance fee of 10 pesos and in fact, there are small cottages you can rent if you want to stay overnight.

PALITON BEACH
The giant palm trees lined up at the shoreline, the powdery white sand, and the sparkling blue waters make Paliton Beach a nice spot for basking under the sun.
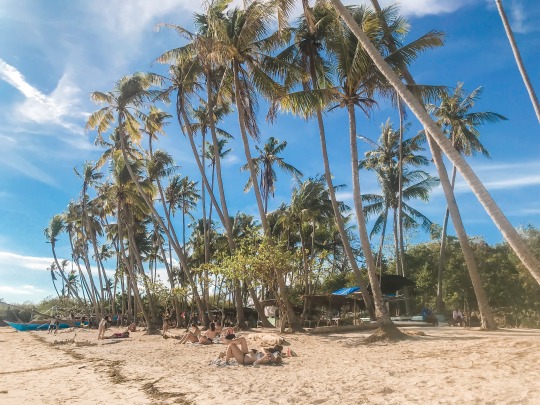
It was 3 in the afternoon and the sun shone brilliantly, making the water in the ocean glitter invitingly. Definitely a perfect tour-ender – we just unwind and chill by the beach until it’s time to go back to our hotel.

Other tourist spots in Siquijor:
Saint Francis de Assisi Parish Church
Hapitanan Cafe Restaurant
Lazi Church and Convent
Lagaan Falls
Capilay Hot Spring
FOLLOW ME!
Instagram: https://instagram.com/janetimbengan
Twitter: https://twitter.com/janetimbengan
Youtube: https://www.youtube.com/channel/UCrBSwTcWdhohq2UCPzUOs_Q
#Travel#Siquijor#Philippines#Siquijor Philippines#DIY travel siquijor#what to do in Siquijor#where to go in Siquijor#where to stay in Siquijor#travel itinerary siquijor#island tour siquijor#cambugahay falls siquijor#paliton beach siquijor#white san beach philippines#activities in siquijor#tourist spots siquijor#place to visit Siquijor#budget itinerary siquijor#one day tour siquijor#what to do dumaguete#getting around siquijor
10 notes
·
View notes
Text
Taiwan 2019 | Places to Visit in Taiwan

The truth is Taiwan was never in my must-visit place until I saw a lot of my friends go to this country ever since the visa-free entry was granted to Filipinos. And to my surprise, Taiwan did not disappoint with its traditional streets, local temples, and array of mouthwatering street food lining up at the night market and not to mention the very reason why we go here – MILK TEA!!!
FROM AIRPORT TO HOTEL
We booked a car rental through Klook that will transfer us from airport to our hotel for only P1,371 for 3 pax (P457 each) since we will arrive by midnight.
BOOK HERE
There’s actually an Airport Train Station from Terminal 1 that can take you to Taipei Main Station in 35 minutes (if you’re riding the express train; 50 minutes if you board the commuter train which stops at all stations).
WHERE WE STAYED
One thing we always consider when choosing a place to stay abroad is the accesibility of public transportation (travel tip: subways and trains are the easiest way of transportation when you’re in a foreign country). We have shortlisted a lot of options and after much deliberation (and away hahaha!), we’ve chosen Kingshi Hotel.
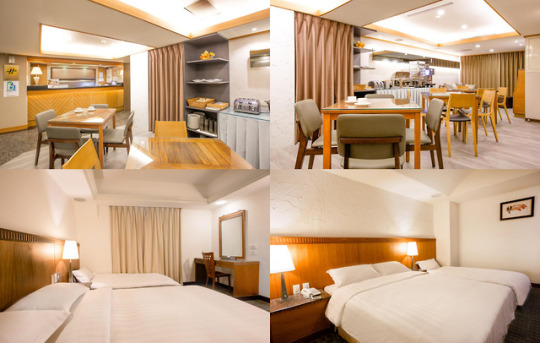
© Photos from Booking.com
Kingshi Hotel offers us a nice location since it is near the busy shopping district of Ximending (like 5 minutes walk lang siya!!!) and close to Ximen Station and convenience stores. A good value for money, the hotel is undeniably cozy with its amenities and clean bathrooms. It also comes with free breakfast however, do not expect much since they only serve breads, sausages, hams, boiled eggs, and coffees (rice, who?) and the eating area is just in front of the reception.
TAIWAN ESSENTIALS #1: WIFI
We booked a 4g WiFi rental through Klook and have it picked up exactly at our hotel so we wouldn’t have much trouble getting it at the airport. We paid P221 each good for 5 days already.
BOOK HERE
TAIWAN ESSENTIALS #2: EASY CARD
If Japan has their Kansai Thru Pass, Korea has their T-Money Card, then Taiwan has their Easy Card!
One can easily get this in train stations and convenience stores for 100 TWD and you can use this not just in their trains, but in their buses as well. Mind you that their fares are pretty cheap so go easy on loading your card, you can just reload it everytime at the stations.
TAIWAN ESSENTIALS #3: GOOGLE MAPS / TAIWAN METRO MAP OR APP
Just like in Japan and Korea, Google Maps will be your best buddy during your travel abroad! You can also save the Taiwan Metro map or download the app for easier navigation. Although, google maps is more efficient since it gives you the departure and arrival time of trains or which transportation (bus or train, or paglalakarin ka niya nang malayo) to take.
PLACES TO VISIT IN TAIWAN
LONGSHAN TEMPLE
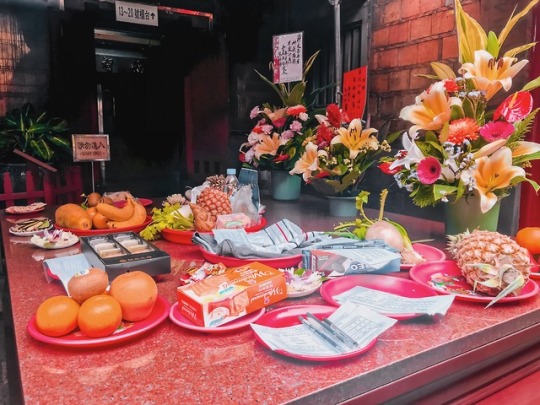
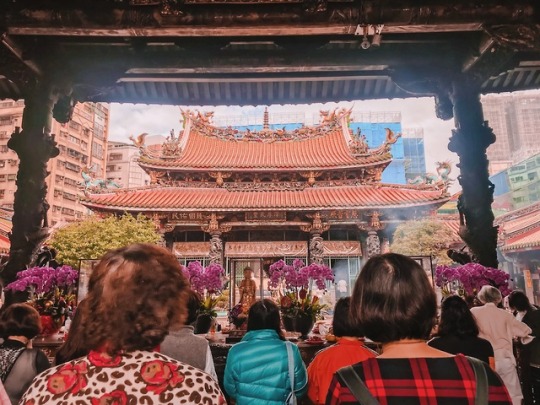
We started wandering the city of Taipei and found ourselves roaming around the temples. Looking around, these places of faith showed how religious they are – they light incense, bow their head a few times, drop red crescent shaped pieces of wood, kneel in front of the golden statues, and whisper a little prayer hoping everything will come true.
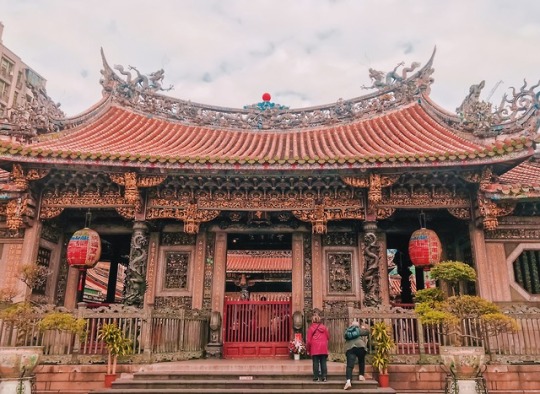
Longshan Temple, almost 300 years old, is Taipei’s oldest and most famous temple. It is central to the history, traditions and culture of Taiwan’s capital city.
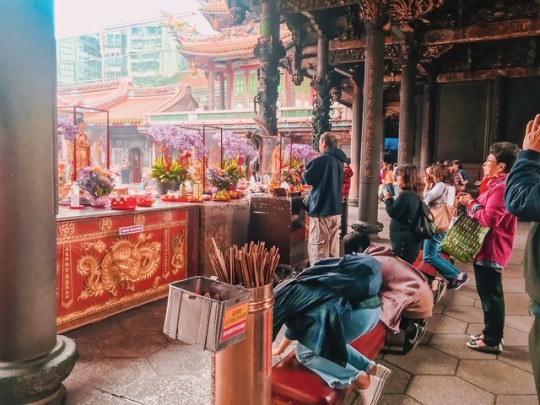
Admission: FREE
Schedule: 6 am – 10 pm, daily
How to get there: Take the Blue MRT line to Longshan Temple Station and head for Exit 1.
CHIANG KAI SHEK MEMORIAL HALL
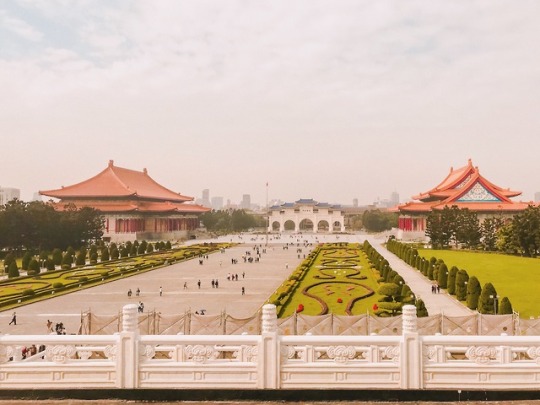
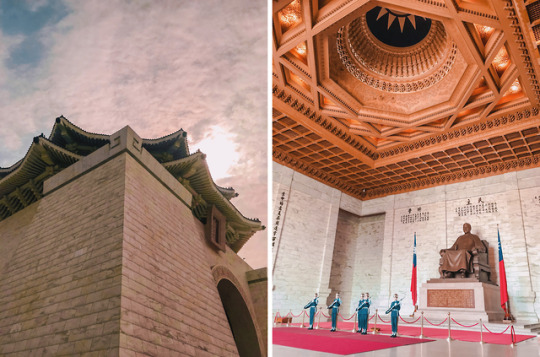
Watching the changing of guards at Chiang Kai Shek was probably one of the highlights of our first day. The snappiness, the coordination, everything was so smooth. Chiang Kai Shek Memorial Hall was built in 1980 in memory of the former President of the Republic of China. And upon entering, I was left in awe with how huge the whole park is.
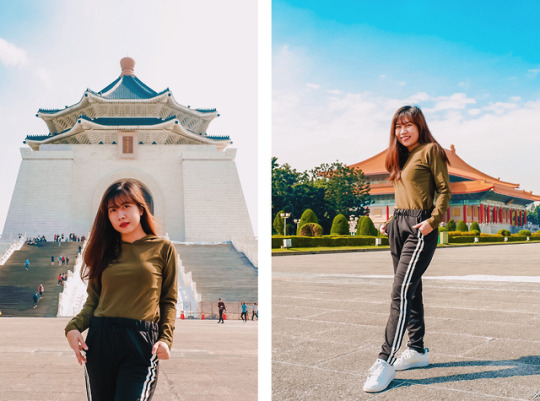
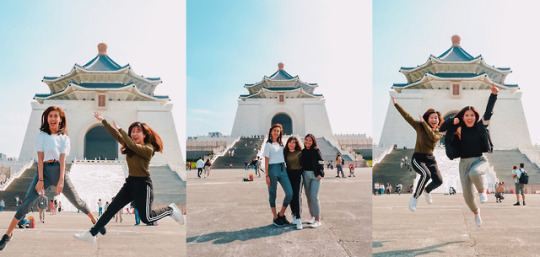
Admission: FREE
Schedule: 9 am – 6 pm, daily
How to get there: Take Red Line 2 or Green Line 3 to Chiang Kai-shek Memorial Hall, sometimes labeled as C.K.S. Memorial Hall.
ELEPHANT MOUNTAIN TRAIL
Elephant Mountain Trail was just a simple climb (the term ‘mountain’ is a bit of a misnomer) but we were sweating and catching our breaths when we reached the top.
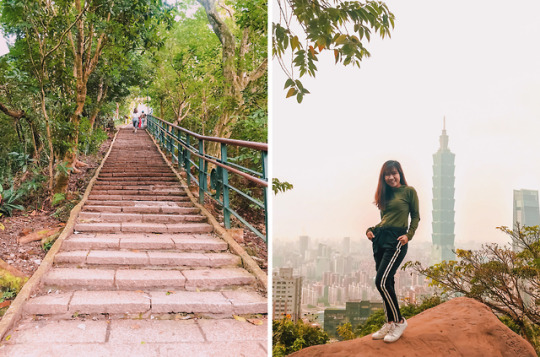
“The view must better be worth it,” I whispered to myself in between heaves of exhaustion. True enough, it does offer you a striking view of Taipei City, with Taipei 101 in the center.
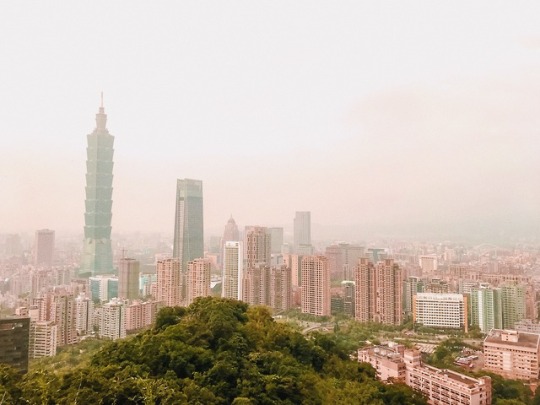

Admission: Free
Schedule: 9 am – 9:30 pm
How to get there: Take Red Line going to Xiangshan Station and leave from Exit 2. Continue walking alongside the edge of the park. At the end of this road, take a left and follow until the entrance for Elephant Mountain Trail.
TAIPEI ZOO
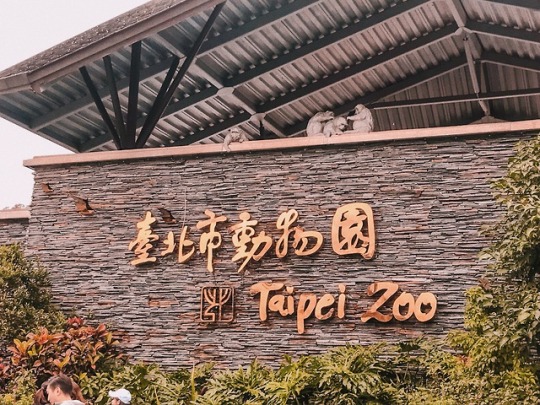
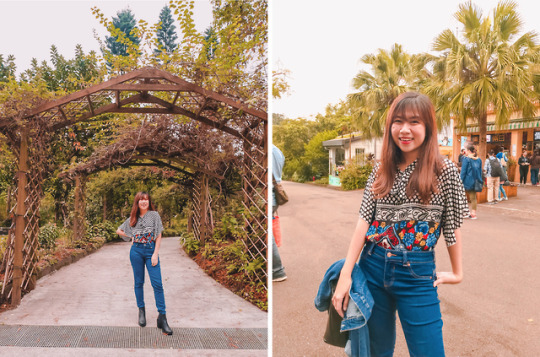
A must-visit if you love animals! Considered as the largest zoo in Asia, Taipei Zoo is the home to Yuan Zai, the first giant panda cub born in Taiwan. The zoo is very gigantic to the point that my feet almost gave up while strolling around (pero sino ba kasi nagsabing mag boots ka??? HAHA tiis ganda for OOTD).
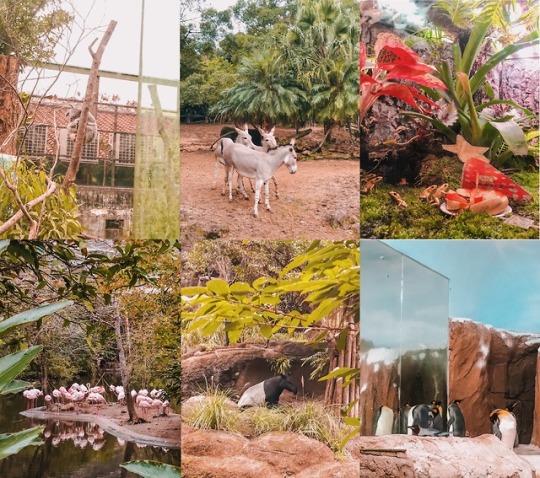
Admission: NTD 60
Schedule: 9:00 am – 5 pm, daily
How to get there: Take the Brown Line 1 to Taipei Zoo Station and take Exit 1.
RAINBOW VILLAGE
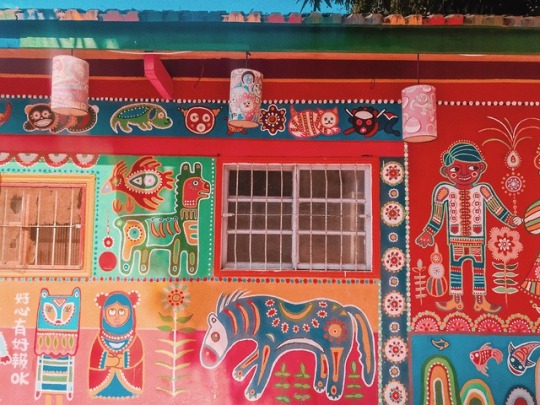
Rainbow Village is a small village painted with artwork by a veteran soldier called “Rainbow Grandpa” to save it from being demolished and now being considered as a cultural area.
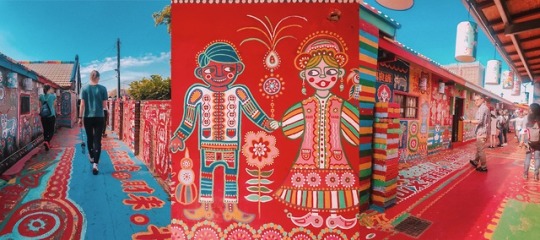
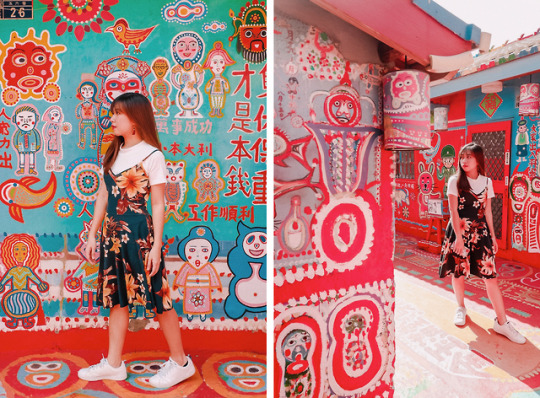
The quirky village is just a small collection of painted houses and can be toured in less than an hour, however, like any tourist place, this place was packed with a lot of people, making it hard to get good photos for Instagram (you know it haha!).
Admission: Free
Schedule: 8:30 am – 6:00 pm
How to get there: From Taipei Main Station, take a high-speed rail (hsr) to Taichung. From Taichung HSR Station, go to the bus terminal and ride Bus #30 going to Rainbow Village. For easier transportation, take a cab going to Rainbow Village.
HOULI FLOWER FARM / ZHONGSHE FLOWER MARKET
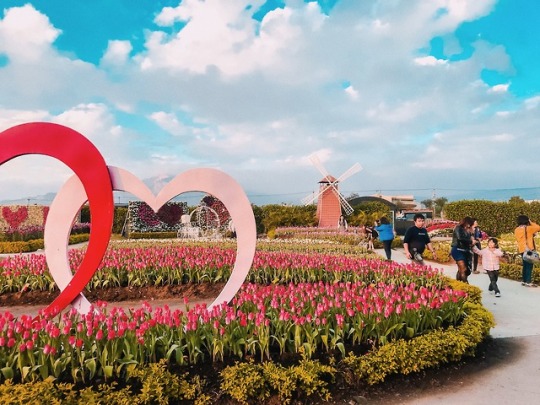
As you enter Houli Flower Farm, you can see a bbq area inside and just a few steps away, the path will lead you to the flower fields. Different explosion of colors and various kinds of flowers welcomed our eyes as they stretched along musical instruments, flower arches, and life-sized photo frames.
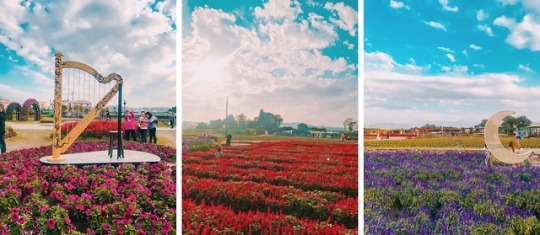


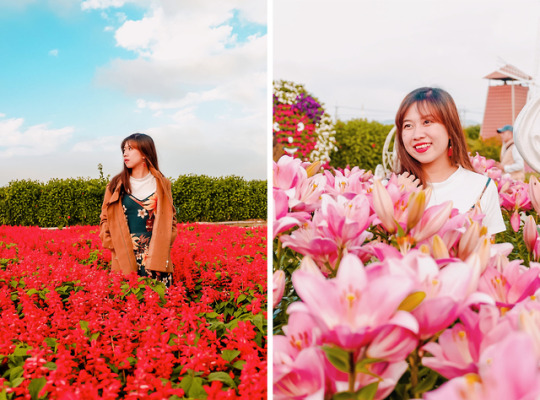
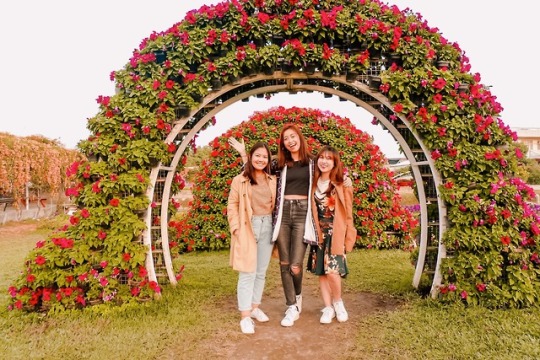
Admission: NTD 150 (NTD 350 package for unli bbq and entrance fee)
Schedule: 8:00 am – 6:00 pm (weekdays) / 9:00 pm (weekends), daily
How to get there: From Taichung Station, take Exit 3 connected to TRA. Take the train going to Houli Station. Take a taxi going to Houli Flower Farm. (From Rainbow Village, take taxi going to Houli Flower Farm for a more convenient transportation.)
YEHLIU GEOPARK
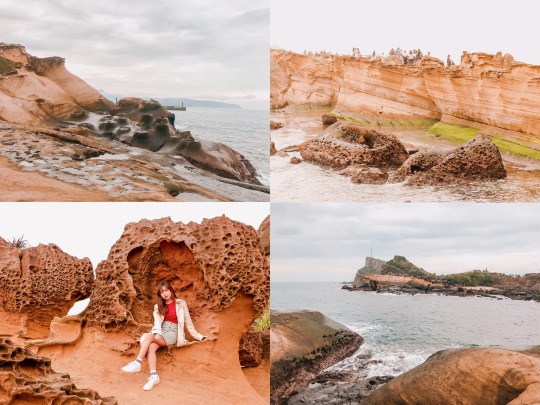
One of the most visited tourist spots in Taiwan, Yehliu Geopark boasts its great rock formations that stretches in 1.7 km landscape. You’ll see rocks in oddly shapes that resemble like mushroom, candlesticks, ice cream cones, queen’s head, making you feel like you’re in a different world, like maybe you are in Alice in Wonderland film.
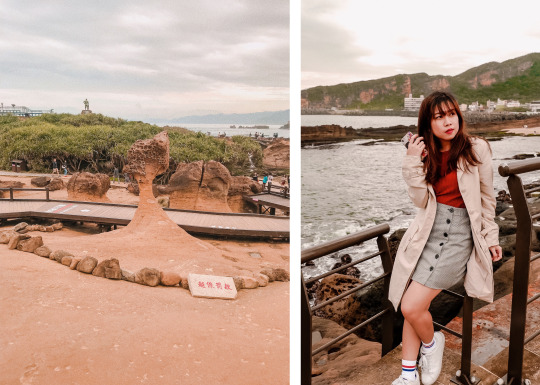
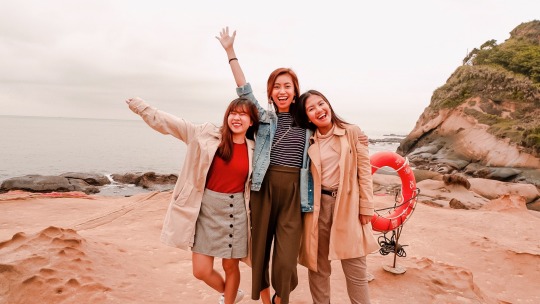
At any time of the day, there are influx of tourists here and the place could really get crowded, it will be hard for you to take photos.
Admission: NTD 80
Schedule: 8 am – 5 pm, daily
How to get there: From Taipei Main Station, take Bus 1800 going to Keelung City. From Keelung City port, take Bus 790, in front of Family Mart. Then, walk going to Yehliu Geopark entrance.
SHIFEN OLD STREET
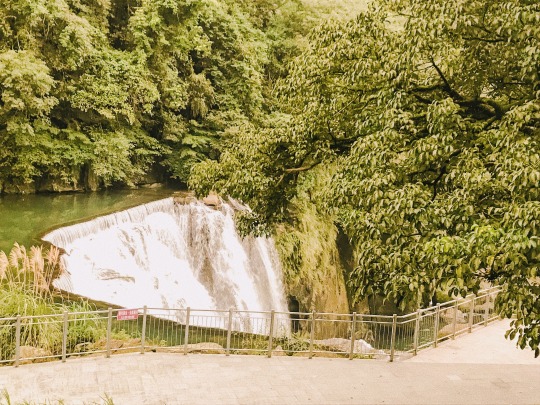
Its old streets and railroad town and sky lanterns have made Shifen an interesting tourist spot in Taiwan. It has a collection of lanes and alleys where tourists can take their photos and full of restaurants and small stalls selling Taiwan delicacies. However, we skipped those and proceeded to the 20-meter tall waterfall, known as the “Little Niagara of Taiwan”. Unfortunately, it was already closed by the time we arrived there so we just had a glimpse of the waterfalls.
Admission: Free
Schedule: Shifen Waterfalls – 8:00 am – 4:30 pm
How to get there: From Taipei Main station, take a train heading to Ruifang Station. Take a train to Shifen Station.
JIUFEN
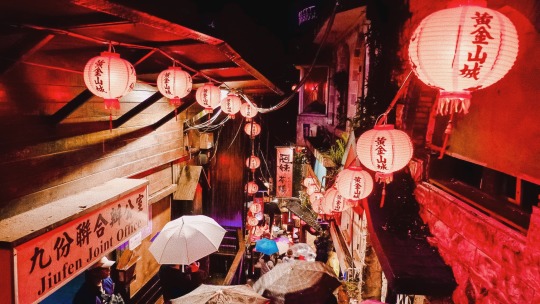
Filled with array of red paper lanterns casting a soft glow on the streets, Jiufen has a majestic and unique atmosphere especially at night. Sadly, we arrived here pretty late that almost all food stalls, cafes, and restaurants, were closing, and not to mention that it was raining hard that time. We still wandered through the streets and found ourselves buying a milk tea, although, we didn’t reach the famous A Mei Teahouse.
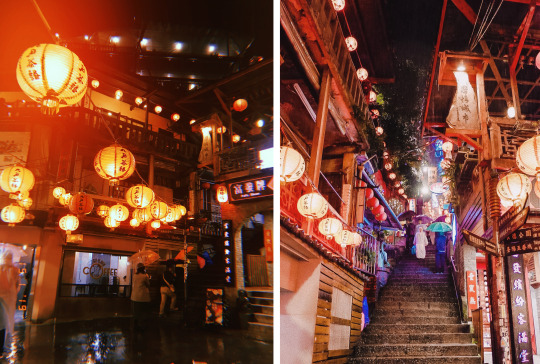
Admission: Free
Schedule: 8:00 am – 10:00 pm
How to get there: From Taipei Main Station, take the train going to Ruifang Station. After exiting the station and facing the Wellcome supermarket, take a left and walk 200 metres down Mingdeng Road. Next to the police station is a bus station with routes 827 and 788 heading toward Jiufen.
CONFUCIUS TEMPLE
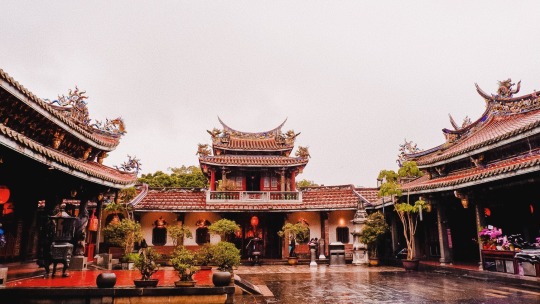
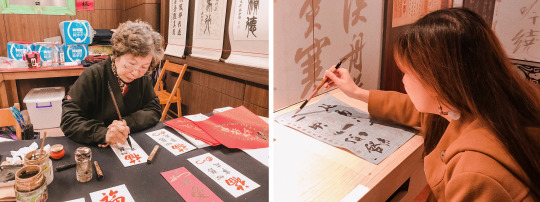
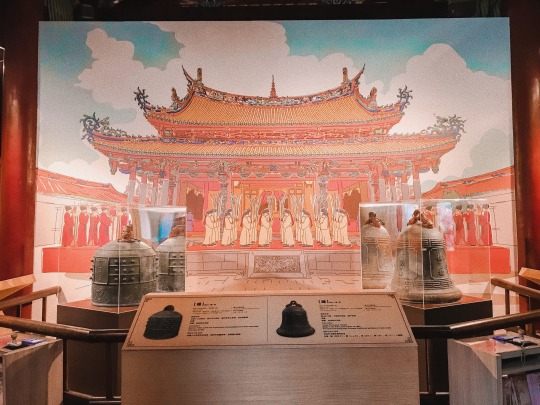
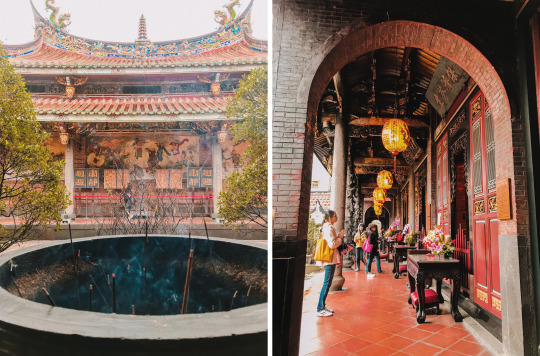
Easily my favorite temple that we’ve visited in Taiwan, exploring Confucius Temple gives you an introduction to Confucius’ teachings, Taiwan’s culture, religion, and history. This temple is interactive and very informative, there are a lot of things you can actually do and see here aside from the temple itself – 4D cinema, Chinese calligraphy, traditional ensembles, etc.
Admission: Free
Schedule: 9 am – 5 pm
How to get there: Take the Red Line to Yuanshan Station. Leave at Exit 2, continue walking down Kulun St, and take a right at the intersection of Dalong St.
#travel#Taiwan#Taipei#taichung#Longshan temple#Chiang Kai Shek Memorial Hall#Rainbow Village#Houli Flower Farm#Yehliu Geopark#Jiufen#Shifen Old Street#Conficius Temple#Where to go in Taiwan#Places to visit in Taiwan#Where to stay in taiwan#What to do in Taiwan#Where to eat in Taiwan#taiwan night#Taiwan itinerary#Taiwan DIY itinerary#Taiwan 6 days 5 nights#Taiwan 6D5N itinerary#Taiwan itinerary budget
6 notes
·
View notes
Text
South Korea 2018: Travel Guide (6-Day Itinerary + Budget)

It was mid-September last year and with the autumn approaching, South Korea boasted its mixture of green, yellow, orange, and red glamorous shades of leaves. It’s the season where it is mostly sunny but still giving you chill temperature that you still have to wear cozy clothes to keep you warm, especially at night.
And aside from being a dreamy background during this season, South Korea is well-known for its K-drama, K-Pop entertainment, Korean fashion, and, of course, Korean skincare!
How to get a Korean Tourist Visa?
Before, anyone can apply directly at the Korean Embassy, but by the time I was processing my Korean Visa, around August 2018, a new policy has been made that the application will need to course through Korean Embassy’s designated travel agencies only.
Step 1: Prepare the documents/requirements needed for your application. Below is the list of the documents you need to prepare in getting your Korean Visa:
1. A duly accomplished printed visa application form. Download the form HERE. Print the form in A4 size of bond paper. Fill in the form completely (Must be computerized, not handwritten. Do not leave anything blank). For items that are not applicable for you, kindly leave it blank.
2. Passport-sized Picture. Prepare a colored 4.5 cm x 4.5 cm photo with white background.
3. Philippine Passport. Must have at least 6 months validity and with at least 2 blank pages.
4. Photocopy of current Philippine Passport bio page. This is found on page 2 (the part where your passport photo and other info are shown).
5. Original and photocopy of valid visa(s) and arrival stamps to OECD member countries within the last 5 years, if applicable. Click HERE for a list of Organisation for Economic Cooperation and Development (OECD) member countries. If you have been to any of the OECD countries, make sure to submit the original and photocopy of the relevant visas and arrival stamps.
Additional requirements if you’re applying WITHOUT GUARANTOR:
If you’ll be shouldering all of your travel expenses in Korea, you must prove that you are capable of doing it. You must present the following:
a. For Employees
1. Certificate of Employment. Must contain the address of the employer, the landline number and email address of employer’s HR department, applicant’s position, date hired, and compensation.
2. Original Bank Certificate. Must include account type, current balance, account opening date, and 6 months average balance (ADB).
3. Original or certified true copy of bank statements/passbook covering the last 3 months.
4. Photocopy of ITR (Form 2316). If you have travelled to OECD member countries within the last 5 years, you are exempt from submitting an ITR.
5. Copy of PRC Card or IBP Card, if applicable only.
b. For Self-Employed
1. Photocopy of Business registration form from DTI or SEC. Must include pages with the names of stockholders.
2. Photocopy of Business permit or Mayor’s permit.
3. Photocopy of ITR (Income Tax Return) or Form 2316 with corresponding payment receipt from BIR authorized bank and with pages including net income and total revenue.
4. Original Personal Bank Certificate. Must include account type, current balance, account opening date, ADB.
5. Original or certified true copy of bank statements/passbook covering the last 3 months.
6. Copy of PRC Card or IBP Card, if applicable only.
Step 2: Submit the requirements to accredited travel agencies
As mentioned, Korean Embassy will no longer accept direct application. You will need to submit your documents to accredited travel agencies.
For list of Korean Embassy – accredited travel agencies, click HERE.
I processed my visa application through Reli Tours and Travel Company in SM Megamall since it is near our office. They charged me 700 pesos for the handling fee and kindly note that personal appearance is required. You can check their website HERE.
Step 3: Wait for your Korean Visa
Normally, visa processing will take 7-10 business working days but, sometimes it can be as fast as 3 working days.
Reli Tours texted me on Saturday morning that my visa was already available however, they didn’t indicate if it was approved or not (side story: I was in Cebu that time and will be back in Manila the next day so, imagine the anxiety of waiting to see the result of your application…) The Monday next week, I claimed my passport and yay it was approved!!!
How long is the validity of the visa?
Korean Visa is valid within the next 3 months (90 days) of the issue date and you can stay in Korea for as long as 59 days.
How to get to South Korea?
Typically, people book going to Incheon International Airport which a lot of airlines fly from Manila. Flight prices start from 10,000 pesos (if not promo), excluding the baggage allowance. Luckily, we scored our flight for only 3,000 pesos!!! Thank you, Cebu Pac piso sale!
WiFi in South Korea
We booked an unlimited 4G wifi for 7 days thru Klook. While you can connect to internet anywhere in Korea, it is best that you have your own pocket wifi so as to help you navigate the places around (hello, Google maps!). The rate is P110 per day which is pretty cheap yet giving you a super reliable internet connection. Book HERE!
Upon arrival at the airport, we picked up the device at their booth.
Getting Around South Korea
The most efficient and easiest way to travel around South Korea is by train. Just purchase a T-Money card (like a beep card) from any 711 store, load it, and use it in subways, trains, and public buses. With this, you can save the hassle from purchasing single journey tickets every time.
We mostly use Google Maps to guide us going to our destination and to see train stations. You can also download Seoul Subway App to help you find out which stations you should take.
From airport, since we arrived late at night, Airport Express Train (AREX) was already closed - operating hours is from 5:30 AM to 11:00 PM only. However, there are buses outside the airport, just check the nearest bus stop from the location of your hotel.
Place to Visit in South Korea
N SEOUL TOWER
Famous for its love locks, Namsan Seoul Tower is Seoul’s most iconic landmark where you can indulge the scenic view of the entire city.
We were welcomed by a wooden terrace which will lead you to “Locks of Love” area located at the roof terrace. A thousand of padlocks were attached to the fence by the couples symbolizing their eternal love.


Inside the tower, after we wandered around Hello Kitty Island, we queued for the elevator going to the observation deck. The observatory offers the 360° panoramic view of the entire city of Seoul at a glance. As the dusk fell, darkness gathered all around and the lights from the buildings blinked on, rewarding us with the dazzling sight of stars and luminescence below.

Book HERE (N Seoul Tower Obeservatory Deck + Hello Kity Island = Php 489)
Admission fee: Namsan Cable Car = KRW 9,000, 10:00 am - 11:00 pm
Directions: Take exit 3 of Myeongdong Station (Seoul Subway Line 4), walk for about 10-15 minutes following the right side of the Pacific Hotel to Namsan Cable Car Station.
EVERLAND
Everland, the largest theme park in Korea, offers 5 different themed zones – Global Fair, American Adventure, Magic Land, European Adventure, and Zootopia, serving you some thrilling rides and some child and family-friendly attractions.


Being a kid at heart, I always have a soft spot for amusement parks. I like riding heart-stopping and rip-roaring rides. However, we just strolled around mostly in garden areas since my bestfriend is not a fan of thrilling rides.
Book HERE (1-Day ticket = Php 1,678)
Admission Fee: KRW 56,000, 10:00 am - 10:00 pm
Directions: Train to Gangnam Station and exit no 6 or 7. Walk straight till you pass dunkin donuts, cross the road and take bus 5002 from the bus stop in the middle of the road. Bus journey to Yongji takes approximately one hour. Alight and take a free shuttle bus to Everland entrance.
BUKCHON HANOK VILLAGE
A time capsule right in the heart of Seoul. A village where you can find almost 900 traditional Korean houses. Walking in the village, you will see a lot of tourists who visit here wear the traditional Korean dress, Hanbok. It was like being on the set of a Korean drama.

Admission Fee: FREE, 9:00 am - 6:00 pm
Directions: By subway, get off at Anguk station (line 3), exit 2. Walk straight for about 500m to arrive at Bukchon Hanok Village. There are actually a lot of tour guides on the street who will help you locate the village.
GYEONGBUKGONG PALACE
The largest among five grand palaces in South Korea, Gyeongbukgong Palace, which means “palace greatly blessed by Heaven,” was constructed under the Joseon dynasty and served as the royal residence. This one’s a huge palace to tour and you can opt to watch the Royal Guard Changing Ceremony at 10:00am or 2:00pm.


Admission Fee: FREE (if you’re wearing Hanbok), 9:00 am - 6:00 pm
Directions: Take the exit 5 of Gyeongbokgung Station or Exit 3 of Anguk Station (Seoul Subway Line 3).
CHANGDEOKGUNG PALACE
Changdeokgung Palace, referred to as “East Palace” and known for Huwon Secret Garden, is the second royal palace constructed after Gyeongbukgong.


Admission Fee: FREE (if you’re wearing Hanbok), 9:00 am - 5:00 pm
Directions: Take Anguk Station (Seoul Subway Line 3), Exit 3. Walk straight from the exit (towards east) for about 5-min to arrive at the palace entrance.
NAMI ISLAND
Known for the Korean drama “Winter Sonata,” Nami Island has become a must-visit place when you’re in South Korea. It is also famous for its majestic tree-lined roads, so dreamy that it has been a sought-after destination every season (especially during autumn!).
This half-moon shaped island is 430,000 sqm big and would require at least a day to stroll around the whole area and enjoy side activities like biking.


Admission Fee: KRW 13,000, 7:30 am - 9:45 pm
Directions: Take a train going to Gapyeong Station then ride a shuttle bus in Gapyeong. Gapyeong City Bus covers all 4 tourist spots in the island (Nami Island, Petite France, The Garden of Morning Calm, and Gapyeong Rail Park) for a flat rate of KRW 6,000. Alight to Gapyeong Wharf and ride a ferry going to Nami Island.
THE GARDEN OF MORNING CALM
All nature lovers’ dreamland, The Garden of Morning Calm consists of 26 themed gardens boasting a myriad of colors and occasionally a sense of warmth from Maples leaves turning red and orange (since autumn is just starting that time). It’ such a great walk admiring the undeniable charms of flowers and greenery landscape.


Admission Fee: KRW 9,500, 8:30 am - 7:00 pm
Directions: Ride the Gapyeong City Bus (from Nami Island) going to The Garden of Morning Calm.
Other Places to Visit

Ewha Womans University
Jogyesa Temple
National Museum of Modern and Contemporary Art Seoul
Ihwa Mural Village
Style Nanda
Starfield Library
Itinerary

DAY 0 - Arrival in Korea

DAY 1 - Experiencing Seoul

DAY 2 - Everland

DAY 3 - Experiencing old South Korea

DAY 4 - Winter Sonata in Nami Island

DAY 5 - Back in Seoul

DAY 6 - Back in Manila
#travel#South Korea#How to get a Korean Visa#Wifi in South Korea#Getting around in South Korea#Places to visit in South Korea#Where to go in South Korea#Itinerary and budget South Koread#6 day itinerary South Korea#Winter Sonata Nami Island#Nami Island#The Garden of Morning Calm#Other places to visit South Korea#What to eat South Korea#love locks South Korea#Everland South Korea#Admission fee South Korea#Hanbok South Korea#Bukchon Hanok Village#gyeongbok palace#Changdeokgung palace#Hanbok rental South Korea#Seoul#Korean skincare#South Korea travel guide#Seoul travel guide
4 notes
·
View notes
Text
El Nido, Palawan: Wonders of Lagoons (Tour A)

Waking up the next day seeing those gigantic limestone cliffs, El Nido never fails to fill me with fascination with its splendors. It was surreal, seeing those rock formations surrounded by crystal blue waters, as if it was alluring you to another part of the world.
A perfect way to celebrate our birthday, we hopped on the boat and started our tour, discovering another wonders of Mother Nature.

SEVEN COMMANDOS BEACH
Seven Commandos Beach, named after a ship that was stranded on the island, gives a majestic welcome with its wide stretch of white sand and dozens of palm trees.


After we jumped off the boat, we left our things in one of the nipa huts and explored the island. Apart from the beach where you can snorkel or swim, there’s a volleyball net and a basketball ring and some vendors who sell buko juice and other drinks. A perfect appetizer for today’s tour, we spent nearly an hour swimming and enjoying the sight of the nearby islands. This is normally the last stop of the tour so we had the beach to ourselves. Our tour guide even offered us to take some pictures at tinuturuan niya pa kami saan maganda mag pose HAHAHA thanks, Kuya!


SMALL LAGOON
In time for lunch, our boatmen started cooking our food while we did some kayaking towards the lagoon.
One has to paddle through a small hole to get to the Small Lagoon.


An opening to the richness of nature, Small Lagoon offers us a peaceful feeling with its calm and cold waters enclosed with limestone cliffs. The water is clear enough for you to have a captivating sight of the corals and fishes.


After devouring our by-the-boat lunch, we cruised towards our next destination.
Secret Lagoon
Situated on the other side of the huge rocks, we had to swim and crawl, one by one, through a small hole to get inside the Secret Lagoon. There’s a pretty huge crowd when we arrived here so we had to wait in line before finally getting inside. Secret Lagoon is a small pool of waist-deep water surrounded by towering cliffs, it’s like entering another side of El Nido.


Shimizu Island
For our next spot, our boatmen decided that we do some snorkeling instead of going to the shore of the Shimizu Island, which was named after a Japanese scuba diver who unfortunately wasn’t able to come back after exploring the island.


Big Lagoon

Our boat sped away from the island going to our last destination and about 30 minutes later, we anchored in the middle of the sea. We opted not to rent a kayak again however, dahil malakas yung charm natin (hahaha joke), our tour guide gave us a free kayak ride! As our kayak glided through the entryway of the lagoon, we were welcomed once again with sky-high cliffs that lined up on both sides. The water is shallow and very clear that some of the tourists were actually walking. But as you go farther, the water becomes deeper and you feel like uncovering a hidden paradise in another dimension. Big Lagoon is like a postcard turn into reality. It was definitely a sight to behold.

By the time we went back to the shore, the weather became gloomy and soon started raining. It was pretty hard that the wind and waves were getting intense. After an hour sailing, we arrived safely with a feeling of enchantment with nature’s grandeur.

The same day after getting back to our place, we traversed going back to Puerto Princesa and squeezed in Underground River tour the next day.

5-DAY EL NIDO AND PUERTO PRINCESA ITINERARY
Day 1: Puerto Princesa to El Nido
3:10 PM – Arrival at Puerto Princesa Airport
4:00 PM – Travel to El Nido (via van)
9:00 PM – Arrival at Abad’s Place
9:30 PM – Dinner
Day 2: Tour C
7:00 AM – Breakfast
9:00 AM – Start of Tour C (P1400 + P200 environmental fee)
4:00 PM – End of tour
7:00 PM – Dinner
Day 3: Tour A
7:00 AM – Breakfast
10:00 AM – Start of Tour A (P1200)
5:00 PM – End of tour
6:30 PM – Travel to Puerto Princesa
Day 4: Puerto Princesa
1:00 AM – Arrival at Marianne Hotel
6:00 AM – Breakfast
7:30 AM – Pick up / Travel to Underground River
9:00 AM – Start of Underground River Tour
1:30 PM – End of tour
3:00 PM – Back at the hotel
Day 5: Puerto Princesa
7:00 AM – Breakfast
9:00 AM – Pasalubong/Souvenir shopping
12:00 PM – Check-out
1:00 PM – Travel to Puerto Princesa Airport
3:50 PM – Flight back to Manila
#travel#El Nido#Palawan#Tour A#Seven Commandos Beach#Small Lagoon#Shimizu Island#Secret lagoon#Big lagoon
13 notes
·
View notes
Text
El Nido, Palawan: Nature’s Hidden and Secret Beaches (Tour C)

Situated in Bacuit Bay and nestled amongst limestone cliffs, El Nido captured the hearts of many travelers with its unspoiled setting, astonishing lagoons and rock formations, powdery white beaches, crystal clear waters, and diverse marine life, enough to make one leave in awe.
The sun shone brightly across the clear blue sky when we arrived at Puerto Princesa Airport. Our driver going to El Nido, not minding the scorching heat, welcomed us with his charming smile. Albeit, halfway down the road, the rain started to pour, making me worried if our tours will be cancelled. It took us at least 5 hours of endless chats, bumpy rides, curvy roads, and one stop over before we finally reached our destination. Ahhh, hello, El Nido!
After breakfast the next day, our tour guide fetched us from our accommodation and led us to the meeting place where we waited for the other tourist groups before proceeding to the boat. There was a drizzle but it didn’t stop the thrill in my heart the moment I saw our boat floating toward us. It’s like a new adventure awaits, the kind of escape that will feed my soul.

We all found our way to the boat, settled ourselves with life vests, and prepared our minds as the boat moved towards the center of the sea. Our tour guide explained our itinerary for the day, schedules, signals (when we need to go back to the boat), and some safety rules.

HELICOPTER ISLAND


A prologue to more pristine beaches, Tour C started with Helicopter Island. An island named after its queer shape, it has a long stretch of fine, powdery sand and crystal clear waters perfect for beach bumming and snorkeling. We spent at least 30 minutes taking pictures and soaking ourselves on the beach. Then, we headed to our next destination.
HIDDEN BEACH

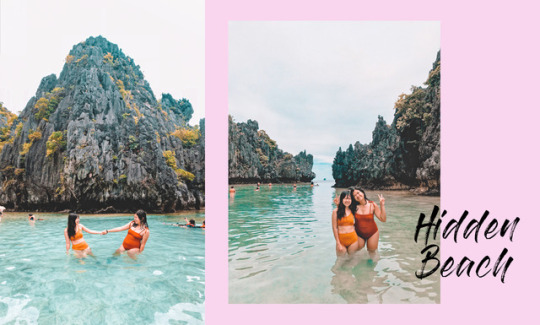
Docking the boat in the middle of the sea, we needed to swim towards a little bit on the side of the cave, a small and narrow channel covered by limestone showing us the wonders of the Hidden Beach. Well, it’s not named “hidden” after all for no reason, right?
TALISAY BEACH


Our boatmen, in time for lunch, took us to Talisay Beach, a famous picnic area for tourists. While waiting for our food to be cooked by our tour guides, we relaxed on the fine sand, indulged ourselves with the sound of crashing soft waves, and admired the limestone cliffs surrounding the beach. By around 1 PM, our feast was ready and everyone dug in our sumptuous meal. Why is eating with your bare hands in front of the beach tasted more delicious? Ugh, so satisfying!!!
SECRET BEACH


Energized with our meal, we embarked on our next stop and almost 30 minutes away, our boat finally anchored in front of a limestone wall. Confused as I am not seeing a beach anywhere, we needed to swim through a hole again so we can reach the entrance going to the Secret Beach (joke, syempre di kami lumangoy, hinila lang kami ng tour guide, hahaha!) The current was relatively strong making it easy for Kuya to push us towards the hole. Upon reaching the other side, we were rewarded with a very shallow beach, almost clear that you can see the rocks and corals below (make sure to wear your aqua shoes!).
MATINLOC SHRINE


Afterwards, we cruised going to Matinloc Shrine, an abandoned pilgrimage site. You can opt to do a short hike on the rocks to get an encompassing view of the nearby islands and tour the inside of the shrine or do snorkeling instead.

For a sun seeker beach bum, Tour C entails astounding views, prodigious seascapes, and secluded shores. It offers a good combination of laid back swimming and superb snorkeling fix. Getting the novelty to plunge into holes and catch breathtaking beaches was an action-packed adventure for our first day in El Nido.

#travel#El Nido#Palawan#Tour C#Helicopter Island#Hidden Beach#Talisay Beach#Secret Beach#Matinloc Shrine#What to do in El Nido#What to do in Palawan#Island Hopping in Palawan#Island Hopping in El Nido#Where to go in El Nido#Where to go in palawan#Palawan travel blog#El Nido tour#Palawan Tour#Snorkeling in El Nido#Snorkeling in Palawan#white sand el nido#white sand palawan#beach in el nido#beach in palawan#Tour A vs Tour C
8 notes
·
View notes
Text
JAPAN 2018: Kobe-Nara-Kyoto-Osaka Travel Guide (6-DAY ITINERARY + BUDGET)

Japan is without a doubt an enchanting country to explore. From its historical temples giving you the cultural, old, and authentic vibe to its modern architectures and vibrant modern city life. Not to mention the vast blush-colored trees everywhere during spring (cherry blossoms!!!) and the ever helpful Japanese people.
HOW TO GET A JAPAN VISA?
Step 1: Determine which type of Japan Visa you are applying for.
There are various types of Japan Visa that you can apply for depending on your purpose: a visa for business, a visa for tourist, a visa for medical purposes, etc.
For this post, we’ll be discussing how to get a Japan Visa for travel purposes (for single entry, and if you’re visiting with or without a guarantor/sponsor).
Step 2: Prepare the documents/requirements needed. Below is the list of the documents you need to prepare in getting your Japan Visa.
Philippine Passport. Must have at least 6 months validity and with at least 2 blank pages. Note that broken passports are not accepted.
A duly accomplished Japan visa application form. Download the form HERE. Print the form in A4 size of bond paper. Fill in the form completely and write N/A for items that are not applicable (Do not leave anything blank and make sure that there are no erasures!) Note: You’re not required to book your flight or hotel yet. You can do that once you Japan Visa is approved.
ID Picture. Prepare a 4.5 cm x 4.5 cm photo with white background (you can just tell to the photo studio that you’re getting a photo for Japan Visa). This must be pasted on the form with your name and birthdate written on the back of the photo.
Birth Certificate from PSA (Philippine Statistics Authority). Must be issued within the past one year from PSA Main Office or Serbilis Outlet Center (Nationwide).
Marriage Certificate from PSA. If you are married, then you need to submit a marriage certificate from PSA Main Office/Serbilis Outlet Center (Nationwide) issued within 1 year.
Daily Schedule in Japan. A simple or overview of your itinerary in Japan. It doesn’t need to be thoroughly detailed.
Additional requirements if you’re applying WITHOUT GUARANTOR:
If you’ll be shouldering all of your travel expenses in Japan, you must prove that you are capable of doing it. You must present the following
Proof of Income.
For employed persons
Latest Income Tax Return (ITR Form 2316). Submit a clear photocopy in A4 paper.
Certificate of Employment (with compensation). Note: If you do NOT have an ITR, write a simple letter explaining why you’re unable to submit it (examples: you’re newly employed, etc.)
For self-employed / business persons
If you’re a freelancer, provide latest ITR (Form 2316/ 1700/ 1701/ 1702) original and photocopy in A4 paper.
If you own a business, submit your Business Registration issued by DTI / SEC and the company ITR.
If you do NOT have an ITR, write a simple letter explaining why you’re unable to submit it
Bank Certificate. Must be an original copy from your bank which must be issued within the past 3 months. How much? There’s no specified amount required by the Japanese Embassy but to be sure, just peg your money at P10,000 per day. So if you’re planning to stay in Japan for 5 days, make sure to have a t least P50,000 in your bank.
Additional requirements if you’re applying WITH GUARANTOR:
If someone will sponsor your trip, you will need to provide the following additional documents (this applies if the guarantor lives in the Philippines – could be your dad, mom, brother, sister, company, etc.):
Guarantee Letter. Download the template HERE. A letter explaining your relationship with the guarantor and include their contact details (e.g. address, contact number). Must be printed in an A4 size of bond paper.
Proof of Relationship with the Guarantor. If your sponsor is family member or a relative, you can sumbit PSA birth certificate or marriage certificate.
Bank Certificate (original) of the Guarantor.
Photocopy of the Income Tax Return (ITR Form 2316) of the Guarantor.
Step 3: Submit your Japan Visa requirements to accredited travel agency for Japan Visa Processing
There’s a list of travel agency where you can pass your requirements since Japan Embassy DOES NOT accept direct applications unless it’s a special case. See list of accredited travel agency HERE.
Once you’ve decided, submit your complete Japan Visa requirements to your chosen travel agency. Service fee will be collected by the travel agency processes ranging from PHP 900 – PHP 1,600. The fee is NON-REFUNDABLE regardless of the granting/withdrawal/denial of your Japan visa application.
We processed our Japan Visa through H.I.S. (PHILIPPINES) Travel Corp located in BGC.
Step 4: Wait for your Japan Visa
Visa processing normally takes 3-5 business working days, but sometimes up to 7 days. Depending on your travel agency, they will send you a message whether your passport is ready for pick up or they will be needing additional requirements. Note that a white sticker at the back of your passport indicates that your Japan visa is approved. A red sticker means your Japan visa was denied.
HOW LONG IS THE VALIDITY OF THE VISA?
Single entry visas are usually valid for a stay no longer than 15 days, and the visa is valid for 90 days (3 months) upon issue.
HOW TO GET TO OSAKA?
Best gateway to Osaka is the Kansai International Airport (KIX) which a lot of airlines fly from Manila. If you don’t book during promo fare or seat sale, cheapest flight from Manila going to Osaka is around P10,000 roundtrip via Cebu Pacific. I suggest you look into different airlines like Jetstar which sometimes a lot cheaper than CebPac. You can score a roundtrip ticket for as low as P7,000, which definitely a steal for a non-promo price!
TIP: If you’re from the North, you might wanna check flights coming from Clark.
WIFI IN OSAKA

We booked an unlimited 4G Portable Wi-Fi Rental for 6 days thru kkday (a site like Klook). It will help you stay connected to the internet while you’re in Japan aka will be your best friend so you can use Google Maps. Rate is P265 per day which is pretty cheap yet giving you a reliable connection and a battery that is enough to last for a day.
Upon arrival at the airport, we picked up the device at their booth, easy and fast, which includes a case, USB cord, transformer (charger) and an instruction booklet.
BOOK HERE
GETTING AROUND OSAKA
Best way to get around Osaka is by train and subway. However, their train system is complicated and a bit confusing. You really need to plan ahead which station are you alighting to and which number of train heads to that station. There’s a chance that you might be boarding the wrong train (e.g., express trains don’t stop at some stations, regular trains will stop at every station which will take you longer time to arrive at your destination).

KANSAI THRU PASS
Since we will be riding train all the time, we purchased a 3-day Kansai Thru Pass, a ticket which enables you to ride on subways, private railways and buses throughout the Kansai district, at the airport (you can also book ahead through Klook) which costs ¥5,500 or around P2,500. This pass will makes it easier to travel around Kansai Region (Kobe, Nara, Kyoto, Osaka, etc.) and will save you from the troublesome task of checking the complicated rate table to buy tickets and you won’t need to buy another ticket every time you make connections.
There are other pass you can buy like JR West Kansai Pass, JR Rail Pass which can get you around Osaka and if you’re traveling to Tokyo also, and ICOCA Card.
GOOGLE MAPS
Yup, go do yourself a favor and download this app! Consider this your travel buddy!
PLACES TO VISIT IN KANSAI REGION
KOBE
Kobe, the capital of Hyogo Perfecture, has a nostalgic-feel ambiance of neighborhood because of its western-style residences, cafes, restaurants, and boutiques which makes you want to walk more around the city. However, since we have a limited time, we only had the chance to explore Kitano-chō.
Kitano- chō
A small district in Kobe notable for its western-style architectures. You will also see one of the Top 3 Starbucks Cafés in Japan.

Read my complete blog post HERE!
NARA
Nara, the ancient capital of Japan, is known for historical temples and a home to hundreds of deer that can freely roam around. During sakura season, the blush-colored trees match the greens and browns perfectly.
Kohfuku-ji Temple
Known as the five-storied pagoda, Kohfuku-ji is a Buddhist temple and a UNESCO World Heritage Site and considered as a landmark and a symbol of Nara.

Admission Fee: Free (Outer Area) / 700 yen (National Treasure Museum)/ 300 yen (Eastern Golden Hall) /800 yen (combination)
Open daily from 9 am to 5 pm
Gangoji Temple
The first Buddhist temple built in Japan sometime in the 6th century and one of the Seven Great Temples in Nara.

Admission Fee: 500 yen (Adults)
Open daily from 9 am to 5 pm (last entry must be made by 4:30 pm)
Nara Park
A home to hundreds of freely roaming deers. You can buy deer crackers in stores around the park for 150 yen to feed these docile deers and to get them closer so you can take pictures.

Admission Fee: Free
Open 24 hours daily
Kasuga-Taisha Shrine
Nara’s most celebrated Shrine and established in dedication to a deity responsible for the protection of the city. This shrine was established in the 8th century by the Fujiwara family.

Admission Fee: Outer Area: Free / Inner Area: 500 yen
Open daily from 6 am to 5 pm
Read my complete Nara trip HERE!
KYOTO
Kyoto is the city that has the cultural, old, authentic Japan vibes with its ancient Japanese temples and houses, stunning Japanese women wearing traditional kimono around the streets, and rich Japanese street food.
Fushimi Inari-Taisha Shrine
Fushimi Inari-Taisha Shrine, an important Shinto shrine in southern Kyoto, is known for its mesmerizing thousands of unending pathway of torii gates up to the mountain. It was first built as early as the 8th century by the Hata family to worship the gods of rice and sake. Along the pathway through the gates, you will also see plenty of stone foxes, usually come in pairs, which is considered to be the messenger of Inari – the god of rice and business. Prepare for a 2-3 hours hike up to the top of the mountain (tip: wear your most comfy shoes).

Admission Fee: Free
Open 24 hours daily
Arashiyama Bamboo Forest
The famous bamboo forest in Kyoto! The entire path is 500 meters long and you can walk through it in 15 minutes, depending on your pace and on how long you take your Instagram pictures. It can get crowded especially at noon but, there were secluded areas where you can take your photos.

Admission Fee: Free
Open 24 hours daily
Nakanoshima Park
A park along Katsura River and Togetsu-kyo Bridge, also called the “Moon Crossing Bridge” and the most iconic landmark in Arashiyama district. Best place to stay for cherry blossoms viewing!

Admission Fee: Free
Open 24 hours daily
Kyoto is not as small as Nara where attractions need only a small amount of walking. There’s a lot more to see in Kyoto and definitely one day isn’t enough to explore the city. I suggest you allocate at least 2 days if you want to visit everything in Kyoto.
Read my complete Kyoto trip HERE!
OSAKA
Osaka is lively with its modern and stunning architectures, vibrant and buzzing nightlife, and diverse and delectable food.
Osaka Castle Park
A popular tourist spot and a striking historical landmark in the middle of a modern urban m cityscape. The main tower is 55m high and has a museum and an observationg deck at the top where one can enjoy the panoramic view of the city.

Admission Fee (Park): Free(Osaka Castle Fee – 600 yen)
Open 24 hours daily
Tempozan Village
A modern neighborhood in Osaka and has a number of attractions – Aquarium Kaiyukan, Tempozan Ferris Wheel, Santa Maria cruise and Tempozan Marketplace.

Admission Fee: Free
Open 24 hours daily
Dotonbori
Known as the “Kitchen of Japan”, Dotonbori is definitely a food haven. Walking along Dotonbori, a lot of food stalls, restaurants, cafes, and shops can be found with both local and tourists bustling around. It is full of lights, noise, and energy. You will also see the famous Glico running man, one of the most iconic landmark of Osaka, being brightly lit over the Dotonbori Canal. You can also find Don Quijote here where you can buy your pasalubong from chocolates, to noodles, clothes, accessories and more.

Admission Fee: Free
Open 24 hours daily (depends on store hours)
Cup Noodles Museum
Cup Noodles Museum gives us an overview of the history of instant noodles and allows us to make our DIY cup noodles.


Admission Fee: Free (DIY Cup Nood;es – 300 yen)
Open daily (except Tuesday) from 9:30 am to 4:00 pm
Ikeda Castle Ruins Park
A well-manicured park with the reconstructed “ruined” castle, winding gravel paths, a large koi pond, and some benches you can sit into.

Admission Fee: Free
Open 24 hours daily
Shinshibaishi
The largest, oldest and busiest shopping district in Osaka. Surrounding by flashing neon lights and billboards, there are a lot of shops you can find in the 600 metres long street lined with boutiques, cafes, restaurants, food fast outlets, popular fashion stores, from both local and well-known international brands.

Read my complete Osaka trip HERE!
ITINERARY

DAY 1– Arrival in Japan and Exploring Kobe

DAY 2– Temple visit and Deer feeding in Nara

Day 3 – Torii Gates, Bamboo Groves, and Cherry Blossoms in Kyoto

Day 4 – Discovering Osaka

Day 5 – Cup Noodles Making

Day 6– Last Day and Departure from Osaka

#travel#Japan#Japan 2018#Osaka#Kobe#Nara#Kyoto#Japan Itinerary#Osaka Itinerary#Nara Itinerary#Kyoto Itinerary#Japan budget itinerary#6 days itinerary Japan#Where to go in Japan#Where to go in Osaka#Where to go in Nara#Where to go in Kyoto#What to do in Japan#What to do in Nara#What to do in Kyoto#What to do in Osaka#Japan Travel Guide#Osaka Travel Guide#Osaka-Nara-Kyoto Itinerary#Osaka Guide#What to eat in Japan#What to eat in Osaka#Where to shop in Osaka#Shinshaibashi#Dotonbori
7 notes
·
View notes
Text
JAPAN 2018: Day 4-6 – 3 Days in Osaka

The sun peeked through our window signaling yet another day for tour and this time, we’re going to explore Osaka. Cold, humid air caressed my face and hands as soon as we exited the hotel. Osaka is lively with its modern and stunning architectures, vibrant and buzzing nightlife, and diverse and delectable food.
DAY 4
We made our way to the train station going to Osaka Castle Park. After a few minutes of walking, the top of the castle came into view and the anticipation to see one of the famous landmarks of Osaka aroused. Branches of cherry blossoms intertwined like tangled yarn lined up in the streets, and a lot of people came here to witness its beauty, see the castle, and have picnics on the ground.

Navigating through the sea of people, we walked our way inside the park. Osaka Castle is as majestic as I expected it to be, surrounded by its magnificent moat and stone walls. The castle gives the glamorous feeling during spring because of the cherry blossoms. We weren’t able to go inside, but it has a museum and a viewing deck at the top floor.

To get the best Instagram-worthy photo, we strolled around, looking for the perfect spot to capture the beauty of the castle. The walk led us towards Plum Garden but unfortunately there were no plum blossoms in sight. Two Japanese women dressed in their traditional Kimono were around the area and we took the chance to have a picture with them.

The sprawling grounds boast of over 600 cherry trees, making it an ideal Hanami spot during sakura season. Hanami spot is an area where people have picnics to enjoy cherry blossoms. My sister and I rested on the ground for a while, admiring the beauty of the falling petals.


After we have eaten our lunch, we decided to pass by Universal Studios without the intention of going inside since my sister’s not a fan of theme parks and thrilling rides. USJ isn’t just about the rides though, I love the atmosphere and vintage-ish vibe around Universal City Walk. I like the mixture of posh boutiques and neon-inspired stores. I like the plethora of restaurants to eat and souvenir shops.


By around 3:30 in the afternoon, we hopped on the train going to Tempozan Village. It is a modern neighborhood in Osaka and has a number of attractions – Aquarium Kaiyukan, Tempozan Ferris Wheel, Santa Maria cruise and Tempozan Marketplace.

Shopping boutiques, food court, some Japanese and Western fast food outlets, Tempozan Marketplace is just basically a mall. We sauntered going to the nearby park and did a sightseeing of the cruise ships, the ferris wheel, and the Tempozan bridge. We watched and waited until the sun sink slowly out of the view, painting the sky pink and light orange, eating away the dusty blue. The air has cooled with the setting sun, cherry blossom trees gossiping with the wind.


In time for dinner, I made sure that we were going to try the most popular ramen in Japan. No doubt, when we arrived in Dotonbori, there’s already a long queue outside Ichiran Ramen. Ichiran is famous for its tonkotsu ramen, a pork-based broth. The waiting isn’t that long since the store is a 3-storey high. As soon as we entered the ramen store, a crew assisted us to order and pay from the ramen ticket vending machine and guided us to where we’re gonna sit.

Each seat is an individual cubicle separated by a small partition which has a water dispenser so there is no need for the staff to serve water. A ledge and hangers for your coats, and tissue papers were also placed behind your seat. When ramen is ready, it will be served through the window in front of your seat, after which it will be shut again.

Known as the “Kitchen of Japan”, Dotonbori is definitely a food haven. Walking along Dotonbori, a lot of food stalls, restaurants, cafes, and shops can be found with both local and tourists bustling around. It is full of lights, noise, and energy. You will also see the famous Glico running man, one of the most iconic landmarks of Osaka, being brightly lit over the Dotonbori Canal.


DAY 5
Aside from the rise of ramen, we cannot deny the fact that we grew up eating instant cup noodles. It’s like a comfort food when the rain wouldn't stop, a convenient food when we’re busy catching up with time. It is a quick and tasty snack when we got nothing to eat.
When I learned that there’s a place where you can make your own cup noodles, I immediately added it to our itinerary. I mean, who hasn’t had an instant cup noodles in their life? Located in Ikeda, Cup Noodles Museum gives us an overview of the history of instant noodles and allows us to make our DIY cup noodles.

Outside, a statue of Momofoku Ando, the inventor of cup noodles, was displayed and as we entered the museum, a lady assisted us and gave us a little guide on what activities we can do inside. A huge tunnel of instant ramen will welcome you tracing the history of the instant ramen product line using over 800 cup noodles packages.

On the right side, it shows the chronological story of instant noodles. Admiring the pictures and exhibits, including a replica of Ando’s research shack, the hallway hum with the collected energy of hundred other tourists.


More thrilled than the kids, we headed towards the factory to design our very own Nissin cup noodles. We queued up to purchase a cup in the vending machine for 300 yen and cleaned our hands in an automatic alcohol spray machine.

For the third step, a lady will assist you to one of the tables where you can draw/design your own cup! You can personalized it with whatever you like. Be artistic! :) There’s also a note in the table on the ingredients and flavor you can choose on the next steps.

Fourth, we had to wait in line to get into the counter where we handed our cup to the staff and showed us how the noodles were being placed inside the upside down cup. Now for the fifth step and best part, we got to choose the flavor and 4 toppings of our cup noodles. We chose curry as broth and egg, mozzarella cheese (special topping of the day), cubic roast pork, and imitation crab for the toppings.
The cup then goes on to the sealing process and will be released by the machine perfectly wrapped. Lastly, we placed the cup noodles into an “air package” using a handheld pump.

After watching an animated film on how Momofoku Ando invented the cup noodles in the Drama Theater, we walked away from the museum with the whole new appreciation for Japan’s famous snack.
The sun was still bright and up in the afternoon when we finished making our DIY cup noodles and we came into a resolution to maximize our stay in Ikeda. Discovering yet another castle park in the area, we explored Ikeda Castle Ruins Park, a well-manicured park with the reconstructed “ruined” castle, winding gravel paths, a large koi pond, and some benches you can sit on.

Starving, we settled ourselves in one of the benches and munched our lunch. Then, we walked the veranda and gazed at the koi, then climbed the narrow stairs to the spacious second floor. The view from the top was mesmerizing. A mixture of green and pink colored leaves, a series of rooftops stretching into the distance, and mountains rising on the horizon.

Hours flew by as we wander through the park and the castle, we went back to Dotonbori and Shinshibaishi for some souvenir and chocolates shopping.

Shinsaibashi is the largest, oldest and busiest shopping district in Osaka. Surrounding by flashing neon lights and billboards, there are a lot of shops you can find in the 600 metres long street lined with boutiques, cafes, restaurants, food fast outlets, popular fashion stores, from both local and well-known international brands. We ended our souvenir shopping in Don Quijote where you can score a lot of good finds in Japan for a cheaper price. I bought a number of packs of Kitkat in different flavors that can only be found in Japan.

DAY 6
Time to fly back to Manila!
A mark to an end of our trip in Japan, our flight back to Manila is at 12:55 PM so we checked out at our hotel by around 8 am to catch the express train going to Kansai International Airport.
Japan is definitely an enchanting country, especially during Sakura Season. Everything is beautiful and gives you a magical feeling. It has been truly an amazing 6-day experience and I will surely come back!!! Sayonara, Japan! Till we meet again!
#travel#japan#osaka#osaka castle#osaka castle park#universal studios#tempozan village#tempozan ferris wheel#dotonbori#ichiran#ichiran ramen#cup noodles museum#ikeda#ikeda castle#shinsaibashi#don quijote
3 notes
·
View notes
Text
JAPAN 2018: Day 3 – Torii Gates, Bamboo Groves, and Cherry Blossoms in Kyoto

After at least an hour ride going to Fushimi-Inari station, we were greeted by dozens of people, both Japanese and foreigners, heading in the same direction to one of the most popular sightseeing spots in Kyoto.

Fushimi Inari-Taisha Shrine, an important Shinto shrine in southern Kyoto, is known for its mesmerizing thousands of unending pathway of torii gates up to the mountain. It was first built as early as the 8th century by the Hata family to worship the gods of rice and sake. Along the pathway through the gates, you will also see plenty of stone foxes, usually come in pairs, which is considered to be the messenger of Inari – the god of rice and business.
A row of souvenir shops and Japanese street food stalls lined up before reaching the main tower of the shrine. The smell and the way the vendors cook the food were inviting but, we opted to go straight ahead the shrine, passing through the Romon Gate at the entrance.

There was a sudden explosion of color orange everywhere and small worship places around the area however, my eyes wandered to where the torii gates are. We passed by the main shrine and walked towards Senbon Torii which literally means “thousands of torii gates.” Tourists flock here and there which makes it difficult to have your picture taken without anyone else photobombing your photo. But, worry no more, because as soon as you climb further the inner part of the orange maze, there were secluded areas with fewer tourists to the point that you can have your own photoshoot with the torii gates.

There was a time when we wasted at least 30 minutes because we’re waiting for the coast to clear so we can achieve an Instagram-worthy photo not knowing that torii gates were really endless and you can take pictures as much as you want until the end of the trail.

We walked through the entire tunnel which comprises of slopes and staircases leading up to Mount Inari. (Tip: Wear your MOST comfortable shoes.) Along the way, you will see multiple small shrines and altars and some actually lit candles and burn incense. There are numbers of stores, vending machines, and restaurants around where you can buy food and water if you found yourself needing a rest.

After an hour of trekking, there is the Yotsutsuji Intersection where you can have a good view of the city.

We’ve taken a break more than a few times and asked myself “di pa ba matatapos ‘to?” because really, it’s a loooong walk going up. My feet and entire legs were screaming as if they want to collapse any minute. It will take at least 2 hours, depending on your pace, to reach the top of the mountain, which is 233m high.

On our way back to the station to head to Arashiyama Bamboo Forest, we feed ourselves with some takoyaki for 500 yen.
Kyoto is not as small as Nara where attractions need only a small amount of walking. All the major tourist spots are spread out in different directions so we had to take another one-hour train ride to go to Arashiyama to visit one of the absolute highlights of Kyoto.
From the station, we crossed Nakanoshima Park and Togetsu-kyo Bridge where cherry blossoms are abundant. I let my eyes drift for a while and let my heart fall in love with the place – it is very dreamy and enchanting. The scenery is like a postcard turn into reality. A view waiting to be captured and be a wallpaper. A painting that comes to life.

We took our time getting to Arashiyama Bamboo Forest, meandering down the bridge, passing through number of tourists walking and riding Jinrikisha, a man-pulled rickshaw (it’s like a “kalesa” in the Philippines).
A vast number of bamboo stalks greeted us and I watched as people stream in and out of the forest. Walking between the bamboos felt fascinating and peaceful. I felt as though I have walked into some other world, somewhat magical. The breeze is atmospheric, caressing our skin and making these tall bamboo groves sway to its rhythm. Amazing how light penetrates through the canopy and how these bamboo stalks seem to continue to grow endlessly up towards the heaven.

The entire path is 500 meters long and you can walk through it in 15 minutes, depending on your pace and on how long you take your Instagram pictures. It can get crowded especially at noon but, there were secluded areas where you can take your photos.


Leaving the bamboo grove, we walked back and stopped by an ice cream store. We devoured a mixed matcha and cherry blossom flavored soft ice cream for 300 yen, not minding the fact that the weather is at 16 degree Celsius *cue music: “the cold never bothered me anyway”*, and rest our feet for a while.

Going back, we dropped by at Tenryuji Temple, the largest temple in Arshiyama district and continued towards the quiet neighborhood full of traditional Japanese houses and more temples. This part of Arashiyama is less touristy and more rural.

By 4 PM, we decided to go back to Nakanoshima Park and soaked in the picturesque view of cherry blossoms along Katsura River and Togetsu-kyo Bridge, also called the “Moon Crossing Bridge” and the most iconic landmark in Arashiyama district. We strolled in silence and settled ourselves in one of the benches in the park, admiring the beauty of nature while watching the boats float in the river.

I took a deep breath of the fresh, crisp air, enjoying the scenic view of the river and the postcard-perfect look of cherry blossoms. Spring in Arashiyama is color pink with dozens of cherry blossoms adjacent to the bridge, clear blue skies, and perfect cold weather. It is great sunsets with colorful mountainside in the background.


We couldn’t get enough of the beautiful view of the flowers but, we have to go back to Osaka before the night gets too late. We run down the street going back to Hankyu Arashiyama Station. A warm-colored lantern-shaped lighting surrounds the station and gives me the atmosphere of an ancient capital – it’s lovely and romantic! This is definitely the most alluring station I’ve seen around Japan.

How to go to Kyoto from Osaka:
Go to the nearest station from your hotel. From Hotel Zipang, the nearest is Dobutsuen-Mae Station.
Ride Tanimachi Line going to Temmabashi Station.
From the station, transfer to Keihan Main Line going to Fushimi-Inari Station.
From there, you can walk going to Fushimi Inari-Taisha Shrine.
How to go to Arashiyama Bamboo Forest from Fushimi-Inari Station:
From Fushimi-Inari Station, ride the train going to Gion-Shijo Station.
Transfer to Hankyu Kyoto Line going to Arashiyama Station.
From there, walk through Nakanoshima Park and Togetsu-kyo Bridge going to Arashiyama Bamboo Forest.
#travel#japan#kyoto#fushimi inari-taisha shrine#fushimi inari#bamboo grove#arashiyama bamboo forest#nakanoshima park
10 notes
·
View notes
Text
JAPAN 2018: Day 2 – Temple Hopping and Deer Feeding in Nara
The next morning after wandering the streets of Kobe, we took a refreshing stroll at Utsubo Park, just a 15-minute walk near our hotel, before checking out and heading to Nara. I love how the wind is so gentle like it envelopes you into a cold hug.
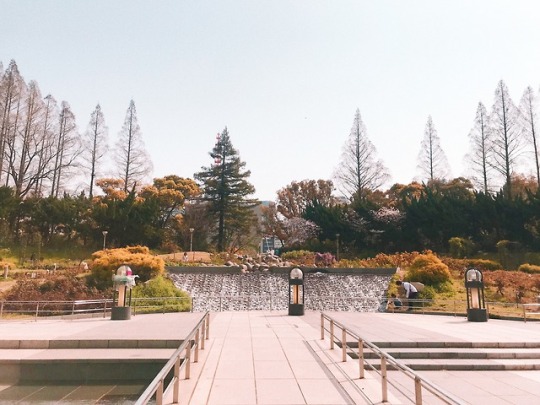
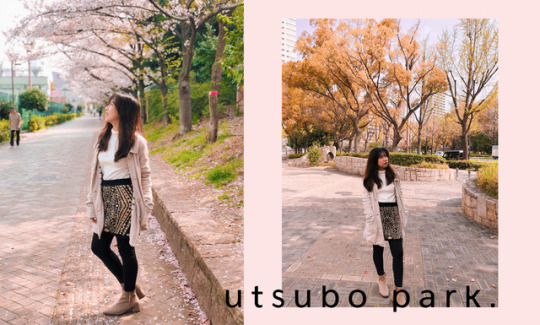
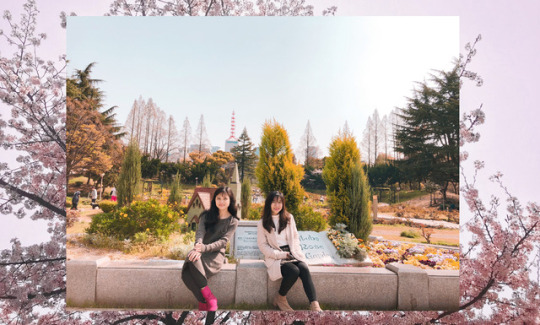
So much for the lovely scenes of flowers and roses, we went back to our hotel by around 10:30 AM to prepare for check-out and head to our next hotel.
After we have settled ourselves in Hotel Zipang, we proceeded to Dobutsuen-Mae Station going to Nara using our 3-day Kansai Thru Pass. It took us approximately an hour to get to Kintetsu Nara Station but it didn’t feel that long because I enjoyed seeing cherry blossoms as we passed by. All I see is pink, melting into the background that nearly block out the sun. (Tip: Take express trains for faster ride going to Nara.)
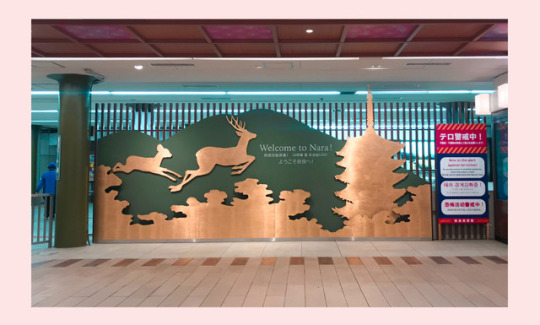
Nara, the ancient capital of Japan, is known for historical temples and a home to hundreds of deer that can freely roam around. During sakura season, the blush-colored trees match the greens and browns perfectly.
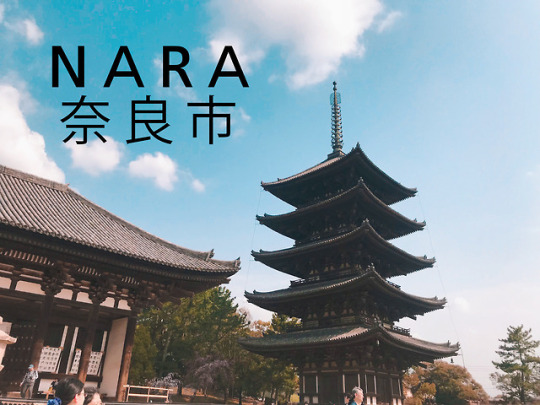
From Kintetsu Nara Station, we sauntered going to the first temple we’re going to visit. Kofuku-ji (興福寺, Kōfukuji) Temple (the five-storied pagoda), a Buddhist temple and a UNESCO World Heritage Site, is a landmark and a symbol of Nara. The temple was devastated by civil wars and fires many times but, was allowed to rebuilt and repaired.
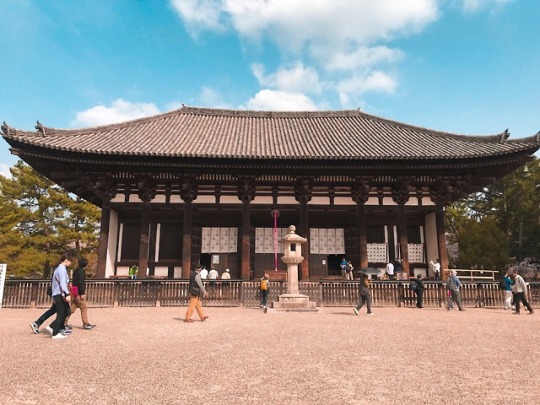
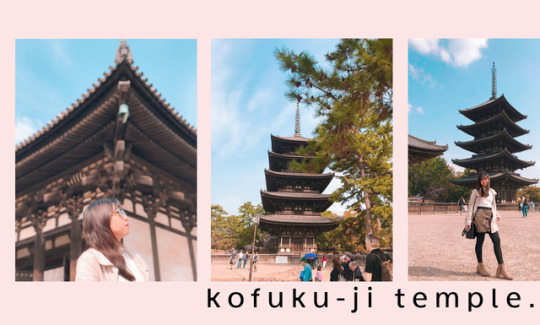
The temple consists of different halls – Tokondo or the Eastern Golden Hall, Gojunoto or the five-storied pagoda, Nanendo or the Southern Octagon Hall, Sanjunoto or a three-storied pagoda, Hokuendo or the Northern Octagonal Hall, and Chukondo or the Central Golden Hall.

Most of Nara’s temple are near each other you can just walk to make your way around the city. Just a few miles away, we paid 500 yen and entered Gangoji Temple.
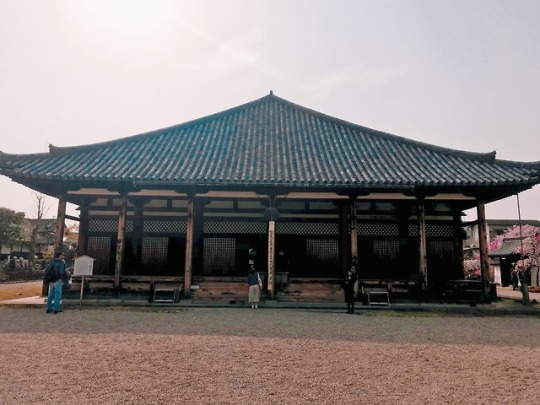
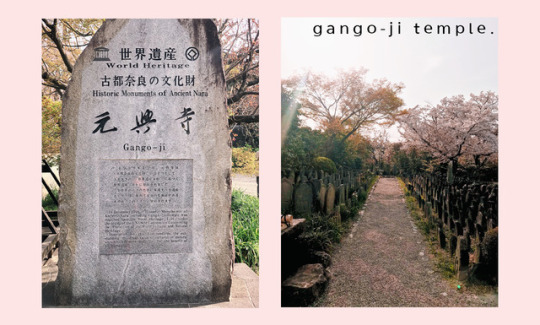
The first Buddhist temple built in Japan and one of the Seven Great Temples in Nara, we wandered around the place which covers the historical site angoji Gokuraku-bo, the old remains of the Buddhist priests’ living quarters, the national treasure Gokuraku-do Hall (main hall of Gokuraku-bo) and the national treasure Zen Room (Gokuraku-bo Zen Room). (Note: Taking photos inside the temple itself is prohibited.) Aside from the temple itself, Jizo statues in groups around the temple caught my interest.
There's solemnity in every temple that we visit. It's like a part of people's lives is etched into it and you'll discover a lot more by wandering through the temples. So natural that Japan had been shaped around it.
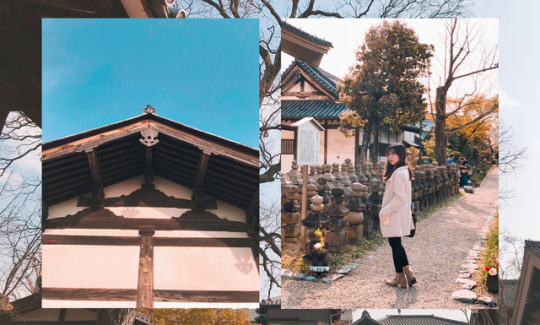
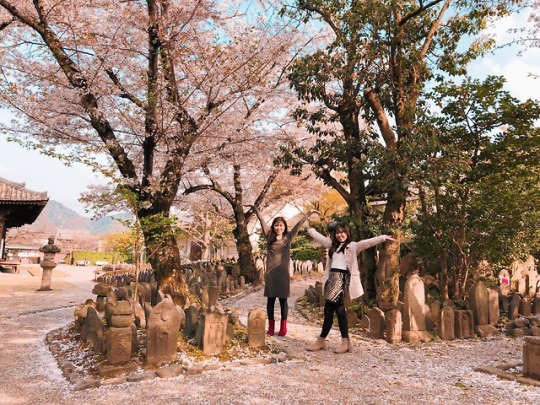
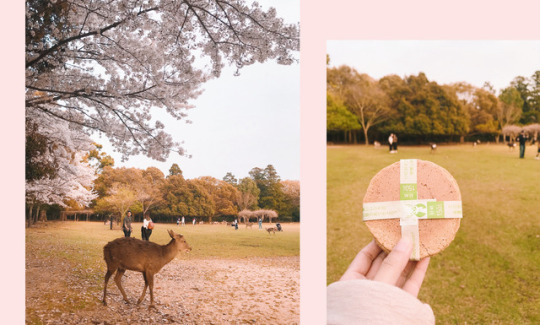
One of the highlights when going to Nara is to see the deer, so we pinned Nara Park to google maps and walked straight after Gangoji Temple. Though it was a very long and tiring walk (sabi ni google maps 5 minutes, naging 15 minutes haha), we got too excited when we saw deers just freely roaming around the park under the cherry blossoms. The deers are very used to humans but I am bit scared when I first went near them. We bought deer crackers in one store around the park for 150 yen to feed these docile deers and to get them closer so we can take pictures.
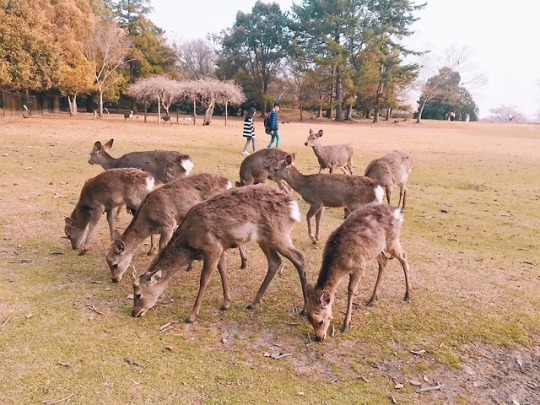
Observing other tourists and residents, there’s a proper way of feeding the deer. By holding the cracker overhead, the deer bows its head one time. Next, put the cracker behind your back, getting the deer to bow a second time. Lastly, hold the cracker overhead one last time, getting that third bow, and then reward the deer with the cracker. Even deers are well-mannered in Japan, how cool is that?!
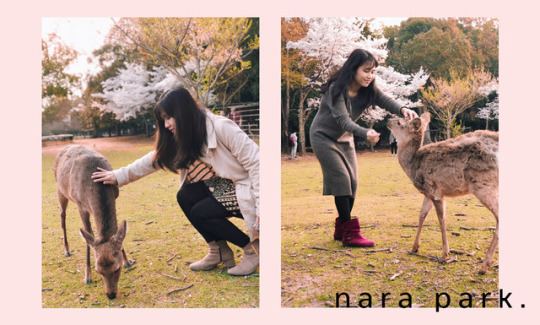
Funnily, while feeding them, I glanced over my shoulder and found that some deers stole our Nara map and happily munched it. My sister and I thought of getting it thinking that maybe it’s our Kansai Rail Map (bukod sa google maps, ito yung buhay namin haha) but we backed away because they looked aggressive. Some deers also chased us even when there’s no crackers left. A bit scary but it was fun watching the deers being adorable and feisty while resting our feet.
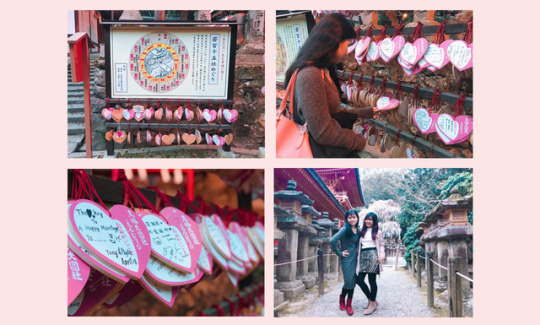
Just a few minute walk along a long pathway, under the shade of tall trees, flanked on both sides by moss-covered, ancient stone lanterns, there is Kasuga-taisha Shrine. Nara’s most celebrated Shrine and established in dedication to a deity responsible for the protection of the city, more temple and shrine can be found at the top of the hill. There were also an abundance of stone lanterns that you can see around the area donated by the shrine’s worshippers.
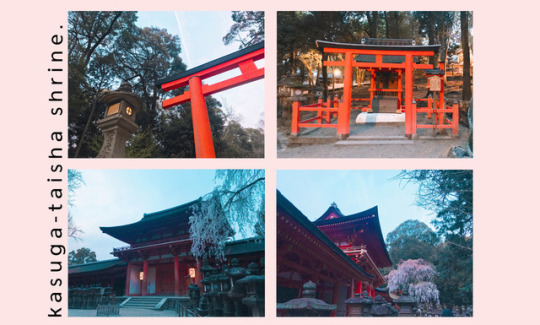
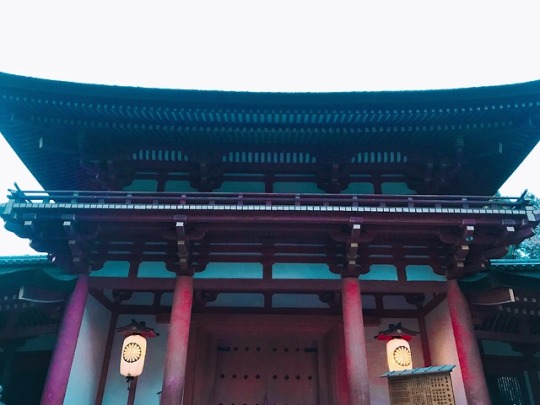
There are actually a lot more things to see around Kasuga Taisha Shrine but since it was getting pretty dark, we opted to return to the station. Along the way, we got lost again but thanks to the ever kind Japanese who approached and gave us the right direction going to Kintetsu Nara Station. The entire trip was quite a bit of walking required so be prepared with comfortable shoes (or tiis ganda tayo sa OOTD aka boots).
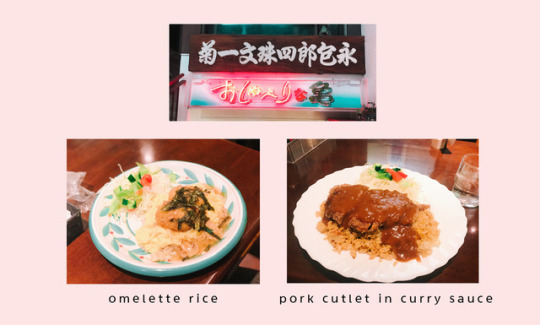
To make our tummies satisfied, we walked down the street near the station to have a dinner before going back to Osaka. Finding a place to eat is quite a difficult task since some of the restaurants don't have english translation in their menu. We just rely on pictures and ended up devouring popular Japanese meals -- omurice and curry.
How to go to Nara from Osaka:
Go to the nearest station from your hotel. From Hotel Zipang, the nearest is Dobutsuen-Mae Station.
Ride Tanimachi Line going to Osakauehommachi Station.
From the Station, transfer to Nara Line going to Kintetsu Nara Station, the last station.
From there, you can walk going to Kohfuku-ji Temple (or any of your first destination around Nara).
5 notes
·
View notes
Text
JAPAN 2018: Day 1 – Strolling the Streets of Kobe

Months before, we were already planning to go to Japan but still haven’t booked our flight until 1 week before we decided to go for it, we even have our visa approved back in January and have our outfits ready.

After passing through the immigration and getting our baggage, we proceeded to money changer to exchange peso to yen (tip: it’s better to have your money exchanged in the Philippines) and bought our 3-day Kansai Thru Pass (¥5,500 or around P2,500), a ticket which enables you to ride on subways, private railways and buses throughout the Kansai district. You can actually buy this online via Klook or kkday. This will save you from the troublesome task of checking the complicated rate table to buy tickets and you won't need to buy another ticket every time you make connections. To ensure our wifi connection and to make sure we can use google maps (your travel-bestfriend) throughout our stay, we rented a pocket wifi for 6 days thru kkday.

As we rode the train from the airport going to Shinshibaishi Station, the nearest station from our hotel, I can’t help but appreciate the scenic view of Osaka Bay and cherry blossom trees lining up the streets. The branches of cherry blossoms overlap like hands with fingers laced together. Who would’ve thought that I can go to Japan the first time in its most beautiful state? CHERRY BLOSSOM!!! We walked from the station going to Guard Hotel not knowing that it is very far and carrying our 25kg luggage were not helping.
Arriving at Guard Hotel by 3 PM, we need to contact the owner first thru Line or Wechat (and unfortunately, we don’t have those apps so another tip – make sure to at least download one popular app in Japan). Our hotel for the first night is a shared room with a shared bathroom (disadvantage of booking your accommodation 3 days before your trip #notadvisable HAHA) but, it’s not bad since you will be out most of the day.
We ate our packed noodles (#tipidtips) once we have settled our things inside and prepared ourselves to get lost going to our first destination – Kobe.

Kobe, the capital of Hyogo Perfecture, has a nostalgic-feel ambiance of neighborhood because of its western-style residences, cafes, restaurants, and boutiques which makes you want to walk more around the city. However, since we have a limited time, we only had the chance to explore Kitano-chō.


By around 7 in the evening, our feet, tired from all the walking that we did, begged for us to come back to our hotel. I can’t remember how many times we got lost even though we have google maps, but at last, we’ve reached Sannomiya Station where we came from earlier.
How to go to Kobe from Osaka:
Go to the nearest station from your hotel. From Guard Hotel, the nearest is Yotsubashi Station.
Ride Yotsubashi Line going to Nishi-Umeda.
From Umeda Station, ride Hanshin Main Line going to Kobe-Sannomiya Station.
From there, you can walk around Kobe.
#travel#osaka#japan#kobe#day 0#what to do in Kobe#half day in Kobe#tourist spots in Kobe#where to go in Kobe#Kobe Japan#tourist attraction in Kobe#Kitano-cho#what to do in kitano-cho#how to go to Kobe#how to go to kobe from osaka#train station to kobe#kansai international airport
2 notes
·
View notes
Text
Canyoneering in Kawasan Falls: An Action-Packed Adventure

Pretty much energized from our sleep the night before, we headed to South Cebu Bus Terminal by 4:30 AM to catch the earliest trip going to Badian via Bato Barili (Bus fare: P120; non-aircon). As much as we want to ride an aircon bus, it will leave by 6:30 AM so we opted to take the ordinary bus instead. (Tip: Eat breakfast before the trip or bring snacks you can eat while on the road.) Kuya Jomy, our tour guide, was waiting for us in front of the Matutinao Catholic Church when we arrived around 8:00 AM. (We contacted the tour operator before we went to Cebu; Fee: P1,500 inclusive of complete gears — life vest, helmet, and aqua shoes, entrance fees, motorcyle fee to starting point, and accredited tour guides.)

Popped on our shoes, life vests, and helmets, we jumped on the back of a habal-habal going to the start of the jungle trail in Algeria for about half an hour passing scenic mountain views and a bit of rough roads. After the thrill of riding in a habal-habal, the tour started with a registration and a quick safety briefing followed by a long walk (or short if 30 minutes of walking is considered short to you HAHA) down to Kanlaob river where you’ll be welcomed by a strong current of water and soon be jumping from the first waterfall.

After the first jump, a short walk and swim will bring you to another cliff, this time higher than the first one, where you also need to jump. I am usually the girl who overthinks what might happen but, instead I took a leap and find myself pulling out to the surface of the water. I enjoyed it!!!

We then passed through tight holes and passages where you’ll step on big and slippery rocks and had a series of jumping and swimming in the cold and refreshing turquoise blue water.

A mini-cave, just below the rock, will lead you to a part of the river where you can slide on a smooth part of the rocks that will throw you into the clear waters of the river.


More series of endless walking and trekking along the curves and narrow passages of the canyon and swimming in the crystal clear waters. In some areas, the river is just shin-deep. In others, waist deep. But in others, we needed to swim. There are mini cascades of waterfalls along the way and finding a place in them is a therapeutic massage for free!

Midway, there are barbecue stalls where you can munch grilled pork meat and hotdogs. Yup, I know. Amazing, right? Since we haven’t eaten breakfast (talk about endurance hahaha), we ordered hotdogs for P45 each.

After few minutes of catching our breaths, here comes the highest cliff of the course. A 30-feet high jump. 30-FEET!!! Tour guides made it look like jumping to a 30-feet high cliff is an ordinary thing to do every day but it took me at least 10 minutes, 50 swears, and a hundred of prayers before actually jumping. I WAS FREAKING OUT, as in nasabi ko na ata lahat ng mura sa mundo and nakapagmura ako in one day more than what i said in my whole life! Mind you that you need to calculate your jump to avoid hitting the other side of the passage. But your sweet girl was brave and conquered the heights!!!
Just when we thought jumping is finally over, another short jump was waiting for us to cross the river under the rocks.

Not seemingly exhausted with all the jumping that we did, we lasted for another good hour of walking, trekking, and swimming to reach Kawasan Falls. We seemed to run on a great amount of energy coming from the fun, excitement, and determination to successfully come out of this adventure alive. We passed through a series of dams, falls, and other tourists who were just excited as we were to reach the gold at the end of the rainbow.

A reward for all the challenges that we did, Kawasan Falls is beautiful with its turquoise waters and charming falls. However, since it’s a holiday, there were influx of tourists and people during that day so we didn’t swim anymore and ride a balsa (P300 rental fee) which will lead you closer to the falls.

The whole adventure took almost 4 hours because we captured a lot of pictures (I love how Kuya Jomy was instructing where to pose and taking pictures of us LOL) and some of the choke points where i am scared to jump the cliff. It was truly a heart-racing, spine-tingling, and nerve-wracking but fun, exhilarating, and breathtaking experience. Once you conquer these jumps, i’m sure as hell you can truly and completely define adventure.
ITINERARY:
Day 3
4:00 AM — Wake up
4:30 AM — Travel to South Cebu Bus Terminal (Badian via Bato Barili; Bus fare: P120; non-aircon)
5:00 AM — Travel to Badian (Kawasan Falls)
8:00 AM — Arrived at Matutinao Catholic Church
8:30 AM — Habal-habal ride to Algeria
9:00 AM — Start of the canyoneering to Kawasan Falls
1:00 PM — End of Tour
1:30 PM — Travel back to Cebu City
4:30 PM — Arrived at South Cebu Bus Terminal
5:00 PM — Sidetrip: Cebu City Tour
• Temple of Leah
• Magellan’s Cross
• Pasalubong/Souvenir Shopping
#travel#Canyoneering#Kawasan Falls#Cebu#what to do in Cebu#Adventure in Cebu#Canyoneering in Kawasan Falls#Canyoneering at Kawasan Falls#Canyoneering in Cebu#Where to go in Cebu#How to go to Kawasan Falls#What to do in Canyoneering#What to wear in canyoneering cebu#Itinerary for Canyoneering Kawasan Falls
23 notes
·
View notes
Text
Bantayan Island: A Piece of Paradise in Cebu

Tucked away in the northern end of Cebu, Bantayan Island is a breathtaking piece of paradise with Sta. Fe's long stretch of powdery white sand beaches and shimmering pristine blue waters. The island is worth all the hassle of 4 hours of bus travel and an hour of ferry ride. Showcasing a plethora of hidden wonders, the island can pass itself as an epitome of beauty.
It was decided last year that Venice, one of my college bestfriends, and I would book a flight somewhere and escape the city for a little while on our birthday (yep, we do have a same birthday!!!) Cebu wasn't our first choice but i am not regretting it AT ALL. The night after our birthday, June 23, we headed to the airport for our 4 am flight and blithely went to Cebu North Bus Terminal to catch the 6:30 am trip going to Hagnaya Port (Ceres Bus, 150 pesos). From there, we rode a ferry (170 pesos plus terminal fee of 10 pesos) and welcomed Bantayan Island with fairly fresh ocean air.


We were tired due to lack of sleep from the day before and due to endless catching up (we haven't met months before that trip!) so seeing our accommodation for the night is very refreshing. Hoyohoy Villas, although a bit pricey for one night, didn't disappoint with its nature-y vibe and vacation feels (fun fact: we had a hard time looking for a hotel since most of them are fully booked already so we grabbed the chance when we found out that Hoyohoy still has available room). The place has only 7 villas and 2 casitas but since we came here off peak, it was almost deserted like we own the whole resort!
Right outside our doorstep is the beach front, however, it was low tide that afternoon so we haven't had the chance to swim. We just lazied around the beach, took pictures, strolled along the beach, and rested in our room like everything is away from us. IT WAS JUST SOOOO RELAXING!!!


We had a feast for breakfast in our room the next morning (hay, can all mornings be like this???) Not leaving the island without dipping ourselves on the beach, OF COURSE, we changed to our swimming attire and initially planned to go to Kota Beach. Luckily, the tricycle driver that we rode in offered a tour around the island (spell s p o n t a n e o u s) HAHA


If you watched Camp Sawi and remember Bela Padilla's diving scene with Sam Milby, yuuup that's right, it's our first stop!


Just a few minutes away from the diving spot, we headed towards Paradise Beach and by paradise i mean WOW WHAT A BEAUTY!!! Paradise Beach, a hidden gem in the island, is a secluded strip of sand and isn't a crowded place unlike Boracay. You just need to walk for 5-10 minutes from the drop off to see and be mesmerized with the calmness of the beach and the scenery and the shades of blue right in front of your eyes. We took a few good pictures before jumping on to the water and let ourselves unwind under the sun and enjoy the serenity and picturesque view.


Before totally forgetting about time, we stepped out of the water and found ourselves amazed with another splendid curved white sand shoreline and magnificent stretch of blue waters in Kota Beach. A tall "Camp Sawi" sign will welcome you upon entering the driveway (fun fact: this is the shooting location of the movie Camp Sawi). After settling our things on the sand and admiring the beautiful view of the blue horizon, we basked under the sun while getting touched by the waters. A powdery white sandbar is also present and even more distinct when it's low tide.


We had to leave immediately and go back to Hoyohoy Villas in time for our check out. But overall, it was such a memorable getaway even just for one day! Would love to come back and stay longer and beach bum! Ahhh, Bantayan Island, you were so enchanting!!!
Photos wouldn't do justice with all the amazement that we had from the island so i suggest that you include Bantayan Island in your next trip!
Itinerary:
DAY 1 5:35 AM — Arrival at Cebu-Mactan International Airport 5:40 AM — Travel to Cebu North Bus Terminal (Taxi Fate: P110.00) 6:00 AM — Arrival at Cebu North Bus Terminal 6:30 AM — Travel to Hagnaya Port (Bus Fare: P150.00) 10:00 AM — Arrival at Hagnaya Port (Terminal Fee: P10.00) 10:30 AM — Travel to Sta. Fe Port, Bantayan Island (Ferry Fare: P170.00) 11:45 AM — Arrival at Sta. Fe Port, Bantayan Island 12:10 PM — Check in at Hoyohoy Villas 2:00 PM — Lunch at Hoyohoy Villas 4:00 PM — Leisure time on the beach
Day 2 6:30 AM — Wake up 8:00 AM — Breakfast at Hoyohoy Villas 9:30 AM — Start of Bantayan Island tour • Cliff Diving Spot • Paradise Beach (Entrance Fee: P50.00) • Kota Beach 12:00 PM — Back at Hoyohoy Villas 1:00 PM — Check out 1:30 PM — Travel to Hagnaya Port (Ferry Fare: P170.00) 2:30 PM — Arrival at Hagnaya Port — Travel to Cebu North Bus Terminal (Bus Fare: P160.00) 6:50 PM — Arrival at Cebu City
#travel#Cebu#Bantayan Island#Hoyohoy Villas#BIRTHDAY TRIP#Where to go to Cebu#What to do in Cebu#Where to go in Bantayan Island#What to do in Bantayan Island#Cliff Diving in Bantayan Island#Paradise Beach#Paradise Beach in Bantayan Island#Kota Beach#Camp Sawi#Kota Beach Camp Sawi#Camp Sawi in Bantayan Island#adventures#Where to stay in Bantayan Island#Cheap accommodation in Bantayan Island#How to go to Bantayan Island#Itinerary for Bantayan Island
21 notes
·
View notes
Text
Holy Week 2017: Things To Do in Cagayan Valley

The bus station's packed with people streaming in and out, all of them dressed in their most comfortable clothes, bags and packages in hand, each one seemingly excited to go to their respective destinations. It was the Wednesday where most work is finally at halt to give way to the celebration of Holy Week which happens to be last April 12.
My family decided to have a quick vacation in my mom's hometown Cagayan Valley, specifically in Solana. The whole bus ride took almost 12 hours that when I woke up it's already 10 in the morning, passing by tall fields of rice and corn, and trees growing on terraced hills. An occasional bridges and ponds and river winding through a flat stretch of land.
Located in Northeastern side of mainland Luzon, not many people think of Cagayan Valley as a vacation spot but it is a home to many old Spanish churches, caves, and the longest river bridge in the Philippines. Beating the scorching heat, here are some things you can do while you're in Cagayan:

Visit Basilica Minore of Our Lady of Piat.
It has become one of our traditions when we go to Cagayan Valley — to visit this church. A significant pilgrimage site of the North, it is one of the 12 minor basilicas in the Philippines and a home to the venerated Black Virgin Mary. The church structure is mainly made of red bricks and stained glass windows located on top of a hill to avoid floods. Surrounding the basilica stood the Piat Basilica Museum, Blessing sites for religious items, Parish Convent, and life-sized representation of the Stations of the Cross.

Cross Buntun Bridge.
Tagged as the longest river bridge in the country, it stretches from Tuguegarao to Solana and spans over Cagayan River, the largest river basin in the Philippines. Since we live in Solana area, we always cross this 1.098 km long bridge— that long enough to carry more than 18 tons of vehicles. I haven't tried going to the bottom of the bridge though.

Explore Callao Cave.
Known for the chapel built inside the cave, Callao Cave, nestled in Peñablanca, consists of seven chambers which illuminates light filters in from a natural crevice above. It was an uphill battle to get to the cave entrance as it takes 184 steps going up so have your water bottles and handkerchiefs ready. For only 20 pesos, you can wander around the beauty of a limestone cave where stalactites and stalagmites have formed inside. There's this stillness and tranquility that you can feel inside the cave especially with the presence of the chapel. After which, we tried the wooden boat ride in Pinacanauan River passing through a small rainforest, a bat, scenic rocky cliffs and picturesque river bank with clear water.

Ride Kalesa.
We always make sure that we try riding kalesa every time we visit our province to have a tour around town. As one of their means of transportation, riding kalesa is very cheap and very convenient as you can frequently see a lot around the town. Made of a wooden cart with a roof and a pair of rubber wheels, it can seat as many as eight persons. It feels nostalgic riding the kalesa as somehow it takes you back to the Spanish era.

Eat Ilokano’s local delicacies.
Ilokanos have rich delicacies and some of them are the Pancit Batil Patong, Papaitan, and Special Halo-halo. Pancit Batil Patong, also known as Pancit Tuguegarao, is a noodle dish made up of miki and an overload of toppings and is one thing you should try if you ever get to visit the town. Another dish popularized by Ilokanos is the Papaitan. It is a bitter and spicy stew consisting of beef or goat innards as liver, heart, tripe and the bitter bile (apdo). On our way home, we bought halo-halo and to my surprise, the halo-halo consists of malagkit rice plus the other usual ingredients. Also, they put yema on top instead of leche flan or ube which also tastes good.
► Holy Week x Probinsya Life
Watch the video of our Holy Week trip to Cagayan Valley!
#travel#Holy Week#Cagayan Valley#Tuguegarao#Things to do in Cagayan Valley#Things to do in Tuguegarao#What to do in cagayan#What to do in Tuguegarao#What to eat in Cagayan#What to eat in Tugeugarao#Our Lady of Piat#Buntun Bridge#Kalesa
22 notes
·
View notes
Text
Courage, dear heart

“Do you feel better now?” I asked my heart and she answered yes in a low tone voice, the kind of voice that’s cracking up signaling someone’s about to cry. On the outside, she has this full smile plastered on her face. But she’s just pretending. As always.
A week passed by with nothing goes right, not even in a single minute and I feel like life is taking its toll on me, testing my patience and faith. I’m starting to feel hopeless and worthless yet again. I’m beginning to see the dark hole hidden somewhere in my chest waiting to drown me. It is only for one week, but the burden feels like months.
Most nights, the wall I’ve built around me comes crumbling down. Before I even realize what’s going on, there I am – fragile, vulnerable, and totally confused. At times like that I feel like I wanted to hide somewhere, in the closet, under my bed, or in the smallest space I can found in my room, and hug myself just to feel safe and secure. Just to feel tiny in this huge and crowded world.
Nonetheless, I managed to survive this week without mentally breaking down, at least.
“Courage, dear heart,” I’d say. Courage to free the storm that is happening inside you. Courage to accept that everything will not always be in your favor. Courage to still see the beauty and hope in every day. This feeling of torment is not forever, that I know for sure. There are far more battles to conquer every day and life can hand us all of that and more, without asking.
We just have to hold on to hope. We have to hold on to the promise of better days, of brighter tomorrow. We have to hold on to the present and mostly, to the future. No matter what. Because honestly? That is all we have. Because while we can’t control what life will throw to us, we can control our outlook in life, the pool of thoughts in our heads, and the hope in our hearts and our bloodstreams.
Listen, dear heart, “Try one more time.” You have to listen to me, to the quiet voice inside you reminding that you are this compassionate and strong-willed girl. You got this, I know. We’re together in this fight. We will see the light again, despite the darkness. Courage my dear heart, is all you need.
10 notes
·
View notes
Text
Boracay, Philippines: A Breath of Salty Air

Nestled between Station 1 and 2 beachfront, The Sun Villa Resort & Spa was a quiet and homey hotel with its rustic-inspired theme. We were welcomed with refreshing complimentary drinks, a home-brewed iced tea, which exceeded my expectations, and went straight to our room after we checked in. We booked a family room since we were five then which has 2 queen-size beds, a sofa bed, air condition, a cable TV, a clean toilet & bath with hot shower and toiletries, and complimentary water bottles, 3-in-1 coffee and tea.

After we settled ourselves in our room, we headed to Boracay Toilet, probably the quirkiest restaurant you’ll see there, to have dinner. Located in the main road of station 1, you’ll notice the place right away because of the big toilet bowl plastered in front. Colorful toilet covers as part of wall, the place was exemplary designed in line with its name from the interiors -- pipes and plungers in the ceiling, bathtubs and toilet bowls as tables and chairs -- up to their plates, menu, and even the dishes’ names.

Going over the menu, we ordered Inihaw na Liem-POOP, Kal-Diri-ta, Also Slimy Worms But White (Carbonara), and bowls of rice. There’s nothing special with the food but at least we got to taste the creativity of the place and have dinner in a unique way possible with its clever concepts and interiors.

We took a nice night stroll on the beach headed nowhere as we traverse from station 1 to 3 after we ate. Two of my friends got a henna tattoo, looked at some souvenir shops, experienced the vibe of the night life, and indulged the ocean air until our legs got tired and decided to go back to our room.

A cool summer breeze enveloped us the next morning as my friends played volleyball in front of the beach and ate breakfast back in the villa afterwards. They have a lot of choices for the free breakfast -- Filipino, American, Continental, and more, in which I’ve got Beef Tapa with eggs and a coffee while others chose Daing na Bangus and Sausage with eggs.


Energized with our meal, we changed to our swimming clothes and started our water activities for the day - banana boat, island hopping (with lunch), and helmet diving, for only 900 pesos (that’s a pretty good deal huh!). A speedboat brought us to the area where banana boats were settled and found ourselves enjoying the 15-minute ride with the salt water splashing right through our faces (although masakit siya sa mata, mga bes hahaha). Right after we came back from the ride, we went straight to our boat for island hopping.


There were about eleven of us in total since it’s a public tour. We all sat on boat, parallel wise, sitting quietly, and taking the salty air. Off from the shore, we moved towards the center of the sea to do some snorkeling and headed to Tambisaan Beach for lunch, across from which you can see the Crocodile Island. Soon, we boated for around 5 minutes going to Crystal Cove and Magic Island for cliff diving but failed to dock because of the strong waves that time, we didn’t even reach the Puka Beach. We, then, sailed going to Diniwind Beach for our last stop and went back to station 1.

At 3PM, we hopped on a speedboat again towards the helmet diving area, briefed on the basics (there are many signals you need to remember which made us more frightened but whatever, the three of us still pursued while the two stayed on the raft) and waited for like 10 minutes before our turn. It was a good 15-minute deep down, seeing the frenzy of fishes even if I panicked the first time I went down because of the water pressure (mind you that the helmet weighs 50kgs!!!). When the guide gave us bread so as the fishes would come near you, i was overwhelmed to see school of fish up close to my face, like reallyyyyy close. Most of them were tilapias but still there are other fishes like nemo (clownfish) and dory (blue tang). They were lovely and colorful to look at making me happier with the experience (one ticked off my bucket list!).

Tired, we refreshed back at our villa after the activities and rushed back down the shore in time for the sunset. Then, we have our dinner at a restaurant along the beach and walked going to D’ Talipapa to buy some souvenirs and pasalubong.


The next morning, my friends had no plans but to stay in our room and prepare for our departure. Albeit, I still pushed to do some picture taking on the beach with one of my friends (for instagram, y’know haha). We also picked our CD (pictures and videos of helmet diving) from the supplier’s office and passed by the Willy’s Rock for a bit.


Around 11:30 am, our guide was already there to pick us up for our transfers going back to Kalibo International Airport for our flight. It was a signal for us to bid goodbye from the beach, white sand, salty air, and lively nights but we made sure that we brought along with us the memories that we made within our stay in Boracay.

Till next time, Bora! :)
#travel#Boracay#Philippines#island hopping#banana boat#snorkeling#helmet diving#adventures#station 1#willy's rock#things do to in boracay#where to eat in boracay#what to do in boracay#where to stay in boracay#cheap accommodation in boracay#cheap accommodation in station 1 boracay
16 notes
·
View notes
Text
Kalibo, Aklan: A Walk in the Town

It was 6:30 in the evening, strapped in my seat, and looking at the window as the sky slowly turns pink, when the airplane plunged through clouds on approach to Kalibo International Airport. Once the plane was on the ground, we stepped down and appreciate the cotton candy sky for a little while. Seeing the sky, it never fails to send amazement to me.

The moment we're complete, we hopped on a van towards our accommodation at Beebee Lodge, munched over dinner at Lorraine's Tapsi, a small eatery near our place which was featured already in Biyahe ni Drew, and killed time at our lodge.

Awaken with the loud voices of my highschool friends the next day, we began to prepare for our Kalibo tour that day and had our jolly breakfast at Jollibee. We headed towards Kalibo Cathedral, where the image of Sto. Niño of the world-famous Ati-Atihan Festival is enshrined, for our first stop. The church was a survivor of world war II and earthquake.


Just a walking distance from the church, our feet brought us to Museo It Akean, a repository of the province's history and heritage through art exhibits and memorabilia that highlights different eras from the past up to the present. For only fifteen pesos, one can revel the glorious past and culture of Aklan. The memorabilia of Geofredo P. Ramos, the Father of Aklan, are prominently showcased in which you can see his pictures and the things he used before. Also, a collection of its antiques and age-old crafts and artifacts can be found in the two-storey edifice.


After a good hour of roaming around and appreciating the beauty of Aklan with its preserved history, we walked towards Kalibo Pastrana Park which is also a feet away from the museum. We rested our feet, took a break for a while, and decided to go to our last stop before having our lunch.
Almost 15 minutes later, we were heading to Bakhawan Eco Park, a 220-hectare mangrove forest and serves as one of Kalibo’s prime attractions. Once registering and paying 150 pesos each and the staff at the entrance done explaining the history of the mangrove forest, we enjoyed our nature stroll trough 1 kilometer bamboo trail appreciating the different species of mangroves.


We came to a stop and the path surprised us with a scenic view of the beach at the end. We had our in-between photo ops (of course, for instagram haha!) making us finished the whole stroll for almost 2 hours which was supposed to be just a 15-minute walk. I didn't expect to see a beach at the end but it made the whole walk worth it. It's very calming and peaceful and very far from the busy streets in Manila. There's also a so-called open bar with bamboo tables and chairs where one can rest and enjoy the view. For 300 pesos, you can opt to have a tamilok or woodworm tasting which was now a very famous thing to do in Aklan. Sadly, we didn't divulge ourselves to try.


When we recovered from the long walk and finished indulging the fresh air from the sea and enjoyed the peacefulness in the arms of Mother Nature, we decided to go back to our lodge and packed our things in time for our check out. After which, we make our tummy satisied with our lunch at Manukan Haus Kamayan and headed to Kalibo International Airport for our transfer to Boracay.
#travel#kalibo#philippines#kalibo cathedral#museo it akean#bakhawan eco park#aklan#what to do in kalibo#things to do in kalibo#where to stay in kalibo#cheap accommodation in kalibo#where to eat in kalibo#activities in kalibo#tour in kalibo#places to visit in kalibo
12 notes
·
View notes