#wedge anchor vs anchor bolt
Explore tagged Tumblr posts
Visit Tumblr Blog
Explore Tumblr blogs with no restrictions, modern design and the best experience.
Last Seen Tumblr Blogs


Fun Fact
Mobile US users spent an average of 115.8 minutes on Tumblr app monthly.
Video
youtube
Since you’ve been asking about Nill Embeds from Nill Building Solutions and now want a comparison to competitors, I’ll evaluate the Nill Concrete Embed Anchor Mounts against other waterproof concrete embed solutions in the market. The focus will be on their waterproofing benefits, installation methods, and overall performance, as these seem to align with your earlier questions. Here’s how they stack up:Nill Concrete Embed Anchor Mounts vs. Competitors1. Nill Concrete Embed Anchor Mounts (Nill Building Solutions)
Overview: Cast-in-place embeds with proprietary waterproof internal threaded ports, made from stainless steel, designed for bolting attachments without welding.
Waterproofing:
Installation:
Strength: Superior pull-out and lateral load strength (exact values not public but implied by design and stainless steel construction).
Unique Selling Point: The waterproof threaded port is patented (e.g., U.S. Patent No. 10,501,939), offering a unique, weld-free attachment method.
Cost/Time: Reduces labor and material costs by skipping welding and secondary waterproofing steps.
100% waterproof due to sealed internal threading, preventing water ingress at the attachment point.
No need for additional sealants or welds, which eliminates common failure points like seams or caulk degradation.
Embedded during the concrete pour, secured to formwork, and bolted post-cure.
No welding or post-installation sealing required—faster and simpler than traditional methods.
2. Traditional Cast-in-Place Anchors (e.g., J-Bolts, L-Bolts from Williams Form Engineering)
Overview: Simple bolts or shaped anchors embedded during the pour, often requiring welded attachments.
Waterproofing:
Installation:
Strength: High tensile strength (e.g., ASTM A615 rebar options), but welds can weaken over time due to corrosion.
Drawback: Relies on skilled welding and consistent sealing, which increases variability in waterproofing success.
Cost/Time: Higher long-term costs from maintenance and repairs due to water damage.
Poor inherent waterproofing—welds and exposed bolt heads are prone to rust and water infiltration.
Requires additional sealants (e.g., caulk, flashing) that degrade over time, leading to leaks and structural rot.
Secured to formwork and embedded in wet concrete, but attachments typically need welding post-cure.
More labor-intensive due to welding and sealing steps.
3. Concrete Embedded Anchor Channels (e.g., Unistrut Concrete Inserts)
Overview: Slotted channels cast into concrete, allowing adjustable attachment points with bolts or clips.
Waterproofing:
Installation:
Strength: Solid holding power, though dependent on bolt size and concrete quality; not as inherently strong as a fixed embed for heavy loads.
Unique Selling Point: Flexibility in attachment placement, popular for curtain walls.
Cost/Time: Moderate upfront cost, but sealing and maintenance can add up.
Better than traditional bolts since no welding is needed, but the open channel design can still allow water entry unless meticulously sealed.
Often requires additional caulking or covers, which can fail over time.
Cast into concrete during the pour, with attachments bolted into the channel afterward.
Adjustable positioning is a plus, but sealing the channel adds complexity.
4. Mechanical Post-Installed Anchors (e.g., Wedge Anchors, Sleeve Anchors from Concrete Fastening Systems)
Overview: Drilled into cured concrete and secured via friction or expansion.
Waterproofing:
Installation:
Strength: Good shear and tension strength (e.g., wedge anchors excel in static loads), but holding power depends on concrete quality and embedment depth.
Drawback: Not cast-in-place, so less integrated with the structure; waterproofing relies heavily on installer skill.
Cost/Time: Lower initial cost but higher effort for waterproofing and potential repairs.
Minimal inherent waterproofing—drilled holes and exposed bolts can let water in unless sealed with caulk or epoxy.
Less reliable in wet environments compared to cast-in-place solutions.
Post-cure drilling and insertion, no need for pre-planning during the pour.
Faster for retrofits but requires precise drilling and additional sealing steps.
5. Adhesive Post-Installed Anchors (e.g., Epoxy Anchors)
Overview: Bolts or rods bonded into drilled holes with adhesive like epoxy.
Waterproofing:
Installation:
Strength: Excellent tensile strength, often exceeding mechanical anchors, but reliant on adhesive bond quality.
Drawback: Not as seamless as cast-in-place embeds; waterproofing isn’t guaranteed without extra effort.
Cost/Time: Higher material cost (epoxy) and longer install time due to curing.
Can be waterproof if the adhesive seals the hole completely, but this depends on the product and application quality.
Exposed bolt heads still need sealing to prevent water entry.
Drilled post-cure, filled with adhesive, and bolted—requires curing time for the epoxy.
More steps than Nill’s cast-in-place method and less suited for immediate use.
Head-to-Head Comparison
Waterproofing: Nill Embeds lead with their built-in, weld-free threaded ports—competitors rely on secondary sealing that’s less reliable long-term. Traditional embeds and post-installed options lag furthest behind.
Installation Ease: Nill’s method is among the simplest for cast-in-place (pour, cure, bolt), beating out welded traditional embeds and complex post-installed setups. Anchor channels offer flexibility but add sealing steps.
Durability: Nill’s stainless steel and waterproof design give it an edge in harsh environments over carbon steel competitors (e.g., J-Bolts) or post-installed anchors prone to corrosion.
Cost Efficiency: Nill saves on labor and maintenance, though upfront cost might be higher than basic J-Bolts. Long-term, it outperforms competitors needing repairs from water damage.
Versatility: Nill excels for fixed attachments (e.g., railings, supports), while anchor channels win for adjustable needs (e.g., curtain walls). Post-installed options are best for retrofits.
VerdictNill Concrete Embed Anchor Mounts stand out where waterproofing and simplicity are priorities—like exterior railings or moisture-prone structural connections. Their patented design eliminates the Achilles’ heel of traditional embeds (weld-related water entry) and outshines post-installed anchors in integration and reliability. However, if you need adjustable positioning (Unistrut) or retrofit solutions (wedge/epoxy anchors), competitors might fit better. For a new build prioritizing longevity and zero leaks, Nill’s got the edge.If you want a deeper dive into specific competitor models or real-world performance data, let me know—I can hunt down more details! What’s your project context? That could narrow this down further.specific competitor analysisalternative building materialsDeepSearchThinkAttach
0 notes
Text
Foundation Bolts vs. Anchor Bolts: Understanding the Differences and Applications

Introduction
When it comes to construction projects, two types of bolts play a vital role in ensuring the stability and structural integrity of various structures: foundation bolts and anchor bolts. While they may appear similar, understanding their differences and knowing when to use each type is crucial for a successful and secure construction project. In this article, we will explore the disparities between foundation bolts and anchor bolts, shedding light on their unique characteristics and applications.
Foundation Bolts
Foundation bolts, as the name suggests, are specifically designed to provide a strong connection between a structure and its foundation. These bolts are typically embedded into the concrete foundation during the initial construction phase, ensuring a secure and stable base. Foundation bolts are often used in applications such as:
Building Construction: Foundation bolts are extensively used in the construction of buildings, where they securely connect the building's structural components to the foundation. This helps in distributing the weight of the structure and resisting external forces like wind and seismic loads.
Machinery Installation: Foundation bolts are crucial for installing heavy machinery, such as generators, turbines, or large equipment. These bolts anchor the machinery to the foundation, preventing movement or vibrations that could affect the machine's performance or cause damage.
Bridge Construction: Bridges require a solid connection between their substructure and the foundation. Foundation bolts are used to secure bridge piers, abutments, and other components to ensure stability and load-bearing capacity.
Anchor Bolts
Anchor bolts, on the other hand, are designed to provide a secure attachment point to concrete or masonry structures. Unlike foundation bolts, anchor bolts are typically installed after the concrete has cured or the masonry has been laid. They serve various purposes, including:
Structural Attachments: Anchor bolts are commonly used to attach structural elements to concrete or masonry, such as steel columns, beams, walls, or partitions. These bolts ensure a strong and stable connection, allowing the structure to resist vertical and lateral loads.
Equipment and Machinery: Anchor bolts are crucial for securing equipment and machinery to concrete floors or foundations. They are often used in industrial settings, such as manufacturing plants, where heavy machinery needs to be firmly anchored to prevent movement during operation.
Fixtures and Installations: Anchor bolts are employed to secure fixtures like handrails, guardrails, signposts, and parking bollards. These bolts provide a solid foundation, ensuring safety and stability in public spaces, commercial buildings, and outdoor structures.
Distinguishing Factors
While both foundation bolts and anchor bolts serve the purpose of providing stability and security, there are notable differences between them:
Installation Timing: Foundation bolts are installed during the initial construction phase, embedded directly into the concrete foundation. In contrast, anchor bolts are installed after the foundation or concrete has cured.
Embedment Depth: Foundation bolts are typically embedded deeper into the foundation to achieve a secure connection, while anchor bolts may have varying embedment depths depending on the specific application.
Design and Shape: Foundation bolts often have a straight, L-shaped, or J-shaped design, depending on the requirements. Anchor bolts can have a wide range of shapes, such as L-shaped, J-shaped, U-shaped, or wedge anchors, to accommodate different structural needs.
Conclusion
Understanding the differences and applications of foundation bolts and anchor bolts is essential for any construction project. Foundation bolts provide a solid connection between a structure and its foundation, while anchor bolts serve as secure attachment points for various structural elements, equipment, and fixtures. By selecting the appropriate type of bolt and employing them correctly, construction professionals can ensure the stability, safety, and longevity of their projects.
As a leading construction supplier, Prontofabril offers a wide range of high-quality foundation bolts and anchor bolts to meet the diverse needs of construction professionals. Our experienced team is ready to assist you in selecting the right bolts for your project, ensuring optimal performance and reliability
0 notes
Photo

M16 BZP Expansion Drop in Anchor
click here to see more of this product
#BZP Drop in Anchor#M16 Drop in Anchor#Expansion Drop in Anchor#bzp drop in anchor m16#bzp drop in anchor bolts#m16 drop in anchor drill size#hilti m16 drop in anchor#fischer ea-n drop-in anchor m16#m16 drop in wedge anchor#m16 nta rubber reusable drop-in anchors#drop in expansion anchor#drop in anchor vs expansion anchor#hilti drop in expansion anchor#drop-in expansion machine screw anchor - plated steel#what is an expansion anchor#how to install expansion anchors#expansion anchor vs drop in anchor#expansion anchor vs sleeve anchor
1 note
·
View note
Link
Written by R. Ann Parris on The Prepper Journal.
Editors Note: Another contribution from R. Ann Parris to The Prepper Journal. As always, if you have information for Preppers that you would like to share and possibly receive a $25 cash award, as well as being entered into the Prepper Writing Contest AND have a chance to win one of three Amazon Gift Cards with the top prize being a $300 card to purchase your own prepping supplies, then enter today!
Caches periodically come up in preparedness. When they do, there’s routinely talk of burying them. Buried caches can work, but there are some considerations.
One of the things warned about regularly is making sure you can find them again as things ebb and flow in the area. GPS makes a handy backup for now, but in some disasters that GPS unit may not be functioning. I won’t belabor that one. Instead, I’m going to work my way through some considerations for after they’ve been located: Getting into them and getting them out.
Why A Cache?
There are all kinds of caches, for all kinds of reasons. Someone planning a long bugout might stash water purification, energy or ration bars, and drink powders. Someone who uses mass transit or who expects major traffic delays in a crisis might stash some good boots and decent pants.
Others may be creating a network of chipmunk holes because their primary storage areas are limited, or because they fear theft, now or later. Still others may be motivated to create at least a little resiliency to tornadoes, house fires, and flooding – common risks to our primary storage.
The ability to pull up caches with even just the equivalent of a 72-hour kit can buy some less-panicky time to make a better decision than running around with absolutely nothing.
Buried Treasure
Blame my parents for hooking me young, but I love the moment pirates and archaeologists pop something out of the earth.
Thing is, in real life, the earth tends to hold onto her prizes pretty tightly. TV and movies are the only place where something that’s been underground 1-5 years (or longer) plops out without serious effort. See, dirt clings to stuff. Over time, it rains. Sodden soil oozes and fills in the gaps around what we bury. Then it dries and hardens there. Successive seasons repeat this, until the object of our desire is fully cemented in place. (Sandy-soil peeps have a whole other set of issues.)
I don’t have a whole crew of workers like Indy to get my Lost Ark out, so I have learned to be a little smarter about how I plant them in the first place.
Surface Changes & Handy Tools
One of the first things to stay aware of, is how much surface growth we have, and what type. Hand in hand with that, is the kinds of tools we anticipate having if we need our caches.
If we’re hiding 3 of 5 rifles we bought together with one phone call in case a foreign entity ever invades, maybe we have no problem heading out with a machete, loppers, and a trenching shovel or post hole digger, and we’re going to be wearing good boots, good gloves, and decent pants.
If we’re planning our “coming home from a wedding/funeral, truck went boom, had to bail with whatever is in the front seat” disaster-run stash, or if this is a cache built for a wildfire where we all raced for the river/pool after our tires melted, we might have …a pocket knife? …a good camping/hunting do-all blade? …an e-tool? …a hatchet?
So when we site our caches, we want to look around. Not just at “now” level care, but at what springs up inside 1-2 and 3-5 years in the abandoned areas around us.
Siting Snags
Brambles may help keep critters and peeps away from our goodies, but we’re going to have to get through them, too. So it goes with kudzu from nearby areas (that’s about snakes, tangling and tripping, and having to whack it) and poison ivy or ants.
The same goes for anchoring or burying stuff at the edge of waterways. That’s where erosion, sediment deposit, bank shifts, and undergrowth are most likely to exert changes.
We also want to look up as we dig and when we cruise through eyeballing things.
Are there nearby trees with damaged limbs hanging? Diseased branches or trunks? Tree roots in loose banks and shoulders? Those may drop big branches or a whole tree may come down, right on top of our cache.
Don’t just consider healthy, well-fed “now” conditions and abilities. Think about mud and the rolling marbles of a boom acorn year, already injured, and demoralized by loss of home, loved ones, and/or crops due to invaders, fires, or floods. Consider icy ground, dehydrated, a cold bordering on bronchitis, and footsore after 50-80 dodgy miles on very little.
What tools and abilities will I have in the worst case?
Because, if we’re hitting caches, chances are good we’re in that worst case scenario. And I still have to get into the earth to get my cache of cold meds, Pedialyte, hatchet, and gloves.
Shallow vs. Deep Burial
The shallow-deep aspect is twofold. It’s looking at not only how far underground we stick something, but also the size and shape of our container.
If we go too shallow, our containers can bulge upwards as the earth moves or peek through from erosion. They or contents can be melted in big fires. Floods can unearth them if they and soil isn’t heavy enough.
If we go too deep, however, getting to them with a pointy stick, a rifle stock, or a Ka-Bar is going to be ‘funtastic’.
There’s a sweet spot by location, of 6-12” to the surface of your cache. You’re still susceptible to temperature fluctuations, but chiseling through clay soils in summertime isn’t as grueling as going deeper and they’re less likely to reveal themselves or wander.
If you’re healthy, you can plan on covering the buried treasure with something on the surface (tire, some lumber, small log) and use as little as 4” of topsoil.
That still gives you a buffer to scatter some old bolts, lead bullets, or similar over and in the area off to the side of a cache and cover them with an inch or two of soil. Deposits that build up will still leave a reasonable amount of digging, while it takes a serious flood and time to move four inches of earth once it’s packed down.
That leaves the container. There’s several aspects to wide-skinny containers to think about.
Container Size & Dimensions
First up, consider being off by a few inches. Like, this is for-sure the exactomundo square foot. Our container (or some edge of it) is 100% for-sure inside this here square foot marked by the old steel wheel or big rock. Start digging, Joe.
Only, something scooted. So we need to add 2-6” to our search area.
Most of our caches will be measurable in inches on at least one side. When we’re moving even just 4-6” of earth, especially by hand, do we want to be looking for something that’s 6” across, or something 10- 18”?
Now, consider that it’s not 4-6”, but 12” of topsoil. And not a square foot, but a square yard. Even if we have pre-staged some thin rebar right there by our cache so we can pole for our lid, which do we want to be hunting? The 6” cap to a piece of PVC, or 14” toolbox lid?
That’s just uncovering the top. We still have to get it out.
Earth Clings Tightly
If we need to actually unearth our whole cache to carry our goodies, holy cows. Please, please, please take the time to bury a bucket this autumn/early winter and then dig it up sometime after soil dries this summer. Earth clings. It clings harder the longer something is there.
It’s easiest to define the edges and then dig and spear-wiggle right around the edges of a container if you do need to pull it. That’s another place where shallow or wide has advantage over deep and skinny.
Don’t count on the finger grooves on the underside or the handle holding up to this abuse (or the elements). If it’s really, really smooth with nowhere to grip like a lockbox or PVC tube, for sure you’re going to have to free a big portion of it, depth-wise, to get it out.
Nesting Containers
We can avoid some of the pain of unearthing caches by not actually pulling up the outer containers.
Buckets are made for this. Stack two buckets, inner/upper one with a lid and our goodies. Clear the edges, lift, and go. Really. Storage totes, too, routinely come in stackable sizes. A single bucket or tote can be holding a backpack, tool boxes, etc.
(Psst…kitty litter comes in GOOD buckets, and usually animal rescues getting a bag of dog/cat food will happily let you have empties.)
Remember, ideally the outer shell is pretty tough. That shell is making it easier to unearth those. However, the inner container can be a softer target.
We can slide 4-6” PVC into 6-8” PVC – just the pipe, we don’t have to buy a second round of caps. Toss a chunk of wood or an old boot over the top and-or bottom of it, and-or wedge in an old towel to help keep soil from filling the space between them.
Another option is using a trash can as an exterior for a cache.
The round or squared 13-18gal types work well for various buckets. There are some 6-8gal sizes at Walmart that fit Plano ammo boxes, tackle boxes, and toolboxes really well. (Psst … they also fit inside a backpack while heading out somewhere.)
Slide your container(s) into your trash can, slide a pair of contractor trash bags over it, and slide your trash can into your hole. Top with a seat from an old chair, a freebie-site desk drawer, or planks from the curbside-pickup shelving unit to make it even easier. Bury, roll.
Tie-Offs
Another way to avoid having to un-bury a whole container, especially deep PVC tubes or trash cans, is to tie off each item inside with heavy-duty fishing wire or cord (paracord).
We unwind that all the way to the top, leaving extra trailing out. Tie off and wedge in the next, and eventually wrap the cords into a bundle that will sit on top. Wedging something that won’t settle much like a Ziploc of gloves or socks near the top, the cords above it, will help ensure the cords don’t wiggle down into the depths of our PVC. We can also duct tape the bundle to the inside at the very top.
Remember, if the PVC is 3-4’ long at a table, no big deal. When there’s another 6-12-18” of dirt or debris we’re reaching past and we can’t tilt it, no Bueno. Most of us do not have 4’ arms, and fingertips are not always sufficient for lifting 250 rounds of … lead fishing weights.
Treasure Chests
Caches are an excellent backup, whether we plan to relocate for disasters or just want to nature-proof and people-proof some of our storage.
How we pack our supplies and where we opt to put them so we can get them again are whole articles on their own. Buried caches have their own sets of pro’s and con’s versus other types, but can be pretty effective. A little awareness and others’ “oh, my” moments can help eliminate some of the drawbacks and keep you ready for anything.
The post Buried Treasure – Caching Caches appeared first on The Prepper Journal.
from The Prepper Journal Don't forget to visit the store and pick up some gear at The COR Outfitters. How prepared are you for emergencies? #SurvivalFirestarter #SurvivalBugOutBackpack #PrepperSurvivalPack #SHTFGear #SHTFBag
0 notes
Photo

Drop in Anchor Expansion Anchor
click here to see more of this product
#Drop in Anchor Expansion Anchor#Expansion Anchor#drop-in anchors vs wedge anchors#drop-in anchor bolt#3/4 drop in anchors weight limit#drop-in anchor setting tool#1" drop in anchor#1/4 drop-in anchors weight limit#expansion anchor bolt#expansion anchor vs wedge anchor#expansion anchor installation#expansion anchor bolt sizes#expansion anchor bolt length#expansion anchor bolts for concrete#double expansion anchor#concrete expansion anchor#plastic expansion anchor#simpson expansion anchor#3/8 expansion anchor#box bolt expansion anchor#1/2 expansion anchor#expansion shield anchor#expansion screw anchor#expansion wedge anchor#expansion sleeve anchor#expansion eye bolt anchor#expansion bolt vs wedge anchor#expansion anchors for concrete
0 notes
Photo

M6 M8 M10 M12 M16 drop in anchor expansion anchor for construction
click here to see more of this product
#M6 drop in anchors#drop in anchor expansion anchor#M8 drop in anchor#M10 drop in anchor#M12 drop in anchor#m10 drop in anchors#stainless steel drop in anchors#drop-in anchors bunnings#how strong are drop-in anchors#m10 knock in anchors#drop in anchor m8#drop-in anchor setting tool#threaded rod anchor bunnings#drop-in anchors vs wedge anchors#drop-in anchor bolt#3/4 drop in anchor#3/8 stainless steel drop in anchors#3/4 drop in anchors weight limit#1" drop in anchor#3/4 drop-in anchors drill size#316 stainless steel drop-in anchors#drop in anchor setting tool m8#m8 drop in anchor drill size#m6 drop in anchor#16mm drop in anchor#drop-in anchor tool#12mm drop in anchor#drop in anchor m16#m10 drop in anchor setting tool#m10 drop-in anchor bunnings
0 notes
Photo

ss or carbon steel drop in anchor
click here to see more of this product
#Ss drop in anchor#powers drop-in anchors pdf#drop-in anchors vs wedge anchors#1/4 drop in anchors drill size#1" drop in anchor#dewalt drop-in anchors#stainless drop-in anchors#3/4 drop-in anchors drill size#drop-in anchor bolt#1/2 drop in anchors#carbon steel drop in anchor#1/4 drop in anchor set tool#3/4'' drop-in anchors#1/2 drop in anchors weight limit#drop-in floor anchor
0 notes
Photo

drop in expansion anchor bolts
click here to see more of this product
#drop in expansion anchor bolts#drop-in anchors vs wedge anchors#3/4 drop in anchors weight limit#drop-in anchor bolt#3/4 drop-in anchors drill size#drop in anchors 1/4#1" drop in anchor
0 notes
Photo
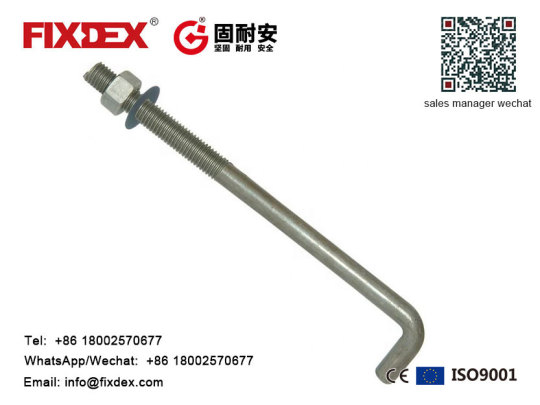
Concrete Wedge Bright or HDG L Type Anchor Bolt With Nut And Washer
click here to see more of this product
#Concrete Wedge Bright#HDG L Type Anchor Bolt#L Type Anchor Bolt With Nut And Washer#anchor bolts for brick#wedge anchors for brick#through bolt vs anchor bolt#3/8 powers wedge anchor#drop-in anchors vs wedge anchors#best concrete anchors#l type anchor bolt dimensions#l-bolt#l bolt threaded both ends#l type bolt#l-shaped anchor bolts for concrete#l-shaped bolt fastener#l bolt home depot#l anchors#l shaped threaded bolts
0 notes
Photo

carbon steel white zinc plated through bolt wedge anchor
click here to see more of this product
#white zinc plated through bolt#white zinc plated wedge anchor#carbon steel through bolt#carbon steel wedge anchor#zinc plated bolts vs galvanized#zinc plating bolts near me#zinc plated bolts vs stainless steel#yellow zinc plated bolts#zinc coated fasteners#mechanical zinc plating salt spray hours#white zinc plated through bolt wedge anchor#white zinc plated through bolt anchor#white zinc plated through bolt hole#1 4 20x1 3 4 wedge anchor#hot dipped galvanized drop in anchors#stainless expansion anchor#wedge anchor zinc-plated#zinc plated sleeve anchor#5/8 wedge anchor drill bit size#strong-bolt 2 wedge anchor#5/8 galvanized wedge anchor#5/8 concrete sleeve anchors#simpson sleeve-all#stb2 62600p1#carbon steel bolts grade#stainless steel bolt material#steel bolts and nuts#ss nut bolt price list india#unit weight of bolts nuts#nut bolt weight calculation formula
0 notes
Photo

Heavy Duty Anchor Bolt Wedge Through Bolt
click here to see more of this product
#Wedge Through Bolt#through bolt wedge anchor#through bolt vs wedge anchor#Heavy Duty Anchor Bolt#heavy duty eye bolt anchor#magnum plus anchor 4 bolt heavy duty lock#heavy duty expansion anchor bolt#heavy duty toggle bolt anchor#heavy duty bolt down post anchor#power-bolt heavy duty sleeve anchor#anchor bolt heavy duty faz ii 8/10 gvz#heavy duty anchor bolts#heavy duty anchor bolts for concrete#heavy duty anchor bolts for drywall#hilti heavy duty anchor bolts#deco heavy duty anchor bolts#heavy duty floor anchor bolts#concrete fixings anchor bolts#rawl bolts stainless steel#m20 rawl bolts#throbolts#thrubolts#stainless steel concrete screw bolts#foundation anchor bolts#anchor bolt types#anchor bolt sizes#anchor bolts for concrete#expansion bolt#through bolt vs dynabolt#through bolts bunnings
0 notes
Photo

Galvanized wedge anchor with nut and washer
click here to see more of this product
#Galvanized wedge anchor#wedge anchor with nut and washer#galvanized wedge anchors fastenal#wedge anchor vs sleeve anchor#galvanized anchor bolt#stainless steel wedge anchors#3/8 galvanized wedge anchors#galvanized wedge anchors home depot#galvanized wedge anchor fastenal#galvanized wedge anchor bolt#5/8 galvanized wedge anchor#1/2 x 7 galvanized wedge anchor#3/8 galvanized wedge anchor#5/8 x 6 galvanized wedge anchor#red head galvanized wedge anchor#3/8 x 5 galvanized wedge anchor#1/2 x 8 galvanized wedge anchor#3/8 x 3-3/4 galvanized wedge anchor#5/8 x 5 galvanized wedge anchor#hot dipped galvanized wedge anchor bolts#galvanized wedge anchors#galvanized wedge anchors lowes#galvanized wedge anchors 5/8#galvanized wedge anchors near me#galvanized wedge anchors 3/8#galvanized wedge anchors powers#hot dipped galvanized wedge anchors#1/2 wedge anchor drill size#m10 wedge anchor drill size#1/2 wedge anchor lengths
0 notes
Photo

wedge anchors for concrete Through Bolt
click here to see more of this product
#wedge anchors for concrete Through Bolt#wedge anchors for concrete#Through Bolt#wedge anchors Through Bolt#wedge anchors for concrete block#how to use wedge anchors for concrete#stainless steel wedge anchors for concrete#hilti wedge anchors for concrete#epoxy for concrete wedge anchors#redhead wedge anchors for solid concrete#concrete wedge anchors for gazebo#concrete cure time for wedge anchors#how to install wedge anchors into concrete#Wedge anchor Bolt#Sleeve Anchor#Hilti anchor bolt#Drop In anchor bolt#Expansion bolt#hilti through bolt#through bolt vs anchor bolt#through bolt wood#m16 through bolt#fischer through bolt#through bolts m12#through bolt anchor#through bolt sizes#through bolt design#through bolt vs lag bolt#through bolt images#through bolt door handle
0 notes
Photo

SS 304 Drop In Anchor M6-M16
click here to see more of this product
#SS 304 Drop In Anchor#SS 304 Drop In Anchor M6#SS 304 Drop In Anchor M16#10mm drop in anchors#1/2'' drop-in concrete anchor#wej-it drop-in anchor installation#what are drop-in anchors used for#wedge anchor vs drop-in anchor#anchor bolt drill size chart#powers drop-in anchors pdf#drop-in anchor submittal#dewalt mini drop in anchors#dewalt drop-in anchors#stubby drop-in anchors#ss 304 drop in anchor m6 m16#ss 304 drop in anchor m6 16#hilti drop-in anchors drop-in anchor submittal#powers 7/8 drop-in anchor#ss 304 drop in anchor m16 dimensions#ss 304 drop in anchor m16 pdf
0 notes
Photo

drop in expansion anchor bolts
click here to see more of this product
#drop in expansion anchor bolts#drop in anchors white zinc plated#drop in anchors yellow zinc plated#expansion bolts drop in anchors#High Quality expansion bolts drop in anchors#what are drop-in anchors used for#powers drop-in anchors#drop-in anchors vs wedge anchors#1/4 drop-in anchors#10mm drop in anchors#hilti drop-in anchors
0 notes
Photo

M16 concrete wedge expansion anchor bolt
click here to see more of this product
#M16 concrete wedge expansion anchor bolt#M16 wedge expansion anchor bolt#M16 concrete wedge anchor#concrete wedge anchor#m16 wedge expansion anchor bolt size#m16 wedge expansion anchor bolt dimensions#m16 wedge expansion anchor bolt price#m16 concrete wedge anchor size#m16 concrete wedge anchor dimensions#concrete wedge anchor bolts#concrete wedge anchor pull out strength#concrete wedge anchor installation#concrete wedge anchor vs epoxy#concrete wedge anchor spacing#concrete wedge anchor removal#concrete wedge anchor won't tighten#concrete wedge anchor vs tapcon#concrete wedge anchor depth#how does a concrete wedge anchor work#how to install a concrete wedge anchor#saflok concrete wedge anchor#remove concrete wedge anchor#5/16 concrete wedge anchor#what size drill bit for 1/2 concrete wedge anchor#1/2 concrete wedge anchor#how to use a concrete wedge anchor#how to install concrete wedge anchor bolts#drill bit size for 3/8 concrete wedge anchor#concrete screw vs wedge anchor#concrete sleeve anchor vs wedge anchor
0 notes