#uv glue
Explore tagged Tumblr posts
Text

Last year the Museum of Vancouver had a retrospective of artist Tobias Wong's work, and they got the OK to make their own exhibition copies of Wong's Glass Chairs No. 1 & 2 (2002). Which the rest of this blog post is not necessarily suggesting you do, but the measurements and specs are there, and also the UV glue glass bonding Youtube tutorial.
#tobias wong#glass chair#uv glue#museum of vancouver#exhibition copy#bootlegging a chair that is itself a remake of a donald judd chair is like notions of authorship all the way down
27 notes
·
View notes
Text
My coworkers are talking about hair and makeup and nails and I try to say "that's actually really unhygienic because xyz" and "I don't really like how beauty culture makes women pay money for all these things that don't last" and they're actually all ignoring me, one is laughing like I'm making a joke and another keeps talking like I didn't just say anything and the others look at their phones when I start talking
#'Long acrylic nails harbor way more bacteria than long natural nails'#'Hahahaha!'#'And you can get cancer from regularly getting nails done because they use UV to activate the glue'#Crickets. And then 'I wish I could get my nails done but they don't let us do it here!' (Cleaning in the hospital)
16 notes
·
View notes
Text

I am learning the joys of hot glue guns.
#uve just been stitching my flowers together bc i dont like hot glue guns#ive*#but this is Way faster
13 notes
·
View notes
Text
I'm making the decorations for my birthday nails now (at 11PM) because that was my original plan for today before I got called in, so I couldn't do it earlier. Also because I can't sleep
#pei rambles#don't worry I'm in a ventilated area with the cats locked out#I'm making them out of UV resin and I'm gonna glue them on the nails
2 notes
·
View notes
Text

Tiny lemonade glasses
#myart#miniatures#miniature food#polymer clay#for the lemon slides#the straw are paperclip pieces#and the glasses are a plastic ink cartridge cleaned and cut with some glue inside#or perhaps I used UV resin for these ? I can't remember
4 notes
·
View notes
Text
Making my own keychains would be cheaper than ordering them aw man
#tbh i could also make a dssign i like aswell 😓😓😓😓#i forgot that shipping js genuinly insane#aw#maybe i will get resin and a uv lamp somepoint#wanna make another Edwin figure first though#Edwin [hash] 2 is currently broken in pieces and is in a ziplock bag#maybe ill glue him back together one day#i need to make more oc statues/ figures 😓😓😓😓#life stuff#thoughts#no because its a really nice keychain for like 8 and then the shipping is 32 usd jesus
1 note
·
View note
Text
I didn't do everything I wanted to today, but I got close enough. Most important thing was to replace the screen protector on my phone, having that crack on the side was really getting on my nerves. There was a piece missing in the kit (I got a new protector for free via warranty, but they didn't provide any of the glue application pieces so I'm glad I kept all the original stuff... or so I thought), so it was actually a much more harrowing process than it should've been, but it went off without a hitch!
#For something seemingly so simple it's surprisingly complicated#It's tempered glass applied to the phone screen with UV-reactive glue#Absolutely worth it though!#It has only failed to protect my screen once#But every other time it acted as intended: the protector broke but the screen did not!
0 notes
Text

rest in peace tiny sculpted hydrangea blooms that crumbled off the panel when i breathed on em too hard
#has to be done by christmas and everything is going. so poorly#i think i’m just going to paint the hydrangeas on because the two roses and iris have a nice visual line as it is#i had to restick the big flowers on w uv glue but now im out of uv glue. everything is going poorly why did i put this off for so long#i still have to PAINT EVERYTHINGGGGG
1 note
·
View note
Text

real
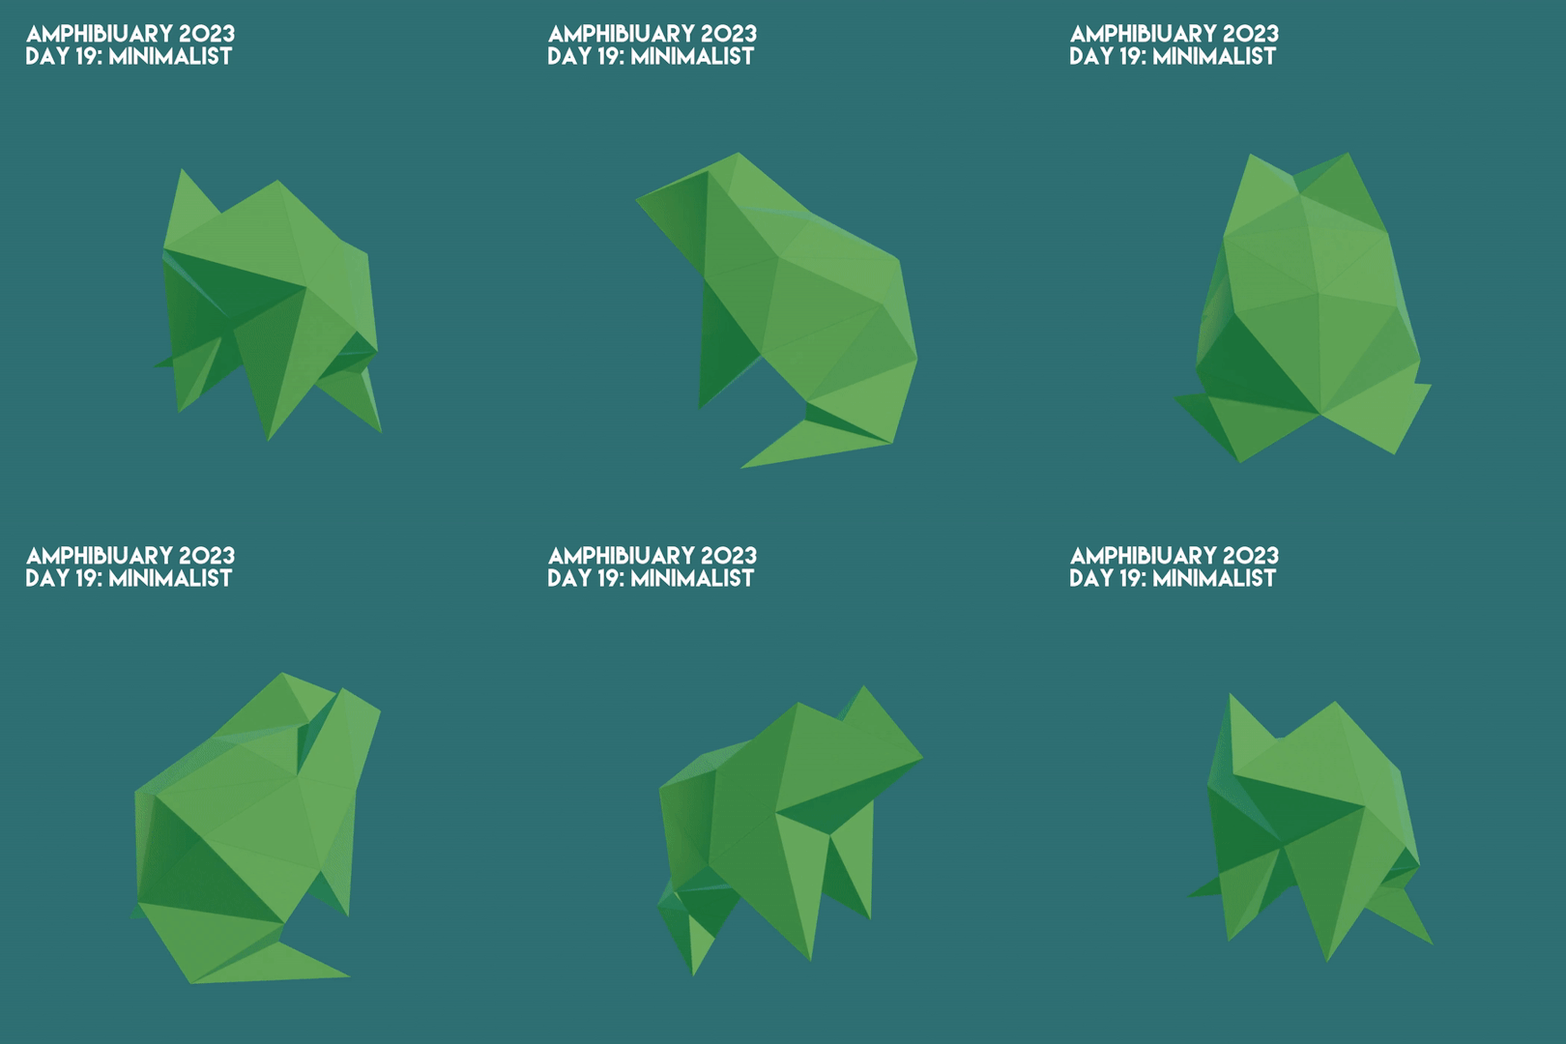
#this was way too difficult to put together which you might notice by the messy corners#putting the last piece together was near impossible theres so much glue residue on the belly#also the back uv is too flat i think i could NOT get away with making it all one bit like i did#i rate this 4/10 would not share the pattern with anyone unless i rework it to be foldable by human hands#ft unfinished caecilian plush in the background
706 notes
·
View notes
Video
youtube
Portable Handheld UV LED Curing Machine for Paint Drying
Handheld UV LED Curing Machine
For paint refinishing, curing and drying.
Instant on and off, cheap and power saving. Welcome to inquire.
WhatsApp: +8618924582621
Email: [email protected]
1 note
·
View note
Text
The Revolutionary World of UV Curable Adhesives Glue: Uniting Materials with Speed and Precision

In the realm of modern manufacturing and DIY projects, the adhesive industry has witnessed a remarkable revolution with the advent of UV curable adhesives. These cutting-edge glues have redefined the way materials are joined, offering unparalleled speed, precision, and efficiency. In this article, we will delve into the fascinating world of UV curable adhesives, exploring their composition, working mechanism, applications, and the numerous advantages they bring to various industries.
1. Understanding UV Curable Adhesives
UV curable adhesives are a class of advanced adhesives that cure rapidly upon exposure to ultraviolet (UV) light. Comprising unique chemical formulations, these glues remain in a liquid or semi-liquid state until subjected to the appropriate wavelength of UV light, which triggers a photochemical reaction. This reaction transforms the adhesive into a solid, robust bond, fusing the materials together with exceptional strength. To know more here UV Curable Adhesives Glue Manufacturer.
2. Composition and Types
There is a diverse range of UV curable adhesives, each tailored to specific applications and material properties. Generally, these glues consist of four primary components: a) Photoinitiators: Responsible for initiating the curing process when exposed to UV light. b) Oligomers: Form the backbone of the adhesive, determining its mechanical properties and adhesion strength. c) Monomers: Enhance the adhesive's flexibility and control the curing speed. d) Additives: Added to modify the adhesive's characteristics, such as viscosity and color.
3. How UV Curable Adhesives Work
The curing process of UV curable adhesives is fascinatingly swift and efficient. When the adhesive is applied to the bonding surface, it remains in a liquid state, allowing for easy alignment of the materials. Once in position, a UV light source is applied, typically through a UV lamp, exposing the adhesive to the required UV wavelength. The photoinitiators absorb this light energy, kickstarting the chemical reaction that cross-links the oligomers and monomers, transforming the liquid adhesive into a solid bond in mere seconds.
4. Versatile Applications
UV curable adhesives find applications across diverse industries, owing to their exceptional characteristics. Some key applications include: a) Electronics and Microelectronics: Bonding delicate components in electronic devices, sealing LCD displays, and encapsulating sensitive microelectronics. b) Medical Devices: Assembling medical instruments and equipment, bonding needles, catheters, and syringes. c) Automotive Industry: Bonding components, glass, and lenses, and enhancing structural integrity. d) Optics and Aerospace: Joining optical lenses, securing optical fibers, and assembling aerospace components. e) DIY and Crafts: Enabling quick and precise bonding for hobbyists and DIY enthusiasts.
5. Advantages of UV Curable Adhesives

The adoption of UV curable adhesives has been driven by their numerous advantages: a) Rapid Curing: UV glues cure within seconds, reducing assembly time and increasing productivity. b) Precision: The liquid state before curing allows for accurate alignment of materials, minimizing errors. c) Environmentally Friendly: UV adhesives contain no volatile organic compounds (VOCs), promoting eco-conscious manufacturing practices. d) Strong Bonds: The cured adhesive forms robust bonds with high tensile and shear strength, enhancing overall product durability. e) Enhanced Quality Control: Immediate curing allows for real-time inspection, ensuring consistent and reliable bonds. f) Cost-Effective: Faster curing times and reduced waste lead to cost savings in the production process. Find out more here about UV curable adhesive https://www.uvadhesiveglue.com/
Conclusion:
UV curable adhesives have undoubtedly transformed the adhesive industry, revolutionizing the way materials are bonded across various sectors. With their rapid curing, precision, and myriad applications, these glues have become indispensable tools for manufacturers and creative enthusiasts alike.
Embracing UV curable adhesives not only leads to improved efficiency but also contributes to a greener and more sustainable future. As the technological landscape continues to evolve, UV curable adhesives will remain at the forefront of adhesive innovations, bridging gaps and uniting materials with unprecedented speed and precision.
0 notes
Text
in immense suffering rn <— can’t remember if the eyes on his bjd were 1 cm or 2 cm and therefore cant order a mold to recreate them bc he’s not at home and cant just re measure them to know what to buy
#tbh i might just not buy a mold and freehand it yk……..#i wanna buy another one of those bunny bjds to make my current one i posted recently a friend#but i wanna give her different eyes since they all come with regular old blue eyes#i’ll probably end up making the sclera out of air dry clay and then use a teeny drop of uv resin nail glue to make the iris and pupil clear#i’ve never made inset eyes before so wish me luck?#then again i’ve also never made a face up with eyes so. idk#my plan for the next bunny is to make her brown with white spots#as for her outfit……… i do not want to even think about sewing again after that itty bitty sweater i hate it so much genuinely#🐋
0 notes
Text
#epoxy resin#epoxy resin art#how to#resin#how to epoxy resin#how to use epoxy resin#how to make resin rings#epoxy#uv epoxy resin#how to make resin jewelry#epoxy resign#resin ring#how to make rings#resin crafts#do it yourself#how to uv resin#meteorite ring#super glue and baking soda repair#coloring resin#arts and crafts#diy epoxy earrings#resin for beginners#etsy#DIY resin jewelry#flowers in resin#forget me not to DIY#flower necklace#real wildflower#Cat ring#Cat ears ring
0 notes
Text
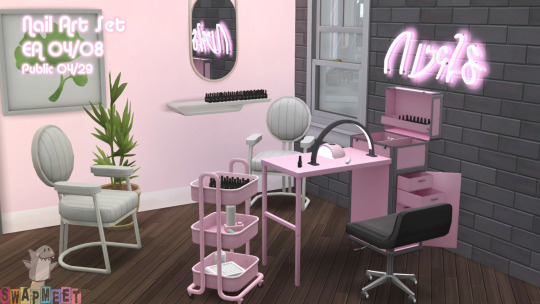
Nail Art Set + Freebie!
The nail art set is up for EA! Here is a direct link to the public preview on Patreon with more pictures and information! The freebie is at the bottom
Or, here is the information all here if you don't want to click:
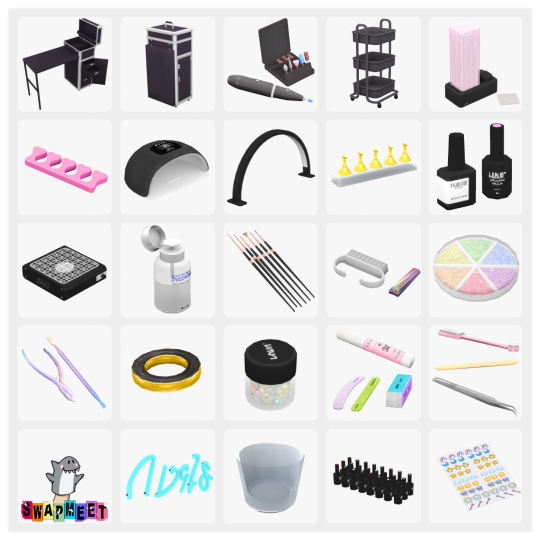
The Set has way too much tiny clutter items. If I had half a brain, I'd have done what other people do and made clutter "groups" instead of making everything individual.
Like always, all simlish text was made with the wonderful fonts from https://franzillasims.tumblr.com/
The set features a "travel" workstation on two variations. The open version is a mini-desk, and is fully functional as one, and is base-game.
The closed version is basically a tall end table. it has six small deco slots on the top, surrounding the handle.
Both versions have 11 swatches. Make sure to have bb.useobjects enabled to access all the slots! :)
A small rolling cart. six slots on each layer. 4 swatches.
An UV curing lamp. This turns on and off, and only glows from the inside. 3 swatches.
An Arched desk lamp. This is so cool - I would have loved one when I was customizing dolls and minitures! Glows only from the bottom and slots onto the desk!
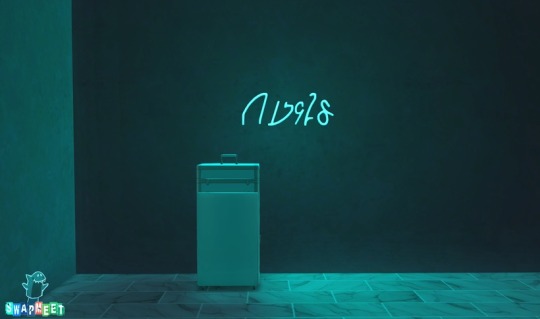
Two neon lights. The pink one is a false light, it kind of has the illusion of glowing, but just looks pretty. The blue one is an obnoxiously bright light, that illuminates everything around it. Looks best outside! ^^ The blue one is free now!
A handheld nail drill with bits, or a dremel if you are familiar with the tool. :) The drill and bits are separate items, both in 3 matching swatches.
A dust vacuum/collector - this is absolutely necessary when you a using a drill and filing nail tips. It sucks up all the harmful residue the drilling creates. 3 swatches.
Tissue/wipe dispenser. 5 swatches.
And a whole TON of clutter.....
A stand for displaying and working on nail tips.
A nail brush and clippers.
A set of cuticle tools.
A set of files and buffers.
A set of fine brushes.
A small glass for ...something.
A small container of glitter.
A magnet wand for cat-eye effects.
A tube of nail glue.
A bottle of gel polish with 20+ swatches
A bottle of Base/Topcoat/Matte Effect. Three swatches.
A set of polishes that can also slot into the workstation top.
A set of nail stickers. 5+ swatches.
A roll of metallic detail tape. 3 swatches - silver, gold, rosegold.
A little round storage wheel for rhinestones.
A toe separator.
A pair of fine tweezers for setting tiny details.
An orange cuticle stick
You can get the obnoxiously bright neon light as a freebie, right now!
It's at the bottom of the Public preview post!
#sims 4 cc#sims 4 creator#sims 4 maxis match#the sims cc#sims 4 mods#maxis match#sims 4 clutter#simblr#sims 4 free cc#ts4 simblr#ts4 custom content#ts4cc#ts4mm#ts4 maxis match#ts4ccmm#thesims4cc#the sims 4 custom content#ts4 cc#nailart
388 notes
·
View notes
Note
I love your art so much!!! I've also been starting to paint with gouache, and I'd love to know a little more about your process! What kind of paints do you use, do you sketch first or start with paint, do you paint in layers over several day or all at once?
Hi and thank you! I hope you don't mind me answering this publicly and apologies for length, but:
MY ART PROCESS!
Supplies: I use winsor and newton gouache and arches cold press paper blocks, usually 140 lbs (the lime green ones) and sometimes 300 lbs (the teal green ones). Even though this paper comes pre-stretched in blocks, I actually take the sheets off and stretch them myself because I've found arches' glue isn't as strong as it used to be. This is how you get watercolor paper to lay flat! I recommend youtubing some videos on how to do it -- there's a lot of great tutorials out there. Also, I use princeton brushes, and kraft paper tape and these boards to stretch my paper. (these aren't affiliate links, I just shop at blick)
A word about art supplies: these are the exact tools I use but everyone uses supplies differently and two people with the exact same supplies might get different results! A lot of it is about what works for you and what you like, so I always suggest that gouache/watercolor beginners just buy a few tubes from a couple of different paint companies and some small pieces of paper from different manufacturers to see what you like. Just changing one ingredient in the above has created massively different results for me, but maybe that'll end up being something you'd like! The first step in learning a new medium imo is to play. Just have fun!
ALSO: gouache isn't super light permanent, check your tubes for which ones hold up to sunlight. Here is winsor and newton's color chart explaining which ones will fade when exposed to sunlight -- all manufacturers will give you this. I only use the colors rated A and AA, and I still frame my pieces with UV glass just to be safe. Not all gouache is re-wettable, but winsor and newton is. I just put it in my palettes and refill my palettes if it runs low. AND SOME PAINT IS TOXIC. A lot of paints have cadmium and cobalt in them. I don't use any of the toxic colors, but if you do, make sure you don't eat while working and wash your hands thoroughly afterwards. This information is also usually available on manufacturer's websites. As more people are rejecting cadmium paint, you'll see more tubes labeled things like cadmium-free yellow. This is why. More artists should be aware that their tools can be dangerous. You don't need that many tubes of paint to begin, just a warm and cool red, warm and cool yellow, warm and cool blue, white and black. I have around 50 colors and use 20 regularly. I always mix all my colors myself, and never use straight tube paint. Most of my colors have about 5-6 different tube colors mixed together. If you use re-wettable paint a tube of paint will last you years; even as a professional I only buy new paints every 5 years or so.
Process: I ALWAYS start with a sketch first. Not everyone has to, but because I do illustration work -- where sometimes a client gets input on a drawing -- I always do a lot of preliminary work before I even begin to paint. At this point, even my personal work usually involves the exact same process:
I start with a 3" or so thumbnail that I scan (left; I traced it quickly digtally for clarity to myself here) and then either clean up digitally or print out and clean up traditionally with tracing paper (right):
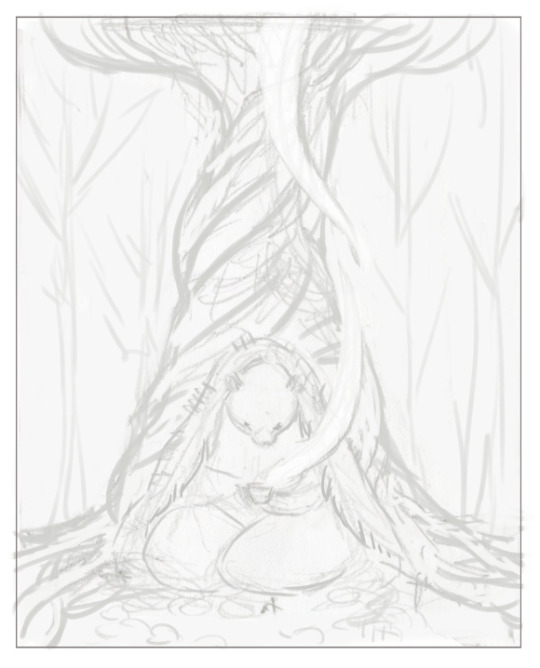

Then I scan the cleaned sketch in and color rough it digitally (left, this was for a gallery show, so no one had to approve my color roughs, so it's messy!) then I transfer my sketch to my paper (with either carbon transfer paper or a light table), stretch my paper, and paint (right):
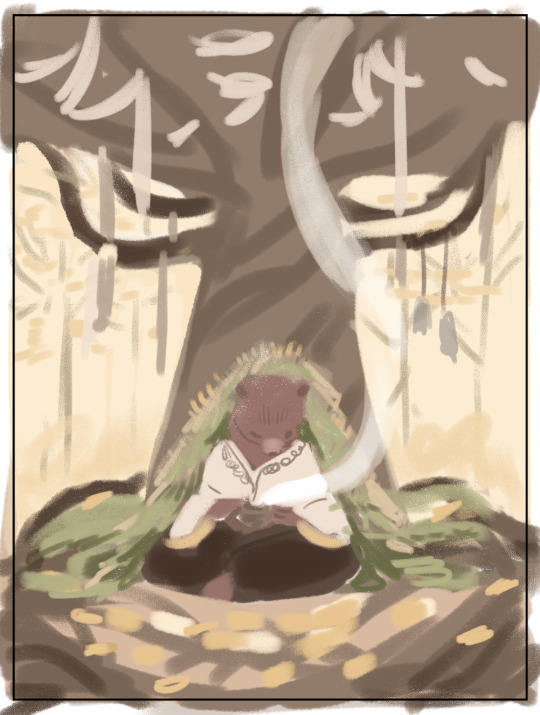

I obviously changed my mind about the color of the ribbon in the trees, ha, and made everything a lot more vibrant. The benefit again of gallery work is no pre-approval!
You are correct, I paint in a series of washes, going from lightest to darkest, where I apply the same color beneath all shapes that are the same warmth (cools under all upcoming cools, warms under all upcoming warms). I paint a piece usually in one or two days, depending on complexity. I didn't take pictures of the above painting, but here's a different painting to show you a little bit what I mean:
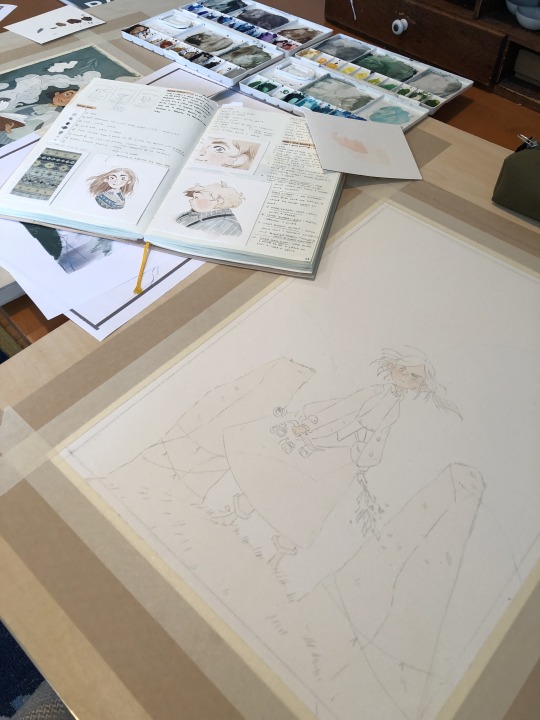
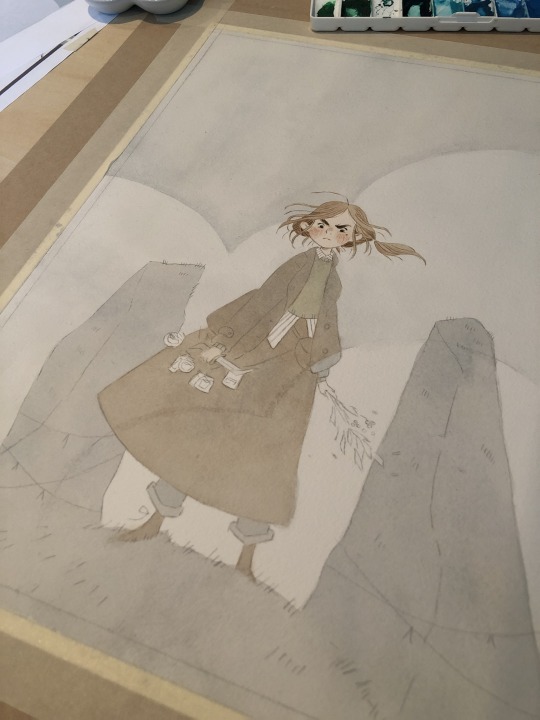
I painted the peach color under everything (and twice for skin tones), and the gray color of the sky under everything that would be grayish (the rocks, trees, her pants, her skirt, and coat). I do this to stop me from getting darker lines where two different colors butt up against each other, and also for color harmony. I have step by step photos of this in my process stories highlight on my instagram; also check my FAQ and tip highlights for more info on all this stuff. Most pieces take around 25-30 washes before I start adding in the details (sometimes I add in face details early though because if I mess those up it's not worth finishing the rest of the painting! 😅)
All this might seem like a lot of work (...it is) but I do it so that I can show clients previews of the final piece and so I don't have to repaint the finals. I also used to pre-test all of my washes on scrap paper like this:
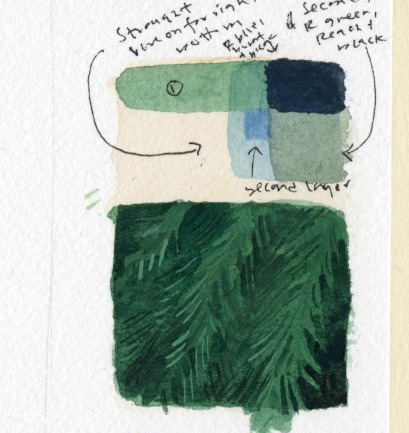
I still recommend doing this if you're just beginning! But at this point I only do it when testing techniques because I know my paints really well. (the above was my test for the pine boughs in this piece)
Painting by far is the longest part of the process, so I do more work up front to not have to do it twice. Every piece takes about 6-24 hrs of actual work time to produce. Stretching watercolor paper takes about 24 hrs to dry, and because I sell most of my originals in galleries, they need to be flawless, so planning ahead is useful and in the end saves me time.
And to conclude this novel of an explanation, don't be overwhelmed by all the information I've given you! I put it here so that people at various stages of their artistic journey can maybe find something useful in it. But seriously, the first step to learning how to paint whether it's traditionally or digitally is just to have fun. Try it out, see what's working and what isn't, and then try to solve specific issues that you're struggling with. I've been doing this for a loooooong time at this point, but here's my first watercolor piece from when I was re-teaching myself how to paint traditionally nine years ago:
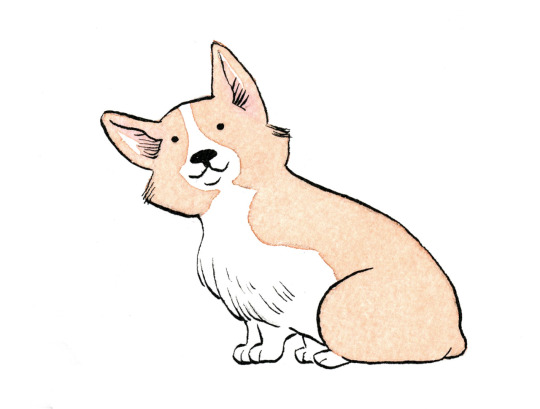
Obviously, I was destined for greatness. Ha, yeah, no. If you scroll back through my tumblr archive, you can see me learning how to use these paints in real time. And keep in mind that I'd been working digitally for years before then, and years before that where I didn't post my work online at all.
So for anyone who needs to hear it: there's no such thing as talent, just hard work, patience, and trying again and again and again...and sometimes again. What I do is a skill and anyone can learn it. Sometimes, progress is slow. I'm 38. I only really feel like my art was half-way decent starting a few years ago, but I've been making art my entire life, and I went to art school at 18. 20 years later I'm kind of figuring it out.
The best advice I can give, whether it's about art or not, is find the thing you love so much that you'll keep at it even when you suck at it, because most skills you'll suck at to begin with -- and perhaps for a long time. I sucked at art for yeeeaaaaarrrrs. On top of the usual learning curve, I struggled with fine motor control and dexterity. But I loved it so much I kept trying every time I failed. If I can do it, so can all of you, no matter what stage of art you're at now, and no matter how old you are.
Anyway, thank you to those still reading this deep in. I wish you all the best on your artistic journey. Art can kick your butt sometimes, but it's also pretty dang rewarding 💛
535 notes
·
View notes