#ui developer
Explore tagged Tumblr posts
Text
Optimizing Your UI Development Process: Strategies for Quicker, More Astute Outcomes
0 notes
Text

https://www.incerro.ai/insights/ui-designer-vs-front-end-developer
#UI developer vs Front end developer#UI developer#Front end developer#programming#startup#website development#front end development#application engineering
0 notes
Text
Shopify Developer | Freelance Website Developer (freelancershweta.in)
Working with a freelance web developer equips your business with a dynamic digital storefront, setting you apart in the competitive online landscape, and establishing the foundation for continued growth and success. This partnership ensures that your online presence remains not only up-to-date but also adaptable to future technological trends, establishing your position as a leader in your industry.
#Freelance website development#freelance shopify developer#freelance website developer in india#ui developer#ux developer
1 note
·
View note
Text
What is the role of a UI developer in designing?

Who is a UI Developer?
A UI developer is tasked with the implementing and design of a front-end application that forms a part of the entire user interface.
This includes the creation of several interactive elements such as menus, forms, buttons, web pages, design and layout of a website, application screens and many more.
Other than designing and implementing the front-end of an application, UI developers are also concerned with testing and bug fixing to ensure that the interface works efficiently and is void of errors.
They must also ensure ongoing support and maintenance to keep the interface updated and functioning effectively.
UI Developing and Design
The task of a UI developer in Design is to bring attractive and visual changes to the interface in the medium of codes.
The UI developer must work closely with the design team to have the knowledge of the design requirements and transform them into the codes that will produce the intended user interaction.
Besides coding the design of the interface, the UI developer must also ensure that the application has been optimised for usability, accessibility and performance.
They must test the application along several browsers and devices, and make suitable changes to ensure a seamless user experience.
Skills for becoming a proficient UI developer for design:
A UI developer should have an equipped skill set for a technical career as this one. A few skills that an aspiring individual can start working are explained below:
1. Be Proficient in Front-end technologies:
UI developers should have an informed foothold in front-end languages such as Java, HTML and CSS.
They must write easy, adaptable and versatile codes that are compatible with different interfaces and devices.
2. Debugging and Testing:
UI developers must be experienced with debugging and testing to ensure that the UI works smoothly and has less errors.
They must fix performance issues and bugs quickly with efficiency.
3. Multi-Functional Collaborations:
Developers should possess strong networking skills in order to maintain communications with the designers, managers and accountants to understand the various requirements.
Visit our site to read more: https://digitalipsum.in/what-is-the-role-of-a-ui-developer-in-designing/
0 notes
Text
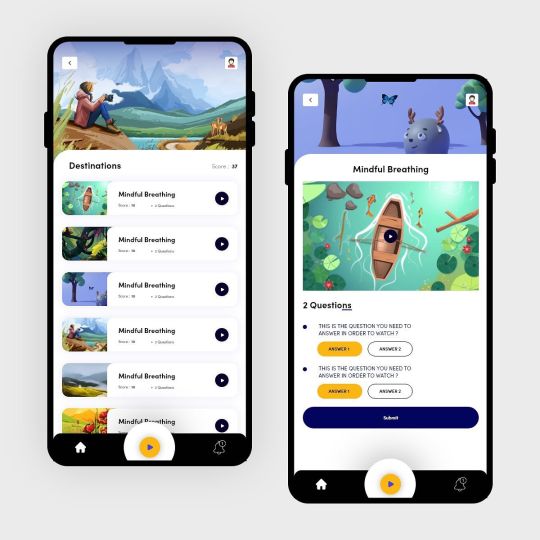
Top Full Stack Developer Training Coures | Nilesh Thorath
I have more than 10 years of extensive experience in Full Stack Developer. I’m highly skilled in C#, java, SQL & Adobe software as well as other tools and design technologies. My solid background in problem solving has allowed me to manage teams with exceptional performance. As a computer science major I have passion to strive for innovation and fresh ideas.
For more details Contact us : 9033851355 or visit us: http://www.nileshthorath.com/
#Full Stack Developer#UI UX designer#Shopify Developer#Website developer#Brand Designer#UI DEVELOPER#UX DEVELOPER#UI DESIGNER#UX DESIGNER
0 notes
Text
“My Dream Is Still Alive Despite the Rubble”
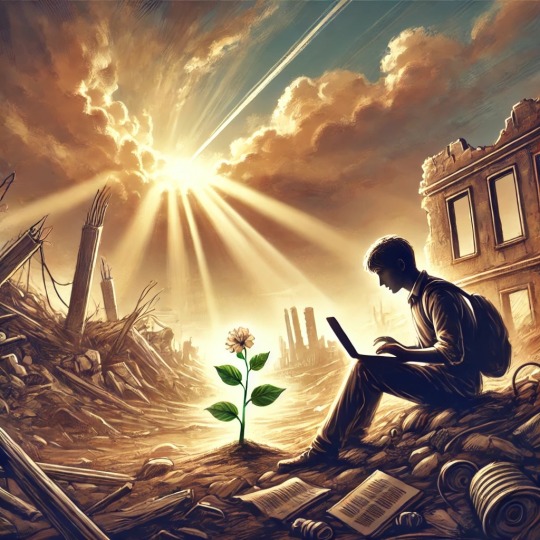

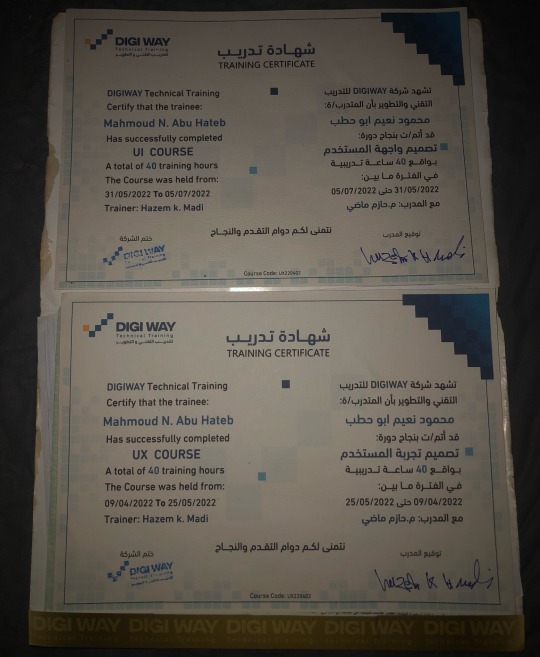
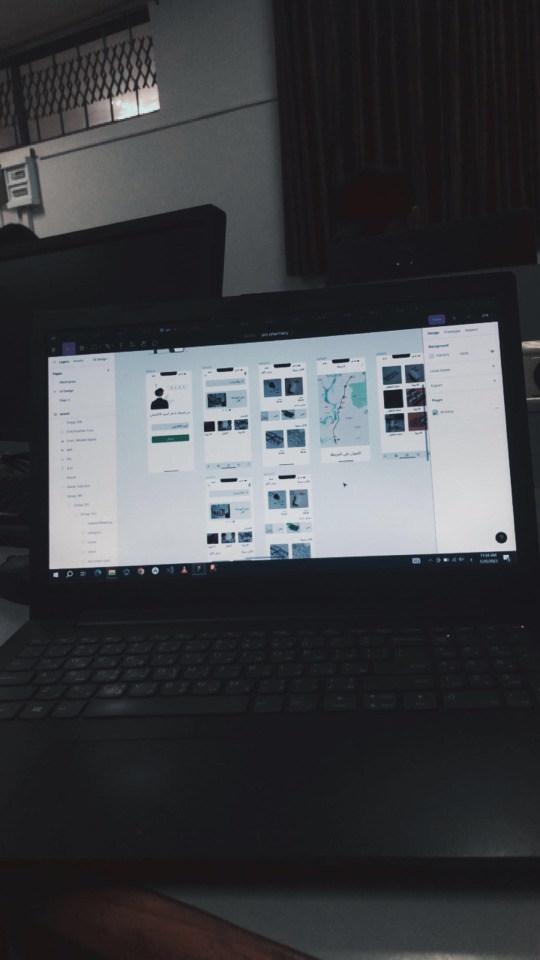
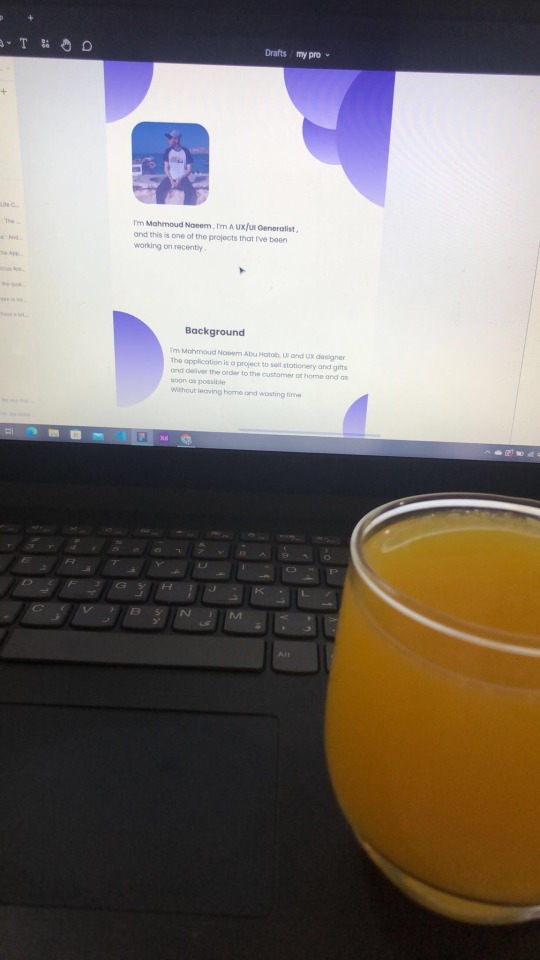
My dream has always been to become a UX/UI designer and a web developer. This dream has been my compass toward a better future for me and my family, giving my life meaning and hope despite the challenges.

But the war in Gaza turned our lives upside down. We lost our home, my university, and even the laptop I relied on for learning and work. We were displaced to the southern part of Gaza, where we suffer daily from power outages and limited internet access. Despite these circumstances, my heart still clings to hope, and I refuse to give up on my dream.
I am not just asking for support to acquire equipment; I am asking for a chance to rebuild my future—not just for myself, but for my family as well. I believe that every challenge holds an opportunity, and I am determined to turn this hardship into a story of success.
Why Do I Need Your Support?
To continue my education and pursue my dream, I need some essential tools to help me learn and work under these harsh conditions:
• Laptop: $2,000
• Solar Panel: $2,000
• Power Inverter: $1,000
• 100Ah Battery: $1,000
Total Cost: $6,000.
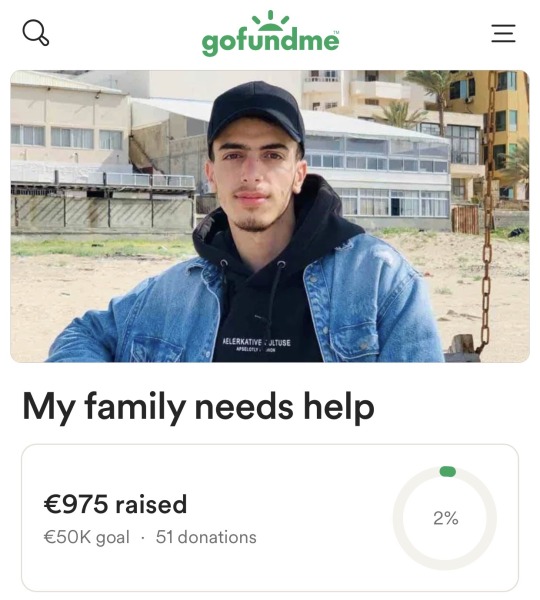
So far, I’ve managed to raise €975 through my GoFundMe campaign, but I need to reach €7,000 to cover all costs.
My Vision for the Future:
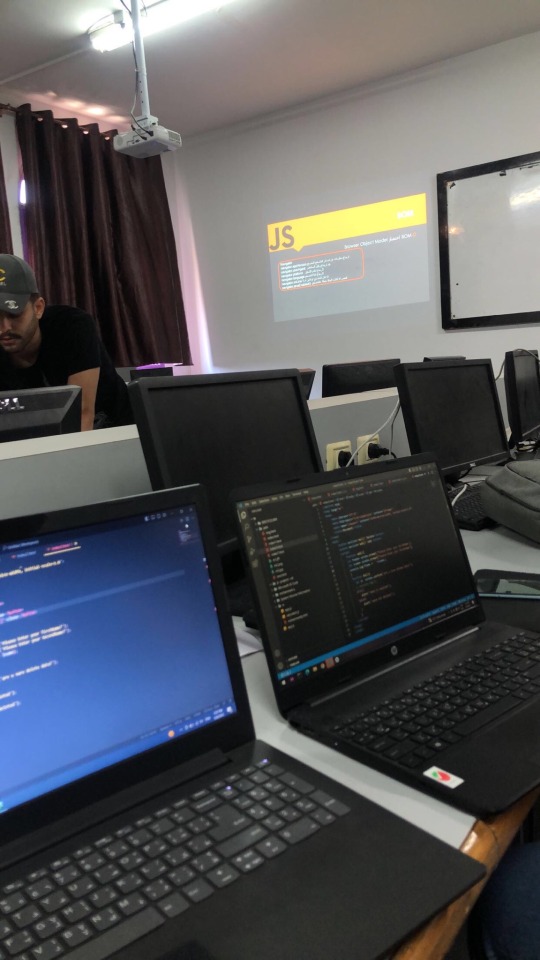
My ambition is not just to complete my studies but also to use my skills to support my community in Gaza. I aim to train young people in programming and design so we can contribute to building a better future despite the challenges we face.
Why Your Contribution Matters:
Your donation is not just helping me personally but is an investment in a young man determined to empower his community. I aspire to become a role model for Palestinian youth, showing that resilience and creativity can overcome any obstacle.
A Heartfelt Thank You:
I live under difficult conditions, but I believe that goodness exists everywhere. Every person who contributes to my dream brings hope back into my life and gives me the strength to keep going.
How You Can Help:
1. Donate to the campaign:
GoFundMe
OR USDT

TLns8czyFHsJQWkaAEeza3of5cgEH7vi3n
2. Share my story with your friends and family. It might reach someone who can help.
3. Offer advice or opportunities that could help me develop my skills and achieve my dream.
Finally:
I promise to share every step of my journey with you—from acquiring the equipment to completing my education and realizing my dream. You are part of this story, and your support is the light I need right now.
“In the darkest times, there is always a ray of light. That light is you and your support, which gives me the strength to carry on.”
Special Thanks:
I would like to extend my heartfelt gratitude to everyone who has supported me so far. A special thanks to:
@gaza-evacuation-funds @gaza-relief-fund @wellwaterhysteria @ayeshjourney @nabulsi @catnapdreams @vetted-gaza-funds @vetted
#gaza#free gaza#save gaza#palestine#free palatine#save palestine#help my family#ui ux design#programming#web development#web design#vetted fundraiser#vetted#university#figma#design#gaza gofundme#palestine gofundme#gofundme#gfm#palestine gfm#gaza gfm#vetted gfm#gaza fundraiser#palestine fundraiser#fundraiser#help gaza#help#please help#christmas
313 notes
·
View notes
Text
#indiegamedev#gamedev#indiegames#indiedev#game development#50 caliber 3d platformer#500 caliber contractz#digital art#ui#skeumorphism
259 notes
·
View notes
Note
Does the entire cast have social media? If so what do they post on there? Or do we get to see that in game 🫣
it's my dream to include! i really liked how the social media interface worked in the ps4 spiderman miles morales game because of how it kind of fills out the world because you see average npc #1 responding to something plot-relevant that happened, haha. like for keyframes, can you imagine the random passerby that saw this group of college students on a massive lawn waterslide?
#keyframes asks#the gap moe of how much i love spiderman and then the fact i sit here writing sol visual novels#we can't promise that it'll happen bc honestly it .... would require more ui to be developed lmao#and also i'd have to write ........ all of it but i think it'd be quite fun#and wouldn't it be nice to see familiar faces that you see around campus doing things when you aren't there haha
57 notes
·
View notes
Text
JavaScript Fundamentals
I have recently completed a course that extensively covered the foundational principles of JavaScript, and I'm here to provide you with a concise overview. This post will enable you to grasp the fundamental concepts without the need to enroll in the course.
Prerequisites: Fundamental HTML Comprehension
Before delving into JavaScript, it is imperative to possess a basic understanding of HTML. Knowledge of CSS, while beneficial, is not mandatory, as it primarily pertains to the visual aspects of web pages.
Manipulating HTML Text with JavaScript
When it comes to modifying text using JavaScript, the innerHTML function is the go-to tool. Let's break down the process step by step:
Initiate the process by selecting the HTML element whose text you intend to modify. This selection can be accomplished by employing various DOM (Document Object Model) element selection methods offered by JavaScript ( I'll talk about them in a second )
Optionally, you can store the selected element in a variable (we'll get into variables shortly).
Employ the innerHTML function to substitute the existing text with your desired content.
Element Selection: IDs or Classes
You have the opportunity to enhance your element selection by assigning either an ID or a class:
Assigning an ID:
To uniquely identify an element, the .getElementById() function is your go-to choice. Here's an example in HTML and JavaScript:
HTML:
<button id="btnSearch">Search</button>
JavaScript:
document.getElementById("btnSearch").innerHTML = "Not working";
This code snippet will alter the text within the button from "Search" to "Not working."
Assigning a Class:
For broader selections of elements, you can assign a class and use the .querySelector() function. Keep in mind that this method can select multiple elements, in contrast to .getElementById(), which typically focuses on a single element and is more commonly used.
Variables
Let's keep it simple: What's a variable? Well, think of it as a container where you can put different things—these things could be numbers, words, characters, or even true/false values. These various types of stuff that you can store in a variable are called DATA TYPES.
Now, some programming languages are pretty strict about mentioning these data types. Take C and C++, for instance; they're what we call "Typed" languages, and they really care about knowing the data type.
But here's where JavaScript stands out: When you create a variable in JavaScript, you don't have to specify its data type or anything like that. JavaScript is pretty laid-back when it comes to data types.
So, how do you make a variable in JavaScript?
There are three main keywords you need to know: var, let, and const.
But if you're just starting out, here's what you need to know :
const: Use this when you want your variable to stay the same, not change. It's like a constant, as the name suggests.
var and let: These are the ones you use when you're planning to change the value stored in the variable as your program runs.
Note that var is rarely used nowadays
Check this out:
let Variable1 = 3; var Variable2 = "This is a string"; const Variable3 = true;
Notice how we can store all sorts of stuff without worrying about declaring their types in JavaScript. It's one of the reasons JavaScript is a popular choice for beginners.
Arrays
Arrays are a basically just a group of variables stored in one container ( A container is what ? a variable , So an array is also just a variable ) , now again since JavaScript is easy with datatypes it is not considered an error to store variables of different datatypeslet
for example :
myArray = [1 , 2, 4 , "Name"];
Objects in JavaScript
Objects play a significant role, especially in the world of OOP : object-oriented programming (which we'll talk about in another post). For now, let's focus on understanding what objects are and how they mirror real-world objects.
In our everyday world, objects possess characteristics or properties. Take a car, for instance; it boasts attributes like its color, speed rate, and make.
So, how do we represent a car in JavaScript? A regular variable won't quite cut it, and neither will an array. The answer lies in using an object.
const Car = { color: "red", speedRate: "200km", make: "Range Rover" };
In this example, we've encapsulated the car's properties within an object called Car. This structure is not only intuitive but also aligns with how real-world objects are conceptualized and represented in JavaScript.
Variable Scope
There are three variable scopes : global scope, local scope, and function scope. Let's break it down in plain terms.
Global Scope: Think of global scope as the wild west of variables. When you declare a variable here, it's like planting a flag that says, "I'm available everywhere in the code!" No need for any special enclosures or curly braces.
Local Scope: Picture local scope as a cozy room with its own rules. When you create a variable inside a pair of curly braces, like this:
//Not here { const Variable1 = true; //Variable1 can only be used here } //Neither here
Variable1 becomes a room-bound secret. You can't use it anywhere else in the code
Function Scope: When you declare a variable inside a function (don't worry, we'll cover functions soon), it's a member of an exclusive group. This means you can only name-drop it within that function. .
So, variable scope is all about where you place your variables and where they're allowed to be used.
Adding in user input
To capture user input in JavaScript, you can use various methods and techniques depending on the context, such as web forms, text fields, or command-line interfaces.We’ll only talk for now about HTML forms
HTML Forms:
You can create HTML forms using the <;form> element and capture user input using various input elements like text fields, radio buttons, checkboxes, and more.
JavaScript can then be used to access and process the user's input.
Functions in JavaScript
Think of a function as a helpful individual with a specific task. Whenever you need that task performed in your code, you simply call upon this capable "person" to get the job done.
Declaring a Function: Declaring a function is straightforward. You define it like this:
function functionName() { // The code that defines what the function does goes here }
Then, when you need the function to carry out its task, you call it by name:
functionName();
Using Functions in HTML: Functions are often used in HTML to handle events. But what exactly is an event? It's when a user interacts with something on a web page, like clicking a button, following a link, or interacting with an image.
Event Handling: JavaScript helps us determine what should happen when a user interacts with elements on a webpage. Here's how you might use it:
HTML:
<button onclick="FunctionName()" id="btnEvent">Click me</button>
JavaScript:
function FunctionName() { var toHandle = document.getElementById("btnEvent"); // Once I've identified my button, I can specify how to handle the click event here }
In this example, when the user clicks the "Click me" button, the JavaScript function FunctionName() is called, and you can specify how to handle that event within the function.
Arrow functions : is a type of functions that was introduced in ES6, you can read more about it in the link below
If Statements
These simple constructs come into play in your code, no matter how advanced your projects become.
If Statements Demystified: Let's break it down. "If" is precisely what it sounds like: if something holds true, then do something. You define a condition within parentheses, and if that condition evaluates to true, the code enclosed in curly braces executes.
If statements are your go-to tool for handling various scenarios, including error management, addressing specific cases, and more.
Writing an If Statement:
if (Variable === "help") { console.log("Send help"); // The console.log() function outputs information to the console }
In this example, if the condition inside the parentheses (in this case, checking if the Variable is equal to "help") is true, the code within the curly braces gets executed.
Else and Else If Statements
Else: When the "if" condition is not met, the "else" part kicks in. It serves as a safety net, ensuring your program doesn't break and allowing you to specify what should happen in such cases.
Else If: Now, what if you need to check for a particular condition within a series of possibilities? That's where "else if" steps in. It allows you to examine and handle specific cases that require unique treatment.
Styling Elements with JavaScript
This is the beginner-friendly approach to changing the style of elements in JavaScript. It involves selecting an element using its ID or class, then making use of the .style.property method to set the desired styling property.
Example:
Let's say you have an HTML button with the ID "myButton," and you want to change its background color to red using JavaScript. Here's how you can do it:
HTML: <button id="myButton">Click me</button>
JavaScript:
// Select the button element by its ID const buttonElement = document.getElementById("myButton"); // Change the background color property buttonElement.style.backgroundColor = "red";
In this example, we first select the button element by its ID using document.getElementById("myButton"). Then, we use .style.backgroundColor to set the background color property of the button to "red." This straightforward approach allows you to dynamically change the style of HTML elements using JavaScript.
#studyblr#code#codeblr#css#html#javascript#java development company#python#study#progblr#programming#studying#comp sci#web design#web developers#web development#website design#ui ux design#reactjs#webdev#website#tech
391 notes
·
View notes
Text
November 2024 Check In

Hello, everyone!
Got some stuff to share! Our artists had a bit of a respite as we took a breather between the Moontail push, but we’re continuing back to work!
As stated previously, most of our art efforts have been towards accessories and mass illustration of the same things over again, so that legaves less “new” things to share, but we’ll be sharing what we’ve accomplished!
Accessory Illustrations
Necromantic Cloak
We’ve completed the Necromantic Cloak on all starter breed poses!
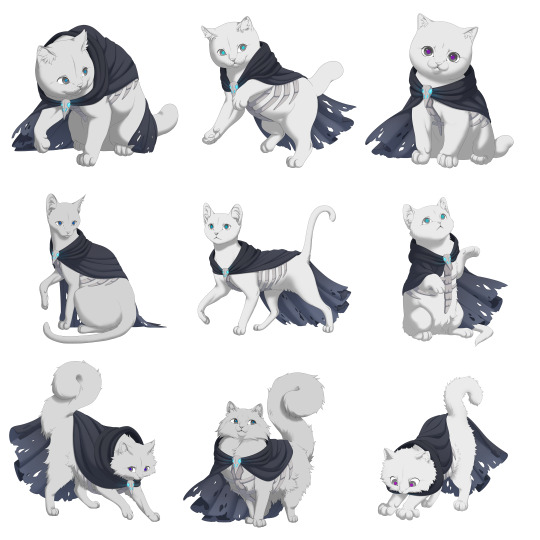
Illustration by Remmie, Tybaxel, and Hydde
And we have finalized colors!
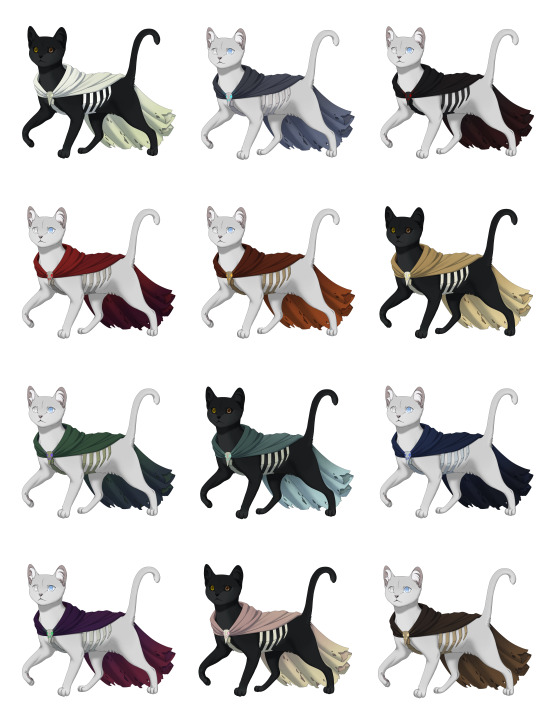
Color design by Emma
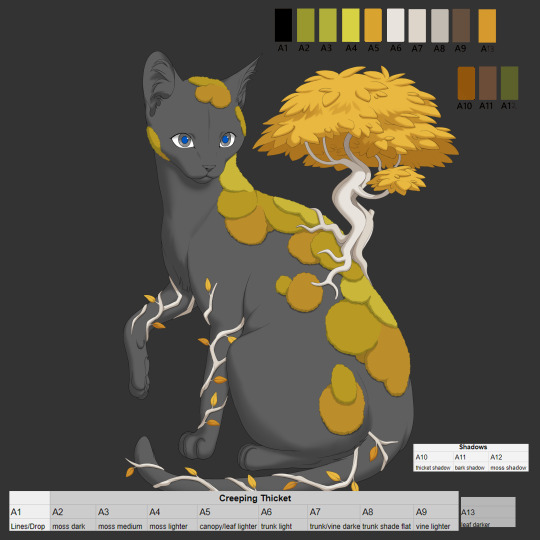
Creeping Thicket
We’ve completed the Creeping Thicket on all starter breed poses!
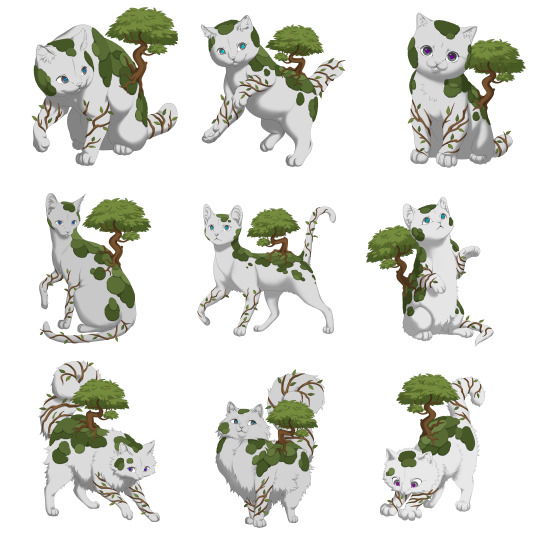
Illustration by Remmie, linework by Tybaxel
We are actively working on the colors for this piece, but we shared a preview of the work in progress earlier this month!
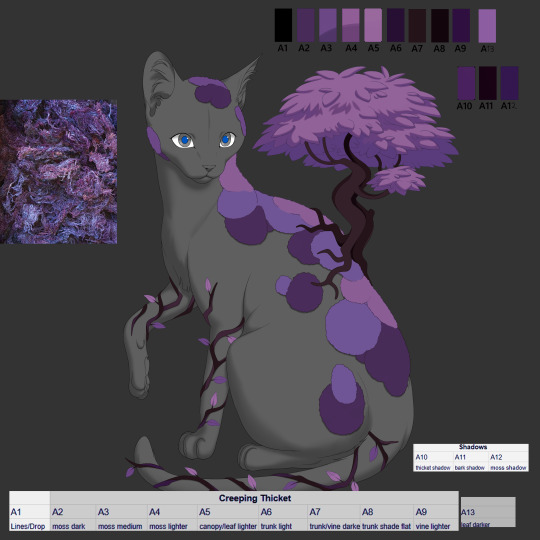

We have also decided to divide up the original item into two items: the Creeping Vine and Creeping Thicket.
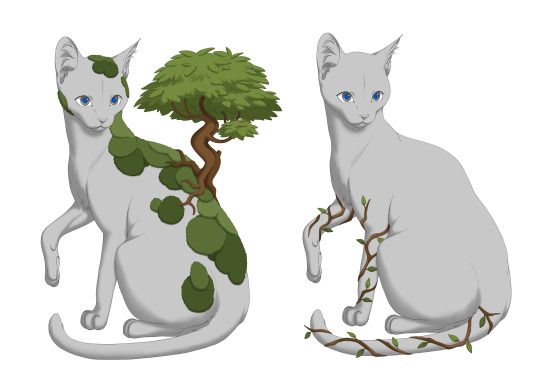
All Kickstarter backers who purchased a Creeping Thicket will receive both items!
We decided this after understanding that a division will allow for more variability and utility of the item.
Gilded Set
We have also divided this accessory into three items: the Gilded Teardrops, Gilded Collar, and Gilded Tailpiece, thus creating the Gilded item set!
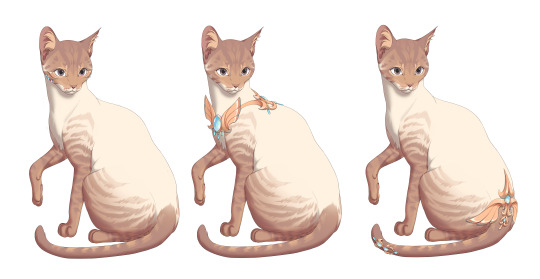
We’ve completed the Gilded set on all starter breed poses!
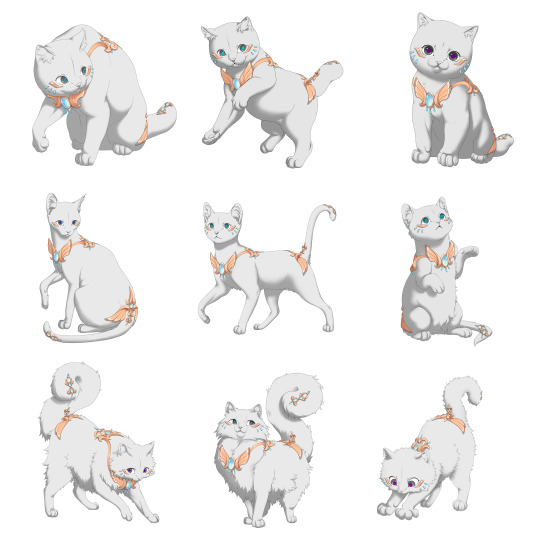
Illustration by Azarel
Regal Set
We’ve completed the Regal set on all starter breed poses!
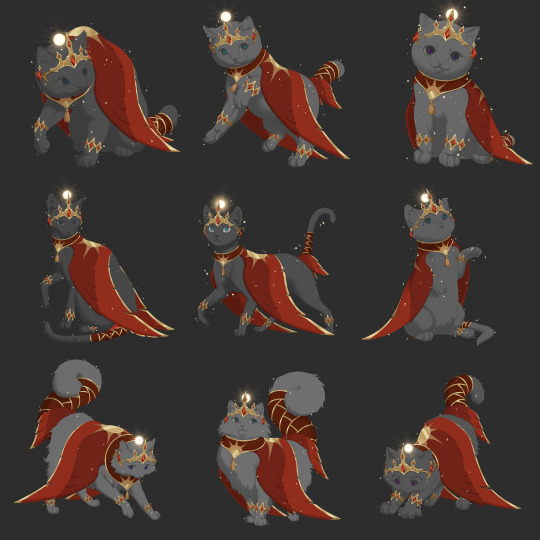
Illustration by Azarel
Backdrops
Grand Library
We completed the Grand Library backdrop!
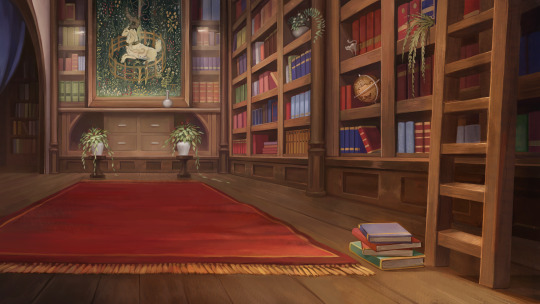
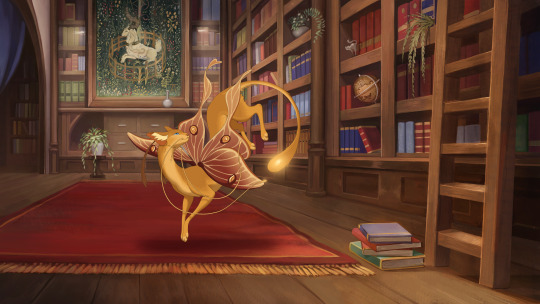
Composition by Runeowl and Giulia, final illustration by Asp
Cogwheel Outskirts Nighttime


Nighttime edits by Giulia, original illustration by Kzart
Decor Check In
Previously, we shared decor which was attempted to fit into the backdrop style, intending for decor to fit seamlessly into a backdrop. However, after careful consideration and several iterations, we have decided that from now on, decor will by stylized like the cats and fauna.
Decor will be lined with soft-cell shading, and will not look blended into the backdrop itself. We found that with varying textures and shading unique to different backdrop environments, the aesthetics were unsustainable and problematic long term. We have begun production on decor which closer resembles the stylistic truth of cats, icons, and fauna, and we feel this direction will be much stronger in the long term!
Pelt System
And something big… a design for the pelt system! This design took a lot of work, as we wanted to make the process as seamless and quality as possible.
There is a lot of information to work with on this page, and we’re quite proud of how it’s turned out. We hope users enjoy!
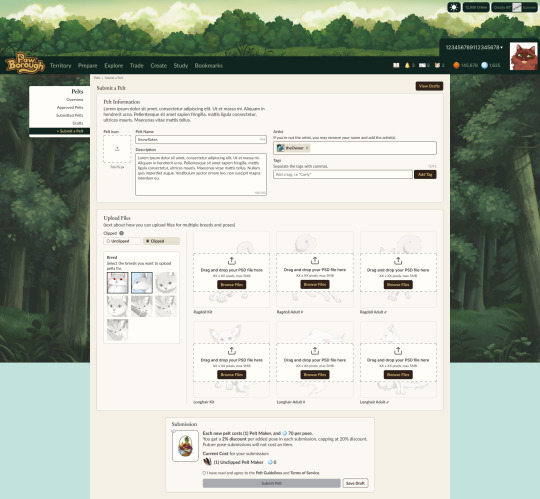
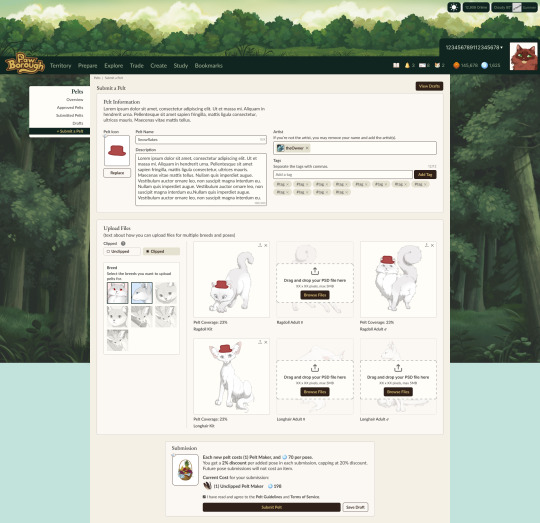
Users will be able to toggle on breed poses to upload, so as to avoid a long drop down. If a pelt is a commission, users will be invited to credit the proper artist.
In addition, we have an "add more" feature which will invite and allow users to submit more poses for their pelt even after the pelt has been approved and added into the game.
Submitting more poses at once offers a slight discount because it is easier on the mod team. But importantly, at any time users will be able to expand pelts into new breed releases. This will serve to prevent item and submission bloat!
One of the most exciting developments in this category has been our adaptation for pelts to utilize the dynamic layering. Using the PSD and layer system we already designed and implemented, users will be able to utilize it too for unclipped pelts!
Our system works by users paying an upfront fee for moderation approval, and then all further printing will be at a significantly cheaper rate. Creators will also be able to list their pelts for sale without printing, in which buyers pay the print cost as a tax, giving sellers more freedom.
We will be basing the cost of pelt submissions on our ability to pay moderators a fair rate. We are currently running tests to time and calculate our moderation efforts, so no prices are set in stone yet!
Development Check In
User Settings
We’ve completed work on user settings. Users can now change their icons to any cat they own, validate new emails, change their password, username, and Borough! Mundane, but hugely necessary advancements.


In general, we're currently working on the pelt system and general polish. We’ve also just begun implementing ways for users to pay for digital content, which is huge for us.
And with that, one more announcement regarding development support...
Trying out Patreon!
Many months ago, we discussed the option of opening up tertiary support efforts, such as "support bundles," as a way to continually aid and bolster development. We denied pursuing this avenue at the time, because we had to focus solely on development with the resources at our disposal already. We mentioned a plan to do something in the future when the time was right.
Since then, we've gotten countless questions on how people can support us after missing the Kickstarter, and how they may help contribute to our development.
We are at a point in our timeline now where we could utilize the support funds. Our scope is higher than it was when we first imagined the project, and while we've been able to manage expectations vs. the necessary additions to make our game the best it can be out the gate, we've decided to open up support for those who'd love to see more behind the scenes.
Introducing our Patreon!
! Not signing up will not harm the project! It does NOT void nor devalue your Kickstarter rewards, nor will we EVER be handing out retired goods through this platform !
Please do not feel obligated to signup if you are not in a place to! This is simply something we're pursuing as an additional avenue of support in a time where we can use it, especially for those who have asked how they can engage with the project while having missed the Kickstarter.
Like the idea of support bundles, we are offering something amidst the work. We'll be offering behind the scenes updates, showing off sketches, drafts, development shots, and the design process of content that is typically only shown in a finished or near-finished state for our public updates.
Simply put: see things before the public sees 'em!
We work every weekday, so there will always be something new to show. Get frequent posts of the lore workshopping, the design pipeline, UI/UX designs, compositions, and all the other juicy tidbits of behind the scenes.
We'll be thinking about what more to offer in addition, but the last thing we want is to introduce more retired stuff, or undermine the exclusivity of the perks promised in the Kickstarter. This is not Kickstarter 2.
However, if this Patreon offers a lucrative solution for us, we may be able to expand our expectations for breed releases, mechanic timelines, and content updates!
All content on this page is available at a low price, and higher tiers do not give more behind the scenes. Instead, we've priced higher options if users would like to be credited as supporters on the credits page of the game.
And Kickstarter backers will also be automatically credited from here on.
As a way to reward the highest tier, we will also feature exclusive community polling. This is different and more lowkey than the giant polls we have done in the past. Sometimes, we as a team have deliberations for small things; minor design choices, UI differences, or content that has generally been too inconsequential to burden the community with giant polls. As a way to engage and have some fun, we're taking these smaller discussions here!
Large polls which pertain to more serious and consequential topics, such as sweeping mechanic changes or big decisions that we specifically want community input on, will still be done publicly.
Lastly, it's unclear at this time what the fate of this page will be once we move into launch. We may repurpose it as a way to recruit beta testing for new updates post-launch, we may shut it down, and we may keep it exactly as is with behind the scenes exclusivities and previews before content hits the game. Depending on the pros and cons during slower development cycles, we'll have to make that call when we get there. But right now we're in full force on mass production, and we'd love to keep on that track!
Thank you everyone!
To summarize: We shared a large amount of accessory progress, backdrops, the pelt system, and what we're currently working on in development. In addition, we launched a Patreon to post sketches and early access content.
What to expect next update: Potential beta updates, further asset and development updates.
#paw borough#petsite#pet sim#development update#pawborough#kickstarter update#art update#indie game#pet site#apparel#pelts#ui ux design#patreon
44 notes
·
View notes
Text


My manager said I can be a part of the UI/UX design process so I get to have more designing prototypes of the websites kind of tickets soon and I'm so happy~!
As much as I love coding, I also love designing stuff that might/might not be implemented later on~!
#xc: side note post#coding#codeblr#programming#progblr#studyblr#studying#comp sci#ui/ux design#work developments
82 notes
·
View notes
Text
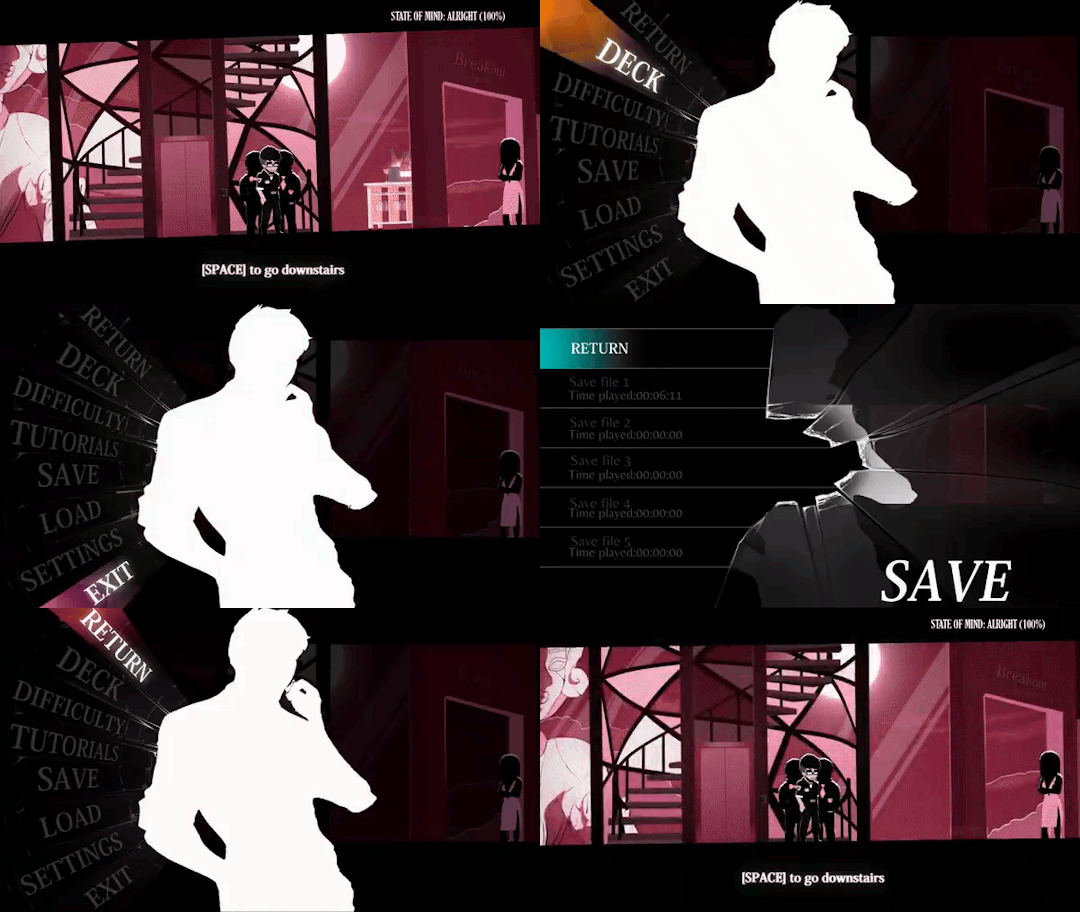
menu design is my Roman Empire
Wishlist Chromatose here for more sexy menu designs (and flawed characters seeking redemption and killer character sprites and monster designs and):
#chromatose#game menu design#game ui#uidesign#gamedev#indie game dev#indie dev#game dev stuff#game dev#visual novel#indie games#game development#akabaka
30 notes
·
View notes
Text
I love a good CRT filter as much as the next nerd, but I think that as retro game fans at some point we've got to admit that a lot of NES-era games were not, in fact, designed with any particular respect for the limitations of contemporary home televisions. The fuzz of a low-scan-rate CRT doesn't lend them subtlety and depth, it just makes them look like blurry garbage. It wasn't until the Super Nintendo era that console developers had consistently figured out how to work with pixel fuzz to their advantage, and some never really did – I can think of any number of PSX RPGs where the text is practically indecipherable when viewed on the kind of TV that most actual players would have had at home at the time of their publication.
746 notes
·
View notes
Text
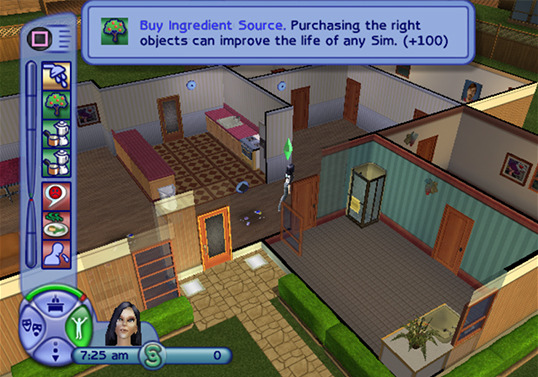
📺 Some facts about The Sims 2 Console Development from chat of recent stream with Will Wright: UI Development
In the stream chat there was a user with the nickname Hans_10K8, who claims to have worked on Sims 2 on home consoles, shared some facts about its development. And one of those facts is about UI development.
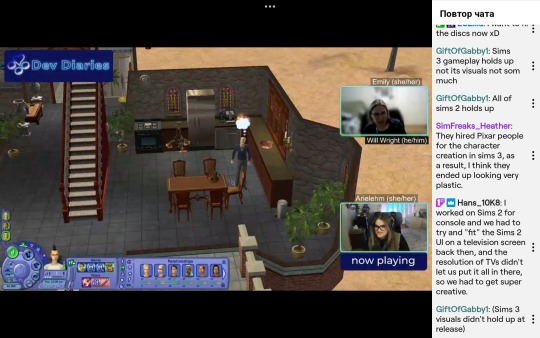
"I worked on Sims 2 for console and we had to try and "fit" the Sims 2 UI on a television screen back then, and the resolution of TVs didn't let us put it all in there, so we had to get super creative."
19 notes
·
View notes
Text
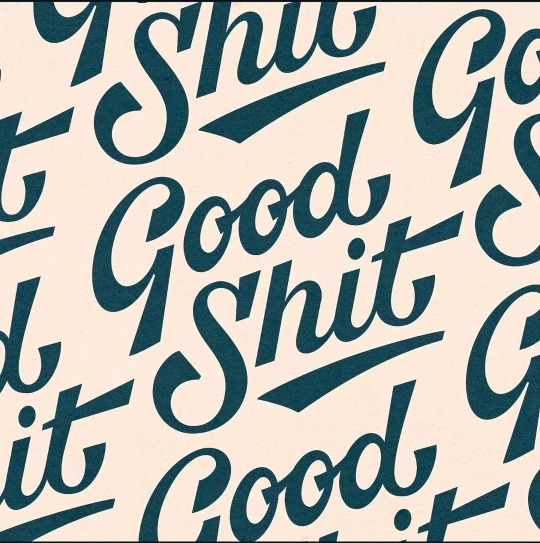
Good S**t typography design ☆☆☆
#typography#logo#illustration#artists on tumblr#ui ux design#development#laptop#macbook#apple#ipad pro
23 notes
·
View notes
Text
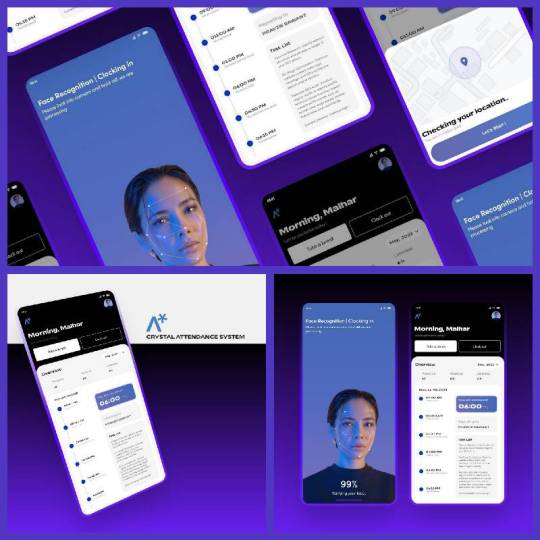
Best UI/UX Designer & Full Stack Developer | Nilesh Thorath
I have more than 10 years of extensive experience in UI/UX Designer & Full Stack Developer & Shopify Developer & Website developer & Brand Designer, mobile and desktop application design and development. I’m highly skilled in C#, java, SQL & Adobe software as well as other tools and design technologies. My solid background in problem solving has allowed me to manage teams with exceptional performance. As a computer science major I have passion to strive for innovation and fresh ideas.
For more details Contact us : 9033851355 or visit us: http://www.nileshthorath.com/
#UI/UX designer#Shopify Developer#Full Stack Developer#Website developer#Brand Designer#UI DEVELOPER#UX DEVELOPER#UI DESIGNER#UX DESIGNER
1 note
·
View note