#tuserfran
Explore tagged Tumblr posts
Photo


SHANG-CHI AND THE LEGEND OF THE TEN RINGS 2021 | dir. Destin Daniel Cretton
#shang chi and the legend of the ten rings#gifs#by drea#filmedit#mcuedit#filmgifs#usermarcy#tuserssam#tuserfran#tusermadi#usershreyu#usercroft#uservalentina#tuserdi
2K notes
·
View notes
Photo
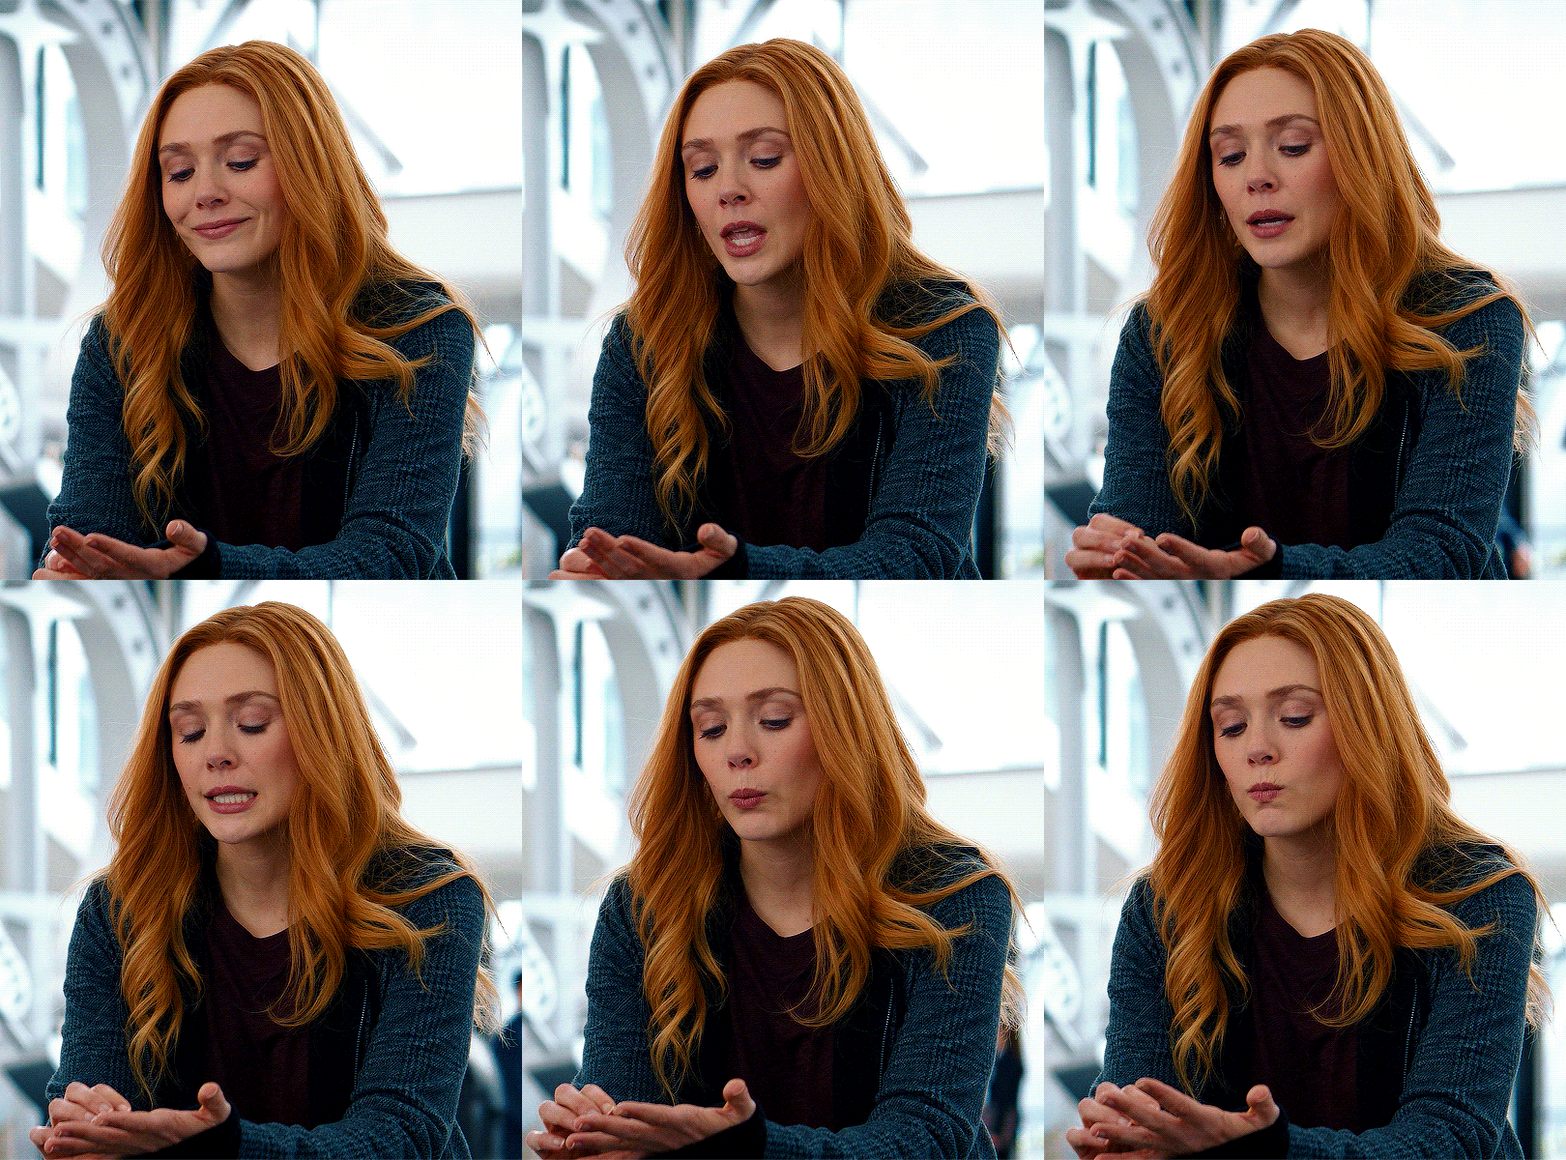
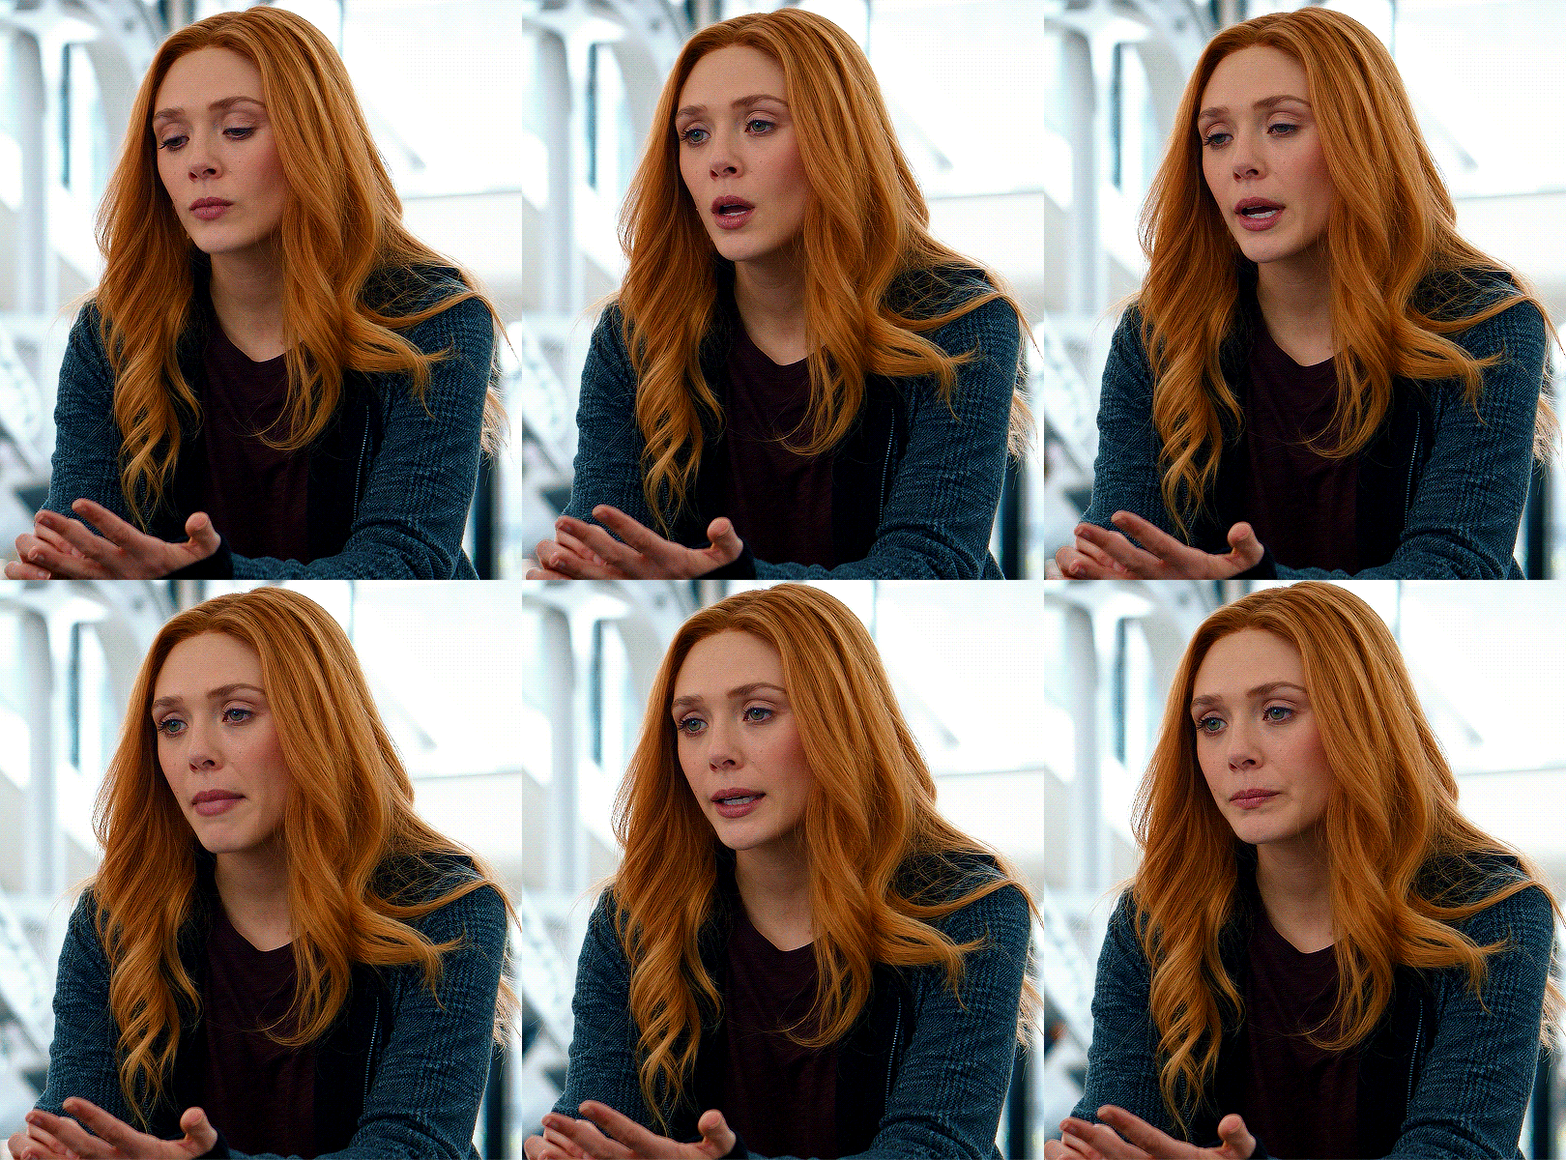
WANDAVISION (1.08)
#wandavision#wanda maximoff#wandavisionedit#wandamaximoffedit#marveledit#mcuedit#marvelheroes#marveladdicts#dailymarvel#tusermeg#uservalentina#tuserfran#usertix#userannalise#userlaur#andthwip#userchaitali#*#gifs#1k
2K notes
·
View notes
Photo


We know each other! He’s a friend from work!
#marveledit#mcuedit#dailymarvel#mcufam#dailyavengers#theavengers#marveladdicts#marvelheroes#fyeahmarvel#mcugifs#usertix#tuserfran#dailymarvelgifs#cinemapix#*#marvel#thor odinson#loki laufeyson#the hulk#thor: ragnarok
2K notes
·
View notes
Photo


ANTHONY MACKIE as SAM WILSON in THE FALCON AND THE WINTER SOLDIER (2021) | EPISODE 1: NEW WORLD ORDER
#tfatws#tfatwsedit#sam wilson#anthony mackie#usertix#tuserfran#tusermeg#userannalise#tuserhannah#usermeemo#userpavi#userchaitali#usersunny#userhella#hawkaye#marveledit#dailyavengers#mcugifs#chewieblog#my edits
2K notes
·
View notes
Photo
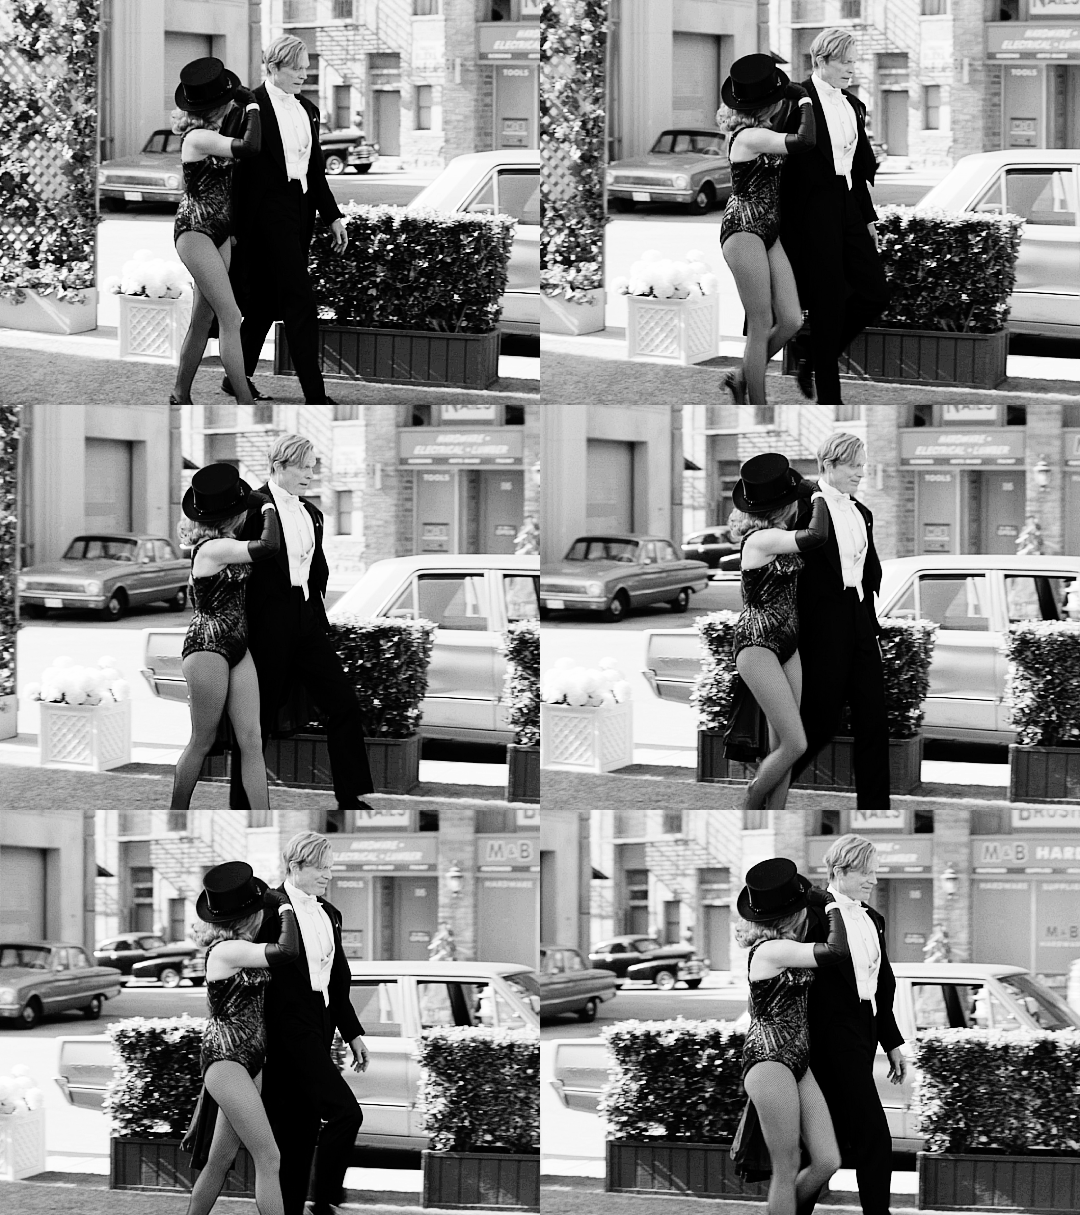
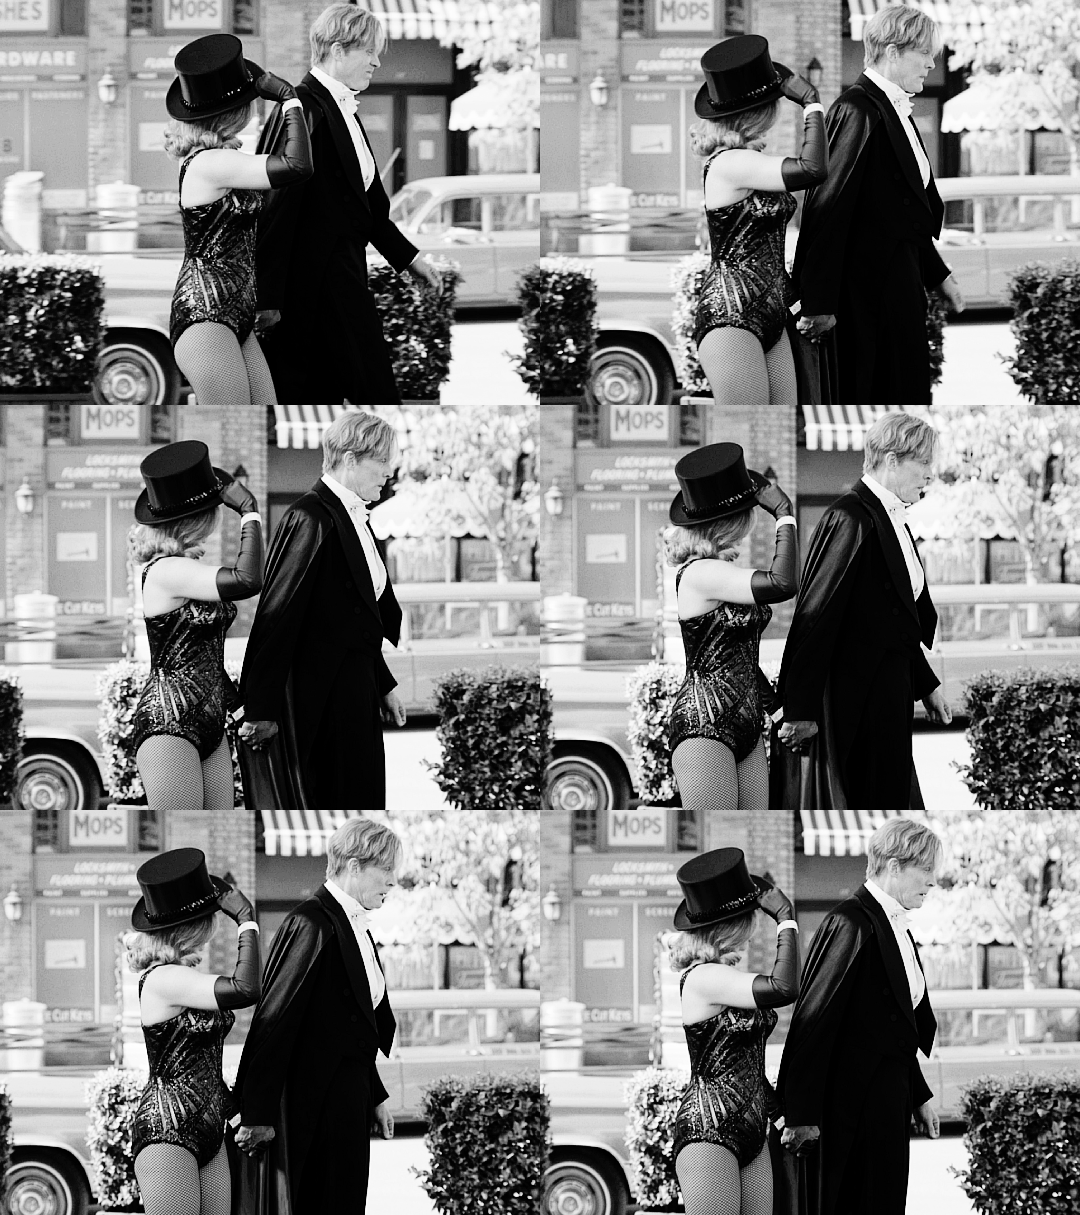
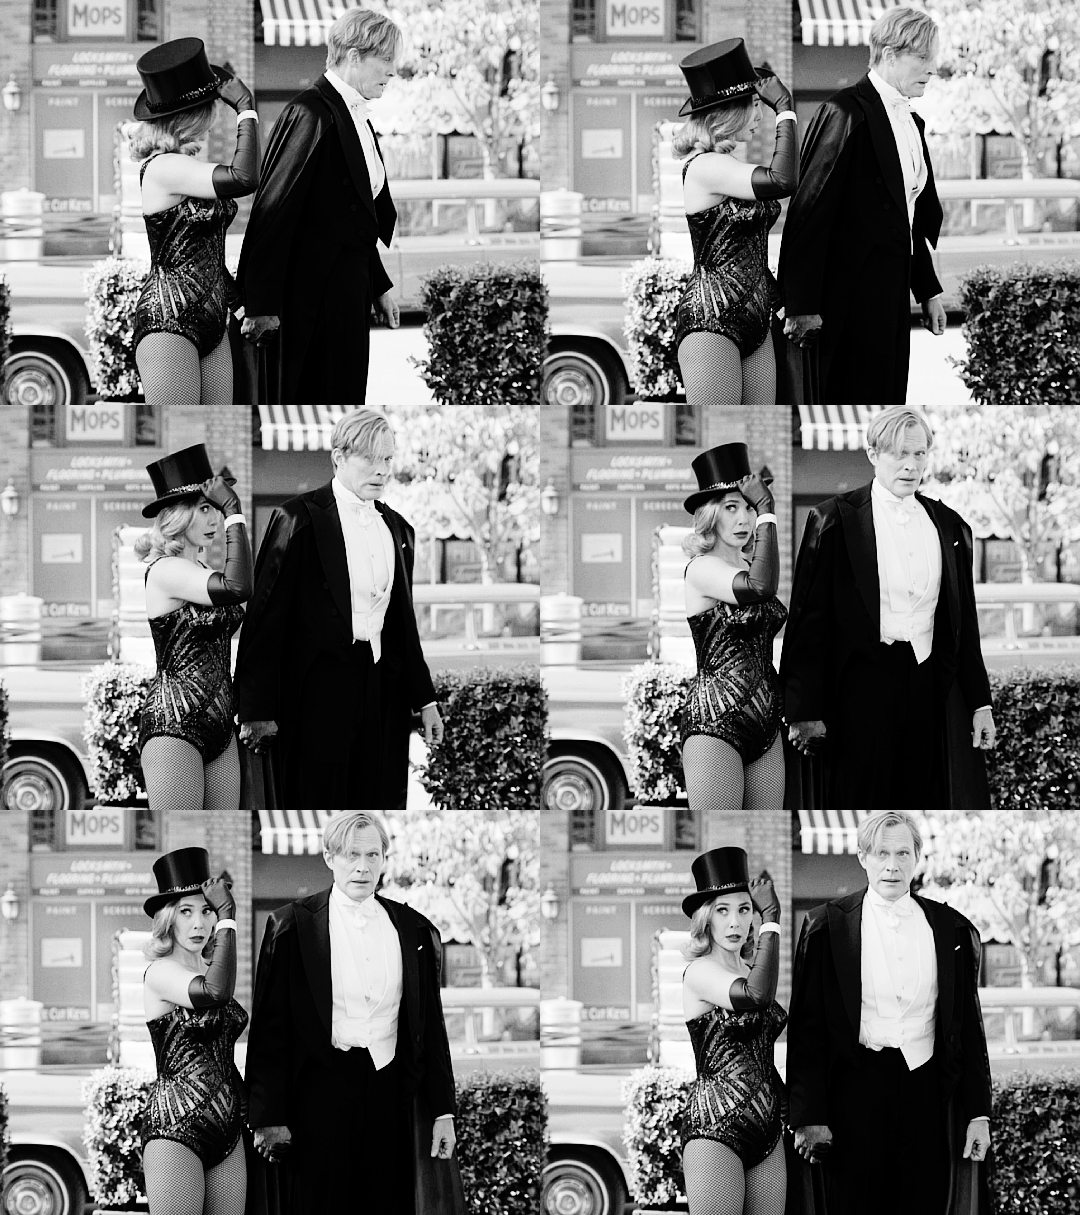
“You two! Stop right there!”
#wandavision#wandavisionedit#wandavisionnet#disney#marvel#mcuedit#marveledit#wandamaximoffedit#visionedit#userlaur#userlaura#usermirna#userringo#tuserfran#they are just so cute here kgjhjkn#love how they are sneaking out while holding hands#if that isn't Peak Romance™ idk what is#mine#gifs
760 notes
·
View notes
Photo


MAIA MITCHELL IN 'HOT SUMMER NIGHTS' (2017)
#hot summer nights#maia mitchell#maiamitchelledit#mmitchelledit#femaledaily#filmedit#dailytvfilmgifs#chewieblog#userbbelcher#tvcentric#ladiesofcinema#cinemapix#userdevon#maziekeen#tuserfran#moviehub#useroptional#*
248 notes
·
View notes
Text


You are a product of all who came before you. The legacy of your family. You are your mother. And whether you like it or not, you are also your father.
Shang-Chi and the Legend of the Ten Rings (2021) Dir. Destin Daniel Cretton
#marveledit#mcuedit#shangchiedit#shang chi and the legend of the ten rings#usersameera#userlcufeysons#tuseraud#tuserpluto#tuserfran#mine#my edits#*#marvel
217 notes
·
View notes
Photo


FRIENDS 4.18 | The One With Rachel’s New Dress
#friendsedit#cinematv#userharumi#userkan#sallysimpsons#useroptional#tuserfran#userpavlova#userwaldorf#userlix#useryusi#usergeena#friends#tv#myedit#i thought this was so funny#please ignore the box i put over the last one#i'm not about to blur out here
316 notes
·
View notes
Photo


GOOD TROUBLE 3.05 WHOOSH POW BANG
#good trouble#evan speck#mariana adams foster#otpsource#tvfilmdaily#tusertay#userlix#tuserfran#userzaley#userpavi#userdrea#usercallie#tv#myedit#i tagged randos i'm sorry#i MISS THEM#evan x mariana
97 notes
·
View notes
Photo
💜 HOW TO MAKE A GIF WITH PHOTOPEA 💜
Hey everyone! I recently got asked to do a tutorial on how I make my gifs. I know that many people (such as myself) don’t have access to Photoshop for various reasons but they’d like to get into gif making. When I started making gifs, I only had a free trial of Photoshop, but when that ran out, I had to find another way to make gifs. Enter Photopea! A free, web-based software that you can use anywhere and that works just like Photoshop!
In this tutorial, I’ll teach you how to make a basic gif like the one I did above. I use a macbook air, but it should be doable on a regular pc too!
If you found this helpful, feel free to share it with your friends! The tutorial can be found under the cut below 💜
THINGS YOU’LL NEED
A browser (I switch between Safari and Chrome, more about this later)
A screencapping software (like MPlayer OSX Extended) or, alternatively, a presentation program like Keynote or Powerpoint.
A program to screenrecord or a program that let’s you download from YouTube
Lots of patience bc gifs are annoying little shits <3
1. GETTING A VIDEO BY SCREENRECORDING
First things first, you need to have the clip you want make a gif out of. There are plenty of ways that you can get them. I’ve seen some gifmakers say that they torrent entire movies and gif from that. The way I do is I screenrecord the part I want to gif directly from where I’m watching the movie or show (like Disney+ or Netflix [or something like 123movies if you’re a pirate 🏴☠️)]). That way, I don’t have to download the entire movie and I have just the part that I want.
To screenrecord, I use my macbook’s built-in program called Screenshot.
Open the program by pressing ctrl + command + 5 on your keyboard and you get these funny little buttons.

Click on the button that says record entire screen. The program is now recording your screen. Play the scene and make sure you expand the video into full screen so you get a full resolution. When you’re done, click the stop button that is at the top right of your screen (next to the wifi and battery symbols.)

If you don’t have Mac, I suggest you look into how to screenrecord on your computer, as I don’t know how other operating systems work. Sorry!
1B. GETTING A VIDEO FROM YOUTUBE WITH CLIPGRAB
Another way you can get videos is from Youtube. I use a program called ClipGrab for this. Download and open the program. You’ll get this window
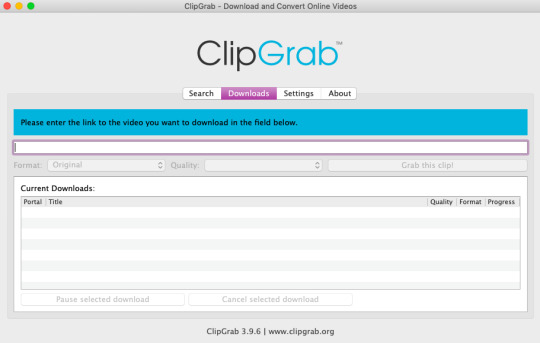
Simply paste the link and chose the highest quality, then click ‘grab this clip!’. Done!
2. SCREENCAPPING
After we’ve obtained the clip we wanted, we can do this two ways. The first way is to use the program MPlayer OSX Extended. Here’s a tutorial on how to set it up, make sure you do this if it’s your first time using the program. Make sure that you have a special screenshot folder!
Open MPlayer, then go to file > open and find the video of the scene you screenrecorded or downloaded. MPlayer will now play the video. Use the left and right keys (< and >) to go go backwards or forwards 1 minute, but try not to move around too much because the software crashes if you do. If that happens, just click the reopen button when the popup comes on, and reload the video again.
When you’ve gotten to the point you want in the video, press the command + shift + s buttons at the same time and the program will now take a screencap of every single frame until you stop.
If everything goes smoothly, you should find all your frames in your screenshot folder that you’ve made before when setting up the program!
2B. USING A PRESENTATION SOFTWARE TO MAKE A GIF
If you want to skip the screencapping part and you want to have a fully completed gif, you can do the second option. That’s what I used to do before I got MPlayer. In my experience, it’s a really fast way to make a gif, but the quality isn’t really good.
Here’s a tutorial on how to turn a slide into a gif in Keynote.
Here’s a similar tutorial on how to make a gif on PowerPoint.
Basically, you make sure that the size of your presentation is the same as your video, and that you make sure to export one slide into a gif. Also make sure that you export in the highest quality!
3. LOADING THE FRAMES IN PHOTOPEA
Finally, we can start giffing! As I said at the start, Photopea can be used anywhere, but I switch between Safari and Chrome. The reason why is that if I upload the frames in Chrome, the frames will be out of order. In Safari, that doesn’t happen, but the downside is that once I start editing, Safari will reload the page because it takes up too much memory.
So, first I go to photopea.com on Safari. I click New Project and put in the same dimensions as the screencaps (in my case, they are 1440x900 px). You’ll get an empty project.
Then click file > open & place and select your screenshots. Wait until Photopea has loaded all the frames, then, at the speed of light, quickly click file > save as psd before Safari reloads! You’ll find it in your folder where all your downloads are.
Next, I open Chrome (I use the incognito window because I have adblock on my usual Chrome, the program won’t work as usual if you have it enabled) and I click Open From Computer, locate your saved .psd file that you saved from Safari.
Now, you’ll see all the frames as individual layers. Select everything by clicking on the first layer, then golding the shift button and clicking on the last layer. Press command + G to group the frames into a folder. Here’s how everything should look after you’ve grouped the layers.
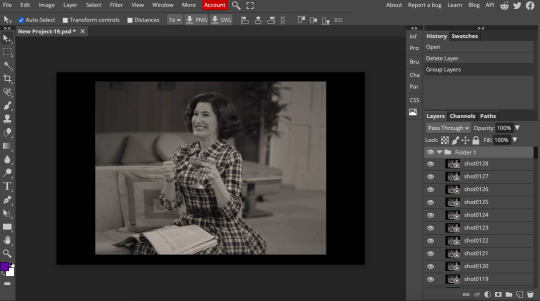
^^ See how Agnes approves! Agnes things you’re going a great job!
Now, it’s time to crop the gif and get rid of the black borders. Making sure that the folder is selected, click on the crop tool (or press C) and click on Fixed Size

W is Width and H is Height, write in your sizing here. Tumblr’s max width is 540, so I put the width as such. For the height, I use 405. Then you just drag the corners until you’ve selected the part that you want, like this
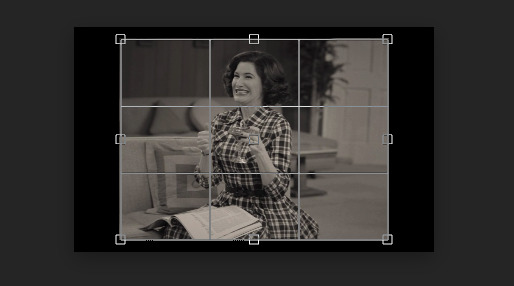
Press enter and the image will be sized down 540x405 px.
Now, our gif looks like this after cropping!
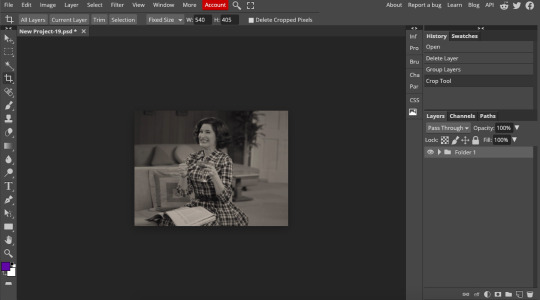
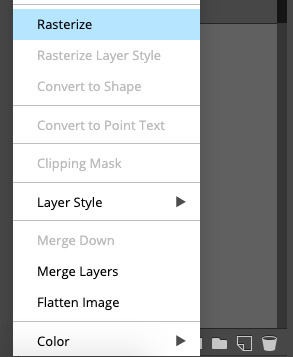
Open the folder so you can see all the layers. Select all your layers and right click on them, then click rasterize.
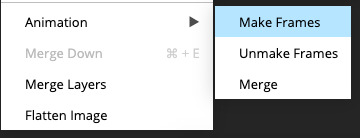
Then, go to layer > animation > make frames. You’ll now see that each layer begins with _a_ - this is crucial because this is how Photopea knows that the layers are part of a gif. If your layers don’t begin with _a_, then it will not play as a gif
If you instead already have a gif done, all you have to do instead is simply click open from computer when you first open Photopea and load your already finished gif and it’ll have the _a_ at the start of every layer. You won’t have to go through the steps of loading your frames into a new project to make your gif as it’s already done and in a folder :) Just start cropping once you load it
You can preview your work by going to file > export as > gif. Make sure to change the speed in the preview window until your gif plays the way you want it! I put my speed at 500%
4. SHARPENING
Hooray, we now have our gif! But to make it look a little nicer, it’s good to sharpen it. I always use Smart Sharpen when I sharpen my gifs, and many other gifmakers use that too. It’s really good :D
To sharpen your gif, again, make sure that all your layers are selected. Go to filter > sharpen > smart sharpen. I use two different settings for my gifs, it really depends on the gif.
Setting 1 (which is the default setting)
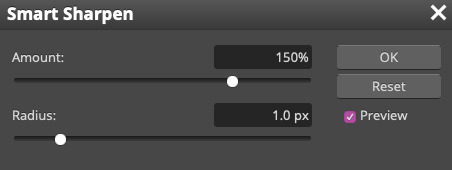
Setting 2
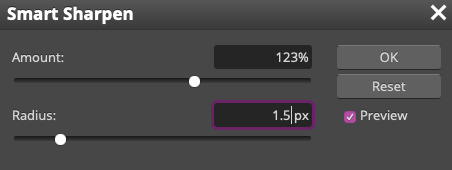
Again, it depends on the gif, play around until it looks good to you!
Here’s our gif after sharpening it

I ended up deleting the last few layers as the gif got bigger than 10mb (that’s Tumblr’s file limit, it your file is bigger than 10mb, it won’t upload). I also added a gradient map and it made the file size smaller, more about that in the next segment!
5. COLORING
Here’s the fun part! Now we get to play around with the gif, making it brighter and look Extra Nice™! Since this is a black and white scene, I make sure that the blacks and the whites really pop.
Notice how in the original scene it’s not actually b&w, it has a slight sepia tint to it. I want to remove this, so I add a gradient map by clicking on the white square with a black circle (I want to point out that we’ll be clicking on this button a lot in this step)

and I change the blending mode to Saturation
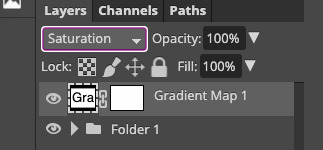
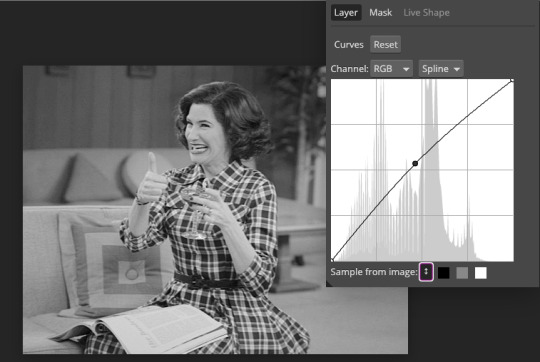
Then I add a curves layer using these settings
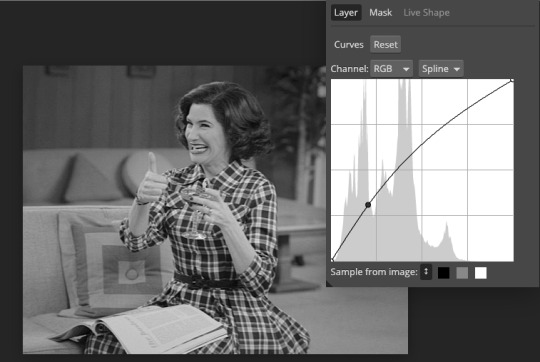
Then a second curves layer
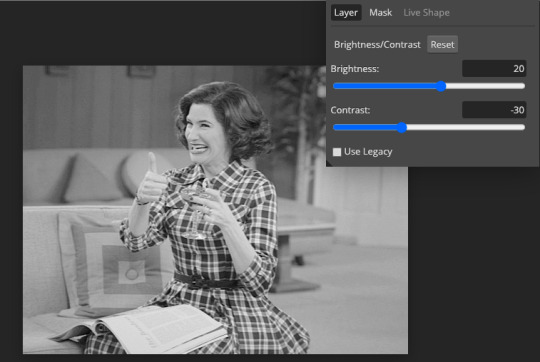
Brightness/contrast
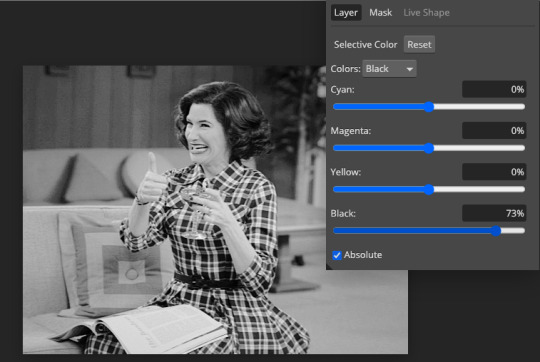
Then my favourite! Selective color! First layer, I deepen up the blacks
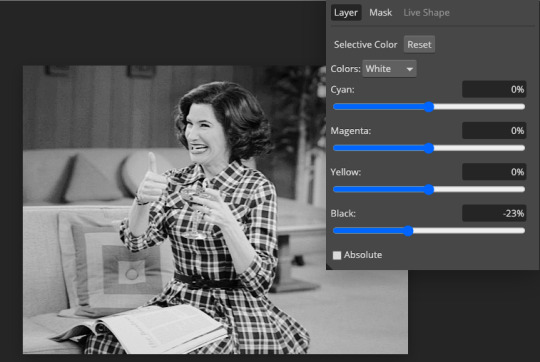
Then another selective color layer, this time the whites
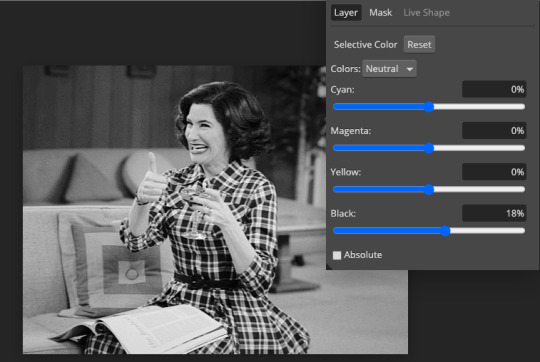
Lastly the neutrals
Here we have the final results!

Wasn’t this a gas! I hope this helped you out, let me know if you want to know anything else about gifmaking, I’m happy to help! Also, sorry if I wasn’t very clear, I’m bad at explaining 🙈
MORE RESOURCES:
Here are some other tutorials that are really helpful in making gifs. These users use Photoshop, but you can still use their tips most of the time in Photopea too, you just need to play around and see what works for you!
Gifmaking for beginners by @chloezhao (this one saved my life)
Pale coloring tutorial by @itsphotoshop
Two-Toned Gif Background by @clubgif
Text with white outline tutorial by @anya-chalotra
#resources#tutorial#gif tutorial#photopea#photoshop tutorial#photopea tutorial#tuserfran#userlaur#userlaura#usermirna#(tagging mutuals if you wanna share :P)#my tutorials
1K notes
·
View notes
Photo


♡ ULTIMATE SHIPS MEME ♡ : First Times [1/5] ↳ Evan Speck & Mariana Adams-Foster, Good Trouble 2.18
#tvedit#good trouble#usc*#tuserrose#sallysimpsons#userlix#userelliee#tuseranna#useryoumna#usercallie#userbean#rapunzels#tuserfran#tusercarolina#marianna adams foster#evan speck#i went and got myself all emotionally invested in them#and got fucking torpedoed#when will i learn to not trust freeform
61 notes
·
View notes
Text


#(´ ꒳ ` ✿)
#marveledit#mcuedit#wandavisionedit#wandamaximoffedit#scarletwitchedit#marvelladiesdaily#dailymarvel#dailyavengers#mcuwomen#tuseraud#userlace#tuserfran#tuserpluto#userlcufeysons#userbreslin#wanda maximoff#wandavision#mine#my edits#*
172 notes
·
View notes
Photo


WANDAVISION + the magical girls in town
#wandavision#wandavisionnet#wandavisionedit#marvel#mcuedit#marveledit#wanda maximoff#agatha harkness#monica rambeau#mcufam#dailymarvel#dailymcu#dailyavengers#tuserfran#usermirna#userlaur#userlauren#userringo#a lil idea i've had for a while <3#bc agatha's right - there are more magical girls in town#:D#really love how these turned out!!!#mine#gifsets
138 notes
·
View notes