#tray sealer
Explore tagged Tumblr posts
Visit Tumblr Blog
Explore Tumblr blogs with no restrictions, modern design and the best experience.
Last Seen Tumblr Blogs


Fun Fact
130K people were victims of a chain letter scam that affected Tumblr in May 2011.
Text
Beyond Frozen Dinners: The Versatile World of Tray Sealers in Australia
Think tray sealers are just for pre-made lasagnas? Think again! While these machines excel at keeping your favorite frozen meals fresh, their applications extend far beyond the supermarket freezer aisle. At Emrich, we're proud to offer a range of tray sealers in Australia, perfect for packaging a diverse array of products.
Tray Sealers: Sealing the Deal on Freshness
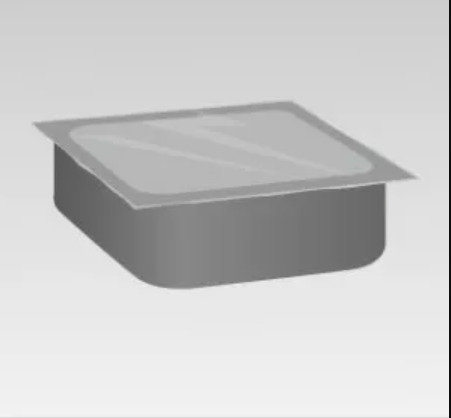
So, what exactly is a tray sealer? It's a packaging machine that forms a tamper-evident and airtight seal around a pre-filled tray. This creates a secure and hygienic environment for your product, extending shelf life and preventing contamination.
Beyond the Meal Deal: Unveiling Unexpected Applications
While food packaging is a mainstay for tray sealers, their uses are much more creative:
Medical Marvels: Tray sealers ensure sterile packaging for medical devices and instruments. This is crucial for maintaining hygiene and preventing infections in hospitals and clinics across Australia.
Wiped Out, But Not Spilled: Tray sealers effectively package wet wipes and other personal care items. The airtight seal prevents leaks and ensures wipes stay moist, ready for use.
Hardware Haven: Small components and hardware can be neatly organized and protected using tray sealers. This is especially useful for items susceptible to rust or moisture damage.
Emrich: Your Partner in Tray Sealing Innovation
At Emrich, we understand that every product has unique packaging needs. That's why we offer a variety of tray sealer models to suit your specific requirements:
Automatic or Semi-automatic: Choose the level of automation that best fits your production workflow.
Material Matters: We offer tray sealers compatible with various tray and film materials to ensure optimal performance for your product.
Hygiene in Focus: Our tray sealers are designed with easy cleaning and maintenance in mind, ideal for applications requiring a high level of sterility.
The Benefits of Tray Sealing
Here's why tray sealers are becoming increasingly popular in Australia:
Versatility: Tray sealers can package a wide range of products, making them a valuable investment for businesses with diverse needs.
Efficiency: These machines can significantly speed up the packaging process, boosting productivity and output.
Sustainability: Tray sealing often uses less material compared to traditional packaging methods, reducing environmental impact.
Emrich: Sealing the Deal on Your Packaging Success
If you're looking for a reliable and versatile packaging solution in Australia, look no further than Emrich's tray sealers. Contact us today to discuss your specific needs and discover how tray sealers can revolutionize your product packaging.
Contact- Web - https://www.emrich.com.au/tray-sealers/ Ph - 1800 801 243 / +61 3 9540 0255 Address - 1/14-18 Venture Court, Dandenong South VIC 3175, Australia.
0 notes
Text
#Automatic Packing Machine Manufacturers In Chennai#Auger Packing Machine Manufacturers In Chennai#Weighmetric Packing Machine Manufacturers In Chennai#Multihead Weigher Machine Manufacturers In Chennai#Volumetric Packing Machine Manufacturers In Chennai#Multipurpose Packing Machine Manufacturers In Chennai#Liquid Packing Machine Manufacturers In Chennai#Paste Packing Machine Manufacturers In Chennai#Pharma Packing Machine Manufacturers In Chennai#Oil Packing Machine Manufacturers In Chennai#Mini Doy Pack Machine Manufacturers In Chennai#Horizontal PFS (Pick-Fill-Seal) Machine Manufacturers In Chennai#Ffs - Volumetric Packing Machine Manufacturers In Chennai#FFS TRAY Model Machines Manufacturers In Chennai#Multitrack Packing Machine Manufacturers In Chennai#Flow Wrap Packing Machine Manufacturers In Chennai#Semi – Automatic Machine Manufacturers In Chennai#Semi Automatic Weighmetric Filling Machine Manufacturers In Chennai#Semi Automatic Paste Filling Machine Manufacturers In Chennai#Semi Automatic Volumetric Filling Machine Manufacturers In Chennai#Heavy-Duty Band Sealer Machine Manufacturers In Chennai#Semi Automatic Auger Filling Machine Manufacturers In Chennai#Conveyor Machine manufacturers in Chennai#Z-Conveyor Manufacturers In Chennai#Screw Conveyor Machine Manufacturers In Chennai#Bucket Elevator Machine Manufacturers In Chennai#Roller Conveyor Machine Manufacturers In Chennai#Flat Belt Conveyor Manufacturers In Chennai#Inclined Conveyor Manufacturers In Chennai#Packing machine manufacturers in Chennai
0 notes
Text
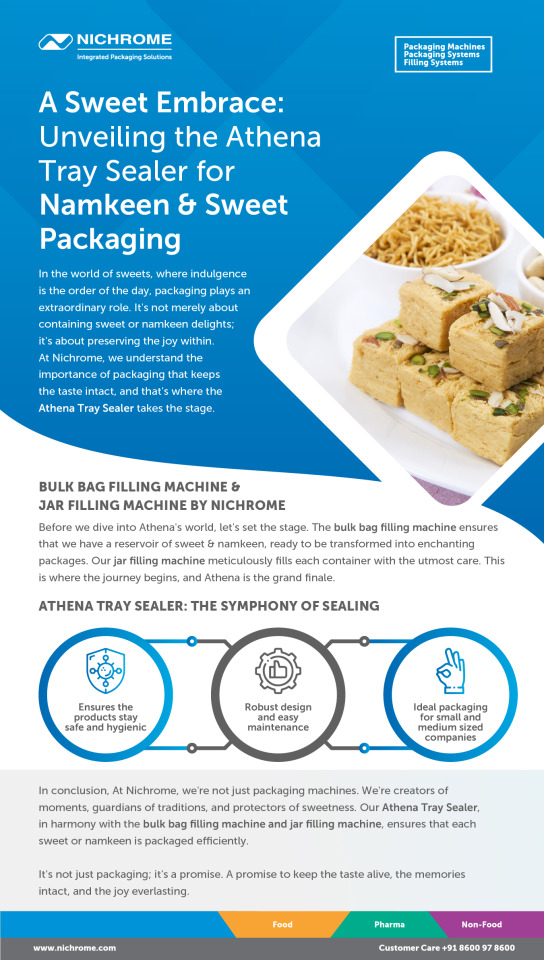
Thermoforming: Transforming Dairy Packaging with Nichrome's Athena Tray Sealer
Changes in the dairy industry necessitate innovative packaging that would guarantee product safety, prolong shelf life and cater for consumer requirements. Thermoforming capabilities that suit these needs are included here by our renowned pioneer in packaging technology targeting dairy products. It is none other than our Modified Atmosphere Packaging (MAP) tray sealing machine called Athena Tray Sealer. It is a highly advanced machine that has set new standards for the packaging of dairy products.
The Power of Thermoforming in Dairy Packaging
Among the most dependable MAP tray sealing machines is our Athena Tray Sealer. This technology-driven machine offers a protective atmosphere (vacuum + gas) or with "Skin effect" all types of trays or jars.
Modern MAP Technology: The Athena Tray Sealer employs Modified Atmosphere Packaging, which replaces the air inside the packaging with a protective gas mix. Through this, shelf life of dairy products is prolonged greatly due to reduced aerobic organisms’ growth and oxidation.
Reliability and Precision: The Athena Tray Sealer is known for its high seal quality and consistency. Its engineering precision ensures that every single tray gets sealed as it should be retaining both the integrity and safety of milk products. Due to its strong stainless steel structure and easy maintenance, Athena is ideal packaging for use in small and medium sized companies.
User-Friendly: Designed for user friendliness, this well-known brand has an easy-to-use interface that accommodates even new users. Efficient performance enhances effective operations within manufacturers allowing them to minimize downtimes by optimizing packaging processes.
Benefits for our Thermoforming for the Dairy Industry
Nichrome's thermoforming solutions, particularly the Athena Tray Sealer, offer numerous advantages for the dairy sector:
Enhanced Product Safety: The robust sealing cxapabilities ensure that dairy products are protected from contamination and spoilage, maintaining their quality and safety.
Extended Shelf Life: By using MAP technology, the Athena Tray Sealer extends the freshness of dairy products, making them last longer on store shelves and reducing food waste.
Sustainability: Nichrome's commitment to sustainability is reflected in the Athena Tray Sealer's design, which minimizes material waste and uses recyclable packaging materials.
Conclusion
In conclusion, Our thermoforming packaging solutions, highlighted by the Athena Tray Sealer, are revolutionizing dairy packaging. With advanced technology, reliability, and a focus on sustainability, we continue to lead the way in delivering innovative packaging solutions that meet the evolving needs of the dairy industry.
0 notes
Text
Proof I am exhausted? I can’t paint a hog!
I have a pet hog!!!! This is utterly shameful!!!!
See, I decided to paint a Death as Hogfather bit inside the box I’m doing for Mom. I quickly sketched a rough of it, then went back to what I was doing on the rest of the box.
And now I can’t paint it!!
I mean, I knew I’ve been tired. The first few nights went so easily, but each night it has gotten just a bit worse. I’ve always had good nights and bad nights when I paint boxes. On good nights I fly through, everything done in one take no matter how tough. On bad nights I paint and repaint, tweaking desperately, watching the the thing I’m painting swell and distort until it bares little relation to my intent, or anatomy. (See my Doctor Who box and look at the 2nd Doctor for an example of the swelling effect) Thing is, bad nights are starting to outnumber the good night.
I had a devil of a time with Death, and he’s just a skeleton in Father Christmas gear. As for Albert, well, best not to think about it. If I say it's Albert, it’s Albert I guess.
But then last night I decided to do the hog (only one would be in the “shot”) This was going to be so easy I was going to be done early for once! **
And at 2 am I was in tears.
I must have repainted that hog a hundred times, each one worse than before. I got so I was washing the paint off because it was turning into a sculpture from all the layers. By the time I gave up for the night I had obliterated all but the head (it isn’t too horrible).
And washing off the hog, because it was so small, led the painty water to seep all over, and now it looks like Death and Albert are flying through a dense fog!
And THEN I discovered that not only was I covered in paint. And Nony who had been sleeping on my lap. (Didn’t help he likes to stretch his paws or rest his head in the paint tray) And my clothes. And the chair. And the floor. (All a pig smaller than a quarter!) …I had smeared paint on some of the characters on the outside of the box! One little drop can destroy a whole figure!
But, okay, I can fix this.
So after breakfast I thought I would practice drawing a hog. Just to get my hand used to making the shapes.
And I couldn’t do it!!
Admittedly I’m a harsher critic. I know damn well what a full grown hog looks like. You don’t spend so many hours brushing, sharing treats with, having nose to snout “conversations” with Ryoga without knowing exactly what a hog looks like! ***
But, ugh. I HAVE to fix this! It’s Mom’s Christmas present, and I need it done not only in time to mail, but to catch any warmish day for spraying it with sealer.
**sigh**
Seriously, though, of ALL the things to cause me to crash to a halt why did it have to be a hog?!?
**So far I have been able to do an average of two characters per evening, running about two hours per character.
***Fun fact: I can’t watch a movie with a pig (ex. Babe) without noticing if the casting doesn’t match the description in the plot (male/female, age). They almost NEVER use full grown pigs. I mean, you think youth skewed casting only happens in humans! Which is kinda funny because I keep imagining how LOUD it must have been on set every time they pick up a little baby piggy. (They get quiet as they grow up, but believe me, the little ones scream a lot…like human babies really. LOL
4 notes
·
View notes
Text
tired
Worked two back-to-back 12-hour days so i'm tired.
(bitching about work lol)
Tuesday was chicken processing-- 333 chickens, as it wound up, wound up in the ice baths. On slaughter day afternoons, Farmsister and I and a rotating cast of characters will package up all the whole birds, counting them out carefully into the market cooler, the freezer to prep for wholesale orders, the fridge for on-farm sales, and then the remainder stay in the walk-in cooler for further processing.
This season, BIL is doing the parts-cutting-up while we're packaging the whole chickens, and sometimes he can get his buddy the chef (who helps us cut chickens for sausage) to help, and so they get all the chickens cut up for sausage-making on tuesday, and then BIL cuts up the parts birds on wednesday. Yesterday, chef guy's wife had just had some surgery a couple days before, so he'd said he wouldn't be able to make it, but then BIL talked him into coming for just a couple hours in the afternoon, and he agreed because his in-laws had volunteered to come babysit his poor recovering wife.
We had a couple real good solid slaughter crew helpers stick around for packaging, so we flew through it. So before 3pm, Farmsister joined them cutting up birds (she did it over the winter too), and I started labeling bags.
Chef guy had until 6pm, so we kept working until 6pm. We need so many pounds of sausage, it took that long to get all the birds BIL had allocated for it all reduced to meat. I stuck around and did cleanup at the end, and got a small percentage of the bags I need labeled.
Immediately after chicken processing, I help package the hearts and livers, and I've started taking care of the feet then too. Last time I loaded them into the dehydrator and fired it up at noon on Tuesday, so it would be done before the weekend so there'd be time to run a second batch.
Farmsister and BIL ran out of time. The batch finished Friday evening and they didn't have time to take care of it. They wound up throwing them out, both the finished ones (sat too long unpackaged, can't be used) and the second batch I'd saved in the fridge ready to go.
They did put up the white ones i'd sorted out of that batch to freeze, at least.
So this time I loaded the yellow ones into the oven, in carefully-stacked trays. And I put that on as low as it would go.
They were just about finished today. I pulled them out and put them into the dehydrator to finish (they felt dry to me, but were still oily, and I felt like a whirl through the dehydrator would sop that up a bit) and immediately started a second batch. As part of this I sorted the "white" feet into a bin I kept in the fridge the rest of the day.
(When chickens are scalded, they're clipped to the holder by one foot. As they're dunked, the other foot spends most of the time in the scalding water, but the clamped foot rarely gets submerged. So the scalded foot, you can pinch the talons and pull the claw sheaths and outer skin of the foot right off, and be left with a clean white foot with soft inner nails, not claws. Those feet are suitable for human consumption; people who save feet for their own use generally would scald them and peel the skin off like this, as the outer layer is generally uncleanably filthy and not a great idea to consume. But that outer layer is no impediment to a dog's enjoyment. So we save the "white" feet for people to add in when making stock, as there's a lot of collagen in feet; some people also buy them to cook them, as several world cuisines have chicken feet as a dish. Meanwhile, the "yellow" feet go into the dehydrator to become dog treats.)
Then I spent the rest of the morning packaging chicken parts as fast as BIL could cut them. This wasn't just putting them into the packages (we use a vacuum sealer now, a nice chamber unit), but then also getting them into the correct freezers. We had a wholesale order-- 10 each of wings and legs, 30 breasts and 30 thighs. The problem is, the wholesaler expects every package of wings and legs to be 1.5 lbs exactly, and every package of breasts and thighs to be 1 lb exactly, and that's not... easy to get. It's not uncommon for a pack of breasts to be exactly a pound but they're often larger; meanwhile, thighs are almost never that large, and mostly average around three-quarters of a pound for a two-piece package (bone in, skin on). So I dedicated a shelf in the freezer to this order, and kept a running tally on the clipboard on the front of the freezer, and then when the shelf was full I had to load it onto a tray and go put it into a different freezer to stay segregated, and then fill the shelf again.
We also had an order from a chef. 30 thighs, packaged in bulk, not frozen. he did not specify size. So what I kept doing was that I'd put a thigh in a bag, weigh it, and if i could get the pack of two to be about a pound, then I'd put the bag into the sealer, and if I couldn't, I'd dump it out into the big bag for the chef. Which means I was able to give him fairly consistent-sized thighs, and also give the wholesaler packages the size he expects.
And we also had a package to assemble for a local artist collective BIL wanted to give a donation to. Chicken breasts, eight, size unspecified. I gave them the odd-sized ones but I expected they were incorporating them into some kind of dish, so uniformity of portion would not be the issue for them that it would for the chef who was planning to serve the thighs intact.
Anyway I got the wholesale order collected, got all the parts packaged and actually managed to cram them into the freezer which kind of rules, and also briefly worked the fresh chicken sale. During the sale some lady cleaned us out of all the frozen feet we had (there are a few more in a box i couldn't easily reach, so i'll dig them out later, but really not many). ("They don't come with feet," she said, indicating the whole chicken, "so I buy 'em separate," and while I'm sure she intended to make broth with them she didn't say that so I am continuing to contemplate the idea that perhaps she was hoping to do some sort of frankenchicken construction situation. If that's the case she bought the wrong number of feet i think.)
So when I went back to the kitchen (the sale was actually in the middle, I worked the first hour or two of it so BIL could spend that time cutting up the last parts, so I could go back and finish packaging them up), after I finished everything else, I dug out that bin of "white" feet and sat with paring knife to get the ugly foot callus out of the ones that needed that kind of attention, and then set to packaging, and got maybe a dozen, maybe two dozen packs of those into the freezer. Until the bin was empty.
Not too bad. We hadn't been careful about any of it last year, hadn't been too worried about it, I'd sort of been gently mocked for spending as much time on it as I had, but then we sold out of all of the kinds of feet this winter and customers kept asking for them. So the feet are important this year, but the problem is we don't have any more time for dealing with them than we did last year when we kept not bothering to save them.
So anyway. I can't stay this weekend so I am doing my absolute level best to get some saved up before then, because I know damn fine well that anything I leave unpackaged is going to wind up having to be thrown away, no one will be able to deal with it.
but it took me until after 6pm. I could sit for most of it, for the feet I mean, which was good because the day's first eight hours were all on my feet. Both today and yesterday, I worked eight hours on my feet and managed to weasel in four hours of sitting on top of that, which is the only way I could survive a 12-hour day anymore.
anyway i'm. real tired. and oh i took an edible for the pain and it just hit and i'm. uh. well. okay
18 notes
·
View notes
Text


Gargoyle (sculpted by Josef Ochmann)
Hobby Products: Metal Magic Fantasy
I don't remember when I bought this miniature, definitively. It languished in the tray under my desk for many years because I couldn't think of what to do with it and the wings kept falling off. Based on the old paint, it seems to be before I started amassing cheap craft paints, so it must be among the first figures I bought circa 2000.
I know (how) to pin the parts together now and that it's meant to be glued into the base, so the figure is properly secured.
Interestingly, the pots of blue paint and gloss sealer have survived the last 24 years, so just for fun I used them on the base. (The figure itself uses Vallejo gloss varnish to continue the nostalgic look. The old sealer is—and always has been—rather thick and a bit lumpy.)

I also still have the light blue you can see in the original unfinished paint job but didn't use it. Model paints were wildly inconsistent back then in terms of longevity and all 3 of the blue pots remain useable, but I've had to discard most of the others.

Interesting fact: This model went out of production in 1996 and the mould was sold to a private collector.
5 notes
·
View notes
Text
I am about to commit a fucking war crime!
Yesterday I made the dopest little dice tower for our DnD campaign.
Along with its own tray that also acts as a lid (first times I'm making anything like this)

Today I went and got some spray sealer to use on the foam.
And only waaaay to late did I remember that spray paint and sealers FUCHING DESOLVE foam.
I think I might have FULLY ruined it.
I just hope it just fucks up the texture and it'll still be usable.
I hadn't even showed any of our party except for the Dm. I wanted it to be a surprise on Wednesday when we have our session
2 notes
·
View notes
Text
Consumer Preference for Sustainable and Safe Packaging Fuels Tray Sealing Machines Market Growth
Introduction
The global tray sealing machines market is experiencing significant growth, primarily driven by increasing consumer demand for sustainable and safe packaging solutions. As environmental concerns and food safety regulations become more stringent, manufacturers and food service providers are turning to tray sealing technology to enhance packaging efficiency while meeting sustainability goals. The shift towards eco-friendly materials and innovative sealing techniques is further propelling the market forward.

Growing Demand for Sustainable Packaging
Sustainability has become a key driver in the packaging industry, with consumers actively seeking products that reduce environmental impact. Companies are responding by adopting recyclable, biodegradable, and compostable packaging materials. Tray sealing machines play a crucial role in this transformation by offering efficient sealing solutions that work with sustainable materials like paper-based trays, plant-based plastics, and bio-polymers.
Furthermore, the reduction of plastic waste is a major concern worldwide, leading to an increased focus on minimal packaging and the use of recyclable content. Tray sealing machines enable precise sealing, reducing excess material usage and ensuring a tight, durable seal that extends product shelf life without compromising sustainability.
Emphasis on Food Safety and Hygiene
In addition to environmental concerns, food safety and hygiene have become top priorities for consumers and regulatory authorities. Contamination risks, improper storage, and inadequate sealing can lead to foodborne illnesses, making secure packaging essential for consumer protection.
Tray sealing machines provide an airtight and tamper-evident seal, preventing leaks, contamination, and spoilage. These machines help maintain product freshness and extend shelf life by using advanced sealing techniques such as vacuum sealing and modified atmosphere packaging (MAP). With increasing regulatory scrutiny on food safety standards, businesses are investing in tray sealing equipment to ensure compliance with global health and safety regulations.
Technological Advancements in Tray Sealing Machines
Innovation in tray sealing technology is contributing to the market’s expansion. Modern tray sealing machines come with advanced features such as:
Automation and Robotics: Fully automated tray sealing machines enhance efficiency, reduce labor costs, and improve production speed.
Smart Sealing Systems: AI-powered and IoT-enabled sealing machines optimize temperature and pressure control for consistent sealing quality.
Energy Efficiency: Manufacturers are developing energy-efficient tray sealers to reduce power consumption while maintaining high performance.
Versatile Material Compatibility: Advanced machines support various eco-friendly materials, making them adaptable to the shifting sustainability trends.
Increasing Adoption Across Key Industries
The food and beverage sector remains the largest end-user of tray sealing machines, with strong demand from:
Ready-to-Eat (RTE) Meals: Rising consumer preference for convenience foods has increased the need for effective tray sealing solutions that ensure freshness and leak-proof packaging.
Frozen and Processed Foods: Sealed trays extend the shelf life of frozen and processed foods, making them suitable for long-term storage and transportation.
Meat, Poultry, and Seafood: Vacuum and MAP sealing in tray packaging enhance food safety by reducing bacterial growth and maintaining product quality.
Retail and Supermarkets: Pre-packaged meals and fresh produce sections require efficient tray sealing for better product presentation and extended freshness.
Market Challenges and Opportunities
Despite the market’s rapid growth, certain challenges remain, such as high initial investment costs for advanced tray sealing machines and the need for skilled labor to operate them. However, the long-term benefits of automation, cost savings in material usage, and regulatory compliance make tray sealing machines a viable investment.
Opportunities lie in developing countries where the adoption of packaged food is increasing due to urbanization, changing lifestyles, and a growing middle class. Companies investing in research and development to create cost-effective, user-friendly, and sustainable tray sealing solutions will gain a competitive edge in the market.
Conclusion
Consumer preference for sustainable and safe packaging is reshaping the tray sealing machines market. With rising awareness of environmental impact and food safety regulations, businesses are increasingly adopting tray sealing technology to enhance packaging efficiency. The continuous evolution of sealing materials and machine innovations is expected to further drive market growth, making tray sealing a crucial component of the modern packaging industry.
As manufacturers continue to embrace sustainability, the future of the tray sealing machines market looks promising, with ample opportunities for growth in various industries. Investing in eco-friendly and high-performance sealing solutions will be key to meeting consumer demands and regulatory standards in the years to come.
0 notes
Text

Increase Production with Packaging Automation
With the increasing demand for faster delivery times and precise packaging, it’s no wonder that warehouses are turning to automation to increase productivity and lower costs to stay competitive. Investing in the right end of line packaging equipment, companies can expect to boost productivity, improve accuracy, and increase safety in the packaging process.
Case Packers are fundamental components of any automated packaging line. These machines efficiently load products into cases, containers, or trays, creating neat and secure product cases that maximize space and protection during transit. Case packers can pack products in a variety of formats, including film only, pad and film, tray and film, and wrap-around cases.
By automating this part of the workflow, your company can significantly increase packing speed while reducing labor costs and human error. This not only streamlines operations but also enhances product consistency and quality, leading to fewer returns and greater customer satisfaction.
Case Erectors and Case Sealers are two more pivotal automation tools that work together to enhance the packaging process. A case erector takes flat-packed boxes and assembles them into shape, making them ready for product loading. This process not only saves time versus manually erecting the box but also ensures that each box is perfectly formed, providing a solid and consistent foundation for packing, stacking, and wrapping the boxes on a pallet.
Once a case is packed, a case taper steps in to seal the box securely with tape. Automating the sealing process guarantees uniformity and strength, reducing the risk of boxes opening during transportation. Utilizing case erectors and tapers ensures that packaging is done quickly and consistently, freeing up your staff to focus on other critical tasks.
Stretch Pallet Wrappers play a vital role in maintaining load integrity during transportation and storage. These machines apply stretch wrap tightly around the palletized loads, securing the products to the pallets and providing protection from external elements, such as dust and moisture.
Automating the stretch wrapping process ensures consistent and precise application of the film, minimizing the risk of product movement during transit, which results in primary packaging and product damage.
Ready to look at packaging automation? Call our experts at 813 242 6995 or reach [email protected]
#pricing news#Increase Production with Packaging Automation#case packers#case sealers#case tapers#high speed labeling
0 notes
Text
#automatic packaging machine#Athena Tray Sealer#jar filling machine#bulk bag filling machin#stick pack packaging machines manufacture
0 notes
Photo

Materials Needed To get started, gather the following materials: Decoupage napkins – These come in a variety of patterns and designs. Choose one that fits your project and style. Mod Podge or decoupage glue – This acts as both an adhesive and a sealer, ensuring the napkin stays in place. Foam or bristle brush – A soft brush helps apply the glue smoothly without tearing the napkin. Scissors or utility knife – Used to trim excess napkin for a clean finish. Plastic wrap or soft cloth – Helps smooth out wrinkles without damaging the napkin. Clean surface – Works best on wood, glass, candles, or any smooth item. If the surface is rough, a little sanding might be needed. Know About: How Many Wedding Cocktail Napkins Do You Need? How to Decoupage with Napkins 1. Prepare the Surface A clean and dry surface is essential for a smooth finish. Wipe the object with a damp cloth to remove dust, dirt, or grease. For wooden surfaces, sand them lightly to create an even base. If working on glass, clean it with rubbing alcohol to remove fingerprints and oils. If you’re working with a dark surface, consider painting it white before applying the napkin. Lighter backgrounds help the napkin design appear more vibrant. 2. Separate the Napkin Layers Decoupage napkins usually have multiple layers. Only the top layer with the printed design is needed. Carefully peel away the plain white layers underneath. This makes the napkin thinner and easier to adhere to the surface. If the layers are difficult to separate, use a small piece of tape on the corner of the napkin. Press it down and pull gently—this will lift the top layer, making it easier to remove. 3. Plan the Design Before applying glue, arrange the napkin on the surface to see how it will look. If working with a curved or large surface, cut the napkin into smaller sections for better placement. For straight-edged surfaces like trays and furniture, aligning the pattern can create a seamless look. If the napkin has a repeating design, match the patterns when placing multiple pieces to create a continuous effect. 4. Apply the Napkin There are two common methods for applying the napkin: Direct application: Place the napkin on the dry surface, then use a brush to apply Mod Podge over it. This prevents tearing since the napkin remains dry when positioned. Traditional method: Apply a thin layer of Mod Podge to the surface first, then place the napkin on top. Once positioned, apply another layer of Mod Podge over it. For beginners, the direct application method is easier, as it allows for better control and reduces the risk of tearing. 5. Smooth Out Wrinkles Since napkins are thin, wrinkles may appear during application. To smooth them out, place a piece of plastic wrap over the napkin and gently press it down with your fingers. The plastic wrap prevents tearing and helps the napkin stick evenly. A soft cloth can also be used to pat down the napkin, but avoid rubbing, as this may damage the design. If wrinkles remain, embrace them—they can add a vintage or handmade look to the piece. 6. Let It Dry and Trim Edges Allow the Mod Podge to dry completely before trimming any excess napkin. If you cut too soon, the napkin may tear or pull away from the surface. Use a sharp utility knife or fine scissors to remove the overhanging napkin. For a clean finish, sand the edges lightly with fine-grit sandpaper. This step is helpful when working on wood surfaces, as it blends the edges for a seamless look. 7. Seal for Protection To protect the design, apply a thin topcoat of Mod Podge over the napkin. This seals it in place and prevents peeling. For items exposed to moisture, such as coasters or trays, use a waterproof sealer. For added durability, spray a clear acrylic sealer over the surface. This gives a smooth, professional finish and prevents yellowing over time. Read More: Linen Cocktail Napkins: Elegant & Stylish for Every Occasion Decoupage Napkins on Different Surfaces Decoupage Napkins on Eggs Eggs are a great surface for Easter-themed decoupage with napkins. Their smooth, curved shape makes it easy to create intricate designs. Pastel or floral-patterned napkins add a festive touch, making each egg a unique decoration. This simple technique brings a handcrafted charm to Easter celebrations. For the Best Results: Choose soft, flexible napkins to fit the egg’s curved shape. Apply glue in thin layers to prevent wrinkles and tearing. Seal with a clear varnish or Mod Podge for a smooth, long-lasting finish. Decoupage Napkins on Glass Glass surfaces like jars, vases, and plates can be beautifully decorated with napkins. Since glass is smooth and non-porous, it allows for easy application. Transparent glass creates a soft, delicate effect when light passes through the napkin design. For the best results: Use a light-colored napkin to enhance visibility. Work in thin layers to avoid air bubbles. Seal with a clear acrylic spray for a polished look. Decoupage Napkins on Wood Wood is one of the most popular surfaces for decoupage. It provides a sturdy base for applying napkins, making it ideal for trays, picture frames, and furniture. To get a smooth finish: Sand the wood lightly before applying the napkin. If the wood is dark, paint it white for better contrast. Use a fine brush to apply glue evenly. Decoupage Napkins on Candles Adding napkins to candles creates custom decorative pieces for holidays and special occasions. Since candles have a waxy surface, they require a slightly different approach. For a secure application: Apply Mod Podge in a thin layer and press the napkin down gently. Avoid thick layers of glue, as it may cause the napkin to wrinkle. Use a heat gun or hairdryer on low to help the napkin bond smoothly. Decoupage Napkins on Pumpkins Decorating pumpkins with napkins is a fun way to create seasonal decor. This works well for both real and artificial pumpkins. To achieve a flawless design: Use white or light-colored pumpkins for vibrant results. Cut the napkin into smaller pieces for better placement on curved surfaces. Apply Mod Podge in sections, working from top to bottom. Read On: 7 Basic Paper Napkin Folding: Simple and Elegant Ideas for Any Occasion Tips for Better Results A few simple techniques can make a big difference in how your decoupage napkins turn out. Avoiding common mistakes and using the right approach will help you achieve a smooth, polished finish. Here are some tips to improve your results: Use a dry brush to avoid soaking the napkin with too much glue. Work in small sections to prevent tearing. Let each layer dry before adding more glue. If wrinkles form, press lightly with plastic wrap instead of fingers. Choose napkins with a bold pattern for a striking effect. Decoupage napkins are an easy way to add creativity to everyday items. With the right materials and techniques, plain surfaces can be transformed into decorative pieces. From glass jars to wooden furniture, the possibilities are endless. A little patience and care will help achieve a smooth, beautiful finish every time. Now it's time to try it yourself and bring new life to your favorite objects! Source link
0 notes