#todayonqanda
Explore tagged Tumblr posts
Photo

Not sure what she'll see first. These posts or this headboard sitting outside her room that Quinton and i made for her 20th birthday! 🎉🎂 • Ruby, thank you for always bringing laughter into my life & always being there for me, especially when i need someone most. You've been a rock in my flowing water of crazy for more then the last year and i am thankful for you and everything you do for me. • I hope your birthday is filled with as much laughter as you bring into my life! Love you Ruby, happy 20th! • #todayonqanda #homemade #homedecor #diy #diydecoration diyheadboard #behr #stain #spruce #wood #woodworking #birthday #happybirthday #20birthday #celebration #birthdaypresent #youngblood https://www.instagram.com/p/BoT7ituFCib/?utm_source=ig_tumblr_share&igshid=8q1meam92f8v
#todayonqanda#homemade#homedecor#diy#diydecoration#behr#stain#spruce#wood#woodworking#birthday#happybirthday#20birthday#celebration#birthdaypresent#youngblood
4 notes
·
View notes
Photo

Decorated the front porch for fall because lets be honest, i cant wait another 21 days. 🐶🐾🍁🍂🌻💛 #fallforfall #falldecor #fall #haybales #leaves #sunflowers #todayonqanda #homedecor #home #lifestyle #diy #diyprojects #diydecoration #whitegirl #pumpkinspice #pumpkinspicelatte #germanshepherd #belgianmalinois #creed #family (at Melfort, Saskatchewan) https://www.instagram.com/p/BnMtsdOjepM/?utm_source=ig_tumblr_share&igshid=1og3w11l3askl
#fallforfall#falldecor#fall#haybales#leaves#sunflowers#todayonqanda#homedecor#home#lifestyle#diy#diyprojects#diydecoration#whitegirl#pumpkinspice#pumpkinspicelatte#germanshepherd#belgianmalinois#creed#family
3 notes
·
View notes
Photo


Made some gifts from the heart for some ladies who sarcastically sassed their way into my heart. 💛
#todayonqanda#diy#diy projects#diy ideas#diypallet#diy shelf#mountain shelf#mountains#decor#home & lifestyle#home decor#itiswellwithmysoul#wood#woodworking#wooden#stain#birthday#happybirthday#palletprojects
3 notes
·
View notes
Photo

Inside renovations have been put on a bit of a stand still but we are currently working on our backyard with all this wonderful weather we've been having!
4 notes
·
View notes
Photo

Another set of two bar height chairs headed out the door for a returning customer!
#todayonqanda#wood#woodworking#wooden#diy#diy projects#diy crafts#home & lifestyle#home#homemade#home improvement#chair#bar chairs#stain#wood stain
4 notes
·
View notes
Text
Rail Road Spike Curtain Tie Backs
I hope everyone is having a wonderful spring.
I am finally finishing up the little bits of the basement. - who am i kidding, there will always be something to do. - Until Quinton has his bar put together, or the spare room downstairs done. I am moving onto our little split level entry way! I know i’ve been saying that for the last little while .. but whatever.
Other then the colours Quinton picked for the basement, the bar, and his gun room i wanted to make it a little more for him. I managed to come across these spikes and i got Bob, a gentleman and friend i work with to bend them down for me and drill holes into them. I was trying to make it as surprise.
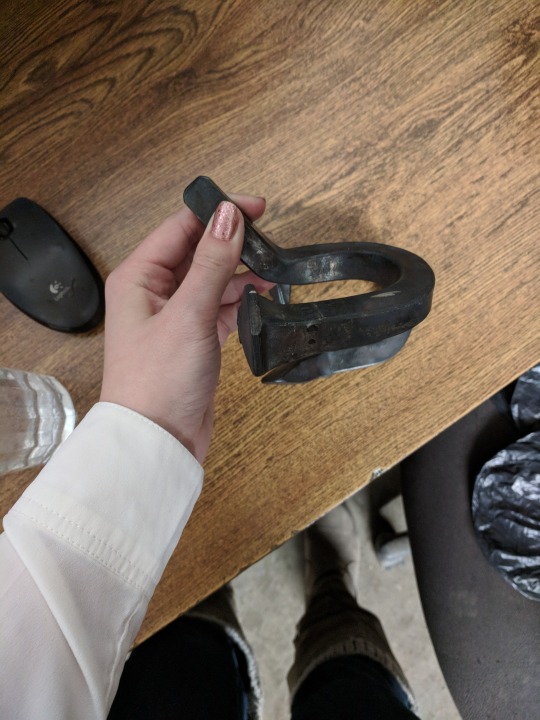

Then i took them home, cleaned them up and coated them with just a clear top coat of spray paint. Then we hung them up!
The far side of the basement.
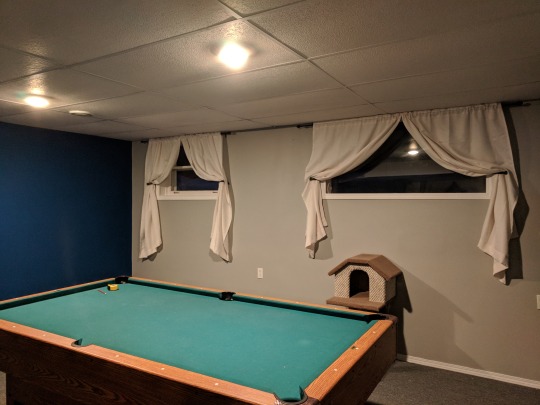

Then the closer side to the stair case.
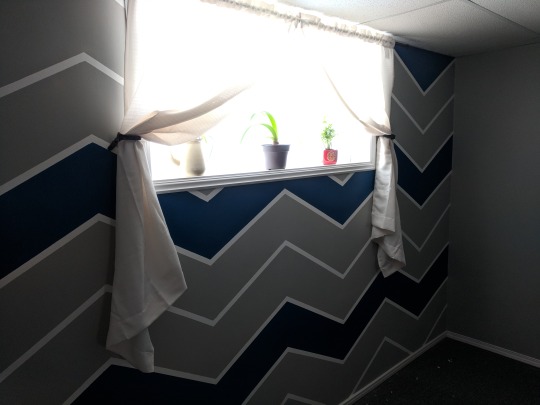


I absolutely love how they turned out. Its a nice little finishing touch that i hope most of our guests will notice. I hope Quinton loves them just as much as i do!
#todayonqanda#railroad#railway#spikes#railroadspikes#diy#DIY Projects#diycurtains#curtain#curtain tie back#white#blue#Behr#chevron#wallart#home#homemade#homedecor#homerenovation#walldecor#trim#accentwall
5 notes
·
View notes
Photo

Can't wait to start the little renovations for this split level entry way! Set of chairs to build, a wall to paint, and im coming for you.
9 notes
·
View notes
Text
DIY Chevron Wall
This weekend I ended up tackling the last wall in our basement that needed some love. Our basement has a range of colors from this amazing electric blue that has completely worn on me. Greys, creams, and blacks. Some how, I personally think its all went together very well so far!
The one side of our basement is mostly this electric blue, with a light grey accent wall, white trim, black curtain rods, and cream curtains. Then kind of in the middle, we have our bar that is where all the black comes from. Then on the other side to tone it down a bit we did the opposite mostly grey walls and we left one for an accent wall. This is where i decided to do the chevron pattern.
I eventually hope to turn this little area into a small sitting area with a tv. To start off i measured my walls and decided how many peaks i wanted to have. I really didn’t want to make it too crazy! Still wanted it to be calm and i think i achieved that. So we started laying down the vertical lines.

Then we moved onto the horizontal lines.
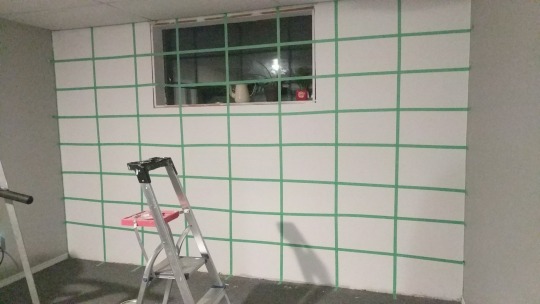
These were harder to get straight for me... but i thought since i only need the intersection points it would be okay? It kind of worked out! I read another way to lay down chevron patterns with a piece of cardboard and chalk. I hope my future self decides to do it that way next time.

So then we just started taping to connect the points! I eventually ran out of tape..


Now it was time to lay down the paint! All the articles i read said it was best to paint the stripes with a brush instead of a roller, and to paint away from the tape so you have crisper lines. I think these tips worked! I definitely think my lines turned out for the most part.

I chose the grey from the opposite wall in the basement, and incorportate the blue that is every and used the white primed wall to break it up and i think it turned out fantastic!


I understand there not completely perfect! The more i look at it the more flaws i notice but thats okay! Its my first wall, and my very first attempt at something like this! Now we just need to buy a baseboard, some trim for the window and hang our curtains! Then my work in the basement is done! This weekend hopefully when im actually done i’ll take a few snaps of the entire basement!
#basement#Renovation#home renovation#diy#diy projects#diy interior#chevron#stripes#pattern#paint#behr#home#home decor#todayonqanda
1 note
·
View note
Text
DIY Family Scrabble
This one was super special to me and very close to my heart. It’s for my fathers fiancee, and their little family in Arborfield. ♥
Again I came across this idea on Pinterest. I take pride in being able to recreate these beautiful pieces, but when it comes to making a blue print myself - I would have been better off giving her a stick. Literally.

So we started off tearing a pallet apart to get six little blocks. I wanted these blocks to read FAMILY, but i wanted them to be a little bit bigger then the scrabble pieces. So i think i ended up making them 2x2 blocks.
Quinton cut them out as per usual. Much love.

Once they were cut out i sanded them, and we stained them a black colour. I think they turned out really well.


If i remember correctly it’s called Ebony and we picked this up at our local Canadian Tire.

Made a stencil with my wood burner and then all that was left was just to put it together!

I used black construction paper from the Dollar Tree and Gorilla glue to hold it all down. I bought a shadow box from Michaels and voila!

#woodworking#wood#wooden#stain#stencil#scrabble#family#love#diy#diy projects#DIY crafts#diy interior#todayonqanda#Merry Christmas#christmas#christmasgif#crafts#happyholidays
2 notes
·
View notes
Photo

Merry Christmas from our little home, to yours! ❤️🎄
1 note
·
View note
Photo

The Christmas crafts have begun!!
#christmas#christmasgifts#holiday#merry christmas#todayonqanda#pallet#project#diy#diy interior#homemade#home decor
1 note
·
View note
Photo
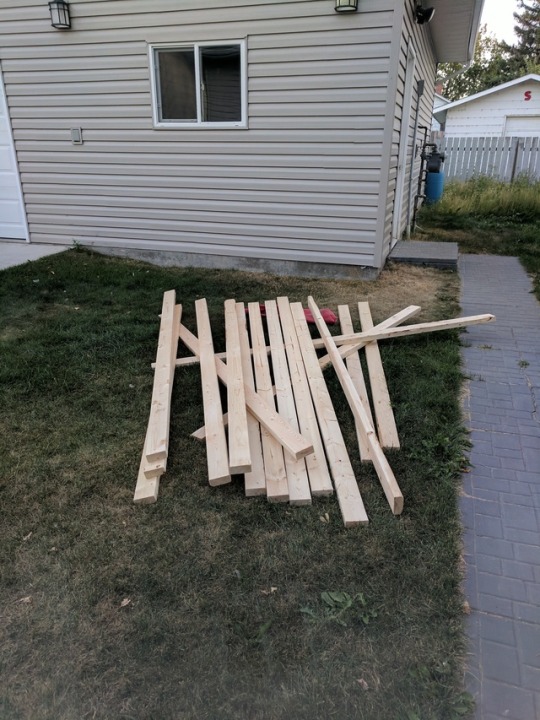
If you don't follow me on snapchat @ akkkkkk6 you might not know what i've been up too. 😉 Can anyone take a guess?
5 notes
·
View notes
Photo

Another completed menu board for a good friends birthday! Customized saying, and hooks! So glad she loves it. 💕
2 notes
·
View notes
Text
DIY Menu Board
Good afternoon guys! I decided to finally post something.
I wanted to share with everyone this DIY Pallet Menu Board I attempted. I had the idea implanted into my head because we were soon to be moving, and gaining two extra people. I thought, what better way to feed four people so that we all know what we are eating, and what ingredients we are missing for someone to pick up then a menu board!
After countless of hours searching Pinterest for some good layout ideas. I finally just decided to wing it. Now, if i didn’t break my phone and lose all of my photos you would have had a complete photo step by step process of what I did here. Unfortunately that is not the case.
I decided that I liked the way the pallet ones looked, and i wanted something kind of rustic looking. So we headed out on the town to find a pallet we could have. We brought it back home and cut the middle section wood pieces, and then we assembled them as shown below with two vertical supports on each side. I attempted my first go at white washing. Found out im too much of a perfectionist for whitewash.
Went onto the good ol’ Google. Went to Google Docs and used it to find a font i really liked, this one was Bilbo Swash Caps. If i remember correctly. Typed everything out, printed it off, and then used an exacto knife to cut out the letters and turn them into a stencil. Taped them down where i liked them and used a foam brush and acrylic paint from the dollar tree and she was good to go.
For the clips, they are just magnetic hinge clips from the dollar store as well. I painted them with a foam brush, and glued them to the wood using Gorilla Glue.
This project was literally so easy and so fun for our first DIY project together. Looks great on the wall, and is awesome for meal planning our busy home!
If you have any questions about anything go ahead and ask, but stay tuned for our next project!


3 notes
·
View notes
Text
DIY Bar Stool Chairs
Alright, so last week I posted a photo of a huge pile of 2x4′s in Quintons back yard and I had asked everyone if they could take a guess at what I was doing!

The most interesting idea thrown around was life sized Jenga. Sadly, I did not take a swing at that plate. Instead I decided to take a stab at building our very own table chairs! -exciting-
I am super old school and I love enjoying supper with everyone eating around the table talking about their day and telling stories. So I started my research on Pinterest, of course, to find my best plan of attack. I have the most basic wood working skills ever. I truly don’t even know what half of the tools are called. So I had to find the easiest tutorial out there. I found this tutorial by DIY Pete
DIY Petes Bar Stool Tutorial - http://www.diypete.com/how-to-make-bar-stools/
and he makes bar stools out of 2x4′s. I had watched his tutorial which is amazing. Super explanatory, easy to follow, it’s a good time. Then I had started watching other people attempt it too. I seen other women, busy mothers, and men changing them up and all of them turning out really good! So I decided to just bite the bullet and try it! I could not have been happier with how they turned out! -squeal-
Tools Needed:
Miter Saw
Sander 120 Grit
Drill
Pencil
Tape Measure
Would recommend to wear all the necessary safety equipment. ( Safety glasses, ear protection, gloves, etc )
Shopping Trip:
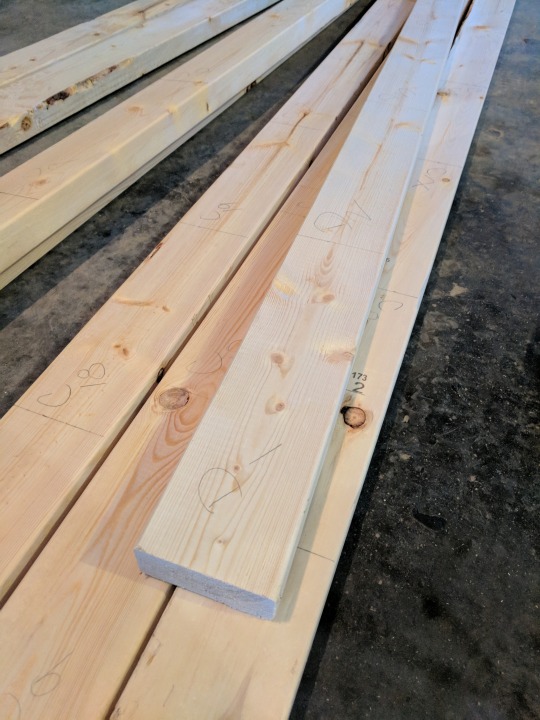
[ 4 ] 2x4x8 lumber (Whatever kind you like I think would work fine. Just depends if the chairs will be outside on a deck, or inside where the weather will not wear on them.)
Box of 2 1/2″ wood screws
Stain (I bought the Coffee (SC-103) solid Behr Premium Stain.)
Anti Scuff Pads (If your chairs end up inside your home)
I did not have a Kreg Jig - which I learnt that you can use to drill holes into an angle to a certain depth. Fancy. But I would totally recommend if you have one to use it. Makes everything look so much nicer. So instead we had to just drill at an angle which produced a small fear of my wood splitting and then there were just more drill holes you could see, and they weren’t as smooth. I’m also sure in a year or two because I didn’t use wood glue, we will eventually have to re-tighten the screws. But, oh well. I also got all of my lumber from Castle here in town. Trina is my go to lady there. She got all of my order put together, and she has all of the answers when I need them!
Over all chair dimensions - 18″ wide , 42″ tall , 16″ deep. Seat height comes in around 25 1/2 “ I do believe.
Cut List:
[2] 42″ - back legs
[2] 24″ - front legs
[6] 11″ - back & front boards
[4] 13″ - side boards
[2] 14 1/2″ - outside seat boards
[3] 16″ - inside seat boards
[2] 15″ - seat supports for underneath the seat
It helps if you’re super organized. I can’t keep my head on straight half the time so as I was measuring my cuts I labelled them in groups. A-G. I also did 4 chairs so then when we were done cutting we put all the correct pieces into groups so we could move from group to group assembling chairs.

For this project Quinton was actually away at training. So I had the wonderful help from our roommates Ruby & Jared.

We started out building the back and the front of the chairs first. Then the rest of it kind of just came together!

Jared drilling all of the wood together for me because lets be honest I just come up with the ideas. :)


Quinton then came home and helped me finish drilling the rest of the screws, we sanded, and then I got to stain them!

This is our finished project in our home. I absolutely love it, there could have been a few things I would have done differently. But I am in love with them and how they turned out! I’ve already had a few people ask if I would make them a set, so if you’re interested let me know and I will try my best to make time.

#diy#diypete#kitchen#chairs#dining+table+and+chairs#dining+table#building#woodworking#wood#wooden#stain#lumber#2x4#todayonqanda
1 note
·
View note
Photo

Put together some laundry hampers! Check out the full details on our facebook page Today On Q & A! #todayonqanda https://www.instagram.com/p/Bt6W3b4FlnZ/?utm_source=ig_tumblr_share&igshid=21b2cnpaalhe
0 notes