#the sims 2 freetime
Explore tagged Tumblr posts
Visit Tumblr Blog
Explore Tumblr blogs with no restrictions, modern design and the best experience.
Last Seen Tumblr Blogs


Fun Fact
The KCSC sent more than 20K requests to delete posts related to prostitution and porn to Tumblr from January to June 2017.
Text
🧩 The Sims 2: FreeTime Hobbies Mind Map – A Look at a Deeper Hobby System
Because of the announcement of the Business and Hobbies expansion pack for The Sims 4 and because people are writing that few hobbies were provided there, I wanted to share the mind map for The Sims 2: FreeTime expansion pack that was created by The Sims 2 developers during development of this expansion pack and shared by Lindsay Pearson (SimsGuruPearson) on September 23, 2015, on X/Twitter.


This mind map illustrates the hobby system introduced in The Sims 2: FreeTime. It shows how different gameplay mechanics related to hobbies are interconnected.
Main Elements of the Mind Map:
1. Hobbies – The Central Node
All mechanics related to hobbies branch out from this core concept.
2. Heavy Hobbies
These involve more active pursuits, including:
Sports (basketball hoop, soccer net, football toss)
Games (board games, PC games, RC cars/helicopters)
Science (telescope additions, ant farm, stargazing enhancements)
Music (violin, modular synth)
Fitness (exercise bike, jogging, protein shakes)
Arts & Crafts (pottery wheel, sewing machine)
Engineering/Tinkering (train kit, repairable car, tinker interaction)
3. Light Hobbies
These involve less physically intense activities:
Nature (bug collecting, bird watching, hiking)
Literature (writing novels, reading unique books)
Food (judging contests, food platters, nectar bar)
Entertainment (TV additions, merchandise)
4. Hobby System (Tracking)
The mechanics that govern hobbies, including:
Hobby Factors (various influences on hobby progress)
Instruct Interaction (mentoring between Sims)
Hobby Chance Cards (random events related to hobbies)
Share Hobby Tips (Sims discussing their hobbies)
Hobby Secret Lots (exclusive locations for Sims with high enthusiasm)
Iconic Hobbyists (notable Sims tied to certain hobbies)
"The Zone" (a gameplay effect for mastery in hobbies)
5. Lifetime Fulfillment
How hobbies connect to Sims’ long-term aspirations, friendships, and parenting mechanics.
6. Preoccupation (Hobby Obsession)
Additional interactions related to hobbies:
Sims talking about hobbies
Newspaper sections dedicated to hobbies
Sims dreaming about hobbies
Hobby-related idle animations
A computer patch for blogging and surfing about hobbies
7. New Careers
Careers linked to hobbies with objects like the drafting table, ballet bar, koi pond, surveillance mic, and fame star rug.
This mind map visually explains how FreeTime expands the game by integrating hobbies into careers, social interactions, and long-term aspirations, making Sims' lives feel more dynamic and immersive.
Source:
#sims 2#ts2#the sims 2#sims2#free time#freetime#freetime ep#the sims 2 freetime#sims 2 freetime#Lyndsay Pearson
56 notes
·
View notes
Text
the freetime comparisons going around are making 0 points for me. that expansion sucked ass and the hobbies had zero depth.
your sims filled a meter using an object to gain access to a boring half done hobby lot. the expansion also reused old base game aspiration objects to fill in half done hobbies that didn’t get a unique gameplay object.
#if u are gonna compare at least compare it to open for business which is peak sims 2#slop ass freetime.. you’ll never get me to praise it 🫥
16 notes
·
View notes
Text
No More BFFs

Download on Mod The Sims
Mirror
simNopke-noMoreBFFs simNopke-BFFRemover
#ts2#download#mod#disabler#relationships#freetime#s2cc#ts2cc#the sims 2#sims 2#sims2#sims 2 download#the sims 2 download#ts2 download
148 notes
·
View notes

Text

anyway.... goodbye real world it's been... exhausting knowin' yah
#sims stuff#makin' magic you beautiful bitch I'm on my way. freetime you beautiful bitch I'm on my way.#sims 1#sims 2
4 notes
·
View notes
Text
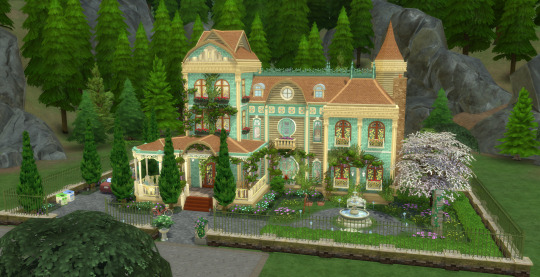
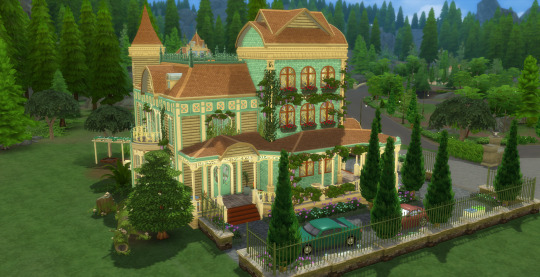
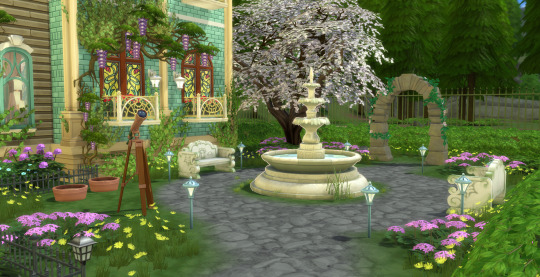


Summerdream Manor
#sims 2#sims 2 FreeTime#sims 4#ts2 to ts4#sims 2 to sims 4#Summerdream#héritage save file#savefile#build#Glimmerbrook
18 notes
·
View notes
Text
if EA released The Sims 2: Freetime in 2025.

1K notes
·
View notes
Text
currently re-living one of my weirdest childhood "traumas" (person on a power trip self-destructing an online community i'm a part of)
#i spent most of my freetime from 12-14 on this sims 2 proboards forum#it was populated mostly by teenagers & some college kids but the main admin was this woman who was 40-ish#and idek the whole story but what i think happened: some of the other members (who were older teens) called out some stuff#like things they wanted changed. suggestions. and her ego couldn't handle being “told what to do” by kids#& she shut down the whole forum lmao. it wasn't a huge deal bc i'd already kinda left & was talking to my friends on msn messenger#BUT some of the members who stood up to her created a second forum that we all flocked to for a hot second#and a pretty significant time was spent roasting her behavior#anyway a similar thing is happening on one of my discord servers and i'm experiencing the weirdest deja vu#m.txt
0 notes
Text
gee, I wonder what changed between the release of Sims 2 FreeTime in 2008 and the creation of the Businesses & Hobbies EP in 2025...
🤔
it's almost like... we've lost the concept of recreation for recreation's sake, and not turning every possible hobby into a side hustle...?
maybe some... broader economic and cultural shifts that we should... take a look at... maybe...?
635 notes
·
View notes
Text
Wrong Motive Bubble Fix

Download on Mod The Sims
Mirror
simNopke-wrongMotiveBubbleFix
#ts2#download#fix#mod#freetime#s2cc#ts2cc#the sims 2#sims 2#sims2#sims 2 download#the sims 2 download#ts2 download
236 notes
·
View notes


Text
50+ Sub-Hobby Traits (Sims 2)

Published: 2-3-2025 | Updated: 2-5-2025 (French Translation) SUMMARY Hobbies and interests were introduced via the Freetime EP (EA/Maxis, 2008). There are 10 hobbies (cuisine, film & literature, tinkering, sports, music and dance, fitness, arts & crafts, science, games, and nature) and 18 interest categories (sci-fi, culture, environment, paranormal, health, fashion, politics, sports, school, animals, toys, money, entertainment, work, crime, food, travel, and weather). Here are 50+ trait tokens featuring various sub-hobbies – these are meant to compliment the original hobby categories and let players assign specific hobby-related interests to their sims. The Sub-Hobby Project comes from the collective brainstorming of @grilledcheese-aspiration, @slyndseysims @gayars and @anachronisims. DETAILS Requires all EPs/SPs. §0 | Buy > Misc > Misc (purple icons) At the time of this post, these are for storytelling/completion purposes only. These are TOKENS ONLY – they do not alter sims/gameplay on their own. If/when they are incorporated in mods, their custom function(s) will depend on the mods in question. The collection file is REQUIRED to access the traits in-game.

ITEMS Download a PDF/Excel document with the traits and their GUIDs using the link below.

DOWNLOAD (choose one) HOBBY TRAITS from SFS | from MEGA LIST OF TRAITS & GUIDs from SFS | from MEGA REQUIRED: COLLECTION FILE from SFS | from MEGA This file includes 3t2, 4t2, historical/medieval, fantasy, color, music, hobby, and other CC traits for Sims 2 (and some randomizers). Only visible trait tokens are included, and this file should REPLACE the original "Traits-Collection" file. CREDITS Thanks: @grilledcheese-aspiration, @slyndseysims @gayars and @anachronisims. Sources: 3t2 Traits Project (Hexagonal-Bipyramid, 2018), Any Color You Like (CuriousB, 2010), Beyno (Korn via BBFonts), EA/Maxis, Offuturistic Infographic (Freepik), Flat Icon. Translations: French (@ilovethesims2).
617 notes
·
View notes
Text
Sims 2 Aspirations Benefits
I completely forgot about the aspiration benefits that come from the Freetime expansion pack. But when I hovered over one of the meters and it said "no secondary aspiration" and it said it can be found in Aspiration Rewards section.
I had enough points to get literally everything for Isabella. I chose Family as secondary aspiration since she just became a mother:

I didn't have enough to get everything for Lilith but still used up her points, also Family as secondary due to motherhood:

-
[Sims 2 on PC]
0 notes
Text
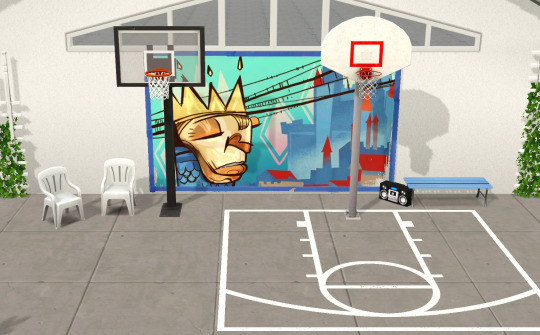

Handful of Hobby Items Collection 🪀
The Sims 2 and The Sims 4 both have really nice variations of hobby items that we have in The Sims 3, so I decided to convert some and put them together in a hobby item collection!
The basketball hoop on the right in the first photo, the basketball court markings, and the freestanding ballet barre are from The Sims 2: FreeTime.
The basketball hoop on the left in the first photo is from The Sims 4: City Living, the piano and telescope are from The Sims 4 base game, the easel is from The Sims 4: Discover University, the training dummy is from The Sims 4: Strangerville, and the dance floor is from The Sims 4: Get Together.
The piano and one version of the dance floor require The Sims 3: Late Night and the training dummy requires The Sims 3: World Adventures to function.
The basketball hoops need the Rim Rockin’ Basketball Hoop, and the ballet barre and the other version of the dance floor need the Stiff As A Board, Light As A Feather Dance Collection from The Sims 3 Store to function.
The plastic chair in the first preview photo is a conversion by aisquaredchoco here, and the mural is a previous conversion of mine here.
Entertainment -> Sporting Goods
Super Shot Basketball: three channels | §650 |
H-O-R-S-E of course Basket Ball Hoop: three channels | §2750 |
Décor -> Rugs
Basketball Markings: one channel | §50 |
Entertainment -> Hobbies & Skills
Tickle My Ivories Grand Piano: three channels | §1415 |
Rob Russ' Happy Little Easel: two channels | §600 |
Back Pocket Observatory: three channels | §750 |
Better Barre by Deuxjoint Ltd: three channels | §200 |
B64 Training Bot: non-CAStable | §500 |
Hip to the Max Cardboard Dance Floor: one channel | §50 |
Hip to the Max Cardboard Dance Floor (Store Version): one channel | §50 |
Credit: meshes by EA, The Sims 2, The Sims 4, SimPe, Sims4Studio, TSRW, Blender, Milkshape, Photoshop, and Gimp.
Download (SFS, package) | Mirror (MEGA, package)
If you like my work, please consider tipping me on Ko-fi.
Experiencing issues with my conversions? Inbox me. Enjoy! 💙
825 notes
·
View notes
Text
Plumpad Sketchpad Functional for The Sims 2
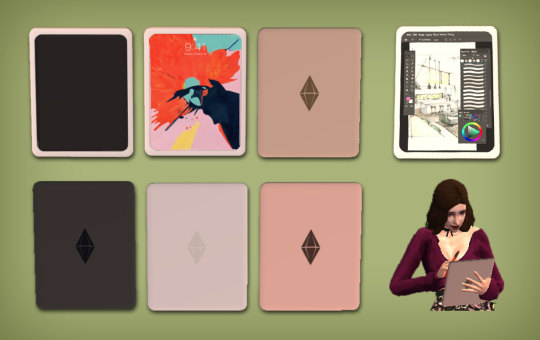
This is a 4to2 conversion from Tunayegit, low poly. This object is cloned from Mog Hughson Manuscript and works in the same way.
Your sims can use it to improve their Creativity Skill but I also added an option to increase fun and comfort (and fixed the jump bug that occurred when sims put the object on the floor). After some time they will complete the drawing (you can't choose it like the easel, it's always the same, but if you have FreeTime you can edit the cover art) and sell it (like the novel does). Can be used also by children. Can be put on floor, tables or desks. Found in Hobby-Creativity. Both pad and cover (screen) are recolorable.
Read the original post for more info.
DOWNLOAD HERE
----------------------------------
If you want to support my creations, you can send me a donation with Paypal or Ko-fi ☕ If you want to ask for a paid commission, HERE you can find more details. Thank you <3
#the sims 2#ts2#sims 2 cc#sims 2 download#the sims 2 cc#ts2 download#4to2#4to2 conversion#buy mode#functional#sketchpad#sketches#art#creativity#hobby#drawing
691 notes
·
View notes
Text

Fully Underwater Lot Tutorial
@creida-sims @kitkat99
UPDATE January 2025
There is now a much, much easier way to do this. This version of SimPE now includes a tool to change terrain geometry. To edit the terrain in SimPE, go to Tools/Neighborhood/Neighborhood Browser and load your neighborhood. In the Resource Tree, select Neighborhood Terrain Geometry (NHTG) and select the only resource in the Resource List. In Plugin View, click Terrain Editor. It's very intuitive, but basically, you can edit the terrain under a lot to make it be underwater. You can also delete the road with the Road Editor.
I'll keep the old tutorial for archival purposes, but unless you can't or don't want to install this version of SimPE, it is pretty much obsolete.


Some warnings and disclaimers
1. This is not a beginner tutorial. I have tried to explain with as much detail as I can, but still, if you just started playing The Sims 2 I recommend trying out other building tutorials first.
2. I have tested it but there's always a possibility that some new problems will come up. Follow at your own risk. Backup your neighborhoods before trying this. Test it first in a new empty neighborhood.
3. These lots are roadless, so they require specific gameplay conditions to avoid breaking immersion (pun intended).
4. They will behave like normal lots in the sense that sims can walk around and do anything as if they were on land. There's one big problem to consider: when sims go fully underwater, their hair and some parts of their clothing might disappear visually.
So this is more useful for structures that sit above the water, shallow water that doesn't reach a sim's head or, with some modifications, small islands surrounded by water. So unless you want bald mermaids, I don't recommend this for sims that live underwater.
5. If you use Voeille's hood water mod, reflections will look glitchy in lot view, because this is technically not a beach lot. The only solution I found is enabling "Lot view ocean reflections" in RPC Launcher. Otherwise you'll have to deal with glitchy reflections.
6. Before following this tutorial, make sure you know the basics of creating, editing, importing and exporting SimCity 4 terrains. Written tutorial by SimEchoes here, video tutorial by loonaplum here.
Software and mods used
The Sims 2 FreeTime expansion pack (required for the modifyNeighborhoodTerrain cheat)
SimCity 4 (required) Hood Replace by Mootilda (required)
Lot Adjuster by Mootilda (required)
Portal revealer by Inge Jones (required)
Voeille's pond and sea water overhaul and RPC Launcher (optional, see disclaimers)
The Sims 2 Apartment Life and Bon Voyage expansion packs (optional, for "walk to lot/work/school" options)
Cheat codes used
moveObjects on/off
modifyNeighborhoodTerrain on/off
1. Creating/editing a terrain in SimCity 4
1.1. You can edit an already existing terrain or create your own from scratch. In both cases, you need to keep two things in mind: If you want the usable area of the lot to be underwater, such as making houses for mermaids or a coral reef, make sure the water is shallow. No more than a few short clicks with the terraforming tools in SimCity 4. This is because The Sims 2 live mode camera won't go underwater, so making the water too deep might make it uncomfortable to build or play the lot.
If you goal is to build a structure mostly above water, like a ship or an oil rig, you can get away with making the water a bit deeper, but not too much. I've noticed that sometimes the lot terrain tools stop working correctly if there a hill that's too steep.
1.2. Once you've created the terrain, you will need to add a small island on the area where your lot will be. I know it seems contradictory, but trust me, it will make sense. Create and name your city. Use the terraforming tools in city mode to make a tiny island of about 6x2 squares.

1.3. On the island, use the road tool to place a straight road that takes up 4 squares. Then, using the street tool (the last option), place two short streets at each end of the road.
Streets will disappear in TS2, only roads translate to roads in ts2, so why do we place them? Well, placing a street at the end of a road will get rid of the rounded end bit in TS2, which can't be used to place lots. This will be important for the placement of the lot and to make sure the edges of the lot are underwater. If this doesn't make sense yet, don't worry, it might make sense later.
1.4. Save the terrain. Don't exit SimCity 4. Copy your new/edited sc4 terrain from your SimCity 4 folder to your SC4Terrains folder in your Sims 2 documents directory. It is usually
"C:\Users\YOURUSERNAME\Documents\EA Games\The Sims 2 Ultimate Collection\SC4Terrains"

1.5. Back in SimCity 4, we're going to make a second version of this terrain. Remove the roads and streets you made before, with the bulldozer tool. With the level terrain tool in Mayor mode, carefully remove the island, so it's on the same level as the bottom of the ocean/lake. Don't change anything else. Save, exit and copy this second terrain to your Sims 2 SC4Terrains folder. Make sure you rename the file to something different from the first one, like adding "no roads" to the filename. You should have two terrains by the end of this step. One with the small island and one without it.
2. Editing the terrain in The Sims 2
2.1. Open The Sims 2 and create a new neighborhood using your new terrain. Something to keep in mind: if you want the terrain to be a subhood of another neighborhood, make it a subhood from the start. You will not be able to move the lot once it's finished, since it will be roadless. I don't recommend decorating the neighborhood for now. Leave it empty until the end of this tutorial.

2.2. Place the smallest empty lot (3x1) on the island.
2.3. In neighborhood view, open the cheat console by pressing Control + Shift + C, and type
modifyNeighborhoodTerrain on
To quote The Sims Wiki:
"This allows you to alter the neighborhood terrain by raising or lowering it. To use this cheat, be in the neighborhood view, then enter the cheat "modifyNeighborhoodTerrain on" (without the quotation marks), and click over the area you would like to change. To select a larger area, click and drag the cursor to highlight the desired area. Press [ or ] to raise or lower the terrain by one click, press \ to level the terrain, and press P to flatten terrain. When you're finished, type “modifyNeighborhoodTerrain off” in the cheat box (again, without the quotations)."
If you use an English keyboard, these instructions will probably be enough for you. If you don't, I recommend first testing the cheat, because the keys for using this cheat are different in other languages. For example, in my spanish keyboard, the question marks are used to raise and lower the terrain and the º/ª key flattens it.
Another aside: When you select an area using this cheat, a green overlay is supposed to show up. Some lighting mods make this green overlay invisible, like the one I use. If that's your case, you kind of have to eyeball it. Remember that one neighborhood grid square in TS2 is equivalent to 10 lot tiles, or the width of a road. I recommend getting a mod that allows you to tilt the neighborhood camera on the Y axis, which will allow you to have a bird eye's view of the terrain.

2.4. Flatten the terrain around the lot so it's at water level. This cheat won't allow you to edit the terrain inside the lot, so you have to edit the terrain around the lot. Make sure there is plenty of flat underwater space around the island. You should end up with something like the picture above. The water will have some holes, but don't worry, those get filled with water the next time you load the neighborhood.
2.5. Enter the lot and place any object on it. Save the lot and exit the game. This is so LotAdjuster recognizes the lot in the next step.
3. Expanding the lot with Lot Adjuster
3.1. Open Lot Adjuster and select your neighborhood and lot.

3.2. Click "Advanced…". Check "Over the road (only enlarge front yard)". Use the arrows to add 20 tiles to the front yard. Click "Finish" and "Restart".

3.3. Select the same lot again. This time, check "Add and remove roads". Uncheck the road checkbox for the front yard. Add 20 Tiles to the back yard, 20 tiles to the left side and 10 tiles to the right side. Check "Place portals manually". You should end up with a 60x60 lot, which is the biggest size. You might want a smaller lot, but unless you know what you are doing, I recommend starting with this size. You can shrink it later. The goal of making the lot this big is making sure the edges of the lot are underwater. Click "Finish" and exit.
4. Moving portals and flattening the lot

4.1. Make sure you have the portal revealer by Inge installed in your Downloads folder before the next step. Open your game and load your neighborhood. The lot should look something like the picture above.

4.2. Load the lot. Delete the object you placed before. Place the portal revealer on the lot near the mailbox/phone booth and trashcan. It looks like a yellow flamingo and you can find it in Build Mode/Doors and Windows/Multi-Story Windows catalogue. You will notice that when you select the object from the catalogue, some yellow cubes appear on the lot, and when you place the object, the cubes disappear. After placing the portal revealer, pick it up and place it again. This will make the yellow boxes visible again.
So what are those yellow boxes? They are portals. They determine where sims and cars arrive and leave the lot. The ones on both ends of the sidewalk are called pedestrian portals, and in the street, one lane has portals for service vehicles (maids, gardeners, etc.) and the opposite is for owned cars and carpools. You can see the portal's names if you pick them up. Make sure not to delete any of them.
Now, since this is going to be a roadless lot, ideally there won't be vehicles in it. This means that the lot would ideally be accessed through walking only. In community lots, this would not be an issue if you have the Bon Voyage expansion pack, which allows sims to walk to lots.
In residential lots, you might run into some problems. Service NPCs always arrive on vehicles, and unless your sim owns a vehicle, the carpool and school bus will always come to pick sims up for work/school. It might break your immersion to have a vehicle show up underwater or on a ship. There are many options to avoid this: having sims work on an owned business instead of a regular job, not having kids on the lot, making the kids homeschooled, avoiding calling service NPCs… it depends on how you want to play the lot. For example, my icebreaker is a residential lot, only adults live there, some sims live in it temporarily and none of them have a regular job.

All of this is relevant because we're going to move the portals. Where you move the portals depends on you. Think about how you're going to use the lot. In my icebreaker, I placed the car portals (which won't be used) underwater, on a corner of the lot. I placed the pedestrian portals on the ship, to pretend that the walkbys are part of the crew or passengers. But for now, just move the portals, mailbox/phone booth and trashcan to a corner of the lot. To be able to pick up the mailbox/phone booth and trashcan, use the cheat moveObjects on. Delete the street and sidewalk tiles using the floor tool (Control + click and hold left mouse button + drag).


4.3. Flatten the island with the level terrain tool. Save the lot. Almost done! Don't mind the hole in the water, this will be fixed. You will notice that in neighborhood view, the island is still there. This is because the neighborhood terrain under the lot hasn't updated. I don't know why this happens, but it does. Normally, moving the lot would fix it, but we can't move this lot using the game's tools. Instead, we are going to fix the terrain with Hood Replace. Don't exit the game yet.
5. Updating the terrain with Hood Replace
5.1. Create a new neighborhood using the new roadless terrain. Make sure it has the same type of terrain (lush, desert, etc.) as the first one. Again, name it "NO ROADS" or something similar. Exit the game.

5.2. Open HoodReplace. On the left column you will select your "NO ROADS" neighborhood. In the right column, select the neighborhood that has the underwater lot. Check these settings: Replace terrain, replace road, and versioned backups. Leave everything else unchecked. Click Copy.

5.3. Open The Sims 2 and load the neighborhood to check if the changes worked. That concludes the tutorial. At this point you can shrink the lot if you don't want it to be so big. Remember to move the portals to their final placement when you're done building the lot. Also keep in mind pedestrians (walkbys) always walk by the mailbox, so keep the mailbox accessible for sims.
If you're going to have multiple underwater lots, I recommend making them first, and decorating the neighborhood after. Doing this in an already existing neighborhood might be more difficult, mainly because, if you made any changes to the terrain using the modifyNeighborhoodTerrain cheat in the past, they might get reset when using Hood Replace.
150 notes
·
View notes