#the perfect consistency without it being too fluffy or too dense
Explore tagged Tumblr posts
Visit Tumblr Blog
Explore Tumblr blogs with no restrictions, modern design and the best experience.
Last Seen Tumblr Blogs


Fun Fact
69% of Tumblr users are millennials.
Text
I know it’s silly but sometimes i think about food i’ve had in the past and have such a good memory of it that any attempt to try to find or make something even similar to it just isnt what i hoped for and it feels like i imagined it. there are probably better things to yearn for but i crave the simplicity of a baked good
so if youre out there, blueberry muffin
#stupid rant is stupid#its been years#it was just a large muffin#no extra topping#not overly sweet#fresh large berries#the perfect consistency without it being too fluffy or too dense#maybe if berries are on special this coming weekend
171 notes
·
View notes
Note
Hi hello yes I LOVE your blog also if it's not too much trouble I'd like to see a roceit piece with borrower!Roman bonding with a soft Deceit
[Thanks so much for the request! Was not expecting any if we are being honest. I appreciate it and I hope you enjoy the fluffy boys! Also, so sorry it took so long. It’s a longer piece though, cause I couldn’t stop myself from writing. So hopefully it makes it a bit better. Enjoy!]
Characters: Janus, Roman
Warnings: None, literally fluff
The silence in the room was tense. Neither person in the room had a clue on what to do, both were frozen and staring at the other. The TV glowed behind the smaller of the two, thankfully muted.
One decided they couldn’t sleep and went to the living room to silently watch a movie. The other was restless and thought a midnight adventure was in order. They both knew what they were doing this late at night would be frowned upon by the dad of their strange group.
After all, a group consisting of three humans and three borrowers was rather strange.
“If we agree not to tell on each other to Padre, you want to hang out?” Roman shot a pleading look to Janus. He was relieved to see Janus smile in relief.
“I guess I wouldn’t mind the company, but you better not tell him about this.”
“I may be reckless but I’m not stupid. Pat will have no idea about this if I have anything to say about it.” Roman paused for a moment in thought. He looked up at the scarred human. “If we are going to hang out, mind giving me a lift? The light over here is starting to hurt my eyes.”
That startled Janus out of his thoughts. Janus shot a brief look of acknowledgement at Roman to show he heard him before picking the remote back up. He turned off the television before walking over to the eccentric borrower. He set both hands palm up right by the edge of the TV stand so Roman could walk on.
Roman shot the human a strange look as he quickly settled on the hands. Very quickly he realized that Janus probably couldn’t even see him, but Janus seemed to be going to answer the unasked question.
“I decided a movie may have been a bad decision. The lack of sound was no fun and, like you said, the lights were killer. We’re just hanging out in my room. Patton also has no way of busting us if we go there anyways. Perfect time for plotting sabotage.”
Confused, Roman raised his head to try and read the human’s expression to gauge the meaning of what he just said. At least from what he was able to see with no lights. “Sabotage? Really? Against who?”
Janus opened the door to his room, careful not to jostle the tiny prince in his other hand. He closed the door behind him with a soft click and moved to settle on his bed. He reached over to his nightstand to turn on his small desk light. As soon as he could see, he shot Roman a look that could only be read as ‘are you serious?’
“Remus has been getting on my nerves recently. I also guess you haven’t noticed the pranks he has been pulling on you too.”
“Ah, that makes more sense. So what plans of ‘sabotage’ are you considering?” Roman replied, deciding to entertain Janus’ late night ramblings. Janus smiled at him excitedly.
“I think the best course of action… is to push him down the stairs.”
“Janus! You can’t push everyone down the stairs!”
“Fine. I’ll trip him in the hallway.”
“No!”
“Duct tape his door shut?”
Roman didn’t even dignify that one with a verbal answer, only glaring at Janus. Janus stuck his lip out in a clear pout as he lifted Roman up to his face. Roman held his gaze steady in a firm glare.
“You, my dear tiny prince, are so much fun.”
“I do try my best!” Roman puffed his chest out proudly. Janus couldn’t help but to break his pout into an amused smirk.
They both sat in silence. A couple of quiet minutes passed and Janus could tell Roman was getting fidgety again. No wonder the borrower got in trouble for late night adventures as much as Virgil got in trouble for attempting to pull all-nighters on his phone. Roman had way too much energy.
Just as Janus found himself losing himself in his thoughts again (and realizing he probably needed sleep), a sudden weight pressed up against his nose. He quickly crossed his eyes in shock to find Roman draped across his nose in a strange makeshift sort of hug. His face reddened as he let out a breathless chuckle.
“And now what are you doing?”
“I have no idea.” A pause. “We need sleep.”
Janus carefully maneuvered the hand holding Roman so that he could return the hug as best as he could while reaching over to turn off his desk light. He continued to press Roman against his nose with enough pressure to keep him there but not nearly enough to hurt as he laid down on his bed.
“Can I stay the night, Janus?” Janus wondered if Roman could feel his smile under his legs at the request.
“I definitely don’t appreciate the company.” He drawled. The giggle from the borrower confirmed that Roman understood the blatant sarcasm. Good. Roman could be a bit dense when it came to sarcasm. Though, Janus could agree that Virgil’s sarcasm was extremely difficult to translate correctly.
“But are you sleeping on my face or my pillow? Not that I don’t mind the hug we got going, but I would like to breathe without worry tonight.”
“Actually, can I sleep on your stomach?” Janus could easily imagine the puppy eyes he was getting from the tiny drama queen. He rolled his eyes at the mere thought.
He then wordlessly picked the borrower off of his face with his thumb and forefinger. Roman squirmed at the sudden intrusion, but otherwise made no move of discomfort. Janus set the small being on his chest and settled his hand over the borrower as a heavy blanket.
He reached his other arm out and pulled the comforter over himself so it rested just beneath Roman’s head, leaving that the only visible part of the borrower visible under the hand and blanket. Roman snuggled deeper into the soft fabric of Janus’s shirt in response. Janus had to bite back the coo that was building in his throat in order to not fluster the borrower. He did finally get him to calm down, no need to work him back up.
Janus sighed in contentment and finally relaxed against his pillow. These are the nights he would kill for. One of the borrowers, especially Roman, trusting him enough to sleep with him. It made up for the rocky start. And with that thought floating through his head, he fell asleep with a small smile on his face.
#infinitesimal!sides#tiny!roman#human!janus#giant!janus#roceit#request#soviet-speck#fluff fluff fluff#love the cuddles#am I ever going to have completely serious tags?#probably not#sanders sides gt#bitty writes
56 notes
·
View notes
Text
Top 12 Personal Favorite Hit Songs from 2014

The “least good” of the three best years of the 2010s. This is still a top 12. Because I can, and I will.
I know. People also call it a bad year. And I think they’re wrong.
Disclaimers:
Keep in mind I’m using both the year-end top 100 lists from the US and from France while making these top 10 things. There’s songs in English that charted in my country way higher than they did in their home countries, or even earlier or later, so that might get surprising at times.
Of course there will be stuff in French. We suck. I know. It’s my list. Deal with it.
My musical tastes have always been terrible and I’m not a critic, just a listener and an idiot.
I have sound to color synesthesia which justifies nothing but might explain why I have trouble describing some songs in other terms than visual ones.
New job, which is the one I still have currently. Also, I discovered Doctor Who in December 2013 and you know exactly what happened in 2014 because I dived head first into the extended universe as soon as I finished New Who and I’ve never really recovered since then. The end of the year was highly stressful, with my cat being sick, my father needing a very dangerous surgical intervention, and me being so stressed out I was basically unable to sleep for days. Might explain why there’s a lot of cute songs on this list, I needed cute stuff.
That year wasn’t very generous in good albums from bands I liked. Epica released The Quantum Enigma, and it was okay, Within Temptation had Hydra, and it was also okay, and Coldplay had the very underrated (in my opinion at least) Ghost Stories, a mostly melancholic album full of bittersweet post-breakup songs. So I’m left with no choice but to declare The Birthday Massacre’s album Superstition my album of the year for 2014. They had stayed at a consistent level since Pins And Needles so I wasn’t expecting anything better from them, but boy do they delivered. Here is Divide, it’s about a subterranean world and it might be a metaphor but as you know I’m very literal-minded! Here’s Beyond, about a lady falling in love with a strange woman who might be some sort of fae or supernatural entity!! I love most of the album and there’s only one subpar song on it. I know they’ll never get a crossover hit but they’d deserve it so much. Look at the state of the world. We’re so ready for a new mainstream wave of energetic, angsty, weird music. Just bring it on.

There’s only one non-elligible song that truely pisses me off this time, and it’s Traffic Girl by Indochine, another single from their Black City Parade album. It’s about a policewoman in North Korea who has to wave and smile at non existant traffic all day long and the song presents her as a modern hero. It’s one of my favorite songs on the album and I’m so mad it didn’t make the French year-end list.
Here’s a list of honorable menti-holy shit why is this list so long
Albatraoz (AronChupa) - Riiiiiight at the limit between catchy and annoying. But it’s blissfully short.
Chandelier (Sia) - I would like this more if it wasn’t that painful to listen to, I swear.
Magic in the Air (Magic System) - Insert my usual comment about these guys and their fun & happy songs.
Un Jour Au Mauvais Endroit (Calogero) - Great music, good lyrics. It’s still Calogero and I tend to dislike how overdramatic he usually is. Not enough to ruin that one song for me though.
Je Garde le Sourire (Black M) - This isn’t the last time he’s gonna appear in this post.
Prayer In C (Lilly Wood & The Prick) - A bit repetitive but in a good way.
Budapest (Georges Ezra) - A bit repetitive but in a good way 2, the return but in a completely different genre.
The Monster (Eminem & Rihanna) - We’ve now entered the songs which I considered putting on the list, and yeah, there’s a lot of them even if this is a top 12. “Bad year for pop music”. Yeah. Right.
Addicted To You (Avicii) - This is good, and the music video is great, and I want to stop feeling emotional about Avicii. Please.
Don’t Tell Em (Jeremih) - I. Uh. What the f█ck. Okay. There’s no way I can justify this. I simply adore this beat even if the lyrics are really, really bad. It’s just visually stunning and I really wish the song itself was better.
Photomaton (Jabberwocky) - I don’t think this would have charted without the success of Kavinsky the previous year. But still. Wonderful stuff. Well deserved.
Madame Pavoshko (Black M) - This was on the first version of the list but in the end I really had no room left for it. It’s a song about a guy telling his old teacher he made it in life despite the fact she labelled him a hopeless case at school. With such a premise, it could be an angry song, but no, it’s upbeat, sarcastic and fun. Wonderful stuff.
Le Graal (Kyo) - Kyo? Wait, you mean the embarrassing emo guys from my 2002 and 2003 lists? These guys?? They were back on the charts after ten years?? And suddenly everyone thought it was cool to like them again?? Including me??? Sounds fake but okay
Turn Down For What (DJ Snake) - The last cut. Stim music at its finest, sharp, aggressive and colorful. Everything I ever wanted from a hit song.
Well, that was long. Here’s the actual list.
12 - Wake Me Up (Avicii)
US: #22 / FR: Not on the list

“So wake me up when it’s all over, when I’m wiser and I’m older” should make no sense. You can’t get wiser if you’re asleep. At least that’s what I would probably say if I didn’t feel this. There’s a lot of times in my life I wished I could be switched off and woken up a couple of years later and be like “hello I’m back, I feel better now, what did I miss”. I totally get it.
The only reason this song is so low on the list is the drop. I don’t like it very much. The rest is damn good.
11 - Boom Clap (Charlie XCX)
US: #34 / FR: #84

Boom! Boom! Boom! CLAP. That song got me after its first seconds. Love its atmosphere, very cotton candy-like, very fluffy, with a sharp voice. Doesn’t work well if you listen to it on a loop, though, and that’s the only negative thing I can say against it.
10 - Stay The Night (Zedd)
US: #94 / FR: Not on the list

This on the other hand works very well on repeat and that drop is golden. I’m afraid I don’t have anything very interesting to say about it. It stayed on my playlist from 2014 to summer 2019, though, so that’s an impressive feat.
9 - Rather Be (Clean Bandit)
US: #41 / FR: #18

Several critics I follow have commented this song is 1) mostly meaningless 2) too perfect to say anything about it and I agree. It’s also too perfect to be really passionate about it, unfortunately, but still, very, very good stuff.
8 - Magic (Coldplay)
US: Not on the list / FR: #66

You already know I don’t really like lowkey emotional songs and I also hate the first act of Coldplay’s career, so why on earth did I like Ghost Stories so much and why is Magic making me feel so emotional, you ask? Well it’s because the music itself isn’t bland. It’s lowkey but rich, dense and colourful, and it works much better than whatever they were doing before with their slow boring songs. Also, I really struggle with dramatic vocal performances on quiet emotional songs (which is why I tend to have issues with Adele’s voice on some of her stuff), and here the balance is just ideal. Soft colors, soft textures, soft voice, this is like a colorful plushie you’ve lost for years and just found in the attic and it brings you to tears. I adore it.
Also the part of the lyrics that goes “And if you were to ask me / After all that we've been through / Still believe in magic? / Oh yes I do”, that makes me want to hug someone and never let go.
7 - Waves (Mr Probz)
US: Not on the list / FR: #15

This is completely hypnotic. It’s perfect to drive, to walk, to draw. to sit on a bench and look at the trees. It’s just wave after wave of pastel colors with a good beat and it washes away your anxiety slowly but surely. Therapeutic and beautiful without ever feeling bland. Wonderful stuff.
6 - Uptown Funk (Bruno Mars & Mark Ronson)
US: Not on the list (#1 on the 2015 year-end list) / FR: #3

Everyone loved it and I wasn’t an exception. You all know it and I’ve got nothing new or interesting to say about it. A ton of fun. Love the lyrics.
5 - Sur Ma Route (Black M)
US: Not on the list / FR: #7

If you’re wondering what’s going on in this picture, the guy is parodying a lot of famous movies or series in the music video. It’s a simple but super energetic song about trying to trace your own road in life and all the problems you encounter and how you can’t always count on people you thought were your friends. It’s very propulsive and motivating and it’s my favorite song from that guy even though he made a lot of good songs. Just great stuff. Check it out if you’ve never heard it.
Speaking of being on your own...
4 - Ain’t It Fun (Paramore)
US: #47 / FR: Not on the list

I miss hearing that kind of thing on the radio and yes, I’m aware that makes me sound like an old idiot. Oh how I wish this had been released in 2010 when I just started to work, that would have been perfect. I know the song is supposed to be sarcastic with the whole “ain’t it fun being on your own” angle, but yeah, when your life wasn’t great before, it’s actually liberating to “live in the real world”, even if it sucks at times, even if it’s difficult and you have responsibilities and all.
Also the music video is super cute. Love it.
3 - Pompeii (Bastille)
US: #12 / FR: Not on the list

I’m honestly surprised this is only #3 on this list considering how much I loved this one back when it came out, and don’t get me wrong, it’s still a song I love to this day, just... a bit less. Maybe it’s because of overplay? I’m not exactly sure considering #1 was also played very often and I never ever got tired of it. And it’s well written, and it’s not every day that you hear a song about two dead people talking about the wrath of the gods after their city was engulfed in ash.
So yeah. Not sure what happened there. I hope this band is eventually gonna have another hit like this one. Bastille, more of Pompeii and less of Happier, please.
2 - Dangerous (David Guetta)
US: Not on the list / FR: #8

A few months ago I heard Memories by Maroon 5 and I was instantly filled with a truely disproportionate amount of rage for such a bland pop song. See, I love it when music uses well-known classical tunes and completely changes their context and tone, but Memories doesn’t do any of that, it’s just the Pachelbel canon with some bad lyrics on top. So yeah, it’s a pet peeve.
Dangerous, on the other hand, is a song mixing a small loop of Toccata & Fugue in D minor and it basically uses it as an ominous pseudo-police siren in a song about illegally cruising a car with your possibly criminal, possibly gangster crush and not knowing if you’re scared, in love or feeling the thrill of adventure, or all of that at once. I. Love this damn song.
When the only bad thing I have to say about a song talking about driving at night way too fast is “eh this isn’t as good as Kavinsky”, you know you’ve found gold.
1 - A Sky Full of Stars (Coldplay & Avicii)
US: #51 / FR: #9

As much as I love Dangerous, there wasn’t any doubt about what would top this list. I’ve spent about ten lists explaining how my appreciation of Coldplay kept growing over time and four lists explaining how much I loved Avicii, and this song is the best of both worlds. The first time I heard it, I was driving and, no joke, I was so overwhelmed I had to park my car to properly concentrate on the song.
One day I will have to paint this song to explain how fantastic it looks and I’d have to use purple, china blue and pink watercolor inks and basically paint a psychedelic night sky full of little lights and yeah, this is basically another of these songs that are deeply satisfying on a synesthetic level, and it joins this very select club with the blue song called “Blue”, the song full of bright flashes called “Lights” and the song that looks like gentle pulsing lights called “Fireflies”. I’m trying (and failing) to learn how to play it on the piano. I know the chords, and I suck, but I’m very determined.
On top of that deeply satisfying visual, there’s the soft vocals so specific of the Ghost Stories album, and the very simple, very cute lyrics, and I simply hear “'Cause you're a sky, 'cause you're a sky full of stars, I'm gonna give you my heart” and I die instantly. This is high quality musical fluff. Come to think of it, this list is full of it, and this is the Ultimate Fluffy Song. One fluff to rule them all.
Sidenote, considering I fell into the DW audios right when this song came out, that’s one of my theme songs for Eight and Charley. Because of course it is.
Next up: The beginning of a progressive drop in quality but you wouldn’t be able to tell considering how long this list of honorable mentions is
11 notes
·
View notes
Text
Keto Scones
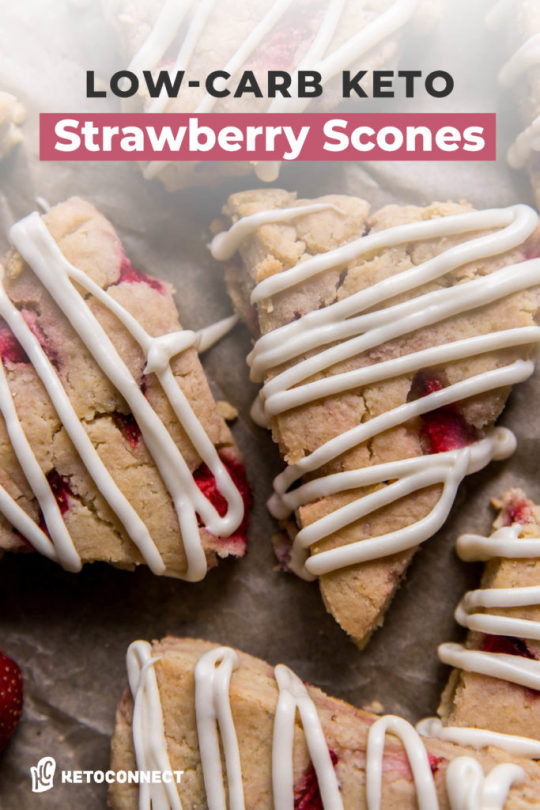
Strawberry Keto Scones
Scones are one of the best keto breakfast options because Keto Scones taste just as good as the high carb alternative. The fact that they are a dense pastry makes them well suited to being made with keto friendly flours and ingredients. Throw in some strawberries and a few simple techniques and you will come out with the perfect recipe for a lazy Sunday at home!
What is a Scone?
A scone is a baked good usually made of wheat or another type of grain and flavored with sugar and spices. This was a tasty way to eat wheat and oats, which were staples of European diets in the early 1500’s. Fast forward 500 years and scones have been completely transformed, often using berries, chocolate chips and a variety of other additions to make them a sweet compliment to any breakfast or lunch. The signature quality of a good scone is that it should be dense and satisfying. It is not like other breakfast pastries in that they are fluffy, and soft. This is perfect because baked goods made with almond flour tend to be on the denser side.
Are Scones Keto Friendly?
Scones are definitely not keto friendly. They traditionally use refined flour, refined sugar and a host of other ingredients you’re probably trying to avoid. This recipe uses almond flour and keto friendly sweeteners to turn scones into a perfect breakfast for a low carb diet. This recipe is gluten free, sugar free, and is very easy to make. Coming in at just 5g of net carbs per scone it is a great alternative to your typical 60+ grams of carb scone.
Most recipes can be made keto friendly through substituting flour for low carb keto flours such as almond flour and coconut flour. For the sugar we use a combination of low carb sweeteners to replace the sweetness.
How to Make Low Carb Keto Scones
If you want to make keto scones just follow the steps below. This is one of the easier recipes you’ll see and is great for a newcomer to keto baking that isn’t used to working with almond flour.
Mix the Dry Ingredients
For the best result it is a good idea to separate the wet and dry ingredients before combining them to form the final dough. The dry ingredients in this case are almond flour, coconut flour, erythritol (a low carb sugar alternative), baking powder and salt. Make sure you get rid of any clumps in your dry ingredients by mixing them with a whisk or fork.
Mix the Wet Ingredients
Next we will mix together the melted coconut oil, heavy cream, vanilla extract, stevia and 1 large egg. Be sure that the mixture is not too warm when you add the egg or you run the risk of the egg cooking before it is mixed in. You may notice that the wet ingredients are very small in comparison to the dry ingredients. This is because the dough for keto scones is very firm and loosely held together. It is not a wet batter and is more of the consistency of a pasta dough.
Combine Wet and Dry
Now comes the fun part. Add the wet to the dry and begin mixing together. I like to use a firm spatula for this step. The dough will be very dry and have a sandy consistency. It WILL NOT combine easily and you will need to use some force when you form the scones to get the dough to come together. This is necessary to get that signature scone texture. If you are struggling with this step watch the video for an example of what the texture of the dough should be before you form it into keto scones.
Add in Berries
We’re using strawberries for this recipe but any berry will work great with this recipe. We’ve made this exact recipe with blueberries, and raspberries and they both came out great. You could also add in some nuts, like pecans or walnuts, as well as some low carb keto chocolate chips. Whichever route you decide to go they will come out great. Once you add in your berries lightly mix them into the dough until they are evenly distributed.
Form the Keto Scones
Once you’ve got your completed mixture it is time to form the keto scones. The easiest way to do this is first to form the dough into a tightly packed ball using your hands. The dough should not be every sticky and should be easy to shape with your hands. Once you have a ball place the dough into your cooking vessel. Either a skillet or a baking sheet will do. Flatten your ball of dough into a disk that is about 1 inch thick.
Next you will cut the dough into 8 equal sized triangles and separate them from one another slightly. Separating the keto scones from one another will allow for the entire exterior of each scone to brown and harden.
Bake and Top With Glaze
The keto scones will bake at 350 degrees for about 20-25 minutes depending on your oven. The easiest way to know they are done is once the scones become browned slightly on the outside and they are firm to the tough. Despite the baking powder in this keto scones recipe, they do not rise very much. Allow the keto scones to cool on a baking rack for 20 minutes before topping with the homemade glaze.
To make the glaze you will just need two ingredients – erythritol and heavy cream. Erythritol is a sweetener we commonly use in our keto recipes. You can learn more about what your best options are when it comes to keto sweeteners by reading our comprehensive keto sweetener guide. To the erythritol we just add a splash of heavy cream and whisk together. Add more or less heavy cream depending on how thick you want the glaze to be. Reference the recipe video for a visual guide of what to look for.
If you want an even thinner glaze you can use almond milk or coconut milk in place of the cream.
If you decide to skip the glaze you may want to add additional sweetener to the scone recipe. This recipe is designed to include the glaze to achieve the correct level of sweetness so the keto scones themselves may not be sweet enough for your liking without the addition of the glaze.
Making Scones With Almond Flour
When it comes to keto baking you usually have to decide between coconut flour and almond flour for your breads and pastries and making keto scones is no different. With scones the decision is quite easy. We use a 9 to 1 ratio of almond flour to coconut flour in this recipe in order to achieve the traditional texture and crumble of a scone. This is one of those recipe that cannot be made with only coconut flour because the texture will be off. Stick to our almond flour ratio and you’ll come out with a perfectly tasty scone recipe.
Can I Only Use Almond Flour?
Yes you can, but it isn’t recommended. Almond flour scones are good but that little bit of coconut flour is what provides the softness and slight crumble. If you want to go with a fully almond flour scones recipe then you should add about 3/4 cup of additional almond flour and remove the 1/4 cup of coconut flour. Scones made with almond flour are very good but the tiny bit of coconut flour really takes them to the next level.
Can I Make Nut Free Scones?
You probably could make a recipe using only coconut flour but it would be very difficult and would definitely not be the same as this almond flour version. Almond flour is very important to this recipe and should not be omitted. If you do want to avoid nuts in your baked goods you could try some of the other keto breakfast recipes on our site. While this recipe is not nut free it is sugar free and gluten free.
Can I Make Dairy Free Scones?
Yes you can! The dairy in the recipe cones in the form of cream in both the dough and the glaze. To make scones that are dairy free you can simply use water, almond milk, or coconut milk in place of the cream in both instances. One thing to remember is that you will likely need a bit less of your substitute liquid because it will be thinner than cream is.
Tips for Making Low Carb Keto Scones
Here is a few tips to keep in mind to make sure your low carb scones come out as good as ours do.
# Use finely ground almond flour. In just about every low carb recipe you’re better off using flours that are finely ground. With almond flour you will often see “almond meal”, “almond flour”, and “finely ground almond flour”. We always choose the most finely ground version we can.
# Grease your knife before cutting the scones. Using coconut oil to coat the knife prior to cutting the scones will ensure they do not stick to the knife. This makes for an easier cutting process and guarantees your scones will come out nice and pretty.
# Allow the scones to fully cool before adding the glaze. If the scones are still warm when you add the glaze it will become thin and run off of the scones. If you want the scones to hold onto the glaze let them fully cool and a cooling rack for 20-30 minutes prior to adding the glaze.
More From Our Keto Bakery
If low carb scones aren’t your thing you should take a look at all of the other recipes we have to offer on our site. We have a long list of baked goods that would be perfect for a family gathering or a lazy weekend brunch before a big day of watching football. Here’s some of our personal favorites.
Diner Style Keto Pancakes – The best keto pancake recipe on the internet. This will take you back to your childhood days of enjoying pancakes at the local diner.
Keto Egg Loaf – This one might sound a little crazy but it is a super easy recipe that only requires 3 ingredients and tastes exactly like French toast! Are you a waffle, pancake or French toast person? I’m pancakes all day.
The Best Keto Bread – Bread is the recipe everyone wants to recreate for a keto diet and we’ve done it for you. This recipe is the most popular on our site.
Keto Cinnamon Rolls – No recipe has taken us longer to perfect than this keto cinnamon roll recipe. There is nothing that brings me back to my childhood like a tray of freshly baked cinnamon rolls.
If you can’t find a keto recipe you’re looking for just leave us a comment below and we will try our best to come up with the recipe you’re looking for.
Storing Strawberry Scones
With most keto low carb recipes storing them can be a bit of a challenge. You can’t just keep these on the counter at room temperature like you can with traditional pastries. Scones made for a low carb diet will require refrigeration in order for them to stay good for up to a week. If you want them to last longer you can stick them in the freezer where they will last for up to a month.
The nice thing about scones is they taste just as good two weeks later as they did on the day you made them. I’ll pull one out of the freezer and microwave it for 60 seconds, or place it in the oven for about 10 minutes and enjoy it with a cup of coffee in the morning!
youtube
#Keto Scones#Strawberry Scones#Strawberry Keto Scones#Keto Strawberry Scones#Low Carb Keto Scones#Easy Keto Scones Recipe#How To Make Keto Scones
0 notes
Text
If you’ve been in a never-ending cycle of dieting down and eating minimal total calories without seeing much difference or plateauing, chances are your body needs a reverse diet to strengthen your metabolism. What’s a reverse diet, you ask?

Reverse dieting is a process in tracking macronutrients in where you gradually increase your calorie intake after a sustained period of dieting. This concept allows you to slowly reintroduce extra calories (usually in the form of carbs and some fats, while keeping protein fairly consistent) so that you can help your metabolism recover from low-calorie dieting. Adding calories back in slowly is ideal in order to not rapidly gain back what you worked hard to keep off. Not to mention, it helps tremendously for your mental health after the stress of so much calorie restricting. I digress, this post is not intended to explain exactly what a reverse diet is, so if you’re curious to know more, here are a few great sources:
Macro Fit
Corina Nielsen
Dr. Layne Norton, PhD
You may have seen folks in the fitness industry that track their macros, post about their reverse diets on Instagram with glowing pride. Just check the #reversediet hashtag…
This slideshow requires JavaScript.
When people post about their reverse diets, it is usually all sunshine and happiness. Hell, even I have been guilty of that the first time I ever was put on a reverse diet, which was back when I first started tracking my macros two and a half years ago:

December 3, 2014
The first time around, it sure was fireworks and fuckyeahs all around. I mean, what’s not to be ecstatic about? Coming off of bro diet and paleo, I was eating bread again, eating much more AND getting leaner?! You bet your ass I was eager to share my results. Who wouldn’t be?

Well, that was back then. I’ve done a couple short term (bad idea, but I’ll touch on that a bit later) reverse diet stints since then. I have been in a constant vicious cycle of dieting down to fairly poverty macros, but would get exasperated with the low numbers and see little change, so I was quick to think they’re not working, so I’d hop right back into a reverse diet, but as soon as any gain began happening, I’d freak out and get back into a cut.

This time, I’m here to stand on my little soap box and proclaim that reverse diets are not all rainbows and sunshine every time. Are they necessary? Yes, but there is a dark side to it that not many talk about.

Fat gain is inevitable. How much will vary. As you saw, on my first reverse diet, I leaned out quite a bit. Those are the lucky few – and, from what I’ve seen, it seems like people tend to lean out on their first reverse diet and not as much on their following ones. But don’t quote me on that, I don’t have scientific data to back that up, it’s just what I’ve seen. On some, the gain will not be noticed, but on others, it most definitely will be noticed. You will notice it before anyone else does – specially on the scale – and this is where most people will want to jump ship and start to cut (diet down / lower macros) again prematurely, before they’ve truly given their metabolism a chance to recuperate and get their intake up.

Too soon?
Mental fuck. This correlates to the last point but it deserves to be expanded on. The mind is a very powerful part of your being as a whole and holy crap it makes it hard af to be okay with gaining some weight. It takes mental grit to accept yourself in a controlled chubbier state. Not to mention, during the reverse diet process, you’ll be seeing a whole lot of #transformationtuesday and Before/After posts on social media of people with the body you had or want. And if you happen to be reversing in the summer months, it stings just a little more. The gain will mess with your mind and make you question why you’re doing this.

So much food. Eat all the foods they said. It’ll be fun they said. Well, I may be in the minority here, but I do not have goals to eat 300g+ carbs and 150g+ fats. You may see people on social media that eat that much (and more) and look shredded with comments on their posts from followers green with envy about eating that much and how they wish they could eat that much and look like that. Well, eating a lot not only can leave you full all of the time (which can make training uncomfortable) but it also gets expensive! I’m currently on a reverse diet and I’m currently at about 180g carbs and 70g fats and it is already starting to feel like a lot. Sometimes it gets to a point where the thought of eating another meal to hit your numbers for the day is nauseating. When you start to feel this way, first of all, be patient, but second of all, you have start to include more calorically dense foods into your day while still getting in your micronutrients, of course.

Feels like forever. The more I consult with experts (hey Mark from Avatar, you the real MVP), the more I realize how much I shorted myself in the past on the previous reverse diets I’ve been on. My first two lasted no longer than 2 months each. Any sign of puffy or gain and I ran back to a cut. From what I’ve read, the recommended timeframe is about 4 to 6 months, but obviously it is case by case.
Enough about the overall dark sides. My experience on this particular reverse diet has been fairly unique because of numerous factors, but doesn’t make it any less of a mental fuck.

Having hip arthroscopy surgery in November 2016, followed by being put on a too aggressive reverse diet while still in recovery by my coach at the time, combined with dealing with a developed mysterious constant abdominal discomfort, caused some initial weight gain post op. Fast forward to about March, during my journey to find out why I’ve been experiencing abdominal pains and while still going through the last of my physical therapy, I made the decision to re-join Avatar under the moderate fat loss setting (of course I wanted to start cutting again, haha) and sadly, my body did not respond to poverty macros for the month I was on them. No change or loss and eating very minimal calories considering by this time I was cleared to return to regular training. After a long email chat with Mark, I was advised to begin a conservative reverse diet because it really wasn’t safe for me to go any lower with macros for someone my size and with the amount of training I was doing. And I’ve been on a reverse diet since then. There was an initial gain when I first started but after about 2-3 weeks of keeping at it, weight finally stabilized and has been within a 2-3lb range since then. But boy is it a mental battle.

My woes: I try to avoid being in pictures at all costs these days because I feel fluffy. I’ve avoided going to the beach to not have to put on a bikini. I’ve only posted training videos when I’m very happy about my post op recovery but refrain otherwise because I don’t like the way I look in them. Weighing myself tends to be disheartening, but I know it’s necessary to see trends. Knowing that I know what to do to lose fat but holding off for my own good, is so hard. Feeling sexy while in this chubbier state is hard to come by. Training while not only dealing with that pesky mysterious abdominal pain but also while generally being in a state of full, sucks.
There ARE bright sides…don’t worry, I’ll keep this section brief since these benefits are what people tend to talk about when referring to reverse dieting.
Fun foods. Eating more definitely has its perks. You’re able to easily fit in more “fun” foods such as bagels, rice, pasta, peanut butter (not just a tiny teaspoon), donuts, french fries, pizza and much more. Of course, you can fit these foods in while cutting, but it is definitely not as easy, and usually have to eat a lot less through rest of the day. I’m trying to keep this in mind and fit in foods I normally don’t get to. And also remind myself that this reverse is temporary so I might as well take advantage and try to enjoy it while I can.
Socializing. Having the freedom of being social and actually eating at these social events without feeling extremely restricted is a pretty great feeling. When on a cut and on low macros, it takes a lot of planning to attend and enjoy a social event. With higher macros, you have more flexibility to enjoy the people around you and the food that is there.

Get strong(er). This is the part I’m trying to focus the hardest on. I’ve had the all clear from my surgeon since April and I have been back on a full 5-day weightlifting cycle since then, working on technique and re-gaining the strength I lost post op. Couple this with eating more and it is the perfect recipe for getting stronger. It seems to have been working because I am extremely close to matching my pre op lifting numbers (more on this in a post coming soon). Eating at maintenance or in a surplus is the prime time to make gains in the gym. Although it may not feel like it, you ARE building muscle underneath the fluff and one day it will show.

Temporary. This is another aspect I’m trying to keep in mind. A reverse diet is temporary. There will be an end to the fluff. Remind yourself you’re doing this for the long term, for the big picture, for your optimal health.
This post is not meant to make you fear reverse dieting. Reverse dieting is necessary. Humans were not meant to diet their whole lives. Not meant to be in an endless deficit. So, here I go, going to keep on trucking on this reverse with a plan to begin cutting in late September or early October. Until next time, party people.

Check out my mew post that covers the dark side of #reversedieting, what people don't tell you If you've been in a never-ending cycle of dieting down and eating minimal total calories without seeing much difference or plateauing, chances are your body needs a reverse diet to strengthen your metabolism.
#Flexible Dieting#flexibledieting#Health#if it fits your macros#iifym#macros#Nutrition#reverse diet#struggle
1 note
·
View note
Text
Best Potato Ricer Reviews 2019: Top 5+ Recommended
I don’t know about you, but I’m a bit obsessed with mashed potatoes.
This dish— it seems unappealing, unappetizing on a plate, but somehow, a spoonful on that creamy, smooth mash always end up being my favorite part of my meal.
And if I got some time to squeeze on my day, I’d love getting my hands on that mashed potato and flour and creating a homemade gnocchi, too! Those regular dense potatoes turned into something tender, little pillowy dumplings would complete my day anytime!
But, if you are constantly greeted with a gummy, lumpy, overly mashed pile of spuds or can’t re-create the pillowy texture of Italian restaurant gnocchi, then I’ll let you in on a little secret:
If you ditch the food processor, stand mixer, or hand masher, and use the best potato ricer instead, you are almost guaranteed to get those perfect mashed potatoes you search for, every time!
Potato what?
No. Images Products Where to buy?
1
Bellemain Stainless Steel Potato Ricer
2
Oxo Good Grips Potato Ricer
3
Norpro Commercial Potato Ricer
4
Chef ‘n FreshForce Potato Ricer
5
Tundras Potato Ricer
What is a Potato Ricer?
A potato ricer is a kitchen tool used to process potatoes or other foods by forcing it through a sheet of small holes that are usually about a diameter of grain rice.
Usually resembling a garlic press, potato ricers come with two long handles, one with a flat surface which sits into the basket, the other with a perforated basket at the end.
The food is placed in the basket, then the flat surface is pushed down by pressing the handles together which forces the food through the holes.
Potato Ricer VS. Potato Masher
A lot of people tend to mix up potato ricers and potato mashers. So, let me clear that confusion.
Being an extrusion tool, potato ricers force cooked potato through tiny holes and delivers rice-like pieces of potato, thus its name. A potato masher, on the other hand, is a tool you use to push down on potatoes and create a mashed texture.
You see, potato ricers are much better than mashers.
Ricers break potatoes into the smallest pieces possible without even disturbing the starch molecules, producing airy and fluffy mashed potatoes. Whereas, mashers often leave lumps and is also quite exhausting to use.
Do I really Need a Potato Ricer?
Good question!
Although some people might argue that you can have your mashing needs with a food mill or a masher, a potato ricer brings you some benefits that just are not there when choosing other mashing tools.
Like I’ve said before, potato ricers produce fluffy, smooth and lump-free potatoes every time! You also do not need to peel the potatoes before mashing them since the peels will remain in the hopper of the ricer when the clean mash is squeezed out. Moreover, potato ricers are crucial for home cooks who wish to create restaurant quality gnocchi.
And if you think that you do not need it that much since it only has one role, then you got it wrong. Potato ricer may be its name, but this kitchen tool is not limited to mashing potatoes. It can be used for several other culinary tasks such as creating homemade jam, applesauce, baby purees as well as squeezing liquid out of veggies such as spinach, cucumber, and spaetzle.
Potato ricers are simple to use, thanks to straightforward features. It is also non-electric and hand-held, which makes it easy to travel with whenever you go camping. Lastly, they are easy to clean and most models only require you to throw it to the dishwasher.
How to Use a Potato Ricer?
Here is a step by step process of using a potato ricer to create creamy and smooth mashed potatoes:
1Wash the potatoes thoroughly. Cut them into smaller pieces about 1-inch cubed. Cook the sliced potatoes in boiling water for at least 15 minutes or until soft enough to break up when pressed with a fork. Drain the potatoes.
2Fill the basket of the potato ricer with a few pieces. Make sure not to overfill the basket or the potatoes might ooze out to the sides. In case your potato ricer comes with a choice of discs, use the one with the largest holes.
3Hold the potato ricer over a bowl or an empty pot and squeeze the handles together until the potatoes begin to extrude through the holes. Refill and press again, working quickly before the potatoes get cold.
4After mashing, add your desired ingredients such as nutmeg, pepper, salt, warm milk, sour cream, or butter. Stir with a spoon to combine.
Using the Potato Ricer for Other Foods
As I have said before, potatoes are not the only food you can use on a ricer. Here’s how you can use a potato ricer on other foods.
Make a spaetzle with the potato ricer by pressing the dough into boiling water, forming the noodles.
Steam foods such as broccoli, peas, or apples until very soft. Add it into the ricer and press into a puree for baby food.
Cook fresh berries or thaw frozen berries in a saucepan with a bit of sugar until soft. Press the berries through the ricer into a bowl in order to make a fruit sauce or coulis.
Buying a Potato Ricer: A Professional Buying Guide
Now that you are convinced that you really need a potato ricer in your kitchen arsenal, you might be wondering how to choose the best one out there. Well, here is a detailed guide to help you choose the right one for you!
So, what do you need to look for?
1. The Material Used
Take note the potato ricers are usually made of plastic or stainless steel. Usually, however, the most preferred is one made of stainless steel. Plastics are commonly less durable and much prone to damage while stainless steel can last longer, enduring more abuse.
Some ricers come with the addition of ergonomic grips or rubber grips that can be quite helpful for pureeing larger amounts of veggies and fruits.
2. Size and Number of Holes
No one expects you to turn the potato ricer upside down and start counting how much holes which might confuse the sale associates. But, what you can do is to assess the density of the holes and the width. The more hole that the potato ricer has, then the better chances of it delivering a more consistent and smoother texture. If the holes are just too big, then you might end up with lumps like those that can be produced with a potato masher.
3. Quality and Durability
Even though made in stainless steel, there are some potato ricers that comes in poor build quality, particularly if they are not well connected to the bolts and screws. Being loosely connected can make them prone to falling apart, or of connected to firmly, it makes them harder to operate since they can lack flexibility.
Also, look for a potato ricer that can take a lot of abuse that can mash several potatoes at once or puree harder food items.
4. Ease of Use
Potato ricers are pretty much straightforward to use. However, there can be some models that make it difficult to use. The best potato ricers come fully equipped with a non-slip knob that is opposite to the handle so that you can rest on the bowl and have more leverage when operating it.
5. Components to Look
One component that you need to always look carefully when buying the best potato ricer is its mill features or much commonly known as the hopper. This is the part where you need to put the potato before you press it through the holes. The hopper needs to be large enough in order to fit a potato— either cut into smaller pieces or as a whole.
Moreover, you also need to consider its press apparatus to be sturdy and functional. Lastly, the handle of the best potato ricer needs to be easy to hold and grip. Consider those with a rubberized coating in order to avoid slipping when using. Ergonomic handles can also make the job of grating and mashing a potato easy even for children who naturally have weaker hands.
6. Versatility
Even though you can easily put a whole apple in almost any potato ricer out there, what happens if you wish for a different texture than a gnocchi-ready puree? Do you prefer going out there and buying another ricer for such an occasion? Or look for one that comes with interchangeable discs of different sizes and numbers of the holes? I bet you prefer the latter.
7. Price
Well, obviously, you should not spare on the money if you want to buy good-quality kitchen products. That is, unless if you want to come back to your kitchen store and buy new ones every few months.
But, always remember that a higher price does not always mean higher quality. If you consider all the factors mentioned above, then you should be able to make the right purchase and consider only the price as the last criteria to finalize your decision.
The Top 5 Best Potato Ricer 2019
*Below, you'll find our more detailed reviews, but you can also click the links above to see current prices or read customer reviews on Amazon.
No. Images Products Where to buy?
1
Bellemain Stainless Steel Potato Ricer
2
Oxo Good Grips Potato Ricer
3
Norpro Commercial Potato Ricer
4
Chef ‘n FreshForce Potato Ricer
5
Tundras Potato Ricer
#1: Bellemain Stainless Steel Potato Ricer
Via Amazon.com
Quality
Price
Our rating
Create outstanding potato dishes with this amazing potato ricer from Bellemain! Made from high-quality, heavy-duty 18/10 polished stainless steel, the Bellamain potato ricer indicates a long-lasting design that should last for generations!
Easily create perfectly creamy, smooth and fluffy mashed potatoes with this instrument as the comfortably cushioned, form-fitting, bright red, long handles require you to use less of your hand strength. The ricer features a good sized basket to make at least 1.5 cups of mashed potatoes, baby food or cauliflower mash. Plus, the large non-slip red knob securely holds the ricer in place on a bowl or a pot.
Not only that, you can get really creative, thanks to Bellamain offering a complete set of 3 interchangeable ricing discs for different coarseness or fineness. It is also very easy to clean— you can either soak it in soapy water or throw it in the dishwasher! This is such an amazing kitchen gadget to buy, however, if you are not that satisfied, Bellamain offers a 100 percent refund guarantee, no questions asked! Oh, plus, it also comes with a 2-year warranty for a risk-free buying!
What We Like
Sturdy and heavy-duty
Good quality
Good price
Comfortable grip
Large knob
1.5 cup capacity basket
Comes with 3 interchangeable discs
2-year warranty
100 percent refund guarantee
Dishwasher-safe
What We Don't Like
Discs can be hard to clean
Discs are hard to secure to the hopper chamber
Overfilling can cause the ricer to break
#2: Oxo Good Grips Potato Ricer
Via Amazon.com
Quality
Price
Our rating
Whether you want to create perfectly fluffy, light and smooth mashed potatoes or homemade pureed baby food or restaurant quality, pillowy gnocchi, the OXO Good Grip Potato Ricer can do it all!
Coming with a durable and sturdy stainless steel construction, this potato ricer can produce perfectly smooth texture every time, to the point that there you will not need to add milk and butter to the potatoes. Other than easily mashing potatoes, it also allows you to mash fruits and veggies such as apples, yams, cauliflower, carrots and more!
The potato ricer boasts soft and comfortable non-slip grips on its handles that conform to the shape of your hand and also absorb pressure as squeeze it together. It also features non-slip cushioned knob that securely hooks onto any type of bowl or pot. Cleaning is also a breeze— a few scrubs of soapy water and rinses it with running water and you’re done or you can just throw it to the dishwasher! Equipped with a hanging hole, you can hang it for easy and quick storage!
What We Like
Affordable price
Dishwasher-safe
Convenient hanging hole
Versatile
Soft and comfortable non-slip grip that absorbs pressure
Cushioned, non-slip knobs to hook onto any pot or bowl
Durable and sturdy stainless steel construction
What We Don't Like
It does not have a large capacity
Edges are quite sharp
It needs a strong grip
#3: Norpro Commercial Potato Ricer
Via Amazon.com
Quality
Price
Our rating
If you are obsessed with mashed potatoes or working in a restaurant, then the Norpro Potato Ricer is second to none when it comes to preparing lots of fluffy, light, soft a lump-free mashed potatoes.
For fast and easy mashing of large batches of potatoes, this potato ricer is constructed from commercial grade, high-quality stainless steel. Having a whopping capacity of 2.75 cups, you can create batches by batches of mashed potatoes in no time! Also, thanks to its unique design and shape, this potato ricer is definitely easier to press than most models. Its sturdy handle offers you good leverage, plus it fits nicely over most pans and pots for an easy potato “ricing” operation without the mess!
Not only for mashing potatoes, the Norpro Potato Ricer can also mash veggies like tomatoes, yams, cauliflower, and carrots, fruits like apples and even allow you to create baby foods. Cleaning is not that easy though thanks to its shape which creates lots of nooks and crannies and because it is not dishwasher-safe, some of its parts can be cleaned with soapy water.
What We Like
Fits over most bowls and pots for a no-mess operation
Sturdy, commercial grade stainless steel
Ideal for home use and restaurants
Affordable
Large capacity
Heavy-duty handles for good leverage
What We Don't Like
Not dishwasher safe
Stop lever is hard to press down
The handle can bend after a long term of use
The handle is not that comfortable
A bit pricey
#4: Chef ‘n FreshForce Potato Ricer
Via Amazon.com
Quality
Price
Our rating
Talk about fast and effortless operation, the FreshForce Potato Ricer from Chef’n is definitely a joy to use! The stainless steel ricer comes with a gear-powered mechanism that helps push down the potato through the hopper, thus requiring less strength from you and makes it easy for one-handed operation.
Its handle is constructed from heavy-duty plastic that is padded and super comfortable in order to minimize hand strain. Having a fair-sized hopper with small holes, you get fluffy and light mash potatoes every time. It also allows you to prepare other food such as gnocchi, potato croquettes, shepherd’s pie, and baby food.
Thanks to its simple, 2-construction design, you can remove the stainless steel basket and wash it with warm, soapy water or go directly into the dishwasher!
What We Like
Dishwasher-safe
Two-piece construction
Easy-to-squeeze plastic handles
Dual-gear mechanism that minimizes hand strain and increases pressing power
High quality
Multi-function
What We Don't Like
Bulky
The basket is hard to remove
A bit pricey
#5: Tundras Potato Ricer
Via Amazon.com
Quality
Price
Our rating
Making restaurant-quality mashed potatoes from the comfort of your own home has never been easier with the Tundras Potato Ricer. With this potato ricer, you can create top-quality dishes with absolute ease.
The potato ricer comes with 3 interchangeable discs which give you full control of your meals. You can choose from coarse, medium and fine sized grains for making baby food, mashed potatoes, mashed squash, gnocchi and more!
Featuring an easy grip handles, the ricer significantly reduces tension and stress on your wrists and hands so you can mash easily and quickly. Thanks to its stainless steel construction, the ricer is guaranteed to last long that can mash even the toughest of potatoes.
This kitchen tool is also easy to keep in great shape as it is easy to use. Because the discs can be removed, you do not have to worry about reaching into every nooks and cranny. Plus, the whole potato ricer is dishwasher safe
What We Like
Comes with 3 interchangeable discs
Easy to grip handles
Stainless steel construction
Easy to clean
Dishwasher safe
What We Don't Like
Flimsy frame
Grip of the handles are sharp
S-Mashing King
We simply can’t end the article without announcing the best of the best, can’t we?
So, now among the top 5 recommended potato ricers above, I’ll tell you my favorite. All hail the “S-Mashing King”…
Bellemain Stainless Steel Potato Ricer!
Reputable name, heavy-duty stainless steel, easy to operate, long handles, good capacity, comes with 3 interchangeable discs, dishwasher safe and offers risk-free buying— I mean what more will you ask?
Everything good points to this superb kitchen tool for you to create yummy, creamy, and fluffy mashed potatoes, every time!
Fluffy Thoughts
Whether you are making mash for your side dish or want some homemade gnocchi or creating tasty toppings for your Shepherd’s pie or even a healthy pureed food for your little one, a good potato ricer can help you achieve that quality mash that the whole family will surely love.
I hope you find this article helpful! If you have questions or maybe a tasty potato recipe, feel free to share it with the community and fire up the comment section below!
Until then, happy mashing!
The post Best Potato Ricer Reviews 2019: Top 5+ Recommended appeared first on Cooky Mom.
0 notes
Photo

New Post has been published on http://cookingtipsandreviews.com/the-best-waffle-makers-serious-eats/
The Best Waffle Makers | Serious Eats
amzn_assoc_placement = "adunit0"; amzn_assoc_tracking_id = "makemoneyq-20"; amzn_assoc_ad_mode = "search"; amzn_assoc_ad_type = "smart"; amzn_assoc_marketplace = "amazon"; amzn_assoc_region = "US"; amzn_assoc_title = "Shop Related Products"; amzn_assoc_default_search_phrase = "cooking"; amzn_assoc_default_category = "Kitchen"; amzn_assoc_linkid = "51fe4d035c7af8dc5928e6f5e5b79c4e"; amzn_assoc_default_browse_node = "284507"; amzn_assoc_rows = "4"; amzn_assoc_design = "text_links";
[Photographs: Vicky Wasik]
Sunday brunch, or any-morning brunch, is better with warm, golden waffles. Crisp and light and scented with vanilla, waffles are the shape of a perfect breakfast, cupping pools of melted butter and maple for a lavish start to the day. Even though there’s always a place in my heart for frozen Eggos, nothing beats the taste of homemade waffles, and making your own lets you skip the busy brunch rush. A great waffle iron and Stella’s recipes for buttermilk or yeasted waffles make homemade waffles a cinch.
We rigorously tested the top 12 models ranging in price from $20 to $125 (at the time of testing) to find you the ones that consistently make the best waffles—ones that are crisp and golden on the outside while still fluffy and moist on the inside, ready to mop up country gravy, runny yolks, or warm maple syrup. We want waffle irons that reheat quickly so you can feed a crowd. We also want ones that are easy to clean, store, and operate. Because waffle irons are bonus, luxury appliances, we’ve found winners that we’re confident are worth the splurge (and counter space)—tools you’ll want to reach for any time of day. For those who don’t want to spend a lot, we’ve also picked our favorite budget models; they don’t work quite as well, but, with bonus features like removable plates for easy cleaning, we think they’re worth considering.
Our Favorites, at a Glance
The Best Flip Belgian-Waffle Maker: Cuisinart Double Belgian Waffle Maker
If picture-perfect waffles are a must-have, then this flip model is the pick for you. The flip function makes it easy to distribute the batter from edge to edge, without worrying about overflow. The Cuisinart waffle maker heats up and cooks waffles fast, producing a crisp outer shell and fluffy interior. Its heavy plates heat evenly and retain the heat well, so batch after batch of waffles turns out consistently browned. This iron quickly makes two large waffles at a time and reheats rapidly, so it can handle a lot of growling stomachs. This model also features an on/off switch, allowing you to always have it set up on your counter for waffles on the fly.
The Best High-End Belgian-Waffle Maker: All-Clad Stainless Steel Belgian Waffle Maker
This waffle iron was the priciest of the units we tested, but the waffles that it produced were so evenly browned, so delicately crisp on the outside while fluffy on the inside, that we believe it’s the best option for Belgian waffles. This All-Clad model features extra-deep divots, for Belgian-style waffles with maximum butter and syrup capacity. It makes two waffles at a time and contains a drip tray for minimizing spills and messes. The heavy stainless steel body and die-cast plates heat up fast and evenly for consistent browning.
The Best High-End American-Waffle Maker: Breville No Mess Waffle Maker
The Breville quickly produces crispy brown waffles, with the most consistent color of all the batches we tested, making it the best option if you prefer the thinner type of American waffle. The waffles managed to be perfectly crispy, without becoming dry, and maintained some fluffiness within. Although it makes only one waffle at a time, it reheats and cooks rapidly, so you can crank out waffle after waffle with ease. The built-in drip tray, nonstick surface, and minimal design keep cleanup effortless.
The Best Budget Belgian-Waffle Maker: Krups Adjustable Temperature Waffle Maker With Removable Plates
With its large cooking surface, the affordable Krups waffle maker is the best for feeding a crowd on a budget. It has a large enough capacity to make four waffles at a time, but still tucks away easily, with locked handles for upright storage and a cord that coils away underneath. The removable plates are dishwasher-safe, making cleanup quick and easy.
The Best Budget American-Waffle Maker: Black+Decker 3-in-1 Waffle Maker With Reversible Plates
If you’re tight on space and money, the Black+Decker offers the most bang for your buck for thin, American-style waffles. It produces waffles that are thin and crunchy on the outside, with some chewiness on the inside; it makes four square waffles, with shallow wells, at a time; and its reversible plates and adjustable hinge convert it into a panini press for toasting thick sandwiches. The unit also opens up to lie completely flat as a griddle for eggs, pancakes, and more, making this a cheap all-in-one breakfast station. The plates are fully removable and dishwasher-safe for fast and easy cleanup.
The Criteria: What We Look for in a Great Waffle Iron
[top]
There are countless styles of waffles, including the light and crisp Italian gofri, the sugar-speckled Belgian liège, and the charming, heart-shaped Scandinavian vafler. For our testing we decided to limit ourselves to the two most common waffle styles in the United States, broadly divided into the “American” and “Belgian” categories. Although there are dozens of varieties of “Belgian” waffles alone, for marketing purposes, thicker waffles with deeper wells are considered Belgian, while shallow, thinner ones are categorized as American or “regular.” Both American and Belgian waffles can be made in either a circle or a square shape, so it’s up to you to decide which form is more waffle-y to you.
The mechanisms of all stand-alone waffle irons are pretty much the same, and relatively unchanged from those of their stovetop predecessors. Traditional waffle makers consist of two molded cast iron plates connected by a hinge, and feature a long handle to keep your hand out of the heat. The iron is preheated over a stove before the batter is added, and the waffle is manually flipped. These traditional styles work well, but they require some coordination on the cook’s part, as well as attention to heat regulation.
Electric waffle irons are made of two plates similarly set into a hinged body, which is heated through electric coils housed in the unit behind the plates. Some of these electric waffle makers have basic plug-and-play designs, while others offer variable heat settings, timers, and indicator lights telling you when your waffle is ready. For this review, we looked only at electric waffle makers and excluded stovetop waffle irons, since success with the latter has more to do with the cook’s skill and the heat source than differences in design.
Our goal was to determine which waffle irons offered consistent results with minimal effort, even heating for uniform browning, and a short reheat time so you can tackle waffles for a crowd. We also wanted waffle irons that were easy to clean, store, and handle, so you’ll want to reach for them over and over again.
The Testing
[top]
Waffles: Buttermilk, Yeasted, and Boxed Mix
[top]
First, we have to identify what makes a good waffle. Regardless of whether you prefer your waffle light golden or dark brown, it should be crisp on the outside and light and fluffy on the inside. We always want a waffle that’s evenly cooked, free of burnt centers or pale edges; it should also be the same color on both sides. The key to achieving this is a waffle maker with coils that get hot enough to quickly cook the waffles, coupled with heavy plates to better retain the heat. A waffle iron that gets and stays hot can cook the batter surface more quickly, setting it into a crisp shell while keeping the inside moist and light. Waffles that take too long to cook end up dense, flabby, and leathery. We found that the best waffles were cooked in under four minutes.
We made several rounds of waffles, using three different batters, in each of the models being tested. We took note of how long they took to heat up, to cook the batter, and to reheat for the next batch of batter. We also judged the taste, texture, and appearance of the resulting waffles.
For our first round of testing, we made waffles using Stella’s buttermilk waffle batter. This batter relies on steam to puff the waffles, so it has a high level of hydration for a light and crisp result. With this batter, we found significant differences in the quality of the waffles made by each iron. Irons that didn’t get hot enough weren’t able to produce enough steam, resulting in heavy, dense, and soggy waffles, while those that heated up well produced very light and crisp waffles.
This batter also benefited the most from the flip mechanism found in some of the irons we tested, likely due to the fact that it’s a thinner batter that flows flat into the iron. (The flip design delivers even heating by making sure that a thin batter receives equal contact with the plates on both the top and the bottom.) The waffles resulting from this batter browned more evenly in the flip models than in the stationary ones, with the exception of our high-end picks, the Breville and All-Clad, both of which performed excellently. Ultimately, though, aside from our top-rated flip model, we’d steer you toward our other top picks, including the budget ones, even though they’re stationary: They produced better waffles overall due to higher heat and shorter cook time, despite their uneven browning.
For the second round of waffle testing, we used Stella’s overnight yeasted waffle batter. Although this batter also relies on steam to power the rise, the fermentation by the yeast fills the batter with air bubbles even before the creation of steam, so it gets a one-two punch of leavening. This batter was thicker than the buttermilk batter due to the air bubbles it contained, which meant there was no difference between waffles made in a flip waffle maker and those made in a non-flip unit. The same irons that performed poorly due to inadequate heating in the previous test fell short here as well, but with less dramatic results, because steam isn’t the only leavening agent in this batter.
Our final round of waffles was made out of Aunt Jemima waffle mix, prepared according to the package’s instructions. These waffles use a combination of chemical leavening and steam from the added liquid to result in the rise of the waffles. The waffles made with this batter were consistently dense and cake-like in all the waffle makers, but the color came out evenly brown in all machines. Where we found variations was in the crispness of the crusts, with machines that were hotter yielding thinner and crispier crusts. With this batter, we also found no differences between flip and non-flip units. If you make waffles mostly with a boxed mix, you can definitely get away with using a cheaper iron, since the differences were closer to minimal.
Non-Waffle Tests
[top]
Because waffle irons are more of a kitchen extravagance than an absolute necessity, we decided to test out a few non-waffle items in the machines just for kicks—the more versatile these tools can be, the better. We waffled up some grilled cheese and sage stuffing to see how the machines would do. As we’ve seen in the past, a waffle iron may be the best tool to make things like grilled cheese: The divots become extra crisp, with cheese oozing out and forming a crackling frico, while the peaks remain soft and chewy. The nonstick surface ensures no bits of stuffing or bread are left behind. The results of this test followed the trend of the previous ones, with our high-end picks edging out the rest.
High-End Versus Low-End
[top]
With all three batters, as well as our bonus rounds of stuffing and grilled cheese, there was a clear difference in the quality of results between higher-end, more expensive models and lower-end, budget models. The high-end models heated up significantly faster and hotter, and had a much shorter recovery time between waffles. They all have heavier plates than the lower-end models, resulting in even heat and consistent browning. The waffles made in our more expensive models all became deeply browned in under four minutes, while the less expensive models took anywhere from eight to 15 minutes. This resulted in huge variations in the density of the inside and the texture of the exterior of the waffles.
That said, the price differences between the high-end and low-end models are also significant, with the budget models ranging between $20 and $60 while the expensive models reached upwards of $125. Even though the budget models we chose as winners did not brown as evenly or result in waffles with near the quality of the expensive models, they still outperformed their peers. Our winning budget models also offer removable, dishwasher-safe plates, making them far easier to clean than our high-end winners, a much-appreciated feature that we feel makes them worth recommending.
Extra Features and Ease of Use
[top]
Some of the models we tested come fully loaded with features, while others are more bare-bones. The question is which of these bonus features, if any, are worth having. Almost all the waffle makers come equipped with adjustable heat settings, a feature we found mostly useless, since there’s almost never a situation in which you’d want anything less than maximum heat. It’s a feature that’s even more vexing on the losing low-end models, which, even at their highest settings, were not very hot. (There were some exceptions to this: Our winning flip waffle maker got so hot that we appreciated being able to turn the heat down.)
Most waffle makers also come with a timer or indicator light to tell you the waffle is ready. But in almost all instances, the waffles require more time than the indicators suggest, rendering the feature unhelpful at best and misleading at worst.
Electric waffle irons are available in flip and stationary models. Proponents of flip waffle makers suggest that they heat more evenly by better distributing the batter throughout the plates. After testing both styles with different batters to see if this was truly a useful feature, we found that our three high-end picks cooked all the batters on the top and the bottom evenly. There was no difference between our flip model and a high-end stationary model. We did, however, find the flip a useful function when comparing lower-end models cooking the thinner buttermilk batter. Ultimately, we didn’t pick any low-end flip models because, although they may have heated more evenly than our budget picks, they cooked the batter so slowly that the waffles ended up too dense and heavy.
There was one area in which the flip proved useful, which was creating full waffles with batter that flowed from edge to edge without overflowing the iron. With a stationary model, you’re left to depend on just the weight of the top plate to spread out the batter, which often requires you to overfill it to reach the edges, particularly with square waffles. With a flip model, you also get some help from the rotational movement to distribute the batter, making it easier to completely fill the plates with less batter.
The features we found particularly useful were removable plates and drip trays for easy cleanup, as well as cord storage and locking handles, which allow for upright storage.
How We Chose Our Winners
[top]
Our winners consistently made the best waffles, ones that browned evenly and quickly and turned out crisp and light. They also had useful features that made them easy to use, clean, and store.
The Best Flip Belgian-Waffle Maker: Cuisinart Double Belgian Waffle Maker
[top]
What we liked: The Cuisinart waffle maker was the hottest of all the irons we tested, making waffles in just over three minutes. The waffles it produced were light and fluffy on the inside, with a delicate and crisp crust. They had deep divots for holding lots of syrup and butter, and a traditional round shape. Because the iron gets so hot, the adjustable temperature is actually a useful feature, unlike on most of the other waffle irons we tested.
This model is also equipped with an on/off switch, which people with large kitchens may find useful, as it makes it easier to keep it set up on a counter without having to unplug after each use (especially helpful if your outlets are in inconvenient places, and repeatedly plugging and unplugging is a hassle). It makes two seven-inch waffles at a time, with a two-minute recovery time, allowing you to make waffles for a crowd. The flip function means it evenly cooks thicker and thinner batters alike and requires less batter to fill edge to edge.
What we didn’t like: This is a big and bulky unit, making it a difficult fit in small spaces. Without a drip tray, there is potential for mess. (However, because it’s a flip model, you need less batter to fill up the iron, so drips are also less likely.) There was some unevenness in cooking, with the edges browning a touch faster than the rest. The deep wells and fixed plates make cleanup difficult.
The Best High-End Belgian-Waffle Maker: All-Clad Stainless Steel Belgian Waffle Maker
[top]
What we liked: The All-Clad is well built and sturdy, and heats up quickly and evenly for perfectly crisp, light, and consistent waffles. The crunchy, golden waffles made with this model are tall and square, with deep nooks. The All-Clad makes two waffles at a time in under four minutes and reheats fast, requiring just two minutes between batches. It browns evenly along the surface and between the top and the bottom of the waffle, even without a flip mechanism. A drip tray is fitted to the back of the unit to contain spills for easy cleanup. This unit is also compact, as it’s equipped with cord storage and locking handles.
What we didn’t like: At over $100 (we’ve seen significant price fluctuations on this unit on Amazon, with a low point of around $125), it’s an investment, best for avid waffle fans.
The Best High-End American-Waffle Maker: Breville No Mess Waffle Maker
[top]
What we liked: The Breville made crispy and light American-style waffles in three to four minutes. The waffles made in this model come out round, thin, and crispy, yet manage to maintain a soft interior. Even though it makes only one waffle at a time, the Breville reheats and is ready for another waffle in under two minutes, so it can make a greater quantity of waffles in the same amount of time as many larger models. This model also heated the most evenly of all the brands we tested, both across the surface of the waffle and when comparing the top and bottom. With a built-in drip tray, this unit remains true to its “no mess” name. Equipped with convenient cord storage, a locking handle, and a slim design, it’s easy to store in tight spaces or small kitchens.
What we didn’t like: At over $100, this waffle maker is also an investment.
The Best Budget Belgian-Waffle Maker: Krups Adjustable Temperature Waffle Maker With Removable Plates
[top]
What we liked: This large and affordable unit makes four waffles at a time. The square waffles produced by this model don’t feature wells as deep as those of the Cuisinart or All-Clad, but they are chewy and tender, with crispy edges and peaks. The removable, dishwasher-safe plates are our favorite feature, as deeper-welled Belgian-waffle makers can be difficult to clean. This waffle iron is particularly worth considering if you typically use a store-bought waffle mix, which is less sensitive to inconsistent heating than homemade batter. The cord storage and locking handles make the Krups simple to store, even with its large capacity.
What we didn’t like: The cooking time and reheating time on this model are slow—about 10 minutes to cook one round and about eight minutes to reheat. The resulting waffles are denser and softer than those made in the high-end waffle irons. We also found that the tops of the waffles from this model are much paler in color than the bottoms.
The Best Budget American-Waffle Maker: Black+Decker 3-in-1 Waffle Maker With Reversible Plates
[top]
What we liked: This compact and lightweight model from Black+Decker is a great multitasker for any small kitchen. It makes thin waffles with shallow wells, crispy on the outside and slightly chewy on the inside. On average, it makes waffles in about eight minutes—longer than ideal, but still respectable compared with other affordable options. The large surface makes four square four-inch waffles at a time, but it still has a low profile, making it a good fit in tight spaces. The plates on this unit are reversible, revealing a flat griddle, which opens up into a large cooking surface for eggs and pancakes and can accommodate large sandwiches with its adjustable hinge. The plates are removable and dishwasher-safe.
What we didn’t like: This model struggled to heat evenly, often resulting in waffles that were lighter in the center than at the edges.
The Competition
[top]
Here are notes on the other models we tested for this review:
The Chef’sChoice WafflePro Express Waffle Maker comes packed with features, such as a locking handle and cord storage, making it convenient to tuck away upright; two indicator lights; and an on/off switch, allowing you to store the unit plugged in (the only model besides our winning Cuisinart equipped with such a switch). Unfortunately, the waffles it produced were highly uneven in color, with pale edges and one side much darker than the other.
The Hamilton Beach Belgian Waffle Maker is a compact and lightweight model featuring indicator lights, variable temperature, and a locking handle. But it never got very hot during our tests, resulting in the batter sticking to the iron. That also meant long cook times, leading to leathery and dense waffles.
We also tested the flip model from Hamilton Beach, the Hamilton Beach Flip Belgian Waffle Maker. It has a drip tray and removable plates for easy cleanup, and, although this unit is larger, the handle folds in for easier storage. Similar to the other Hamilton Beach model, though, this unit did not heat up well, which led to sticking and dense waffles.
The Oster Belgian Waffle Maker was one of the lowest-priced models we tested. It is small, compact, and lightweight, with minimal features. Despite its slight design, without a locking handle or cord storage, upright storage is difficult. The waffles it produced were pale even after 10 minutes, and they came out dense and soggy as a result.
The Oster Flip Nonstick Belgian Waffle Maker nearly made it to the winners’ list. Its design is similar to that of the Hamilton Beach, featuring a drip tray for easy cleanup and a folding handle for compact storage. The waffles it produced were evenly browned, but, once again, they required too much time to cook, resulting in dense and soggy waffles.
The Presto FlipSide Waffle Maker flips from side to side on a hinge, rather than with a rotary motion, like the other models we tested. It does not feature a locking handle, however, so the side-to-side flipping motion easily leads to spilled batter. The unit heats up quickly but never gets very hot, resulting in a long cook time. It features a one- or two-minute timer to indicate when to flip, but the waffles take upwards of 10 minutes to brown, so each waffle requires frequent beeping.
The Proctor Silex Belgian Waffle Maker has a flimsy design and no extra features. Without a cool-touch handle, the entire body of this unit becomes extremely hot, making it difficult to lift the lid. Many of the waffles stuck to the plates, making it hard to clean and use.
amzn_assoc_placement = "adunit0"; amzn_assoc_search_bar = "true"; amzn_assoc_search_bar_position = "bottom"; amzn_assoc_tracking_id = "makemoneyq-20"; amzn_assoc_ad_mode = "search"; amzn_assoc_ad_type = "smart"; amzn_assoc_marketplace = "amazon"; amzn_assoc_region = "US"; amzn_assoc_title = "Shop Related Products"; amzn_assoc_default_search_phrase = "cookware"; amzn_assoc_default_category = "All"; amzn_assoc_linkid = "b45319dac495d29e17b5eff312392025"; Source link
0 notes
Text
Strawberry Jam Filled Oat Muffins
Get back to baking this fall with these delicious Strawberry Jam Filled Oat Muffins! Perfect for a healthy grab-and-go breakfast or even a back-to-school snack!
Can you guys believe it’s almost fall! I mean where did the summer go??
Hey you know what that means though, break out the scarves, the delicious pumpkin lattes and, most importantly, get back to baking! There is just something SO warm and cozy about fresh muffins coming out of the oven on a fall day. Am I right?? Well with school officially starting back up, these Strawberry Jam Filled Oat Muffins make the perfect grab-and-go breakfast your kids (and you!) will love. These muffins are lighter in calories, made with wholesome ingredients and each bite oozes with gooey strawberry jam which keeps them moist all week long! The perfect breakfast or after-school-snack to have on hand.
I love making these on a Sunday so that I can just easily grab one before running out the door in the mornings and kids love them too because of all that delicious strawberry flavor! To make these muffins I used a mixture of oat flour and whole wheat flour along with some homemade strawberry jam and lightly sweetened them with Stevia In The Raw® which is a zero-calorie sweetener perfect for baking! I really like using Stevia In The Raw® because the sweet taste comes straight from the leaves of the stevia plant and also comes in these conveniently packaged bakers bags which are great for storing in your pantry! Seriously the fact that I can seal them right up and put them away until my next use makes baking and cooking with them super simple.
Another thing that I love about baking with the Stevia In The Raw® Bakers Bag is that it actually measures cup for cup with sugar giving you the same amount of sweetness without all those extra calories! No confusing conversions necessary either, you can start by swapping out half the sugar for Stevia In The Raw® Bakers Bag while still achieving that same browning and caramelization you would get using all the sugar called for. I mean one cup of sugar has approximately 700 calories, so that’s a lot you’re cutting out!
When baking with healthier flours such as oat flour, almond flour, etc., these flours contain less gluten making them much more dense than typical muffins I’m sure you’re used to, so I’ve had to play around with various recipes in order to achieve that perfect combination. One thing I did that I found SO helpful is I actually sifted both the flours before mixing with the rest of the ingredients which really made them so much lighter and not as dense. It’s also important that you mix your dry ingredients separately from your wet so that everything gets evenly distributed. Then just fold it all together being careful not to over-mix your batter because you want those muffins to rise up and be nice and fluffy! I usually mix for about 20 seconds.
There are two simple ways that you can add your strawberry jam to these muffins and I promise you either way will still taste delicious! The first way is to fill each muffin cup only halfway full, place a dollop of strawberry jam in the center then evenly distribute the rest of the batter over top of each muffin. The other way (which is what I did), is to fill all 12 muffin cups with an even amount of batter then spoon a dollop of jam in the center of each one. Using a toothpick, I swirled the jam all throughout the batter. This makes it ooze out from the top which I really liked, but feel free to make this recipe however you prefer!
Hope you all enjoy these strawberry jam oat muffins as much we did and have fun diving back into all that fall baking! If you want to know more about Stevia In The Raw® and all their other delicious products, head on over to their website here or you can easily find Stevia In The Raw® at your local grocery store!
For updates, yummy recipes and MORE, make sure to follow Stevia In The Raw® on Facebook, Instagram and Pinterest!
Strawberry Jam Filled Oat Muffins
Print
Serves: 12 muffins
Ingredients
2 cups whole wheat flour
½ cup oat flour
1 Tbsp baking powder
½ cup Stevia In The Raw®
½ tsp. salt
2 eggs
1 cup unsweetened almond milk
2 Tbsp coconut oil, melted
1 Tbsp honey
1 tsp. vanilla
¼ cup strawberry jam
Instructions
Preheat oven to 425 degrees F.
Using a flour sifter or mesh colander, sift whole wheat flour, oat flour and baking powder into a large bowl. Whisk in Stevia In The Raw® and salt until all combined and set aside.
In a medium bowl, lightly whisk eggs then add almond milk, melted coconut oil, honey and vanilla, whisking until combined.
Pour wet ingredients over dry and fold together until just combined (don't over mix), it's okay if it's a little clumpy!
Divide batter between 12 prepared muffin cups then top each muffin with about a teaspoon of strawberry jam. Using a toothpick, swirl the the jam throughout the batter then bake muffins in the oven for 15 to 20 minutes, or until a toothpick inserted into the middle comes out clean.
Transfer muffins to a wire rack to cool then enjoy!
Nutritional Information
Serving Size: 1 muffin • Calories: 132 • Fat: 3.9 g • Saturated Fat: 2.3 g • Carbs: 21.6 g • Fiber: 3 g • Protein: 4.3 g • Sugar: 3.2 g • WW Points+: 4 • Smart Points: 5 *To make oat flour, simply add rolled oats to a blender or food processor and blend until they are finely ground into a powder-like consistency. Store in an airtight container.
3.5.3218
This post is sponsored by Stevia In The Raw®. As always all opinions are 100% my own.
The post Strawberry Jam Filled Oat Muffins appeared first on Eat Yourself Skinny.
from Eat Yourself Skinny http://ift.tt/2iCKLzB via IFTTT Strawberry Jam Filled Oat Muffins Eat Yourself Skinny, IFTTT from topofbestone http://ift.tt/2wCRyiA via IFTTT
0 notes
Text
Rose / Rosehip Oil
Whether you’ve got dry or oily skin, including an oil of some sort in your routine is a brilliant idea. Rose(hip) oil has helped my very dry skin settle down. I can now use powders without worrying that they’ll crack throughout the day. My skin is also softer and smoother, which is a dream for applying make-up on.
Essano Rosehip Oil / 45ml
Too Faced HangoverX Primer
Primer has become so important over the past year and my favourite is the HangoverX because of it’s ridiculously hydrating formula – it feels like I’m applying another moisturiser! It doesn’t extend the wear of make-up by that much but if my skin is hydrated I don’t find my make-up moving around anyway. Discovered this lifesaver thanks to KathleenLights on youtube!
Too Faced HangoverX Replenishing Face Primer / 40ml
Urban Decay Primer Potion (anti-age)
After coming to the revelation that I have hooded eyes, an eyeshadow primer has been a must. The Primer Potions by Urban Decay are the best I’ve tried so far. I currently use the anti-age formula because I read somewhere that no matter how old you are, using something anti-age on your eyes is a good idea – so why not kill two birds with one stone right?
Urban Decay Eyeshadow Primer Potion in Anti-Aging / 10ml
Nars Sheer Glow Foundation
How could this not be my favourite foundation of 2016?! It’s a cult fav. I love a dewy look because it balances out my naturally dry skin and gives that healthy look. Sheer Glow is also a great buildable foundation – 1pump is light, 2 medium, and 3 high coverage. It also doesn’t settle in lines (smile, forehead, etc.) as quickly as others I’ve tried.
Nars Sheer Glow Foundation in Mont Blanc / 30ml
NYX Contour Wonder Stick
So easy to use to contour without any hiccups. It’s smooth formula and stick design allows the product to be drawn on without having to worry about a heavy hand. The formula is so blendable that even if too much goes on it’s easy to blend away without looking muddy. I discovered this gem thanks to GinsMakeup on youtube.
NYX Wonder Stick Highlight and Contour Stick in Light/Medium / 4g
Too Faced Cocoa Contour Kit
My favourite for the second year in a row! I don’t like powder contour because of my dry skin – I steer away from powders as much as I possibly can – but this one ontop of the NYX Wonder Stick is a dream combination. The light cocoa powder is perfect for under the eyes to brighten and to use to set the T-zone.
$40USD
‘Chiseled to Perfection’
Too Faced Cocoa Contour Face Contouring and Highlighting Kit / 20g
RCMA No-Colour Powder
Powders aren’t my favourite because of my dry skin but this one is a BLESSING! How RCMA managed to make a fine loose powder that doesn’t cake up or suck the moisture out of my skin is a complete mystery! I again discovered this one through KathleenLights as well.
RCMA Make-up No-Colour Powder / 85g
Physicians Formula Butter Bronzer
Another dream product discovering thanks to KathleenLights; a bronzer and a contour all in one! I usually struggle with bronzers because of my pale skin, sometimes they look muddy and sometimes my face ends up being darker than the rest of my body – which is not good! But this bronzer is just the right amount of cool tone that it can pass for a bronzer if used with a big fluffy brush and all over the face, but can also pass for a contour if used slightly heavier in contour areas.
Physicians Formula Butter Bronzer in Bronzer / 11g
Mac Cosmetics Soft & Gentle Highlighter
Another cult fav; this highlighter used lightly (with a fan brush) can be natural and used a little heavier (with a more dense brush) can be a ‘night-out’ kind of glow. The natural effect is down to the fact that there is no chunky glitter in the powder and it is a mineralised finish.
Mac Cosmetics Mineralise Skinfinish in Soft & Gentle / 10g
Anastasia Beverly Hills Modern Renaissance Palette
This palette, pictured on the left, is one of a kind. No matter how many pop up because of the trend this started, none will compare. The shades such as Golden Ochre, Vermeer, Raw Sienna, Burnt Orange, Red Ochre, and Buon Fresco I have not seen in any other palette I’ve come across. They are such unique and renaissance shades. I get so much wear out of this palette. Vermeer is my go to inner-corner highlight shade, even if I’m using a completely different palette for the look.
Anastasia Beverly Hills Modern Renaissance Palette / 9.8g
BH Cosmetics ShaaanXO Palette
If you want a sunset on your eyes then this is the palette for you. The colours go on smoothly and don’t crease for a substantial amount of time. The shimmers are not too intense which makes them everyday wearable (if you don’t like full glam everyday). One side (shown) has 9 eyeshadows the other has 9 lip colours. The lipsticks I don’t use as much but there is a good mix of your standard pinks, reds, and nudes.
BH Cosmetics ShaaanXO 18 Colour Eyeshadow and Lipstick Palette / 24g
Mac Cosmetics Fluidline Brow GelCreme
This stuff has been with me almost 2years and it’s still going strong. The gel consistency gives ease when apply with an angled brush and allows me to nail the gradual hair like strokes at the front of my brows and the sharp point at the end.
Mac Cosmetics Fluidline Brow GelCreme in Deep Dark Brunette / 3g
Sephora Outrageous Curl Mascara
This mascara holds true to it’s name, the curl is outrageously good. Although the plastic applicator may be key to the formula working it’s a wee bit of a nuisance as you can’t shimmy/redistribute the product once it’s applied – I use an almost empty mascara wand or just a spare spoolie to feather out the lashes. But apart from that this is the best mascara I’ve ever used (and combined with Benefit’s Roller Lash Mascara, your lashes will be out of this world!)
Sephora Outrageous Curl Dramatic Volume and Curve Mascara / 15ml
Mac Cosmetics Fix + Spray
This spray is so refreshing and helps make-up fight the day and stay in place. It does what it’s supposed to brilliantly!
Mac Cosmetics Prep+Prime Fix + Spray / 100ml
Mac Cosmetics Stripdown Lip Liner & Velvet Teddy Lipstick
An iconic duo I bought thanks to GinsMakeup on youtube. These two are my go to brown nude everyday lip look. They both last the day and you only need a little top up of velvet teddy after eating.
Mac Cosmetics Velvet Teddy Lipstick & Stripdown Lip Liner.
Colourpop Liquid Lipsticks & Lippie Sticks
These liquid lipsticks took the world by storm this past year, and with all the hype I had to get my hands on them… now I have an obsession. Colourpop just does lips so well.
The mattes stay on all day (even through eating) and the formula is so thin that after a while you forget you’re even wearing it – some shades are more drying than others, but I’ve personally never had one that has been uncomfortable.
Ultra Matte Liquid Lipsticks
Creeper, Notion, Love Bug, Mama, Beeper, Chi
Knotty, Midi, Bad Habit, Viper, Chaps
Shades bottom to top; Creeper, Notion, Love Bug, Mama, Beeper, Chi, Knotty, Midi, Bad Habit, Viper, Chaps.
The satins are my favourite of their liquid lips because they stay on like mattes but are softer and less drying – the sheen they have also makes lips look more ‘plump’.
Shades left to right; Hutch, Wink, Baracuda, Calypso, Point Zero.
The gloss’ are so pretty are go great over any of their other lipsticks or any other brand you have in your collection, but they also look stunning on their own – a softer everyday look.
Shades left to right; My Jam (Metallic), Piranha, Fairyfloss, Hack, Nonsense, Kink, Furry (Metallic).
The Lippie sticks I originally didn’t like – I had first order a satin one and, although their colours are unique to the brand, the formula just feels like any old bullet lipstick with a creme or stain finish but slightly wetter. The Lippie stick mattes though..OH MY! Now they’re something to yell about, they’re not near as drying as the liquid ones (in fact not at all), and they don’t budge through eating and THEY DON’T BLEED! I ordered a red shade and red always, always bleeds on me (no idea why) but this one didn’t AT ALL! Truly magical.
Shades left to right; Aquarius, Trust Me…, Poppin’.
What was your favourite beauty product you discovered in 2016?
Love,
Geena xx
2016 Beauty Favourites | Some purchased thanks to @KathleenLights1 & @GinaShkeda | #nzbloggers Rose / Rosehip Oil Whether you've got dry or oily skin, including an oil of some sort in your routine is a brilliant idea.
#ABH#bh cosmetics#brushes#butter bronzer#cocoa contour kit#colourpop#contour#esssano#fix +#fluidline brow gelcreme#ginsmakeup#hangover primer#kathleenlights#lip liner#lippie sticks#lipstick#liquid lipsticks#mac cosmetics#mascara#modern renassaince#morphe#morphe brushes#nars#no-colour powder#nyx#physicians formula#prep + prime#primer potion#RCMA#real techniques
0 notes