#the jpeg artifacting is important
Text

holotype
#my art#digital illustration#clip studio paint#ocs#Tuskosuchus#my fursony :)#the jpeg artifacting is important#furry
2 notes
·
View notes
Text


TMNT 2003 Model Sheets and Concept Art Round 3: Raphael! He's got some fun ones, especially for Back to the Sewer!
Edit: Replaced the third image with a better quality version. This is why it's important to thoroughly check all versions of a file you have on hand so you don't accidentally upload one suffering from a major jpeg artifact problem.
145 notes
·
View notes
Note
how do you edit comics so good? how did you practice/any tips or advice? i want to edit comic art but i have no clue how to start
I'm between calls so this going to be rushed Whoops.
- start on pieces that have a similar style to your own. this just makes getting your brush settings right easier.
- fuck with your brush settings. Jpeg artifacting and the way older comics were scanned and printed adds a lot of Texture Jank that you need to match to make the edit seamless.
- touch as little of the piece as physically possible. Your hands and the ogs have different muscle memory and will make different decisions on how a line should lay. so, make as few changes as you can and feather the edited areas out (this also helps with hiding the texture jank not lining up perfectly)
and this one's important:
- Focus On Pieces That Fuck Up The Way You Tend To. Yes pointing and laughing is fun, being a pedant is one of life's joys. But critique of other art is fundamentally about self improvement. You don't critique a finished piece to improve It you critique to teach your brain how to not make those same mistakes and to see them in your own work. if other people benefit from seeing your process then that's just a bonus.
I started almost exclusively working on pretty ladies bc I'm a gay man and like drawing big hairy men and so had an Extreme Lack of ability when it came to drawing women pretty. (I can draw women pretty now)
- Once you're comfortable move on to other styles, trace the images, make your brushes match the lines in front of you line for line, use fewer layers. and just Learn how to match another person's hand. This plasticity is extremely useful bc it can make you more comfortable exploring new styles and the transitions between them in your own work fun and seamless.
#not a fix#i think thats everything#Like. study up and practice your stylization with reference materials bla bla bla but thats less editing specific
41 notes
·
View notes
Text
How WebP (and JPEG XL) is saving me tons of storage
(8 minutes read)

In this article, I will cover the underappreciated WebP digital image format as well as how I found its usefulness for me to take over even less storage, and also JPEG XL to some extent. This will cover my history with it as well as its perks over the common formats found on the web, and probably give you an important efficiency advice.
So, if someone mentions you the name "WebP", how would you react? The answer I'd expect would be either:
you simply have never heard of it before;
you actually did, but you've complained about its problems at least once and, as a result, always viewed it negatively;
you are not too annoyed by it, but you just don't know its point for existing in the first place.
I actually understand all of that. Back then, when the software I used couldn't take advantage of the image, just like many others, I also had a feeling that it was useless, so I could relate. I'd just convert it into either a PNG or a JPEG, both of which were formats that I used the most back then. I felt as if they are the easiest to pick up thanks to their extremely wide software compatibility. As a result, I used PNG, for Portable Network Graphics, the lossless compression format for much of my digital drawings, and JPEG, for Joint Photographic Experts Group, the ancient lossy compression format for highly-detailed images to prevent them from taking up too much space.
Initially, these formats looked pretty fine to me, since I used to export very light images only, which meant I didn't have to worry much about storage use. The images often weighed between 100 kB and 1 MB, on a 1 TB hard disk, so I could save hundreds of thousands of them only on that disk. However, as I started exporting artwork with higher resolutions and detail simultaneously, storage use became a problem for me. Some of them began to weigh at least 10 MB when encoded into PNGs. JPEG also had big issues that I noticed later on; its very ancient compression algorithm meant that, while I also used it to compensate for large images to be able to upload them faster, they become garbled as a result of artifacts appearing from the encoding. Finally, this year is where I began to think that it was time for an ultimate change to see if I could fix them all, and indeed there were ways.
Looking up information wasn't so hard, after all
After at least five years of relying on the most popular formats, JPEG and PNG, I began thinking that perhaps they weren't actually the best. The amount of times I used them throughout my life made me realize that I should start trying out alternatives. So by searching for them, what I ended up often seeing is the main point of this article: WebP, maintained by engineers at Google.
I actually read a few times about that format before then. The only thing I learned from it back then was that it could offer better compression than JPEG, which I initially neglected because of my previous experiences with it that I already mentioned. For a few years, I never really cared about it, until my curiosity for it finally rose and I realized that I was probably underestimating its value. After I read more about it, I was thrilled to see that it could also offer a better lossless compression than PNG, but I simply kept that in mind since I needed to wait before trying it out and adopting it entirely. Alongside WebP, I came across the JPEG XL format, announced by its developers (who were also behind the legacy JPEG) to be the universal replacement for the current major image formats, which is hard to dream of, but it's indeed interesting to know how it could succeed. Sometimes I saw AVIF alongside, but I never saw any interest in it.
With that in mind, I first wanted to take JPEG XL in priority, after comparing two images encoded in the former and WebP side-by-side. and noticing that JPEG XL's compression outperformed WebP, which is a huge comparison to both PNG and JPEG. Sadly, due to the lack of support for it which may be addressed in the future, I decided to go for the more universal WebP instead. Needless to say, I still had really good times with it, even if I wanted the other alternative, which is not a big deal for now.
The perks of WebP to know
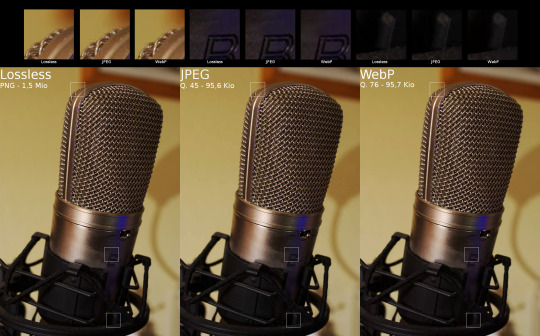
Being designed differently than PNG and JPEG, but also much later compared to them, WebP looks to address their issues and essentially become superior to them in several ways. It's actually a mix between both formats, meaning it can perform both lossy and lossless compression, with lossy meaning that artifacts will appear on the image, with their visibility depending on the compression strength, and lossless meaning that all detail will be kept on the image while still reducing its size, only less than lossy.
But it's not just that! WebP also has the following strengths:
Alpha blending, that is partial and full transparency, adopted by PNG;
Animation, adopted by PNG (did you know that?) and GIF;
Being an open format, letting anyone contribute to its development at any will (a rare Google W, by the way);
Less visible artifacts seen on lossy images, assuming that it has a similar size to the same image rendered in JPEG (demonstrated in the image above);
Stronger lossless compression than PNG (which I have bragging rights for);
A compatibility with several color spaces;
Oddly enough, "presets" (available only on some encoders), which seem to change the way images should be rendered...
...all of which can be combined together in a single image, even for animations. This is much more than what most other raster image formats offer, so with that single format, you can take advantage of its huge flexibility for multiple purposes! An amount of perks that is pretty outstanding, to say the least.
I tested this format out on a entire folder in which I kept fanart, most of which were PNGs. After converting them into WebP, and although it took a long time because of how large those images were in the first place, it resulted into about 50% of data being removed! So when considering that a collection of PNGs has a total of 1 GB of data, it's easy to notice how big of a difference 500 MB is compared to the former.
Conclusion
Despite what it seems to be for most people, WebP is a highly practical format. While its incompatibility with some popular software could be a deal-breaker for some, it still fares pretty strong with its multitude of features all combined together. While I am not convincing anyone reading this to immediately transition to that format as it could lead to some issues, it does deserve to be tested out by the average user to see how well it performs for them! Personally, WebP has helped me a lot for my main use cases, and while I was not in any tight situation before thinking of moving into it, I could definitely say it would let me avoid dealing with that for a much longer time.
If you appreciated WebP, that said, you should also check out the recently released JPEG XL format, designed with the same purposes but intended to be superior. There are still much more image formats that are meant to have their own big strengths, so you should keep looking for each of them too, in case you're interested.
This is the author of this article, Laddy, signing off now! I hope you all have a really lovely day, peace. 💙
4 notes
·
View notes
Text
memes are really interesting to me because like. they invite universal participation, become in-group signifiers etc, and most often they cannot be traced to one individual source. so, people will often say "it's just a joke" when a meme is criticized on some political basis. people are generally much quicker to make this defense of a meme as opposed to like, a stand-up comedian's joke. and I think this is because most often the meme is something that the person in question has "participated" in, in some way (retweeting or making their own version, or adopting the meme in speech with friends), so they feel some inclusion or ownership, so they feel more like they are implicated in the accusation of racism or whatever-it-is.
but of course, everything is political, maybe jokes especially, and maybe memes even more than ordinary jokes, because memes are actually a reflection of broader culture. a stand-up comedian's joke is a reflection of their own style, their own persona and their own opinions; so a criticism of that joke is a criticism of those things. but a meme is a reflection of a cultural moment that we may have participated in and enjoyed, and so a criticism of a meme speaks to things we do in our everyday lives, in our downtime. and in order for something to become a meme in the first place it has to have qualities that make it appeal broadly enough that most people won't think twice about hitting "share." so often the memes that get the most popular are basically pure reflections of popular opinions and values of the moment, and that's precisely why they are important and it's not silly at all to think and speak about their political implications.
i actually wouldn't be surprised if in future history classes, students end up studying memes like we did political cartoons for "document-based questions" on exams. this might already be happening for all i know. not to mention that the way a lot of memes are literally labeled with political signage (think wojaks/rage comics), they are more or less indistingushable from old-timey political cartoons, only now they have jpeg artifacts.
in conclusion,

3 notes
·
View notes
Note
[Bonked by the stick, all but the bonked Miku are incinerated by the power of NEO.]
hehe.. you might have won the battle, frisk... but you didn't realize one thing!
[Out of the cloud of ash that was once a Hatsune Miku flies the SORD.......!]
[It... bonks Spamton on the cheek on the blunt end. Spamton's natural shittiness combines with the SORD........ to create a cloud of pure deep-fried-ness!]
Mark my words... we WILL meet again!
[The artifact ball floats towards Hatsune Miku, and in a flash of high-contrast light, she disappears. In her place is... Toby, covered in residue and jpeg artifacts. What, did you think you could kill someone as narratively important as him?]
...
...
...
WHERE THE FUCK IS PAPYRUS!?!??!
14 notes
·
View notes
Text
extremely specific memory that i feel like someone else must have an analogue of somewhere
up until halfway through third grade until i was abruptly pulled out, i went to this pretty ritzy private jewish school attached to a massive community building that also had jewish summer camp, and so when it let out in the summer we’d all just hang out in this huge lobby and buy snapple from the cafe there.
the lobby was attached to this holocaust remembrance museum, which was also pretty ritzy. there were interactive displays there on touchscreens (and bear in mind, this was first established in like 2004 when that stuff was not widespread OR cheap to set up) that would let you get more in-depth about important military figures, donors, or where other things were in the building. a pretty big chunk of money went into this setup.
what i figured out pretty fast was that these touchscreen displays were still technically computers running regular-ass windows xp, just with a specialised program running on them, and that they’d have to be connected to the internet to function the way they did. if you could trick the holocaust program into crashing one way or another, or simply get clever with where the mouse was positioned so you could deselect the task or convince it to right-click (there was no keyboard in order to to maintain the illusion that these were specalised displays), you could back out of it and do whatever you wanted
and i was like 11 so what i wanted to do was play line rider.
there were security guards there, of course, but they were intensely focused on the front doors to keep people from trying to shoot up a school full of jews (something that sadly wound up being extremely necessary later on), and they had no reason to monitor us. why would they? there were a few counselors hanging around (also waiting to leave), we didn’t break things, we knew better than to try and climb inside the displays and touch historical artifacts. if a bunch of kids want to crowd around a monitor and be really, really, really into holocaust remembrance for some reason, more power to them!
for about two weeks i was the coolest kid in camp for knowing how to “hack” the boring touchscreen display computers and get not only flash games working, but also this cool new website called “youtube” that had just come out and had all sorts of craaaaaazy videos on it! the computers were slow as hell (they were super cheap prefabs never meant to do more than display text and jpegs), and you had to fight with the mouse the entire time, but unlike school computers these ones didn’t have a website filter on them because presumably nobody anticipated someone hijacking it to (attempt to, remember no keyboard) play fancy pants adventure.
i never got directly caught in the act, but i guess someone else, or perhaps i, must have forgotten to bring the holocaust program back up when they were done. or maybe they decided to look into all the crash reports the computer must have been logging for their low-resource holocaust info widget. either way, one day i came back to find someone stationed by the kiosks and admin permission required to even run the browsers. the moral of this story is cover your goddamn tracks or you’ll ruin it for everyone i guess.
4 notes
·
View notes
Text
How to Make Your Product Photos Pop with Editing
In the competitive realm of e-commerce, striking product photos are key to capturing the attention of potential customers. High-quality images not only enhance the appeal of your products but also instill trust and professionalism. To ensure your product photos stand out, mastering the art of photo editing is essential. This comprehensive guide will walk you through the best practices and techniques to make your product photos pop.
1. Understanding the Importance of Product Photo Editing
Product photo editing is crucial for several reasons. It helps in highlighting the product's features, removing any imperfections, and creating a consistent look across all images. Properly edited photos can significantly increase conversion rates and reduce return rates by providing a clear and accurate representation of the product.
2. Choosing the Right Editing Software
Selecting the right editing software is the first step. Popular options include Adobe Photoshop, Adobe Lightroom, GIMP, Capture One Pro, and Affinity Photo. These tools offer a wide range of features that cater to both beginners and professionals.
3. Basic Adjustments: Exposure, Contrast, and White Balance
Start with the basics. Adjust the exposure to ensure the image is neither too dark nor too bright. Increase contrast to make the product stand out against the background. Correct the white balance to ensure the colors are accurate and true to life.
4. Cropping and Straightening
Cropping helps in focusing on the product and removing any unnecessary background elements. Ensure the product is centered and fills the frame appropriately. Straighten the image to make sure all lines are horizontal and vertical, giving it a professional look.
5. Background Removal and Replacement
A clean, distraction-free background highlights the product. Use tools like the pen tool or magic wand in Photoshop to remove the background. Replace it with a solid color or a simple gradient to make the product stand out.
6. Enhancing Colors and Saturation
Vibrant colors make product photos more appealing. Use the saturation and vibrance adjustments to enhance the colors without making them look unnatural. Be cautious not to overdo it, as overly saturated images can look unrealistic.
7. Retouching and Cleaning Up
Remove any blemishes, dust, or scratches using tools like the healing brush and clone stamp. Smooth out surfaces and correct any imperfections to ensure the product looks flawless.
8. Sharpening for Clarity
Sharpening enhances the details and textures of the product. Use tools like Unsharp Mask or Smart Sharpen to make the product appear crisp and clear. Again, avoid over-sharpening, which can introduce noise and artifacts.
9. Using Layers and Masks for Non-Destructive Editing
Working with layers and masks allows for non-destructive editing. This means you can make changes without altering the original image. It also makes it easier to experiment with different adjustments and revert to previous states if needed.
10. Adding Shadows and Reflections
Adding shadows and reflections can give your product photos a professional, polished look. Use layers to create realistic drop shadows and reflections that match the lighting of the scene.
11. Utilizing Presets and Actions for Efficiency
Presets and actions are pre-recorded sets of editing steps that can be applied with a single click. They are useful for maintaining consistency across multiple images and speeding up the editing process.
12. Batch Processing for Multiple Images
When dealing with a large number of photos, batch processing can save a significant amount of time. Most editing software allows you to apply the same adjustments to multiple images simultaneously.
13. Exporting for Web
Ensure your images are optimized for the web. Export them in the appropriate format (JPEG, PNG) and resolution to balance quality and file size. Properly compressed images load faster, improving user experience and SEO.
14. Creating Consistency Across Product Photos
Consistency is key in product photography. Ensure all your product photos follow a similar style, background, lighting, and color scheme. This creates a cohesive look on your website and strengthens your brand identity.
15. Staying Updated with Trends and Techniques
The field of photo editing is constantly evolving. Stay updated with the latest trends and techniques to keep your product photos fresh and engaging. Follow industry blogs, join photography forums, and take online courses to continually improve your skills.
Conclusion
Mastering product photo editing is essential for creating images that captivate and convert. By following these detailed steps and utilizing the right tools, you can ensure your product photos stand out in the crowded online marketplace. High-quality, professionally edited images not only attract more customers but also build trust and drive sales.
0 notes
Text
How to Make Your Product Photos Pop with Editing
In the competitive realm of e-commerce, striking product photos are key to capturing the attention of potential customers. High-quality images not only enhance the appeal of your products but also instill trust and professionalism. To ensure your product photos stand out, mastering the art of photo editing is essential. This comprehensive guide will walk you through the best practices and techniques to make your product photos pop.
1. Understanding the Importance of Product Photo Editing
Product photo editing is crucial for several reasons. It helps in highlighting the product's features, removing any imperfections, and creating a consistent look across all images. Properly edited photos can significantly increase conversion rates and reduce return rates by providing a clear and accurate representation of the product.
2. Choosing the Right Editing Software
Selecting the right editing software is the first step. Popular options include Adobe Photoshop, Adobe Lightroom, GIMP, Capture One Pro, and Affinity Photo. These tools offer a wide range of features that cater to both beginners and professionals.
3. Basic Adjustments: Exposure, Contrast, and White Balance
Start with the basics. Adjust the exposure to ensure the image is neither too dark nor too bright. Increase contrast to make the product stand out against the background. Correct the white balance to ensure the colors are accurate and true to life.
4. Cropping and Straightening
Cropping helps in focusing on the product and removing any unnecessary background elements. Ensure the product is centered and fills the frame appropriately. Straighten the image to make sure all lines are horizontal and vertical, giving it a professional look.
5. Background Removal and Replacement
A clean, distraction-free background highlights the product. Use tools like the pen tool or magic wand in Photoshop to remove the background. Replace it with a solid color or a simple gradient to make the product stand out.
6. Enhancing Colors and Saturation
Vibrant colors make product photos more appealing. Use the saturation and vibrance adjustments to enhance the colors without making them look unnatural. Be cautious not to overdo it, as overly saturated images can look unrealistic.
7. Retouching and Cleaning Up
Remove any blemishes, dust, or scratches using tools like the healing brush and clone stamp. Smooth out surfaces and correct any imperfections to ensure the product looks flawless.
8. Sharpening for Clarity
Sharpening enhances the details and textures of the product. Use tools like Unsharp Mask or Smart Sharpen to make the product appear crisp and clear. Again, avoid over-sharpening, which can introduce noise and artifacts.
9. Using Layers and Masks for Non-Destructive Editing
Working with layers and masks allows for non-destructive editing. This means you can make changes without altering the original image. It also makes it easier to experiment with different adjustments and revert to previous states if needed.
10. Adding Shadows and Reflections
Adding shadows and reflections can give your product photos a professional, polished look. Use layers to create realistic drop shadows and reflections that match the lighting of the scene.
11. Utilizing Presets and Actions for Efficiency
Presets and actions are pre-recorded sets of editing steps that can be applied with a single click. They are useful for maintaining consistency across multiple images and speeding up the editing process.
12. Batch Processing for Multiple Images
When dealing with a large number of photos, batch processing can save a significant amount of time. Most editing software allows you to apply the same adjustments to multiple images simultaneously.
13. Exporting for Web
Ensure your images are optimized for the web. Export them in the appropriate format (JPEG, PNG) and resolution to balance quality and file size. Properly compressed images load faster, improving user experience and SEO.
14. Creating Consistency Across Product Photos
Consistency is key in product photography. Ensure all your product photos follow a similar style, background, lighting, and color scheme. This creates a cohesive look on your website and strengthens your brand identity.
15. Staying Updated with Trends and Techniques
The field of photo editing is constantly evolving. Stay updated with the latest trends and techniques to keep your product photos fresh and engaging. Follow industry blogs, join photography forums, and take online courses to continually improve your skills.
Conclusion
Mastering product photo editing is essential for creating images that captivate and convert. By following these detailed steps and utilizing the right tools, you can ensure your product photos stand out in the crowded online marketplace. High-quality, professionally edited images not only attract more customers but also build trust and drive sales.
1 note
·
View note
Text
The Best Solution to Fix QR Code Blurry Online in 2024

In the ever-evolving field of digital communications, QR codes have become an indispensable tool for seamlessly connecting the real and virtual worlds. From marketing campaigns to contactless payments, QR codes enable efficient information exchange with a simple scan. However, as technology advances, so do challenges, and a long-standing problem faced by users is encountering ambiguous QR codes. These obscure codes can impede the flow of information. In 2024, with the rapid advancement of online tools and solutions, we urgently need an effective method to repair blurry QR codes quickly and accurately.

The Wide Application of QR Codes in Daily Life
In daily life, everyone can easily scan them using a smartphone or a special QR code scanner to obtain various information, making it a versatile tool suitable for various applications. QR codes are also widely used in the following industries:
• Retail: QR codes are used for inventory management, providing product information and facilitating mobile payments.
• Marketing: They effectively engage customers by linking to promotional content, websites and social media pages.
• Logistics: QR codes simplify the tracking and management of goods throughout the supply chain.
• Healthcare: They provide quick access to patient records and medication information.
• Events and Ticketing: QR codes are used for paperless admission and provide event details.
So clear QR codes are essential in any industry.

Why The QR Codes Become Blurry?
There are many reasons why QR code becomes blurred, but common reasons include:
Printing Errors: Errors or problems in the printing process may lead to blurred QR code. This could include low-quality printed material, misaligned printing positions, or incorrect printer settings.
Low-resolution Images: The QR codes generated from low-resolution images may appear blurred, especially when magnified or printed in a larger sizes. Using high-resolution images can ensure a clearer QR code.
Physical Damage: Physical damage (such as scratches, stains or folds) of the QR code can lead to distortion and blurring. This may happen when handling, transporting or exposed to harsh environmental conditions.
Compression Artifact: When QR codes is saved or transmitted in a compressed format (such as JPEG or PNG), compression artifact may appear, resulting in image quality degradation and blur.
Environmental Factors: Poor lighting or environmental factors such as dirt, dust or humidity can affect the readability of QR codes, especially for outdoor signs or labels that have been weathered for a long time.
This is very important for you to obtain important information! Therefore, it is necessary to ensure the clarity of the QR code. However, it is inevitable that you will encounter various situations that can not be solved. You can read this article, which will provide the most comprehensive method to fix the fuzzy problem of QR code!
QR Code Blurry: How to Ensure Successful Scanning and Improve User Experience
Online Tools and Solutions to Fix Blurry QR Codes
iFoto Photo Enhancer
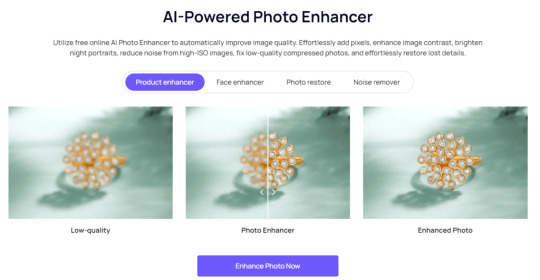
iFoto Photo Enhancer is an AI-powered tool designed to improve the quality and resolution of images, making them sharper and clearer. It is especially useful for e-commerce enterprises, digital marketers and social media managers who need to quickly and efficiently create professional-looking product images. This tool specializes in enhancing the clarity of QR codes through automated image processing algorithms.
Pros:
Editing Efficiency: it simplifies the photo editing processes and can achieve fast and professional results.
Diversified Tools: Provide customized solutions for various types of e-commerce.
Cons:
None.
PicWish
PicWish is designed to enlarge images, including QR codes, up to 8x online without causing blurriness.It's a practical choice for maintaining the quality of QR codes when scaling them to larger sizes. However, users should be aware of its limitations regarding performance and file size compatibility.
Pros:
Versatility: It supports various file formats like JPG, PNG, GIF, and TIFF, and offers features like background removal, upscaling, sharpening, retouching, compressing, and cropping.
Free Version Available: PicWish offers a free version that provides access to many of its features, making it accessible for users who need basic touch-ups without any cost.
Cons:
Occasional Performance Issues: Some users have reported stuttery performance, which might affect the editing process.
Mobile App and Web Version Sync: There may be inconsistencies between the mobile app and the web version, which could be inconvenient for users who switch between them.

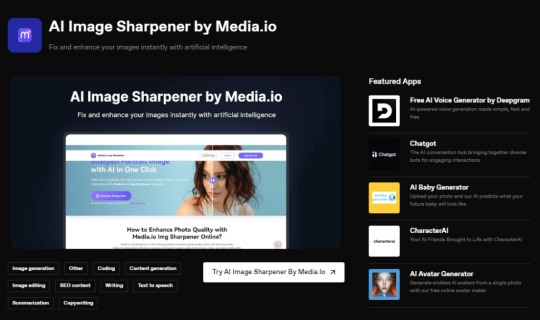
Deepgram
As the name suggests, Deepgram sharpens blurry QR code images, making them clearer and easier to scan.It's a straightforward solution for quickly enhancing the quality of QR codes.
Pros:
Improved Readability: The primary advantage is the ability to make QR codes more scannable, which is essential for their functionality.
Quick Fixes: They can provide quick solutions to common problems like blurriness without the need for complex editing software.
Cons:
Limited Recovery: If a QR code is significantly damaged or extremely blurry, the tool may not be able to recover it fully.
Dependence on Quality: The effectiveness of the sharpening process can depend on the original quality of the QR code image.
Potential for Overuse: Over-sharpening can lead to distortion, which might make the QR code unreadable.
ProductFeaturesCompatibilityPricingUser RatingsiFoto Photo EnhancerAdvanced image enhancement algorithms, error correction capabilities, batch processing optionsCompatible with various file formats and QR code typesFree basic version, premium plans available4.7/5 stars based on user reviewsPicWishIntuitive user interface, customizable settings, support for high-resolution imagesCompatible with most devices and operating systemsFree to use with optional premium features4.5/5 stars based on user reviewsDeepgramAI-driven image enhancement, real-time preview, multi-platform supportWorks with all QR code formats and generationsSubscription-based pricing with free trial available4.2/5 stars based on user reviews
How to Use iFoto to Enhance QR Code Clarity?
To improve QR code clarity, you can use the iFoto, which provides powerful image enhancement and optimization tools. Please follow the steps below to effectively improve the clarity of the QR code:
Upload the QR Code
Navigate to the iFoto website or open the application. Locate the upload section and select the blurry QR code image from your device, and wait for the image to upload completely before proceeding.

Select Enhancement Tools
Once the image is uploaded, access the editing tools provided by iFoto. Look for tools specifically designed for image sharpening, contrast, and brightness adjustments.
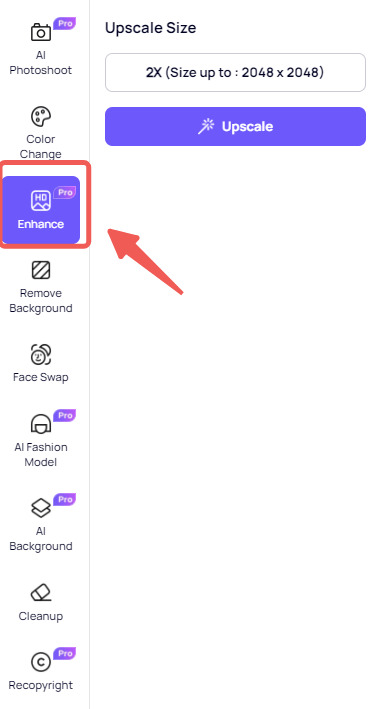
Apply Enhancements
Use the sharpening tool to reduce blurriness. Adjust the level of sharpness carefully, too much can distort the QR code. Then adjust the contrast and brightness to make the black and white squares of the QR code stand out more clearly. If available, use any deblurring tools to further enhance the image quality.
Preview Changes
After applying the enhancements, preview the changes to ensure the QR code is clear. Compare the before and after images side by side if possible. And make sure the QR code squares are distinct and the edges are not pixelated.
Save and Download
Once satisfied with the enhanced QR code, save the changes. Download the improved QR code image to your device. You can test the QR code with a scanner to ensure it works correctly.
Conclusion
iFoto QR Codes Sharpen can significantly improve user participation, simplify processes and improve customer experience. By fixing the blurred QR codes in iFoto Photo Enhancer, you can ensure the accessibility, reliability and security of the QR codes, and expand your product information more quickly. The quality of your QR code reflects your brand and the quality of service. Don't let such small details as ambiguity destroy your potential for innovation. Start applying these best practices today and establish a new standard of excellence in your industry. Your QR code is not only a pattern. They are also the digital image of your brand!
Read the full article
0 notes
Text
Dave Strider, Davesprite
Act 5, page 2835-2837
DAVE: sup
DAVESPRITE: hey
DAVESPRITE: oh looks like you got caledfwlch
DAVESPRITE: you found that pretty fast
DAVE: is that how you pronounce that
DAVESPRITE: yeah i guess so
DAVESPRITE: i think its welsh
DAVE: what are welsh things doing in this game
DAVESPRITE: thats an awesome question
DAVE: fuck yeah it is
DAVE: is this thing as pointless as i think it is or do i need it for something
DAVESPRITE: tactically yeah its a downgrade since its what i used to make caledscratch which is obviously way better
DAVE: yeah thats what i figured
DAVESPRITE: caledscratch cycles the sword through its own timeline to points when its broken or nonbroken or old and rusted or recently forged etc
DAVESPRITE: and your snoop snowcone swords probably even better than that so yeah you got options
DAVE: fuck it ill just power through the rest of the game with the SORD.....
DAVESPRITE: hahahaha
DAVESPRITE: with unreal air as a mount fit for a true artifact knight
DAVE: yeah
DAVE: goddamn jpeg hero
DAVE: right here
DAVESPRITE: did that shit ever land or what
DAVE: dude its long gone
DAVE: up in skaia now or something
DAVE: thrashing ill grinds on clouds
DAVESPRITE: fuck
DAVESPRITE: top priority make more
DAVESPRITE: thats an order from your celestial fuckin spirit guide
DAVE: yeah you got it
DAVE: so why wasnt this legendary pos in the sylladex you gave me
DAVE: did you chuck it after you alchemized it
DAVE: should i just chuck it too
DAVESPRITE: it was stolen
DAVESPRITE: by one of hephaestus's minions
DAVE: hes the denizen right
DAVESPRITE: yeah lord of the forge
DAVE: isnt that like a greek god
DAVE: or roman or whatever
DAVE: what is greco roman shit doing in here you know what never mind
DAVESPRITE: yeah pretty much
DAVESPRITE: anyway he gets pissed off you broke it
DAVESPRITE: and he wants it back
DAVESPRITE: to do something important with it though not really sure what
DAVESPRITE: hes a pretty ornery dude
DAVESPRITE: kept raving about how he was waiting for the forge to come
DAVESPRITE: which he needs to complete his work
DAVESPRITE: but in my timeline the forge would never come
DAVESPRITE: so he was extra pissed off
DAVE: whats the forge
DAVESPRITE: volcano
DAVE: huh
DAVE: you mean jades volcano
DAVESPRITE: yup
DAVE: so do you know this stuff cause youre from the future or cause youre a sprite
DAVESPRITE: both
DAVESPRITE: theres all sorts of stuff i suddenly knew about the game when i became this orange feathery asshole
DAVE: so now youre like
DAVE: a wise feathery asshole
DAVESPRITE: i am fuckin filthy with wisdom its sick
DAVESPRITE: i mostly know stuff about your personal quest
DAVESPRITE: what used to be my quest but i guess i got to deal with not being alpha dave no more
DAVE: yeah i guess
DAVESPRITE: shrug
DAVESPRITE: its all good
DAVESPRITE: anyway that sword
DAVESPRITE: its important to getting your shit figured out
DAVESPRITE: you were supposed to break it to get it out of the thing
DAVESPRITE: like another personal sort of mythological milestone you were supposed to clear
DAVE: really
DAVE: there was no other way to get it out
DAVE: thats kind of retarded
DAVESPRITE: well i dont know
DAVESPRITE: maybe if john was to try with his pure heart and shit it woulda popped out like a champagne cork and fuckin hero confetti woulda blasted him in the face
DAVESPRITE: but you
DAVESPRITE: we
DAVESPRITE: we had to break it
DAVE: ok
DAVESPRITE: theres a lot more i know about your quest
DAVESPRITE: all tangled up in ridiculous riddles and bullshit enigmas
DAVESPRITE: and maybe its all a moot point anyway in this timeline who knows
DAVESPRITE: but i think ill spare you all that crap
DAVESPRITE: cause its kind of boring
DAVESPRITE: and youll find out anyway
DAVE: yeah
DAVE: that sounds about like something id do if i were you
DAVE: which i am
DAVE: so hey
DAVE: apparently im about to fall asleep
DAVESPRITE: oh yeah why
DAVESPRITE: rose beckoning you again
DAVE: yeah probably
DAVE: anyway monsters will show up soon and try to eat my sleeping corpse
DAVESPRITE: yeah they werent too happy with my reckless indiana jones bullshit either
DAVE: yeah
DAVE: so thats where you come in
DAVESPRITE: i got your back dude dont worry
DAVE: ok
DAVE: guess ill make myself comfortable here
DAVESPRITE: when you wake up
DAVESPRITE: ill probably get going
DAVE: what do you mean
DAVESPRITE: ill just sort of
DAVESPRITE: release myself
DAVESPRITE: go do my own thing
DAVESPRITE: after this i dont think youll need me
DAVESPRITE: seems like youve got the stable time loop thing figured out already
DAVESPRITE: which means youll be alright
DAVESPRITE: future yous will get you out of trouble
DAVESPRITE: if youre gonna live up to the responsibility of eventually becoming them
DAVESPRITE: and by virtue of loop stability it sort of means you cant technically fuck up anymore
DAVESPRITE: but dont let that idea go to your head itll mess you up
DAVE: where will you go
DAVESPRITE: dunno
DAVESPRITE: fly around
DAVESPRITE: up away to the sun like a fucknig piece of gargbage
DAVESPRITE: see if i can catch up with bro maybe
DAVESPRITE: elusive bastard
DAVE: oh yeah
DAVE: where do you think he is
DAVE: what happened to him in your timeline
DAVESPRITE: who knows
DAVESPRITE: i completely lost track of him
DAVESPRITE: in that timeline and this one
DAVESPRITE: the dude is fucking inscrutable we both know that
DAVE: yeah
DAVE: ok good luck with that
DAVESPRITE: thanks man
#homestuck#dave strider#davesprite#homestuck act 5#page 2835#page 2836#page 2827#homestuck act 5 act 2
1 note
·
View note
Text
Tangential to this thread, I'm not entirely sold on the technical merits of webp. From what I've seen it's better at minimizing artifacts than jpeg but worse at preserving texture, and I think the latter is at least as important, depending on the image, for perceptual image quality
0 notes
Text
Ready for a Change? How does JPG to PNG Converter Elevate Your Images?

In the world of digital imagery, the format you choose can significantly impact the quality and versatility of your visuals. One of the most common image format transitions is from JPG (or JPEG) to PNG. But why do so many creators opt for this change? What benefits does converting JPG to PNG offer, and how does a converter play a pivotal role in this transformation?
In this blog, we'll explore how a JPG to PNG converter can elevate your images and why it might be time for you to make the switch.
Understanding the Difference
Before diving into the advantages of using a JPG to PNG converter, let's first understand the key differences between these two formats:
JPG (JPEG):
Compressed format: Great for reducing file size.
Lossy compression: Can result in some loss of image quality.
Supports millions of colors, making it ideal for photographs.
Doesn't support transparency.
PNG:
Lossless format: Retains image quality without compression artifacts.
Supports transparency (alpha channel): Perfect for images with varying levels of opacity.
Suitable for graphics, illustrations, and images with sharp edges.
Larger file sizes compared to JPG due to lossless compression.
Advantages of Converting JPG to PNG:
Now that I have clarified the differences between JPG and PNG, let's explore how converting from JPG to PNG can elevate your images:
Preservation of Image Quality: One of the most significant advantages of converting to PNG is the preservation of image quality. PNG is a lossless format, meaning it doesn't compromise on image fidelity. This is crucial for graphics, logos, and images where every detail matters.
Transparency: PNG's support for transparency, including partial transparency (alpha channel), opens up a world of creative possibilities. You can easily overlay images on different backgrounds or create stunning visual effects that were previously challenging with JPG.
Text and Line Art: If your images contain text or line art, converting to PNG is a smart move. PNG's lossless compression ensures that sharp edges and text remain crisp and legible, making it a preferred choice for logos and designs.
Editing Flexibility: PNG images are ideal for editing because they maintain their quality through multiple saves. You can make adjustments without worrying about degradation, a common concern with JPG files.
Versatile Usage: While JPG is excellent for photographs, PNG is versatile and suitable for a wide range of applications. Whether you're designing web graphics, icons, or digital artwork, PNG can handle it all.
The Role of a JPG to PNG Converter:
Now, let's discuss the importance of a JPG to PNG Converter in this transition:
Efficiency: A good converter simplifies the process, allowing you to batch convert JPG files to PNG effortlessly. This saves you time and ensures a consistent output.
Quality Control: Quality matters, and a reliable converter ensures that the converted PNG images retain the high quality you expect, without any loss or distortion.
Convenience: With an intuitive interface, converters are designed for user-friendliness. You don't need to be a tech expert to make the switch to PNG.
Conclusion:
In the world of digital imagery, making the change from JPG to PNG can be a game-changer for your visuals. It's all about elevating your images to the next level of quality, versatility, and creativity. Whether you're a graphic designer, photographer, or content creator, a JPG to PNG converter is your essential tool for making this transition smooth and efficient.
So, are you ready for a change? Embrace the power of PNG and discover how it can enhance your image quality, transparency, and editing flexibility. With the right converter by your side, you'll be well on your way to unlocking a new level of visual creativity.
0 notes
Text
Background Removal service - Clipping Next
Background removal services are offered by various companies and online platforms to help remove the background from photos or images. This service is often used for various purposes, such as product photography, e-commerce listings, portrait editing, and graphic design. Here's how background removal services typically work:

Upload or Submit Image: You start by uploading or submitting the image that you want to have the background removed from. Some services allow you to do this directly through their website or app.
Manual or Automated Editing: Depending on the service and your specific needs, the background removal can be done manually by a skilled graphic designer or automatically using software algorithms. Manual editing tends to be more precise and is often used for complex images, while automated tools are quicker and suitable for simpler images.
Background Removal: The service will isolate the subject or object in the image from its background. This is achieved by creating a precise selection or mask around the subject, separating it from the background.
Background Replacement (Optional): After removing the background, you may have the option to replace it with a new background or leave it transparent, depending on your preferences.
Quality Check: The edited image is typically reviewed for quality and accuracy to ensure that there are no artifacts or imperfections left in the final result.
Delivery: Once the background has been successfully removed, the edited image is delivered to you in the desired format (e.g., JPEG, PNG) via email or through the service's platform.
It's important to note that the quality of background removal services can vary depending on the service provider and the complexity of the image. Simple images with well-defined subjects are generally easier to edit, while more complex images with intricate details may require more time and expertise.
#clipping path service#professional photoshop services#best clipping path service#remove background from image photoshop#clipping path service usa#photo editing services#clipping usa#color correction service#image editing service#clipping path service company
0 notes
Text
A Step-by-Step Guide for Using Online Image Compressor for Free

Images are the most expressive type of content on the internet these days. Whether you have a website or an app, images let the customer visualize the content on your website. Thus it enhances the user experience. With the evolution, everything is getting online. Whether you want to shop or learn, you say it, and it’s here on the internet. This is the main reason for the increased number of websites. The use of the images transfers the information to the user and it’s the major factor in a website storytelling process.
But, using images in JPEG or PNG formats makes the website heavy. It results in a decrease in the speed of the website. The user gets frustrated and hence it will face an increased bounce rate. If the problem is caused by images, solve it by using image compression. You simply need to use any tool or software to compress images. Image compression is not only used for websites. You can also use it to save space on your systems making room for more things. To save you from any hassle, we have come up with this guide to use image compressor.
We have discussed enough of the problems, now let’s dive into the solution for the same.
All about image compressor:
Image compression removes or reduces the irrelevant image data that takes up the space. On this note, we can say that image compression is the process of minimizing the image size in bytes. You can do it by removing bytes of information from the image. On the contrary, use an image compression algorithm. This will rewrite the image file. Thus you can reduce the storage space and accommodate more images. With a light image, the website’s performance increases. The fast-loading image is more interactive on a website than a slower one. You can say that image compression is an important phenomenon in image optimization.
Types of image compression:
Image compression depends on the type of image you are using. There are basically two types based on which images are classified. These are:
1. Lossless Compression
2. Lossy Compression
Let’s see some details about each of them:
1. Lossless Compression :
By lossless compression, it means that when images are compressed the quality is not lost. It does not remove any part of the image. So, the image is not that much reduced. It is mostly used to archive the images.
Different types of lossless images are:
PNG – Compresses pictures to keep them compact by searching for patterns in photos and compressing them together. Because the compression is reversible, the image restores immediately when you open a PNG file.
RAW – Found in many DSLRs and stores all light data from the camera’s sensor. This is fantastic news for a professional. These file formats, however, tend to be fairly enormous in size. There are also multiple versions of RAW, and you may require certain tools to edit the files.
BMP – A format that is unique to Microsoft. It is lossless, although it is rarely used.
2. Lossy image compression:
Lossy image compression keeps the image’s most important information while discarding every pixel. It generates compression artifacts, especially when utilized at low bit rates. Lossy compression decreases picture size by deleting certain image components. It removes tags that aren’t necessary. If you use this strategy, you may acquire a smaller version of an image with only a minor reduction in quality. You will also enjoy a quicker loading speed.
Different types of lossless images are:
JPG: Also known as JPEG, this format removes bits and pieces of a photograph that may be visible depending on the amount of compression used. Normal compression will not be evident, however high compression will be.
GIF: GIF is a file compression format that reduces the amount of colors in a file. This format will make the image appear less attractive if it includes more than 256 colors (the maximum number of colors that previous computers could have). The ideal applications for GIFs are animated pictures.
WebP: Although it provides lossless compression, it is most typically used for lossy image compression. Google has created to replace the JPEG, PNG, and GIF file formats.
High Efficiency Image Format (HEIF): The High Efficiency Image Format (HEIF) is a form of container file for compressed images. Images compressed in this manner are commonly referred to as HEIC files.
Key Features of Image Compressor:
An online image compressor is a necessary tool for improving digital photos. Its primary qualities make it important for a wide range of applications. Data compression can help you conserve storage space, speed up file transfers, and save money on storage. Redundancy and irrelevancy are the two primary ideas employed in picture compression. JPEG and JPEG 2000 are two prominent picture compression formats. The main advantage of compressing a picture is that it takes less time to load on a web page. Metadata Preservation guarantees that key information such as EXIF data is kept. It is critical for photographers and digital archivists. Integration with many platforms enables the smooth use of various software and apps. It improves usability across many processes. These fundamental capabilities make image compressors essential for anybody wishing to manage and distribute digital photographs efficiently.
Steps to use image compressor:
You have learned about image compression. Now let’s move on to the steps to use an image compressor.
1. Select an Image Compression tool:
To start the compression, you need to pick an image compression software. When selecting it, you must check whether it meets your requirements or not. There are several solutions accessible online. Some are free and others paid, each with its unique set of features and capabilities.
Read rest of the steps here
0 notes
Text
What is Content Digitization?
To create the final reel of a 3D animation, a number of skills are needed. A 3D modeler, 3D rigging artist, texturing artist, layout artist, 3D animator, renderer artist, and maybe a compositor are all needed for the project. Grab an opportunity to learn from the best 3D animation courses in Pune.
Content digitization is the process of transforming physical content, such as books, documents, images, and videos, into digital formats that can be easily accessed, searched, and shared. The goal of content digitization is to preserve and make information easily accessible for future generations while also providing greater convenience and accessibility for users in the present.
The process of content digitization involves scanning or converting physical content into digital formats such as PDF, JPEG, MP4, and other file formats. This process often involves specialized software and equipment, such as high-speed scanners or cameras, to ensure that the digital copies are of high quality and resolution.
One of the key benefits of content digitization is that it allows for greater accessibility and convenience for users. Digitized content can be easily accessed from anywhere in the world using a computer or mobile device, making it easier for people to access and share information. In addition, digitized content can be easily searched, making it easier to find specific information or keywords within a document or video.
Content digitization is also beneficial for organizations and institutions that need to preserve valuable historical or cultural artifacts. By digitizing these materials, they can be stored and preserved in a secure digital archive, ensuring that they are protected from physical deterioration or loss.
Another benefit of content digitization is that it provides greater flexibility for content creators and publishers. By digitizing content, it can be easily distributed and shared with a wider audience, and can even be monetized through digital sales and licensing. This has led to the rise of digital publishing and e-commerce platforms, which have revolutionized the way that content is created, distributed, and consumed.
Overall, content digitization is an important process that has transformed the way that we access, preserve, and share information. By converting physical content into digital formats, we can ensure that valuable information is preserved for future generations, while also providing greater convenience and accessibility for users in the present.
0 notes
Last Seen Blogs

velesej
Velesej

catboy-beb0p
All horses are libertarians

girishdas
Untitled

gingerhulksmash
Shrubbery.

hotlinefb
HotlineFB