#supersampler
Explore tagged Tumblr posts
Text
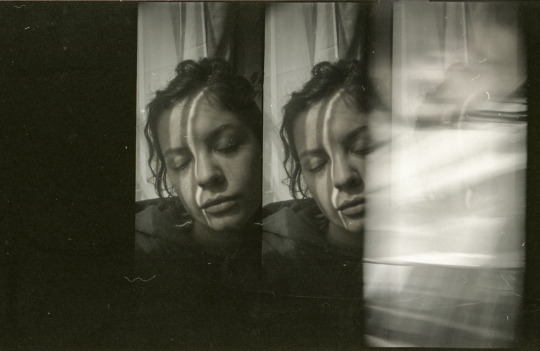
lomography supersampler
#film photography#35mm photography#35mm flim#35mm#filmisnotdead#analog#35mmclub#self portrait#expired film#lomophotography#lomography#lomo#supersampler
147 notes
·
View notes
Text
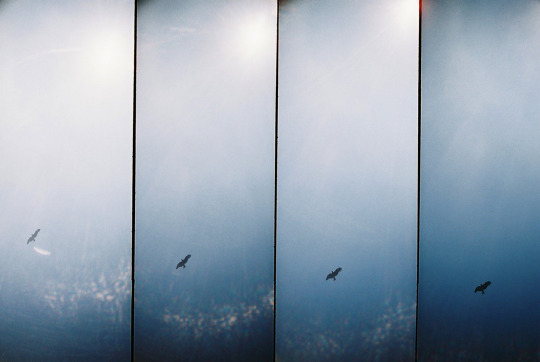
とんび
4 notes
·
View notes
Text
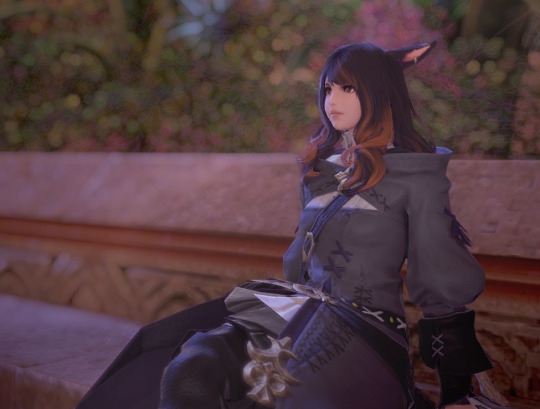
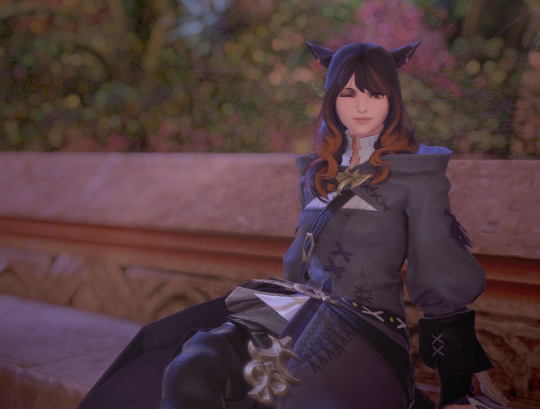
Now, a game with an expressive pose system is really something else, huh?
Alternate sitting poses? Independent head direction and facial expression? This game is indulging me too much.
#now if only i could figure out some supersampling for it...#ffxiv#lico brightlily#ffxiv photography#in-game photography
17 notes
·
View notes
Text
idk if I'm just unlucky but ever since I started doing diff 7 missions for supersamples this last week in helldivers the quality of random teammates has plummeted like a boeing plane fresh off the assembly line. Missions barely get completed if at all and every one has at least one person drop before the end. The worst part by far is the kicking. The moment you annoy someone as host, you're gone and your time is wasted. I think I'm done with the game for a while until they add a vote to kick feature or something.
Some notable squadmates from hell include:
-A guy who had music blaring so loud into his mic at all times that it just sounded like white noise and he tried to scream over it to communicate. -A charming fellow who called me a slur the exact second I loaded onto his destroyer and kicked me immediately. -At least three separate instances of someone teamkilling at extract. -A host who said nothing for 90% of the mission until extract wherein he started calling the rest of the team losers and cowards for not doing all the objectives then kicked us before we could get on the ship to leave. He sounded like he was 7. -A guy who insisted several times that he would handle the samples. He barely participated in fights, killed us and took our samples whenever we picked one up, and ultimately lost them all anyway at extract because he wasn't paying attention and got flattened by a charger while searching. He blamed the rest of the team and kicked us because of course he was host. -Finally, someone with an open mic who I'm 75% certain was either getting head or had porn on in the background, based on the amount of slurping and moaning. I'm inclined to believe it was former because he played at the skill level of a drunk stroke victim.
#helldivers 2#absolute shit show in quickplay#I really hate supersamples for forcing me to endure these people
2 notes
·
View notes
Text
no but like seriously lol
im glad to be in an era where i can have some of the features of the these remasters (achievements, widescreen) and play them in a version that doesnt suck on an emulator with more shit like 4k


#like sh3 especially looks phenomenal i just wanted to make sure it worked i cant fucking believe its a ps2 game#too bad i fucking suck shit at horror games!#i dont own a 4k tv so the screenshots are 1080 but if i did this would be one of the games to try i think#supersampling does help a lot though the edges... they are smooth
2 notes
·
View notes
Text
Watched a few 1997-9 era commercials for the Honda StepWGN and felt like doing a little bit of video editing
#Tokyo Xtreme Racer Zero#The ugly rainbow moire pattern comes from this being a 1080p recording of Reshade CRT-Royale running at 4K#I *could* turn it off for the sake of cleaner recordings but I don't wanna downgrade the look of supersampled standard-def games
1 note
·
View note
Text
USING RELIGHT FOR RESHADE - a tutorial by amoebae
[You can also find this tutorial over at imgur and patreon]
ReLight is a premium shader for ReShade made by Marty's Mods (Pascal Gilcher). It allows you to add four new lights to your scene that help illuminate, and create realism and drama. To download and use ReLight you need to subscribe to the Path Tracers tier on Gilcher's Patreon to get access to the iMMERSE Ultimate package of shaders. Once subscribed, you'll be prompted to link your Patreon account to discord, and then you'll be granted access to his discord server, and, most importantly, to the Path Tracers discussion channel and the Downloads Level 2 channel, which is where you will find ReLight (along with the other premium shaders included in that tier).
Be sure to also download the up-to-date free iMMERSE shader package, because you'll need the Launchpad shader and some of the other included files.
The following guide is for the older qUINT_relight.fx version of ReLight. The latest version of ReLight is MartysMods_RELIGHT.fx, released on 31st December 2023. Many of the settings have changed in the newer version, but you can still use this guide to help understand how to enable and position lights. The guide will be updated/rewritten once I've had time to properly play around with the new version. You can continue to use the older version if you'd prefer.
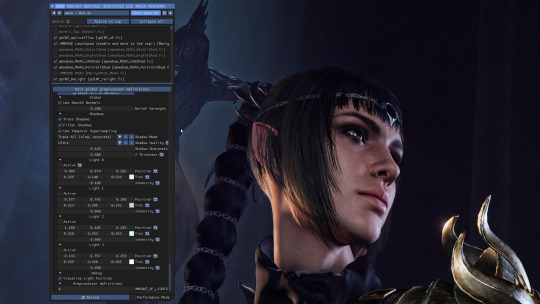
When you turn on ReLight in the ReShade menu you'll be greeted with these settings. Yours may look different because I've used it a lot and it remembers your last settings.
Take a look at the settings at the top.
Use Smooth Normals = On
Trace Shadows = On
Filter Shadows = On
Use Temporal Supersampling = On
Shadow Mode = Trace All
Shadow Quality = Ultra (change this if you get bad performance)
Shadow Sharpness = I have mine set around 0.65 but you can play around with whatever looks best
Z Thickness = Play around with this too. It controls how realistically shadows fall on and around objects
At the very bottom of the settings is Visualize Light Position. Turn this on so you can easily see where your lights are.
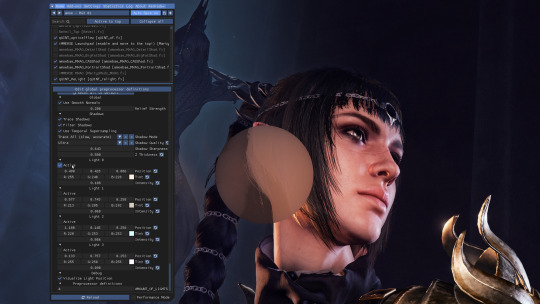
Now we can turn on one of our lights. Remember, it remembers your previous settings so yours will look different to mine the first time you use it.
Under Light 0 check the Active box.
You should see a big circle appear somewhere on the screen. If you have any object close enough to it, you should see them get brighter. If nothing is close to the circle you may not see any difference.
You can see a difference between this screenshot and the last - Shadowheart's face is brighter.
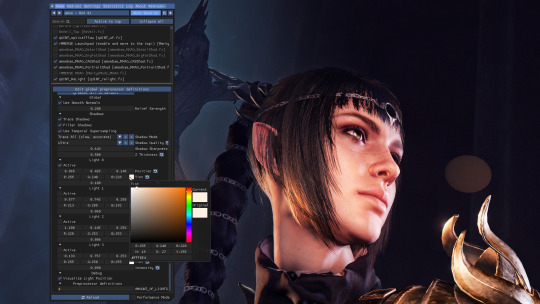
Now it's time to move the light where we want it and change it to a colour we like.
Under the Active box you'll see a row of 3 boxes containing numbers, next to the word Position. These control the coordinates of your circle of light in relation to the screen. You can place your mouse inside these boxes and move it while holding down left-click to change the value a little like a slider.
Left box = moves the circle left/right
Middle box = moves the circle up/down
Right box = moves the circle forward/back
In this shot I've moved the circle of light over to the right and a little further back so it better illuminates the front of Shadowheart's face.
Next you can choose the colour of your light.
In the row below Position you'll see it says Tint. Click on the coloured box next to Tint and it will bring up the colour picker you see in the screenshot. Choose your colour from here. Click anywhere in the main ReShade menu to close the colour picker.
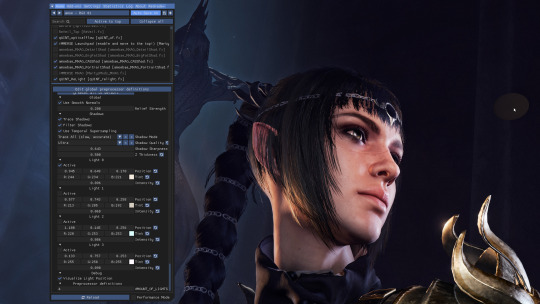
I adjusted the position and the tint a little more until I had it exactly where I wanted it. You can see a darker circle now over in the top right of the screen (my mouse cursor is hovering over it to make it easier to see).
You can use the Intensity slider (directly below Tint) to control how bright the light should be.
You may need to go back and forth between the Position, Tint, and Intensity settings until you get just the right effect.
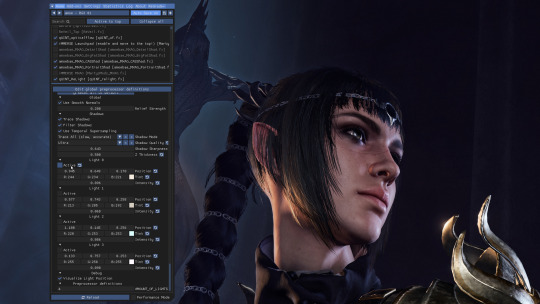
Here's a reminder of what the picture looks like without that added light. Compare it to the screenshot above to see how great our new little light has been at helping illuminate Shadowheart.
You can turn individual lights on and off whenever you want by checking or unchecking the Active box next to the light in question. It will save your settings.
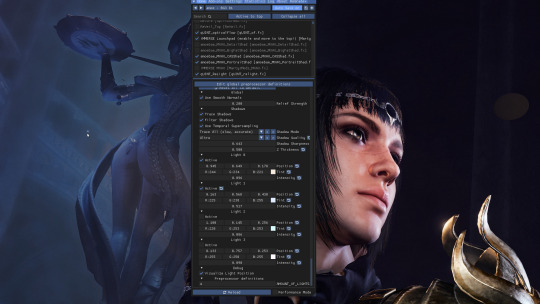
Now I want to add a second light. I've moved my ReShade window over a little so I can see what I'm doing.
I turned on the Active box under Light 1, and positioned my new light where I wanted it. Look over to the left of the statue in the background. You'll see my mouse cursor, and directly above it is a tiny blue circle. That's our second light!
The further you move the light away from the camera (using the right-hand box under Position) the smaller the circle gets, because it's further away!
I made this light blue, and I turned the intensity up quite high. This has helped illuminate the statue and added nice shadows that help give it some depth.
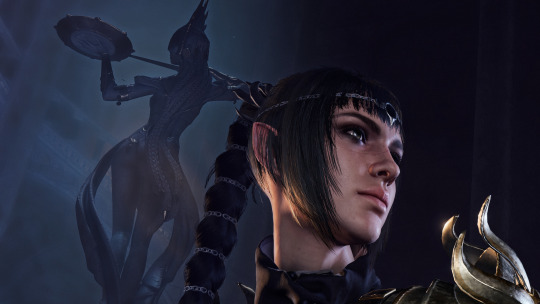
Here's a screenshot to remind you what everything looks like without any of the ReLight lights I added.
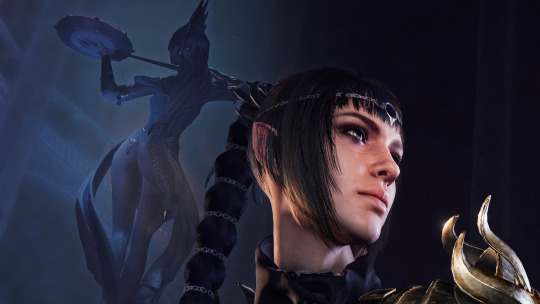
And here's a screenshot showing how everything looks with ReLight turned on and my two lights in action. I chose a subtle effect because I just wanted to draw attention to Shadowheart's face and to the statue behind her.
When you close the ReShade menu the circles that helped you know where your lights were will go away, but the light they cast will remain. Notice how you can't see the two circles in this shot?
You can also uncheck the Visualize Light Position box if you want to hide the circles while keeping the ReShade menu open. This can be helpful if they're obscuring parts of the scene that you need to see while you continue editing.
---
And that's it! You can add up to 4 lights and control them independently from one another. You can use them to just help illuminate a character for a portrait, to add drama with bold lighting, or to increase the realism of a scene with better shadows and light falling where you would expect it to. If you have a big fiery sword you can add a light to it that makes orange light cast onto the character who is holding it, which can look really cool. The only limit is your imagination.
(If I ever learn how to make videos I'll translate this tutorial into an easier format, but for now I hope this helps.)
843 notes
·
View notes
Note
What do you use to upscale 1080p switch footage to 1440p? Is it just a direct transform/scale within OBS (or whatever recording software)?
I've found out that the current beta for DaVinci Resolve 18.5 offers Super Scaling and I typically set that to 2x (regular 2x, not 2x Enhanced because that takes days to render) with sharpness and noise reduction on high and that works pretty well for pre-recorded stuff, despite taking a bit longer to render.
so i actually have a pretty wacky setup going on that required some financial investment on my part but actually doesn’t just benefit switch capture, but ALL capture of consoles that output 1080p and under. i basically have the raw output from the switch running through two upscaling devices: the “marseille mClassic” and the “photofast 4K gamer pro”
these two upscalers are not at all magic and come with their own individual downsides if you don’t use them in the proper context or if you just don’t like the image they produce, which is totally valid. but for me i’ve found that, especially for a lot of first party switch games, the mClassic adds a kind of artificial anti-aliasing pass to the footage that subtly smooths out the overall picture and makes certain games (like FE three houses and pokémon legends arceus) look markedly better, while offering more minor but still relatively pleasant effects for the rest of the library. then, after that AA pass is added, the 4KGP takes the 1080p signal that the mClassic produces and scales it up to a 4K video signal, as well as adding extra sharpening to contrasting values in the image. in my experience and to my taste, i only really get a picture quality that i enjoy looking at with the 4KGP set to its absolute lowest sharpening settings. the 4KGP as a reputation of looking… well, a bit bad at the medium and high settings, cause it just WAY oversharpens the image and leaves it looking super grainy and noisy. it can do a lot more harm than good to the picture without the restraint to leave it on Low and without the mClassic smoothing the image beforehand so it’s not exacerbating aliasing artifacts.
after that, I then supersample the 4K image signal DOWN to my OBS canvas by just having my Elgato HD60 X output a 1440p60 signal, which makes the overall image look even smoother i think.
119 notes
·
View notes
Note
hi love, i was wondering what are your thoughts on using srwe for taking pictures in game (if you've ever used it) rather than using just the regular way of screenshotting or if you could possibly recommend some tips/ways on how to get your pictures so high quality
Hello Nonny, I do not use SWRE, I have a 6K native monitor. My understanding is that SWRE lets you emulate a higher resolution than may otherwise be unavailable to you due to your monitor size, which is essentially supersampling. This would increase the quality of your images, yes. I also published a comprehensive guide last year - PXL's Anatomy of Screenshots - explaining the considerations necessary when producing hyper realistic images.
7 notes
·
View notes
Text
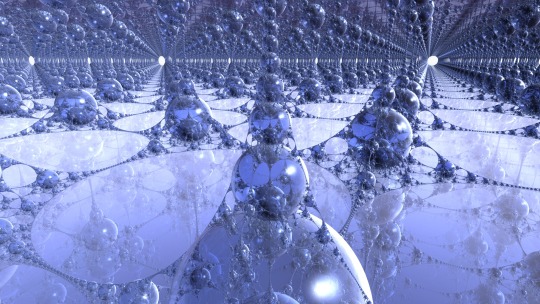
The Palace of Crystal Spheres
Did a pretty ambitious 3D fractal render in Mandelbulber while I was out of town over the holidays. It seems like it took 3-4 days to fully render, but I had all the fancy visual effects turned way up, ratracted reflections & transparency, anti-aliasing by monte-carlo supersampling, and a bunch of other stuff. This is honestly more of a materials appearance test than anything else, the fractal itself is just the built in pseudo-kleinian on its default settings, since it creates a bunch of nice-looking spheres.
19 notes
·
View notes
Text
My brother is so fucking lame. I’m telling him all the cool features the Ocarina of Time PC port has including Master Quest, Boss Rush, built-in randomizer support, bug fixes, properly implemented missing features, QoL changes you can turn on or off, high frame rate, 4k resolution with supersampling, anti-aliasing, and TONS of other features to customize it to be the definitive OoT experience, but he said “But it doesn’t have the 3DS models.”
He’d really rather just play the 3DS remake because it has more polygons.
10 notes
·
View notes
Text
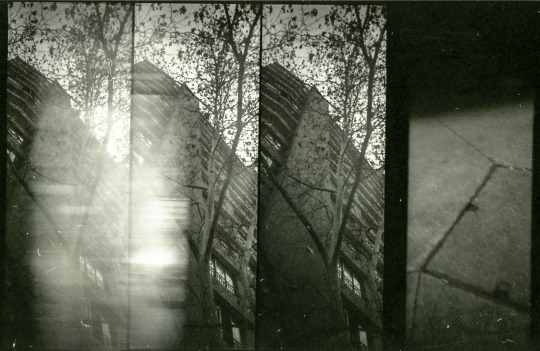
Supersampler
de mi primer día de licencia.
#film photography#analog#35mm photography#35mmclub#expired film#35mm#filmisnotdead#35mm flim#supersampler#lomography
14 notes
·
View notes
Note
hi! wanted to ask how you take such hq screenshots in bg3, i want to do mjne for my chadacter too!
Hi anon. That's a combination of a few things, here's my personal list of must-haves in order of importance (#1 is most important):
Hunt for good lighting (I trial and error brute force till I get a good pic sometimes). In gaming, lighting can make or break a photo even if composition, colors, and LOD remain the same
Save your image as png (jpeg will completely wreck quality)
Have textures quality as high as possible (in my pics it's Ultra, some games have 4K textures mods, use them if possible as they're HEAVY if used more than just a few characters)
Camera tool that forces higher LOD (like this one x)
Hotsampling or supersampling to 8K/10K/12K or even 16K if your PC has the juice for it still (I just take my photos in 4K, too impatient to wait for 8K/10K photos to render, I have people to romance in BG3 I'm not waiting 60s for a photo as I take A LOT)
Not really related to hq photos but it's about your neck: if you take portrait shots, use FreezeShot.fx shader on ReShade so you don't have to tilt your neck every time (your neck will thank you)
Happy capturing!
16 notes
·
View notes
Text

This reaction to seeing games on a crt is so funny. Supersampled low res on a high quality crt is completely different than playing on low settings on whatever dell monitor. I love when people don’t understand what they’re talking about.
8 notes
·
View notes
Text
Dunno if this is just me or everyone but after the Star Rail update today you might want to recheck your graphics settings. Mine weren't where I left them before and I only noticed because my fans were goin crazy thanks to it defaulting back to 1.2 rendering quality (which I believe is just supersampling, definitely get that back down to 1.0 if you're not on a high-end PC)
edit: I should probably specify this is 1.5
2 notes
·
View notes
Text
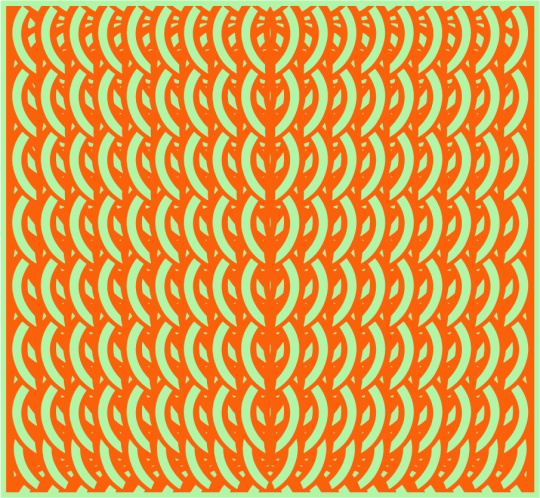

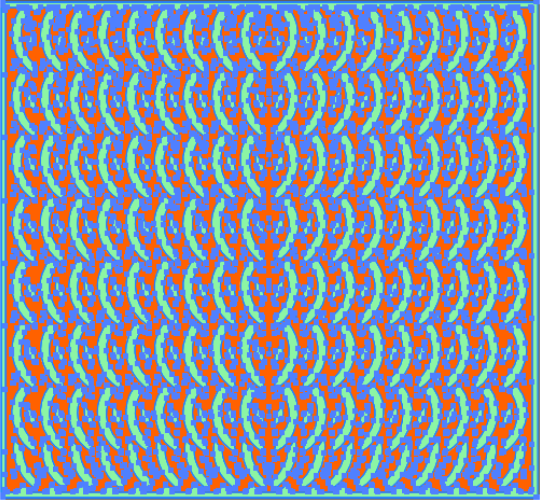
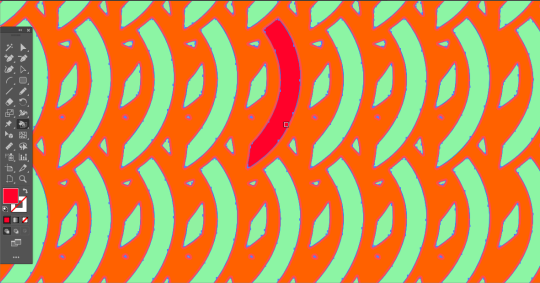

Exclusive = selling one time only & on rare discount right now
• quality PNG file 10689x9863px 300ppi interlased supersampled RGB with embed CMYK profile ready to use/print on fabrics,tiles,ceramics & other products
• interactive vector IA CC quality file easy recolurable & reshapeable made in cs6 compatible with illustrator 17 & above Subset fonts when % of characters used is less than 100 PDF compatible embded ICC profiles compressed
Do not include graphic & brand identity services as resizing, reshaping, recolour or other modifications, suggesting or adding fonts, adapt to print on products or business stationery, suggesting or creating advertisements, adapt to billboard size dimensions, printed ads or stream. Selling my art work only.
DOPEMAINEQUATION <<<<< buy graphic elements here
DOPEMAINEQUATION <<<<< shopable portfolio
#vector#png#ai#interactivevector#exclusivevector#exclusivepng#exclusiveai#dopemainequation#eysneyabalance#industrialprint#onsalenow#printonproduct#fabrics#tiles#printonfabrics#printontiles#exclusive#art#bohemianstyle#bohemian#bohostyle#discount#graphicelements#graphicobjects#pattern#textileprinting#textilepattern#tile pattern#graphicelement#graphicobject
2 notes
·
View notes