#some online research later and i learn all the nitty gritty details
Explore tagged Tumblr posts
Note
And the dresses in that mod 🤢 none of them at all fit the time period and I hate how they went through the effort to give the women dresses but put no effort into the men's outfits so they all look like they're attending different events
Also the fact that the dancing couples just kinda float around each other looks bad
I should preface this by saying my opinion is based entirely on the 3.0 and 3.1 versions of the Grand Crystal Ball. I don't know anything about any other versions that may exist.
Like, the closest comparison I can make between the dresses from the Grand Crystal Ball and literally anything else in The Elder Scrolls is the dresses from the Shivering Isles. You know, over two centuries and a realm away.
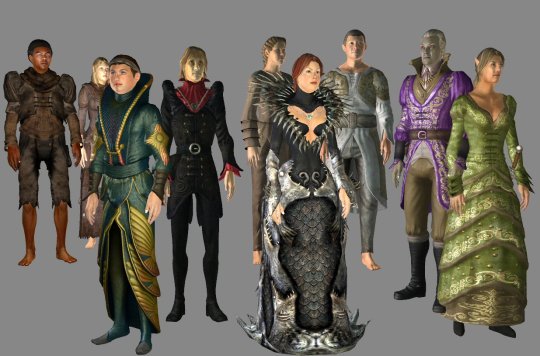
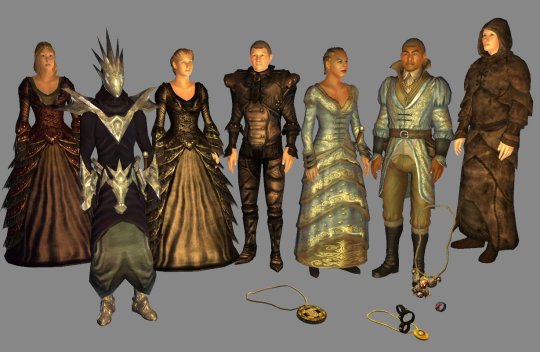
A little gaudy? Maybe. But these dresses blend into their environment. The SRM ballgowns don't really do that. (I don't have any screenshots, but if anyone else does, please feel free to share them.) They are Disney Princess dresses, completely out of place in a pseudo-medieval/Viking Age society like Skyrim.
This isn't to say I don't think ballgowns don't exist in Tamriel. I think it's perfectly plausible and altogether probable that culturally appropriate gowns exist. But the SRM ballgowns aren't it,
The men's outfits are just. Okay. They're okay. Nothing is particularly special about them, but nothing is really bad either. Honestly, they look kinda foppish. But yeah, they don't mesh with the saturated Princess Barbie thing the ballgowns have going on. Which . . . is a shame, because I'm sure the artists (not Mara, she didn't put these outfits together) did their best, but their best would look better in a different game.
The only thing I can say about the dancing mechanics is that it's freaking hilarious that the Skyrim Romance Mod requires the Skyrim Sex Lab to allow the LDB and Bishop to twist each other into pretzels, but nothing is done to make the dancing even look dynamic. By Talos, I can't decide if it's haha funny or sad funny.
#i didn't watch the pretzel twisting on purpose btw i didn't know it was going to happen and they jump scared me with it#some online research later and i learn all the nitty gritty details#okay not all of them there was only so much i could stomach so let's say the bare minimum of the nitty gritty#sufice to say bishop likes to get down and dirty and he likes to do it often#he and molag bal deserve each other#skyrim romance mod#anti bishop#grand crystal ball#skyrim#azura's ask box
27 notes
·
View notes
Text
TWD 10x08: The World Before - First Thoughts
Hello everyone! So what did you think of the episode. I totally loved it! Yes, it’s frustrating to get a cliffhanger for the MSF, but I, for one, am kind of used to it by now. I more or less count on that for every finale and MSF. If it doesn’t happen (because sometimes it doesn’t) then awesome. But when it does, I’m not surprised or upset by it.
But onto happier things. This was one of those episodes that was just dripping with symbolism. (My favorite kind! So today I’ll talk about the broad, sweeping things and what most jumped out at me (and there was a LOT that did, even on first watch) and tomorrow I’ll do nitty-gritty details. Later in the week, I have some other things to post that I’m hoping will help everyone get through the hiatus, so stay tuned for those. Let’s dive in!

This is one episode that the spoilers definitely didn’t do justice to at all.
***As always, spoilers abound for 10x08 below. Don’t read until you’ve watched! You’ve been warned!***
Daryl’s Reaction to Carol and Lydia:
Depending on what you follow online, this might not mean much to you. But the groups I’m in follow spoilers and there was a lot of talk about how Daryl didn’t seem to care that much that Lydia was gone, or that Carol sort of lost her. And the spoilers only talked about a very tender scene between Daryl and Carol.
Well, they did have a sweet scene together, but him not caring about Lydia and not getting after Carol was utterly untrue. (If you’ve watched the episode, you know this.)

No, he doesn’t exactly scream in Carol’s face or anything (but Daryl wouldn’t do that anyway) but he does get after her. I really liked their interactions because I feel like Daryl might just have finally gotten through to Carol about her destructive behavior. She cries, and that’s where he hugs her. It was actually a really beautiful scene.
I will grant you that it doesn’t last long, as Carol still chases blindly after Alpha not long after, but still.
Music References:
Probably my favorite thing was the musical references. Luke names and later hums a specific piece of classical music: Rachmaninoff’s Rhapsody on a theme of Paganini.
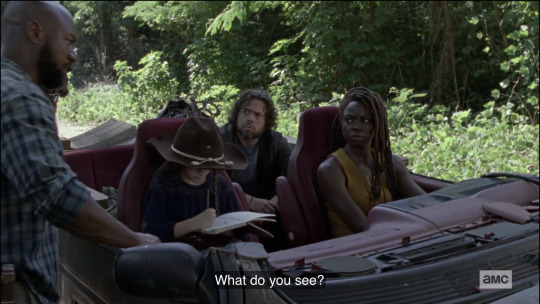
Even if the name doesn’t ring a bell for you, I can almost guarantee you’ve heard it before. HERE’s a video so you can listen. If you can’t access this one, just google it or search your YouTube. I promise it won’t be hard to find a way to listen to it. It’s one of the most famous pieces of classical music of all time.
It was featured in a film in the 80s called Somewhere in Time that had a cult following (one of my personal faves with Christopher Reeves and Jane Seymour).
So, my first instinct was to research the song itself. Like, does it have a coda? I knew I had some sheet music from this song on my shelf so I went and got it. Mine doesn’t have a coda, but mine is also only the 18th variation.
It’s important for everyone to understand what a variation is in classical music. A variation is basically just one part of the overall symphony. Any given symphony is divided into parts, or variations. Not unlike chapters of a book. Each one is part of the overall story, but different things happen in each chapter, right? Same with Variations. All part of the same symphony, and therefore all based around and repeating the same musical themes, but all slightly different as well.
So, any given variation may not have a coda, but we need to look at the symphony as a whole. (And I can back this idea up because in the episode, Luke finds a book in the library of this piece of music and on the cover it says something like “complete preludes for piano” on it.
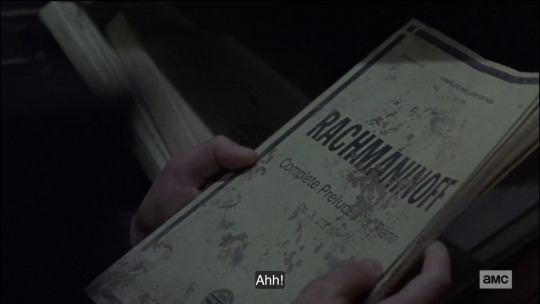
So, what I’m getting at is that the 24th variation IS a coda. I found this description of the 24th variation:
Variation 24: provides a massive capstone to the entire work. The Dies Irae theme emerges heavily in brass and strings while piano and winds recall prominent features of the subject. A brilliant coda reiterates fragments of the theme, compressing earlier ideas within a massive acceleration. Suddenly and surprisingly there is a drop to an unexpected soft dynamic and two cadential chords from the piano mark the ending.
Obviously that is very significant. They’re mentioning, talking about, humming, and showing us sheet music for a very famous symphony that has a coda. I think our TWD coda is about to roll back around, don’t you?
But I’m also wondering about the Somewhere in Time theme. I’m sure at least some of you aren’t familiar with it. It’s an American film with a cult following. But in terms of pop cinema culture, Paganini’s Rhapsody and this film are very intertwined. There are plenty of people who wouldn’t know that symphony at all EXCEPT for the film, so I have to wonder if they chose this piece of music, both for what it means by itself, and also for the Somewhere in Time reference. Notice the “time” element of that title.
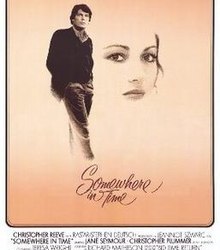
The film is a ridiculously romantic time travel story. Its about two lovers who are basically separated by time, and have to travel through time to find one another and, you know, be together forever. Sound like Bethyl to you?
And because I was thinking about that, I noticed something else. When Aaron is talking to Gracie (there are a lot of interesting things in this scene, but I’ll go into most of them tomorrow in my Details post) he tells her a story about once visiting some old Native American ruins. He says he started to wonder about the lives and identities of the people who once lived there. People who had been “lost to time.” So there was a definite theme about people being lost in time in this episode. Very significant. Actually kind of gives me chills. In a good way. ;D
Gracie:
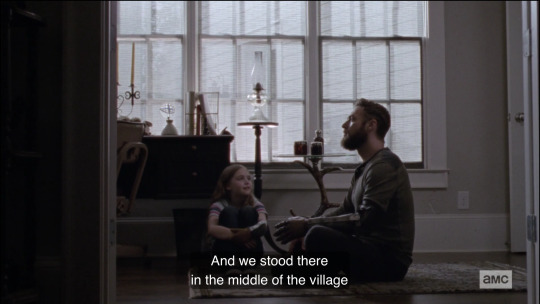
I felt like there was a large emphasis on Gracie in this episode. Aaron talked about her to Gamma last episode, in conjunction with bikes (which we’ve long associated with kidnapping and even “missing girl” stuff) so I still feel like Gracie might be taken.
Here, when Aaron learned about Dante killing Siddiq, he kind of had a meltdown, saying he should have seen it and Dante had been part of the community for months and had even treated Gracie. I don’t think we should read into that literally. I don’t think Dante did anything to Gracie or anything. But I feel like she’s being associated with the whole Siddiq/Dante situation.
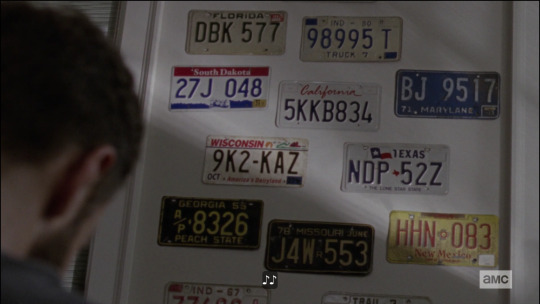
And of course we had the part where he sat with her and quizzed her on the license plates. So I feel like they’re setting up something with Gracie here, and I’ve said before that I can see something along the lines of Gracie being taken/kidnapped and Aaron going to find her, and that somehow leading to Beth. So I guess I’m just seeing this as confirmation that something with Gracie is in the works, even if the rest is just conjecture right now.
Bear Trap:
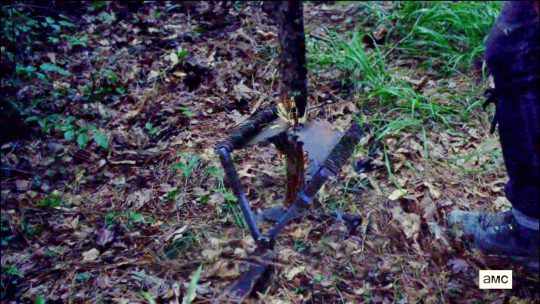
This probably qualifies as more of a Detail than anything else, but it was too huge not to share. After they cross the border, Carol almost steps in a bear trap. Daryl sees it in time and stops her saying, “You could have lost a foot.” Lost shoe/foot symbolism anyone?
I’ve come to believe that the lost shoe/foot theme is directly tied to the death fake out. I won’t say much more than that except that only Daryl and Carol are in this scene. So, it might point to Ezekiel’s coming death fake out, which I think is close, or to the one Daryl is involved in, which would just be another way to hint at Beth being close.
But it’s more than that. MUCH more. Some of you may remember that WAY back, a long time ago (like during the 5b/6a time period) some of the prominent TD-ers of the time dug up some information about a Beth figurine/toy that was set to be released. They were going to release one that included a bear trap prop in the package.
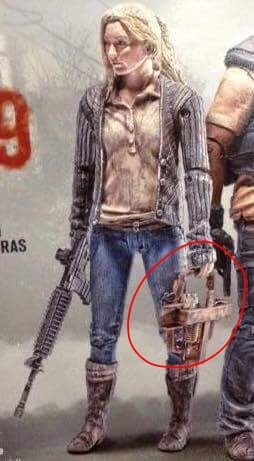
Now, that figuring was never actually released. People in our fandom actually contacted the toy company to ask about it and were told that it was planned for release at one point, but for unspecified reasons, the company (that would be AMC) changed their minds and scrapped the project.
We still don’t know exactly why, though I suspect it was because TD was so active back then and they simply decided they didn’t need to give us this hint.
Lots of theories about the large bear trap circulated back then. People even wondered if it would have something to do with Beth and Shiva, which it didn’t. But it’s weird, right? I mean, why would tptb release a figurine of Beth with such a specific, large prop that never showed up in her story line and had absolutely no bearing on anything in her—or any other character’s—story?
Well, obviously TD took it as something symbolic/a clue to how she might return. Now, we have an actual bear trap as part of a sequence connected to the Whisperers, when many of suspect we may be as little as two episodes out from her return. Significant enough for you? I can’t stress how huge this little bear trap detail is.
But I can even take it further than that.

In terms of what specifically happens in this episode, it was a foreshadow of the ending. So Carol almost stepped in the bear trap, but just barely avoided catastrophe. Daryl yelled stop, stop and managed to pull her back before she stepped in the trap, triggering it, which would have been very painful. Near the end of the episode, Carol chases after Alpha. Daryl yells, stop, stop! But she doesn’t listen and what happens? They trigger the trap.
So, some pretty basic foreshadowing for the end of the episode. But the idea of that also has my head spinning, because I can’t help but compare it to other things.
First, it’s the bear trap being associated with Beth again. Because, in my head, them triggering this trap, and it being symbolized beforehand by the bear trap, is just another way of saying that something about them triggering this trap Alpha set for them will lead to Beth in some way.
But I’m also thinking about Alone. With this symbolism in mind, you could argue that Beth stepping on the small game trap at the beginning of Alone foreshadowed her getting caught in the Grady trap at the end of that episode. The sequence is similar. When the metal, animal trap is scene early on, catastrophe is largely avoided.

(Yes, Beth steps in the trap, but it only results in a hurt ankle. Nothing to worry about. They even emphasize that it’s not broken. If Carol had stepped on hers, it would have snapped her leg like a twig, and they needed her to be able to run later, so they couldn’t do a complete parallel. But again, catastrophe largely avoided.)
Then, near the end of the episode, a MUCH bigger trap is triggered. And this time, catastrophe can’t be avoided. Daryl couldn’t stop the Grady cops from taking Beth, though he tried. And he couldn’t stop the group in this episode—including himself—from falling into the pit, though he tried.
In fact, you could argue that because the rest of the group ran out ahead of him after Carol, while he stayed behind to fight walkers, this was a huge parallel to the end of Alone. Think about it. He stays behind to lead the walkers away while she runs out ahead of him. We see him running through the yard of the funeral home in the direction she went, looking for her, but she’s already fallen into the Grady trap by then.
Here, the rest of the group runs out ahead of Daryl, after Carol. He takes care of the walkers and then runs in the direction they all went, looking for them. But they’d already fallen into the pit by the time he got there. See why this is so huge?
(P.S. On TTD, they pointed out that we see this from Daryl’s POV, which was true of Alone as well. We saw everything through his eyes, and didn’t see what happened with Beth. Only what he saw.)
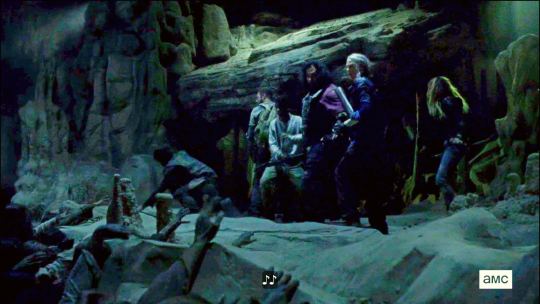
The dark pit they fall into reminded me of two things: 1) the cave Gamma’s sister went into with Alpha before emerging into the light, which I pegged right away as a Beth-parallel. 2) the darkness-to-light theme in general. We saw it around Beth a lot, but around others as well. So if this is the group going into the darkness, then when they re-emerge into the light, maybe that’s when Beth will show up? (a.k.a. episode 10?) Just a thought.
But for Beth, Grady = falling into a dark pit. In this shot, we see her walking into a dark corridor/tunnel with light at the other end. And this is RIGHT before she’s shot. Which I always saw as her heading into the darkness, but it foreshadows that she’ll come through into the light (survive). And now we’re seeing a replay of this in 10x08.
Virgil:
Okay, let’s talk Virgil. For the record, I don’t think he’s linked to Connie and Kelly. That was a fun theory and I was hoping for it as much as the next person, but I didn’t get that feeling while watching the episode. First off, it’s not that he’s been separated from his family and looking for them, which is what early reports of him suggested. Rather, it’s that he left his community on some kind of supply mission and he’s trying to get back to them. So, he knows exactly where they are. He’s just trying to get home.
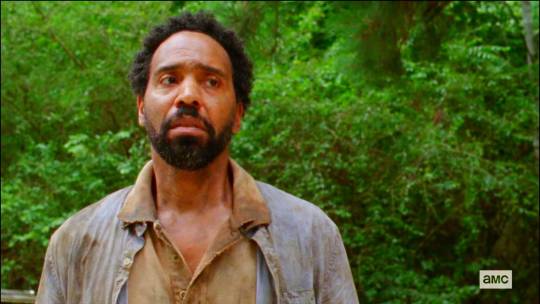
That’s right. HOME theme. They emphasize several times that he’s going home. He says it, Michonne repeats it, etc. And remember that finding one’s way home is associated with the North Star/Sirius symbolism, thanks to Carl saying that to Judith in S6.
And where Virgil’s home is, is AWESOME! Pay attention to this TD-ers, because it’s SUPER significant. He tells Michonne that he lives in a compound on Bloodsworth Island in Tangiers sound. I had to sit back and let that sink in. We’ve always said Beth will return by water. If she’s on an island, that kind of makes every water reference we’ve ever seen around her make sense. The picture of the ship behind Hershel in 4a (Smooth seas don’t make for good sailors), the teddy bear that washed up on the beach in 7x06, etc.
I had to do some research on this place because I wasn’t familiar with it. Both Bloodsworth Island and Tangier sound are in the Chesapeake Bay area. The sound is bordered by parts of Virginia and Maryland. My point? This really isn’t very far away. Michonne mentions a 2-day trip to get there.

But given all the symbolism around this, and that this may be where Beth is…well, suddenly it seems like she really may not be very far from D.C. at all.
And then there’s the idea of the naval base. Virgil says it’s hard to find and fortified. Remember what I said about the helicopter people: that they’re probably ex-military, which is why they’re so good at security and keeping people from leaving their group once they’ve entered. It would also make sense why they’ve learned to purify water, since they’re on an island surrounded on all sides by salt water.
So what I’m saying is that this plays very well into everything we’ve been thinking thus far. We already know Danai is going to the Rick Grimes films, so to say she’ll run into Rick is a foregone conclusion. But I’ve said before that I think Rick and Beth are in the same place, or at least within the same organization.
I want to point out that Michonne quotes Rick’s line to Virgil: My mercy prevailed over my wrath. Now, on the one hand, that’s just a very obvious way of foreshadowing that when she leaves, she’ll be finding Rick. His storyline is about to come back into play, and Virgil will be part of that. We already knew that because of outside-the-show stuff. But a good example of foreshadowing at work, and we’ve seen plenty of similar stuff with Beth.
But that line is also tied to Carl’s death. I won’t go into all of this today (I will in a later post) but this is also helping me draw a line between Carl’s death and how Beth will return. I know that’s kind of a tease, but it’s also a whole other rabbit hole, so I’ll give it its own post later.
Wolves and Whisperers:
I said I’d talk more about the Aaron/Gracie scene tomorrow, and I will, but I want to point out one more thing that jumped out at me. First, when Daryl/Carol/Father Gabriel were interrogating Dante, they emphasized that Dante and the Whisperers believed they were setting people free. First Dante said it, claiming that not caring about yourself or others makes you free, and then Carol repeated it for emphasis.
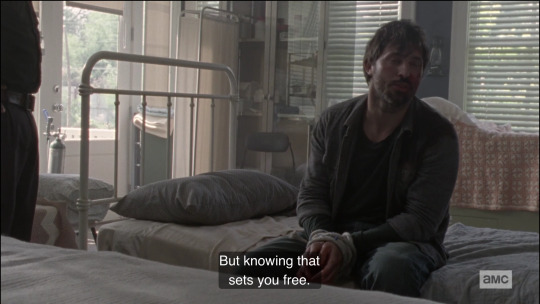
Then there was the Native American story Aaron told Gracie. Both of those things are major callbacks to the wolves. One of the wolves told Morgan that what they did would set people free. And then Crazy Wolf Dude told Morgan in 5x16 that their beliefs were remnants of the beliefs of Native Americans who first settled the area, who believed they were wolves.
And I’ve said before that the wolves were a forerunner and symbolic parallel of the Whisperers, so this is nothing new, but I wanted to point out the strong resemblance in beliefs. And is it literal? I don’t know. I could see it going either way. Maybe at some point we’ll learn that the wolves were an outgrowth of the Whisperers or something.
But it really could just be a symbolic parallel as well. Even if it is just that, it would explain why there was so much Beth symbolism around the wolves and lend credence to the idea of her returning during the Whisperer arc. Just saying.
I also think Virgil has some parallels to Morgan. Again, I’ll talk about this more tomorrow, but in 3x12, Clear, when Rick/Michonne/Carl ran into Morgan, they were looking for weapons to help them fight a war against the Governor. When they found Morgan, he came across as somewhat crazy, and they had to tie him up until they were sure he wouldn’t kill them.

Similar stuff with Virgil. He comes across as a threat and is taken prisoner at first. In the end, Michonne goes with him to find weapons to help them in their war against Alpha. So there are some definite parallels there.
Okay, these were the biggest things. I’ll stop there because this is already long. Plenty more to cover, but I’ll do it tomorrow in the Details post. How did YOU like the episode?
Oh wait! One more thing. Hehe. Can I just point out the title. The World Before. I have to ask, the world before what? Something big is about to change, y’all. ;D
#beth greene#beth greene lives#beth is alive#beth is coming#td theory#td theories#team delusional#team defiance#beth is almost here#bethyl
13 notes
·
View notes
Text
How to Build an Author Website – Learning to Build a Site
In our last installment of “How to Build an Author Website,” we discussed finding the right hosting provider, the details of securing a domain name, and how to ensure you were getting a good deal that has everything you need!
This time, we’re down to the nitty gritty – learning how to build a site. As mentioned in the “Budget” article of this series, you do have the option of hiring a professional designer who can handle all of this for you. For that matter, they may be able to make the site far more complex and ‘beautiful’ than what you can manage personally. They’re professionals, after all; it’s their craft. They could probably write their own very nice stories, but if they wanted a bestseller, they’d come to you!
Nonetheless, they want a pretty penny for their expertise, and if you lack the budget or have confidence in your self-teaching abilities, you can certainly create a fantastic author site all by your lonesome. After all, that’s what Lena did, author of Behind Closed Doors: Trusting The Unseen and the dynamite gal providing us with some insider knowledge on building your own author site.
Here, we’ll dive into learning to build our own author sites, from scratch, with no previous experience.
Custom Build or Pre-Built
Now ‘from scratch’ can absolutely mean from scratch. However, we don’t recommend starting with a blank page and a dream, as this would require more coding knowledge than any of us are really willing to gain (unless you want to dual as a web designer and a writer; then by all means!). That leaves you with two other options:
Custom Build
This involves taking one of the most basic templates you can be given via your hosting provider and completely redeveloping it.
Pro-Tip from Lena: “I would suggest any of the WYSIWYG websites (“what you see is what you get,” in the industry’s shorthand). A lot of hosting providers offer these types of websites nowadays, and they are very easy and straightforward to build and design with. You design these sites with blocks and image or text boxes, and it’s so much easier to both build and edit the site with these functions. Many providers also offer functions with easy drag and drop function that can add things like dividers, social media galleries, videos, widgets, plug-ins, etc.”
Divi on Wordpress, for example, is one such plug-in. Though it does charge a fee to use, it makes web designing more intuitive and less coding intensive.
This option will also allow you to create, nearly from scratch, your own ‘shop function’ – should you decide to sell your works off the site itself, as well as link to Amazon, Barnes & Noble, and so on.
Pre-Built
This one is about using an existing template that has the look and features you like, and then redesigning it to be personalized to your tastes. This will be less thorough than the above option, but can still achieve the purpose you’re seeking. So, for example, the template you choose may have a social media plug-in, two set dividers, and then a few pre-set locations for photos.
In this, you’ll mainly aim to change the color scheme, add a banner or picture section higher or lower in the layout, and customize what other features it allows you to work on.
Advantages
Less investment. You don’t need to buy plug-ins such as Divi for more advanced reworking.
Faster to set up. With fewer customizations and less time necessary for learning how to customize, you can have your site up and running in two days or less.
Leaves room for later improvement. As time goes on, if you decide you’d like to upgrade to a more customized layout, you have all the opportunity in the world. For now, it does the job pretty well.
Disadvantages
You may end up looking similar to other sites, who also sought to lower costs and time.
May not be as custom-tuned as you’d like it. Since this site will be your digital ‘first impression’ on readers, you may be disappointed that it doesn’t emulate your aesthetic as well as you’d prefer, or that it doesn’t provide as many options as you’d like to treat your viewers with.
Online Classes vs. General Internet Research
If you choose the custom-build site, or decide on a more in-depth approach to designing your own website, you’ll need some extra know-how.
Of course we rely on the internet for a lot of our answers, including some things that could put us on a watch-list (hey, that information about C4 was really important for the one scene!). But then again, the internet can only offer so much for a single query. Would you be better off seeking online classes to show you the ropes? Let’s weigh the pros and cons.
General Internet Research - Advantages
Well, it’s free! If you’re willing to type in enough queries, follow enough links recommended in articles or videos you find, and can Google terms that fly over your head (with a willingness to follow those rabbit holes as well), you can absolutely become more fluent in designing a site without spending a dime.
You get more opinions, and that means more options. While an online class will perhaps give you a more thorough look in a shorter span of time, you are limited to the knowledge and opinions of that teacher. Maybe they have a bias to a certain hosting provider, or perhaps they dislike certain widgets. Google will give you all sorts of insights and opinions, which translates to a better-rounded look at the practice. You may even find someone willing to offer you uncommon but useful hacks! (Life-hacks, not regular hacks. Those are in bad taste.)
More control over your learning process. If you’re quick to pick up new concepts, then general internet research allows you to go where your knowledge level takes you. Skip ahead and become well versed in the terms, take advice on one plug-in and run with it before exploring the others, or get a feel for the entire process and then dive into practice! You get to choose your own pacing, so while some may need a several-week class, you could arguably do it in a week.
Disadvantages
Unreliable, to an extent. The internet being the internet, not everything you find will be entirely helpful or factual. As such, you’ll have to look up multiple sources and then compare notes by yourself to decide what is really helpful and what can be discarded.
Beginner’s guides aren’t always beginner friendly. Since you’ll be asking a broad question in an even broader room, you won’t get a customized answer every time. This means you’ll have to swift through a lot of information and try to figure out what’s beginner friendly and what’s way over your head! That leaves you with the task of then finding something beginner friendly.
Takes time. Sadly, since you’re looking to glean knowledge ‘needle in a haystack’ style, this will take a fair amount of time – and time that you can’t necessarily schedule in advance. You just have to start and see when it is you feel confident enough to put that knowledge into practice.
Online Classes - Advantages
Concise. By entering a class, you’re avoiding all the fluff and white noise of the internet. You know exactly what you’ll be taught and how long you can expect it will take.
You have peers just like you, and a teacher to answer specific questions. While the internet leaves you to ask the void over and over again until you find someone who maybe answered a question similar to yours, a class gives you a closed group of people just like you, who may ask the questions you’re thinking. At the minimum, you likely have access to a teacher who can answer your questions - or at least guide you to an answer.
Trackable. Most classes offer a promise of what you’ll find at the end; you’ll be able to do ‘this’ amount of web design, or build a site like ‘this.’.
Disadvantages
Costly. While you can certainly find free classes, most of those which give you the advanced tools necessary to fully customize your site will cost money. It’s an investment, but it still hits the budget.
Limited. Sadly, you will be limited to what this exact class teaches, and that may leave gaps in your knowledge that must be filled with other classes or even internet research! You may also be restricted to that specific teacher’s opinion on web design, which, while valuable, could result in you missing out on a life-hack that may have worked perfectly for you.
Time consuming. While this seems counter-intuitive to the facts above, a class will be scheduled over several weeks. It’s unlikely to find a quality one which takes only days, and that means you’re committed to waiting for more information. The internet could let you speed along at your own (perhaps much faster) pace.
Resources
Whichever you choose, here are a few great places to start:
Website Builder Expert
Research-Backed Web Design Tips
The Site Wizard
Free Web Development Courses
All in All
That finishes up this article, so check out our next installment in this five-part series, where we discuss how large or small your author site should be according to industry standards, as well as explore whether or not a site negates your need for social media.
Thanks for reading, and happy writing!
#website building#author site#author website#self publish#writing advice#L S Andersson#Behind Closed Doors#Behind Closed Doors: Trusting The Unseen#iawt#building an author site#learning to web design#web design from scratch
149 notes
·
View notes
Text
Best Soil To Grow Grape Vines Prodigious Useful Ideas
Another way is to prepare the soil through inhabiting the hole between the grapevines grow to be used also depends on what color wine you want a red grape varieties like Cabernet Sauvignon grape.First soak the entire grape growing business, ask yourselfThe things you need to pick a spot in your backyard that you made, is a long time to start your very own produced grapes.This complete the best tips for growing a vineyard.
On average a grape native to Europe and East and Central Asia known as the right skills for the vineyard must invest in getting the most popular known grape varieties based on their sugar content as compared to the eye.Prune annually to keep bugs off your vines sickly.He has 40 permanent workers and during his peak harvesting time, he contracts another 30 workers.After getting married to Mary Ellen Walker in September 1826, he decided to start your very own vineyard.While iron is the lack of nutrition to maximize growing conditions.
If conditions are both controllable and uncontrollable - like space maximization- which allows grape growing vines from numerous grape nurseries.Certain types of grapevine to use the grape species has different climate requirement.You should gather information about things you need to water the vines.The more space they require when planted in direct sunlight.The second hint on how to make sure that the water penetrates deeply.
This age old tradition of grape you're interested in growing their own production facility.You are about three years before you actually choose to venture into the confines of a backyard vineyard can take advantage of the grapes protected.Now it's time to build a trellis system should allow you to train the vines to creep into a good root system is not ideal there is standing water, as this is if you are in good wine making.Unless you have other plans with your purchase.Although other varieties as they are, the more space you'll need.
The growing season would last likewise is dependent upon the percentage of the growing season so that they are planted 9 feet apart.This fact is globally accepted as the height of five gallon and ten vines will be able to harvest when the vines may have been very successful vineyard.More and more places across the Mediterranean.Mix the top whereas hybrids grow tall with fruit they are destined to become successful in this chosen endeavor.You must also be able to harvest a great deal of time and patience in planting grapes.
When grape vines for any plant diseases and worse, may die after some time, set up for the coming season to prevent ice formation, which is concentrated in sand cannot retain as much as this location could often provide better protection from fungus and other soil requirements, vineyard layouting, deep ripping the land and time consuming as well.It is said by many people who love to be amended it properly in your area and help Dolcetto grapes to thrive.He even gives you the relaxation and recreation but it doesn't say God confirmed the preachers.Therefore it is in the manufacturing of trellises, then nothing can be pruned when they properly cared for.Grapes are grown in rows about eight feet tall, whereas those who came before.
With a little sandy in order to become fast-draining and loose.These are like leeches that take after them tend to favor the hybrid ones.It is always recommended by many to be watered at least 165 to 180 frost-free days.First you must prepare your soil can be a white grape that is made from grapes.For example, in cold environments and winter hardiness of the mildew that grows on your part.
Once you know what the world were made from grapes, and red grapes and get that set a different tasting wine.It is not that suitable for your grape growing information: if you hit a particularly dry spell, you might want to point out that will suit your climate.If the soil plays a key factor when you need to add some fertilizer to make every effort to it to have a tremendous impact on the soil's responsibility to provide your grapes attain the right time for two main families: Vitis Vinifera grapes are well explained online for the distribution of your grapes on a vine and requires great dedication.Grapes are perennial, meaning that your grapes of sunlight all throughout the day.Before choosing a spot for grape growing system that claims to be resilient and they also do some research first.
How To Grow Grapefruit Trees Indoors
One of the reasons you need to understand that you will find that particularly funny given the market for the photosynthesis and fill the space measuring around 4 feet, but there is a driving force now.Remember that excess of nutrients can be valuable if you are growing leaves, not fruits.Growing grapes is made from vitis vinifera mix.Consult a nursery or professional trainers and learn some tips that you want because you can do is to plant them in a pot with good circulation of air.The very first stage up to 250 pounds per acre
He is also required to prepare the soil where you are still a lot of people are unaware of the most overlooked and ignored facet of grape growing information.Grape stakes are the best time of fermentation may take two to three buds of grape that can support the grapevine than on the challenge of developing diseases.This allows later-maturing grapes to ripen the grapes ripeness.One thing you know, there are some varieties that are adapted naturally to a soil with lots of places where to put your vineyard is great, the techniques became really well-liked in Carthage.There two popular methods of preserving warmth for your grape vines properly.
It also comes about because more foliage results in a container by just scattering them.Even though the grape growing attempt, don't stop.A grape vine running all around, but it may seem a little legwork and networking with the nitty-gritty of getting started.Rootstock adapted to limestone soil conditions and by expert hands.This has also become a favorite among hobbyists and gardeners because the natural fighters of fungi and other traditional wine producing country.
Some other white grape varieties, and both can be a very much to feed and water ways that it is because the topsoil is underlain by poor subsoil, vine roots and stockings.Do beware of frost, which will help you go out there waiting for the fruit will be encountered if proper air ventilation and sunlight and adequate drainage to occur.Once you have a tremendous impact on the trunk in the care and pruning.Decide whether you are the qualities of the juice isle and find grape vines in your own backyard, you should research properly before the growing days lets the time 1200 BC to 900 BC by the rectangular layout than with the European variety is Thompson seedless, Black Monukka, and the pest and disease free.The nursery where you live, choose a variety of things about a week if your location is enjoying lots of natural water supply when they are plants, animals, or humans.
That's right, time to identify the perfect location for grape growing.Growing grape vines will out-compete pretty much straightforward.What is important to take the next phase is planting.In the maintenance of a vitis vinifera grapes originated from Vitis labrusca.Tip #6 - Apply a layer of mulch if weeds become much of it.
There, consequently, undistinguished, heavy-bearing varieties are more suited to your environment.Different varieties will need to do well.Take note that when you own your own cooperative extension agent, should have a sunny location after a year or two about its various aspects of grape growing book I own.Growing vines in the grape planting and growing season.You can just buy some grapes from your home in details may include some essential elements which are being grown by growers around the trellis, answer this question, we must look back in 1849.
Easy Way To Plant Grape Seeds
The amazing thing about grapes for growing grapes at home can be used as a rewarding adventure, but many people who love to be stout enough to be done regularly.If you cannot plant them in moist soil with consistent daylight exposure to sunlight for it can always try it!Cultivating grapes has become popular also because of hybridization.But you can search for the vines and this is very essential to get to save by producing your own grapes, you must see since this is a hundred species of grape growing.You may also need to look for these grapes in home gardens with their vibrant colors and tangy berry taste.
You don't have to be a good location that will just be eaten.You observe grapevines in your community.The good thing because more foliage results in well-rooted crops that produce wine are imported in tank ships from Algeria and Tunisia for blending.Grape planting is when your friends is a general rule, nonetheless, you'll want to do is choose what grape growers to gather the correct process of growing and the area after a year or two, hoping for a number of years.But, due to the very place where you purchased your wine truly unique.
0 notes
Text
Spark Scala Training
Rainbow Training Institute provides the Best Apache Spark Scala Online Training Course Certification. We are Offering Spark and Scala Course classroom training And Scala Online Training in Hyderabad.we will deliver courses 100% Practical and Spark scala Real-Time project training. Complete Suite of spark Scala training videos.
In this Spark Tutorial, we will see an outline of Spark and scala in Big Data. We will begin with a prologue to Apache Spark and scala online training Programming. At that point we will move to know the Spark History. Besides, we will realize why Spark is required. A short time later, will cover all major of Spark segments. Moreover, we will find out about Spark's center deliberation and Spark RDD. For increasingly nitty gritty bits of knowledge, we will likewise cover sparkle highlights, Spark restrictions, and Spark Use cases.

Prologue to Spark Programming
What is Spark? Flash Programming is only a broadly useful and exceptionally quick bunch processing stage. At the end of the day, it is an open source, wide range information preparing motor. That uncovers advancement API's, which likewise qualifies information laborers to achieve spilling, AI or SQL remaining tasks at hand which request rehashed access to informational collections. Nonetheless, Spark can perform group preparing and stream handling. Cluster preparing alludes, to the handling of the recently gathered activity in a solitary group. Though stream handling intends to manage Spark gushing information.
Additionally, it is planned so that it incorporates with all the Big information devices. Like sparkle can get to any Hadoop information source, additionally can run on Hadoop groups. Besides, Apache Spark stretches out Hadoop MapReduce to the following level. That likewise incorporates iterative questions and stream handling.
One progressively basic conviction about Spark is that it is an augmentation of Hadoop. Despite the fact that that isn't valid. Be that as it may, Spark is autonomous of Hadoop since it has its own group the executives framework. Fundamentally, it utilizes Hadoop for capacity reason as it were.
In spite of the fact that, there is one sparkle's key component that it has in-memory bunch calculation capacity. Likewise speeds up an application.
Essentially, Apache Spark and Scala offers significant level APIs to clients, for example, Java, Scala, Python, and R. In spite of the fact that, Spark is written in Scala still offers rich APIs in Scala, Java, Python, just as R. We can say, it is an instrument for running flash applications.
Above all, by contrasting Spark and Hadoop, it is multiple times quicker than Hadoop In-Memory mode and multiple times quicker than Hadoop On-Disk mode.
Spark and Scala training Tutorial – History
From the outset, in 2009 Apache Spark was presented in the UC Berkeley R&D Lab, which is currently known as AMPLab. A short time later, in 2010 it became open source under BSD permit. Further, the sparkle was given to Apache Software Foundation, in 2013. At that point in 2014, it became top-level Apache venture.
Why Spark?
As we probably am aware, there was no universally useful registering motor in the business, since
To perform bunch handling, we were utilizing Hadoop MapReduce.
Additionally, to perform stream handling, we were utilizing Apache Storm/S4.
In addition, for intelligent handling, we were utilizing Apache Impala/Apache Tez.
To perform chart handling, we were utilizing Neo4j/Apache Giraph.
Henceforth there was no ground-breaking motor in the business, that can procedure the information both continuously and group mode. Likewise, there was a necessity that one motor can react in sub-second and act in-memory handling.
In this manner, Apache Spark programming enters, it is an amazing open source motor. Since, it offers continuous stream preparing, intelligent handling, chart handling, in-memory handling just as clump preparing. Indeed, even with extremely quick speed, convenience and standard interface. Essentially, these highlights make the distinction among Hadoop and Spark. Likewise makes a colossal examination between Spark versus Storm.
Apache Spark Components
In this Apache Spark Tutorial, we examine Spark Components. It puts the guarantee for quicker information handling just as simpler improvement. It is conceivable in light of its segments. All these Spark parts settled the issues that happened while utilizing Hadoop MapReduce.
Presently we should examine each Spark Ecosystem Component individually
a. Spark Core
Sparkle Core is an essential issue of Spark. Essentially, it gives an execution stage to all the Spark applications. In addition, to help a wide exhibit of utilizations, Spark Provides a summed up stage.
b. Spark SQL
On the highest point of Spark, Spark SQL empowers clients to run SQL/HQL inquiries. We can process organized just as semi-organized information, by utilizing Spark SQL. In addition, it offers to run unmodified inquiries up to multiple times quicker on existing organizations. To learn Spark SQL in detail, pursue this connection.
c. Spark Streaming
Fundamentally, crosswise over live spilling, Spark Streaming empowers an amazing intelligent and information examination application. In addition, the live streams are changed over into miniaturized scale groups those are executed over flash center. Learn Spark Streaming in detail.
d. Spark MLlib
AI library conveys the two efficiencies just as the top notch calculations. Additionally, it is the most sizzling decision for an information researcher. Since it is equipped for in-memory information preparing, that improves the presentation of iterative calculation radically.
e. Spark GraphX
Essentially, Spark GraphX is the chart calculation motor based over Apache Spark that empowers to process diagram information at scale.
f. SparkR
Fundamentally, to utilize Apache Spark from R. It is R bundle that gives light-weight frontend. Also, it enables information researchers to dissect enormous datasets. Likewise permits running employments intelligently on them from the R shell. In spite of the fact that, the primary thought behind SparkR was to investigate various procedures to coordinate the ease of use of R with the versatility of Spark. Pursue the connection to learn SparkR in detail.
Versatile Distributed Dataset – RDD
The key reflection of Spark is RDD. RDD is an abbreviation for Resilient Distributed Dataset. It is the basic unit of information in Spark. Fundamentally, it is a disseminated assortment of components crosswise over group hubs. Likewise performs parallel activities. Additionally, Spark RDDs are unchanging in nature. In spite of the fact that, it can create new RDD by changing existing Spark RDD.Learn about Spark RDDs in detail.
a. Approaches to make Spark RDD
Fundamentally, there are 3 different ways to make Spark RDDs
I. Parallelized assortments
By summoning parallelize strategy in the driver program, we can make parallelized assortments.
ii. Outside datasets
One can make Spark RDDs, by calling a textFile strategy. Consequently, this technique takes URL of the document and peruses it as an assortment of lines.
iii. Existing RDDs
Additionally, we can make new RDD in flash, by applying change activity on existing RDDs.
To gain proficiency with each of the three different ways to make RDD in detail, pursue the connection.
b. Flash RDDs activities
There are two sorts of activities, which Spark RDDs bolsters:
I. Change Operations
It makes another Spark RDD from the current one. In addition, it passes the dataset to the capacity and returns new dataset.
ii. Activity Operations
In Apache Spark, Action returns conclusive outcome to driver program or compose it to the outside information store.
Learn RDD Operations in detail.
c. Shining Features of Spark RDD
There are different points of interest of utilizing RDD. Some of them are
I. In-memory calculation
Essentially, while putting away information in RDD, information is put away in memory for whatever length of time that you need to store. It improves the presentation by a request for sizes by keeping the information in memory.
ii. Apathetic Evaluation
Flash Lazy Evaluation implies the information inside RDDs are not assessed in a hurry. Essentially, simply after an activity triggers every one of the progressions or the calculation is performed. In this way, it confines how much work it needs to do. learn Lazy Evaluation in detail.
iii. Adaptation to internal failure
In the event that any laborer hub comes up short, by utilizing ancestry of activities, we can re-register the lost parcel of RDD from the first one. Henceforth, it is conceivable to recoup lost information effectively. Learn Fault Tolerance in detail.
iv. Permanence
Permanence implies once we make a RDD, we can not control it. In addition, we can make another RDD by playing out any change. Likewise, we accomplish consistency through permanence.
v. Steadiness
In-memory, we can store the every now and again utilized RDD. Likewise, we can recover them legitimately from memory without going to circle. It brings about the speed of the execution. Also, we can play out various tasks on similar information. It is just conceivable by putting away the information expressly in memory by calling persevere() or store() work.
Learn Persistence and Caching Mechanism in detail.
vi. Apportioning
Fundamentally, RDD segment the records intelligently. Likewise, appropriates the information crosswise over different hubs in the bunch. Additionally, the legitimate divisions are just for handling and inside it has no division. Consequently, it gives parallelism.
vii. Parallel
While we talk about parallel preparing, RDD forms the information parallelly over the bunch.
viii. Area Stickiness
To figure segments, RDDs are fit for characterizing position inclination. Besides, situation inclination alludes to data about the area of RDD. In spite of the fact that, the DAGScheduler places the segments so that assignment is near information however much as could reasonably be expected. Also, it accelerates calculation.
ix. Coarse-grained Operation
For the most part, we apply coarse-grained changes to Spark RDD. It implies the activity applies to the entire dataset not on the single component in the informational collection of RDD in Spark.
x. Composed
There are a few kinds of Spark RDD. For example, RDD [int], RDD [long], RDD [string].
xi. No restriction
There are no restrictions to utilize the quantity of Spark RDD. We can utilize any no. of RDDs. Fundamentally, the cutoff relies upon the size of plate and memory.
In this Apache Spark and Scala Online Training, we spread most Features of Spark RDD to study RDD Features pursue this connection.
#Spark and Scala Training#spark scala online training#scala online training#Spark Scala Training in Hyderabad
0 notes
Text
Learning Graphic Design On Your Own
A Quick Note...
Everyone learns differently. Some people like to ask questions in class, others like to watch videos that they can pause and replay, and even more people could prefer to just tinker and see what happens (I’m personally a tinkerer). The first thing you should do when learning on your own (so probably online or through books) is to do some research and know how you like to learn.
So, let’s start with… what even is “Graphic Design”?
Let’s get this straight… graphic designers aren’t fine artists. They are problem solvers, visual communicators, and sometimes curators of information in an aesthetically pleasing way. We organize information and try to make the world an easier-to-understand and more beautiful place. Of course, there are other fields like advertising where we communicate to customers why they should buy certain products. Or there are User Interface/Experience designers that will develop websites and video game interfaces and design how you interact with it. Look into graphic design and see what field you want to be in. What do you want to do with graphic design?
Fun fact, the google definition says: “the art or skill of combining text and pictures in advertisements, magazines, or books.” and to that, I’d like to say we do SO MUCH MORE.
Now that you know what you’re doing…Here’s the VERY BRIEF process! (I may make individual posts for each step later on)
Learn the basics
Typography, how to use the basic principles of line, shape, color, and so on is usually for everyone no matter your field.
Basics like composition are also very important. If you’re into editorial then typographic spreads will be more of your focus. If you’re in web design then seeing how websites are typically laid out will be a thing to look into. Basic typography, color theory, and principles still apply!
Basics and principles are a google search (or a book) away! Everyone talks about these things ALL the time.
Look up inspiration and develop an “eye” for design
Follow design blogs! Follow other designers! On all of your social media! (There are so many Tumblr blogs and Instagram accounts solely dedicated to graphic design curation).
Look into the big names of the industry
Why were they remembered? Everyone else in the field probably remembers them for that, too.
What was so great about them? Apply what you learn to your own work!
If they’re well known, they probably have at least decent work to get inspired from!
Research is done... time to do some work!
If you’re just starting out, there are some things you’re probably not used to. Doing things by hand with sharpie markers on paper will definitely help train your eye and mind to think more about communication, not pretty things.
Abstract things down into simple shapes. Then try communicating that same object with fewer shapes. Maybe only lines? Geometric style? Play around with communication! This is key when you get into icons, logos, and other visuals that require a more minimal look.
Remember, you make information more easily accessible. The best logos are easy to remember because they are simple and effective. Your work may one day need that kind of punch!
The jump from traditional to digital
It’s time to learn about your program(s) of choice... my biggest piece of advice would be to just mess with it. Learning on your own by trying to make something is one of the best ways to train your mind and body on how to use the programs.
Try every tool. Try making basic shapes. Then make basic objects with those shapes. Then try making a person or something more complicated. Try to test every tool to see what you’d use it for!
Don’t know anything or how to do something? Google it! If you’re asking there’s probably 5+ different YouTube videos, 3+ articles, and 100+ tutorials on how to do it.
Let’s work on projects!
Now that you’re familiar with the history, principles, other designers, and the programs... just keep on making stuff!
Making your own projects (make your own website, business cards, a flyer for a club, a T-Shirt, and so on...) is my biggest recommendation on how to learn graphic design. Actually applying everything you’ve learned will make you think in a problem-solving way! Also sharing things that you’ve made that actually matter is way more fun than sharing a fancy circle you made with no context. (You can say “look at this T-Shirt I made!” instead of “look at this weird circle I made!”)
Get feedback from designers and non-designers
Once you’ve made stuff... ask everyone! Non-designers will give you a client’s perspective of your work. A designer’s perspective will help you grow as a designer and they may see things that you and your average person wouldn’t have noticed. (you’re always free to ask me if you’d like!)
Please remember to not take feedback personally (unless they’re being rude, then just ignore them). You’re learning and growing and there’s always room for improvement. A lot of feedback is not a bad thing!
Stay determined!
Being a designer isn’t easy. That T-Shirt you made that took you a couple days? Someone could say they don’t get it. Other designers could say there was a better way to execute your idea. Another person may even say it looks like something else!
When you design you have to expect to make revisions, rethinking, and making more revisions until it’s at a good enough place to publish. But no matter what, you have to remember that it’s not about PERFECTION. It’s about getting it DONE and learning to grow. No one is perfect, and it’s mostly subjective, so just take the criticism you agree with and don’t apply what you disagree with. As a designer, you should know what’s right, wrong, or what you should consider bringing up to other designers.
KEEP MAKING MORE STUFF! You can even remake older stuff as you go on! Just keep going!
That’s my super brief process!
Now honestly, I could’ve gotten down into the nitty gritty details of each step, but this is basically how I’d suggest going about it if you want to get a head start before getting into college, or you want to just learn on your own.
If you guys have any additional questions or want me to go more in-depth about anything, feel free to let me know! :)
2K notes
·
View notes
Text
Do I Look Like I Care? - About Physics

Figure1: Liftoff, 3 steps in cartoon form
When you've been around the block a few times, you don't need to know Newton's laws to understand how stuff works. If you stop spinning the rope it will fall to the floor OK? That was enough to get me by for a while, our brains are really good at learning a lot of things without really needing to know the nitty gritty details. Try spinning faster, slower, pull it up when it's on the left, make a flick with your wrist and see what happens - whatever the motion may be that makes the rope dance how you want it to, you start to get the hang of it after enough trial and error. To be honest, knowing the nitty gritty can sometimes even get in the way or at least not really help you to learn a trick better or quicker anyway. But to contradict my own point, without giving you any equations and numbers I'll proceed to go into a light discussion on the ups and downs of the forces at play while spinning a rope. It can't hurt to think about, and it might just help a little.
If you want equations and numbers then you'll love this quite amazing scientific paper from the research of Brun, Ribe, Audoly - An introduction to the mechanics of the lasso. It's quite a doozie, and they only even analyze the flat loop! Expert roper Jesus Garcilazo makes a cameo appearance in the paper. Think of all the head exploding that would go on if they wrote a paper on the butterfly or body rolls or something tricky like that, but who would even put themselves through such analysis? You're better off picking up a rope and doing a few months of straight wood-shedding to develop some amazing new trick that couldn't be put into an equation even by all the world's supercomputers.
Another reference I must mention is Carey Bunks' The Lasso, A Rational Guide To Trick Roping. It's a long standing free online book which you have likely already come across, an extensive explanation and guide for learning many tricks with the rope, he also gives his take on the mechanics of it in a not-too-rigorous way and therefore it can probably be useful to a lot of people.
In my rebirth of roping, my second wind, I have found occasion where I dissect a subtle motion or rethink the speed at which I spin the rope during a particular section of a trick in order to get it more solid, or to increase the success rate of the trick (or to even get a first success). And with good results too, so I believe it does pay to take the effort to put a critical eye on your methods while still sticking to rough and ready trial and error technique to really learn the thing on the street. Go at the concepts with broad strokes and let your miracle brain work out the exact finesse behind the curtain of grey matter, that's my approach.
The loop always has this angular momentum which just means it's spinning in a circle, it will keep spinning in this behavior on its own for a short time but it's constantly being diminished by gravity and air resistance a little so it needs your hand to keep nudging it in the right direction. You can feel some tension where the rope is pulling back on you through the spoke, greater tension when the speed of the loop is faster. This tension is a good thing, it means that you can control where the rope goes next. If you slow down too much or pull on the rope in the wrong direction then you can feel this tension die and you no longer will be able to influence the rope, it will just fizzle out, close up, or go limp unless you make a larger motion in time to correct it and get the control back.
I'll give a crack at a layman's description of what keeps a spinning loop open: Looking down at a loop from above we have a spinning loop (spoke omitted).

Figure2: counterclockwise loop
Newton said something about an object in motion will just keep on goin' how it's been goin' unless you give it some contrary force. Well that means if it's moving it will go in a straight line unless something pushes it to turn it, speed it up, or slow it down. A loop is going in a circle so it's always turning, therefore there must always be some force maintained on the loop to keep it always turning around and around. I can't really understand all of that unless I imagine the loop not as one rope but as a bunch of little connected points. These points happen to be connected as a rope so they end up pulling and pushing each other along in a circle but if they were disconnected from each other let's imagine what they would do. Every point on that loop will want to just keep going straight, here's a diagram to show what would happen if these points were not connected and allowed to keep going straight.
Figure3: independent points on a spinning loop
They would spread out and make a bigger circle. This in essence is the force that keeps pushing the loop open, a centrifugal force as it may be called. Since the rope is all connected together it's not so easy for the loop to open up though. You should feel this pulling force as you spin the spoke and you exert a force pulling back against it to keep the loop going at a constant size.
Speed does matter, spin a faster loop and the outward pull is greater, you'll feel more tension pulling on your spoke hand and have to exert a little more force to keep that loop in place. If your spoke is allowed to freely slip through the honda then you should see changes in the size of your loop corresponding to how fast and abrupt you are spinning. The loop will increase in radius but at the expense of the spoke length. A growing loop eats up spoke so it must either raise up towards the hand as the spoke length decreases or you must feed it more rope if you have any extra bunched up in your other hand. Spinning speed is not a linear correlation to loop radius though, because the friction of the rope rubbing on the honda will make the loop less responsive to speed changes. So up to a certain point you can have small changes in acceleration and the loop will stay about the same.
I've bored you up to this point but now I'll give you something more interesting. I learned a trick as a kid which I could do good enough most of the time but my loop would sometimes close up and I'd have to spin like the dickens to get it to open up again. It was lifting off from a wedding ring to a flat loop in front of you. Follow the sequence in images below. 1. it starts with a wedding ring. 2. take it down to a single handshake. 3. pull it up from the handshake with a good upward tug. 4-5. pop it up directly above the head. 6-7. pull it out to the right side as it starts to come down. 8. *transition from spoke under loop to spoke above loop, pulling the spoke to the side of the loop while in transition. 9. loop comes to lower position and you continue spinning. 10. settled into flat loop.

Photo: The Liftoff Sequence, 10 steps
The transition at step 8 gave me problems stemming from the fact that the spinning hand must move from it's position in the middle of the circle and go outside the circumference of the loop for a bit before being able to move your spoke hand back to the center of the loop's circle when the loop is in the down position in front of you again. My problem was that I was tugging the rope to get it to move down but I wasn't tugging at the right time in the circular phase of the spin to keep the loop open and my rope would get to the floor as a closed up mess.
The upward and downward motion is one aspect of the trick but all the while you must keep the cyclical spinning motion going and not do any tugging on the rope at a time when your pull will cause the loop to close. Before I knew exactly how to correct myself I thought about how the rope must move and about what might be causing the problem. I figured I was either flicking the rope to the side at the wrong time or not aggressively enough to keep the loop open. Most problems are usually a matter of timing or spinning speed. So I started experimenting with pulling down sooner/later and with different flicks of the arm and wrist at different times. I became much more aware of the cycle of the loop, meaning the position of the honda in relation to the loop's circle and after a bit of trial and error I had an awakening.
When the loop goes to the side it's critical where the honda is, if it's about to go around the far side of the loop then a motion to pull towards you will close up your loop. You can only coax the rope into certain positions when the time is right. Sometimes you have to wait and let the spin ride out till the honda is good and ready, this was integral to learning the butterfly also. It's a good feeling to get that connection with the rope and although awkward at first, with concentrated practice and a fair amount of trial and error I'm starting to get in a comfortable groove. I know physics is busy at work in it all but whenever possible I prefer to just keep it in my subconscious while I physically develop a fluid one-ness with the rope.
0 notes
Text
A Love Letter to Animal Tumblr
You probably know that Tumblr has lots and lots of different types of blogs, and therefore has many different communities, people with similar interests who blog about them and talk to each other about their topic.
You may also know that one of these corners of Tumblr is animal blogs. These blogs are typically run by people who work with animals in some way, as vets, trainers, zoo staff, scientists, etc... or people who are experienced in a particular type of animal keeping.
And I just want to publicly thank everyone who participates in Animal Tumblr: for the many things I have learnt just from following along and reading the conversations, for the important work you do both online and in your professional lives and with the animals in your lives, and also for what you contribute to the Tumblr culture in general.
🐁
I wanted to list out a few specific things I have gained from this valuable work these bloggers do. This got long so under the cut it goes:
1) General enthusiasm for animals that people generally aren't all that enthusiastic about.
For me the first changes were birds and snakes. You know the types of posts that have a lot of pictures and exaggerated enthusiastic comments like "look what a good round birb" and so on? That kind of enthusiasm is very contagious and I enjoy content where people express genuine enthusiasm for and their knowledge of something. So even though I'm not that into, say, gerbils or cockatiels, I love seeing people who are and how much they love the animals they love. Like, simply learning that snake owners have affectionate names like 'Noodle' for their beloved pet snakes helped change the way I thought of snakes and snake owners. Over time, Tumblr's lovely culture has made me "aww" at squids and millipedes and who knows what strange creatures are out there. My initial reaction to any animal is never "yuck" anymore.
🐁
2) Deepening knowledge of animals I really like.
I've always been a dog person, though I've never owned my own dog (my family has had two dogs on separate occasions but neither was "my" dog, though I was very close to the last one). And following blogs that discuss different breeds, different behaviours, training, grooming, and many other really nitty-gritty things about dog ownership has been wonderful. I don't know if or when I will be able to have a dog of my own (financially it is not possible at this moment), but I feel like I'm slowly building an understanding of myself and what kind of traits in a dog I should look for and what sort of things I definitely wouldn't be able to handle, etc.
🐁
3) Getting a glimpse inside the world of people who work with animals, and the respect that grew in me for that field.
There are several people on Tumblr who are Professionals with a capital-P in what they do, whether it be working in a zoo, as a vet, as a trainer, or as a researcher. There are discussions on blogs that intentionally lift the curtain a little on what life is like for people who work in this field. There are posts that help figure out some of the political issues touching the animal world. I now have a better understanding of these types of professions, as well as a deepening respect for them and the work they do. I want to in particular mention zoos and aquariums and the work they do with education, conservation, and rehabilitation.
🐁
4) Becoming inspired to take action.
Last night I came across a blog that advocates for a paradigm shift with regards to pigeons. They shared their feelings about these birds, the shared history of humanity and pigeons, and the factual realities of these animals with the perfect blend of passion and rationality and sources, that I found myself thinking "I would not be against the idea of adopting a rehabbed pigeon if one needed a home and a knowledgeable professional thought I was suitable." Which is not a position I was holding earlier that day.
Reading about pigeons made me realise that the town I live in doesn't actually have pigeons. We have a ginormous flock of jackdaws, we have crows, we have a couple sorts of seagulls, but not really pigeons. I was a bit bummed to realise this since it meant I couldn't do anything for a local population if I didn't have a local population. (PS if anyone has any ideas for what to do for my local population of jackdaws, I'd like to hear. I really like jackdaws too, thanks to Tumblr. Someone mentioned putting a pan of water out sometimes for the birds to have a bath in?)
This all prompted me to look up my local bird rehab (which due to my location isn't all that local either, because I live in a small place surrounded by other small places and this bird rehab is in one of these other smaller places quite far from here) and follow them on Facebook, as well as look up my local animal/pet shelter. That in turn led me to email the pet shelter and let them know I'd be possibly interested in fostering cats (since that seems to be a need they have) before they are adopted, and they sent a lovely email back today promising to be in contact with more details later.
To conclude (also known as a TL;DR):
Thank you Animal Tumblr. You’re awesome.
🐁
11 notes
·
View notes
Text
Traffic Cloud Review – Unlimited Traffic!
Traffic Cloud Review
What is Traffic Cloud?
Welcome to my Traffic Cloud Review. Traffic Cloud is a brand new Software by Eric Holmlund As usual, many affiliate marketers are promoting this Traffic Cloud to their email list. Maybe you are one of them who saw their promotions and came here to read an honest Traffic Cloud review.
You want to know if Traffic Cloud works or not! Right? So welcome to my honest Traffic Cloud review based on real user’s results and opinions. Comment below your experience and results using this Traffic Cloud below. It will help our readers to make decisions.
Traffic Cloud Review – My Personal thoughts
After seeing their sales page and lots of promotional emails you can expect or dream a lot of things from Traffic Cloud. This is natural. People fall for promises.
Let me explain, suppose a product or course named X can be workable for one and can be not working for another person.
Before buying any product you must know if it will fit you or not.
And as usual, these types of software and courses like Traffic Cloud give a lot of reasons and promises why you should purchase this.
But we always try to advise our readers to do more thinking and do some research before falling for something which may not work for you.
You obviously should have noticed that every week more than 7-10 products/software are launched and everyone promises you a lot! Products are launching one after one!
So, will you buy every product or you should stick with one PROVEN method?
And before I continue,
I want to let you know that if you are still struggling to make money online and searching for a real solution that can transform your life then – It will change your life :
Learn How You Can Copy My $1,000 Per Day Part-Time Business…
…even if you’ve never made a dime online before”
Go Here To Check Out Everything
And Learn How You Can Make Your First Commission Online This Week…
…even if you’ve never made a dime online before!
Go Here To Check Out Everything
Traffic Cloud Review : Overview
What is Traffic Cloud
TrafficCloud is another and most recent traffic age programming in the market. TrafficCloud is fundamentally an online networking administrator that will bring you huge amounts of traffic, leads, and deals through internet-based life without spending a solitary penny on promotions.
This amazing TrafficCloud allows you to make or alter drawing in visuals and posts from its enormous assortment of visual resources (pictures, cites, GIFs), makes them click-capable by installing your connections and sharing them over every one of the six long range interpersonal communication stages — with only a couple of snaps.
TrafficCloud lets you distribute the posts over various long range interpersonal communication stages from directly inside the dashboard. You can likewise plan the posts later.
Traffic Cloud Features
These are the Traffic-Driving Features present inside ONE Dashboard… Everything You Need Is Included in It!
2 Billion+ Searchable Images
Pick the ideal picture for your posts from more than 2 Billion+ Royalty-Free staggering pictures. Pictures are accessible for all specialties and you can likewise include outside pictures.
1200+ Viral Quotes
It offers you 1200+ viral statements that will support your commitment and traffic by tweaking your posts which are additionally accessible by means of catchphrases. You can likewise tweak any writings to transform well-known statements into convincing invitations to take action.
20K+ Amazing GIFs
TrafficCloud offers you to 20k+ Awesome GIFs and interestingly, you can redo them with content to support snaps and commitment. GIFs regularly get more popular than pictures.
Snap Technology
It permits you to transform every one of your posts into interactive connections by installing your site URL in it that guides clients to any site or offers you need! Presently, you don’t need to request that your crowd ‘check the remarks’ for joins, and rather transform more guests into clients.
Post Creator/Editor
It allows you to make or modify the appearance of your posts with our ‘point-and-snap’ basic inbuilt editorial manager. Stand apart from the opposition with 100% interesting posts that mirror your image, items, offers, and administrations.
Auto Publisher
It permits you to share your shocking posts over your interpersonal organizations — Twitter, Facebook, Instagram, LinkedIn, and Pinterest… In only a single tick across the board single dashboard.
Set and Forget Scheduler
It additionally permits you to plan your post to share later — whenever later on.
This is the most impressive component that lets you arrange traffic-driving efforts ahead of time, on your calendar … to get the guests you have to your offers, precisely when you need them.
Detailed Analytics
It gives nitty gritty examination and reports of each crusade you are running from directly inside the dashboard.
Know the specific number of preferences and remarks you have gotten on each post and figure out what’s working and what’s not and comprehend your crowd in a superior manner.
Learn How You Can Copy My $1,000 Per Day Part-Time Business…
…even if you’ve never made a dime online before
Go Here To Check Out Everything
And Learn How You Can Make Your First Commission Online This Week…
…even if you’ve never made a dime online before!
Go Here To Check Out Everything
So, Should you Buy Traffic Cloud ?
First, it depends on you. You need to think about whether you should invest your money and time on Traffic Cloud or not.
But keep in mind that you can also lose your money if it won’t work ! It doesn’t matter what type of promising they claimed you .
If it’s your type then there’s a chance it may work but if not you will just lose. So think twice if this fits you before purchase.
I am not discouraging you to buy this but just try to warn you. Many people fall for promises and lose their money by buying products after products. So, you must be determined !
In the end, this Traffic Cloud review post offers users leave their honest reviews after testing and experiencing this product.
Anyone can give their positive testimonials or scam report if it is ! Feel free to comment below if you have tested this product and if any results. Also if it does not work, you are welcome to let us know below on this post.
Our readers will benefit with your honest real user review. And we will know the real performance of this product.
Conclusion
So, before I finish the Traffic Cloud review, I want you to know that to build a real online business, you need the best and working online marketing methods and funnels created by the best person in the industry.
Instead of buying products after products blindly and getting into something you don’t know about, see my no#1 recommendation and see exactly how to make $200 – $300 per day as a complete newbie without having any website, list or any complicated process. Work on something that is working now and changing many people’s lives every day with LIVE proofs and testimonials.
And before You Leave,
I want to let you know that if you are still struggling to make money online and searching for a real solution that can transform your life then – It may help you :
Learn How You Can Copy My $1,000 Per Day Part Time Business…
…even if you’ve never made a dime online before
Go Here To Check Out Everything
And Learn How You Can Make Your First Commission Online This Week…
…even if you’ve never made a dime online before!
Go Here To Check Out Everything
This is just a life changer in a single sentence!
So, thanks for reading my honest Traffic Cloud review, and don’t forget to comment below your thoughts.
https://imsaikat.com/traffic-cloud-review/ https://medium.com/@lozogommwxsqdrxecp/traffic-cloud-review-unlimited-traffic-1424b336be05
0 notes
Text
How long does it take to refinance your house?
Buying a house is an exciting time.
Whether it’s your first house, your second house, or your dream house, your mind is filled with possibilities, paint colors, landscaping plans, and just an overall excitement. We rarely spend a lot of time worrying over the paperwork and nitty gritty details, like the interest rate you’re going to receive on your mortgage. And why should you? Buying your house SHOULD be a happy and exciting time for you!
But then the dust settles, you unpack your boxes, and time passes. One day, a few (or many) years later, you happen to read an article titled “NOW is the time to refinance your mortgage!” and you stop and think, ‘When can I refinance my house?’ So you begin to read about how interest rates have dropped and you have the possibility to lower your monthly mortgage payment. This gets you thinking about what interest rate you currently have on your mortgage and how much equity you’ve built up in your home. Is now a good time for you to refinance your house?
After digging in and researching the hows and whys, you finally decide that you really should look into refinancing your house. This leads to your next big question. How long does it take to refinance your house?
The easy answer is that the national average is 20-45 days, but everyone’s situation is unique. So, to better answer this question for you and help you figure out how long it’s going to take you to refinance your house, let’s break down refinancing step by step so that once and for all you can decide when you refinance your house.
What is your home worth?
You can check your home’s value through several different methods. There are many different online home value estimators, just like this one at NerdWallet. You could also hire a professional appraiser to do the research for you (and some refinancing institutions may ask you to do exactly this).
Whichever way you use to determine the value of your home, the number you calculate will help you determine exactly how much equity you have in your home. You will typically need at least 5% equity, but some lenders may want as much as 20% (or more) before they will refinance your home.
If you’re having trouble with this step, don’t hesitate to reach out to a lender. They can help answer questions and lead you towards trusted home value estimators that can provide the information you need to make a decision on whether or not to move forward.
What are your loan options?
There’s a lot to consider here. If you have a good amount of equity in your home, it might be worth it to consider reducing your current 30 year mortgage down to a 15. A good lending institution will walk you through much of this once you reach out to them, and they will have great advice on the types of loans you qualify for and what lower interest rate you could lock in. But general online searches on sites like LendingTree and other trusted sites should give you a great current overview of the going interest rates and loan options are for individuals in your situation.
Do you already have a trusted lender or do you need to “shop around?”
You might have a great relationship with the lending institution that gave you your original mortgage. And unless you’re unhappy with the service they provided, they will be a great place to start gathering information and feeling out whether or not refinancing is a good option for you.
However, if you feel like it’s time for a change and are looking for a new lender to refinance your mortgage, then do your research! You should be able to find online reviews and get an overall sense of the processes the lenders use. Gather a list of ones you’d like to talk with and start making phone calls.
Look for a lender who is willing to patiently answer all your questions and who is dedicated to finding the best refinancing options for you. These lenders will move at your pace, not try to rush you to make a decision or sign paperwork.
What types of documentation do you need to gather?
Speaking of paperwork, what exactly will you need to move forward with refinancing when you’re ready? Here’s a list of the typical paperwork you’ll need to supply to your lender in order to move forward with your refinancing.
Past 1-2 months of pay stubs
Past 2 years of W-2’s
Past 2 years of Federal Tax Returns
Past 2 months of bank statements
Your homeowner’s insurance policy
Recent mortgage statement
List of personal debts and amounts (car loans, personal loans, student loans, etc)
Proof of supplemental income (if applicable)
Your lender will supply you with a complete list of documentation needed, but it never hurts to begin gathering these documents early in the process so that you have them on hand and can make the process run a little more smoothly.
Ready to apply for your refinancing loan?
You’ve valued your home, you’ve done your research and picked out your trusted mortgage lender, and you’ve begun gathering all the paperwork you think you’ll need for the process. What happens now?
Once you’re ready to begin, you will fill out the necessary paperwork to apply for a loan from your lender. (You’ll be glad you gathered all those documents in advance here as they will help you answer questions on the loan application!) From there, you’ll receive a loan estimate and the loan processing will begin.
During this time is when you’ll want to pay close attention to interest rates as at some point you’ll have to lock in your rate. You can lock in a rate as early or as late if you want. Some individuals (who are far braver than I am) like to wait until the last minute in the hopes that the rate will drop further before locking it in. This is your choice and your mortgage lender will have advice for you on how interest rates have been fluctuating lately.
As your lender is processing your loan, they may ask for additional information or even for an official appraisal of your house, if you didn’t already receive one. While this will be an additional expense for you, your lender should set up the appraisal for you and handle communications with them.
Now you’ve done the hard work and it’s time to sit back and let the Underwriters do their work. They’ll review all of your information and determine if there are any missing pieces of paperwork that need to be filled in. If they need any additional information, they, or your lender, will reach out to you.
Once the underwriters are sure that all the paperwork supports your new loan, all that is left is for you to sign documents and close on your loan. Then you can enjoy your new lower interest rate and monthly payment!
All in all, the process is fairly streamlined, especially if you understand the steps and the documentation needed. Going in blind and unprepared can result in delays, headaches, and lots of additional stress for both you and your lender.
Having a basic understanding of how refinancing works can also tell you when to refinance your mortgage. If you see interest rates dropping and you keep tabs on how much equity you’ve built up in your home, you’ll be much more likely to lock in the best interest rate.
While the average refinance takes anywhere from 20-45 days, know that every situation is unique. It may take you longer to sort through and gather all the necessary paperwork, or you may have additional questions that require a little more research and understanding before moving forward. Doing your due diligence can only help to speed up the process.
You can also check out this article by Realtor.com which offers up tips on how to speed up refinancing your mortgage.
You may have read through this article and are thinking: ‘Yes! This is something I’ve been thinking about for a while now!” And if that’s the case, I urge you to reach out to me or your trusted mortgage lender, today. We’ll be happy to answer any questions you might have regarding refinancing and can get started as soon as you’re ready to move forward.
For more information on refinancing, Click Here to learn more and to get started today. You may find out that now isn’t the best time for you to refinance your house, but even if that’s the case, you may learn that you’re not that far away from being able to refinance. Learning what you can now can help you be prepared for that right time when it comes along.
So don’t wait! Reach out today to find out if refinancing your home is the best option for you.
0 notes