#so you really want to get into bookbinding?
Explore tagged Tumblr posts
Note
Do you have any advice/suggestions for getting into bookbinding? What is the process like if you don't mind sharing?
Hello! Very happy to share bookbinding advice/resources 💜 it's a wonderful and delightfully rewarding hobby, and while it can be complicated and easy to get stuck in the weeds with it, you can also get started with some really simple binds with materials you may already have around your living space.
Info below the cut:
First off, there are a lot of instructional videos and guides out there for bookbinding. My favorite YouTube channel for those just starting out bookbinding is Sea Lemon, who has a ton of instructional videos for various styles of bookbinding. Her method of explaining things is clear and concise, and she tends to work with simpler tools and materials that don't cost much and that you may already have on hand. She is not a professional bookbinder with professional tools (afaik) but in my opinion, that's perfect for a beginner because it's not as overwhelming and has a much lower barrier to entry. Perusing her channel and watching a bunch of videos was where I started before even picking up tools to start my first bind.
Another guide I highly recommend is How to Make A Book, by ArmoredSuperHeavy. This is a wonderful step-by-step guide for taking a fic from AO3 and turning it into a book. The most helpful part of this guide, for me, was the typesetting instructions. Typesetting is the act of taking a piece of text (eg. a fic on AO3) and formatting it in the correct way for printing and binding into a book. Note that this guide is specifically for MS Word, though you can also typeset in Google Docs, Libre Office, Affinity Publisher, InDesign, and other programs (even LaTex!).
(Pro tip: save yourself the headache of trying to use Word's bookfold option and just set your document page size to the page size of your finished book (if you're printing on letter paper, this is 5.5" x 8.5") and then use this software to put your pages in the correct order: https://momijizukamori.github.io/bookbinder-js/)
A final resource that I recommend, but that can also get a bit overwhelming, is the Renegade Guild Bookbinding Discord. It's a space specifically for people doing fanbinding, and there are a ton of resources within it, including typesetting guides for various softwares, guides for where to get the tools you need and which tools are best, and people who can answer any questions you may have along the way. It's gotten quite big since I joined, and it can be overwhelming since there's so much information available and so many people who have been binding for a while and thus often offer up solutions or advice that's hard for beginners to understand, but it has never failed me when I've had a tricky question that I needed answered that I couldn't find information on anywhere else.
All that said, here's some more advice from me when just starting out!
Start with a simple bind. A single-section pamphlet bind is easy, cheap, and quick. Here's a Sea Lemon video for how to put together a pamphlet bind.
If typesetting seems intimidating, you can bind blank notebooks. This is also a good way to practice new binding styles if you don't want to go through the hassle of typesetting, imposing, and printing for something you worry you might mess up.
A good word count range for fics when you're learning how to bind case-bound books (ie, the typical hardcover books you see in stores) is 25-50k. Shorter than that, and your books will be thin and a bit fiddly to work with. Longer than that is probably fine, but it will be a quicker process for a thinner book, which is nice when you're just starting out. (And then you don't have to worry about rounding and/or backing, which can be complicated.)
There are very, very few tools that you absolutely need to make a book. There are quite a few tools that will make your life easier, or that will make your book look nicer, or that will make your book last longer, but when you're just starting out (especially if you're trying to minimize cost or deal with space constraints), you can forgo a lot of "required" tools. I'll include a list below of the general bookbinding tools you'll want and some substitutions for them.
You might hear talk about the grain direction of paper or bookboard. When you're just getting started, don't worry about this. Once you get more comfortable with the bookbinding process, then you can start ensuring that your bookboard has the correct grain direction (parallel to the spine) to reduce the warping of your covers. The grain direction of your textblock paper matters the least, and I didn't start using "proper" textblock paper (ie short grain) until about 2.5 years after I started binding.
Bind something you like! Pick one of your favorite fics and bind it, even if it's your first bind and you're worried about it turning out ugly. The excited feeling of having bound your first book will be that much more exhilarating when you're able to put a story that you love on your shelf for the first time.
So you're ready to bind a hardcover book! Here are the tools you will want/need:
An awl, for punching holes in your signatures (groups of paper). You can use a thumbtack for this, or even a strong needle if you have something to cushion the end of it that you'll be holding, like an eraser. Awls are typically pretty cheap, though. You'll want a thinner one so you don't make huge holes in your paper. I have this one and it's worked just fine for me.
A bone folder, for creasing the pages. Historically, these are made out of actual bone, and the reason for using one is to get sharp creases in your paper without tearing or damaging it. You can also use basically anything else in your house that can accomplish this task. When I'm feeling lazy and just need to crease one piece of paper, I use my thumbnail. Bone folders are also cheap, though--I have this one. (As a tangent--when you're making your signatures for your book, you're going to be folding and slotting together usually between 4-6 sheets of paper. Fold the paper normally without creasing with the bone folder, slot them together, and then use the bone folder to sharply crease them all together. Trust me on this--the pages will fit together much better if you crease after putting the signature together.)
PVA glue, for all aspects of gluing involved when making the book. You can, I've heard, use Elmer’s glue for this in a pinch, but I've never tried it. PVA will dry flexible, which is what you need for your book, especially when gluing the spine. For things like attaching decorative paper to your covers, this is less important. If you're making a book that doesn't require gluing the spine (like a pamphlet or coptic stitch book), you may not need PVA. There are also lots of other glue mixtures you can use when bookbinding (paste is a popular one) but I've been a straight PVA guy for over three years now and I can't offer any advice when it comes to other types of adhesives. One note about PVA is it dries quick, so once you've stuck something to it, that's that. Prepare yourself for some crooked books until you get the hang of it.
Gluebrush/paintbrush, for applying glue. I recommend something with bristles; the foam brushes technically work but will absorb most of the glue and will probably cause you a headache. Silicone brushes are wonderful, as you can just wait for the PVA to dry and then peel it off, but a regular glue brush will also work; just be sure to put it in water immediately once you're done with it, otherwise the PVA will dry on it and ruin your brush.
Ruler + pencil, for measuring. Any kind of ruler will do, but if you have access to a quilting square or something similar, this will help you get nice and even right angles.
Needle and thread, for sewing the signatures together. You can use regular sewing needles and sewing thread (doubled up for more strength) if you don't want to buy anything specific for this. An easy step up from this that I recommend is buying a block of beeswax (I got mine for like $4 from a farmer's market) and waxing your thread (running the thread along the block a few times). This will keep your thread from tangling and make it easier to work with. You can also use embroidery thread, especially if you're doing a pamphlet or coptic stitch bind and want some color. I recently upgraded to linen thread (thread weight 35/3), which is the standard for archival-quality books, but you absolutely can use cotton thread and it will be fine.
Paper, for the textblock. You can use your standard white copy paper for this and all will be well. Or, if you want to get a bit fancier, you can use cream-colored paper; 8.5 x 11 hammermill 20lb cream colored paper is easy to find and relatively cheap and will make your books look better, as plain white paper can look almost blue in a book. (That said, I also have some actual published books that use white paper, and I've never noticed anything off about them.) If you decide you want to get really into the proper grain direction, I get my short-grain cream-colored paper from Church Paper. They have both 20lb (typical copy paper weight) and 24lb (slightly heavier) weight. I have both and I actually really like the 24lb; it has a luxurious feel to it, with less bleed from my inkjet printer. If you feel like springing for nice paper, check out their site!
Book press, for pressing your book while it dries and pressing your folded pages before sewing. There are a lot of different kinds of book presses out there, many of which are very very expensive. You can usually make do with some heavy books to weigh down your book while it dries, or thin boards and C-clamps if you have those on hand. If you have access to basic power tools, it's also super easy to make your own press with carriage bolts and cutting boards (this is what I did). There's a lot of videos out there with instructions; here's one from Sea Lemon.
Printer and ink, or a printing service/print shop like Staples. Print shops can get expensive in the long run, and it's nice to have your own printer so you can do test prints of your typesets. If you're going out and buying a printer, I highly recommend either a black and white laser printer (if you're not planning on printing in color; Brother is a good brand) or a tank inkjet printer (like the Epson Ecotank). Do NOT get a new HP if you can help it; their ink subscriptions are brutal. I'm upgrading to a black and white laser this year, but I've been using a very old, cheap HP inkjet that I got off Facebook marketplace for the past few years and it's been reliable (if a bit restrictive). If you do have an inkjet currently that takes cartridges, I highly recommend looking up how to refill your own cartridges. Buying one set of genuine HP cartridges and then refilling them with generic brand ink until they die has saved me probably hundreds of dollars by this point.
Book board, for the covers. Otherwise known as chipboard, which is easy to find on Amazon or at craft stores. This is NOT the same as corrugated cardboard; that will not work. You can cannibalize old three-ring folders, which have chipboard inside them, or even old hardcover books/textbooks. Don't bother with genuine bookbinding chipboard; imo, it's overpriced and unnecessary. You can find chipboard on Amazon for relatively cheap; I recommend the 12x12, as you can get a front and back cover out of one sheet with the correct grain direction. You can use chipboard for your book spine, if you're making a flatback, or you can use a thinner material that you can bend if you're making a rounded book (or for flatbacks as well). For this, thin cardboard (eg. old cereal boxes) or thicker cardstock will work just fine; you don't have to go out and buy genuine bristol board, and I've never bothered with it.
Exacto knife, for cutting things. You could also use a boxcutter, but a craft knife will be easier to handle. You will probably need to frequently change the blade, as cutting chipboard will dull it quickly, so get one that comes with a bunch of replacement blades.
Bookcloth and/or decorative paper, for covering your book board. Bookcloth is basically fabric with a paper backing on it. You can make your own using heat and bond, tissue paper (I use white tissue paper), and fabric; iron the fabric so it doesn't have any wrinkles in it, then iron the heat and bond onto the fabric, then iron the tissue paper onto the heat and bond. There are other methods out there that you may find easier/better, but this is the one I use. The purpose of the paper backing is to prevent glue from striking through the fabric; if you use a thicker fabric or paper, this is not necessary. For your first books, you may find it easiest to just use paper, or to go out and buy some premade bookcloth.
That's a lot of information, but I hope it was helpful! I'm more than happy to answer any more questions you (or anybody else) might have, and happy binding!
22 notes
·
View notes
Text
Bookbinding for Beginners by a Beginner Part 3
*braces self on a door frame* Right there's a lot of information I still need to cover so lets get into it.
I don't recall if I told everyone to set up the document to be booklet type or not but here's how to do that (I'm not re-reading what I wrote my brain stopped working at some point)
But Layout Tab, Page Layout, hit the little arrow pointing towards the document:
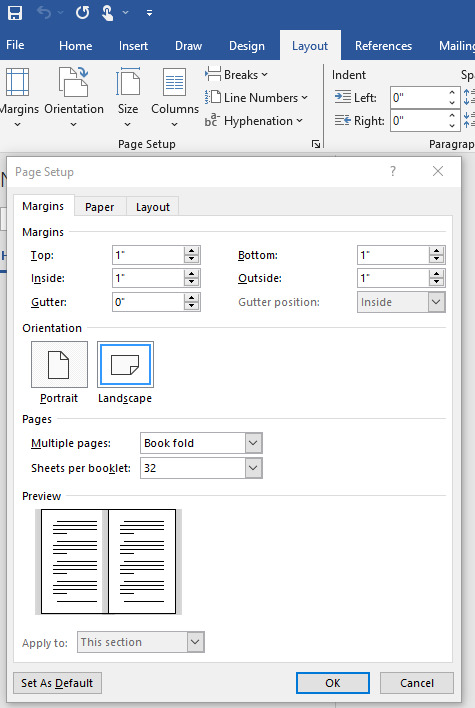
I have the sheets per booklet set to 32, but this site is helpful for helping you get the exact number of signatures (a portion of the fic you are printing it is one section of the book, whereas a text block is the whole thing together)
That's if you want to print through the program you're type facing (the text within the pages all of the formatting and indents and everything we started covering in part 2 is type facing). I have totally done printing through the word processor but there is a different option that I will cover later down this post.
For now I'm going to try and remember all of the extra stuff I need to cover. A lot of this is trial an error and fiddling, farting, and sometimes sobbing your way through this.
OH! Right if the fic you're type facing has a fake email. Like.... I don't know "[email protected]" Word will sensor it automatically when you paste it onto the document. The only work around I have is to have the OG link to the fic you're working on, and try your best to locate the email copy it, and find it within the text of the document using the headers to skip to the chapter in question and scan for the brackets with [Email redacted] or some such, it's usually blue text with "[ ]" going on.
I can't truly think of anything else at this time pertaining to my tips and tricks for Word. There is more I may know but my mind is fizzling out I may circle back to this but I think I'll move on towards downloading and uploading fonts to use in your bookbinding adventures and some Canva stuff.
DaFont and 1001 Free Fonts work
Dafont:

1001:

I'll be using these two Fonts as my examples cause... well I actually quite like them.
Hit "Download"
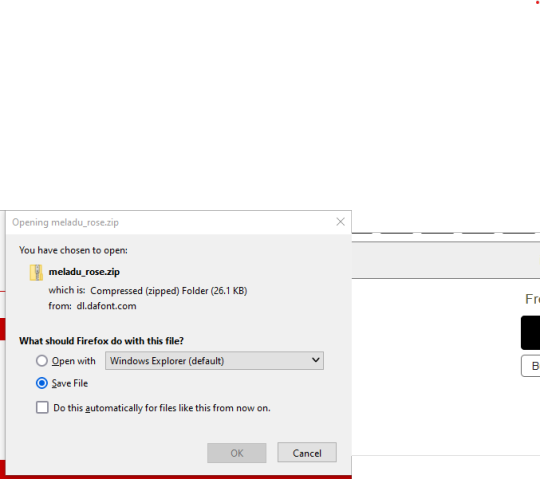
This will pop up on your screen hit "OK"
Go to your Downloads or where you put your downloads,
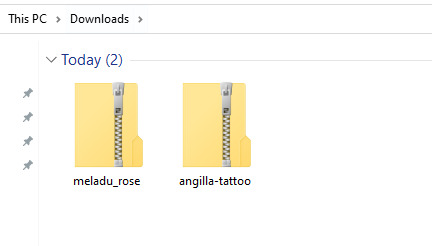
Right click on the file in question and hit "Extract All"
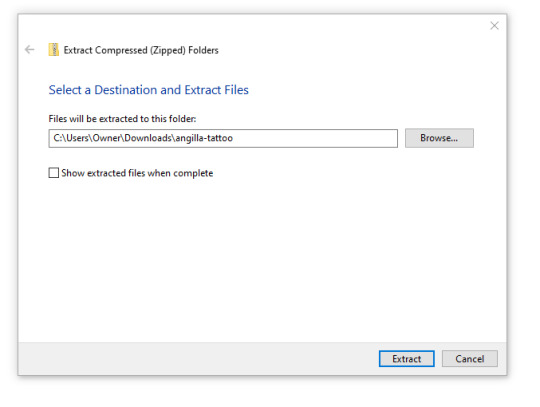
Hit Extract.
Click on the folder post extraction. The file type you're looking for is "Open Type Font File" Right Click, "Install" or "Install for all Users" works as well and the font will be available to anyone that has a User key for the computer you're on.
Sometimes the file will look like this:
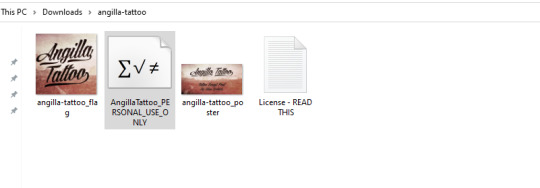
The Greyed out one? That's the type file.
There will be a pop up that says "Installing Font" give it a few seconds and it will disappear.
You will now be able to open up your word processor and go to the font section and be able to find your newly downloaded font
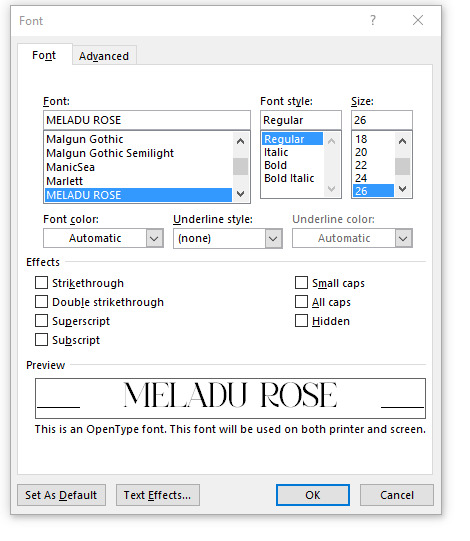
Enjoy your new found power in getting fancy pants fonts on your word documents!
Now... Canva...
You can download it for free like I said. I have it on my phone and on my computer as a software application:
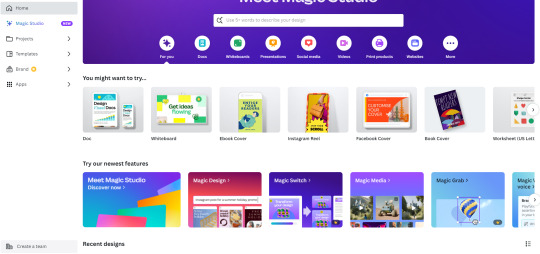
So I don't accidentally doxx myself this is all you really need to see- you can do much much more than bookcovers, I've done bookmarks, and logos and a few other things.
but for our purposes we'll open up a document and make a few pages:
At the very tippy top that I did not show there's "create Design" I usually hit either "Bookcover" or "ebook cover".
There will be a document with some template examples and you can scroll and see if you like any of those. OR You can just go down to "Elements" and start playing and toying around with that.
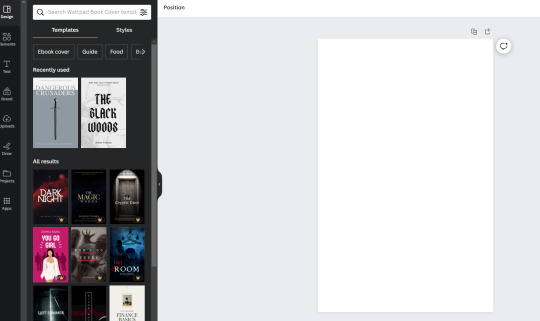
You can also grab screen captures of decorative lines to replace the "***" on your document.
How to do this- in elements there should be a search bar type in "decorative lines" and you can refine it "Decorative Rainbow" "brush stroke" "ornate" then open up the application on your computer that allows for screen shots Snip and Sketch for Windows, I don't know for Mac. Sorry.
Select something you like and when it appears on the document click outside of it.
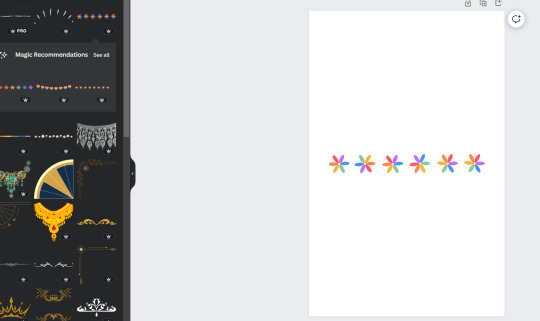
open up your screen grab and grab the line in question

Here's my example.
Now in your word document feel free to go into the Pages tab of the Navigation bar and find whatever the author has used to break up the text. Highlight, right click, hit "search" There will be a pop up on the right hand of word hit the tab that says "Search this document/file" you can see how many times "***" or the equivalent has been used. I would suggest opening this link and reading all of the other tips and tricks since they break it down better than I ever could.
Edit as of November 18th 2023: But the root gist of it all is to highlight the "***" or equivalent divider on the document. Right click, "Search" there will be a prompt that opens on the right hand side of Word hit the "In this Document" and it will bring up every instance of what you have highlighted.
Have the image you intend to replace "***" with right click "Copy". Back in Word, hit "Replace" there will be a box that pops up with "Replace with" Type: ^C . What this does is take the image you've just copied and will override the highlighted "***" Hit "Replace all". You may have to scrub through the document to center it properly but thankfully it's easier to find especially with the Navigation Bar on the "Pages" tab open.
End Edit
Though you can just scroll and find the breaks highlight and drag and drop the image to break up the text if you so choose. Do what works for you.
Now you can also do the same thing with decorative chapter headers, just choose or fiddle and make something that works for the fic in question. Remember when I made you do all of those "Next Page" breaks for the fic? Well on the top of that page with the chapter, double click the header insert an image and "warp image" to "Behind text" and you are free to resize and move the image around.
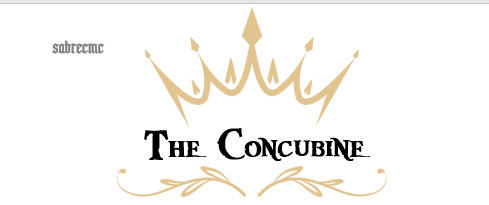
Just so you know whatever is next to the image will repeat with this example it's the author's name, it will appear no matter the page number odd or even. I don't know the work around and it doesn't bother me much at the end of the day. At this point I'm just trying to pull all of the tips and tricks I've learned over time out of my ass to help people out.
Back to Canva. You can make your Covers if you'd like in this and you can do decorative cover pages. Just go to the page that you want the title page on, insert an image, and warp image to "In front of text" You will be free to stretch and fill the page as much as you please. I do the same thing with my logo placement for the logo page.
Now... if you're still with me... Congratulations I'm not sure I'm still with me or not.
So I'll move on to the "OK I like how this all looks and I've saved everything I've done"
GREAT you can calculate the right number of signatures and print from here OR you can take a few extra steps.
Hit File, Export, hit Create PDF/XPS. I hope you have at least a free Acrobat or PDF reader. Wait. Don't panic if it looks like the processor is freezing up on you. there should be a pop up of a PDF after that minor heart attack.
Now. With your new PDF you're going to go to Bookbinder JS
Upload the pdf file you've created and I'll walk you through the steps.
Letter 612 x 792 is your standard 8.5 x 11 paper.
Printer type- Duplex I hope you have a duplex printer. You'll need it or else you will be manually flipping the pages to make this book bind.
Folio- That is just 8.5 x 11 paper folded in half to make 8.5 x 5.5 booklets. Keep these numbers in mind.
Signature format- there you can select "Perfect bound" AKA Paperback. Or Standard signature. Here I select 20 page signatures. Keep in mind that there will be four pages per one sheet of paper.
Preview output ALWAYS preview output because it will tell you how many signatures will be with the upload. For example:

What this means: Total pages of the file uploaded, since the fic I'm type facing is 300+k words I divided the chapters up.
so you know what a 100+k word fic looks like printed folded and the air compressed (I will cover this as well) Keep this in mind this was Celestial Navigation now add similarly stacked pages atop of what's here. 100+k fics it's wisest and best to split this in half. Keep in mind your wrists. 500-600 pages is comfortable holding. You can get to around 800 pages but if it's 900+ pages I would think about dividing the document up.

After you are happy with the number of everything. Hit "Generate Output" wait for the popup for the save file to appear and hit "Save" this will be in a zip file as well. Head over to your Downloads and hit extract, open up the file and some terminology that will help with this:

Aggregate book means "the whole damn thing" Signature 0 is the first signature.
To spare the wrath and protest of my printer- I print one signature at a time and fold it since I don't have to worry about getting the page numbers to line up.
Take however much time you please. Next post. Folding signatures, pressing signatures, stitching, gluing end bands and ribbons.
aka- welcome to the world little fic. We hope you enjoy your stay. You're going to be a real book soon.
If I wasn't running out of steam I would cover Quartos. But if you wanted to print a smaller fic know this- increase the text size through out the whole document, these things are SMALL. 4.5x5.5 all said and done. I would go to TikTok and Youtube and look up "Quarto Book bind" if you want to see the smallest, cutest most pain in your ass book you've ever wanted to try and make.
I've done those as experiments as well... they can be fun but my god I'm bad at mathing at times.
#bookbinding for beginners by a beginner#book binding#DIY#so you really want to get into bookbinding?#have I scared you yet?
8 notes
·
View notes
Note
Hi honey! How are you? How’s your mom doing? I hope she’s better now🥺💚
I’ve recently decided to learn how to book bind bc it’s a must to have my fav fanfics as actual books. I’m still learning and it’s probably gonna take a while before I get the results I want but I wanted to ask you if it was okay with you to book bind The Red Thread? Obviously it would be just for me, I would not sell it or make any profits. (And if it turns out how I want to, I would love to gift you one👀)
It’s one of my favourite fanfics of all time, like it’s a masterpiece and I would love to have a physical copy of it<3
And I know it’s not finished yet but it’d probably have to be a few volumes anyways bc it’s a lot so😅
She's doing ok! Progress is slow but it's definitely happening! She's graduated from at-home physical therapy to outpatient, which is a HUGE thing. We've gotten the house pretty well set up too now (chair lift for a section of stairs not covered before, new railing on the front steps), and between me, dad, and sis's various sleep schedules, we're all able to make sure she has someone nearby when she needs help getting around or opening things. I'm still in caretaker mode and trying to balance everything, but she's getting there, so I hold onto that! As for me, I'm doing... ok I think, considering how exhausting and brutal the past few months have been. I'm taking @shouldbestudying41 's advice and just trying to be kind to myself, and I'll admit my brain seriously needed the break. I continue to miss Cato something awful, but I've felt a little more settled since his ashes came home, and I think I'm starting to adjust to sleeping without him next to my pillow. I also got my follow-up today with my cardiologist on my heart issues and their answer was basically a shrug and a, 'we have no idea why your heart's doing this, but it's getting better every time we test you, so keep doing what you're doing!' Which could be worse. So... I'm getting there. Slow and steady!
And oh my gosh, you absolutely, ABSOLUTELY can bookbind TRT, thank you! 😭The idea anyone would love it enough to bookbind makes me SO FUCKING HAPPY! Hell, if I could sell copies at cost I would, but sadly that's a huge no no and all I can do legally is tell people, YES you can bookbind TRT for your shelf! I'm 100% supportive basically (also I would D I E if I got one, like no pressure at all cause D A Y U M it's a long thing to bind, and also just knowing it's out there on someone's shelf is more than I ever expected would happen so I'm delighted even if you just bind for you!).
TRT volumes one to ten maybe??? LOL. I know I had it planned as a series originally before I decided to just kinda keep it in one thing since we were all already there LOL.
#the red thread#pasta life update#basically mom is doing really well recoverywise! and i'm getting there#the witchy shop has been amazingly supportive and i have people here who've been helping talk me through it along with fam#and the kitties have all been very good cuddlers to me while feeling down about cato#so that's been nice!#and OF COURSE YOU CAN BOOKBIND I LOVE THE IDEA OF BOOKBINDING#i know i've said this before but i never really thought TRT would take off so the idea of ANYONE wanting to bind it is HUGE to me#i always intended it to be a series too and then i just wound up keeping it all in one spot#because... i can't remember#i think i was just feeling lazy when we hit the 'final' chapter of book one and went 'ya'll mind if i keep it all here'#and got a resounding YES THAT'S FINE WE WANT MOAR#and so off we went LOL
29 notes
·
View notes
Text
Book binding 101: Materials
I’ve decided to do a series of posts on how to book-bind since I talk about it a lot, and I think it’s a really fun process. This post will include various inexpensive alternatives to “professional” supplies, many of which you will have at home. Not everyone can afford a cricut and that’s ok! I will also be listing more expensive materials for people who want to invest a bit more into the craft, but they absolutely are not a must.
This first post will focus on a list of supplies you can use to make books, but will not yet get into the instructional part of it. That will come later!
Anyway…
Bookbinding Materials: Essentials
These are items you need to bind, but many you can find around your house!
Sewing thread: Any thread will work for bookbinding, though waxed threads can help reduce tangles. You can also double up thread as another way to prevent tangling if you so choose. Waxed thread is definitely more expensive, so it can be good to use what you have starting out. Here’s a link to the waxed thread I used for those that are interested. You can buy it in a lot of different colors! (White is good if want an “invisible” thread).
Sewing needle: A lot of people say to use a curved needle for binding, but I’ve never found it to be much different from using a regular needle. If you have one, I would recommend a larger needle, however, since it’s better for piercing through signatures (aka the stacks of pages you bind together). In other words: there’s no special needle you need to bind books.
Ruler: I’d recommend any metal ruler since it’s better to use as a straight edge for cutting. There’s a good chance you already have one. It’s just used for measuring and being a straight edge. Nothing fancy.
Paper: Any paper will work. What you wanna use depends on your project really: if you’re binding together a work of text you’ll want to use some kind of printer paper (of course). If you’re making a sketchbook, you can fold up some sketching paper. I like to get sketchbooks with perforated edges so I can tear them out easily if I want to use a blank page for bookbinding. You can also buy large sheets of paper made for any medium. For example, if you want a sheet of water color paper, just search “large watercolor paper sheet”.
Awl (or all alternative): An awl is a tool used to poke sewing holes. It’s nice because it’s sharp and ergonomic, but you can totally also use a pushpin or even a sewing needle.
Bone folder (or a bone folder alternative): A bone folder creates sharp creases when you fold your pages, making them lay flatter. It also helps define the hinge gap on finished books, making it open easier. You can use a ruler if you don’t have one.
PVA glue: PVA glue is what to look out for when it comes to binding glue. There are some designed specifically for bookbinding, which spread out a bit faster than ones that aren’t. You can also use tacky glue which IS a PVA glue.
Book board: Also sometimes called chip board, Davey board, or mat board. This is what you’ll use for hard cover books. It is important to use book board specially, as cardboard will warp. You can buy book board directly, or you can cut the covers off of old textbooks or binders, unwrap the paper/plastic around the board, and use that!
Box cutter or utility knife: for cutting the board
Decorative paper and book cloth: For wrapping around cover boards and for endpapers. Book cloth can also be used to cover boards. You can also draw your own designs on Bristol paper if you want (or any paper with a similar thickness/durability). When it comes to decorative paper I like to either get scrapbook paper or rolls of fancy handmade paper (you can get those on Etsy, through paper source, or through bookbinding websites).
Bookbinding materials: Optional (and not crazy expensive)
These are supplies that you don’t need for binding but that can make the process easier and/or help with the decorative elements of your books. I’d recommend these things for when you’ve been binding for a while and feel these things could be helpful!
Paper trimmer: can cut a few sheets of paper evenly—I find it really helpful for endpapers
Stencils: Super helpful if you want to add text on the covers
Stamps: Good for adding text and also great for adding illustrations if you’re not able to draw them on your own. You can buy ink pads for them or use markers by coloring over the stamp lightly and using the stamp immediately so it doesn’t dry (I’ve tested this with alcohol markers and it works very well)
Paint markers: great for drawing directly on the cover. Since they’re opaque they can imitate the look of vinyl. You can also get them super painterly if you want. The internet usually talks about poscas but there are tons of different brands. Do some research, figure out what you like & can afford.
Hot foil pen & heat transfer foil: Perfect if you want to add foil to your covers but don’t want to spend a ton of money on a cricut. A lot of binders uses the foil quill brand, but there are ones that cost less and work the same (I have both a cheaper one & an actual foil quill because I wanted some nib variation. As long as the pen has good reviews that aren’t from bots you should be good). Also remember: don’t use foil designed for going through laminators (I.e. decofoil) . It doesn’t work the same way.
Bookbinding Materials—Expensive
These are materials I’d recommend for people who have been bookbinding for a while & feel that it’s something they really want to invest in. To be fully transparent, I’m a college student and don’t own these and have little personal experience with them. However, I know a lot of binders who love them!
Cricut machine—Cricuts are cutting machines that can make precise cuts into paper, wood, bookboard, or vinyl. A lot of binders will cut designs out of vinyl and apply them to the covers using a heat press.
Book press—What it sounds like. The pressure helps the pages lay flat and stay even. That being said you can stack heavy books on top of your projects, it just may not have the same even pressure. I also know some people will DIY these, so if you’re skilled with power tools you can give it a go!
Paper guillotine—like a paper trimmer but bigger and can cut more sheets of paper at once. I believe really good ones can also be used to cut bookboard!
Those are all the materials I can think of! Hope this can work as a good starting point for those interested in the craft. I’ll definitely be posting more info about bookbinding for people who are interested :)
-Zoë💗
#bookbinding#book binding#fan binding#craftblr#information#tutorial#book binding resource#resource#book binding 101
698 notes
·
View notes
Text
so, you wanted to start bookbinding?
so @princetofbone mentioned on my post for "factory settings" about wanting to know more about the binding style that i used for it. so i thought i might make a post about it.
i was as terrible as i always am for taking in progress shots, but i can link you to the resources i used in order to make my book. i would also like to point out that "factory settings" is my 120th bind, and i have been doing bookbinding as a hobby for just over 3 years now. unfortunately this means some of the methods that i used for that bind aren't particularly beginner friendly, just in terms of the tools and methods i have used, but i would love to point you in the right direction when it comes to resources. i dont say this to sound pretentious which i fear i might come across, just so that youre fully informed. getting into this hobby is fun and rewarding, but it can definitely be intimidating.
with that caveat, heres a list of links and resources that i have used for bookbinding in general, with additional links to methods i used specifically in regards to this bind.
ASH's how to make a book document. it gives you a great introduction into typesetting fics (where you format the text of fics to look like a traditionally published books) and then turning them into a case-bound book (the style i used for "factory settings"). it is comprehensive, and explains how to use microsoft word to do your bidding. it was invaluable to me when i was just starting out! currently i use affinity publisher to typeset/format my fics for printing, but i only bought and learned how to use that after i had been binding books for a year and a half. i made some beautiful typesets with word, and some of my close friends use it still and design stuff that i never would be able to in my wildest dreams (basically anything by @no-name-publishing)
DAS Bookbinding's Square Back Bradel Binding. a great style to do your first bind in! this method requires, when making the case, to attach the cover board and the spine board to a connecting piece of paper, which makes it so much easier to match the size of the case to the size of the text block (your printed out and sewn fic). using this method is what allowed me to get much more accurately fitting cases, and made me much more confident with the construction of the books i was making. a well-made book is something that is so wonderful to hold in your hands!
DAS Bookbinding's Rounded and Backed Cased Book. This is the specific method that i used to create my bind for "factory settings"! even before i could back my books, i found that watching DAS's videos in particular helped me see how books were traditionally made, and i was able to see different tips and tricks about how to make nicer books.
Book Edge Trimming Without... i trim the edges of my text block using my finishing press and a chisel i have sharpened using a whetstone and leather strop with buffing compound on it. i follow the method for trimming shown in this video!
Made Endpapers. i follow this method for my endpapers, as i used handmade lokta endpapers, and they can be quite thin, but they look beautiful! i used "tipped on" endpapers (where you have your endpaper and then put a thin strip of glue on the edge and attach it to your text block) i used for a very long time before this, but these feel like they are much more stable, as they are sewn with your text block.
Edge Sprinkling. this is the method that i used for decorating the edges of my text block. but the principle is basically clamping your text block tight and then sprinkling the edges. i do not believe you need to trim the edges in order to do sprinkles on the edges, and that's what makes it accessible! i personally just use really cheap acrylic paint that i water down and then flick it onto the edges with my thumb and a paint brush.
Double-Core Endbands. i sew my own endbands, which i followed this tutorial for. that being said, it's kind of confusing, and this video is a bit easier to follow, but it is a slightly different type of endband.
Case decoration. i used my silhouette cameo 4 to cut out my design for "factory settings" in htv (heat transfer vinyl). i also used my cameo 4 to cut out the oval of marbled paper on the front, as i honestly didn't want to try my hand at cutting an oval lol. i also glued some 300 gsm card with an oval cut out of the centre of it onto the cover before covering it with bookcloth, to get a kind of recess on the cover. i then glued the oval of marbled paper onto the top of the recessed area once it was covered with bookcloth, so that it was protected. the images i used were sourced from a mix of rawpixel, canva and pixabay. a more accessible way to get into cover decoration is by painting on a design for your cover as described in @a-gay-old-time's tutorial just here. or even doing paper labels, which look classy imo.
physical materials. sourcing these will depend on your country. i am located in australia, and have compiled a list with some other aussie bookbinders of places to buy from. here is a great post describing beginning materials for getting started binding.
@renegadepublishing. this tumblr is great! its what got me started bookbinding, and being in the discord has been inspiring, motivating, and honestly just one of the best online experiences i have ever had. it is full of resources, and most people in there are amateur bookbinders, with a couple of professionals thrown in. the discord is 18+, and anyone can join!
i'm sorry this post got so long, but i hope that this has a lot of information for you if you would like to get started bookbinding. its one of the best hobbies ive ever had, and i genuinely believe i will have it for the rest of my life.
3K notes
·
View notes
Text
WONWOO FIC RECS ‧₊˚🖇️✩ ₊˚🎧⊹♡


MDNI,18+ CONTENT.
“pincushion” by @pasteidolons
Pairings: tailor!jeon Wonwoo x bookbinder!reader (W.C:19.9k)
Summary: when a newly appointed tailor stops into your shop one autumn morning,you’re unaware the impact he would have on your life better or for worse.
“Sibilance” by @starlightxsvt
Pairing: lawyer fem!reader x rich bad boy (W.C:4.9k)
Summary: he is always getting in trouble and it is your job to get him out each time. The problem is, the more time spend with him, the bigger trouble it becomes for your heart. In the end,who will get you out?
“Bucket of happiness” by @thedensworld
Pairing: Businessman! Wonwoo x reader ft. Mingyu
Summary: After the divorce settled, you immediately moved to Canada for your treatment. Meanwhile, Wonwoo has to run away from his parents who couldn't stop forcing him to get married.
“Of shy smiles and misunderstandings” by @icyminghao
Pairing: Wonwoo x gn!reader (W.C:1.8k)
Summary: Wonwoo sees you at the library almost every day and falls head over heels for you. only, you seem to be avoiding him for annoyingly unknown reasons.
“Catnaps” by @wheeboo
Pairings: jeon wonwoo x gn.reader (W.C:8.6k)
Summary: In which you volunteer at the local cat shelter with your crush.
“Catnaps with you” by @wheeboo
Pairing: jeon wonwoo x gn!reader (W.C:10.1k)
Summary: In which you revisit the cat shelter with wonwoo during autumn break.
“W boyfriend” by @hvllevator
Pairing: streamer gamer bf!wonwoo x afab!reader (W.C:2.4K)
Summary: watching wonwoo play video games is so hot.
“Blindside” by @ylangelegy
Pairing: fem!reader x office worker!wonwoo (W.C:2.7k)
Summary: inspired by THE business proposal scene.
(Or: The three times Wonwoo keeps his glasses on, and the one time he doesn't.)
“Us,again” by @vitaminkyeom
Pairing: Wonwoo x Female Reader (W.C:11.3k)
Summary: If crush at first sight was a thing then you were a fine example of it. How you were heads over heels with a man you had just met was beyond you but you all you knew was Jeon Wonwoo had occupied every bit of your mind and heart. But when you and him finally began dating, little did the two of you expect a your relationships to turn out this way.
Or, in which, you and Wonwoo unfortunately have a happily never after ending.
“Enchanted” by @heechwe
Pairing: jeon wonwoo x fem!reader (W.C:6.1k)
Summary: Life as the housemaid and an inconvenience to your family is not what you wished for, but Wonwoo brings a new, royal perspective that turns your world around.
“new beginnings” by @etherealyoungk
Pairing: husband!wonwoo x fem!reader. (W.C:2.1k)
Summary: in which a certain someone starts getting extra clingy to you, leading you to find out you're pregnant.
“for the books” by @trblsvt
Pairing: jeon wonwoo x fem!reader (W.C:2.2k)
Summary: wonwoo's students seemed intent on matching him up with a fellow teacher. he didn't really want to stop them, it was too funny for him to break up their fun. plus, he didn't mind the certain someone he was being "set up" with.
“Nerd” by @smileysuh
Pairing: Jeon Wonwoo x afab!Reader (W.C:3.9k)
Summary: Look up at me for a moment, gorgeous," Wonwoo commands, and you do as you're told. He meets your gaze, his skin flushed from your mouth suctioning on his cock. "Just need to get your eyes right for your character," he explains, threading his fingers through your hair and aiding you up and down on his throbbing length.
"Such pretty eyes. You look so good staring up at me with your mouth stuffed full, baby."
“By line” by @wonwussy
Pairing: ceo!wonwoo x reporter!afab reader (W.C:5.3k)
Genre: enemies to lovers, smut, dramatic af, angst
“And it was all yellow” by @sunhoures
Pairing: wonwoo x fem!reader (W.C:5.7k)
Summary: wonwoo doesn't believe in love at first sight, but he finds himself falling for you a lot sooner than he thought possible
“You’re my tomorrow” by @hongcherry
Pairing: customer!Wonwoo x cafeOwner!Reader (W.C:5k)
Summary: At first, you didn't think anything of it.
Jeon Wonwoo was just a customer.
However, his daily visits to your bookstore café started to become the highlight of your days. The little conversations here and there made you happy. It's because of him that you always look forward to tomorrow.
“fuck the neighbors” by @sluttywonwoo
Pairing: jeon wonwoo x f reader (W.C:3.3k)
Summary: curiosity killed the cat but satisfaction brought it back- at least, that's what they say.
“Her” by @chocosvt
Pairing: wonwoo x fem!reader (series) (W.C:140k)
Summary: wonwoo, a heartbroken and burnt out writer nearing the end of his math degree, wants nothing to do with the seemingly perfect, intimidating girl who has everyone under her thumb. you.
unfortunately, his literary talent has got him shoved him between a rock and a hard place when you want to write a book and require his expertise. you two are the furthest from compatible. wonwoo can't see this going well. at all.
“The bore next door” by @ncteez
Pairing: wonwoo x afab reader
Summary: Jeon Wonwoo is not dull, nor is he the clean and polite neighbor that your mother assumed he was when she set you up on this awful date.
or the one where wonwoo takes you home on the first date and renders you unable to walk, hoping to god that you don't expose him to your parents.
── .✦ these are some of the fics which I love a lot! The authors/writers have done such a great job, so please show them loads of love! Like and reblog their posts!
Ps: this is my very first time posting something on tumblr, so I apologise if I’ve done something wrong.
#jeon wonwoo#seventeen#jeon wonwoo x reader#seventeen smut#wonwoo fanfic#wonwoo smut#svt smau#jeon wonwoo smut#wonwoo x reader#wonwoo#svt wonwoo#seventeen wonwoo#wonwoo fluff#wonwoo headcanons#wonwooxreader
420 notes
·
View notes
Text
The Secret of Sherlock Holmes bookbinding project!
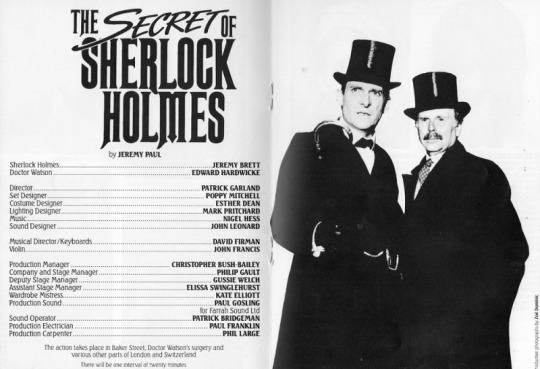
I've really wanted a hard copy for a while of 'The Secret of Sherlock Holmes' play by Jeremy Paul, which was performed by Jeremy Brett and Edward Hardwicke (and is very high on my list of things to go and see if I get a time machine, because there aren't any video recordings of it.)
ANYWAY it's long out of print and very expensive to buy so I figured... I can just make one myself!
First I bound the text block. It's so slim, at a grand total of 75 pages.
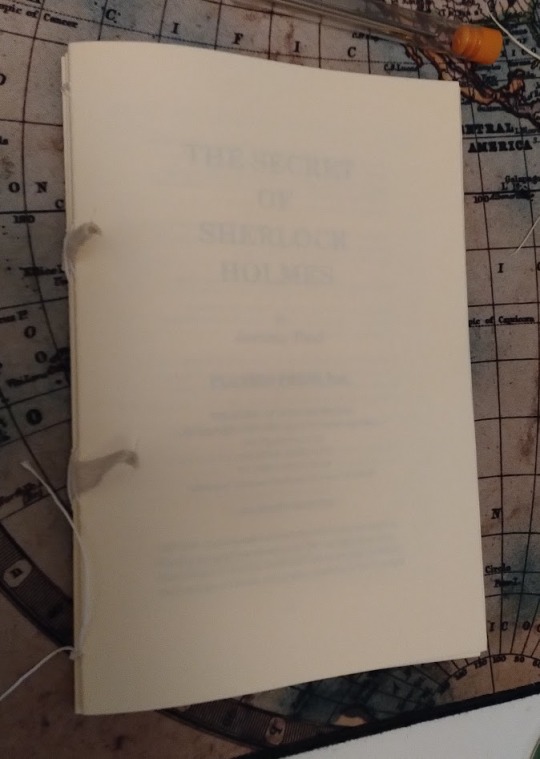
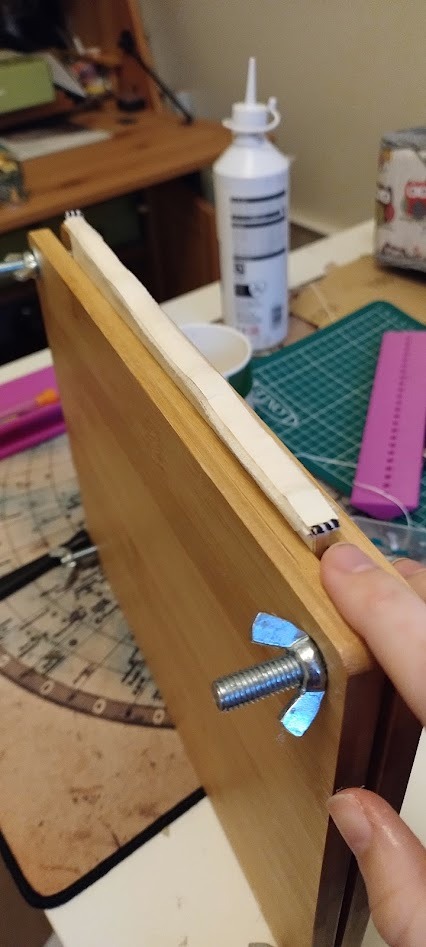
I bound the cover in honey-coloured book cloth, and then set about creating a cover design.
I wanted to use the official logo of the play and this amazing publicity photo, so I went into my paint package of choice (clip studio) and tweaked the photograph until I was happy I'd got a likeness of the actors only using black and white. I think Jeremy Brett lost a little of his handsomeness, alas.
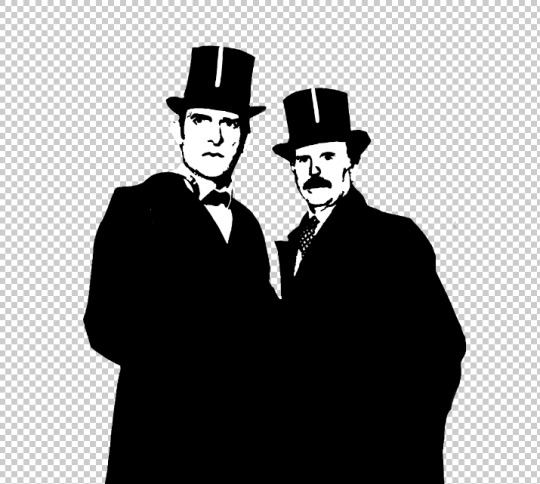
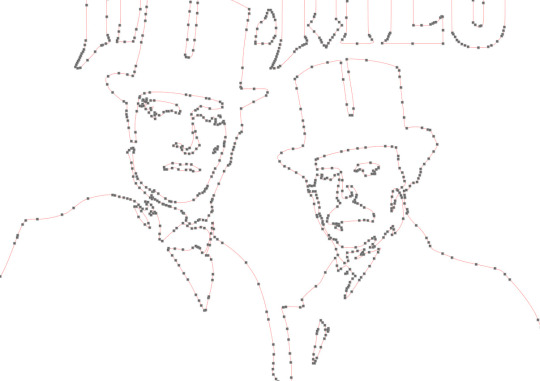
A while ago I bought a cutting machine, a Silhouette Portrait, which comes with some great software which can automatically convert an image like this into a path for the cutting machine to follow, although I usually tweak it manually too.
For example, I figured the weave on Hardwicke's tie was too intricate so I removed it.
Then I set the cutting machine to work!
For a while I tried using self-adhesive vinyl to make covers, but I found that it wasn't very hard-wearing and would start peeling off. These days I use self-adhesive vinyl to make a stencil, and then paint onto the book cloth in acrylic. The fact that the stencil is self-adhesive reduces the chances of any paint sneaking in underneath!
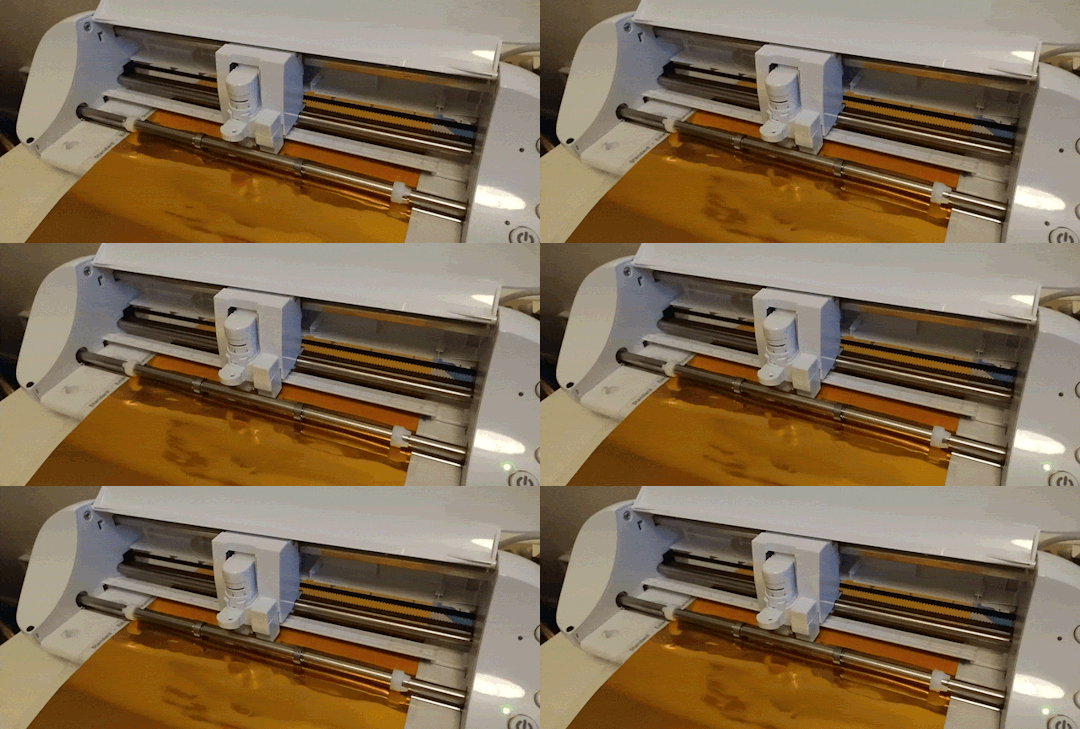
(The stencil is gold just because I have a lot of spare gold vinyl - it's probably not the best colour to use.)
For this project I did something I've never done before, which is doing two layered stencils, a white layer underneath, and then a black layer on top.
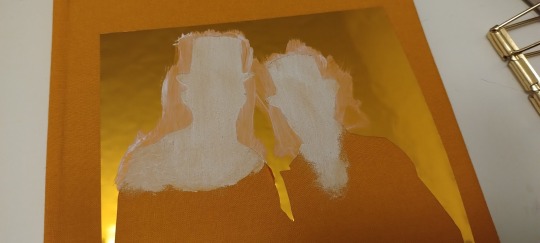
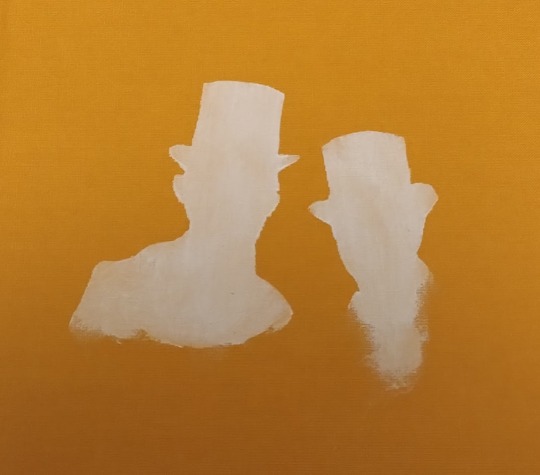
I kind of regret not painting all of the figures in white because if you squint you can see the line where the white stops on the final piece.
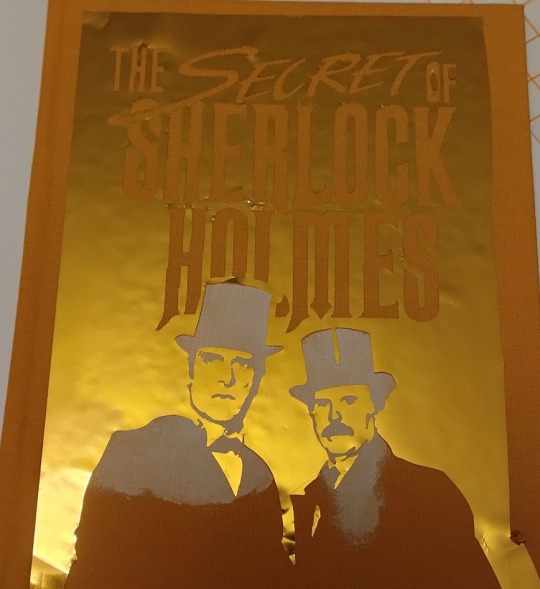
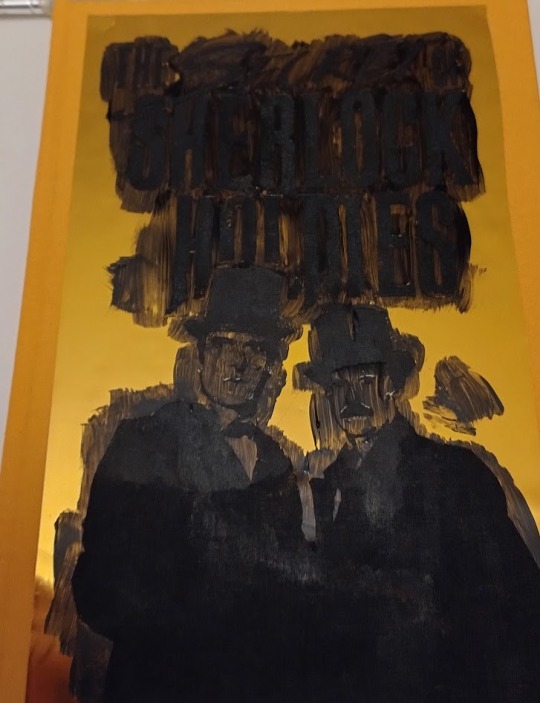
And now for the really satisfying bit - peeling of the stencil when everything has dried!
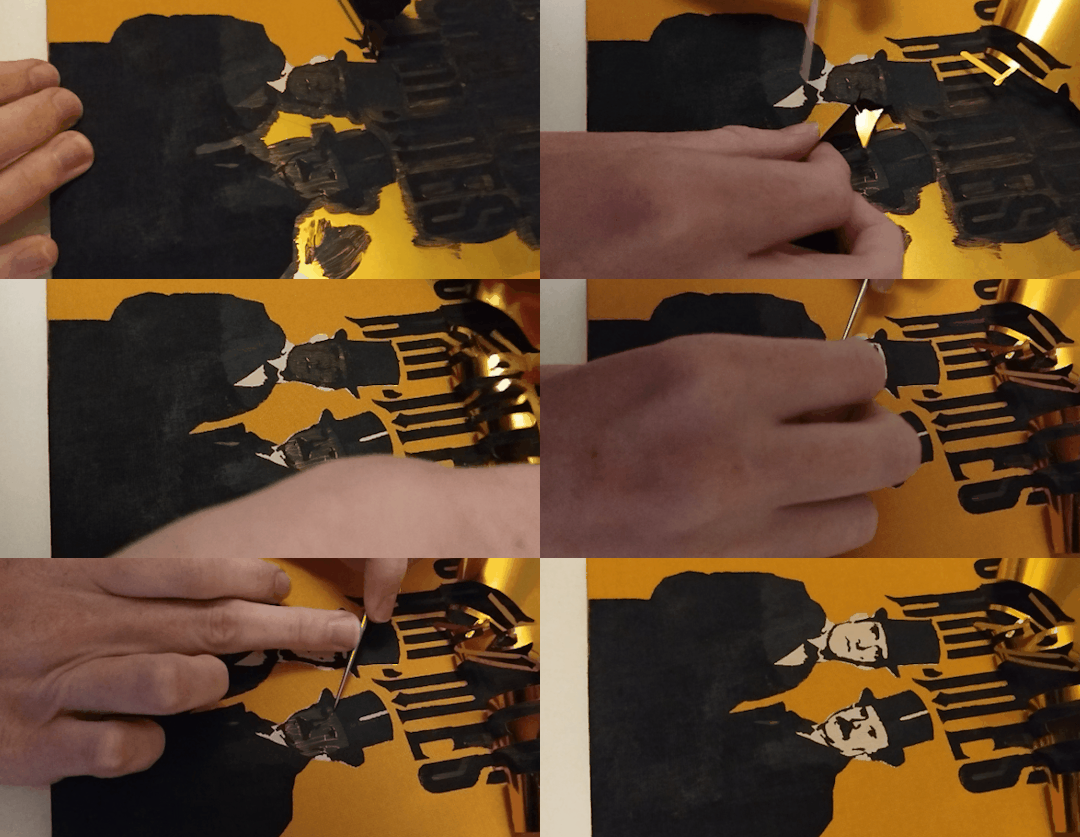
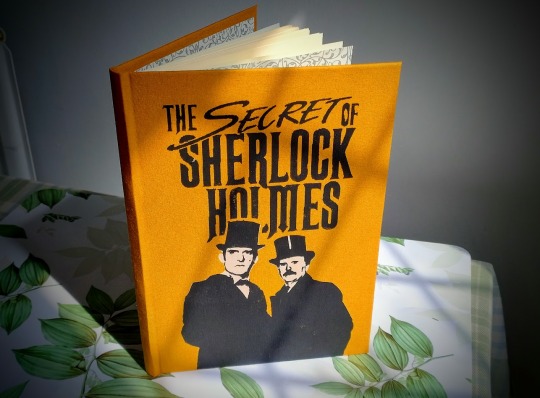
I'm really pleased with the finished book, and it's so fun to possibly have the only hardback version of this play... ever...???
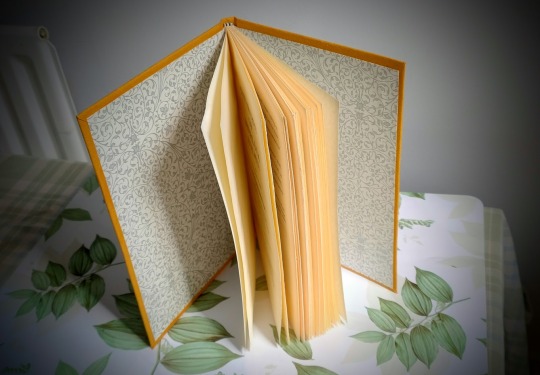
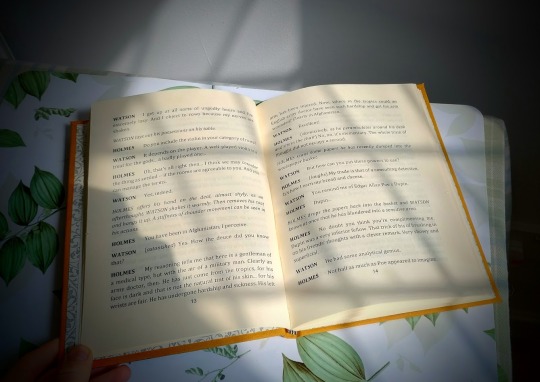
562 notes
·
View notes
Note
what kind/style of endbands do you usually do? they look so good 👀
hi!! sorry for taking a while to answer, I wanted to make sure I could give you my best answer.
I usually do what's called a "double core" endband. I use double core endbands over the "bead on front" method because bead on front style is not great for uneven distributions of color, irregular patterns, or using more than three colors. Functionally it works by having your extra threads wrapped up inside the thread that is showing, forming the smaller secondary core. Ultimately you are doing figure 8s around the main core & then your secondary core of thread. This keeps things pretty neat & tidy. The tutorial I first used was this one by DAS Bookbinding, though I don't think his endband tutorials are his best ones. Another binder I've spoken with endbands about a lot is maleeka, who recently did an endband tutorial herself.
maybe I should do one... but it takes a lot for me to get enough motivation to make videos. I'll take this opportunity to write up some tips I've shared when people ask instead:
1. Endband core material is the MOST IMPORTANT component. You need a core that is stiff but flexible - it should NOT be floppy because it wiggles everywhere under the tension of the thread, but still needs to flex with the opening & closing of the book. You want something that doesn't compress, to reduce tension shifts in thread creating a lumpy endband. Have a smooth core is less critical but helps to avoid snagging threads & allows you some leeway on sliding threads around for adjustments. My personal choice is smooth leather jewelers cord (link is just an example, I get mine from a local craft store).
2. Thread size. All your threads need to be the same size; it will be visible if you are using two different sizes, and mess with your front core. Additionally, I know lots of people will use larger twists of multiple strands of embroidery thread, which can work, but is more likely to compress & alter its size in unexpected ways. A single strand is preferable. If you want something thicker you can find some thread weights that are heavier twists intended to be used in a single strand, not pulled apart. I prefer smaller sizes because it works better for the gradient designs I like.
3. Silk thread is your friend (if you can spend the money on it). It reduces fuzz (no fuzz like you get with cotton/DMC embroidery thread), it's usually easier to manage, has a more compact twist, and a higher shine. I use Japanese silk hand sewing thread in size #9 (9号). There's multiple brands (Tire, Daruma, KNK/kanagawa, etc). Here's a wholesale listing (minimum 20,000¥ for international). A non-Japanese brand is Guterman silk (German brand). Both the Japanese & German threads come in a heavier weight (Japanese is #16, Guterman is buttonhole).
4. Thread tension is the most important part of the actual technique. You need to ensure the threads currently wrapped in the secondary core keep tension when you are working the thread around them.
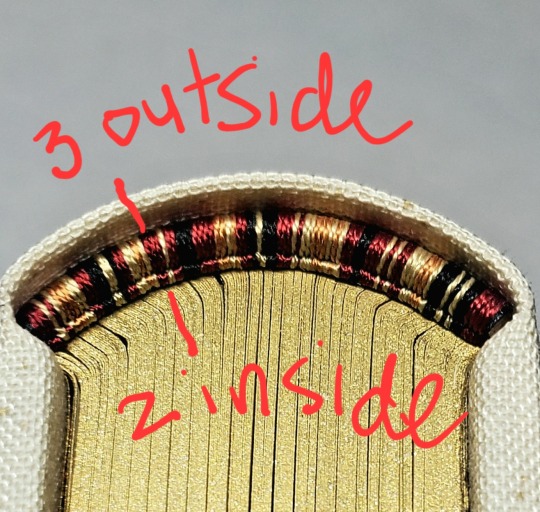
5. Working on a curve. This is only really relevant if you're doing an endband on a rounded book, but the circumference of the curve means there's more real estate on the outside vs inside of the curve. Sometimes this can cause bunching on the secondary core. My own solution to this is that sometimes I wrap the primary core but drop a wrap here or there around the secondary core (only between two wraps of the same color I'm dropping). I uh... don't know of anyone currently recommending this besides myself so I can't point to any pro endorsement for this method, it's just what works for me. Forgive my terrible writing:
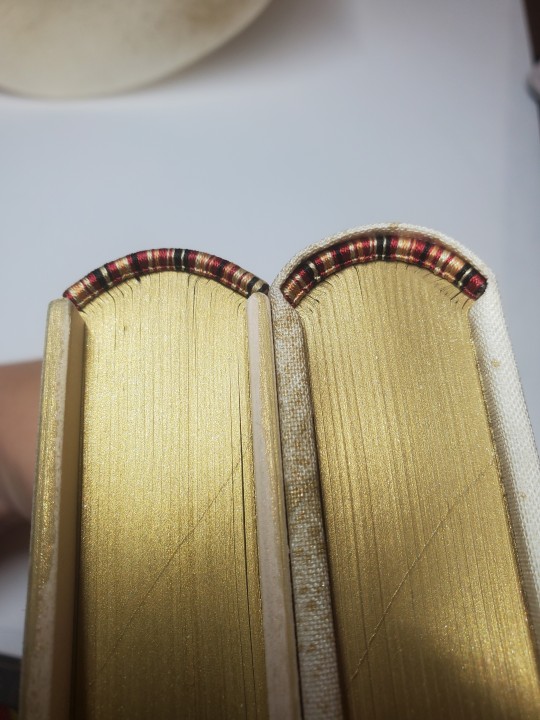
6. Pattern management. I... don't really plan much how my patterns sit on the spine, which is not very helpful. HOWEVER you can do some pattern management on the fly, if you really want your pattern to end at a certain place. Thread can be packed more or less densely on the core, resulting in some pattern compression; you could also strategically drop wraps in less noticeable locations. An unintended example: I was replicating the pattern on this endband (left) when I realize I wasn't packing the thread as densely as I had the first time around (right), which resulted in the overall pattern taking up more space. You can do this on purpose, if you need to.
this was way more than you asked but it gave me a chance to put all this in one spot. Best of luck in vanquishing the dreaded EndWyrms.
#fanbinding#bookbinding#celestial sphere press#in progress review#ask des#i tend to shock ppl a big when i say i don't actually enjoy sewing endbands#i merely Tolerate it#all of this knowledge is 100% spite driven to reduce my own frustration
329 notes
·
View notes
Note
Hii I wanted to ask, I’m getting into bookbinding as a hobby and if you’re okay with me trying to bind Solar Lunacy? I’m not gonna be selling it or anything like that, but I love reading physical books and figured asking for permission would be the polite thing to do.
Go for it!!! I'm a big fan of book binding and fan binding, (I really like the satisfaction of physical book as well, esp when you get to make your own book cover) so folks have my blanket permissions to do for my writings
My only recommendation is to double check the grammer/spelling errors before print. I have the most fun writing and less fun editing, so a lot of my chapters have misspellings.
354 notes
·
View notes
Text


Two author copies delivered! Both for @bropunzeling (AO3 here).
More photos and info under the cut!
I actually did my copies of these a while ago--both in February, one in 2024 and the other in 2023. collide the spaces that divide us was one of my earliest attempts at social media formatting, and one of the last books I ever made with my inkjet printer. I did end up fixing a few things on that one's typeset, but it's nearly identical to my first copy. You may also notice in the photos that I chopped off a bit too much off the edge--I didn't yet know how to use my guillotine, and in all the time that's passed since then, it's become defunct (sharp enough to cut off a hand, but not sharp enough to cut through a stack of paper lol)
It's neat to see such a clear example of how much I've improved as a bookbinder in a year and a half--my copy on the left, author's on the right:


Also, a comparison of color ink (left) vs color laser (right):


Like this, it's easy to see how much more vibrant color toner is than ink. Ink works much better for complex images, but since I don't print a lot of photos, but do make a lot of social media typesets, this works much much better for my purposes.
Soon after that, I bought a black-only laser printer and had a whole new set of challenges. It was in this era of printing that I made only fools rush in. It has one of my most complex title pages to date, as they're not really my forte.
Below are my copy, the title page, and an example of how I did texts in this particular typeset.


My copy has a cloth spine and a different cloth as the cover, with a strip from the endpapers to hide my sins act as a bridge between them. This is one of the binds from last Binderary that I'm most proud of.
The title page is in several different pieces--sort of jigsaw-puzzled together from vectors, Google Drawings, and a few different fonts.
Black-toner-only printing meant adjusting how I did social media formatting, and this is one of my favorite ways I solved that problem. I like the simple, almost minimalist formatting that sets the texts apart but doesn't steal the show.
I'd been meaning to offer author copies for these books for as long as I'd had them, but it's hard to understate how little I wanted to use my inkjet once I got a laser XD It's both slower and more expensive to use an inkjet, so as soon as I got my color laser printer set up, I sent the DM!
I organize my handbound fics by ship--that is, every ship has a set spine cloth and title color--so one of my favorite things about author copies is that I get to be a little more creative about covers!
#my binds#fanbinding#author copy#bropunzeling#collide the spaces that divide us#only fools rush in#hockey rpf#mattdrai#binderary 2023#binderary 2024
123 notes
·
View notes
Note
Now that 2024 is coming to a close:
1) Of everything you've made this year, which ones are you the most proud of?
2) What are a few of your favorite things (art, comics, fics, etc) that someone else has made this past year?
As far as my own stuff, I would have to say:
This Hide and Seek animatic -- I love making animatics, but they end up taking me a LONG time! That does mean that when I finally finish one though, it's very rewarding to see the full thing!
This scene, for the rottmnt cut intro project -- It's a short scene, but was a lot of fun to do! I also think it shows how much I've improved, even from my first scene for this same project.
This hardcopy of IMBI -- I'd never tried bookbinding before, but I had so much fun learning how and was really happy with how it turned out!
These mixed media collages -- It was one of my first times experimenting with mixed media, and I think they ended up looking pretty cool! Plus, just like the others... I had a lot of fun with it! (I suppose it makes sense that my favorite pieces are kind of just the ones I had the most fun doing, huh?)
And then, for other people's stuff... I'm sorry, but I'm just so indecisive! I have to at least pick a few things from each category!
"Long" Comics:
Here There Be Turtles (by @theelvishfiddler) -- This is hands-down one of the most impressive fan comics I've ever seen! Not only does it have incredible art, but the characterization is spot-on, and the storyline is so engaging that I am absolutely dying to see what happens next after every single update! I've seen people saying that the quality is even better than the official comics, and... yeah, no doubt about it, it really is! This comic is INSANELY good!
You've Been Portal Jacked! (by @wickcipher) -- This comic has such an interesting premise, with an artstyle that I love and SO much potential! I was immediately hooked by the first chapter, and was so excited to see it continue! Very much looking forward to seeing where things go from here!
"Short" Comics:
This Raph comic (by @e-turn) -- Raph and Leo tug at my heartstrings sooooo much! And the effect of Raph's time spent under the krangs' control is something that I never get tired of seeing explored. He loves his brothers so much, and would never EVER want to hurt them... but now he has these memories of himself doing exactly that, and those memories are just so much at war with who he is as a person, and AAAARRRRRGGHHHH!!!! I love it.
This Splinter comic (by @charcoaldustonmyfingers) -- THE EMOTIONS. I enjoy seeing this one every time it crosses my dash, and it has yet to lose its impact. Splinter loves his boys so much!!
This alternate movie ending, and part 2 (by @magisav) -- Beautiful, and heartbreaking. Both at the same time. The look on Leo's face is ingrained in my memory forever.
This Firefight fan comic (by @sludge-city) -- This one is such a well-done adaptation of some of the most emotional moments in this incredible fic! It was heartbreaking enough reading it the first time, and seeing those emotions depicted on Leo and Donnie's faces ripped my heart to shreds.
This redrawn IDW scene (by @purplepixel) -- The redrawn panels are beautiful, and I love the coloring! But also... man, this hurts so much knowing what comes next! Donnie, nooooo!
Multi-Chapter Fics:
Emotional Support Water Bottles (by @dandylovesturtles) -- This series is easily one of my favorites! Poor Leo goes through so much... and yet even when it's over, that kind of experience will undoubtedly leave some scars behind. Not physical scars, but very real nonetheless, and I've loved seeing Leo and his family try to navigate their way through that.
Firefight (by @remedyturtles) -- A true classic, at this point. With probably some of the most intensely emotional scenes I have ever read. Highly recommend, if you can handle that level of hurt before the comfort!
DFL's Whumptober 2024 (by @daflangstlairde-art) -- Technically a series of fics, which are unrelated to one another. But they are related in one important way: making me FEEL THINGS. Each one is so well-written, and I've been hooked all the way from the first fic to the last!
Oneshots:
The Shadows May Go (by @remedyturtles) -- This fic. THIS FIC. It made me cry. Splinter loves his sons so much, and even in his darkest moments (perhaps especially in his darkest moments), Leo knows that.
Now the Darkness Comes Alive (@goodlucktai) -- The role-reversal that I didn't know I needed. It's beautifully written, and like I said, Raph and Leo tug at my heartstrings so much! I started drawing something for this fic a while back, and desperately want to finish when I have some more free time on my hands again!!
Bed Sheets (by @dandylovesturtles) -- Splinter is not a perfect parent, by any means. But he loves his sons so much!! This fic is practically the embodiment of those two things, and it makes me emotional every. Single. Time.
Art:
This drawing of April and Karai (by @darkpolicepsycho) -- absolutely beautiful!! I love how you can just feel the power of Karai's ninpo flowing through April.
This drawing of Raph with cherry blossoms (by @pelmenya-owo) -- soooooo pretty!!! The colors. The lighting. I cannot possibly overstate how gorgeous this drawing is!!
These Undertale-style drawings of April, Raph, Leo, Donnie, and Mikey (also by @pelmenya-owo) -- I've never played Undertale, but I love these little animations so much!! Very cool.
This drawing of Samurai Leo (by @kathaynesart) -- I showed this drawing to my husband, and he immediately asked for it on a T-shirt. It is PHENOMENAL.
This Hollow Mind drawing (by @grey-viridian) -- I haven't read the fic that this is from yet, but oh man, the emotion in this scene!! Family protecting family. I love it so much.
This drawing of Leo (by @oh-lordy-lord-save-me) -- The colors. The colors!! The absolutely STUNNING colors!!!
This TNV art (by @windide-blog) -- I'll admit, I still need to read TNV. But even without context, the scene depicted here is amazingly well-done! I can only hope to be able to draw scenes as beautiful as this one day.
This art of Leo falling through the sky (by @sad-leon) -- The background is beautiful. The imagery is beautiful. The animation is beautiful. All around: beautiful.
This drawing of FMA Sprout, plus this one (by @intotheelliwoods) -- I just love these so much! Brotherhood is probably my favorite anime, and man, Sprout makes a great Edward Elric.
This drawing for the Turtles Together zine (by @andva-ri) -- This one has everything. Splinter. April. Draxum. Big Mama. The turtles, of course! I love all the different scenes, and how seamlessly they come together into an absolutely gorgeous art piece! This is a level of skill that I can only hope to one day come close to reaching!
This drawing, also for the Turtles Together zine (by @staticwither) -- Just look at those bright, beautiful colors! Truly incredible. This scene was already great in the finale, but this art piece somehow manages to take that energy and multiply it tenfold! It's beautiful.
This drawing of Leo with water lilies (by @tangledinink) -- I absolutely LOVE the paint-like style of this one! The level of detail on this is insane, and it's just downright one of the most beautiful art pieces I think I've ever seen. I want it on a throw blanket.
This Kingdom Hearts AU drawing (by @boxfullaturtles) -- I have very minimal knowledge of Kingdom Hearts. But even without that context, this drawing is just SO GOOD! I love the stained-glass design! And the way all the characters are in their own circles, and Leo's head is lined up inside of one as well, but continues down into a full-body drawing. Gorgeous.
AUs:
Posessed AU (by @grey-viridian) -- Such an interesting premise!! It somehow manages to be absolutely heartbreaking, but also so much fun at the same time.
Tiz Sep AU (by @tizeline) -- I love the comic. I love the characterizations. I was hooked on this AU from the moment Leo starting infodumping about Sonic! But also, Mikey campaigning for president of the multiverse while Donnie works against him was perfection. I just love seeing these characters do literally anything, because they're just so enjoyable to watch!
"The Besties" (2AL by @intotheelliwoods & SLAU by @dianagj-art) -- I'm aware this is like, an AU crossover within an AU kind of situation, but man is it so much fun! And also, so much more emotional than you'd expect turtle multiverse shenanigans to be.
Animations:
Rottmnt Restored (by @emichen88 & @powerauerart) -- Incredible. Amazing. Phenomenal. Astounding. 100% would watch again and again and again.
This JJK WIP (by @seasaltcosmos) -- I don't care if it's unfinished, I LOVE this!!
That was... slightly more than "a few." And I'm sure I still forgot some. I could go on and on about all the awesome stuff people here have made, but I had to cut it off somewhere!
#rottmnt#ask#ty for giving me another opportunity to gush about other people's stuff!#I really need to do that more often#I get worried about annoying the creator sometimes even though I know that's probably irrational#hopefully nobody minds being tagged#I always debate on if I should or not
77 notes
·
View notes
Text
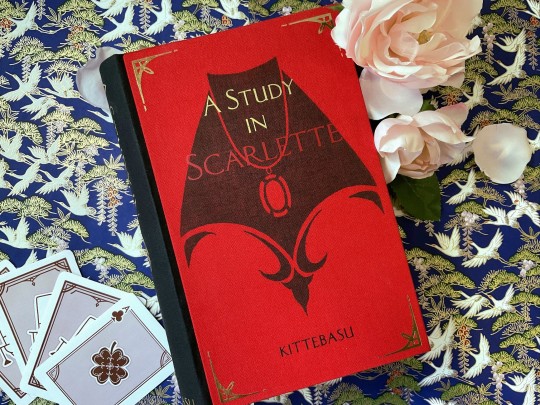

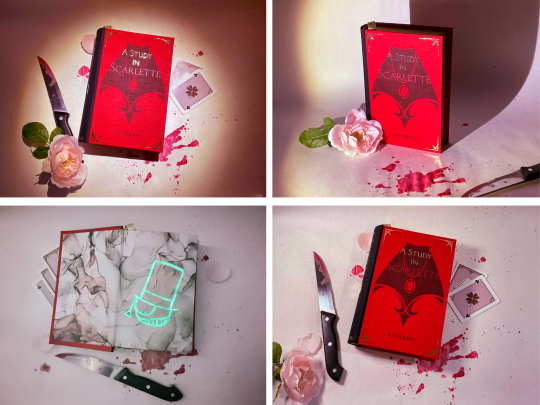
handbinding of A Study in Scarlette by kittebasu
There are people who want to live forever, and then there is Shinichi, who just wants to live a little longer than this.
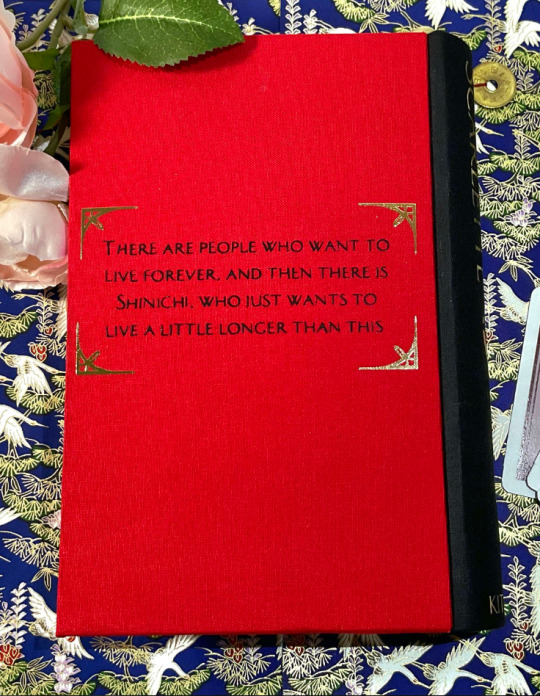
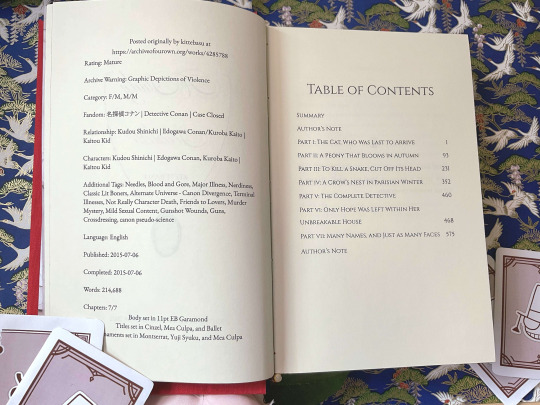

this bind has been in my head since i first read the fic like, three years ago. i dreamed up so many ideas for it, for so long, and now it's finally done! the typeset was actually done in early 2022, back when i was still using google docs, but it went through a few iterations because i was just. so. fiddly. with every aspect of this book. it needed to be perfect (as close to perfect as i, an amateur bookbinder out of my depth, can get) and it had to be absolutely over the top, to reflect the insane amount of love and care that the author put into the fic itself.
the first time i read this fic, i barely knew what detective conan was, much less all of the intricate plot details; i was just along for the ride, but by the end i was completely invested. i went back and watched through the anime as well as a few movies (it took me six months) and then read the fic again. and then a few more times. kaishin and the world of dcmk has utterly gripped me. it's 100% this fic's fault and i love it so, so, much.
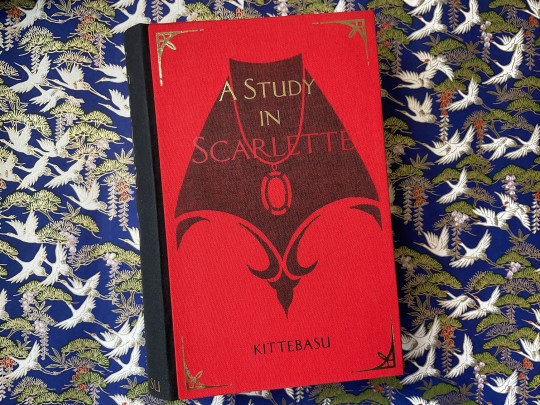
i went through a few iterations of visual designs and i'm really happy with the little details i managed to squeeze in.
the entire color scheme is based around red, because 1) it's a murder mystery, 2) for scarlette shinamoto (and the title of the fic as well as the original holmes novel it references), and 3) the irony of "lady red" actually being red. the secret fourth reason is that i think red/gold is a super sexy color combo.
i sewed the textblock with red thread to reference holmes' "scarlet thread of murder".
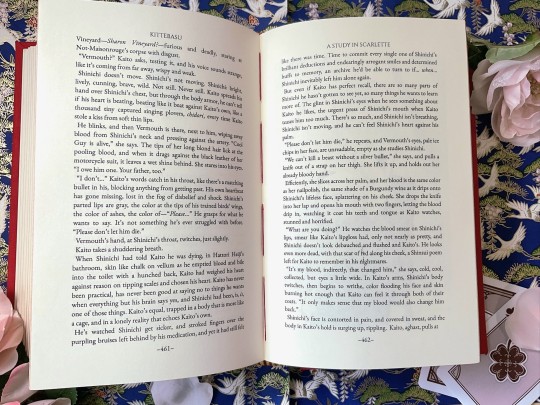
another detail i love is the five yen coin bookmark, it was one of my first ideas and it turned out even better than i thought.
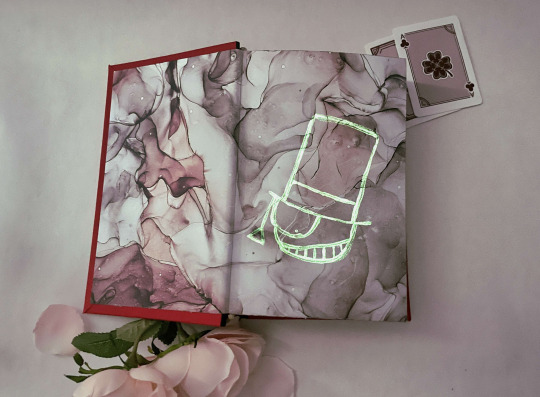
i wanted the endpapers to evoke a sense of the white marbled floor of the ballroom, with the glow-in-the-dark kaitou kid caricature being the luminol on the floor, and the little pops of red looks like blood that's been mixed in. i lucked out in that the other side of the endpaper was like a lavender-purpley color, i like to think of it as a little wink wink nudge to the color of the actual Lady Red.
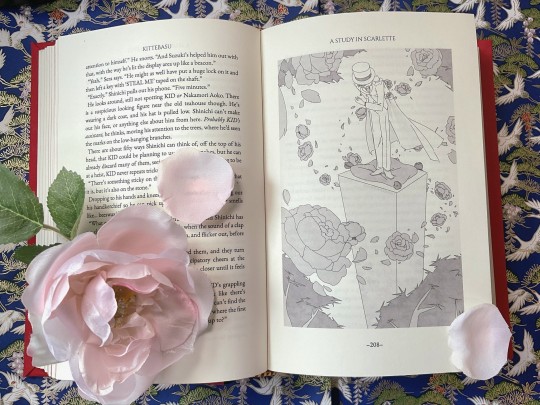
the chapter pages got a few reworkings, but i'm happy with the illustrations i ended up doing for each of them. the chapter titles are one of my favorite things about the fic, each one has so much meaning packed into it and flows so beautifully, and i wanted to put as much care into making them pop as possible.


the cover was a linocut carving i designed and carved, which i then printed onto the bookcloth, and ironed on htv on top.
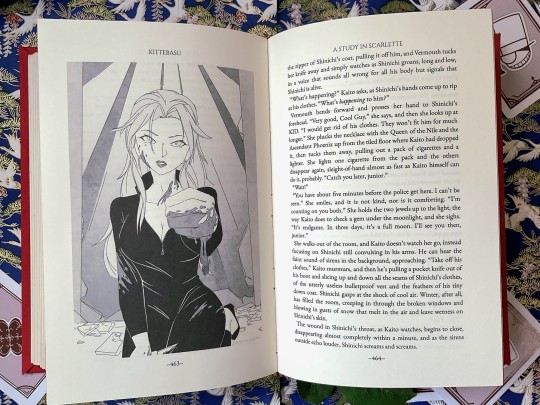
i also threw in a couple of my drawings of my favorite scenes.
this is getting way too long, so i'll end it here. i'll have a separate post detailing the process every step of the way, if anyone wants to take a closer look. this fic is kind of directly responsible for getting me into fanbinding, so it's safe to say it altered the course of my life. i now spend way too much time (and money) looking at book stuff.
kittebasu, if, somehow, you see this and would like an author copy, i would be honored to make one and ship it to you; i would be overjoyed to gift you with any art i have the ability to make, because the fics you wrote have irreversibly altered my brain chemistry, and being able to give back in any capacity would be a dream. (thank you.)
a few postscripts:
i am not selling any copies of this fic. partially because i believe in the gift economy of fandom as well as firmly keeping fanbinding a hobby that will stay unmonetized, but also because it took me months (years, if we are counting when i first finished the typeset) to finish this and i do not have the strength.
however, if you are also a fan of this fic and would like a copy, i honestly, fervently, encourage you to give fanbinding a try! renegade publishing and its discord server are an absolutely wonderful and free resource. i knew nothing about bookbinding and had zero materials when i first started, but i've learned so much thanks to the lovely people there. if you're still apprehensive about getting started, i'd be willing to share my typeset of this fic as well as answer any questions about the making of this book if you DM me.
#detective conan#detco#magic kaito#dcmk#名探偵コナン#my books#kaishin#kaitou kid#kaito kid#kuroba kaito#kudou shinichi#edogawa conan#handbinding#fanbinding#ficbinding#fanfic#bookbinding#a study in scarlette#book binding#guys#its finally done#im tearing up#this has been my dream bind for so long and its FINISHED#and im really really happy with how it turned out#i seriously cannot put into words how much this fic rewired my brain#ash knows though he's seen my 2 am red string theory corkboard#about what the sequel might be about#まじっく快斗#meitantei conan#case closed
505 notes
·
View notes
Text
So took the plunge and bought a kit to get started, and thought, "First one will always be the first, so make it memorable" and so I did; I make a Bookbinding Journey Journal!
Took a few days to decide what exactly I wanted in it and formatting the pages and testing out, and finally was happy and went ahead!
Space for 50 binds in total - I don't expect them to be perfect by any measure of means but I do want to have a chronological reminder to see my own growth!
My bookbinding journey actually soft-started a while ago when asked to make a prop for a friend's short film. I had considered getting into binding a long long time ago...but as a notorious notebook hoarder I didn't want or need to add more to the pile. And then I chanced found fanbinding, specifically @renegadeguild both through researching for the prop and also as part of my studies in Fandom Culture! Which actually came at a wonderful time as I was also in the process of getting physical copies of two of my favourite fanfics from the Authors! @nieded and @dustandhalos ! And there really is something about holding a physical piece of work that you love in your hands, reading fanfics online is one thing, but to have a tangible piece of work (and art!) In your hands just can't be replicated by a screen!
And so, with a culmination of all these things; we're taking the dive! Time is precious at the moment, I'm in the final weeks of my undergraduate course, and my assignments take priority, but I certainly look forward to this journey and hobby!


171 notes
·
View notes
Text
So... @muffinlance wrote a really awesome story. I read a post from a point in time, though I truly do not remember when since it seems like I've been working on this project forever, saying that she gives blanket permission for people to print and bind the story into a book (I think there was an also addendum saying that they do not give permission to be sold, since selling fic is illegal). This fic has had total control over my whole brain since it was sent to me (@creatorofthemind I believe it was you, so thank you forever for tuning me into it) back during the days of like chapter six or seven.
So here I am now, sharing this amazing journey of my first ever bookbinding adventure. Further reading below.
So to give you an idea of what's going on, this is a fanfiction about Zuko (Avatar the Last Airbender) (animated show version, the LA show did not exist yet and we do not speak of the movie) being adopted by Hakoda, Father of Katara and Zuko. (This might have also been what kicked off the Give Zuko A Parent craze, but don't fact check me.)
Overall, the characters from the show stick very well to the cannon versions, but where MuffinLance really shines is in the rich backstories and fleshed out feeling of all the non cannon elements. Especially the background characters. I would argue that the writing in this peice of fanwork could easily rival the cannon show at many points of comparison.
Now that you have context, we can get into the actual process.
To start, I used this guide to figure out where to even begin, and fount the included resource list to also be quite helpful. I cannot for the LIFE OF ME figure out where I found the template I used for the front matter and such, but it must be somewhere and I will link to it when I inevitably come across it again.
Then I began to typeset. This step took... a long time. I worked in chunks from about September of 2022 to late March of 2024. I would get a big section done, sometimes even the entire thing, but then find I hated the way I had done it and give up for months at a time. Such is the life of ADHD and flitting interest in projects I suppose.
And then finally, step one was done, and I was left with pages on a word document that look like this. (And do please let me know if you want the link to the document. It was so much work, and I would love to not be the only one to use it.)
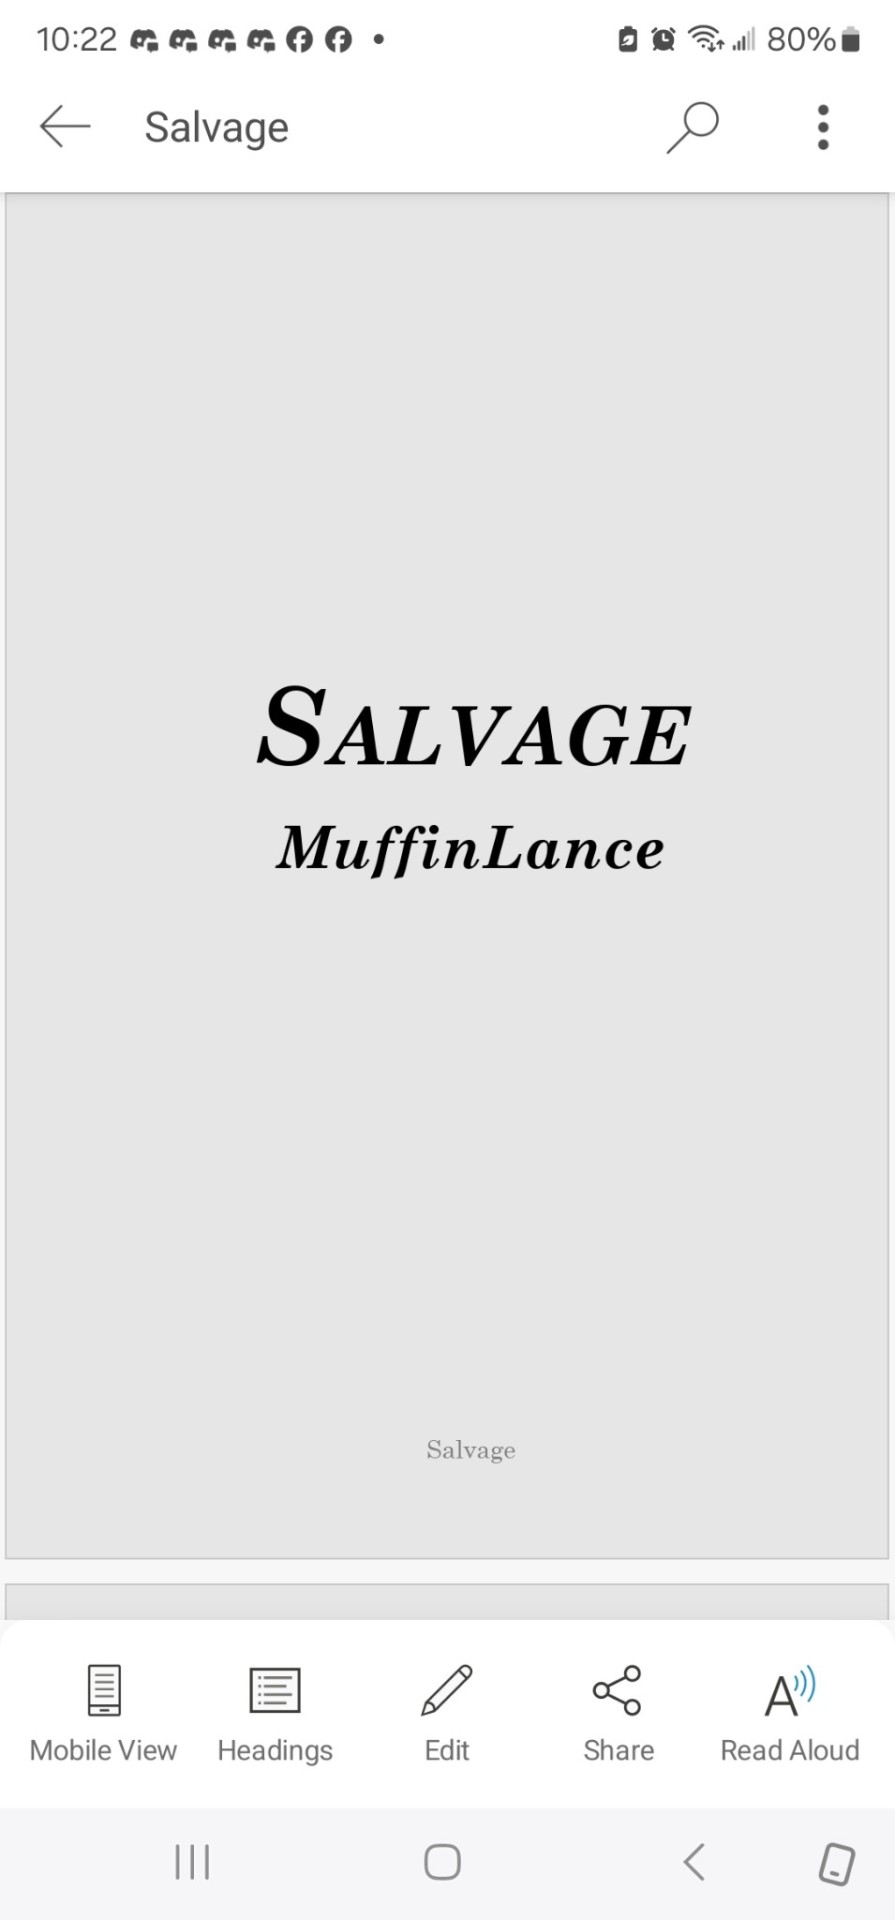
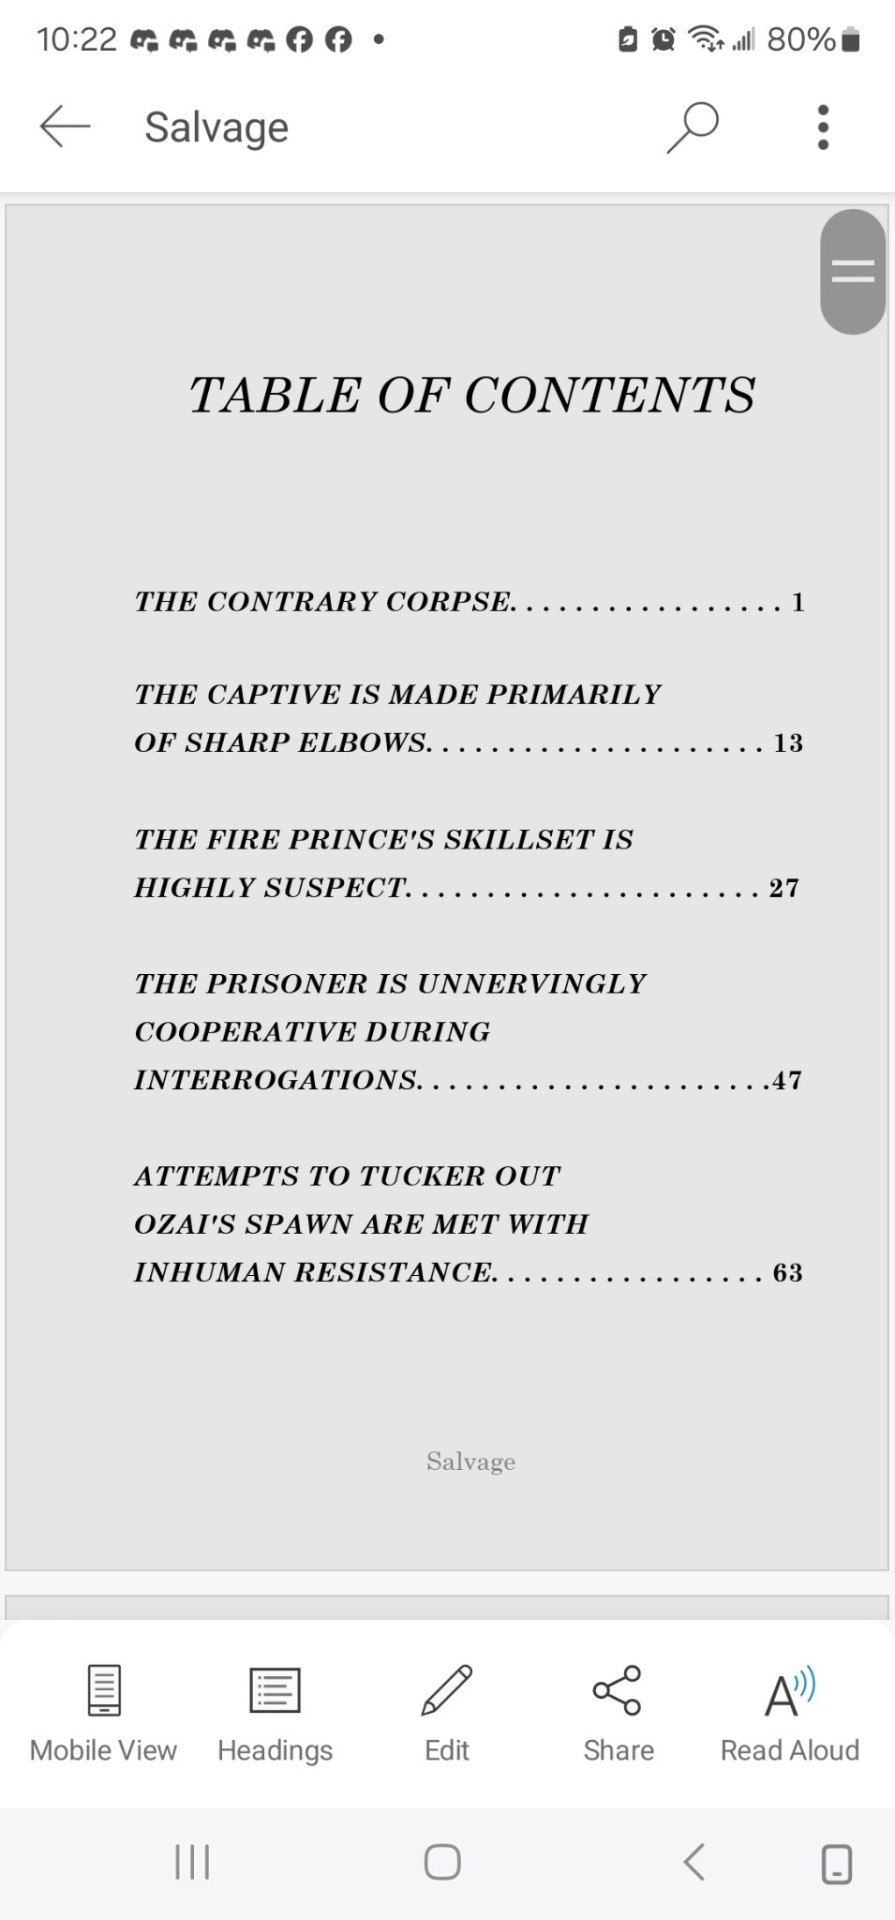
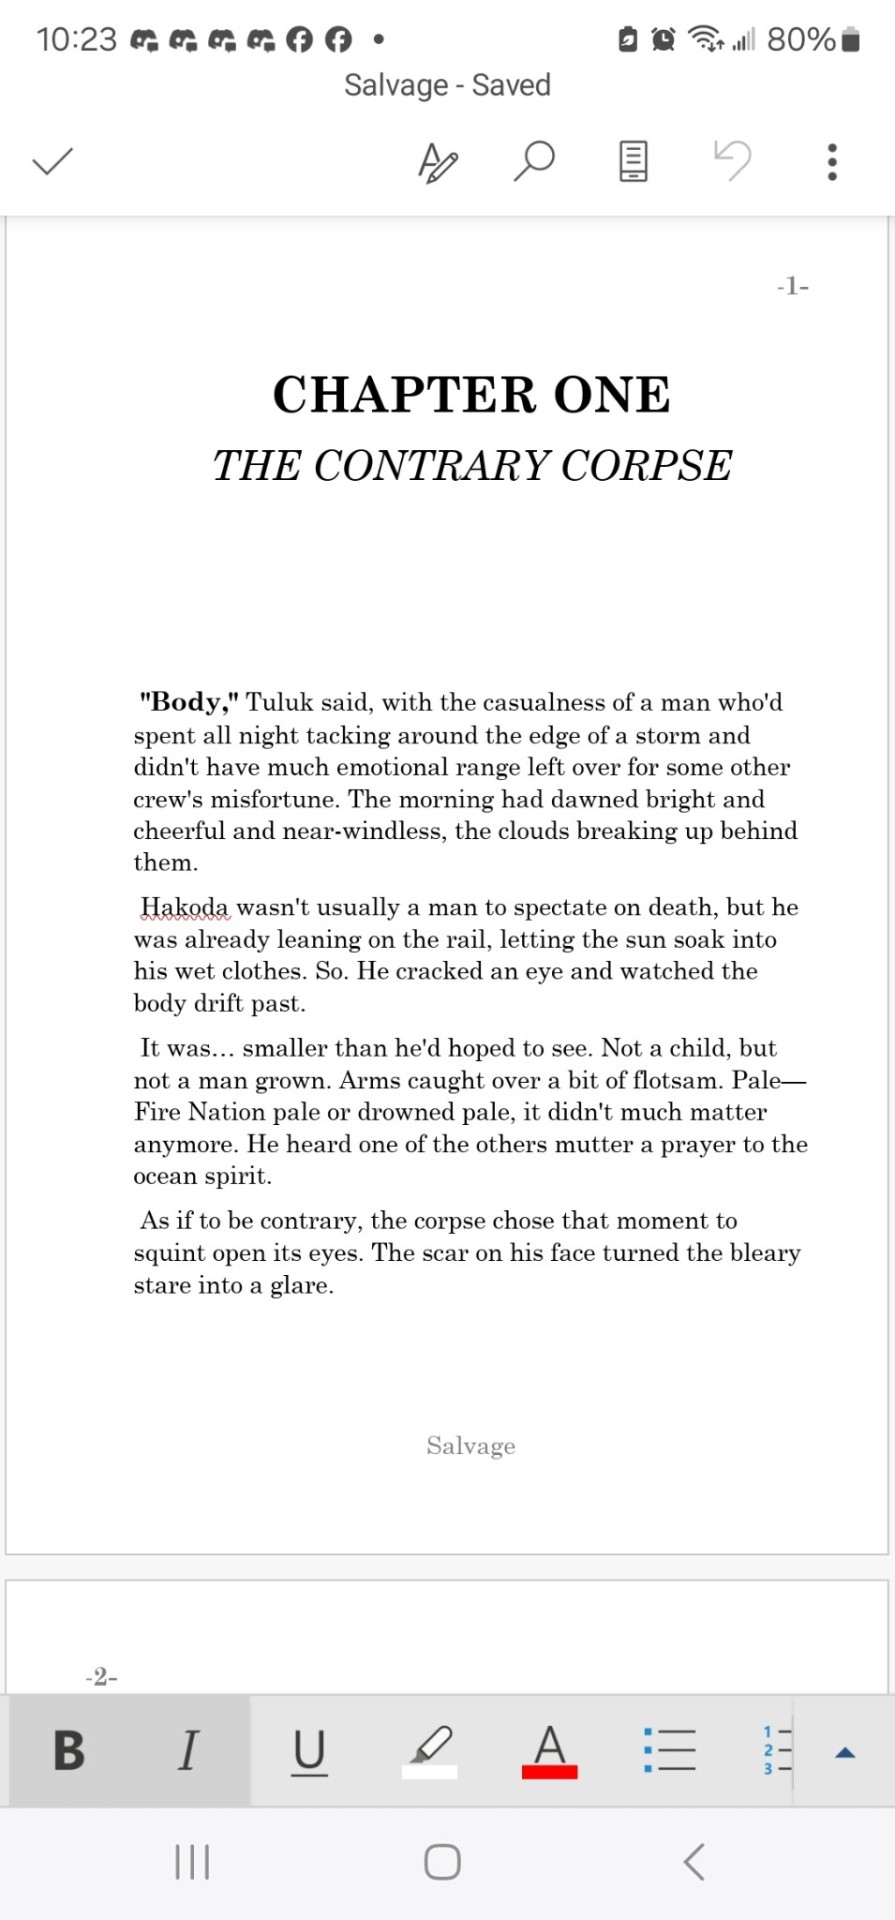
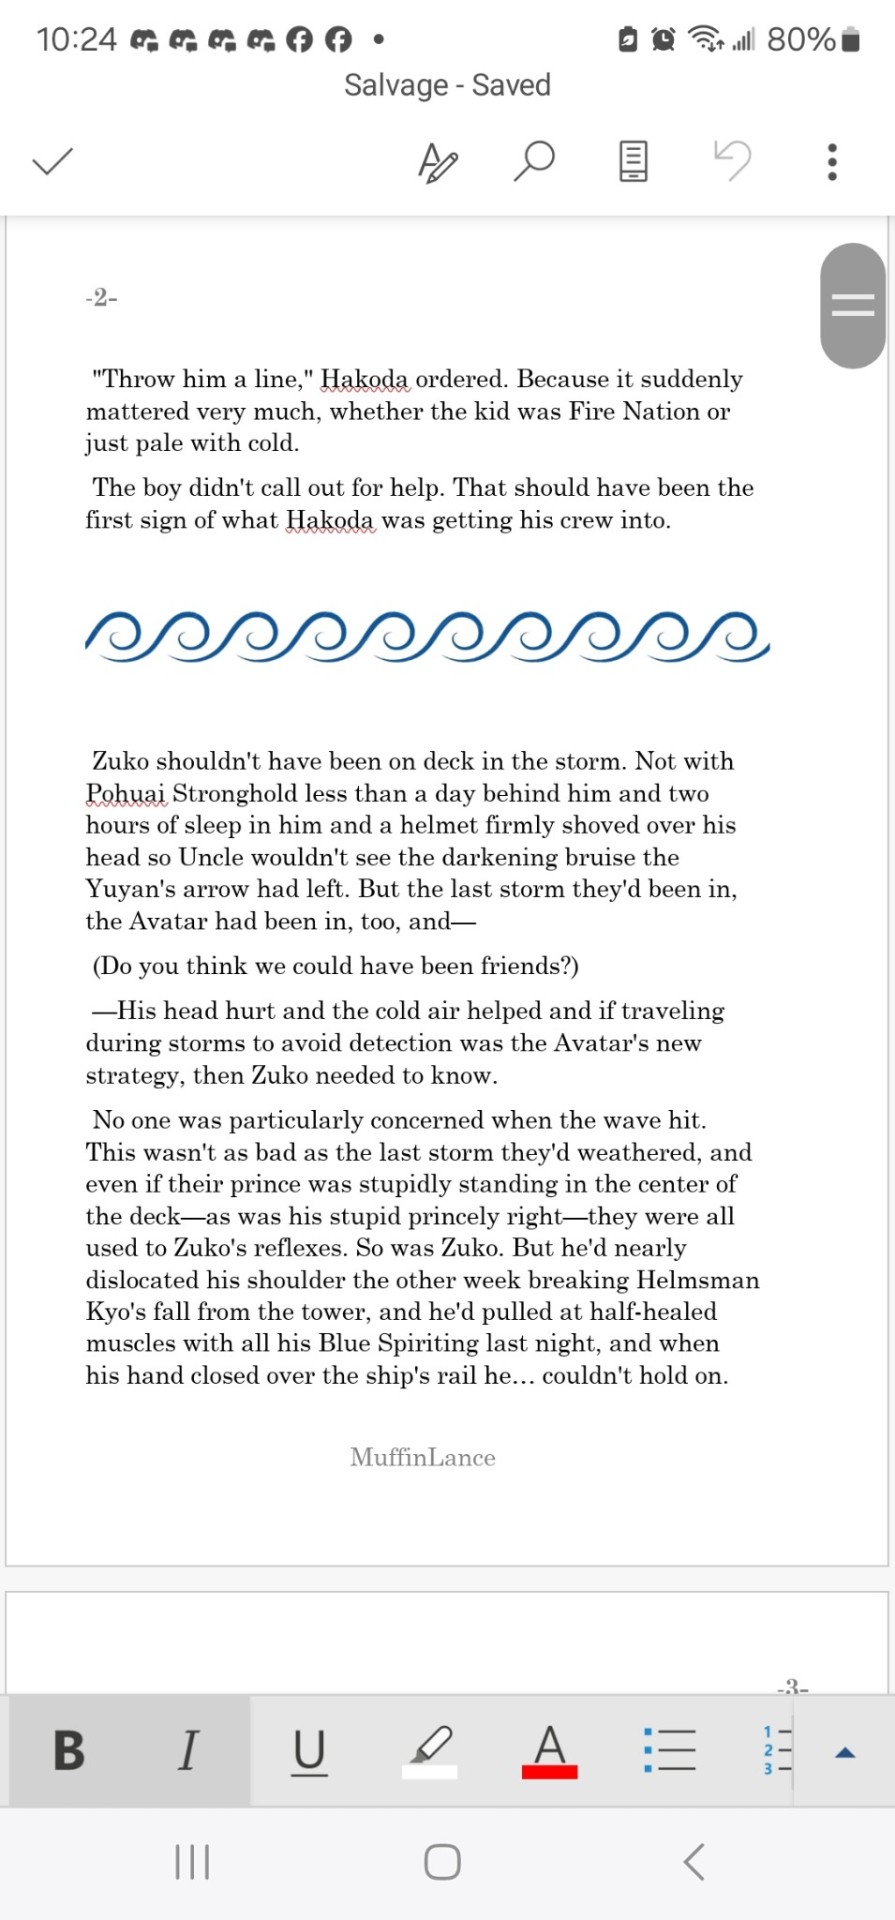
Next step was printing out this beast. Ended up being about eight pages of front matter, and about 630 pages of body text.
That I printed wrong.
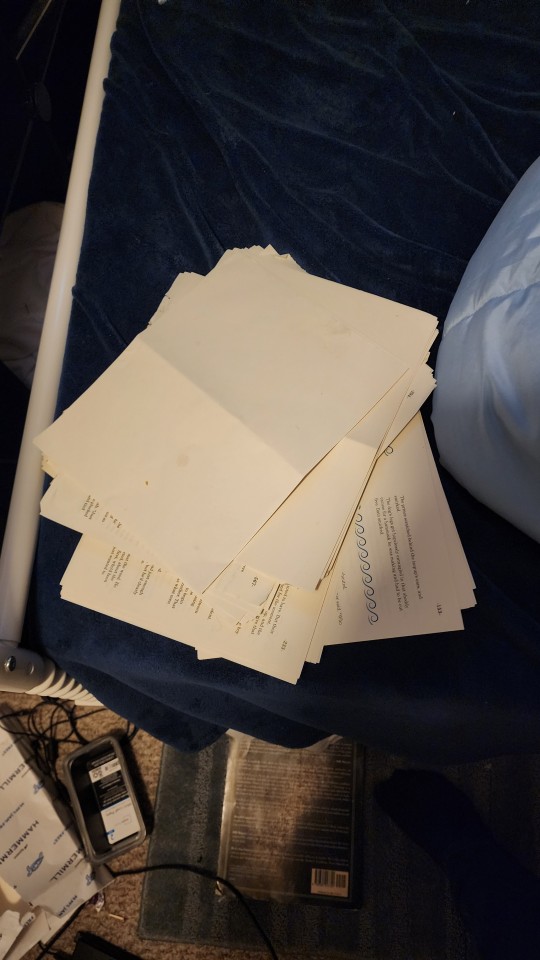
Twice.
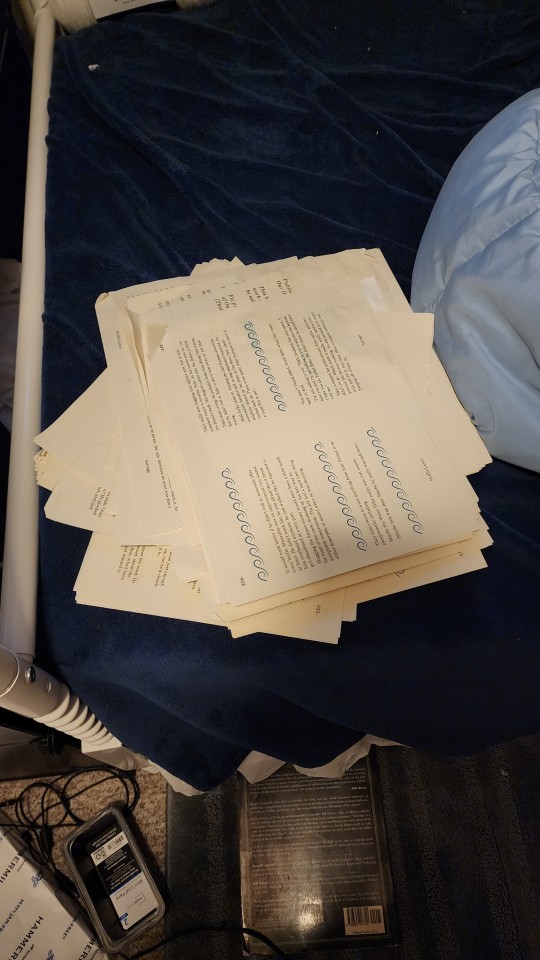
Before finally getting it right. And then not getting a picture of it, because I finished at 4 am and had work at 7, and am also an idiot.
Then I simply stitched along, putting everything together into a beautiful text block.
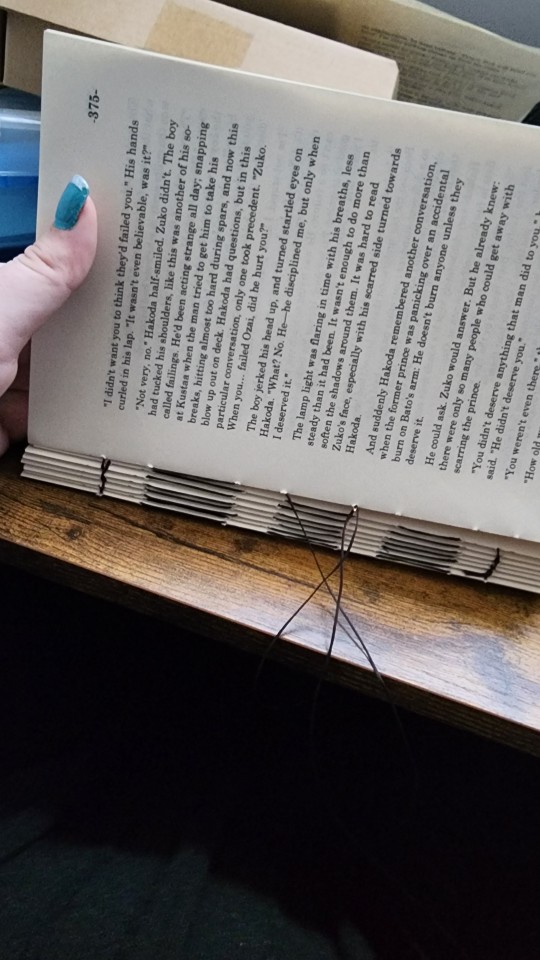
And came up with a design for the cover.
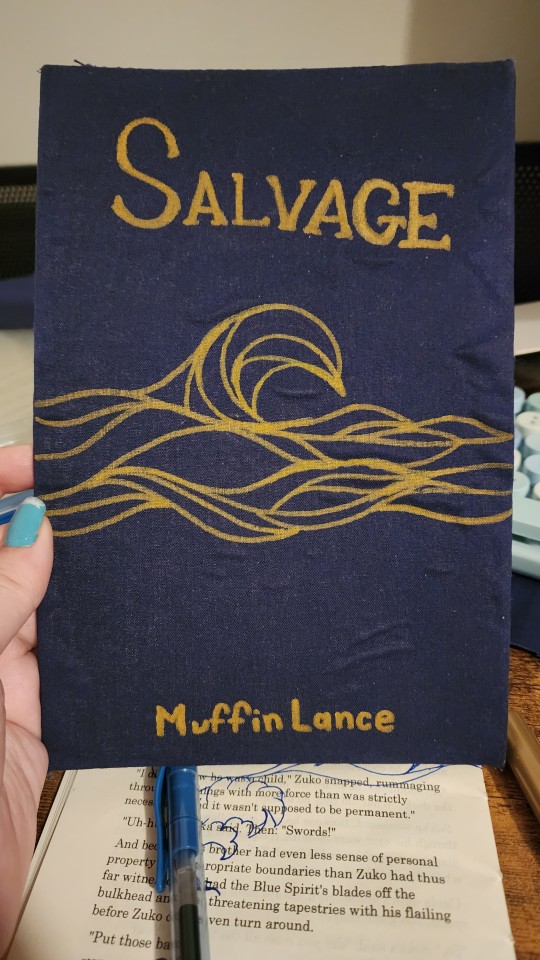
Yes the glue did end up lumpy. Ignore it.
Yes I did have to sketch out the design onto a scraped page several times before I figured out what I was doing. Ignore that too.
The cover design does wrap around the entire cover. No I did not get a picture before I glued the thing down. See again: I'm an idiot. And just... massively impatient.
Finally, we get to the stage of gluing. Behold, my bookpress.
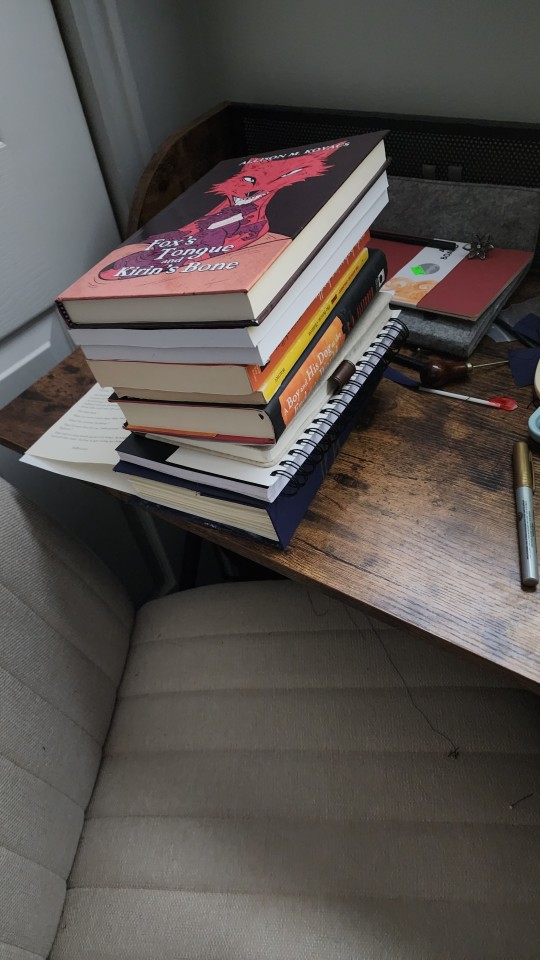
Of course, topped with Madam MuffinLances own actual professional-people book, Fox's Tounge and Kirin's Bone. It is Excelent. Here is the LINK so you can go and support this amazing author with the real-monies as well as the internet-kudos.
Then, once everything is glued together, one must give the book its "gilt" edges.
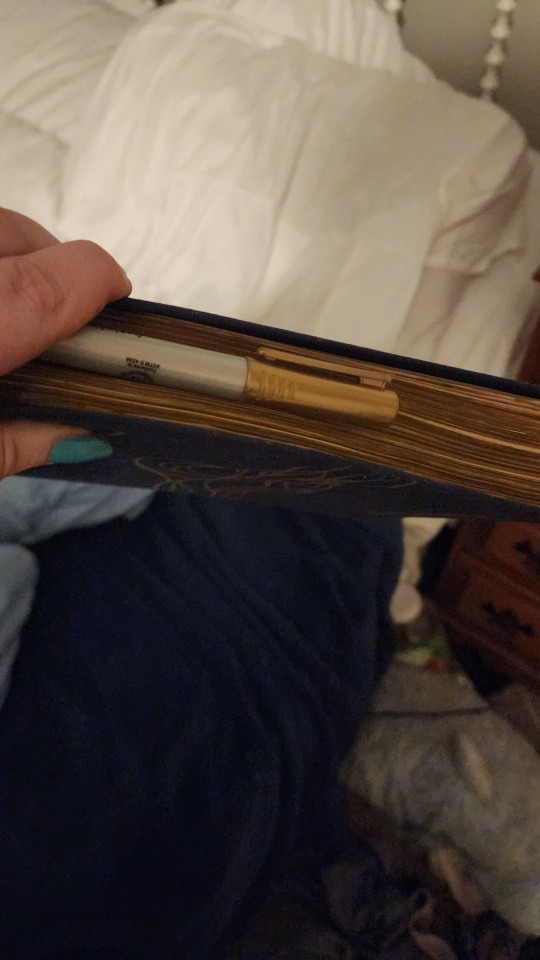
#atla#salvage#bookbinding#fanbinding#muffinlance#I'm a really big fan of this story and the characters ok?#They're really fun and I love them.
150 notes
·
View notes
Text
Day 1 of HOTD adventures at New York Comic Con 🎉
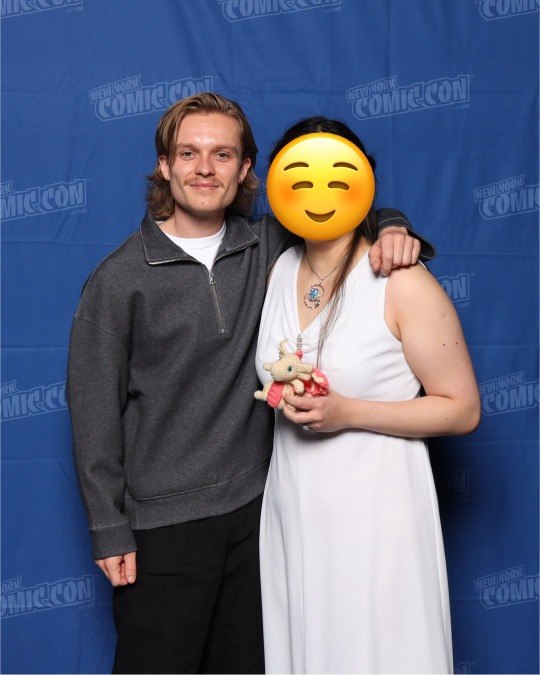
First thing I did today was run to my photo op with Matt Smith.
He. Is. DELIGHTFUL.
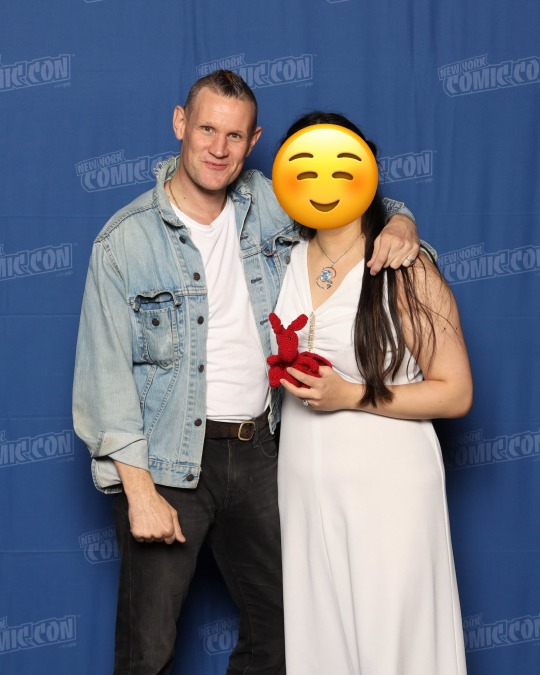
At these conventions, photo ops go super fast because they have huge lines of people to go through. The whole 10-second process is basically step up to the celebrity, smile, and immediately leave so the next person can go.
Matt is hugely popular so it was definitely important that they hurry through his line, but he was still friendly with everybody in the 5 seconds they were standing beside him. Really great energy. My interaction went something like:
Matt: “Hello, glad you’re here!”
Photographer: snaps photo
Matt: “I love Caraxes! 😃”
Me: “Thank you! 😃”
Handlers: usher me away so the next person can go
You can tell that Matt has done a lot of these fan events, and he’s very good at it.
Since my Matt photo op went faster than expected, I was able to go to an earlier TGC autograph session than I was originally planning. (This proved to be a very good decision later.)
Autograph sessions tend to take a little longer than photo ops, because the celebrity generally will exchange a few words with fans while signing. It’s still considered good etiquette not to hog too much time, or else people behind you have to wait even longer. TGC’s line was not super long when I arrived, so lucky me!
TGC also offered selfies at his booth, which was a pleasant surprise. (Not everyone offers it.) He seemed a bit tired (important note for later), but no judgment: conventions are really hard work. The celebrities are taking photos and signing autographs for hundreds of people over multiple hours.
He was VERY polite and nice. When I took out my bookbind for him to sign, he spent a good minute looking at it and complimenting the cover etc. And when he finished signing, he very neatly arranged the ribbon bookmark to mark the page where he signed.
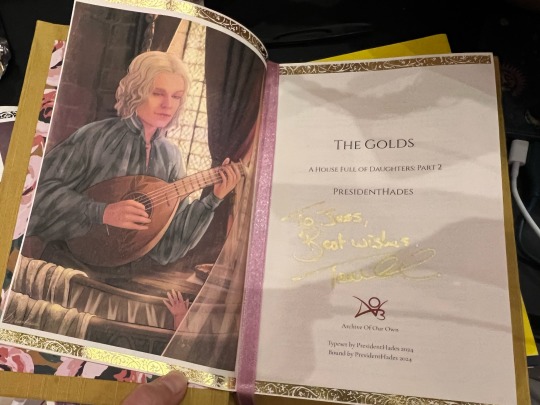
(He was definitely wowed by Debustee’s art too.)
Fabien was in the booth beside Tom’s. Fabien was announced as attending the convention much later than Tom and Matt, so I hadn’t made plans to get photos or autographs with him. Maybe tomorrow if scheduling works out. 👀
Then I went to my pre-reserved photo op with TGC immediately afterwards (different from the selfie). There were dozens of people in line in front of me, and the photo ops go super fast, so we didn’t have a particularly long interaction. But I managed to get Sunfyre in there.
After a lunch break, I went to get in Matt Smith’s autograph line. He was scheduled from 2:20-7:00 with a few short breaks every so often. When I got in line at 2:00, the line was already HUGE.
I waited in line 3 hours 45 minutes to get my autograph. 🙃😤😮💨
HOTD was the main reason I was interested in attending the convention in the first place, so I was prepared to wait in lines to do everything I wanted. But in case anyone was wondering: Matt Smith is indeed very very popular in the year Two Thousand and Twenty Four.
While I was in line for Matt, I heard from other people in line that TGC went home about three hours early. So anyone who hadn’t already gotten their autograph that day needed to get a refund (or maybe a transfer to the next day, I’m not sure). He is still scheduled for autographs tomorrow, but it made me extra glad that I was able to get my autograph early.
I had previously been told to always do photos and autographs ASAP because sometimes the celebrity gets ill or has to leave early, etc. Just a tip for anyone who wants to go to a con and do celebrity interactions in the future!
Back to Matt’s line: I was almost to the front when an event handler announced that Matt was no longer doing quotes. With autographs, there’s of course the actual signature, but sometimes you can add-on things like a quote for the celebrity to write. When I was planning my convention trip months ago, I pre-reserved the quote add-on for Matt. At some point in the last few weeks, they removed the quote option because they realized he would be on a time crunch if he wrote too many quotes. But I’d already paid for and reserved my quote, which the event was supposed to honor even if they changed the process later.
Another woman in line who’d paid for a quote was also upset, and I imagine other people were too. But the event handler came back out and clarified that those of us who already paid for quotes would still get them; they just wouldn’t allow anyone else to get a quote.
Here is the autograph and quote I waited almost four hours for. 🥰
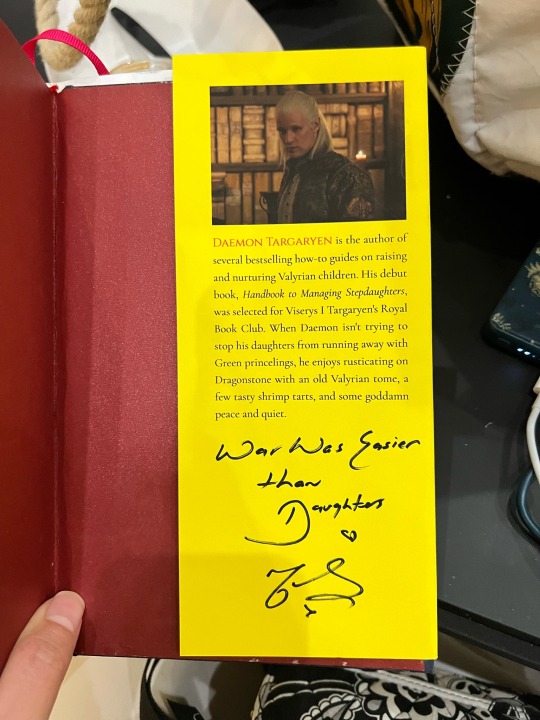
I made an updated version of the Handbook’s dust jacket specifically for the convention. The original dust jacket had my author and fic info on the back flap, but I thought it’d be fun to do one where Daemon gets the author bio.
“War was easier than daughters” is actually a Ned Stark quote, which I borrowed for the Handbook Chapter 11’s title. When you get a quote during an autograph signing, you first write down the quote on a slip of paper. Then you give the paper to the celebrity’s manager and tell them where exactly the celebrity should sign. Matt’s manager was a little confused by the quote but rolled with it.
When Matt read the quote, he said, “Huh, I don’t remember saying that. 🤔😄” But he was very amused and good-natured, and he had no problem writing it down. I was holding little Caraxes again, and Matt was happy to see Caraxes again (although I think Matt may have forgotten he’d already seen Caraxes 7 hours earlier—tons of other fans he was interacting with in the meantime).
I managed to accomplish all my Matt Smith and TGC interactions today, which were my top priorities for this convention. I consider today a success, even though I spent a lot of it waiting in line. Tomorrow morning there will be a HOTD panel, which I have a reservation for, so I’m excited to see Matt, Tom, and Fabien onstage. I don’t think we’re supposed to stream or record the event, but I will try to take notes.
Bonus: a baby dragon and egg that I got at the con! 🐉🐣
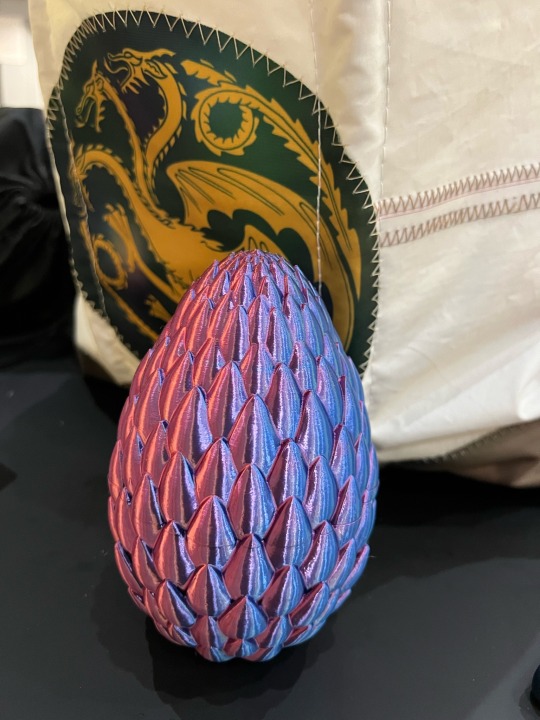
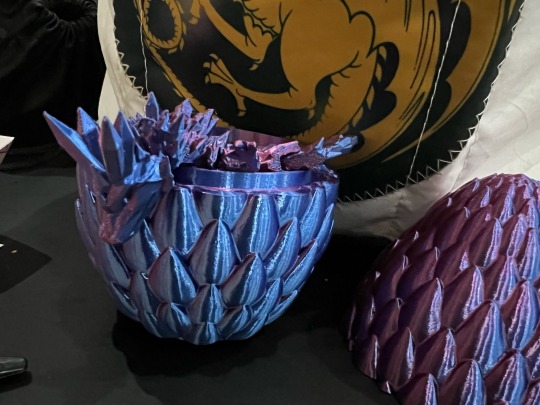
#New York comic con#NYCC#house of the dragon#hotd#Matt smith#Tom Glynn carney#daemon Targaryen#Aegon ii targaryen
60 notes
·
View notes
Text
Drawing random adults from The Blue Eye Samurai because I’m bored and I love giving love to random characters with 5 seconds of screen time. Major spoilers in here!!!!
Characters:
- Chiaki: He explained that his father was a bookbinder so I imagine that he helped him in some way. If it’s true that he lied to get the broken sword, I like to think that something he said there contained a bit of true.
- Abijah: Even he was the main villain, I could feel that he felt a lot of regret towards what he did to his sister for the way he explains it. Idk, I love when they do this instead of having a bland character that is bad just because he is bad. Like, they actually give you a reason why he became such an absurdly bizarre person.
- Heiji and his brother: They where interesting to draw because I like to think they have kinda of a sibling rivalry and Heiji just wanting to be better than his brother.
- Madame Kaji: I like to think that she had a rough childhood and that she tried her best to succeed. The way she cared so much of Kinuyo made me think she really didn’t want any of her environment to be harmed, at least to try.
For now those are my fav and I don’t know, I really liked the way that even the smallest characters have a bit of background.


#oof#got excited#idk this is also my time to practice how to draw kids#abijah fowler#heiji shindo#madame kaji#Chiaki#I was gonna draw Mizu but meh#I love her a lot but tbh we already know much of her so why 🤷♂️?#blue eye samurai
279 notes
·
View notes