#so i did not iron it but topstitch
Explore tagged Tumblr posts
Visit Tumblr Blog
Explore Tumblr blogs with no restrictions, modern design and the best experience.
Last Seen Tumblr Blogs


Fun Fact
Total funding amounts to $125.3M.
Text
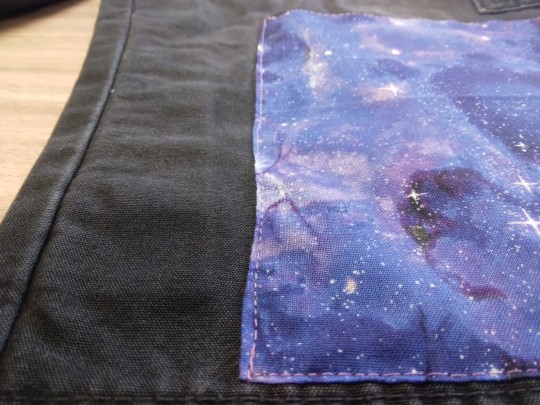
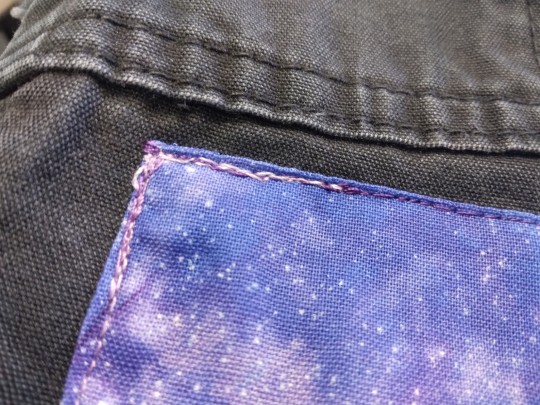
Galaxy Print Knee Patches
I've just spent two hours locked in mortal combat with my machine, but I emerge victorious with awesomer pants!
Yep, we're working on the same tac pants as always. I have two other pairs of solid black pants, so I can confidently decorate these to match my primarily black-and-blue wardrobe.
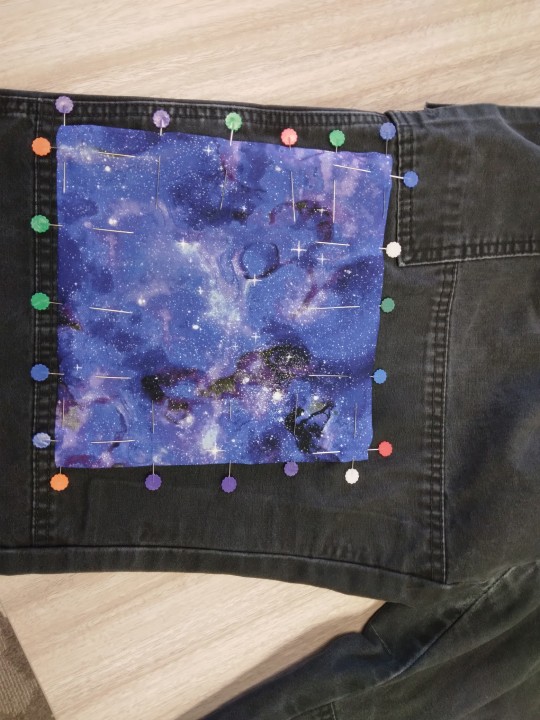
Step one was cutting two 9-by-9 patches. (I thought about doing cool hexagons for about 30 seconds and then couldn't decide which way to orient them, so no.) I did my usual trick of putting cardboard in the leg of the pants. Then I folded the edges under slightly and pinned down all around. (Retrospect: Since I didn't iron those folds, I should've used more pins. They kept trying to unfold as I sewed.)
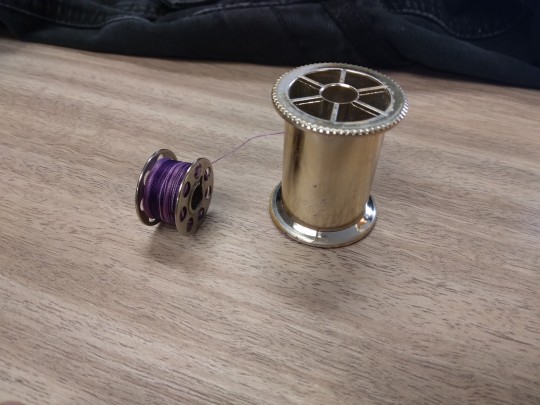
Step two was finding this bobbin of variegated purple thread from my grandma. Rather than hand-winding it onto a spool, I just put it on the machine. Seemed to work!
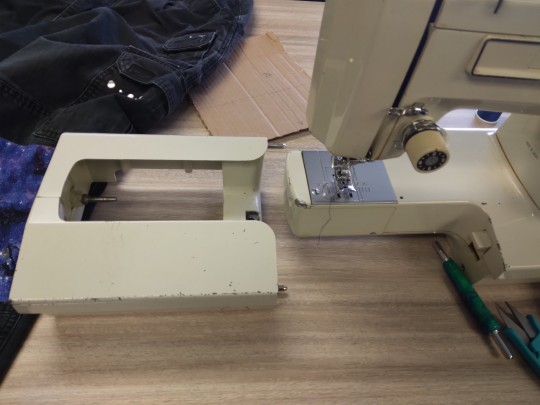
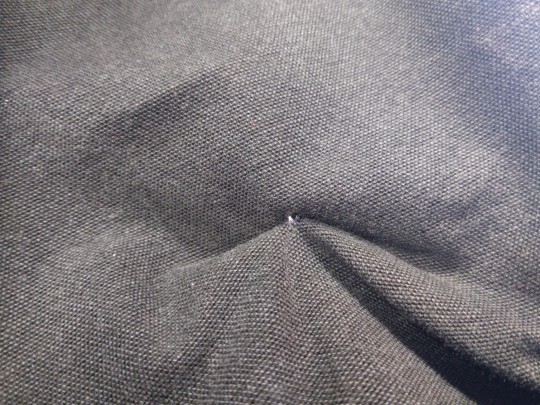
Step three was realizing this was gonna be difficult. The knee parts of the pants are already two layers thick, and I'm adding another folded layer on top of them. Plus, wrestling the heavy pants under the machine. Eliza has a lovely feature where the bottom comes apart to help you get into sleeves and such, but cramming this fabric in was still a pain.
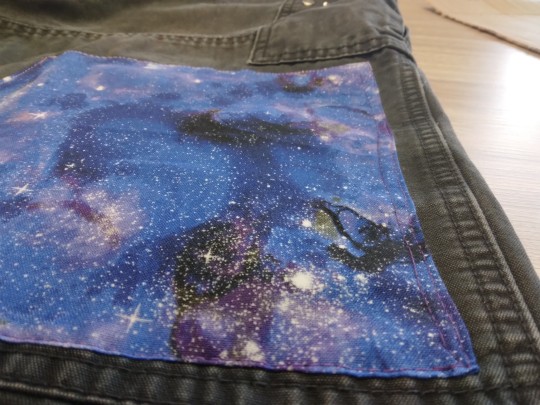
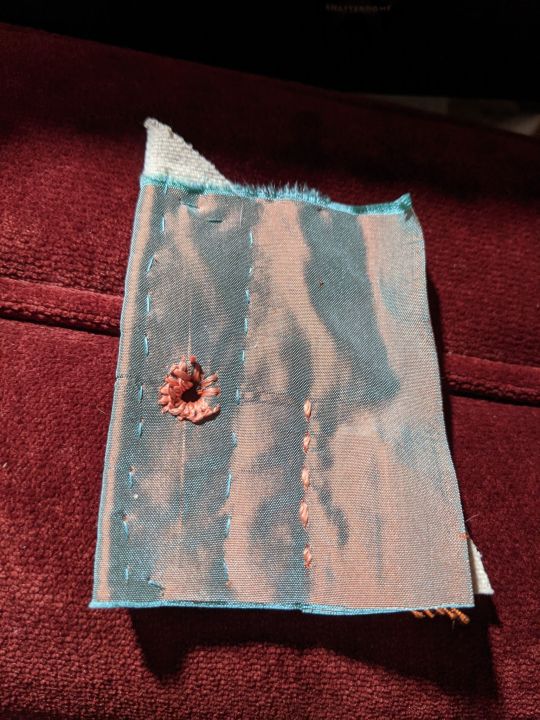
The above photos are called "Why I'm not a quilter." Also, they show how much trouble Eliza was having with the fabric. The stitch lengths are uneven, I kept hitting pins, and every time I stopped and started, she pulled to one side or the other. On the very first seam, in the first photo, I tried to turn around and do a second row of topstitching, but it came up so uneven that I quit immediately and unpicked it.
Also, she's had this worsening problem where, when I finish a seam, I can't pull the fabric away without turning the top tension back to 0, or the thread will just break. This necessitates remembering to put the tension back to 4. Remember that.
Of course, it wouldn't be a proper sewing project if I didn't sew the pant leg shut on the final corner. So I pulled it off the machine, unpicked it, and went back over it again.
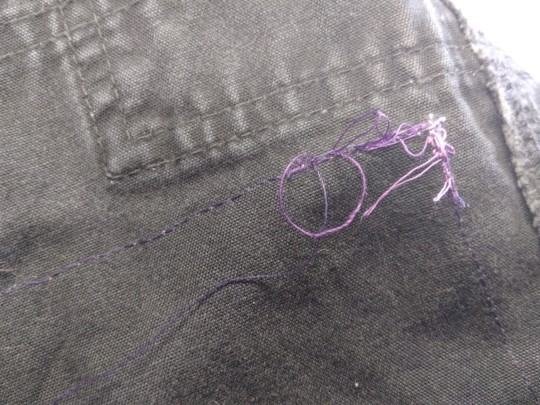
And forgot to reset the tension to 4! Just look at that mess on the back.
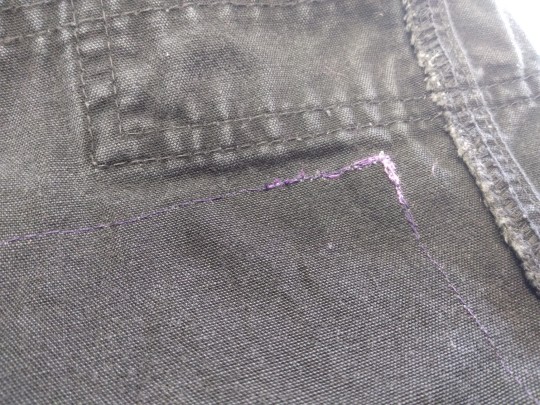
I clipped the loops and just sewed it all down again in eagerness to be done. It's a tad noticeable, but I don't care. It's done!
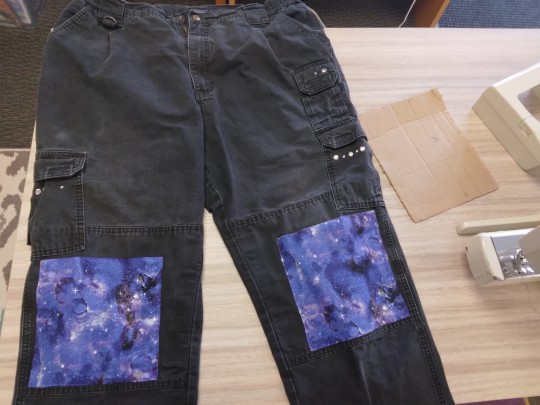
And here's the end result!
Would it be neater by hand? Probably! Is Eliza due for a spa day at the repair shop? Yes! And am I thrilled with the end result?
ABSOLUTELY!
#galaxy print#knee patches#patches#solarpunk#diy#sewing#cj sews#beginner sewing#it's not waste until you waste it#use it up wear it out make it do or do without
69 notes
·
View notes
Text
ok i should probably sew something else ever
I've finished my third Loftus Bralette now, with some minor revisions to the fit. There's a whole series of blog posts about adjustments you can make, and since I wanted mine to be both slightly more supportive and slightly more forward-oriented, I did the adjustments to shorten the straps, shorten the neckline elastic, and shorten the front curve of the powerbar. It worked, and the newest one is slightly more... pointy.
I also made it from linen for the nonstretch components. And that was a qualified success. Qualified, because the combination of the way linen is in general, plus the shorter neckband elastic meaning it was getting gathered more, meant it wound up with a little bit of a lumpy appearance; a synthetic fabric would I think gather slightly more gracefully and be a bit more forgiving. But linen has such excellent moisture-management properties in particular that I forsee this one is going to wind up in very heavy rotation in my wardrobe. I will certainly use linen in bra construction again, though I will watch this one to see how it washes, because I'm not ironing a bra.
I do think I have the fit dialed in now though. So I have a few more fabrics I want to try-- silk, more elaborate laces, etc-- and then I want to try making it with stretch material for more of a lounge bra since I always need more of those in my wardrobe. But in the meantime I have to sew some other things I think.

[image description: the bra in-progress, showing the peach-colored neckband elastic, white linen fabric, and peach topstitching.] I forgot to take a picture of it on. We'll have to see how well it wears.
That center insert panel is a prime location to do some decorative stitching or embroidery....
20 notes
·
View notes
Text
Vere cosplay description/tutorial continued part two (belt edition).
If you made it this far, GREAT!!! You're doing fantastic.
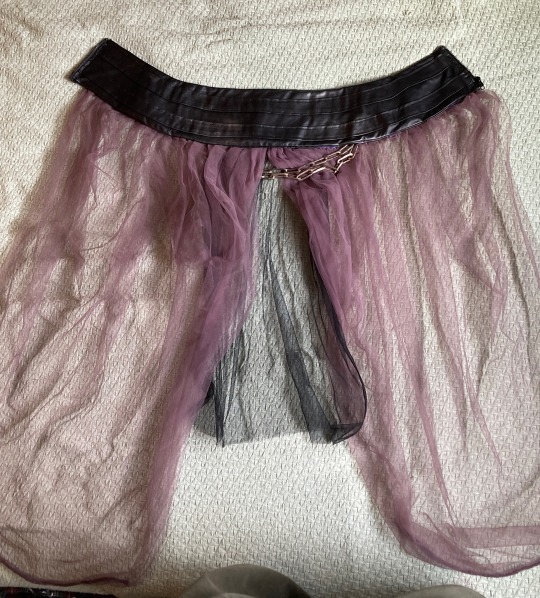
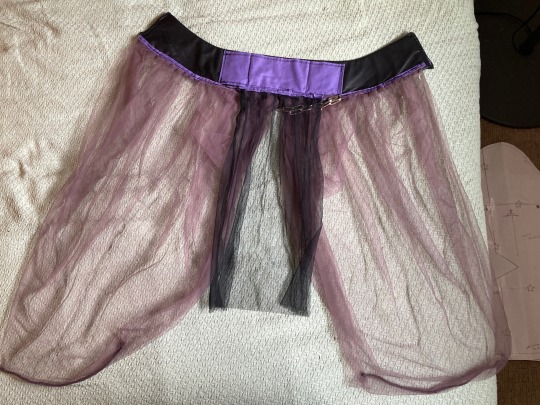
My interpretation of his waist/below
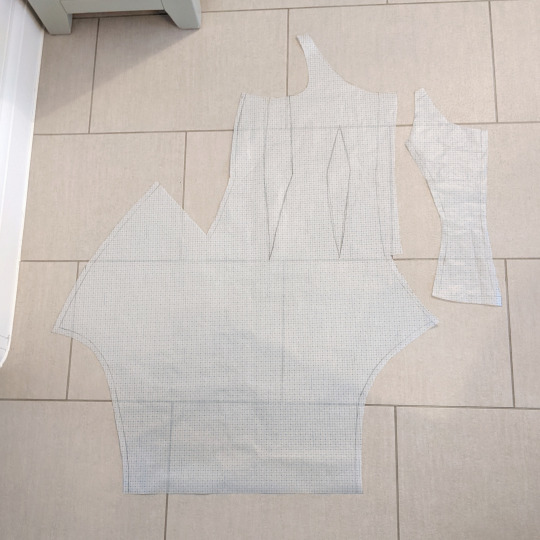
I chose to make the belt into a skirt, rather than the whole thing as a dress. This seemed a lot easier to me than trying to combine things further, and honestly I'd definitely recommend this. I made the belt pattern by covering my torso in Saran wrap, tape (masking or duct tape) drawing the belt shape on my torso, and then cutting it out. Note that your front and back of your torso may differ in shape, so I'd reccomend drawing where your belly button is.
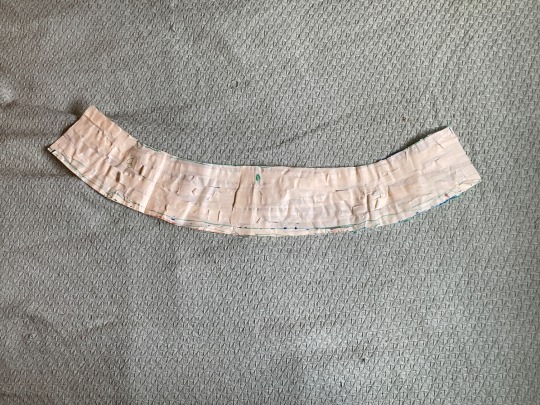
I then cleaned up the lines and made it into a pattern piece. Make sure it's symmetrical.. and ADD SEAM ALLOWANCE! If you're not impatient AF then I'd reccomend tracing your tape pattern onto paper so it's actually flat.
It's important for this belt to be SO STRONG because it's going to be under a LOT of strain during the day due to how it's tight and where it is on the body. Maybe it's overkill but I cut out a front and back piece(so my pattern x2), interlining, and added cotton underlining for strength to both the front and the back pieces.
Steps
1. make ur pattern with Saran wrap and tape
2. Clean up your pattern
3. Iron all your fabric and cut out your pattern (2 x of pattern, 2x of underlining cotton, 1x of interlining)
4. Staystitch and zigag fabric (except not the pleather bc we don't care Abt it as it doesn't fray)
5. Attach your interfacing to the cotton (front side cotton) and then baste the cotton to the pleather (front and back). So now you have 2 pieces of the belt, inside and outside piece.
6. Make the pattern for the strips of leather on the front. You should trace your belt pattern and then draw on the strips onto this tracing. They can't be straight lines bc this belt is a C shape tbh, and so they are almost like mini belt patterns. Don't forget seam allowance for their hems!
7. Sew these straps to the outside piece. If you have an idea for the metalic front belt details it would be great to attach them here in this step but I didn't bc I didn't have a good idea (might get them 3d printed though).
8. Freestyle some pockets bc ur gonna rly want some on the inside. I made one the size of my phone as well as credit cards.
9. Sew the pockets to the inside of the belt piece.
10. Put right sides together and sew the top seam of the belt together (seam by your belly button). Belt is like )( now. clip this inner seam.
11. One option you have is to now hem the bottom of the outside and the inside. In this case, you would put the pleated hanging fabric between these two layers and then topstitch it down. This isn't what I did but it'd look better imo than having it hand stitched to the inside. If you don't want to finish it this way, keep the right sides facing each other , sew the bottom hem, and then turn inside out. This will not be possible if you've added stiff belt details btw.
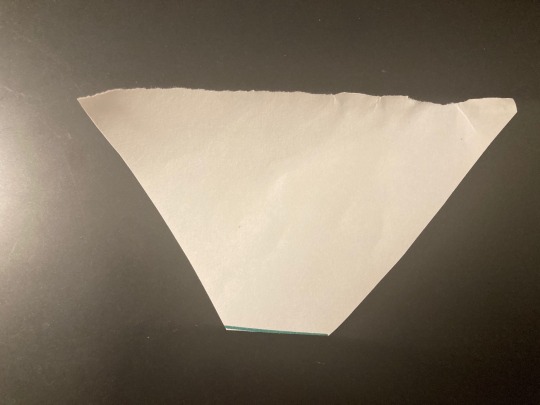
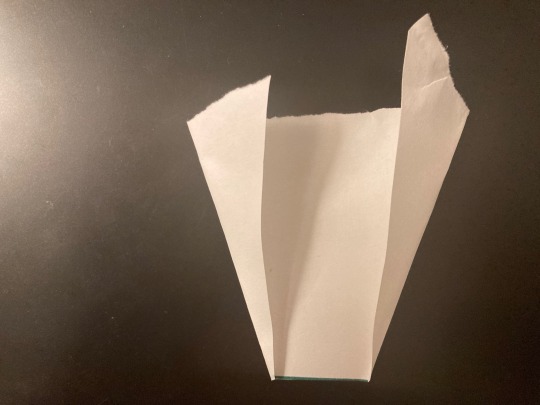
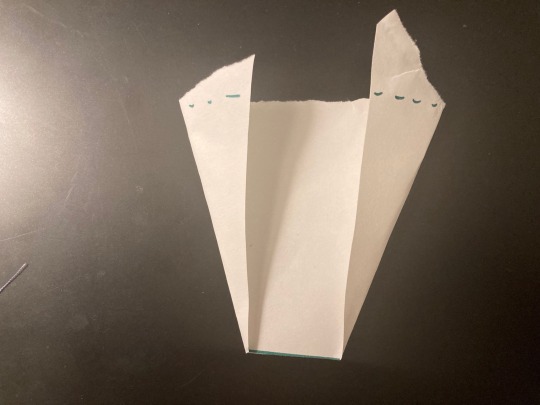
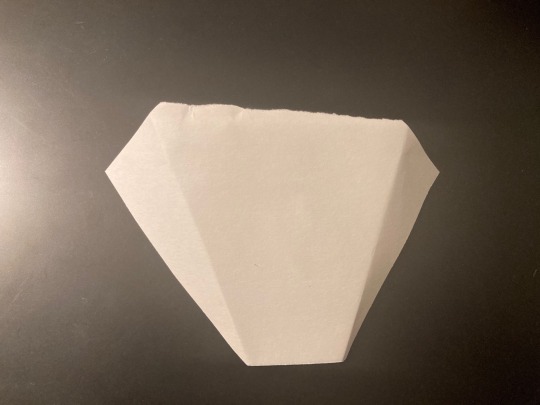
12. Figure out your pleating. I did this by pinning my fabric to my waist while was wearing shorts and seeing what density of pleats looked like and how it compared to what I wanted. It'll depend on how translucent your mesh/tulle is. You can do a small section, and then extrapolate. For me, I did a test of 17.5 cm of freehand pleating which I discovered was 98 cm of fabric (unpleated). As I needed the top pleated edge to be 44.5 cm long, that was-250 cm of fabric for EACH SIDE. These side skirt things are REALLY awkward bc you need all this pleating at the top to get the look but at the bottom, it's supposed to be little wider than a foot or so. Below I demonstrated my end shape with paper. You start with the wide top for the pleating, and the bottom the ending width you want it to be. Then, place weights at the corners and bring up the edges. Cut off the excess. Pleat the top edge as you would normally ignoring the odd shape and it should work out. The proportions in the bottom image is NOT ACCURATE Bc the top edge should be 250 cm and the bottom edge like.. 40 cm.
13. personally I just sewed the pleats to some small strips to keep everything together and then handsewed them to the inside of the belt (with my arm insidethe belt, like a pillowcase). But like I said, you could easily add them into the seam of the belt for a neater look.
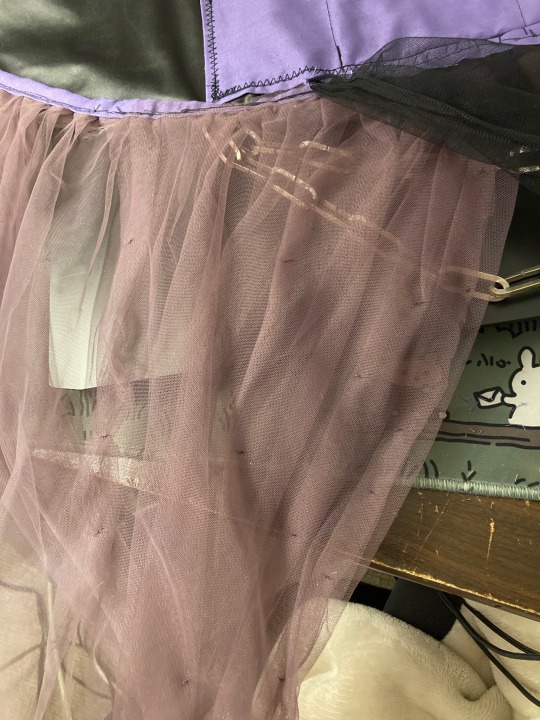
14. Add your black gauze in here. Tbh it doesn't need a weird shape it can just be a rectangle that you pleat
15. I placed an unpleated mesh pannel behind the pleating and sewed small tacks throughout so the fabric stayed pulled back to the side. It felt too skirt like (?) Without this and more puffy, too. You don't have to do this but it was my solution and was pretty unobtrusive.
16. Hand fix your chains in. The cotton is also important for supporting these bc they're heavy af. I used chandelier chains, and I'd reccomend getting some where the links are NOT welded shut or it will be difficult to adjust the length of the chains without heavier duty metal working equipment.
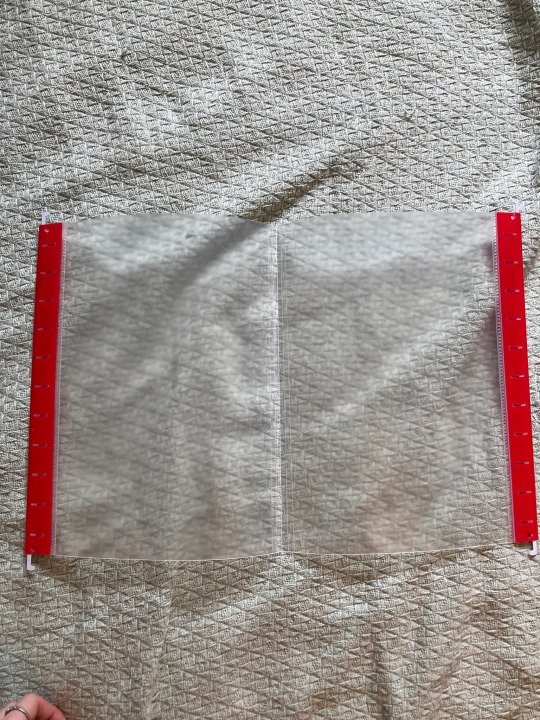
17. Add in some structure! If the belt is an open pillowcase, this goes where the pillow would. I used a stiff plastic folders (below) cut into shape (smaller than the pattern by a bit so it doesn't mess with seam allowances). This gives your belt SO MUCH HEFT and is great!! You could also use foam too! Highly reccomend!
18. Add a closure. Personally I used a zipper, but a corset back would work great too especially if you fluctuate size. We don't see his back yet so you can do what you want lol.
19. Personally I added some wire to the bottom hem of the tulle to help it be straight and hang better with the weight but I didn't really like how this turned out.
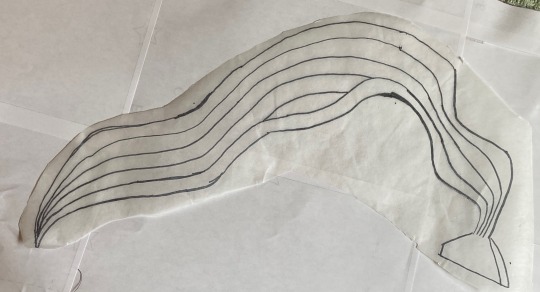
Just for posterity, here's the pattern I made for the legbands. They're prettttty close but not SUPER close. I'd recommend covering your leg in ductape and having yourself or someone else try to draw the shapes in a mirror. It's wack AF though so I thought seeing what mine looks like laid flat might help you.
25 notes
·
View notes
Text
Green trousers part 3:
After getting the darts, pockets and crotch seam ironed, I moved on to sewing the side seams and inseams. I forgot to take process pictures of that part, but it was pretty straightforward anyway.
Next was the fly. I sewed buttonholes (by hand, because my machine’s buttonhole setting scares me) into one side of the facing, folded it to the inside and topstitched it down, then sewed buttons onto the other side. Luckily, I found enough buttons of the right size (and flat enough to not create bulk!) in my stash.

Instead of adding a waistband, I sewed twill tape to the outside of the waist as a reinforcement. I folded the fabric to the inside just below the tape and topstitched it down. I finished the hems with some green bias tape, topstitched on the outside and whip stitched on the inside. Lastly, I added the top button and belt loops.


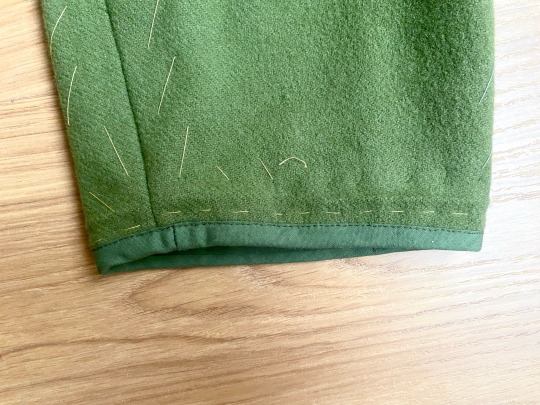
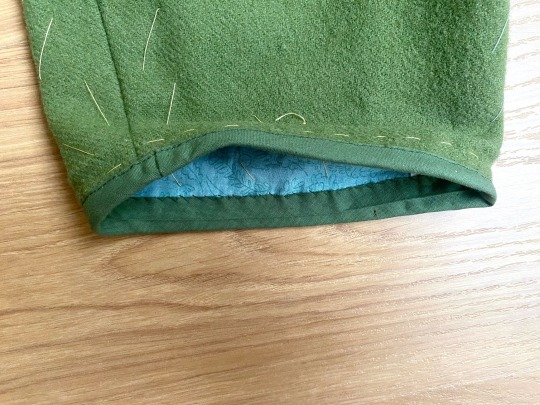
Then came the most time-consuming phase of this project: hand-finishing the raw edges with a whip stitch. I forgot to take out some of my thread marking and basting stitches before I did that, so I ended up having to wrestle with those for a bit afterwards. I’m fairly certain there are no contrasting threads visible on the outside anymore, though…
And that’s that! The trousers are finished! All in all, I’m very pleased with how they turned out, though there are some things I would do differently.

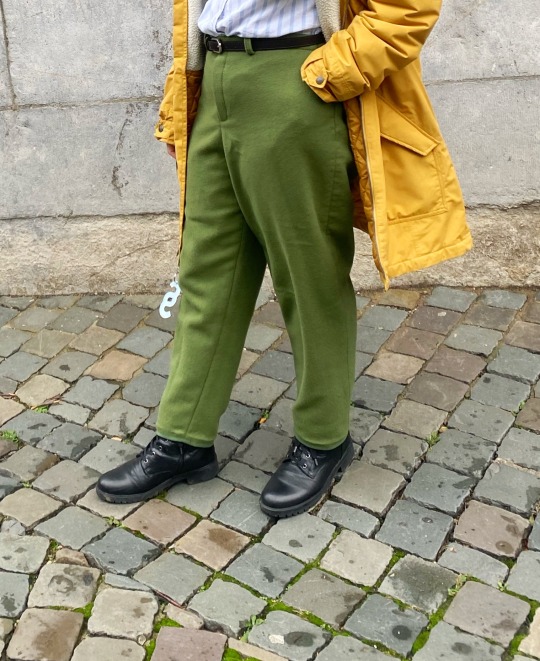
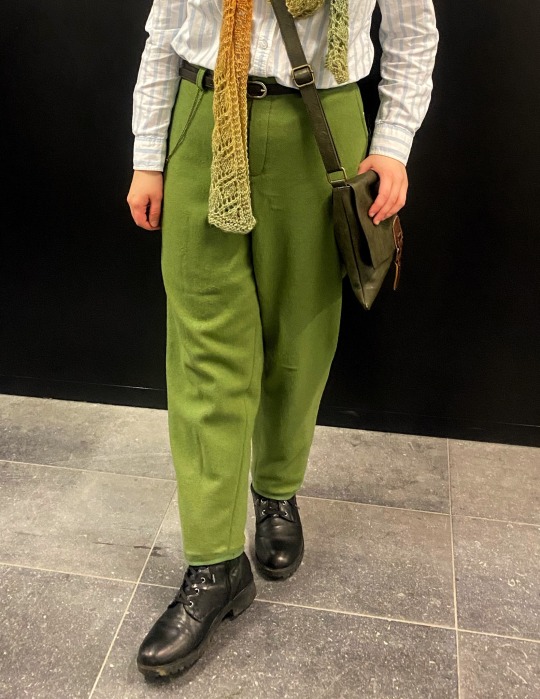
#sewing#fashion#green trousers#my project#so glad to finally have a pair of nice trousers that are actually the right size#I love the fabric too#the green wool is refreshing in winter#and it’s very cozy too
46 notes
·
View notes
Text
Look, everyone can complain all they want about how velvet is the devil but the real devil is silk organza.


But there is no devil that ironing and basting cannot tame.
I don’t usually make corsets using the ‘sandwich’ method because it’s so bulky at the seams on heavier fabrics, but with organza the six (6!!) layers at the seams are still as thin as one layer of quilting cotton. And the seam allowances are so easy to trim down after stitching. Snip snip~!
The sandwich method is for 2-layer corsets. For a front-closing corset you would start with the busk insertion but I don’t have a front closure on this corset so i’m starting from the center back. Seam the center back panels and turn them right side out or just fold them if you cut them on the fold like i did. Take the two pieces of the next panel, line them up right sides together with the previous panel, lining to lining, fashion to fashion. Baste, stitch, trim the seam allowance if needed because you won’t be able to access them again. Press the two layers of the panel away from the seam so they’re right sides out.
Continue until you get to the last panel. Tuck the final seam allowances in, press, and topstitch just inside the edge to close off and finish the panel. If you’re doing what i’m doing, you’ll seam both halves onto either side of one layer of the center front panel, then press the seam allowances in on the second layer and lay it over the raw edges to enclose everything. (Or try the burrito method, I guess?)
Boning channels would be the next step but i’ll simply topstitch along the seam allowances for additional structure and to keep everything flat. Will post an update when I get to this step!
5 notes
·
View notes
Text
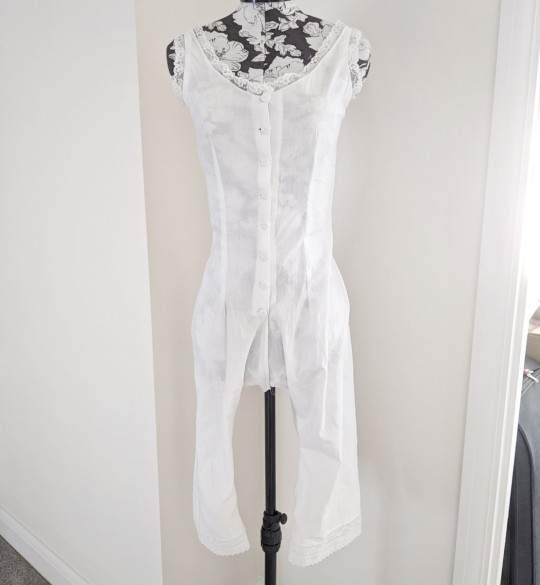
Utilitarian Edwardian Combinations
April 13, 2023
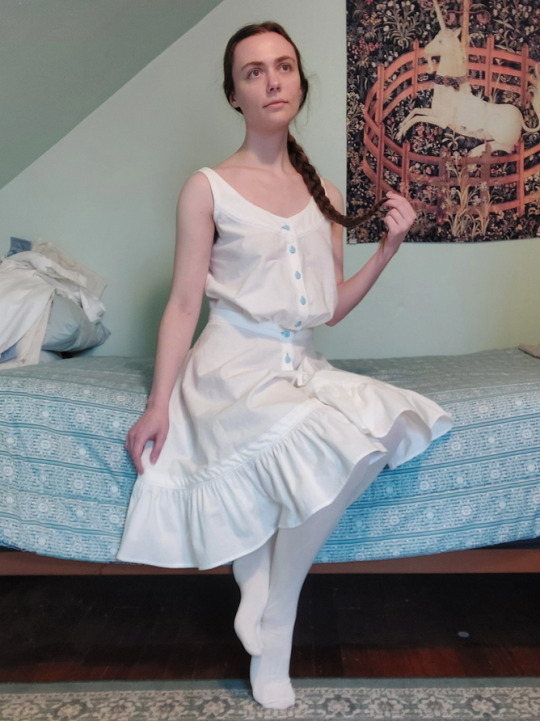
[Image ID: a photo of Alex posing seated on the edge of a bed, wearing white stockings and Edwardian combinations.]
Sometime last summer, having finished my 1890s corset, but not started planning the corresponding wardrobe, I bought a pattern for Edwardian combinations, dug some slightly-discolored white cotton from my stash, and cut out the pieces.
(Now, I want to say that, yes, I understand that these combinations are a few years too late for the 1890s. I prefer the Edwardian shape of combinations over the chronologically-correct 1890s shape. They're underwear, so when I'm dressed no one will be able to tell that they're not accurate. And frankly, everyone's doing it.)
Part of the reason I had put them aside for so long was the fact that I cut out the front bodice pieces as-is, when I had originally wanted to add pintucks. When I got the fabric and pattern back out in mid-March I decided I didn't care enough to do that, so I just started sewing.
Well, actually, I started ironing. There were seven (7) facing pieces that needed to have certain edges ironed down before starting to sew. Then I could actually start sewing - attaching the facings to the front and back bodice pieces, sewing the legs, attaching the leg facings, and making the leg ruffles into a closed loop. More pressing, then more sewing, then more pressing. I skipped the bodice ruffles, though, because they would have been uselessly bulky under a corset.
And then I had an idea.
I didn't intend to add much (if any) lace or decoration to these, but all that white was getting boring. So I decided to spice things up with colored top-stitching. I still have thread left over from my corset, so I top-stitched the bodice facings and the ruffle's hem in light blue! The effect is subtle, but super cute.
I did add a tiny bit of lace, though. I had two lengths of quarter-inch wide lace that I salvaged from... something I can't remember. They were the perfect lengths to add to the bodice just under the facings!
Then it was ruffling time. I didn't want to hand sew the gathering stitches for the leg ruffles, but I was worried that the thread would break if I used machine stitches to gather them. I ended up using the "zigzag stitch over a piece of string" method. I also ended up resorting to an old Pinterest trick where you do two lines of gathering stitches - one above and one below the stitching line - in order to help control the gathers and make them neater.
I'm so glad I did! It was a tedious process but the results couldn't be prettier!
To cover the raw edge of the ruffle, I made bias tape of the same white cotton I used for the rest of the project and used blue topstitching along the top and bottom to hold it in place around the leg.
With the bodice and legs completed, it was time to attach them to the waistband and make it one single garment!
The bodice went first, with a bit of gathering at the center front. I put in two lines of gathering stitches by hand. The result was not as neat as the two lines of zigzagging over string, but oh well. That gets sandwiched between the inner and outer waistbands, sewn, and ironed.
Then the legs get some gathering at the center back. Having learned my lesson on the bodice, I did the gathering with string again. The legs get sewn to the outer waistband first, then ironed. The legs are just barely supposed to meet at the center back (because these are split drawers), but I opted to overlap the facings for a bit more modesty.
I added some more decorative top stitching along the edges of the waistband, which served to attach the bottom edge of the inner waistband as well.
Finally, it was just buttonholes (in blue thread) and buttons (also blue)! The pattern calls for six down the front - one on the neckline facing, one on the waistband, and four in-between. I ended up adding two on the leg facings below the waistband for some more coverage.
And, with that, my combinations were done!
These are easily one of the weirdest garments to put on. I can't explain it, but the way the legs are disconnected just makes it so odd to get into!
I'm mostly pleased with how these turned out, even if my top-stitching doesn't hold up well to close inspection.
There is one thing I want to point out, though. Becuase this pattern (the TV one) is technically for a corset cover and drawers, and the combinations are just a 'pattern hack', the bodice is a bit oddly shaped for wearing under a corset.
As an Edwardian corset cover, the bodice is meant to encourage the pigeon-breasted look of the era, so there's a lot of extra fabric at the bottom front of the bodice. Because I was making a garment to wear under a corset, I could have shortened the center front by an inch or even an inch and a half and the garment would have been a bit more suited to my purposes. It will work fine as is, but it could have been better.
Next up in 1890s sewing is a bust improver and bum pad. I'm hoping to order a bodice and skirt pattern later this month, too, so I can finalize my plans for clothing. I will need a petticoat eventually, but I'm not sure I have the budget to buy fabric for that right now.
My next few sewing projects will not be 1890s, though! I've got a secret project brewing in a new era that needs to be done before the end of the month and then a quick modern project that is already cut out and waiting for me. Then maybe back into the Regency for a bit, but who knows.
Until then,
Stay warm. Stay safe. Stay healthy.
2 notes
·
View notes
Text
Day 13 - Misty Couture
14/02/2024
I overlocked the final piece for the bow then sewed and ironed all the bow pieces, ready to be put together when finishing the dress.
I did some more work on the black corset, stitching in the ditch and top stitching a panel. I pinned and sewed the 2nd panels to the 3rd panels, top stitching the seam allowance towards the back and trimming the seam allowance down.
I then went onto the waspie and sewed the 2nd panels onto the already completed centre front panel, pressed the seam allowance towards the back and sewed twill tape for the boning channels onto the inside, topstitching from the outside to catch either side of the tape.
I ended up sewing the 2nd panels upside down to the wrong sides of the first panel and had to redo all those panels again to get back to the same point. We ran out of the twill tape for the boning channels so couldn’t finish it fully back to the same point. Misty was quite understanding and it just gave me another chance to practise the first few steps.

0 notes
Text
I think using the Catholic newspaper gave me a really weird dream this morning where I was so mad about being in some manner of Catholic-type school with uniforms and they wouldn’t let me get the pants uniform bc sexism that I yelled WHY and woke myself up
Anyway;
I might’ve given the band another coat of gold before sealing everything? Idr. Here it is drying. Tiny jelly jar balanced on top of modpodge bc I remembered almost too late that this has to be Curved
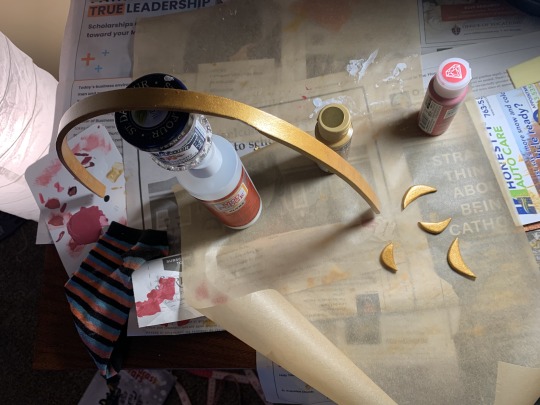
I think I did two coats on the crescents, but I only did one on the band bc it started raining and I wanted to move on anyway
Prooooobabblyyyyy should’ve let it all Set overnight but impatience won out, though I did suffer for it. Hot glued the gem on, forgot this is going to be a circlet, tried “brushing” some hot glue underneath the sides with a wire to some success. Used too much glue for the first big crescent :/ and forgot to bend it Before placing gluing it down… the rest mostly went without incident. I used an embroidery hoop to place the band over to get a realistic curve (briefly wondered why I didn’t just make it out of an inner embroidery hoop to begin with,)
Used a somehwat worn sewing machine needle and a clippers to pick away some of the excess glue. Used the same needle to dab paint over the glue and to patch over where the removed glue tore away some of the paint >.>
Here it is, done (or done Enough) and drying/setting. As long as you don’t look at it too closely it’s not so bad (low blood sugar mood)
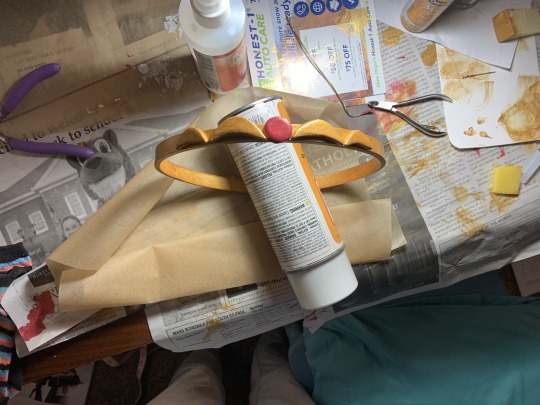
I haven’t joined it Together yet, it’s still a flat strip. I’d cut it about 1/3” wider than my head in case the wig (that I still need to buy, now that I’ve committed to wig and ears in lieu of Staff) affects that. Idk if I want to just glue the ends together or something more temporary/adjustable….
Maybe a small bit of heat shrink tubing to cover the seam? I’d have to paint that ofc but hopefully that wouldn’t be too time consuming
I washed my vest thingy while painting and sealing and then had to spend like Forever ironing it. And there are still wrinkles :( also I should’ve washed it sooner bc the marker lines are still a litttttle visible up close. But it’ll be covered by the cape so 👍
Having to re-press the seams made me realize why I Should’ve done the topstitching the pattern specified…… if I have time after everything else is done I might add that, or I’ll do it after Halloween to save myself some trouble next time I wash it
Tomorrow it’s time to tackle the cape
Zelda EOW cosplay log: circlet
After giving up on the staff, which was already another means for me to take a break from sewing, I got started drafting the circlet
I had some Eva foam from another cosplay ish project that didn’t go very well due to inexperience, so that seemed the most logical choice. I forgot how annoying it is cutting Eva foam though… the “headband” part was easy since I could use my rotary cutter, except the length I needed was longer than my ruler, so there’s a wobbly bit from where I had to scoot my ruler. Didn’t feel like cutting out another piece, so it’ll have to do ¯\_(ツ)_/¯
Studied some screenshots and Sketched out the gem and metalwork bits on paper to get an idea of relative sizing between all the pieces. That damn pvc conduit ended up coming in handy here—I pressed down onto the foam and traced the indent for the gem. Cutting the crescents was realllly fiddly bc I was using scissors. But idk if I could’ve gotten those curves otherwise with an xacto knife
Only on the smaller bits did I think to transfer my sketch onto the foam instead of eyeballing it. My “transfer” method was poking pins along the outline into the foam, kinda like for pumpkin carving. Nice and clear and easy to follow with the scissors without having to worry about painting over anything

I thought I read somewhere that Eva foam can be sandpapered ? So I tried doing that to fix the uneven edges. Idr what grit level sandpaper I used. I mostly used a nail file board actually lol
Somehow I lost my circle gem piece, so I had to cut another one out and sand that :/ I don’t have proper primer so i figured I’d just spray a little modpodge on it to give me a workable surface to paint on. It didn’t occur to me that the pieces were so small that they’d fly off bc of the aerosol blast, so I had to find those in the dark ground bc I keep forgetting to tell the landlady that the outdoor lightbulb is out
I ended up mostly kinda mopping up the modpodge that was left on the parchment paper to get it nice and covered. Then I remembered I should grab a scrap to prime for when I test out paints. Was smart enough to hold the foam with a clothespin so no more glue would get on my hand. A day later It does kinda look like a nice subtle topcoat on my nails though :3 let it dry overnight so I could play some hades 2 and bc I didn’t want to fiddle with mixing paints at like 10pm
The next evening I tested out the paints. At the store I’d been between one metallic red shade and another, and I’d gotten the one that hadn’t seemed Too bright red. This was a mistake. It’s indeed a lovely garnet color, but that’s not quite light or red enough for this. Mixed with a little red looked pretty good. The gold metallic was perfect straight out of the bottle
Also tested whether to use black or white as a base coat. Going with white to keep things brighter

✨The next day ✨
Got my base coat of white on

(Using some weird Catholic local newspaper that some lady who lived here before me still has delivered to catch the mess lol)
First coat of gold. Probably should’ve made sure my sponge was fully dry before painting on the gold… I’m using makeup sponges since they’re denser than the sponge brushes I got for cheap a while ago. Repeating to myself Trust the Process Trust the Process so I don’t get neurotic about how sloppy it looks rn….

Okay yeah second coat is looking a lil better. Added a Little more red to the mix for the gem. I like how the shade looked overall, and especially layered over the other. I dont need another coat on the gem but def will for the gold stuff

Third coat, now we’re talkin. That’s good enough for the crescent pieces, but I think I’ll give the band another coat tomorrow. Testing my gloss sealant on the back of one of the smaller crescents after putting the first coat on the gem to see how that looks

Im planning on using satin modpodge finish though bc it’s an aerosol spray and bc I think that’d contrast nicely and subtly with the glossy. But the glossy is a normal spray bottle, and I wasn’t careful the first time I used it so it got clogged…I usually borrow the spray top from something else, but it’s not the same diameter as the bottleneck so I have to hold it weird :/ I should just buy a replacement nozzle fjsjdhd. But since the pieces are so small I’m just unscrewing the nozzle, taking it out and letting a few drops of sealer fall onto a plastic lid from something or another, then dabbing it on with a sponge
Now that I’m more like Live blogging and not posting about stuff I’ve already done I think I’ll end the post here lol
2 notes
·
View notes
Text

ok here's the post for how to sew lining into a bag with handles for anyone who needs it but mostly me because I always forget how to do this

first assemble the outer bag and lining. match them up right sides together.

sew the edges together normally everywhere EXCEPT the handle halves. sew one side together, but leave 2-3 inches unsewn at the end of the other side. make sure that you leave the same side unsewn on the matching handle half on the other side of the bag so that when the ends of the handle halves are sewn together to make solid loops, the gaps meet each other.

you can see here, the insides of both matching handle halves are not sewn to the edge.

cut a seam open in the lining and pick out just enough stitches to pull the bag right side out through the hole. you could just not sew this seam together in the first place but I like having stitch holes to mark where I need to sew the seam back together later.

bag right side out now yay. I use a crochet hook to yoink the handles right side out cause the hook can grab the end of the handle and pull it out easier than I can jam my fingers in there to do it

match up the ends of the handle halves right sides together and sew only across the very ends to combine the halves into one whole handle. make sure the handle halves aren't twisted before you pin and sew!!

the gap area is still open. iron the edges of the bag flat, while doing so also folding in the seam allowances of the open gaps and pressing them so that you have clean (although unsewn) edges

hand stitch this area closed using a ladder stitch.

also ladder stitch that open seam on the bag lining.
didn't take a pic of this but topstitch along the edges of the bag and handles pretty close to the edge. I did like 1/8 inch in but you could do like 1/4 inch too. you can see the topstitching in the first photo on this post.
tada all done
70 notes
·
View notes
Text
1895 EPQ Project: Part 1
The Foundation Layer
SO basically, in the 1890s you had 2 options for the layer closest to the skin: a chemise and drawers or a combination of the two (handily named combinations). I chose to make combinations since apparently they are more economical in terms of time and fabric, and as a broke busy teenager this suits me just fine.
I wanted my combinations to have 'split' drawers that close with buttons down the centre front. I chose a pattern from an 1895 sewing manual and made my design based on the my pattern, contemporary adverts and extant garments. If you look closely, there's a teensy dotted line on the pattern, I decided this was an option for a low neckline and used that.
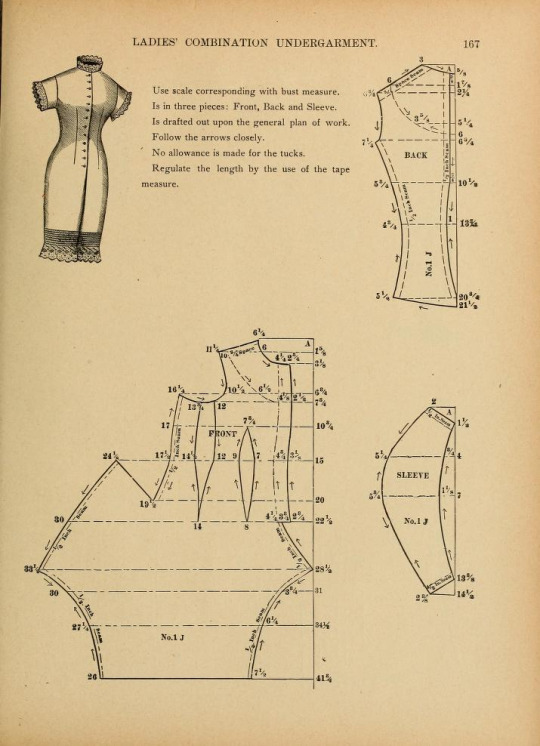
The pattern told me to use a 'scale corresponding with bust measure', however I don't really know 1) what that is, and 2) how to get one, so I decided to draft the pattern according to the scale given in the book and then fake it till you make it. I drafted the pattern pieces onto gridded pattern paper (honestly took me over an hour). I then marked the seam allowances and darts using a Frixion pen, which I cannot recommend enough because it comes right out when you iron it.
First I sewed the back pieces together with a French seam, then I sewed the darts. Next I sewed the fronts to the back piece at the sides and shoulders and flat felled it. This was the first point I could try it on and see if it fit, so naturally I did and naturally it didn't. So I re-sewed the darts until the fronts overlapped as they were meant to.

The next step was to sew the legs together up to where they meet and flat fell the seam. I then hemmed the raw edges of the split and gathered the rear flap (yes haha butt flap very funny) to fit the back panel.

Then it was placket time, babey. I used 8 buttons spaced 2 inches apart . As several extant garments I looked at used cloth covered buttons (these guys right here), I used plastic buttons covered in my fabric. I put the buttons on the left and the buttonholes on the right. Please don't look at them too closely, they are my second biggest weakness after hooks and eyes.
Then I sewed edging lace around the neckline, armholes and legs. I used reproduction lace from Etsy. Yes, it was expensive but it was really pretty so I didn't mind.
To sew it on (mini tutorial time):
Legs: I joined some insertion lace to some zigzag lace with a whipstitch. Then I top-stitched it to the fabric half an inch from the bottom, then folded the seam allowance into a hem and stitched it down (source)
Neckline: I topstitched the lace around 1/4 inches from the edge and trimmed the excess to about 1/8 inches and overcast it to the main fabric (source)
Armholes: I tacked the lace about 1/4 inches from the edge and then pinned and sewed bias binding on top through the lace. I then turned the bias binding to the wrong side and secured it with a whip stitch (source)


I meant to have pin tucks on the legs, but when I tried the finished combinations on they were already the right length so I couldn't have any.
And then it was done!
I'm really proud of this because this is by far the hardest garment I've ever made. Not necessarily the the physical putting together of it, but having to figure out the pattern and instructions myself. Even though there are a few places I wouldn't invite you to look at closely, I still like to think that someone, once, made some combinations that were much worse. And then they wore them every day.
My favourite part is the fact that this is school work. I get to work on my hobby then at the end of it I get a grade!
#this is long#historical costuming#historical clothing#historic fashion#historical dress#dress history#historical fashion#fashion history
26 notes
·
View notes
Note
i'd love to see a tutorial/tips on how to make the kim jacket, if you want to!
Alright! It's a little lengthy so bear with me!
So the first step is to get the patterns. The basic shape of it is going to be like this:
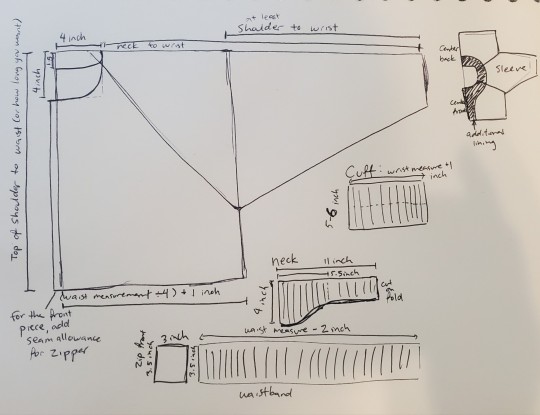
You can note as you make the pattern how cropped you want it to be. The basic shape should be like this and you should end up with 3 main body pieces:

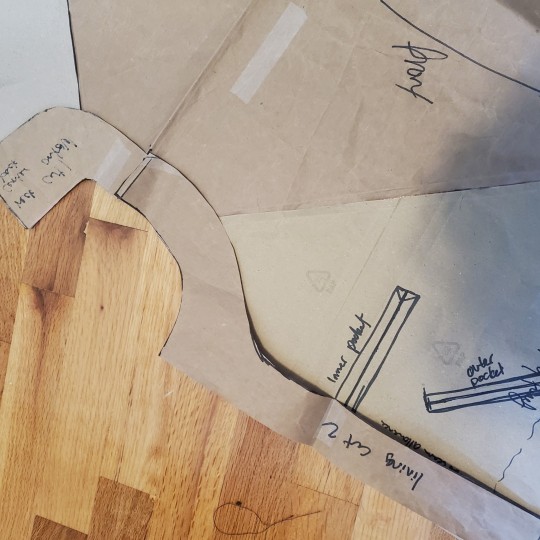
Note how I marked my pocket placements in the front (I have 2 in the front and 2 in the lining) but that's optional. You can omit pockets, or add a bunch but I'm not super confident in my ability to do pockets so I recommend looking up the type of pocket you want. I tried to do welt pockets, but I think zip pockets could also be cool.
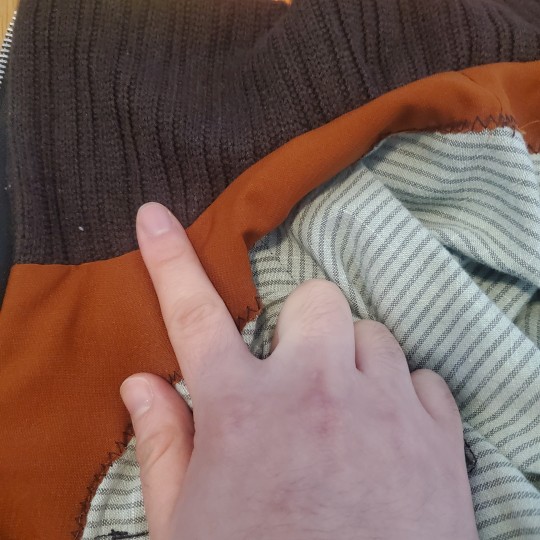
Also optional is this part of the lining which I just got lazy and zigzag stitched on:

What I did for the pattern is I just traced the neckline and freehand the shapes.
Once you have all the pattern pieces, just remember to either go over them again and add a seam allowance or cut your pieces with a seam allowance.
The actual pieces you will cut are:
4 front pieces (2 lining, 2 main fabric)
4 sleeve pieces (2 lining, 2 main fabric)
2 back pieces, cut in fold (1 lining, 1 main fabric)
Lining pieces optional, but you only need the main fabric for those
4 zipper rectangle bits (all main fabric)
2 cuff pieces, 1 neck piece (cut on fold to mirror lengthwise and widthwise), 1 waistband piece, also cut on fold lengthwise
The basic steps are:
1. Cut out the pieces (I like to zigzag stitch the raw edges so I don't have to worry about them)
2. Sew any patches or pockets onto each piece that needs it
Tip:
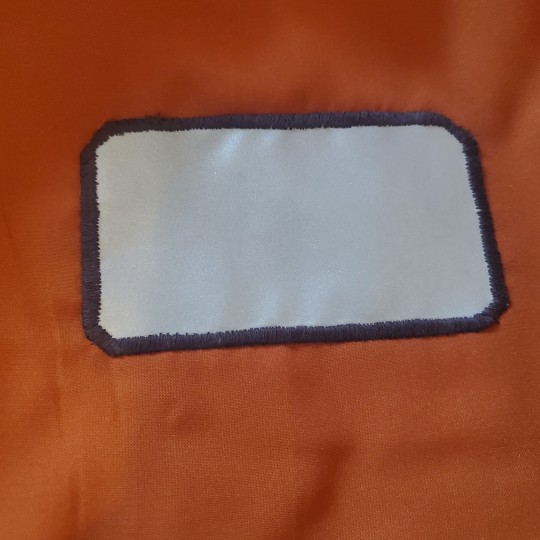
The patches are reflective tape that I zigzag stitched with the smallest stitch setting to make a border. I also cut the corners so the weren't just right angles. The front patch I also used the same technique but followed a stencilled drawing of the patch.
3. Sew the lining pieces together, and the main pieces together
4. Sew the wrist cuffs into loops, fold them over. Sew right sides of the main and lining pieces together at the wrist, with right sides of the cuff sandwiched between. (Be careful and figure out a way to pin them so you're able to flip everything inside out). Stretch as you go as the cuffs will be stretchy and smaller than the main and lining fabric.
5. Sew the zipper rectangle pieces (I don't have a better name for them, sorry) to the waistband pieces on their short ends.
6. Sew two inches of the neck and waistband to the main and lining pieces individually.
Just to about here on all sides.
7. Turn the piece inside out, and sew the zipper sandwiched between the main and lining pieces. Leave about 4 inches unsewn on one side so you can turn the piece right-side out again.
8. Sew the neck piece and the waistband sandwiched between right sides of the main and lining pieces, like with the wrist cuffs. You'll have to maneuver the zipper out of a way
9. Turn everything right-side out and handstitch the open part of the zipper closed
Tips:
Iron everything as you go. Seriously like every seam
For extra hold, do some topstitches
You can also add as many layers as you want for extra insulation. I actually ended up doing 2 lining layers and sewed them together during the cut/zigzag stage.
When sewing a stretchy know fabric to a nonstretch, mark each quarter of the lengths and match them while sewing.
Unfortunately I'm actually not that great at sewing, and I referred to sewing tutorials a lot while working my way through this, so hopefully this helps a bit!
#sewing#kim kitsuragi jacket#idk#i really am not the one to ask#also apologies if the instructions are unclear but lmk if something needs to be explained better
11 notes
·
View notes
Text

My 13 year old daughter's trip to Peru is going to be soon 😵💫

This will be the first time she'll be responsible of an important document too.

I want her to have things that are unique to her tastes and that she'll have an easy time to identify.

She picked the fabric, which I fuzzy cut 😆 I was happy I didn't messed it up.

What I did mess up was the clasp! The first, I forgot the vinyl to seal the fabric and placed the clasp on the wrong side 😭 the second, I forgot the vinyl.😬 And the third, I forgot the vinyl again but I had not done the topstitch yet, so I reaped the seam and almost melted the vinyl when I forgot to change the iron setting🤯


Really, I think it was meant to be Jigglypuff on the clasp 😉

My daughter says she likes it 🥰

Thank you so much to my hubby for giving me lots of kisses between my clasp fails 😘
12.4.2021
11 notes
·
View notes
Photo
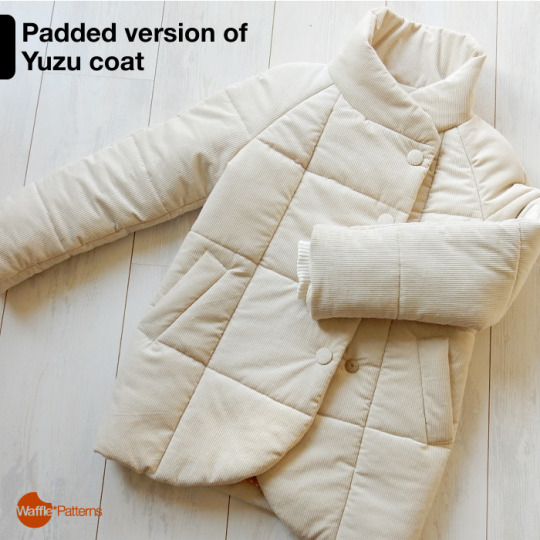
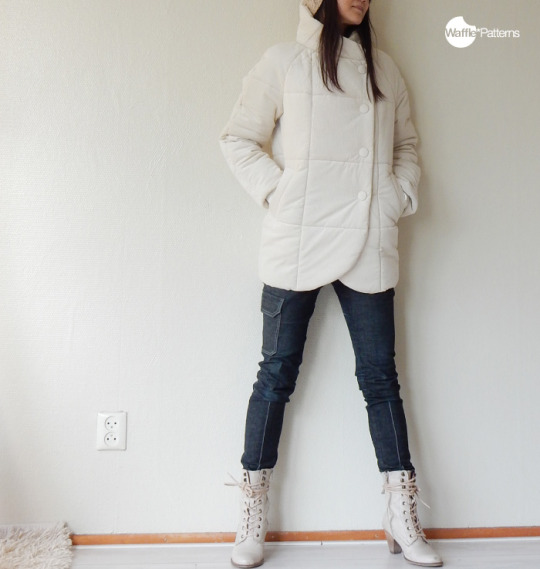
Padded version of Yuzu coat
I have made two padded jackets using my existing patterns for this winter. Here is the 2nd experiment; Puffy padded version of Yuzu coat. (Please see here for the 1st version with Cookie blouson pattern). I really love the result and am sharing here how I made it. I hope it will be a tip/reference for people who want to make one, too. It is not really a down jacket with real feather, but I made it with a normal house sewing machine with batting materials.
<Pattern / Pattern modification>
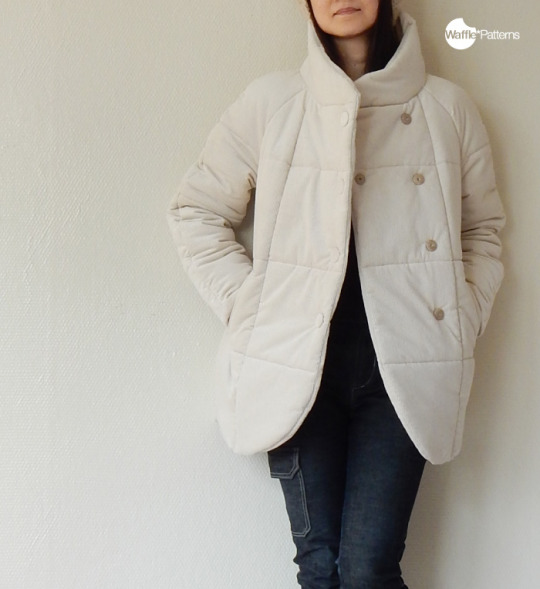
I used Yuzu coat pattern. Normally, double-breasted design is not suitable for very thick materials like batting/quilted fabrics. But I see many double-breasted padded jackets on high street fashion and they all look so cute. So I decided to try it.
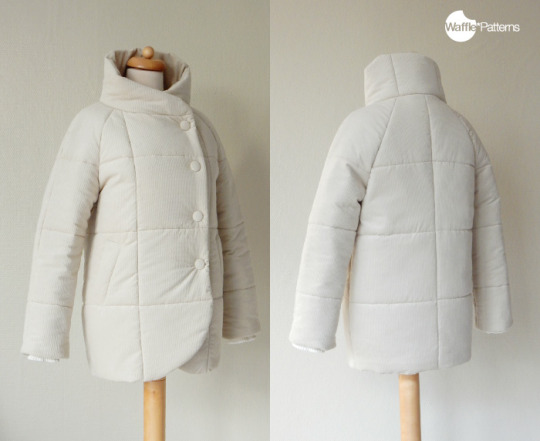
I did not really change the pattern. Just shortened the front part of the high neck collar. Because this thick fabric with this high neck design gives me an uneasy feeling around my face. The cut is similar to the front part of this hood pattern.
This pattern is very roomy, so I used my usual size without alterations. But depending on materials or how to wear, using one size larger might be an option.
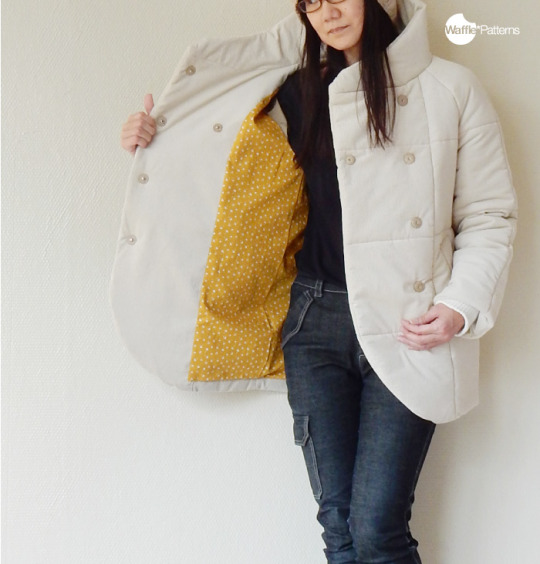
For other small adjustments, I added an inside pocket and knit cuffs for extra warmth.

<Materials>
This shell fabric is corduroy. First I was searching for faux leather or wool twill, but when I saw this one at the store, I decided to use it immediately. This corduroy has a very soft touch and I really love the rich shade.
I considered the water/windproof fabric will be a very functional option, but I still am too chicken to use them. Also, I could not find a nice one.
For the batting, I used about 20mm thick for the bodice, sleeve and collar parts and 12mm thick for the small parts like pocket welt pieces. I did not use it on the facing parts.
<Sewing process>
The sewing process is basically the same as the original one. Just add the batting as an interlining to the shell and topstitch. (I explained this step in another post. Please refer to that.)
As for the hem finish, since it is difficult to iron and crease the fabric after interlined with the batting, I pressed and creased all the hem before the interlining process. Then cut and omit the batting on the hem allowance.
Many store-bought padded jackets use hem finish with the lining edge to edge or shell + facing + lining instead of the folded hem finish. I think it is because they are using mainly water/windproof fabric and those cannot be ironed or creased. Also, the hem + facing finish is suitable for making a string casing. I want to use this faced hem detail when I will make a more functional/outdoor style one.
As for the knitted cuffs, I used the same way as the Tsubaki coat. It is constructed from shell + facing + knit + lining from outside to inside.
<Others>
For flattening and shaping the edge, I used edge stitching a lot. The seam allowances of the edges of the collar and front center are turned to the facing side and edge-stitched. I like it more than topstitching because it emphasizes the puffy effect. Topstitching will be more suitable and functional for sporty items.
The front fastenings are fabric-covered snap fasteners and buttons. I wanted to add a bit lux touch to this silky corduroy. I was planning to use metal snap fasteners or magnet type. But it seems too heavy for this fabric and I could not find suitable design ones.
I used the lining fabric for covering the snaps and the self fabric for the front side. But there are ready-made covered snaps available on the market. I am very much satisfied with this result. They suit this padded corduroy better than I expected.
Other small points/tips are the same as the padded Cookie blouson. Please refer to it.
It was a time-consuming project but I am really like the result! Also, challenging projects cheered me up under this unusual circumstance in lockdown.
I hope this post will be a small help for people who also want to make a winter coat. If you plan to make a padded coat, I strongly recommend experimenting with your materials well. Please consider choosing the right and suitable pattern/size or finishing treatment with your materials and design intentions. Also, I recommend researching store made ones which have a similar design to your idea.
You can find the sewing pattern of the Yuzu coat pattern here.
***************************
follow me! Instagram /// Twitter /// Facebook /// Shop /// Pinterest /// Newsletter
95 notes
·
View notes
Text
Sybil’s 1740s Stays Build: Part 2, Handsewing
When you’re working with a nice, new material a lot of times you practice a bit before making the real garment to make sure Providence doesn’t throw you a curve ball.
Oh thanks, Providence, you bastard. This is when I should’ve realized that I was trying to punch above my weight class.
If tumblr tries to flag the above image, I’m not surprised, because my first attempt at a hand-bound eyelet with the shot silk taffeta I chose (Patina from Silk Baron) looks like a festive, but raw anus. But I had bigger issues.
The fine weave of the silk meant the force of an awl- hell, the force of most SEWING NEEDLES- made it snag and run. Per a tip from someone on facebook’s Elizabethan Costuming group, I’d have to commit a historical costuming anathema and punch my lacing holes.
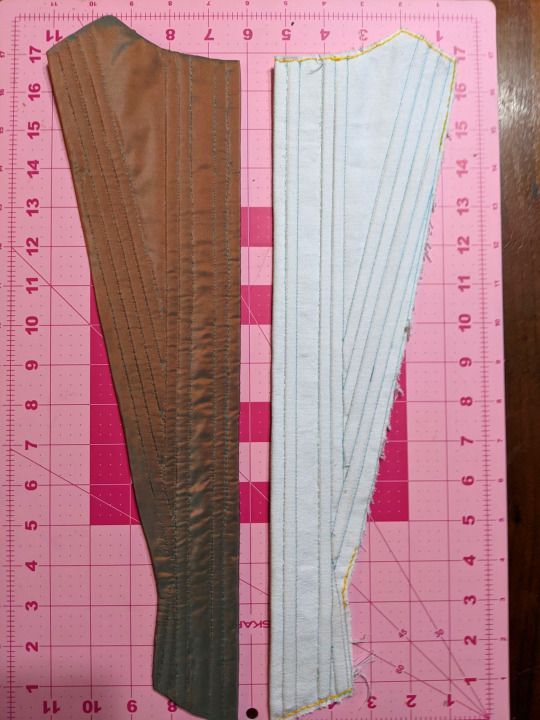
As you can tell by the test piece above, I’m also not the best handsewist. Obviously I picked a helluva piece to level up with, but I was strangely motivated despite the many, MANY boning channels ahead of me. I did cheat a bit by using the machined lines in the mockup/interlining as a guide though.

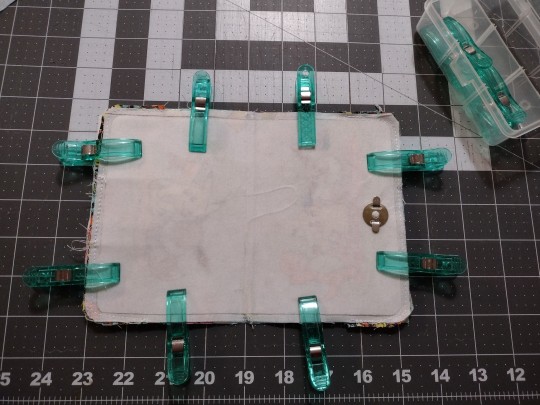
Before that, I decided to fill my boning channels. I went panel by panel so that in the event that I ran out of artificial whalebone (or money to buy it) I could make progress while I waited for it to ship. I also started with the back pieces in case my first several yards of hand-stitching was shoddy. I really dig the artificial whalebone. It’s a bit denser and stiffer than plastic cable ties and the shape looks a little more like the baleen or cane you see in extant stays. I used a grease pencil to mark the lengths then cut them to size with tinsnips. Being a thermoplastic, I was able to straighten out each piece by hovering it above a lit candle before shaping it with my hands. The candle wasn’t just for aesthetics, I swear. I wanted to sit on my couch and not deal with the noise of a heat gun or burned fingies. You can also use a hot iron, but this is less fun.
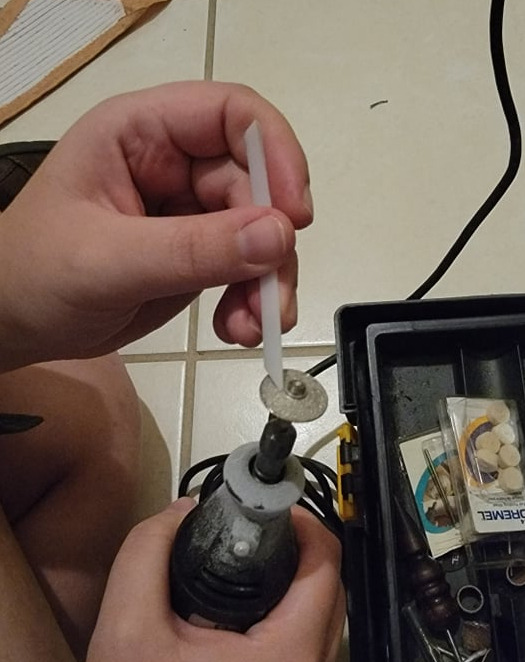
An additional bonus of artificial whalebone is that you can round and smooth the ends of the bones with the grinding wheel of a rotary tool without the plastic getting chewed up. No boning poking out and jabbing my armpits on this build! You can use a hand file of course, but with 44 bones in the stomacher panels alone, I needed to save my energy for literally anything else.
To nobody’s surprise, I ran out of my initial order of 16 yards of whalebone. Seasoned staymakers will have noticed a big mistake in my procedure at this point (but don’t spoil it for the others).
While working on my test scrap I noticed that the boning lines looked REALLY harsh through the taffeta. I stitched between the bones, following the machined lines on the underside and ended up with puckering along the seams. It looked BAD. Someone in the facebook Plus-Sized Costuming Group recommended putting a ‘dampening’ fabric between the canvas and taffeta.
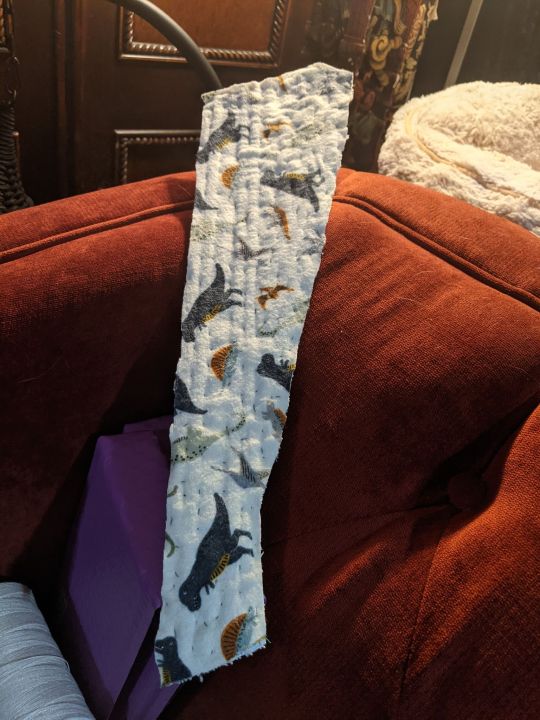
I did the period-accurate thing and used some dinosaur flannel leftover from a commission. Ah, authentic.
This looked a lot better, but I still had some unsightly puckers going on. I chalked this up to inexperience with hand-sewing taffeta, but I was really dealing with the uneven tension on the fabric from having the boning channels filled. Someone mentioned this early on, but I didn’t want to pull out every piece of whalebone. Being a lazy bastard and causing more work for myself later on is a character trait anyhow.
I used Gutermann silk thread, waxed, with a number 10 sharps needle for the topstitching, done in a pretty straightfoward backstitch (oxymoron?). No. 10s ended up being fine enough to poke through the taffeta without disturbing the weave. There were many, many hours of PBS documentaries half-watched...
When finished with each piece, I folded over the edges of the taffeta and whipstitched them down. Eventually the lining will get matched up to this and sewn so I have clean edges even before the binding goes on. I learned this trick from Koshka-the-Kat.
This post is getting fairly long, so Part 3 I’ll cover MORE handsewing, some construction details, and more or less get caught up to where I am at this moment (10/14/21).
#costuming#sewing#18th century#discworld cosplay#stays#Lady Sybil Ramkin-Vimes cosplay#silk taffeta can be your angle...
10 notes
·
View notes
Text
Lost Tomb Lewks, Part 4
(Masterpost) (Other Canary Amusements)
Warning: vague Spoilers for Season 1 of The Lost Tomb Reboot
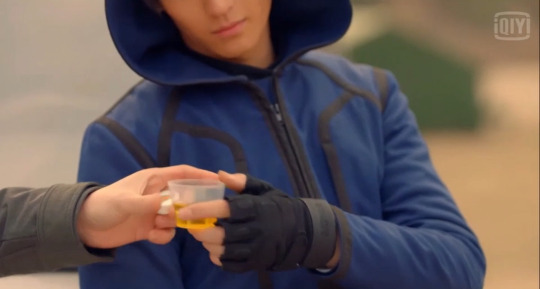
Look 17 is this gorgeous knife.
I’m not a “knives are sexy” person, or I should say, I never WAS a “knives are sexy” person before.
I do have a strong affection for my Alaskan ulu kitchen knife, which is a godsend for anyone who is arthritic (me) or who is an upper-limb amputee (my family member) or is hemiplegic (different family member), but that’s as much attention as I’ve ever paid to a knife.
Until now:

(*whisper* lick it)
Ahem.
This is a kukri, a traditional knife of the Gurkha people in Nepal and India. It’s similar to a machete but it has a downward-curving blade, which means you can slash downward forcefully without bending your wrist. It’s excellent for cracking crustacean shells heavy chopping, as well as combat. Wikipedia doesn’t know why there are notches near the base of the blade but sure does have some theories.
The handle looks to be a mix of metal and ivory. Hopefully antique ivory, or ivory from a properly-compensated voluntary donor. [That is a joke, the ivory trade is bad, don’t kill elephants, etc.] The case is topstitched leather with snaps to keep the knife from escaping. Did OP just spend an hour learning too much about knives? She did. Does this mean she’s going to also make an effort to learn something about watches, a critically overlooked area of her menswear commentary? It does not.
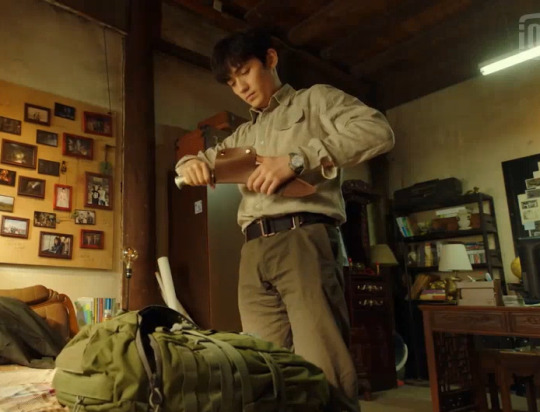
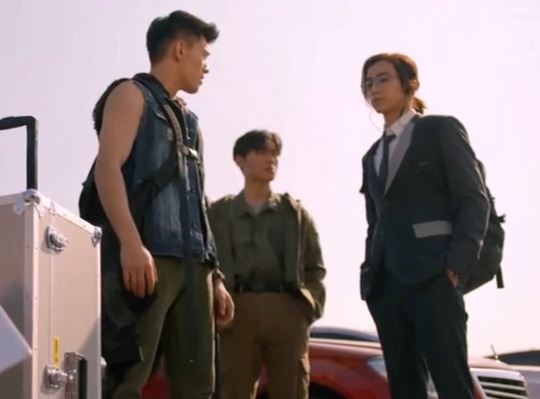
Look 18 is a classic explorer’s rig that looks like it came out of the Banana Republic catalog back in 1987 when the name “Banana Republic” still kind of suited the clothes sold there. (Google it and be startled) This look features dark brown trousers that are comfortably loose but still well-fitted and flattering. The shirt is two warm tans--a dark one for most parts, and a lighter one through the chest and inner arms. This gives it a nice depth and keeps it from looking bland. This outfit also features Wu Xie’s watch, which...is round? and tells time.
(more after the cut!)
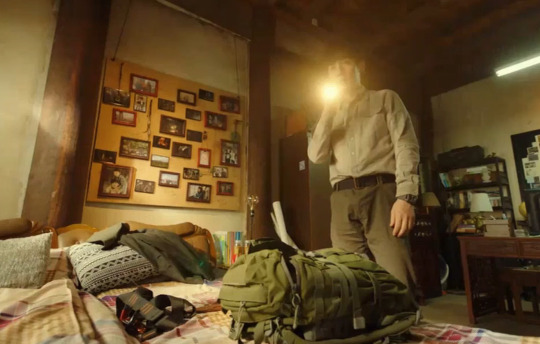
This look features the first of many, many, many times that a character will shine a flashlight directly into the camera. Which makes it painful to watch the show on my tablet in the dark when my bedmate is asleep. Knock it off, characters!

Side Note: Wu Xie’s room has some good features. He’s got a giant bulletin board holding framed photos of all the adventures in which he was played by a different actor. This makes it easy to move his photo collection when his uncle decides to be a dick about the rent.
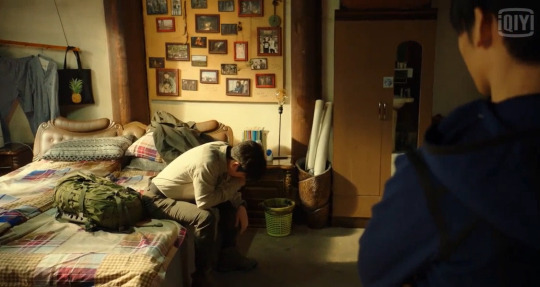
Wu Xie’s bed is big and comfy-looking, with a variety of patterns and textures; appropriate for a person who’s planning on dying, or having an increasingly complicated love life, or both. This bed has room for a 100-year-old boyfriend, a 20-year-old girlfriend, and a thousand-year-old crustacean-brained princess, as long as everyone’s friendly.
It also has a padded headboard, which is so important when you are dating a paper-mache person with a fragile head. This padded headboard also has curved head/neck support things that look just the right size for a person to grab onto with both hands and hold on for dear life. It looks antique, which means Wu Xie bought it for the aesthetic value and definitely not for fucking, right? Definitely not. For fucking.
Wu Xie tops off Look 18 with the handsome swamp green coat from their recent tomb adventure, now completely unmuddy thanks to the world’s greatest dry cleaner, and with a strappy, practical backpack.
This warm-toned outfit and the buttery colors of the room are perfect for having an intimate, deeply truthful conversation...
....in which you gently crush your dear one’s heart into powder.

Look 19 is Xiao Ge’s blue hoodie and black pants combo, which we finally get to see in the full light of day.
The hood is good for hiding in when you want to cry.
This hoodie looks black in low light, but is actually navy blue with black piping, placket, and zipper.
The ensemble features black trousers with an eye-catching vertical silver-toned zipper on the front pockets. Black boots and black tactical gloves round out the look.

Side note: each of the Iron Triangle guys has his own backpack style. Wu Xie’s is an olive green expedition pack. Pangzi’s is two-tone canvas and leather.
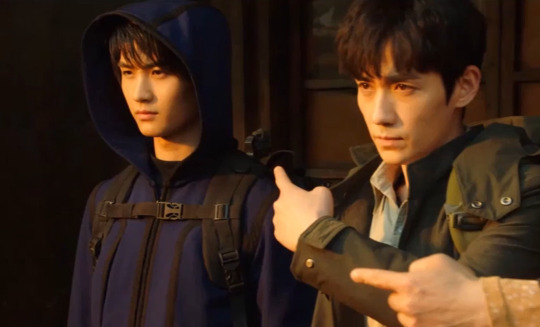
Xiao Ge’s is black tech fabric, and features a chest strap to keep it from shifting around when he is kicking asses. The black straps coordinates well with the black piping on his hoodie.

This outfit is a good one to wear while you exchange tender gazes of pure unconditional love with the guy who is crushing your heart into powder.


I don’t need to look at Pangzi I know what Pangzi looks like and anyway I glanced at him already today.

Did OP slow these gifs way down purely to keep from giving anybody eye strain? She did. OP is considerate of your eyes. Speaking of eyes, awww. Xiao Ge sure is bros with Wu Xie, you guys.
Look 20: Liu Sang! Liu Sang! Liu Sang!

Actor Liu Chang, a man who can wear literally anything and make it look fucking amazing, makes his entry onto the scene in a good, but understated, suit.
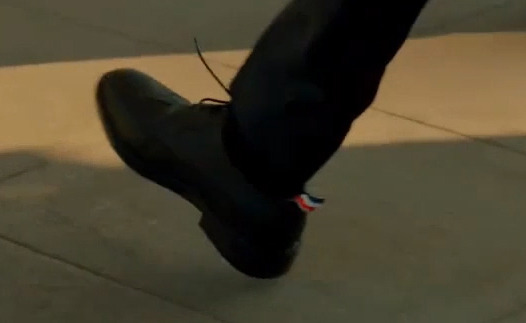
Most of the suit is a charcoal grey, but it has a single light grey lapel and pocket flap, to keep things interesting. He’s wearing it with black Oxford shoes that have a small red, white, & blue tab poking out the back. So he’s dressed conservatively, but with a bit of flair.
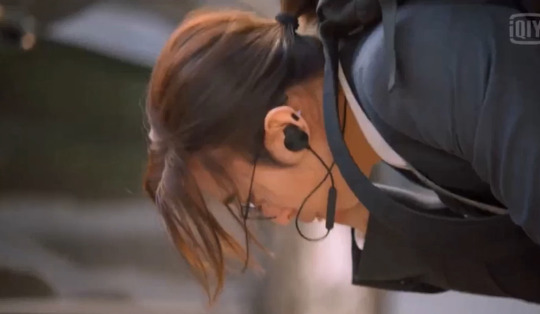
He’s accessorized the look with perfectly fine, but not very interesting, black wirefame glasses that he’ll replace with cooler ones after some time underground. He’s got a cartilage piercing in his left ear with a flat black oblong earring. Because of his extreme hearing, he’s wearing noise-cancelling earphones.

This look says, “normalize the use of adaptive tech.” These are probably - in real life - not as effective as the larger over-ear headphones a lot of noise-sensitive people use, but their sleekness and elegance match the rest of Liu Sang’s accessories and clothing.
Because of his noise sensitivity, Liu Sang pukes as soon as he gets out into the crowded street. He vomits neatly into a drain, however, in the way of someone who’s used to managing this symptom and isn’t going to let it spoil his outfit. We stan a neuroatypical king.
More Lewks coming soon!
#the lost tomb reboot#reunion: the sound of the providence#liu sang#zhu yilong#liu chang#lost tomb lewks#wu xie#canary3d-original#don't worry I haven't forgotten restless rewatch#I just had to write about the knife first#the kniiiiiffffeeee#spoilers
107 notes
·
View notes
Text
Mistcloak Cosplay PART 2
link to part one
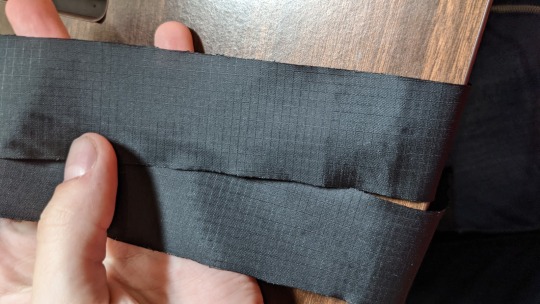
On the right side of your top capelet, lay out the end of the strips you just sewed to the circumference, one next to each other, right side down. I found it easier to pin and sew just a few at a time, rather than pinning all of them. The strips should be pointed in towards the neck hole. Sew the strips on.

Also cut out strips out of the rest of your lining, but with no seam allowance (so 1.5 inches for me). If the edges fray you can hem them (so include an allowance if hemming) or if it’s nylon like mine you can set the edges by quickly passing them over a candle flame. Iron flat.
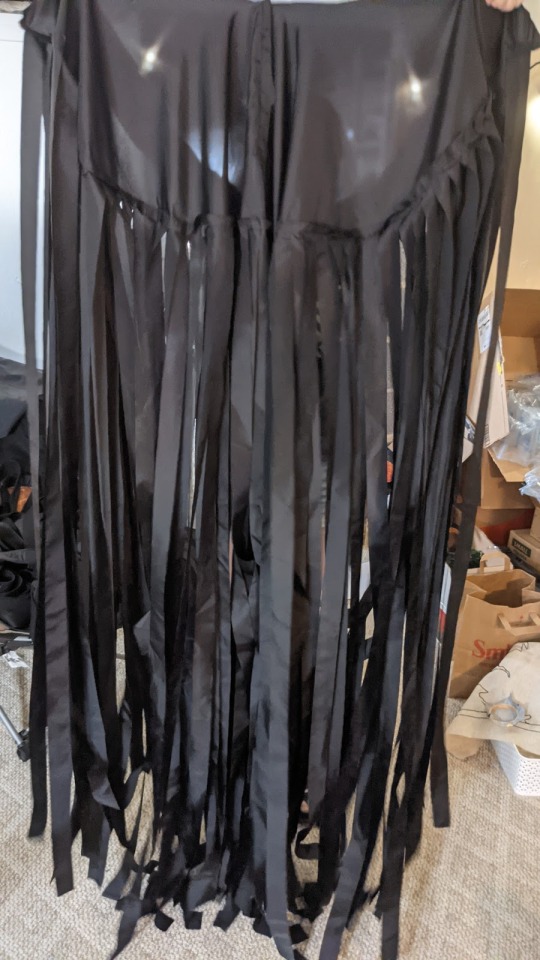
I originally decided to do one layer on the top capelet and two on the bottom, if I overlap them, placing a strip every inch, that puts me at about 96 strips on top (not including the thicker strips) and 240 for the bottom. I ended up actually only doing one layer on the bottom (120 strips). I cut out however many I needed but did end up with a few extras.
Repeat the same capelet and strip assembly with the lining, but with the inner strips, overlapping. The ripstop lining fabric was slippery, so instead of pinning I secured strips with a sewable seam tape before sewing them on, 10 at a time.
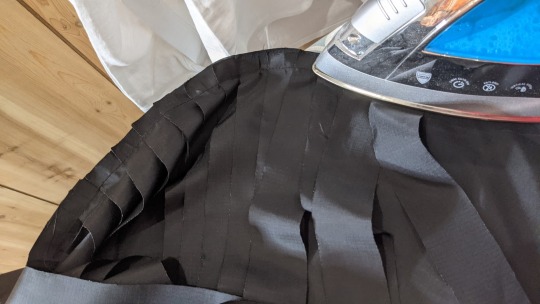
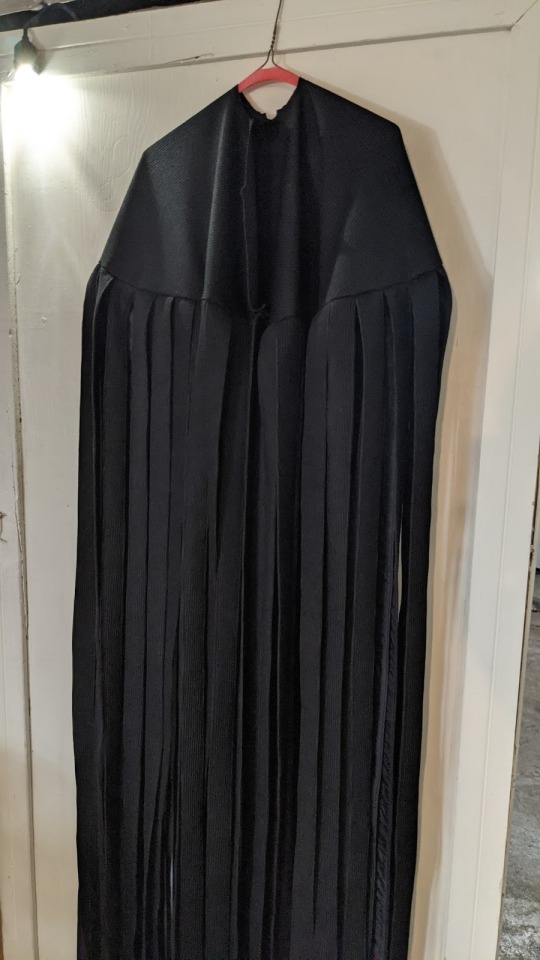
Then, pin the capelet lining on top of the top layer face down, pulling all the strips toward the middle, then sew around the circumference edge, sewing the lining and the outer layer together, leaving the neck and sides of the capelet open. Turn right side out. Iron flat or topstitch. I did half at a time.


You could probably actually stop here if you wanted to, and skip the bottom capelet and next layers of strips. If you only make one capelet, sew the flat front edges right sides together also, when you're sewing the capelet and lining together.
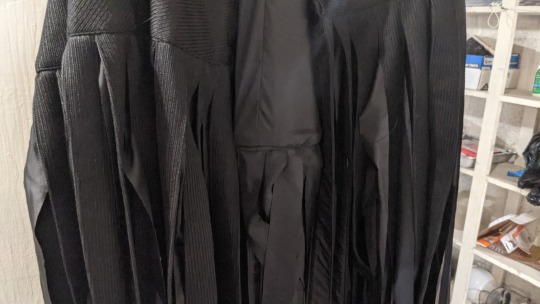
Do the same to the bottom capelet, but with just lining strips. I ended up doing only one layer since the top layer was so full already. I forgot to get a picture of the second capelet on its own but it's pretty much like the first one without the heavy strips.
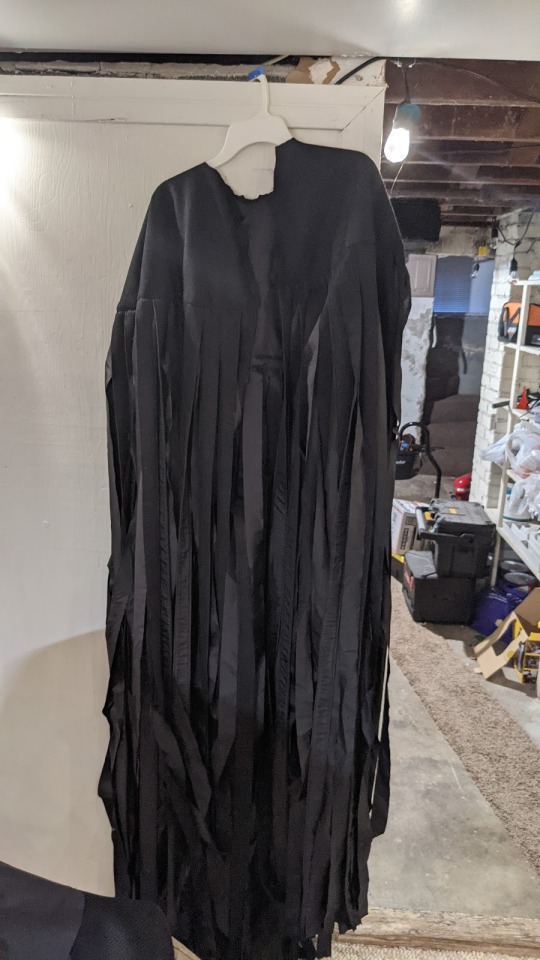
Now you can continue to sew the pattern as directed. Sew the capelets together and line and sew the hood on. Use bias tape or some extra fabric to hide the seam between capelets and hood.
link to part 3
3 notes
·
View notes