#sewing book
Explore tagged Tumblr posts
Visit Tumblr Blog
Explore Tumblr blogs with no restrictions, modern design and the best experience.
Last Seen Tumblr Blogs


Fun Fact
The Tumblr app for Google Glass was released on May 16, 2013.
Text


Let's Make 26 Coin Cases - Japanese Craft Book by pomadour24
72 notes
·
View notes
Text

А 19th century instruction book on sewing and tailoring, with samples, from Dublin, Ireland.
20 notes
·
View notes
Text

【blog】掲載本「願いを込めて作りたい フェルトのお守り」ブティック社
8 notes
·
View notes
Text
Notes on Improve Sewing: a Freeform Approach to Creative Techniques by Nicole Blum and Debra Immergut

Welp, I got the email that this needs to go back to the library, so I guess I better accept that it's leaving my hands tonight or tomorrow.
So for context on why I grabbed this one, I collect ball-jointed dolls (BJD) and am forever looking for help on making clothes for them.
This is a pretty great book for a beginner, but the same things that make it good for beginners put my hackles up. Hemming and finishing seams is an advanced technique in this book! On the other hand, the book points sewists at materials where hemming is optional. The book vibes are very manic pixie dream girl (positive), and the curling edges fit that. And frankly on my dolls, hemming can look bulky and not-to-scale, so...
My biggest complaint is that the book gives "trace an old tshirt" directions for how to get a custom shirt pattern started. Sewing for my dolls, they don't have any shirts yet, that fit or not! But, hey, it's great directions for humans. For skirts, the directions are much more measurement based. I really like the skirts that combine knits and woven fabrics for a better fit!
Not relevant to my current needs, but there are no pants/shorts patterns, and the tops and dresses definitely skew feminine. I think with the right colors, some of the projects could work as masculine alt fashion? And there are some projects for home decor stuff, too.
So it's a solid beginner book, and it's got some great ideas to nudge my thinking when it comes to design and how much simple techniques can really customize a garment. I may check it out again when I actually have time to mess around sewing doll clothes and want a reminder of the more decorative techniques.
2 notes
·
View notes
Text
Top Stitch Vs Straight Stitch

Topstitch and straight stitch are fundamental sewing techniques, each with unique characteristics and purposes. Here's a breakdown of their differences:
1. Definition
Top Stitch: A decorative or functional stitch sewn on the top side of a fabric, often visible and used to reinforce seams or add a finishing touch.
Straight Stitch: A basic utility stitch used for sewing straight seams or joining fabric layers, typically done on the reverse side of the fabric and not intended to be decorative.
2. Purpose
Top Stitch:
Enhances the garment's aesthetic appeal.
Strengthens seams and prevents fabric layers from shifting.
Often used on collars, pockets, hems, and jeans.
Straight Stitch:
Joins two fabric layers together securely.
Forms the foundation for most sewing projects.
3. Visibility
Top Stitch: Always visible on the garment’s exterior, requiring precise execution for a neat finish.
Straight Stitch: Usually hidden within the seam or underneath, so precision isn't as crucial visually.
4. Thread
Top Stitch: Typically uses a thicker or contrasting thread for emphasis.
Straight Stitch: Uses standard sewing thread, matching the fabric color for invisibility.
5. Stitch Length
Top Stitch: Slightly longer stitch length (3-4 mm) for a decorative appearance.
Straight Stitch: Standard stitch length (2-2.5 mm) for durability and clean seams.
6. Usage
Top Stitch: Found in decorative sewing, home decor items, and detailed garments.
Straight Stitch: Essential for constructing garments, making repairs, and creating plain seams.
Pro Tip:
For topstitching, use a presser foot guide to maintain even spacing, and test your settings on scrap fabric to ensure the desired effect. For straight stitches, proper tension and alignment are key for seamless sewing.
0 notes
Text


Quilted book thing- been calling it the lake book
5K notes
·
View notes
Text
Just added to Etsy!
~ "The Complete Family Sewing Book" (1972)
#The Complete Family Sewing Book#sewing book#vintagecdchyld#vintage etsy#vintage etsy seller#etsy seller#vintage books#vintage book seller#book seller#books for sale#vintage#etsy#books books books
0 notes
Text
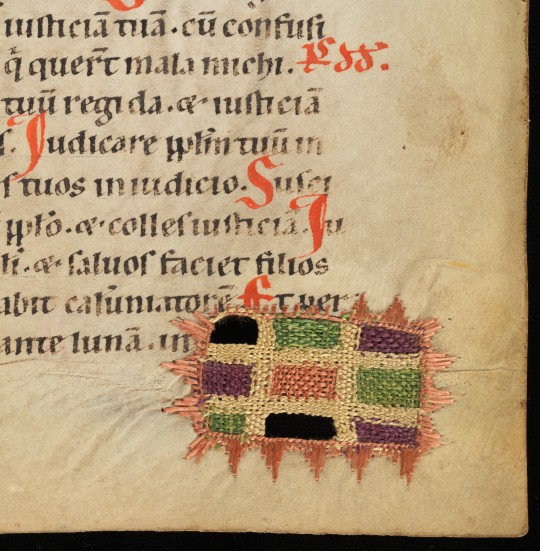
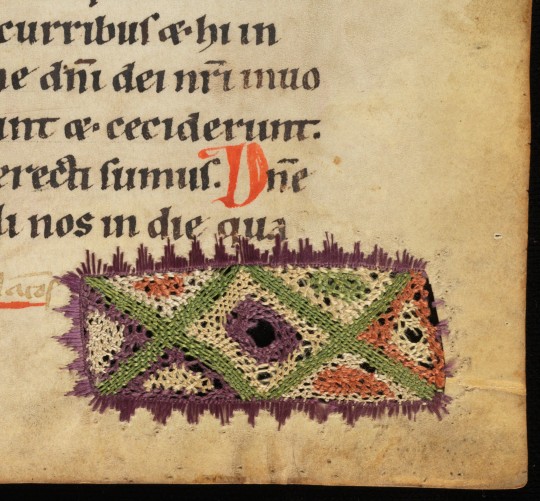
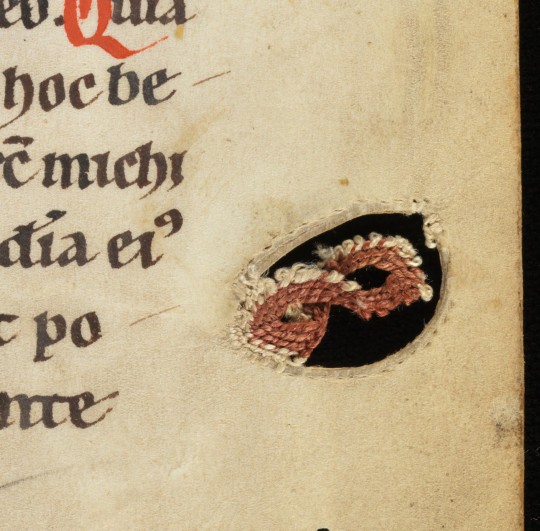
medieval parchment repairs
in a psalter, south-western germany, late 12th/early 13th c.
source: Hermetschwil, Benediktinerinnenkloster, Cod. membr. 37, fol. 19r, 53r, and 110r
#12th century#13th century#repairs#mending#medieval manuscript repairs#sewing#book history#medieval studies#medieval art#psalter#parchment stitching
9K notes
·
View notes
Text

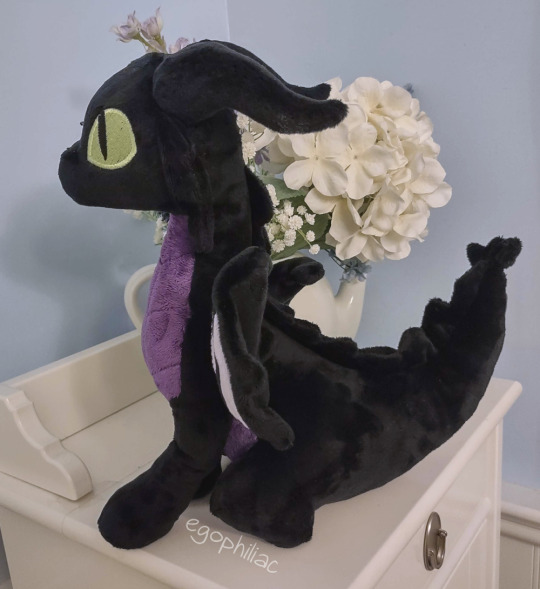
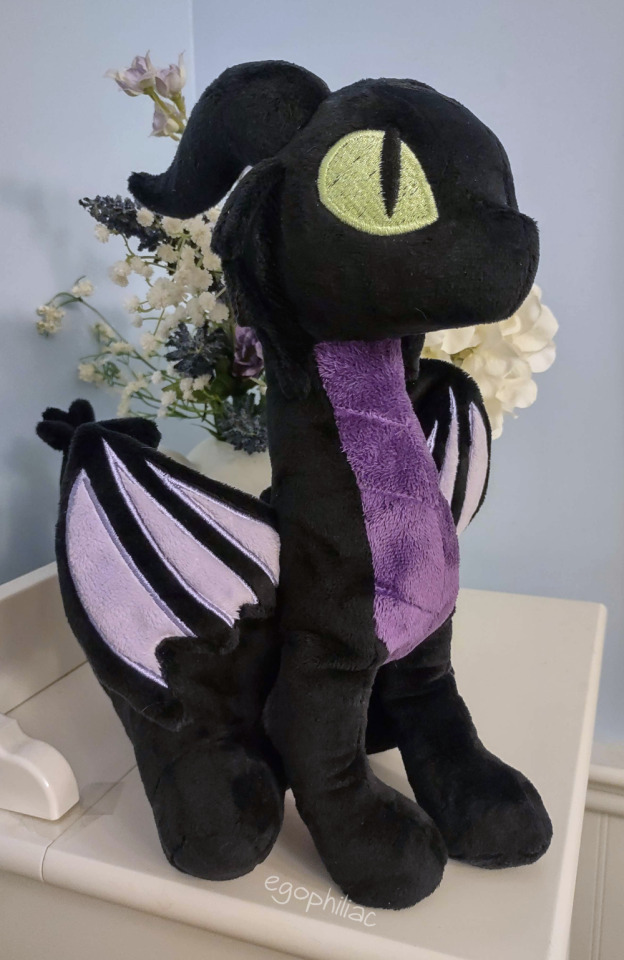
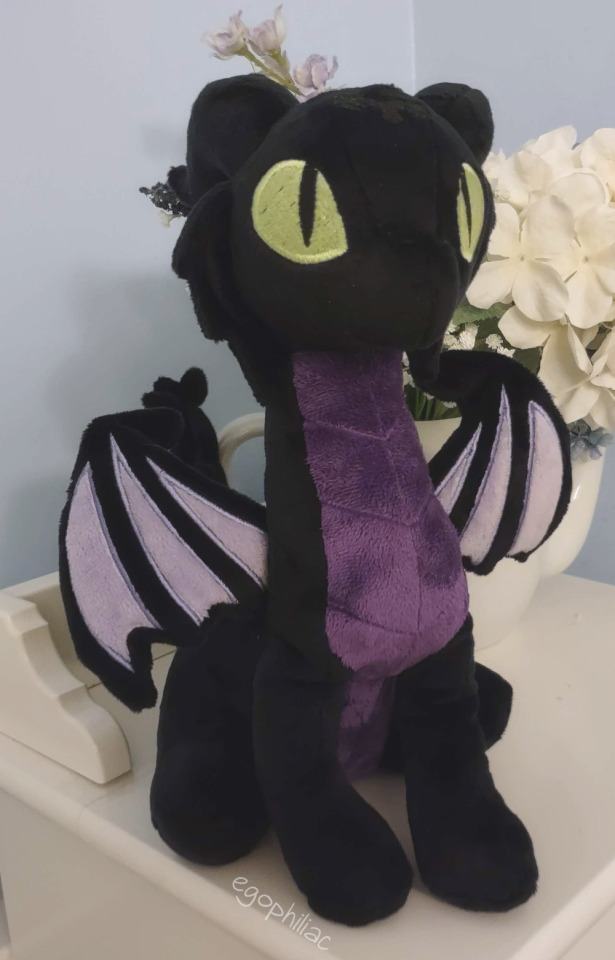
HEY guess who's being completely normal about episode 7 :)
anyway it sure ain't me, so I made myself a baby Malleus! I used the single-headed version of Choly Knight's hydra pattern (link will be in replies ↓↓↓) as a base, and just messed with some of the pieces to make him more Mall-y. including sewing all those little claw pieces, then pinning them on and realizing I actually liked him better without them...oh well. to heck with accuracy, I want stubby little dragon legs!
unfortunately, he doesn't photograph very well, especially his forehead scales (they're there! I promise!) (they're made of glitter HTV so they are actually SPARKLY in real life, yet apparently they come out completely invisible in photos, woe). but he is super cuddly and soft so I'm happy with him! just as in canon, he is a product of LOVE. :>
#twisted wonderland#twisted wonderland spoilers#twisted wonderland episode 7 spoilers#twisted wonderland book 7 spoilers#twisted wonderland episode 7 part 6 spoilers#twisted wonderland book 7 part 6 spoilers#toys#sewing#i impulse-bought the pattern the second i saw it and then couldn't work up the motivation to actually make it :')#until i realized how easily it could be malleus-ified#score one for hyperfixations!#(i gotta make the full version at some point though it's pretty incredible)#i will say that turning this beast after sewing was an experience. oof.#but he made it! and he turned out honestly way better than i thought he would#(don't look at my embroidery i-i'm still learning okay)#i'm kind of in shock at how well the topstitching came out out considering i...literally just drew lines in the plush with a pin...#and then stitched over them while trying not to erase them#hey if it works it works
2K notes
·
View notes
Text
#i got unreasonably annoyed by a poll about creative projects but all the options were like painting/writing book and literally nothing about#cooking or sewing#so i made my own#if YOUR creative project type isn't included here let me know I will create a second poll
607 notes
·
View notes
Text


Finally i got to Misako's book and as my first project i chose the strawberry pouch. Turned out quite nice!
511 notes
·
View notes
Text


Let's Make 26 Coin Cases - Japanese Craft Book by pomadour24
102 notes
·
View notes
Text
It's really cool that so many people have written books on how exactly to do their very specific jobs.
I'm looking through books on archive.org to see if maybe I can find some cool fonts in any of them, and there are books with names like "The complete carriage and wagon painter : a concise compendium of the art of painting carriages, wagons and sleighs, embracing full directions in all the various branches, including lettering, scrolling, ornamenting, striping, varnishing and coloring, with numerous recipes for mixing colors" (1903), "Elements of lettering and sign painting" (1899), and "The expert sign painter" (1911).
I have no intention of becoming an Edwardian sign painter, but it's comforting to know that there's such a thorough introductory course available at any time should I ever change my mind.
#now if only 18th century tailors had written such thorough guides about the actual sewing... alas.#books#19th century#20th century#history#graphic design#internet archive
545 notes
·
View notes
Text

【blog】掲載本「ななめがけの小さなバッグ」ブティック社(再掲載)
2 notes
·
View notes
Text
Notes on Epic Cosplay Costumes by Kristie "Karmada" Good

At 140 pages, this is not going to to cover every costume ever by a long shot, however....
Gonna be honest, if your approach to new crafts is to yeet yourself into the deep end, this is not a bad book to start with.
The information about how to sew is solid, tho not super in depth. The information about materials is enough to give a beginner some guidance in a fabric store. The info on how to sew is enough to.... probably enough to send someone searching for more detailed tutorials, but they'll know what words to look for.
Patterns are somewhat biased towards femme fashion, because, well, it's got a lot more garments that are beginner friendly.
On the other hand, it's got some stuff about painting fabric and a larger section on making foam armor. The stuff on the armor looks more detailed to me than the sewing directions, but I don't know enough to know if it's more in depth or equally superficial.
Also, I genuinely like that there are no patterns in the book, but instead every item has directions on how to draft the pattern yourself. If you've got a body that tends not to get along with commercial sizing, that's a great skill to learn.
Oh, and published 2016. It might be tricky to find new now?
0 notes
Text
Blanket Stitch Filling By Hand
Blanket stitch filling is a creative way to use the blanket stitch not only for edging but also for filling areas in embroidery. This technique can add texture and dimension to your designs, and it’s especially useful for projects like filling leaves, petals, or geometric patterns.

Steps to Create a Blanket Stitch Filling:
Prepare Your Fabric:
Use an embroidery hoop to keep your fabric taut and make stitching easier.
Outline the Shape:
Start by outlining the shape you want to fill using a simple running stitch or backstitch to define the boundaries.
Work the Blanket Stitches:
Begin at one edge of the shape. Anchor your thread with a small knot at the back.
Insert the needle at the edge of the outline and pull it out at the desired spacing (this defines the width of the stitch).
Loop the thread under the needle before pulling it through, creating the characteristic L-shape of the blanket stitch.
Fill Rows:
Continue working the stitches across the width of the shape.
Ensure that each row of blanket stitches is spaced evenly, with consistent angles and tension.
The loops of the stitches should interlock or lie close to the previous row for a uniform appearance.
Adjust for Curves:
If your shape has curves, adjust the stitch length to follow the contour, keeping the edges smooth.
Complete the Filling:
When the area is filled, secure the thread at the back with a few small stitches.
0 notes