#screenshot tutorial
Explore tagged Tumblr posts
Visit Tumblr Blog
Explore Tumblr blogs with no restrictions, modern design and the best experience.
Last Seen Tumblr Blogs


Fun Fact
There are dozens of funny blogs to kill time on Tumblr.
Text
i caved and got dbh for my pc (despite already having it for my console) and honestly it's nice to be able to have have my monitor so close to me and be able to really just stare at all the details in the gallery (i may have spent an obscene amount of time staring at each character model)
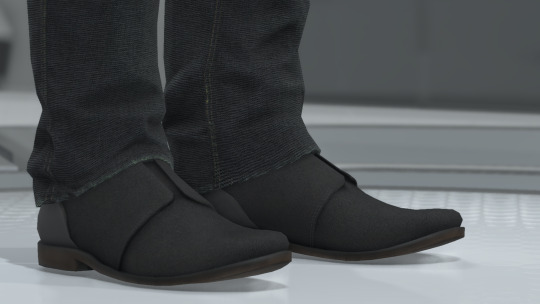
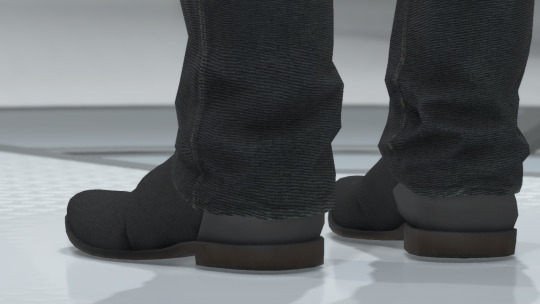
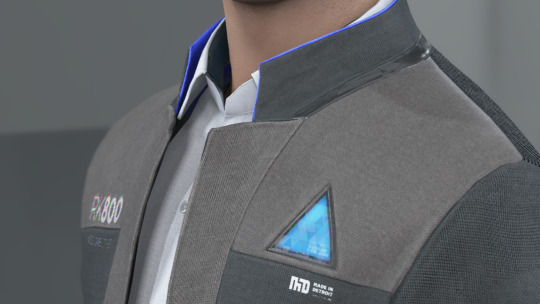
here's some details i noticed about connor's model
firstly, wtf is going on with his shoes. like does it have laces???? is it just a slip-on??? I WANT TO KNOW WHAT THE TOPS OF THE SHOES LOOK LIKE. also why are his jeans unhemmed?????
at the bottom of his jacket there's the two little dark grey rectangles that honestly i never really noticed and i don't think i've ever included it in my art bc my brain just erases them from my brain. it's such a random design choice and i can't decide if i hate them or not.
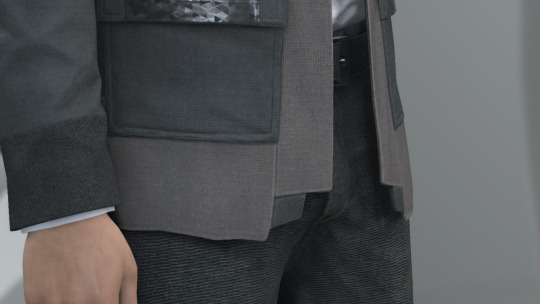
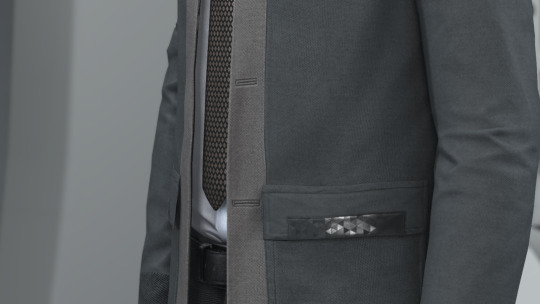
also why tf does he have two random button holes on the front of his jacket??? his jacket doesn't have buttons???? i cannot fathom why these exist or what their purpose is
never really took the time to analyze connor's jacket so closely and i love the detail of the different materials on his jacket. like the tessellated triangle motif throughout his jacket clearly being some sort of synthetic material compared to the cotton/wool fibers
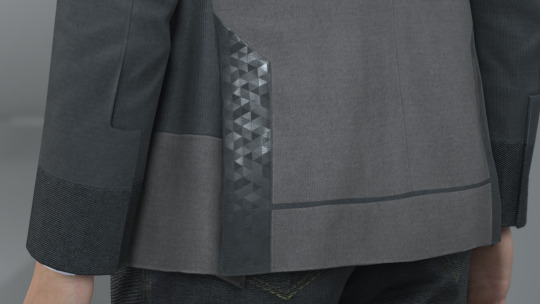
also i love the seam detail on his sleeve? like i love how it's not just one straight line but adds more shape and design to his cuff.
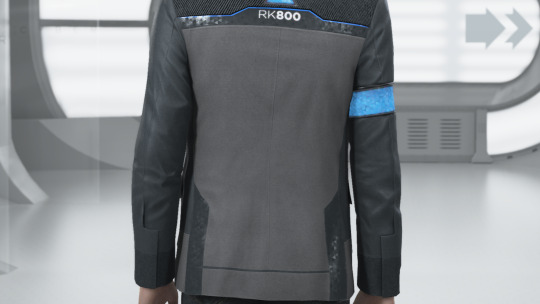
i love the texture on the top back half of connor's jacket. it reminds me of carpet or those really textured couches. it's like some type of corduroy likely or something. i wanna touch it. also the cyberlife branding right under the ANDROID text how did i never notice that??

if you look at the inner lining of his white collar, it has a darker liner on the inside. i don't think you typically see that on white button-ups???
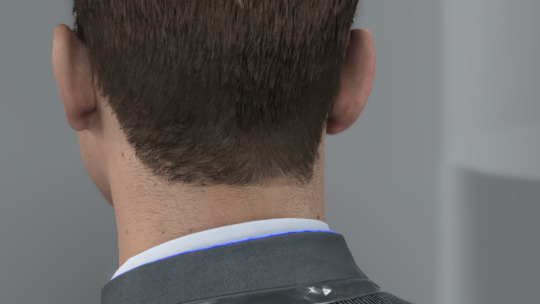
lastly LOOK AT HIS NECK MOLES. HE'S GOT SO MANY LITTLE NECK MOLES. and after extensive zooming in and out and looking at it from all angles, i have determined that he has a little tiny mole on the back of his right ear on the rim. idk if you can see it in these screenies BUT IT'S THERE I SWEAR TO YOU. he's also got the little divot some ppl have on their ears near the top of his ear.

anyway, uhm, yeah i totally haven't spent more time staring at the character models than i have spent playing the actual game
i was also staring at kara's and markus' models and might post my thoughts observations on those at another time. but for now we got connor.
#duda if you're reading this just know i am 1000% going to consult you on how to take screenies bc the in-game camera is ass#also nine if you are reading this imma ask you too and ask you for a tutorial on how to add your mods to the game bc ANDROID HANDS#mine#reference#connor#dbh screenshots#dbh reference#dbh connor#connor rk800#detroit become human#detroit: become human#d:bh#dbh
449 notes
·
View notes
Text

WE ARE SO FUCKING BACK
#i need the tutorial to come back asap bc i need to screenshot zoe's :3 face.....#ive been trying to screenshot all the new sprites for zoe and (especially) liam (he just looks SOOOO good in the new style fr....)#i love love love the new characters so much omfg....#omen and nico and doug and april are all soooo charming lolol#bunni mumbles#monster prom#monster con#anyways. expect a image dump of many liams (ft. a few zoes) in the near future lol
356 notes
·
View notes
Text
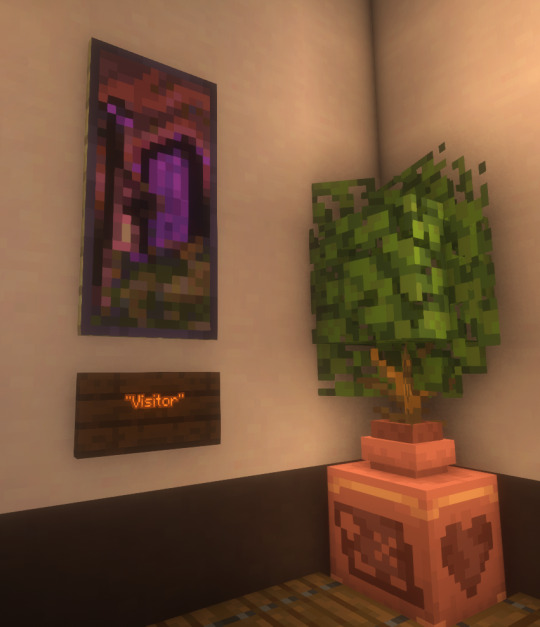
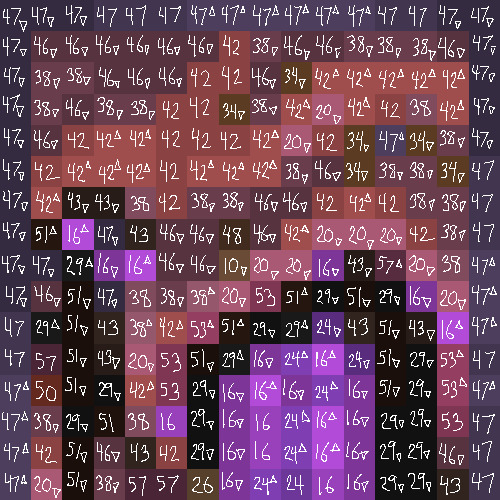
I finally finished a NEW CUSTOM MAP ART!!! "Visitor," a portrait of an enderman, is extra exciting because it's my first full-palette map painting, meaning I used block height to access all the highlight and shadow colours available!! More on the full process under the cut, but the short version of what this means is:
ITS A VERY COMPLICATED CONSTRUCTION. I created the art, then planned and built this manually, without any mods or schematics for construction. Huge props again to everyone else in the server for helping me gather all the materials to make this absurd thing possible!!!
This was the original art I made for it! I'm a huge fan of the "compressed" look of the vanilla paintings, so I've been starting with a large image and shrinking it down, though there were a lot of pixel tweaks to get it to read well. After shrinking it to 16x32 (for an art made of two maps), I convert it to a limited palette that I've set up to match the colours minecraft actually has available:

The map palette is actually tremendously limited, so figuring out a painting that will still look good with that constraint is a challenge in and of itself!
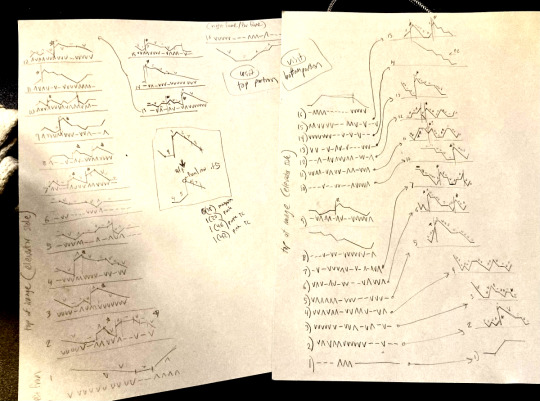
Anyway, the way minecraft maps work, a block that is Taller than the block to the north of it shows up with a slightly lighter colour, and a block that is Lower than the block north of it shows up on the map with a slightly darker colour. So when making a key for this one, I marked all the squares with a little arrow if it's the lighter or darker version:
Each "pixel" here is a full stack of blocks on the mapped area: 64 blocks, 8 rows of 8. In order to achieve the affect of every block in a given pixel being taller or shorter than the block to the north of it, dark and light shades need to staircase either up or down. Because staircasing downwards in survival sounds even worse than this madness, I did some planning to make sure each of the "downwards" staircases would touch the ground, so I could simply staircase up from south to north instead. This involved figuring out how many up and down movements were in each individual column and planning out 32 little layouts:
It's worth noting that if you look up minecraft map art on Youtube, most of what you'll find is either, the simple realisation that placing blocks allows you to make custom map art, or an explanation of how to use a generator that will let you plug in any picture and then produce a schematic for you. It's very cool that these exist, but I wanted to do full palette art myself, without an auto-generated schematic, and at the time THERE JUST WEREN'T ANY TUTORIALS FOR HOW TO DO ALL THIS?? Now, having the experience of finagling all this, i think perhaps the reason is that this is a mad undertaking.
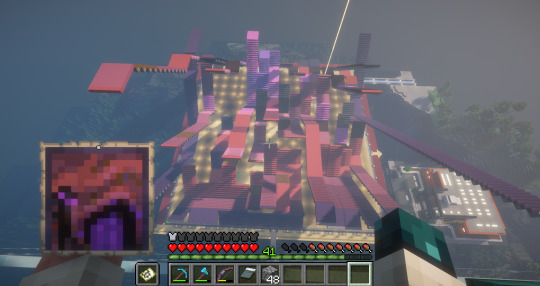
ANYWAY: PROGRESS SHOTS!!
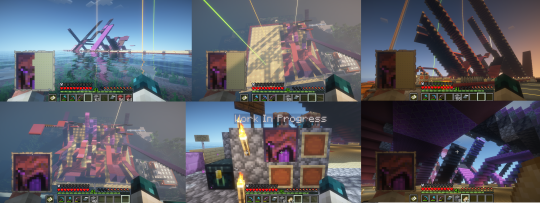
I actually love how the staircases look..... its like some kind of modern sculpture
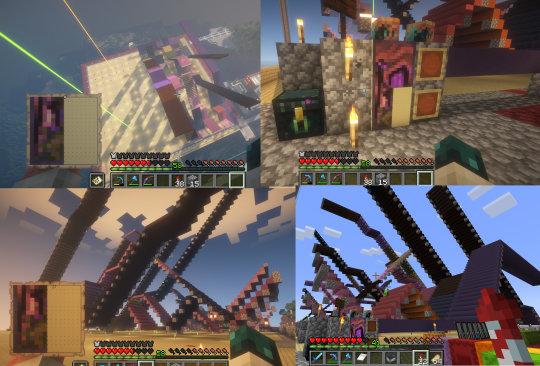
Fewer shots of the second half since I did it on call with friends; the last screenshot is one Thren took of me activating the new locked map to use for the gallery.
Once these paintings are done, I lock the finished maps, make copies, and stock them in the art gallery so other friends on our server can also put these paintings in their homes! It's a lot of work, but really rewarding to see my art decorating various buildings around the server. ;u;
I have one more custom full-palette painting I've done the art for and gathered all materials for; I still need to do the full key and plan staircasing for it before I can start, but HOPEFULLY if my resolve doesn't waver there'll be at least one more of these!!
#minecraft build#minecraft screenshots#minecraft#block game liveblogging#minecraft map art#GENUINELY SO PROUD OF THIS ONE#bsl shaders#im so tempted to make some sort of tutorial on doing this by hand sometime. you shouldnt do it by hand. but a tutorial should exist!!
477 notes
·
View notes
Text
YOUR VISITOR CONTROLLER MIGHT NEED SURGERY
Hello out there!!! If you use Visitor Controller mod for the Sims 2, it might be broken. I am not sure exactly which version I have ... Midge's that allows togas or the older CrispandKerosene's version with personality options.
The personality settings may be broken because I looked at my file today and sure enough, the BHAVs are not referencing personality properly.
Go into the BHAV "Check Personality Flags" inside Visitor Controller in SimPe.
It should look like this:

The highlighted node should not reference any other value but a number higher than 100.
If you see this:

Then it is broken. Personality has to be referenced in hundreds!
You must change it with the Instruction Wizard which is on the right hand side of Plugin view to make Personality features work, as in banning Lazy Sims from a gym.

The first image shows that Sims with a Neat personality lower than 400, which is 0x0190 in hexadecimal, will be banned from the lot.
Repeat for the other personalities lower in the code.
HAPPY SIMMING!!!!
Also, if anyone is interested in a tutorial for adding custom careers to Visitor Controller, let me know!
#sims 2#sims 2 gameplay#sims 2 simblr#sims 2 mods#sims community#ts2#ts2 mods#ts2 glitch#ts2 visitor controller#visitor controller#sims#Sims mods#Sims 2#sims 2 cc#the sims 2#sims 2 screenshots#Simpe#sims 2 tutorials#sims 2 tutorial
86 notes
·
View notes
Text
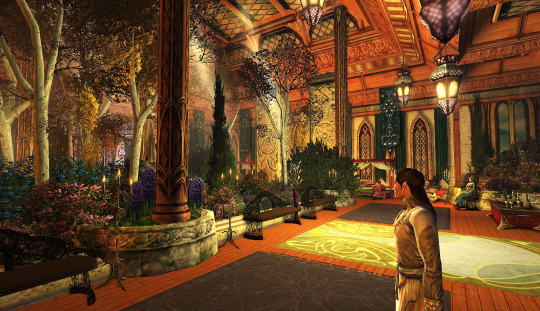
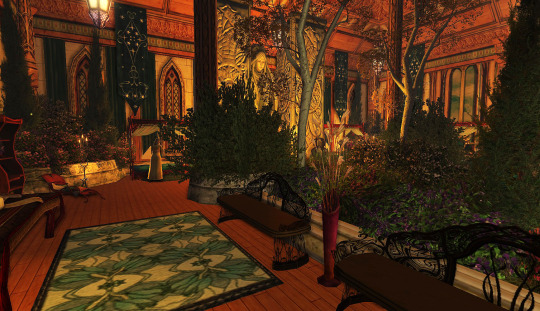
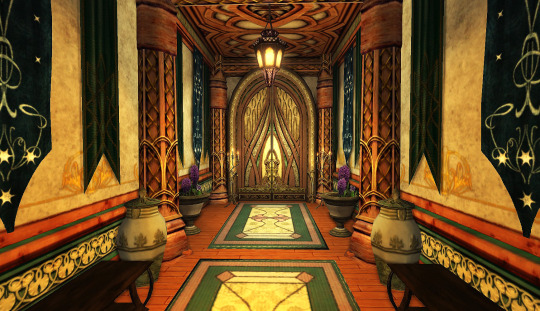
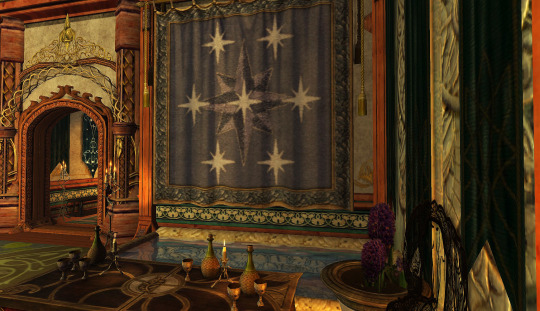
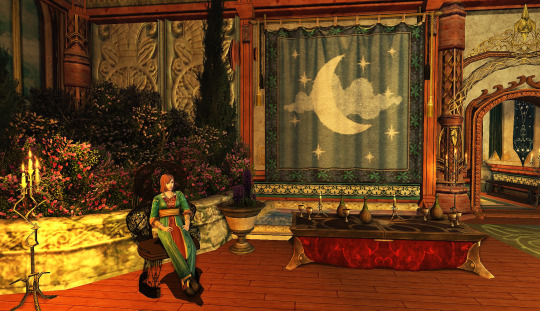
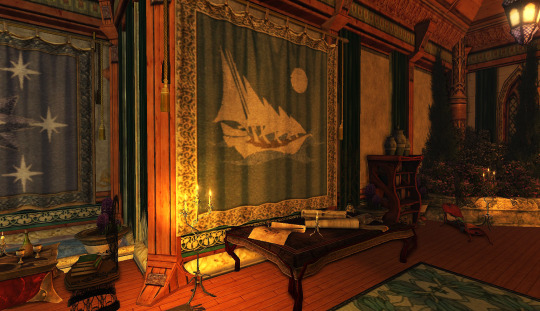
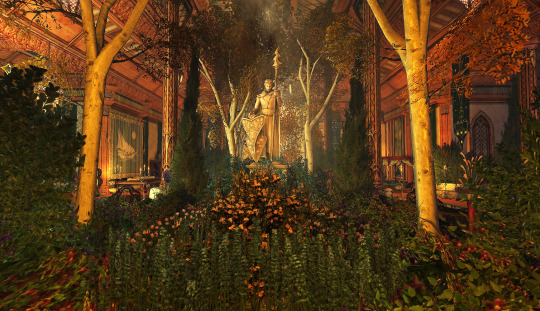
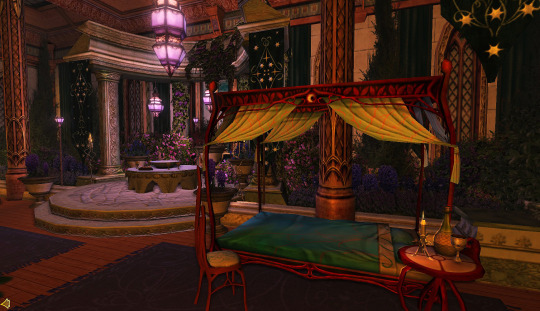
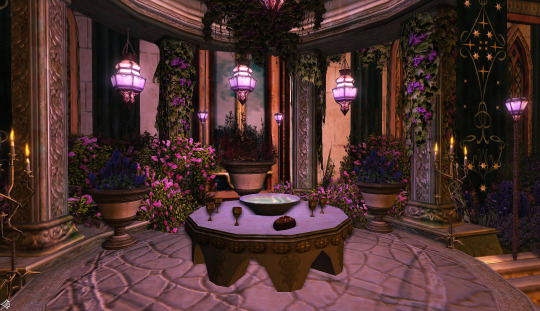

Tham Send, the Hall of Rest
#lotro#lotro screenshots#gaming landscapes#lord of the rings online#tham send - the hall of rest#the last homely house#imladris#rivendell#elrond#tolkien#lotr#the hobbit#high elf tutorial
96 notes
·
View notes
Text

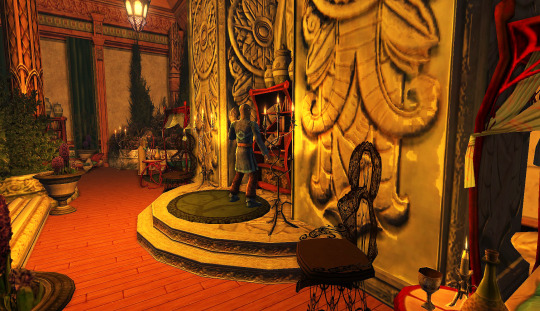
shots from messing with my reshade and decorating the pub
#can someone link me to one of the srwe alternatives?#i think i've seen a few tutorials about taking high res screenshots without srwe#srwe is just not worth it for gameplay#too much hassle#thank you 🙏#i am almost ready to start playing. i made the other 2 households#just need to decorate all the houses 😫😫#and finish my assignments
517 notes
·
View notes
Text
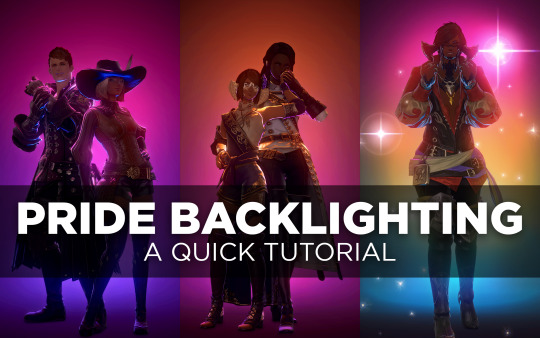
Pride Backlighting Tutorial
A few people have shown interest in replicating the pride backlighting I did, so hey, here’s a quick tutorial below the cut.
Enjoy, and happy Pride Month. 🏳️🌈
STEP 1 — SETUP
First thing you’ll want to do is find a suitably dark background to bounce the light off of. I use the White Screen housing item dyed Soot Black, available from the Housing Merchant or Apartment Merchant in any of the housing zones for 3000 gil.
I line up 2-3 of them for coverage, but one will do if you're trying to be frugal.

If you don’t have an apartment or an FC room to use, try asking friends, FC mates, or even folks you share a Discord server with. You might even find someone who already has a studio space set up and is willing to let you use it!
Lighting in your studio space should be 0 (though you might have success at 1 as well), so make sure to adjust that or ask the studio owner if they can make that change before you start posing.
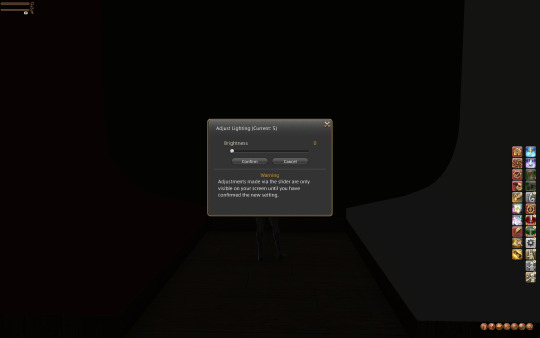
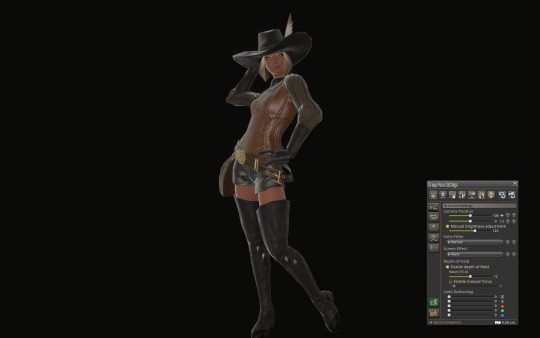
STEP 2 — GPOSE
Position your character(s) just a little ways back from the edge of the screen. You want some space between them and the screen so that the lighting can float there without casting a weird circle on the wall.
Hop into /gpose and bump up the “Manual brightness adjustment” to about 120 or whatever level allows you to see your character well enough to pose them. Pose to your heart's content.
STEP 3 — LIGHTS
Here’s the fun part. In the Light tab of the Gpose menu, switch all of your Light sources to Type 1, which has the shortest falloff radius (meaning it doesn't reach as far as Type 2 or 3). I also set all of my lights to one strong color to differentiate them while I worked on lighting—red, green, and blue, all maxed out at 255 (for now).
Swing your camera (still on all default settings) around to your character’s back and up above their head a little ways. This is where Light 1 (red) will go.
Now pan your camera down at about mid-back height and set Light 2 (green) there.
Pan your camera down one last time until you have a nice shot of your character’s butt and set Light 3 (blue).
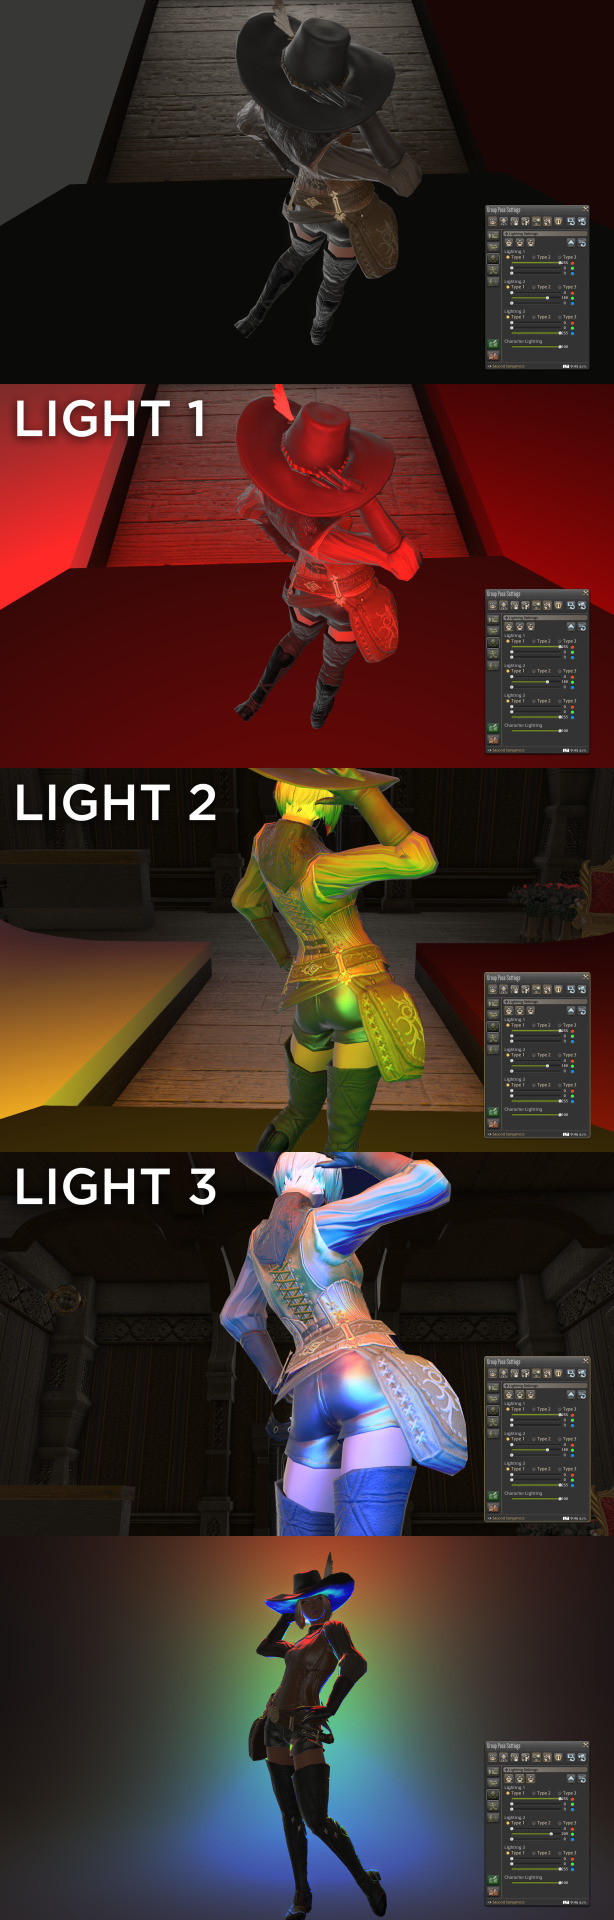
Spin your camera back around and enjoy this nice little macaw-colored gradient.
STEP 4 — CAMERA
Set your camera angle.
The way FFIXV’s lighting works is partially dependent on how much light is in a shot. It will adjust a lot like your eyes do when you’re entering a dark room from a bright room, or vice versa. Your zoom level and camera angle are going to directly affect the lighting, so set this before you start messing with light strength and color. Sometimes this means weaker lighting will actually light your character better.
I ended up bringing my lights down to around ~160 and boosted the "Manual brightness adjustment" up quite a bit to get lighting I was happier with.
For a straightforward vertical shot, I like to have my Field of View (FOV) at 200 and of course my rotation is set to 90. Zoom in or out as needed. Remember to save your camera angle if you plan to pan around and fix things!
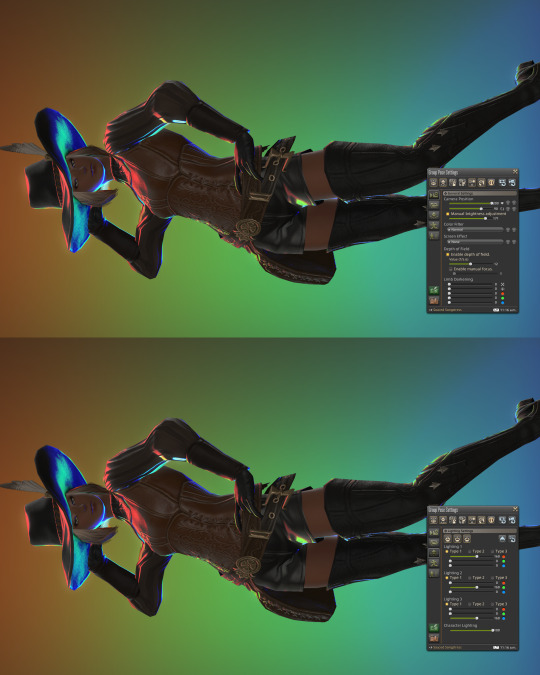
STEP 5 — COLOR
Make it ~queer~.
Take your flag of choice and pick out 2-3 “main” hues. Generally these will be the strongest hues in the flag, if not the only ones. Some flags, like the Pride/Progress/Intersex-Inclusive flag itself, are difficult to replicate for the sheer number of colors that are in it. You can loosely represent a rainbow with some adjustment to the RGB colors, if you’re determined to have a whole rainbow in there.
Shader Note: I recommend picking a shader preset that doesn’t mess too much with color so that colors are represented correctly. You may need to adjust light strength and “Manual brightness adjustment” to be compatible with your preset of choice. Bloom will also heavily affect the way your colors are showing up, so you may need to tone down the bloom FX or toggle it off entirely. This all depends on your preset, however.
If you’re not into RGB math, here are some cheat sheets! Not every flag is represented here of course, but I tried to cover as many colors as I could so that you could grab a color from another flag as needed! Please note that colors will need some adjustment for your own screenshot, presets, and preferences.
And that’s it, y’all! 🏳️🌈
(Open this image up in a new tab for more detail.)
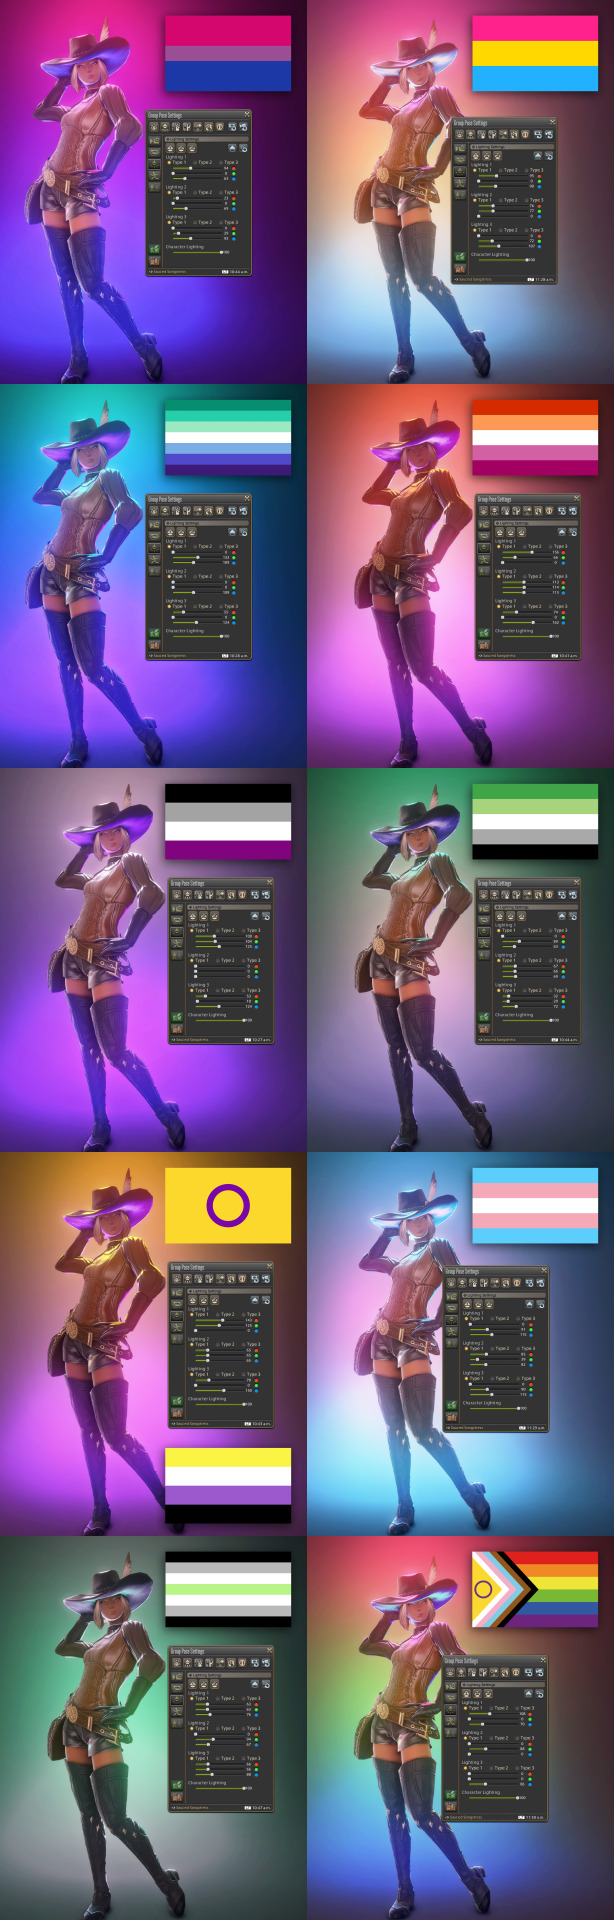
These were taken using a heavily customized shader for that nice glowy effect.
#ffxiv#ffxiv screenshots#[ ooc ]#[ tutorials ]#i didn't actually have a tutorial tag but#now i do#enjoy ❤️
1K notes
·
View notes
Text
youtube
♡ How to move Eyelash CC to new Eyelash category in 30 seconds ♡
It's super simple to move all of your existing eyelash CC to the new category in CAS using Sims 4 Studio ♡ྀི ₊
#sims 4#ts4#ts4cc#the sims community#ts4ccfinds#ts4 lookbook#sims lookbook#ts4 hair#ts4 maxis match#the sims 4#ts4 cas#ts4 simblr#ts4 gameplay#ts4 legacy#ts4 screenshots#simblr#ts4 tutorial#ts4 eyelashes#Youtube
160 notes
·
View notes
Note
I LOVE this set and i was wondering if you could pls explain how you did the text, including how you added texture to the ripped text and the highlighting/circling/etc of words? thank you for posting your beautiful gifs 😊
thank you!! 🥺 & of course! (photopea tutorial)
the majority of the texture for the ripped paper effect i can't really take credit for it's on the paper it's self all i did was make the paper white (because the texture was yellow) and used curves to darken the texture), i got the texture from one of photopea's templates but it seems their whole template section has changed drastically and no longer has like anything i used to see before ???? so i'll just share both versions here:
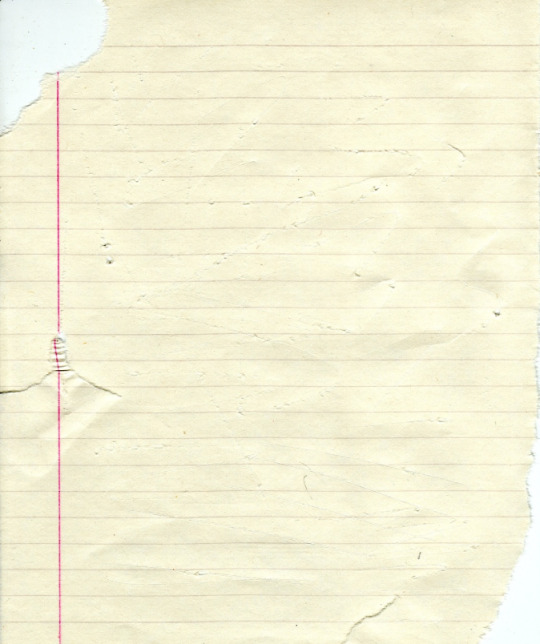
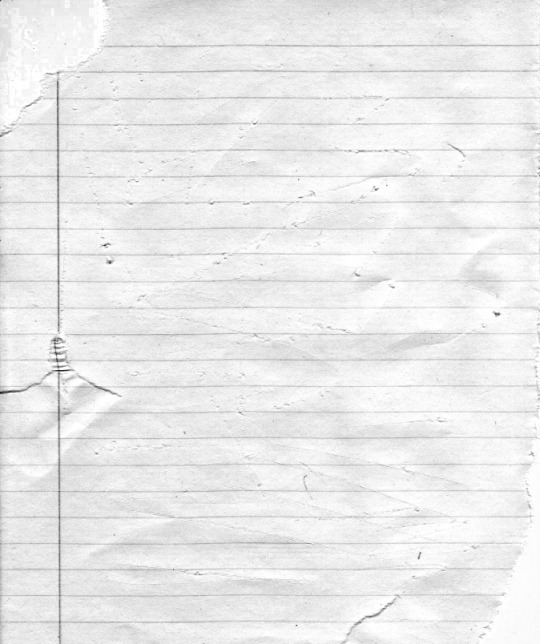
(original & my edited version)
for the ripped parts i just played around with this brush set in the plugins
once i decided which of the paper brushes to use i had a new layer and used it where i wanted, so top left in the gif above, i clip masked the paper texture (and the adjustment layers as well) onto it so you get that ripped effect (if you don't like or want to add to that you can always use the brush tool again (or the erasure tool) set as the paper brush to add or remove sections i did this a lot when i realised certain words i wanted to show weren't on there (also changing the size of the paper brush when wanting to add a little bit or take a little bit away was a massive help)
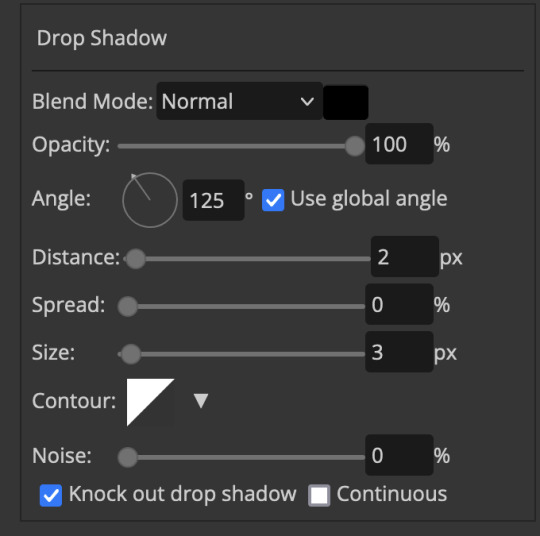
i also always add a drop shadow to my paper textures, the settings i used is mostly the same EXCEPT for the angle for all of the ripped paper (it's also my text drop shadow settings) because depending on how the ripped paper looks you might have to change the angle
also i know in the screenshot below it's on but make sure the use global angle is off if you're going to have multiple different angles of drop shadow in your one gif (so if you want your paper texture on 125° but anything else on 60° the global angle needs to be off but if you want them the same then you can keep that on, which is why it's on for me because the angle is the same for both the text & the ripped paper) (and by text this isn't the text on the ripped paper, there isn't any drop shadow on the text itself there, just to clarify this was for my "ripped paper text tutorial by dengswei" text)
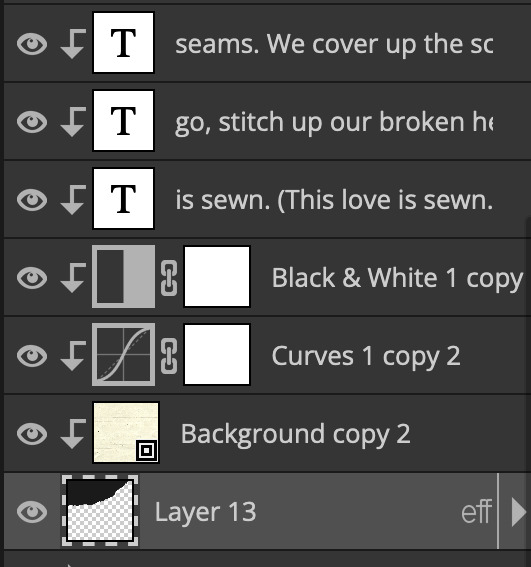
as you can see i also clipped my "handwriting" text to the paper layer this is so it stayed on the paper rather then going onto the gif itself (and it saved the fiddly part of masking it away & it felt more authentic this way too)
i found for me it was easier to seperate the text line by line so i knew exactly which part of the text was on which and if i wanted to change anything either it being a typo, changing the paper texture, or wanting a different word on a different line it was easier that way because it didn't end up messing up all of the text (though you don't have to do it that way, it's just what worked for me here)
font i used was: vag-handwritten (a default photopea font)
all of the next part needs to be above the text on your ripped paper:
for the highlighting, circles, and the lines it's pretty much all the same, i chose the colour which matched the gif (so say purple), for the highlight used the rectangle select & colour fill tools and set that to multiply & then played around with opacity (for most of my highlighting it's set to 50%), for the circles it was the same except the circle shape tool (no fill just stroke) set to purple, set to multiply, with 100% opacity (i found the circles looked better with 100% on some gifs depending on what colour i used), & then duplicated it once or twice and then just moved each circle to where i thought it looked best & the double lines is also the same using the line tool, set to multiply, & playing around with the opacity, & positioning them where i like
for the squiggly lines, the hearts, the 3 small doodle lines at either side of a word, & any other doodles i had on there i doodled them myself with my drawing tablet (you probably don't have to use a drawing tablet i just found it easier that way) using the free pen tool and then did the same thing set it to multiply and played with the opacity
if the colour you choose looks too dark or too light with it set to multiply either try a lighter/darker colour, try out something else like lighten, or screen, or increase/decrease the opacity more (i found i had this issue with the yellow being hard to see on the white paper so i used a darker yellow and kept everything at 100% opacity rather than 50%)
hope that helps! and please if anything is confusing or you want to ask any more don't hesitate to ask i know i ramble on a bit and it can sometimes get a bit confusing 🤣 or if there was anything i missed feel free to ask again 🥰
#replies#edwinas#mine | tutorials#gifmakerresource#photopeablr#photopea tutorial#photopea tutorials#gif tutorial#gif tutorials#usergif#tutorial#tutorials#photopea has so many great default fonts i just spend hours searching through them i barely download fonts now 🤣#i hope i didn't miss anything#also i don't know why the paper textures & my screenshots posted this way i had them side by side#okay they're side by side on mobile but not desktop ??? but mobile doesn't have the read more okay
110 notes
·
View notes
Text
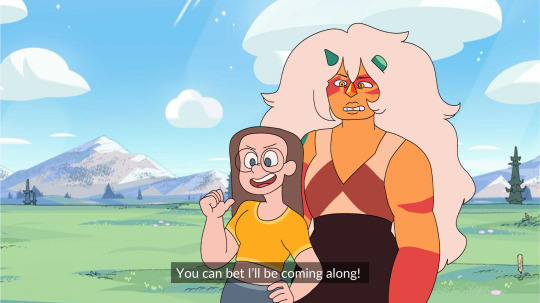
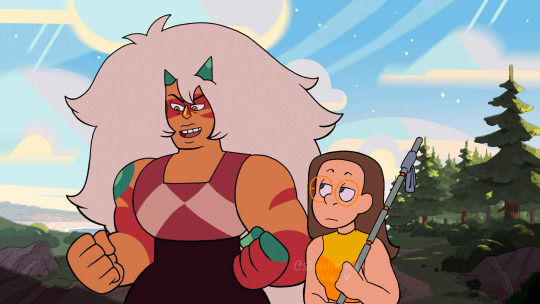
I had someone DM me recently asking for tips for creating an SU sona and drawing in the style, which is one of my favorite topics to think about and discuss!! I'm definitely not the end-all-be-all of SU style replication and have so much to learn, but I wanted to share my method for anyone interested in creating SU art! So here's a Steven Universe Style Replication guide!
Before you start:
Gather LOTS of references. references EVERYWHERE. I have a google drive folder specifically for Jasper references, but I plan on having folders for each character as well. If you know you're going to draw a specific character a lot, gather references!!!
also, gather references of characters you base your S/I on physically. my sona has traits from both Steven and Connie's body types, so I used photos from their references when creating mine - I specifically used Connie's turnaround as inspiration for the height/posing of mine!
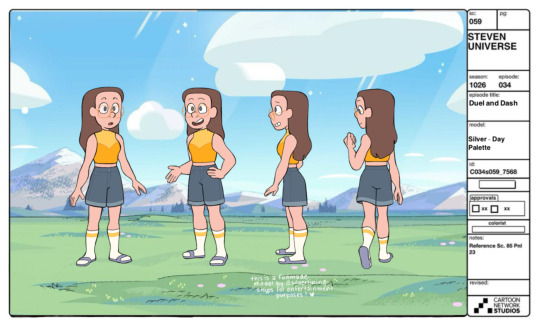
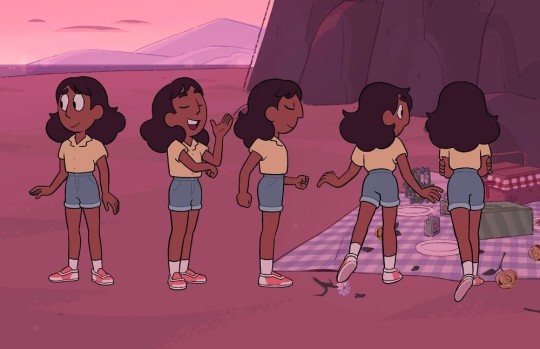
((you don’t HAVE to create a turnaround ofc, but thinking of your sona as one that needs to “follow the rules” of the other characters’ designs can help creating something that looks proportional and accurate!))
Colorwise, it’s fun to consider your f/o or the characters you interact with before creating an outfit palette -> I specifically use yellow as a base color because of the way it meshes with Jasper’s orange pallet, as well as being complementary to Steven’s pink and Connie’s blue
Drawing:
SU has the benefit (and curse) of inconsistent style and size references. it's partially proportions to the other characters, yea, but it's more in the shape language you use when drawing in the style, which is why references are so helpful!

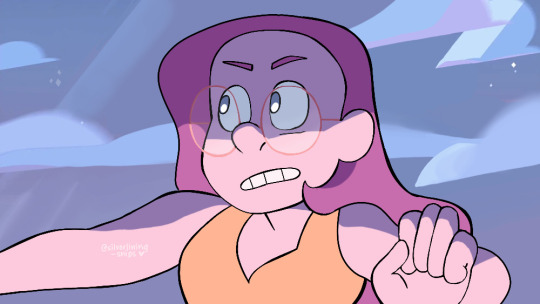
(unrelated but I love how this shows how much I still struggle drawing jasper.... even after six months straight of exclusively drawing her. sigh.)
take these drawings I threw together! these are four completely different characters, but they all feel different because of the shape language used:
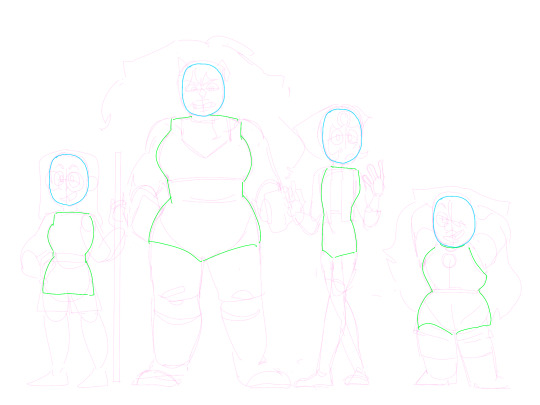
even with my own style bleeding in, really focusing in on what their core body is expressing is what demonstrates the character.
this translates to creating your own sona, too - think about how your sona would fall into the shape language. my sona is similar to Connie, but a bit curvier and stockier, which shows especially in the core of the character design!
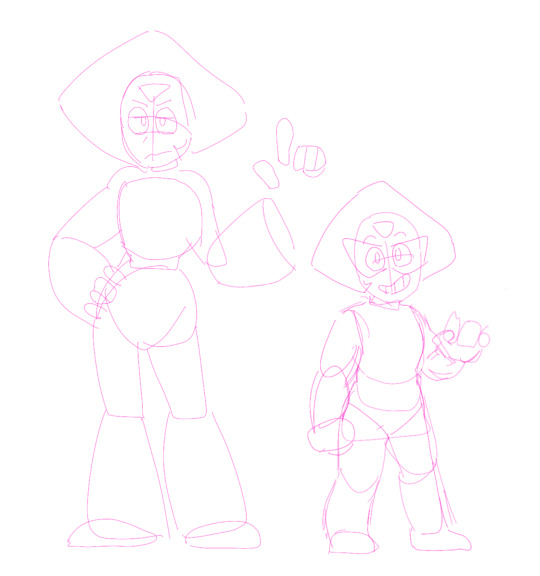
I know the "belted shape" concept has gone around this fandom for years, but I'd recommend not depending on it as in my opinion it doesn't translate nearly as well as just a general concept of the form - like how it doesn't work as well with Peridot when she becomes tiney

[obligatory PSA that anatomy knowledge/practice helps so much here - I've been drawing SU for YEARRSSSSS but my understanding of the forms got so much better when I started practicing gesture drawing/anatomy practice]
Expressions/facial anatomy:
so again, SU has so much style inconsistency that the way you draw expressions will vary based on the boarder - this EXCELLENT because this means expressions are really easy to pass in the style! but some visuals anyway:
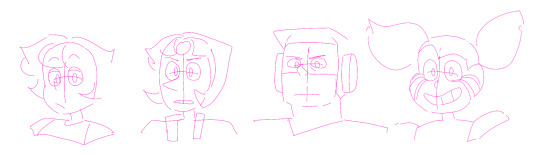
most of the time, faces are extremely simplified with one guideline across the face, a little bit higher than where the "cheek" starts if the character has a cheek
if more masculine, the guideline will be a bit higher and the eyes will be shorter
an interesting note with Spinel specifically is that her eyebrow expression is done through her hairline, which is part of her really fun 20s inspired look!
Lineart:
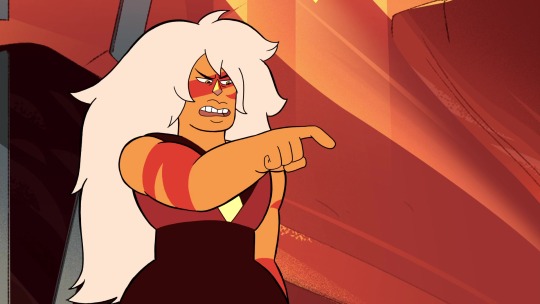
i feel like if anything really makes something look "canon", it's how the lineart is done in a finished piece. if I compare with a couple fake screens/edits I've attempted:
the lineart makes all the difference here!!!!
for specs reasons if you're curious, I use procreate with the "baskerville" brush on a higher stream line setting. I do not have pressure sensitivity, so all of my lines are hand-weighted, but if you have pressure sensitivity you might have an easier time here!
facial details tend to be slightly thinner. eyes tend to be a little bit thicker on either the top/bottom or sides, although it depends
outer borders, major clothing, outer hair tufts and other major features are the thickest lines
sometimes lines aren't used at ALL for various features (gem facets, some more minor clothing details, like the bottom of Lapis' top or the waistline on Jasper's uniform)
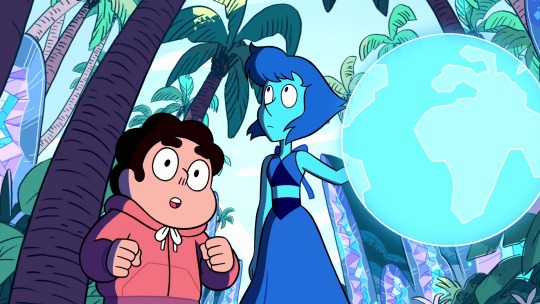
[random screenshots I pulled as examples]
the key part with lineart and style replication, though, is that is varies WILDLY by style. as long as you have some line weighting it's really easy to get it to pass as SU style

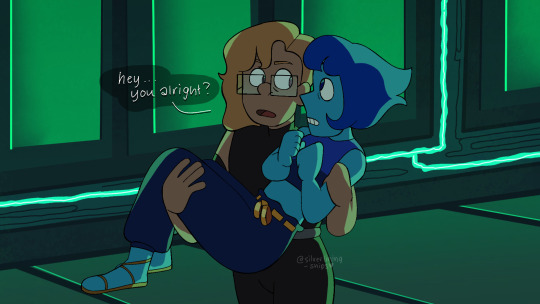
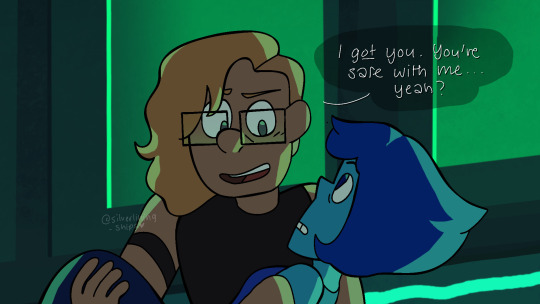
lastly I HIGHLY recommend practicing screenshot edits or fake screenshots if you can!!! I feel like the silly edits I do really help emphasize my understanding of what it takes to make something look like the style, and my little journey into making fake screenshots/"canon" screenshots is a big part of how I've learned to draw in SU style!!!
That's all I have for y'all, make all the SU art in the world!! 2025 will be the Year of Steven Universe Art!!!!
#steven universe will never be over so long we have Fake Screenshots under our belts......#I hope this was helpful!!!#silver's art#steven universe#su fanart#tutorial#art tutorial#self ship#fictional other#steven universe self ship
52 notes
·
View notes
Text
what, I wonder, is worse to be the only living thing alone on a dead planet
or to be as I exist half-dead, yet breathing alone avoided by all warmth and life
#Imayo Mikomori#FFXIV#Screenshots#I got that teardrop tutorial and followed it#and screamed many curses at how finicky they are to pose#but OH so worth it#and yet you almost can't tell they're even in her eyes LOL
129 notes
·
View notes
Text
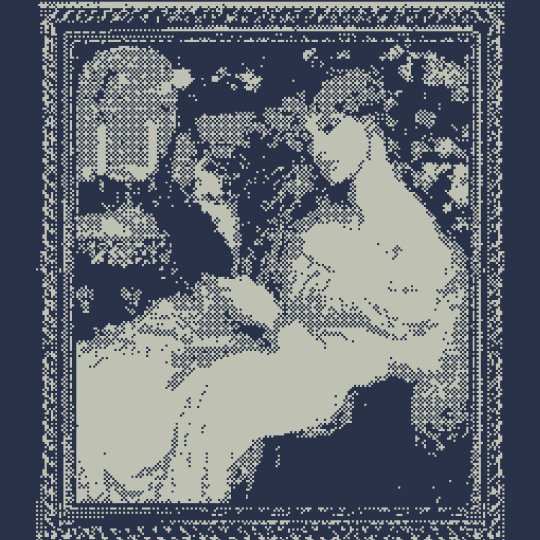
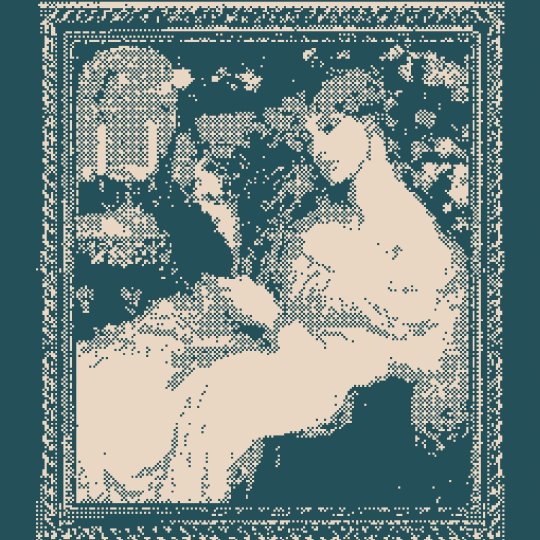
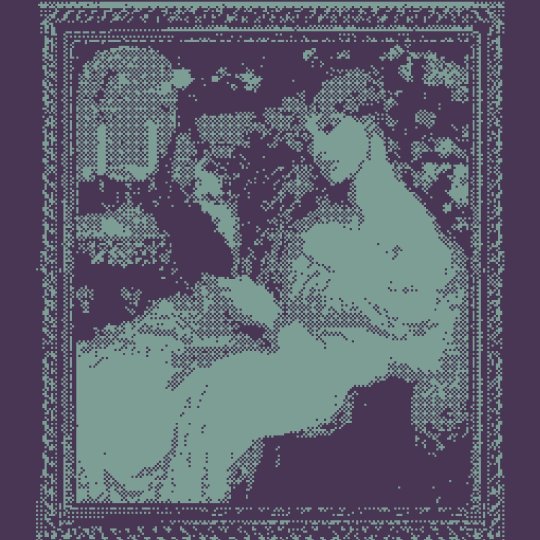
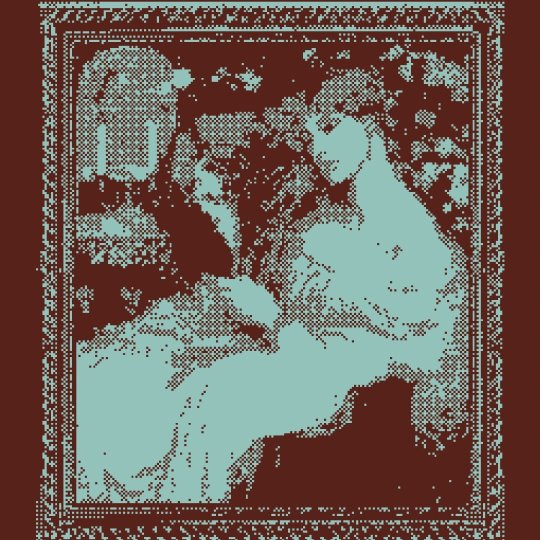
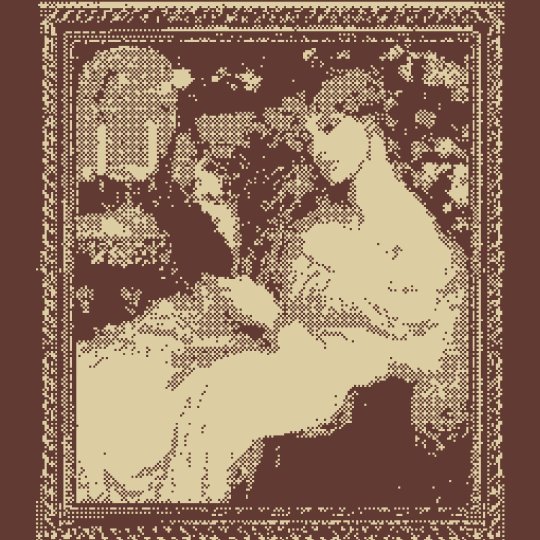
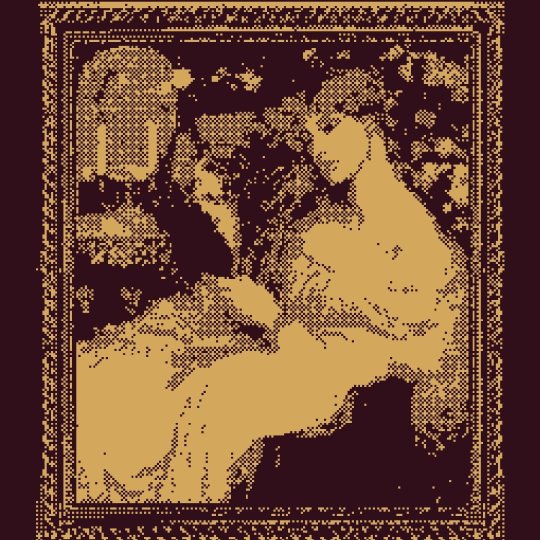
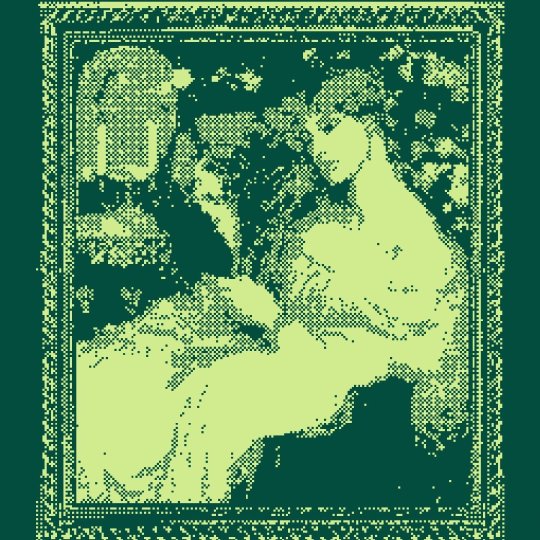
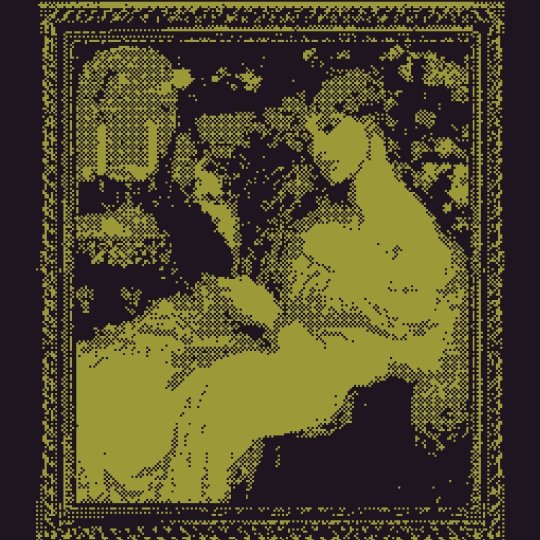
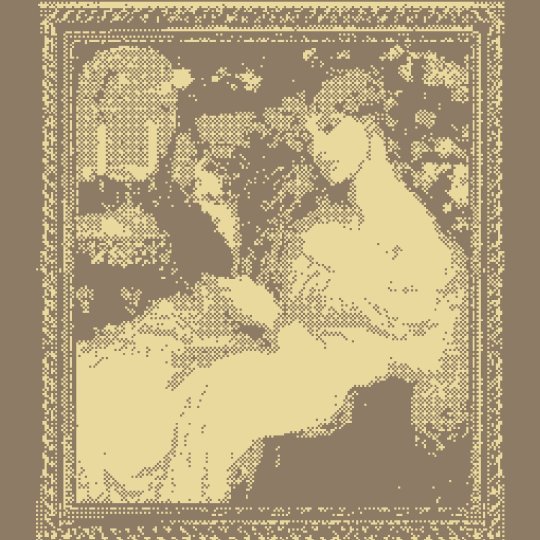
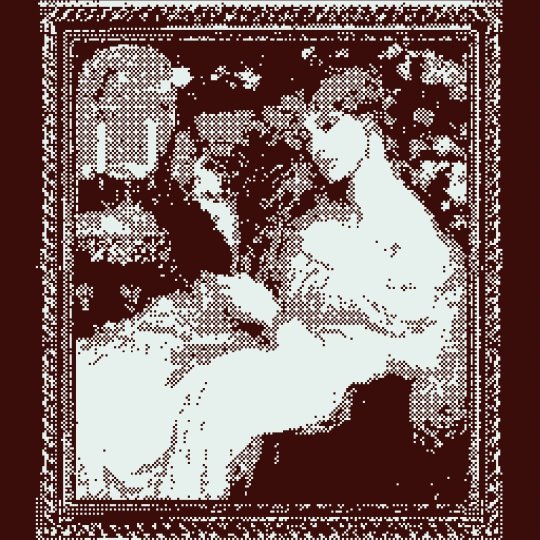
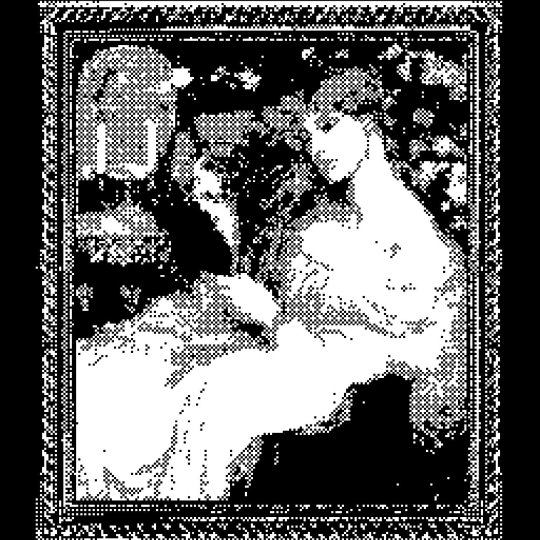
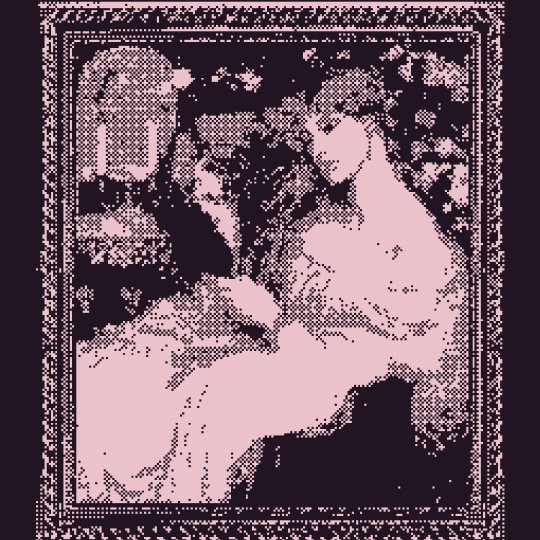
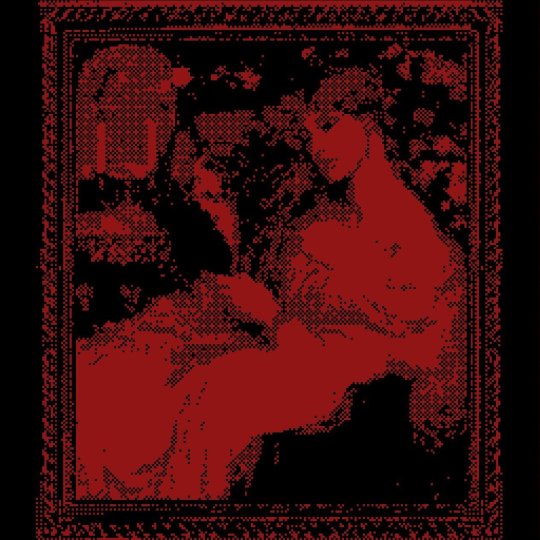
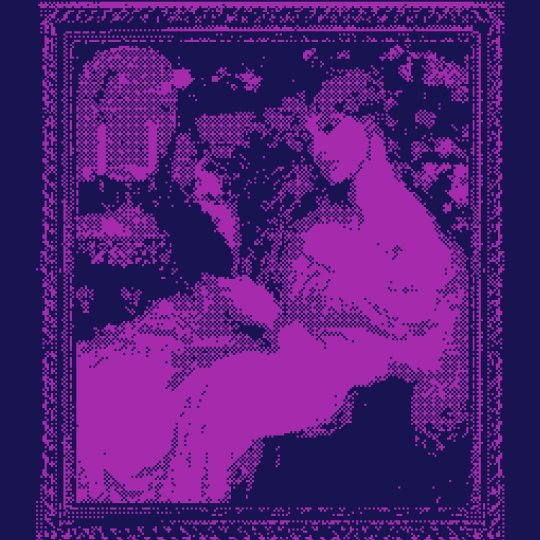
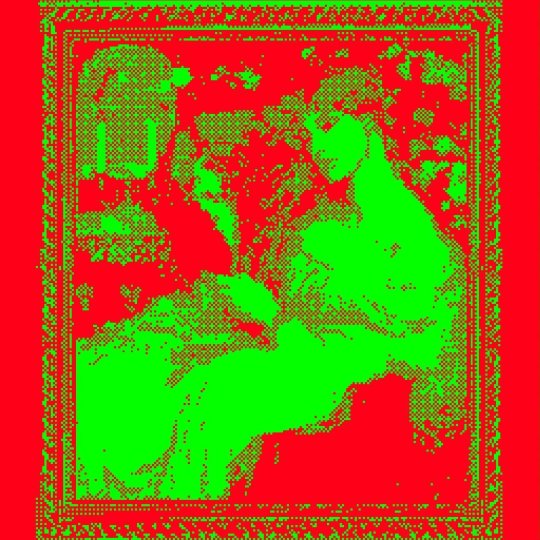
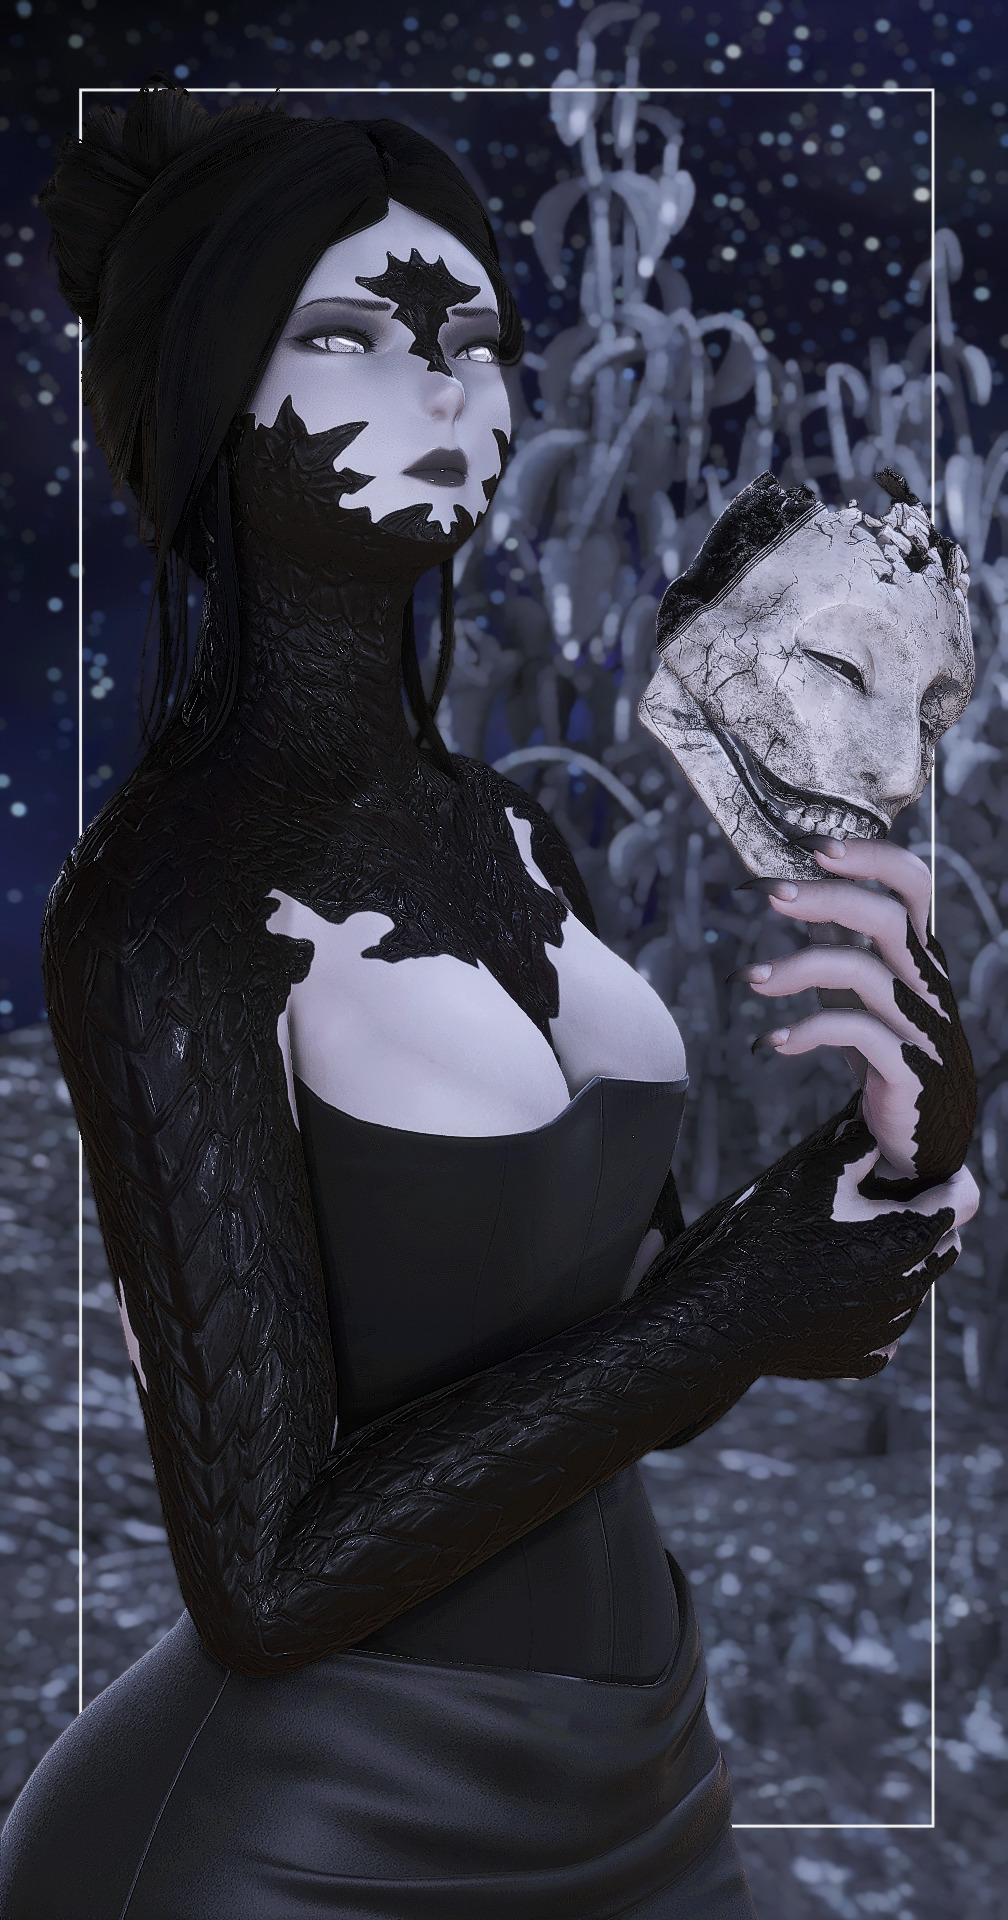
Who's Lila? | William's Lady Lilith painting in all palletes
#all palettes#tanyas stuff#screenshots#whos lila#who's lila?#FOR REAL ALL PALLETS INCLUDING THE ONES LOCKED 2 PLAYERS. thank you beard for ur helpful tutorial on how 2 grab KILFUC and Red Tears#eyestrain
137 notes
·
View notes
Text
These guys are ready! 🥧

youtube
#ninjagood4#ninjago#ninjago dragons rising#monkie kid#redraw#fanart#ninjago fanart#monkie kid fanart#ninjago sora#ninjago arin#monkie kid mei#monkie kid mk#art#screenshot#screenshot redraw#youtube#tutorial#Youtube
127 notes
·
View notes
Text
HQ Screenshot Mini Guide (maybe?)
i THINK i may have figured out how to take HQ screenshots without using SRWE!!
After seeing this post by @moonlitfalls , i started watching some tutorials on SRWE and it just seemed to complicated to use every time i wanted to take a screenshot lol, so i dug a little more and found this post by @glittermutt ! Which led me to dig even deeper and find an even easier way to do it! (yes, i'm so lazy i really needed to find a way to do it with the least amount of effort...also this only works if you have a NVIDIA Gpu i believe, cause you need geforce experience.)
So far it seems to be working pretty well for me, so maybe it'll work for you too! Worth a shot.
Step by step under the cut...
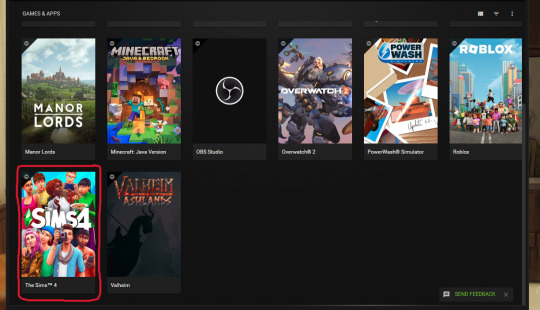
ANYWAYS. all you have to do is open up GeForce Experience and find your game:
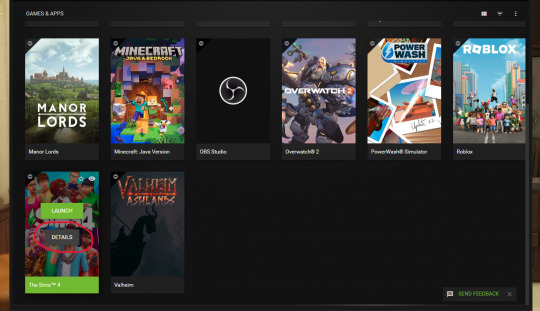
THEN, hover over it and click "details":
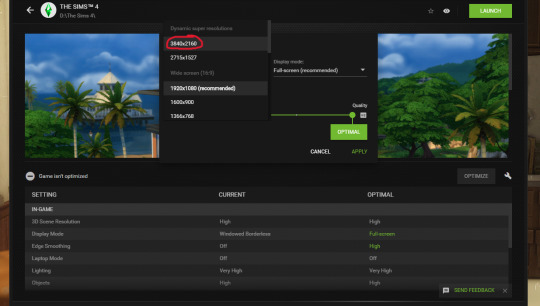
It'll bring you to this screen and you click on the wrench icon:

And then a little window pops up and you choose one of the dynamic super resolution sizes (i went with the bigger one cause my GPU can handle it):
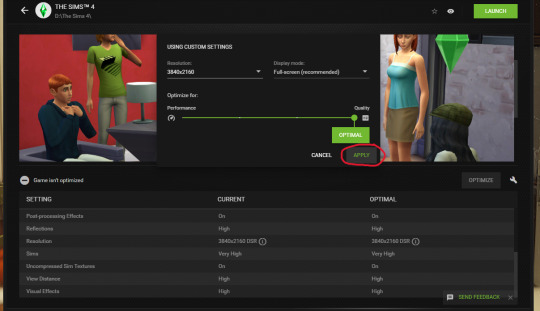
And then just click apply! ( you can also choose fullscreen or windowed etc, whatever you like to play your game with)
And voila! That's it, pretty much.
Now when you open your game, it should automatically be set to run at that larger resolution. You can check in your in-game graphic settings. Then you just take your screenshots, and you can change the resolution in game back to whatever you originally had it at if you want to, so it doesnt put too much strain on your GPU while you play.
Hope that all made sense?? Let me know if it works for you!
80 notes
·
View notes
Text
mutt's guide to using dsr on ts4, with pictures!!!
ok so, dsr is a thing available for nvidia gpus that allows you to take veeery high resolution screenshots of games without much trouble, like this
it's an alternative to srwe, as it plays nicer with a lot of reshade shaders and is just, generally more nice to use! let me teach you how to use it - full tutorial with pictures for every step under the cut (im sorry its too long without the cut)
step 1: right click your desktop and open the nvidia control panel
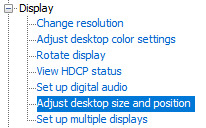
step 2: go here (adjust desktop size and position)
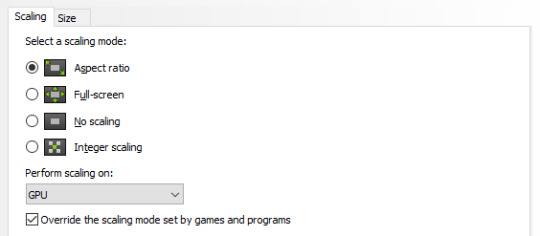
step 3: make sure your settings are set as follows! this is important
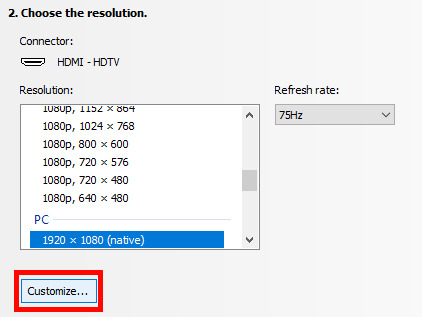
step 4: now, go here (change resolution)

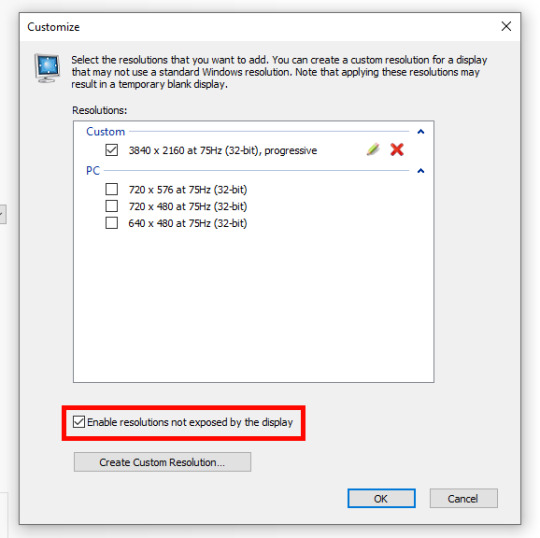
step 5: under change resolution, click on this button (highlighted with a red square)
step 6: in the windows that appears, make sure that "enable resolutions not exposed by display" is ticked! this is very important! (again, highlighted in red - it should look like this)
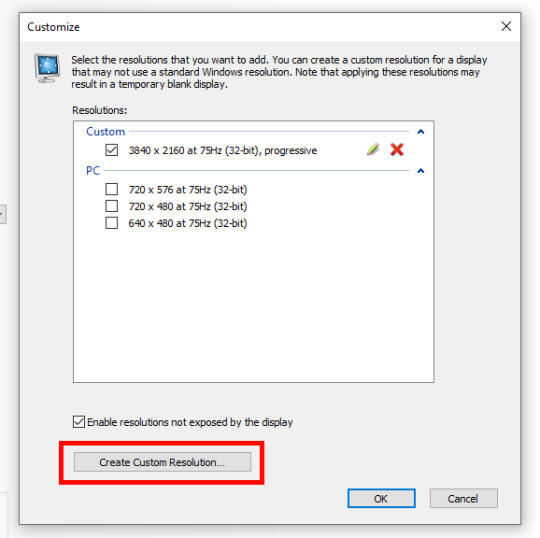
step 7: now, click on "create custom resolution"
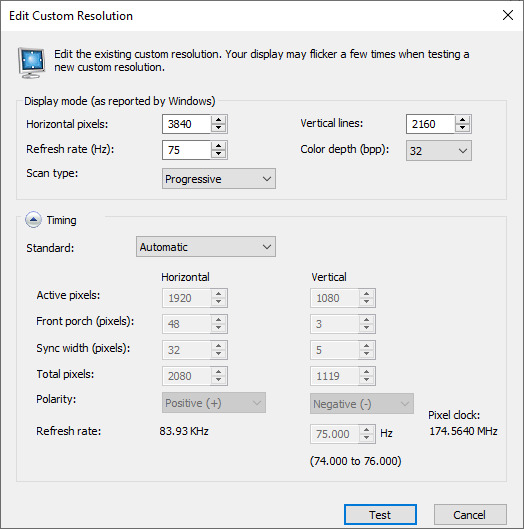
step 8: this is where you set your desired resolution, and where i get a bit rambly; so, in my opinion, there is ZERO reason to go above normal 4K for TS4, as it's generally not a really high-poly game and it has rather simple graphics. you can fuck around a lot here, but if you don't feel like it, here are my settings - this will give you 4K screenshots. NOTE: THE REFRESH RATE DOESN'T NEED TO BE 75! SET IT TO WHATEVER THE REFRESH RATE OF YOUR MONITOR IS!
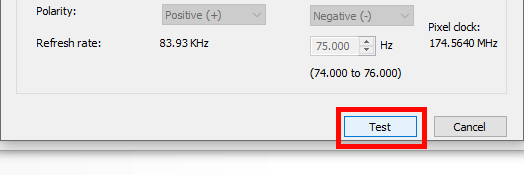
step 9: now, click on test
step 10: let the thing load, and after it's done, a window like this should pop up.. but yknow, in your language. click on "yes" (or accept or ok!! idk mine's in russian; basically, the button highlighted here!)
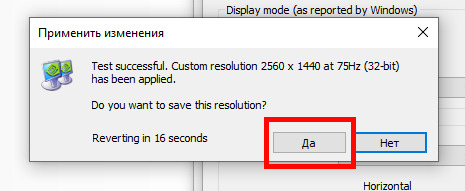
step 11: click "ok" in the window that pops up! like this! afterwards, close the nvidia panel

step 12: open the sims 4 and go into game options, then into graphics
step 13: set your "display type" as "fullscreen", like this

step 14: under "resolution", select whatever resolution you setup earlier; in my case it's 4K, so if you used the same resolution, your settings should look like this
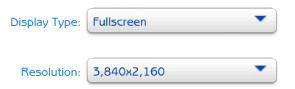
step 15: click on apply changes!
AND UR DONEE!! WAHOOIEE!! now, take your screenshot using reshade, and then go back into sims settings and set it back to what you usually play at, then apply changes!
every time you need to take an HD screenshot, simply open game settings and use your custom resolution! that's it, have fun :3
#sims 4 tutorial#ts4 tutorial#sims 4 screenshots#ts4 screenshots#sims 4 screenshot tutorial#ts4 screenshot tutorial#sims 4 hotsampling#ts4 hotsampling#srwe#nvidia#dsr#tutorials
754 notes
·
View notes
Text

I just found this and thought this was cool! Please don't ask where I found this at this time because I don't want it to be pulled down and people lose access to it on the internet forever. In case that happens, I'm posting this here for all the Prince of Egypt fans! Enjoy!
#the prince of egypt#prince of egypt#moses#tzipporah#how to draw#drawing tutorial#If you can guess where go get screenshots of this book now
112 notes
·
View notes