#sccm dashboard power bi
Explore tagged Tumblr posts
Visit Tumblr Blog
Explore Tumblr blogs with no restrictions, modern design and the best experience.
Last Seen Tumblr Blogs


Fun Fact
Mobile US users spent an average of 115.8 minutes on Tumblr app monthly.
Text
Optimize IT Management with Advanced SCCM Report Builder

Enhance your IT infrastructure with SCCM Report Builder, a powerful tool for creating detailed and customized reports. Gain insights into software and hardware inventories, deployment status, and compliance levels. Ideal for IT professionals seeking to streamline operations and improve decision-making. Elevate your SCCM reporting capabilities for better management and efficiency.
1 note
·
View note
Text
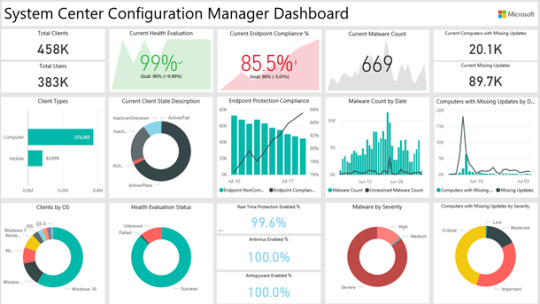
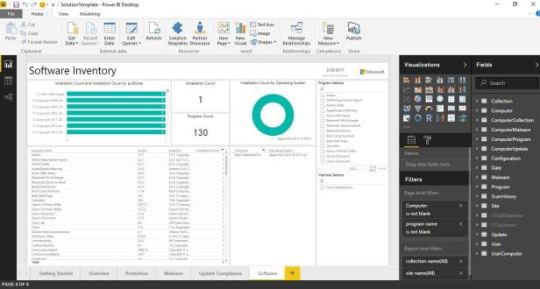
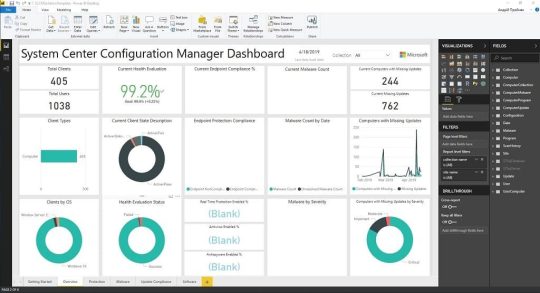
SCCM Install and Configure Power BI Dashboard

SCCM Install and Configure Power BI Dashboard. The SCCM Power BI Dashboard provides detailed information of SCCM hierarchy including client and server health, malware protection, software updates, and software inventory. SCCM Power BI Dashboard Prerequisites System Center 2012 Configuration Manager R2 SP1 (5.00.8239.1000) or later. Read access to System Center Configuration Manager database is required. Destination database: Azure SQL database or SQL Server database (SQL Server 2008 R2 SP3 or later). Valid Work email address (Power BI Desktop sign-in). PowerBI Desktop. PowerBI Pro license (if you want to share your reports) For the machine where the installation is run: Microsoft .NET Framework 4.5 or later. PowerShell version 5.0 or later. For Operating System: Windows Server 2008 R2 SP1, or later. Windows 7 Professional, Enterprise, or later. Note that Windows 10 anniversary update (1607 or later) is not supported at this moment because of a bug in credential guard.
Power BI Desktop Installation
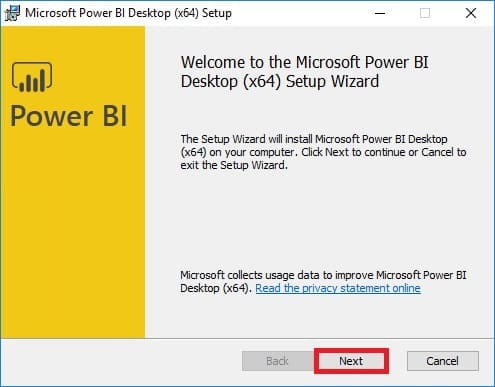
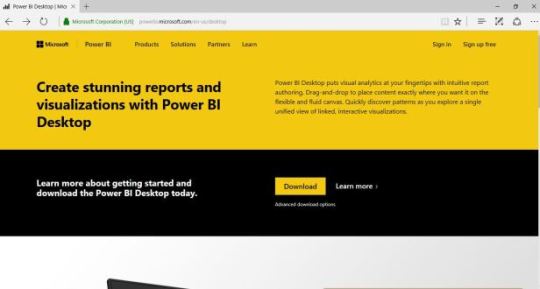
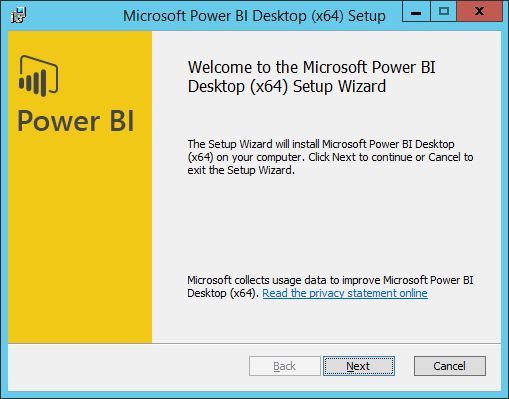
We will start by installing Power BI Desktop: Download Power BI Desktop from the Microsoft download center; Execute PBIDesktop_x64.msi, click Next;
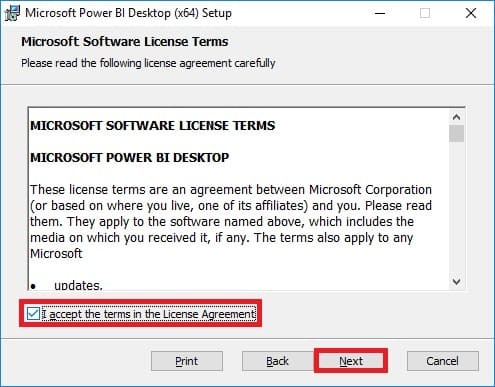
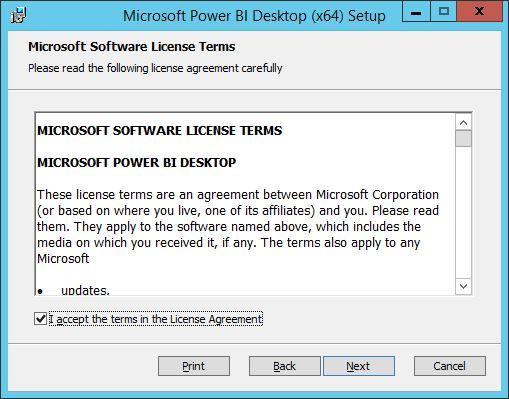
Accept the license terms and click Next;
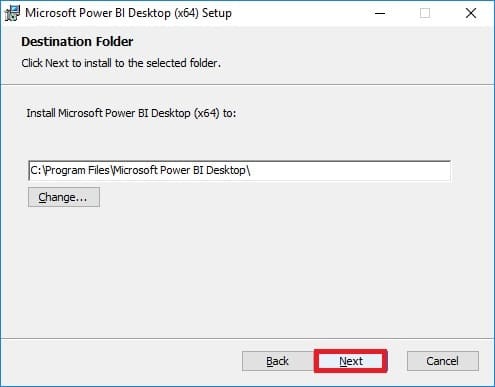
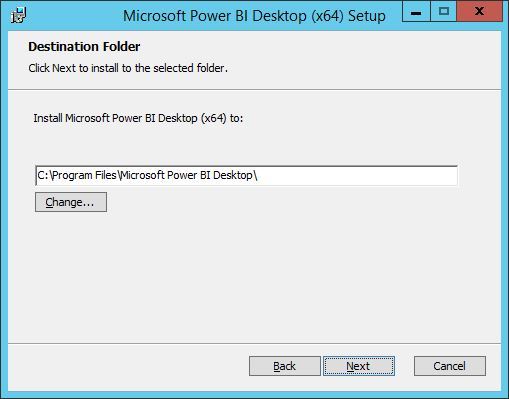
Select the Installation Directory and click Next;
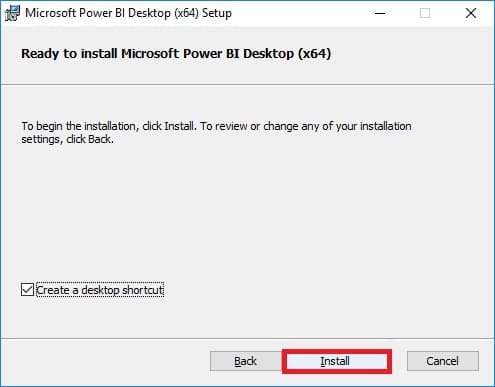
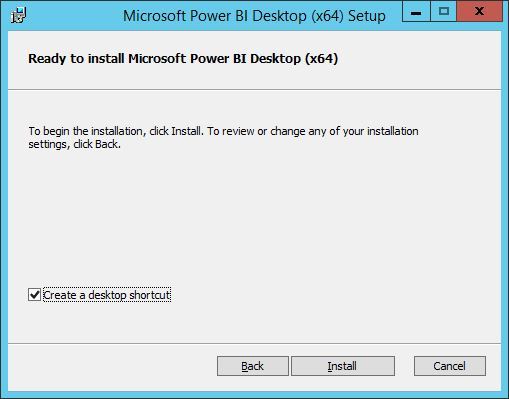
Click Install;
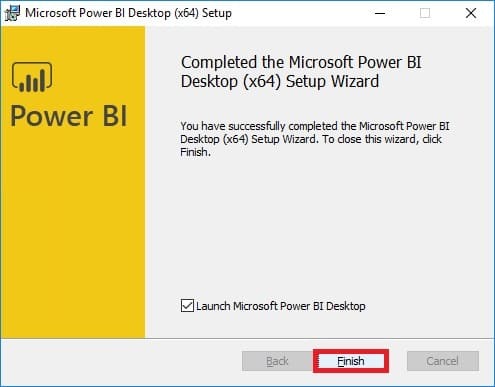
When the process finish, click Finish to close the installation wizard;
Power BI Integration
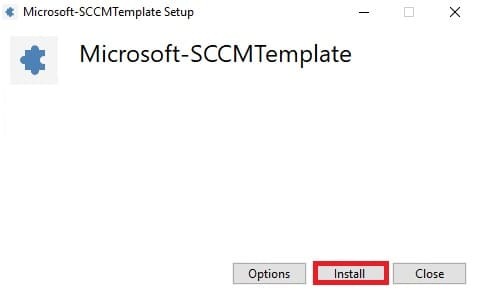
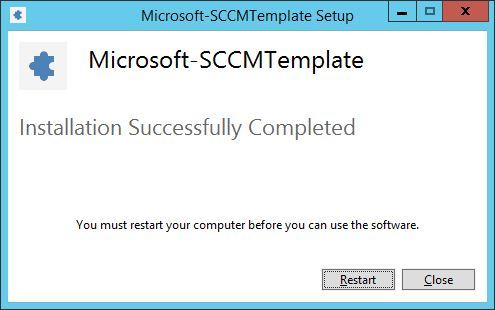
The SCCM Power BI solution template download has been moved to GITHub. Download and run Microsoft-SCCMTemplate.exe.
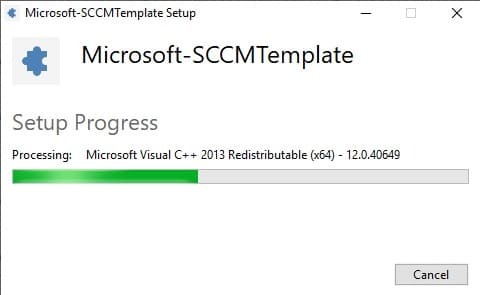
Wait for the process to complete
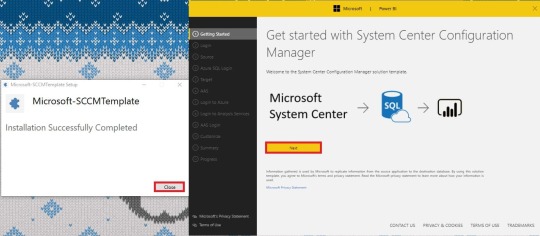
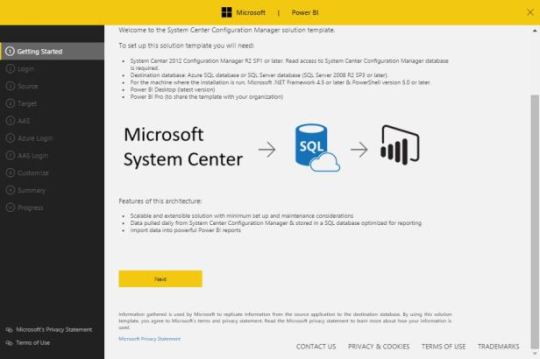
The installation wizard will launch in new window Get Started with System Center Configuration Manager. You can Close SCCMTemplate installation. Click Next;
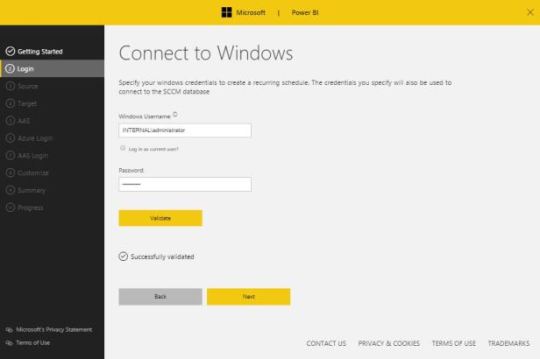
On the Login pane, Enter your credentials to connect to the SCCM database. These credentials will also be used to run a Powershell script on a recurring schedule. Click on Validate, then Next;

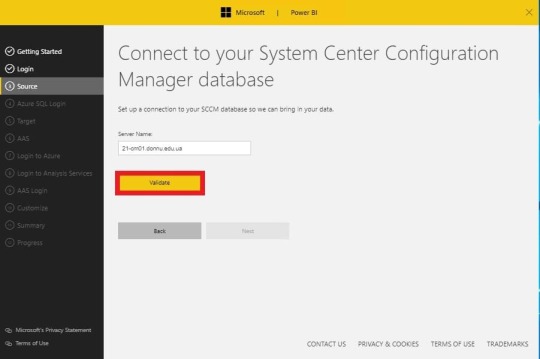
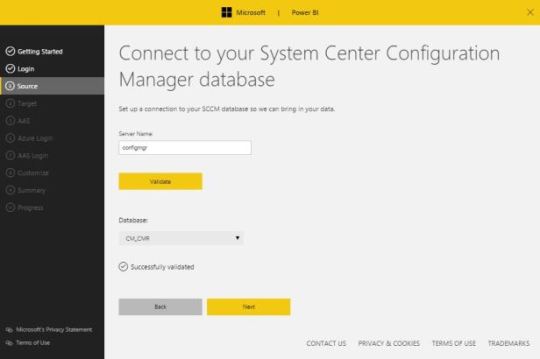
In the Source pane, enter your SCCM server name, click on Validate, select your Database from the drop-down then Next;

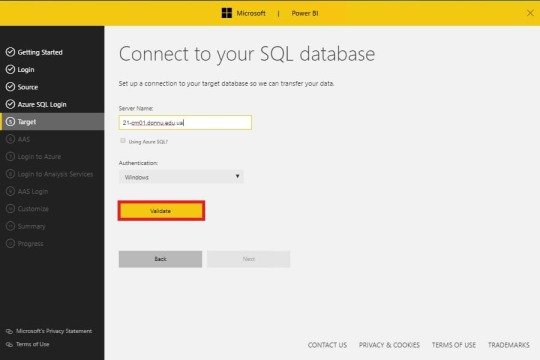
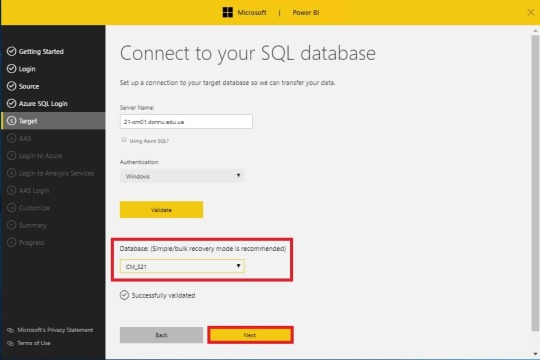
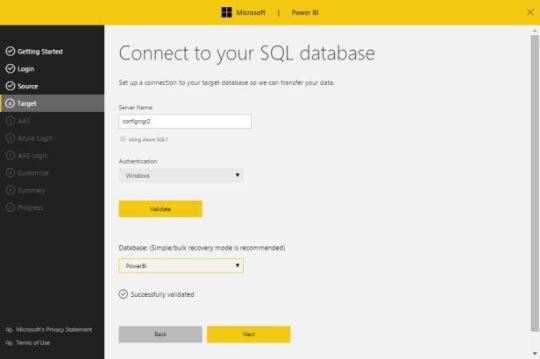
On the Target pane, select your SQL Server, click on Validate, select your Database from the drop-down then Next; If you are using Azure SQL (which is unlikely for an SCCM installation), check the Using Azure SQL box;
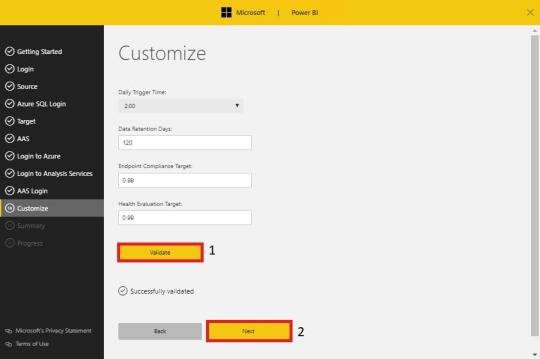
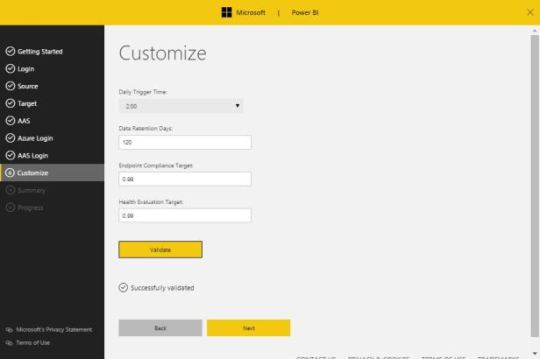
The 5,6,7 and 8 steps will be automatically skipped (Because we don't use Azure SQL); On the Customize pane, select the time you wish to have your scheduled task to be run and the desired Compliance Target number, click on Validate and Next;
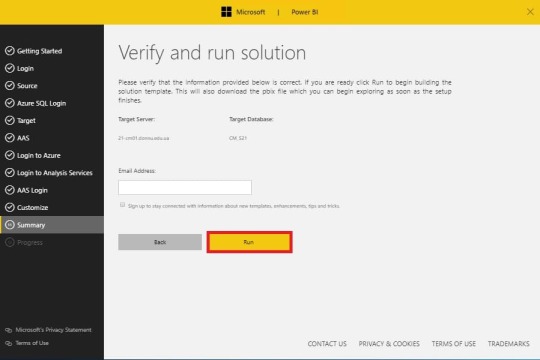
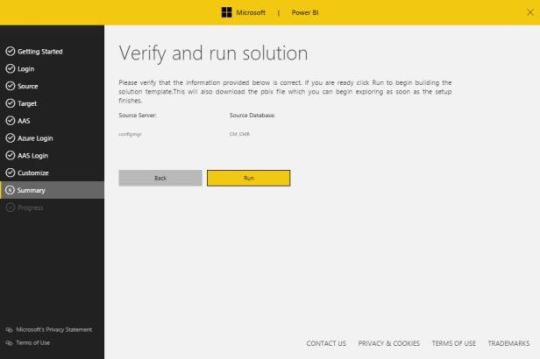
Review your choices, enter your email address if desired to receive information about Power BI and click Run;
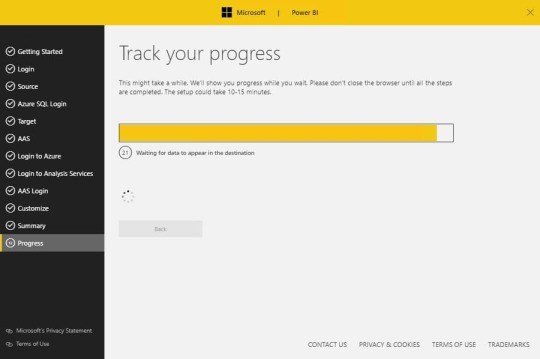
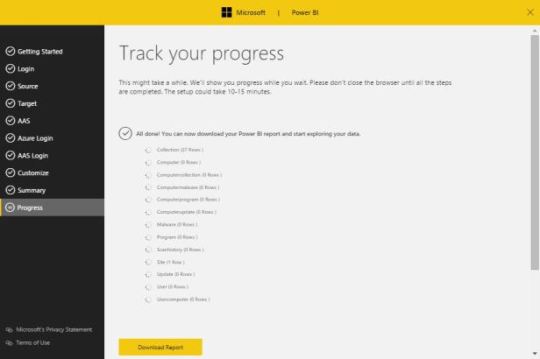
The installation starts. The initial synchronization pulls data out of Configuration Manager database and pushes the data into the specified early SQL Database;
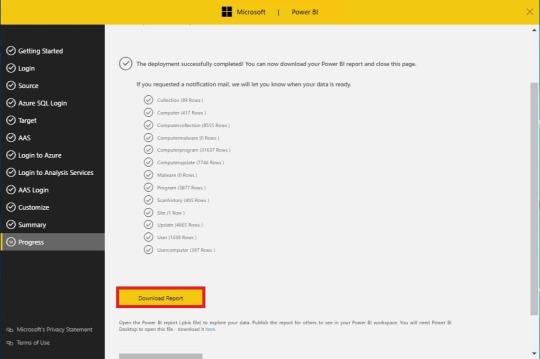
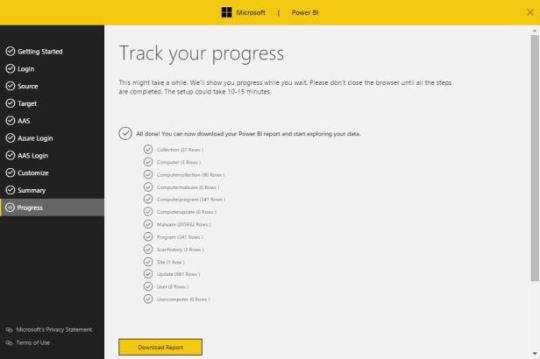
Once the process is completed, you can download the pre-configured Power BI SCCM Dashboard by clicking on Download Report;
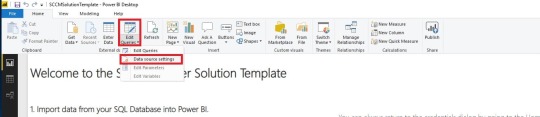
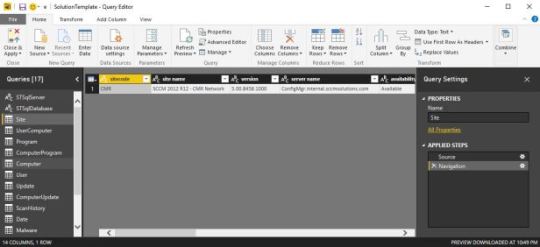
Once downloaded, open the SolutionTemplate.pbix file, it will open in Power BI Desktop. On the top ribbon, click on Edit Query and select Edit Wueries;
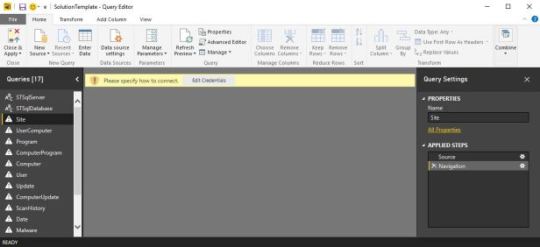
Click on any query on the left pane and select Edit Credentials;

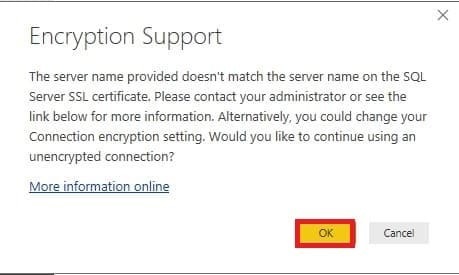
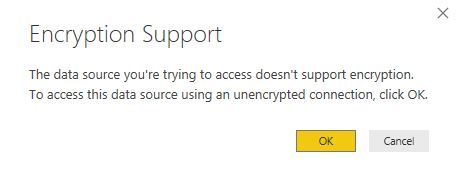
Select your preferred credential method and click Connect; If you have an Encryption Support warning, click OK to accept the unencrypted connection
NOTE: If your credential has the Read right on the SCCM database, all the “!” icons will turn to tables icons. This means that the data can be read.

Click the Apply Changes button on the warning on the top;

Click the Overview pane to validates that the data is shown;

Read the full article
0 notes
Text
Power BI : Power BI SCCM Template from Microsoft
This post runs through the process of setting up Power BI and the SCCM template which will give you detailed information on your System Center Configuration Manager including client and server health, malware protection, software updates, and software inventory across your organisation.
First things first, to run the Power BI SCCM template you need to running PowerShell v5 on the device that you install it on.
Run a Get-Host on your device to see the PowerShell version installed.
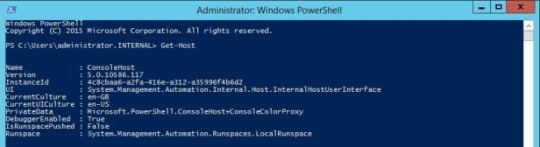
If it’s not v5 then go to here and grab a copy and install.
Download the SCCM Template
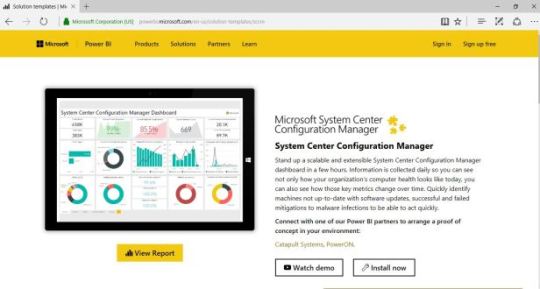
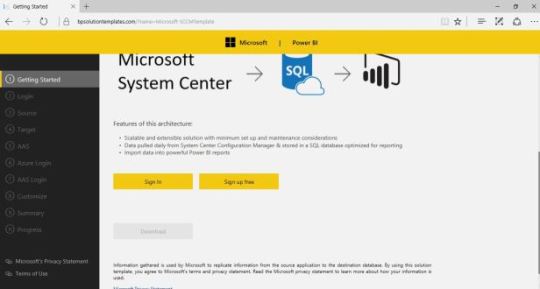
Next head over to https://powerbi.microsoft.com/en-us/solution-templates/sccm/
Click ‘Install Now’ to start the installation of the Power BI SCCM template.
Scroll down and click ‘Sign In’
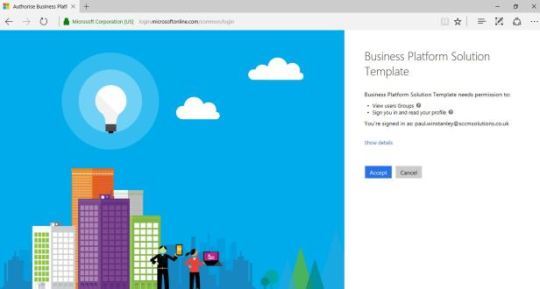
Once you have signed in you will need to allow access to the Business Platform Solution Template. Click Accept to do this.
You’ll now be presented with a Download button.

Install and configure the Microsoft-SCCMTemplate
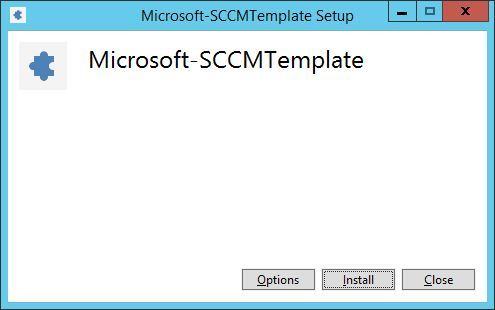
Run the downloaded file ‘Microsoft-SCCMTemplate.exe’. Click Install.
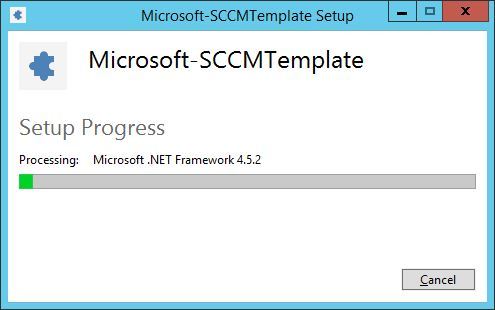
Restart the device once setup is complete.
Once the machine is back up and running you need to execute the ‘Microsoft-SCCMTemplate’ application.
At the wizard click ‘Next’
Enter credentials that will be used to connect to the Configmgr DB and click ‘Validate’
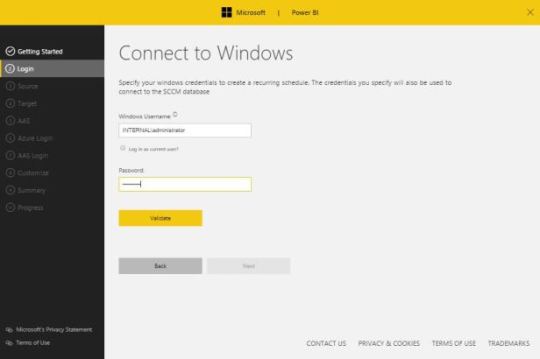
Click ‘Next’ when validation is successful.
Now enter the name of the server hosting your site database and click ‘Validate’. Once validated successfully click Next.
Now we need to specify a server running SQL server to use as a target. I have installed a server called ConfigMgr2 one which SQL is installed. I have also created a database called PowerBI which I will use to host the data. Enter the server name, click Validate and the choose the correct DB from the drop down list. Click Next to continue.
Enter the relevant details for trigger time or compliancy and click Validate then click Next.
Click ‘Run’ to build the solution template.
This process can take a little while so grab a cuppa.
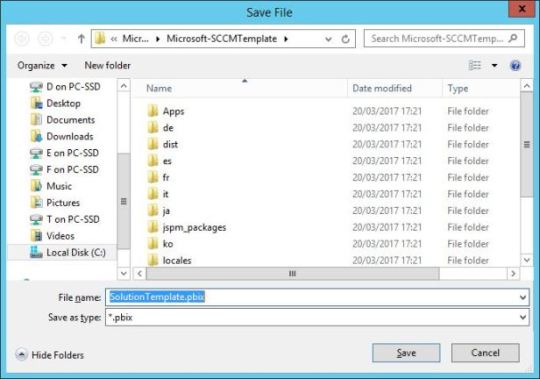
Until it has completed. Then click ‘Download Report’
Save the .pbix file.
Install Power BI Desktop
Go to https://powerbi.microsoft.com/en-us/desktop/ and download the Power BI Desktop.
Run the PBIDesktop_x64.msi on a desktop OS. Click Next.
Accept the licence agreement and click Next.
Enter a location to install and click Next.
Click Install and Finish to complete.

Configure Power BI Desktop to use the SCCM Template file
Launch the Power BI Desktop and open the Solution Template file saved earlier.
In the ribbon click the Edit Queries button and choose ‘Edit Queries’.
Highlight one of the nodes in the left hand nav with a warning triangle, I have chosen ‘Site’, and click ‘Edit Credentials’.
I’m using the current credentials as these will have access to the PowerBi database. Click Connect.
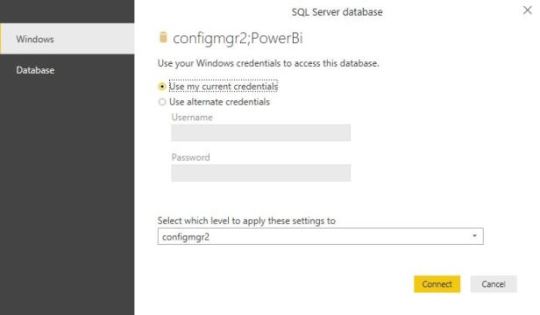
Click OK
The warning triangles will disappear from the left hand hav as the query connections are made successfully.
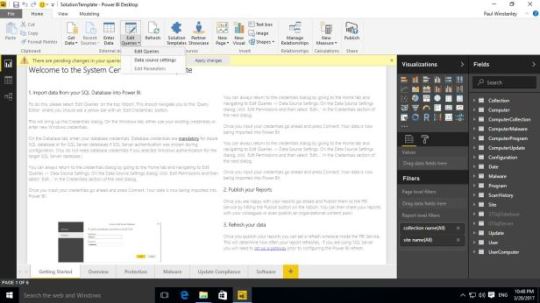
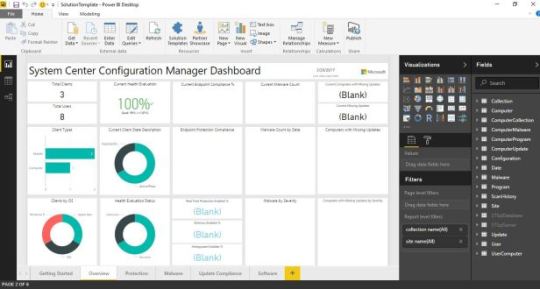
Close the query editor and select the ‘Overview’ tab from the main screen. If the dashboard comes back as BLANK then hit refresh in the Ribbon bar.
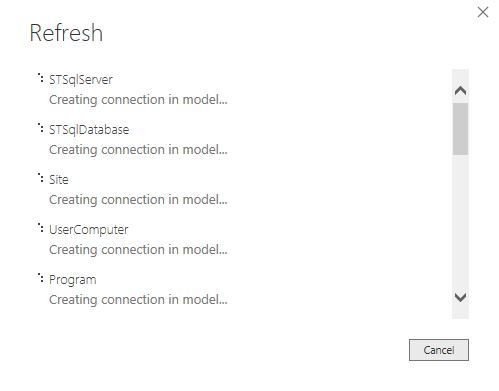
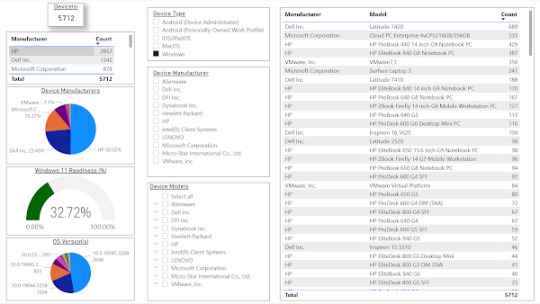
Once refreshed the dashboard should populate with data with some pretty cool info straight out of the box.
from WordPress http://bit.ly/2DYgNyx via IFTTT
0 notes
Text
Some Valuable Advantages of Custom Reporting Solutions
Maximize your business potential with custom reporting solutions: tailored data insights for precise decision-making, seamless database integration for efficient reporting, and enhanced flexibility and scalability. Embrace strategic success with SCCM dashboard power BI and choose a reliable provider for custom reporting solutions. For more information visit: https://customreporting.blogspot.com/2024/01/some-valuable-advantages-of-custom.html
#sccm create custom report#sccm dashboard power bi#sccm reporting#sccm reports'#sccm report builder#custom reporting solutions
1 note
·
View note
Text
SCCM Power BI Dashboard Install And Configure (2019.1)

SCCM Power BI Dashboard Install And Configure (2019.1, Simple). The template is free to download. You can download the SCCM Power BI solution template here. A Power BI SCCM Dashboard provides high level overview of key SCCM metrics. SCCM Power BI Dashboard Prerequisites System Center 2012 Configuration Manager R2 SP1 (5.00.8239.1000) or later. Read access to System Center Configuration Manager database is required. Destination database: Azure SQL database or SQL Server database (SQL Server 2008 R2 SP3 or later). For the machine where the installation is run, Microsoft .NET Framework 4.5 or later. PowerShell version 5.0 or later. For Operating System: Windows Server 2008 R2 SP1, or later. Windows 7 Professional, Enterprise, or later. Note that Windows 10 anniversary update (1607 or later) is not supported at this moment because of a bug in credential guard. SCCM Power BI Dashboard Installation and Configuration The SCCM Power BI solution template download has been moved to GITHub. You will find two templates. Download the one that you require and copy to target location. SCCMSolutionTemplate.pbix SCCMSolutionTemplateAS.pbix
SCCM Power BI Dashboard Configuration
1. Open copied template file (SCCMSolutionTemplate.pbix) with Power BI Desktop; 2. Sign in to Power BI; 3. On the menu bar, click Edit Queries and then click Data source settings;
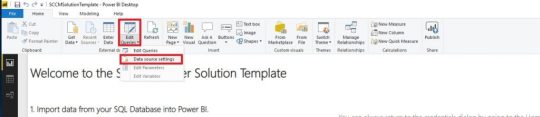
4. Click Change Source and enter your sccm server and database;

5. Click Edit permissions and click Edit. Enter username which has rights to database.
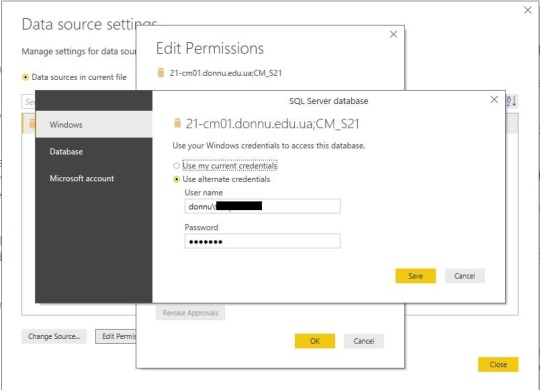
6. Click Close and click Apply Changes;

7. Ready;
Read the full article
0 notes
Text
Power BI : Active Directory v/s SCCM Boundaries : [FREE PBIX]
youtube
Purpose :
Active Directory Sites and System Center Configuration Manager Boundaries are hard to keep in sync – especially in an environment where there are regular changes and several team managing each technology separately.
This Power BI dashboard solution will help analyze and reduce down the gaps in SCCM. The dashboard will help SCCM administrators / architects to resolve issues where clients are not covered – this helps in Client Health / Reporting and Compliance.
The dashboard is based off the Powershell script posted on Technet by Scott Breen and can be downloaded from here : https://gallery.technet.microsoft.com/Validate-Boundary-Group-d85ed496
How to use this :
A. The script can be configured to run on schedule via Scheduled Tasks on a server or via System Center Orchestrator.
B. The output CSV can be placed on a network share on local folder.
C. Power BI will read this csv and perform the necessary DAX operations.
D. Power BI can further be used to publish on o365 on the Power BI portal. Power BI gateway can be configured so that the content is autoupdated on a schedule. Embedded Power BI options can be used to inject the dashboard into Sharepoint or any site.
Backend engine :
The output [download csv here] of the script needs some work to be done and looks like this >

The last column is most important in this csv output – the result ‘False’ indicates the machine is not covered by any SCCM Boundary. The other columns provide plenty of information – but its not really presentable or understandable from the get go.
The conversion of the csv data from crude data to human readable format is performed by Power BI and via DAX. The csv file before conversion is available here – BoundaryCheck-csv
The PowerBI dashboard is configured to pull information from C:\PowerBI\adsite-vs-boundaries\Boundarycheck.csv
Get it now !
Download the PBIX.
from WordPress http://bit.ly/2fWghFa via IFTTT
0 notes
Text
Power BI : Active Directory v/s SCCM Boundaries
youtube
Purpose :
Active Directory Sites and System Center Configuration Manager Boundaries are hard to keep in sync – especially in an environment where there are regular changes and several team managing each technology separately.
This Power BI dashboard solution will help analyze and reduce down the gaps in SCCM. The dashboard will help SCCM administrators / architects to resolve issues where clients are not covered – this helps in Client Health / Reporting and Compliance.
The dashboard is based off the Powershell script posted on Technet by Scott Breen and can be downloaded from here : http://ift.tt/2xH1RjI
How to use this :
A. The script can be configured to run on schedule via Scheduled Tasks on a server or via System Center Orchestrator.
B. The output CSV can be placed on a network share on local folder.
C. Power BI will read this csv and perform the necessary DAX operations.
D. Power BI can further be used to publish on o365 on the Power BI portal. Power BI gateway can be configured so that the content is autoupdated on a schedule. Embedded Power BI options can be used to inject the dashboard into Sharepoint or any site.
Backend engine :
The output [download csv here] of the script needs some work to be done and looks like this >
The last column is most important in this csv output – the result ‘False’ indicates the machine is not covered by any SCCM Boundary. The other columns provide plenty of information – but its not really presentable or understandable from the get go.
The conversion of the csv data from crude data to human readable format is performed by Power BI and via DAX. The csv file before conversion is available here – BoundaryCheck-csv
The PowerBI dashboard is configured to pull information from C:\PowerBI\adsite-vs-boundaries\
Get it now !
The Power BI dashboard is available for $2 or ₹149 which can be paid via Paypal or Paytm.
Link to payment options > http://ift.tt/2yc0jkU
During the payment screen mention ‘advsboundary‘ with your ‘email id‘.
Once the payment is received you will get an email with the link to download the Power BI dashboard [pbix file].
from WordPress http://ift.tt/2fWghFa via IFTTT
0 notes
Text
Power BI : ConfigMgr : Indepth Hardware Inventory Report – (with pbix, query and guide)
This post will guide you through connecting Power BI Desktop to your SCCM Infra and pulling out awesome indepth hardware info based off a SQL Query.
And for advanced users – skip the rest and Download PBIX
The SQL Query – [Download SQL Query]
The Query brings in Machine Name, AD site, User Name, Top User, OS, Service Pack, Manufacturer, Model, Serial Number, BIOS Date, BIOS Version, Managed Date, Memory, Memory Slots, Type of Proc, Disk Size, PC Type.
———————————————————————————————– SELECT DISTINCT sys.Name0 ‘Machine’, sys.AD_Site_Name0 ‘ADSite’, CS.UserName0 ‘User Name’, CASE WHEN U.TopConsoleUser0 = ‘-1’ OR U.TopConsoleUser0 IS NULL THEN ‘N/A’ ELSE U.TopConsoleUser0 END as TopUser, REPLACE (OS.Caption0, ‘Microsoft Windows’,’Win’) OS, REPLACE (OS.CSDVersion0,’Service Pack’,’SP’) ‘Service Pack’, CS.Manufacturer0 ‘Manufacturer’, CS.Model0 Model, BIOS.SerialNumber0 ‘Serial Number’, BIOS.ReleaseDate0 as BIOSDate, BIOS.SMBIOSBIOSVersion0 as BIOSVersion, (SELECT CONVERT(DATE,sys.Creation_Date0)) ‘Managed Date’, SUM(ISNULL(RAM.Capacity0,0)) ‘Memory (MB)’, COUNT(RAM.ResourceID) ‘# Memory Slots’, REPLACE (cs.SystemType0,’-based PC’,”) ‘Type’, SUM(D.Size0) / 1024 AS ‘Disk Size GB’, CASE SE.ChassisTypes0 when ‘1’ then ‘Other’ when ‘2’ then ‘Unknown’ when ‘3’ then ‘Desktop’ when ‘4’ then ‘Low Profile Desktop’ when ‘5’ then ‘Pizza Box’ when ‘6’ then ‘Mini Tower’ when ‘7’ then ‘Tower’ when ‘8’ then ‘Portable’ when ‘9’ then ‘Laptop’ when ’10’ then ‘Notebook’ when ’11’ then ‘Hand Held’ when ’12’ then ‘Docking Station’ when ’13’ then ‘All in One’ when ’14’ then ‘Sub Notebook’ when ’15’ then ‘Space-Saving’ when ’16’ then ‘Lunch Box’ when ’17’ then ‘Main System Chassis’ when ’18’ then ‘Expansion Chassis’ when ’19’ then ‘SubChassis’ when ’20’ then ‘Bus Expansion Chassis’ when ’21’ then ‘Peripheral Chassis’ when ’22’ then ‘Storage Chassis’ when ’23’ then ‘Rack Mount Chassis’ when ’24’ then ‘Sealed-Case PC’ else ‘Undefinded’ END AS ‘PC Type’ FROM v_R_System SYS INNER JOIN ( SELECT Name0, MAX(Creation_Date0) AS Creation_Date FROM dbo.v_R_System GROUP BY Name0 ) AS CleanSystem ON SYS.Name0 = CleanSystem.Name0 and sys.Creation_Date0 = CleanSystem.Creation_Date LEFT JOIN v_GS_COMPUTER_SYSTEM CS ON sys.ResourceID=cs.ResourceID LEFT JOIN v_GS_PC_BIOS BIOS ON sys.ResourceID=bios.ResourceID LEFT JOIN ( SELECT A.ResourceID, MAX(A.[InstallDate0]) AS [InstallDate0] FROM v_GS_OPERATING_SYSTEM A GROUP BY A.ResourceID ) AS X ON sys.ResourceID = X.ResourceID INNER JOIN v_GS_OPERATING_SYSTEM OS ON X.ResourceID=OS.ResourceID and X.InstallDate0 = OS.InstallDate0 LEFT JOIN v_GS_PHYSICAL_MEMORY RAM ON sys.ResourceID=ram.ResourceID LEFT OUTER join dbo.v_GS_LOGICAL_DISK D ON sys.ResourceID = D.ResourceID and D.DriveType0 = 3 LEFT outer join v_GS_SYSTEM_CONSOLE_USAGE_MAXGROUP U ON SYS.ResourceID = U.ResourceID LEFT JOIN dbo.v_GS_SYSTEM_ENCLOSURE SE on SYS.ResourceID = SE.ResourceID LEFT JOIN dbo.v_GS_ENCRYPTABLE_VOLUME En on SYS.ResourceID = En.ResourceID GROUP BY sys.Creation_Date0, sys.Name0, sys.AD_Site_Name0 , CS.UserName0 ,REPLACE (OS.Caption0, ‘Microsoft Windows’,’Win’) , REPLACE (OS.CSDVersion0,’Service Pack’,’SP’) , CS.Manufacturer0 , CS.Model0 ,BIOS.SerialNumber0 , REPLACE (cs.SystemType0,’-based PC’,”), CASE WHEN U.TopConsoleUser0 = ‘-1’ OR U.TopConsoleUser0 IS NULL THEN ‘N/A’ ELSE U.TopConsoleUser0 END, CASE SE.ChassisTypes0 when ‘1’ then ‘Other’ when ‘2’ then ‘Unknown’ when ‘3’ then ‘Desktop’ when ‘4’ then ‘Low Profile Desktop’ when ‘5’ then ‘Pizza Box’ when ‘6’ then ‘Mini Tower’ when ‘7’ then ‘Tower’ when ‘8’ then ‘Portable’ when ‘9’ then ‘Laptop’ when ’10’ then ‘Notebook’ when ’11’ then ‘Hand Held’ when ’12’ then ‘Docking Station’ when ’13’ then ‘All in One’ when ’14’ then ‘Sub Notebook’ when ’15’ then ‘Space-Saving’ when ’16’ then ‘Lunch Box’ when ’17’ then ‘Main System Chassis’ when ’18’ then ‘Expansion Chassis’ when ’19’ then ‘SubChassis’ when ’20’ then ‘Bus Expansion Chassis’ when ’21’ then ‘Peripheral Chassis’ when ’22’ then ‘Storage Chassis’ when ’23’ then ‘Rack Mount Chassis’ when ’24’ then ‘Sealed-Case PC’ else ‘Undefinded’ END ,
BIOS.ReleaseDate0 , BIOS.SMBIOSBIOSVersion0
ORDER BY sys.Name0
———————————————————————————————–
2. The Query Output – sample
This should give an idea of what all data can be played with for reference.
3. Download the PBIX file.
4. Dashboard when first launched.
Dont panic – this is just the clean slate view with no data.
5. Reconfigure the SQL Server
Home > Edit Queries.
Query Editor Window > Home > Data Source Settings
On Data Source Setting Window > Change Source
Enter the Server and Database details – then Hit ‘ok‘
Voila ! you are done ! You dynamic Power BI Dashboard is available. Use the Data Slicers on top or interactive donut pie in the center to filter and analyze – then export the end results to csv. Go ahead put in your feedback / comments once you give this a try.
from WordPress http://ift.tt/2hQkNbB via IFTTT
0 notes